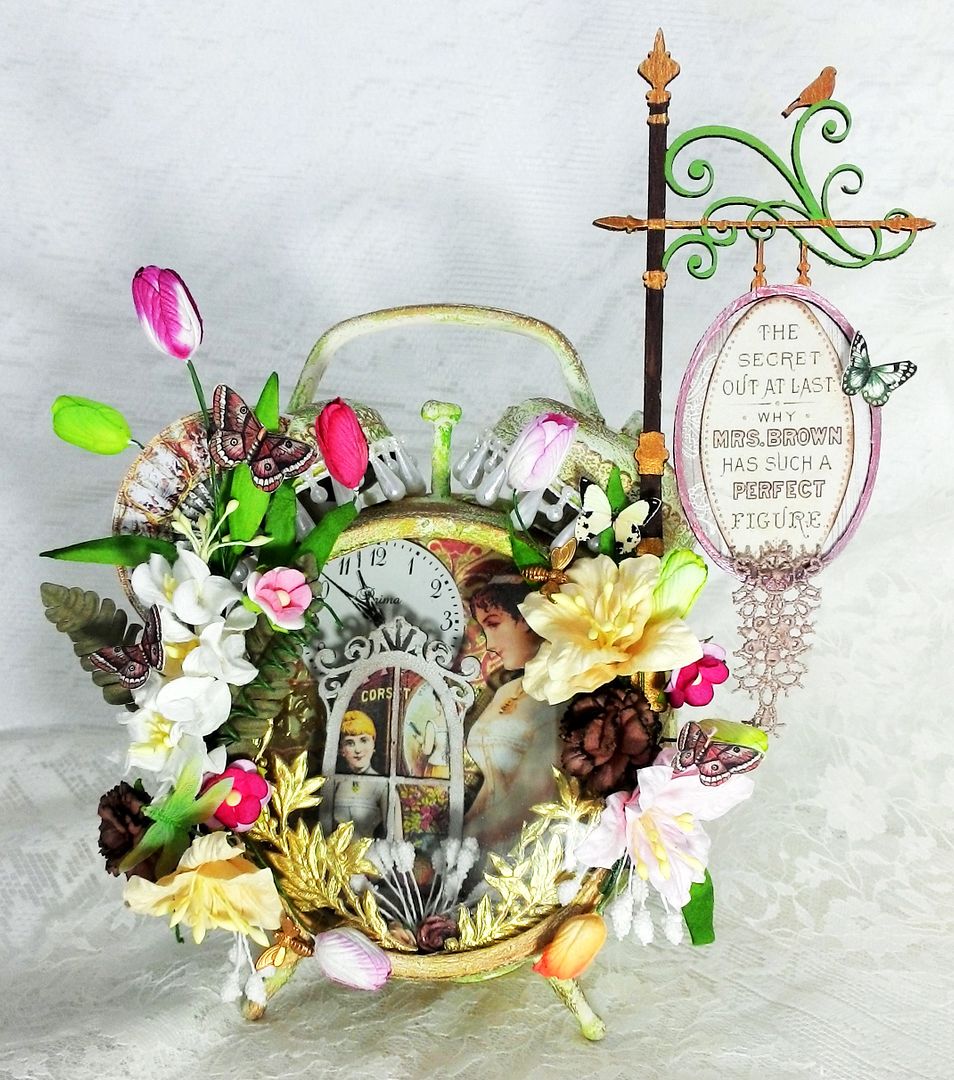
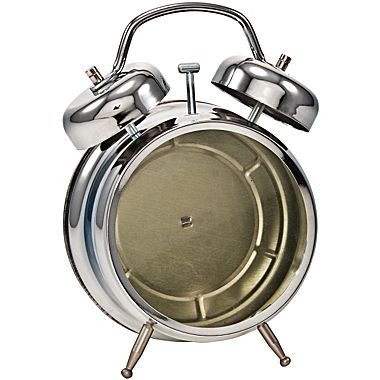
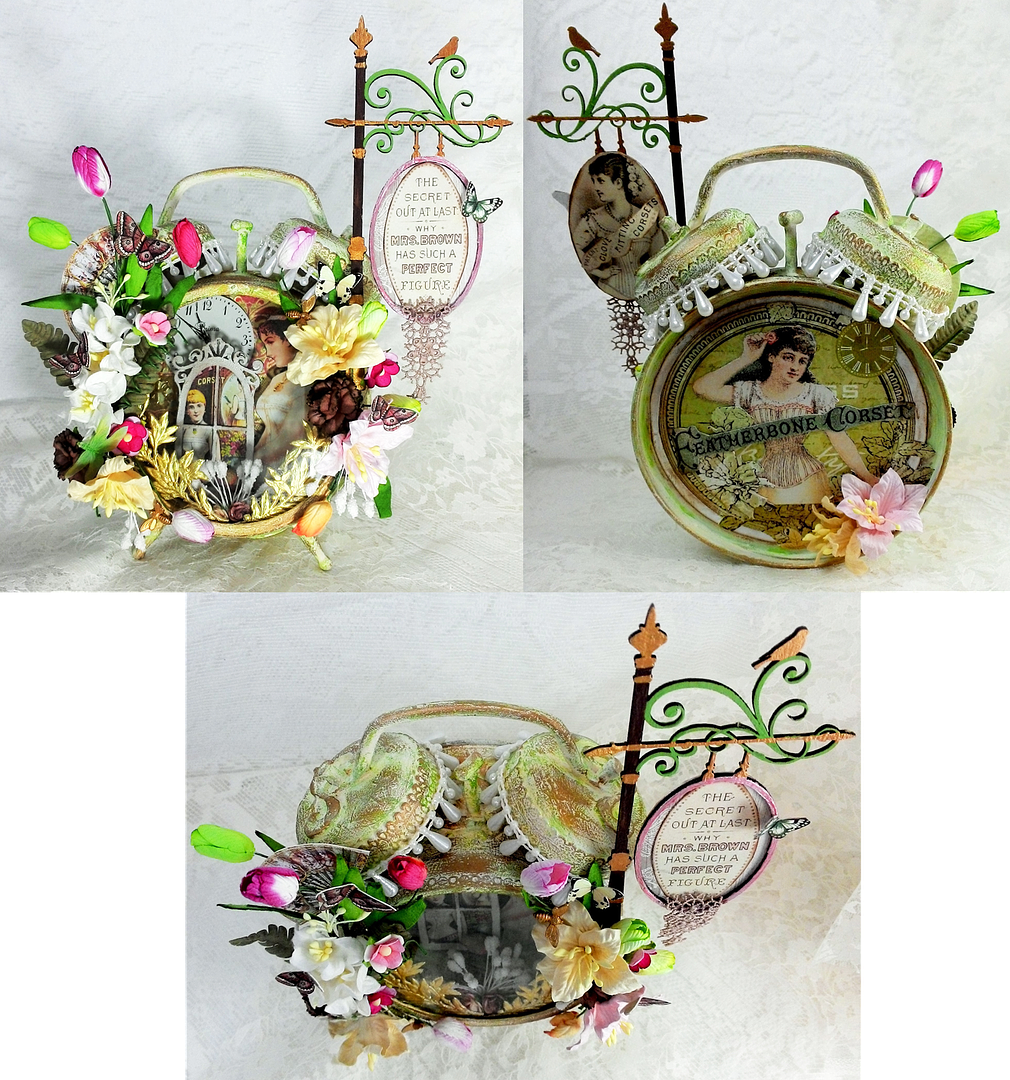
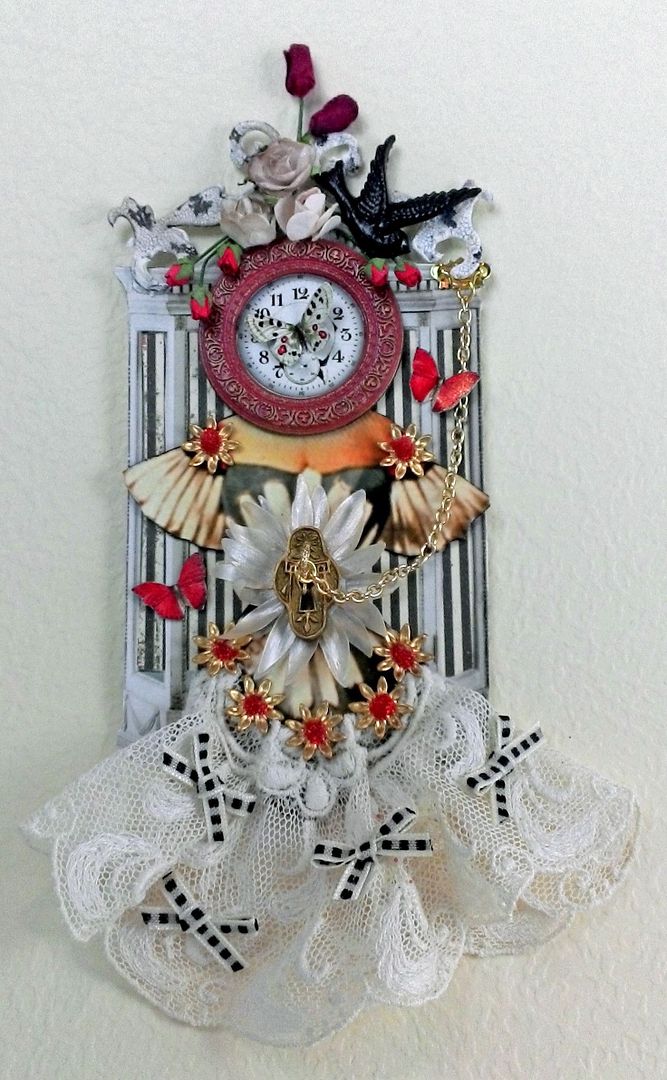
As soon as I saw the raw assemblage
alarm clock I knew I would have to do something with it. This month’s Alpha
Stamps corset theme gave me the perfect excuse. There are two things I love about altering a
clock; turning a functional item into a piece of art the many surfaces to junk
up!
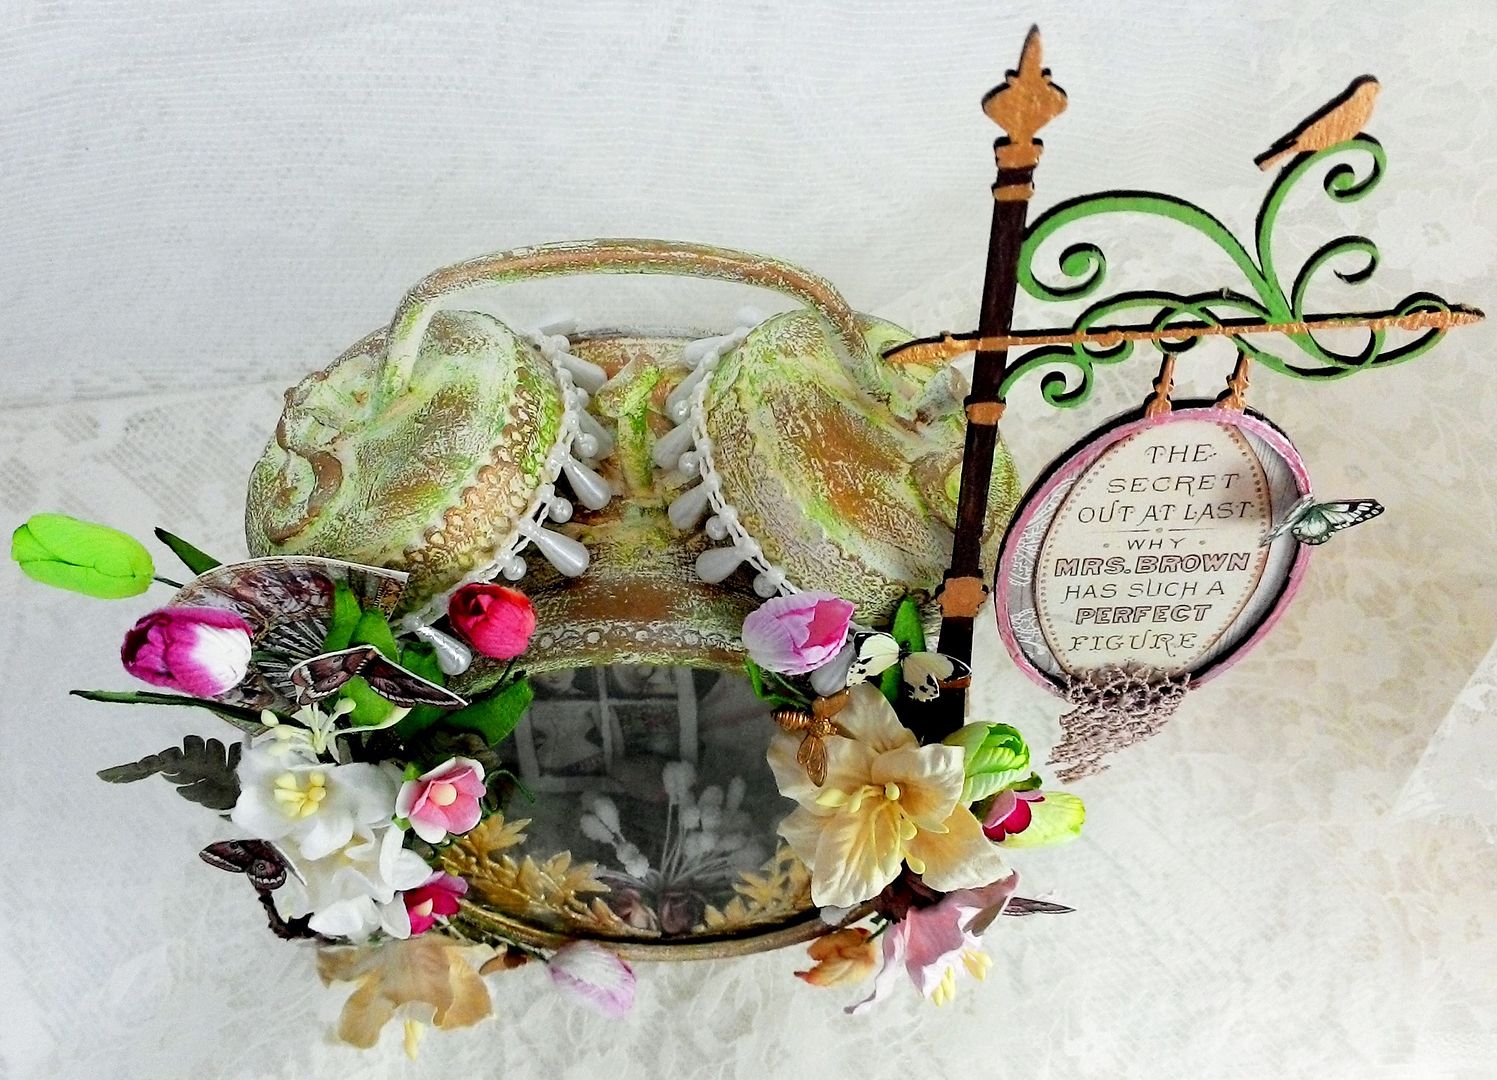
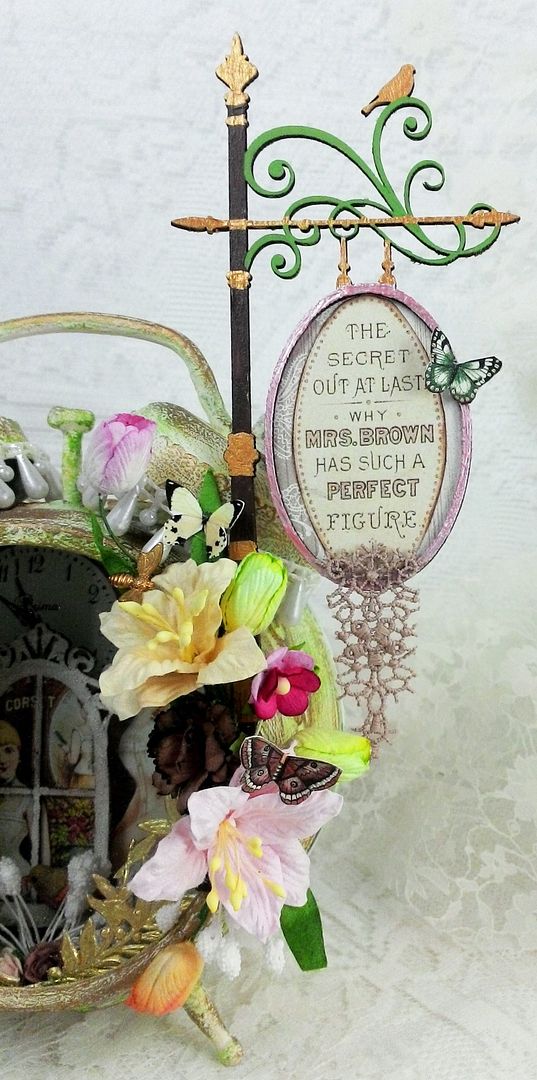
From a theme perspective, I
decided on a Victorian corset shop. I didn’t leave a single
surface untouched and even added the signpost to stick up beyond the top of the
clock.
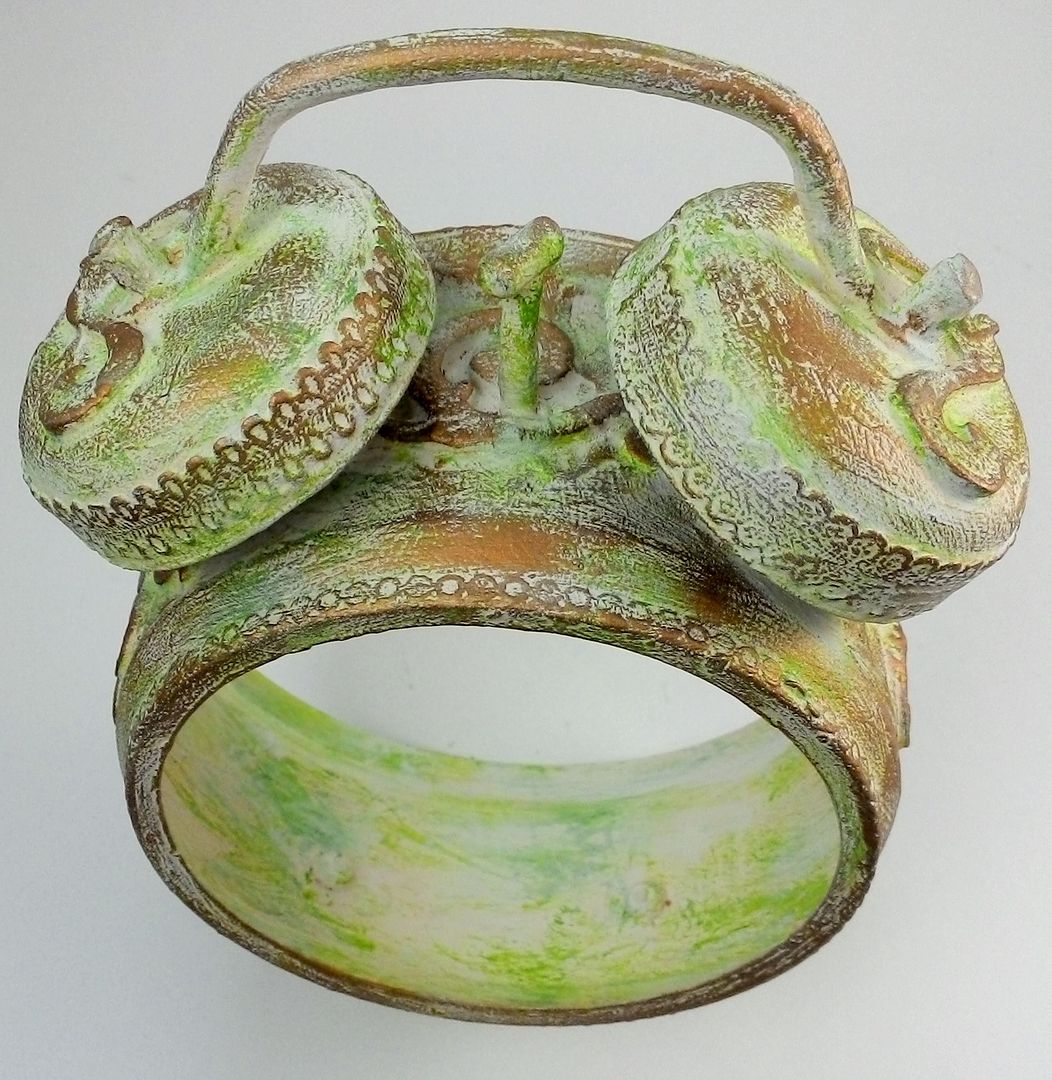
The clock is accented with
gorgeous paper flowers which I chose and Alpha Stamps graciously agreed to
carry. I particularly love the sweet
miniature tulips which are perfect for this time of year and for Easter
themed projects.
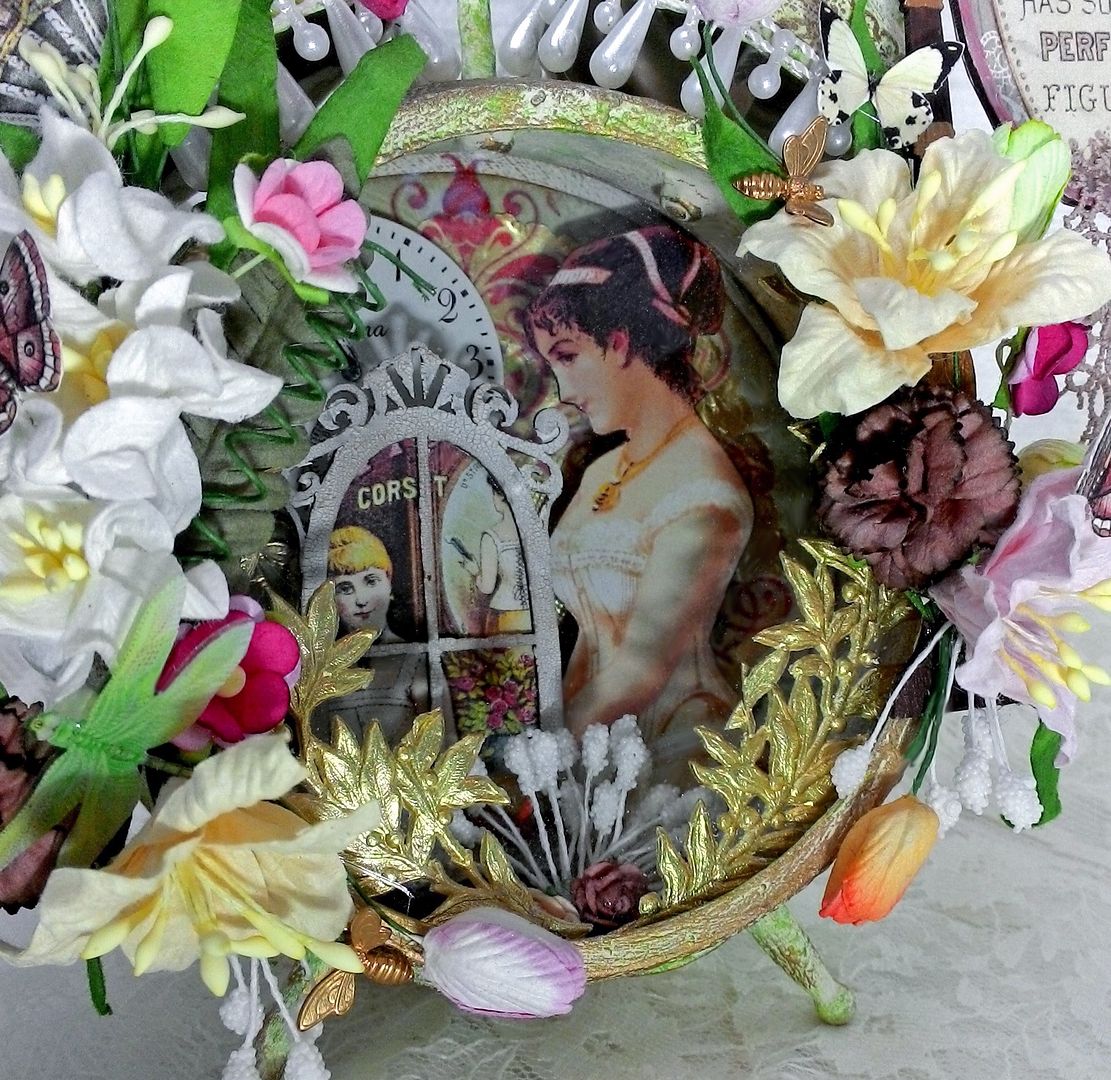
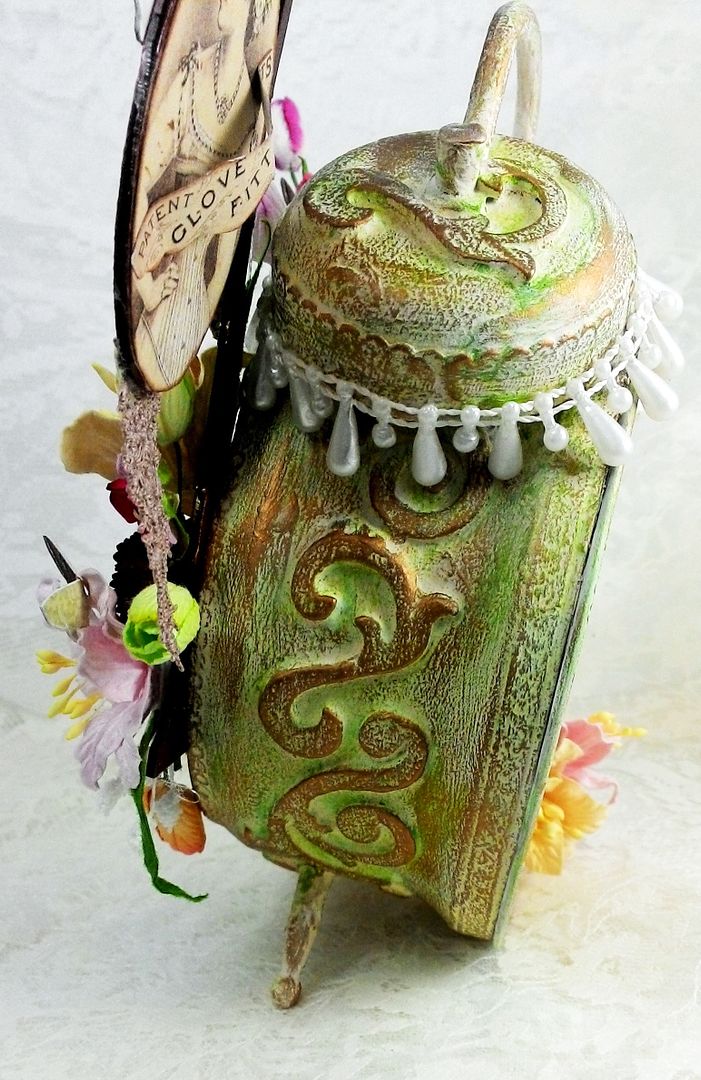
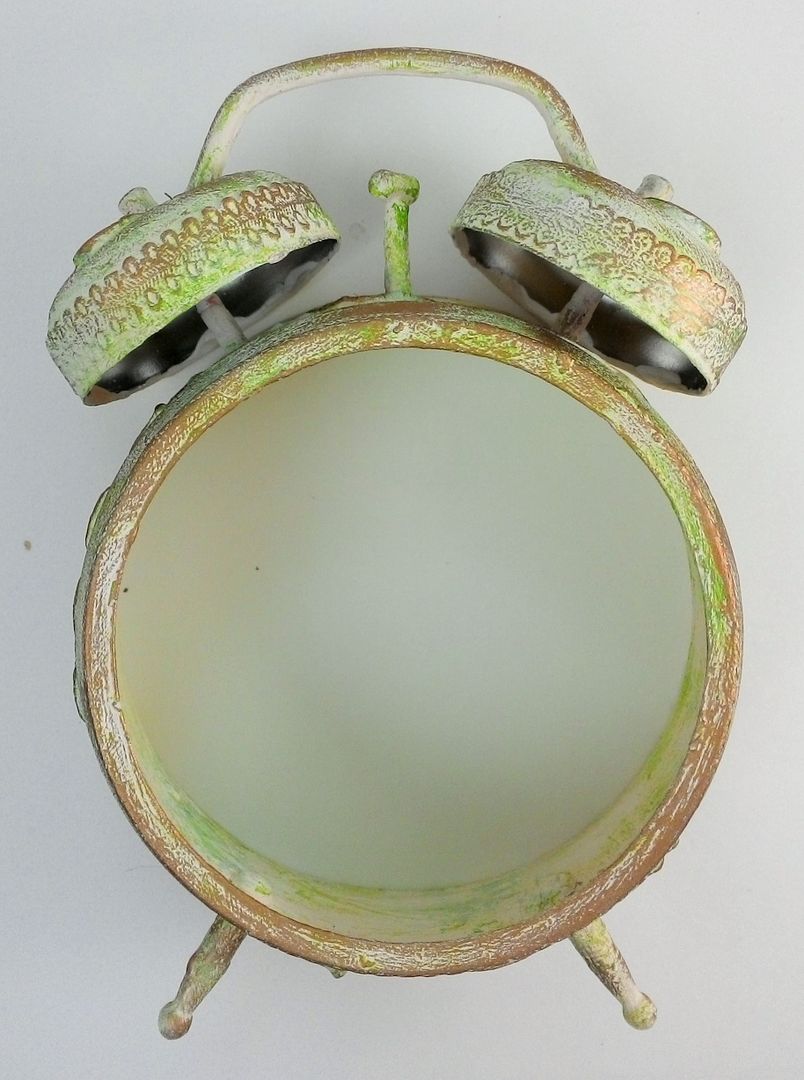
The inside of the clock is super
deep so there is lots of room for dimensional embellishments.
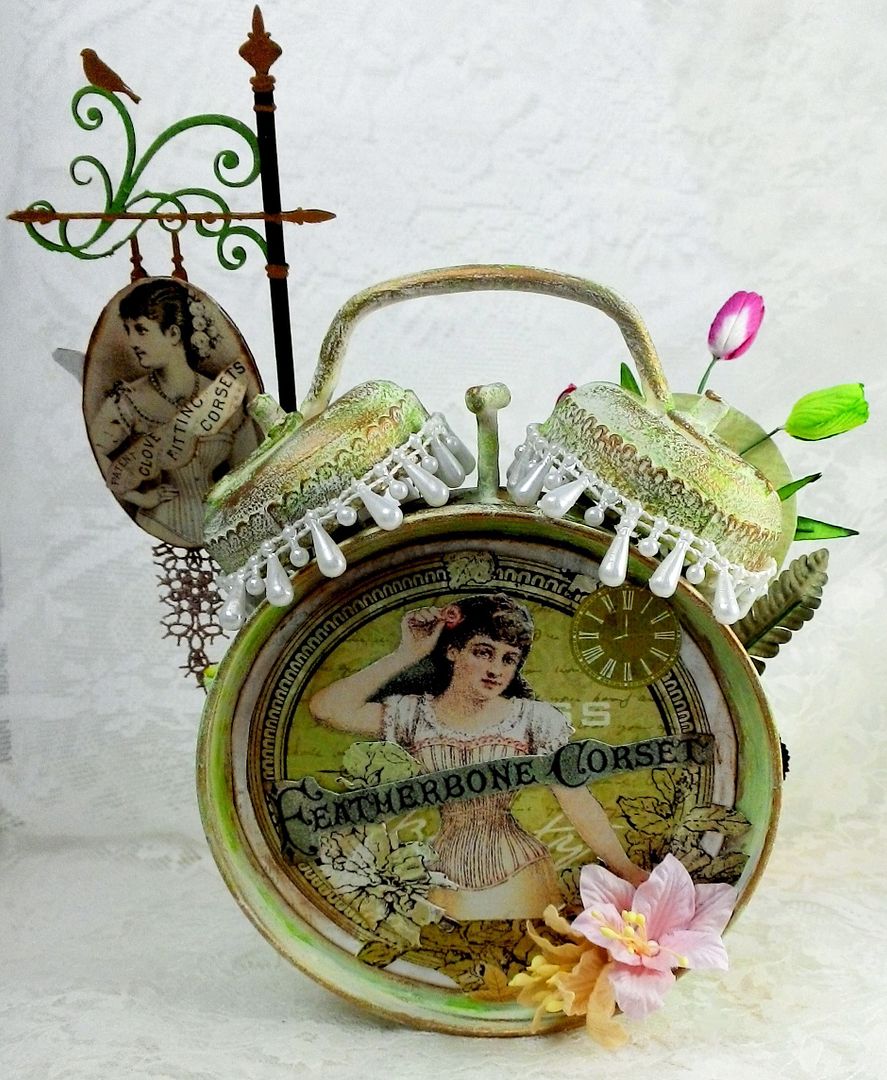
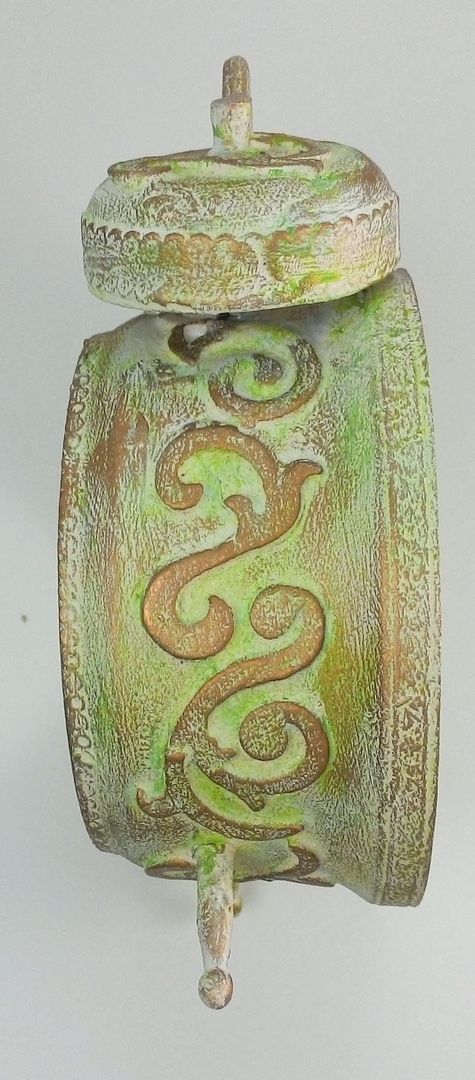
Notice the embossed design on
the sides of the clock and on the bells.
The tutorial will cover how I achieved the embossed design, the
embellishment and re-assembly of the clock.
TUTORIAL
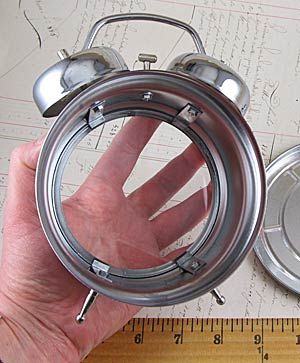
I started by removing the
back of the clock and then loosening the screws inside that keep the tabs in
place. The tabs are used to hold the glass
against the front of the clock. I
removed the screws and tabs and then removed the glass. I screwed the screws back in place (as they
hold the bells and legs in position) but not the tabs. Once the clock was altered, I did not intend
to open it up again, so I decided I could glue the glass in place rather than
using the tabs. Besides, the tabs are
not attractive and get in the way of the embellishments inside of the clock.
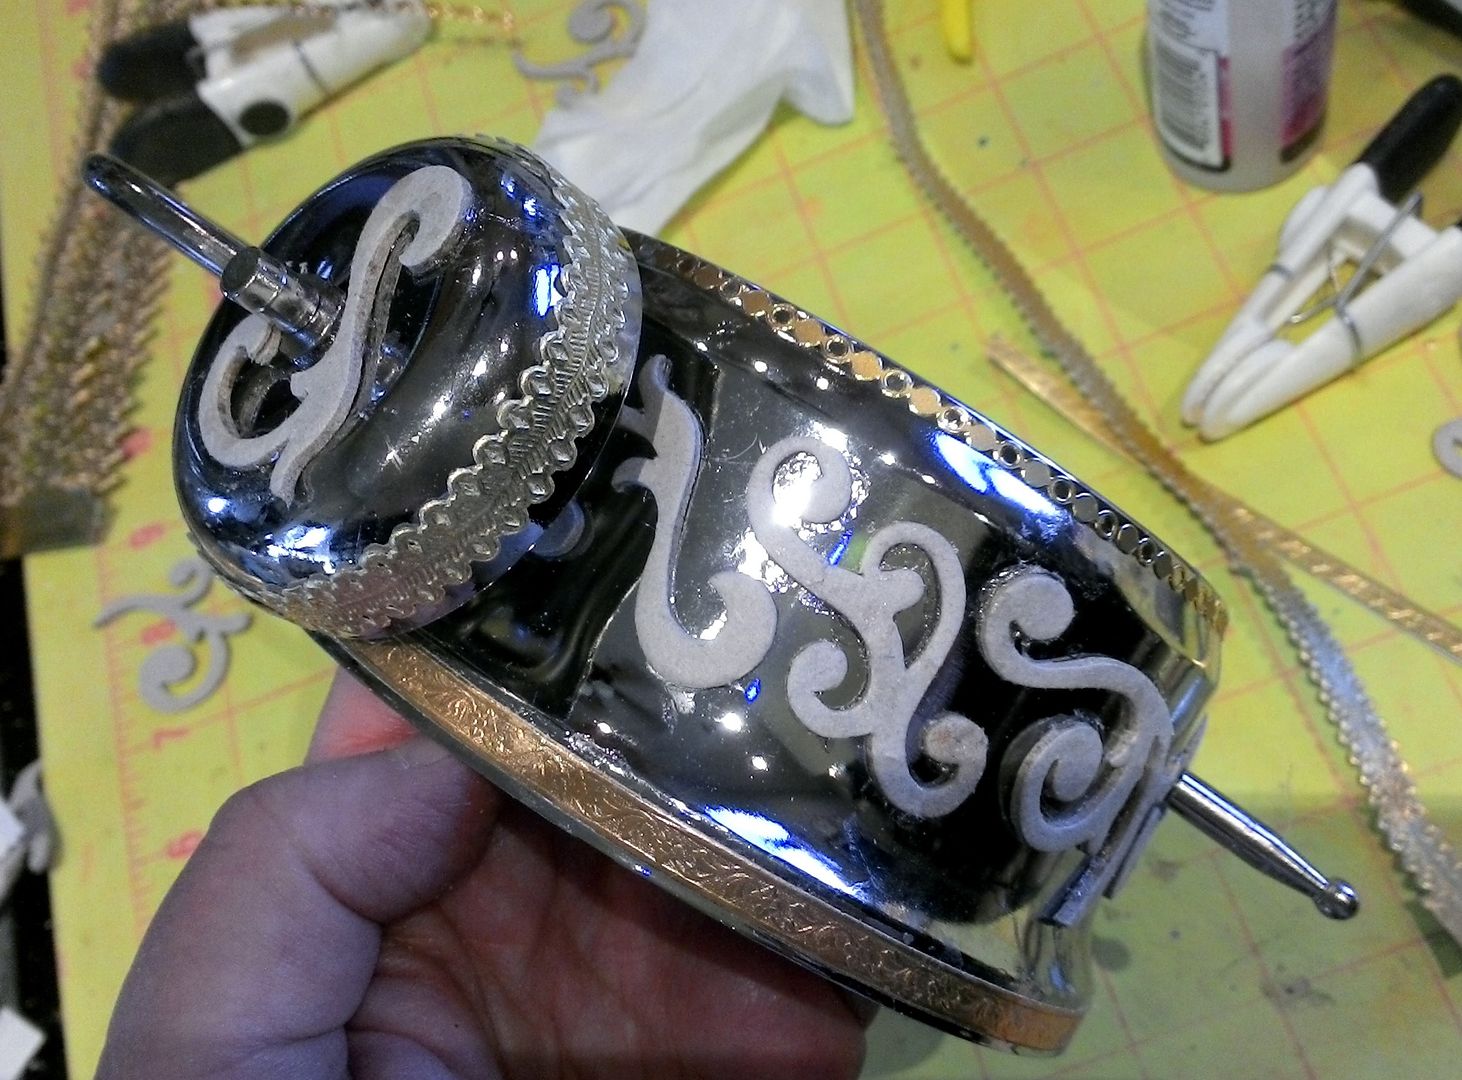
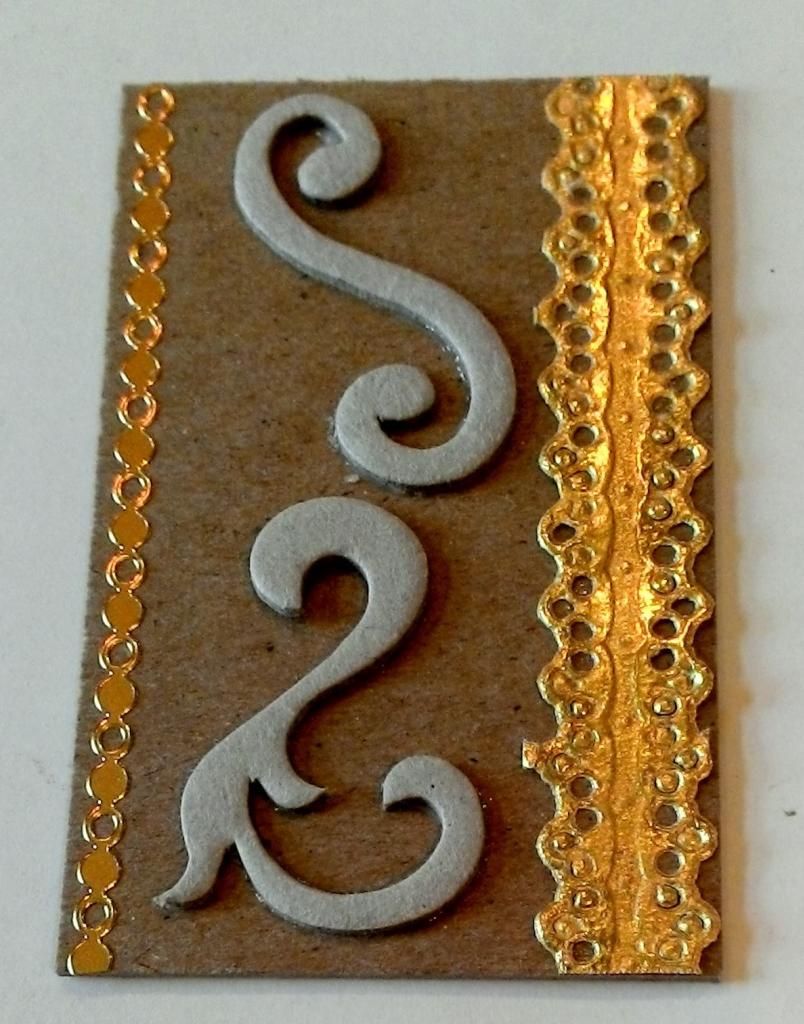
The next step was to create
the embossed design on the outside of the clock. I accomplished this by attaching chipboard
scrolls, Dresden and stickers to the clock.
If you are going to attach something like chipboard to a curved surface,
I suggested you pre-bend the chipboard making it easier to glue in place.
Below, I walk through each
step of the embossed design technique using a piece of chipboard, as I thought
this would make it easier for you to see how it is done. This technique can be used on any surface.
First, attach bulky items to
your surface. I used stickers, chipboard
scrolls, and Dresden.
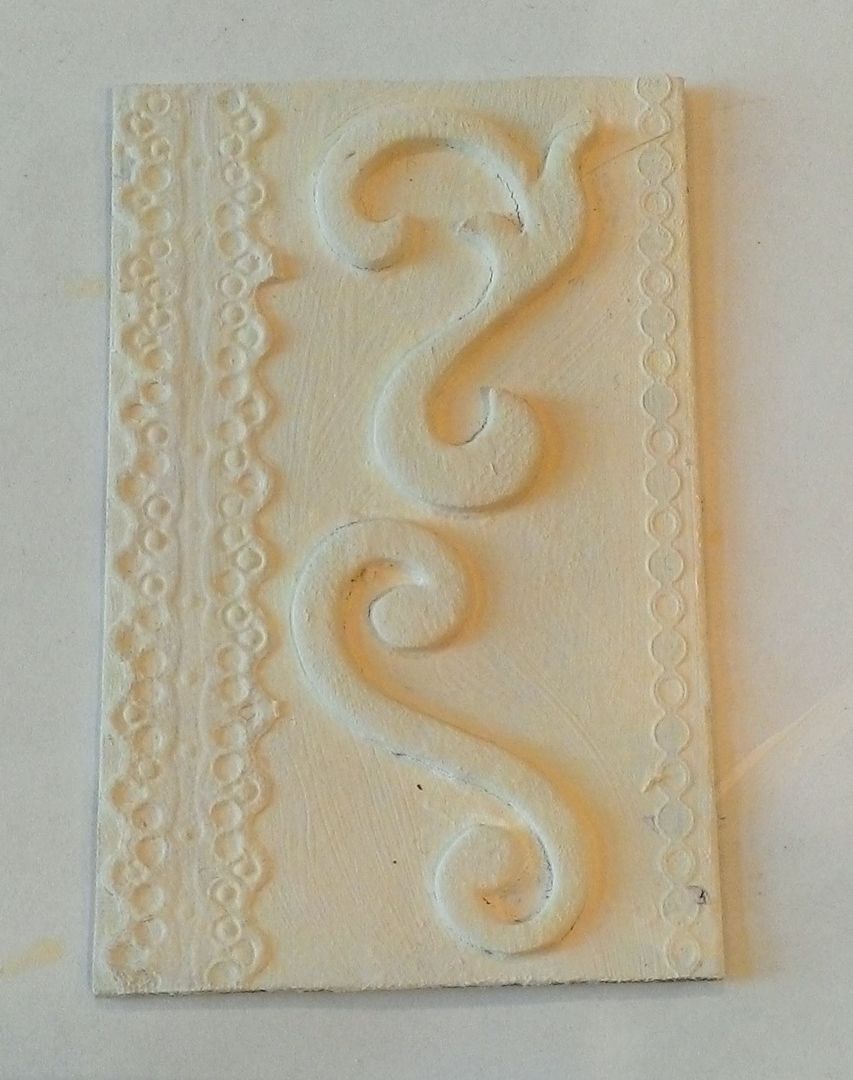
Next, paint your
surface. In the case of the clock, I started
with white Gesso, as it seems to stick better to the metal than acrylic paint. I could have used a metal paint but since
there was so much surface area, it would have been much more expensive. This piece is a decorative one so Gesso or acrylic paint should work fine. If your
piece were going to be handled frequently you might want to use metal paint. It took me 3 coats to block out the silver
metal of the clock.
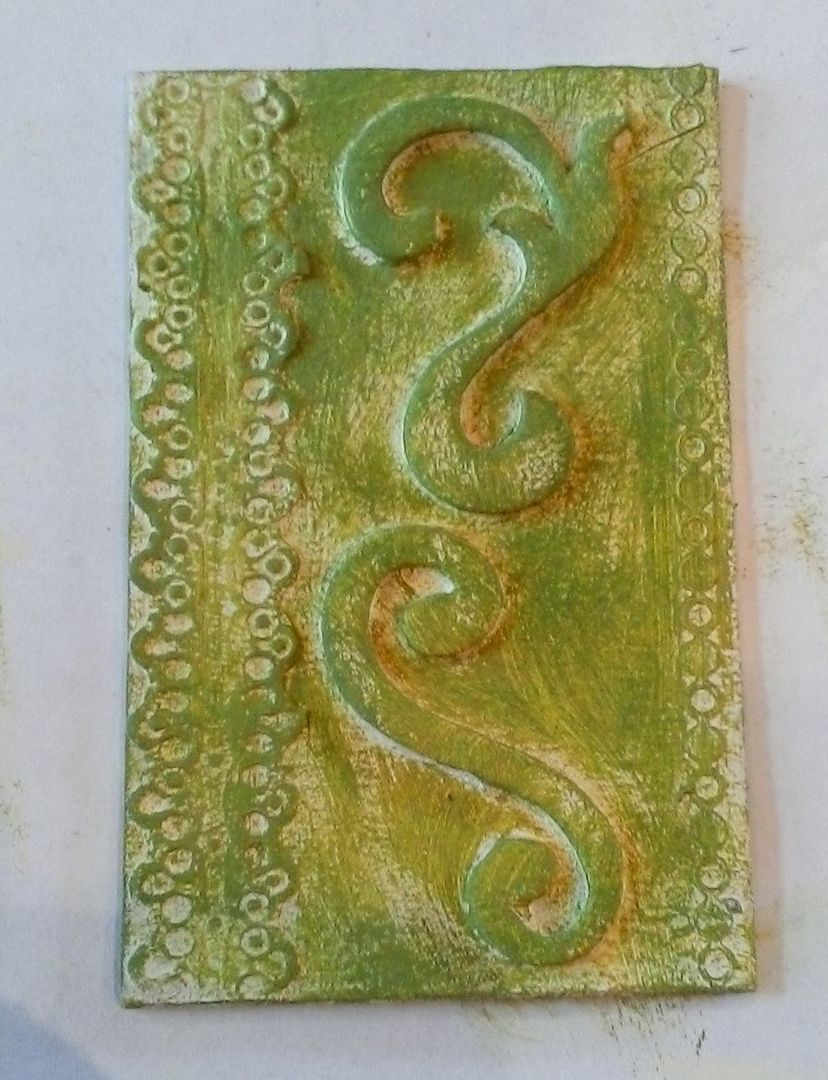
Next, I started adding color
by painting the surface with an off white acrylic paint.
I added more color by dry
brushing the surface with green paint (leaving some of the cream showing).
Lastly, I used my finger to
apply Gilders Paste to the raised surfaces.
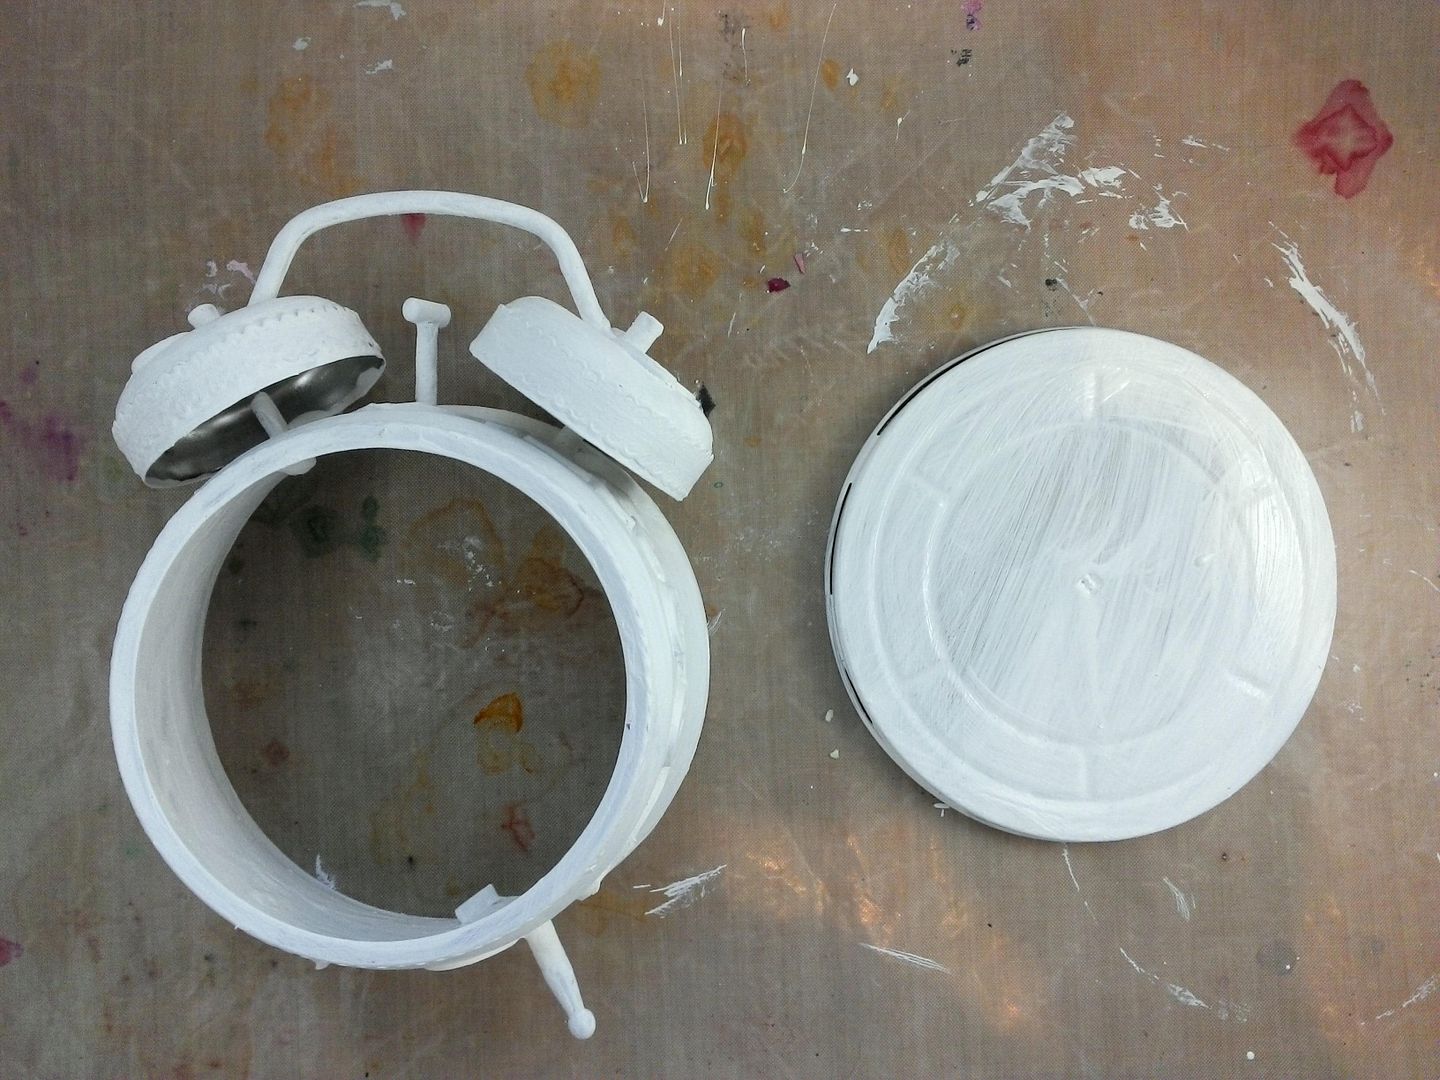
In the picture below you can
see the clock painted with the Gesso.
One thing to note is to be careful not to paint the area where the back
fits back into the clock. The back fits
snugly and paint buildup will prevent it from fitting into the clock. I used a little sandpaper to sand away the
paint before inserting the back into the clock.
Below are pictures of the
finished embossed design technique.
It now looks like the
Dresden, stickers, and chipboard are molded to the clock. My husband upon see the clock though I had
made it from a mold. I explained that it
was a metal shell of a real clock and molding a clock was a little out of my ability. LOL
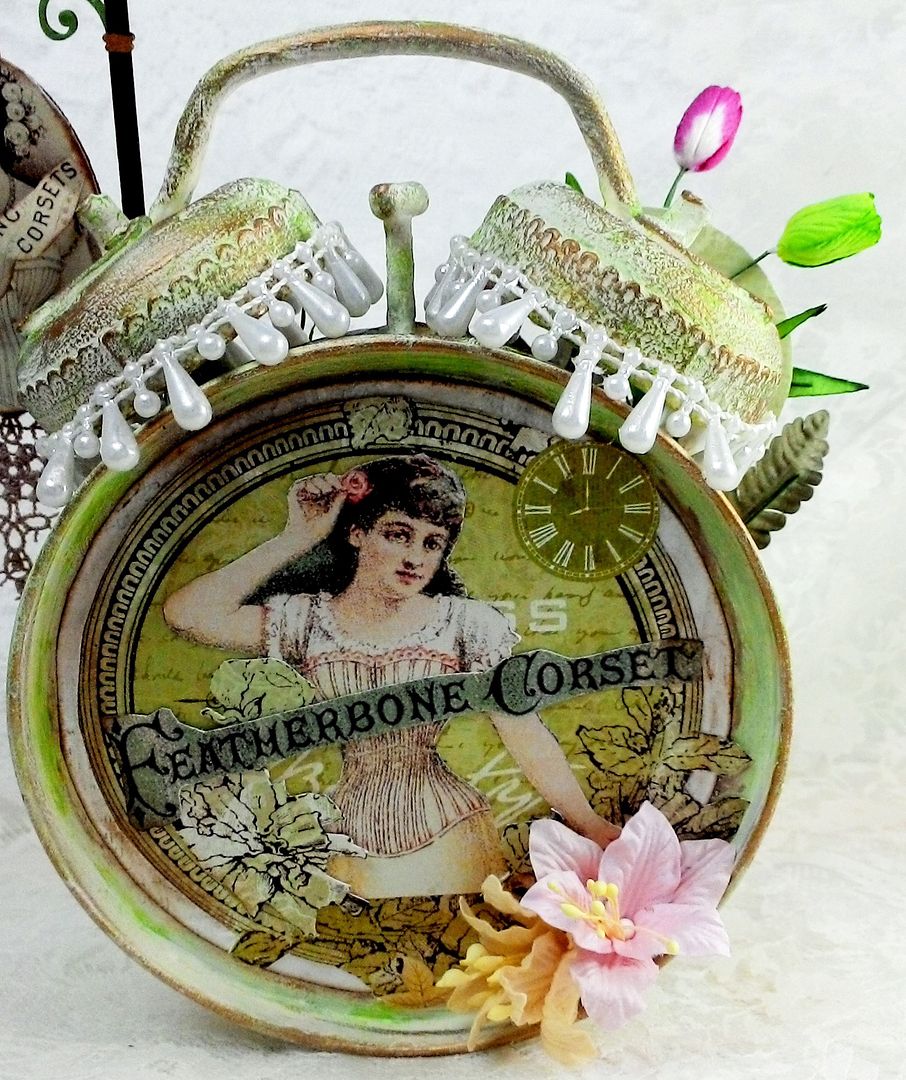
I dressed up the bells of the
clock with teardrop
fused pearls. The bells made me
think of Victorian lamps with hanging beads, which is something I thought a Victorian
shop would have.
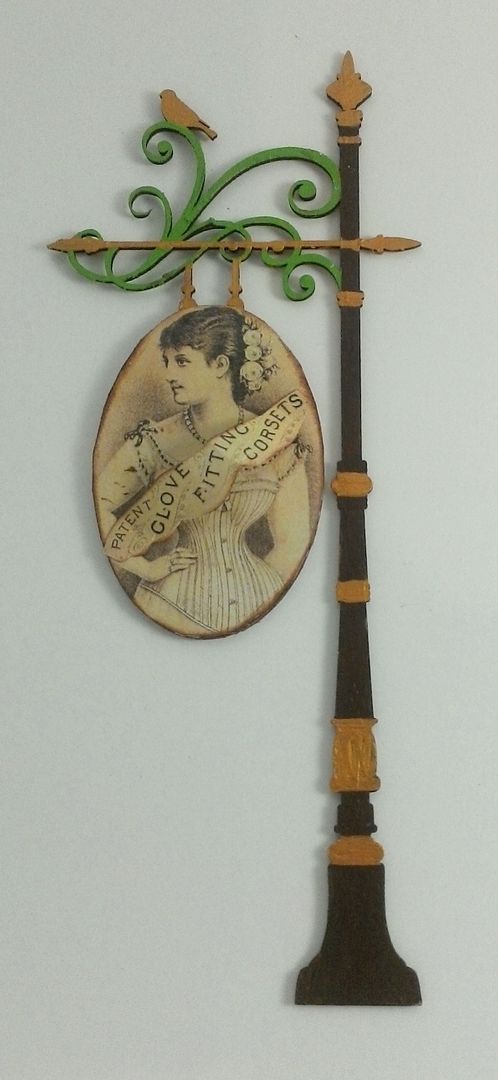
I absolutely love any kind of
signs so I thought adding a chipboard sign to the front of the corset shop would
add a perfect touch.
For a final touch, I added a
piece of lace to the bottom of the sign.
The sign is glued to the rim of the clock, which was done before adding
the flowers.
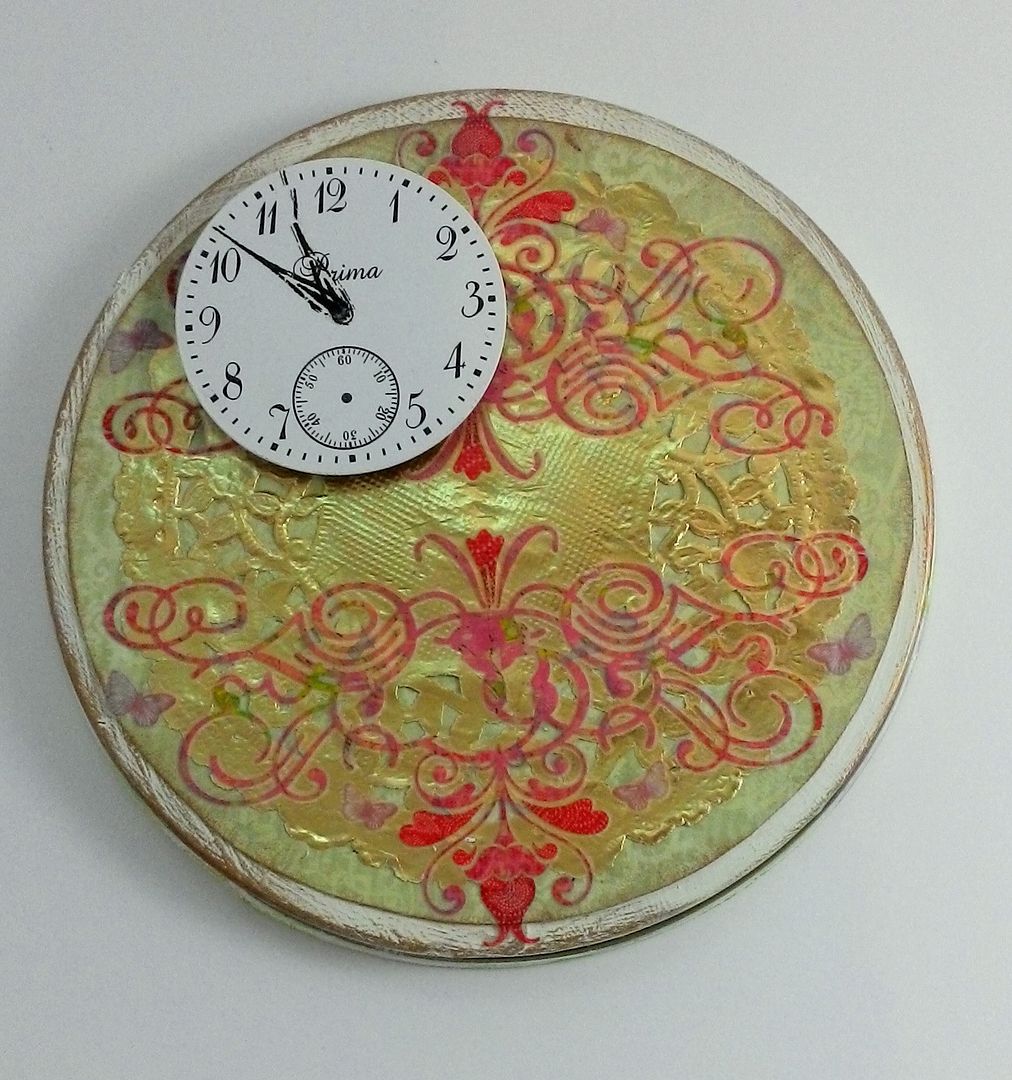
To decorate the inside of the
clock, I first added paper than a 4
inch gold doily. Next, I applied rub-ons
from my stash, and then a clockface popped up with a piece of double-stick foam tape.
I added the image of a woman which is popped up further than the clock, and then the window (popped
out even further) which is painted with Picket Fence Crackle paint and backed
with an image. There is lots of room to
create as much depth and dimension as you like.
I glued Gold
Dresden Myrtle Leaves to the inside of the glass and glued flowers to the
inside bottom of the clock. Once all the
pieces were decorated, I glued the glass in position and inserted the back of
the clock back into place. The last
step was to decorate the front of the clock with flowers.
On
the back of the clock I used an image from The
Garden Timeless scrapbook paper and more images from collage sheets and finally
paper flowers.