I love answering your questions. If you ask them in the comment section, I have no way to answer you (if you haven't heard from me, that is why). If you use the "EMAIL ME" in the left column of this page, I will be able to respond to you. You can also use it if you want to be added to my newsletter. Laura
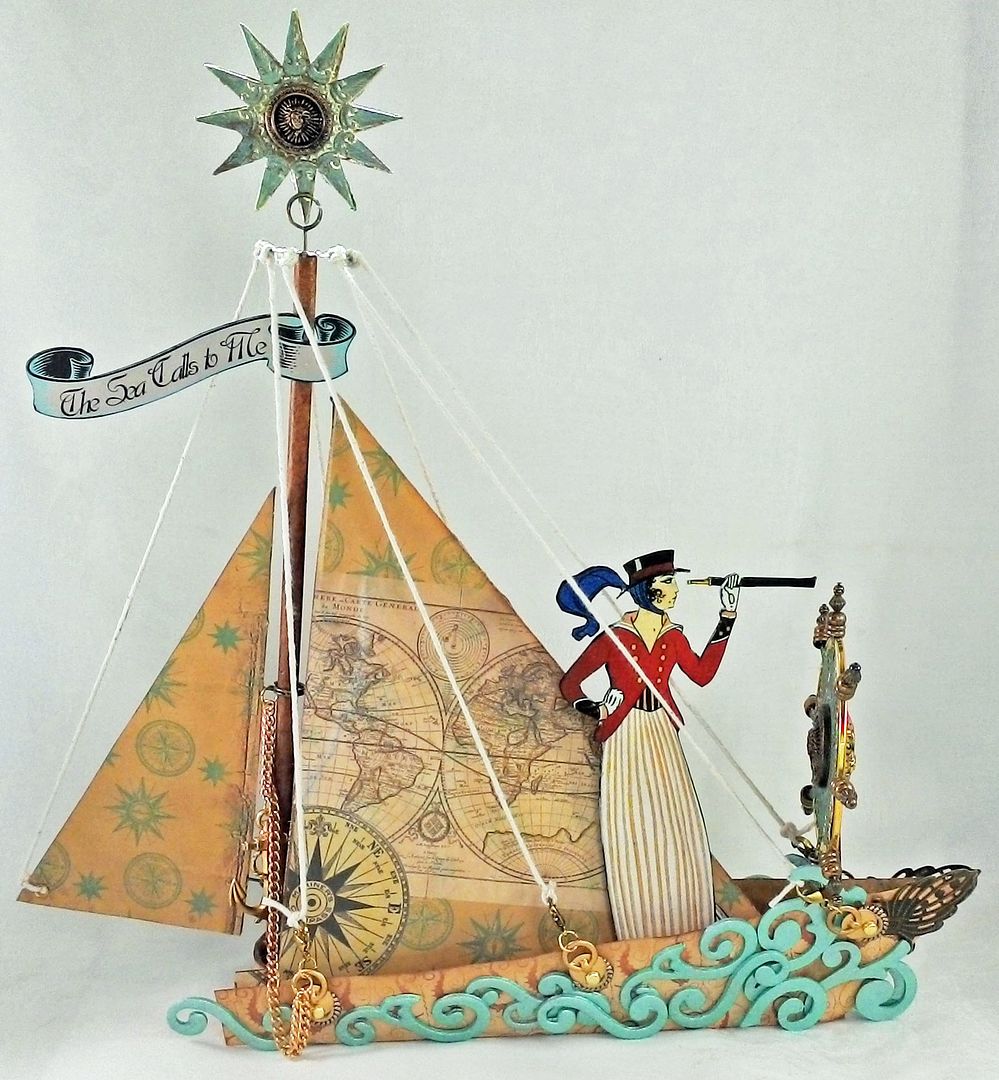
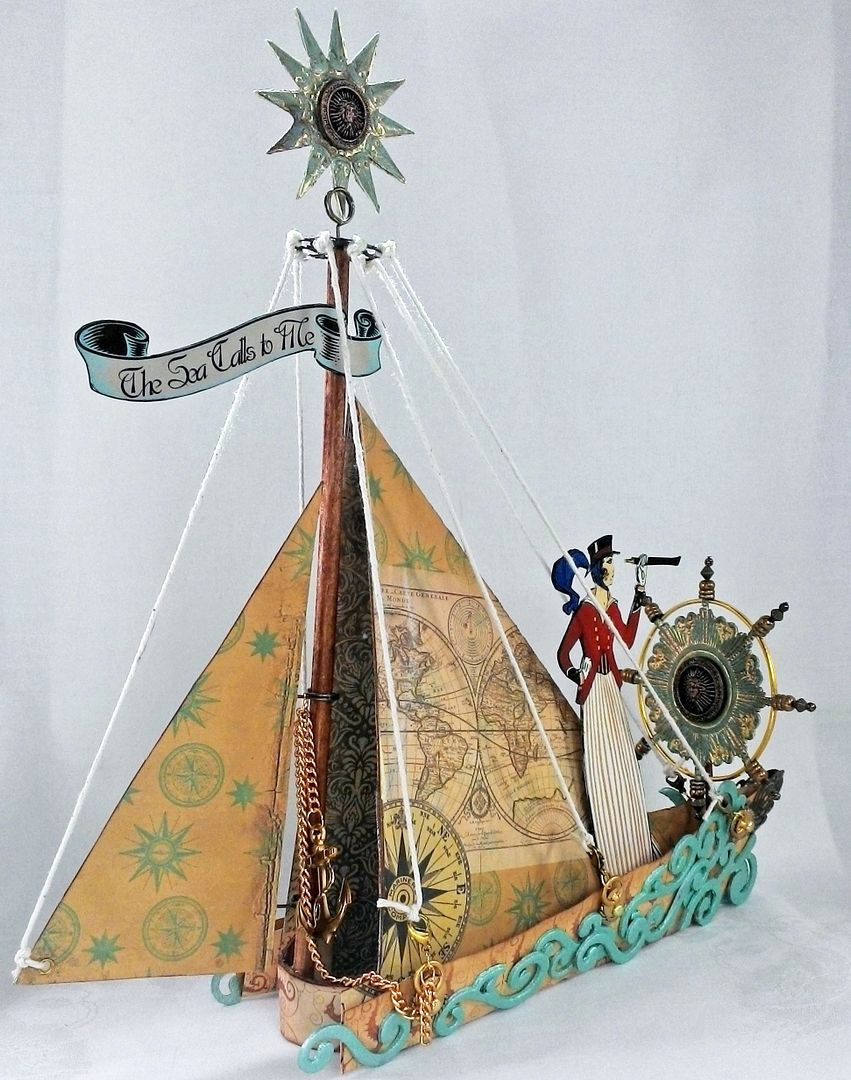
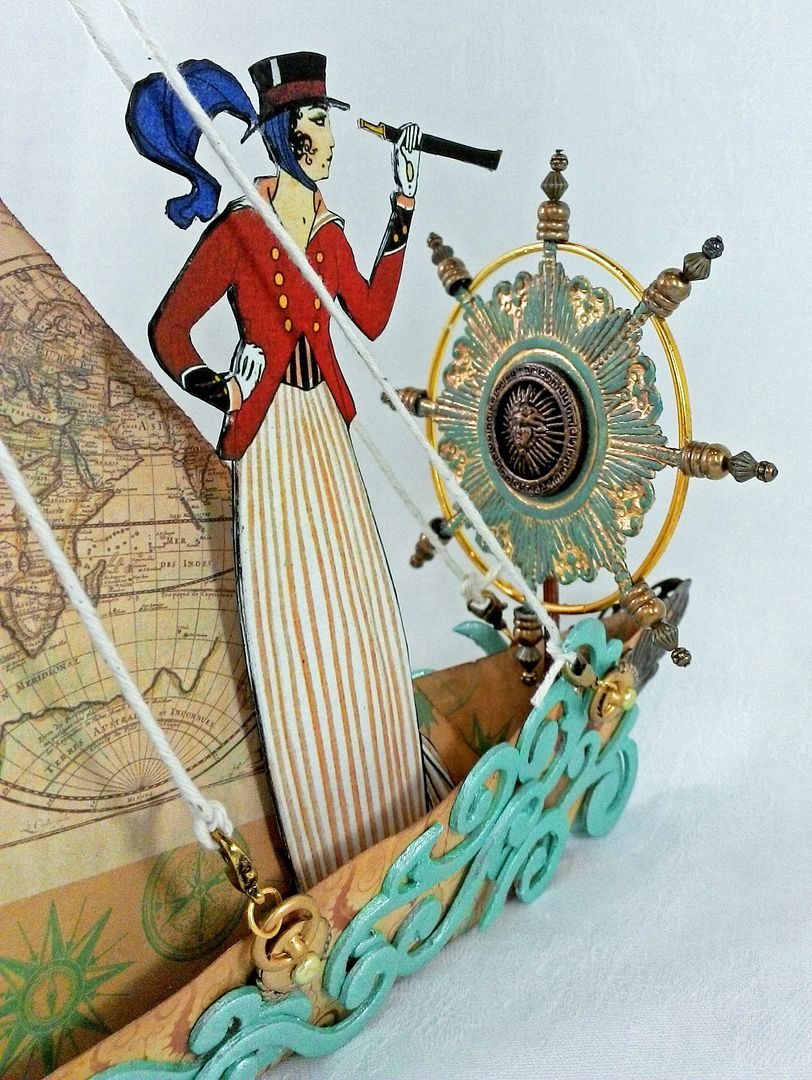
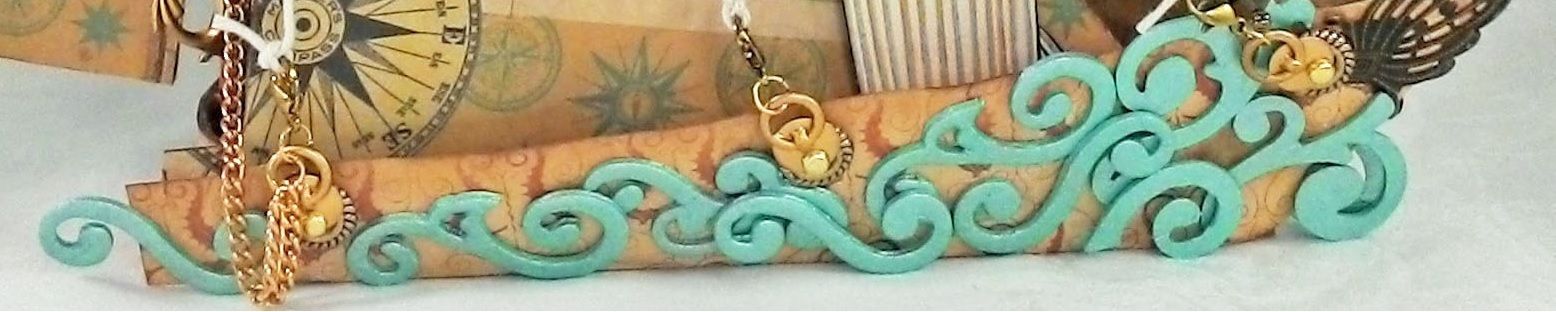
The teal
swirls along the sides of the boat represent the boat slicing through the
waves.
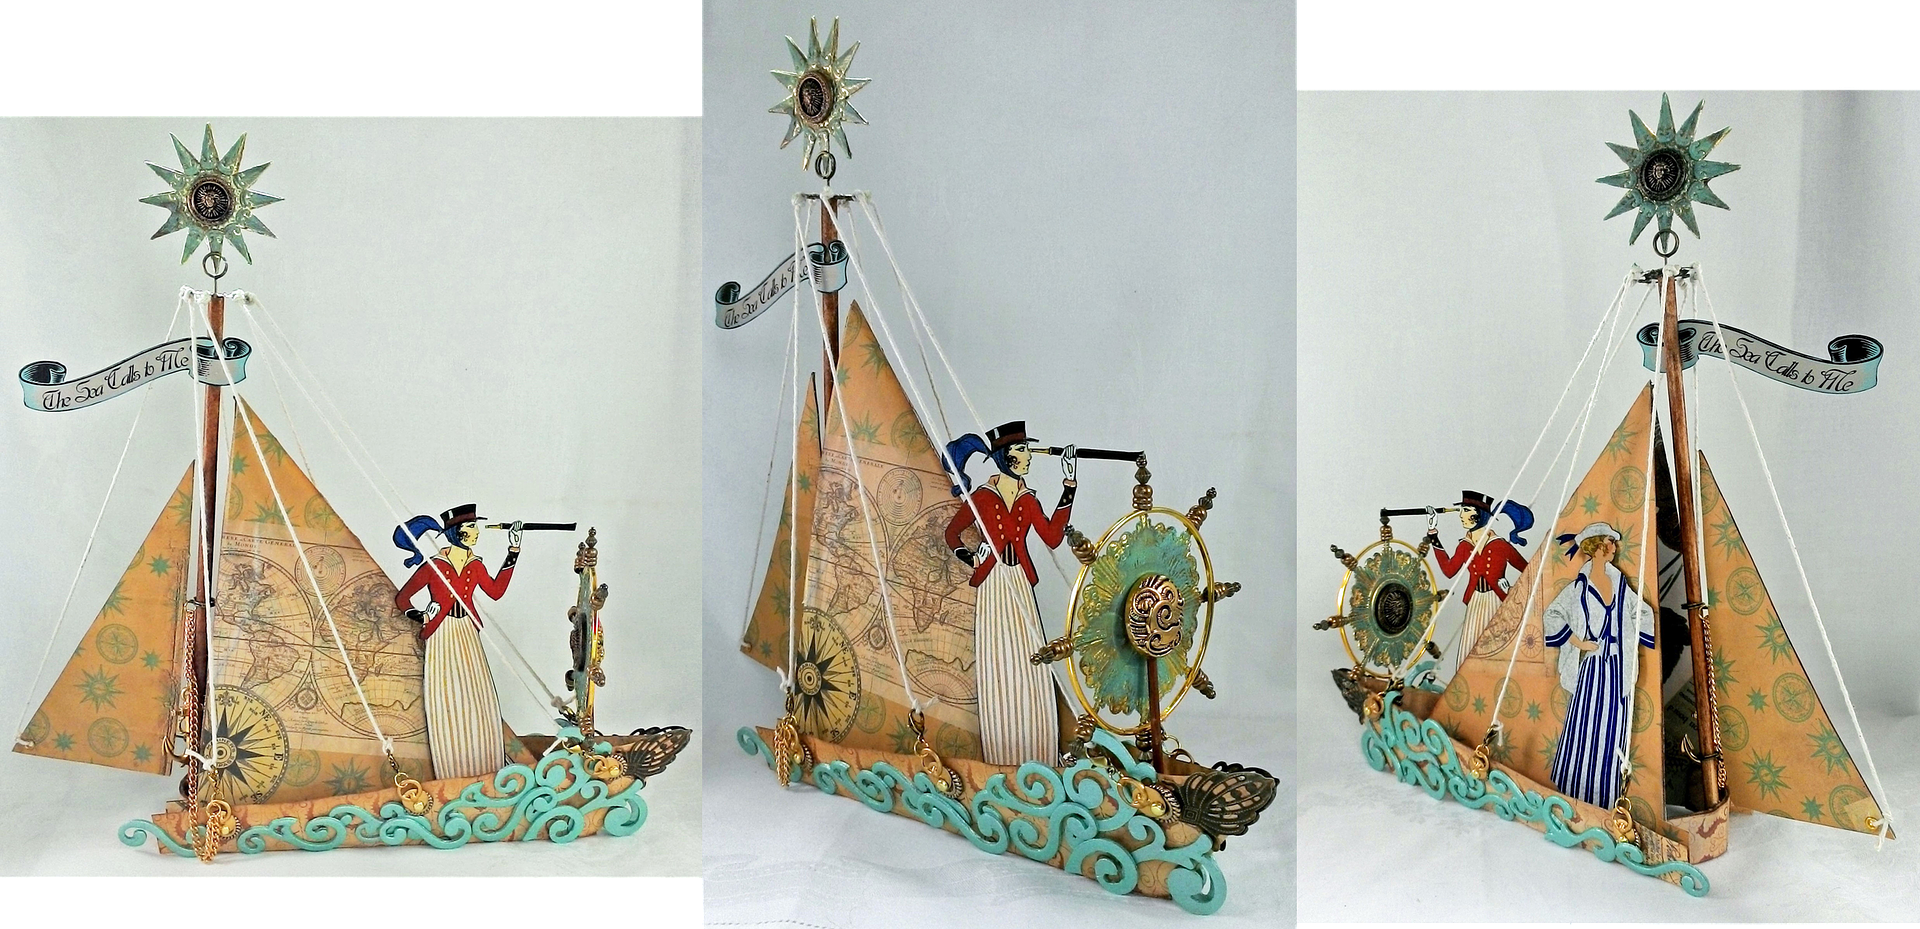
The adventurous
ladies on the boat are from my “TheSea Calls to Me” collage sheet.
TUTORIAL
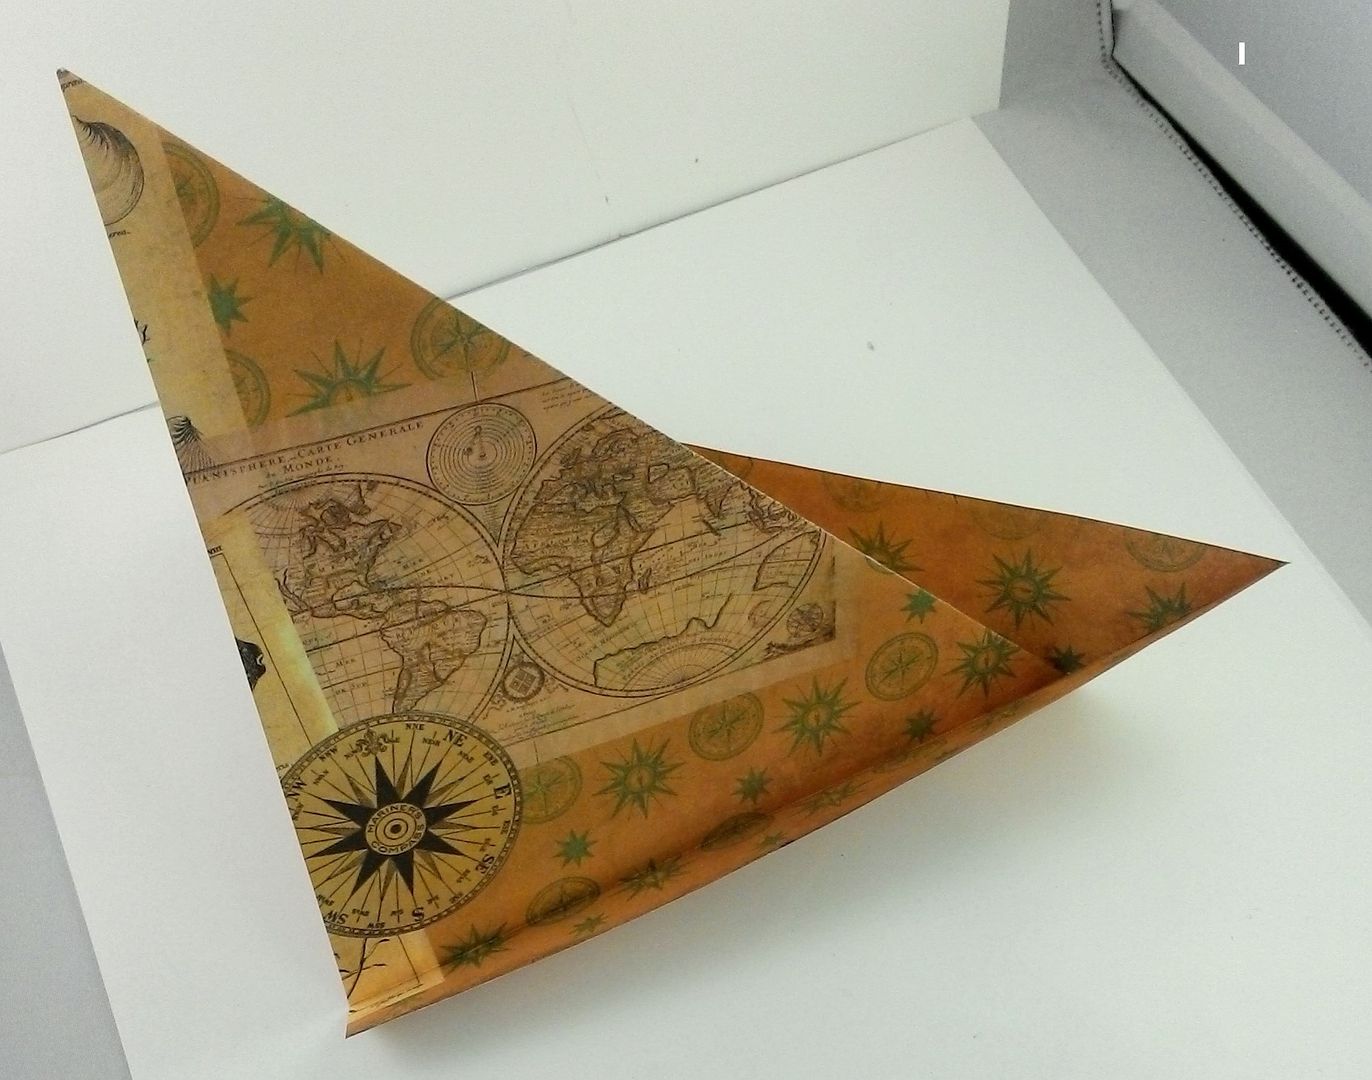
The
base of the boat is a paper sailboat which is super simple to make. I viewed several how-to videos on YouTube looking
for just the right sailboat. I wanted something
that was not complicated and that had a tall sail. The video below by Tavin fit the bill. With 3 folds you can create this boat. After watching the video continue through the
tutorial where I will cover the rest of the steps.
For my
boat, I used 12” x 12” double-sided patterned paper cut to 10” x 10”.
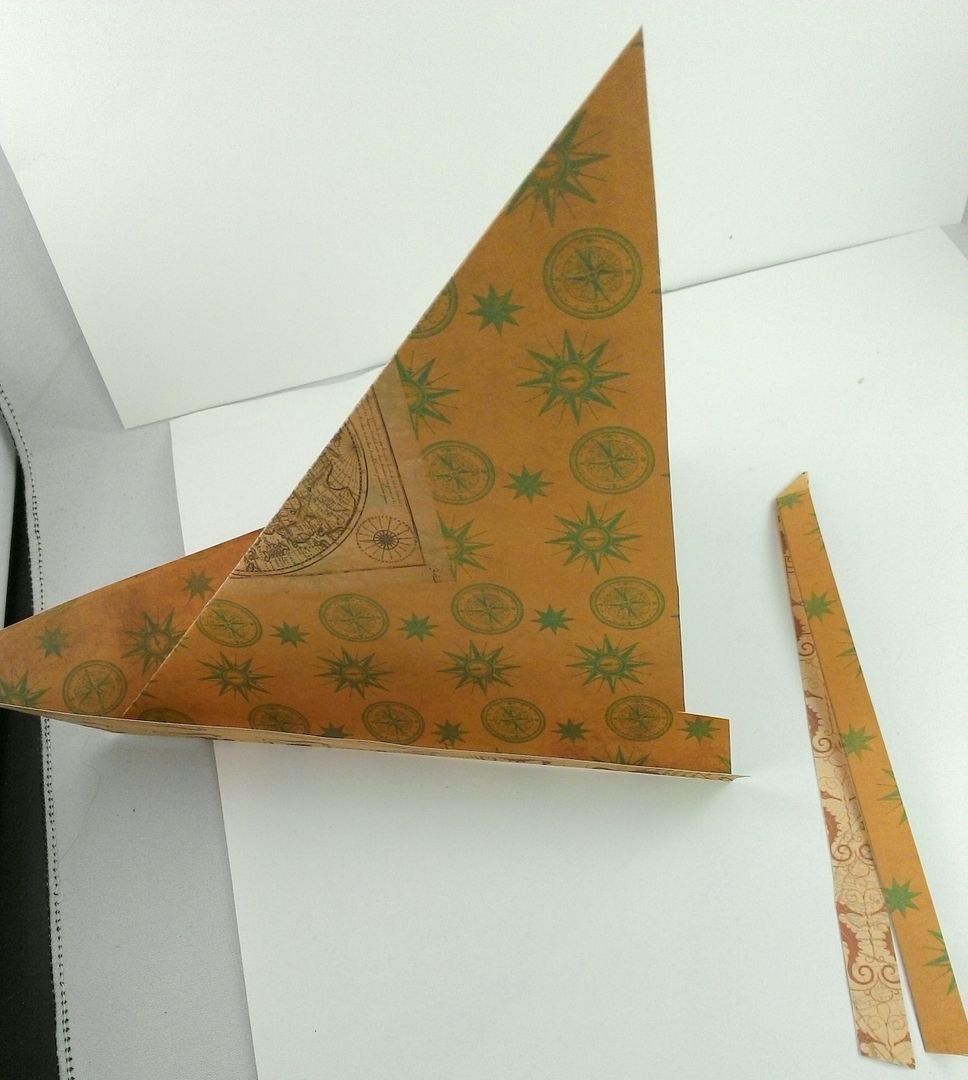
Once the
boat was folded I removed some of the paper from the back of the sail. I did this to accommodate an additional sail
on the back and the mast.
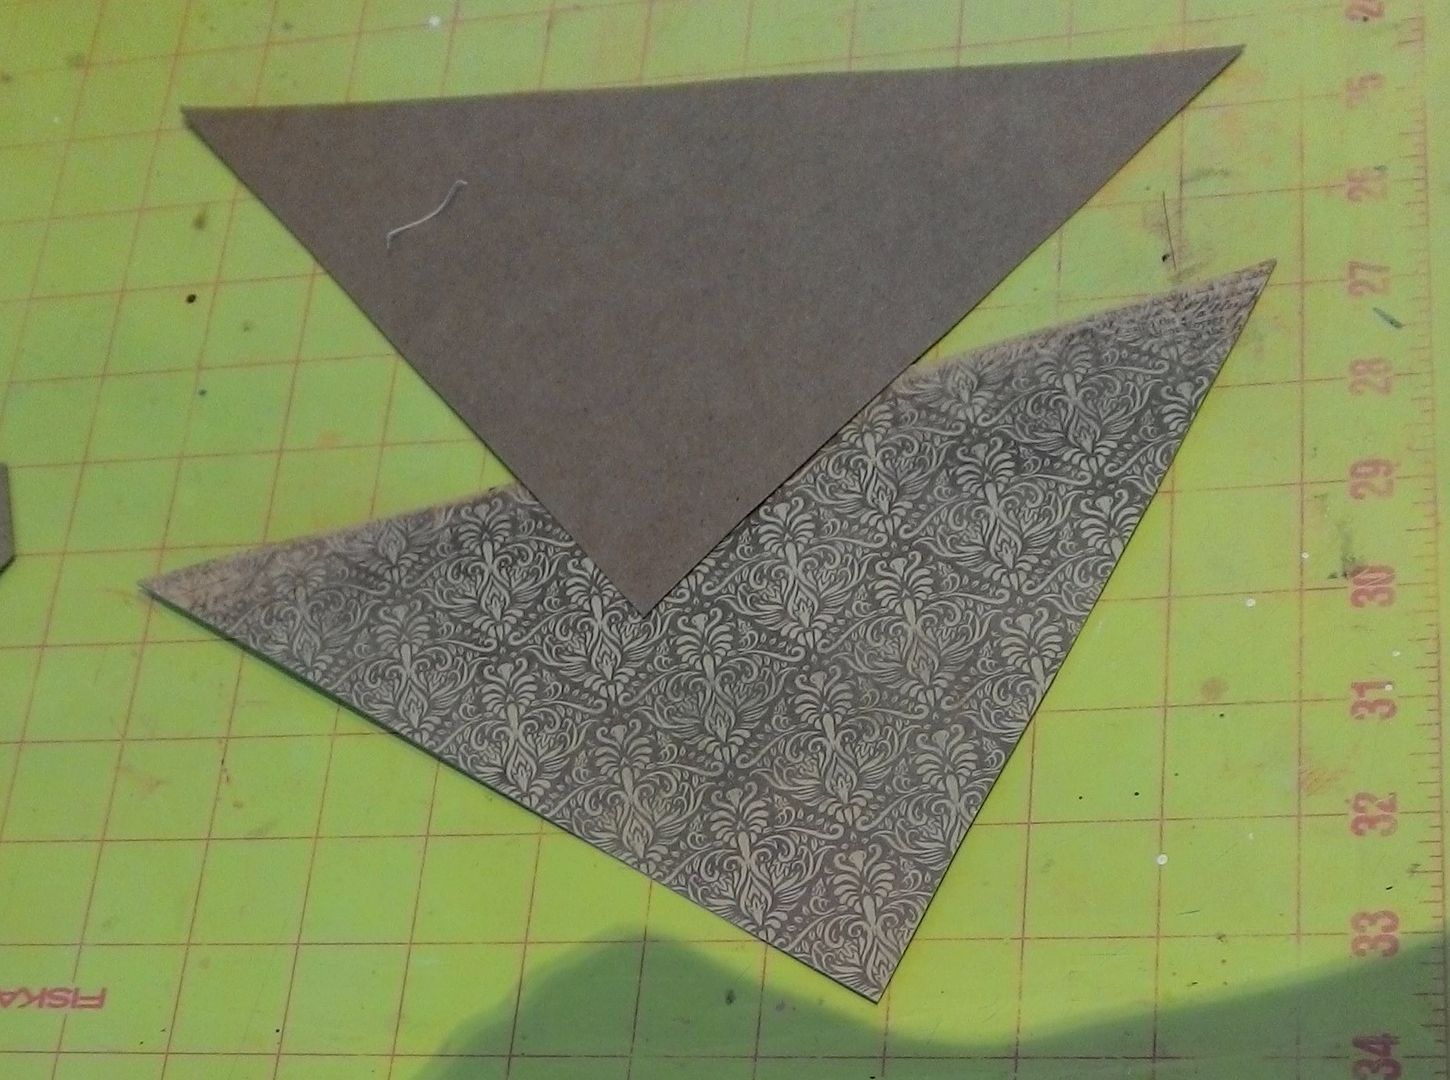
To make
the boat sturdier, I added pieces of thin chipboard to the insides of the
sail. On one side of the chipboard, I
added decorative paper. I used the sail
as the pattern and cut the chipboard slightly smaller so that it would fit
snugly inside the sail.
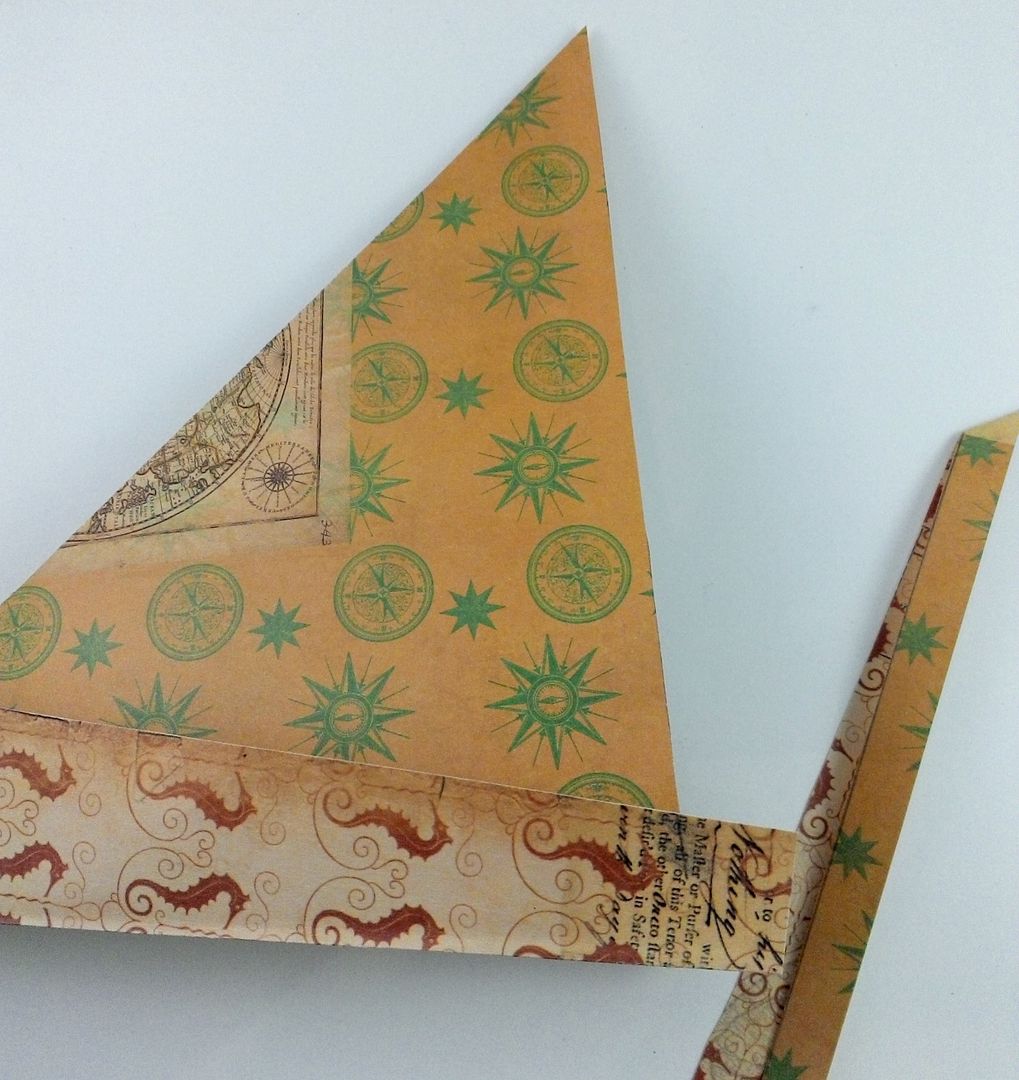
Below
you can see how I flattened the boat out and glued the chipboard in place.
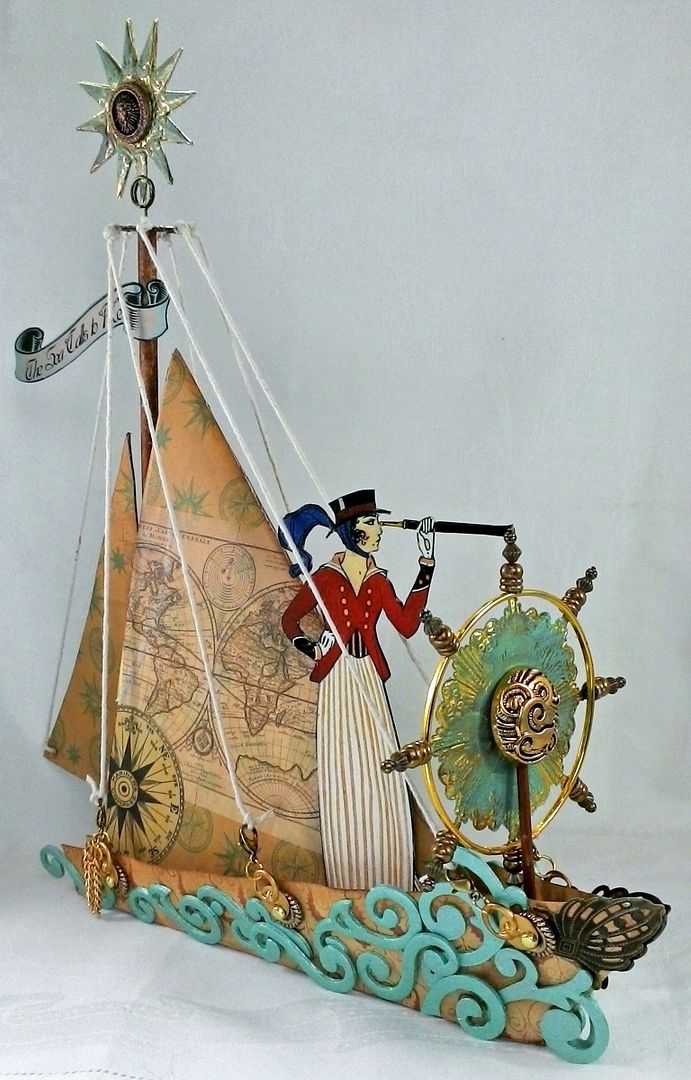
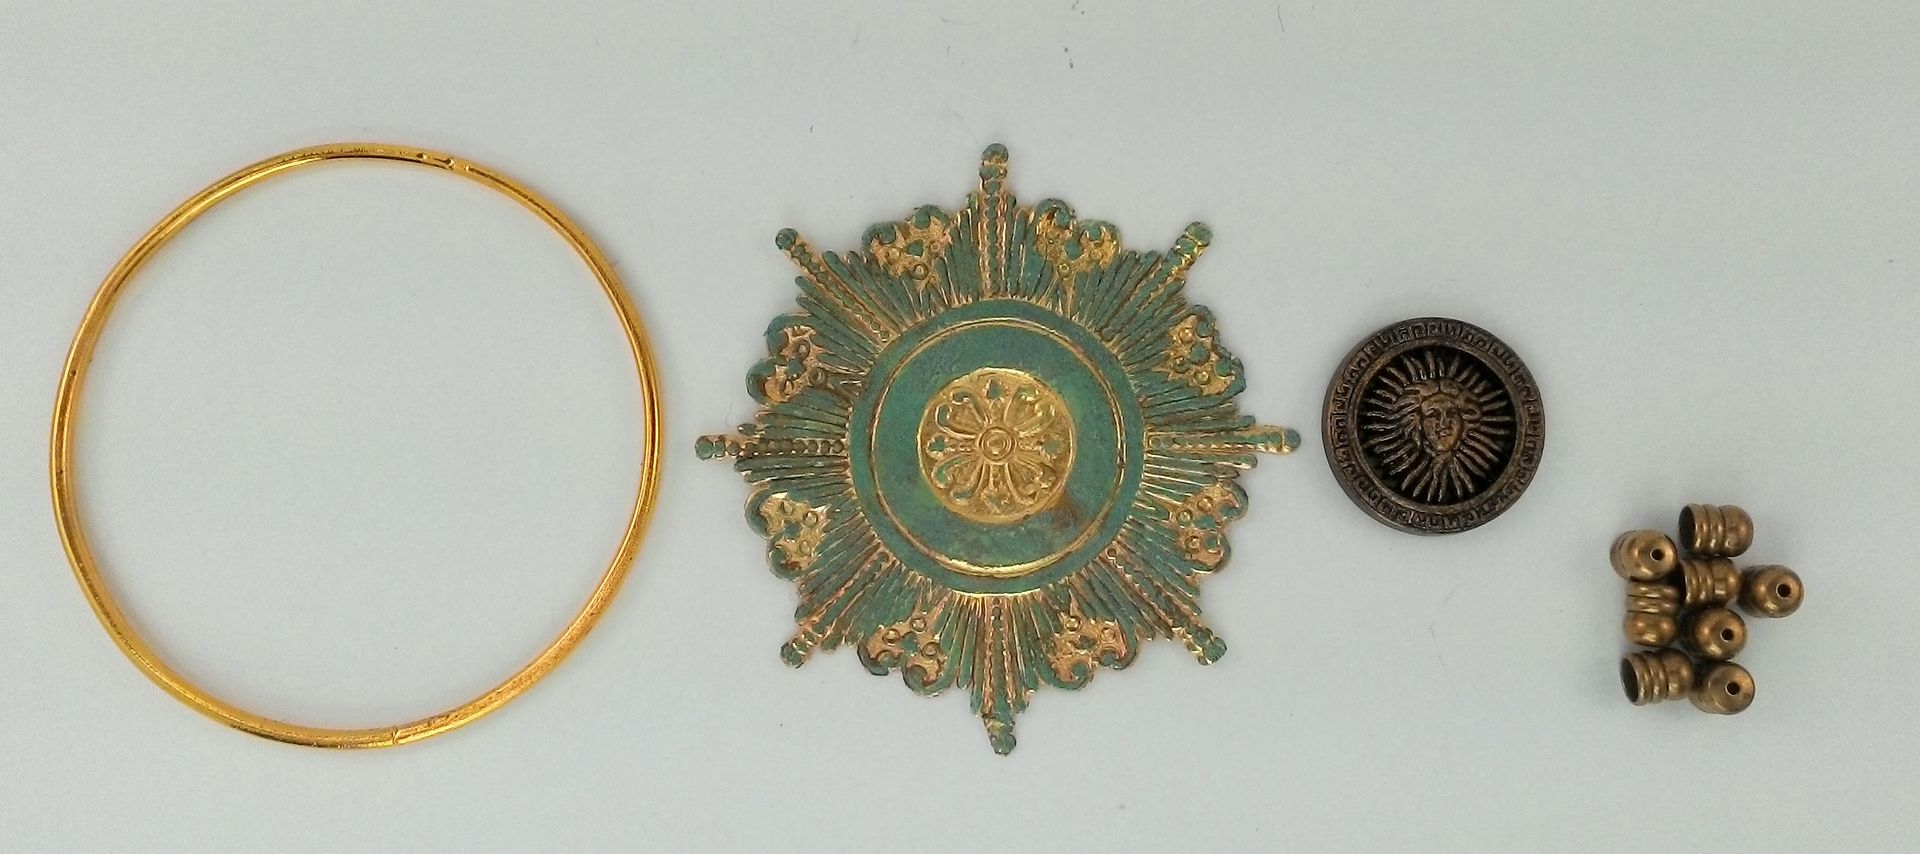
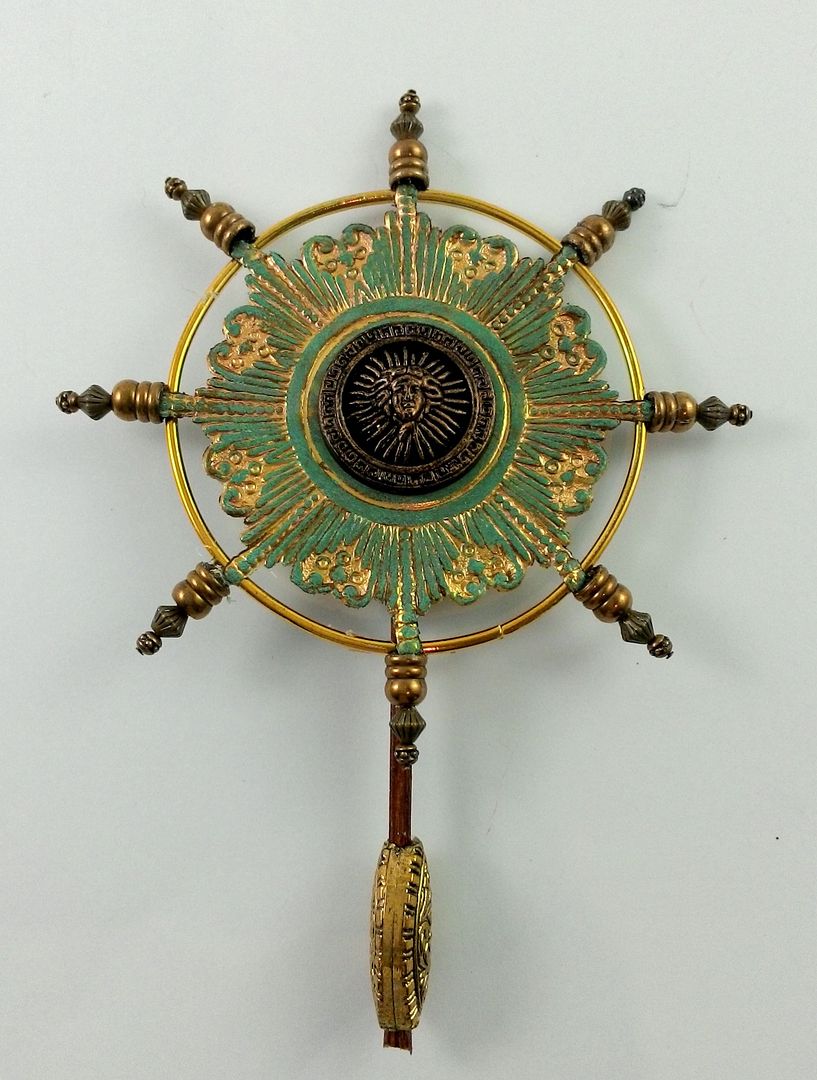
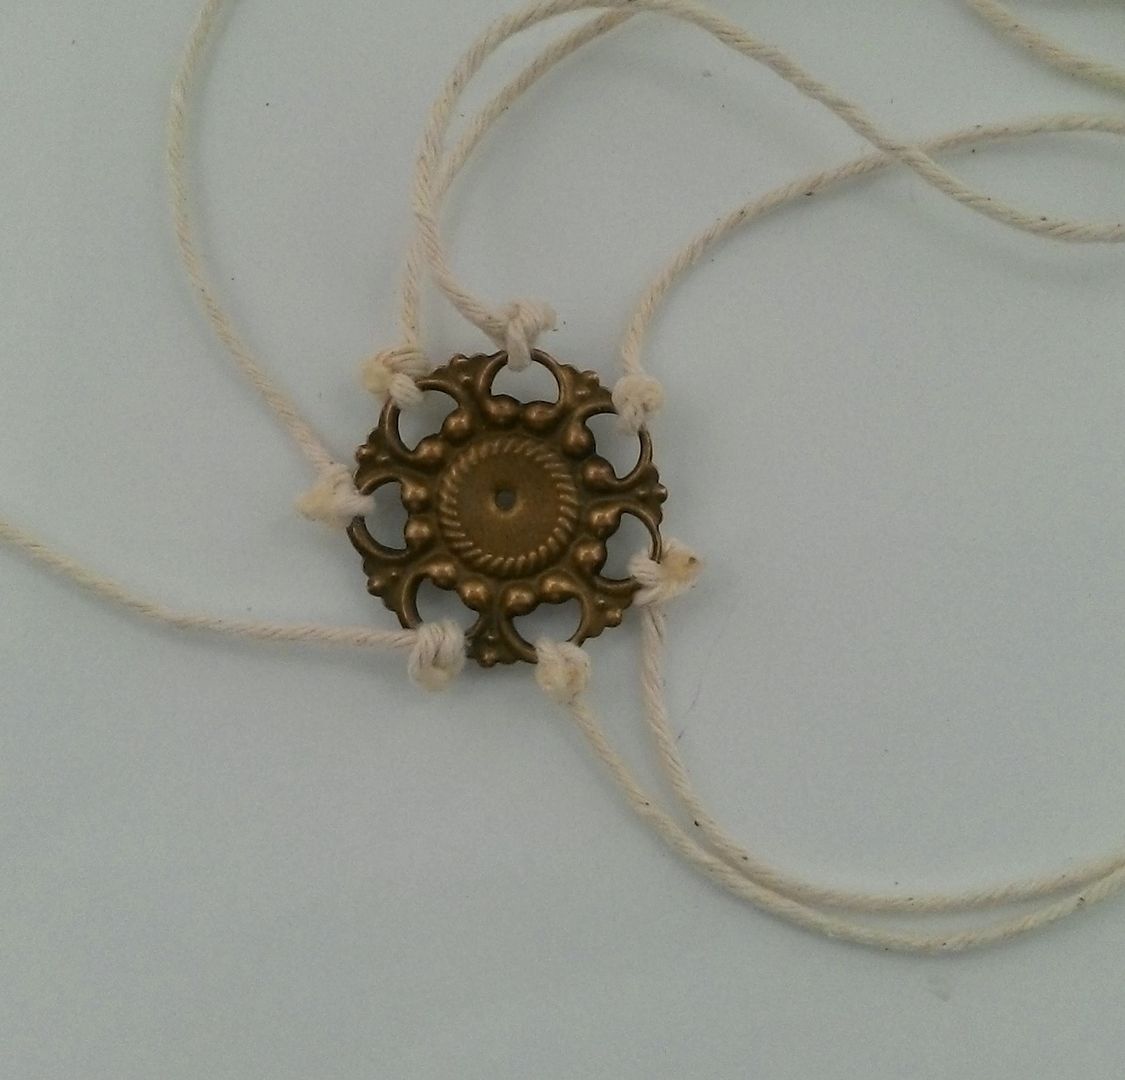
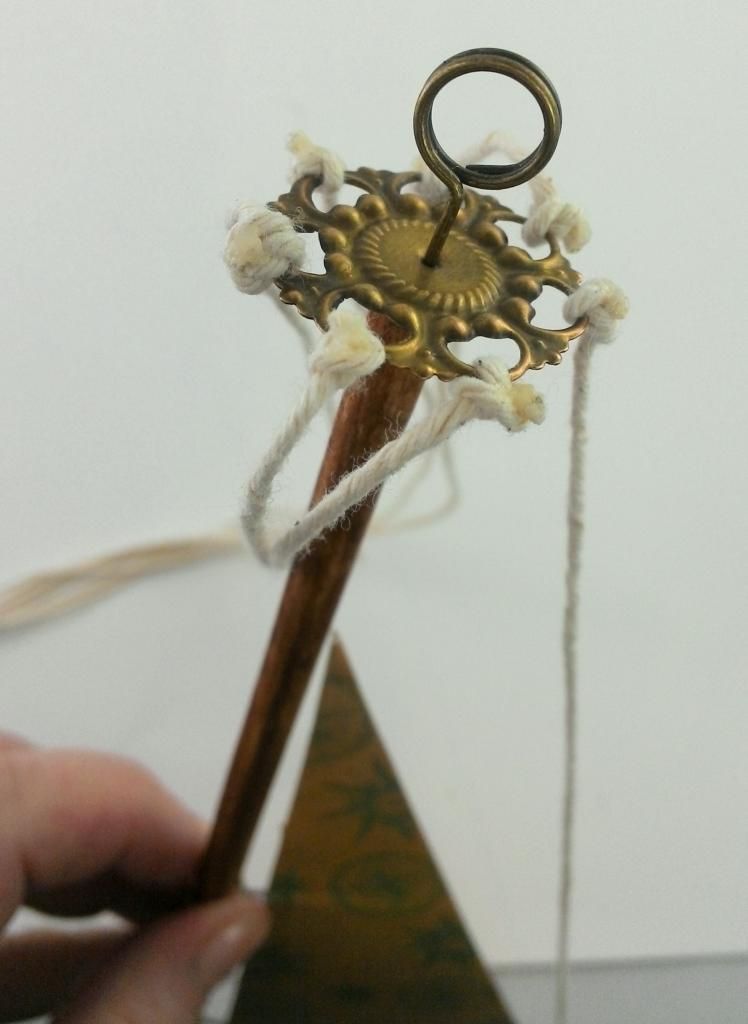
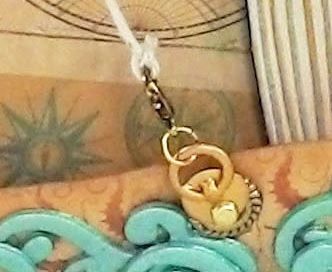
To
create the ship's wheel, I used a combination of a gold bangle, a gold Dresden Medallion, buttons, and other brass bits.
There is a complete list of the items I used at the bottom of the
post. The medallion is colored with
Patina Gilder’s Paste. The button is
painted black and then colored with Inca Gold Gilders paste( to make the design
pop).
I
attached the ship's wheel to a wooden skewer and then added a bead to the
bottom. The bead gives me a larger
surface area to glue the ship's wheel in place.
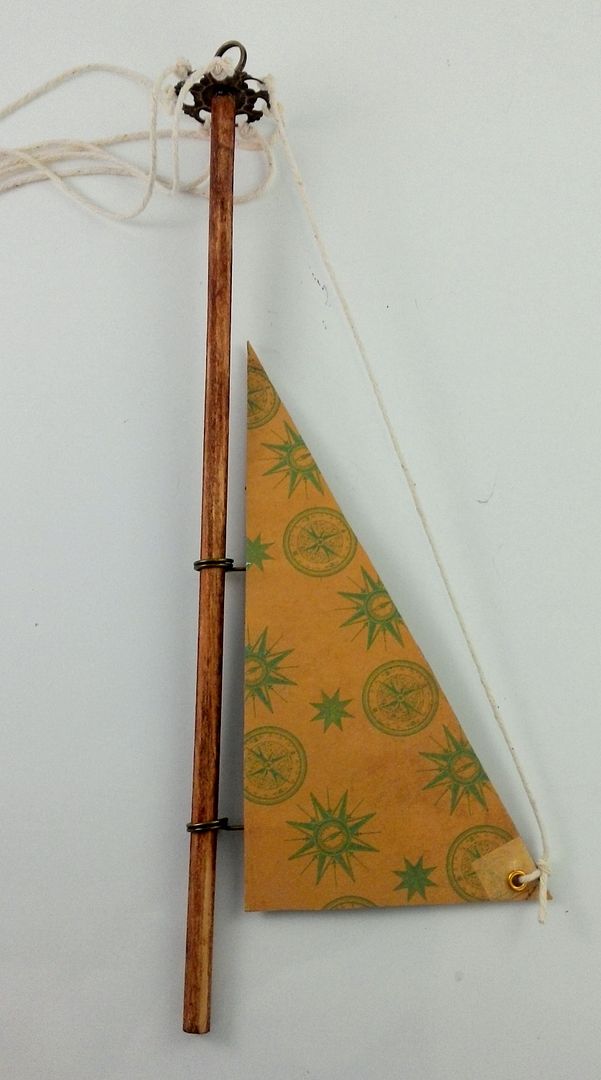
Next, I
made a mast with a second sail.
To accommodate
the string, I used a piece of brass with holes.
I tied 7 strings to the brass; 6 that attach to the main boat and one that
holds the small sail in place. I poked
a hole in the center of the brass piece.
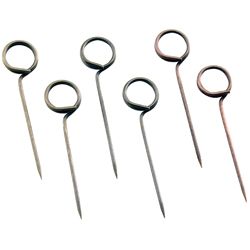
I used
a memo pin and glue (E6000) to attach the brass piece to the top of a wooden
dowel. I cut my dowel to 9”. I pre-poked a hole in the dowel before
inserting the pin. The dowel is stained
with Vintage Photo Distress Ink.
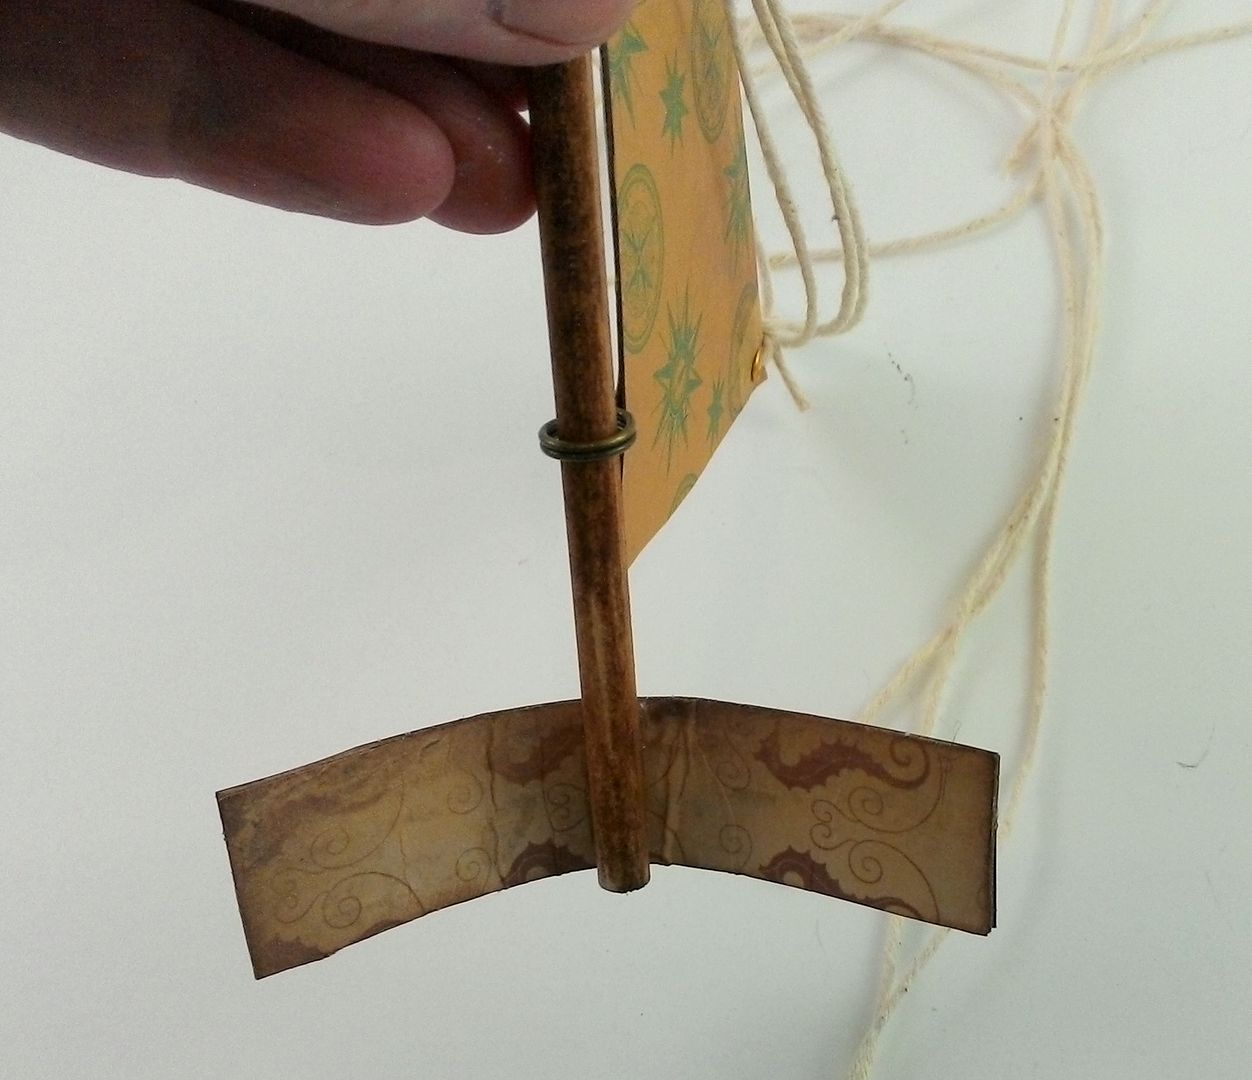
The
sail is made from two pieces of decorative paper glued together with two memo
pins glued between them. The loop of the
memo pin slides onto the dowel. I
punched a hole in the sail and added an eyelet.
One of the strings from the top is inserted through the eyelet. The string keeps the sail in place and the
sail is free to move from side to side.
To the
bottom of the wooden dowel I glued a piece of light chipboard covered with
decorative paper.
The
piece of chipboard is used to attach the mast to the boat and to keep the back
of the boat from opening too far. Make
the height of the chipboard small enough that you won’t see it from the side of
the boat.The width depends on how wide
you want the back of your boat to be.In
the picture, you can see that I curved the chipboard and glued it in place just
inside each side of the mainsail.
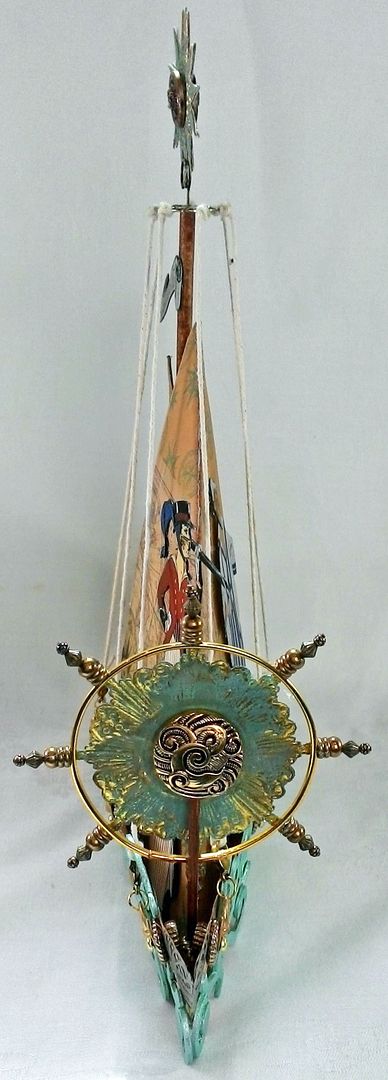
One of
the great things about memo pins are that they gave me a way to attach the
Dresden Star to the top of the mast. I
glued two stars together and colored them with the Patina Gilders paste. Glued in the center of the stars is a button
colored in the same manner as I colored the buttons on the ship's wheel. The double-sided banner is glued to the mast.
To accommodate
the other six strings which make up the mainsail rigging, I punched 3 holes on
each side of the boat. I glued a rondelle
on top of each hole. Using a brad, I
attached ring handles. Doing it this way
means that the ring handles are free to turn making it easier to attach the
string and to get the string taut. I
attached lobster claw clasps to the ring handles using a jump ring and then
tied each string to the lobster claw.
The string not only visually looks like rigging but also functions like
rigging to keep the mast and small sail in place and straight.
Along
the bottom of the boat I used chipboard swirls (you’ve seen me use these on
lots of projects) to add the sense of the boat slicing through waves.I used filigree pieces to dress up the front
of the boat..
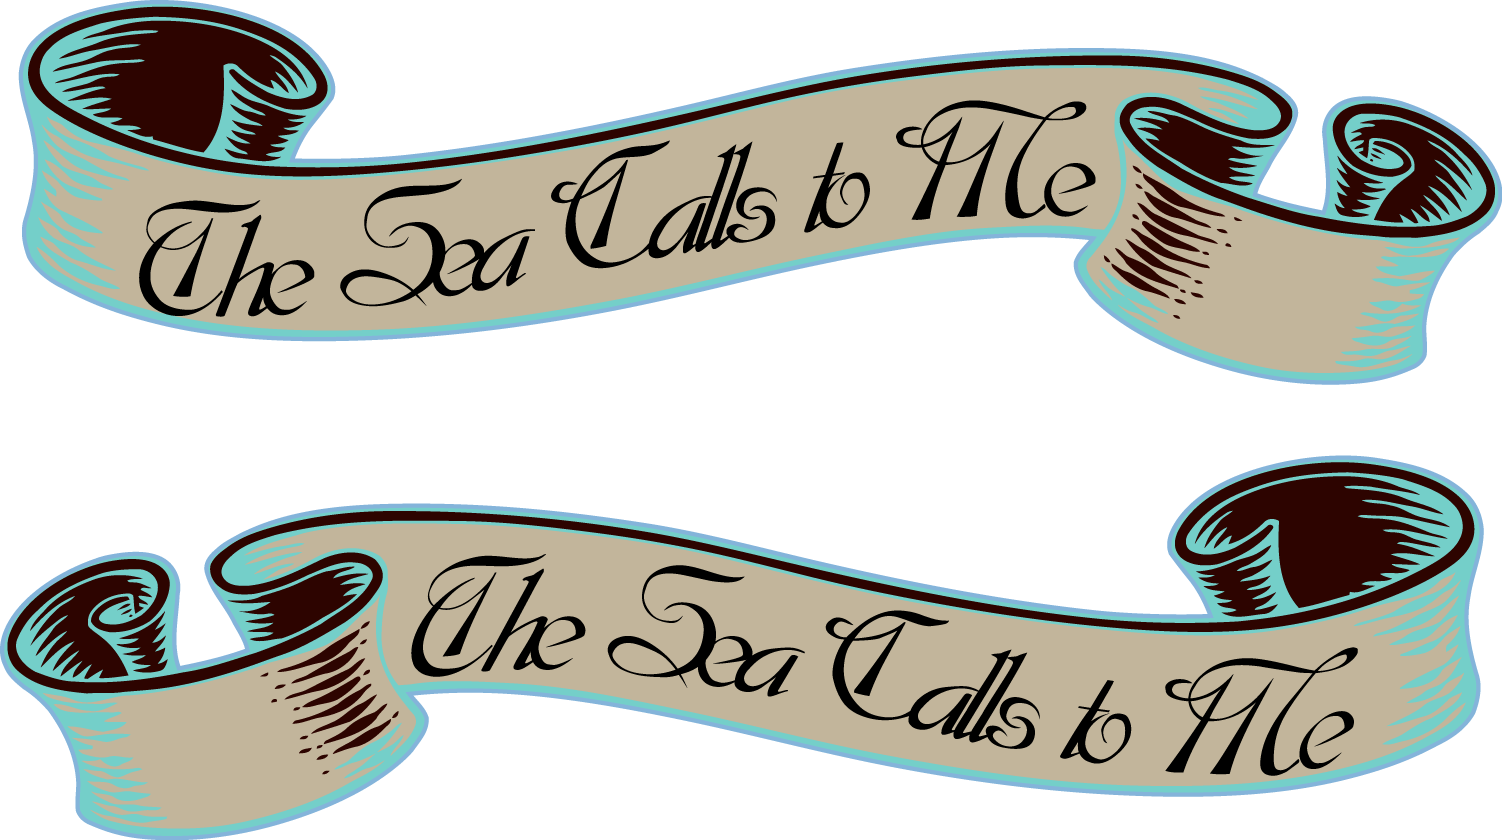
Below
is the banner I cooked up for this project.
There are two so that they can be glued together to make a double-sided
banner. Feel free to use them in your
art.
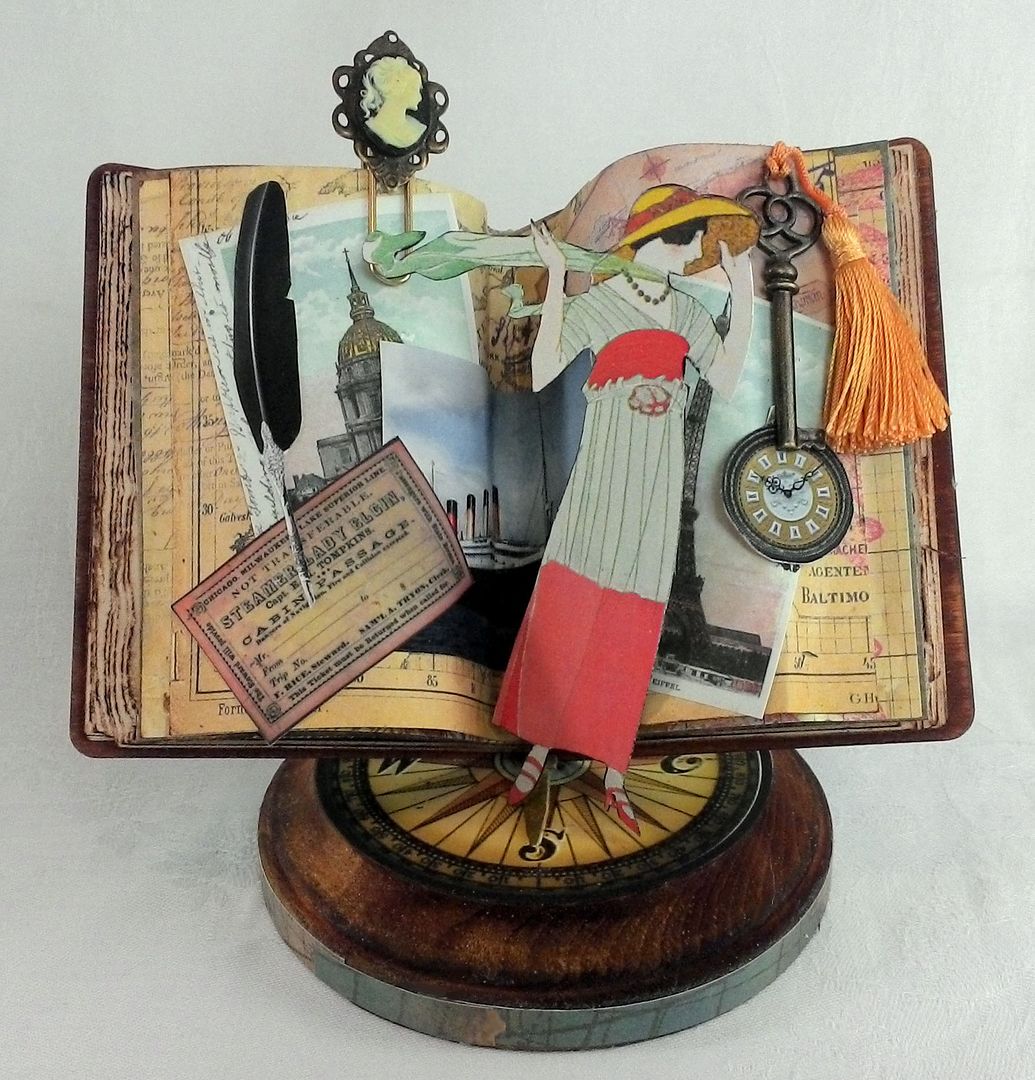
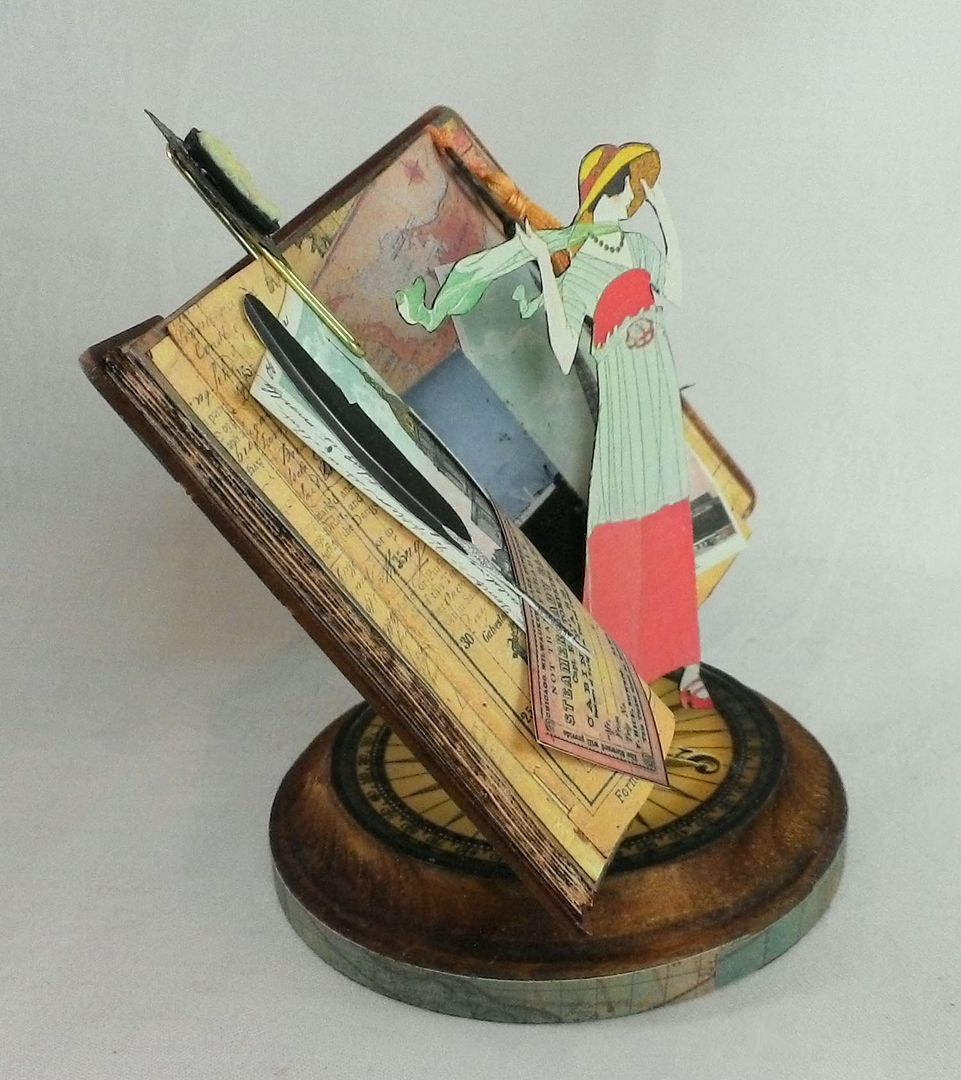
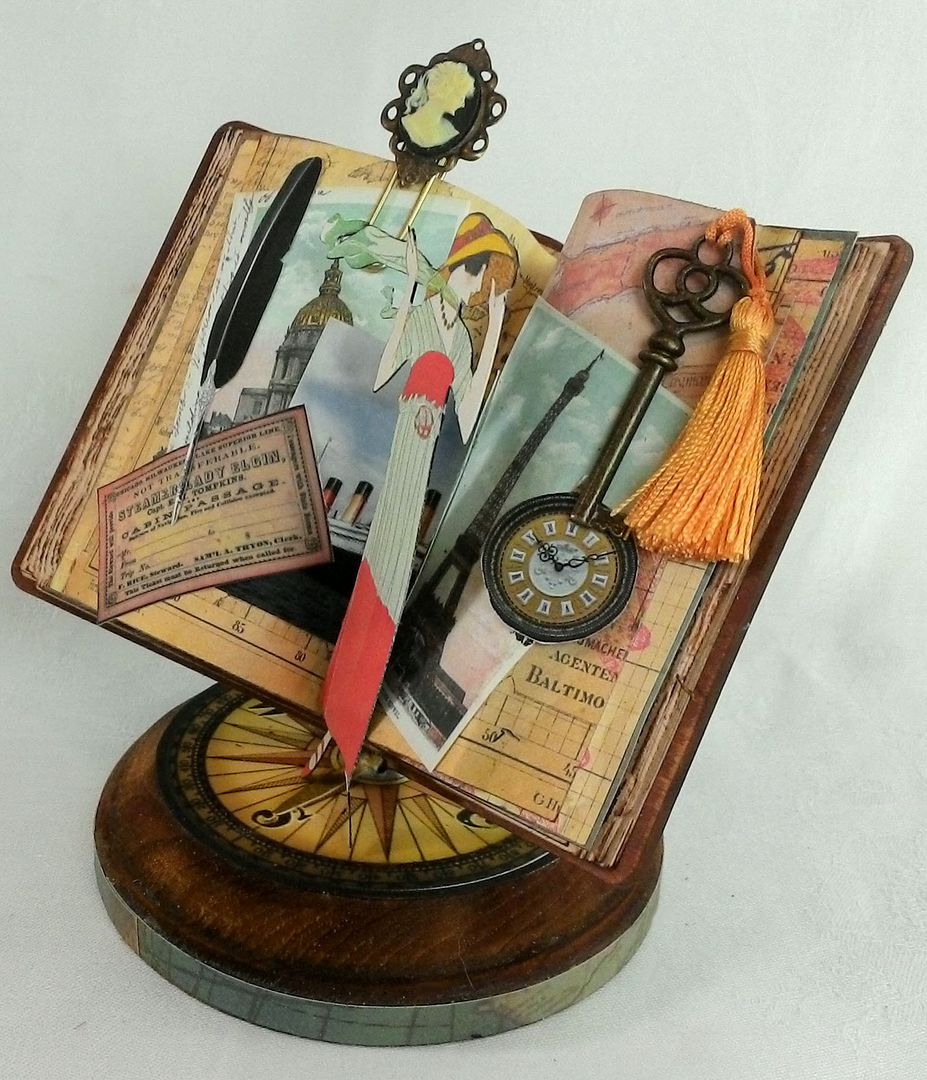
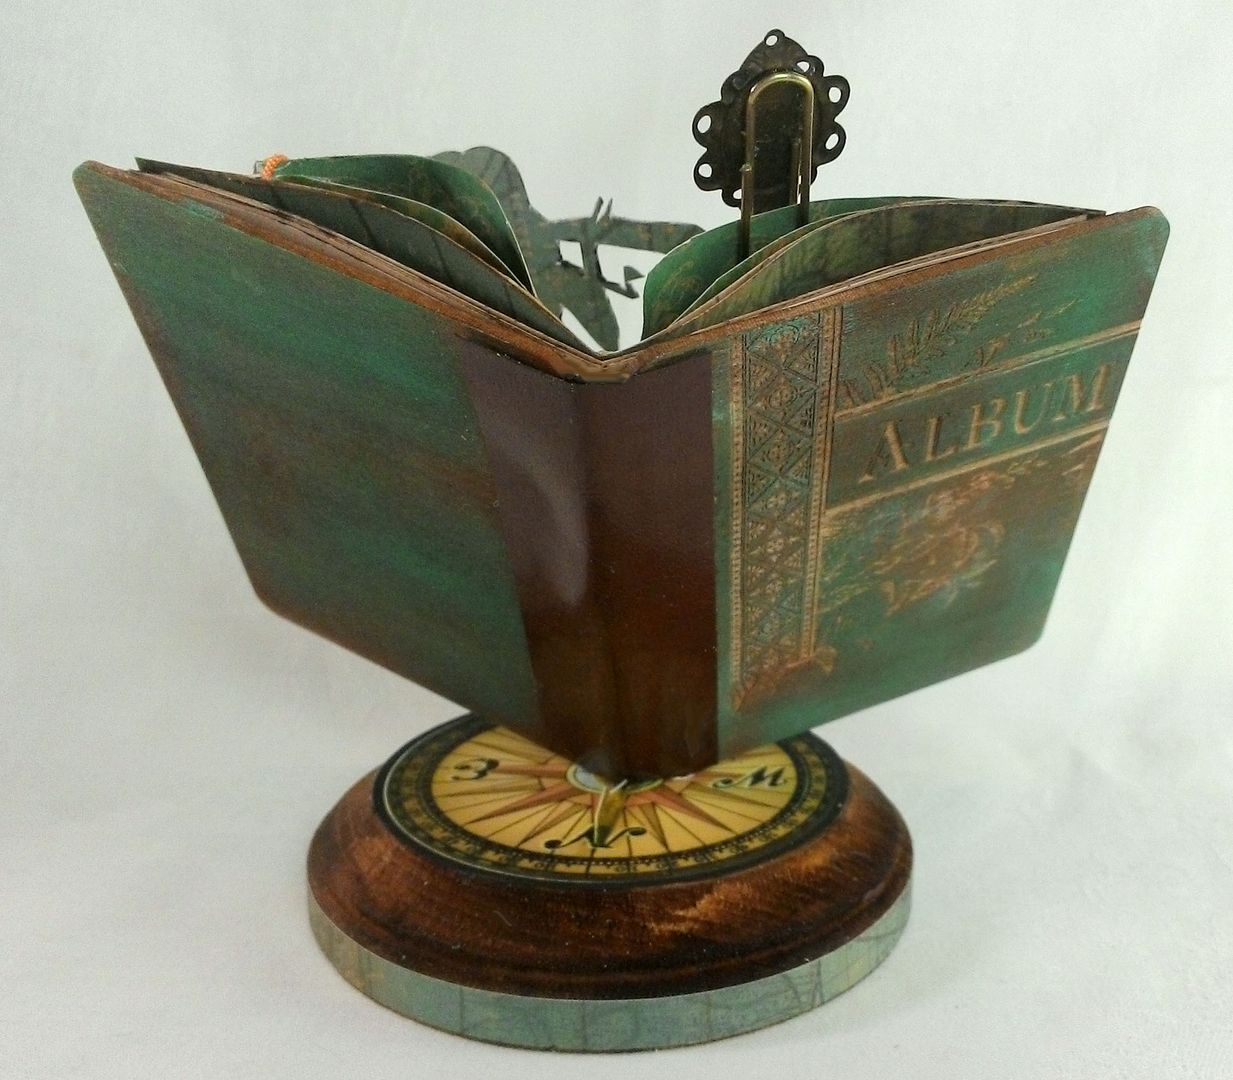
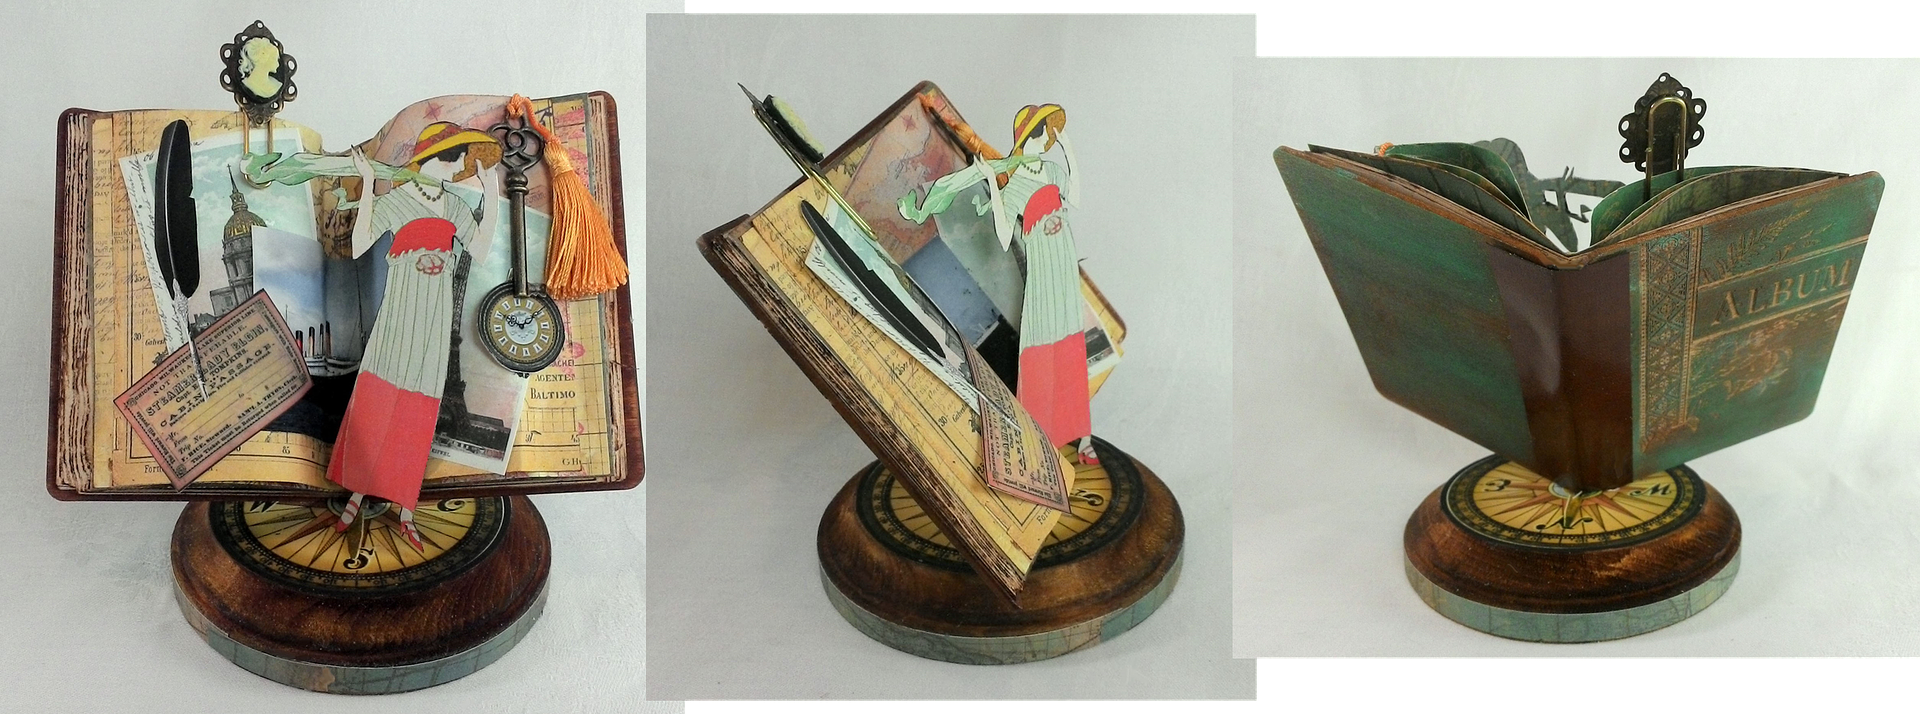
I’ve made many traditional handmade
books and journals over the years but this time I decided to take this travel journal
in a different direction and create something that was more of a display piece.
The book is mounted on a wooden base using a wooden skewer with the pages glued
in place. The open book becomes the display
area. Beyond an art piece, I could see
doing this with a photo and some ephemera from a real trip.
TUTORIAL
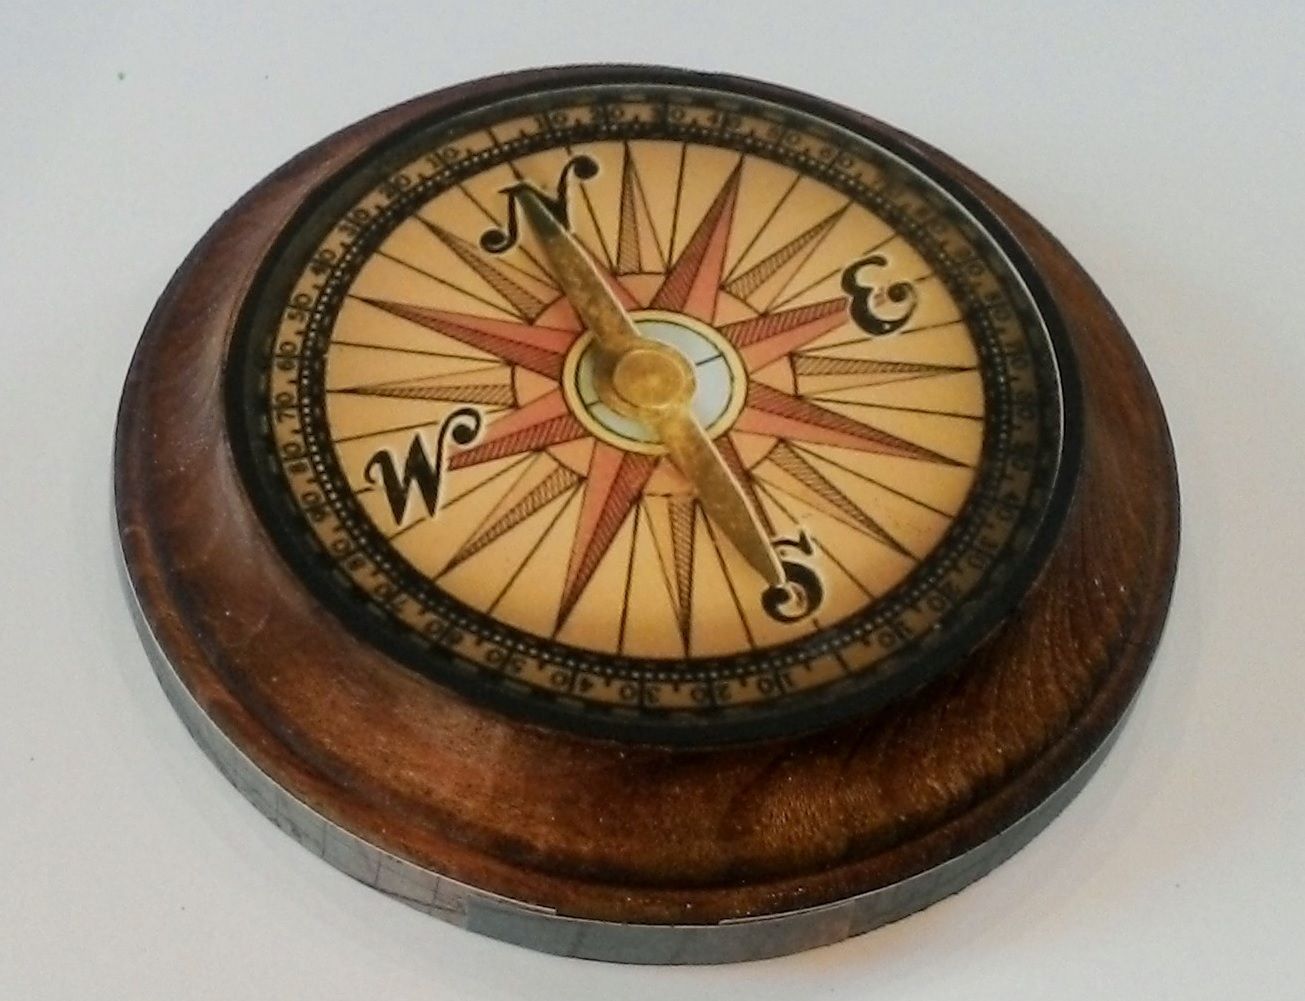
I started by staining the
wooden base with Distressed Ink. I
covered the bottom edge with paper and then use the compass image from my The Sea Calls to Me Collage Sheet for the top of the
base.
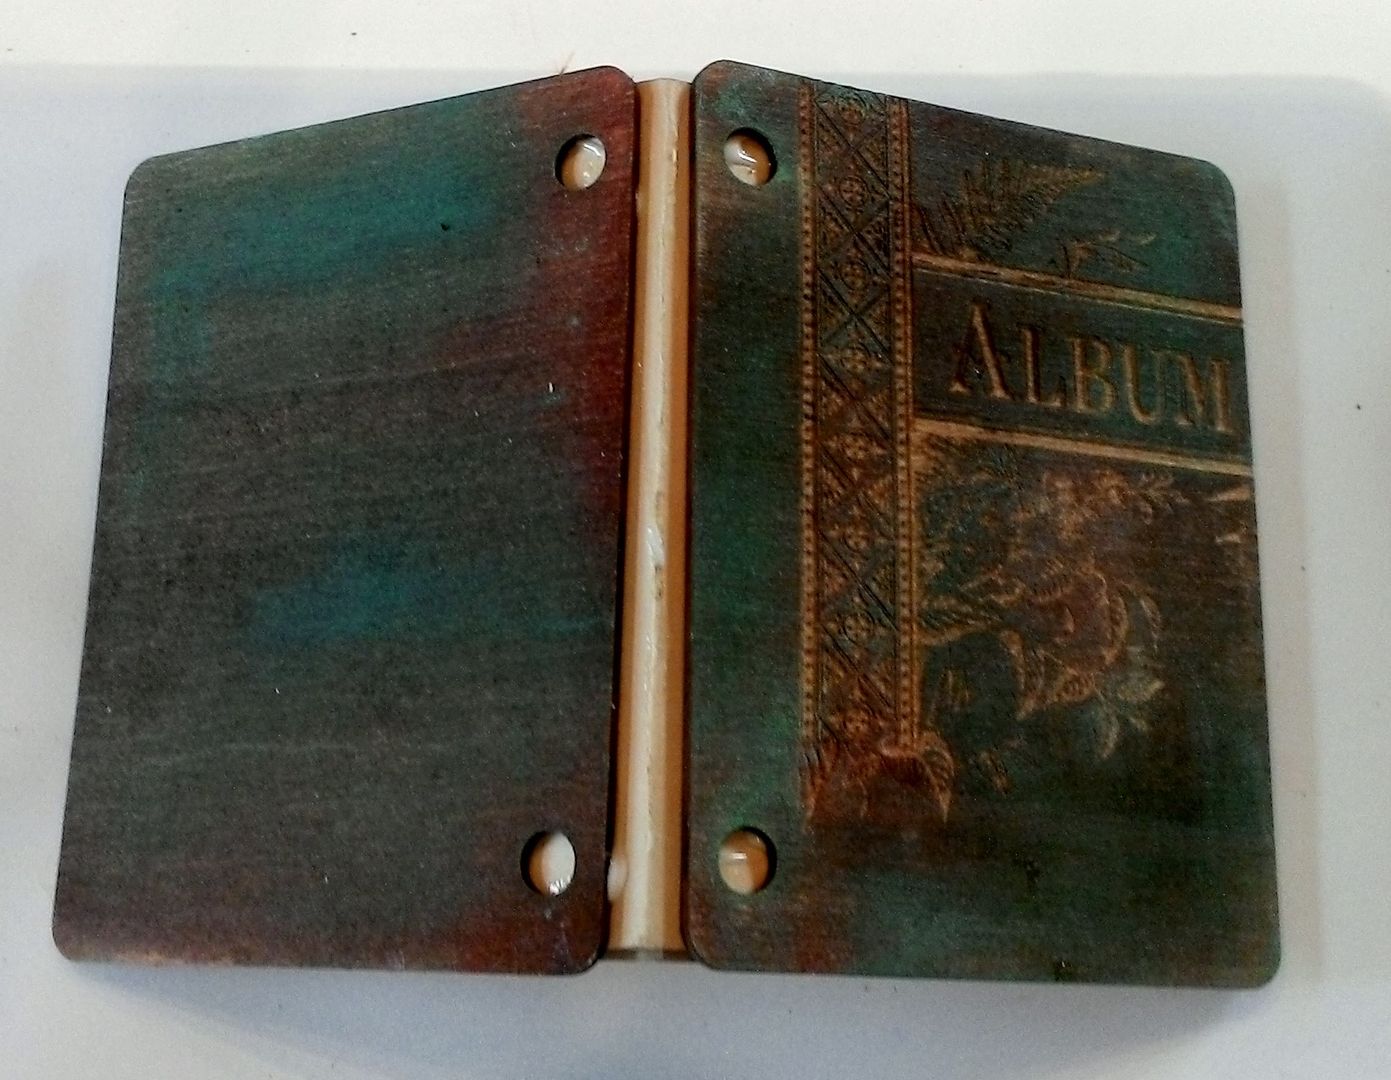
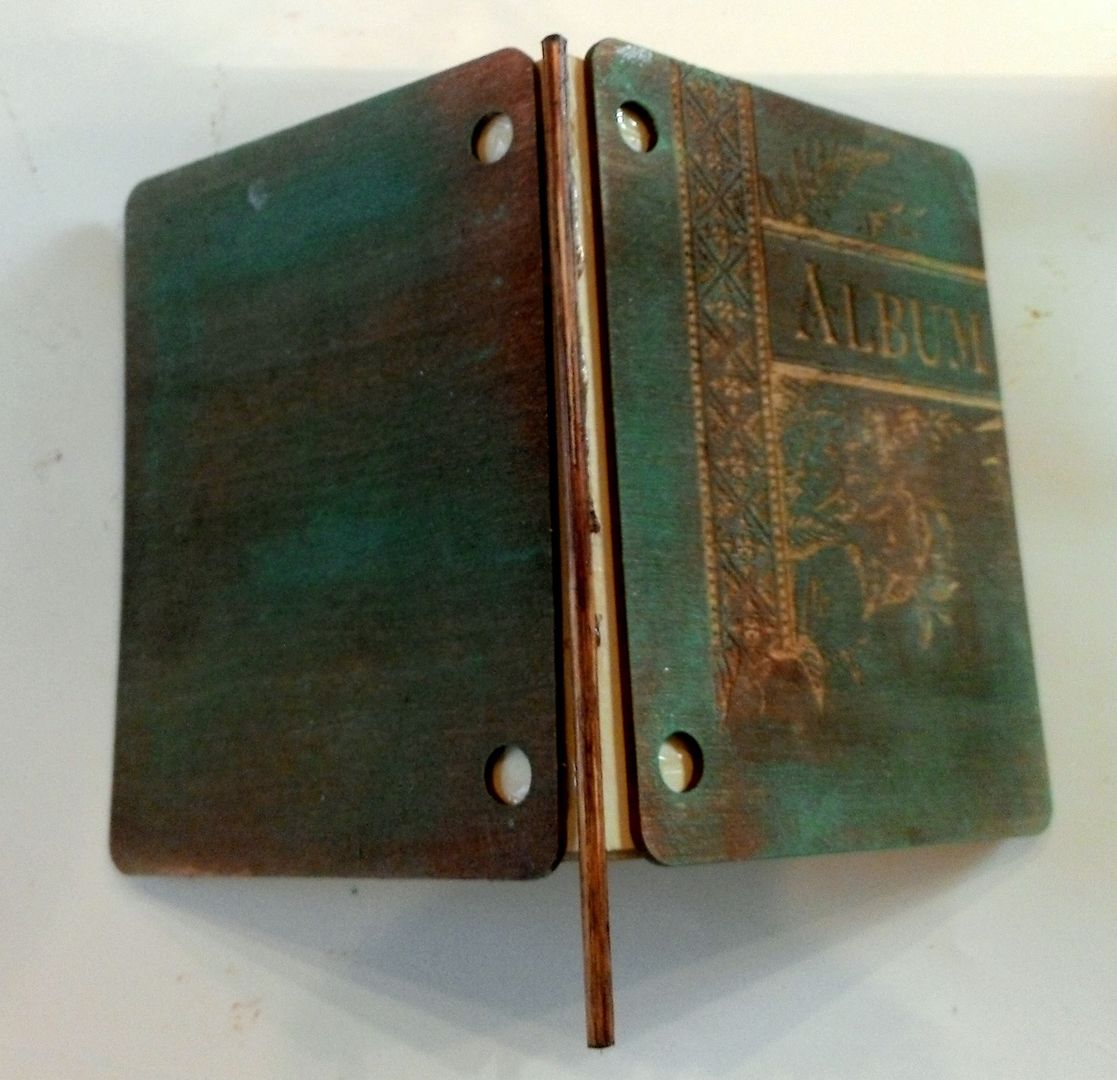
The wooden
album covers measure 2 7/8 x 3 7/8” which makes them slightly larger than
an ATC. I used Distressed Ink to stain
the covers and then Gilder’s Paste to add color.
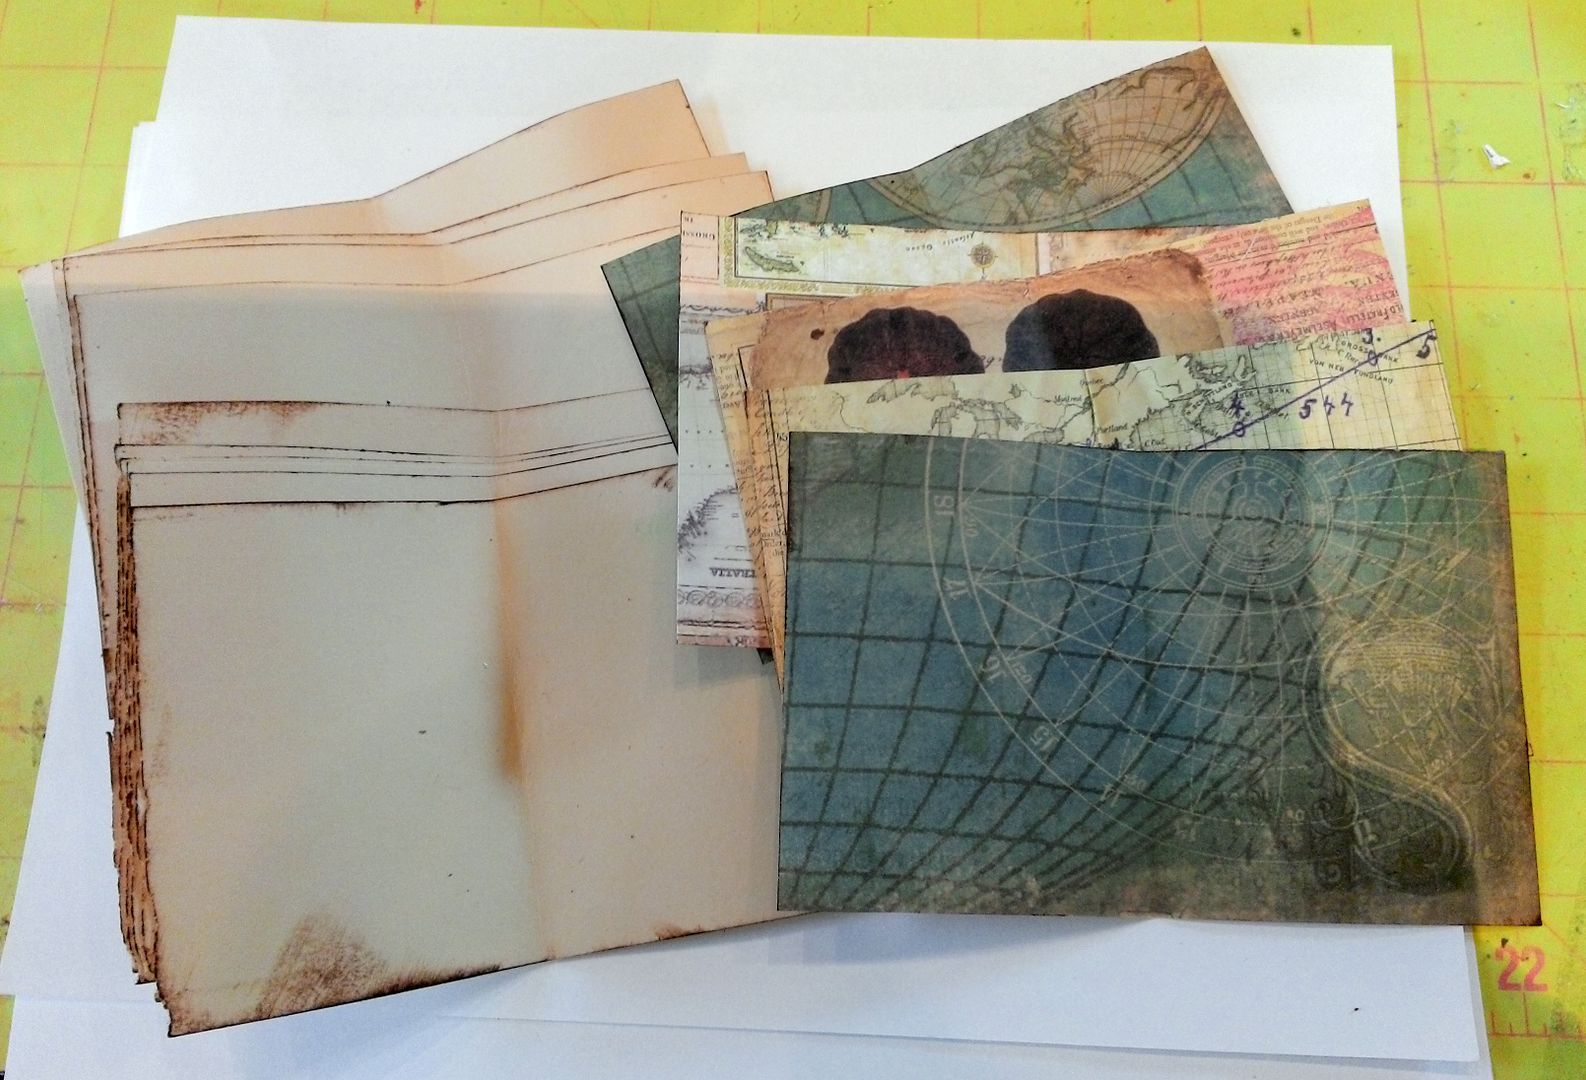
I cut pieces of cardstock and
decorative paper slightly smaller than the covers with each page cut (width-wise) smaller than the one before it. I
inked and distressed the edges of the paper.
I glued the
cardstock pieces to the covers and to each other. In the picture below you can see why I cut
each page a little less wide than the one before it. As you glue the folded pages to each other
the bulk of the pages will cause the next page to stick out past the one before
it if you don’t cut it a little shorter.
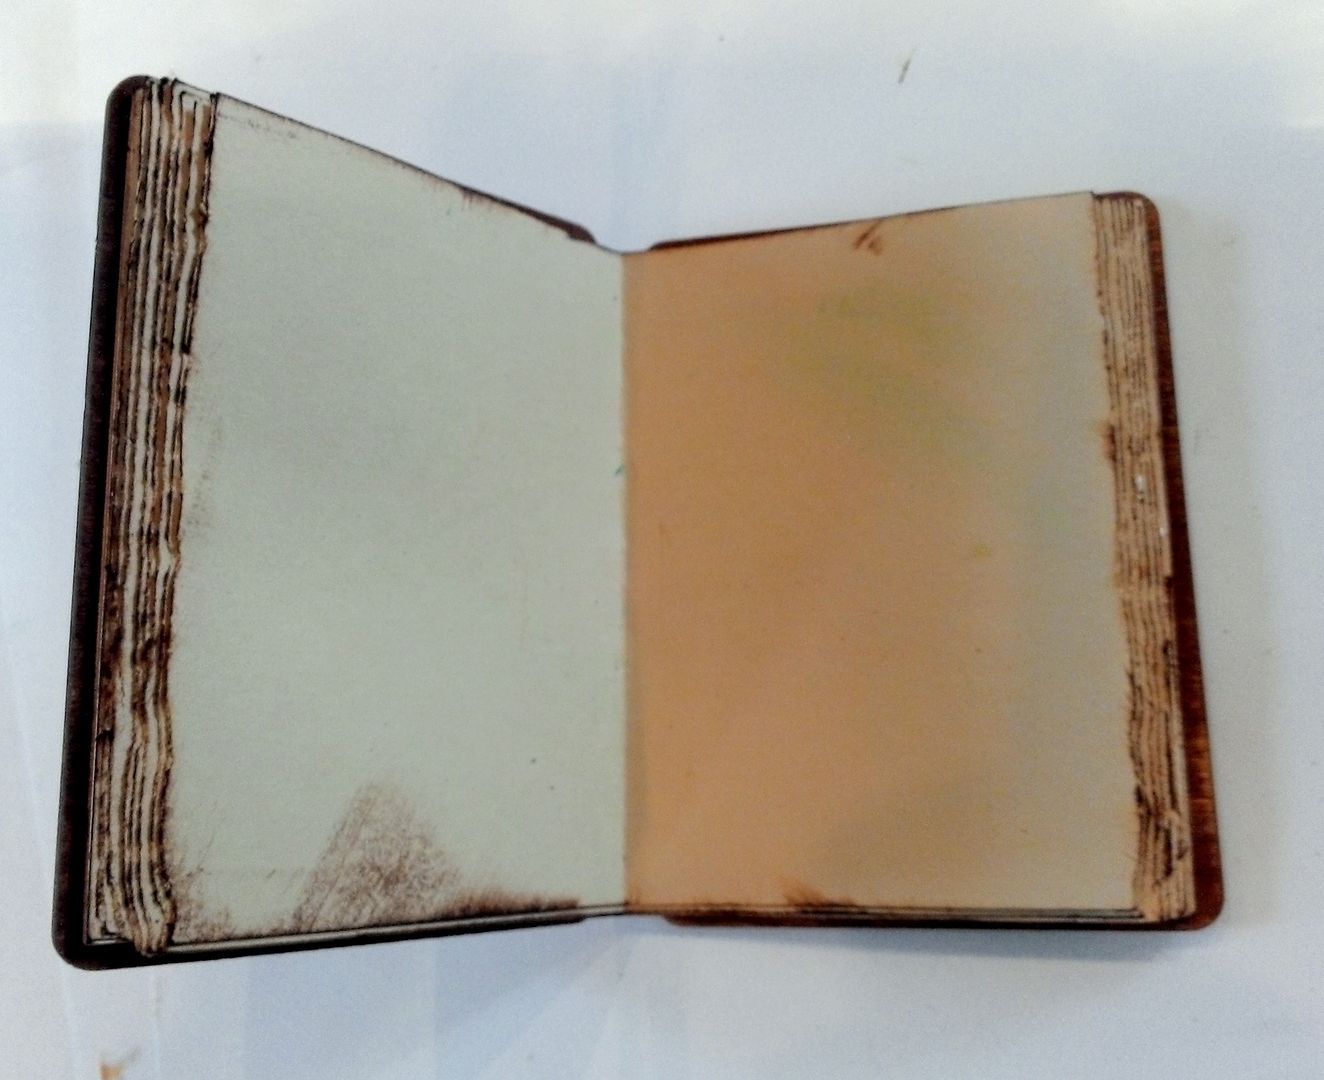
In the picture below, you can
see what the book looks like from the backside.
Notice the gap between the covers.
In the gap in the back I
attached a stained wooden skewer.
I then added the decorative
paper and images to the book. I glued
the decorative paper to the book only at the fold.
Notice in the picture below
how the pages are bowed and then glued in place. You can see why I started by only gluing the
paper to the book at the fold. As a
spine for the book and to hide the skewer I used a piece of leather paper from
my stash.
To attach the book to the
base I used an awl to make a hole in the center of the base to accommodate the
skewer. The hole is at a slight angle so
that the book would tilt back.
Final touches include a key,
tassel, a cameo glued to a paper click and the image of the woman which is
standing and glued to the edge of the book.
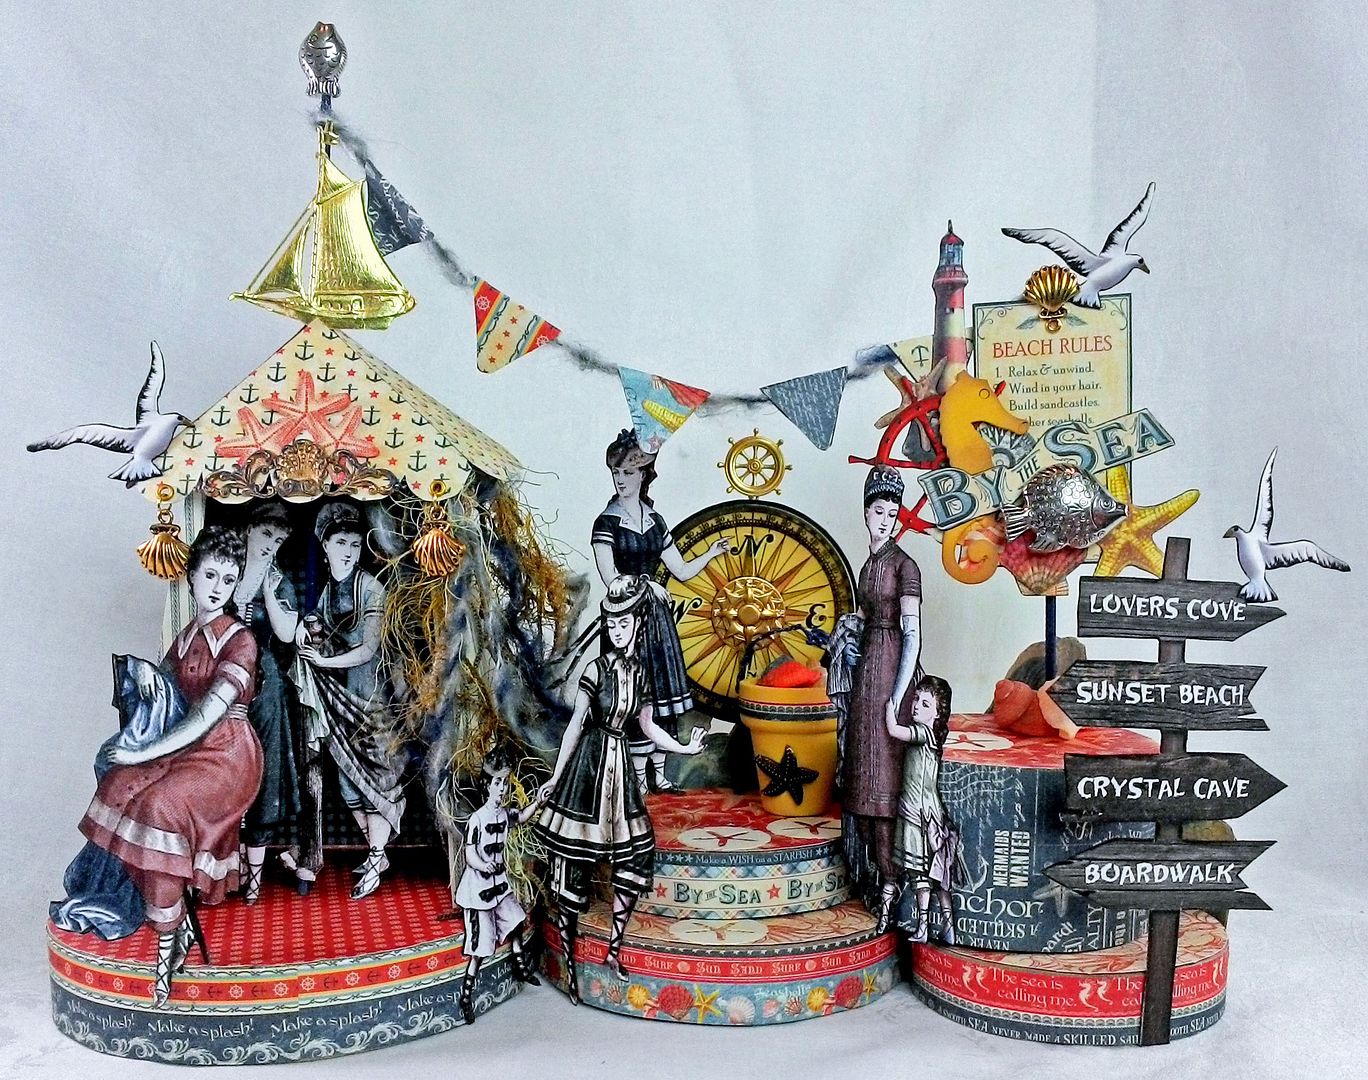
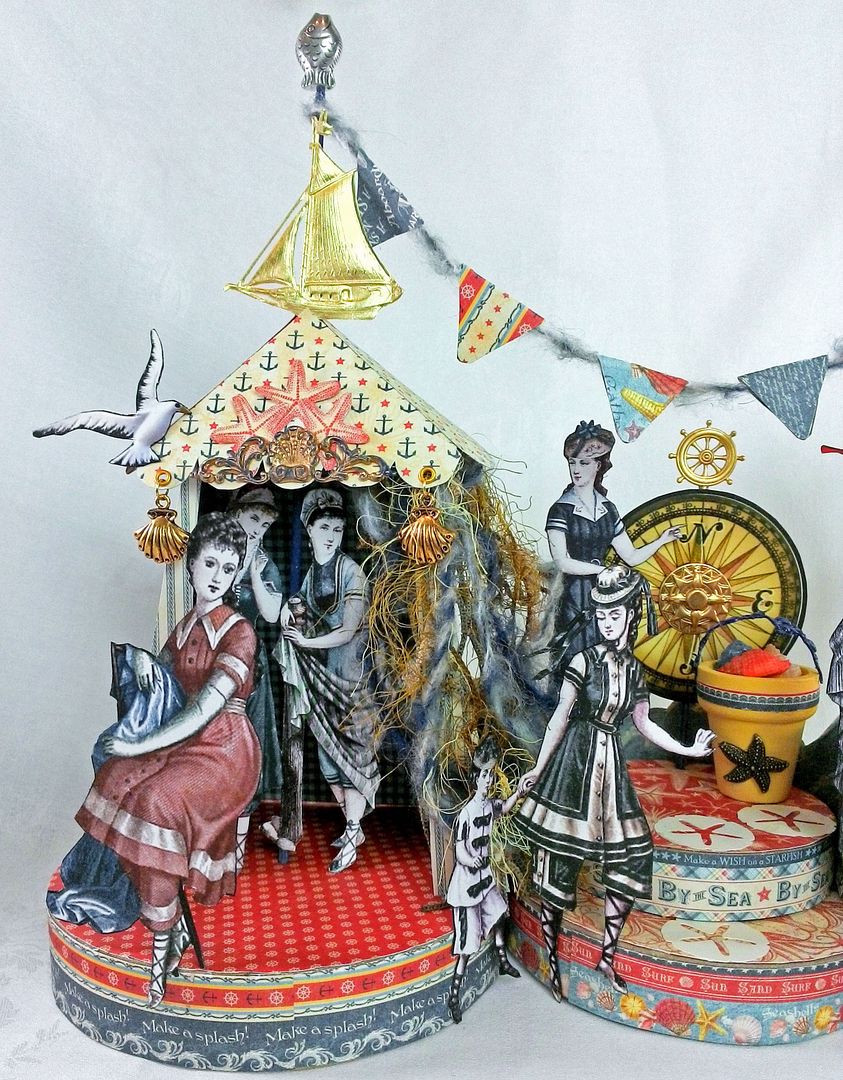
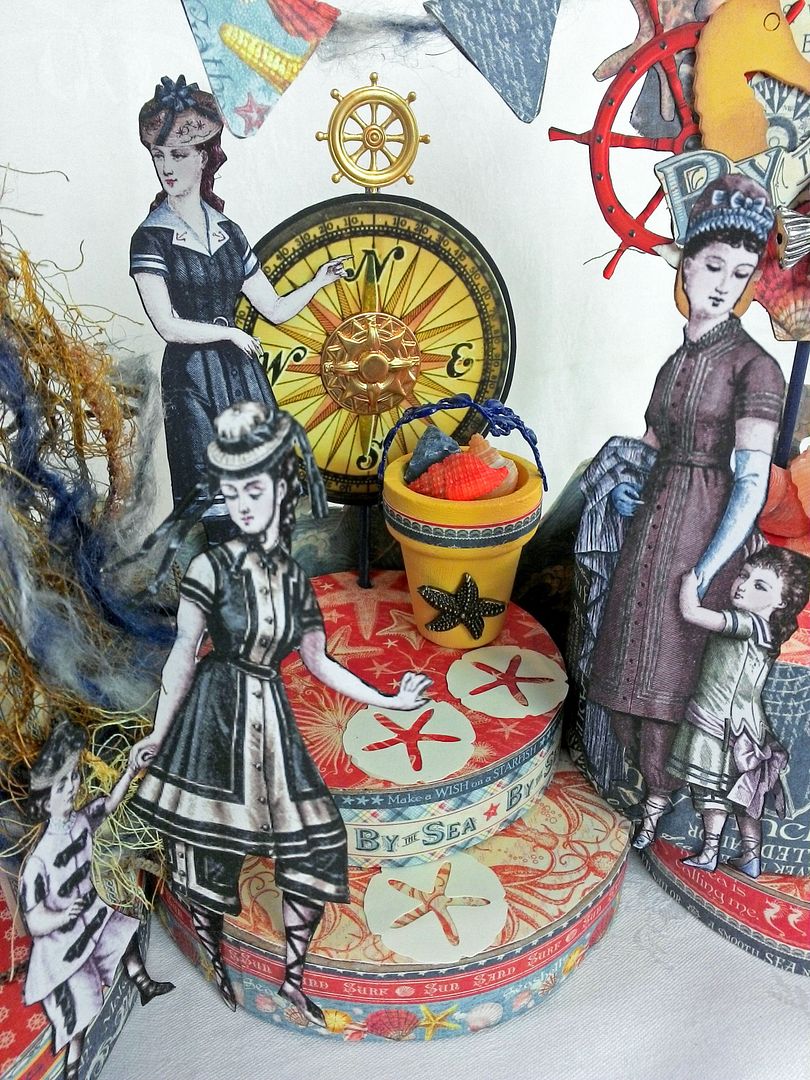
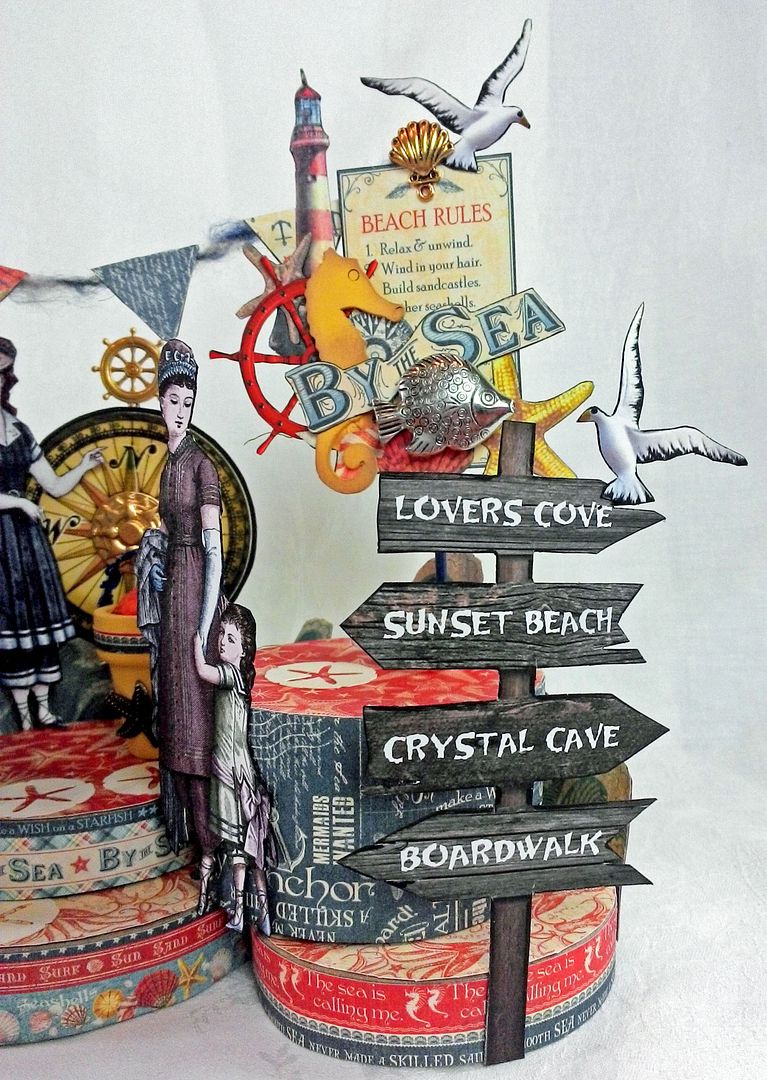
It’s
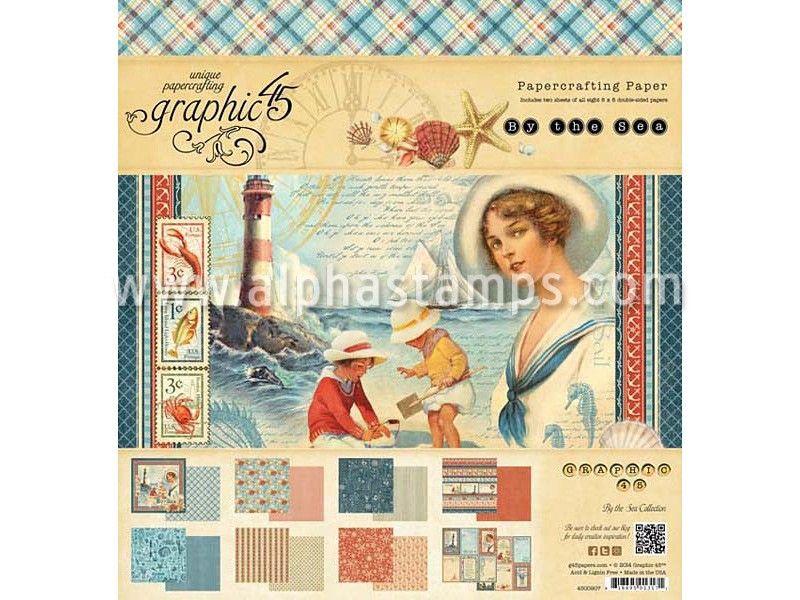
summertime on the boardwalk by the sea in this vintage diorama. My inspiration came from the new Graphics
45 By the Sea papers.
The
base for the diorama is round paper mache boxes which have become a staple in
my stash. I think using round shapes
makes it more interesting. You’ve seen me use these boxes many times in my
projects
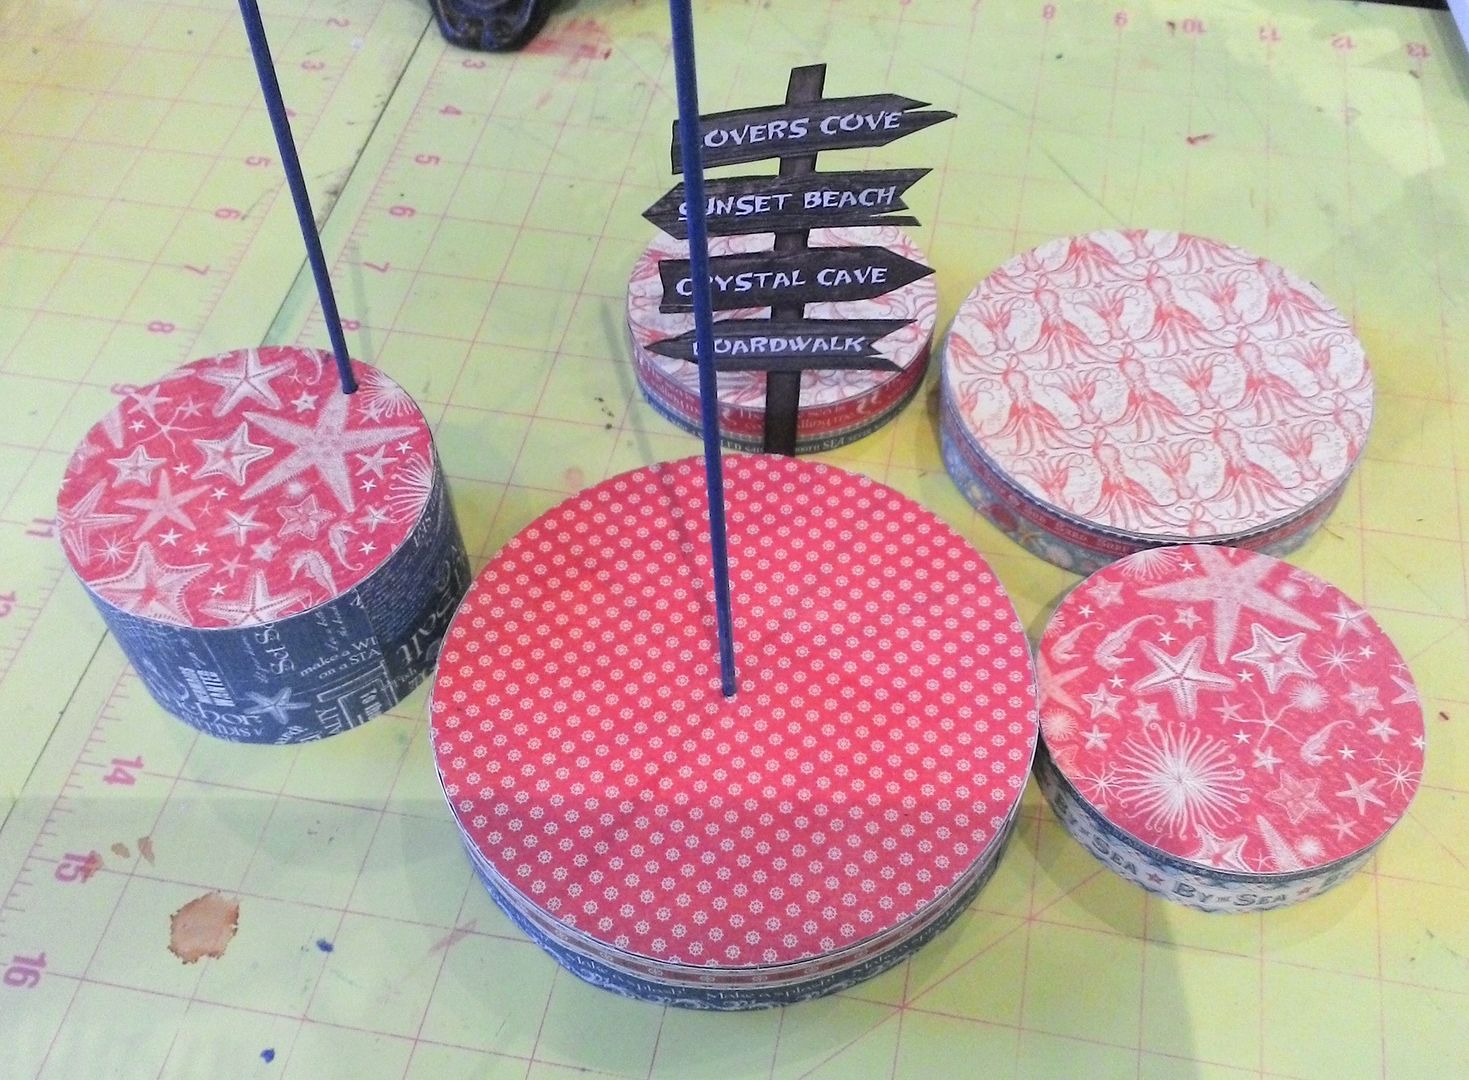
I
used a combination of one bottom and several lids to create the stair-step
effect. The paper mache is covered with a
combination of By the Sea papers. In
some, I inserted wooden skewers into the lids and glued them in place. The skewers act as support for some of the
elements.
On
the left side of the diorama, the beach cabana is the focal point. I used one of the Tent
Digital Image sets as a pattern. One
of the great things about the set is if none of the color schemes work for your
project you can just print and use them as a pattern to create a tent with any
color/design scheme. In this case, I used
them to make a tent from the By the Sea papers.
Notice
that one of the wooden skewers is the support for the tent as well as a place
to attach some of the bathers inside the tent.
At the top of the skewer, I attached a Dresden
boat, flags attached to fibers and a fish
bead. On the side of the tent, I
attached netting and wove fibers through the holes.
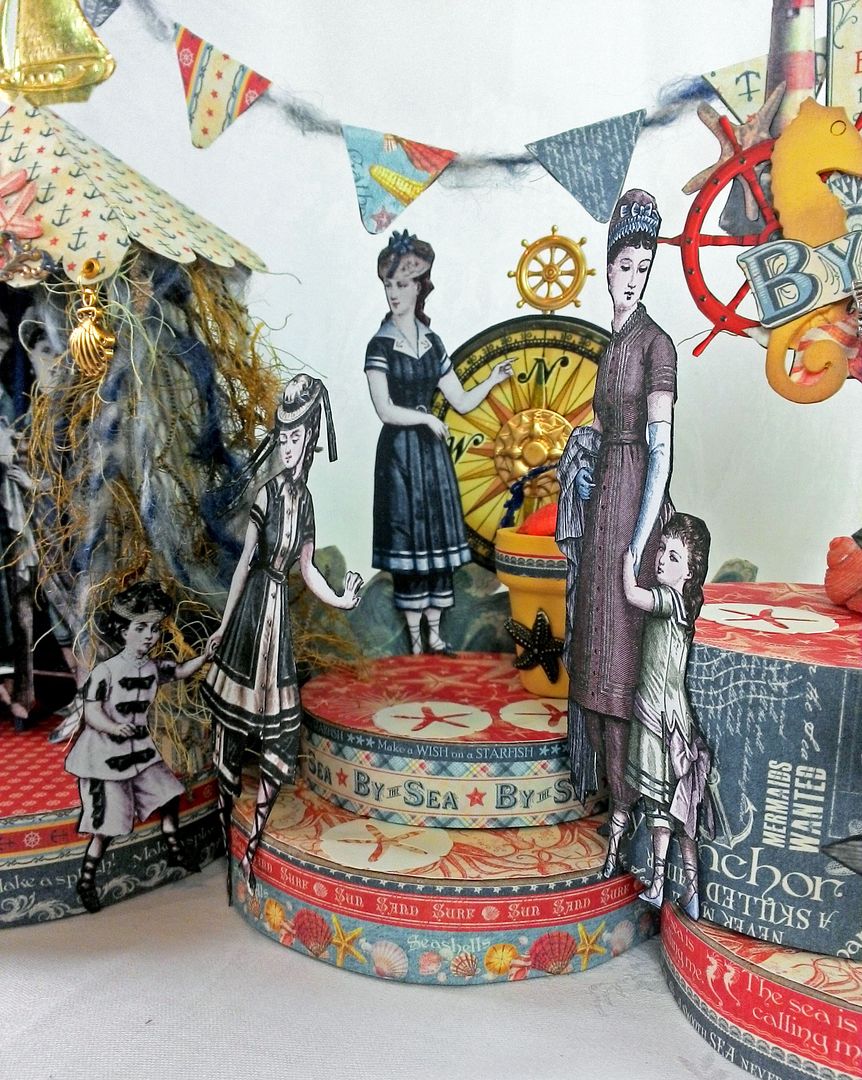
In
the center of the diorama is a compass and ship’s wheel attached to another one
of the skewers.
I
used a mini wooden pot (purchased at the craft store) and a piece of brass from
my stash to create a bucket for seashells.
I glued on paper die-cut sand dollars to give the sense of steps and a path up the box lids.
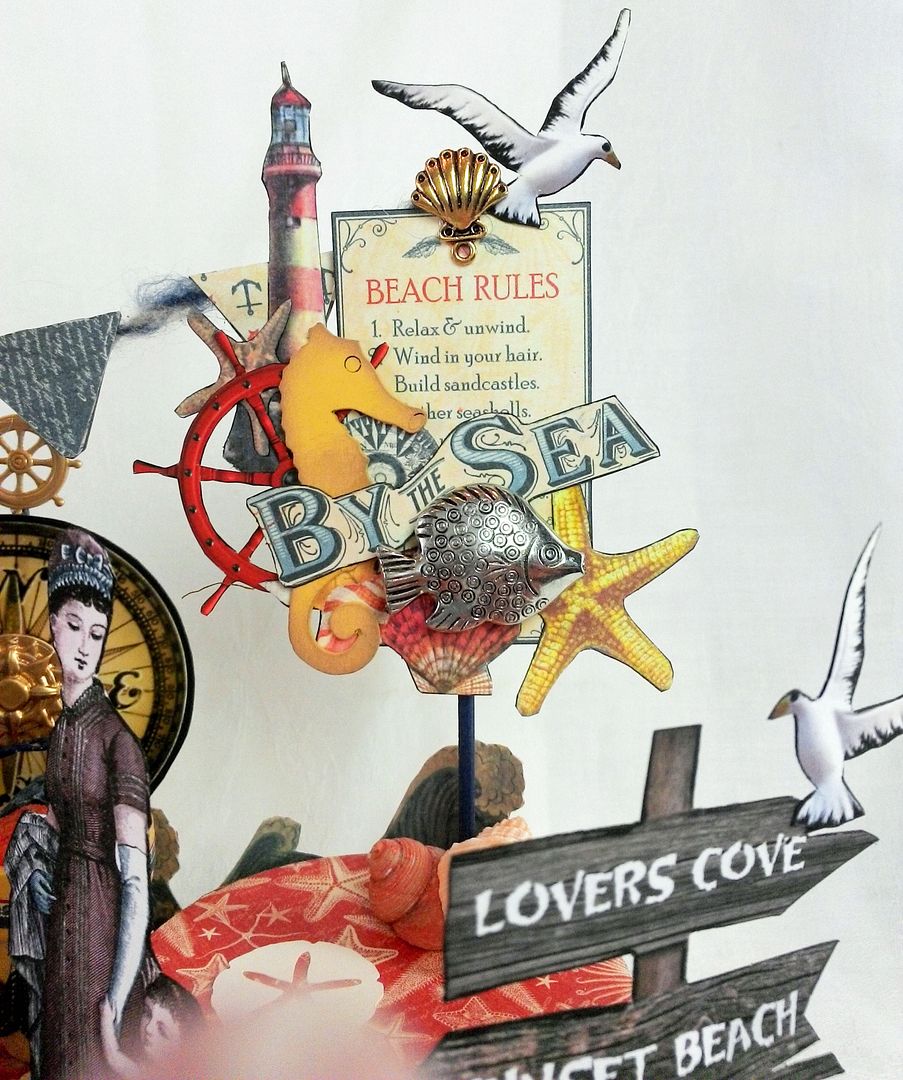
On
the right side of the diorama is a collaged “Beach Rules” sign from the papers attached
to another of the skewers and a wooden direction sign in front.
Note
the ocean waves lapping up against the back of the diorama.
The
ocean waves on the back of the diorama serve two purposes; one decorative and
the other to help attach the base pieces to each other (which are also glued to
each other).