


I could see the items I used applied to other themes like Halloween, Alice in Wonderland, Fairies, etc.
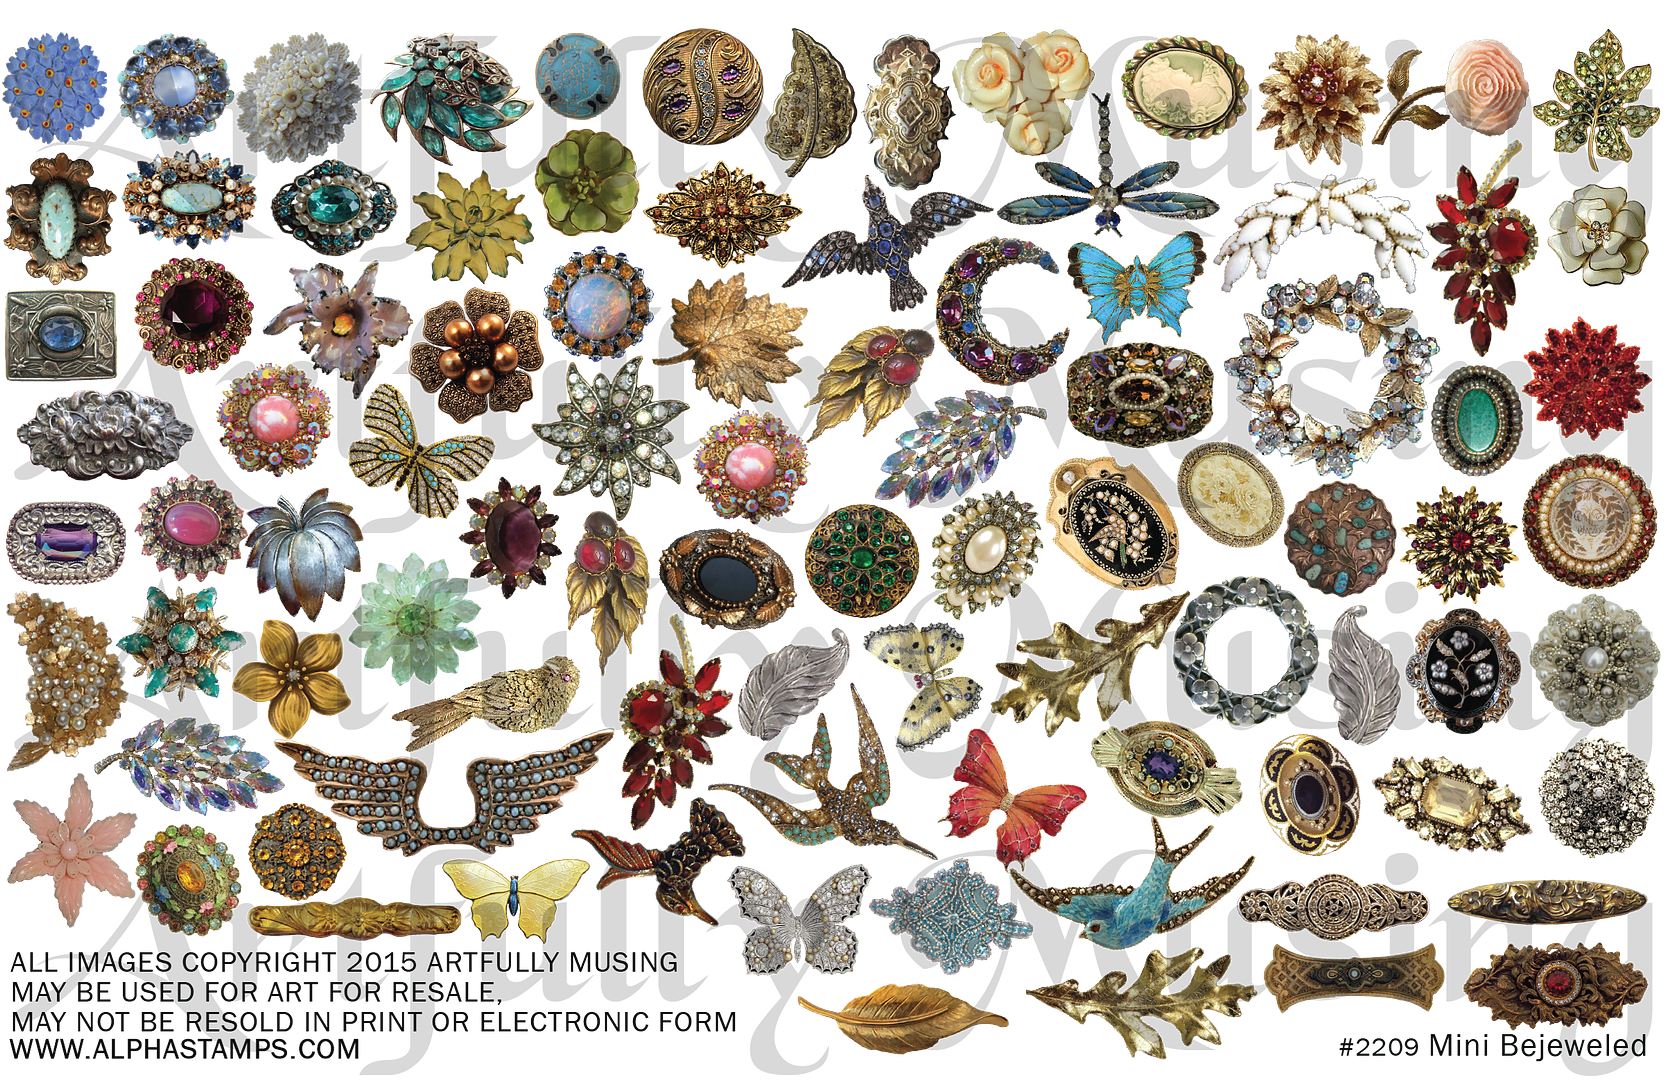
The Mini Bejeweled Collage Sheet is a mini version of my older Bejeweled & Bejeweled #2 Collage Sheet.
The digital image set contains most of the images on the older Bejeweled collage sheets plus some new images. The great thing about the digital image set is that it is easy to size and flip images and to print multiples of an image which is what I did to create my dresses.
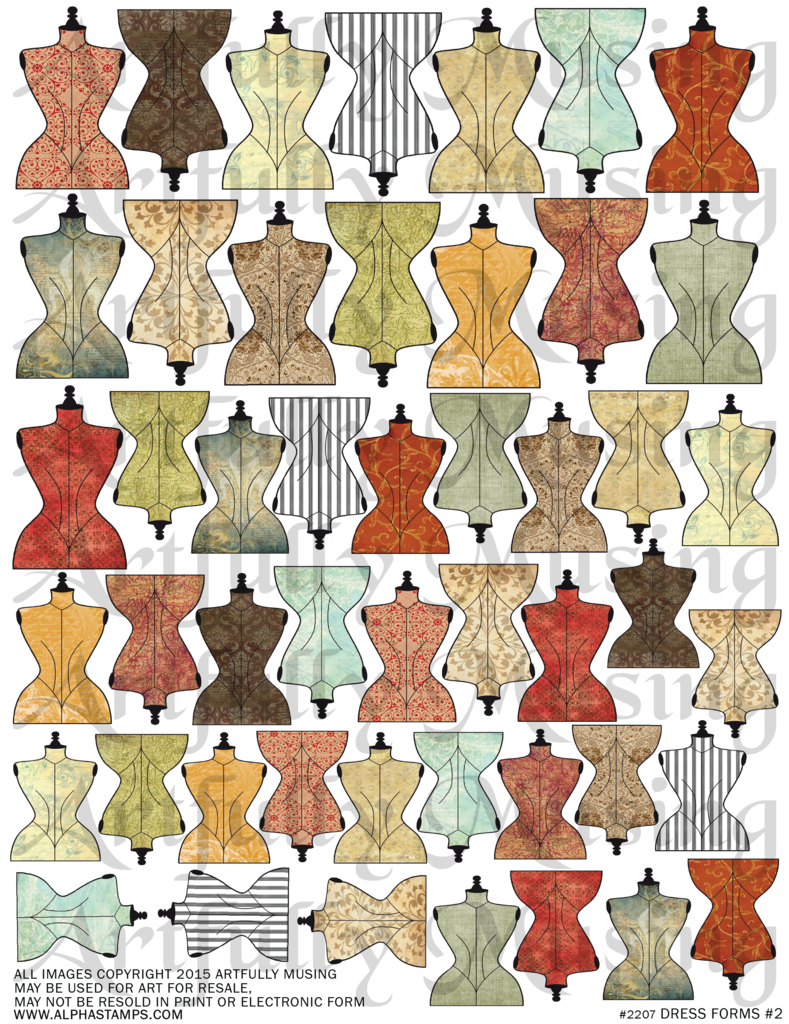
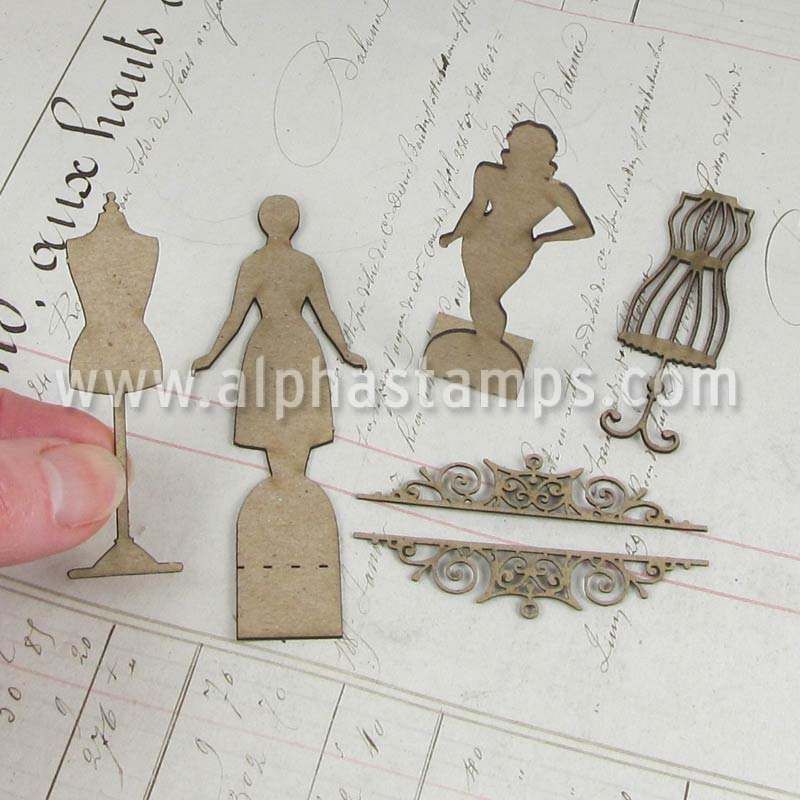
This sheet contains three sets of different sized dress forms with each set made up of 14 unique patterns. The dress forms are sized to work with the Dress Shop Shape Set & the Mini Paper Dolls Shape Set. You can layer the images over the dress forms in these sets or use them standalone.
This collage sheet is a mini version of my larger Bejeweled & Bejeweled #2 Collage Sheets and is packed with all kinds of jewelry. The images are great for smaller projects. Use them as an accent or combine multiple pieces of jewelry to create clothing.

THE DETAILS
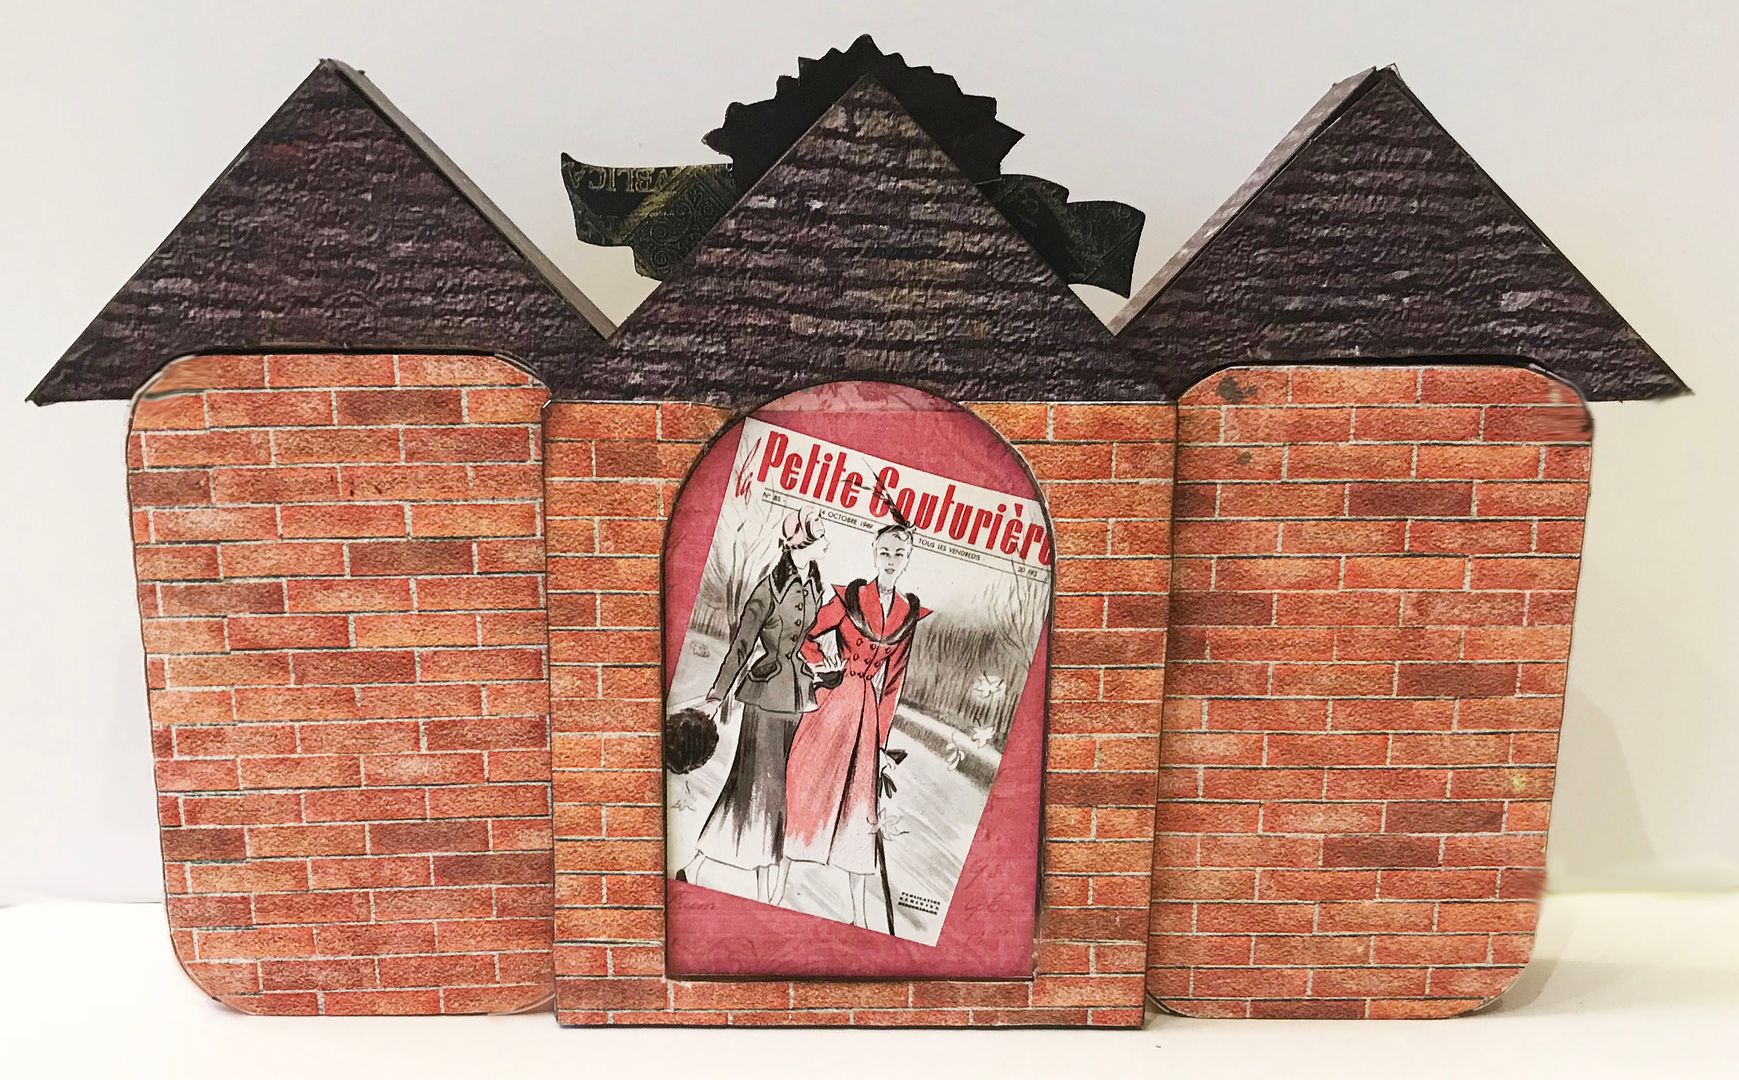
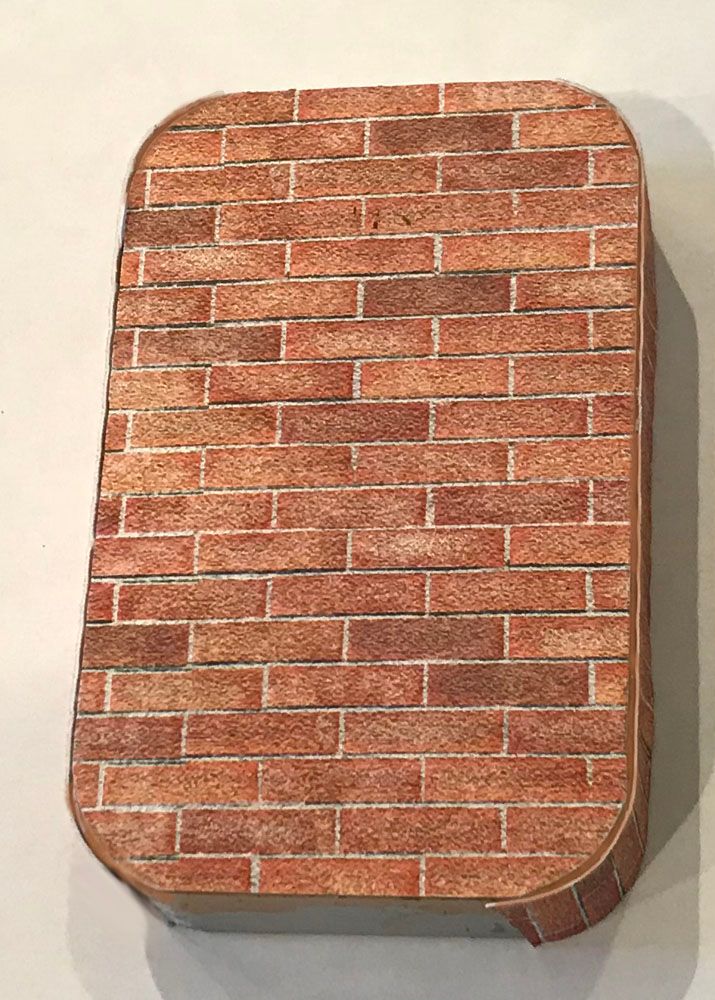
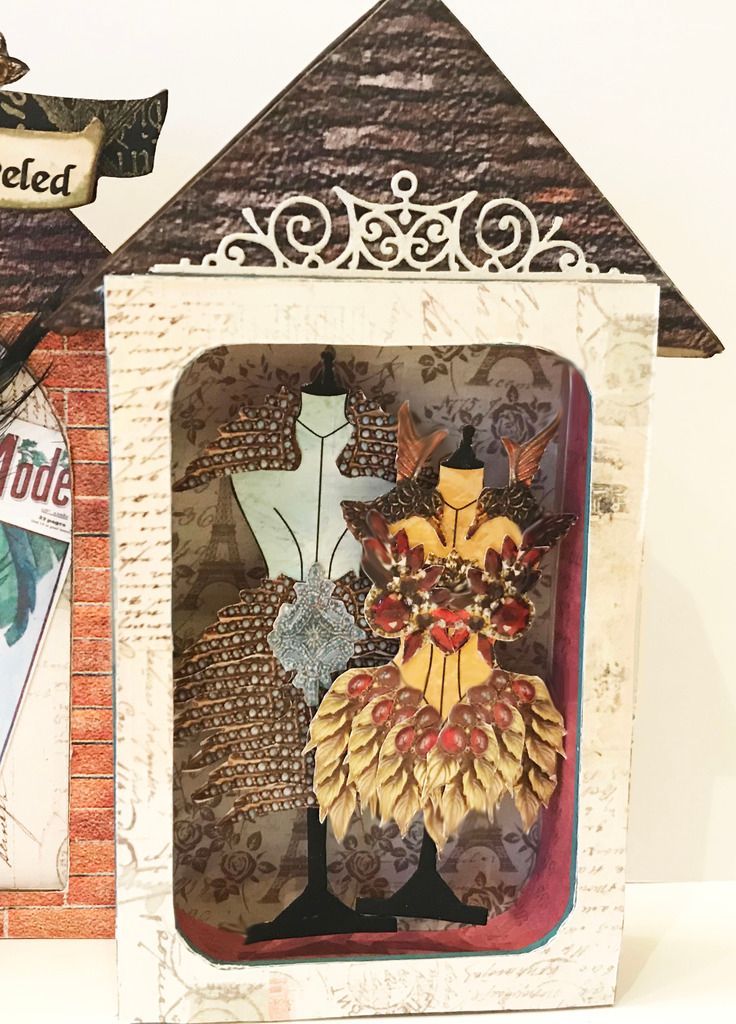
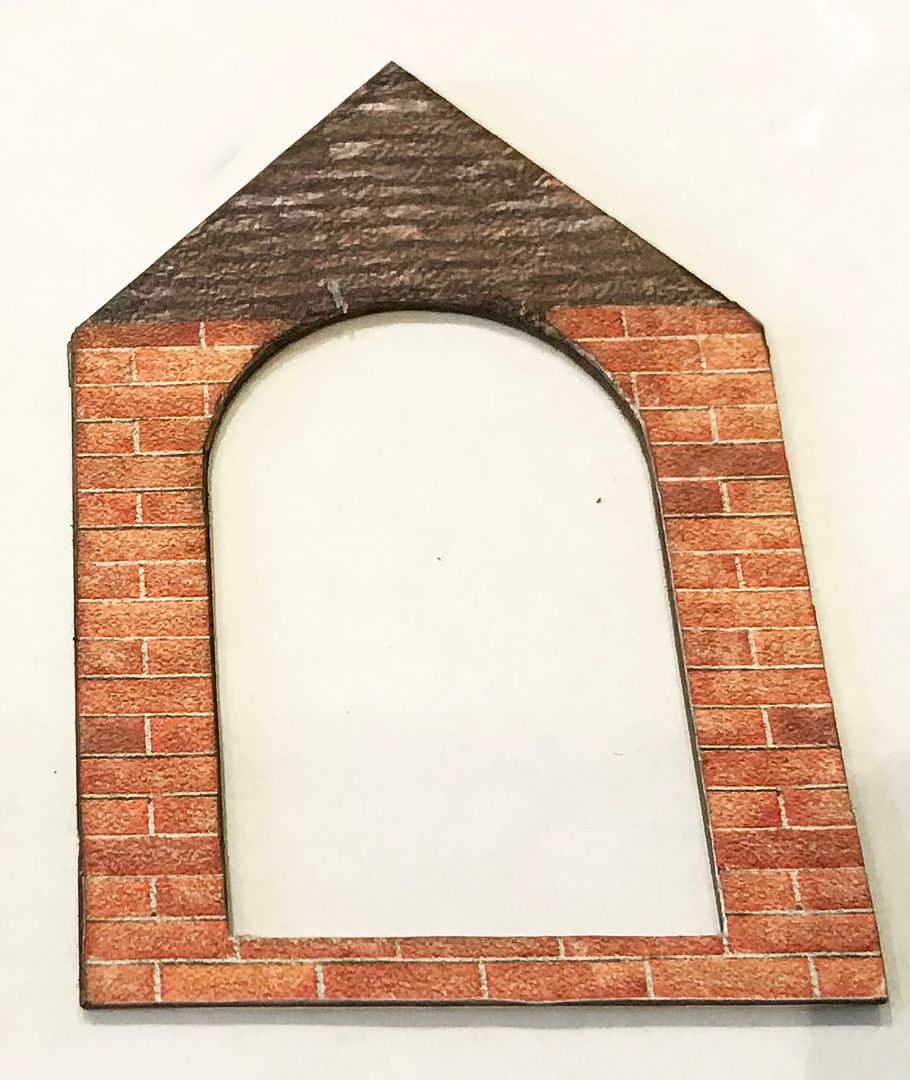
I started by assembling the roofs which are made from a chipboard kit and then covered them with Hampton Brick Scrapbook paper. Notice the grove at the bottom, its designed to fit on top of an Altoid’s tin.

For the tins, I started by removing the lid and flattening the prongs. I covered the back and sides with 1:12 Brick Wall Sheet which is embossed.
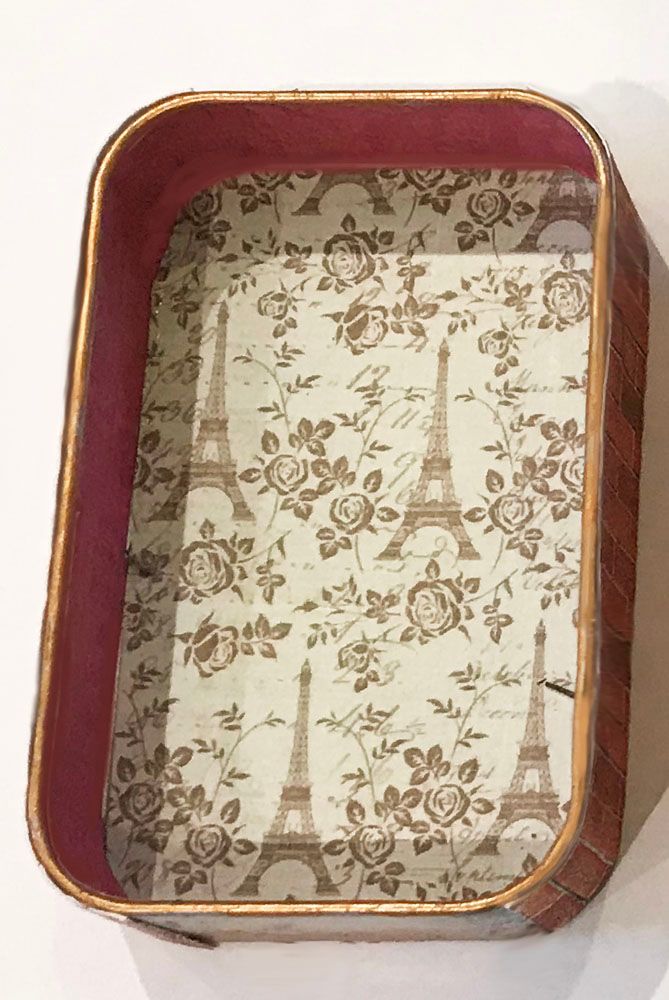
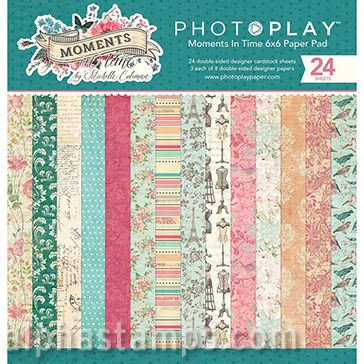
I covered the surfaces on the inside with papers from the Moments In Time 6x6 Paper Pad.
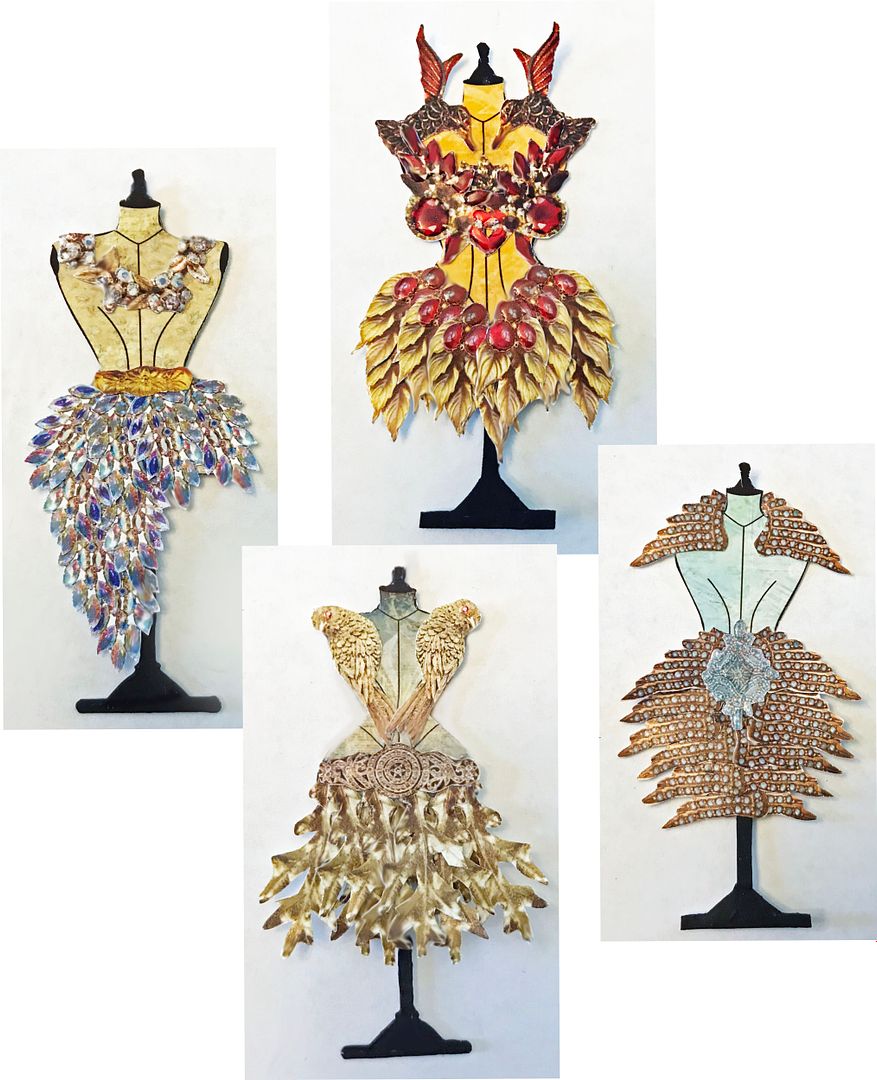
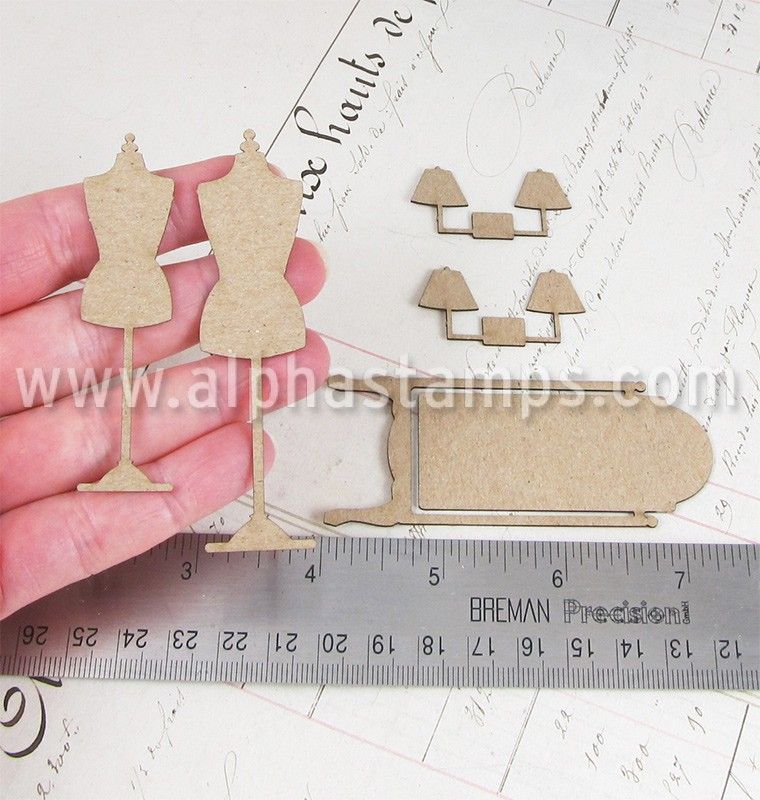
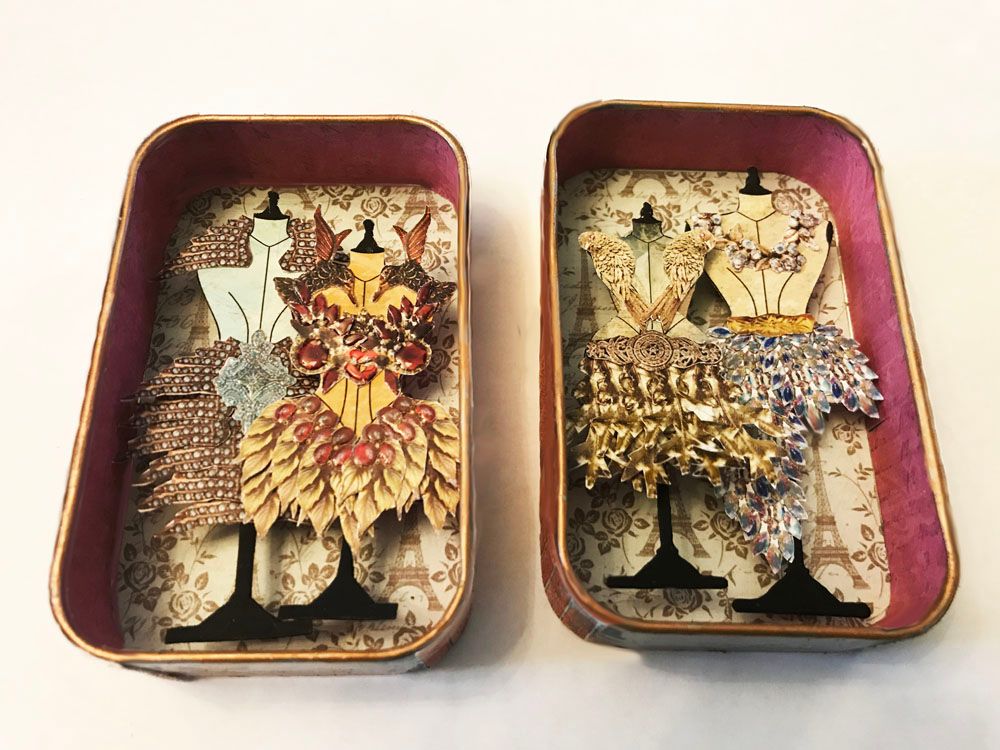
To make the dresses, I used dress forms from my New Dress Form #2 Collage Sheet. I applied the dress forms to chipboard dress forms found on the Dress Shop Shape Set & Mini Paper Dolls Shape Set and painted the bases of the dress forms black.
To create the dresses, I used jewelry images from the Mini Bejeweled Collage Sheet. Since for many of the pieces I need multiples and flipped pieces, I also use the Bejeweled Digital Images Set. The longer curved images and leaves work great for bodices and skirts. Birds are great for shoulder accents and bodices. Horizontal pieces work well for belts or connectors for long waisted dresses. Wings turned upside down work well for collars and the use of multiple wings upside down can create a tapered skirt.
To give the jewelry more dimension, I applied Glossy Accents to some of the jewels. You could also add rhinestones, glitter, Stickles, microbeads and metal findings.
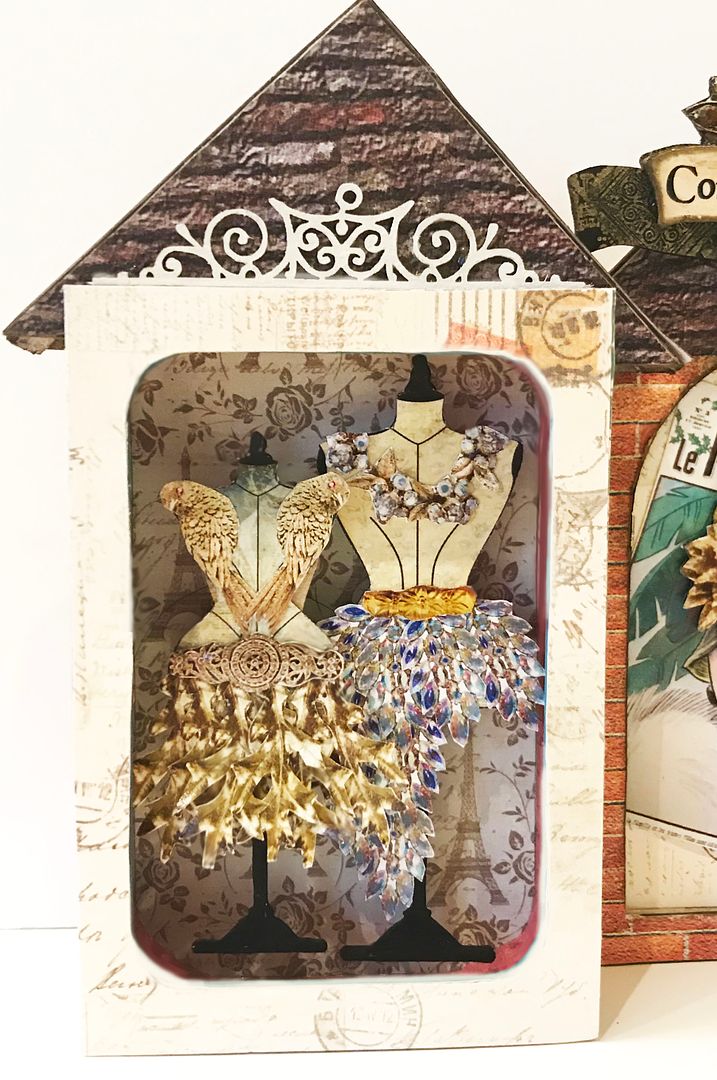
I glued the dresses inside the tins by using layers of double stick foam tape which popped them up from the back.
The frame I glued on top of the tin is from the Altoids Tin Facades which dresses-up the edge of the tin. I cut away the top of the frame as it would have covered up the roof.
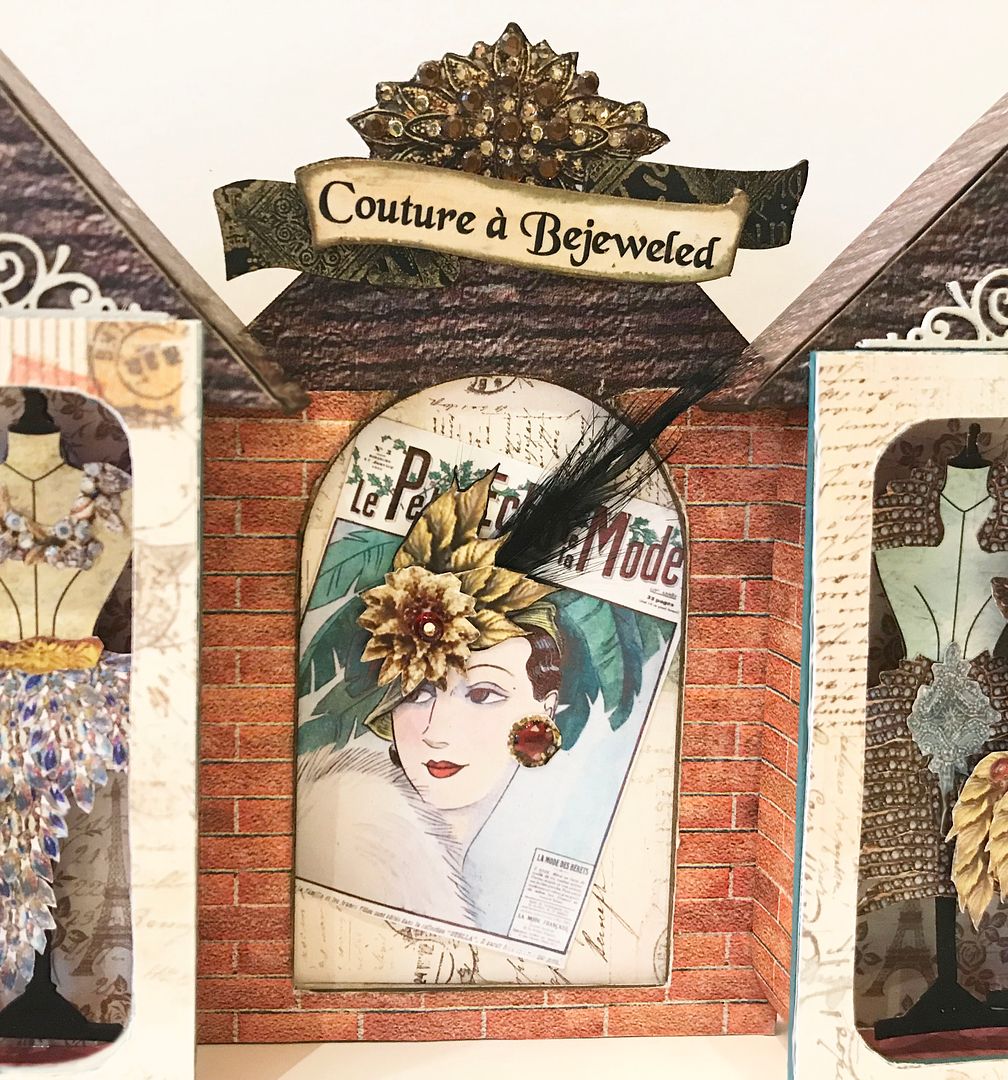
For the centerpiece, I used two more of the Altoids Tin Facades. I used the same paper for the roof and the main area of the frame.
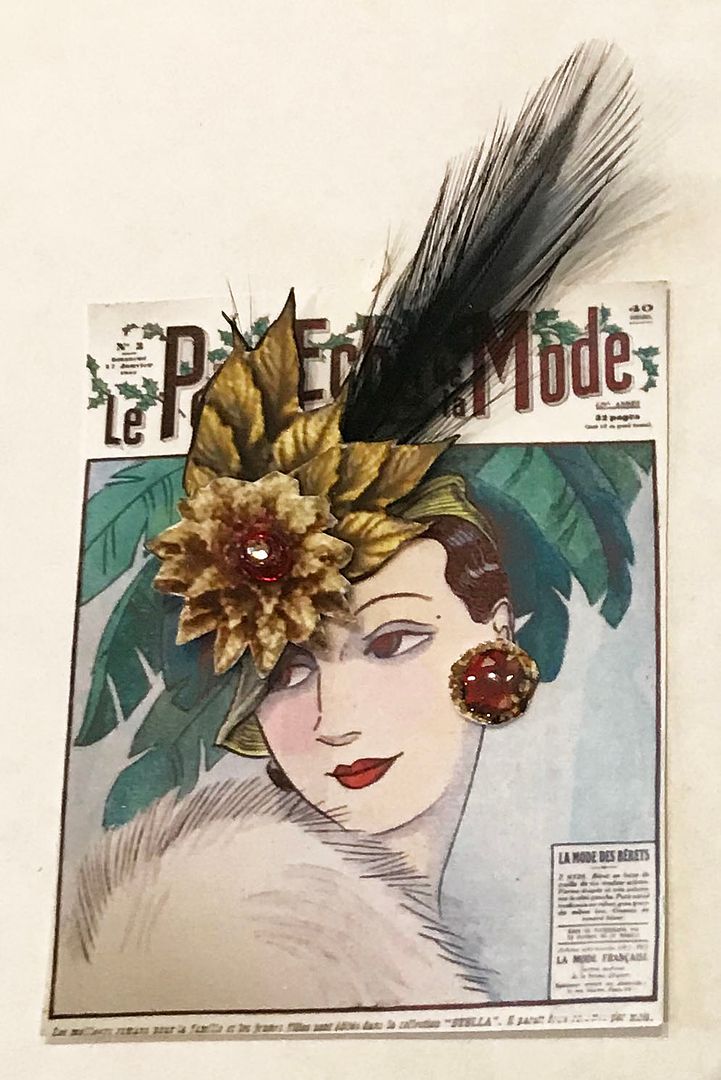
The posters displayed in the opening of the façade come from the Mini French Fashion Magazines Collage Sheet. To the image in the front, I added a feather and jewelry images from the Mini Bejeweled Collage Sheet to the hat and used part of an image for the earring to which I added Glossy Accents. In the center of the flower on the hat, I added a red bead.
I glued the poster images to paper from the Moments in Time paper pad then sandwiched the images between the two facades.
Finally, I glued the edges of the Altoids tin on top of the edges of the façade.
DETAIL SUPPLY LIST
or
Mini French Fashion Magazines Collage Sheet
Moments in Time 6x6 Paper Pad
Hampton Brick Scrapbook Paper
1:12 Brick Wall Sheet
Blank Altoids Tins
Altoids Tin Facades – Set of 4
Altoids Tin Roof
Dress Shop Shape Set
Mini Paper Dolls Shape Set
1 comment:
LOVE THIS! It can be completed in short order (which I wouldn't have believed until seeing this tutorial) and I'm dying to try it! I think I'm going to see if I can modify the black plastic ones from alphastamps to hold actual vintage jewelry. Very light pieces. I have your bejeweled sheets but, even with crystal accents, I can't get the quality of prints you get. I know AS has a revenue stream in printing out the papers, but it would be nice to know the best possible printers and programs to try and make these as nice as yours. Thanks for sharing!
Post a Comment