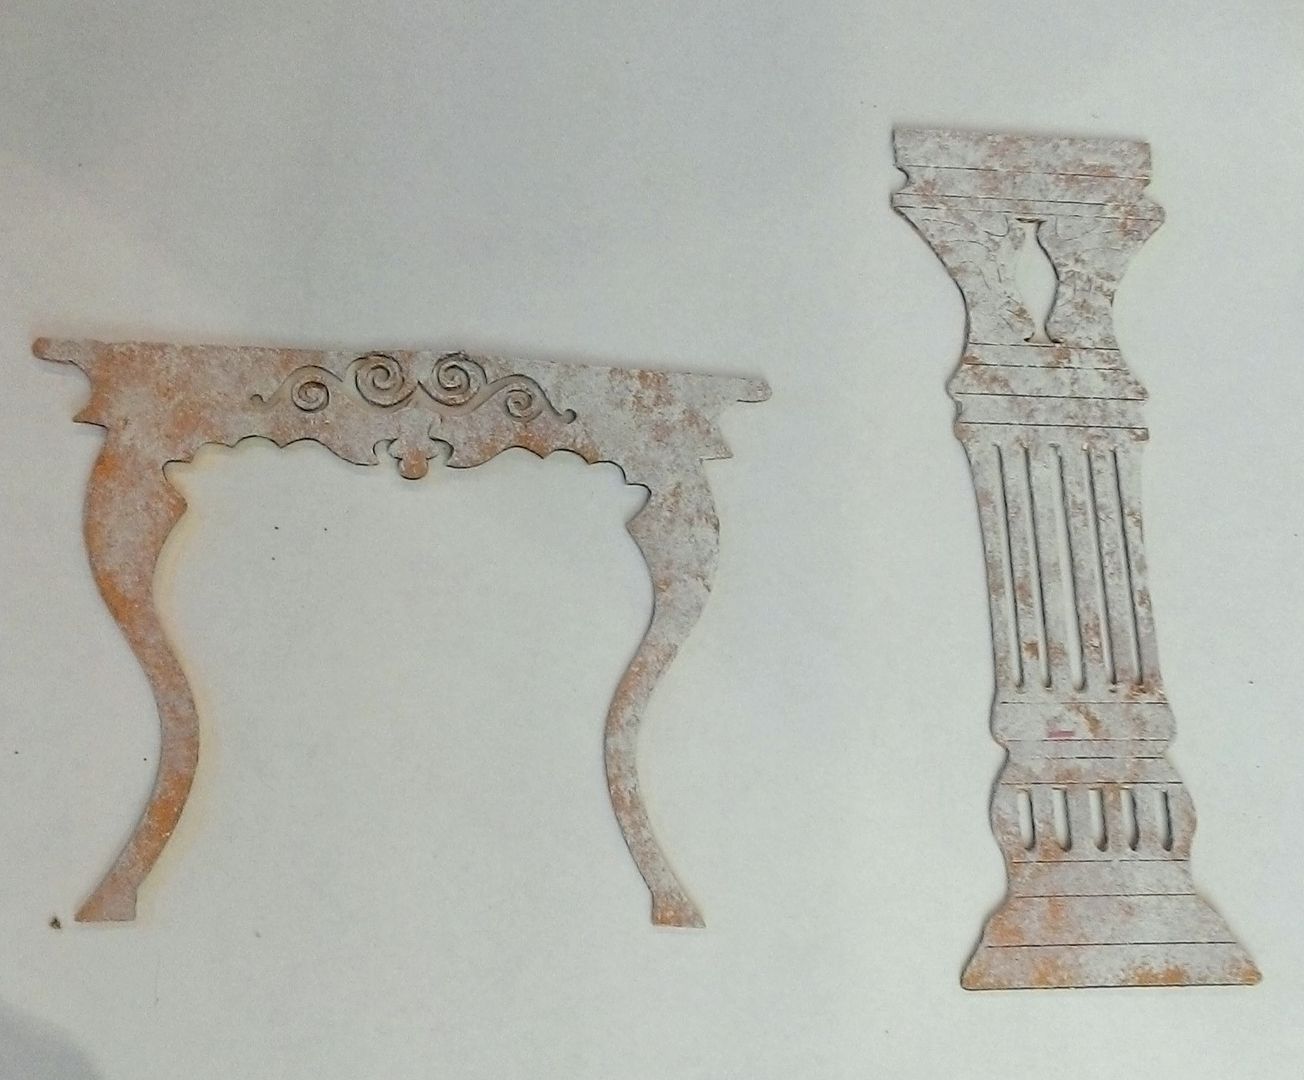
The inspiration for this project was a chipboard column
and table and two new collage sheets “Room with a View” and “Have
a Seat” by Teri Calia, one of the gals at Alpha Stamps.
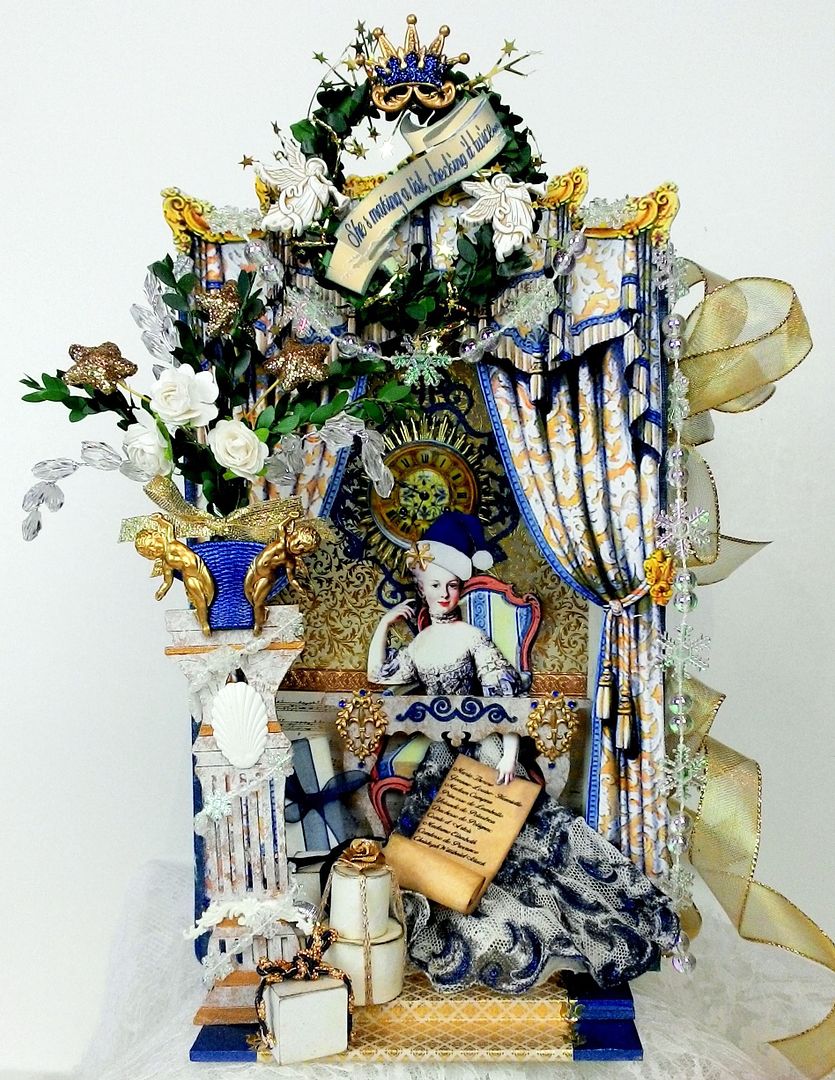
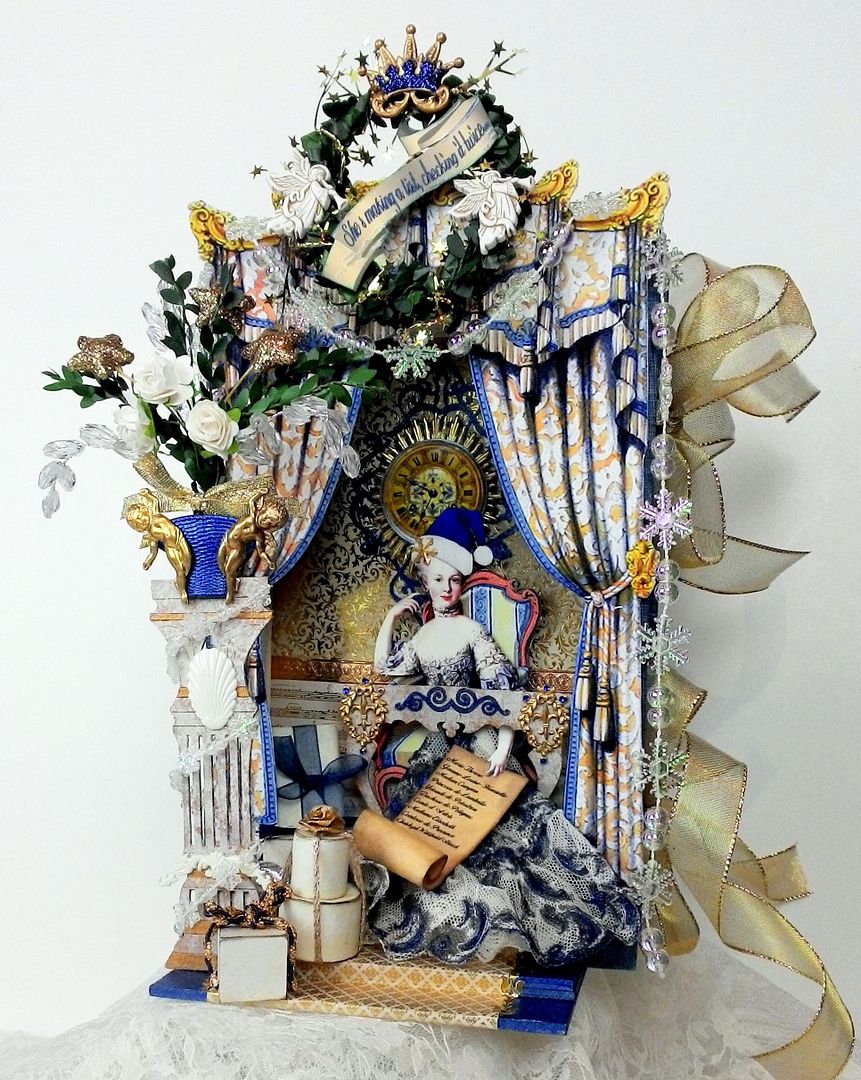
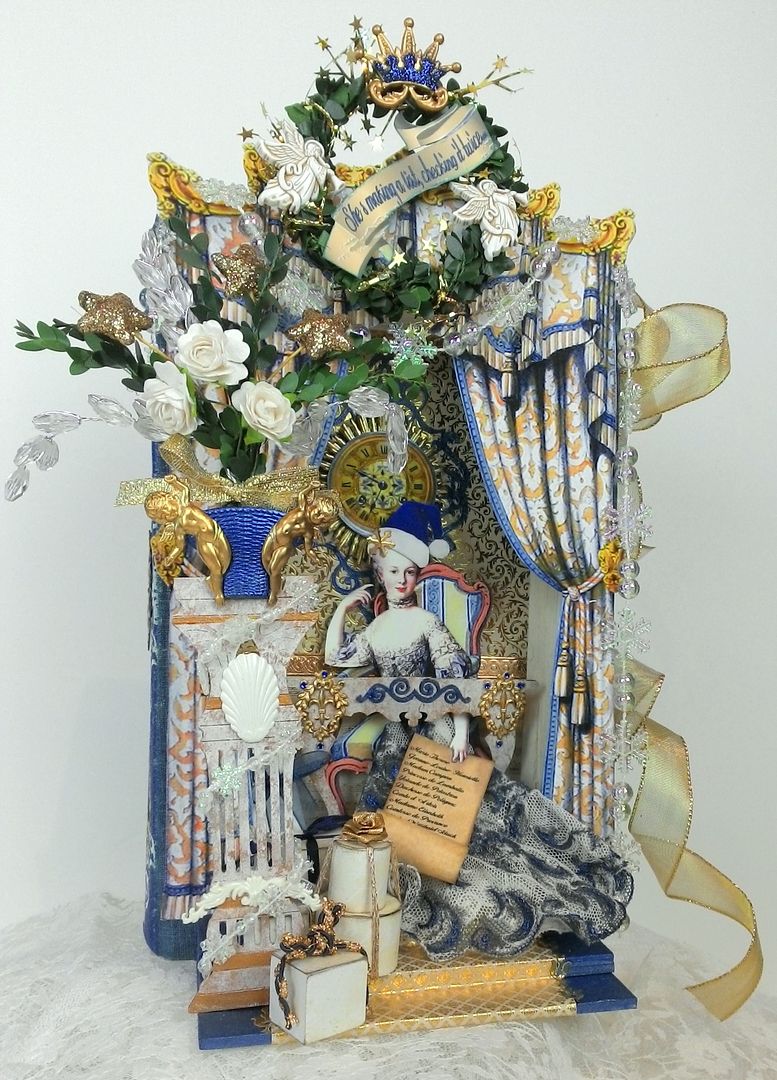
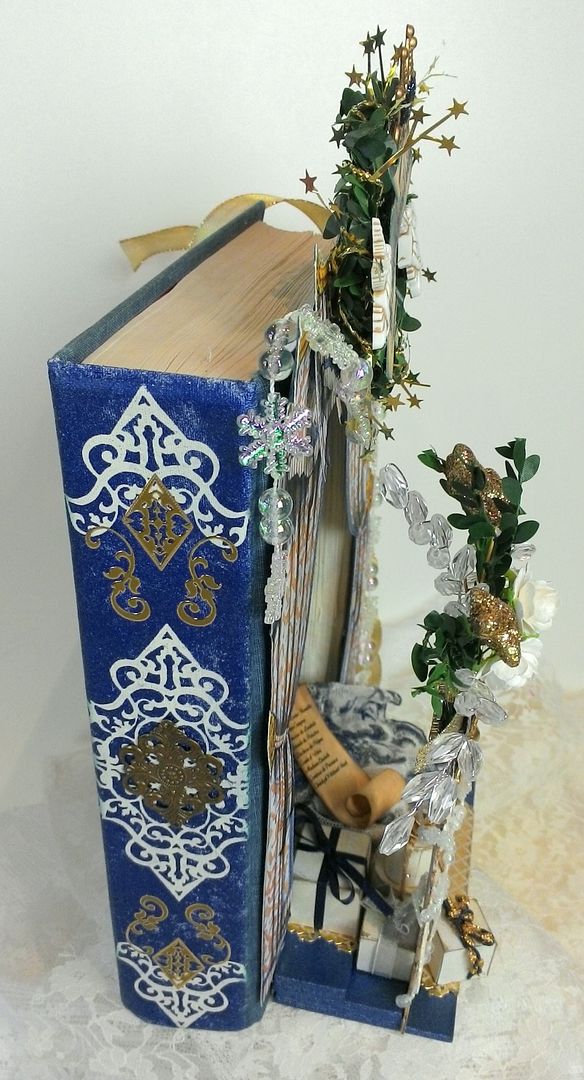
In the process of deciding how I would use the chipboard and collage sheets, Marie stood out as a great option and doing something Christmas themed (since it is right around the corner) also appealed to me. I also decided that I didn’t want to go with traditional Christmas colors. Since all things Marie are over the top, I decided to go with a royal blue, cream and lots of gold
Now
that I had a theme, I needed to decide on the project. Some of you have been asking me to do some
tutorials on altering books so I thought creating a shadow box out of a book would
make a great project and one that can be used with any theme.
I
love the idea of not just filling the shadow box in the book but also having
the contents of the shadow box spill out of the book.
TUTORIAL
In
this tutorial I’ll show you how to transform a book into a shadow box. I’ll also demonstrate how I created each of
the decorative elements and how to put it all together.
Transforming
the Book into a Shadow Box
What you’ll need:
- Book
- Box cutter with a new blade
- Metal Ruler
- Sandpaper or Dremel
This step is not difficult to do but it does take
patience and time. When selecting a book,
think about how the size your hole needs to be to accommodate your project.
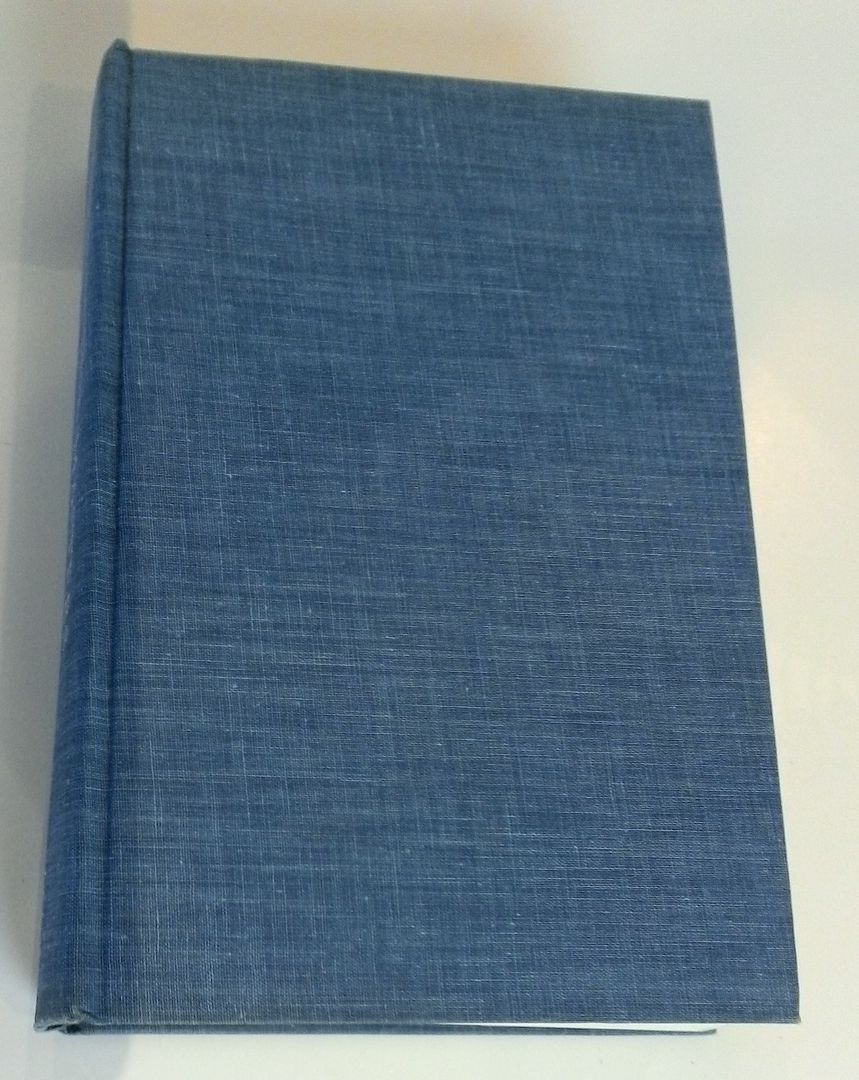
The book I used measures 9 ½” tall x 6 ¼” wide by 1 7/8”
deep.
Using a pencil mark the hole on the cover of the
book. Leave at least a half-inch edge
around the outside of the hole you have marked.
You don’t want to go too close to the edges or the hole will be
difficult to cut and the book might come apart.
Using a metal ruler and a box cutter (with a new blade)
cut along the marks. Cut with an even
stroke multiple times on each line to gradually cut through the cover of the
book.
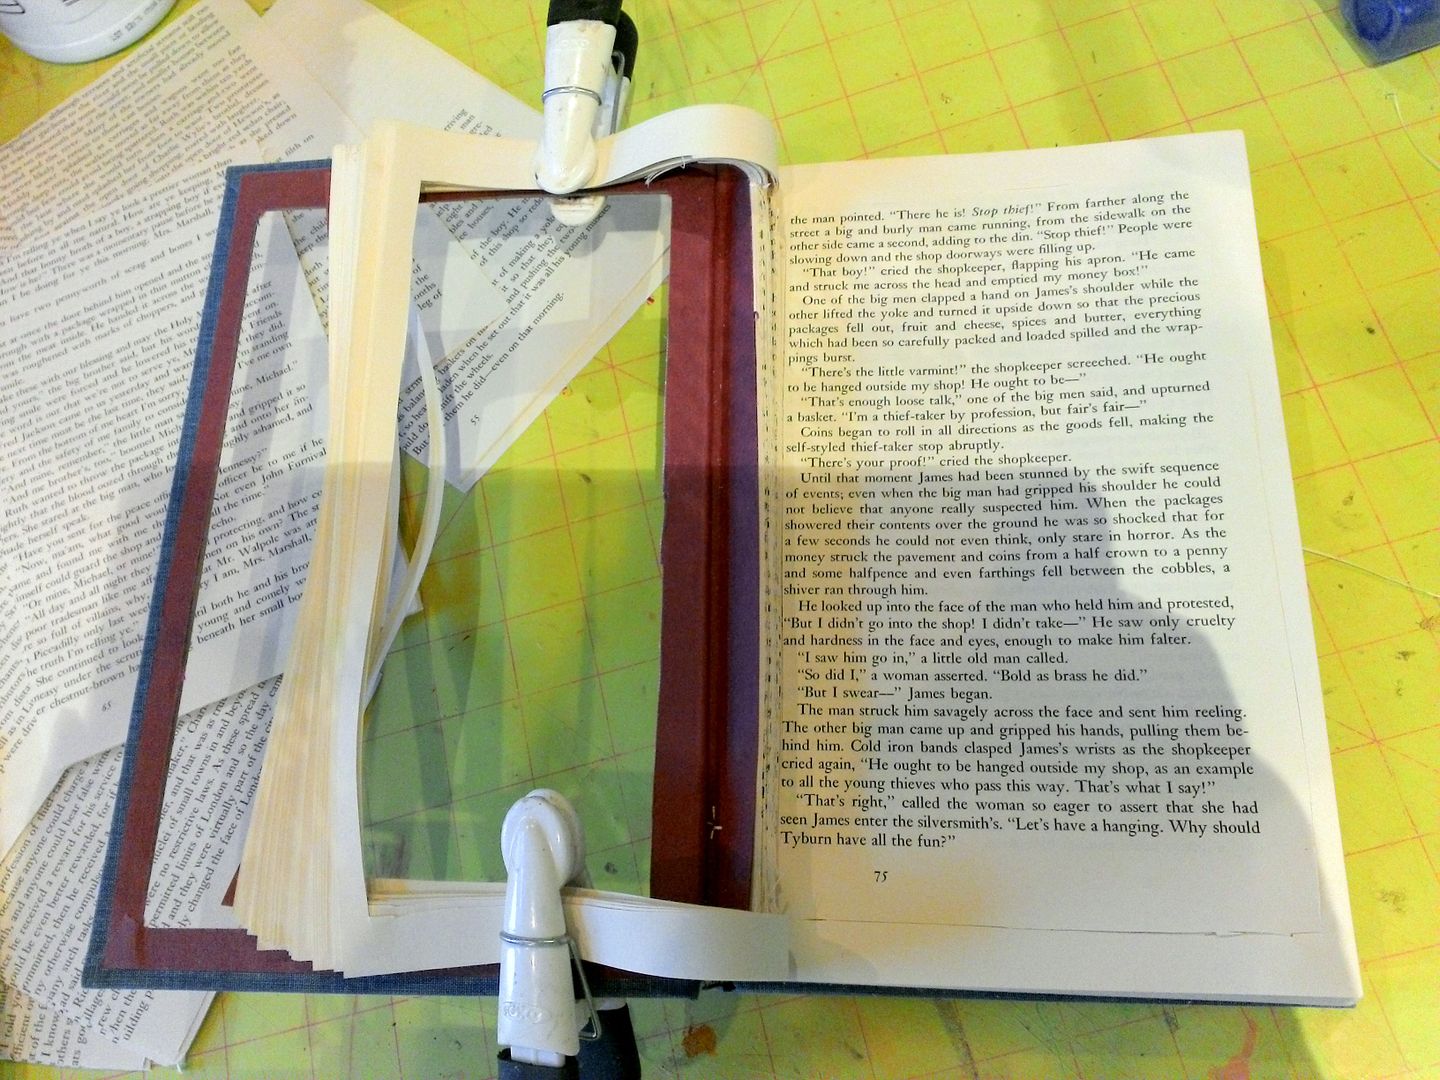
Now that you have a hole cut in the cover of the book,
continue cutting the hole in the pages of the book. When you cut the cover you probably made
marks in the pages (underneath the cover) with the cutter, you can use these
marks as a guide for cutting the pages.
Just as with the cover, cut with an even stroke multiple
times on each line to gradually cut through the pages. Remove the center of the pages as they become
loose.
After cutting some of the pages, I like to clip them to
the cover to make it easier to continue to cut the hole in the book.
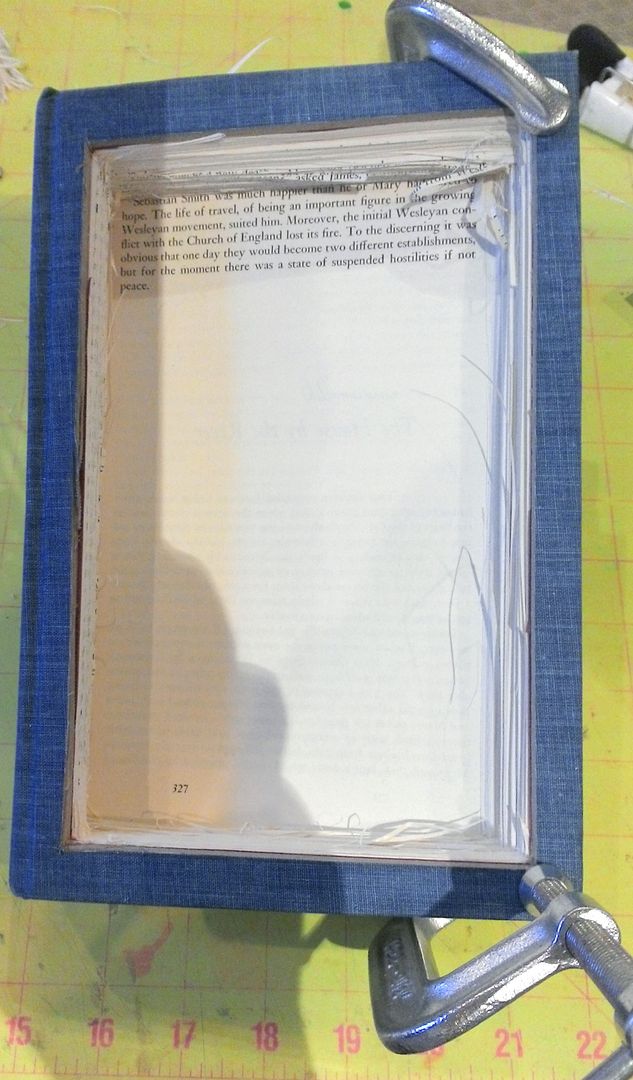
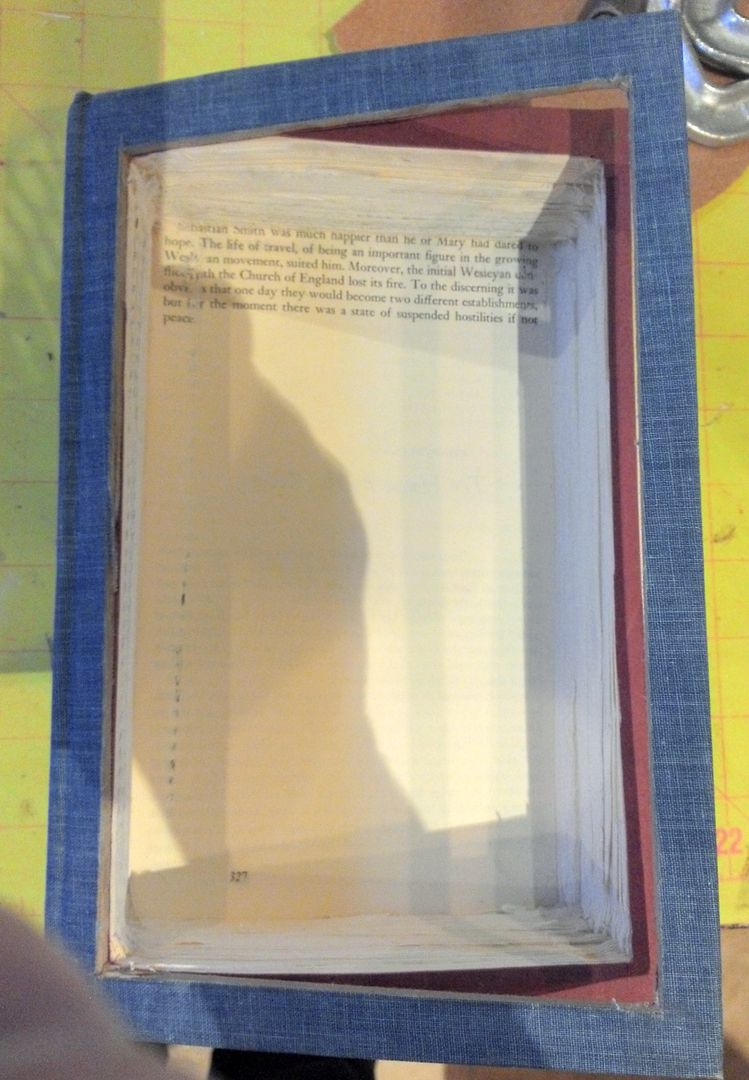
NOTE: As
you clip the cut pages out of the way and as you cut deeper into the book, make
sure that the book is not starting to slant.
If you cut the pages at a slant your shadow box edges will end up at a
slant. See the pictures below to see
what I mean. Try to keep the pages of
the book that you are cutting as square as possible.
In the picture below note how the pages
on the right edge line up with the back cover of the book. This is what you do want.
In the picture below note how the pages
on the right are at a slant as compared to the back cover of the book. This is what you don’t want.
Depth
of the hole – It is really up to you as to how deep you
want the hole. The deeper you cut the
hole the harder it is to keep the edges of the hole straight. For this book, I cut about 2/3 of the way
into the book leaving about 1/3 of the pages uncut. If you want a really deep hole, choose a deep
book.
Decide how many pages you want to cut and then insert a
piece of chipboard into the book where you want to stop cutting. You can do this once you get close to
stopping.
Another option is instead of cutting one large hole you
could cut two or more smaller holes.
Step 2 Cleaning Up the Hole
Once you’ve finished cutting the hole you’ll need to
remove all of the lose pieces of paper and even up the edges of the hole. To do this you can use sandpaper or a
Dremel. If you have a Dremel it makes
the task sooo much faster.
Clamp your book together to keep the cut pages in place while you sand the hole.
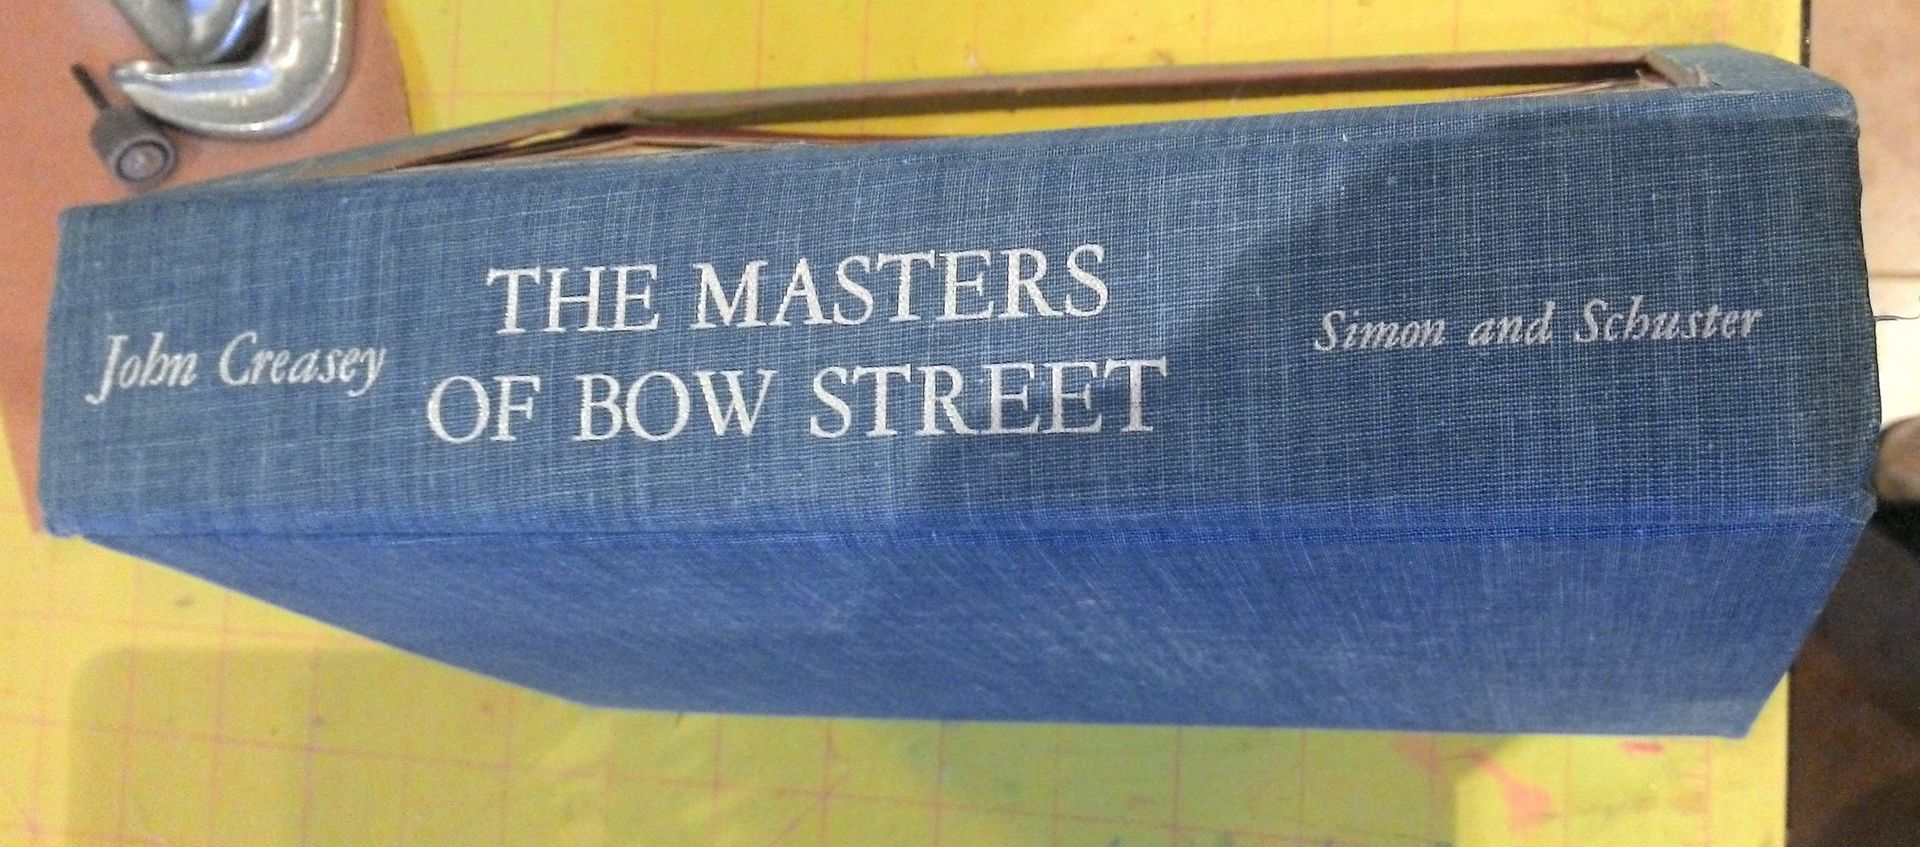
Step 3 - Changing and Decorating the
Spine
This is an optional step.
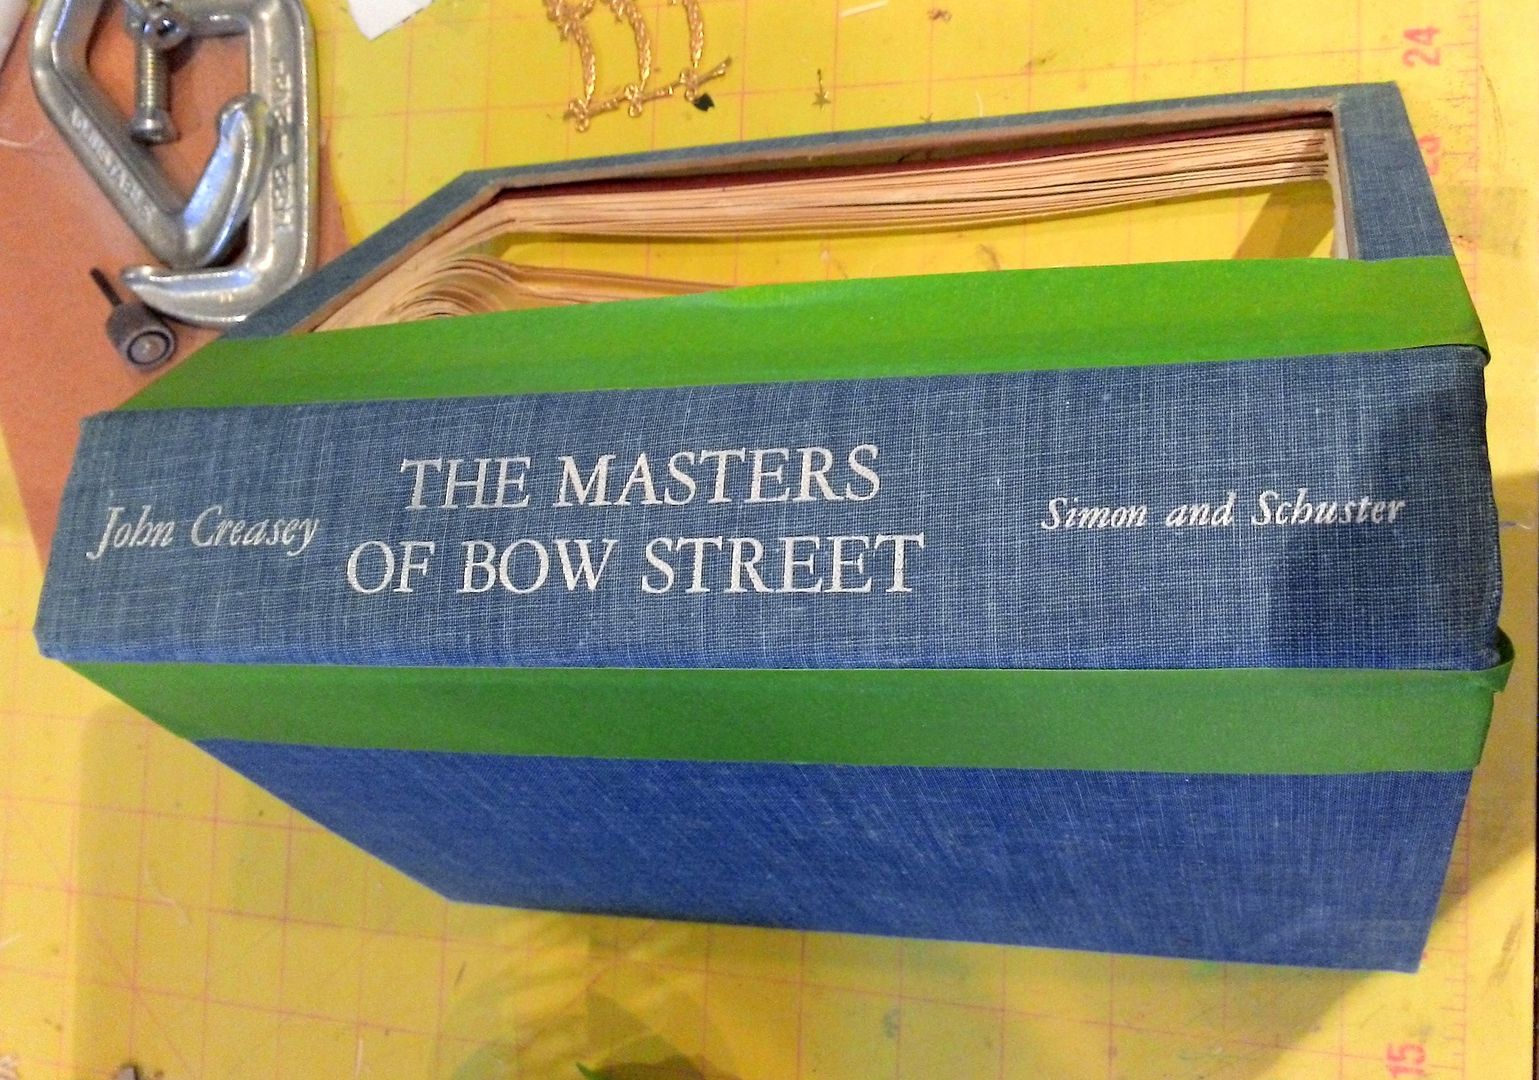
You may find that based on your theme and your book spine that you don’t
want to change it. For this example, the
book I choose did not fit with the theme so I needed to do something to change
the spine.
Of course, you could opt to change the entire cover
Of course, you could opt to change the entire cover
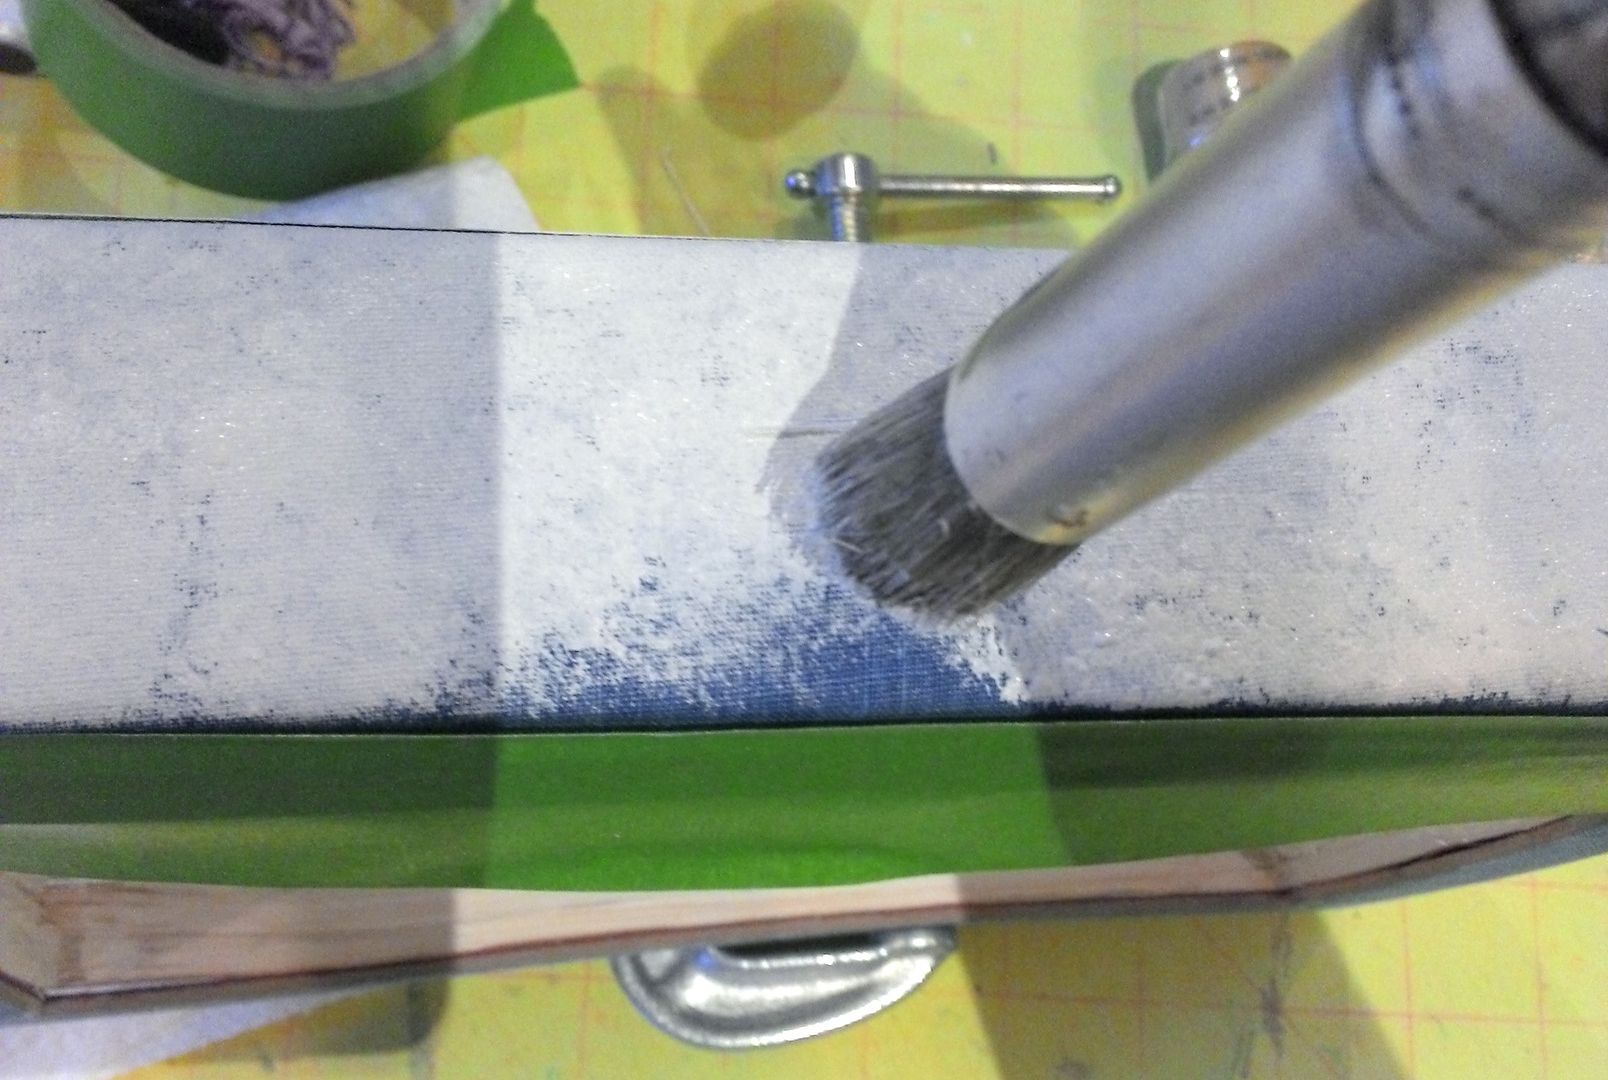
Next, I used a stenciling brush to lightly stipple on
cream paint. I used this dabbing
technique for two reasons. First, so
that I would not force paint under the tape and second so that it would have
more of a textured look.
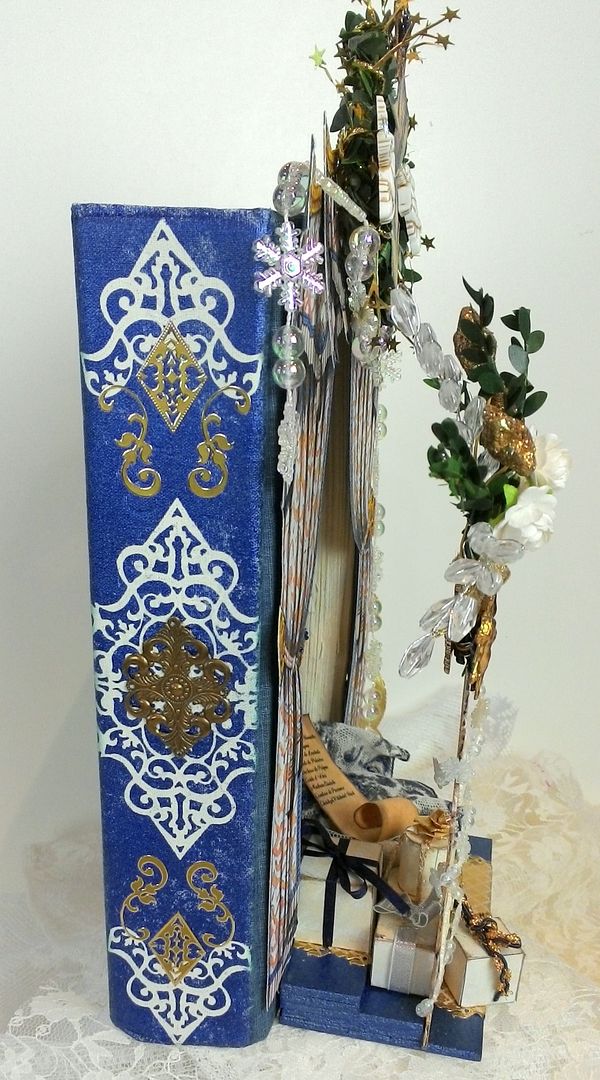
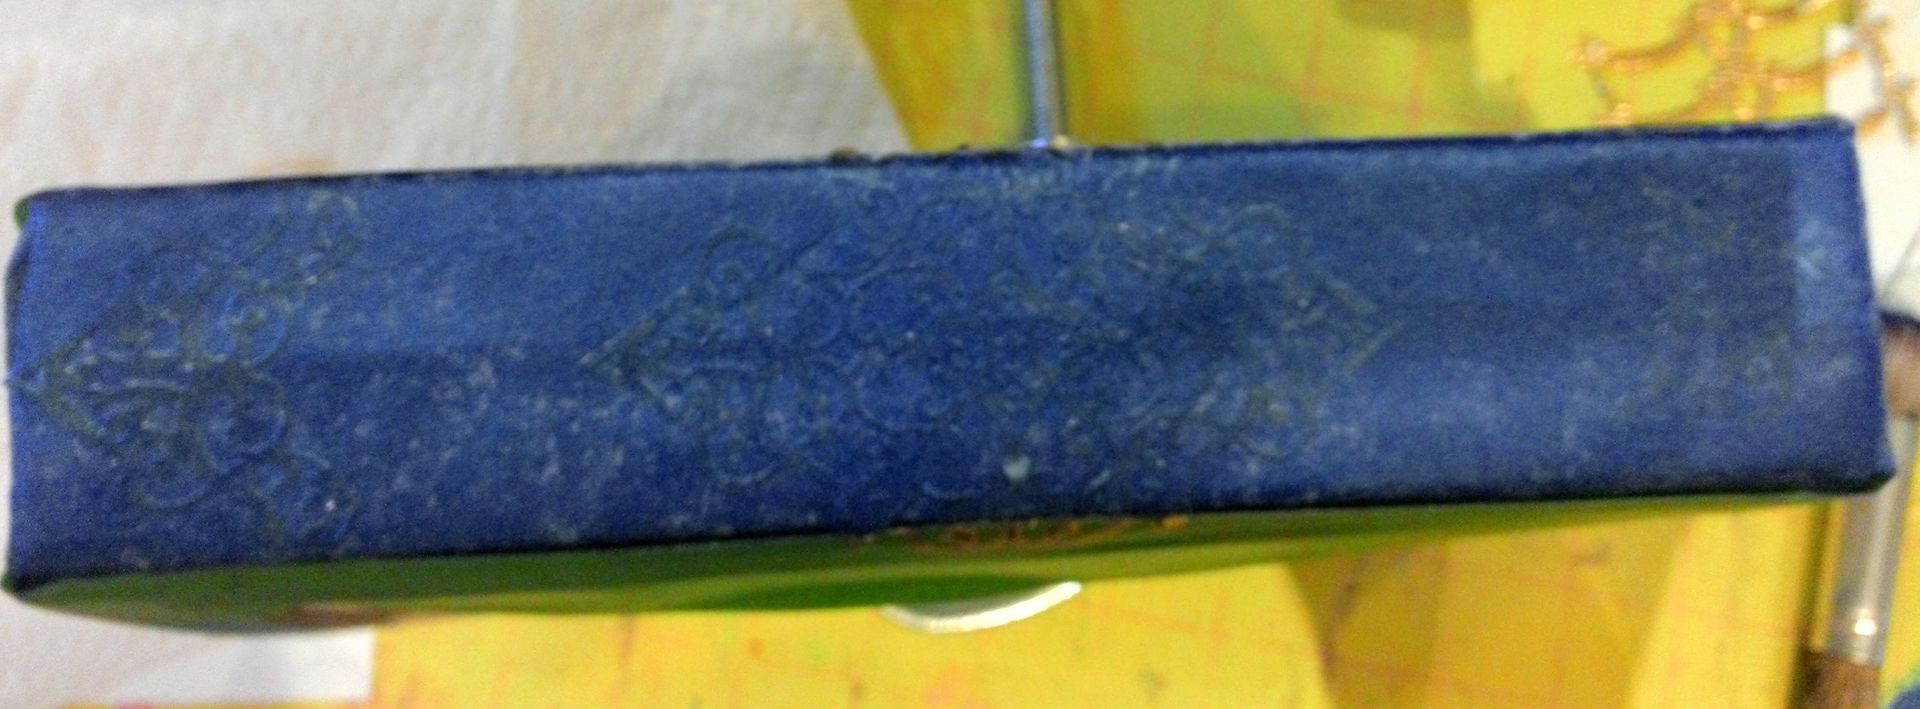
Once the paint dried, I applied stickers to the spine to
create a mask. Again, I lightly stippled
on blue metallic paint (that was very close to the color of the book cover)
covering the stickers.
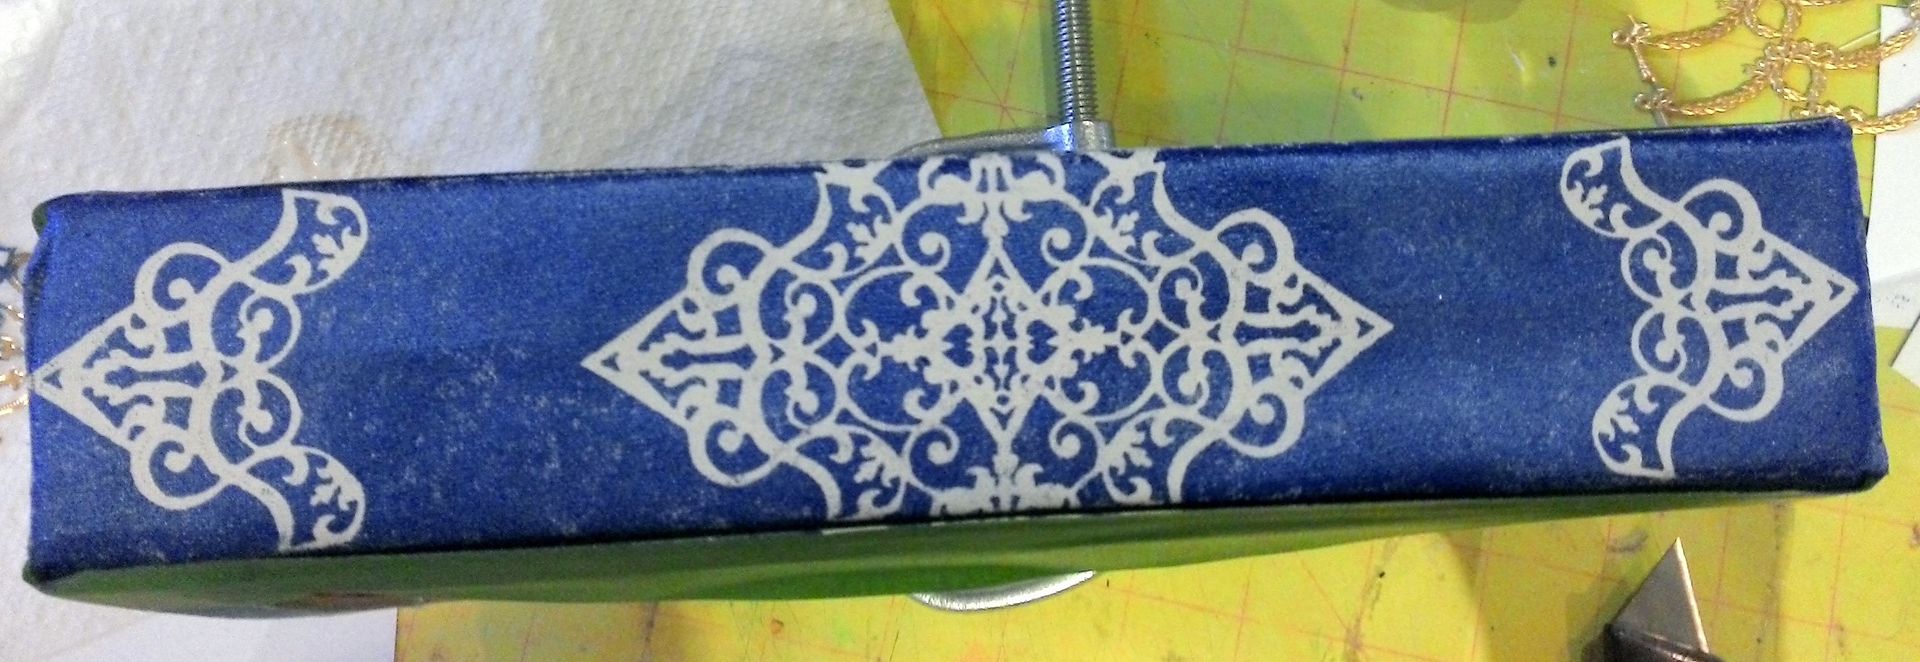
Once the painted dried, I carefully remove the stickers
from the spine using the tip of an X-acto knife revealing the pattern on the
spine. I placed the stickers on a
nonstick mat. The stickers were still
tacky enough to apply to paper (which you will see in a later step).
I also ended up adding more of the gold stickers and a
piece of filigree to complete the spine.
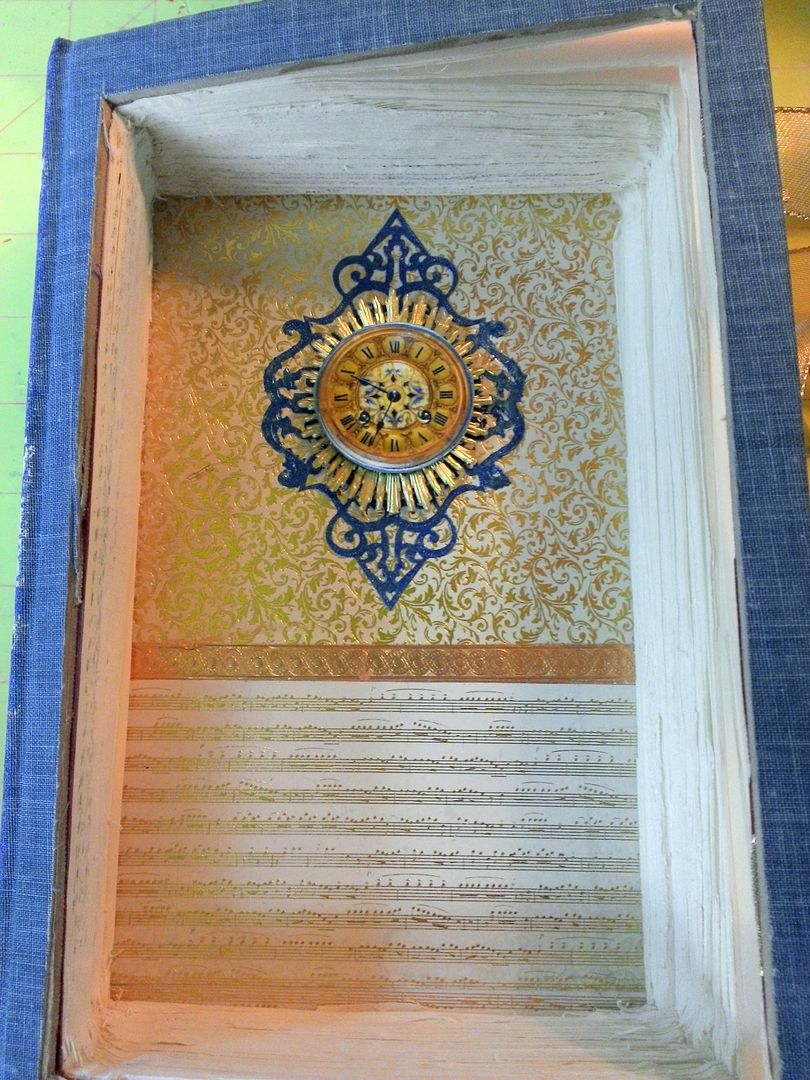
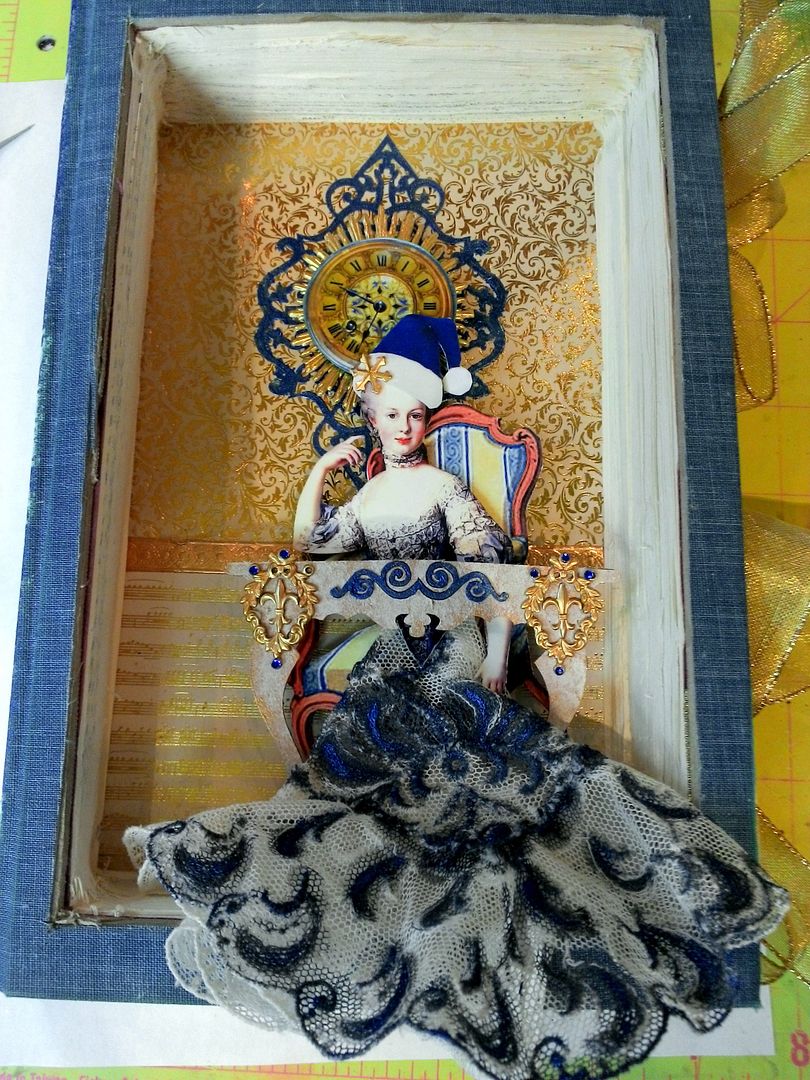
Step 4 – Background inside the Shadow Box
To keep the book closed we will be using ribbon. But before moving on to this step, add
whatever elements you desire to the back of the shadow box as it is easier at
this stage of the process. You could use
paper or paint or whatever you desire. I
glued gold foil paper from the St.
Nicholas 6 x 6 paper pad and a piece of Dresden to the back.
Next, I added the sticker that I used as a mask on the
spine, another piece of Dresden and a clock from my “Tick
Tock” collage sheet. To give them
more depth, the Dresden and clock are popped up using foam core tape.
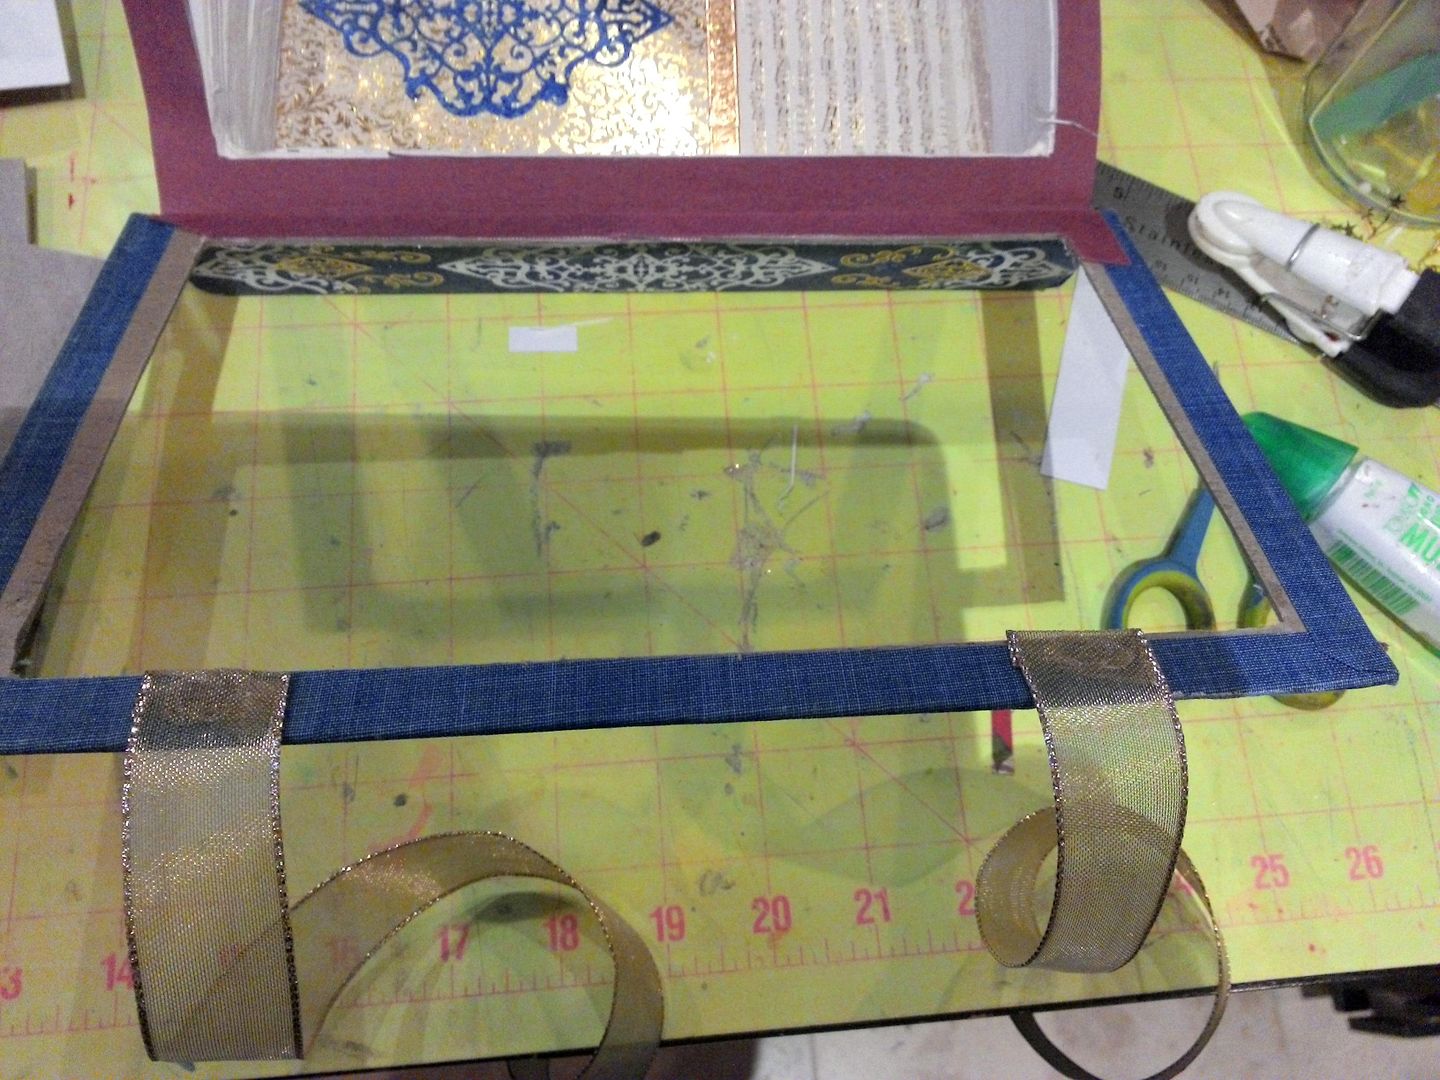
Step
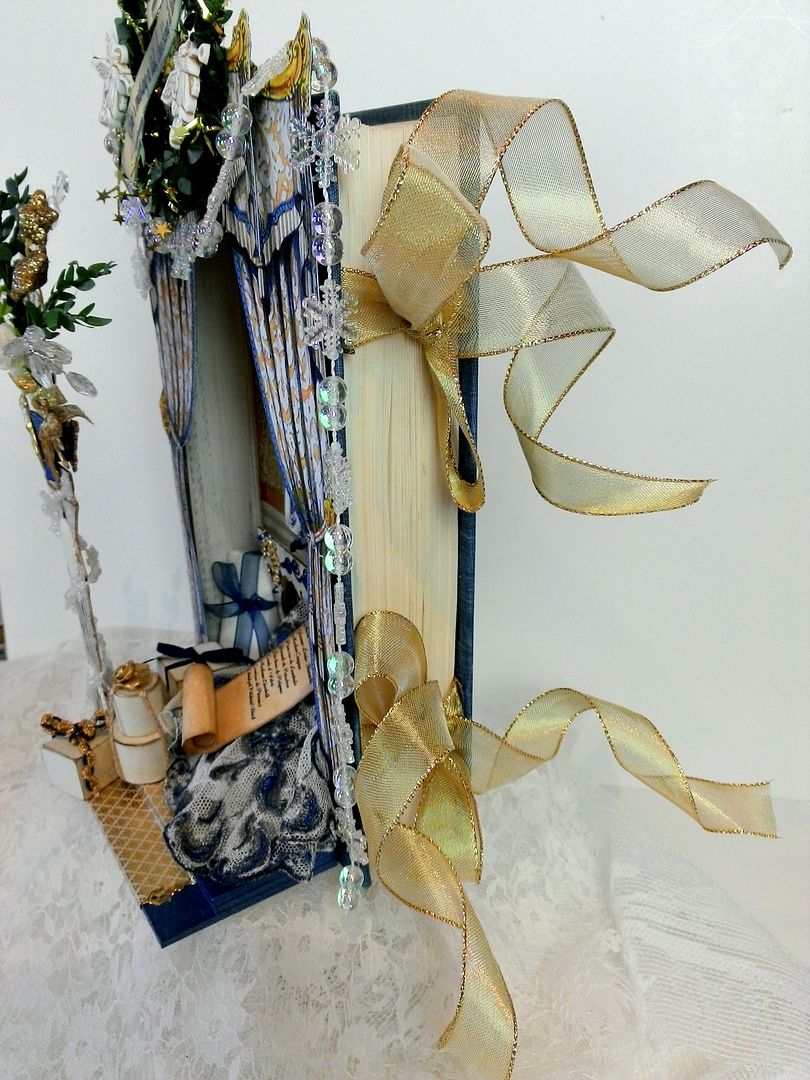
6 - Adding the Ribbon Ties
Now that the basic elements are in place in the back of
the shadow box you can add the ties that will keep the book closed.
Glue ribbon to the front cover and to the back cover (on
the insides of the cover). I recommend
you use two ties as opposed to one. Two
ties will do a better job of keeping the book closed and the edge even. Allow the glue to dry. Another option is to add brads that go
through the covers and the ribbons to hold them in place.
Once the ribbon is glued in place, glue the front cover
to the first few pages of the book and the back cover to the last few
pages of the book. Glue the pages
together first and then the cover to the pages.
Now the ribbon is sandwiched in between the covers and the pages.
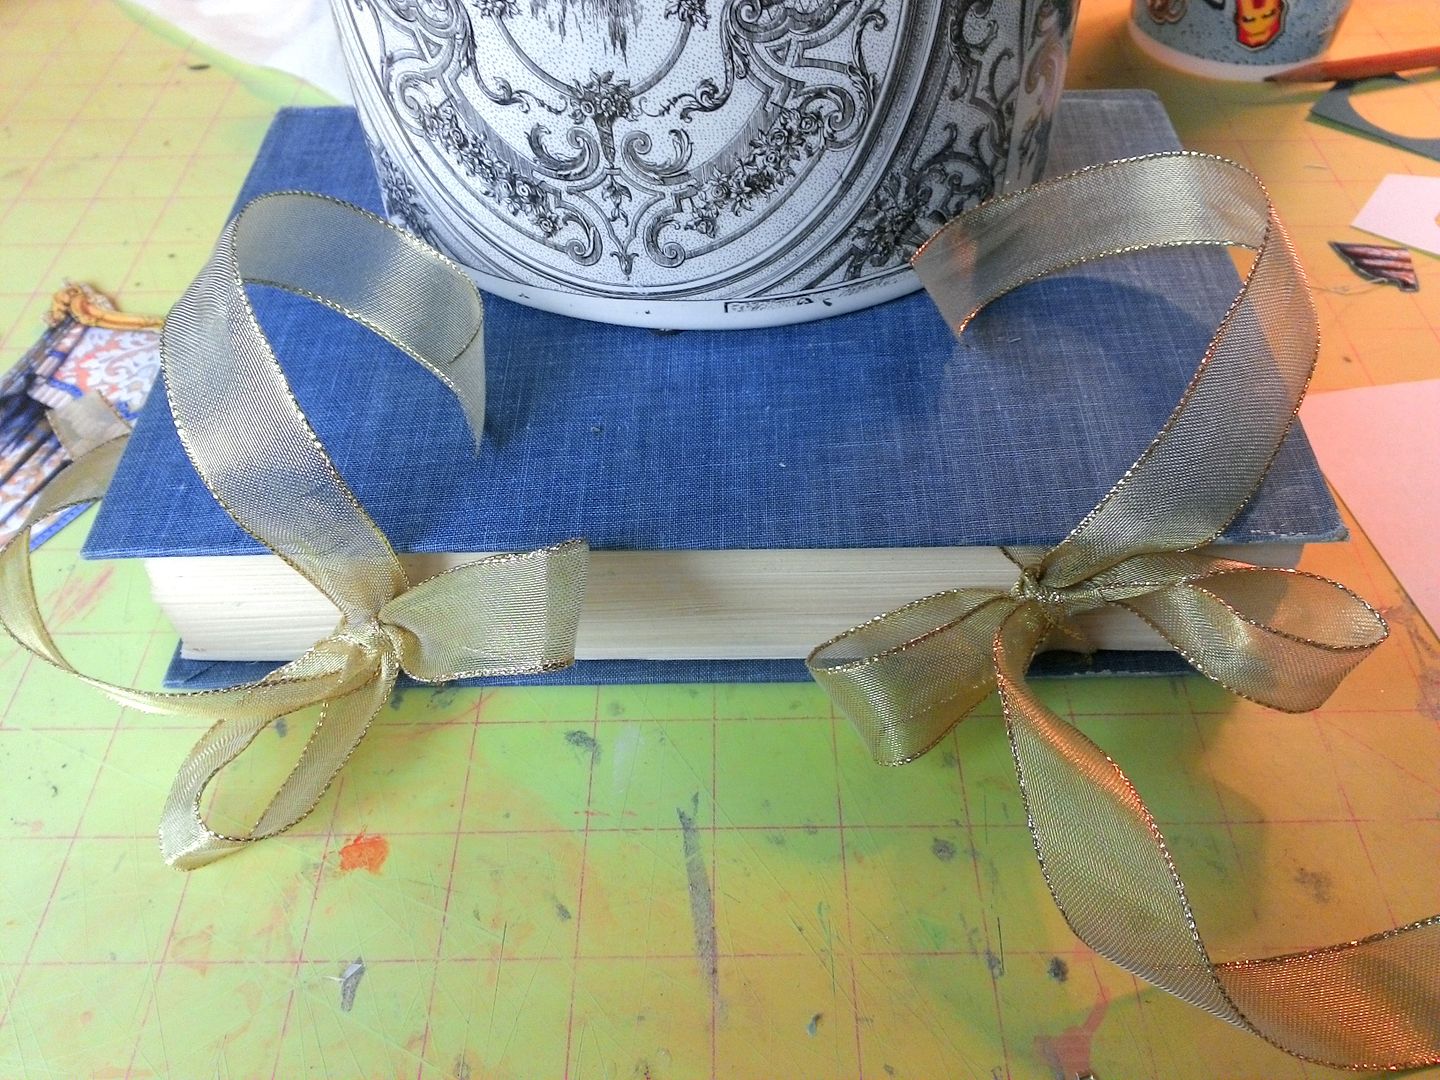
Put a heavyweight on the book and allow the glue to dry.
With the weight in place tie the ribbons. The weight on the book keeps the book closed
tight while you tie the ribbon.
The basic
structure of the shadow box book is complete.
Now it’s time to go crazy with embellishments.
The
Decorative Elements
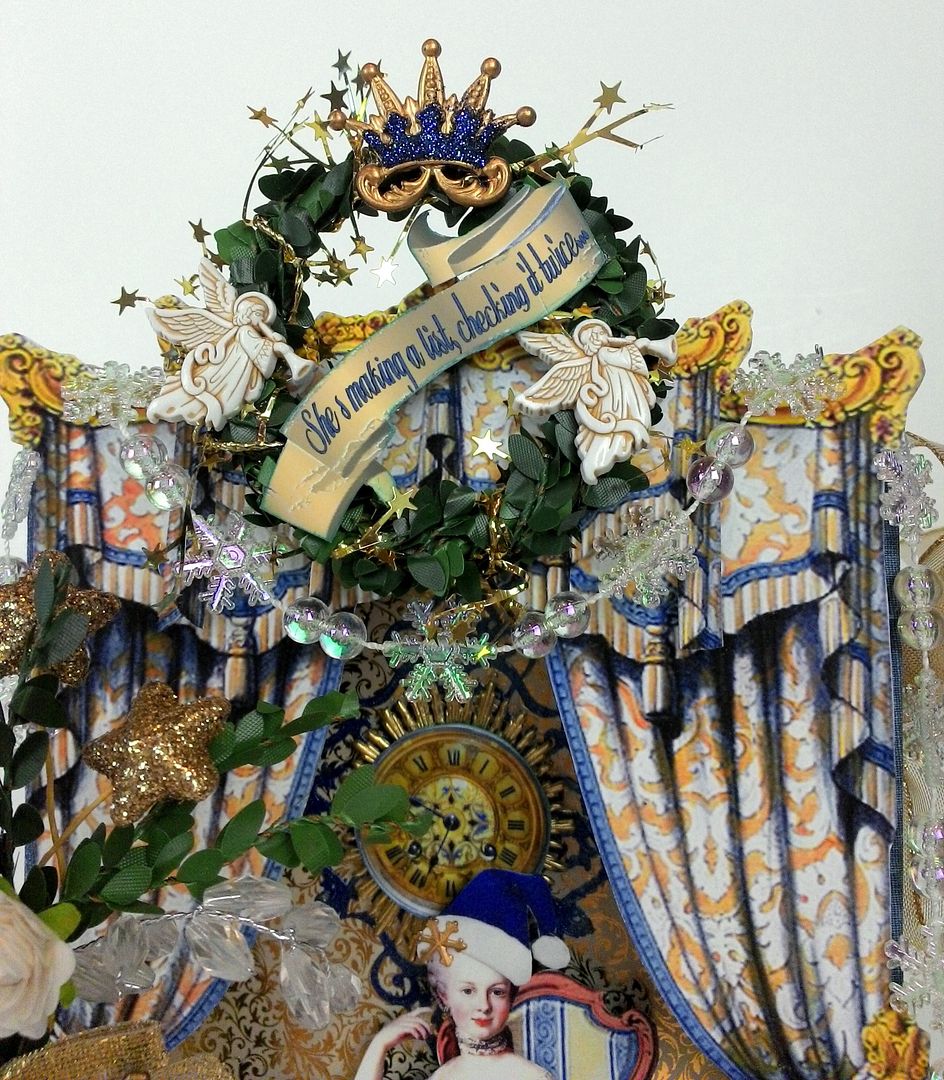
Making the Wreath
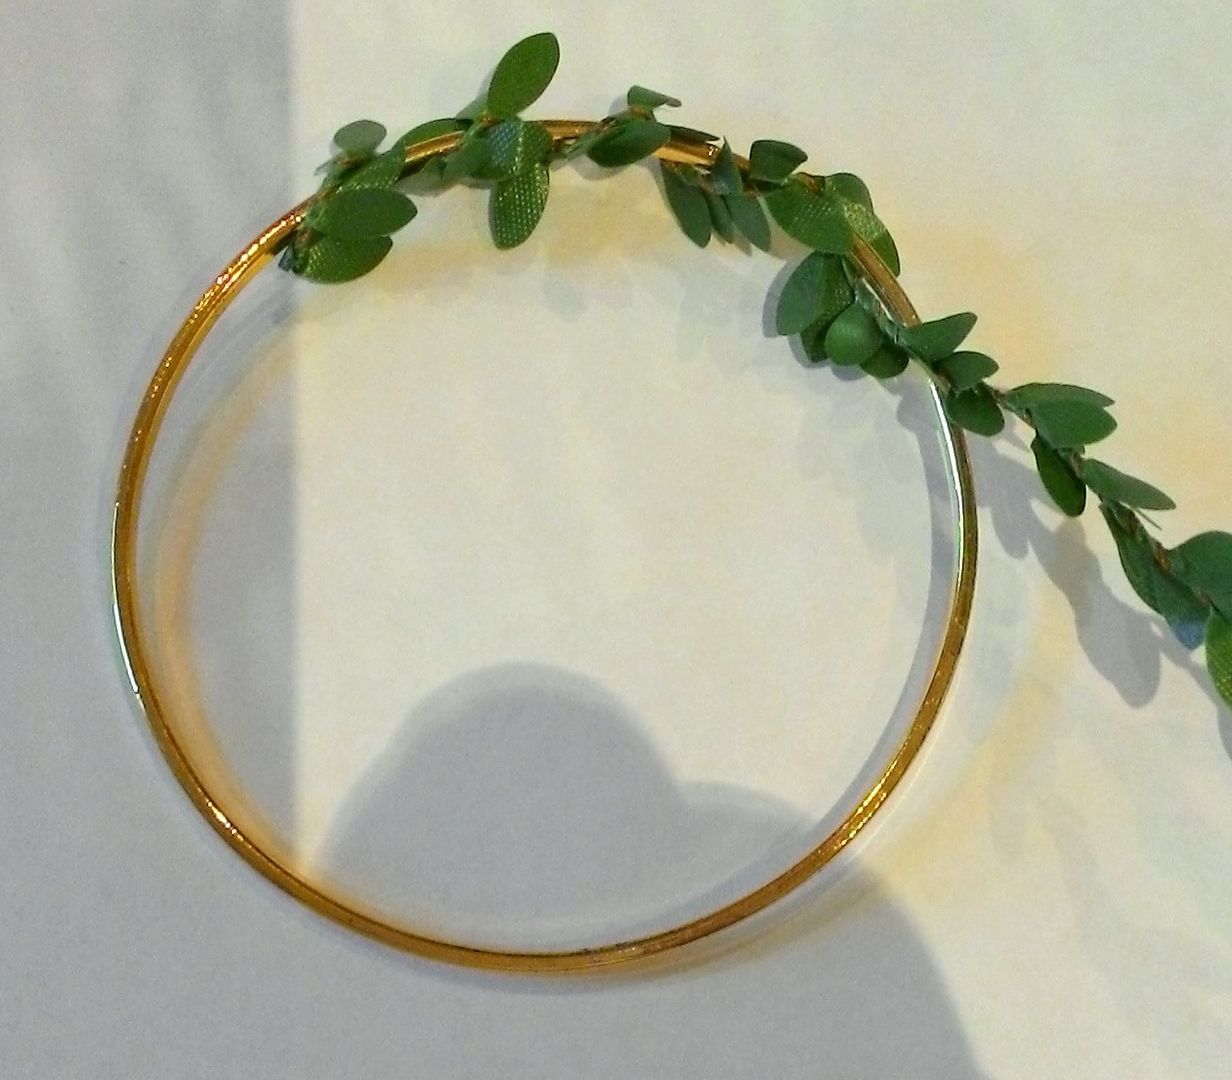
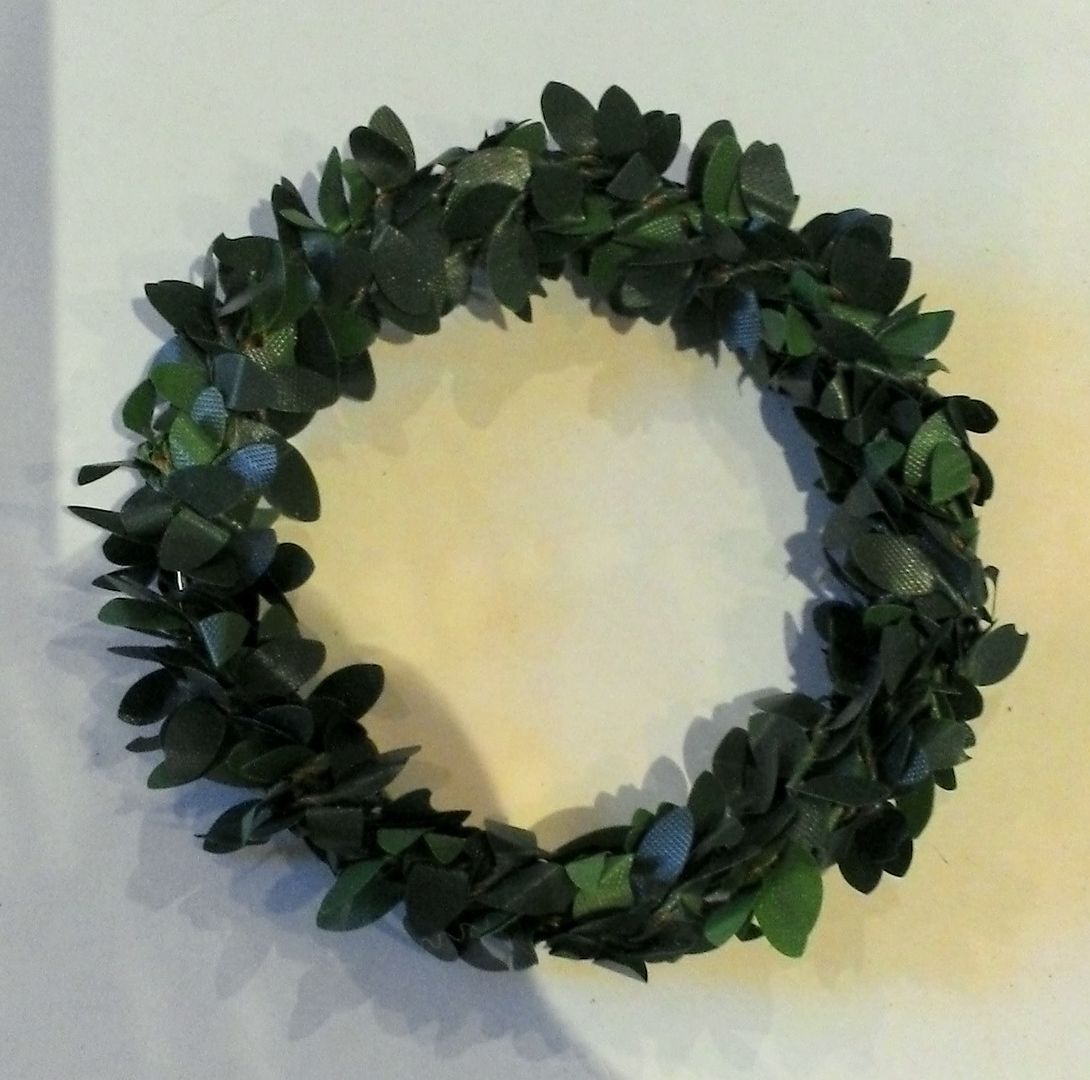
I started by wrapping green
leaf garland around a thin gold bangle bracelet. This garland is made of two strands twisted
together. To make the garland thinner I
untwisted the two pieces before wrapping it around the bracelet. Wrap the garland around as many times as
necessary to achieve the desired thickness and coverage.
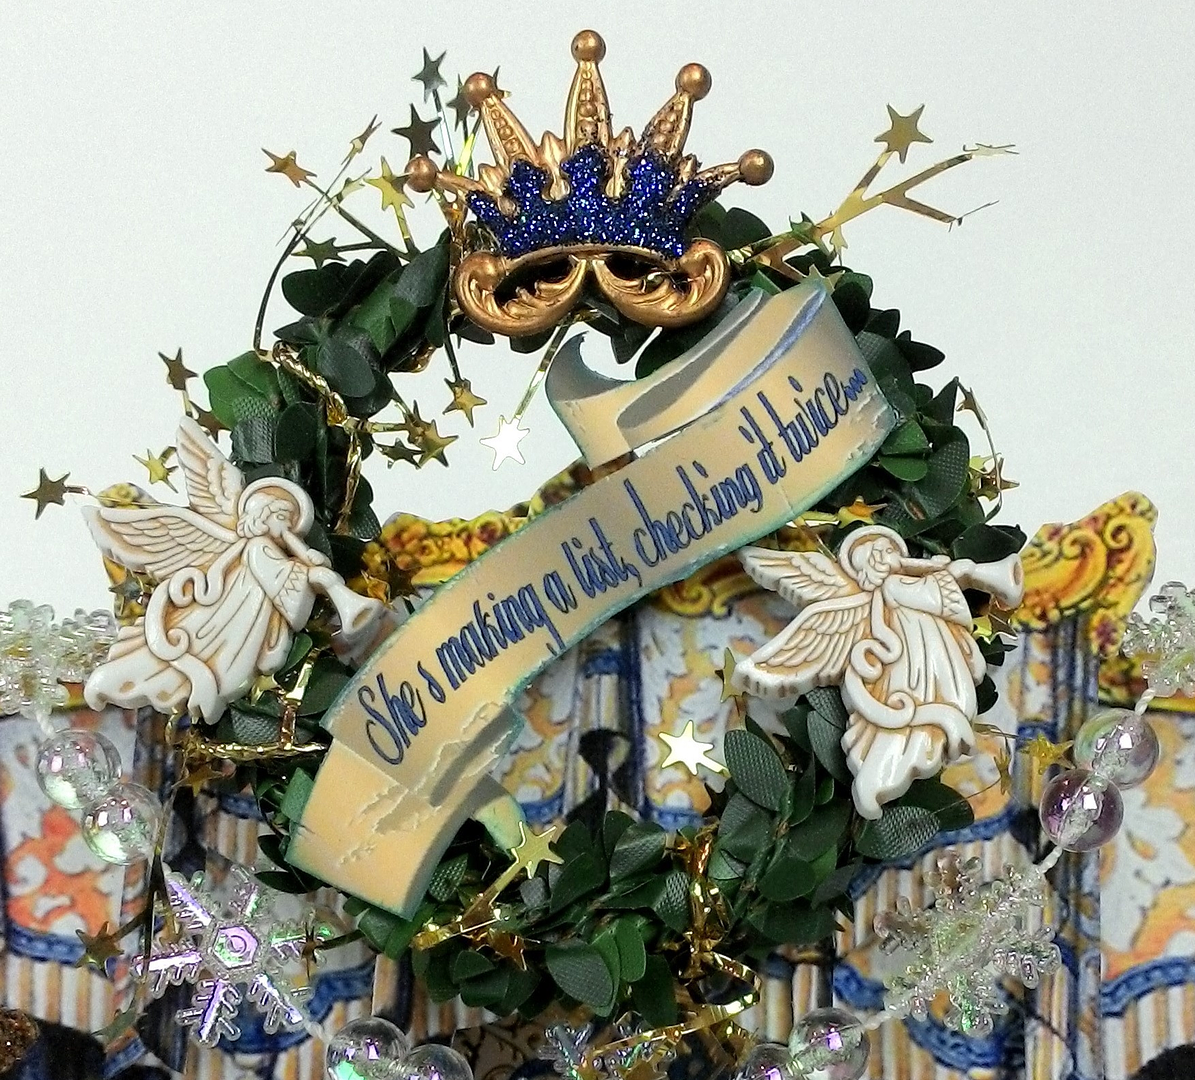
Next, I wrapped the wreath in gold star tinsel to give it
some sparkle.
Final touches are the angel
buttons (with shanks removed), a gold crown accented with blue glass
glitter and the banner.
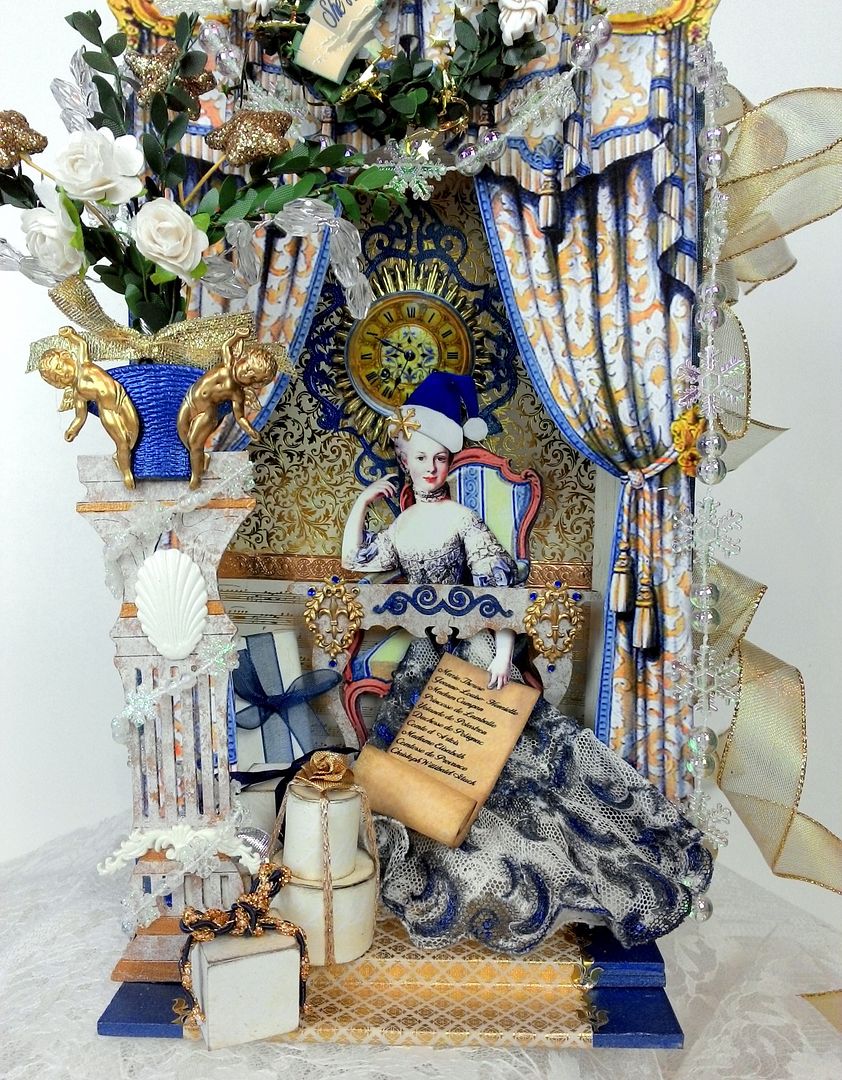
The Column and the Desk
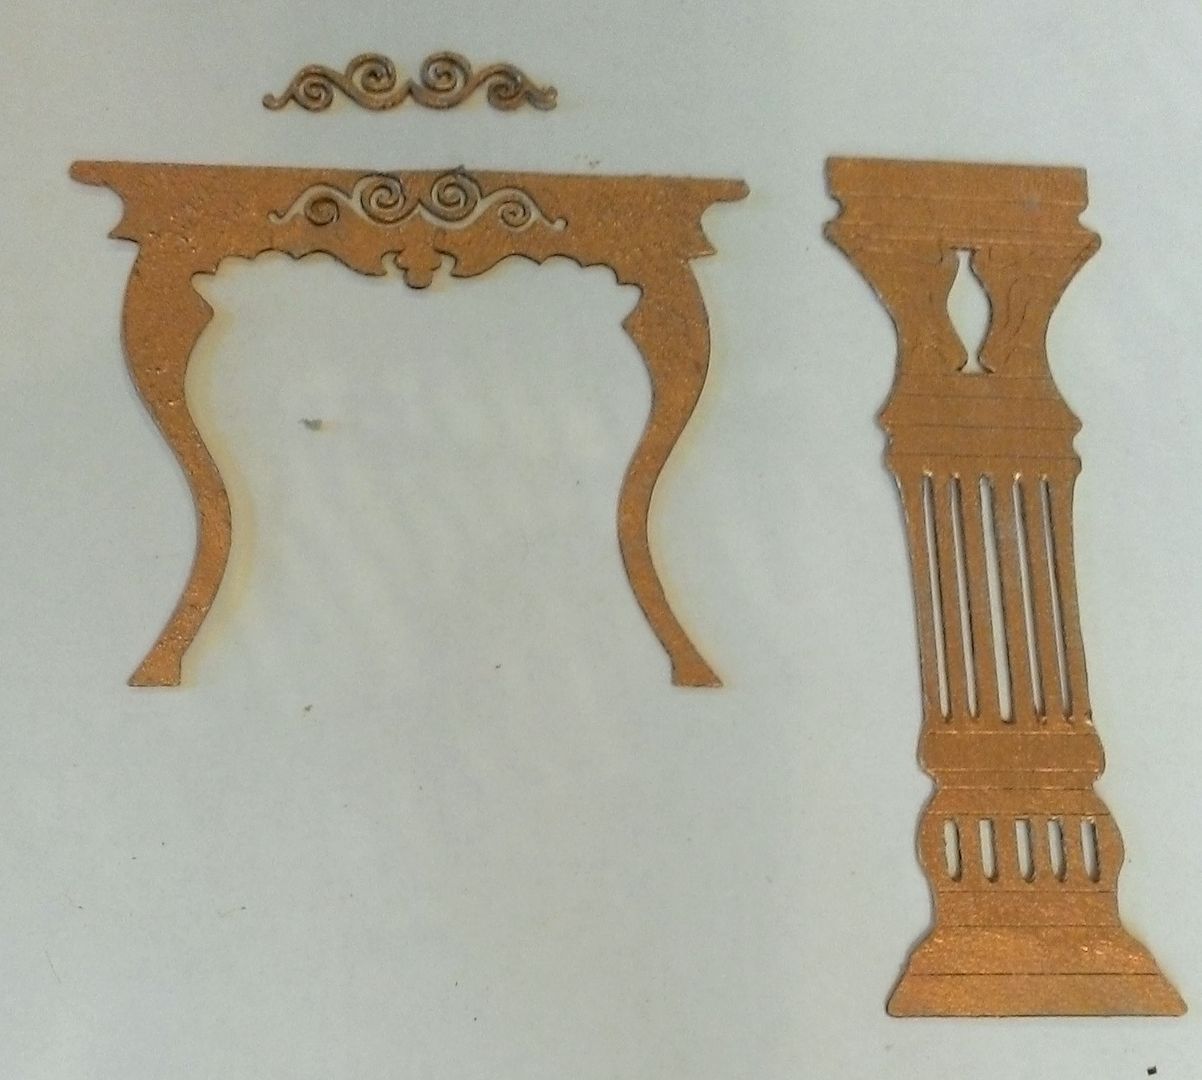
First, I painted both sides of the column and desk gold.
Next, I stippled on cream paint using a stencil
brush. Notice that I did not cover up
all of the gold paint.
Lastly, I repainted some of the detail on the column gold.
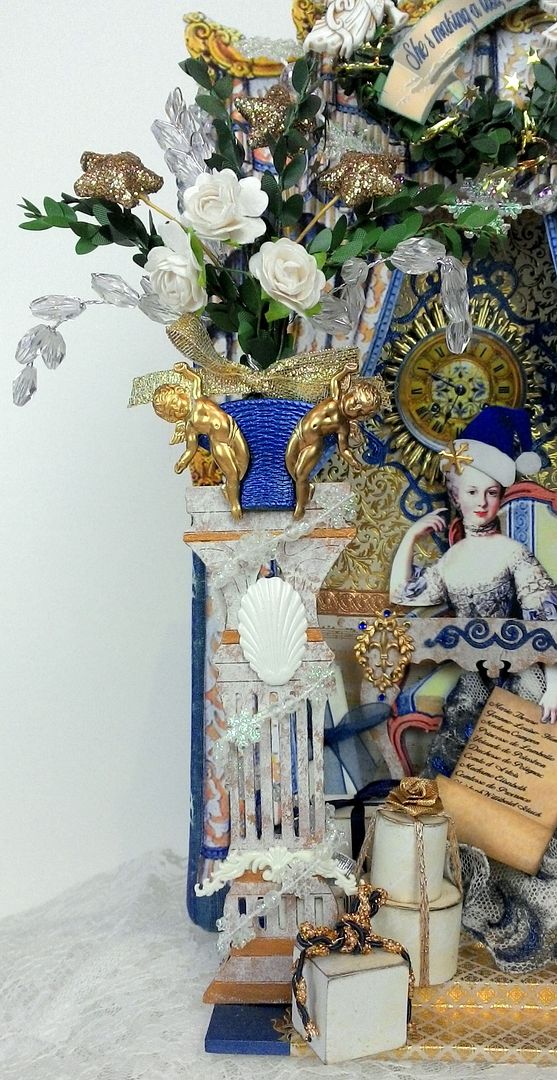
To dress up the piece, even more, I added a shell
and scroll piece. The brass basket
at the top (from my stash) is painted with metallic blue paint and the brass
cherubs are attached with E6000 glue.
The basket is to accommodate the flower arrangement.
The flower arrangement consists of more of the green leaf
garland, acrylic wheat sprays, glittered stars, and white roses. They are twisted together at the bottom.
The flower arrangement is glued behind the blue
basket. I also glued a piece of filigree
behind the flower arrangement to give it more support in the back.
As usual, I looked at the finished column and I ended up deciding
to add more stuff; as in wrapping it in snowflake garland.
Of course just like with the column, once I thought I was
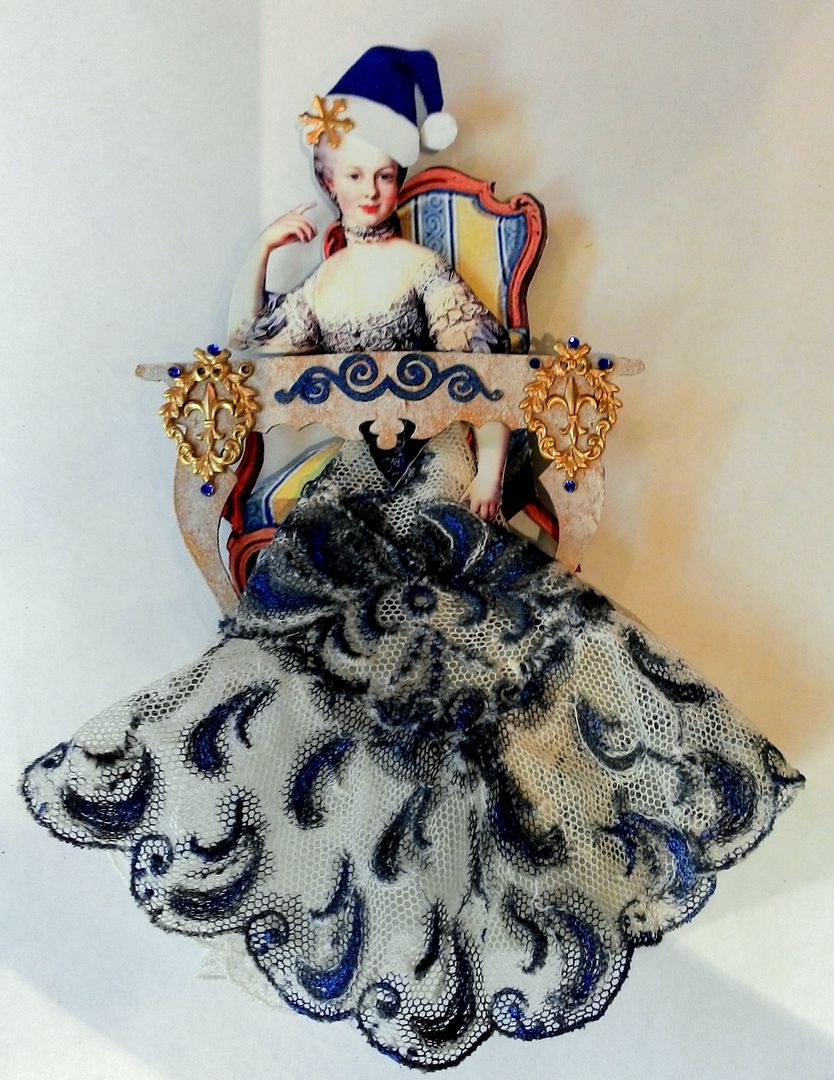
done with the table I decided to junk it up more. I ended up painting the scroll insert metallic blue to
make it pop more and added the brass embellishments with blue crystals to each
side.
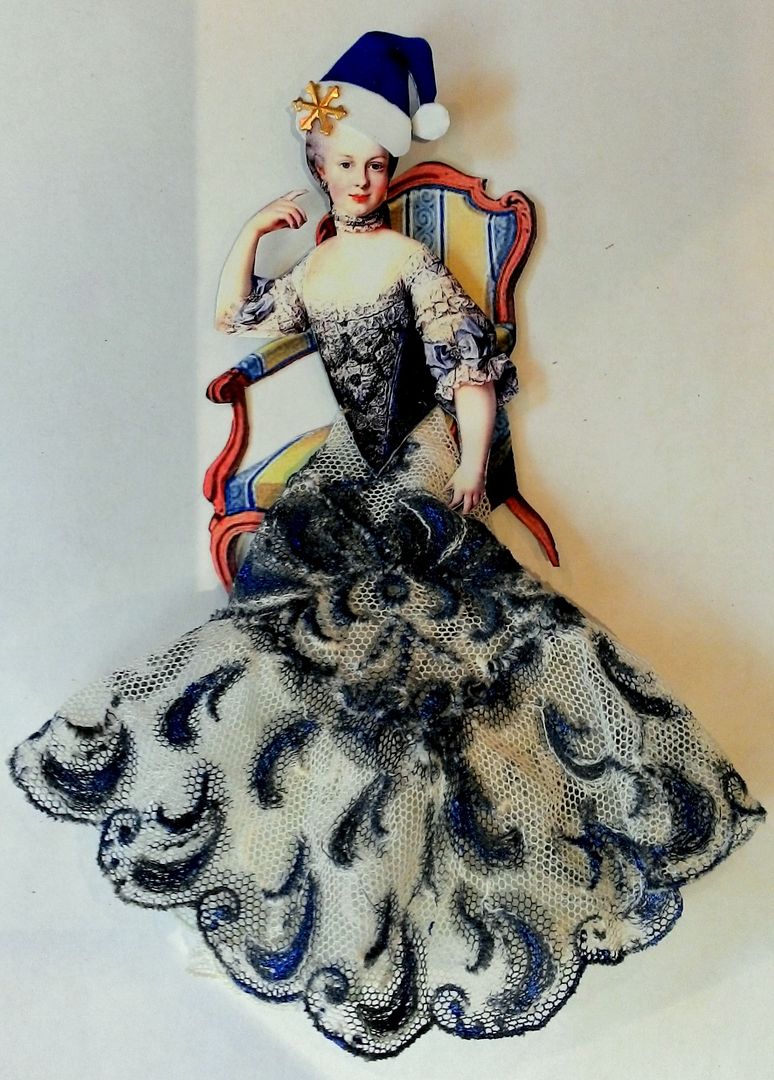
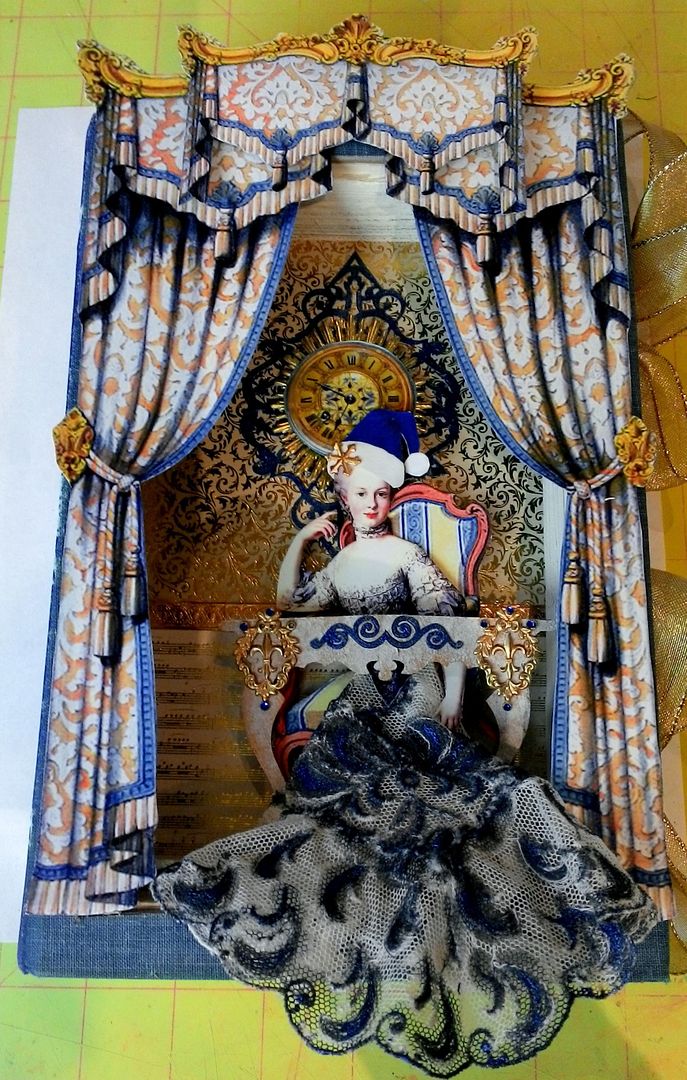
Marie’s Dress – The Challenge
The image of Marie that I choose (because of the colors
and I just like this one) was only from just a little below her waist up. I wanted her to be sitting behind the table
(so you could see the cool table). This meant I needed to come up with the rest
of her dress.
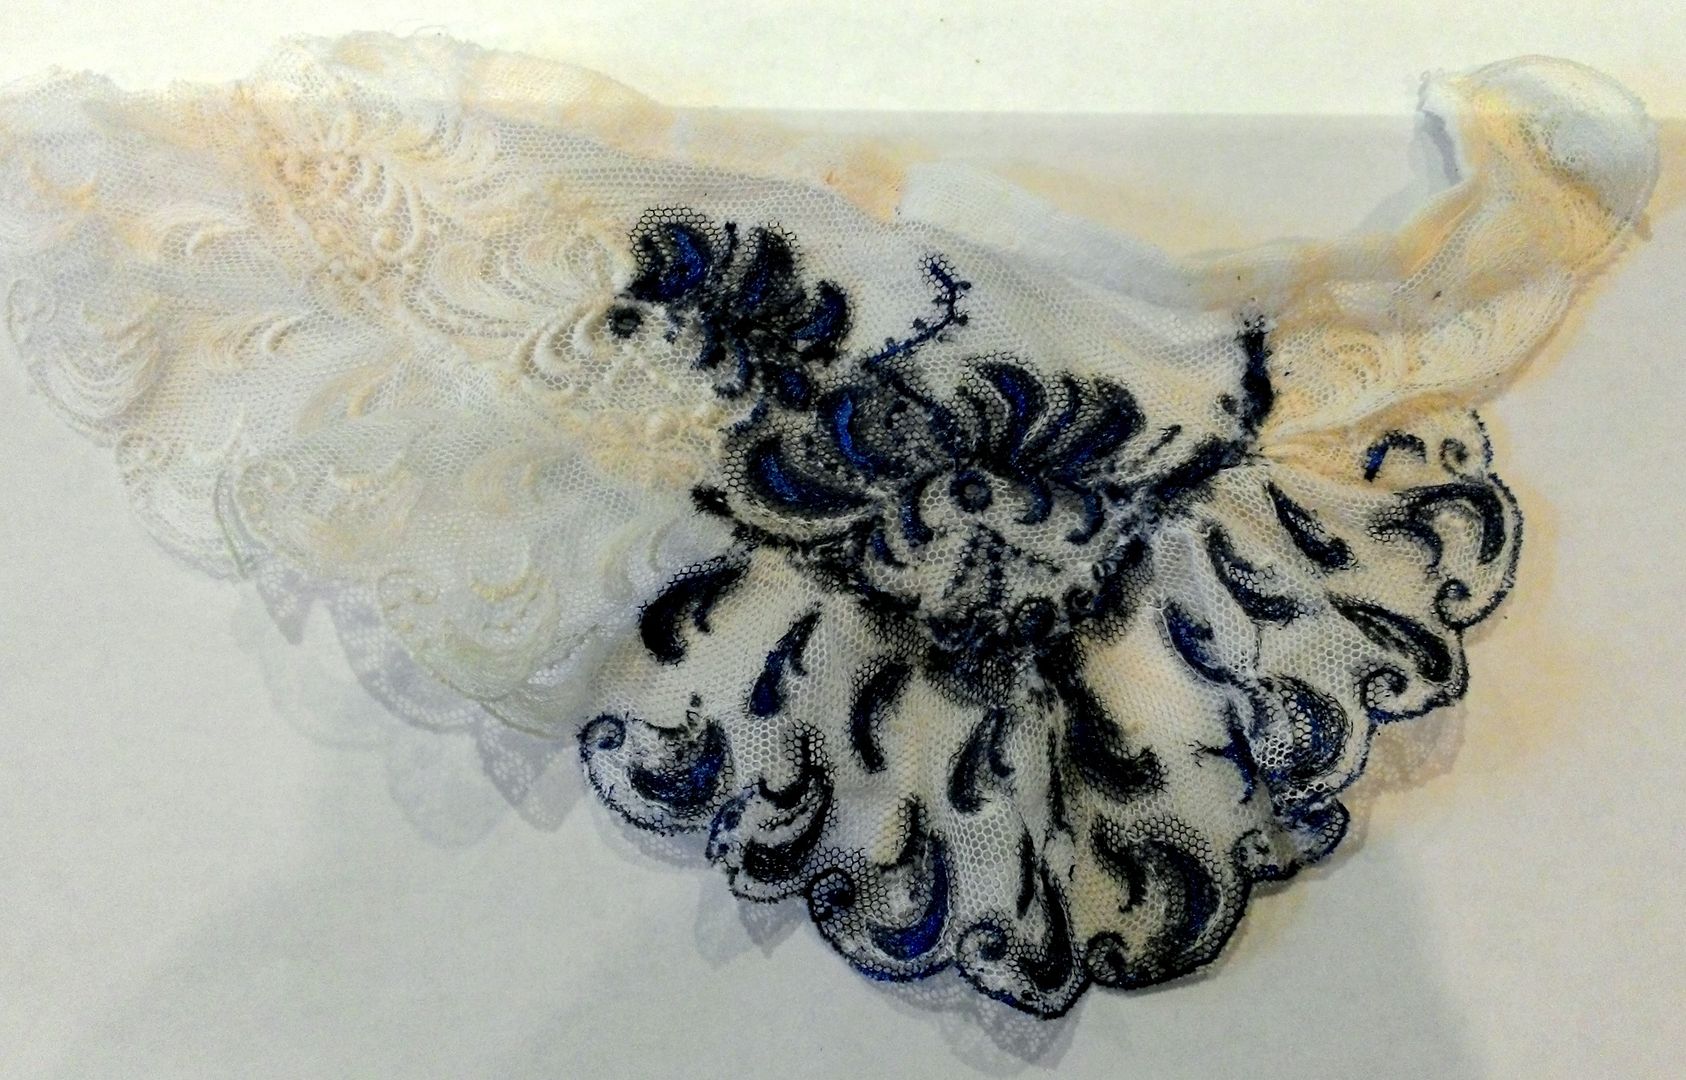
I decided to create the bottom of her dress using an old
piece of lace. I think it was originally
part of a lace collar.
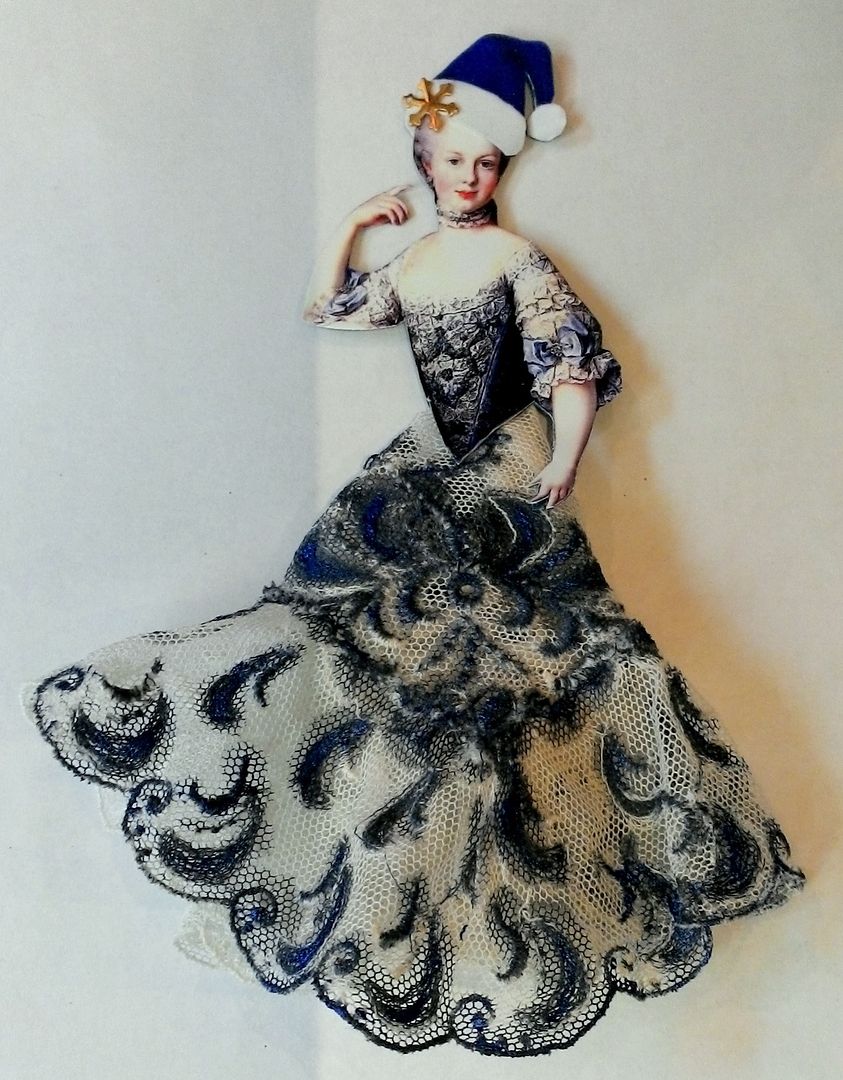
I used Denim Alcohol Ink to paint some of the patterns on the lace and then I added the metallic blue paint on the top of the alcohol ink. I only painted the part of the lace you would see in the front.
I cut away all of the dress in the image except for the
bodice. I folded the lace and attached it to the back of the
bodice and voilà, a dress.
I looked at her and thought “she needs a hat”. Since she is making out her gift list I
thought a Santa’s hat accented with a brass snowflake a perfect choice.
Next, I selected a chair from the collage sheet and
attached her to the chair. To create a
sense of depth, I used a layer of foam core tape to attach her to the chair.
The legs on the chair are not quite long enough but no
worries as her dress will hide the legs.
Next, I attached her to the table; again with a few
layers of foam core to create the sense of depth.
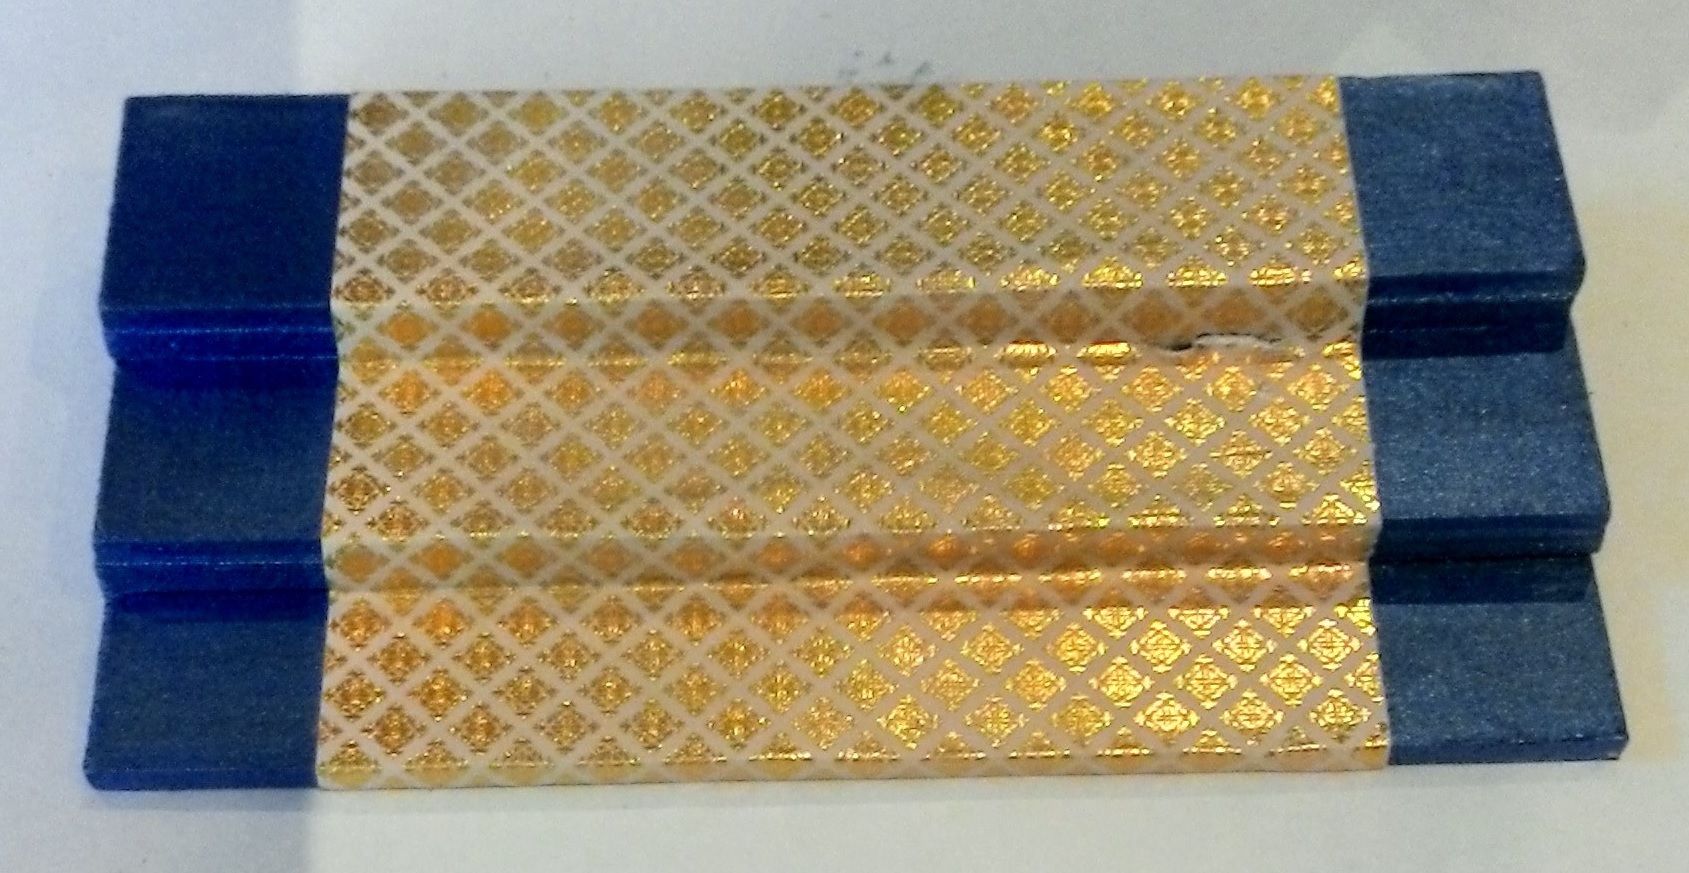
The Steps
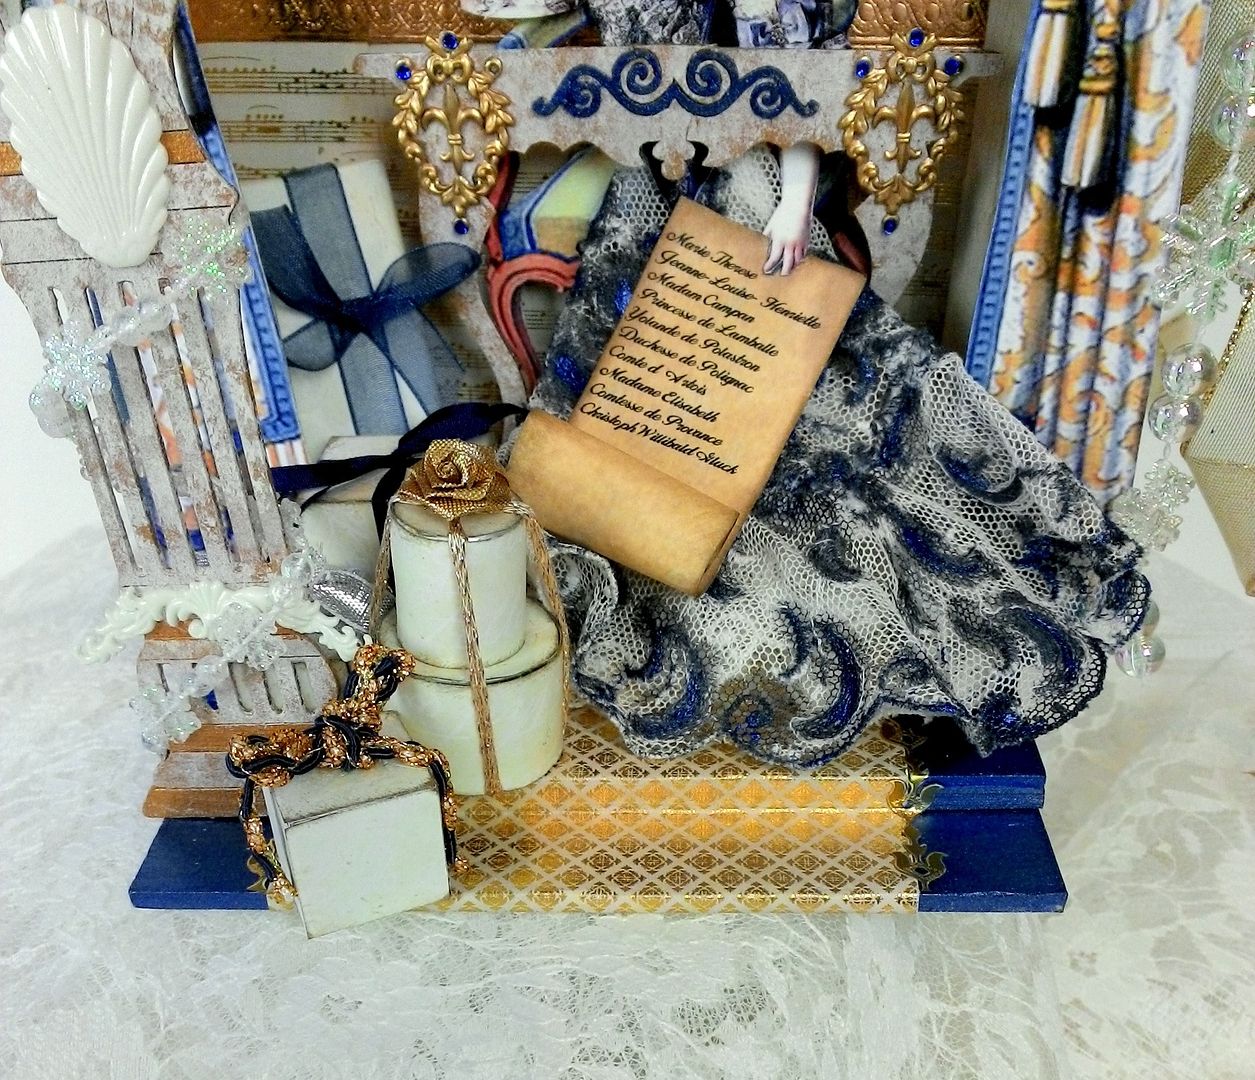
I used layers of chipboard to create the steps so that
they would be flush with the bottom of the shadow box. I also made them the width of the shadow box.
Next, I added more of the gold embossed paper as a runner
up the stairs and then edged the sides with stickers.
Other than the steps giving the book the feeling that the scene is
spilling out of the book, they also provide a place to attach the column and
the packages.
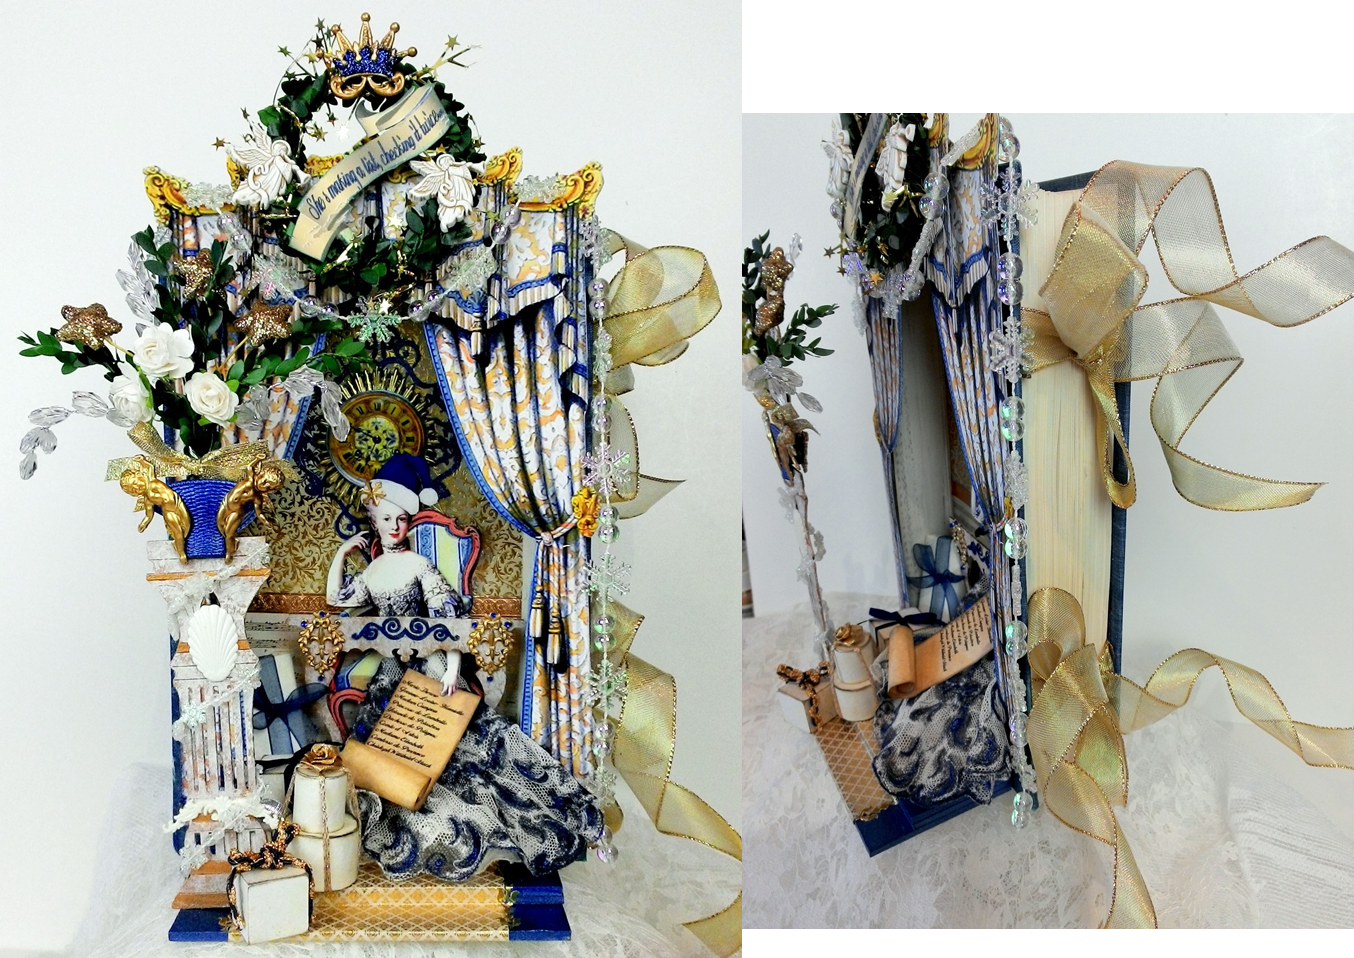
Putting
it All Together
First, I glued Marie to the back of the book, once again
using foam core tape to create depth.
Next, I attached curtains to the sides and top of the
book. I printed a larger version of the
curtains and then printed a smaller version of the top piece to create double
layers and more depth.
Next, I glued the wreath to the top and draped a
snowflake garland over the curtains.
The steps are glued to the bottom of the book and the column
which is to one of the steps.
The presents (made from a matchbox, woodblocks and
jeweler’s tins) are glued to the steps and the back of the column which
provides more support to the column.
The final touch was to attach a list to Marie’s hand. The list contains real people starting with
her first daughter, some of her ladies at court and other friends.










17 comments:
Absolutly amazing, wonderful, stuning!!!!
I LOVE it!!!!
thanks for all your explainations!
Hugs and kisses
I LOVE this!!! It is beautiful!!!! So fun! Gotta love Marie at Christmas! ;)
Wow, great creation Laura! I love how you coloured in the lace for her dress. So pretty!
Fabulous Laura, I love it!! So OTT, so Marie!
Lovely, Laura. I love the whole project and the colors are just what Marie would have herself. Your dress is so clever. I will try to remember the tip in the future to use if you don't mind.
Awesome and gorgeous! Thanks for another great tutorial.
Marilyn
WOW!! Laura this is amazing so intricate and gorgeous. I love the colors and Marie is so beautiful. Thanks for the tutorial-I will definitely try this.
Wow. That is spectacular.
Amazingly beautiful!! This is such a treasure! The tutorial is wonderful, thanks for showing us how it all came together. C'est magnifique! Joyeux Noël
This is absolutely adorable...love it!!
Just amazing. Your projects always leave me in AWWHHH
Wow!!! Pardon me while I wipe the drool from my keyboard.
What an awesome, ingenious project! Love how it turned out. I love all the attention given to the little details. Everything is in the details...lol.
Beautifully done. I had to download your tutorial. I want to make one...only in purple :-)
Happy Crafting
Tracie
What a STUNNING piece. I especially love the curtains....they look so real. Karen.x
wow! I really love the dress you made. Thank you so much for sharing all the details.
thank you for this!
it is absolutely stunning!Wow!!!!
Its beautiful~ You amaze me Thanks you all all the hard work going into alll your pieces. I wish there was more time in a day to keep up!!! LOL
Laura,
WOW!!! Your art just completely astounds me! I am continually in awe! Thank you for sharing your tutorials and inspiration! Amazing! xo Jackie
Post a Comment