-->

Welcome

I love answering your questions. If you ask them in the comment section, I have no way to answer you (if you haven't heard from me, that is why). If you use the "EMAIL ME" in the left column of this page, I will be able to respond to you. You can also use it if you want to be added to my newsletter. Laura

Wednesday, August 23, 2017

STEAMTOWN - TELESCOPE & ELEVATOR - VIDEO TUTORIALS

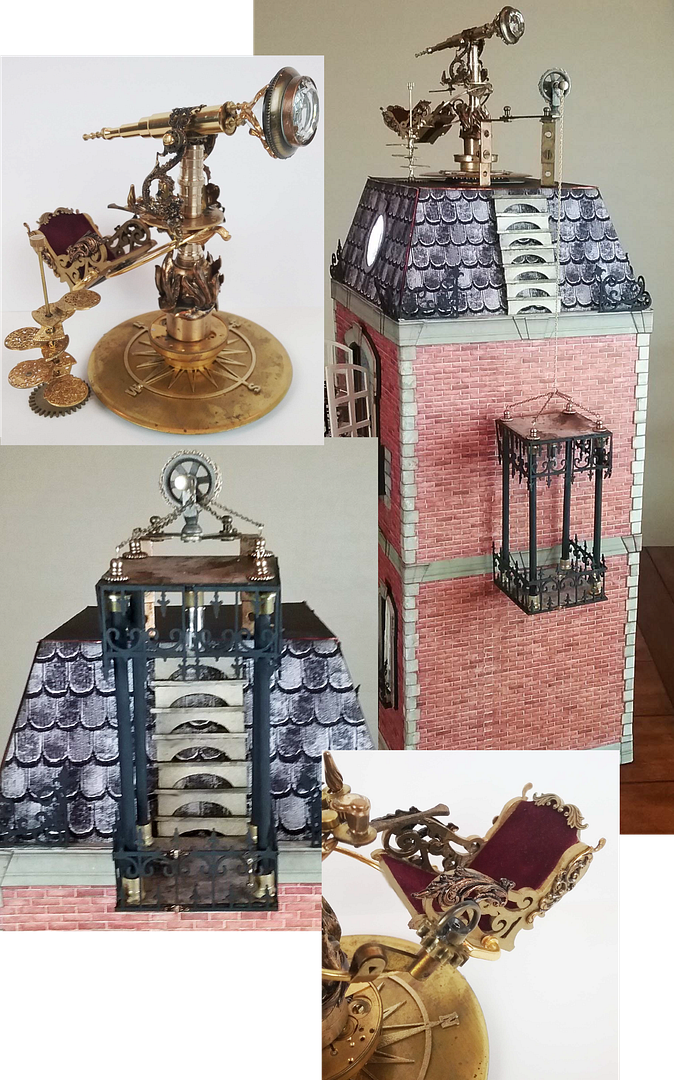
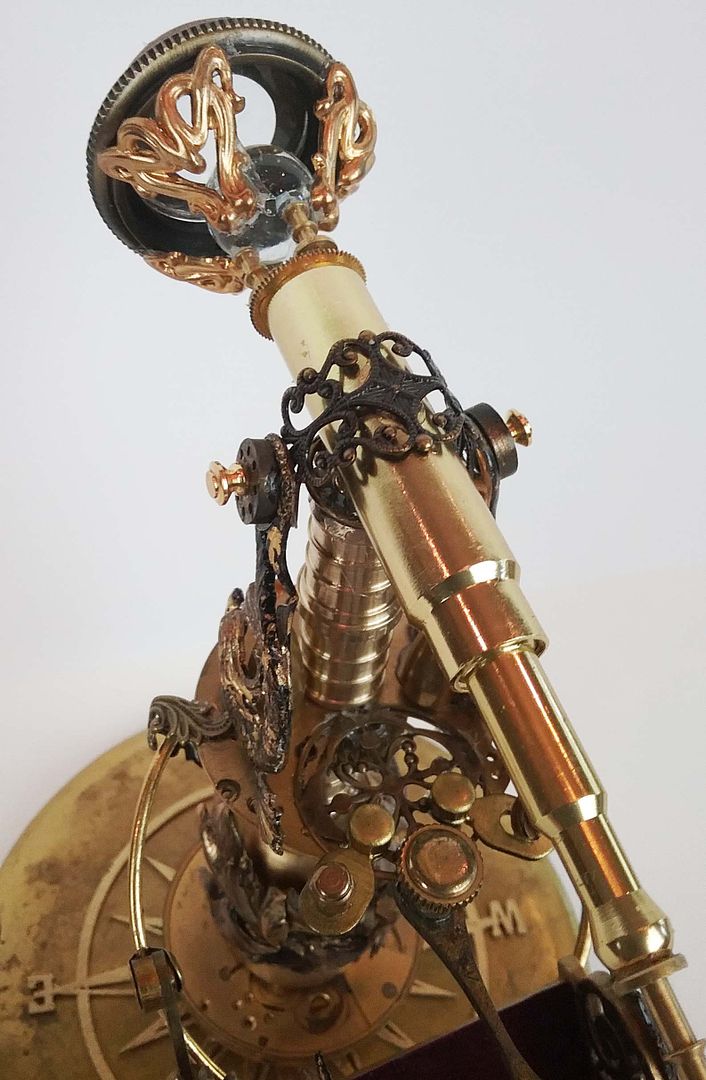
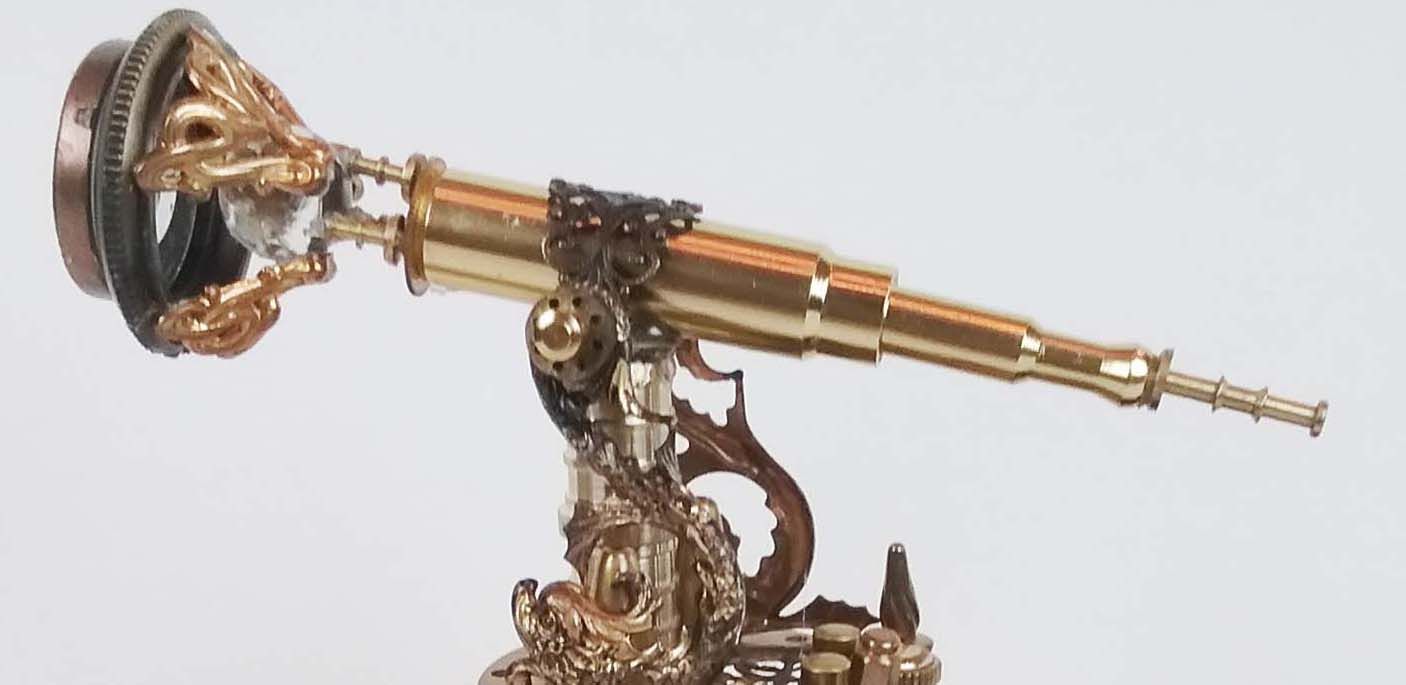
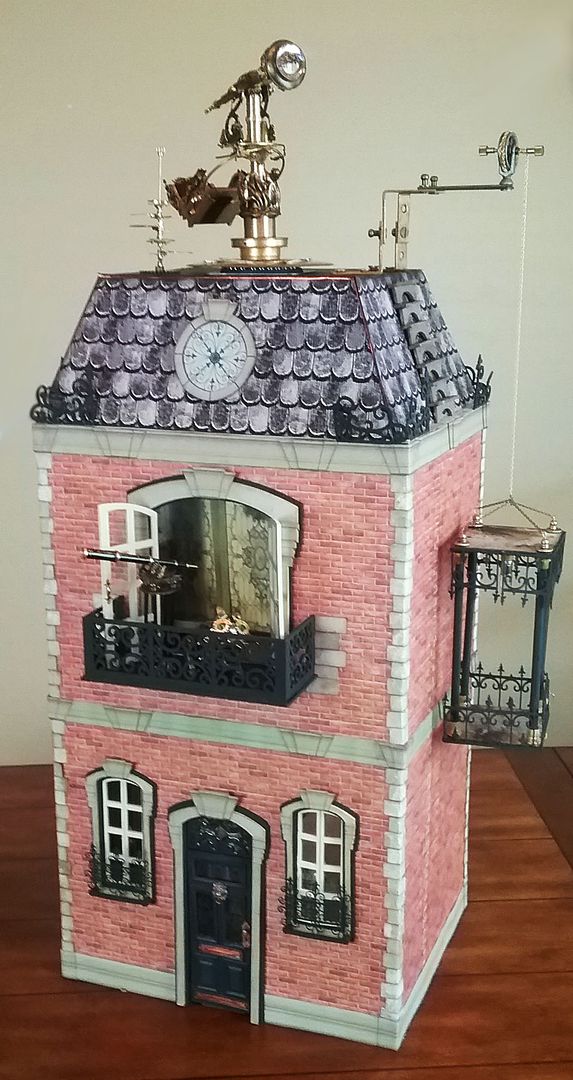
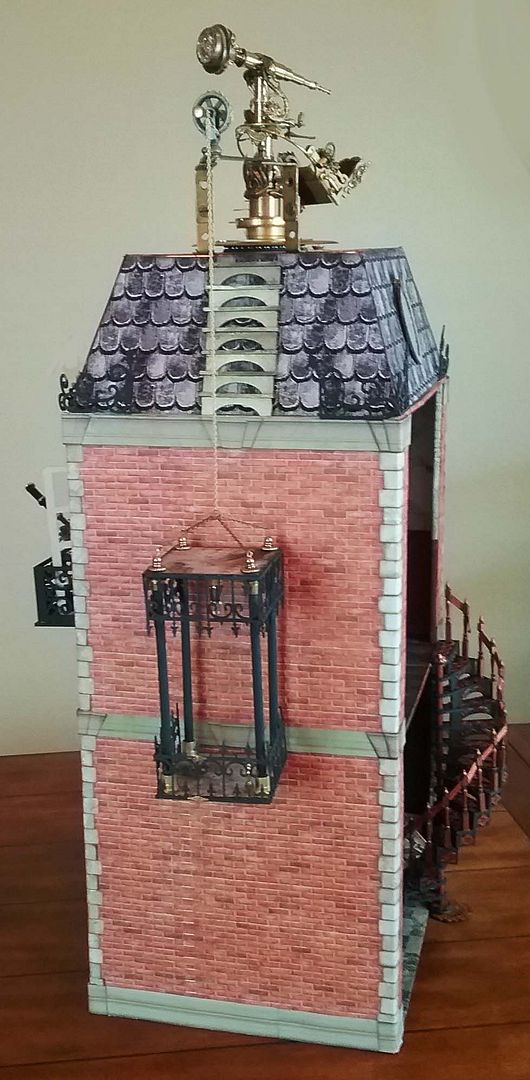
Here we are back at the house on Irongate Street for the last segment of the project.  Since H.G is an explorer, I thought she might explore the stars as well as the planet. To this end, I’ve created a telescope that sits on the roof.
In addition, I've built an elevator that will take Helena to the roof.  

TELESCOPE
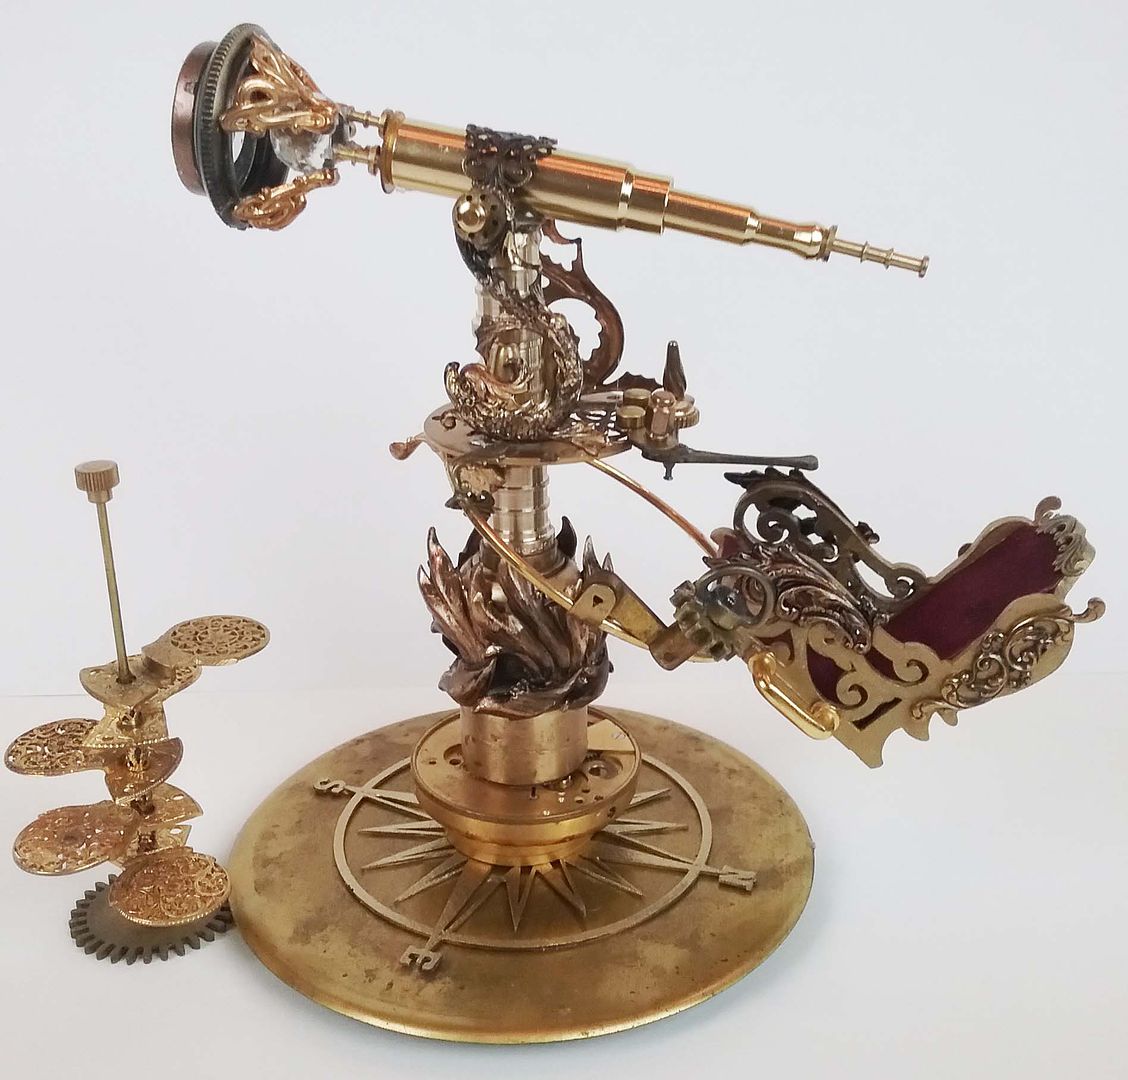
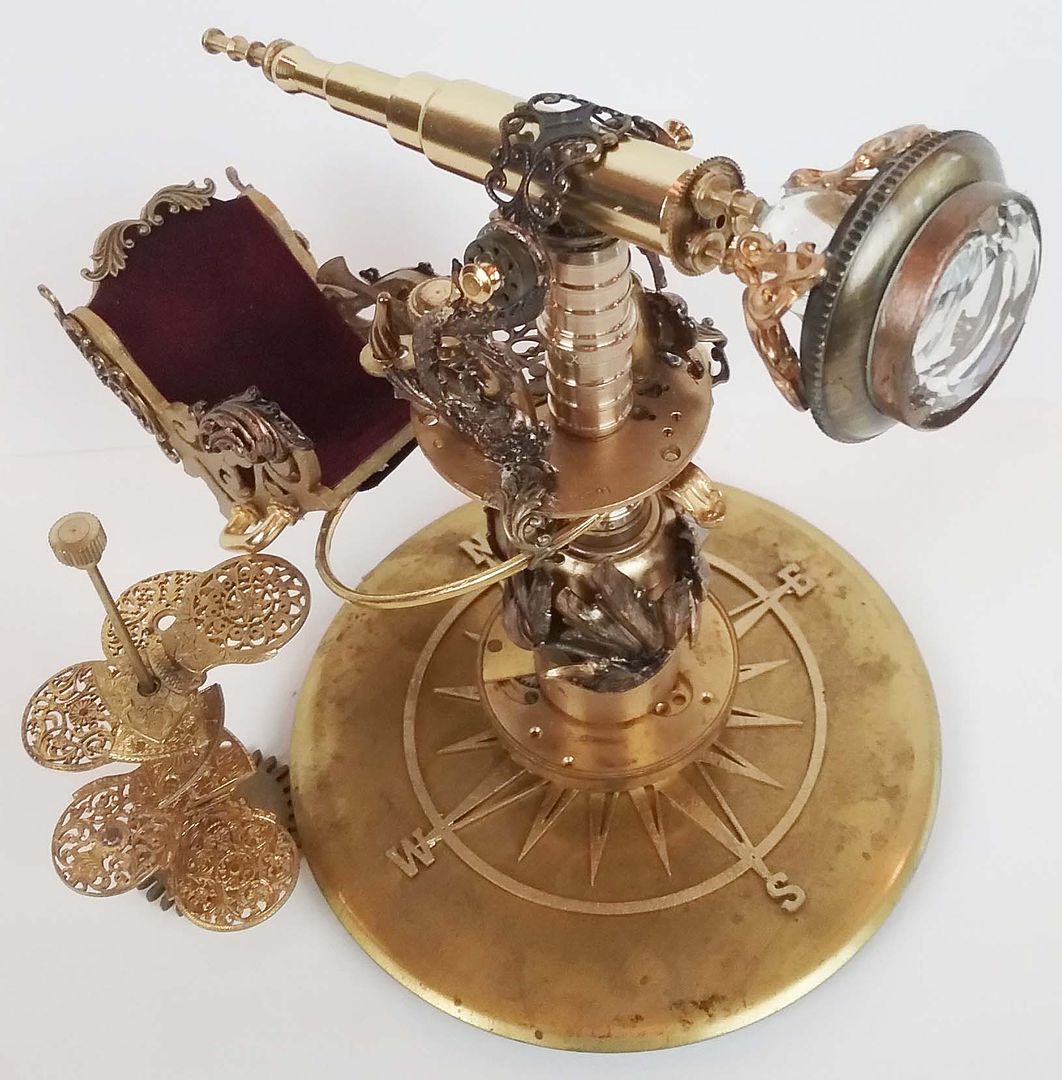
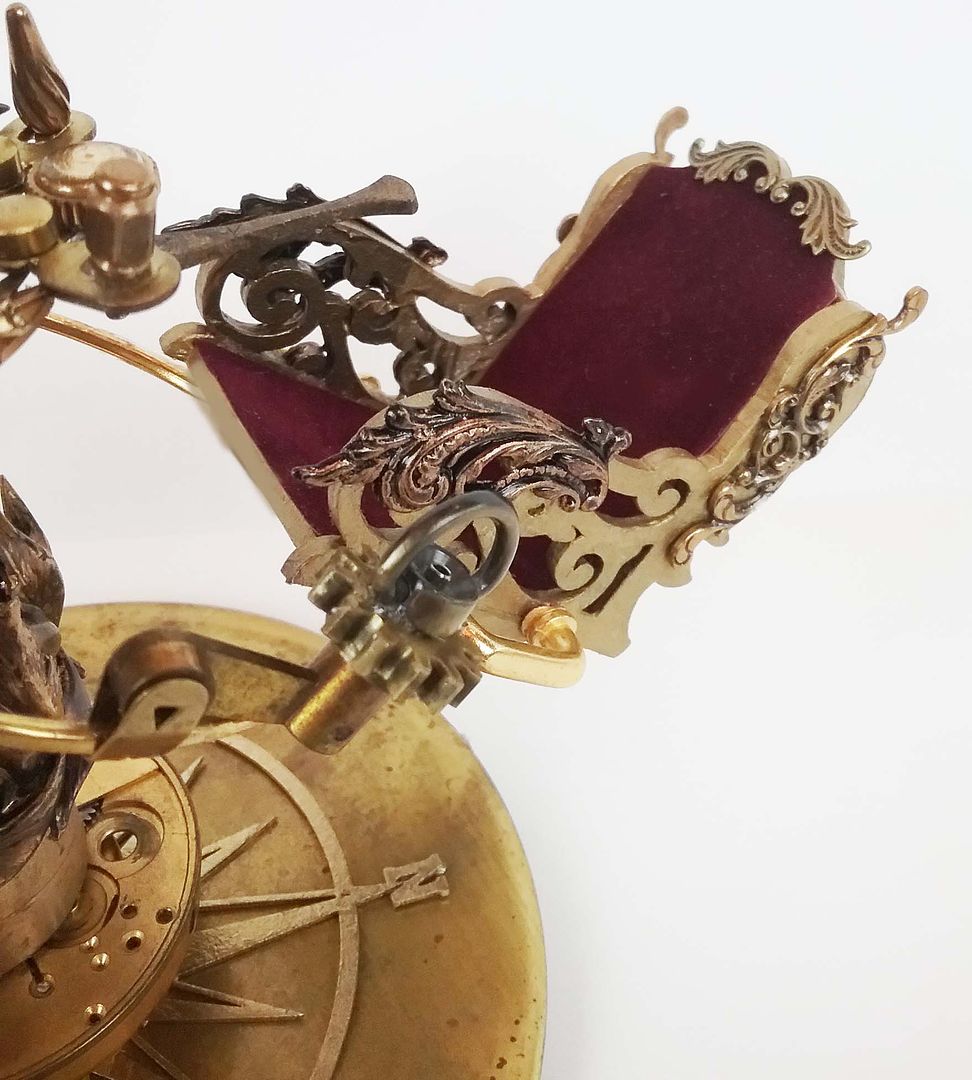
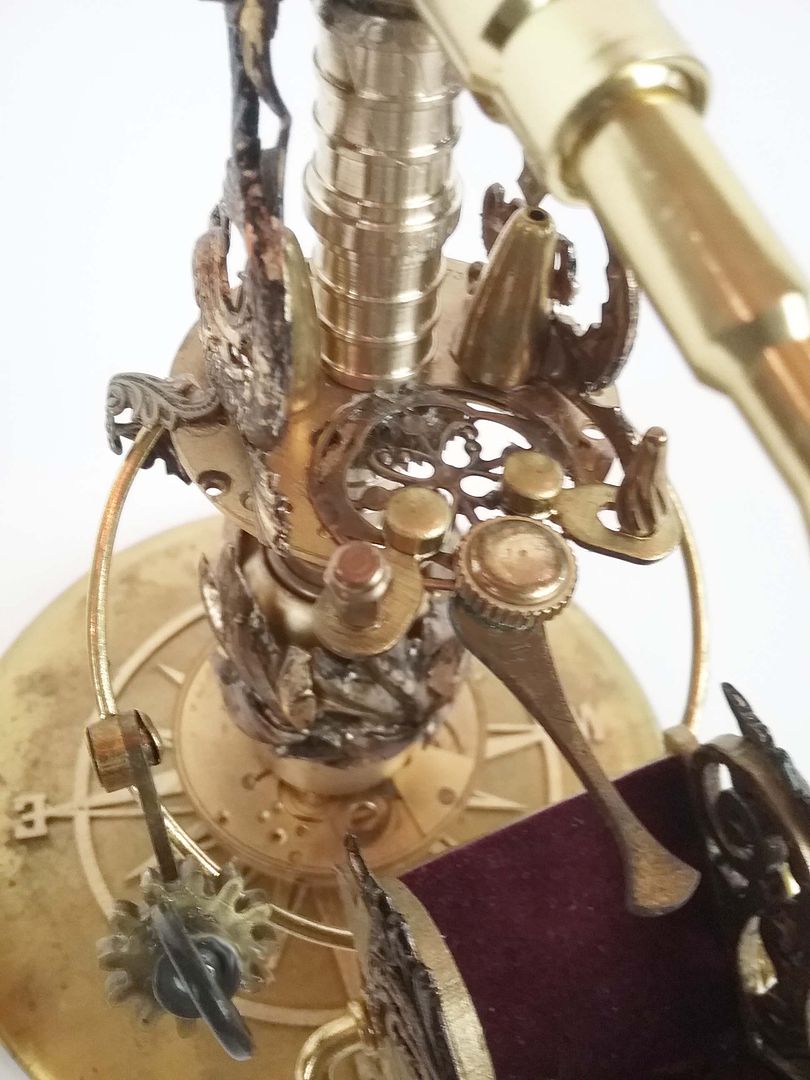
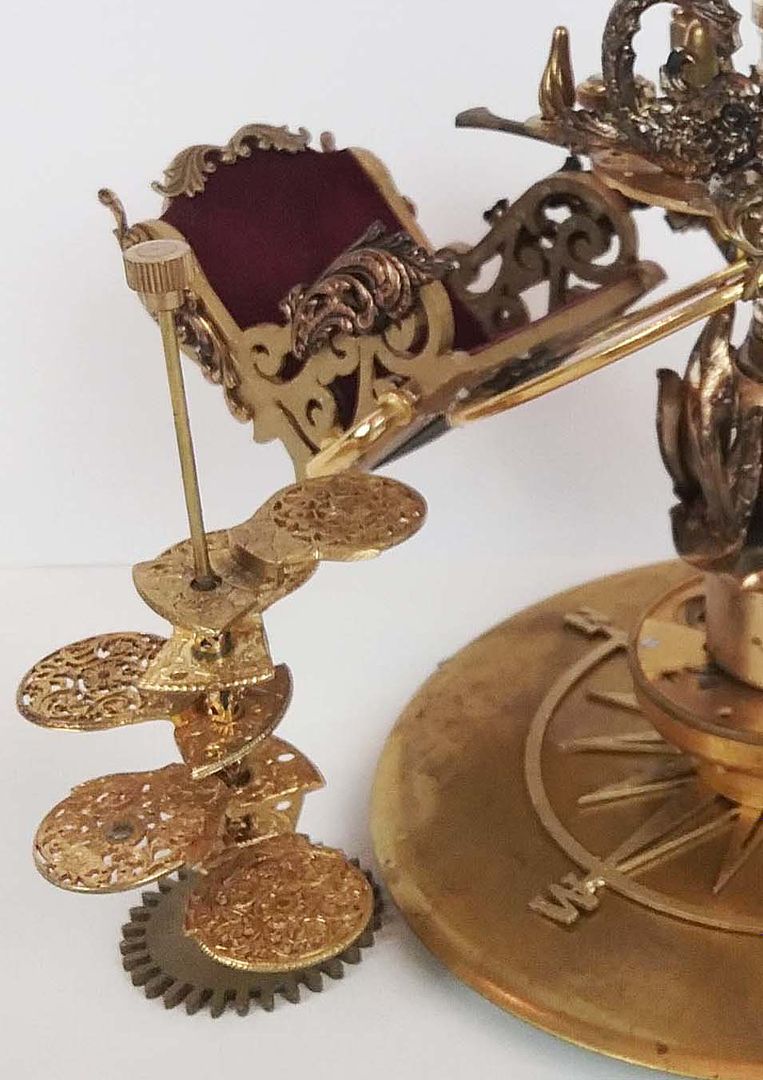
On a clear night, you can sit in a comfortable chipboard chair lined with burgundy suede.  Mounted on the base is a chipboard compass which comes in handy for positioning the telescope.
The lever on the side of the chair allows you to control the height of the chair.  The chair is attached to the telescope using a bangle bracelet and a brass box foot.
The controls (octagon pendant drop & fluted dangle) are mounted in a brass compass to adjust the lens (glass marble & pocket watch cover) and telescope position.
A piece of thin ornate filigree helps to keep the telescope in position.
Both the base and the center section independently swivel
A lovely filigree spiral staircase makes it easy to climb into the chair.

ELEVATOR & ATTIC ACCESS
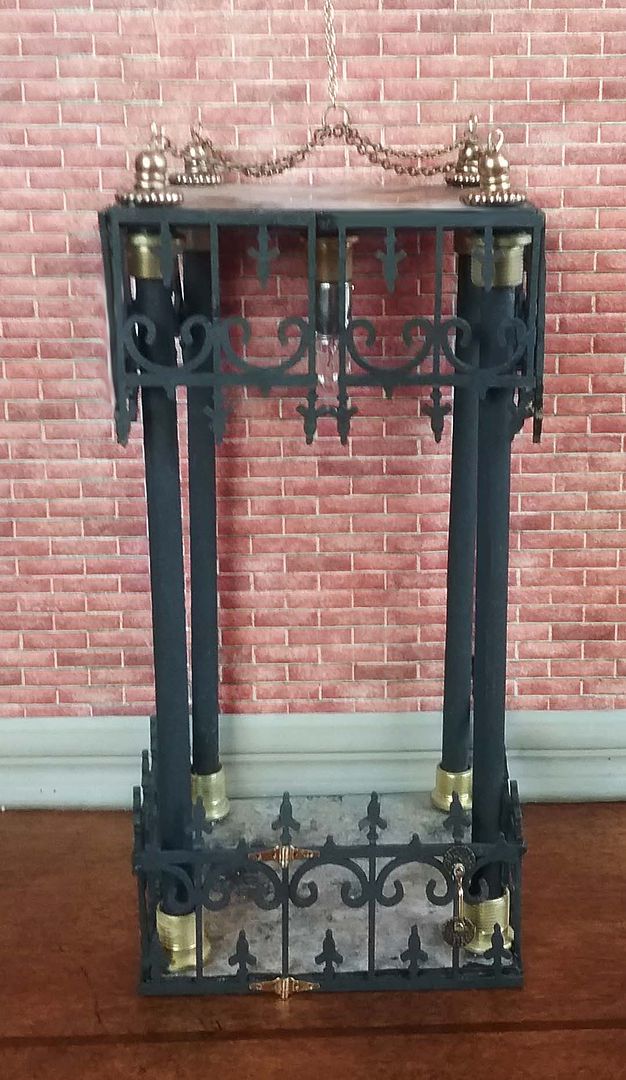
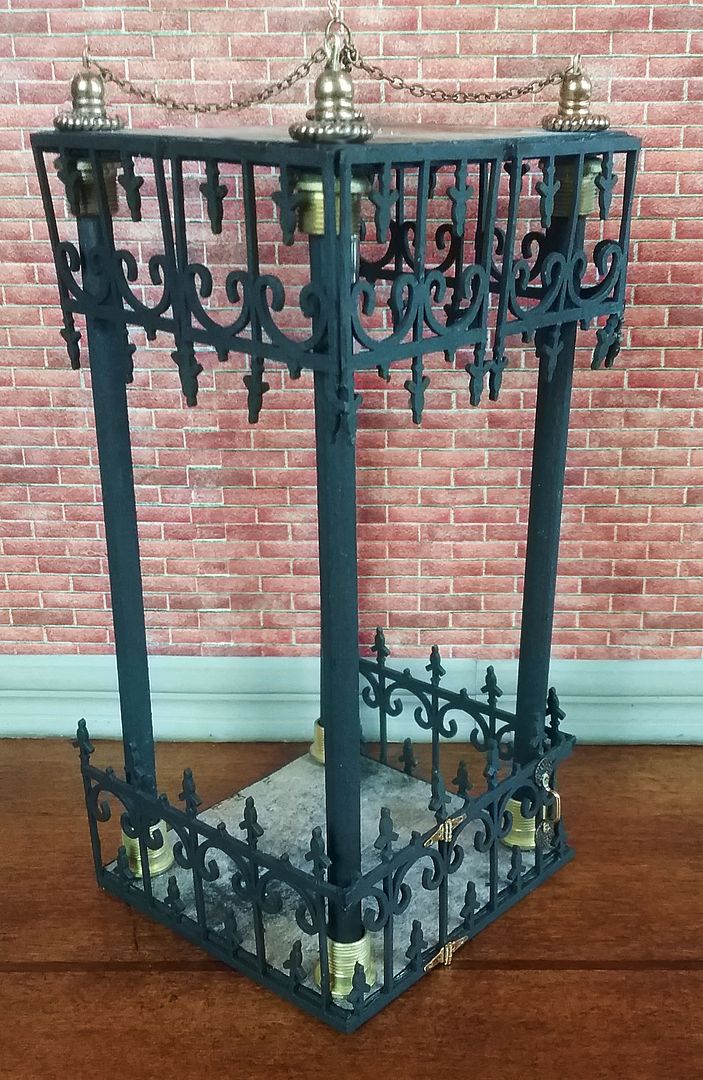
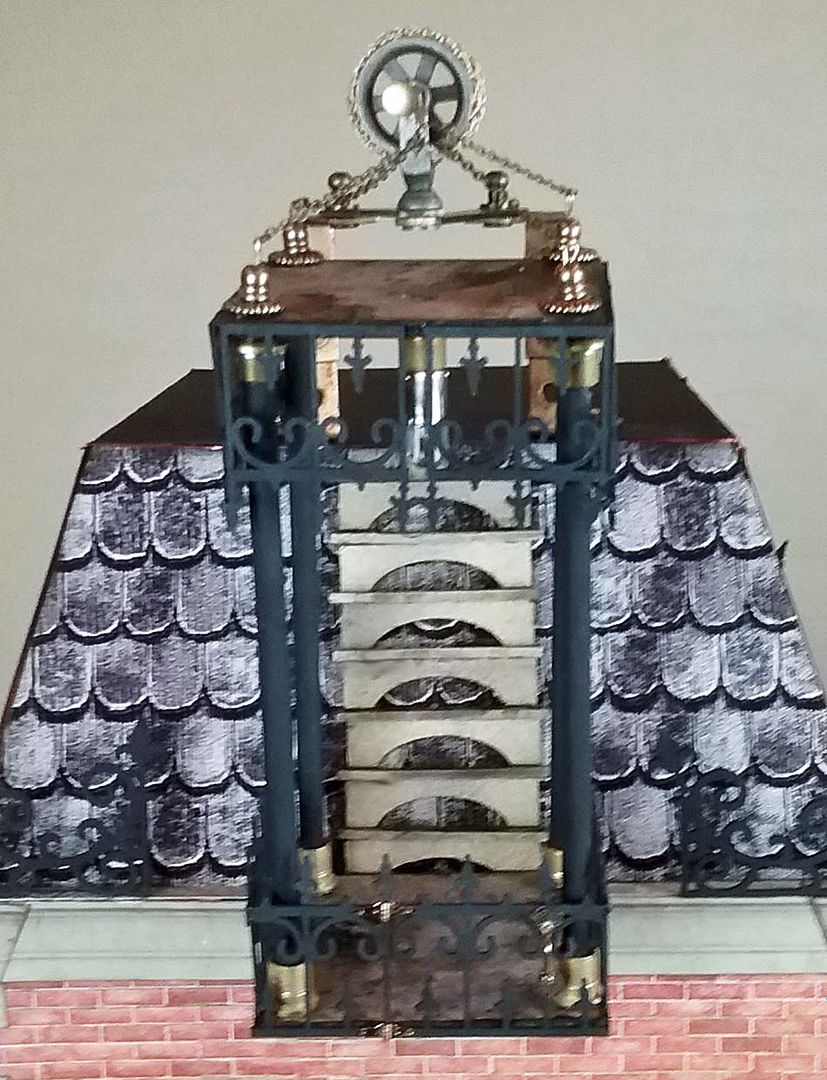
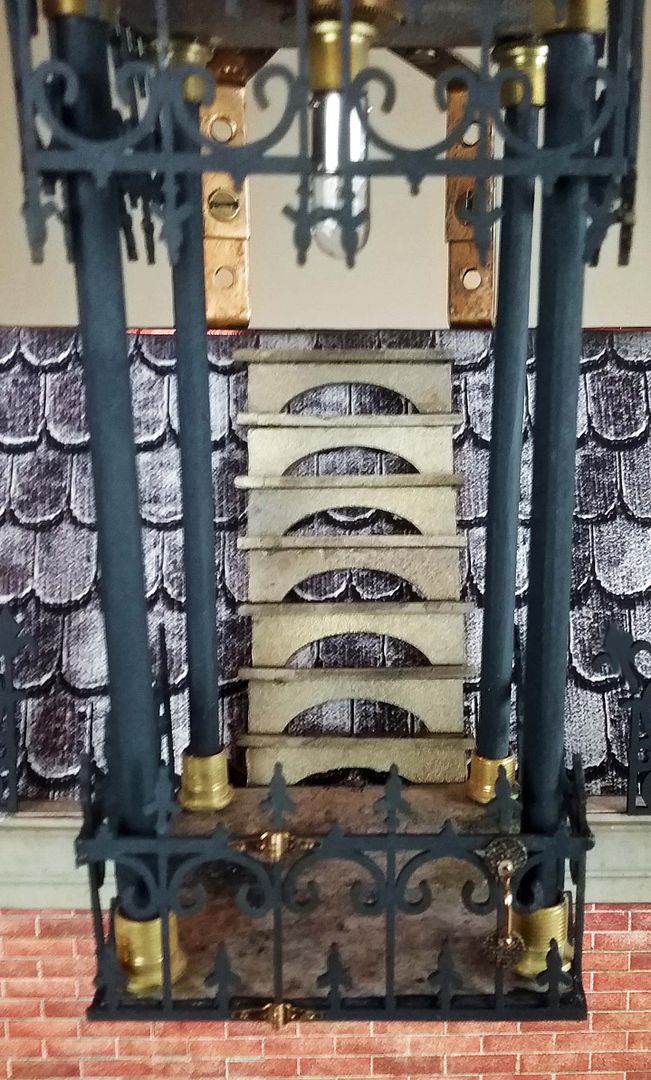
On the side of the house is an elegant wrought iron (made from Gothic border trim) elevator cage.
  On the front of the cage is an entry gate.
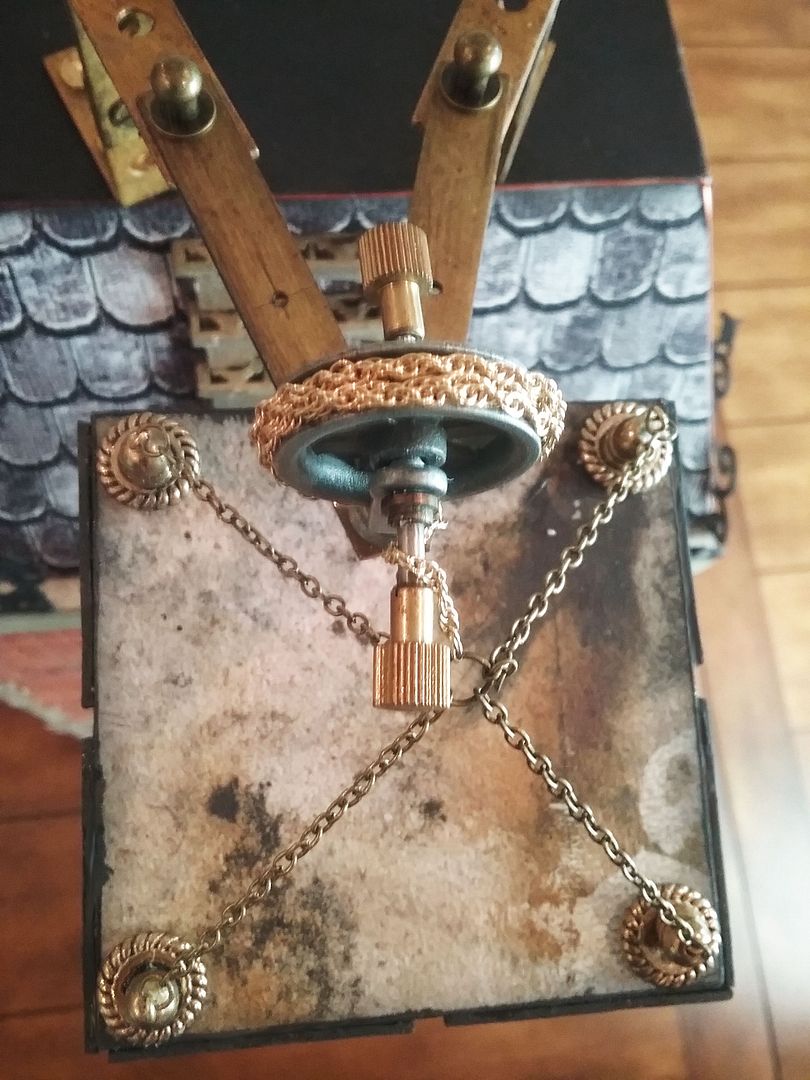
A pulley system raises the cage to the bottom of the roof on the top of the roof.
Once level with the roof, you'll find chipboard filigree stairs leading up to the top of the roof.  These stairs are made using a set of extra steps for the spiral staircase.
The light inside the cage is helpful on dark nights.
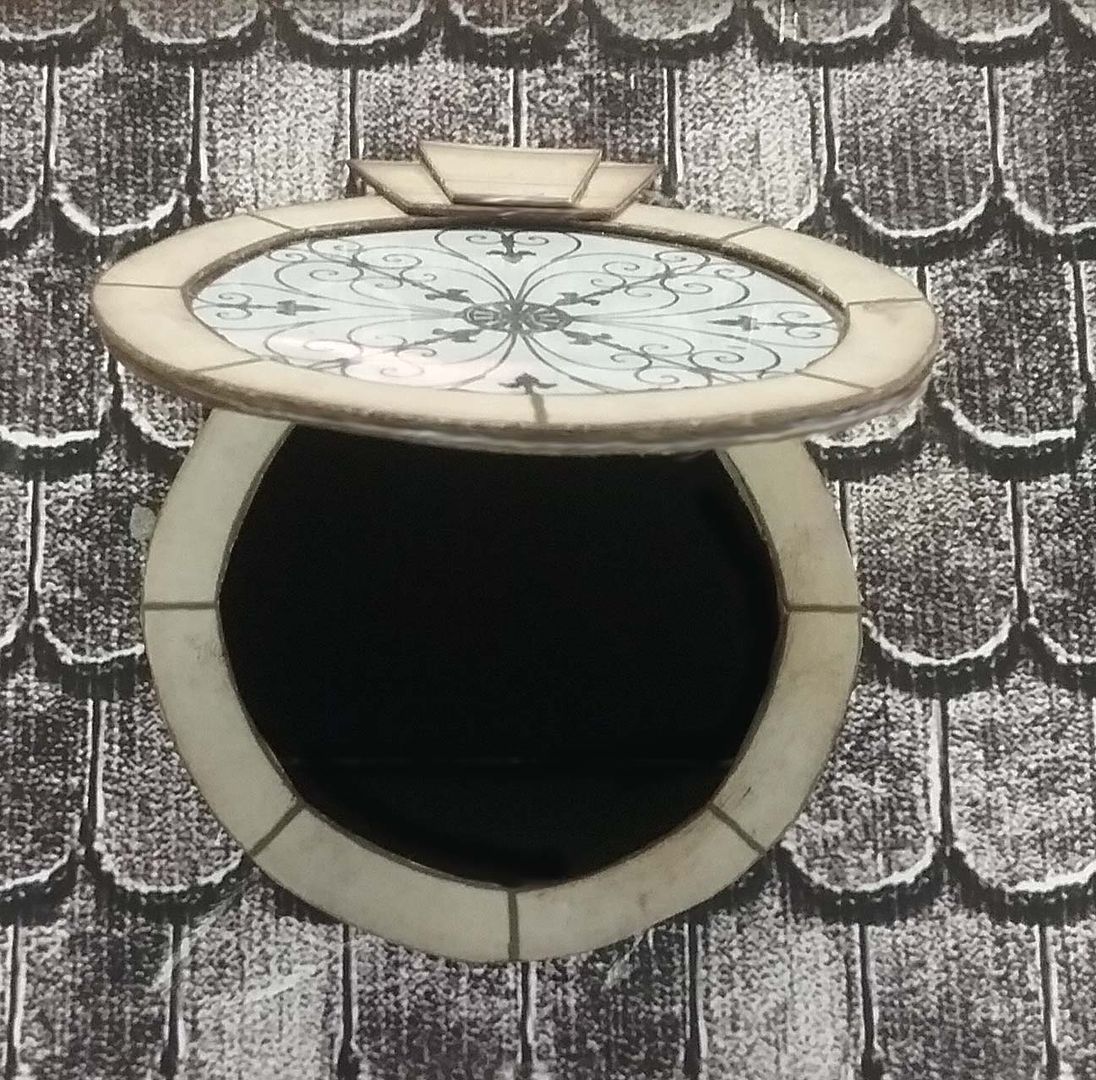
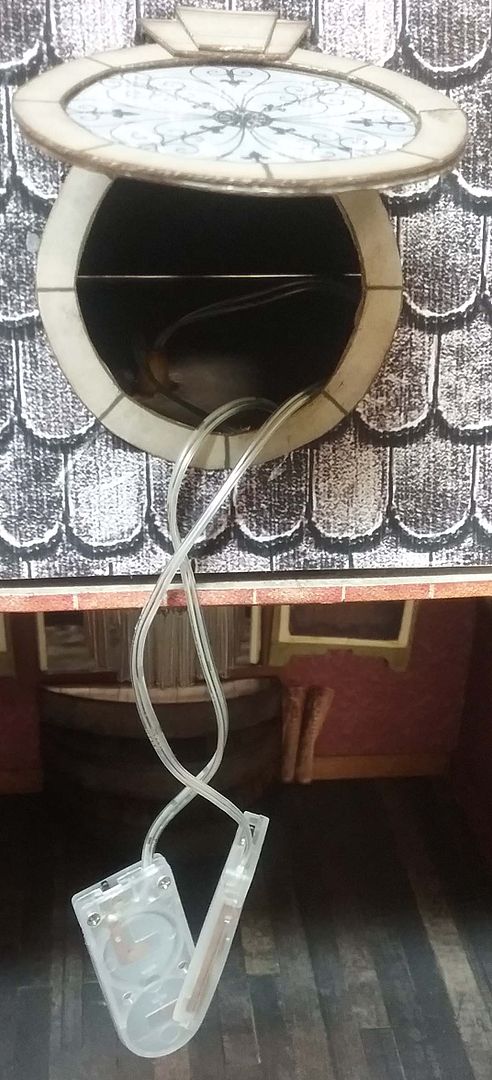
In addition to the video tutorials covering the construction of the telescope and elevator, I’ve also demonstrated how to create a hidden opening in the roof that allows for access to lighting switches and batteries. 


VIDEO TUTORIAL - TELESCOPE

VIDEO TUTORIAL - ELEVATOR


OTHER VIDEOS IN THIS SERIES


DETAILED SUPPLY LIST
TELESCOPE
17mm Raw Brass Bullet Bead Caps – Koi Fish supports
Fancy Chair 1:12 Scale
Gold Mini Dresser Handles – Chair
Symmetrical Bronze Flourish – Chair decoration & chair support
Silver Swirly Connector Charms – Chair decoration
Brass Feathery Scroll Filigree – Chair decoration
Gold Bangle Bracelet – Chair support
Brass Box Feet – Chair support
Burgundy Suede Paper - Chair
Sparrows Compass Brass Link – Control panel
Raw Brass Octagon Pendants Drops – Control panel
Thin Ornate Filigree – Telescope connector
10mm Clear Glass Marbles
Chipboard Compass Set - Base

ELEVATOR
Chesterville Keswick Scrapbook Paper
Chipboard Gothic Border Trim
Tim Holtz Mini Pulley Wheels
Hitch Fasteners
Window Pulls
Antique Gold Rope-Edged Rondelles
Raw Brass Box Feet - Rounded
10mm Antique Brass Washers
7mm Hammered Metal Disks
Brass Gate Hinge – Used to hinge window for attic access
Vintaj Metal Patinas – Aged Bronze
Vintaj Metal Patinas – Victorian Gold

Saturday, August 12, 2017

STEAMTOWN- 2nd FLOOR BOUDOIR - NEW COLLAGE SHEET & DIGI SETS - VIDEO TUTORIAL

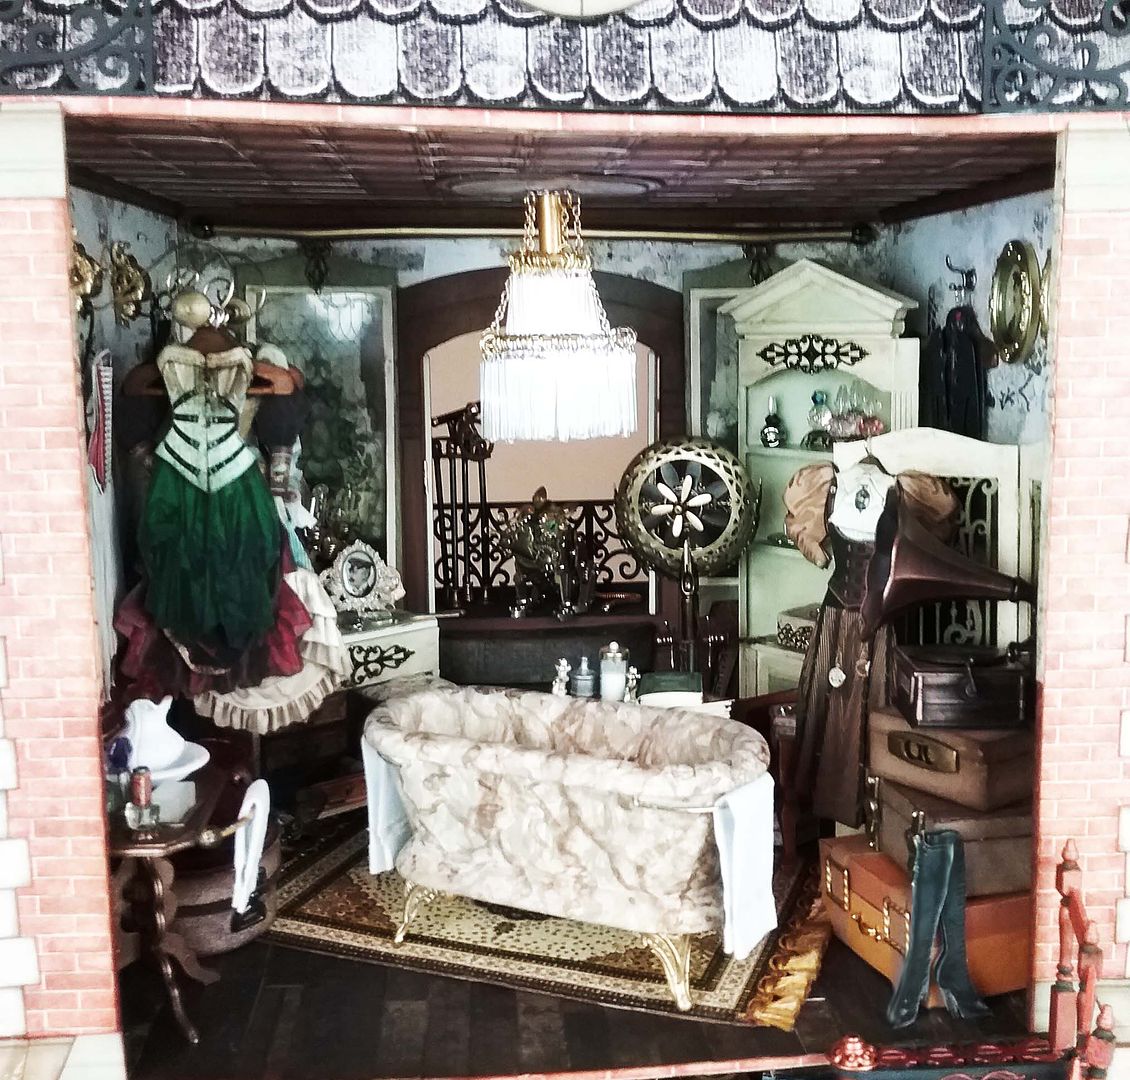
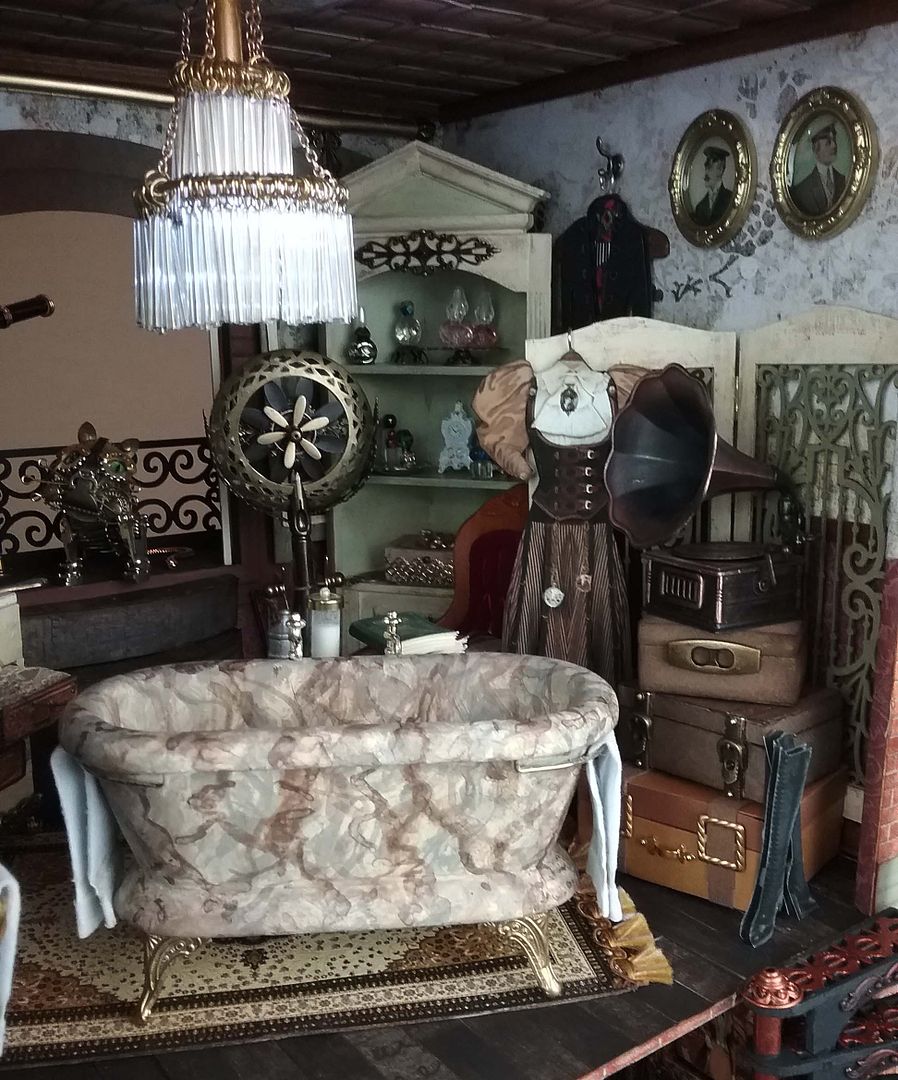
Welcome back to the house on Irongate Street.  Looks like Helena has finished outfitting her second-floor boudoir.  Just like the first floor, she stuffed the room with all kinds of goodies.
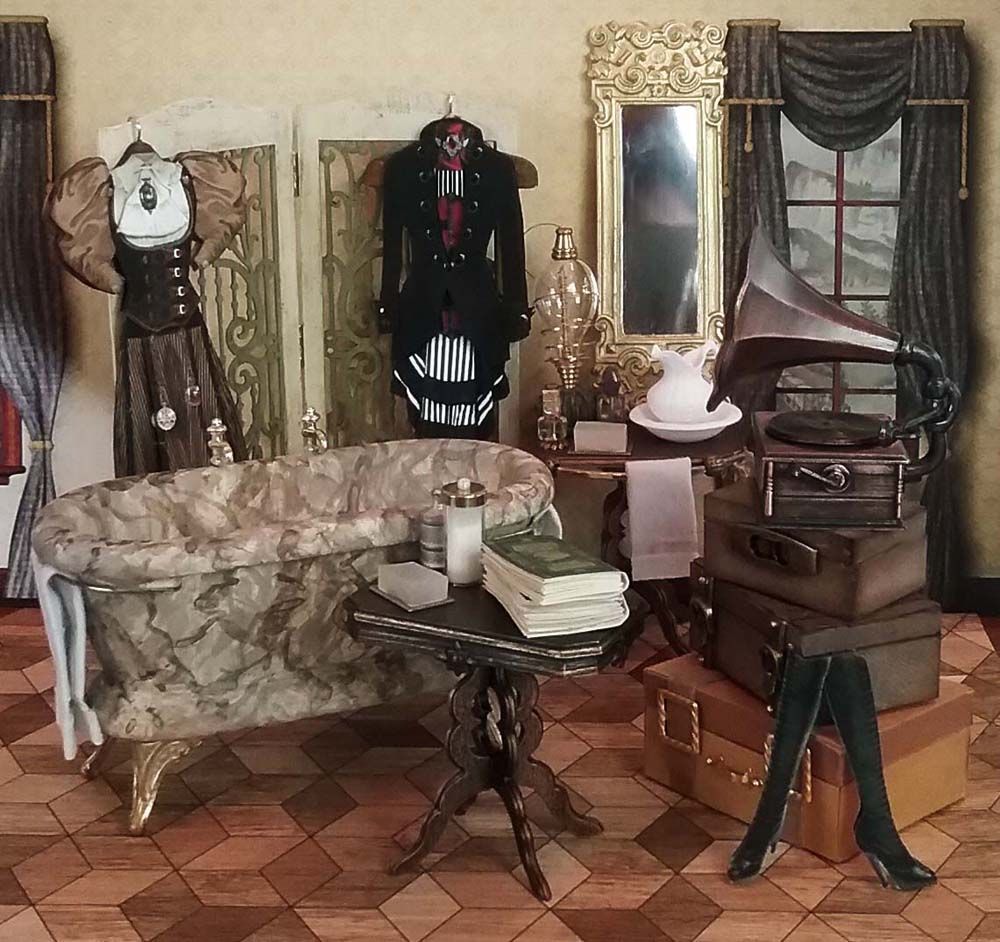
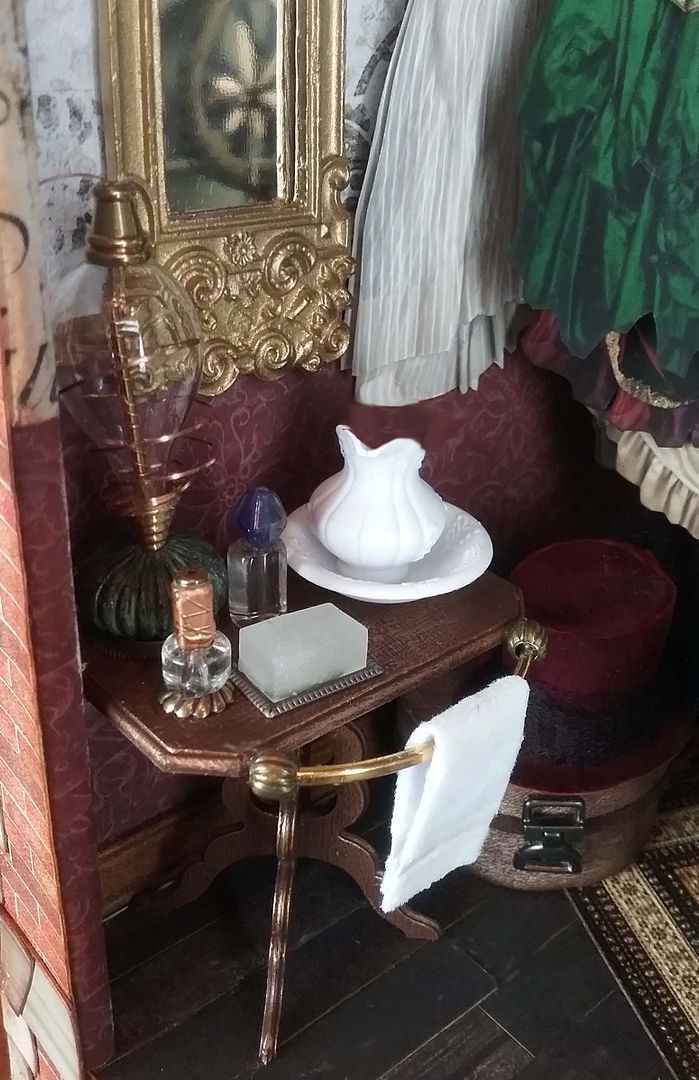
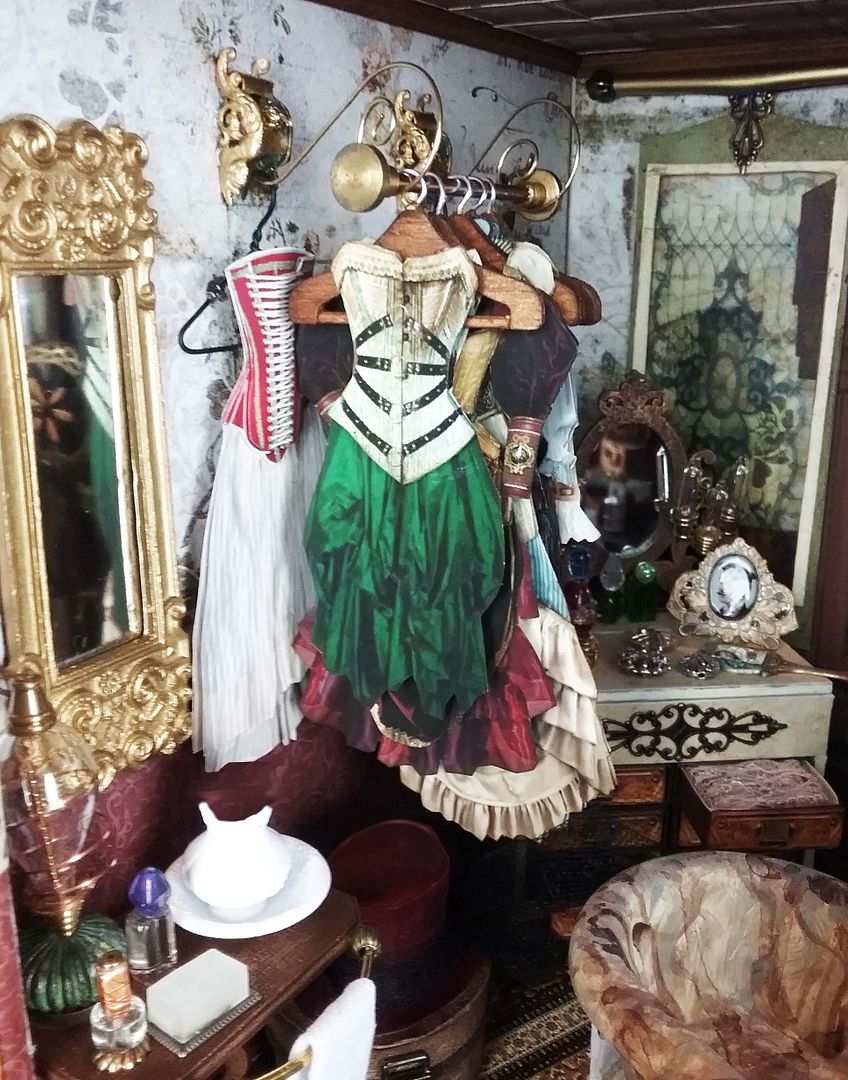
Notice the washstand with its Steampunk lamp, hanging towel & soap (which I’ll show you how to make).
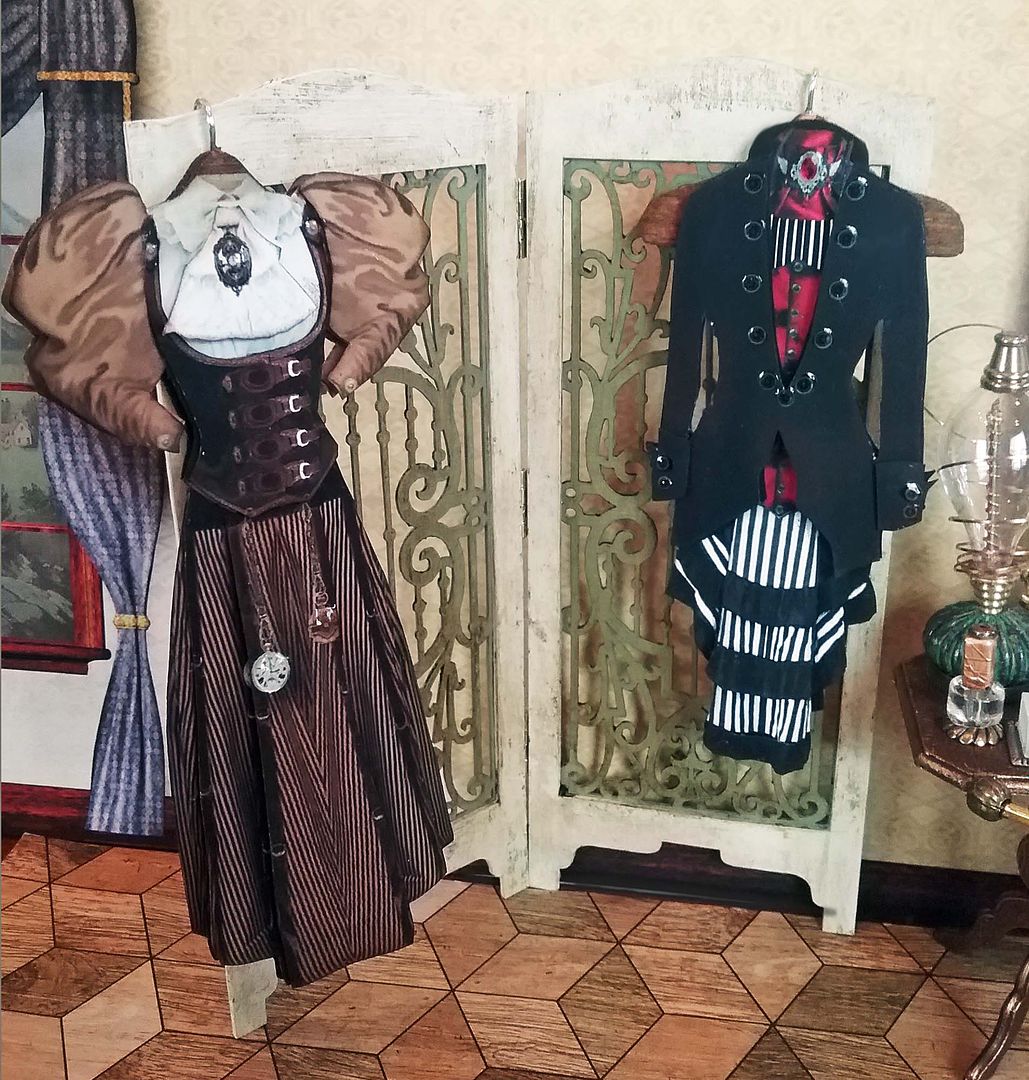
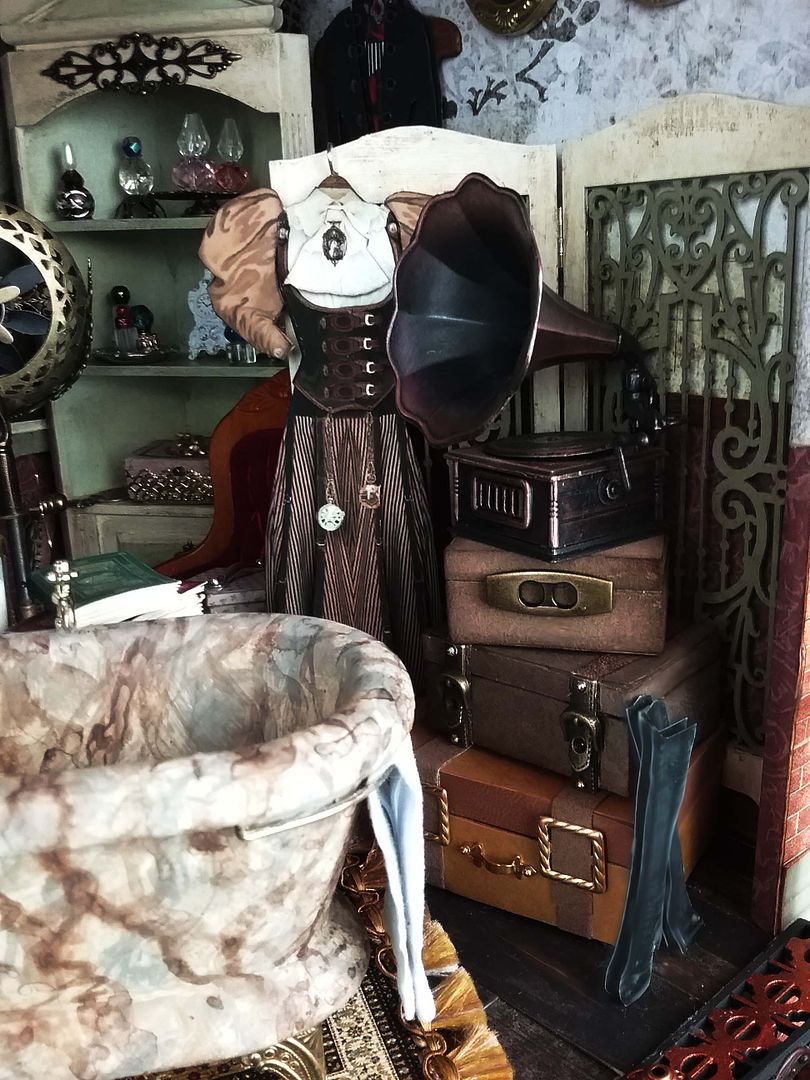
The room is packed with cool steampunk clothing hanging on a fretwork screen. 
Some of the clothing is hanging on a wall rack; it looks like she’s quite the fashionista.
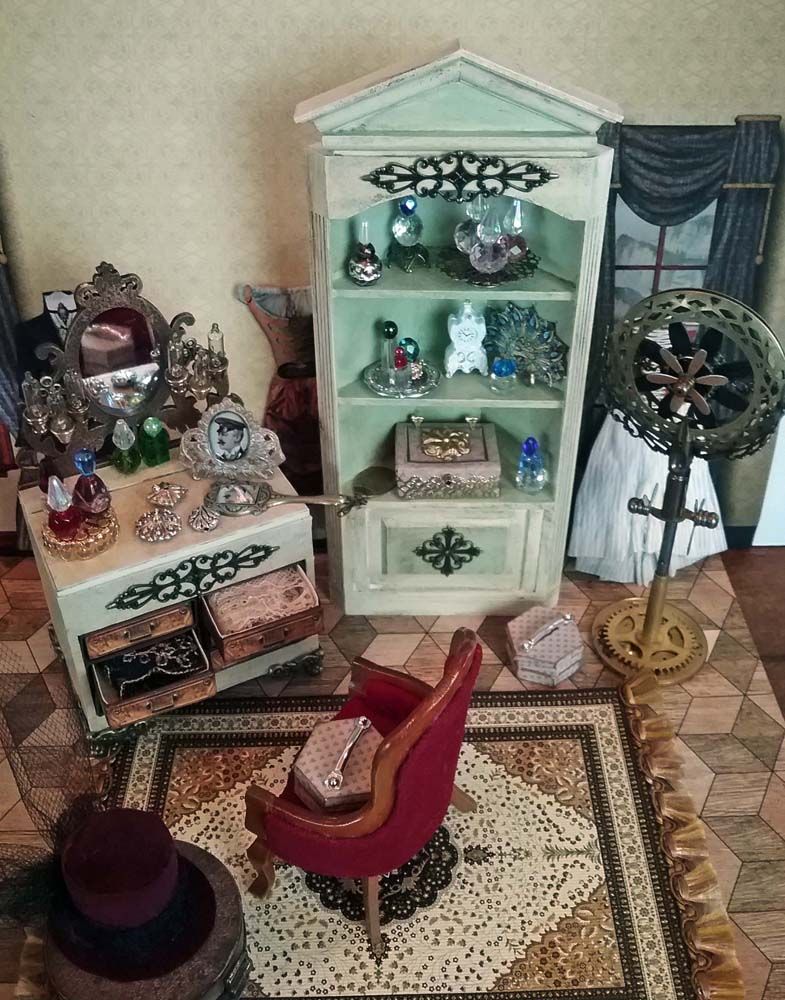
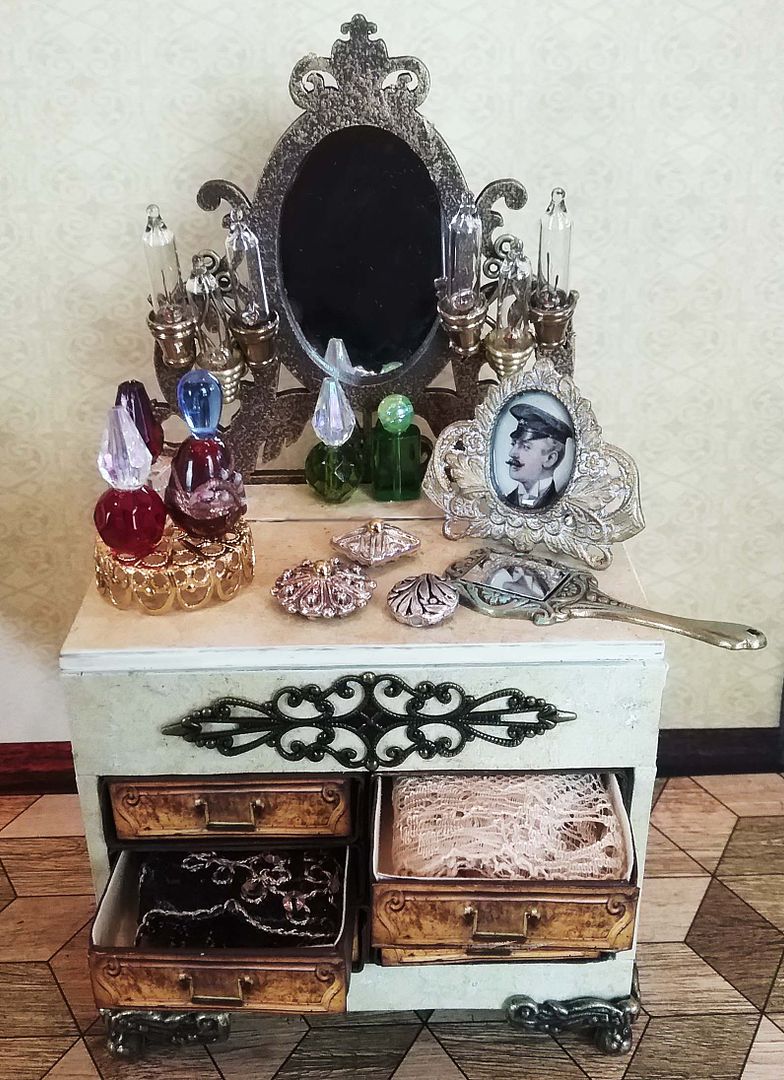
What a lovely vanity (made from a kit and matchbox drawers). 
Steampunk lamps are flanking the mirrors, and perfume bottles, powder boxes, and compact cases are on the top.
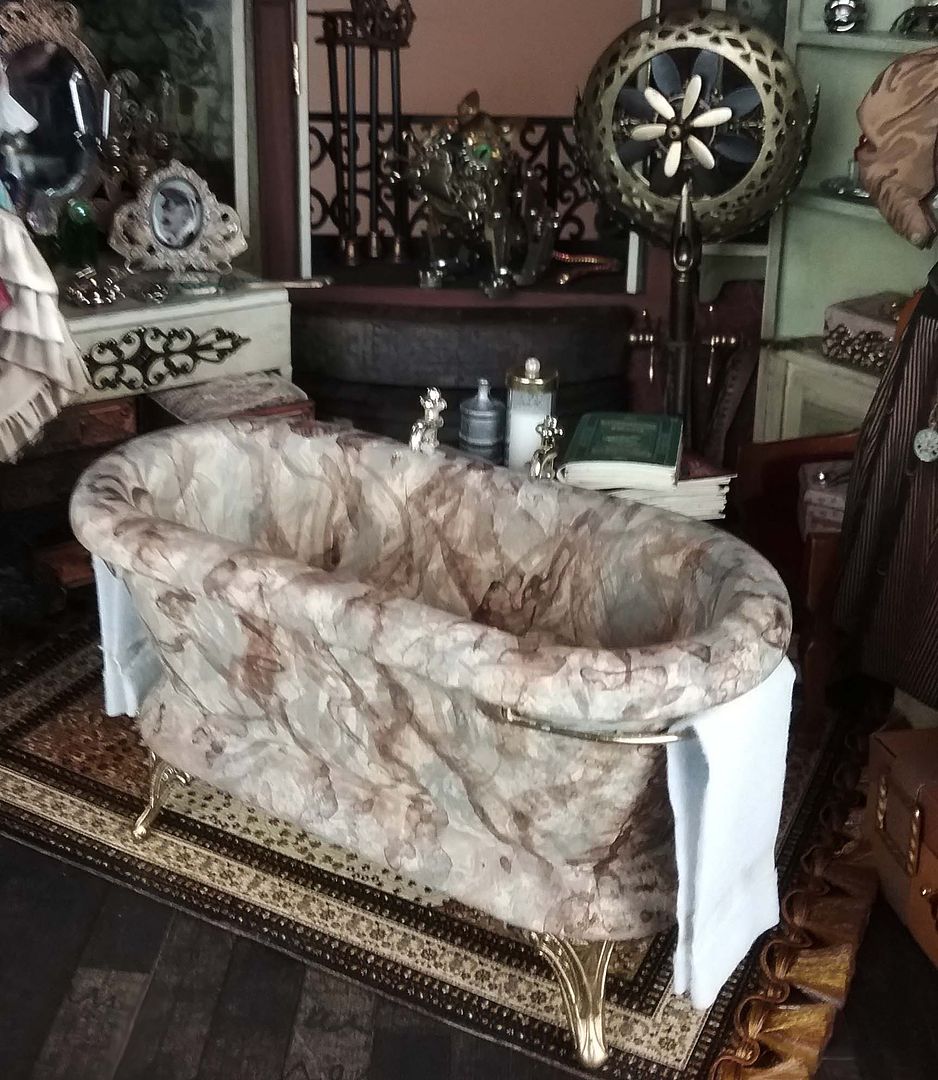
In the center of the room is a beautiful marble bathtub.  In this post, I’ve included a separate Faux Marble Paint Technique video tutorial to help you create this look on miniatures or artwork.
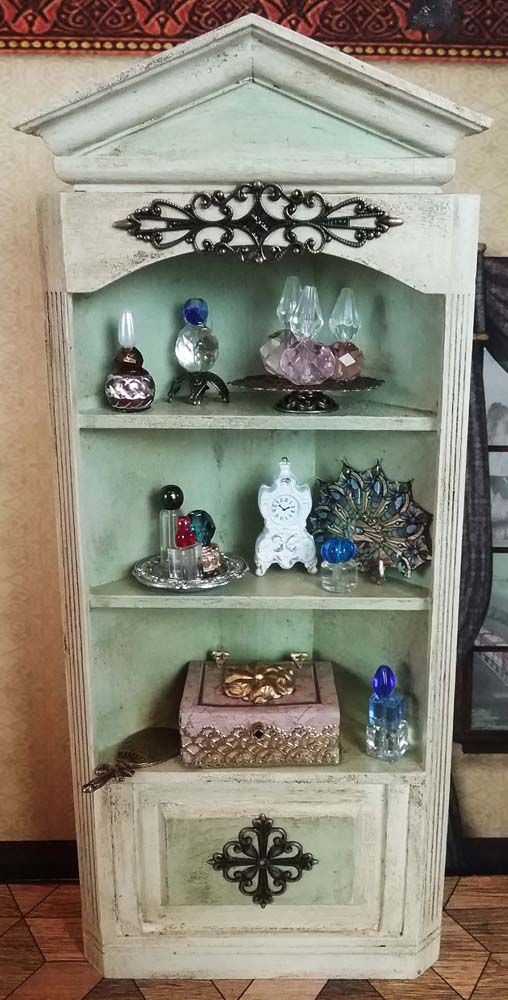
The cabinet in the back corner is loaded with perfume bottles, a lovely box, a fan, and a hand mirror.
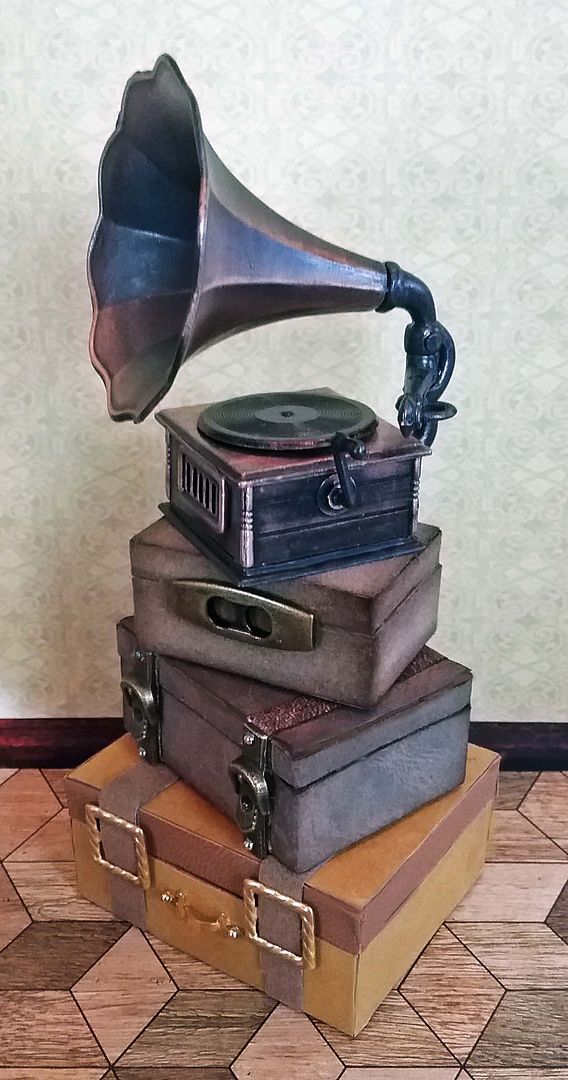
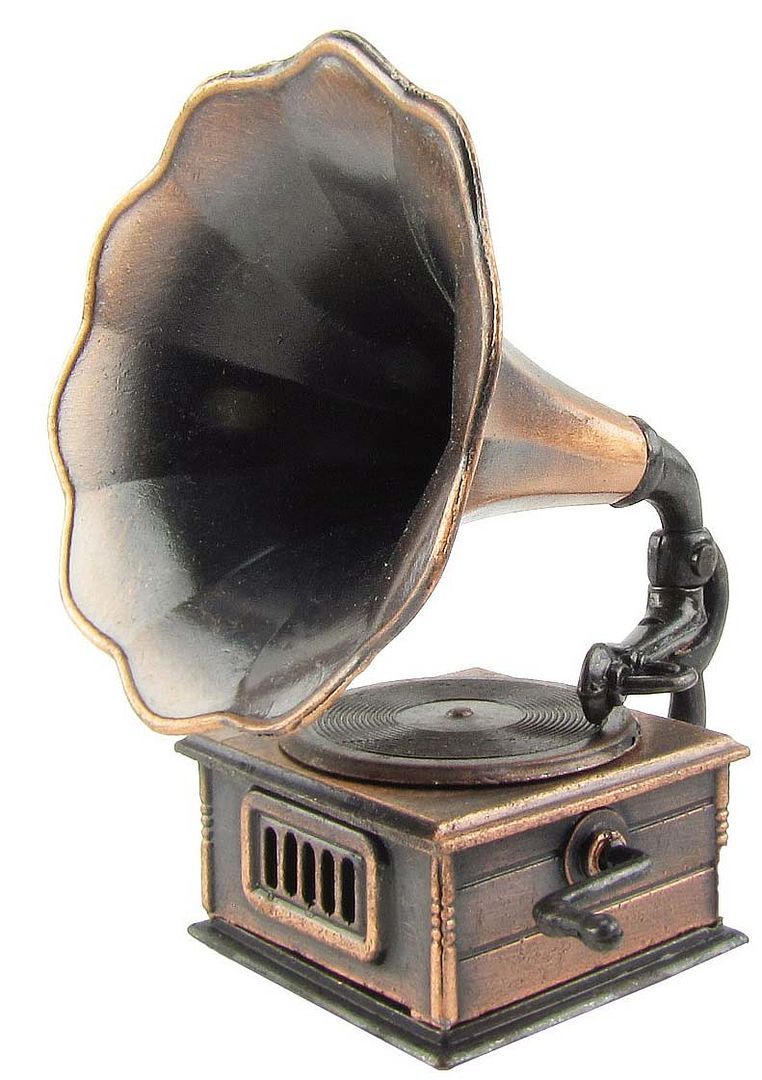
In the front of the fretwork screen are suitcases, a gramophone, and a pair of boots.
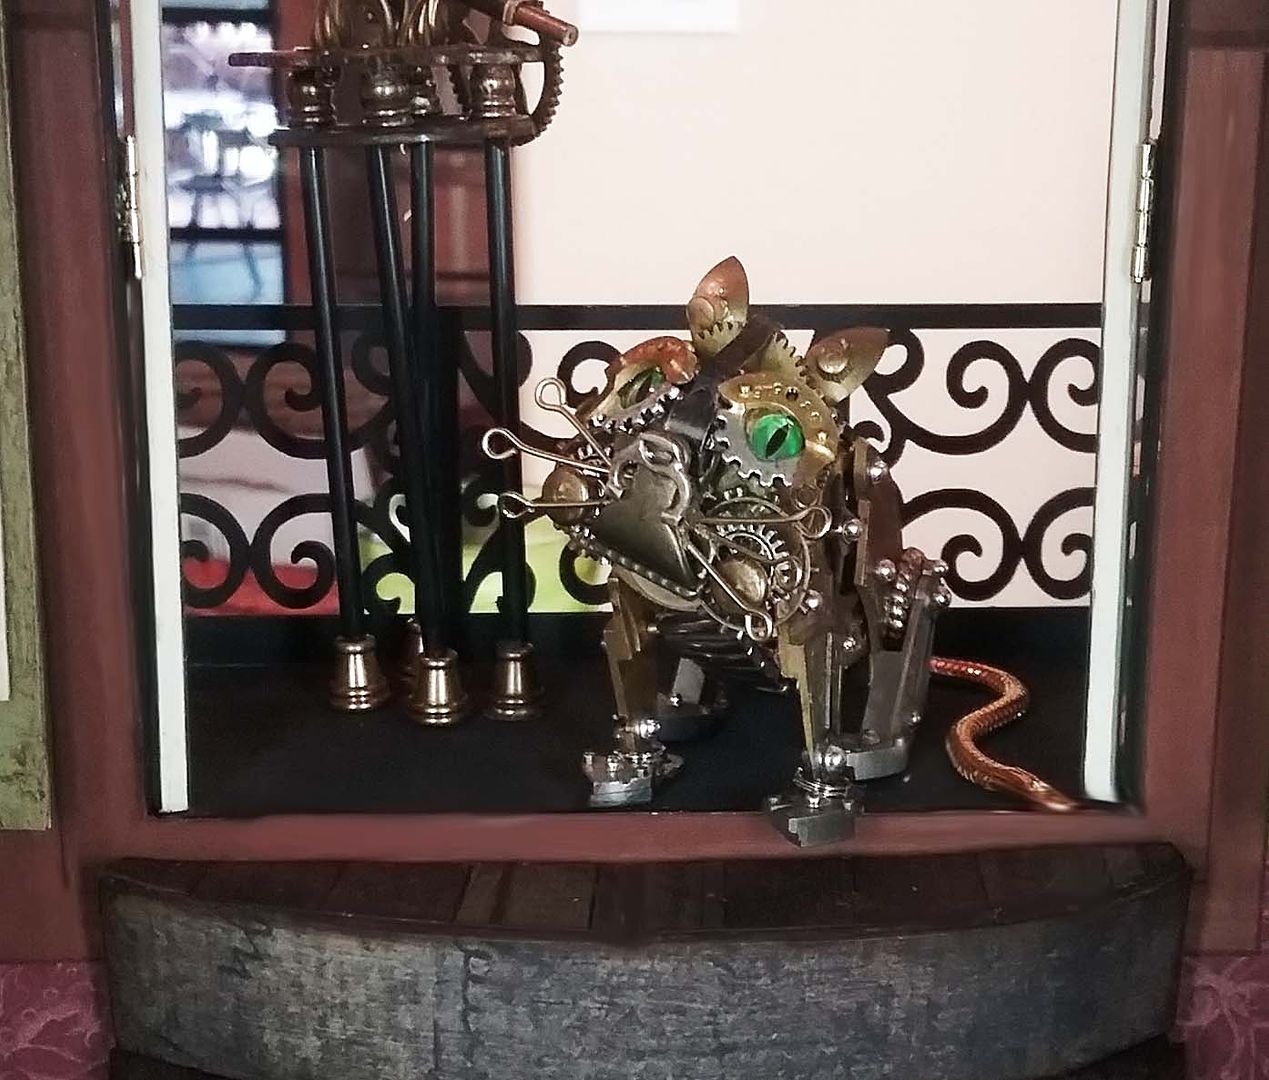
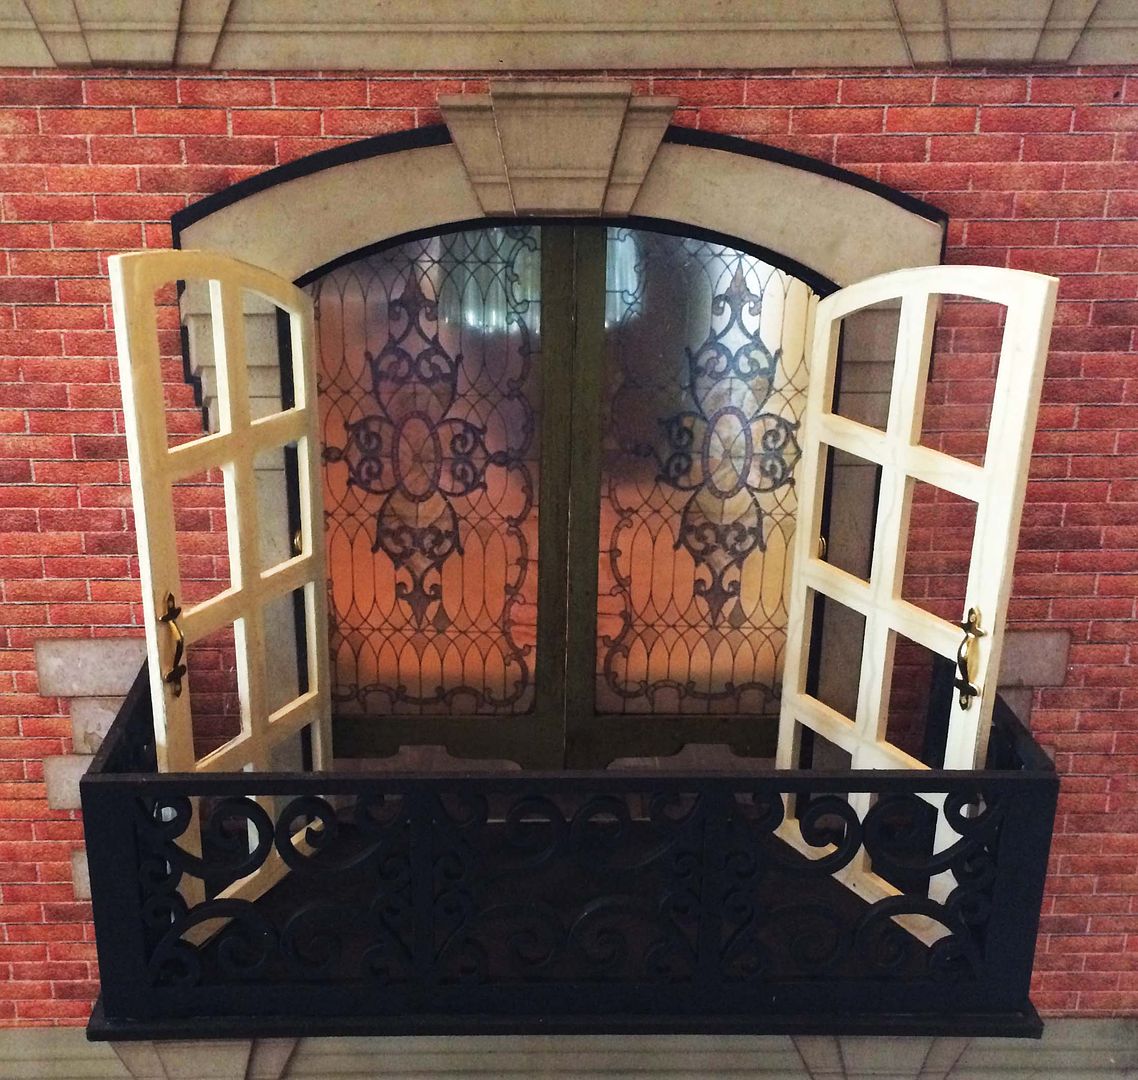
And there is Gizmo, Helena’s cat,  sitting on the balcony.
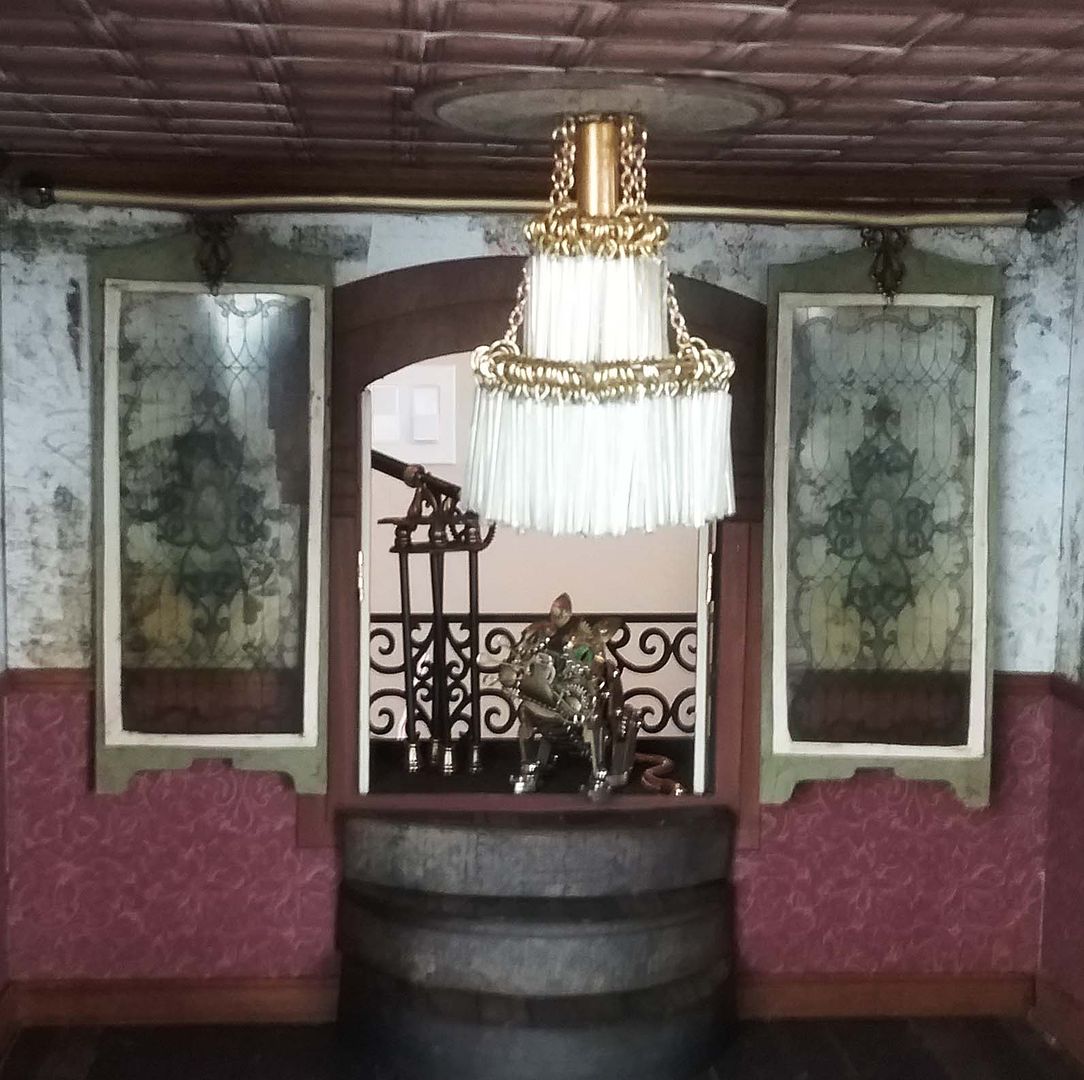
Check out the stained glass hanging screens that you can slide to open or close; they run on a track made from a straw.  The screen frame is the same one I used for the fretwork screen.

In a couple of weeks, I'll be posting the last segment of the house on Irongate street, which will involve the roof.


NEW COLLAGE SHEETS

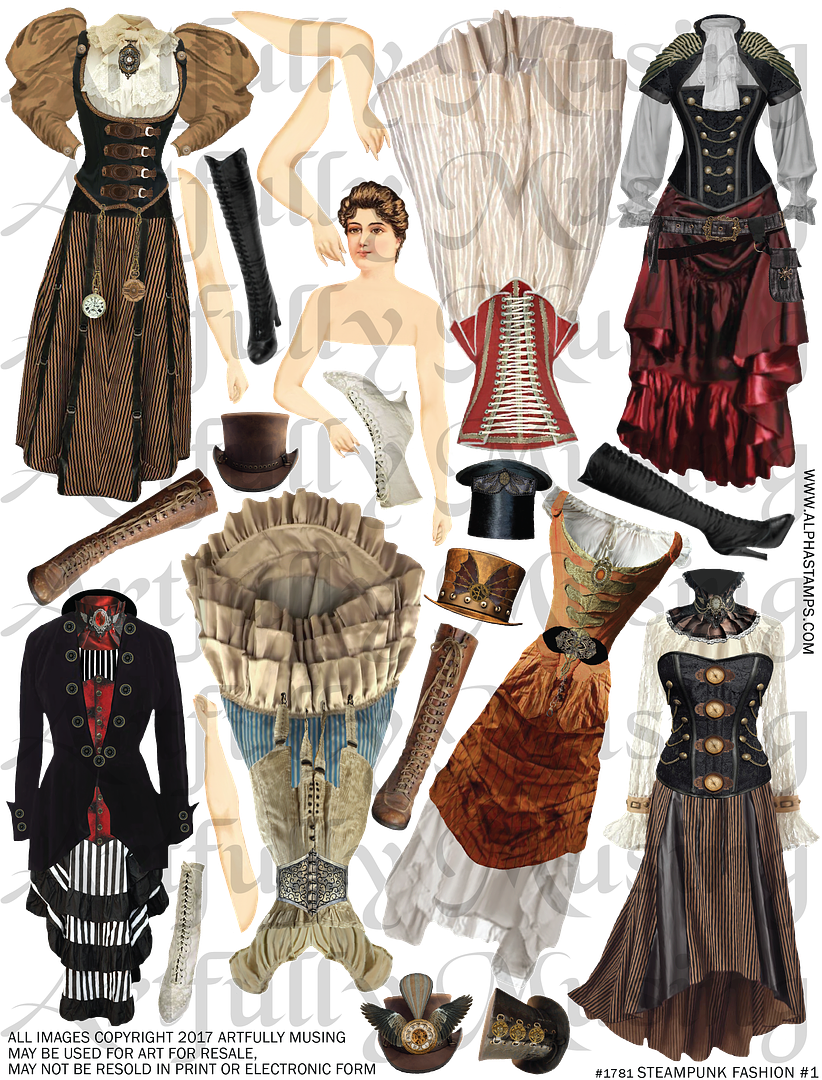
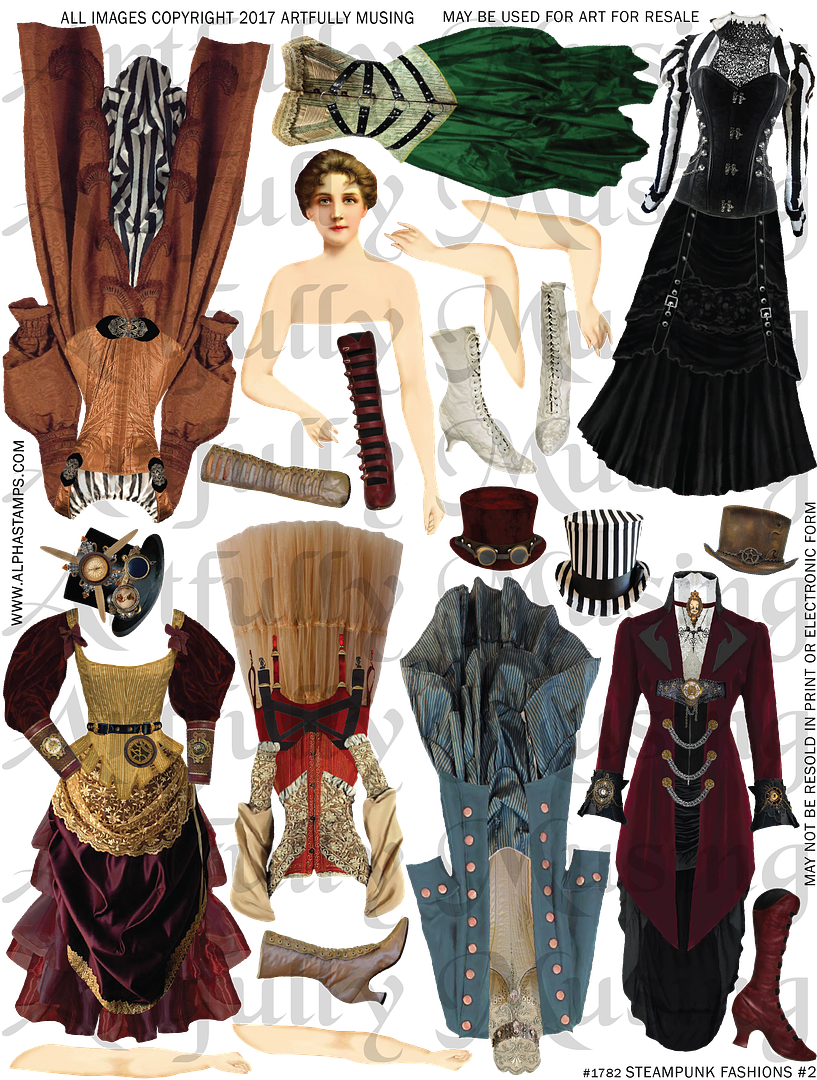
This collage sheet contains Steampunk dresses, boots & hats.  In addition, I’ve included body parts for making paper dolls.  The images are sized to work with 1:12 scale miniatures.  To purchase this sheet, click on the image below.

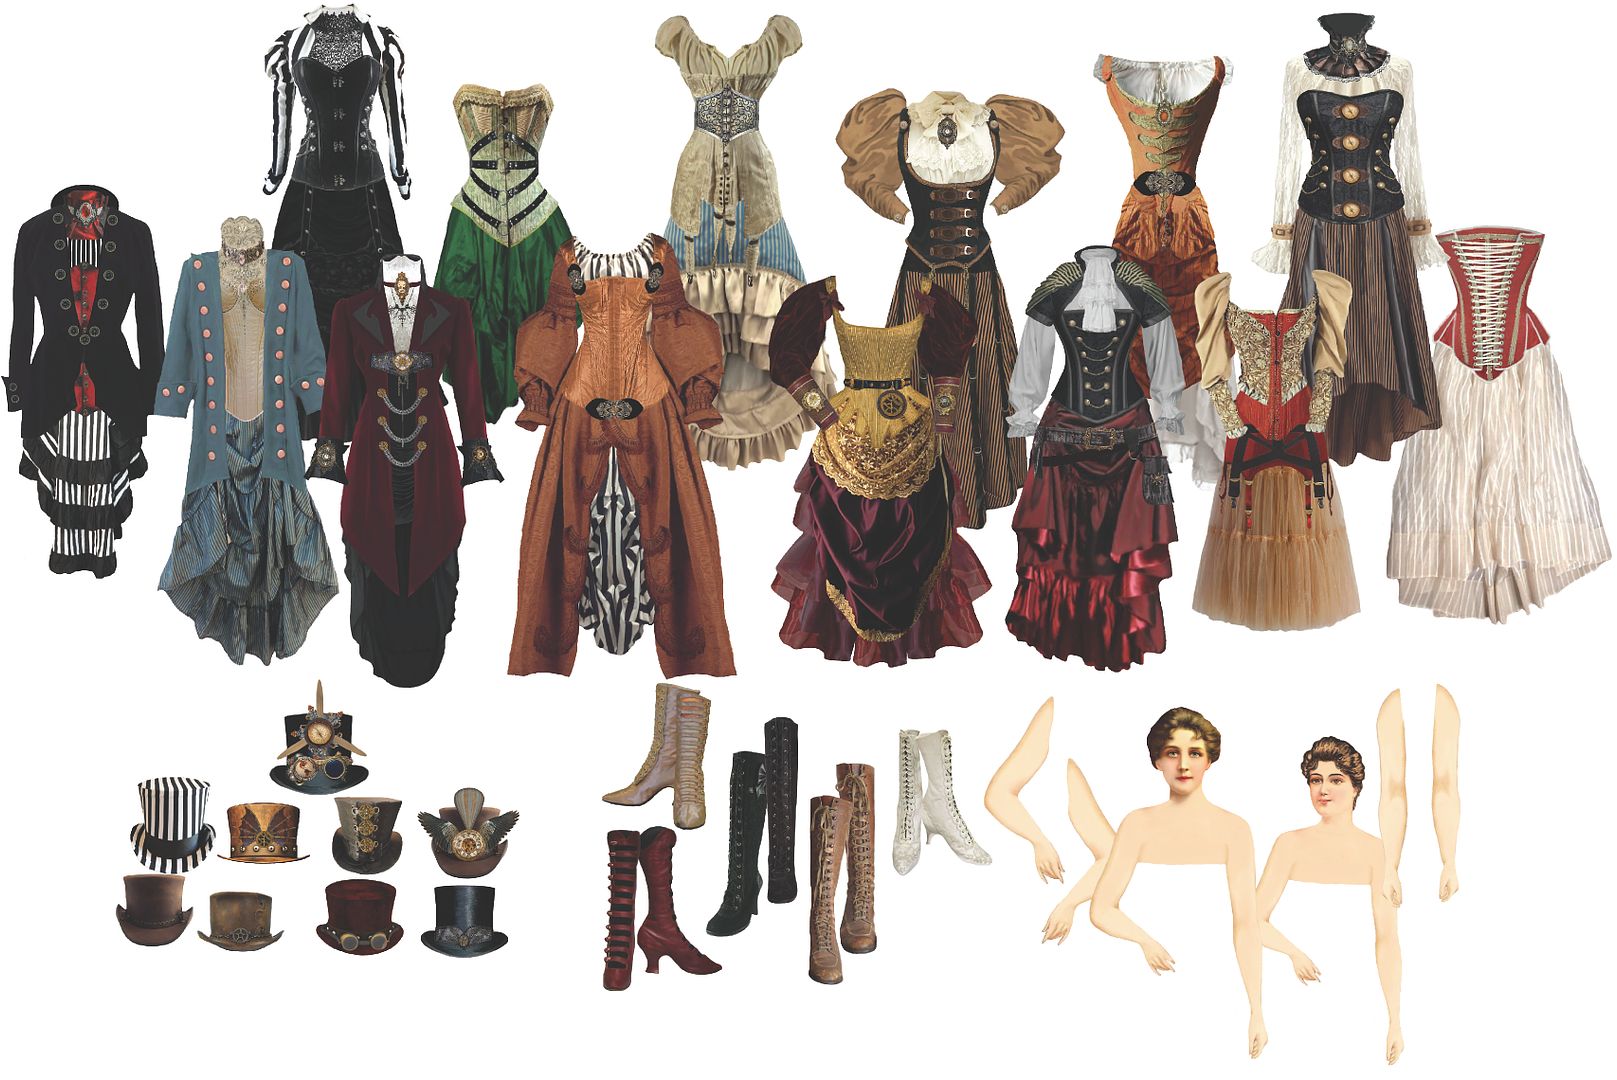
Just as with the Steampunk Fashions #1 Collage sheet, this sheet contains Steampunk dresses, boots, & hats.  In addition, I’ve included body parts for making paper dolls.  The images are sized to work with 1:12 scale miniatures.  To purchase this sheet, click on the image below.

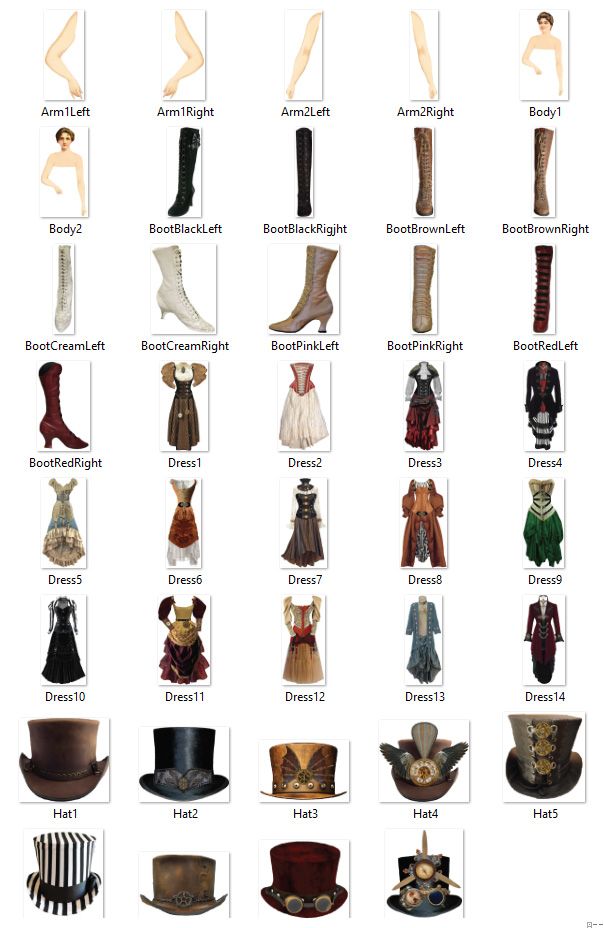
This set of 34 images includes all of the images from both the Steampunk Fashions #1 & #2 Collage Sheets.  Included are: 14 Dresses, 9 Hats, 5 Pairs of Boots & 6 Body Parts (for paper dolls).  To purchase this digital image set, click on the image
below.


VIDEO TUTORIAL - STEAMPUNK BOUDOIR

VIDEO TUTORIAL - FAUX MARBLE PAINT TECHNIQUE


FREE IMAGES & TEMPLATES - USED IN THE BOUDOIR
FEEL FREE TO DOWNLOAD THE IMAGES & TEMPLATES TO USE YOUR ART
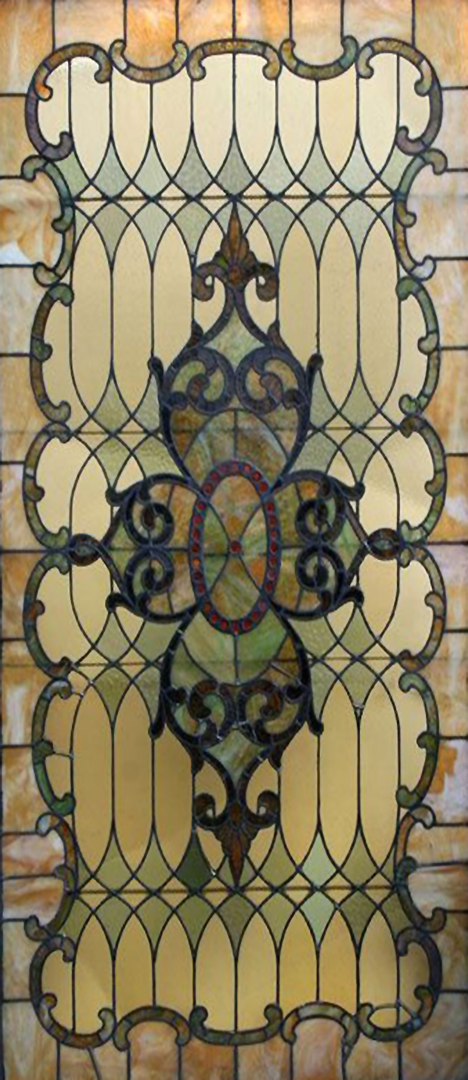
STAIN GLASS


MINIATURE TOP HAT 

TOWELS


DETAILED SUPPLY LIST
COLLAGE SHEETS/DIGI KITS
Rugs Set Download
Steamer Trunk Parts Collage Sheet – Hat boxes
Deco Dames Collage Sheet- Fans
Matchbox Drawer Fronts Collage Sheet - Vanity
Steampunk Explorer Collage Sheet – Books & Magazines
SCREENS
Folding Screen Frame Set
Folding Screen Fretwork Insert
Small Gold Hinges with Screws
TUB
Wooden Bathtub
Brass Box Feet
BOOKCASE
Corner Bookcase with 3 Shelves
Antique Square Open Fleur Filigree
Thin Ornate Filigree
White Mantle Clock
Brass Hand Mirror or Fan
Pewter Dollhouse Dishes
15mm Antique Bronze Filigree Bead Cap
35mm Round Flower Filigree
VANITY
Matchbox Vanity Table
Non-breakable Mirror Material
Mottled Cream Heavy Paper
Small Square Brass Hinges
Metal Standing Picture Frame
4-Leaf Clover Connector - Lighting
Fancy Looped Gold Filigree Base
WASH BASIN TABLE
Pitcher & Basin Set
Round Corrugated Metal Beads
Gold Bangle Bracelet
6mm Round Corrugated Metal Beads
Victorian TableKit - Brown
Tall Gold Ornate Mirror
PERFUME & OTHER BOTTLES
8m Faceted Clear Glass Cube Beads
12x8mm Green Glass Rectangular Beads
DIY Potion Bottles Bead Mix
Faceted, Fire-Polished Glass Beads – Garnet Red & Olivine & Rosaline
3mm Fire- Polished Czech Beads – Aqua
9mm Antiqued Swirl Bead Cap
Set of 4 Metal Apothecary Jars
FAN
Thin Ornate Filigree
Raw Brass Box Feet - Rounded
Brass Propeller
Antique Bronze Pen Nib Charm
17mm Raw Brass Bullet Bead Cap
Photo Turns – Black – similar to what I used
SUITCASES
Red Victorian Armchair
2 3/8” Inch Suitcase
2 Inch Suitcase
1-5/8” Suitcase
Tan Faux Leather Paper
Brown Leather Scrapbook Paper
Worn Leather Scrapbook Paper
Faux Suede Sheets
Large Silver Plated Brass Suitcase Handles
Tiny Round Paper Mache Box Set
LIGHTING
Glass Teardrop Bulb Pendant or Ornament
Raw Brass Box Feet - Cones
15mm Antique Bronze Filigree Bead Cap
20mm Raw Brass Puffy Corrugated Bead
20mm Verdigris Brass Puffy Corrugated Bead
OTHER SUPPLIES
Brass Hanging Clip – Clothing Rack
Mini Brass Coat Hooks – Set of 4 – Hooks on the wall
Set of Gold Oval Frames
Burgundy Suede Paper - Hat
Tulle Netting – 6 Inch Wide – Black - Hat
Mottled Mauve Heavy Paper – Pink Box
Metallique Wax – Aged Brass – Tables & Vanity
Miniature Gramophone - Similar to what I used


The company that carries the gramophone pencil sharpener is Treasure Gurus, LLC.  You can find it at Amazon, Walmart, and other online stores.

Wednesday, August 2, 2017

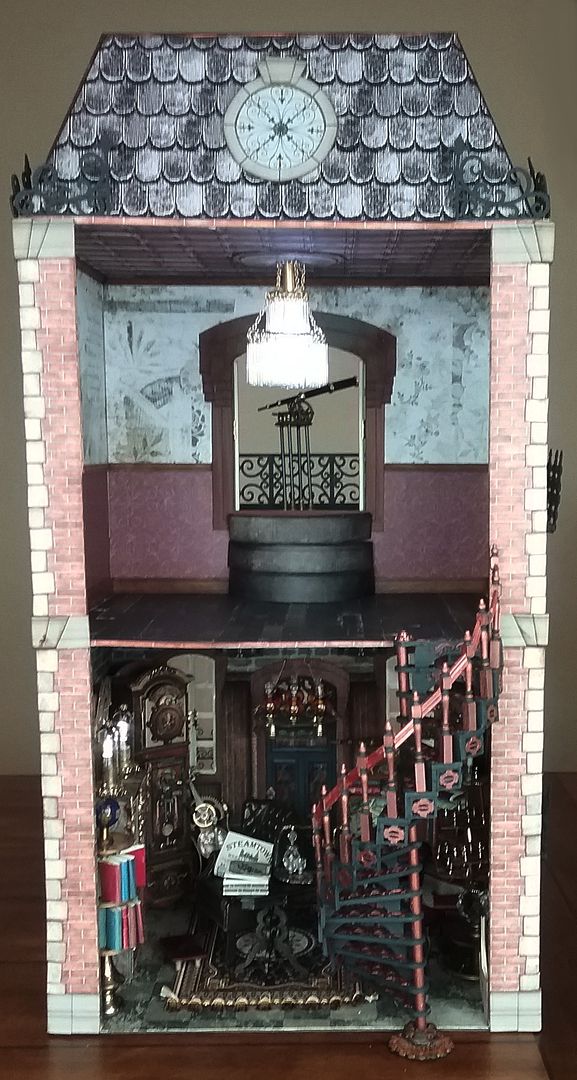
STEAMTOWN HOUSE - SPIRAL STAIRCASE, BALCONY STEPS, LIGHTED CHANDELIER & SPY SCOPE


Welcome back to the house on Irongate Street.  Looks like Helena has made more improvements.
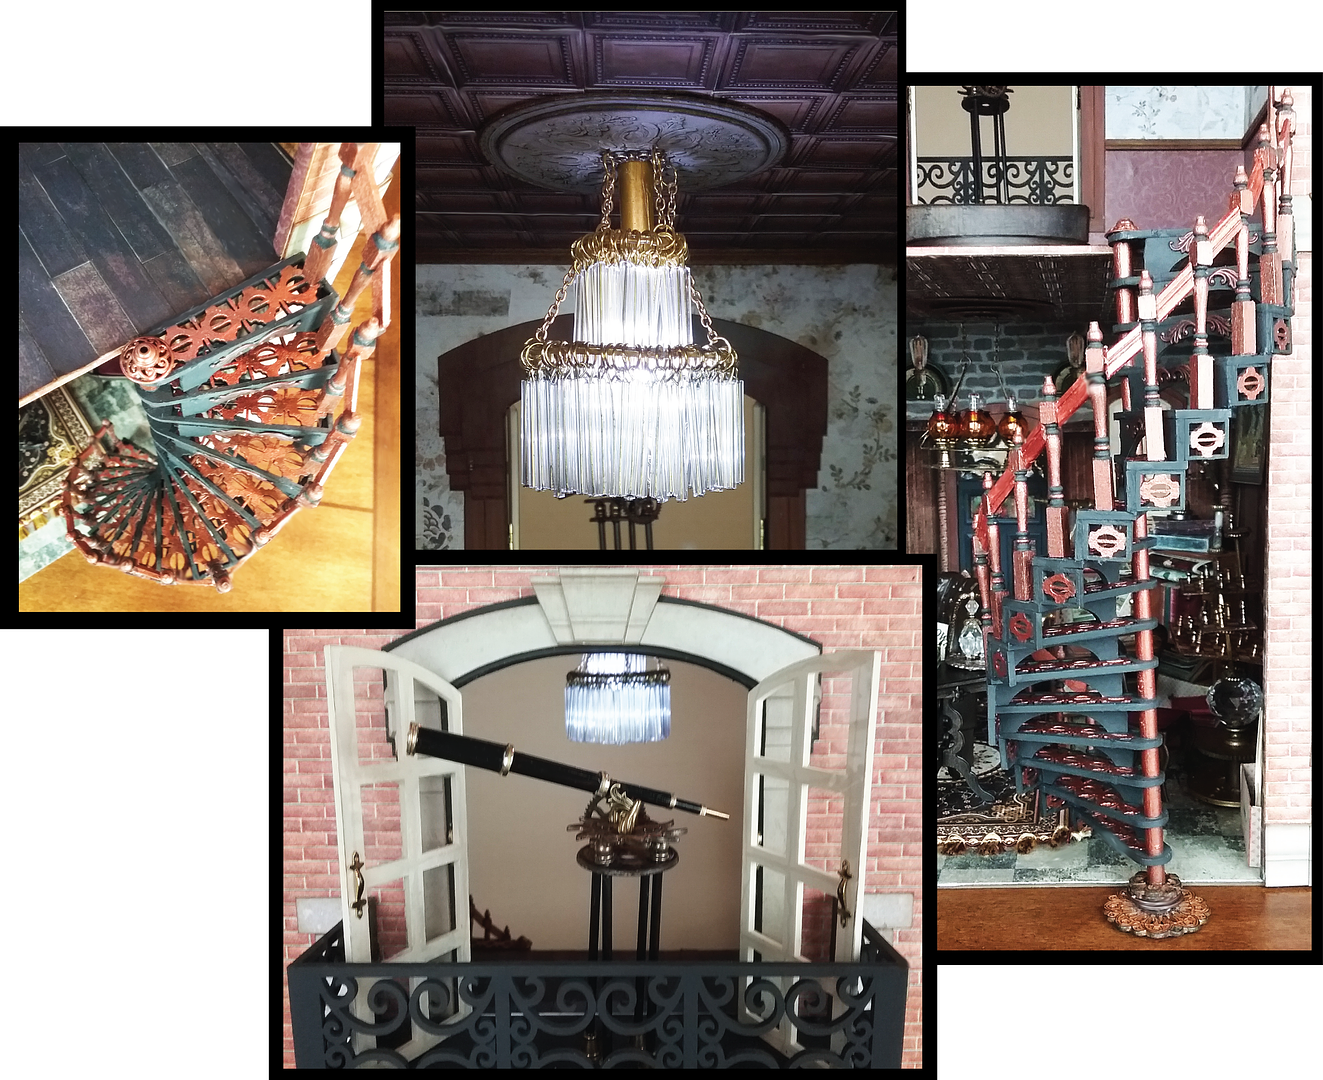
A spiral staircase is necessary to go from the first to the second floor.

It starts on the first floor and spirals up to the front of the second.  The staircase design is versatile and can be used outside of the house (as in this example) or inside the house by cutting an opening in the ceiling.  For this project, I chose to locate the staircase outside so I would have more room for furniture. 
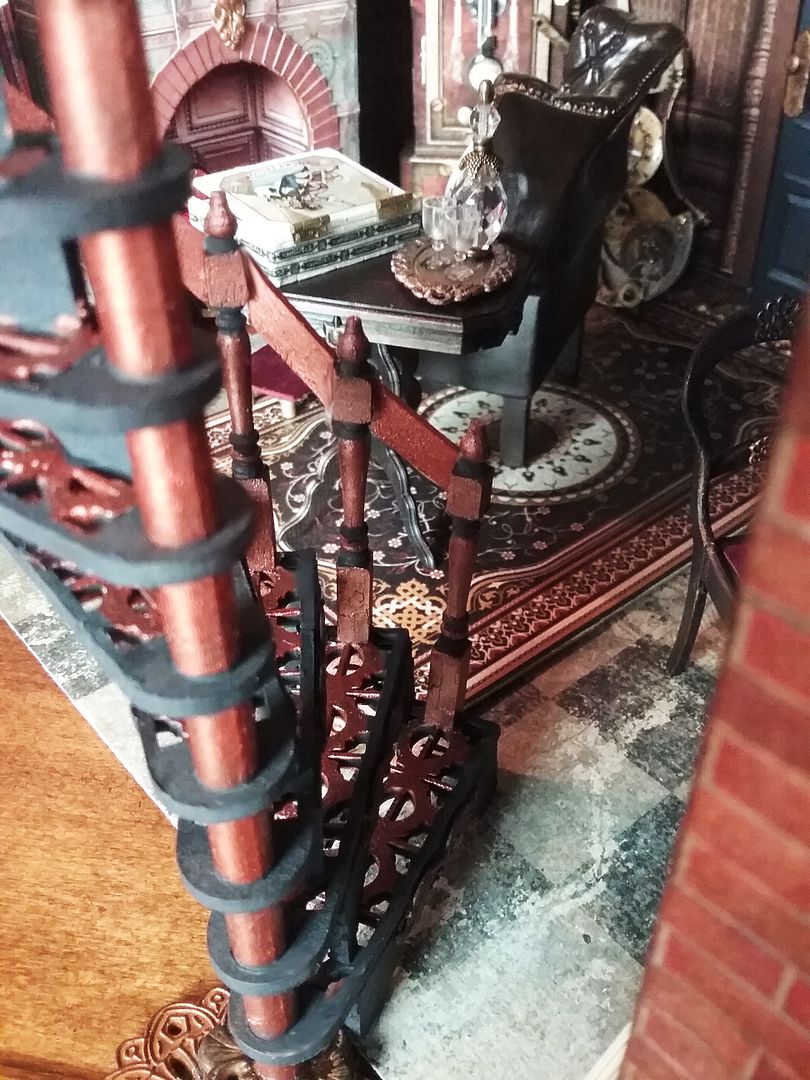
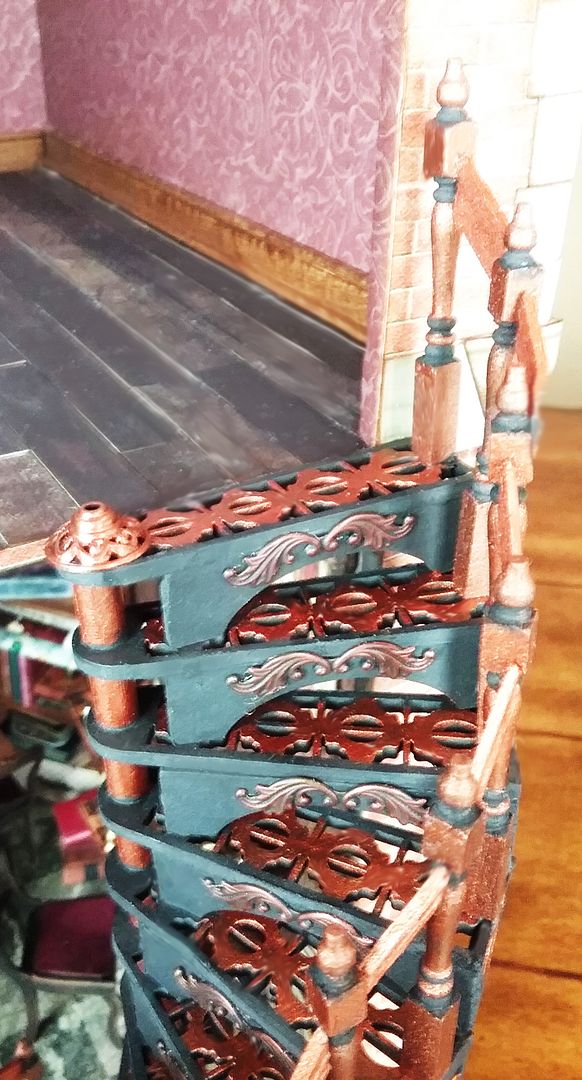
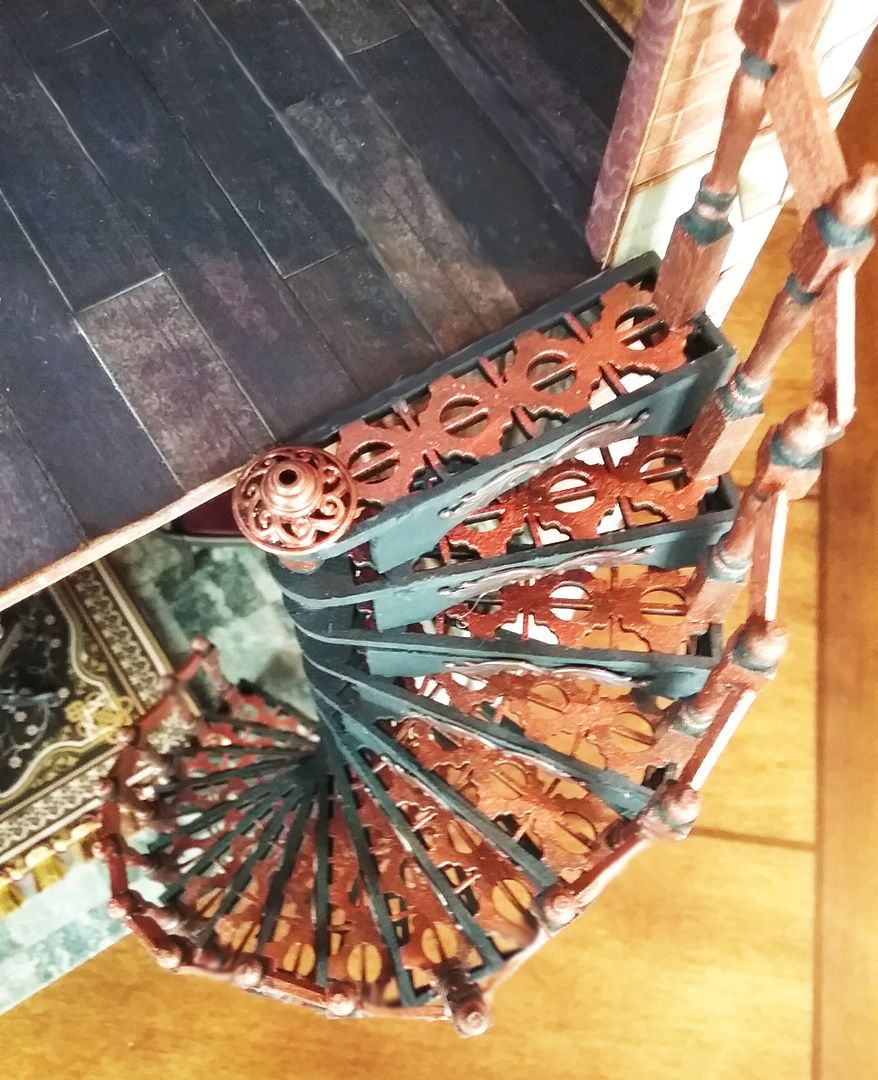
The staircase has beautiful fretwork details.  The good news is that it’s a kit, yeah for kits! 
There are so many things you can do to add a railing.  In this example, I’ve used wooden table legs as the spindles and cut pieces of wood chair railing as connectors. 
And for those who need a staircase for a different project, there is an add-on stair kit with extra steps that can be used to extend the staircase or add your own dowel and build a shorter staircase.  There is so much flexibility with these kits.  In future projects, I’ll be remaking this staircase, demonstrating other styles and railing options (this isn't the only house I will be building).

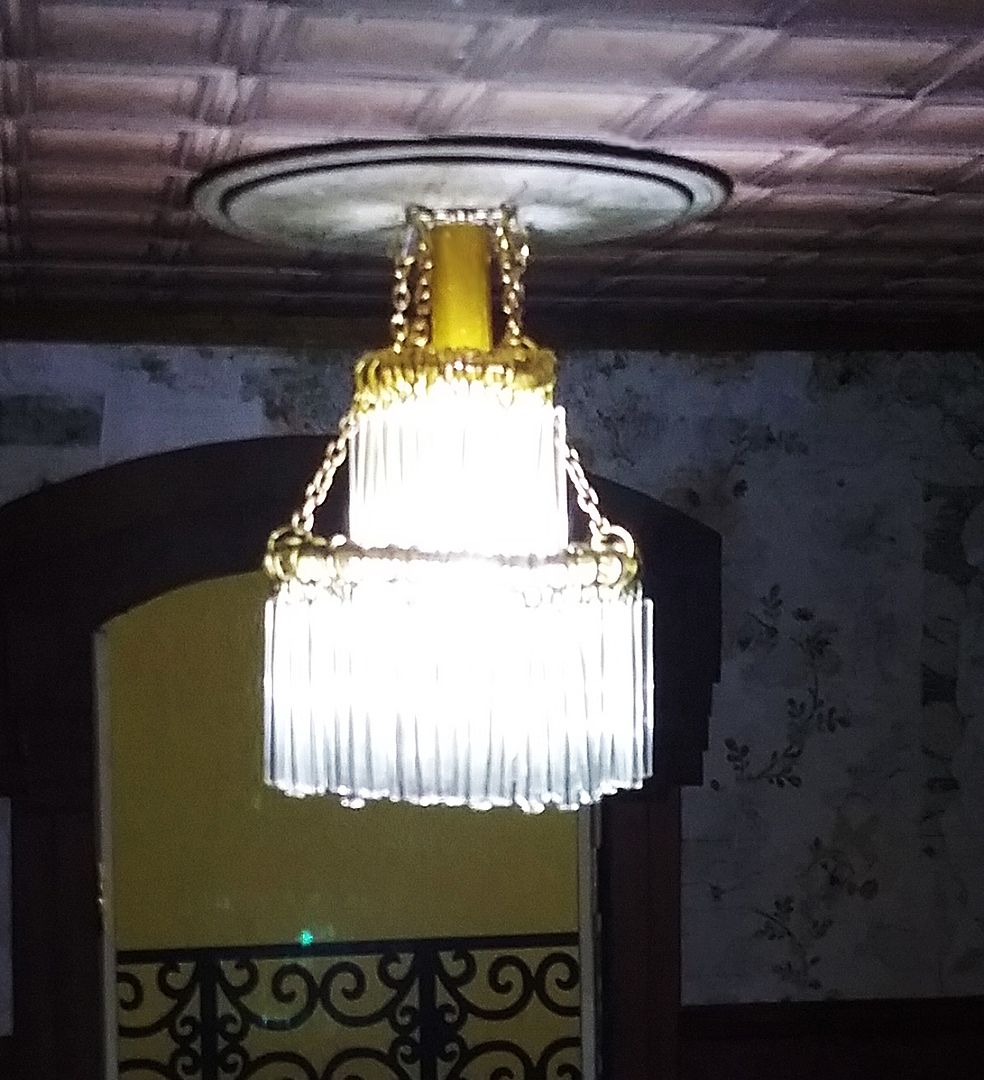
Upstairs you’ll find a lovely lighted chandelier.  Helena thought the room needed some bling and this chandelier fit the bill.   Notice how the light casts shadows on the ceiling.
 
You’ll be surprised at how easy it is to make.  I used two different-sized rings (an earring and a keychain ring) connected with a chain.  Hung on each ring are lots of 1-inch glass bugle beads.  The light comes from two sets of mini fairy lights.  There is a hole in the ceiling where the strings of lights are inserted through a plastic straw down into the chandelier.  The roof hides the batteries and switch, allowing easy access to turn the lights on and off.   But don’t worry; I’ll walk you through the assembly in the video tutorial.

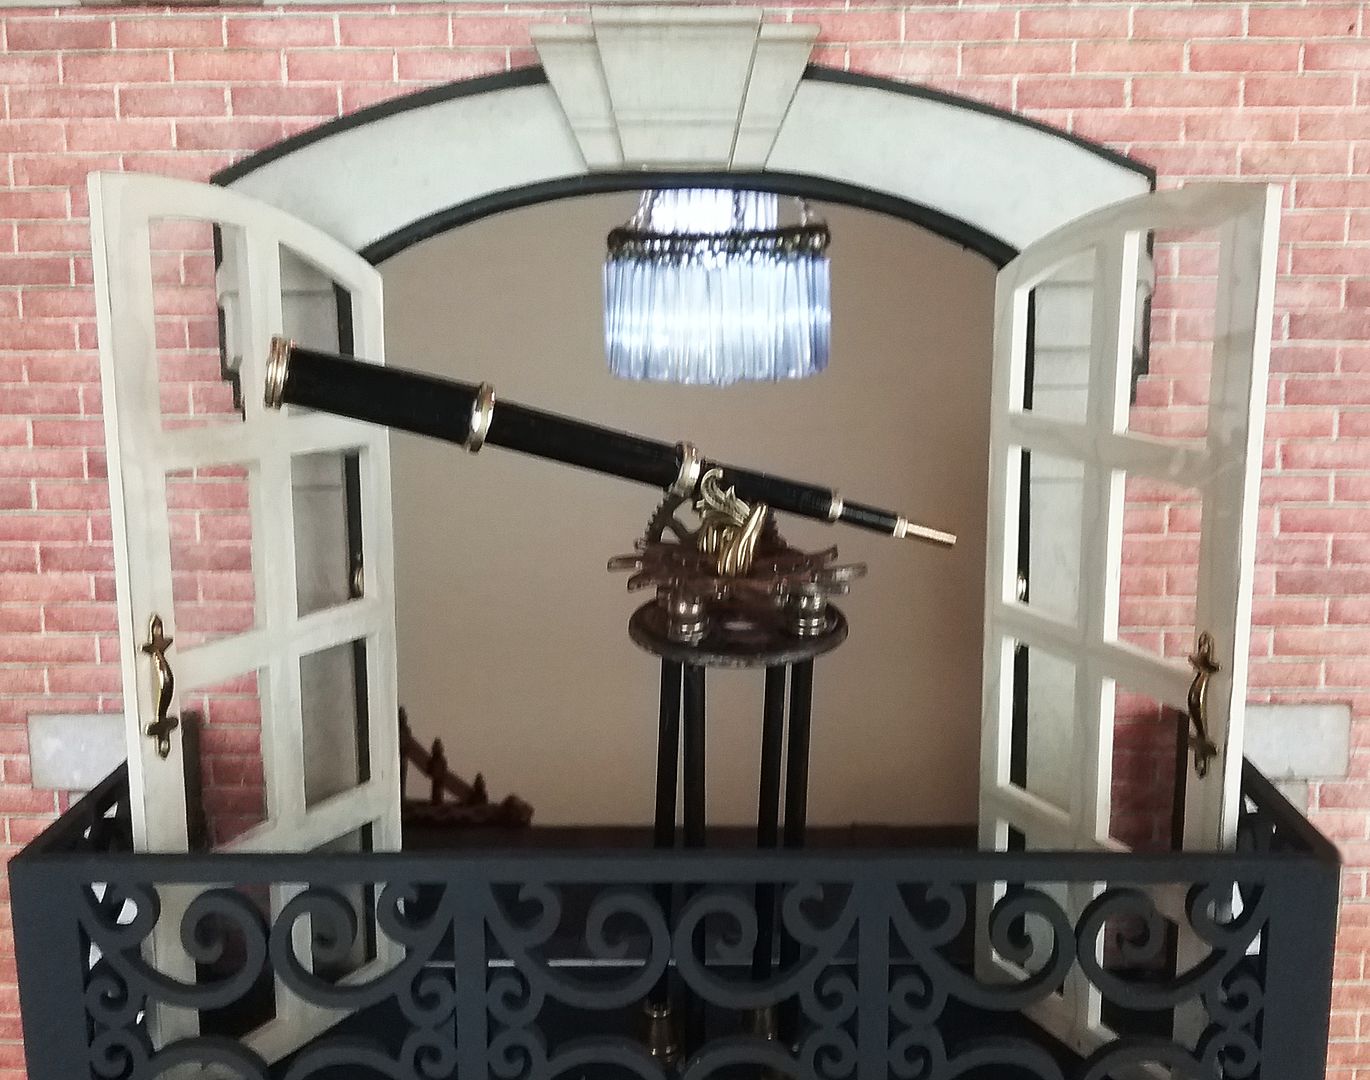
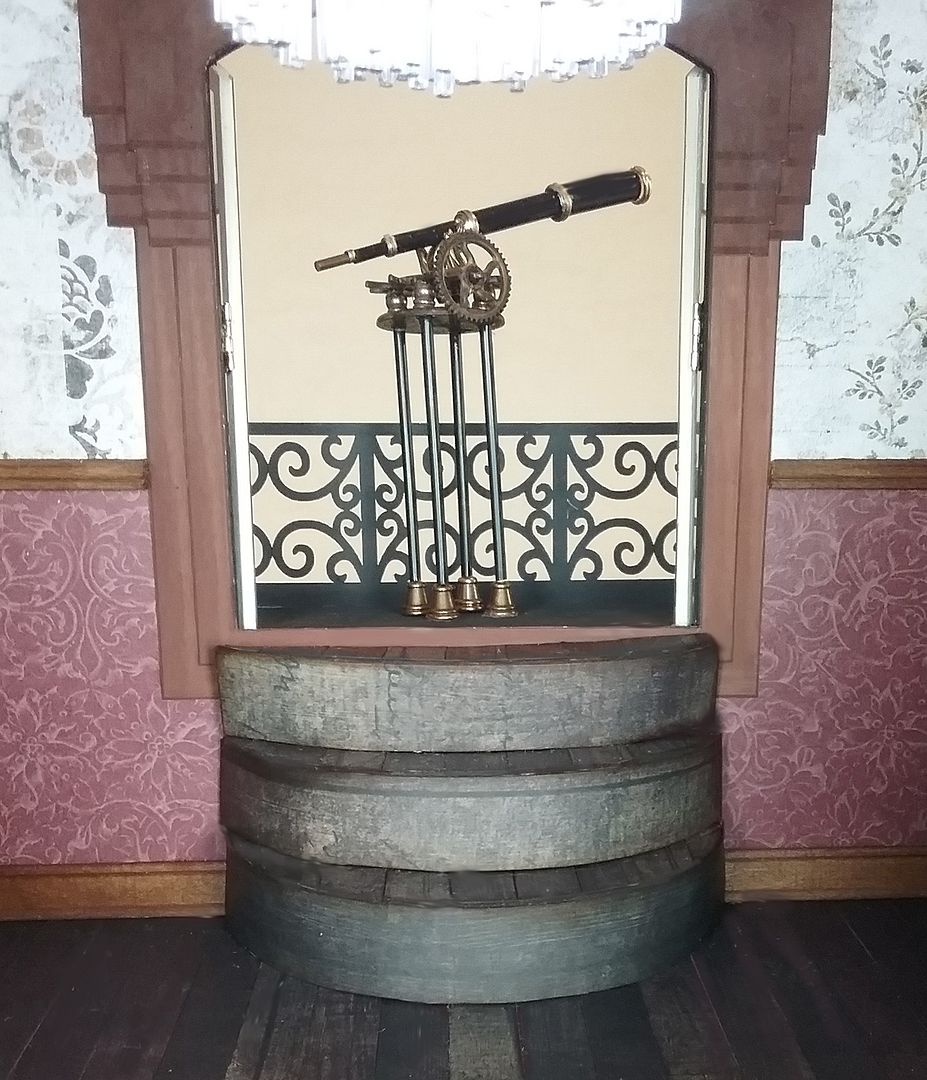
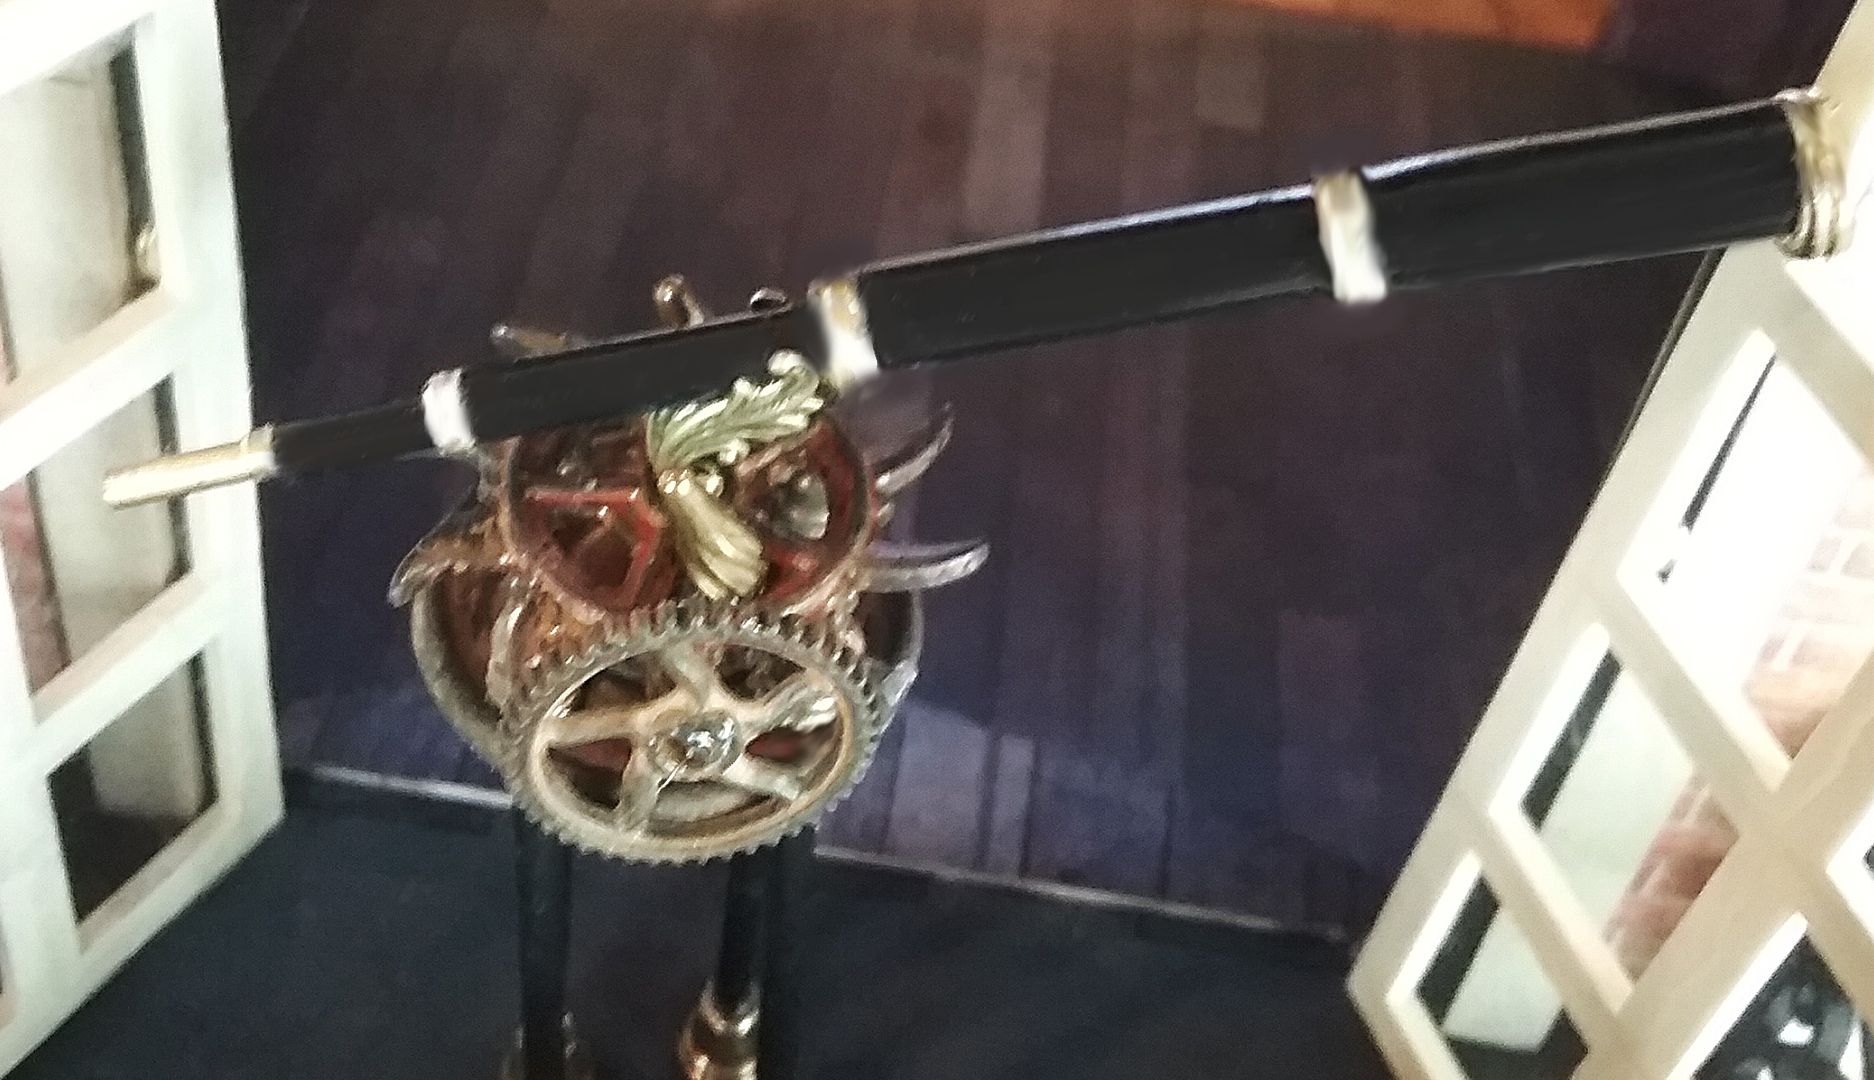
Helena’s spy scope is on the balcony, a necessity for any explorer.  Again I have used one of my favorite construction materials, various sizes of plastic straws; yep, the scope and legs are made from straws.  

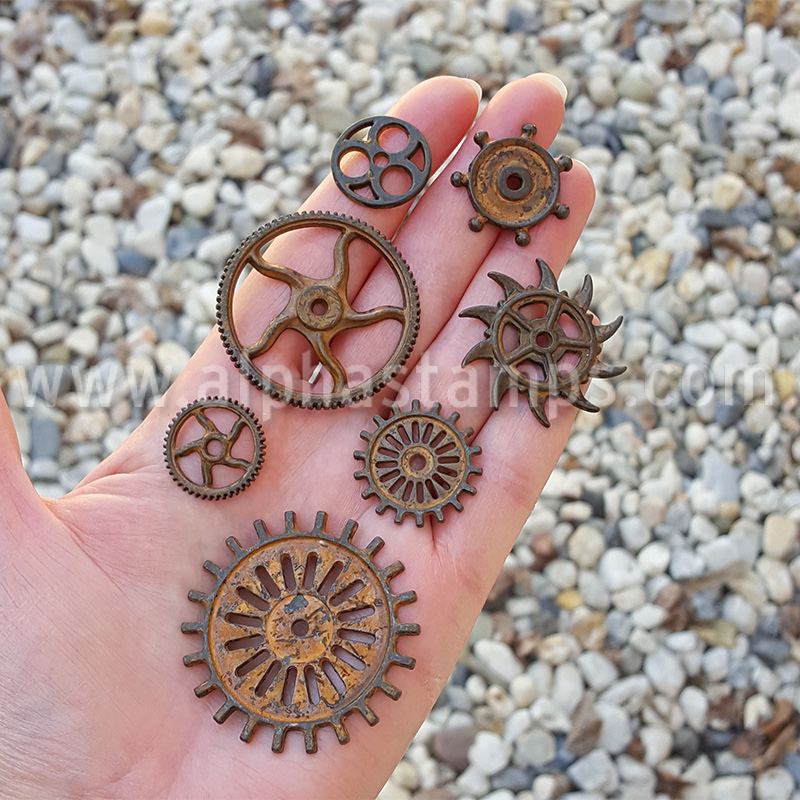
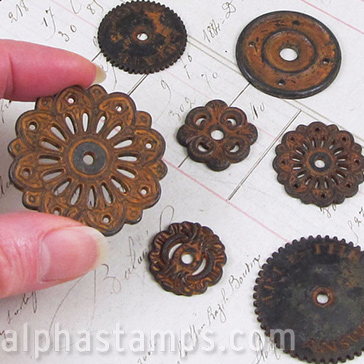
The cool rusted platform is made from Finnabair Mechanical Metals sets.  They come pre-rusted and in various shapes.  You’re going to see me use these repeatedly in future projects.  In this project, I also used them for the base of the staircase. 
 Finnabair Mechanicals Metals - Rustic GearsFinnabair Mechanicals Metals - Rustic Washers
One of the Finnabair wheels and brass fluted dangles are used for controls, and a bronze flourish (folded) is used to connect the scope to the base.
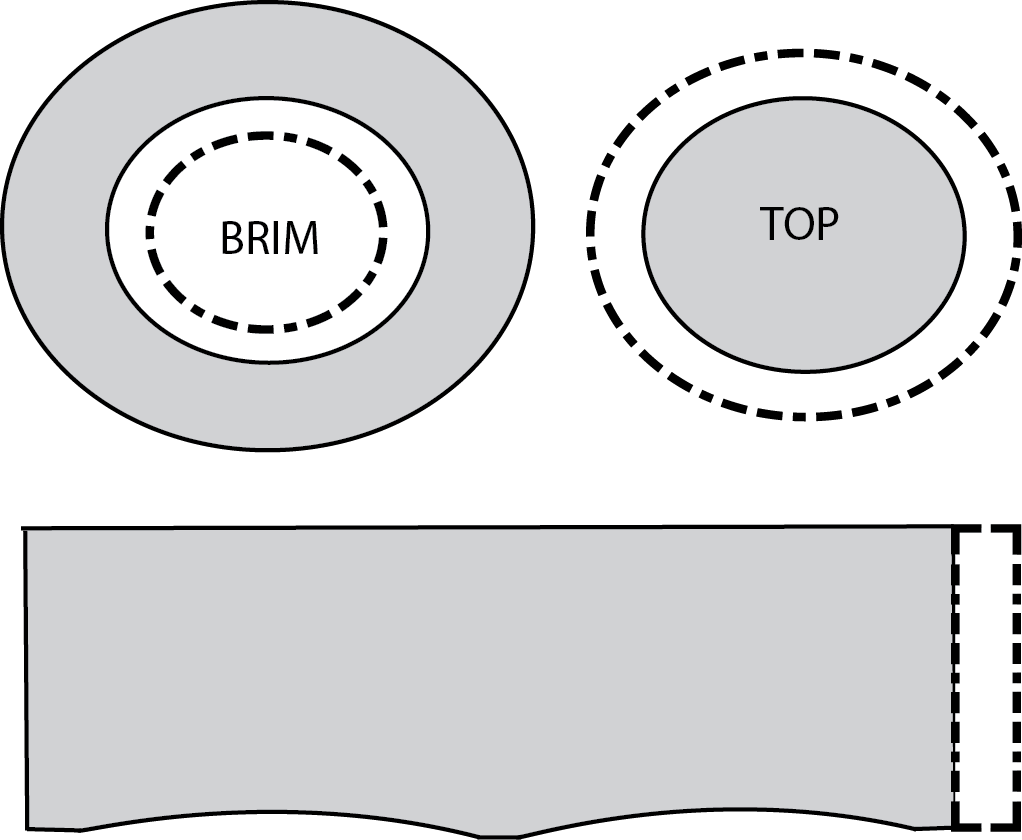
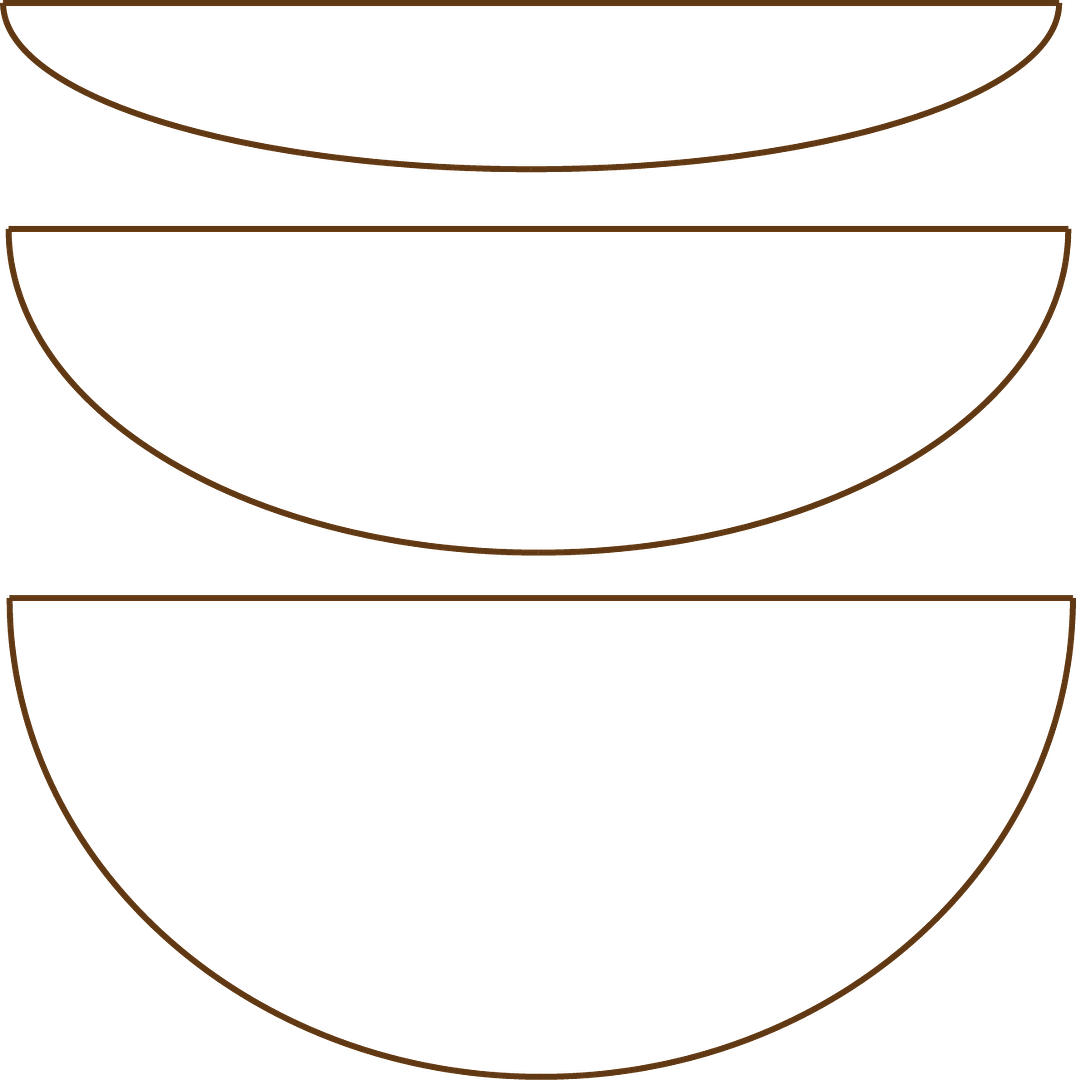
When you first saw the house, you might have wondered, “how in the world do you get up to the balcony.”  In the video, I’ll show you how to build a custom set of steps.  I’ve included the template (at the bottom of the post).

You might have noticed at the end of the last project post, I indicated that decorating the second floor would be the next post.  For timing reasons, I decided to flip the posts and deal with the staircase, chandelier, etc., first, and the next post (I promise) will be decorating the second floor.  Besides, there is no way to get up there without a staircase.

Below you'll find the video tutorial, a link to a picture gallery, the balcony step template, and the complete supply list.

VIDEO TUTORIAL


BALCONY STAIRS TEMPLATE


DETAILED SUPPLY LIST
Spiral Staircase Kit
Chesterville Hargrave Scrapbook Paper – Balcony Stairs
Set of Wooden Table Legs – Spiral Staircase
Wood Trim – Chair Rail – Spiral Staircase
Symmetrical Bronze Flourish – Spiral Staircase
15mm Antique Bronze Filigree Bead Cap – Spiral Staircase
Finnabair Mechanicals Metals – Rustic Washers – Spiral Staircase
Architectural Trims Set Download – Chandelier - Medallion
Mini String of Fairy Lights - Chandelier
1 Inch Glass Bugle Beads or Dollhouse Straws – Chandelier
Antique Gold Square Filigree - Chandelier
Vintaj Metals Patinas – Victorian Gold - Chandelier