About 5 years ago I was looking
for different ways to add moving parts to ATCs.
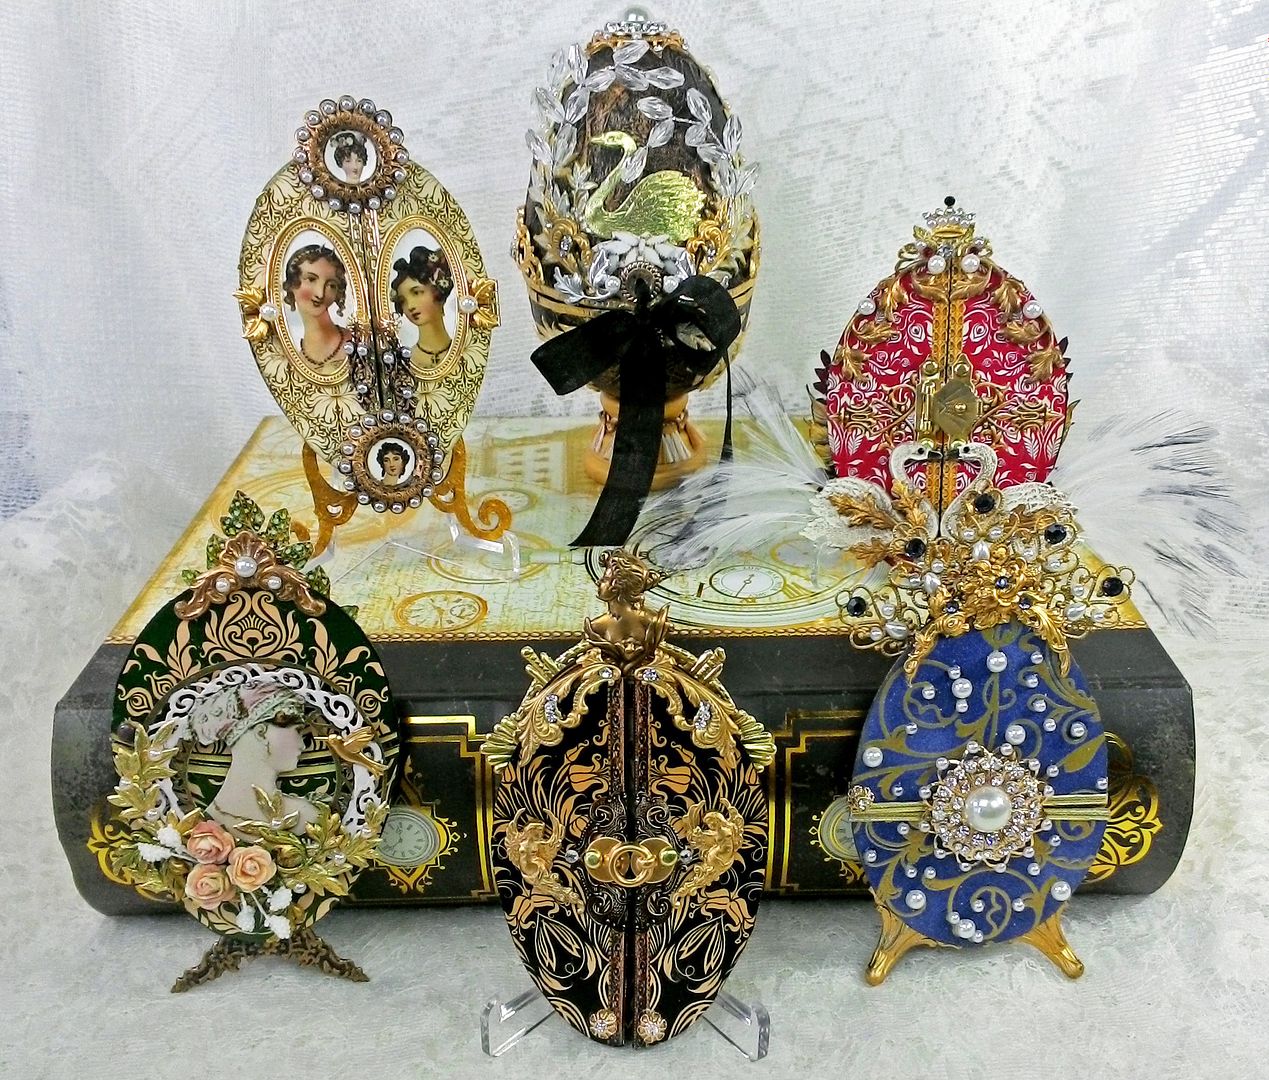
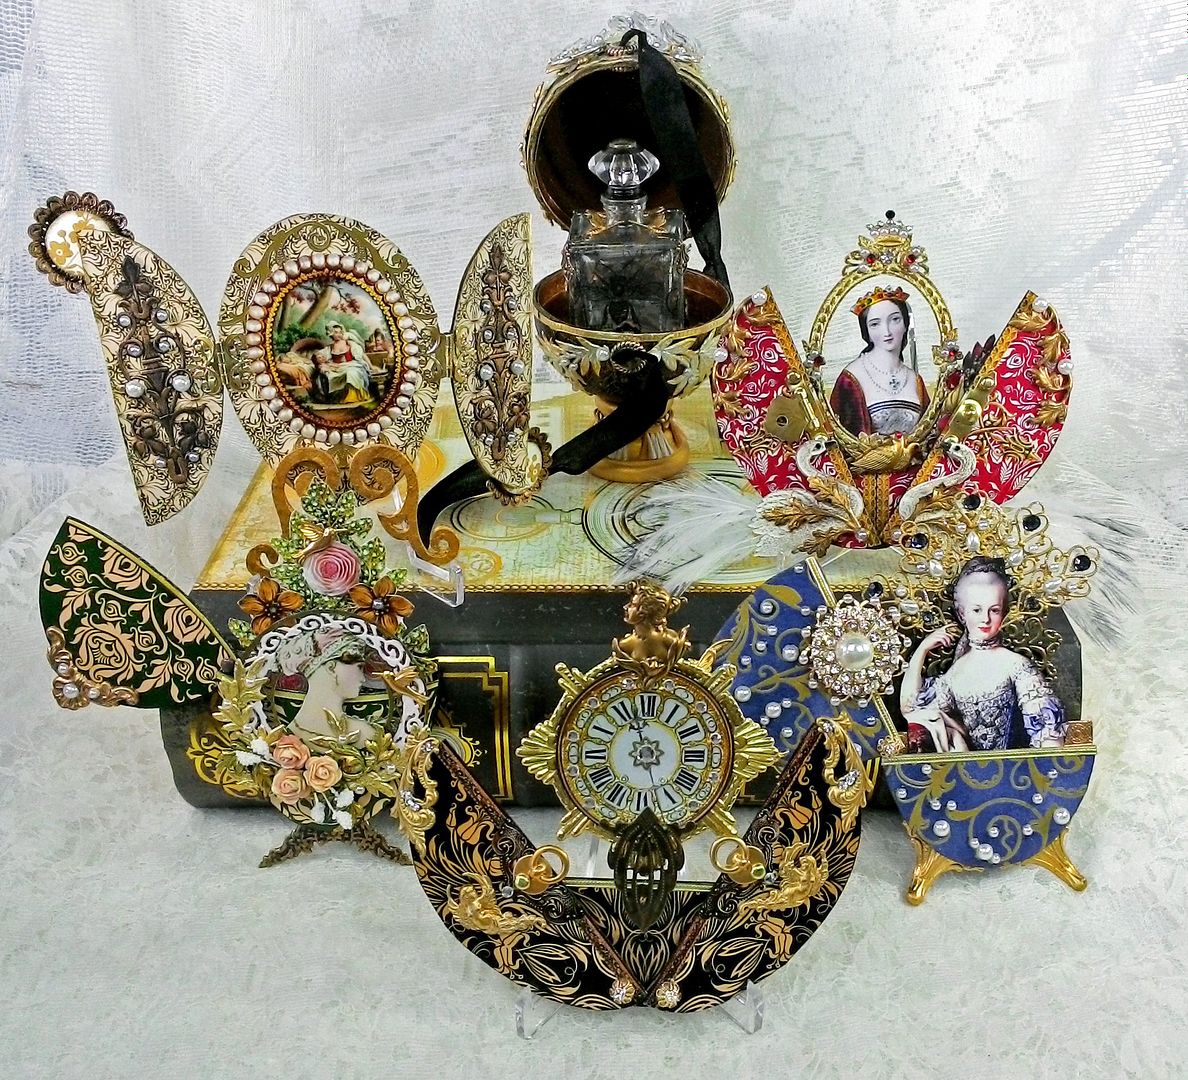
One of the ideas I came up with was to create an ATC that mimicked a
Faberge Egg. The idea was to have an
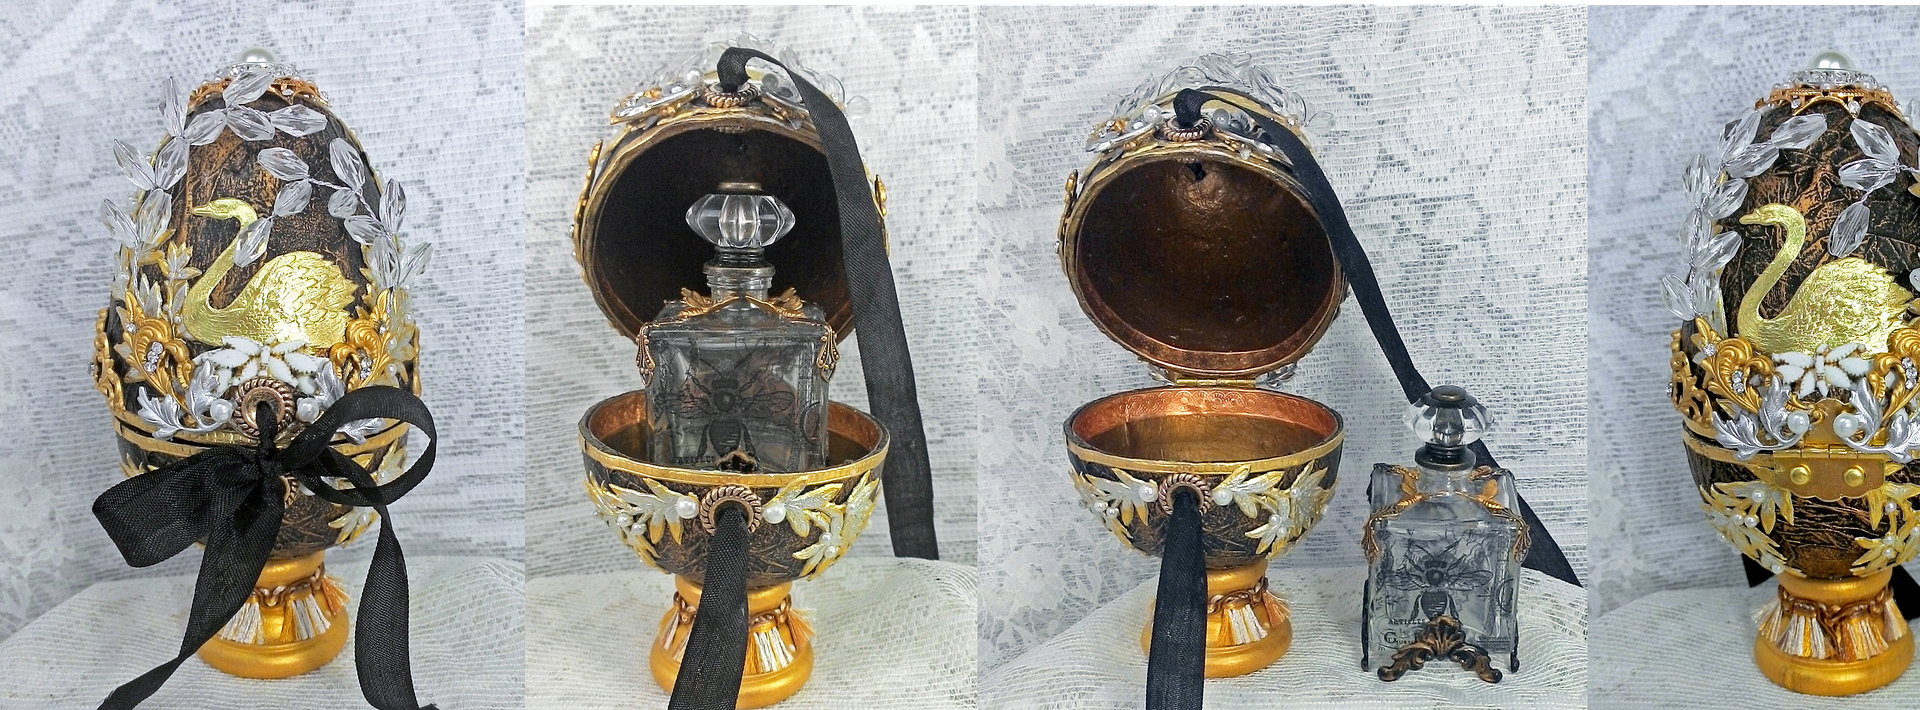
elegant front presentation that would open and reveal a treasure inside.
In this tutorial, I’ll cover how to
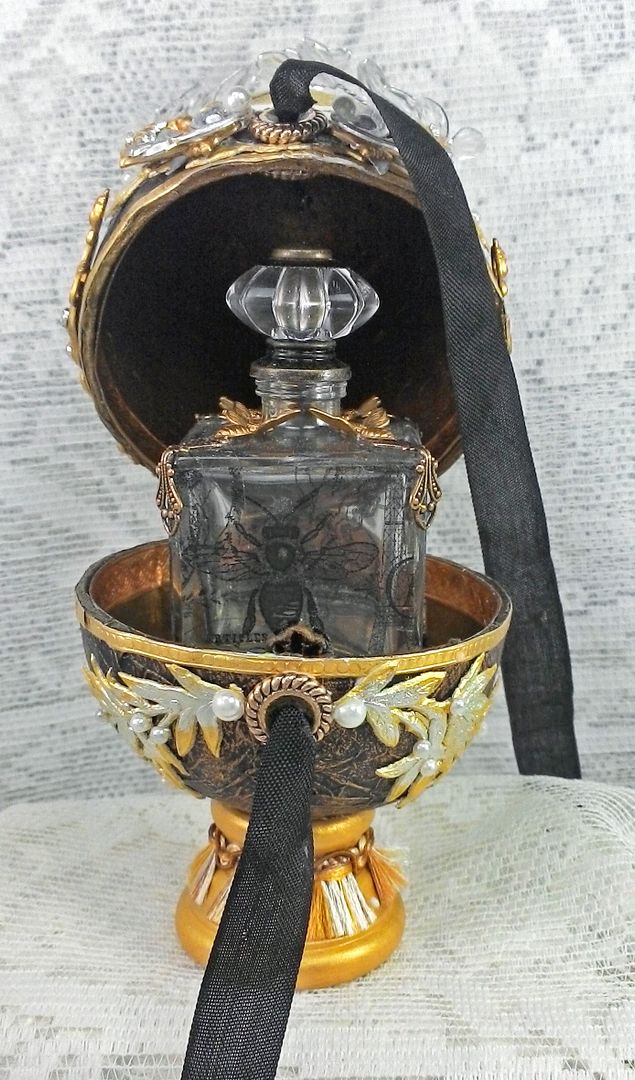
make Faberge like eggs that open in various ways. I’ll also demonstrate how to transform a paper
mache egg into a lovely container for a removable perfume or altered bottle.
Most of the samples in the
tutorial are made using my new Elegant
Eggs collage sheet or digital
image set. I’ve also created a new
sheet titled “Bejeweled
#2” which is a companion to the original “Bejeweled”
collage sheet. Both sheets are packed
with vintage jewelry that adds a touch of elegance to the eggs or other projects.
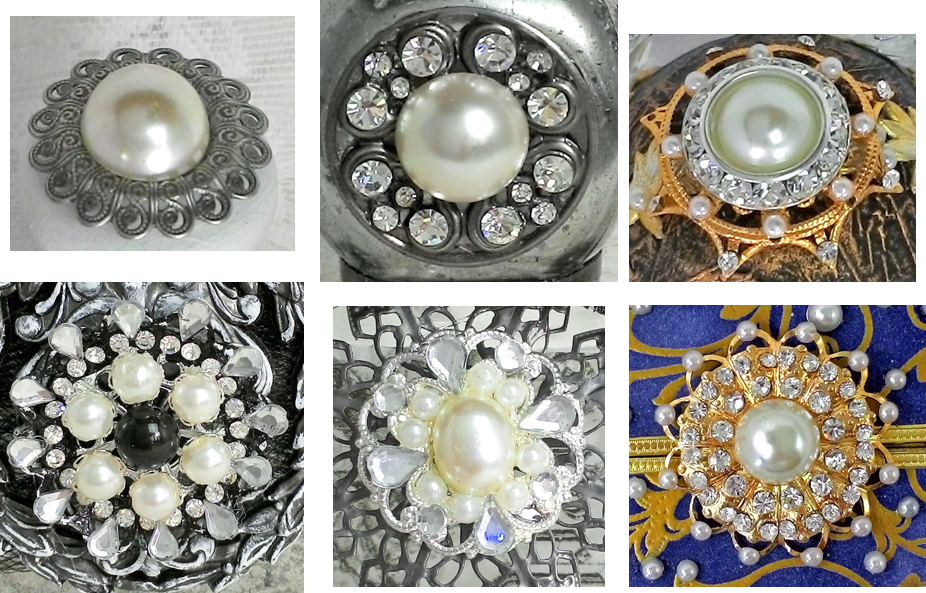
One type of embellishment I created
for the eggs and for the bottles in the previous French
Themed Altered Bottles tutorial, are jeweled elements that resemble buttons. In the tutorial, I’ll cover how I used
filigree, pearls, rhinestones, jewels, crystals and bead caps to create jeweled
buttons for both the eggs and the altered bottles.
The collage sheet contains 7
different eggs to choose from. Click on the image below to purchase the sheet.

The digital image set contains all of
the images in the collage sheet plus a set of eggs without the hardware for a
total of 14 images. Along with more images, the digital image set gives
you much more flexibility in printing just the images you want, and in resizing
the images to your particular needs. Click on the image below to purchase the digital set.

This sheet is packed with vintage
jewelry and is a companion to the original “Bejeweled” collage sheet. Click on the image below to purchase the sheet.

TUTORIAL
EGG TEMPLATE
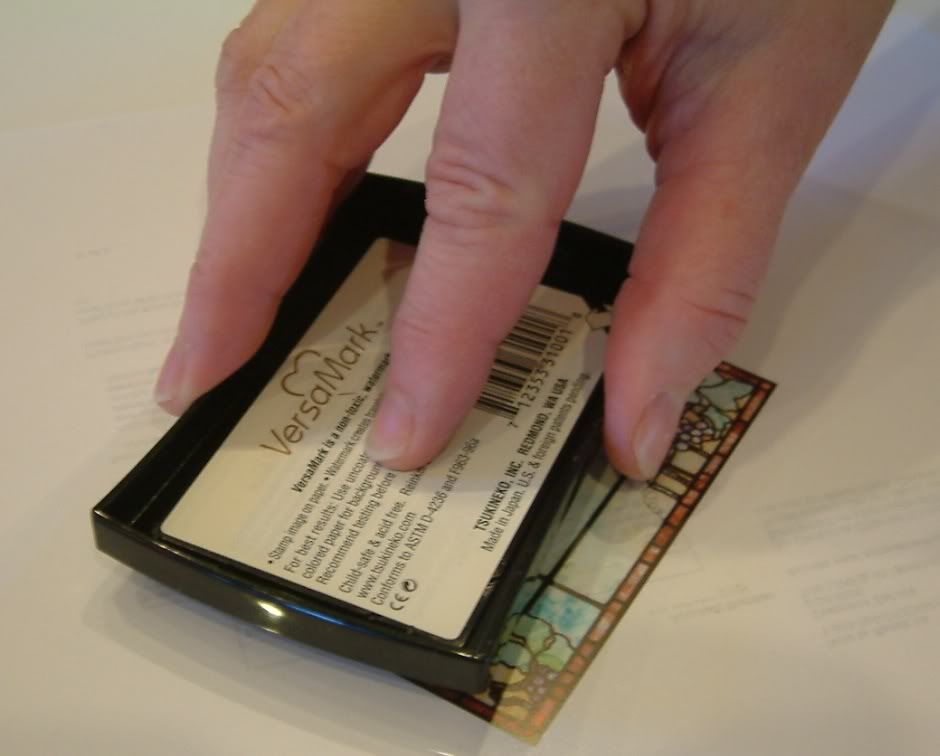
To download the egg template, click on the image to expand it, right-click and select Save As.
This clear plastic ATC stand is a
great way to display the eggs as well as ATCs
DETAIL PHOTOS &SUPPLY LISTS
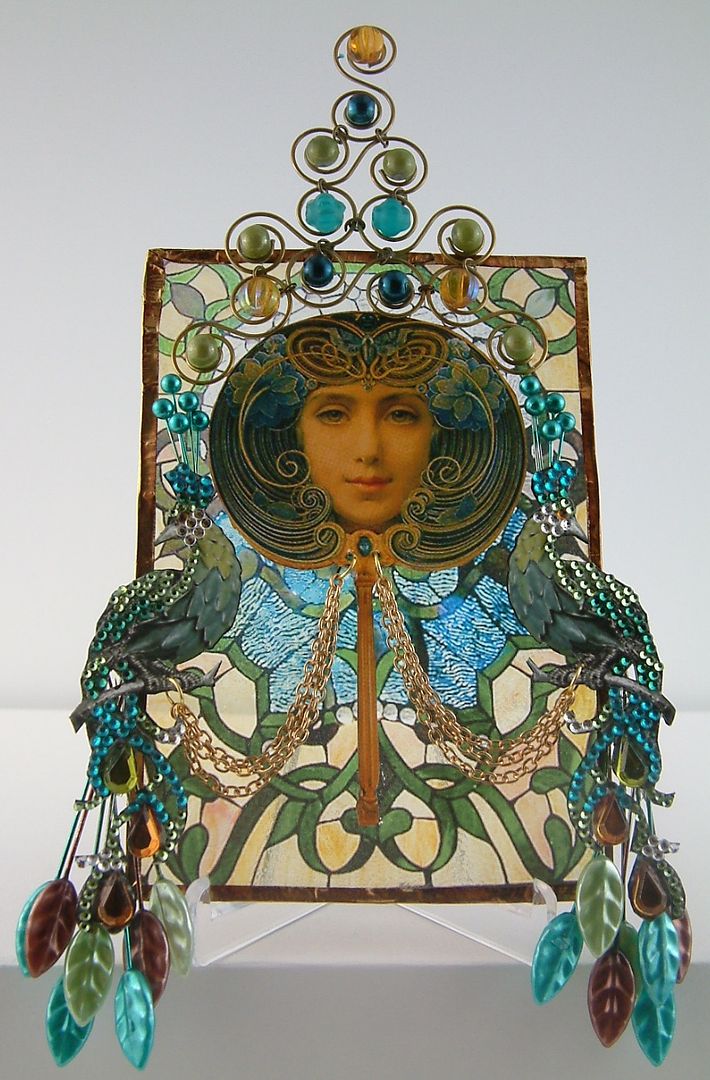
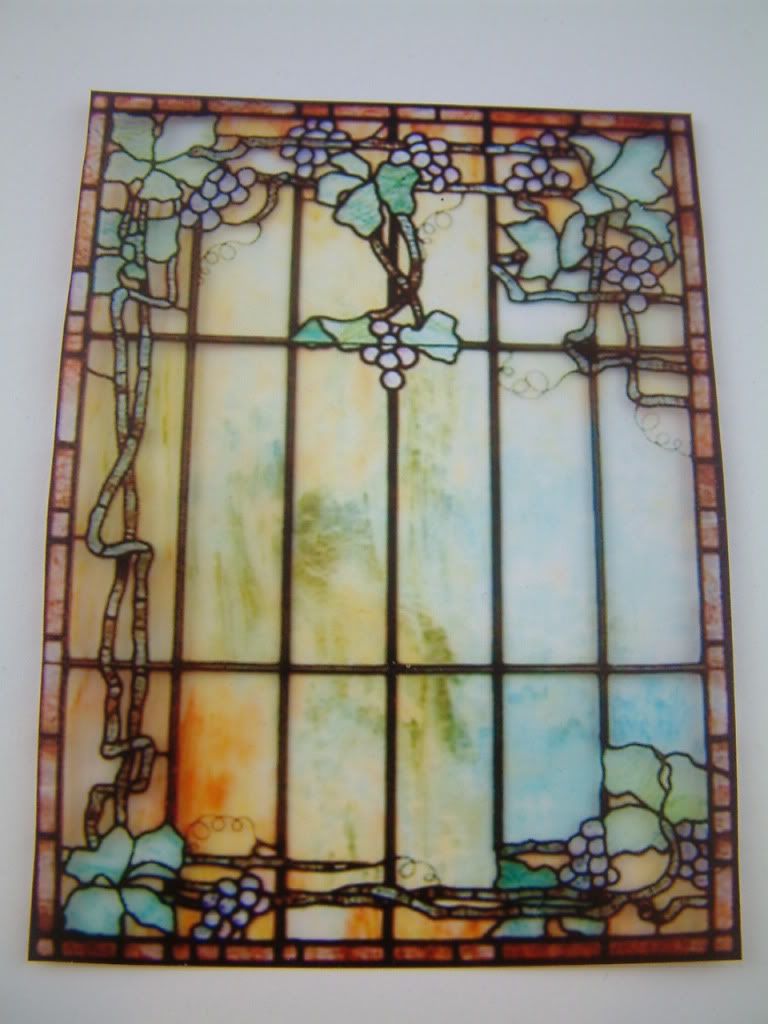
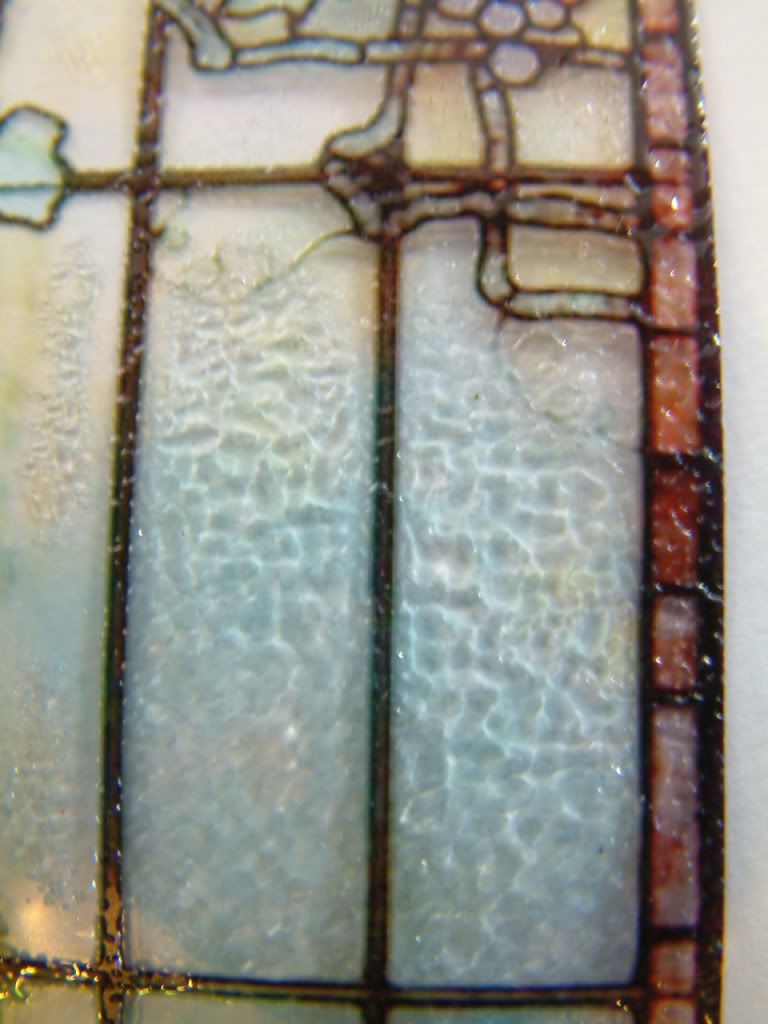
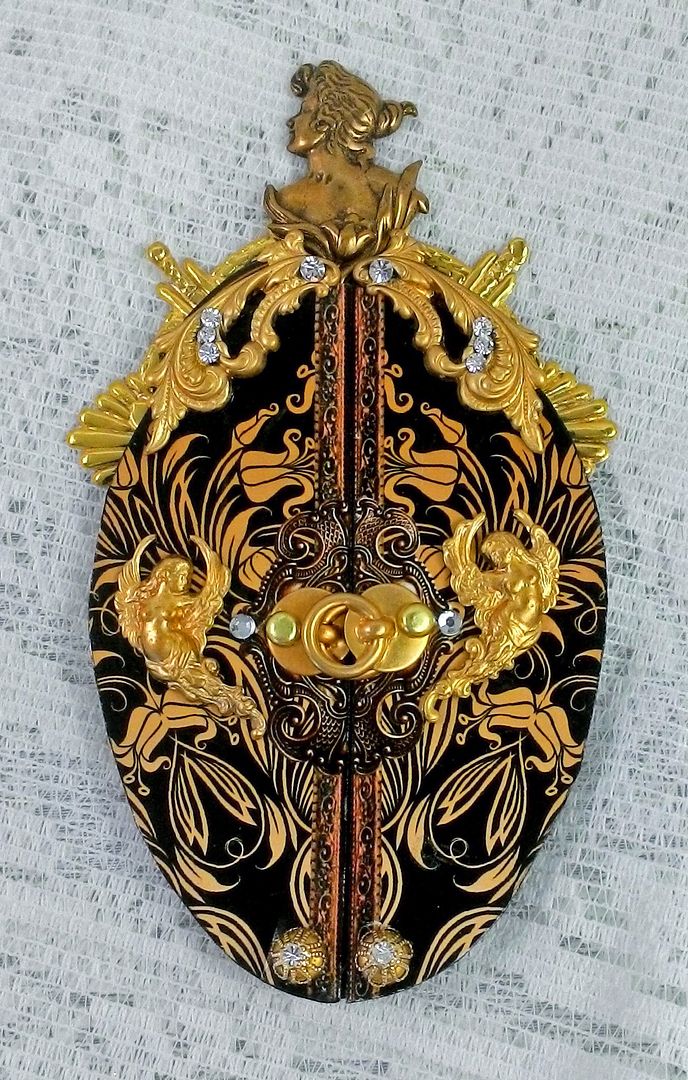
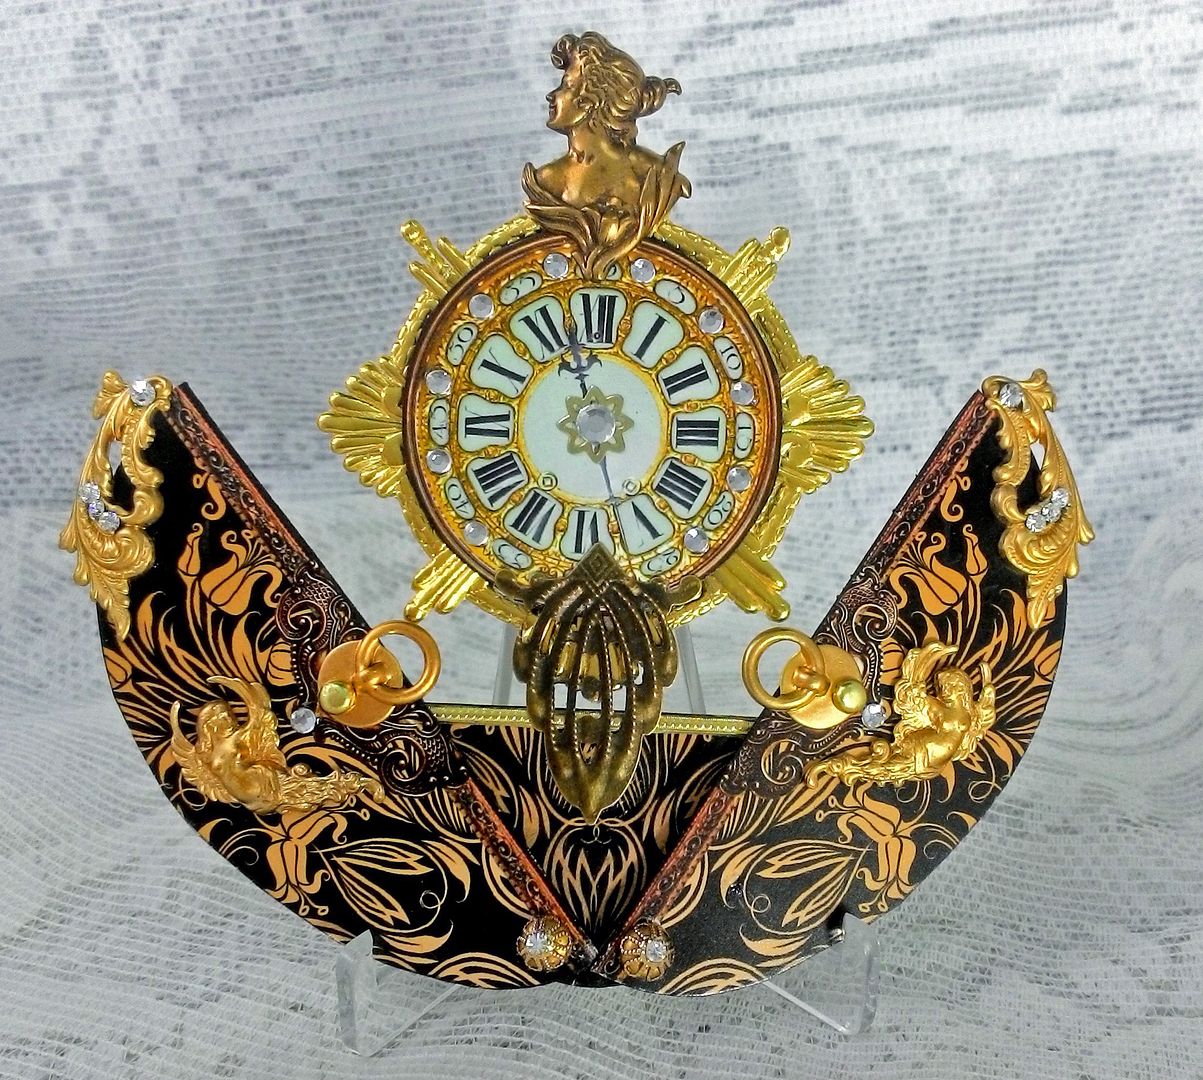
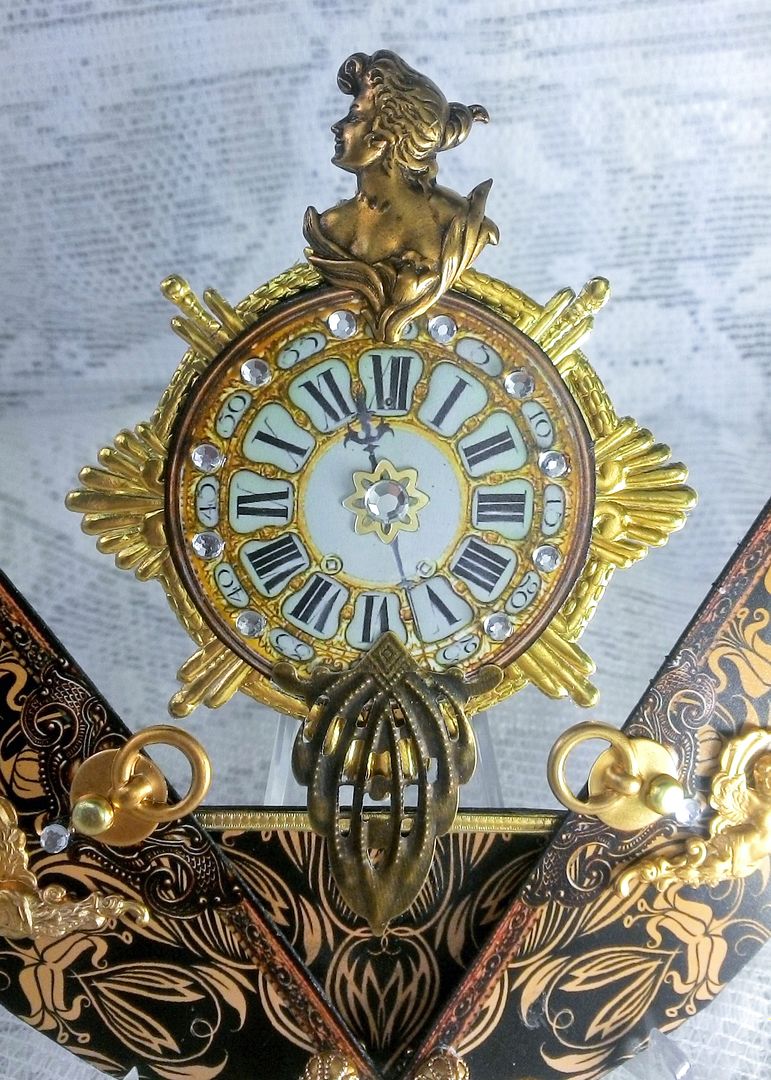
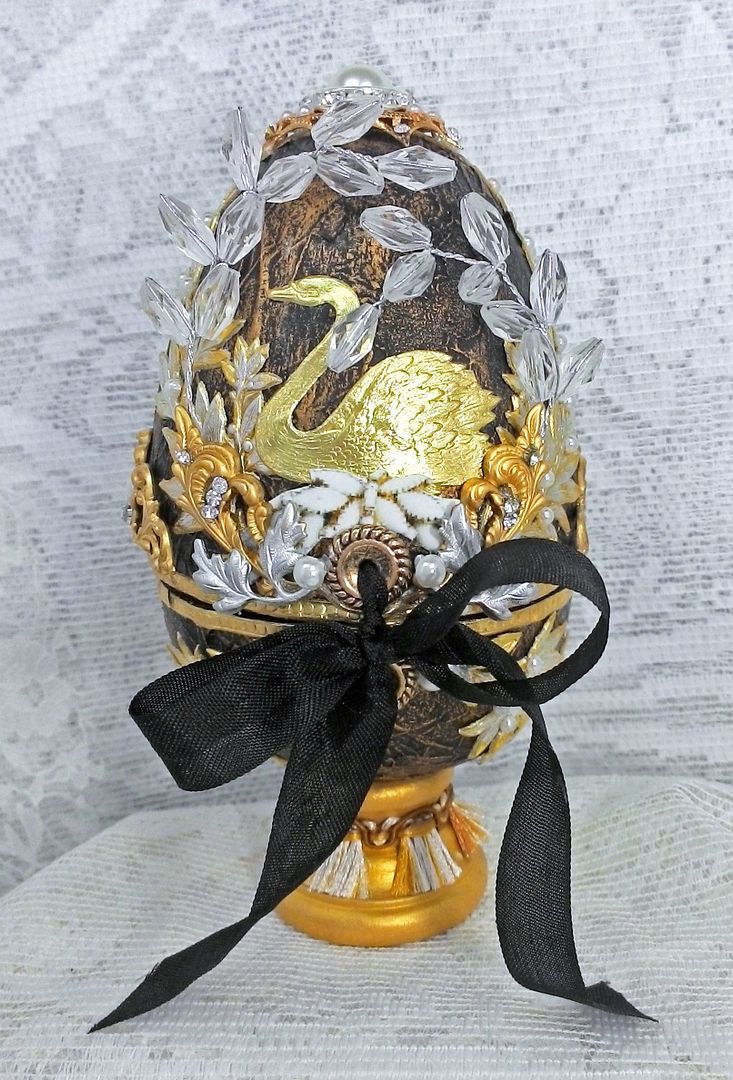
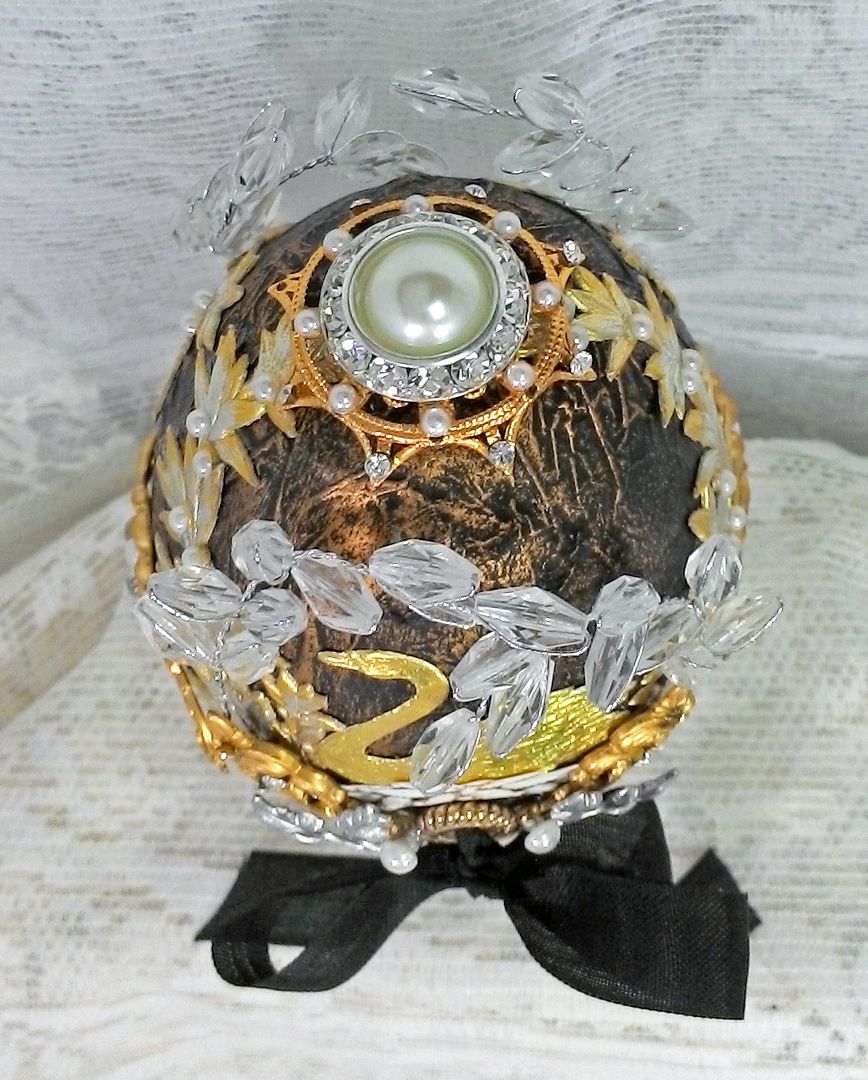
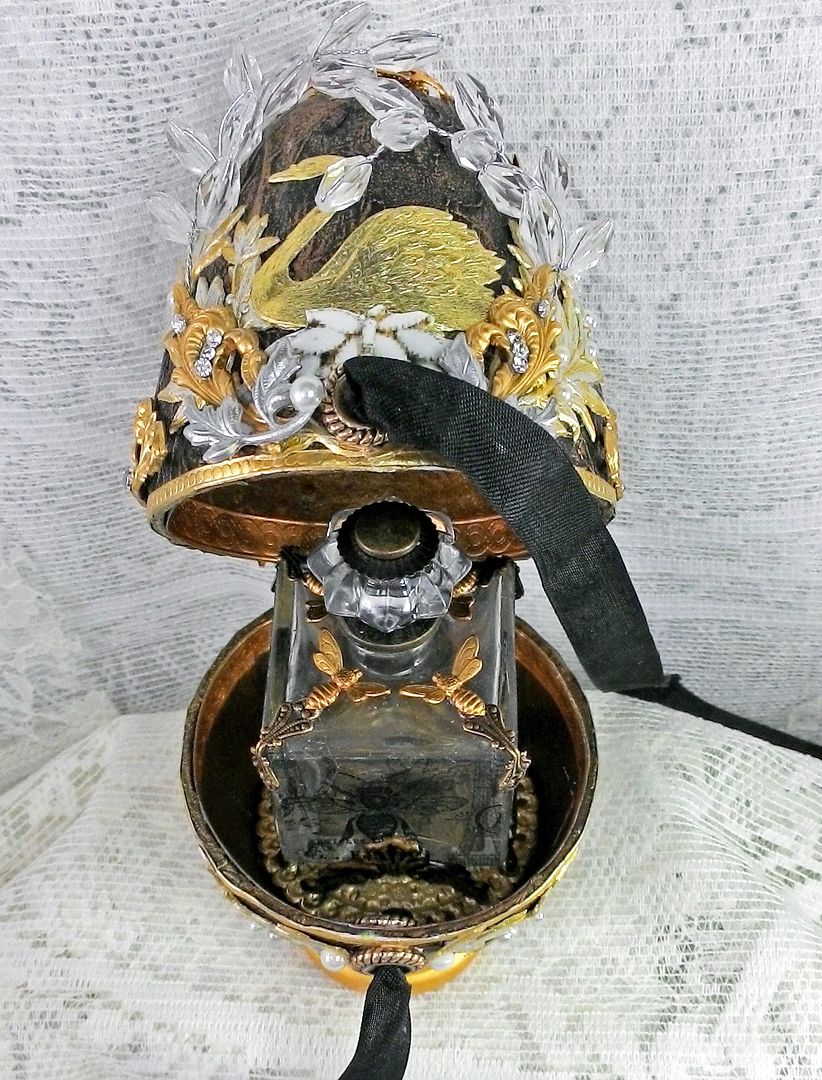
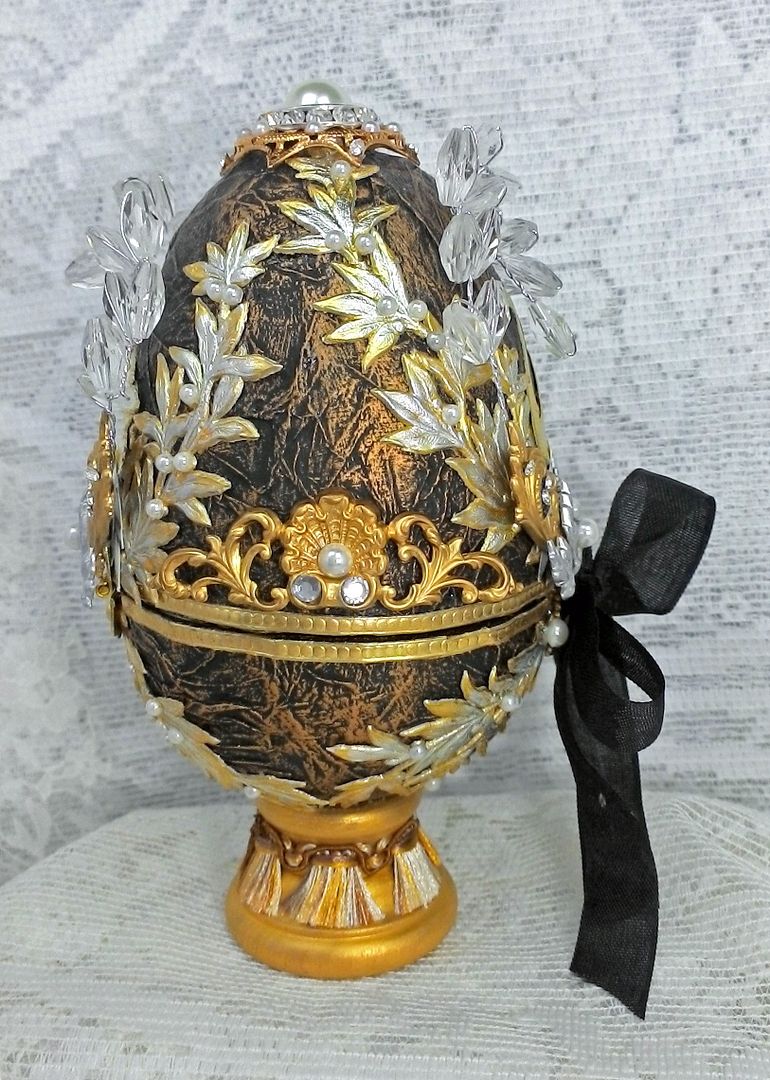
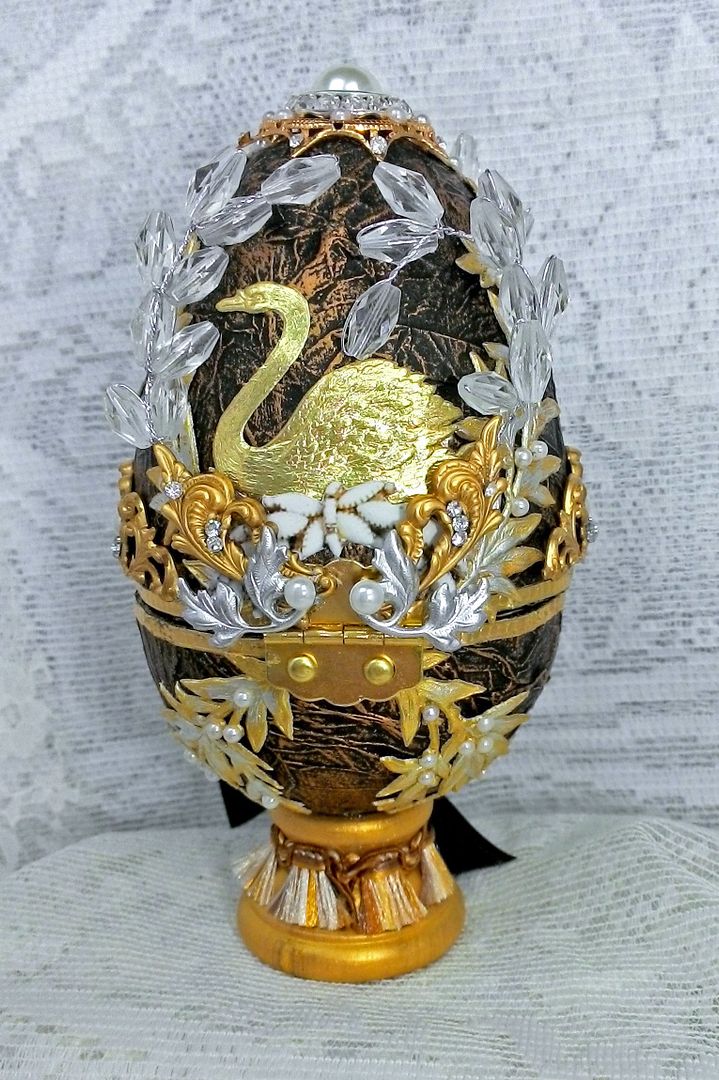
BLACK & GOLD ART NOUVEAU STYLED EGG

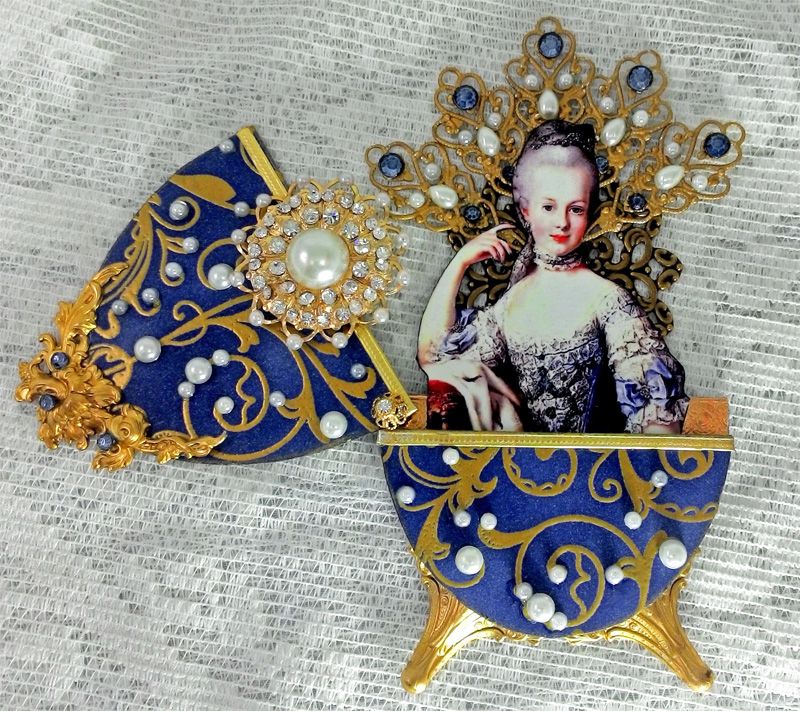
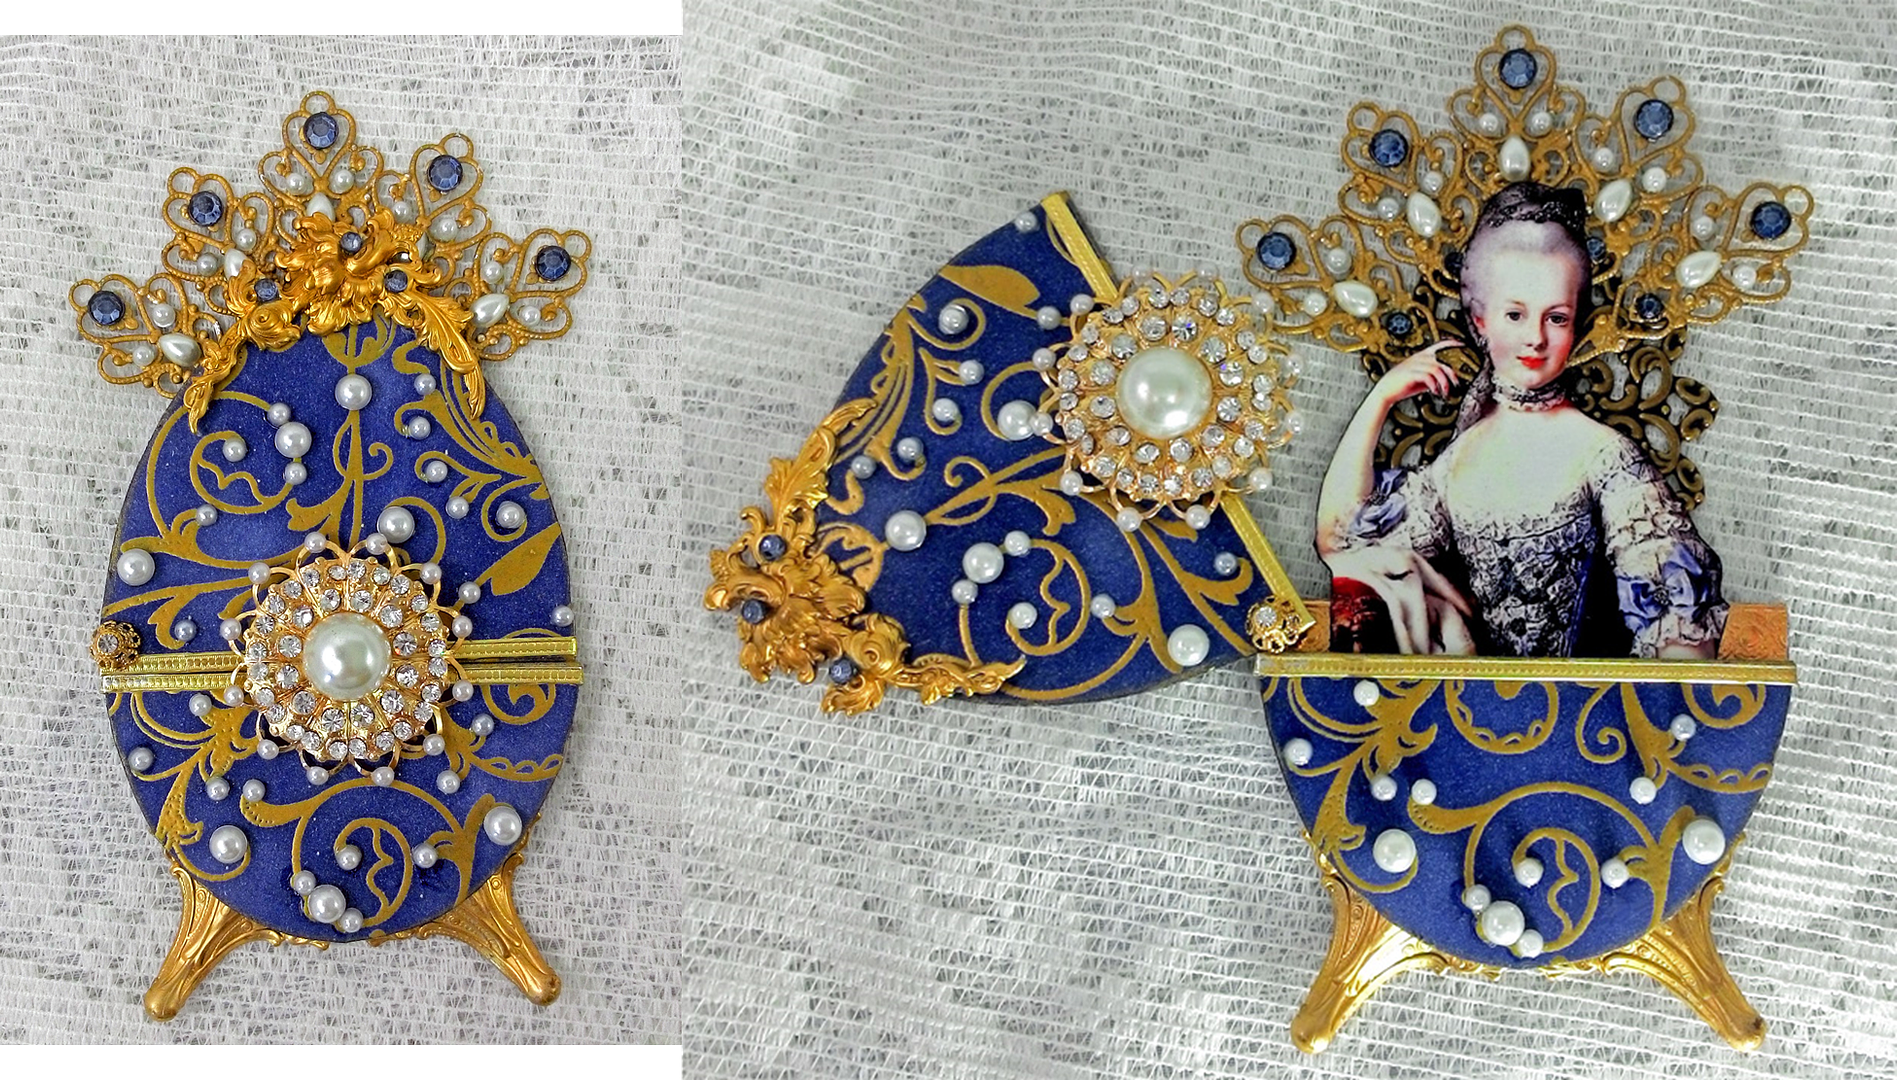
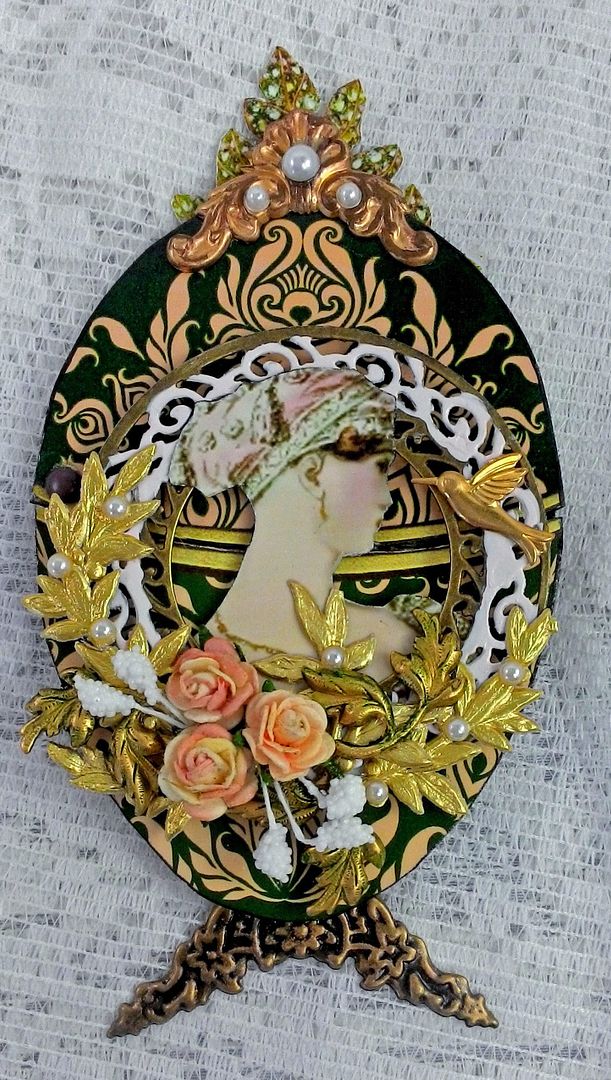
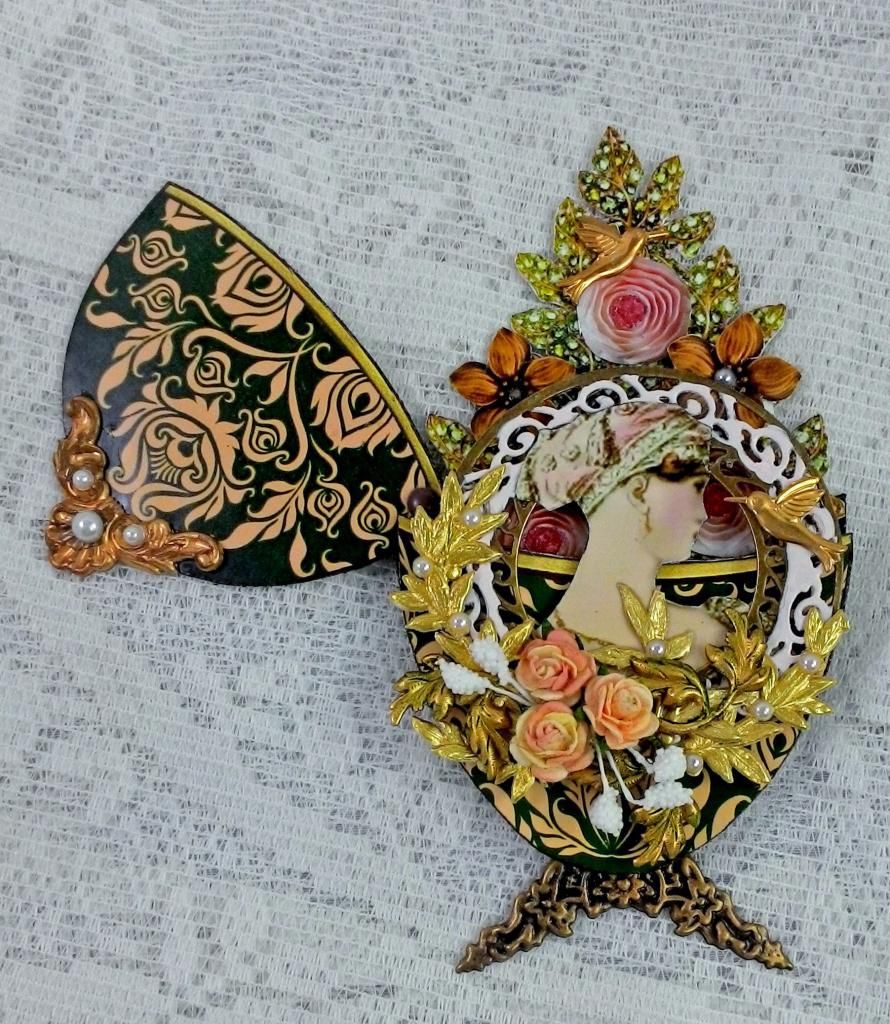
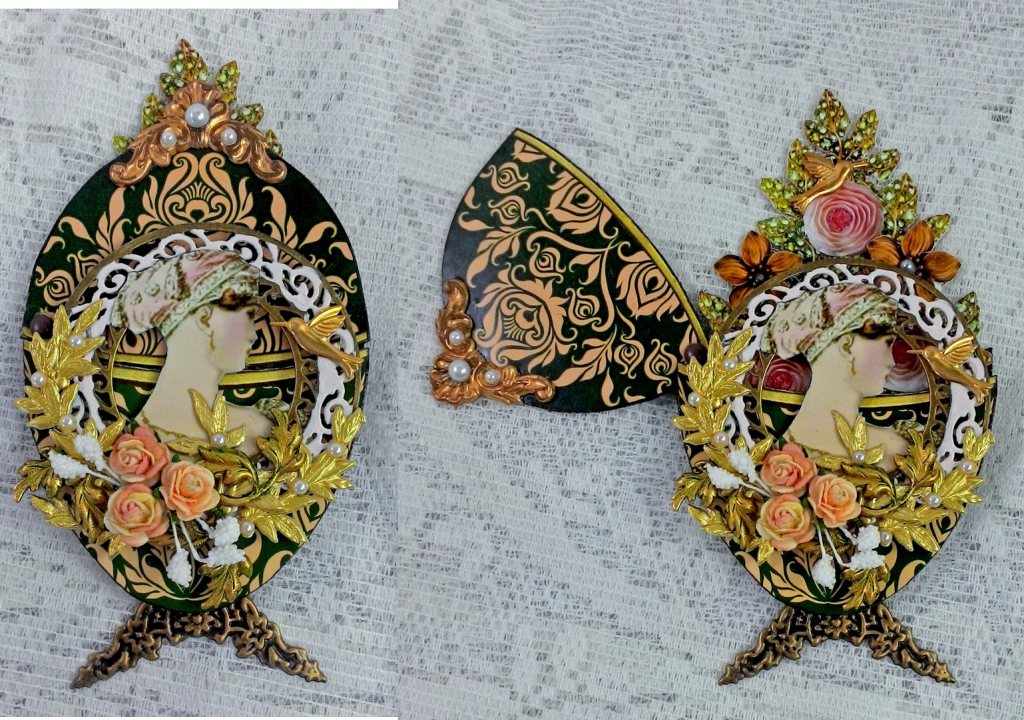
MARIE ANTOINETTE EGG

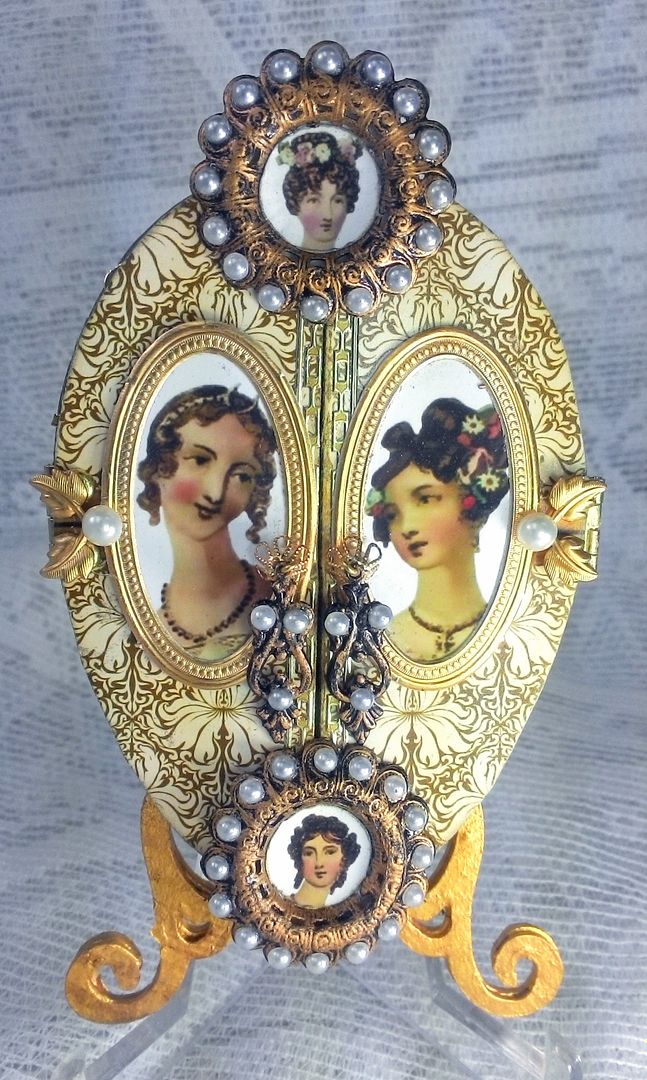
REGENCY EGG

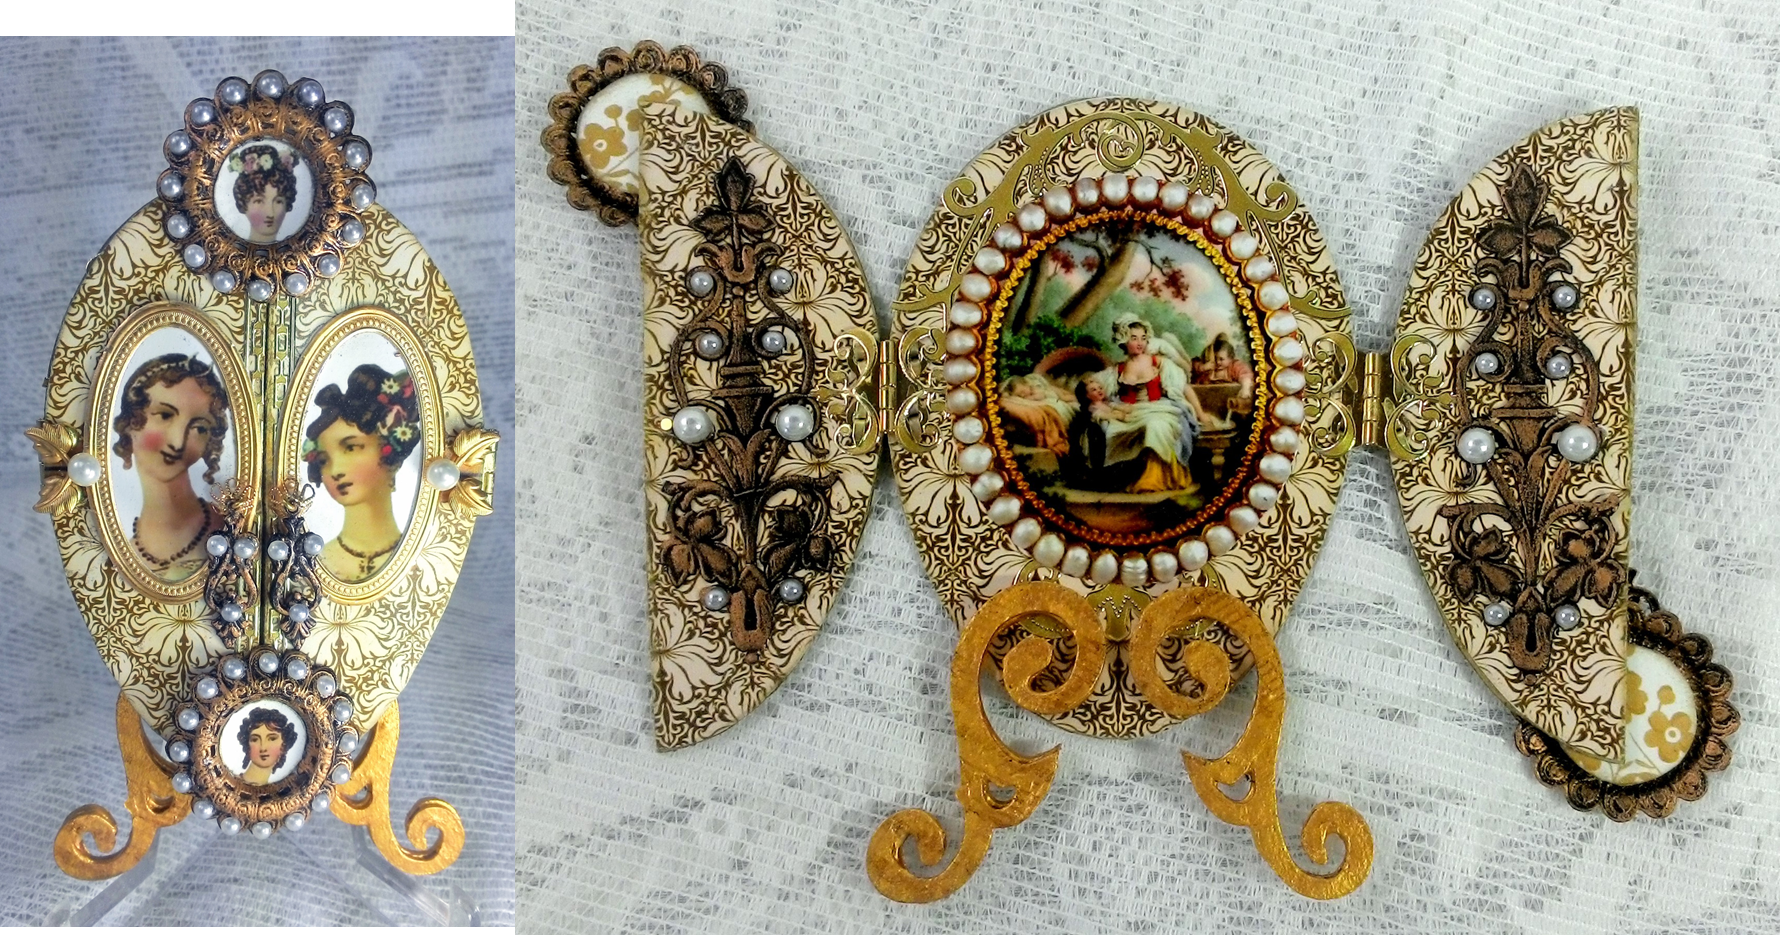
ANOTHER REGENCY EGG
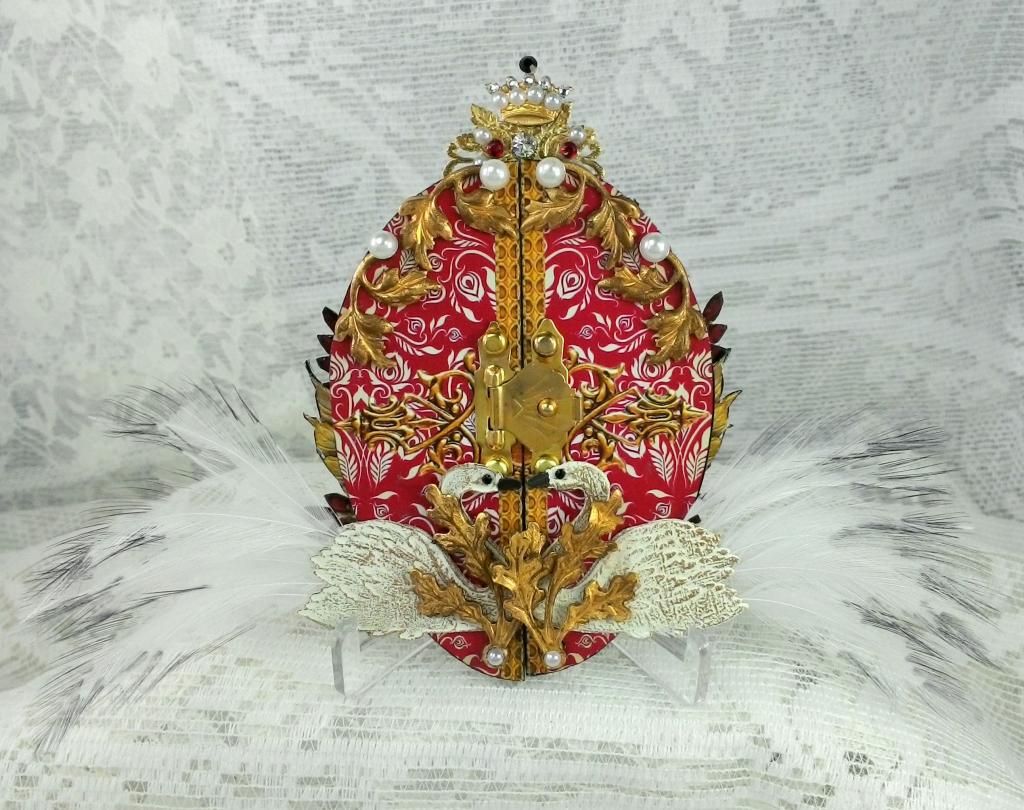
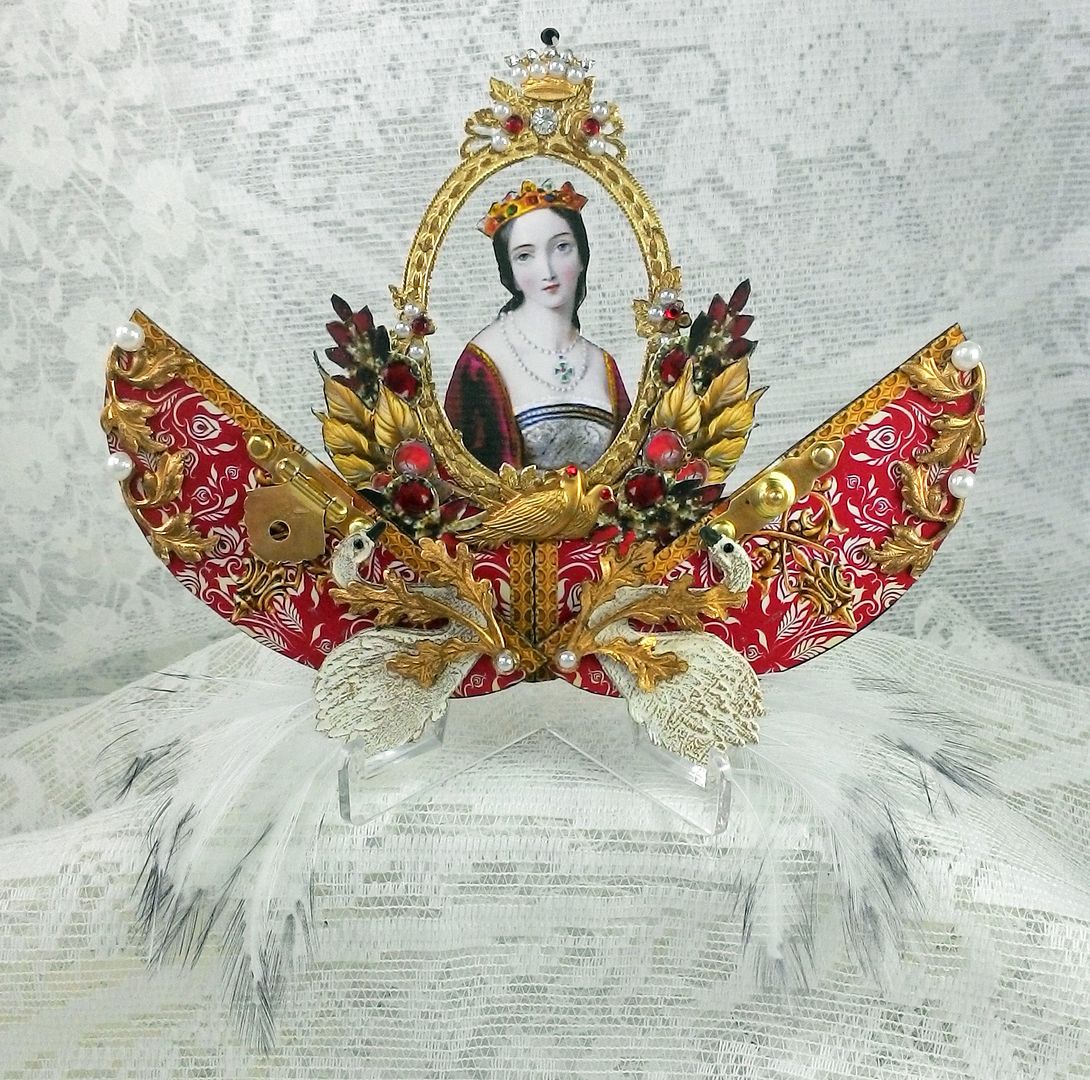
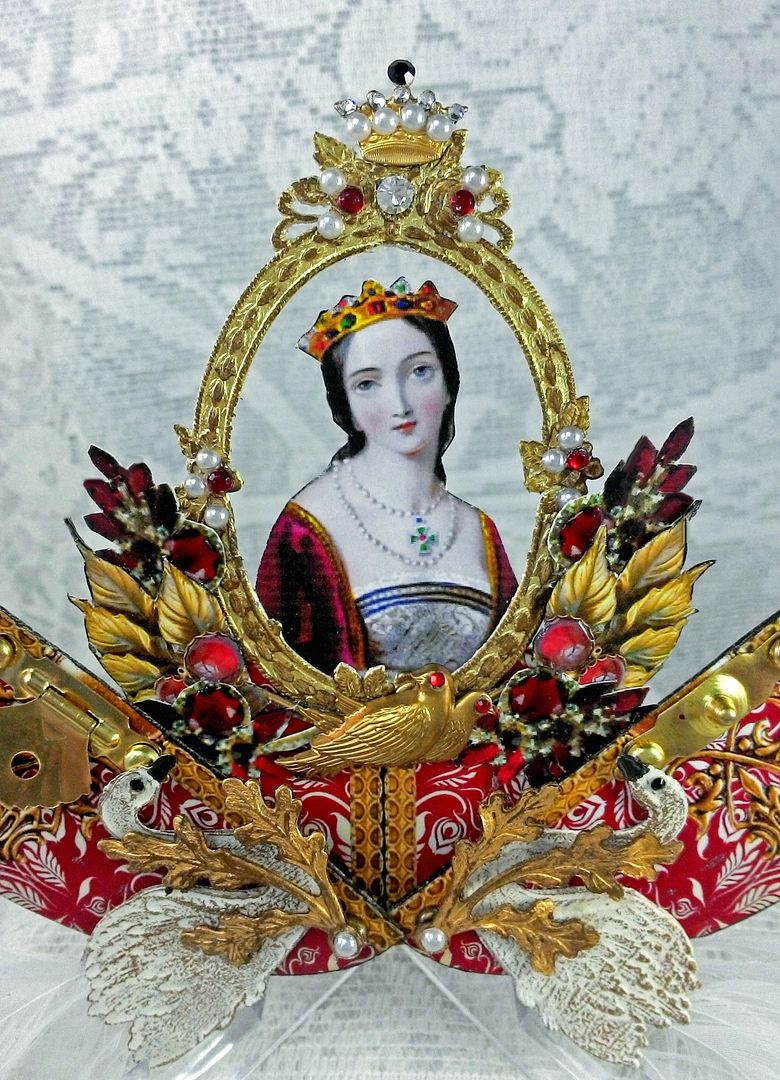
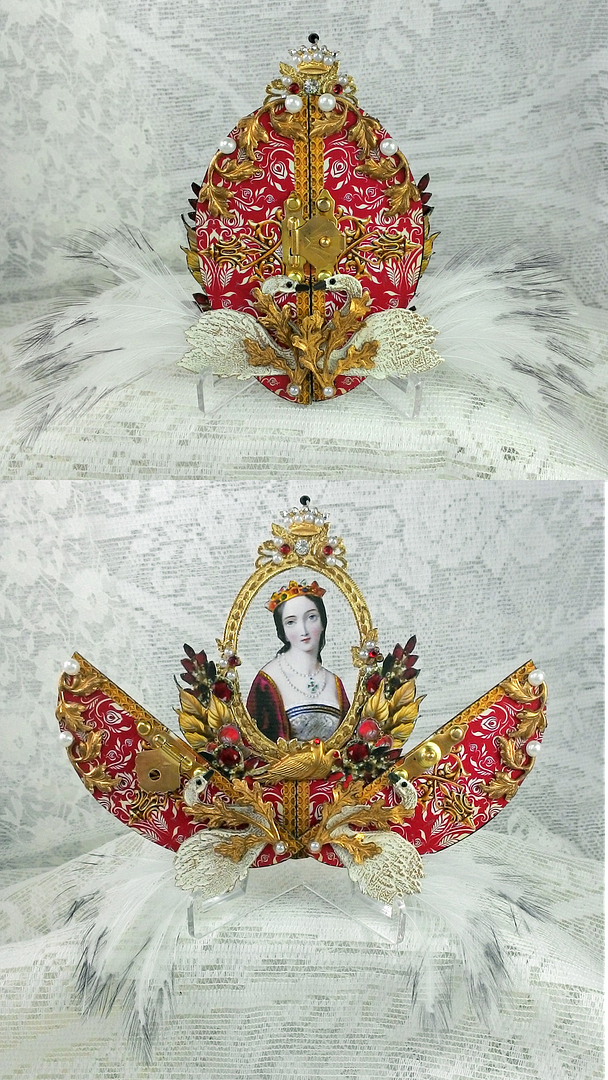
BRITISH QUEEN EGG

Making Jeweled Buttons