-->

Welcome

I love answering your questions. If you ask them in the comment section, I have no way to answer you (if you haven't heard from me, that is why). If you use the "EMAIL ME" in the left column of this page, I will be able to respond to you. You can also use it if you want to be added to my newsletter. Laura
Showing posts with label Carnival. Show all posts

Wednesday, October 5, 2016

MADAM RUE GYPSY FORTUNE TELLER - VIDEO TUTORIAL AND NEW IMAGE SETS

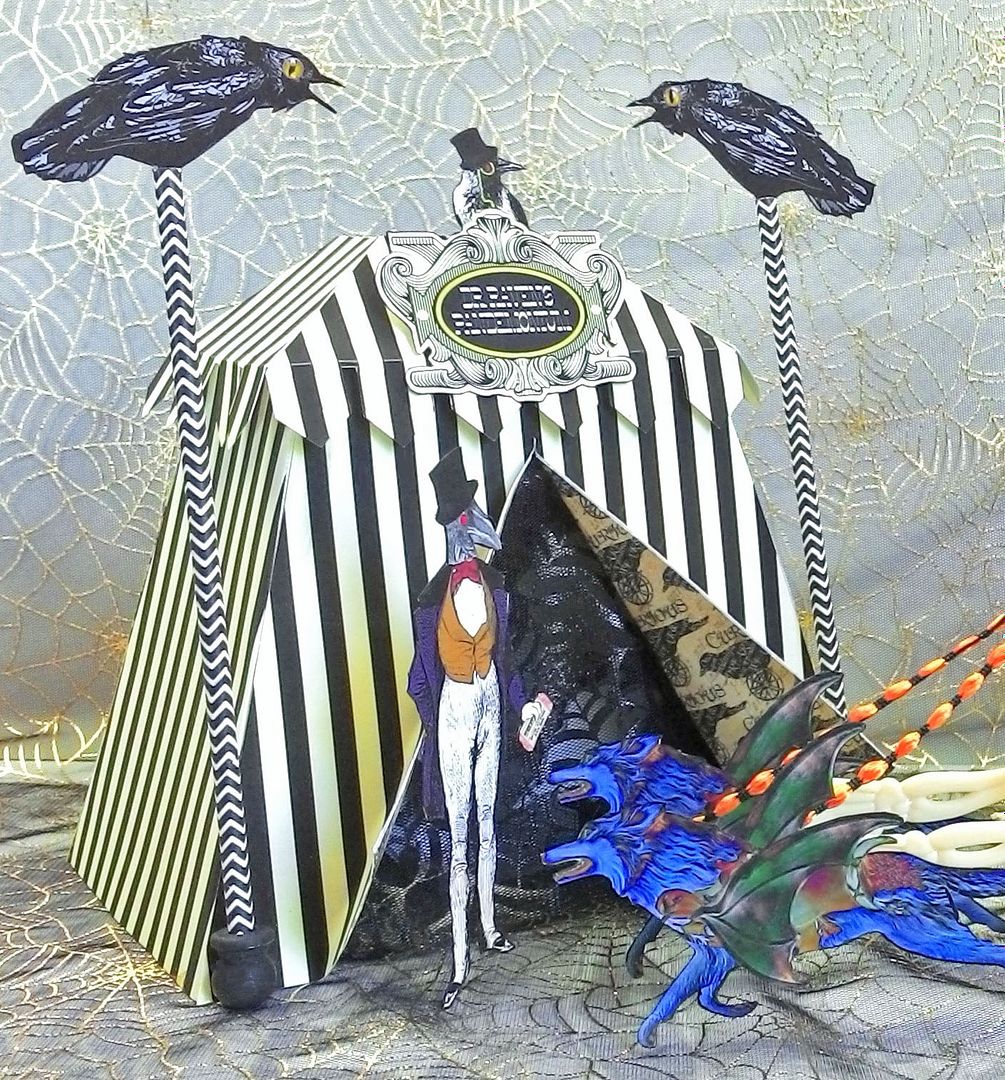
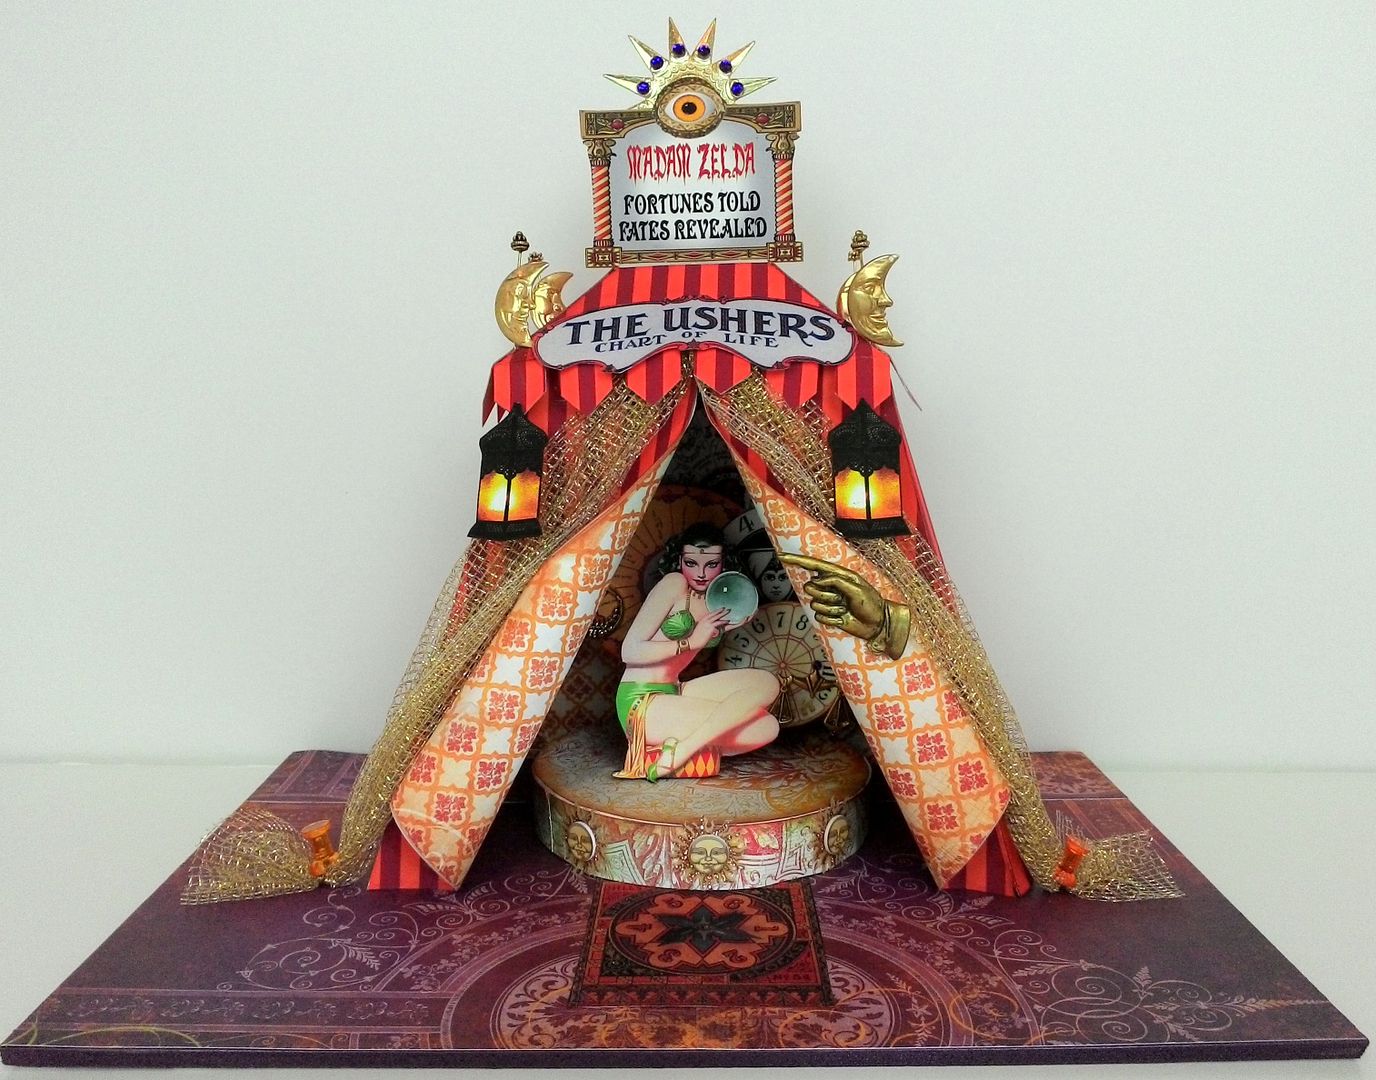
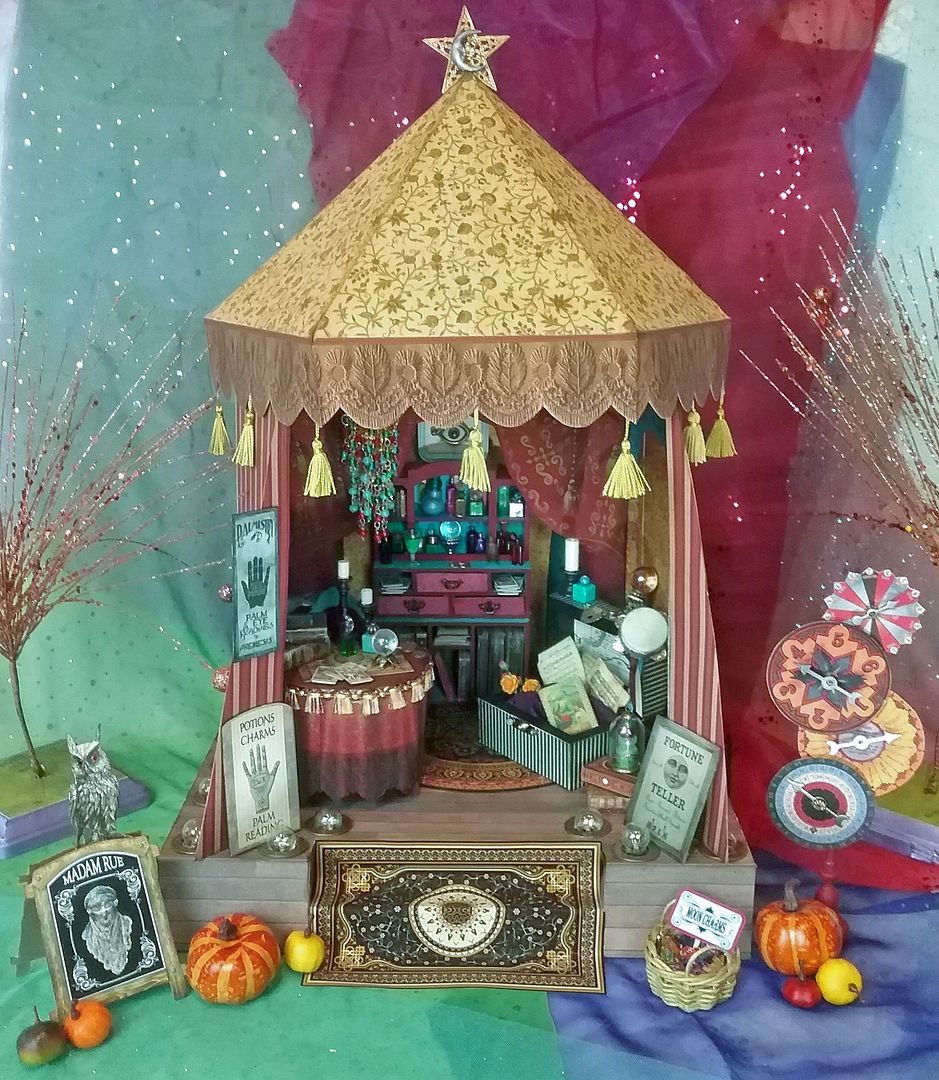
Welcome to the mystical world of Madam Rue.  She has the gift of sight, which can reveal your future and explain your past.  Only she can lift the veil of mystery and connect to the regions beyond.
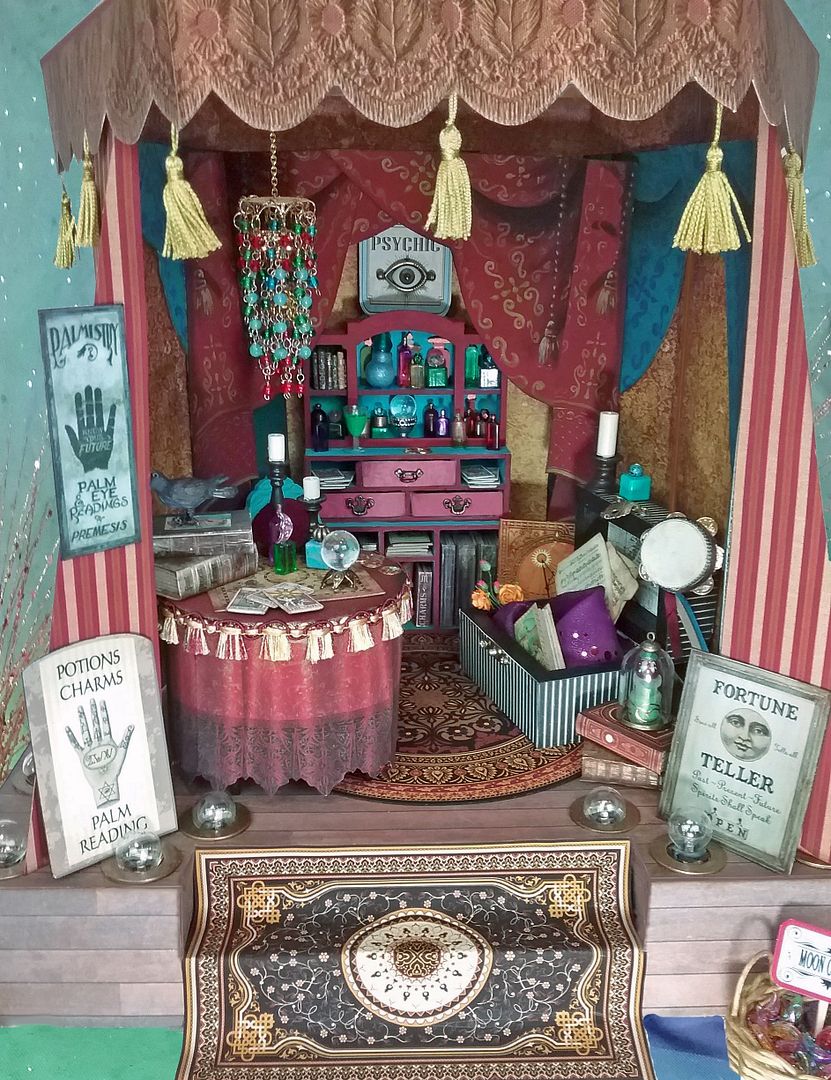
If a revelation is not what you seek but instead a charm or potion, you have come to the right place.  Is it love, fame, fortune, or perhaps release from a curse?
Or maybe the sound of her tambourine and her melodious voice drew you here.  Be not afraid; step inside, and your destiny awaits.
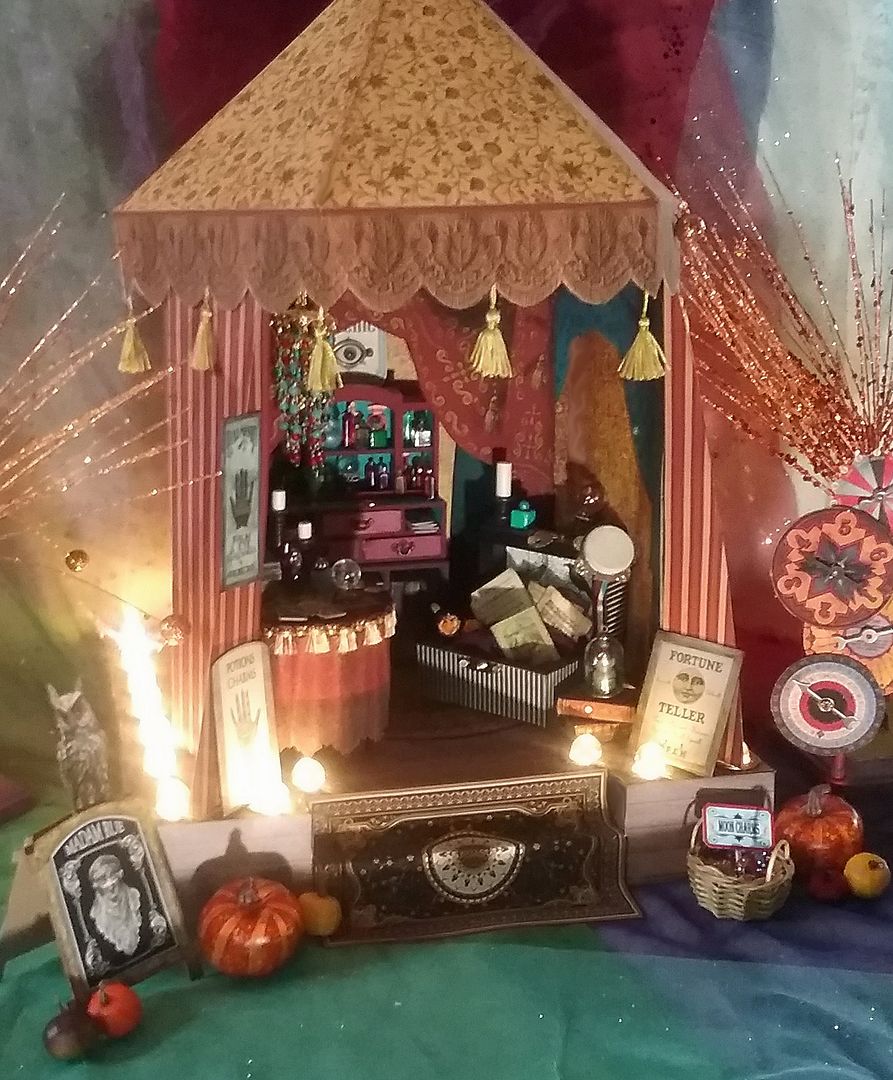
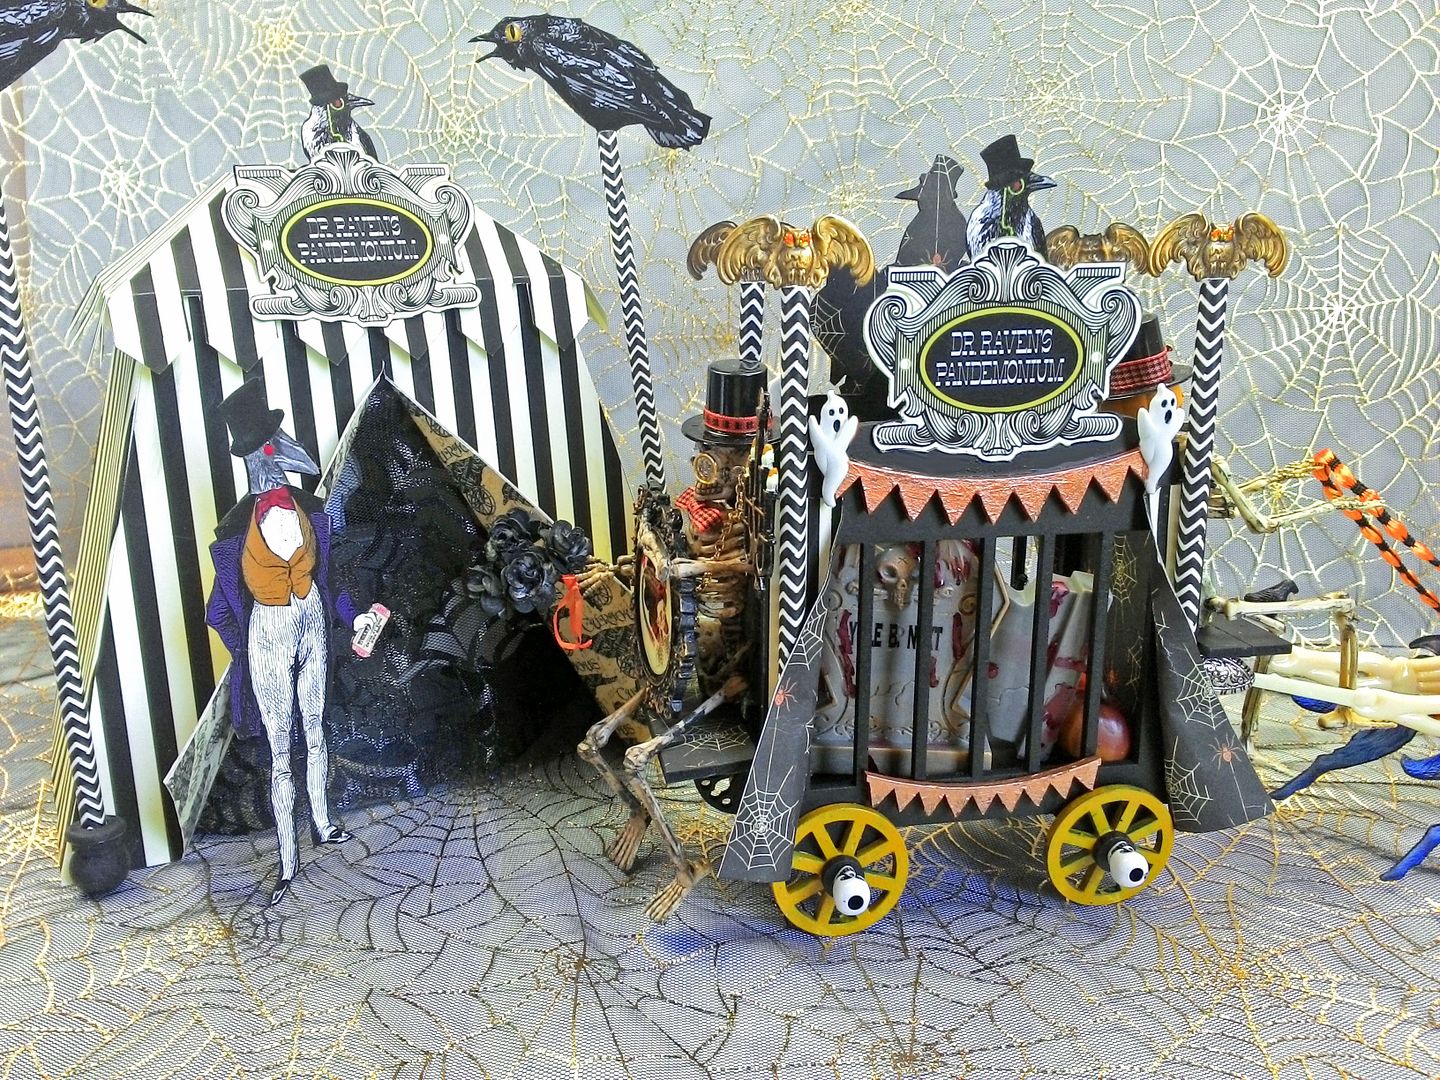
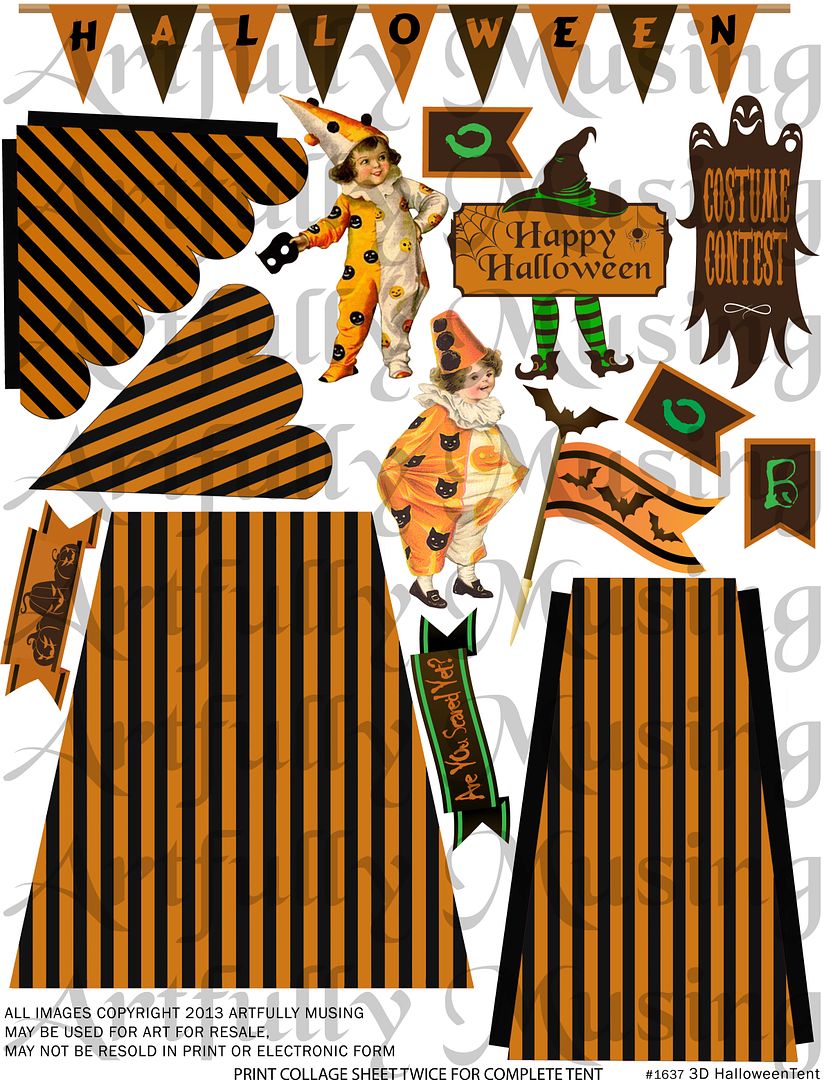
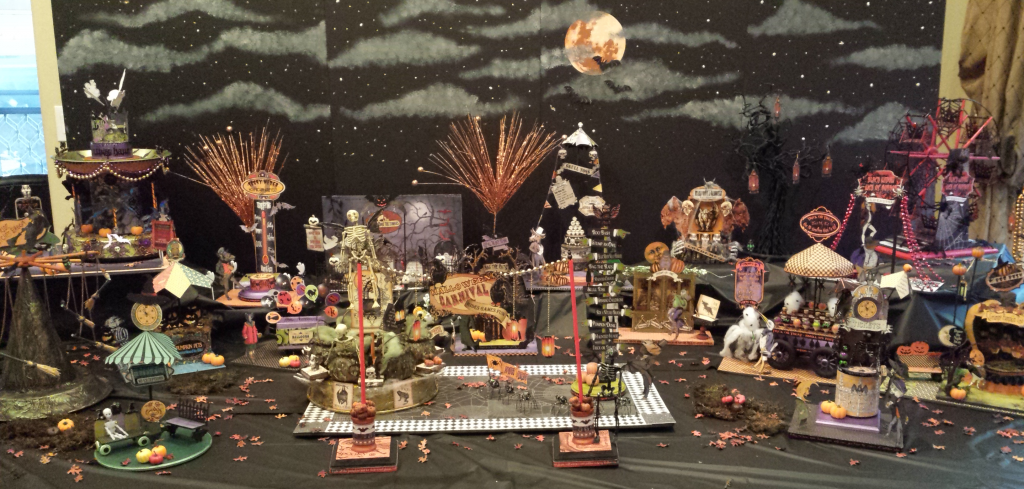
Here comes another Halloween project, although I’m thinking gypsies are never out of season. 
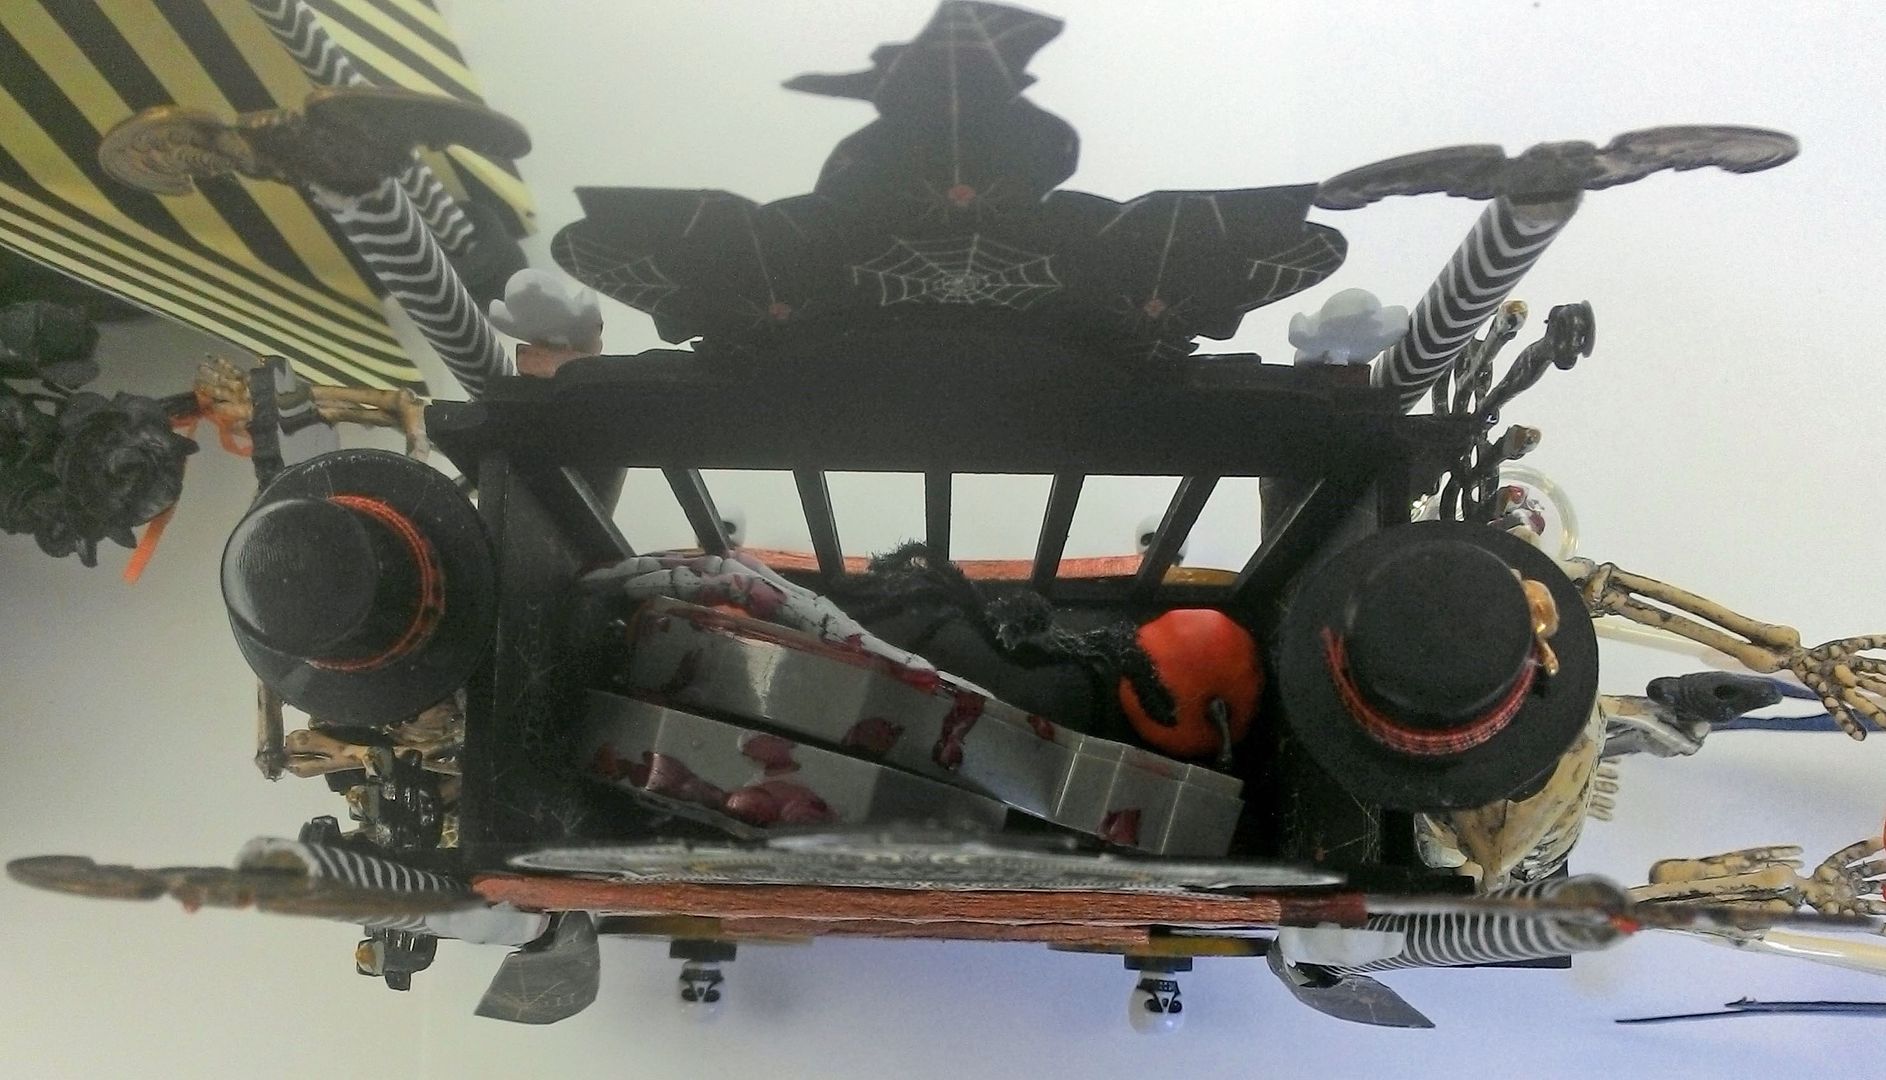
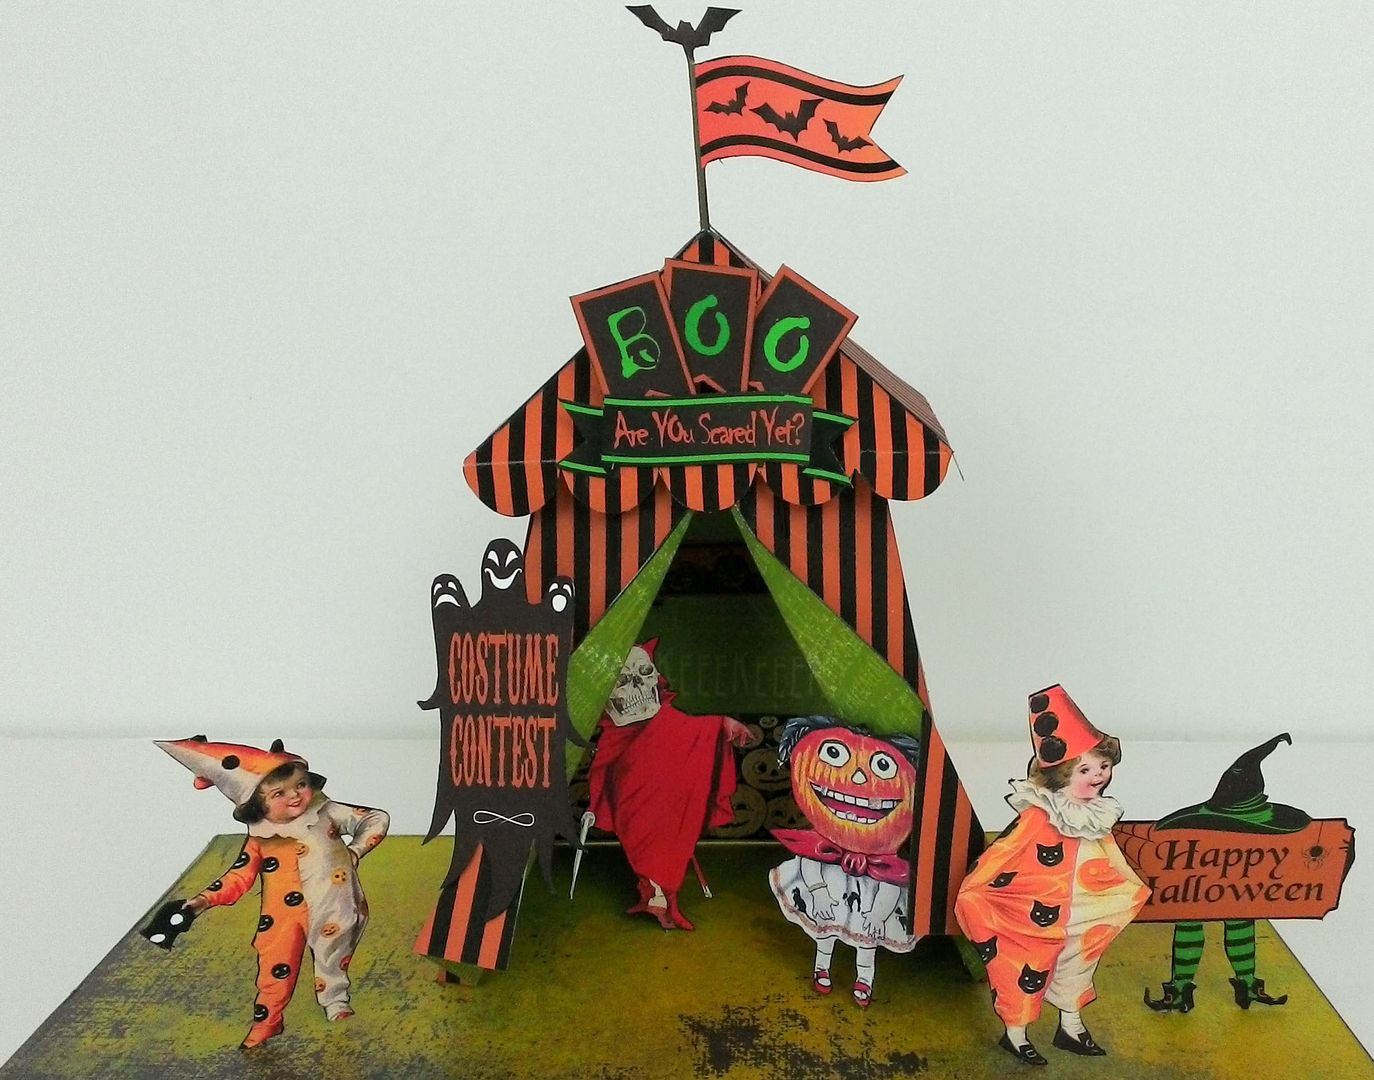
For those who have built or are building the Halloween Carnival, this is a piece you might want to add to your display. 

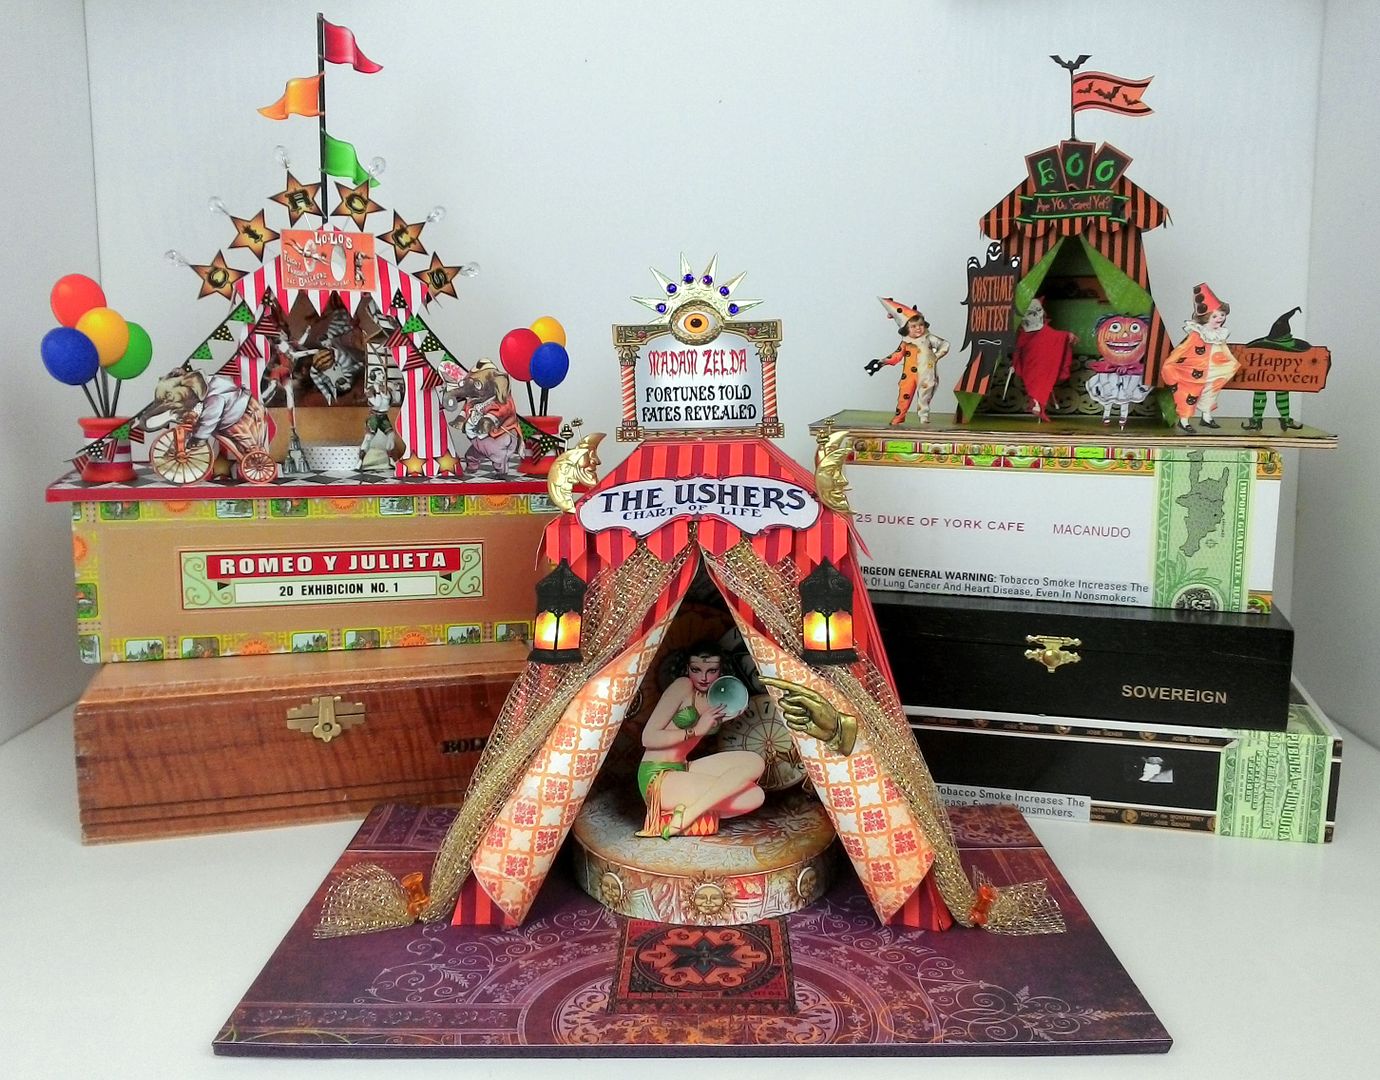
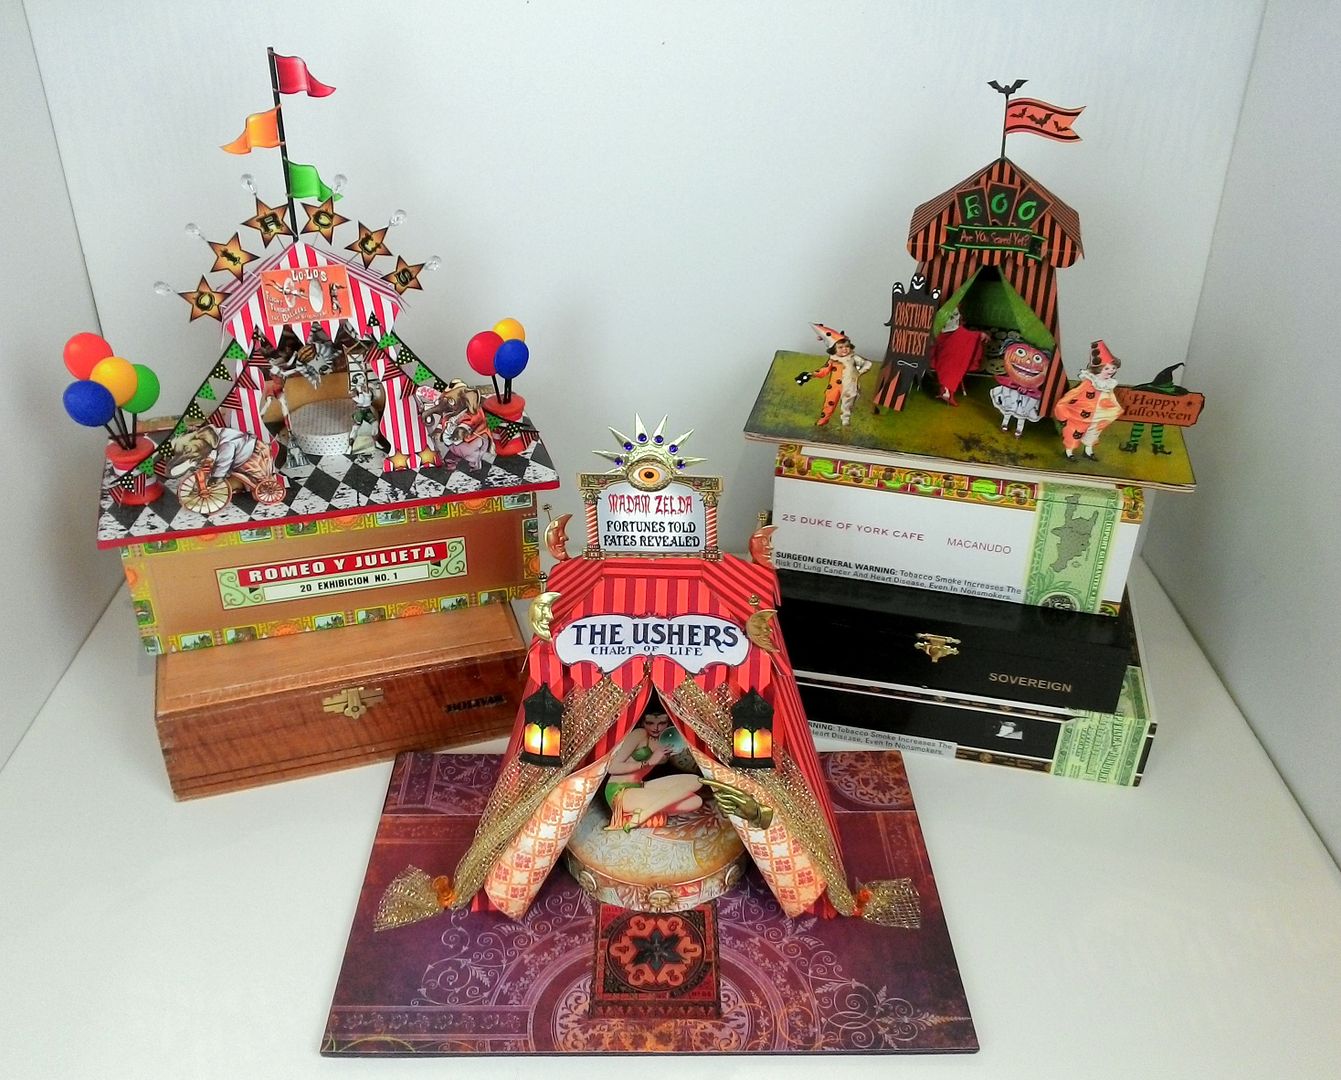
My choice of a jeweled-toned color palette comes from looking at pictures of gypsy caravans, where I noticed bright colors, fabrics, beading, fringe, and bling.
 Image result for gypsy caravan
Image result for gypsy caravan inside
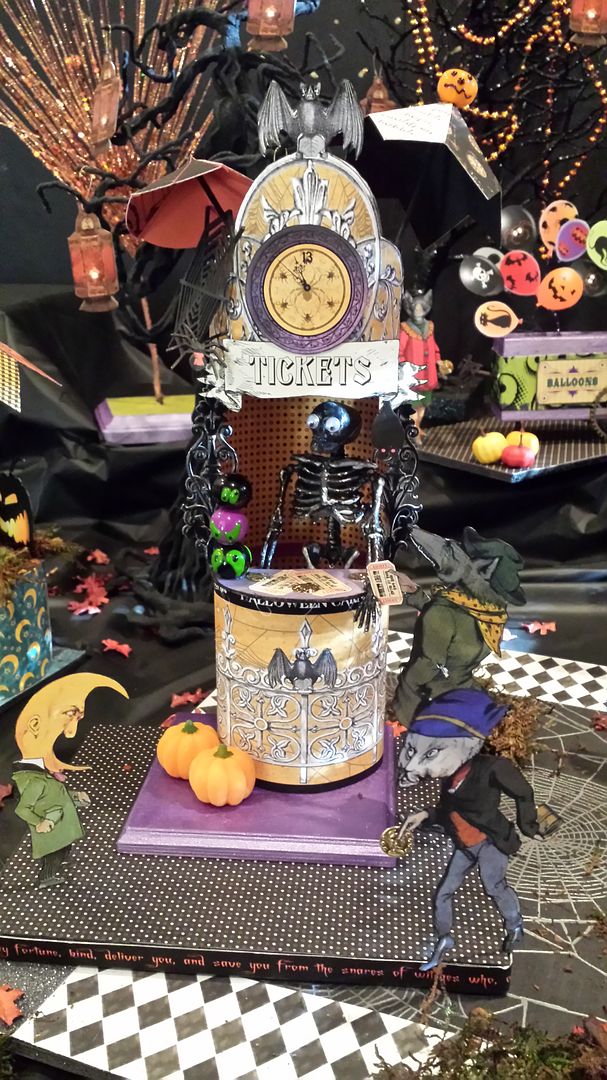
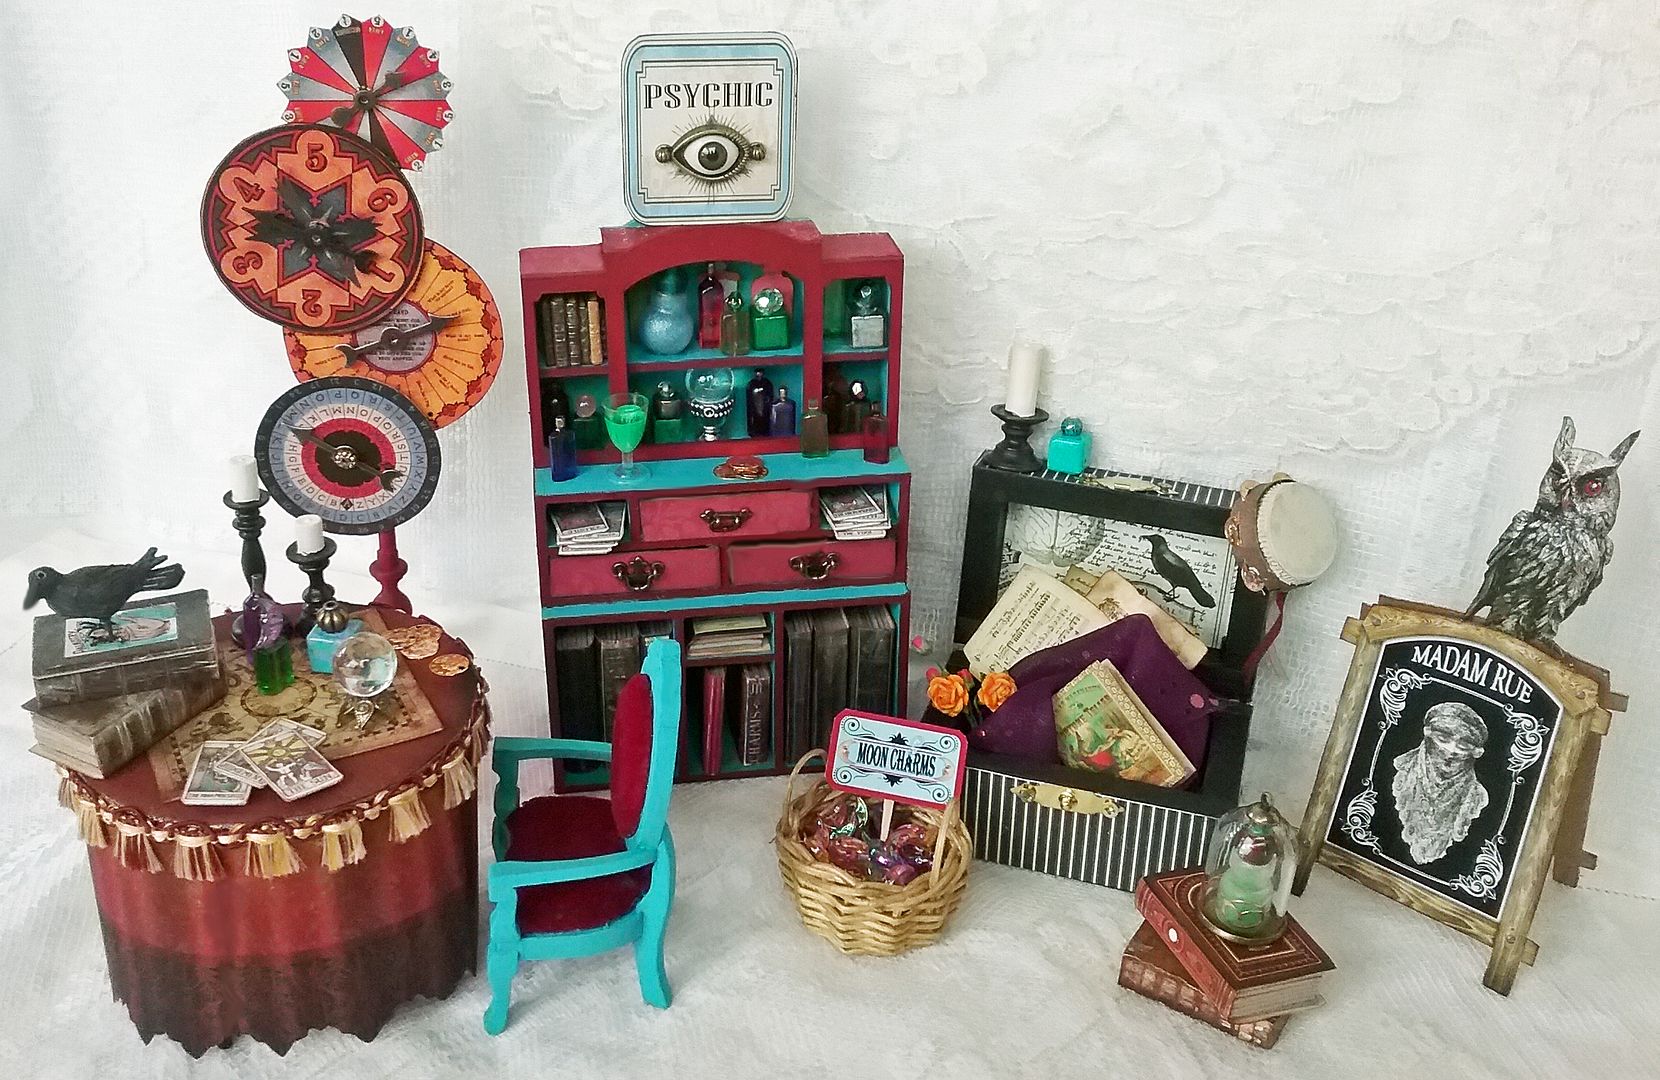
What did I love the most about this project?  I think the mini globe lighting is right at the top.  I wish I could go back to some of my older pieces and use the lighting.  It would also look cool with the Mad Scientist Lab from earlier in the summer.
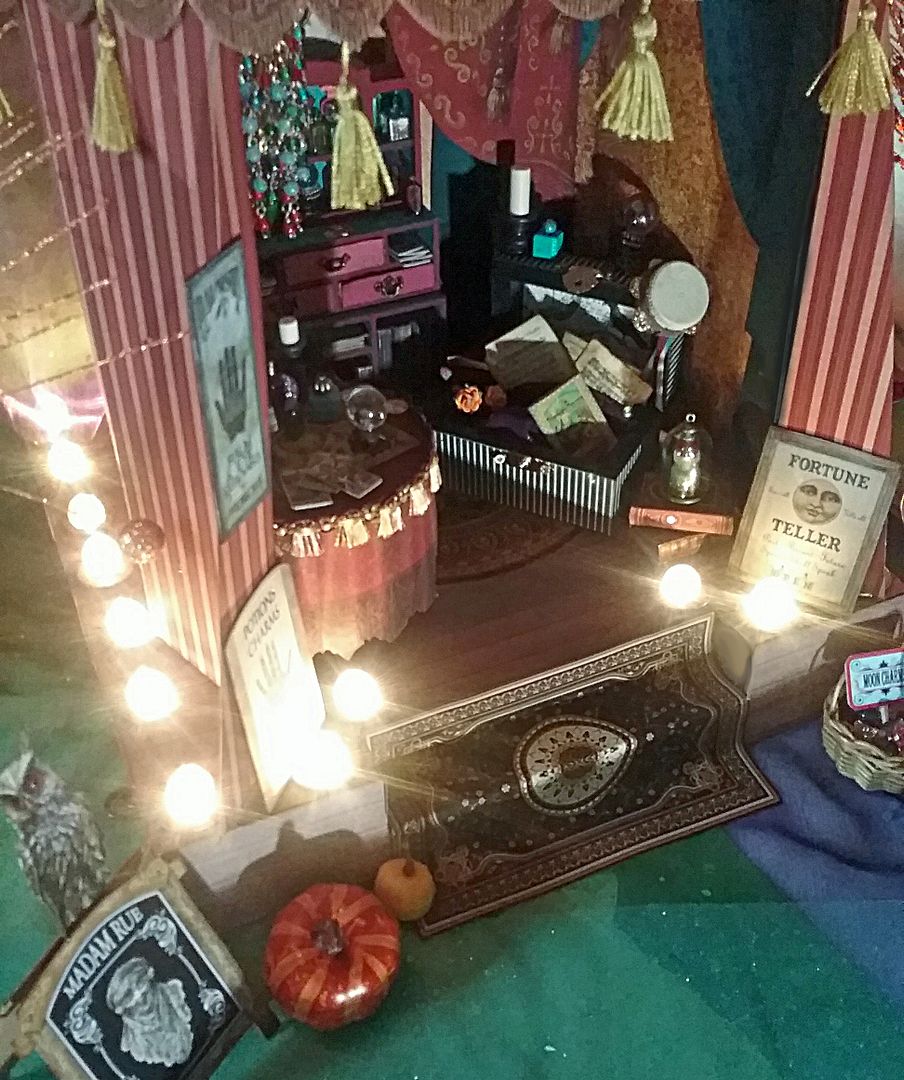
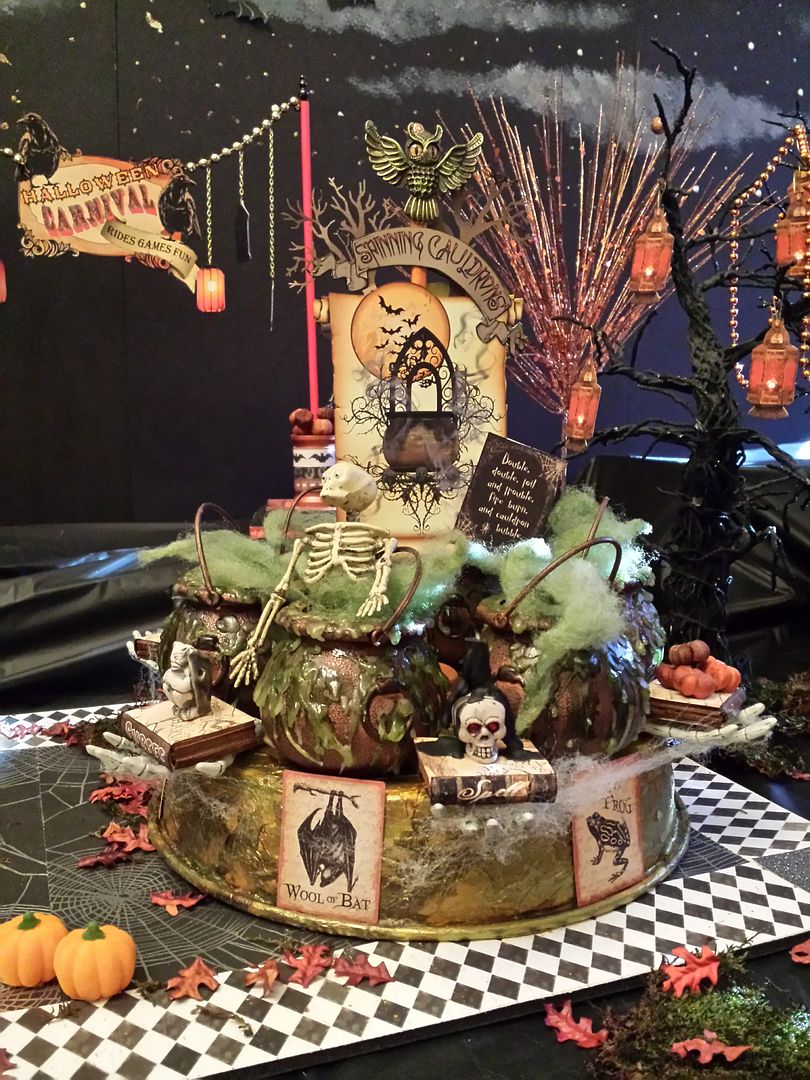
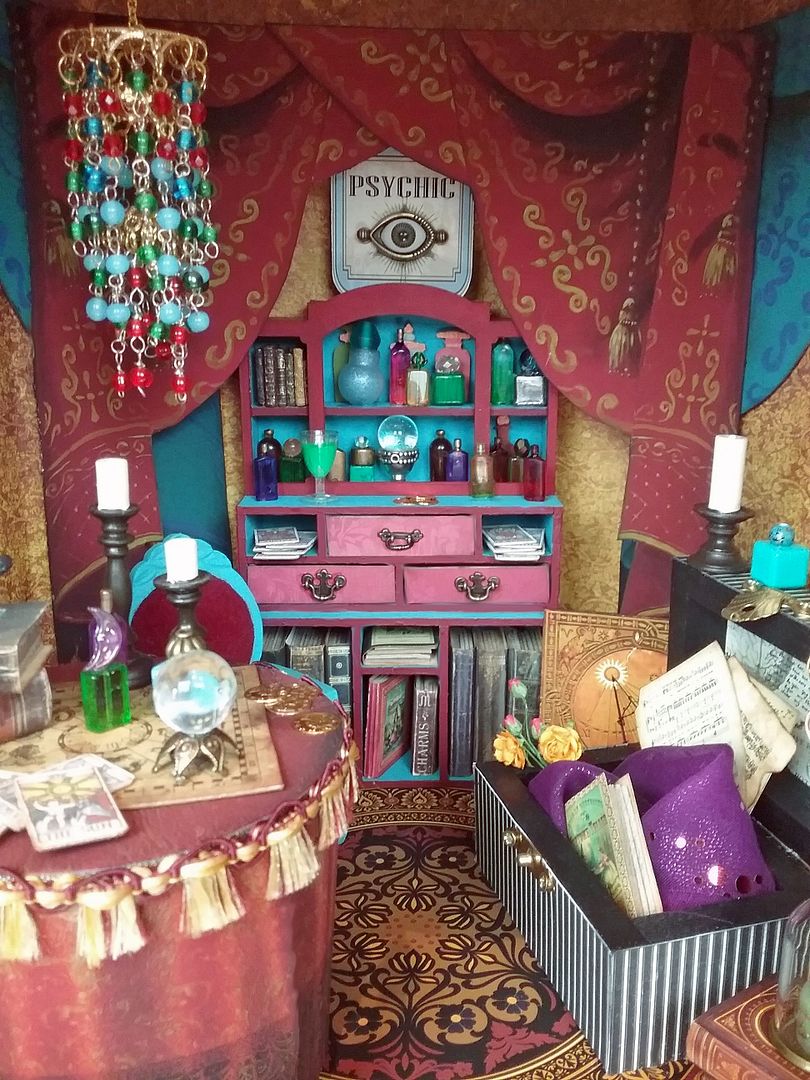
I also love the furniture made from either a kit or unfinished wood items.  My particular favorite is the 3 Panel Hutch sitting on top of a Library Table.  The furniture pieces could easily work stand-alone or as part of another one of your projects.
Don’t sweat the details; there is a video tutorial where I’ll walk you through creating Madam Rue’s tent.

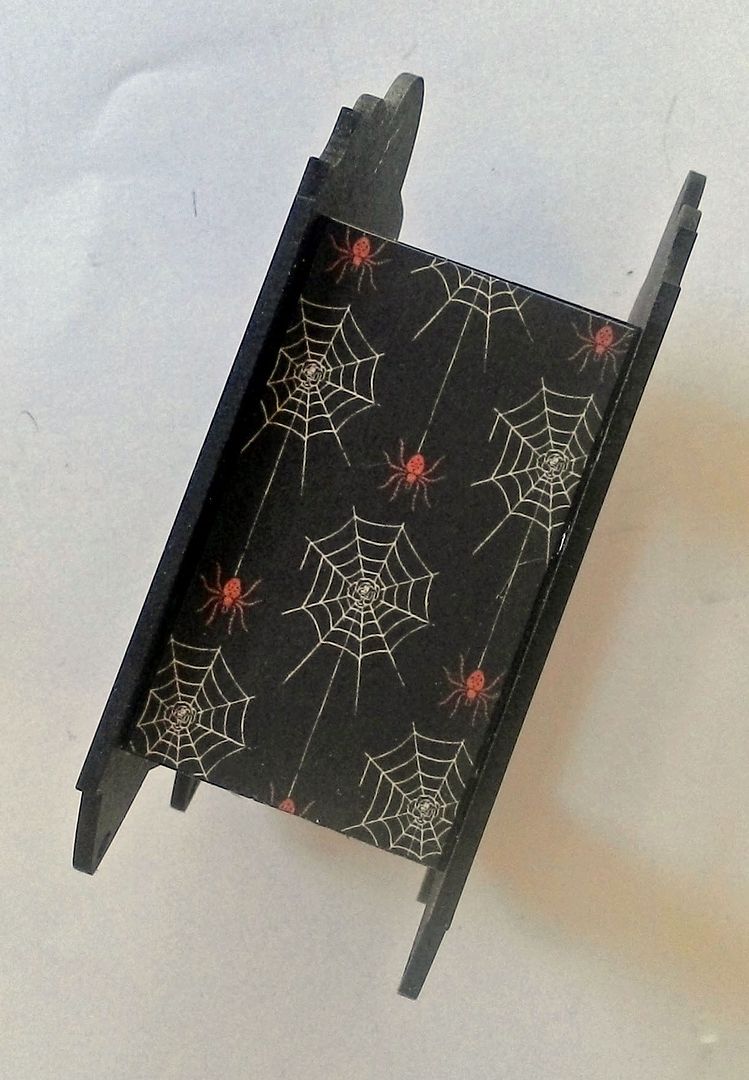
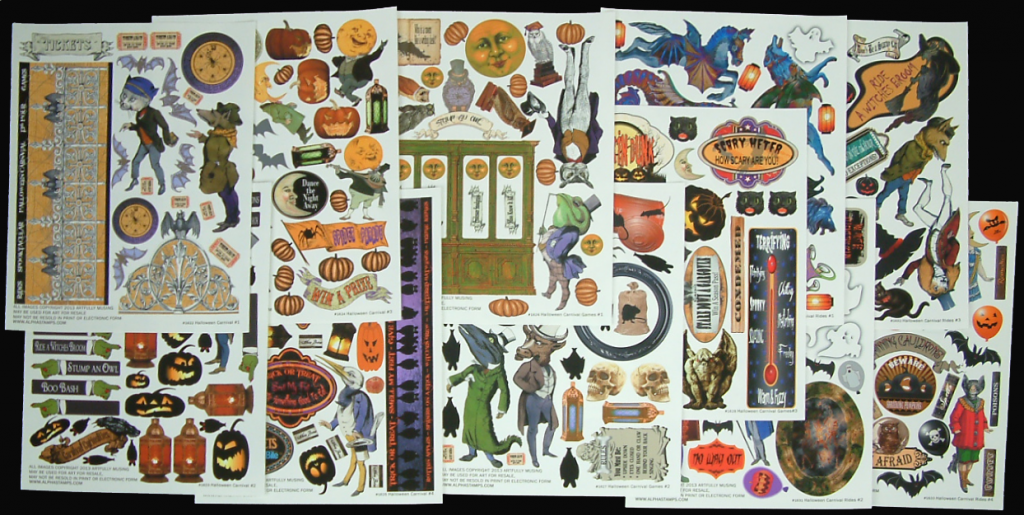
I’ve cooked up some new gypsy fortune-teller-themed images for this project.  I also used some of my Old Books & Papers Digital Image Set.

GYPSY FORTUNE TELLER COLLAGE SHEET

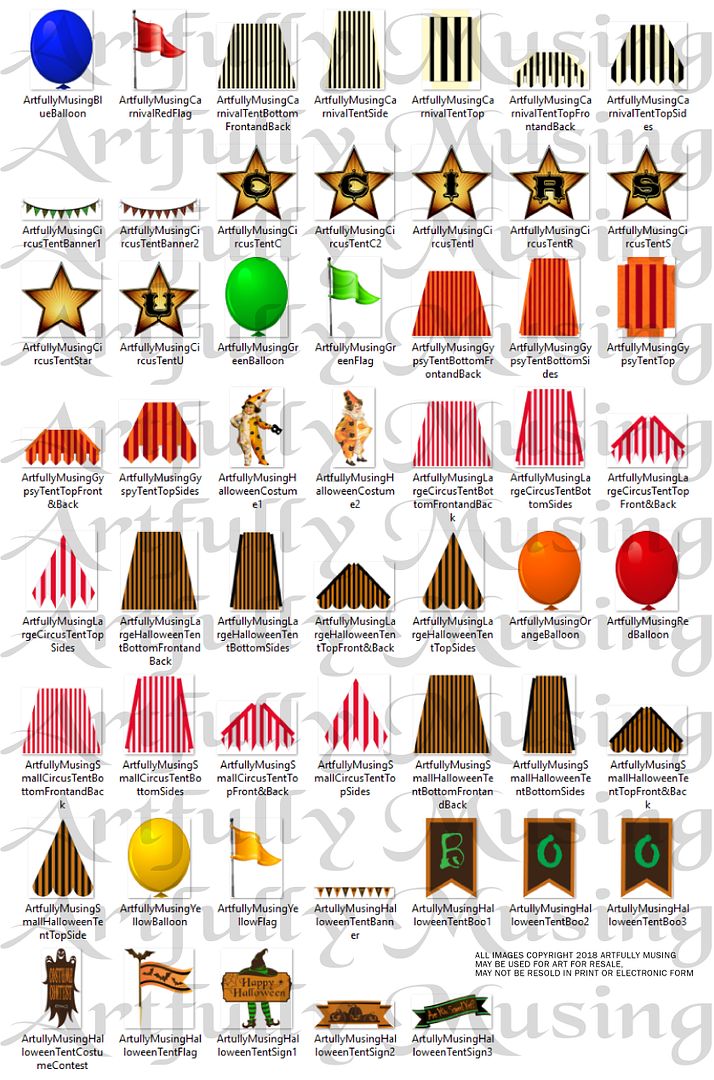
This sheet is a collection of mystical items.  There are books on palm ready, fortune telling, crystal ball reading, and more.  A seer into the beyond might need various business signs, tarot cards, and other odds and ends.

This set is a collection of mystical items that a seer into the beyond might need.  In addition, the set contains images that you can use to create and outfit a gypsy tent.  All of the images in the Gypsy Fortune Teller Collage Sheet are included, plus a tent top panel, tent side panel, and images to decorate a table, curtains, and rugs for a total of 38 images.
All of the images in the set can be re-sized for your project as they are high-resolution (300dpi) PNG formatted images.

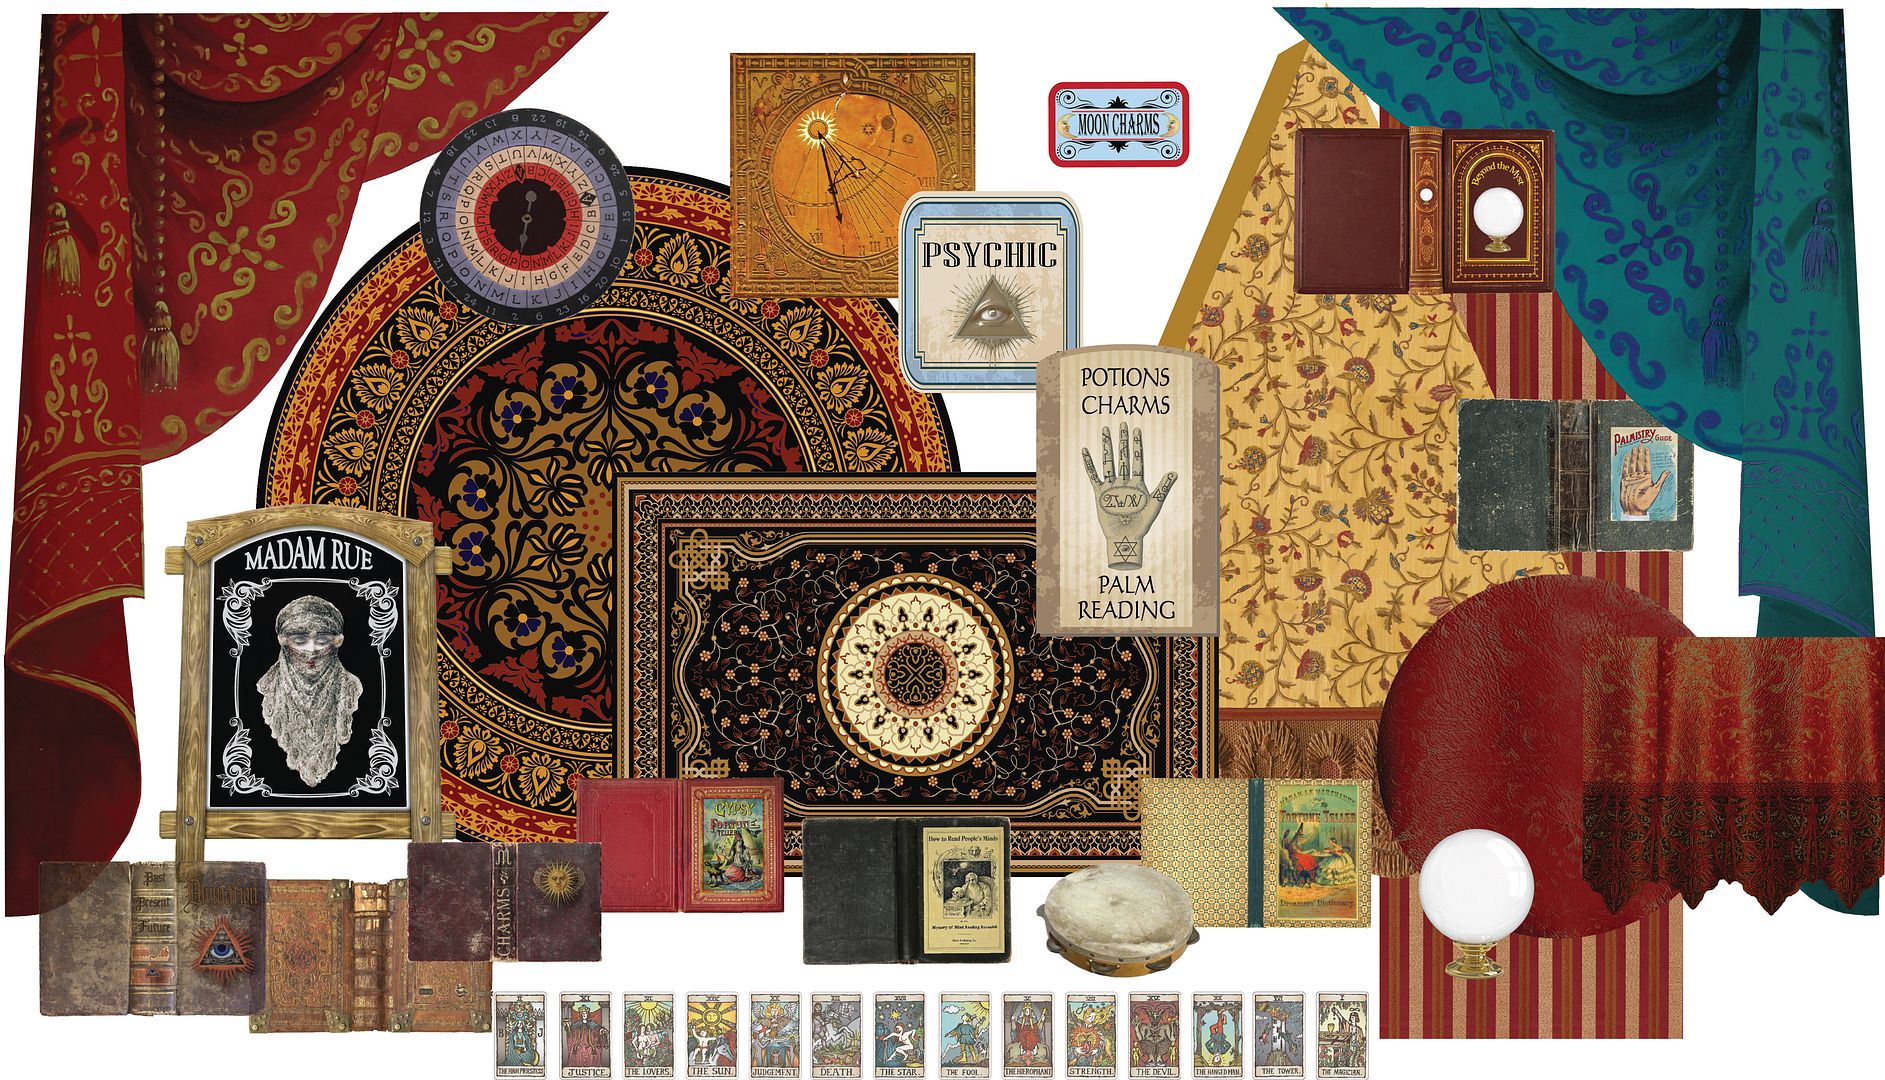
This collage sheet contains 15 different lanterns, with two of each style the lantern, for a total of 30 images.


VIDEO TUTORIAL

COLLAGE SHEETS & PAPER

Gypsy Fortune Teller #3 Collage Sheet
Games & Spinners Collage Sheet
Wood Flooring Scrapbook Paper
Double Dot Vintage Gingerbread Scrapbook Paper
Love & Lace Cherish Scrapbook Paper
Mysterious 6x6 Paper Pad
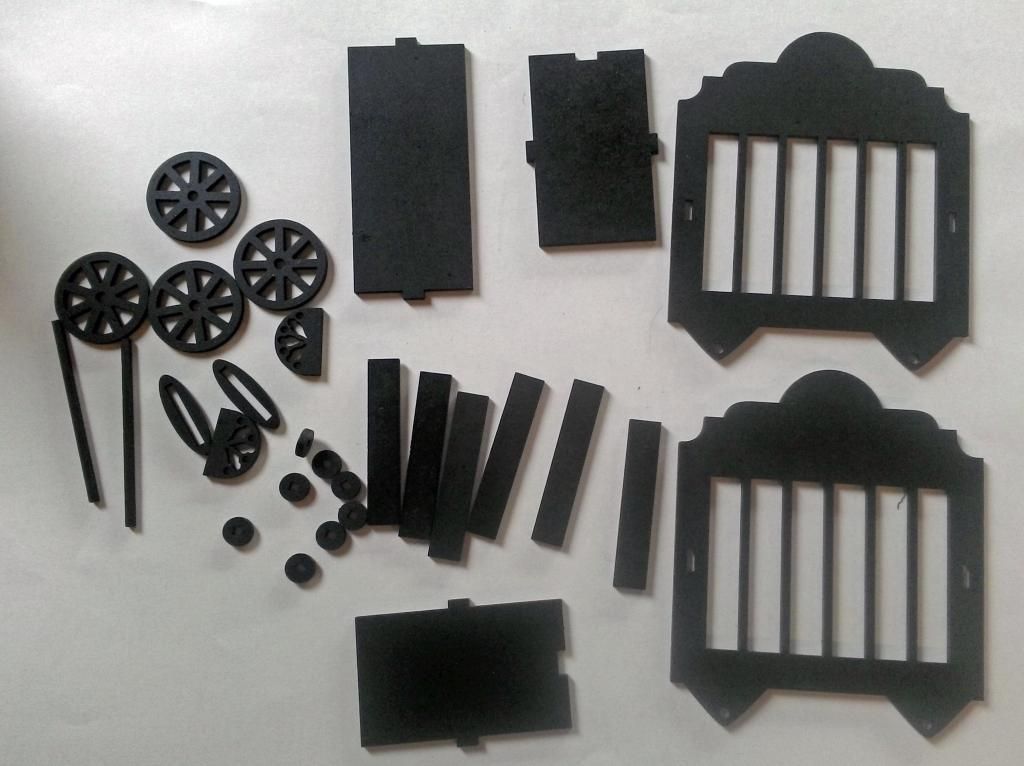
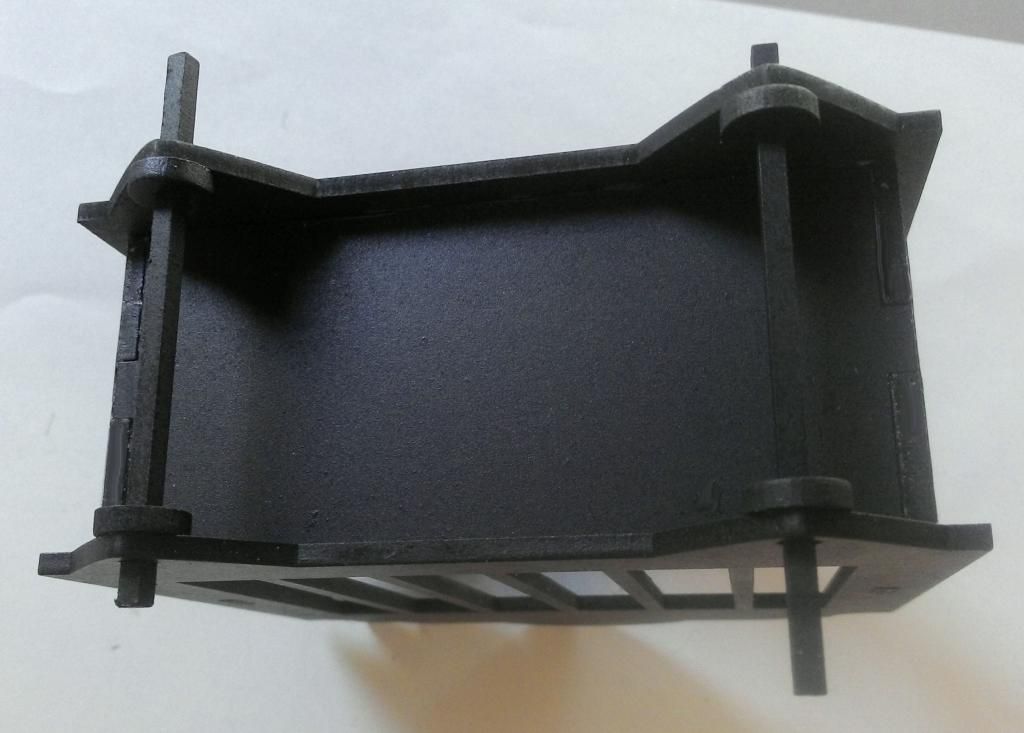
CHIPBOARD KITS, FURNITURE & LIGHTING
Platform with Steps - 1:12
3 Panel Hutch
Library Table
Unfinished Round Table – Spindle Legs
Gold Dark Sweeper Fringe
Armchair with Red Velvet Upholstery
Hinged Wood Chest with Clasp
Antique Brass Mini Fleur de Lys Handle
Antique Brass Mini Oval Drop Handle
Cleveland Vintage Mini Globe string lights
EMBELLISHMENTS
Wood Finial Chess Pawns
American Crow
Black 3-Piece Candleholder Set
Fancy Swirl Bead Caps
Mini Glass Domes - Bronze
Iridescent Crescent Moon Beads
10mm Clear Glass Marbles
Silver Cup Box Feet
Row of Old Books – Resin
Eyeball Cabs in Settings
1 Inch Fancy Gold Filigree Base
Fancy Looped Gold Filigree Base
4mm Beaded Chain – Red & Green
Miniature Wine Glasses - Set of 4
Miniature Pumpkin
Tiny Paper Roses - Orange
Mini Rose Buds - Red
1 Inch Mini Tassels - Gold
Star Trellis Filigree – Raw Brass
Silver Crescent Moon Dimensional Stickers
BOTTLES
10mm Square Glass Bottle with Lid
12x8 Amber Glass Rectangular Beads
12x8mm Green Glass Rectangular Beads
Mini Clear Resin Whiskey Bottle
Miniature Gin Bottle
Amber Resin Potions Bottle
Tiny Round Bottles
Even Tinier Bottles
PAINTS & INK
Metal Patinas – Antique Window
Metal Patinas – Weathered Copper
Metal Patinas – Treasured Heirloom
Alcohol Inks – Purple Twilight
Alcohol Inks - Indigo
Alcohol Inks – Wild Plum & Red Pepper

Saturday, August 16, 2014

Dr. Raven’s Pandemonium

Dr. Raven’s Pandemonium is one of the more popular attractions at the Halloween Carnival.
Mr. Yule B. Next, had an unfortunate accident at the Pandemonium this week.  Dr. Raven thought that in light of the goulash condition of Mr. Next, perhaps he would fit right in at the “Dodge the Zombies” game. 
Of course with a business like Dr. Raven’s it’s important to have a wagon for occasions like these.  The bars on the wagon are a must when transporting some of the more unusual oddities to his Pandemonium.
Mr. Skeletony is hitching a ride over to the Boo Bash.  He goes every night hoping to find his lost love (a purported beauty) carrying her picture and moldy roses (her favorite).
The coachman has a pet gargoyle which is sort of a nasty fellow, so the coachman keeps him in a glass dome; it’s the only way he can prevent him from biting people.

The Wagon
The wagon is as a Masonite kit which includes assembly instructions. 
It’s original purpose is for a circus wagon to hold ATCs but as soon as I saw it I knew I would take it in a spooky direction.  I thought it was a perfect addition to my Halloween Carnival.  In the picture below you can see how the top is open if you want to use it for displaying ATCs.
In addition to sharing with you how I embellished the wagon, I’ll describe the changes I made to its assembly.

I started by spray painting all of the pieces black which made the process much faster than hand painting all of the pieces.  Note in the picture below I also painted the slats from the bars.  The slats will become the benches for the coachman and Mr. Skeletony.
Before assembling the main section of the wagon I added paper to the front and back pieces.  
I approached attaching the wheels in a slightly different manner than the one described in the instructions.  I first glued the washers in place on the inside of the wagon.  I pushed the axles through the washers to make sure everything lined up as the glue dried.  The axles are loose and not glued to anything.
Next, I evened up the axles and slid the wheels onto the axles and then the washers.  The instructions call for the outside washers to be glued to the axle but not to the wheel if you want the wheels to turn (not an easy thing to do).  If you put glue in the washer hole, it gets all over the axle as you slide the axle in place.  Instead, I used skull beads to keep the wheels and washer in place.  The particular skulls I used fit snugly on the ends of the axles.
To pull the wagon I used the wolf image from the Halloween Carnival Rides #1 Collage Sheet which contains spooky carousel animals.  To support the wolves and to make them stand on their own, I glued two pieces of a wooden skewer between them.  I used two skeleton hand food picks to connect the wolves to the wagon.  The wooden skewers slide perfectly into the gap between the thumb and fingers on the pick.
At the end of the picks I attached a bead.  The purpose of the bead was to give me a larger surface area to attach the wolves to the wagon.  The beads are attached under the front bench.
To create the benches I glued together two of the pieces that were in between the wagon bars.  The kit comes with two decorative hitches to which you can attach a string to pull the wagon.  I repurposed the hitches and used them as supports for the benches by gluing them vertically under each bench.  Just gluing the benches to the front and back of the wagon was not enough to support the weight of the skeletons.
The blood on the coffin was made by dripping red candle wax.  I decided it was not dark enough so I painted it with Red Pepper Alcohol Ink.
To manipulate the skeletons into the position I wanted, I used heavy scissors to cut them at the arms, elbows and knee joints.  I then glued them into the desired position.
Mr. Skeletony’s monocal is made from a jump ring, bead, eye pin and chain.  It’s attached to his google eye using Glossy Accents.
The posts are made from chevron patterned straws.  These are heavy and stiff paper straws.  The tails of the owls fit perfectly into the straws.
The tent comes from my 3D Tent Digital Image Set which includes 4 different tents.  Some of the tents are available as collage sheetsFor a video tutorial on how to assemble the tents click here. 


You can find the tutorials and more information about building a Halloween Carnival at:

Below is the supply list and description of how and where each item was used.

Alpha Stamps Supplies Used for Dr. Raven’s Pandemonium
Dem Bones Collage Sheet - Picture of Mr. Skeltony’s lost love
Black and White Chevron Striped Straws - Posts on wagon and tent
Miniature Glass Domes - Containing skull perch and gargoyle
Masonite Circus Flag Cut-Outs - Decorating the sides of the wagon
Plastic Skeletons - The coachman & Mr. Skeletony
Jack-o-Lantern Erasers - The coachman’s head
Acrylic Top Hats - Large - The coachman & Mr. Skeletony’s hats
Ceramic Raven Beads - Small - Sitting on the coachman’s knee
Brass Skull & Cross Bones Charm - On the coachman’s hat
Spooky Ghost Buttons - On the sides of the banners
An Eerie Tale Run & Hide Scrapbook Paper - Spider side paper used to decorate the wagon
Brass Owl Stampings - Used at the top of the chevron straws
Plastic Tombstone Boxes - Inside the wagon
Mini Ceramic Gargoyle Beads - The coachman’s pet in the glass dome
Small Resin Skull Beads - Perch for the coachman’s pet gargoyle
Ceramic Raven Beads - Small - Sitting on the coachman’s knee
Small Plastic Pumpkins Inside the wagon
Skeleton Hand Food Picks - Used to attach the wolves to the wagon
Plastic Skeleton Hand - Inside the wagon
40/30 Fancy Oval Settings - Black - Frame for Mr. Skeletony’s lost love
Antique Candelabra Charm - On the sides of the wagon
Tiny Paper Roses - Mr. Skeletony’s flowers
Mini Spiders - Inside the wagon
Small Wooden Finials - Used to attach the straw posts to the tent
Large Fancy Oval Beads - Used to attach the wolves to the wagon
Black & Orange Mini Gingham Check Ribbon - Used on the coachman’s hat and Mr. Skeletony’s bow tie.
Halloween Spider Leg Ribbon - Used on Mr. Skeletony’s hat
Thin Orange/Black Stitched Ribbon - Reins for the wolves
Metal Patinas - Faded Pickup (Topaz) - Used to paint wheels and candelabra flames
Metal Patinas - Retro Highway (Onyx) - Used to paint candelabra (first coat)
Gilders Paste - Inca Gold - Used to color candelabra (second coat)
Alcohol Inks - Winter Set (Red Pepper) - Used to paint wax to simulate blood

Wednesday, October 23, 2013

NEW 3D Tent Collage Sheets & Digital Image Set - Plus a Video Tutorial

Step right up to check out my new 3D Tent Collage Sheets and Digital Image Set available on Etsy (see links below).  On offer are Halloween, circus, gypsy and carnival tents.  These tents work great for your art project or decorations for a party.  For those of you building a Halloween Carnival, imagine adding a few tents to your carnival display.
COLLAGE SHEETS
One collage sheet features a Circus Tent.  Click on the image below to purchase the sheet.

Printing the sheet twice gives you all of the pieces needed to construct the tent.
The other collage sheet features a Halloween Tent.  Click on the image below to purchase the sheet.
Printing the sheet twice gives you all of the pieces needed to construct the tent.
Digital image sets are a great option in that they allow you to easily resize individual images.  You can also print only the images you need.  The image set includes:
  • All of the images on the Circus sheet plus a larger version of the circus tent
  • All of the images on the Halloween sheet plus a larger version f the Halloween tent
  • A large gypsy tent (pictured below)
  • A large Carnival tent (you’ll see this one in the video tutorial)
Click on the image below to purchase the image set.


 GYPSY TENT
TENT TUTORIAL
In this tutorial, I’ll show you how to assemble the 3D paper tents and give you all kinds of ideas on how to use the pieces.  I’ll show you how to create a different opening for the tents, ideas on how to use just the tops of the tents and how to use the tent pieces as a pattern to create tents with other designs.

Wednesday, September 4, 2013

HALLOWEEN CARNIVAL EVENT – IS HERE!!!

The Halloween Carnival has finally come to town and you are all invited.  There is something for everyone but first, you’ll need a ticket.  Mr. Bones is working the booth tonight and he’ll be happy to help you.  Once you have your ticket you’ll want to check out all the carnival has to offer; lots of games, rides and of course sweet treats to tempt you.
Next, you’ll need to dig out your Halloween stash plus your tin cans, pie pans, cake pans, Tinker Toys, wooden skewers, etc.; yes, we are doing some serious upcycling with this project.  I’m going to throw lots of ideas at you to help bring the carnival to your town. 
 
The great thing about this project is that you can tackle as many pieces as you like with whatever resources and time you have and add to your carnival over the years.  This is a project your whole family can enjoy.

For the event, I’ve created 12 new Carnival Themed collage sheets or if you prefer there are 3 digital kits which contain all of the collage sheet images plus more. (click on the links below to see the details and to purchase the collage sheets or digital image sets.).  

COLLAGE SHEETS

DIGITAL IMAGE SETS

I also have a free collage sheet for you to download (you’ll find it at the bottom of this post).  


OTHER IMPORTANT INFORMATION
The tutorials, collage sheets, and free images will not go away after October 31st.  They will continue to be available for as long as I have a blog so no worries.

Since this carnival is so large and there were some thing’s that didn’t make it into the tutorials, I will be showcasing individual pieces here on the blog throughout September plus the ones not covered in the tutorials. 

Questions – If you have any questions use the Email Me button in the right-hand column of the blog (it's the raven sitting on the ball) so that I have a way to contact you to answer your questions. 

If you are new to my blog and are into Witches Apothecaries, below is the link to last year’s tutorials for that event.

VIDEO  TUTORIAL 1
In this the video I cover making an Entrance Sign, Directory Sign, Ticket Booth, Pumpkin Pets Booth (guaranteed to bite), Boo Bash (where you can dance the night away) and the Trick or Treat Smell My Feet Give Me Something Good to Eat concession stand).

Below is a panel used to make the spider web umbrella I used on the Ticket Booth.  To download the panel, click on the image to expand it, right-click and select Save As.  Print 5 panels and assemble using the orange tab.

VIDEO TUTORIAL 2
This video is all about carnival games.  Included are; Scary Meter, Bat the Rats, Stump the Owl, Stare Down a Gargoyle, and Dodge the Zombies.  

VIDEO TUTORIAL 3
Video three covers carnival rides.  Included are; Haunted Carnival Carousel, Spinning Cauldrons, Ride a Witches Broom and the Black Widow Web of Horror Ferris Wheel.
Click here to watch the Tissue Paper Texture Tutorial as referenced in the video.
Haunted Carousel Pole Placement Template
To download the template, click on the image to expand it, right-click and select Save As.

Round Tinker Toy Pieces for the Ferris Wheel
I know that some of you are having trouble finding sets of Tinker Toys.  Two round pieces with the pre-drilled holes are the important parts.  I bought my set on Ebay.  


FREE COLLAGE SHEET - HALLOWEEN BORDERS
Below is a collage sheet which contains the vintage Halloween poem borders I used on many of the pieces.  Feel free to use it in your art.  To download the sheet, click on the image to expand it, right-click and select Save As.
I hope you have lots of fun creating your carnival pieces and while you are busy I will be working on more Halloween inspired art to share with you over the next two months!