-->

Welcome

I love answering your questions. If you ask them in the comment section, I have no way to answer you (if you haven't heard from me, that is why). If you use the "EMAIL ME" in the left column of this page, I will be able to respond to you. You can also use it if you want to be added to my newsletter. Laura

Wednesday, February 19, 2014

Secret Rendezvous or Maybe Not So Secret

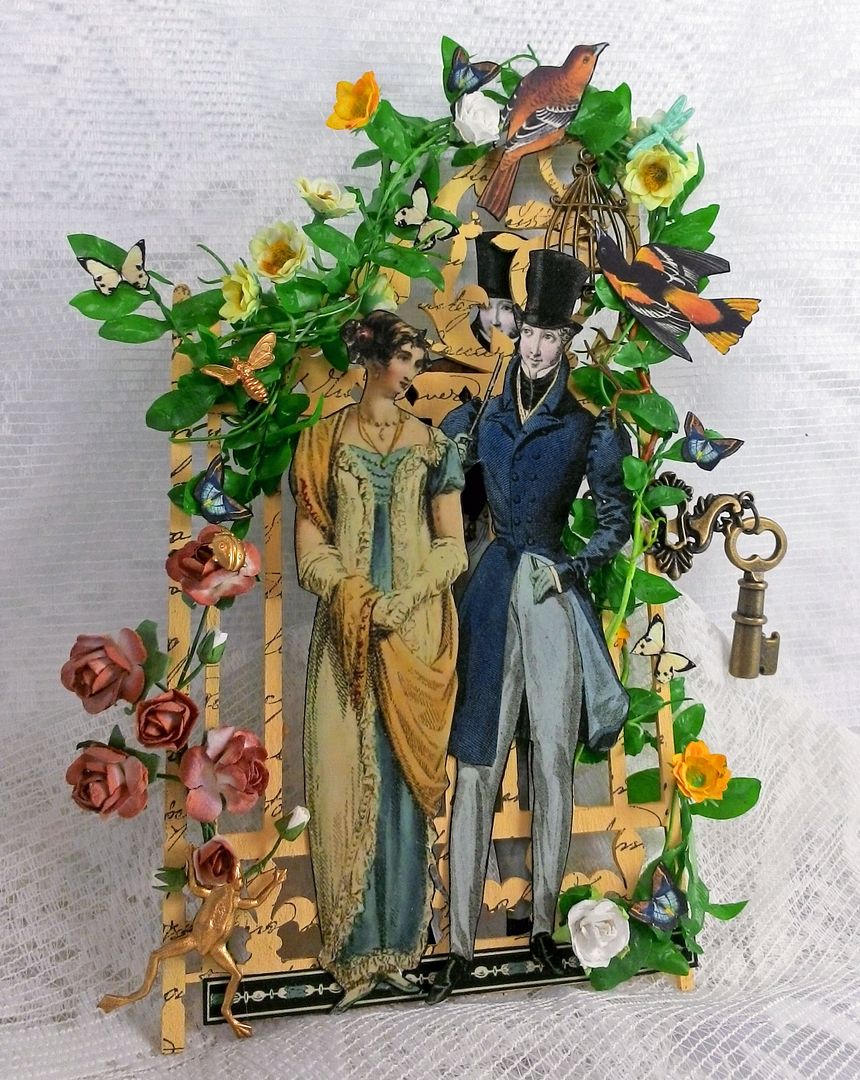
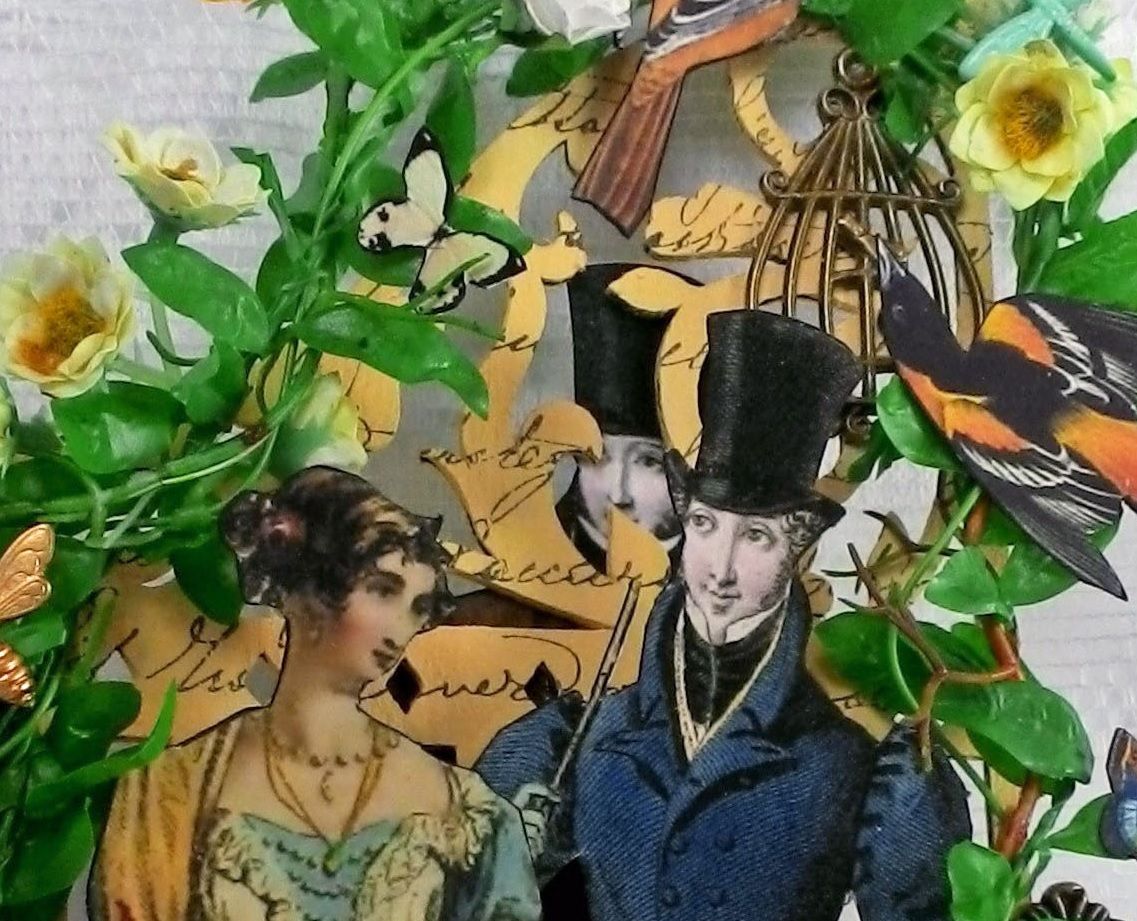
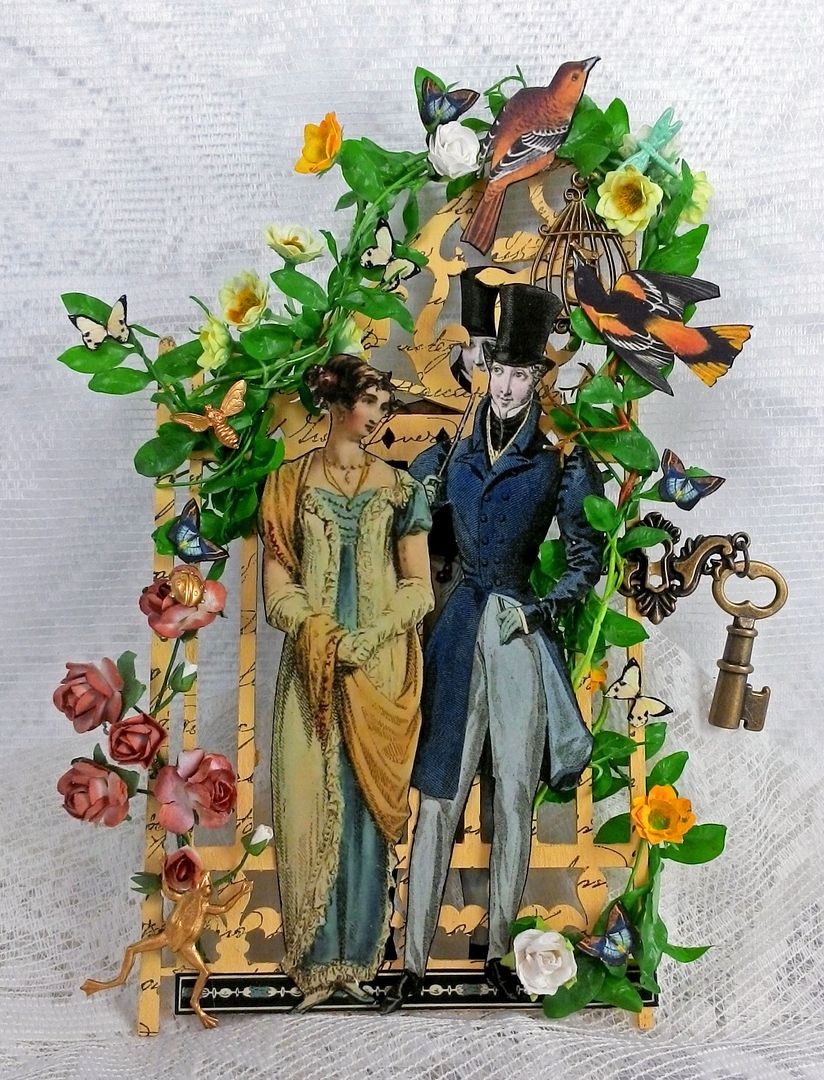
Many times when I design a piece I have a story in mind.  The design is then influenced by the story and the feelings I wish to convey.  As soon as I saw the chipboard gate I thought what a great backdrop, and using the gate gave openness to the piece.  I imagined two young lovers meeting in a garden unbeknownst to anyone.  As I began work, I started thinking about what if they weren't alone, maybe they were being watched.  Did you notice the gentleman standing on the other side of the gate?  Is he there by chance or perhaps a rival for the ladies affections, you decide.
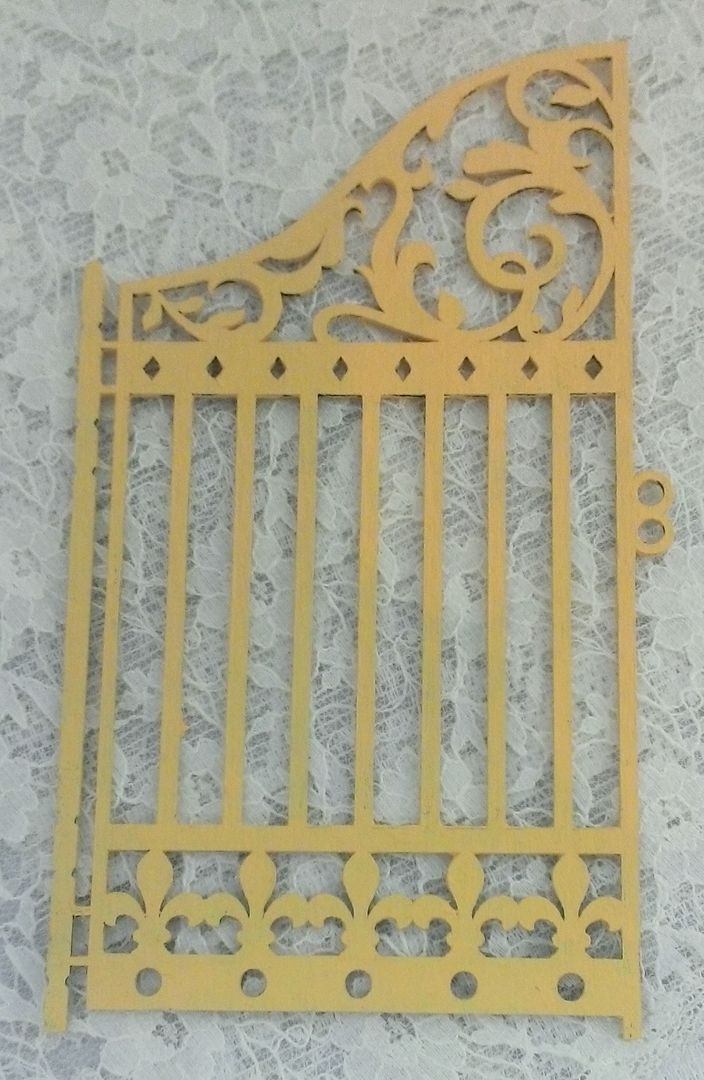
The base of the piece is one side of a Garden Gate Die-Cut Chipboard which is approximately 3 1/8” wide by 5 3/8 wide.  I'll be using the other half in a future project.
I started by painting the gate a pale yellow.
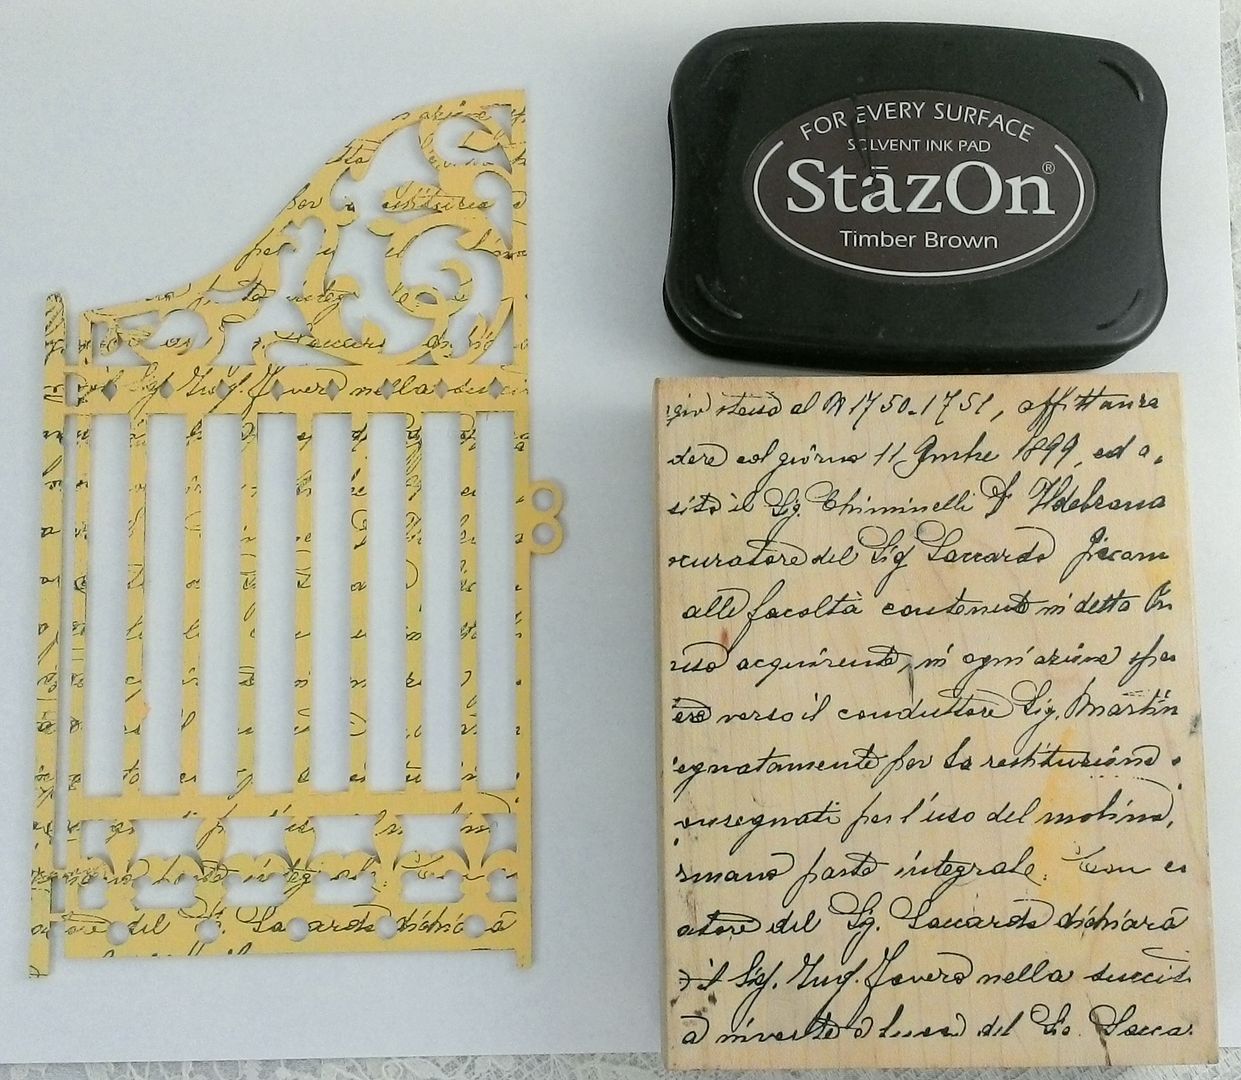
Next, I used a rubber stamp with writing and Timber Brown StazOn ink to stamp writing onto the gate.
I attached the keyhole and key to the gate using E6000 glue.  The Yellow Flower Garland is wired which made it easy to wrap around the gate and secure it with glue.  To the garland, I added paper birds, butterflies, and brass bees.  The brass frog and ladybug were from my stash.  All of the images you see are from my collage sheets.
Lastly, I added the couple to the front and the interloper to the back.
I attached the keyhole and key to the gate using E6000 glue.  The Yellow Flower Garland is wired which made it easy to wrap around the gate and secure it with glue.  To the garland, I added paper birds, butterflies, and brass bees.  The brass frog and ladybug plus the roses were from my stash.  All of the images you see are from my collage sheets (see the complete supply list below.
Lastly, I added the couple to the front and the interloper to the back.  All of the paper images are back with decorative paper to make them look pretty from the back of the piece and to make them stiff.
IMAGE SETS USED
Days Gone By Collage Sheet
or

Monday, February 17, 2014

Waiting for the Eggs to Hatch

This piece celebrates the arrival of spring.  I know for many of you it’s nothing but unending cold, ice and snow (wish you could send some to me).  Here in the Arizona desert, we are in a major drought.  January and February are our rainiest months (we only get a little over 7” a year).  Many people think most of the moisture comes in the summer when we get the monsoons.  We have had no rain and none is in the forecast for the rest of February.  We are also having record high temps with days like today being in the 80s.  So it feels like spring here and many of the plants in my courtyard are in full bloom with the bees busily collecting nectar.
The piece is made from a Bird Shadowbox Shrine Kit and a 2” Wooden Spool.  I used two layers of Picket Fence Distress Crackle paint on the bird and then picked off some of the pieces of crackle to give it a more aged look.

Thursday, February 13, 2014

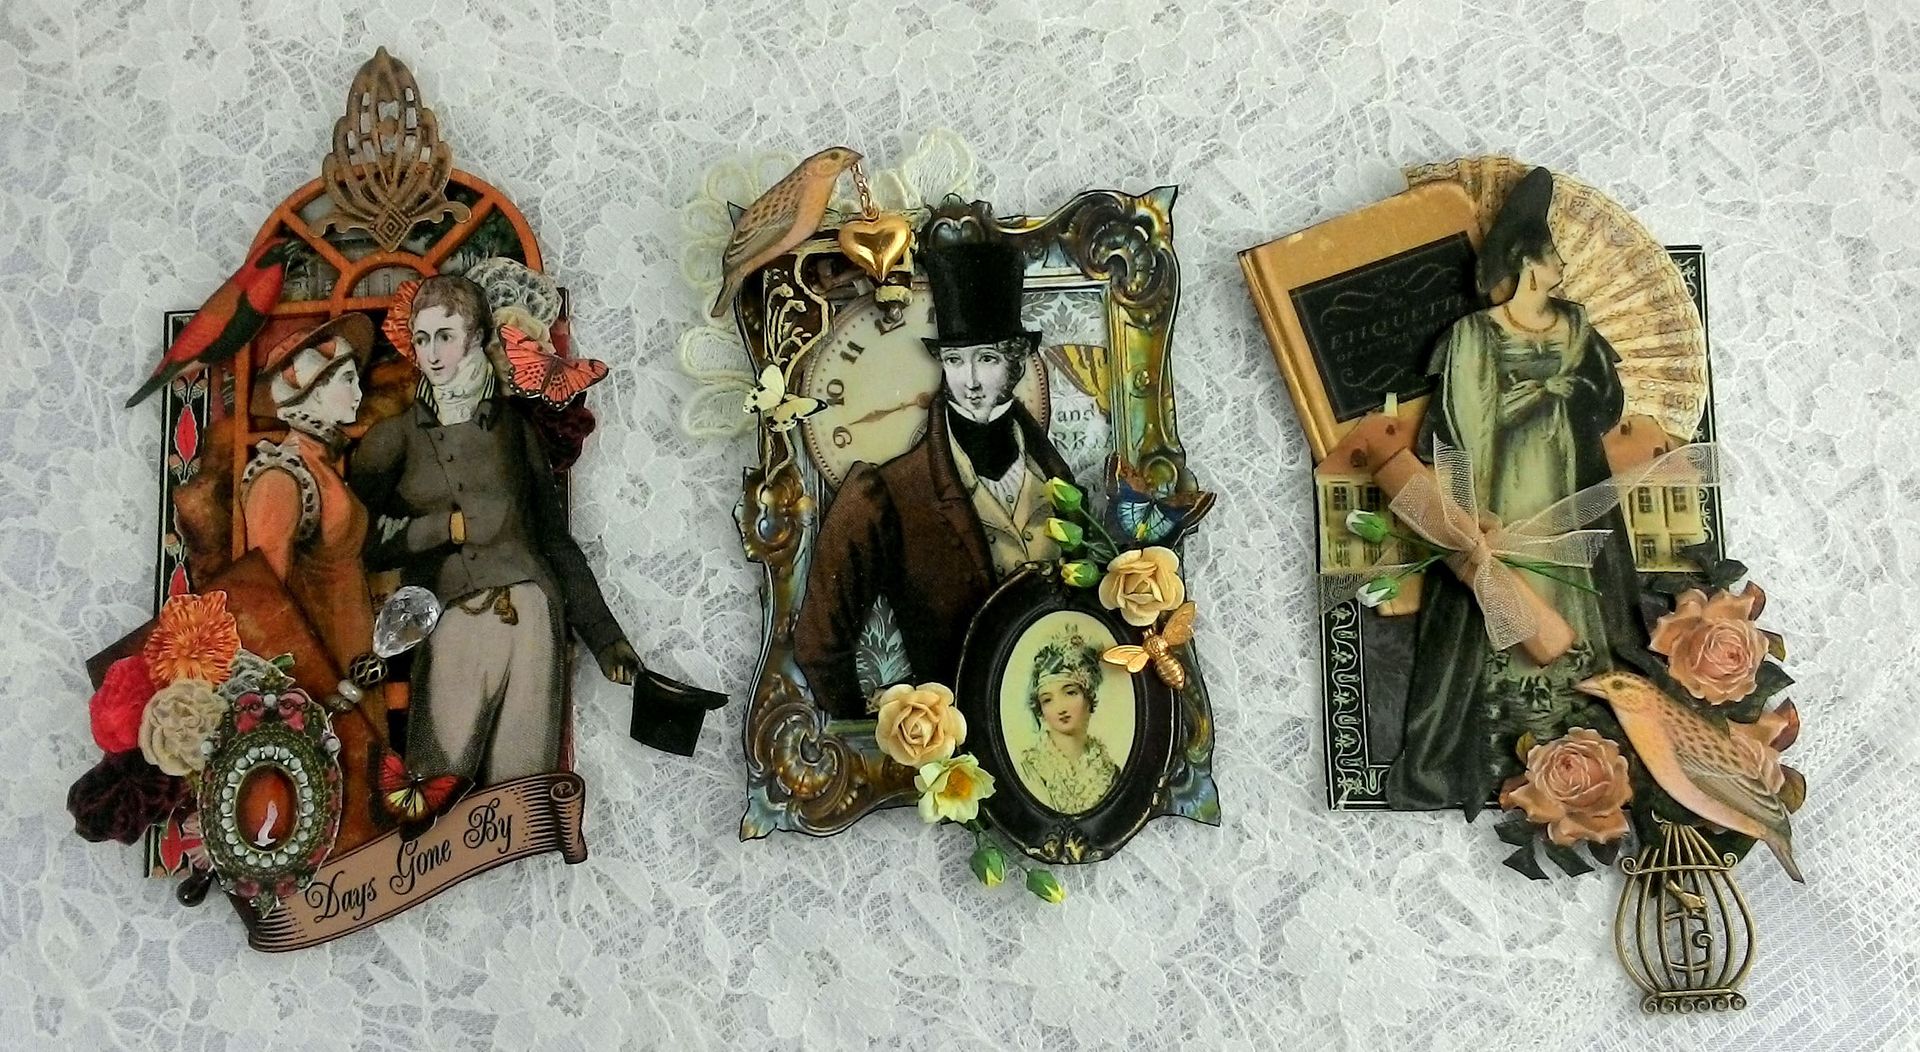
Romantic ATCs

Forever Yours
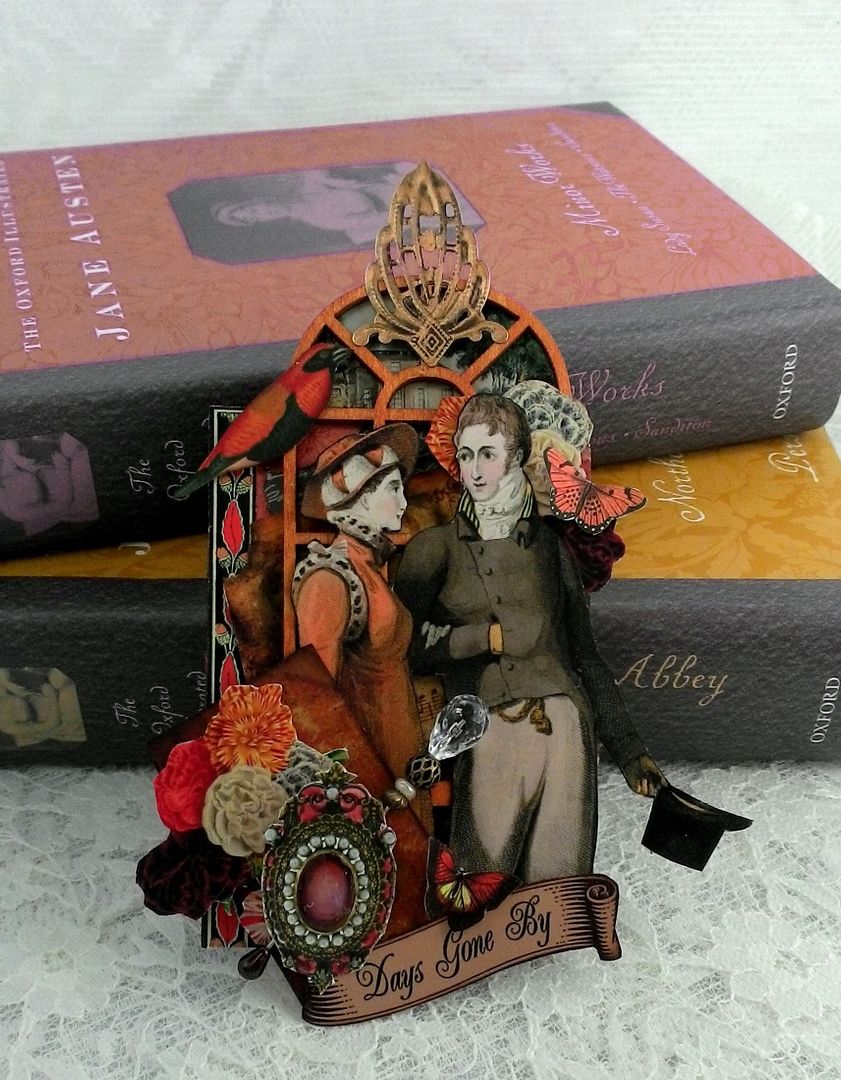
Days Gone By

Design Your Own Hat or Stick Pin
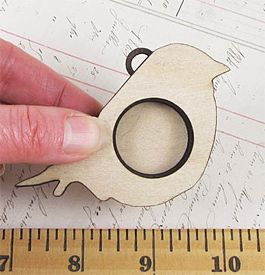
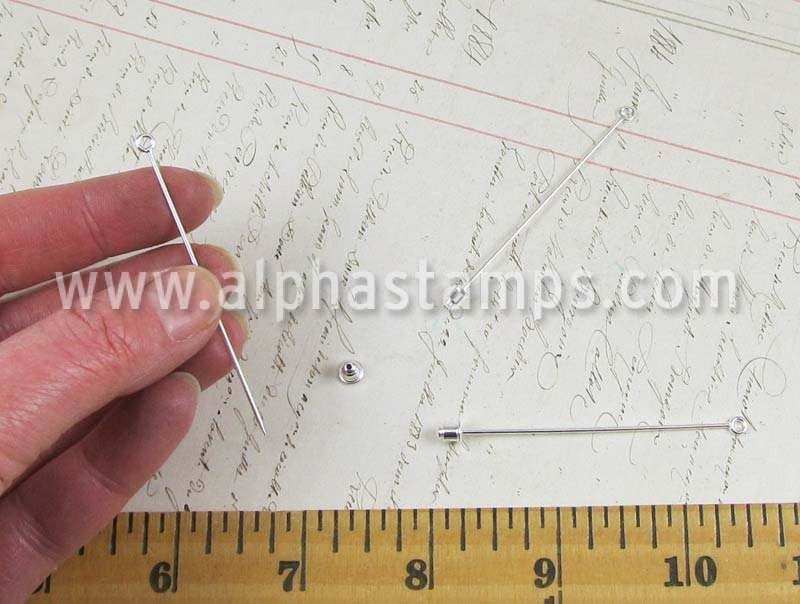
I love the vintage touch a hat or stick pin gives to a piece of art.  It is so easy to make your own pin.  To make the hatpin in the Day’s Gone By I used a stick pin from my stash and added more beads to the end and one at the bottom to cover the point of the pin.  An even better option is to use the silver-plated brass stickpin picture below. 
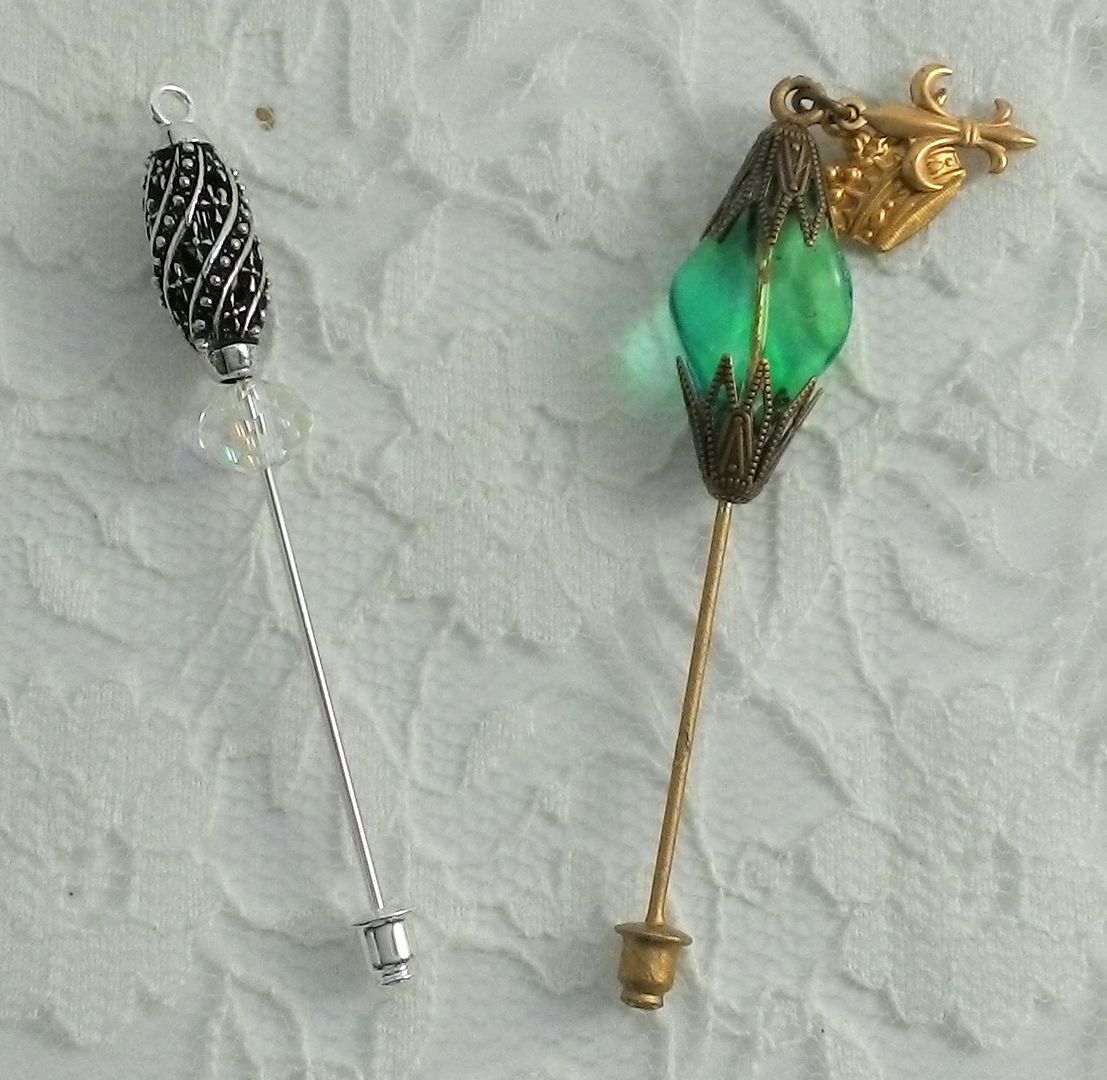
The pin is 2 ½ inches long so there is lots of room for beads and it already comes with a cap to cover the end.  Another great feature is the loop at the end where you can add more beads or a tassel.  Pictured below are some examples.
To keep the beads in place I applied a small amount of E6000 glue to the pin.  You can use Alcohol Ink to change the pin to any color you desire.  You can see in the picture above I used Gold Alcohol Ink on one of the pins.
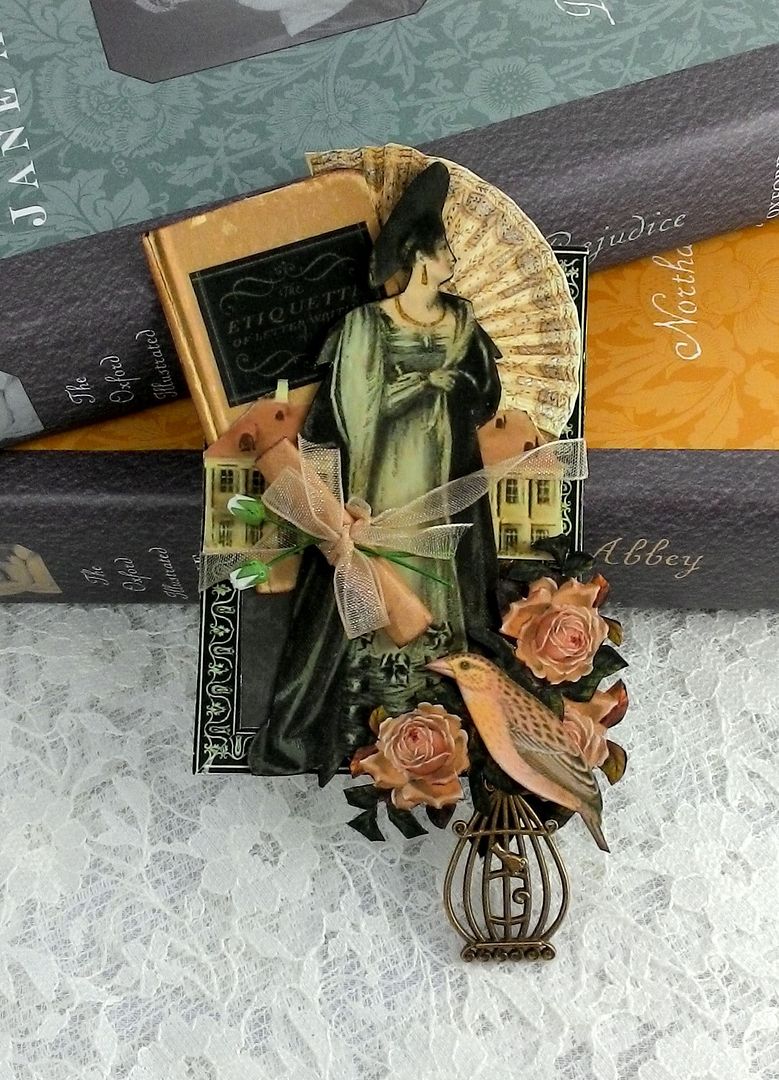
Evangeline
IMAGE SETS USED
Parfumerie #2 Collage Sheet - Fan

Winner of the Love Birds – Birdcage Dress

Random.org has spoken and the winner is Jen Beksel!
Congratulations Jen!!!


Thanks to you all for the lovely comments about this piece. 

Saturday, February 8, 2014

Love Birds Birdcage Dress - New Images, Tutorial & Giveaway

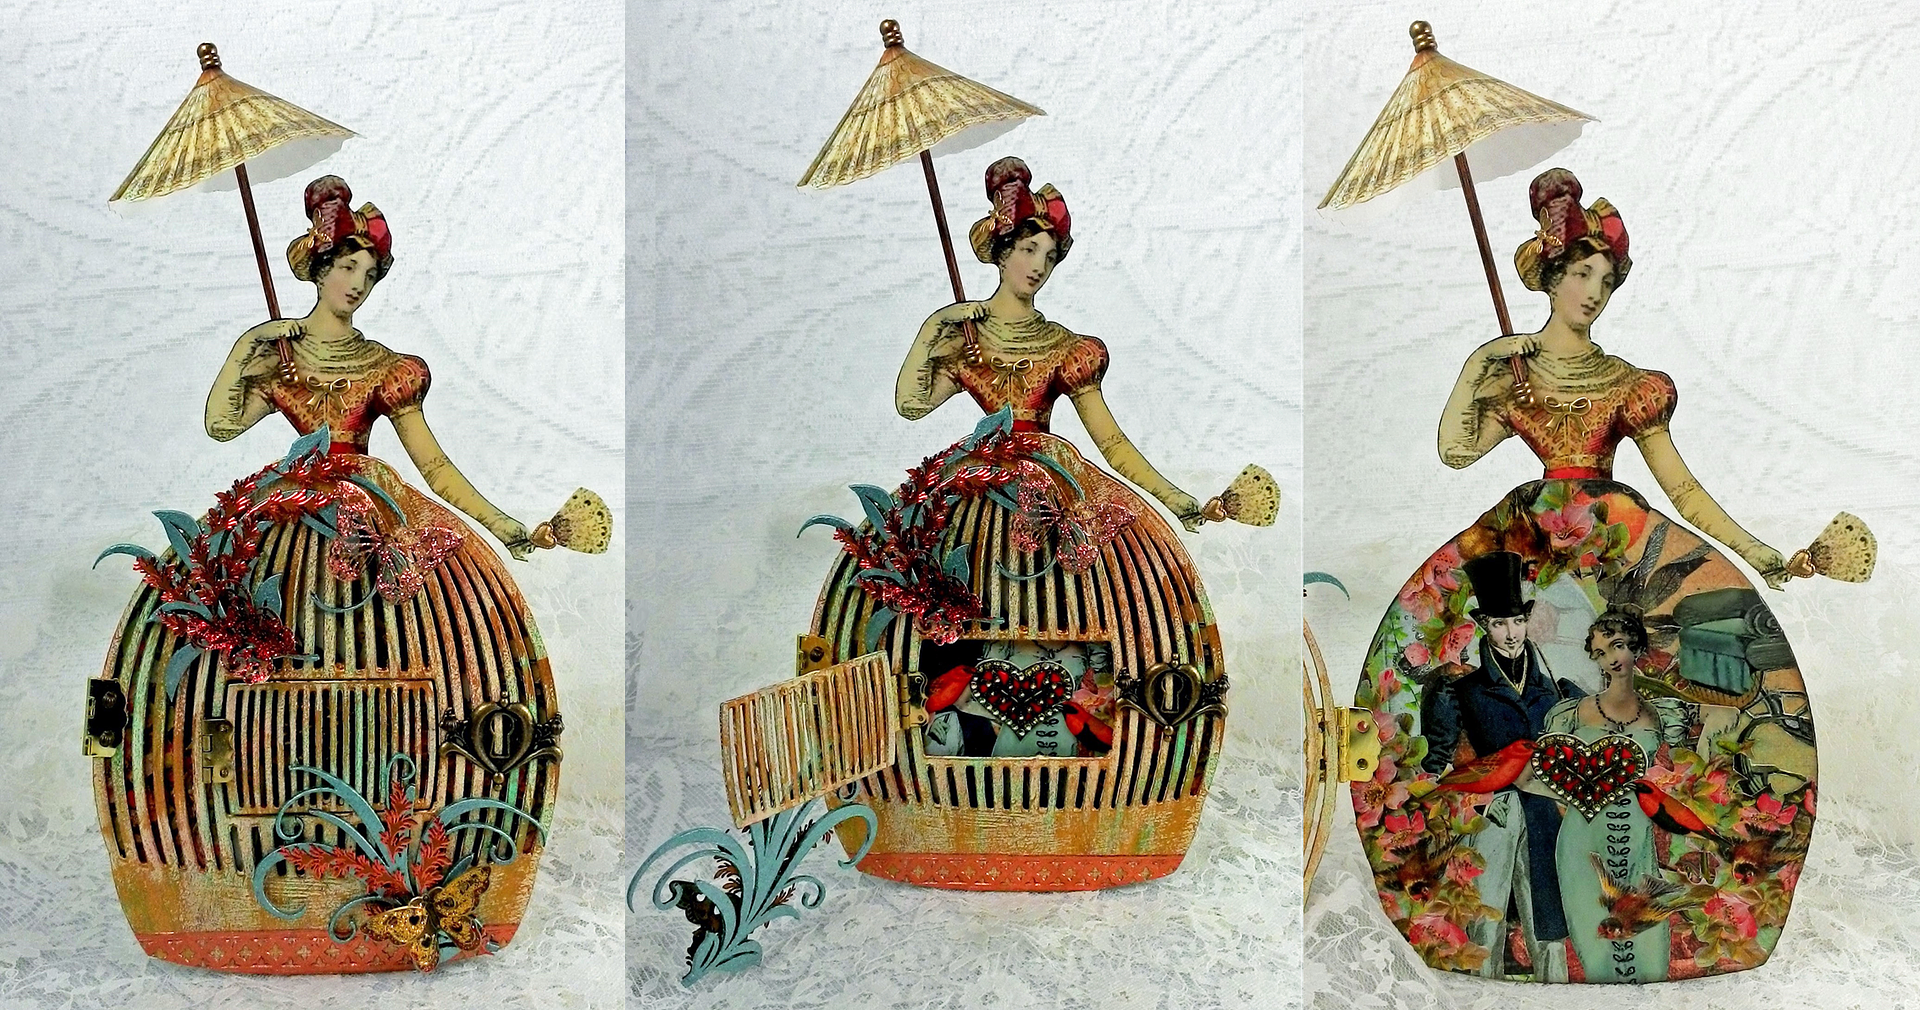
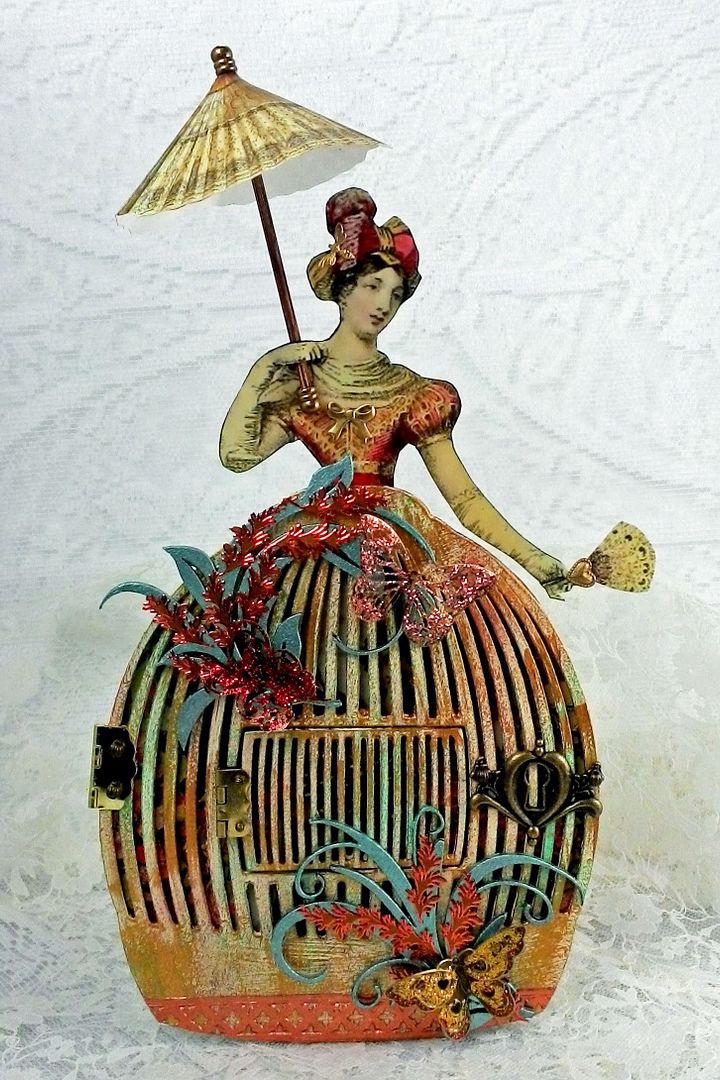
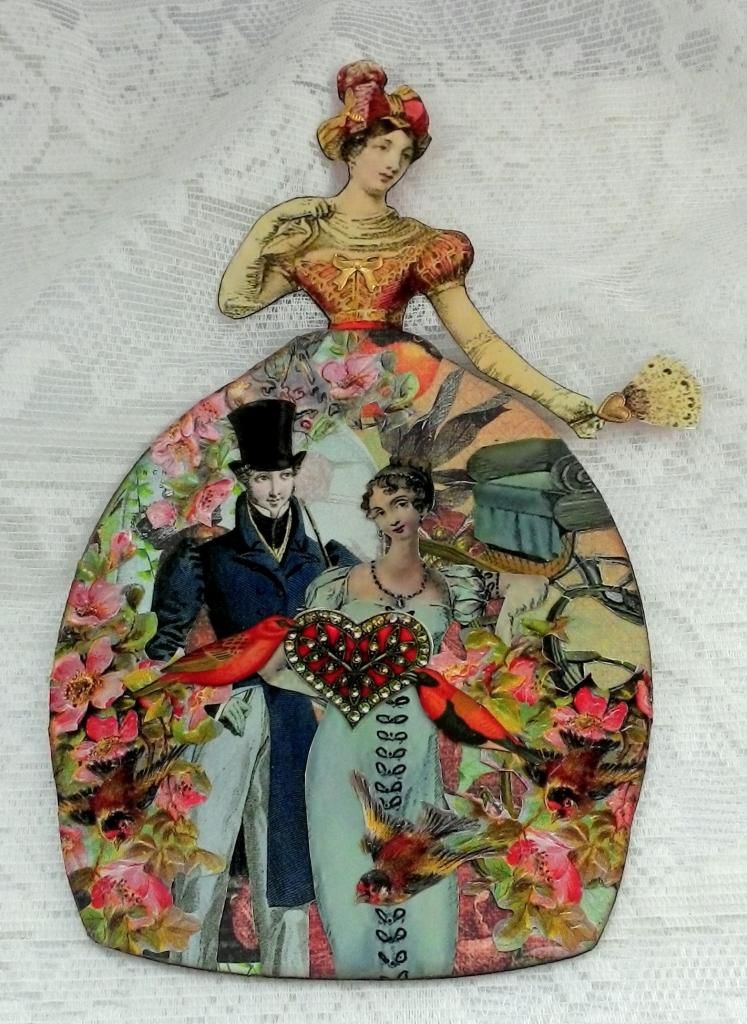
With Valentines just around the corner I have been in a romantic mood which is reflected in this birdcage dress.  In this post I’ve included a tutorial  outlining how I assembled and decorated the birdcage dress. 
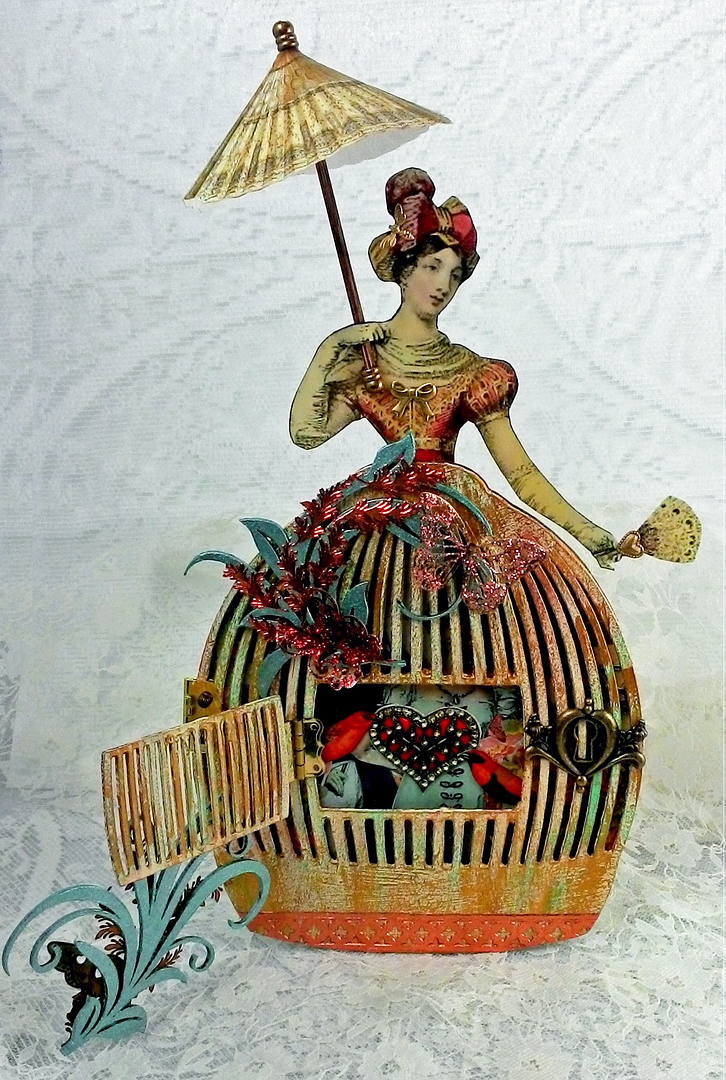
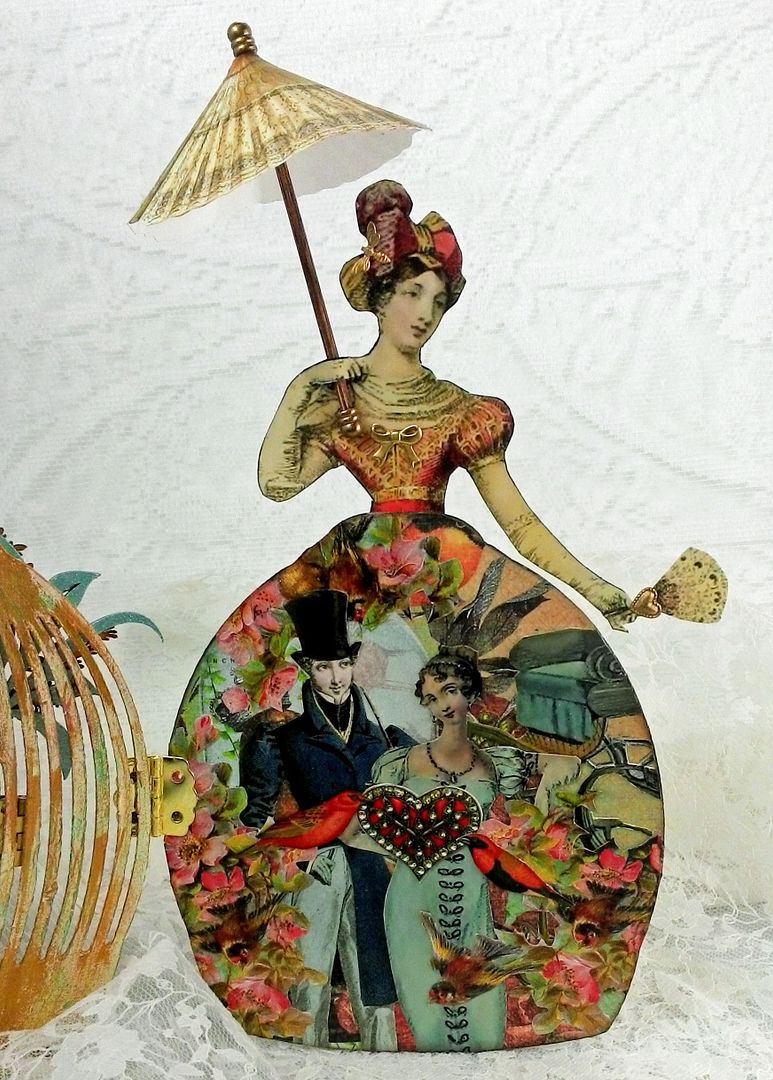
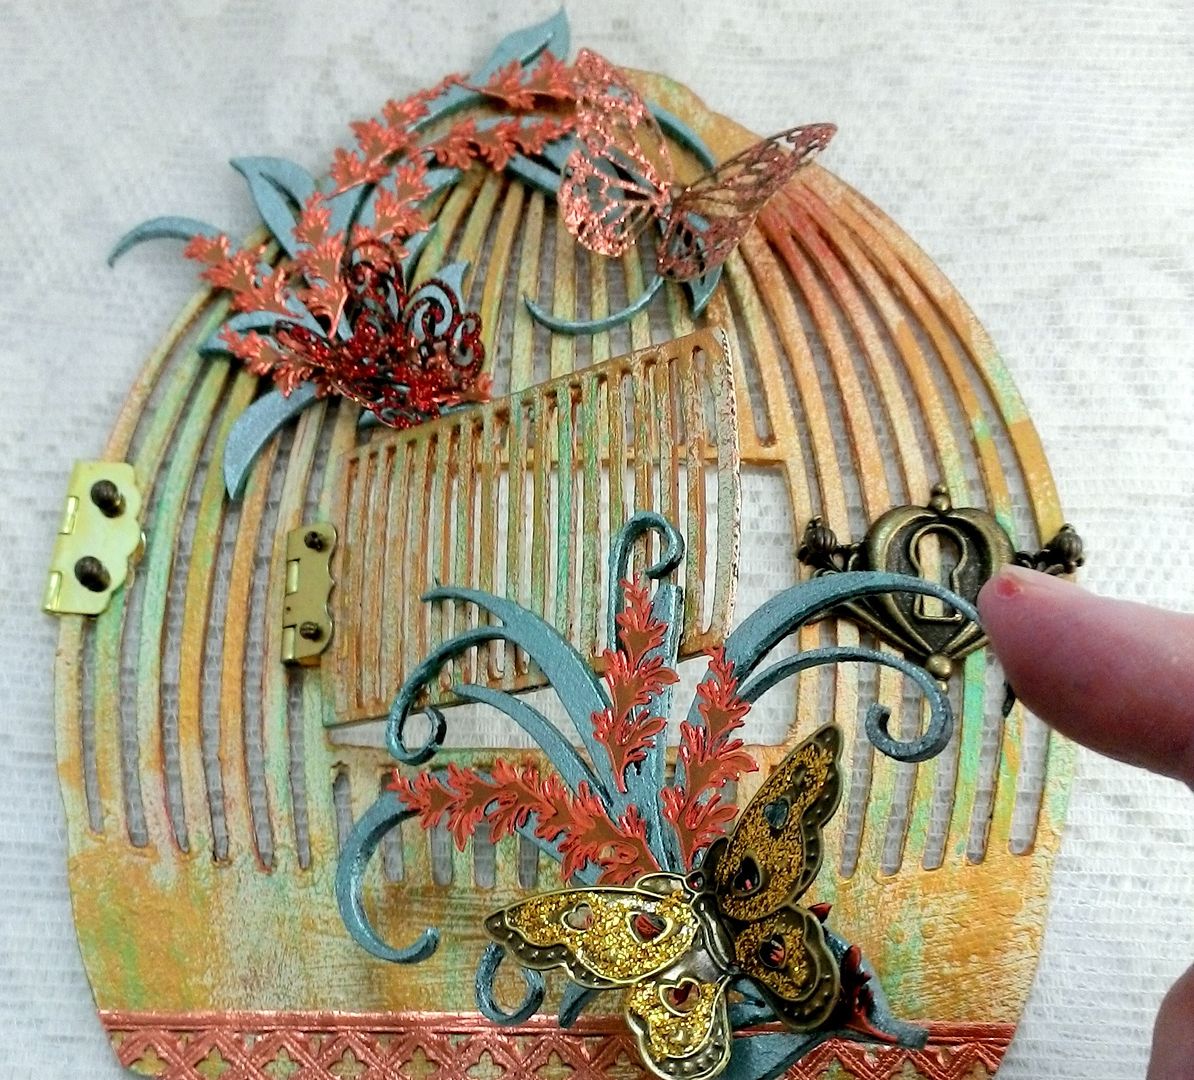
A fun aspect of this piece is that the middle section opens to reveal birds in love and then the entire birdcage opens to reveal the romantic couple inside.
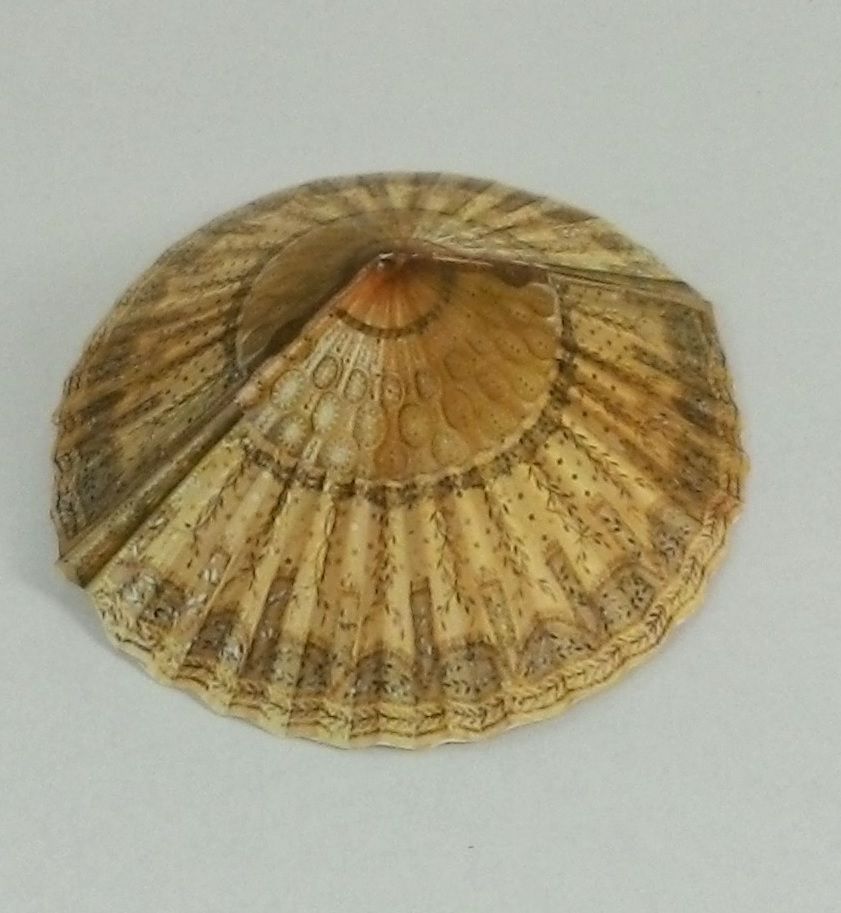
This lovely ladies umbrella is made from 2 paper fan images.  The piece stands up with the aid of a chipboard stand attached to the back.  The images I used are from my new collage sheet and digital image set.

DAYS GONE BY COLLAGE SHEET
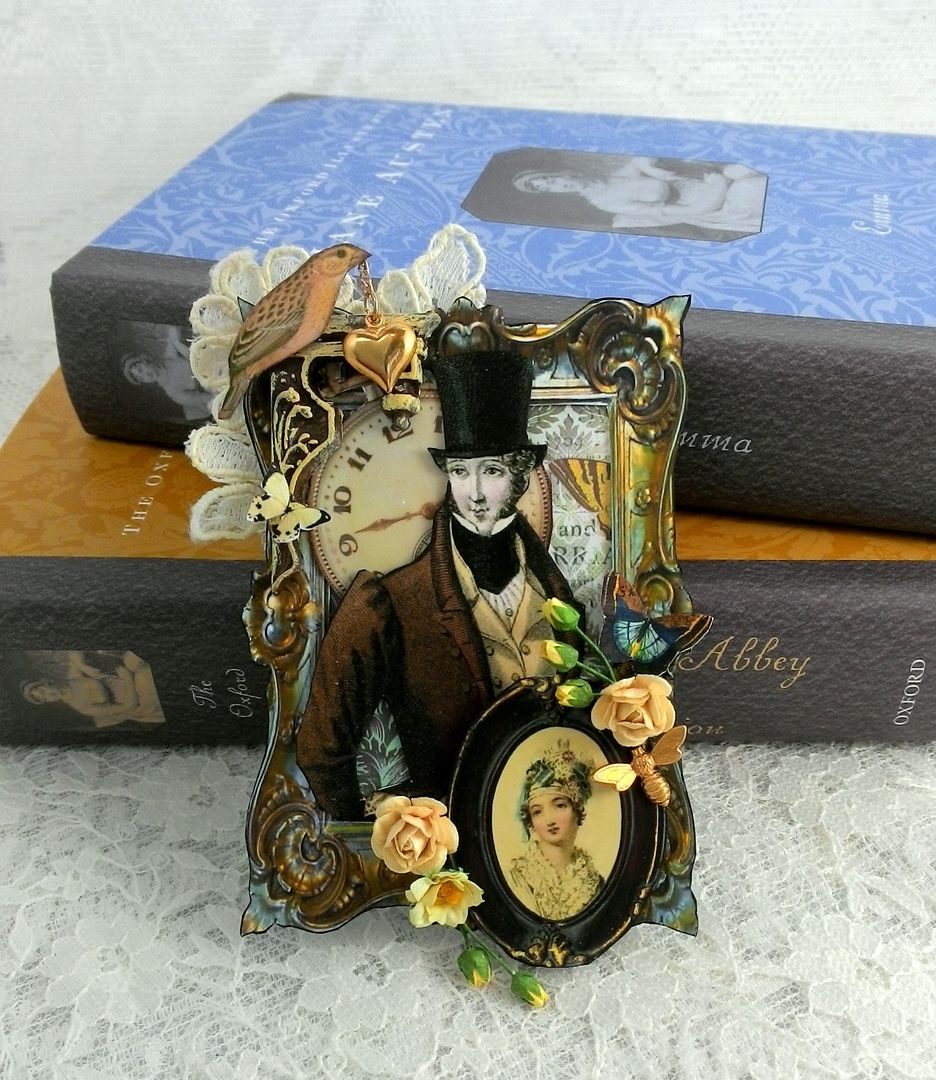
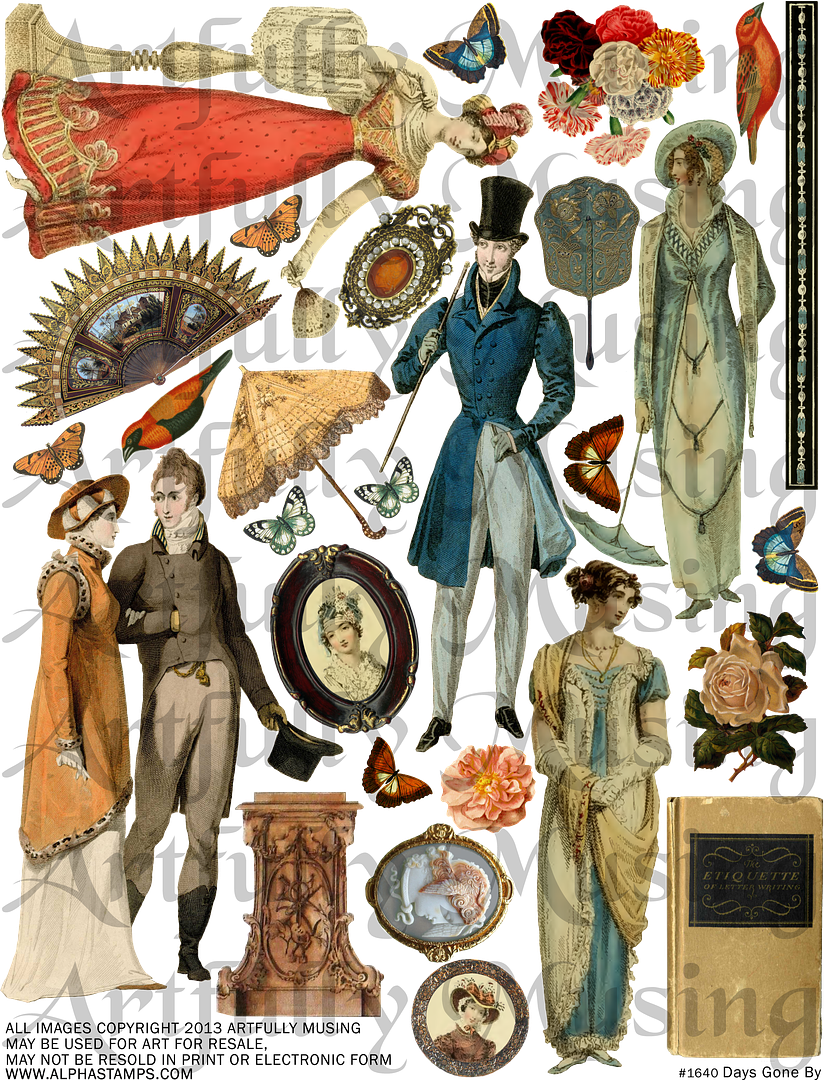
I am so excited about my new collage sheet and digital image set.  The regency period is my favorite and Jane Austen is probably one of my top 5 favorite authors of all time.  I’ve chosen some of my favorite images for the collage sheet pictured below.
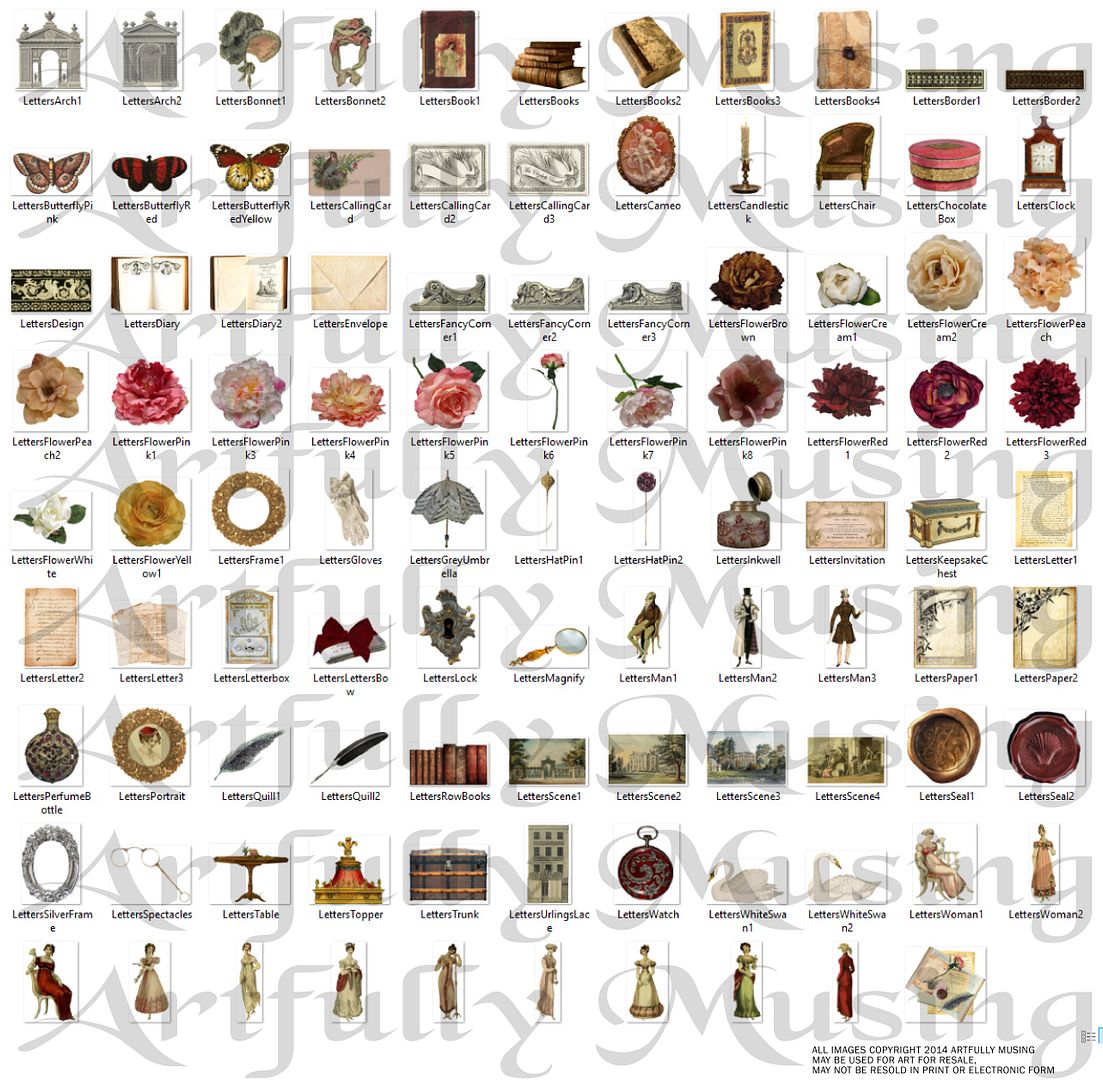
The digital image set includes all of the images in the collage sheet plus many more for a total of 80 images (pictured below).  Along with more images, the digital image set gives you much more flexibility in printing just the images you want, and in resizing the images to your particular needs.  Click on the image below to purchase the image set.


TUTORIAL
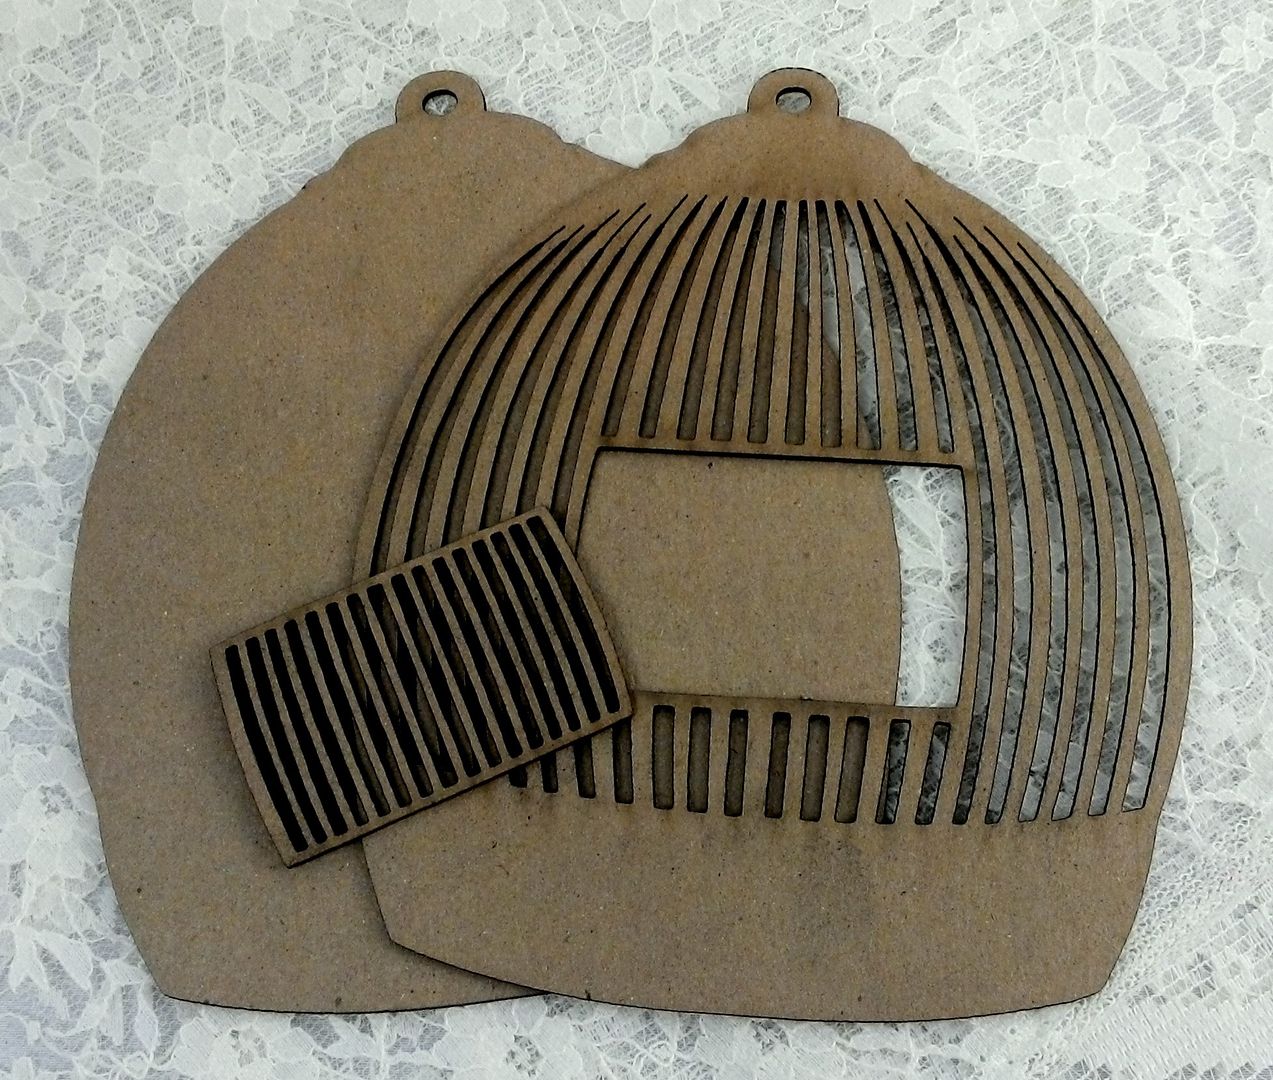
The skirt is made from a 2 Part Die-Cut Chipboard Birdcage which measures approximately 5 ½” wide x 6 ½” tall.
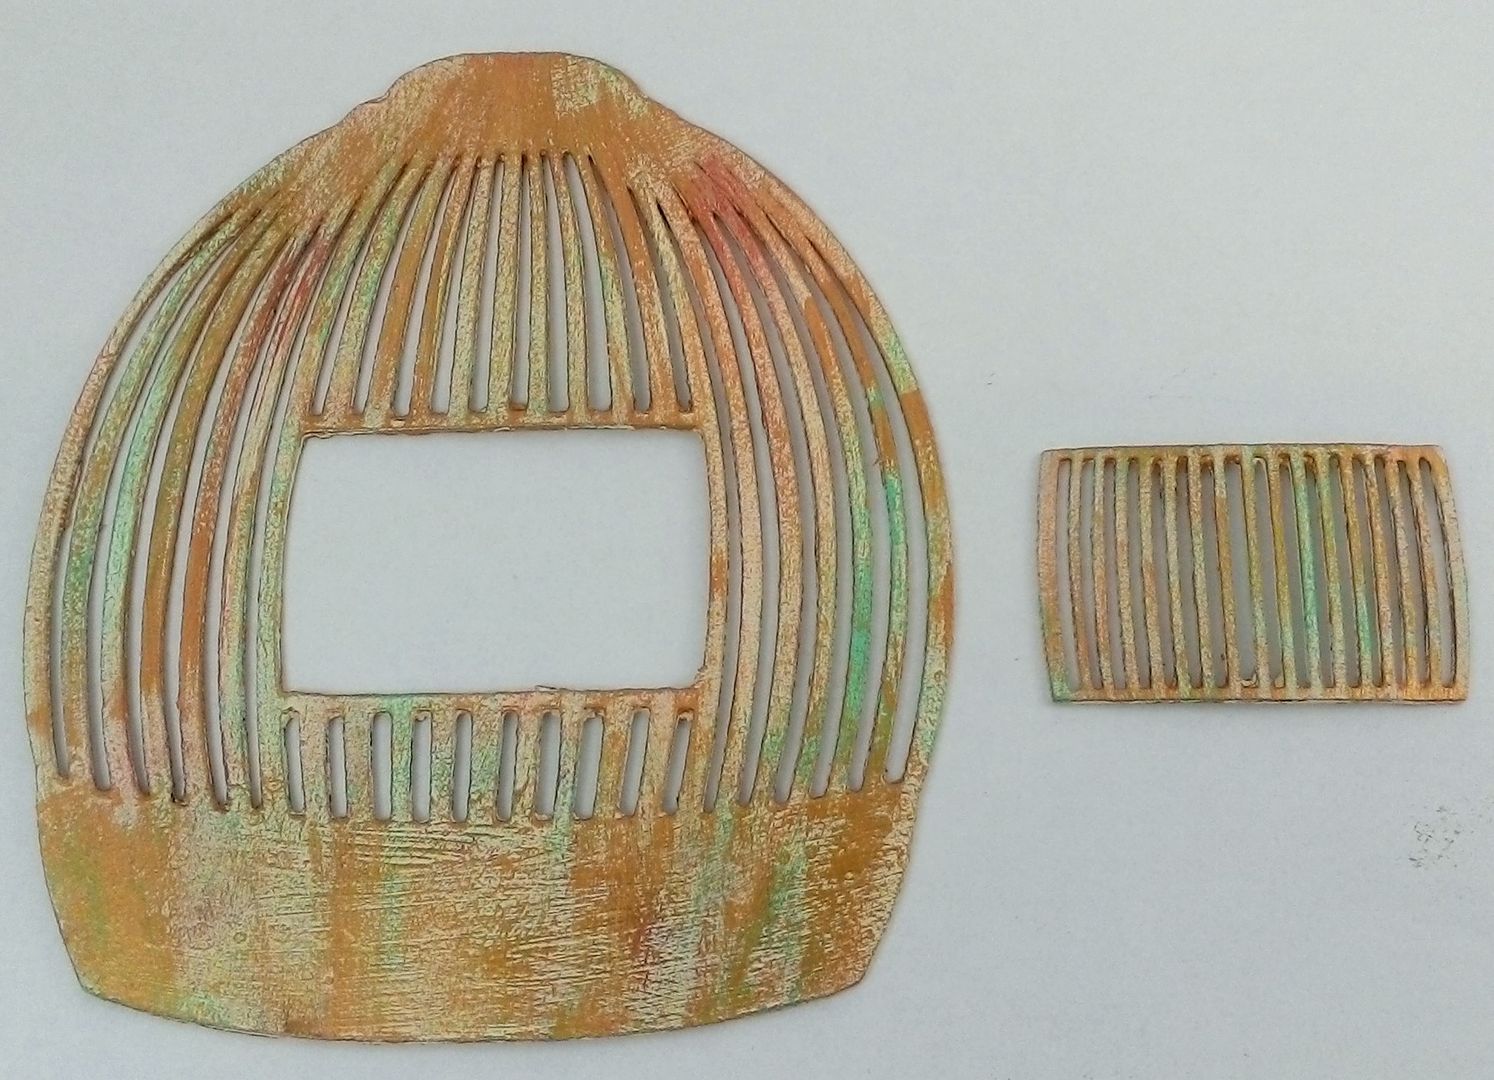
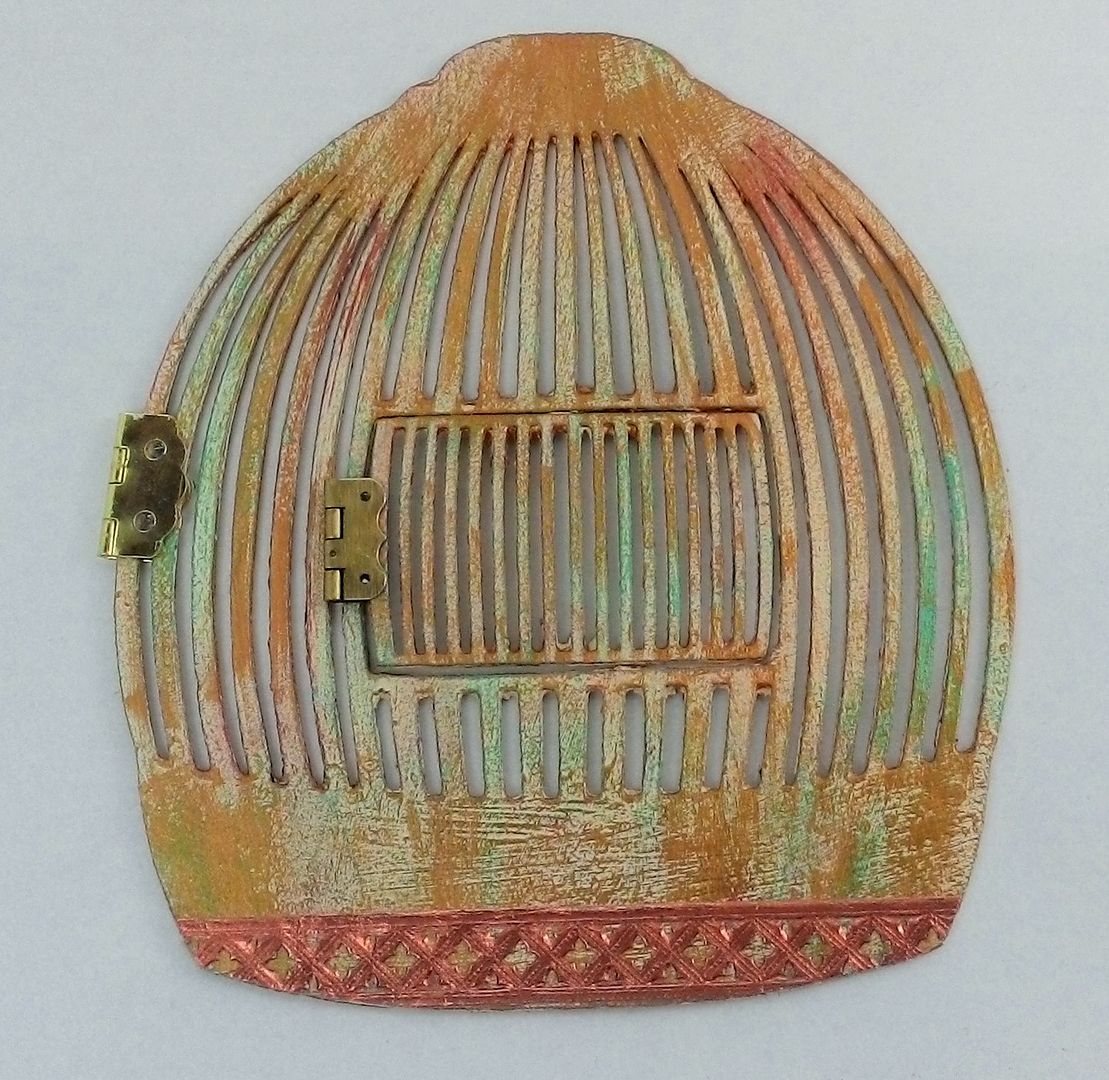
First I painted the front pieces.
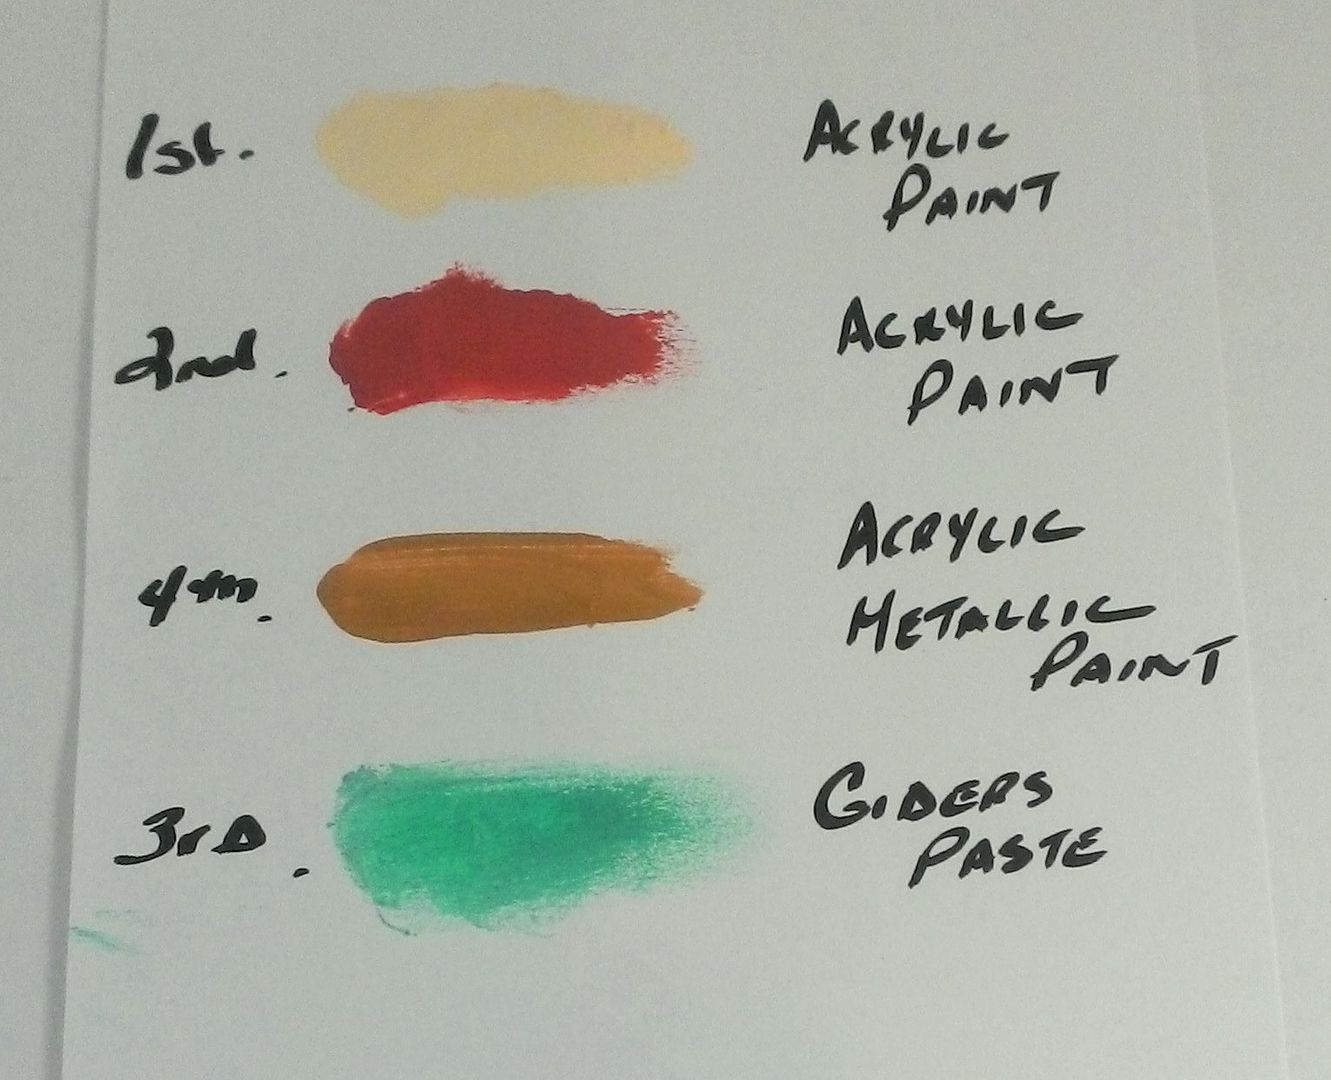
I started by painting the surface with cream paint.  Then I dry brushed the reddish-orange paint onto the cage.  Next, I added Patina Gilders paste and lastly I dry brushed on gold metallic paint.
I added copper Dresden to the bottom.  I glued one side of a larger hinge to the cage and one side of the smaller hinge to the removable door.  Lastly, I glued the other side of the small hinge to the cage.  I used E6000 glue.
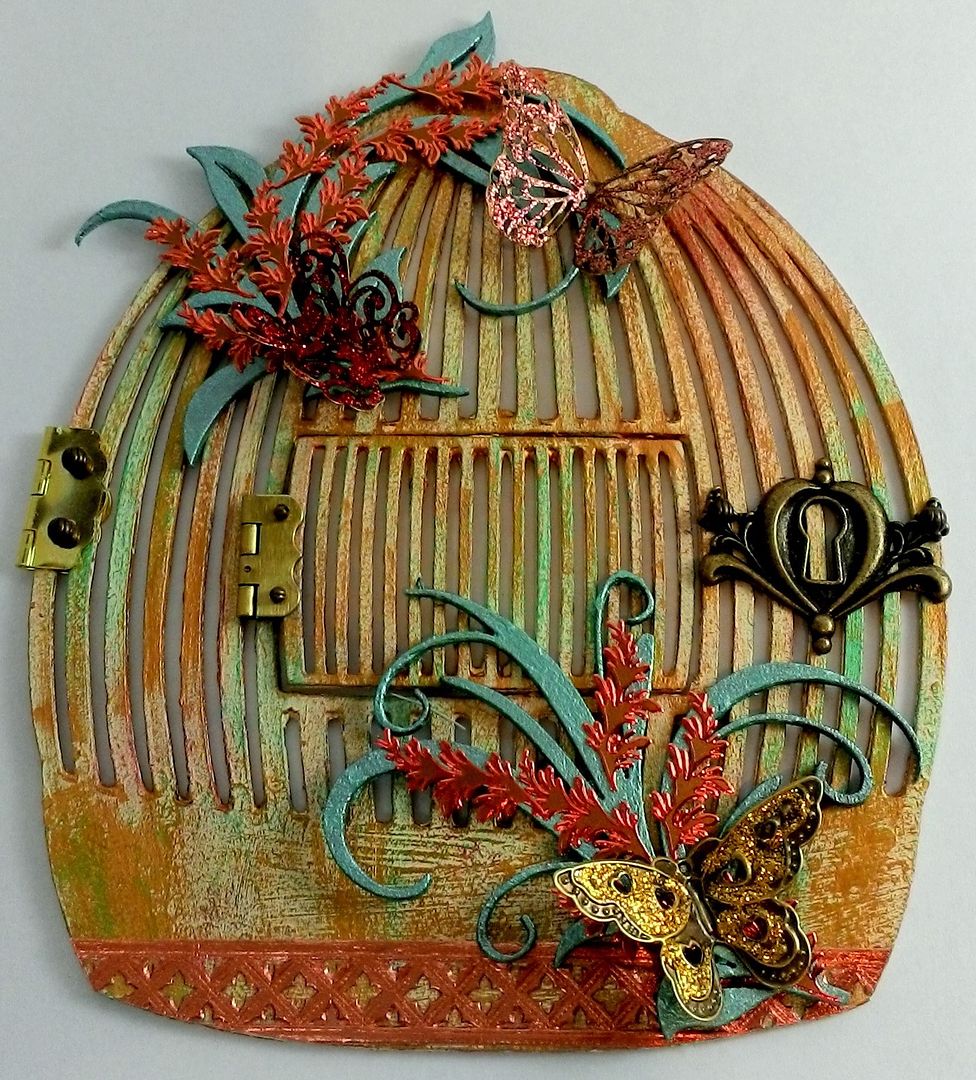
I used beads to cover the holes on the hinges.  To decorate the cage I added chipboard leaf flourishes, metallic stickers (from my stash), a brass keyhole, and brass butterflies accented with Stickles.
In order for the small door to open, I attached the leaf flourish to the door rather than to the cage.
I used multiple layers of paper, Dresden Scraps, paper images from my collage sheets and digital image set.  I used only paper images to decorate behind the cage which allowed the cage door to lay flat when closed.
The last step was to glue the other side of the large hinge to the back piece pictured above.
 The Umbrella
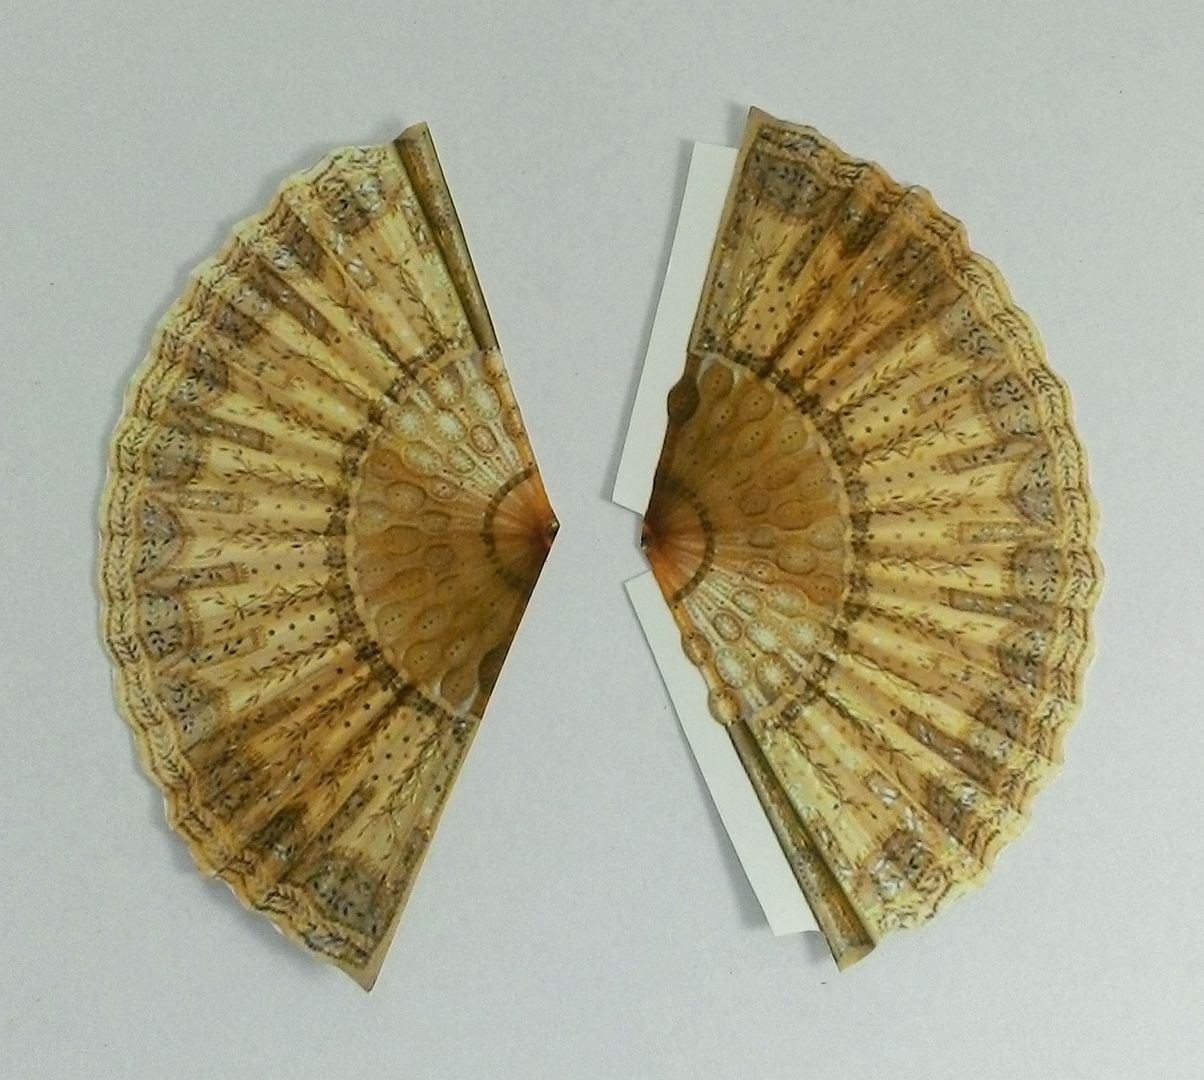
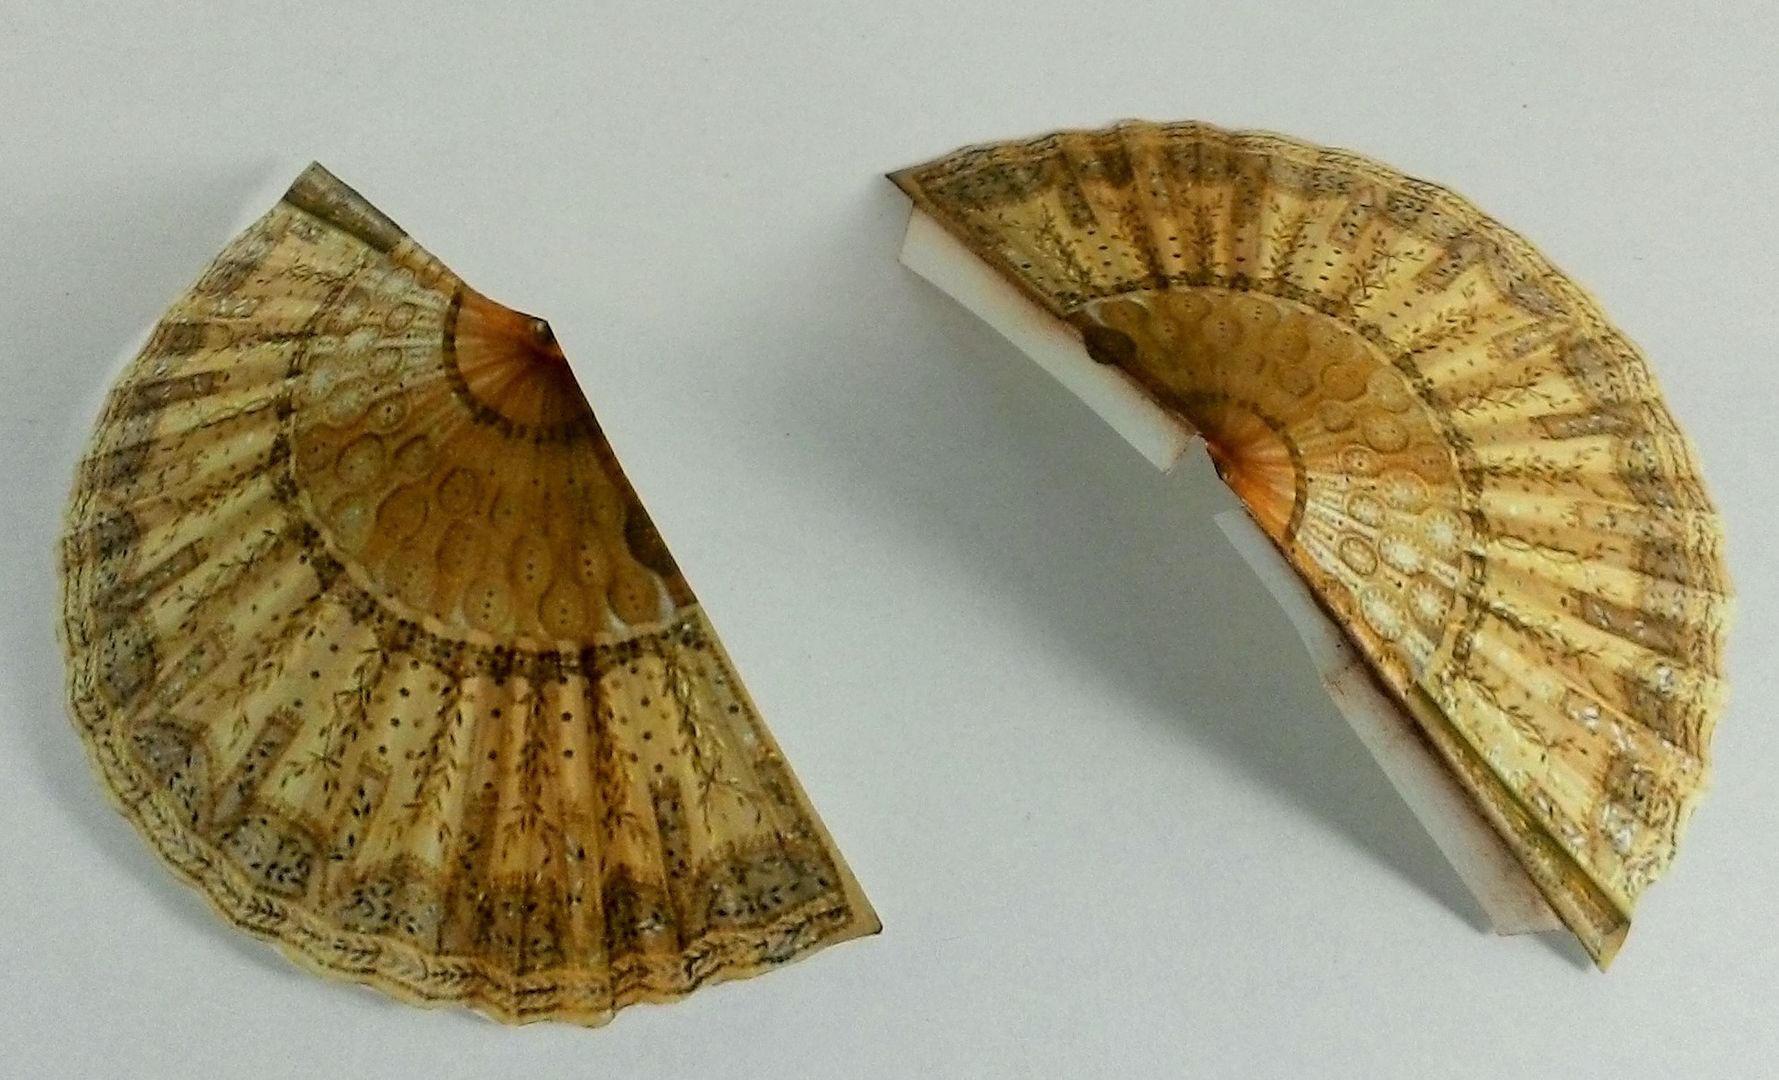
To make the umbrella I used two images of a fan.  When cutting one of the fan images out, I left tabs on each edge of the image.  I used these tabs to glue the one image to the other.  Score and bend the tabs before gluing.
It also helps to pre-bend the umbrella images before gluing them together.  Inking the edges of the images hides the white of the paper when the pieces are glued together.
The Stand
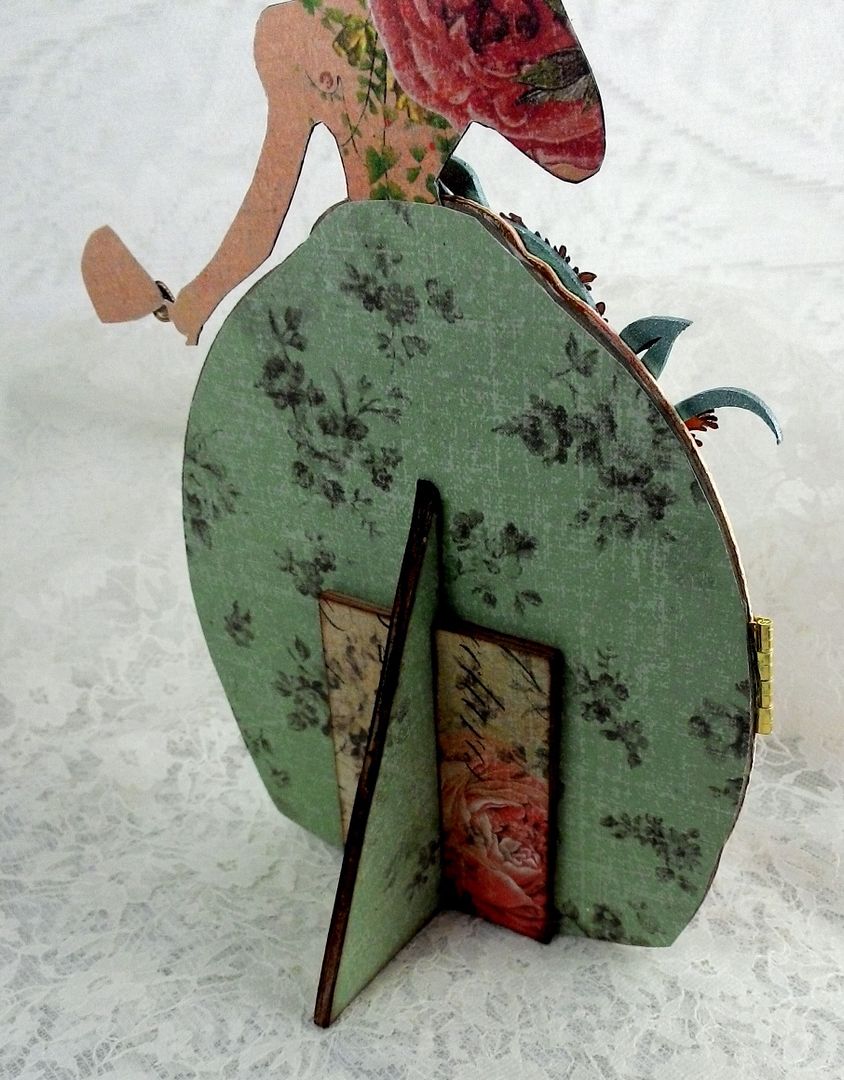
To make the stand I used heavy chipboard.
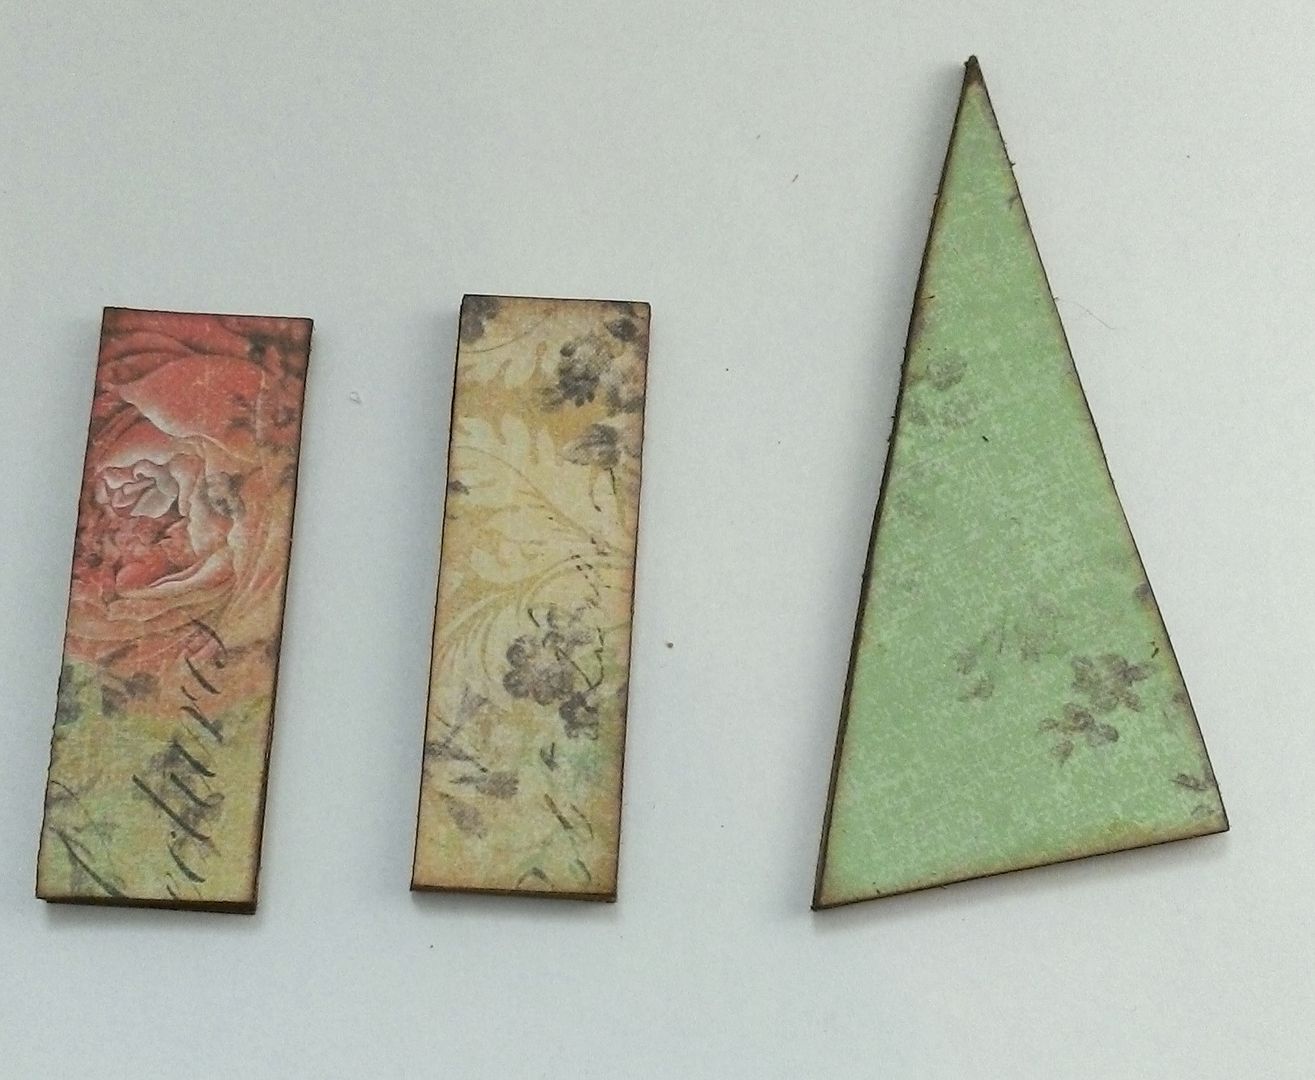
Below you can see the measurements that I used.  The idea is to create a triangle.  Next, cut away part of one edge to create a slant, that when glued to the back of the piece, causes the piece to tilt slightly backward.  I cut two pieces of heavy chipboard and glued them together to give the stand more strength.  If you want the piece to tilt more, cut away a larger piece of the triangle. 
I cut two pieces of heavy chipboard to glue on each side of the triangle giving it more support.  All of the pieces are covered with decorative paper and the edges inked.  I glued the pieces in place using E6000.  Be careful to keep track of the side where you made the cutaway so that you glue that edge to the piece.

Saturday, February 1, 2014

Dress Form

About 2 years ago I started working on a series of dress forms.  I think I finished 6 of them and the last two have been sitting in a box waiting to be finished.  This is one of the last two and I hope to finish the other this coming week.
Since I started this so long ago I don’t have a supply list for you.  

Sunday, January 26, 2014

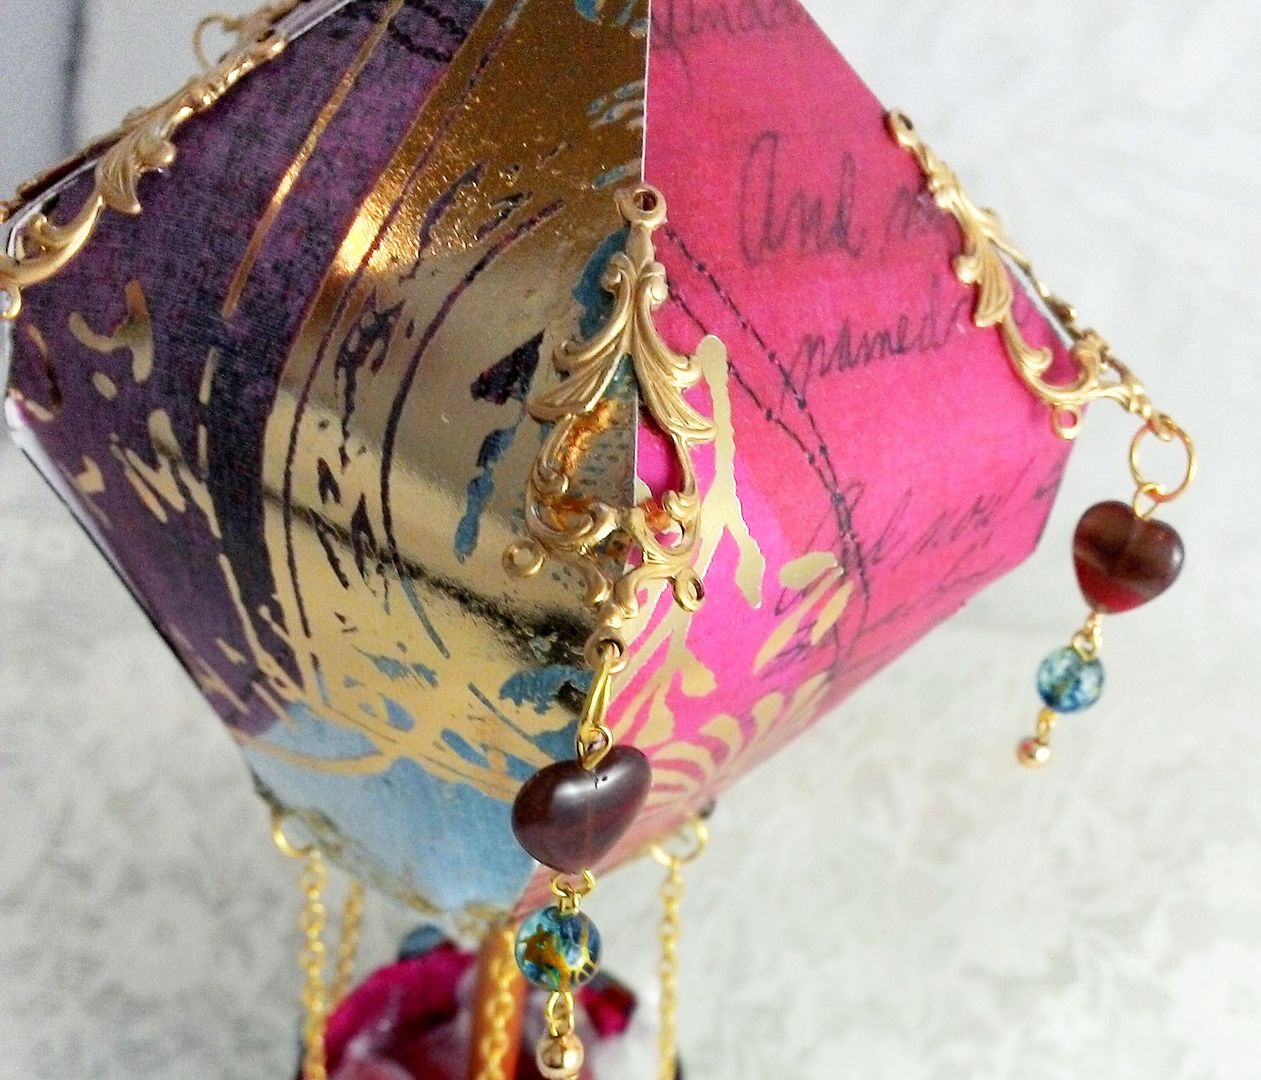
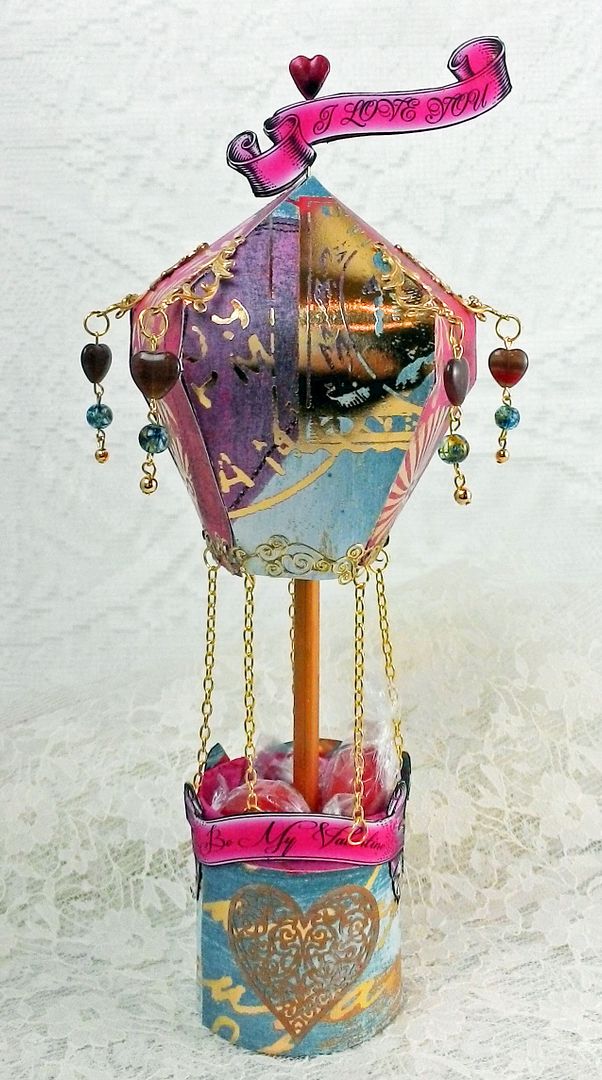
Valentine Hot Air Balloon

I can’t believe it is almost February.  Wasn’t it just Christmas????  Anyhow, every year I make a valentine for my husband; and this year its a hot air balloon with its basket full of candy.
Last summer I posted a tutorial on how to make a hot air balloon.  If you missed it there is a video and templates that you can download.  Click here to jump to the tutorial.
The basic difference between this balloon and the ones in the tutorial is that instead a hanging balloon it is made to sit on a flat surface.  The balloon is held up with a wooden dowel. The basket is a piece of cardboard tubing from wrapping paper.  The chains hanging from the balloon are not connected to the basket.  I wanted to give the appearance that they were but if I actually connected them then it would be hard to get the candy in and out. 
To jazz up the balloon I used some filigree pieces (which I bent to fit the shape of the edges) to accommodate beads.  The banner at the top is attached to a straight pin with a heart (it came that way).  I snipped part of the pin off and inserted it through the top of the balloon and into the wooden dowel.  I pre-poked a hole in the top of the dowel to accommodate the pin.
It would be easy to scale this up to include lots more candy or other goodies.  All of the supplies I used are from my stash.
Below are the two banners I cooked up for the project.  Feel free to use them.

Friday, January 17, 2014

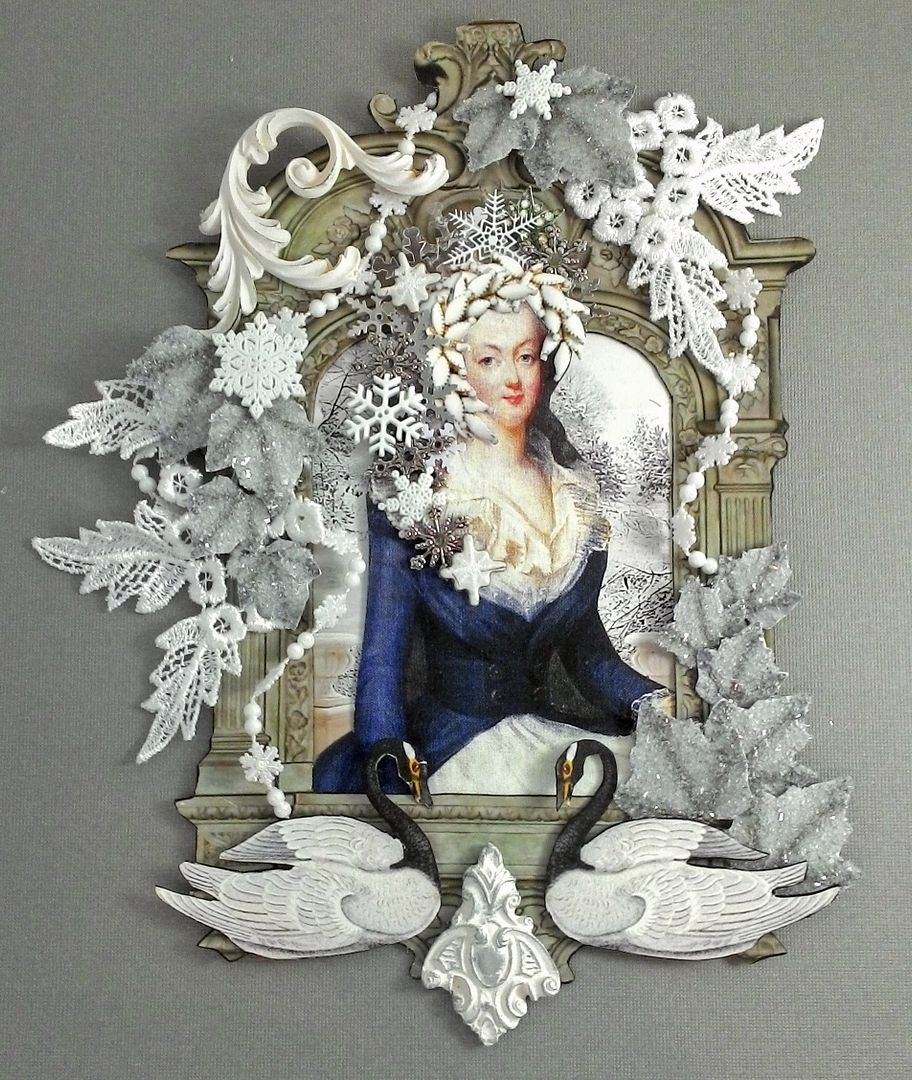
Snow Queen Marie

For all you Marie Antoinette fans I have “Snow Queen Marie” with her crown of snowflakes.  The overall size of the piece is 9” x 6”.  
The piece at the bottom is made from paper clay.  The icy leaves are images to which I added Diamond dust.  Behind the leaves is lace.  The swirl on the top left is resin.

This finishes off my cold wintry projects so now own to warmer themes!

Saturday, January 11, 2014

Off to the Park Victorian Diorama with Tutorial

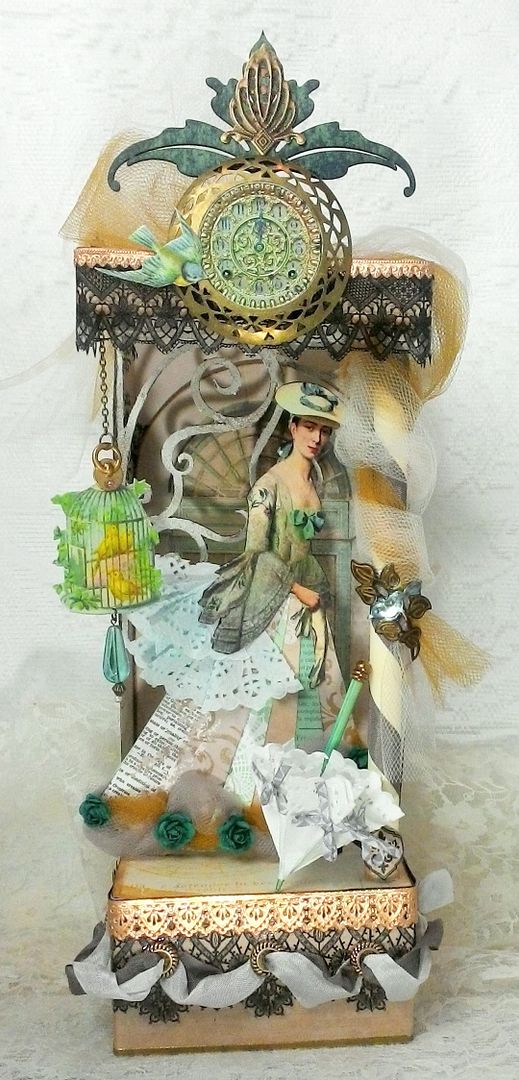
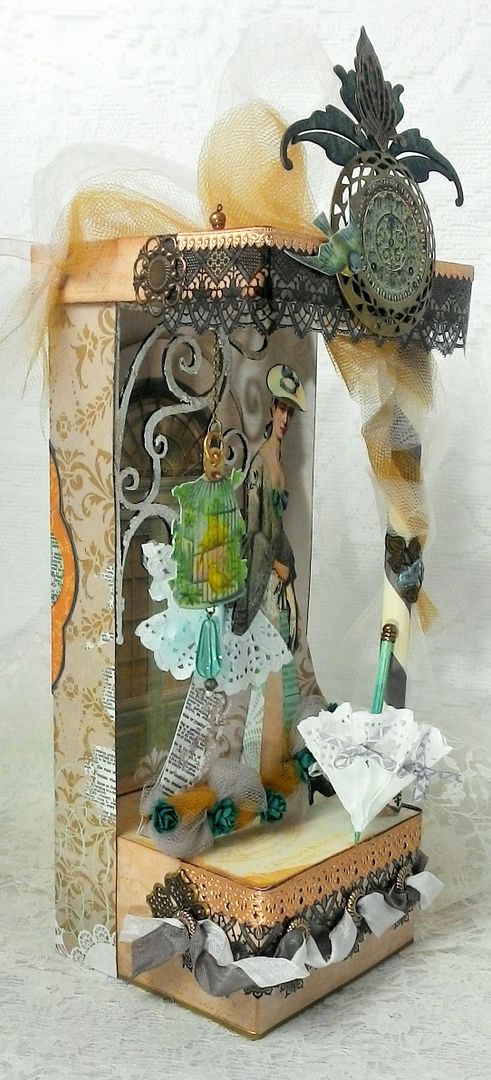
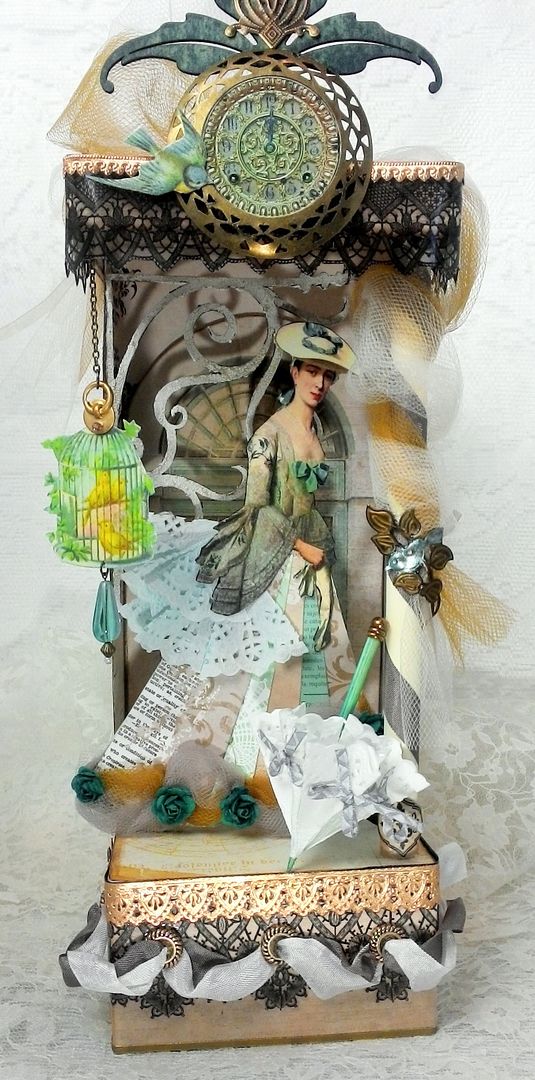
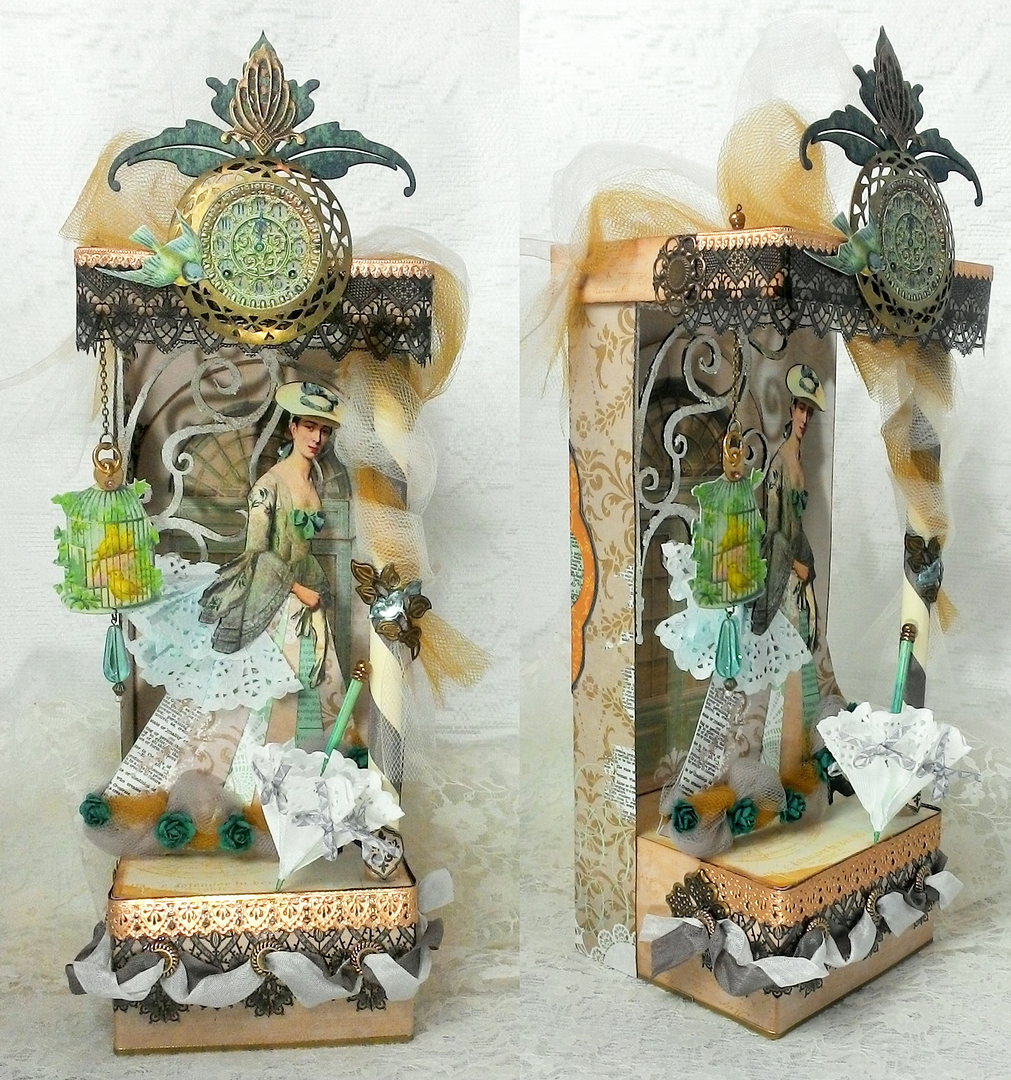
This diorama showcases a lovely Victorian lady leaving her home perhaps to meet a friend in the park.  You can see that she is standing outside a door pulling on her gloves.  Her lovely parasol (made from a doily) is leaning against the column waiting for her to pick it up.  The overall size of this piece is approximately 13 ½” x 4 ½” which includes all of the embellishments.

You all know I love creating dioramas and of course I’m always looking for different methods and materials to use.  If you love them too but have been thinking that they are too complicated to construct, I hope this project changes your mind.
The the base of this piece is nothing more than a box and some paper.  Yep, that is all it is.  The rest is just glue and embellishments.
In the tutorial below I walk you through how easy it is to create a diorama using a paper mache box and decorative paper.  I’ll also go over all of the embellishments I used and how I created the Victorian woman’s skirt and doily parasol.
Assembling the Basic Structure
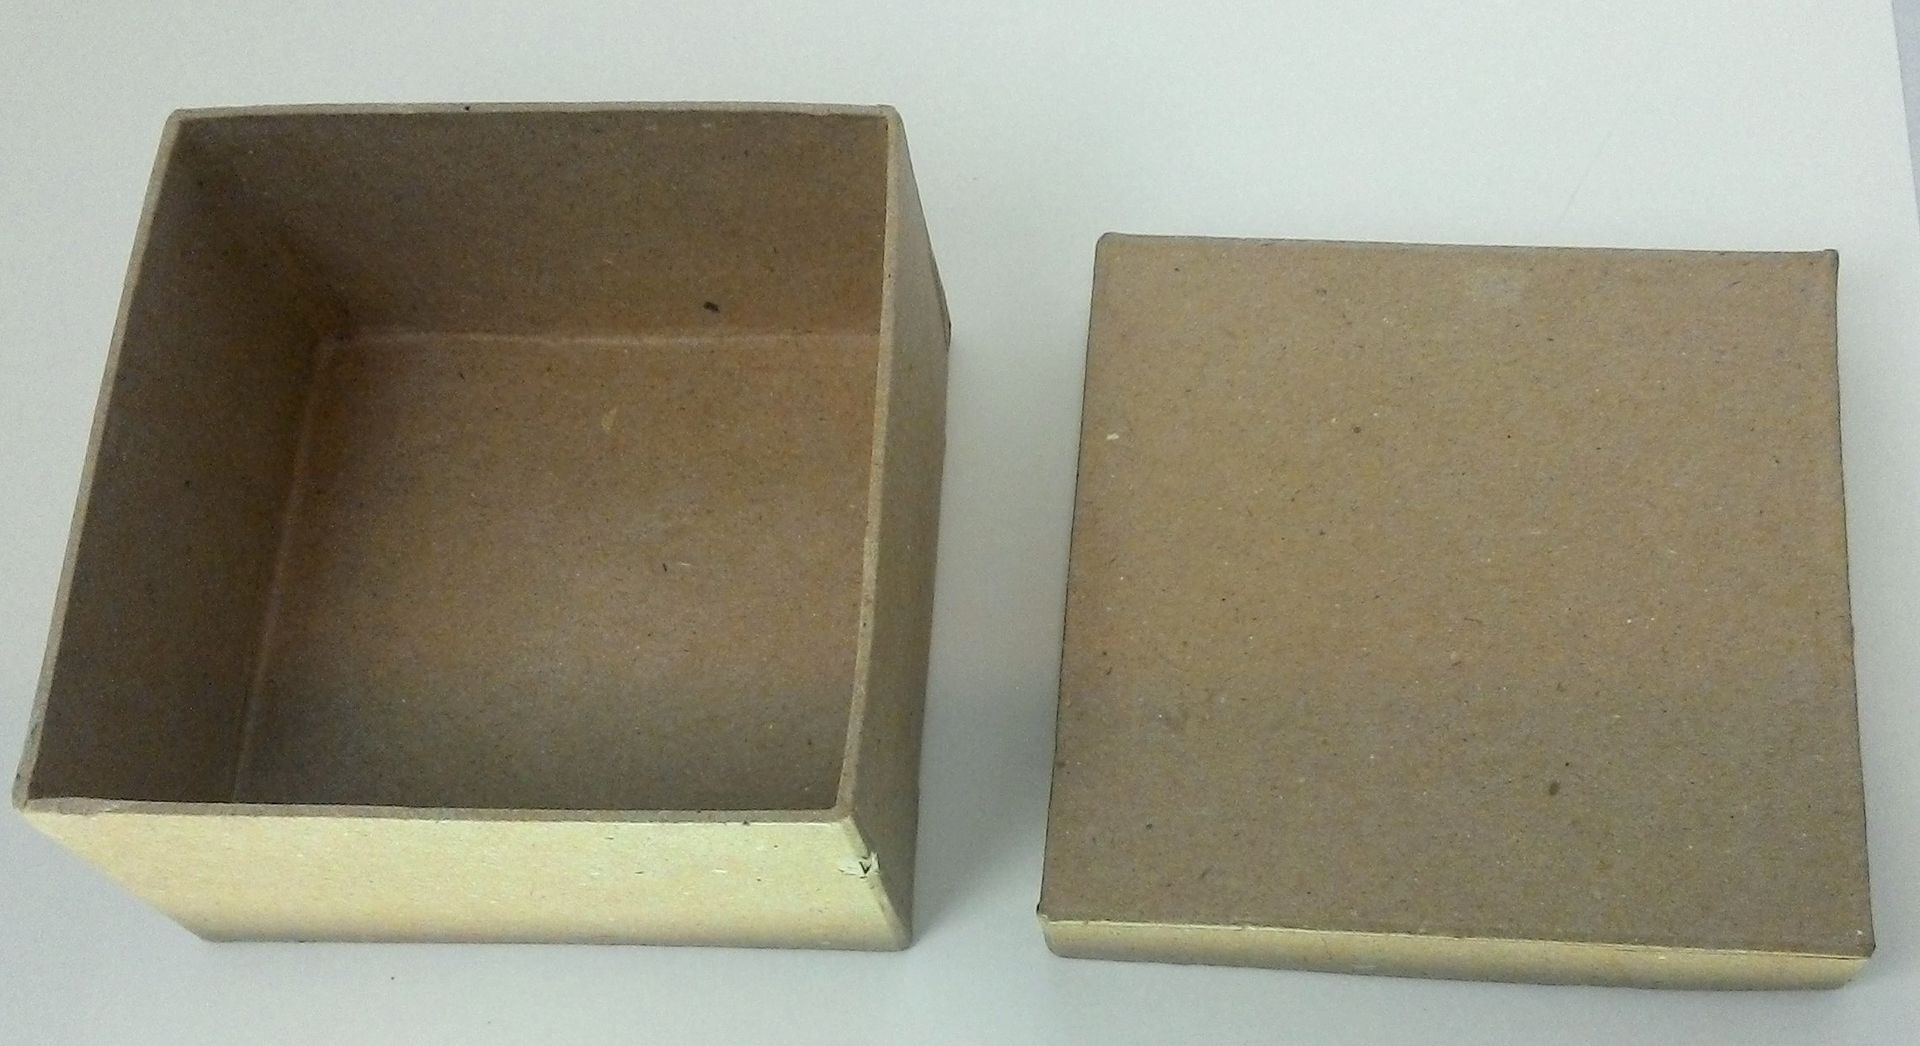
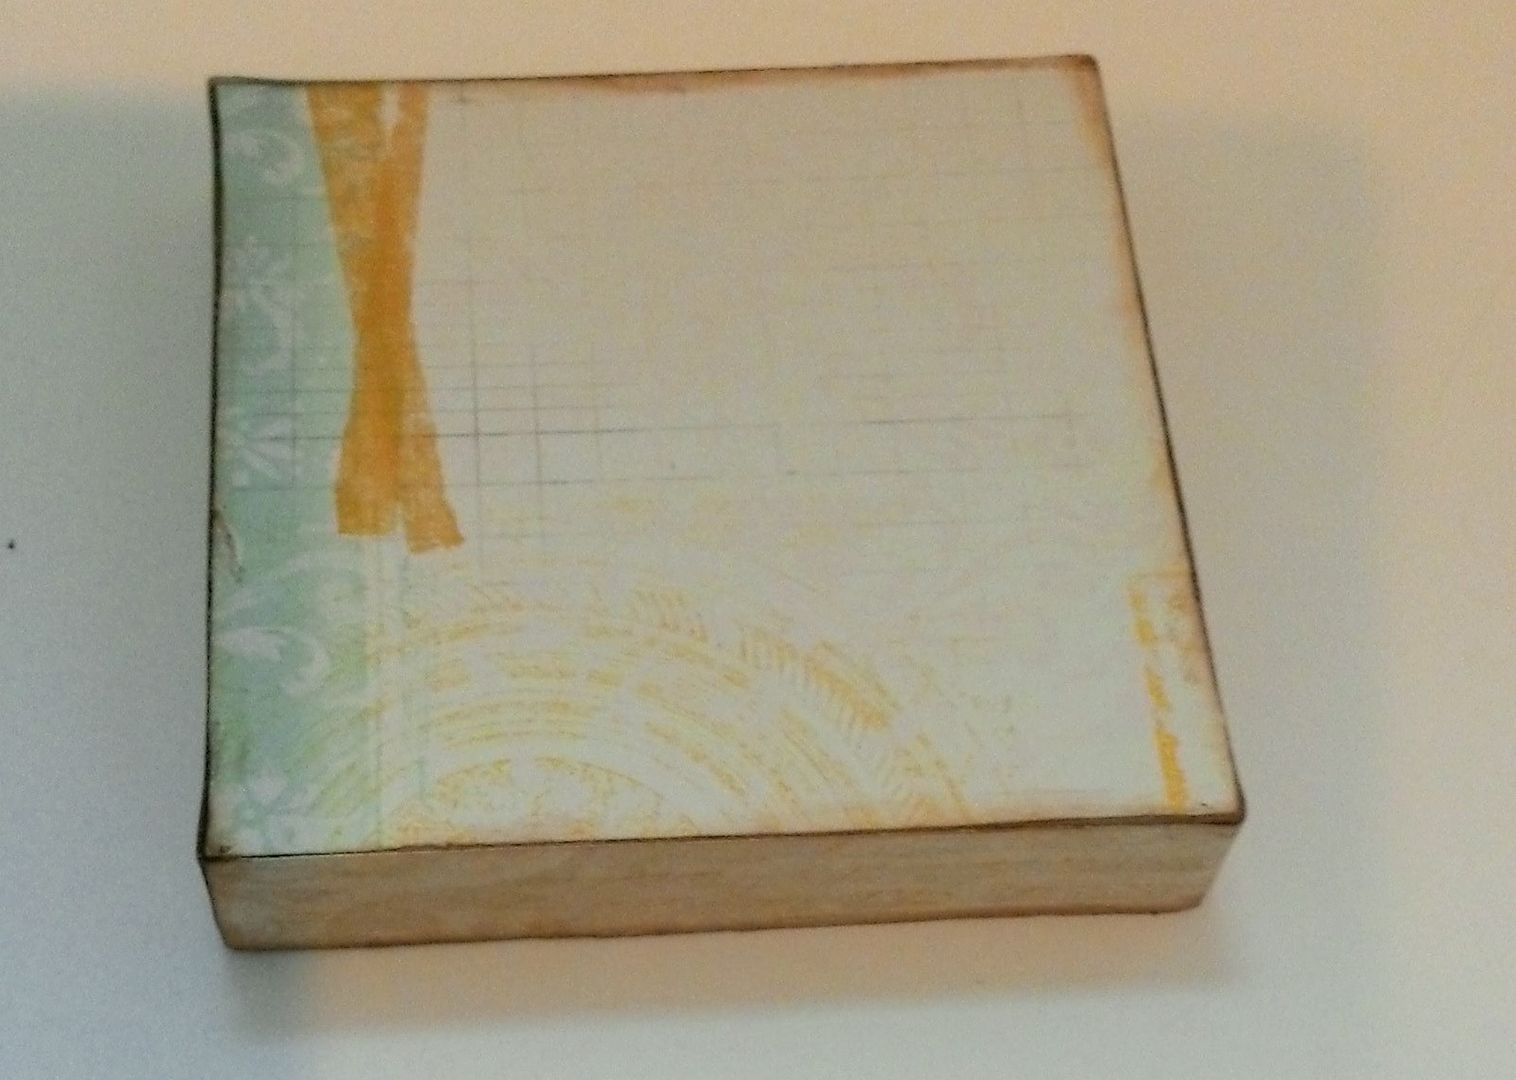
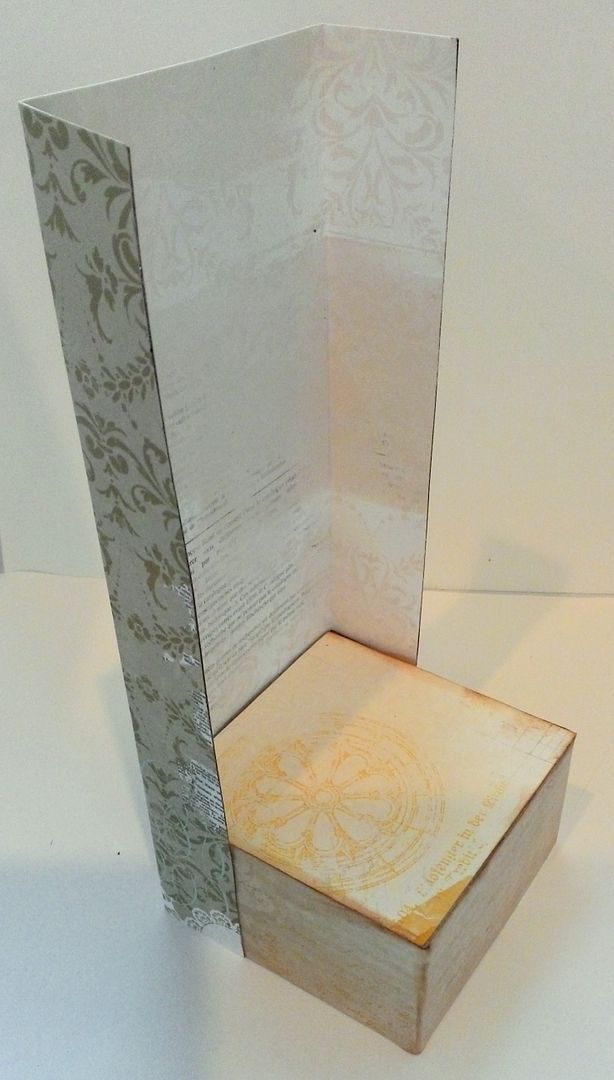
The base of the piece is made from 4”x4”x2” paper mache box.  I covered all of the surfaces of the lid of the box and the outside of the bottom of the box with decorative paper.  I also inked all of the edges.  There is no need to cover the inside bottom of the box as you will not see it.  Of course, painting the boxes is also an option
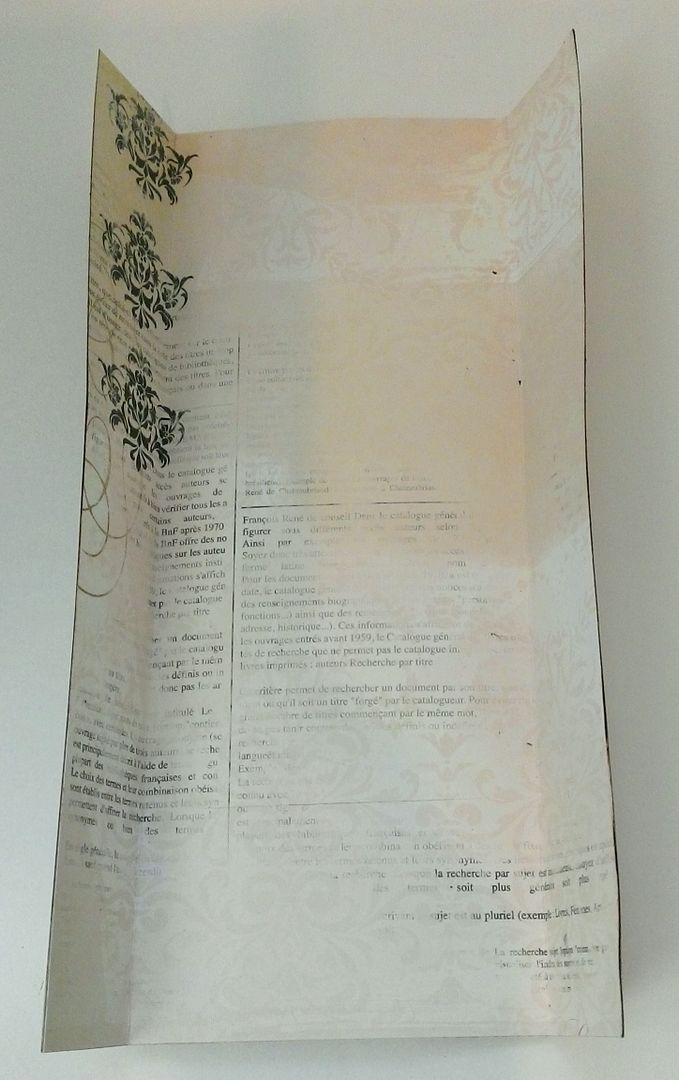
Next, I cut out pieces of decorative paper to serve as the supporting back and sides.  To determine the size of the paper, I used the finished size of the paper Victorian doll (which is 7” tall) plus some extra headroom (3 ½”) for the height.   To determine the width of the paper I used the outside measurement of the bottom of the box (4”) plus 1 ½” for each side of the box for a total of 7”. 
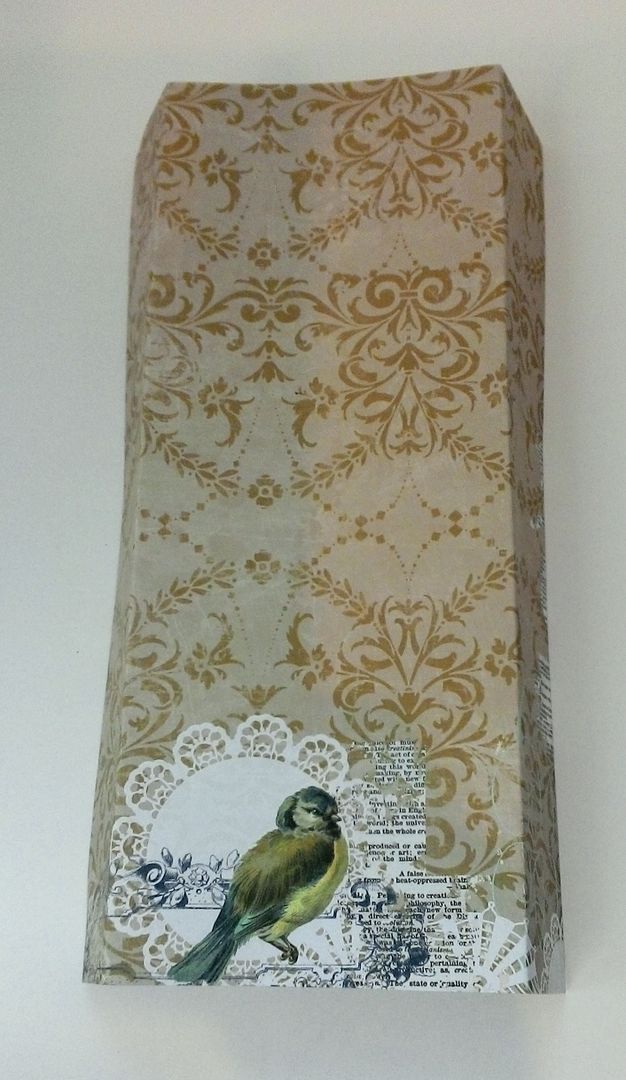
The end result was that I cut two 10 ½” x 7” pieces of decorative paper and glued them together mindful of which designs I wanted to expose on the inside and the outside.  Next, I scored and folded two lines on the paper 1 ½” from the long edge of the paper.  This will make it easier to glue the paper to the box.
I then glued the paper to the outside bottom of the box.  If you are going to decorate the inside of the paper you might find it easier to add your embellishments before gluing the paper to the box  Note that the paper only wraps partially around the box.  This will create support for the lid (which will be the top) but allows the base of the box to be exposed so that you can see the items inside.
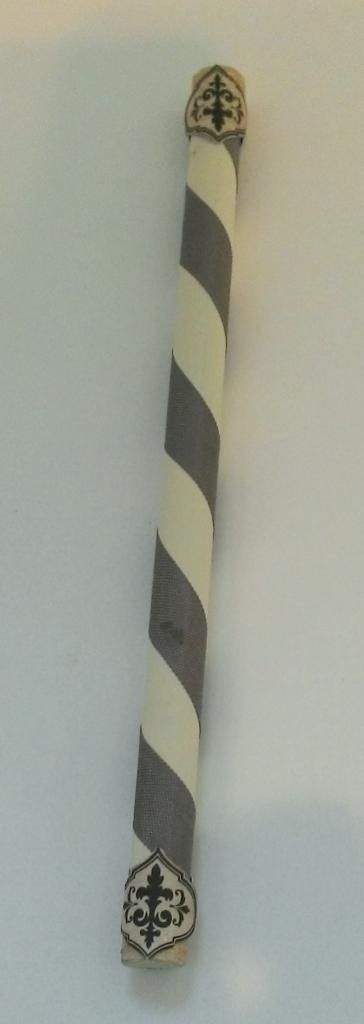
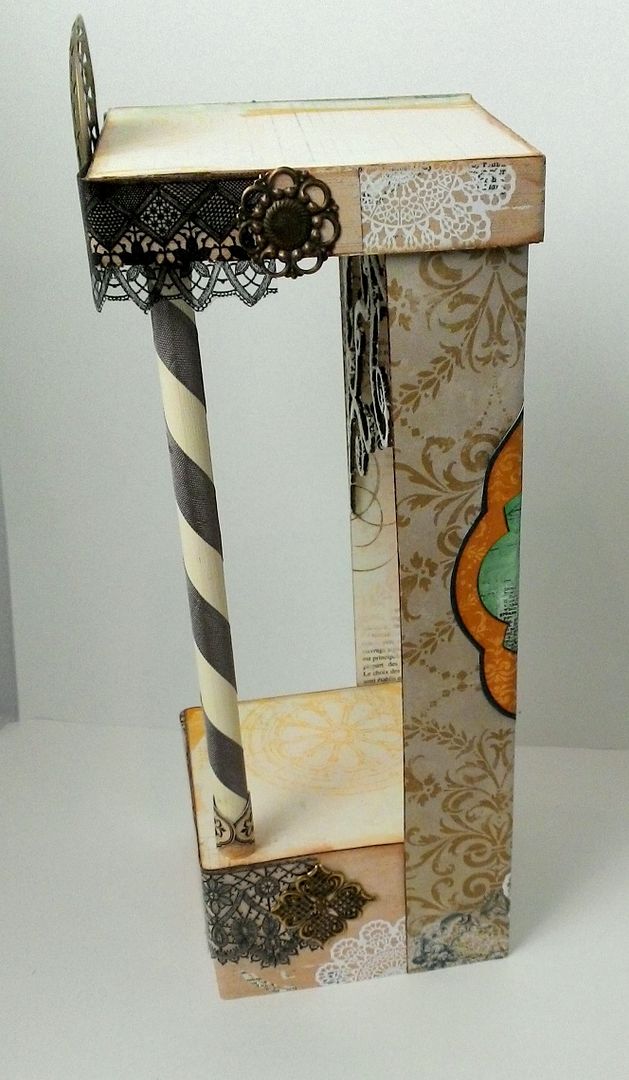
The top of the paper is then glued to the inside of the lid of the box creating the top.  I also glued a wooden dowel in place at the same time as attaching the lid.  The dowel is used to create more visual interest and to add more support to the top.  I painted the dowel cream color paint and wrapped it with seam binding.  At the ends of the dowel, I added pieces of decorative paper.  To determine the length of the dowel, I measured the distance between the top of the base to the top of the paper that is attached to the base.  In the case of this piece, it measures 8 1/8”.  
In the picture below you can see the lid attached to the top of the paper (note the paper is inside the lid) and the dowel is attached to the base and to the inside of the lid.  That’s it; you have a basic diorama structure!
Of course, there all kinds of embellishments that you can add to the basic structure.  Based on what you plan to add, you might want to attach it before or after you assemble your structure.
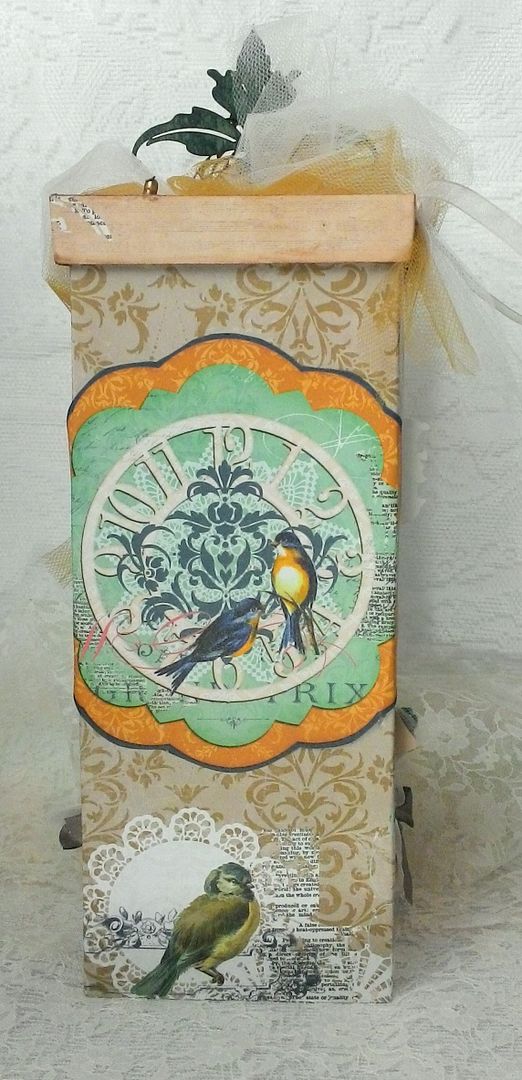
To the top and bottom, I added images of lace printed on transparency sheets.  I used brass pieces to finish the edges.  To the top, I added a clock from my Tick Tock Collage Sheet and framed it with a circular brass piece.
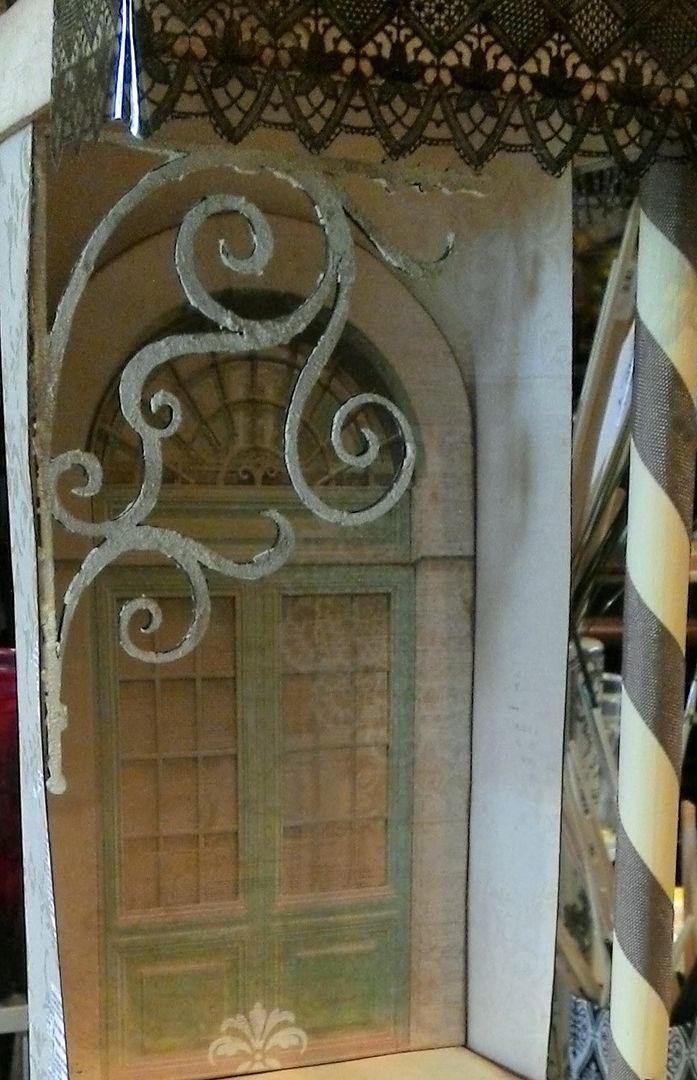
On the inside edge I added a chipboard corner scroll painted with Ranger Picket Fence Crackle Paint.  I cutout a door from one of the decorative papers and attached it to the inside, popping it out slightly with the use of double stick foam core tape.
On the back I added another image from the decorative papers.
Making the Skirt
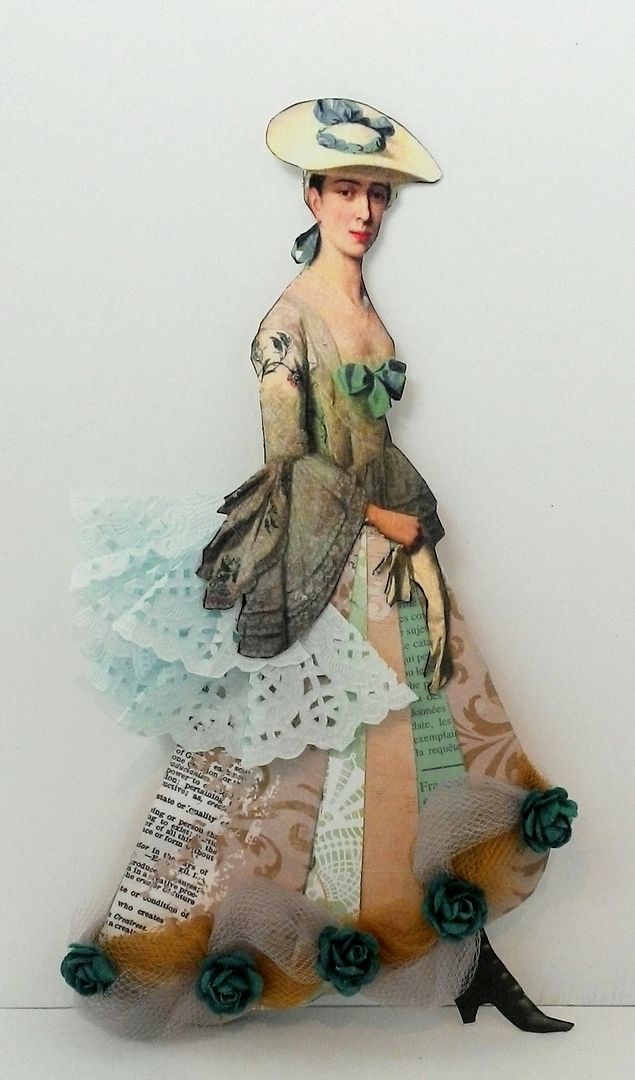
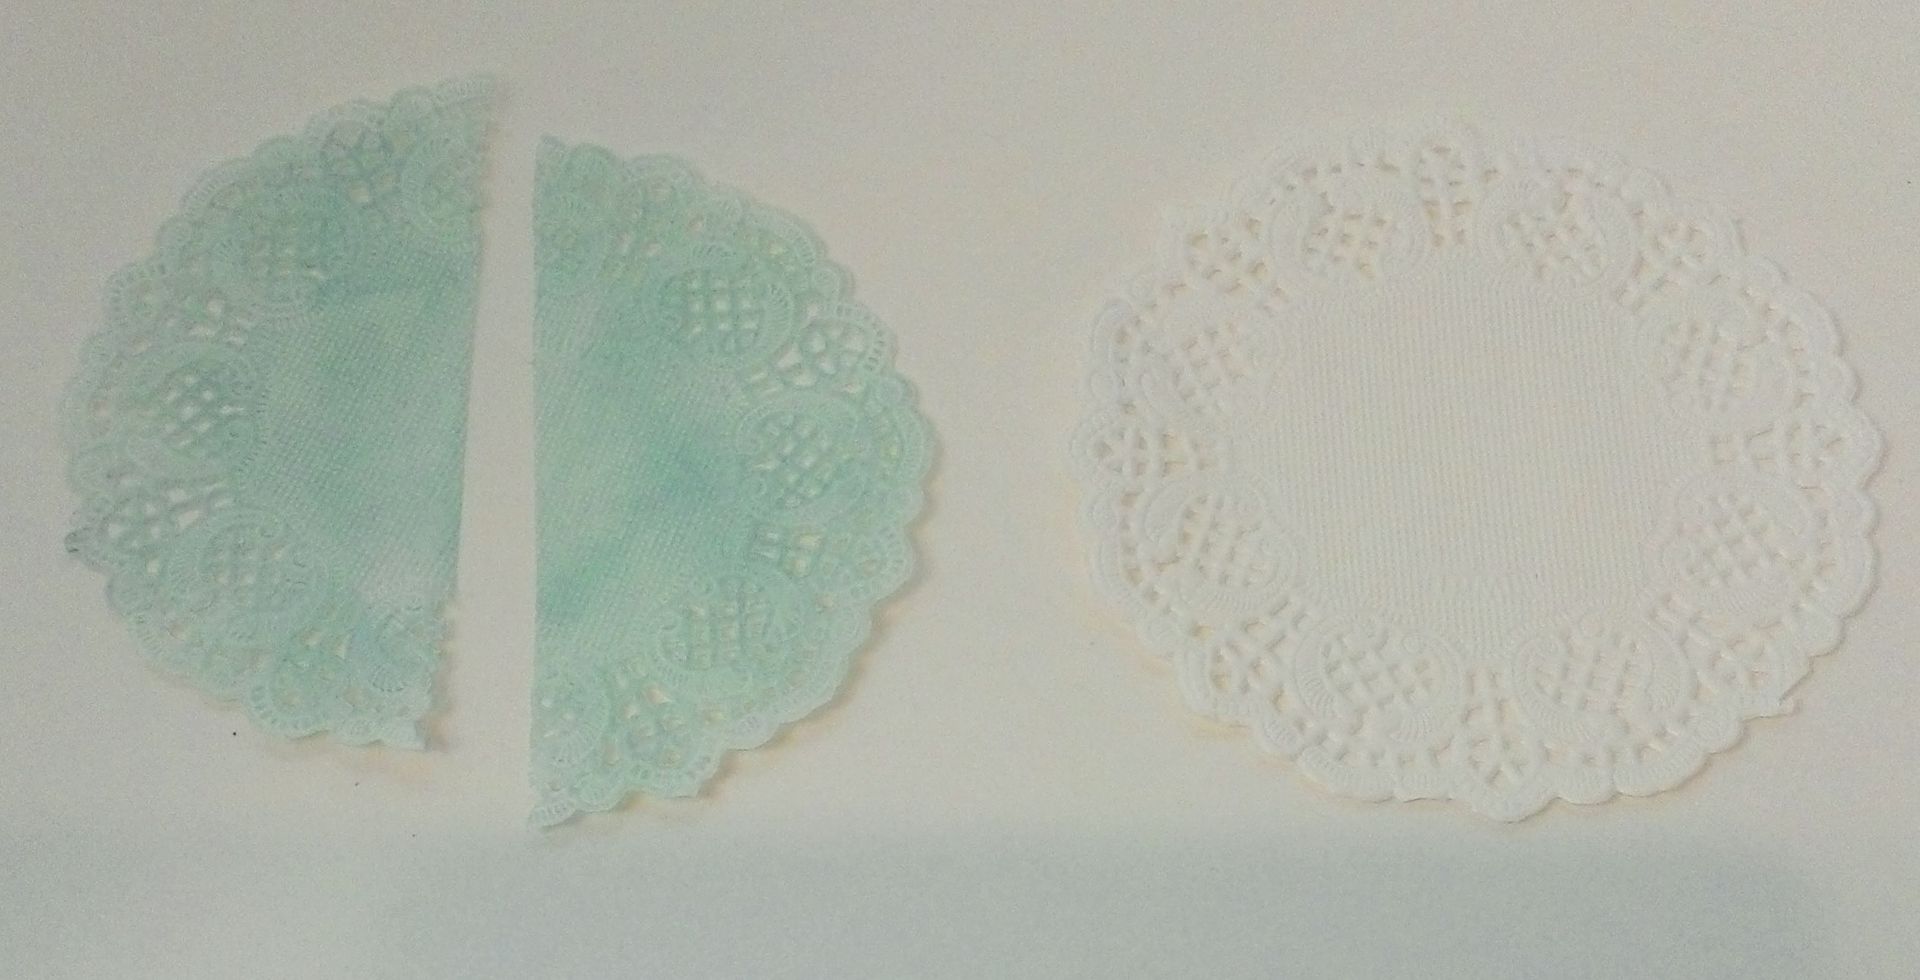
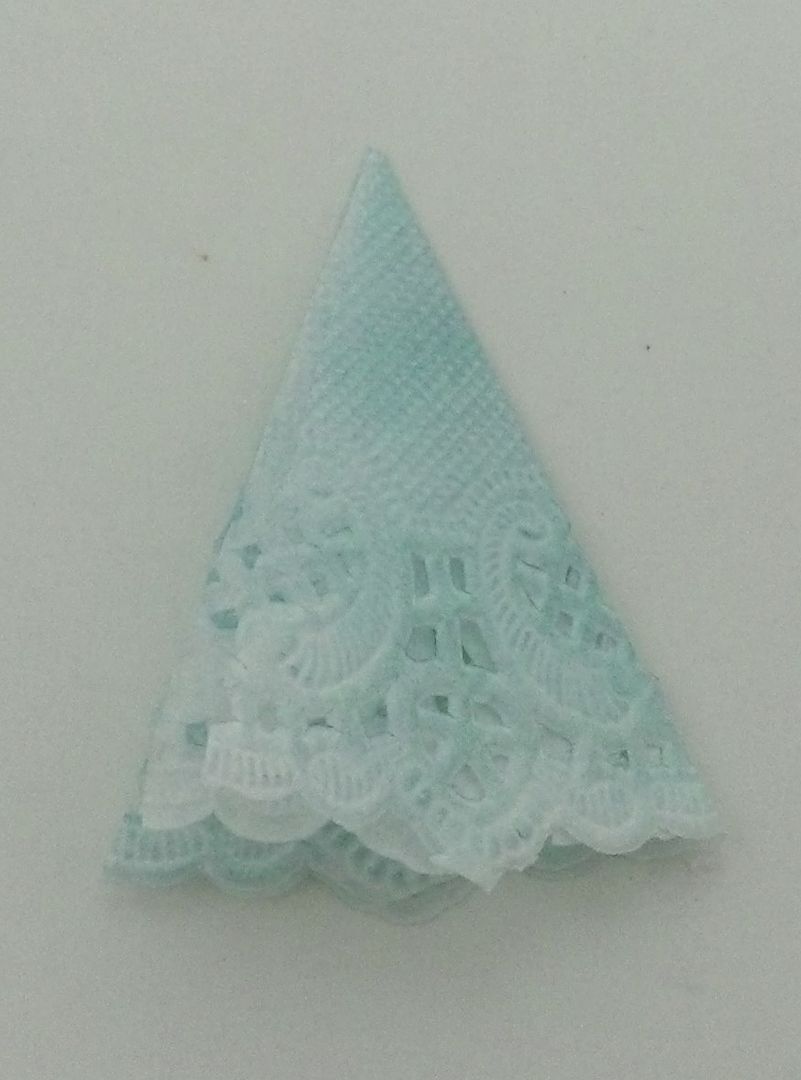
Since the image I was inspired by had only the top half of a dress, I needed to create a skirt.  First, I set out to make a bustle from a paper doily.  I inked both sides of the white doily with Tumbled Glass Distress Ink and cut the doily in half.
Starting with 1/2 or the doily, I folded the doily in half.
I folded the doily in half again.
I folded the doily one last time.  The doily is now folded three times.
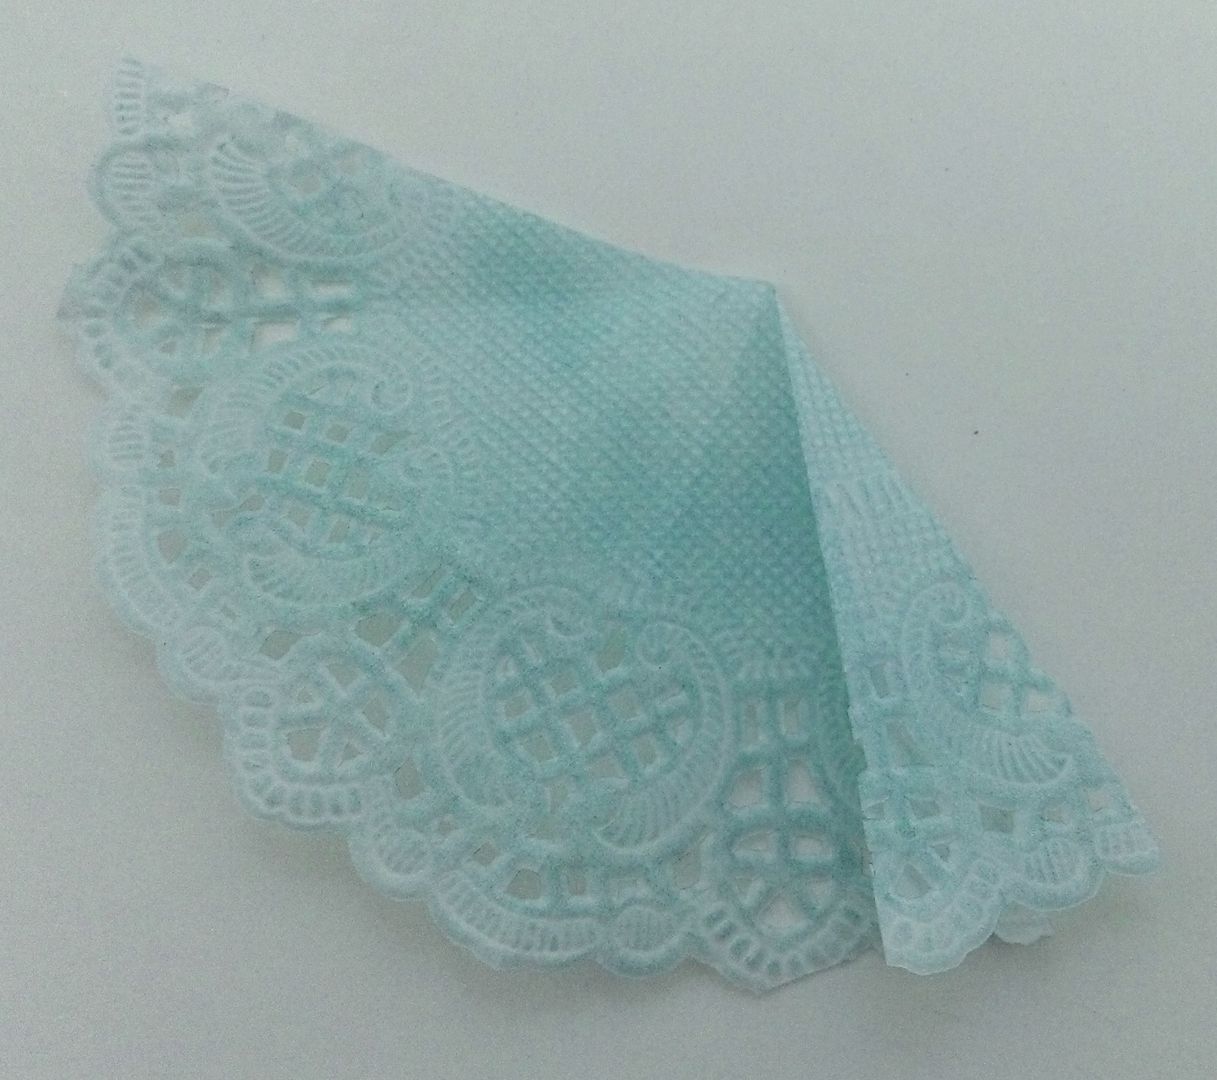
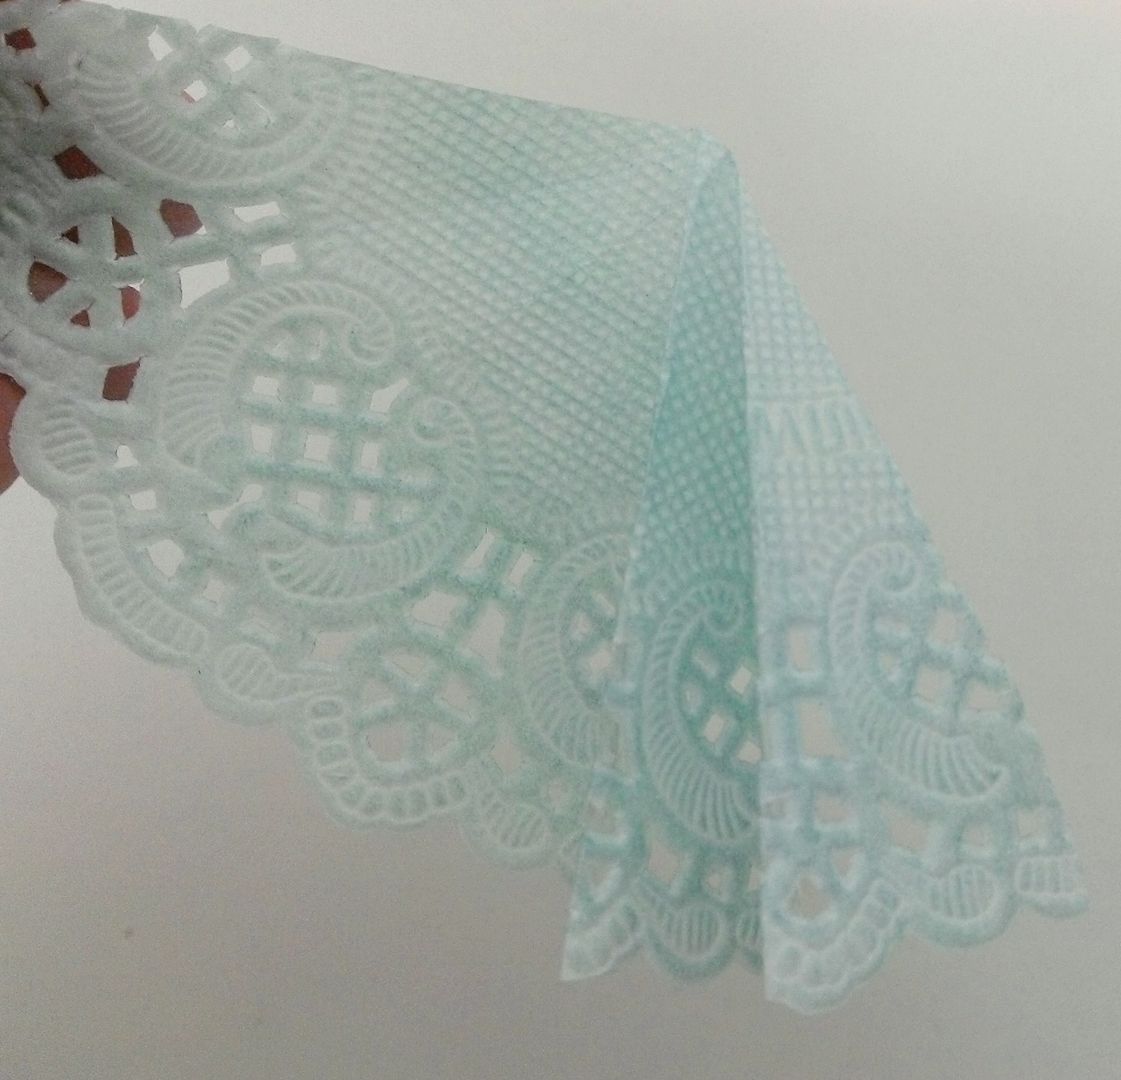
Next, I unfolded the doily.  The purpose of the folding was to create fold lines to make it easier to accordion fold the doily.  Folding it first created equally spaced fold lines which would have been hard to make if you tried to accordion fold the doily with no fold lines.
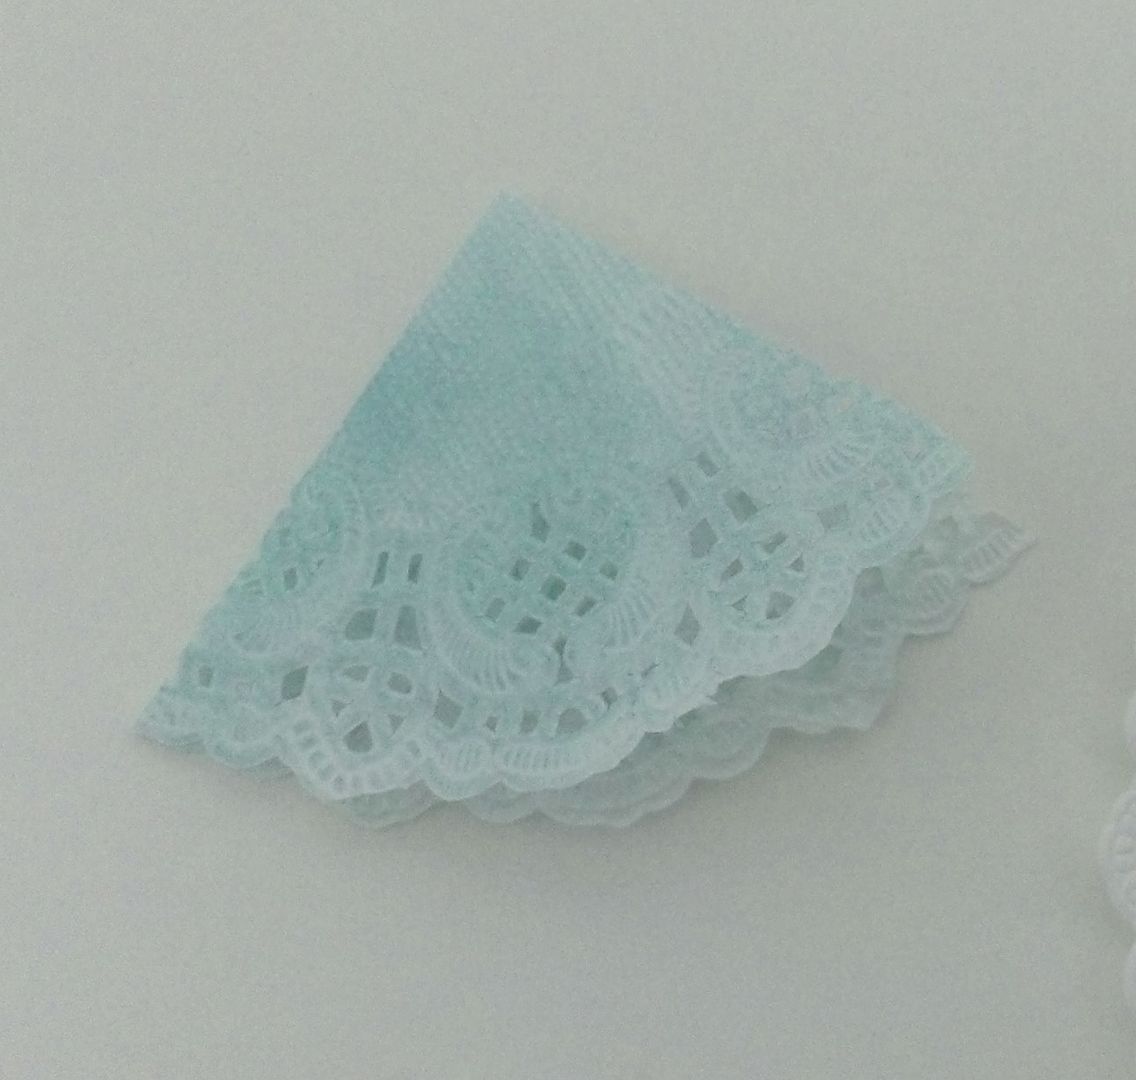
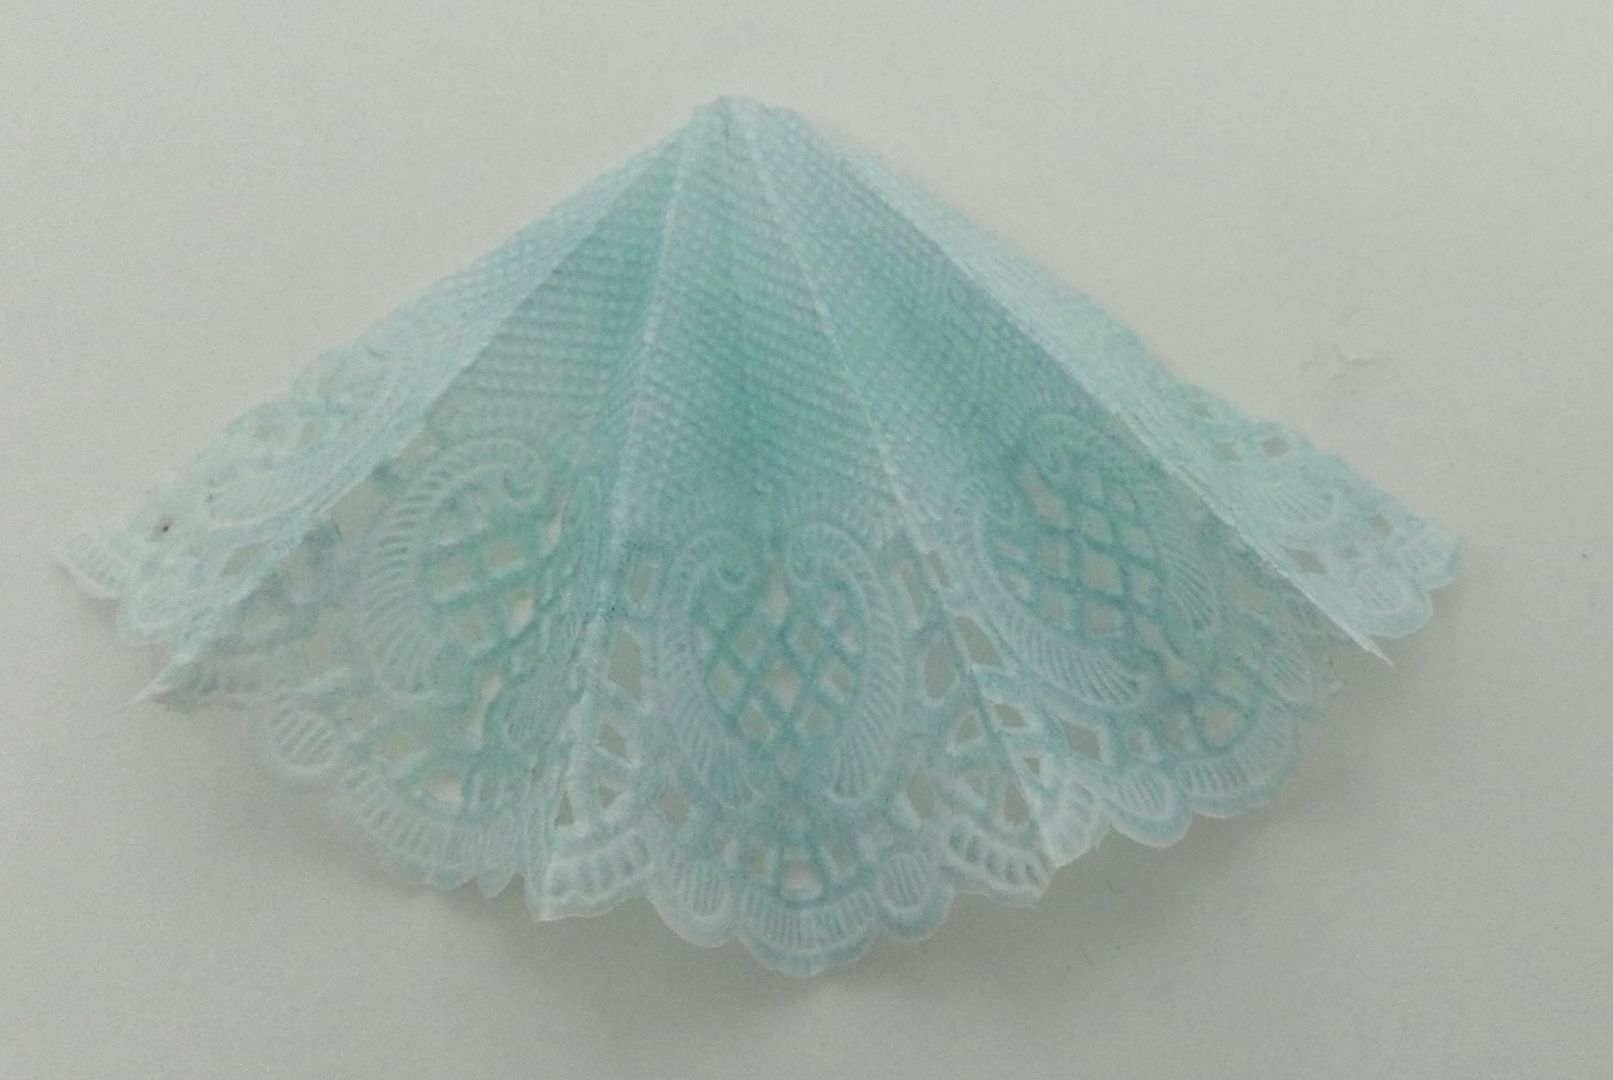
I started accordion folding the doily starting at one end using the pre-folded lines as a guild.
Continue accordion folding the doily along the guide ines until you reach the end.  You should end up with a half doily that looks like the picture below.  I repeated the same process for the 2nd half of the doily.  
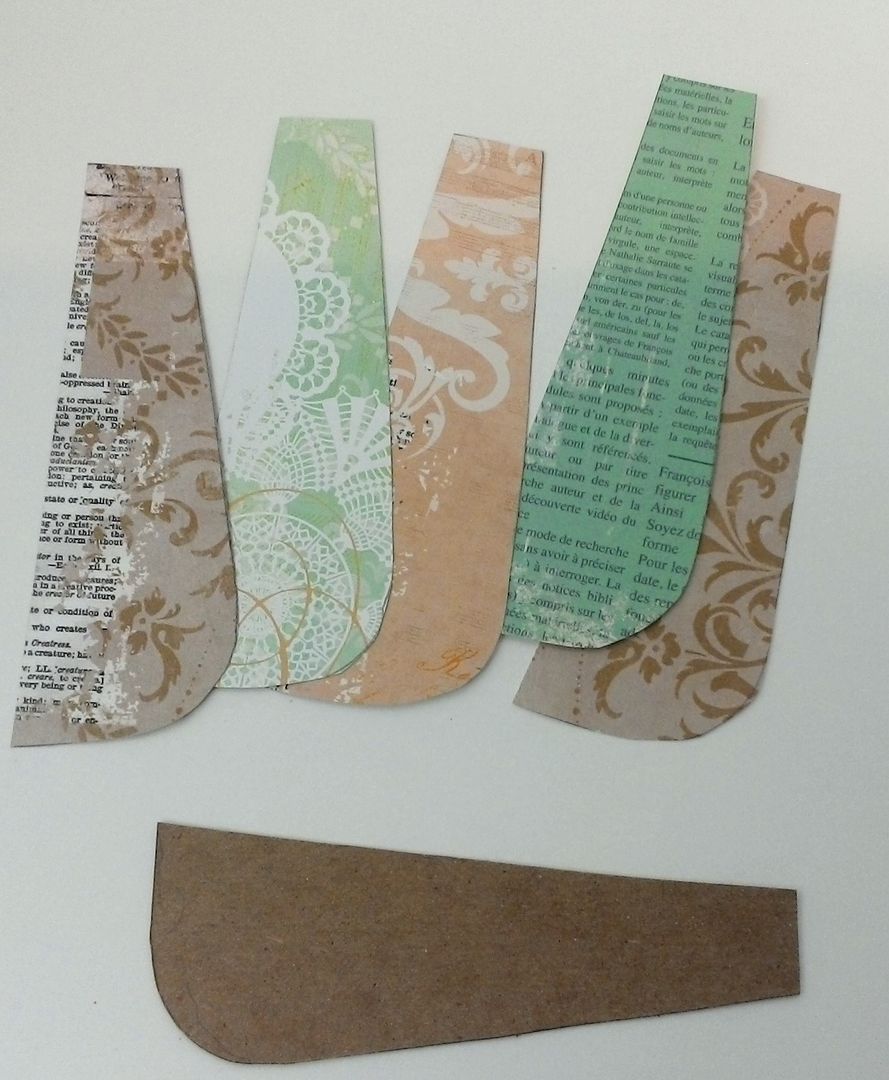
Next, I made panels for the skirt.  
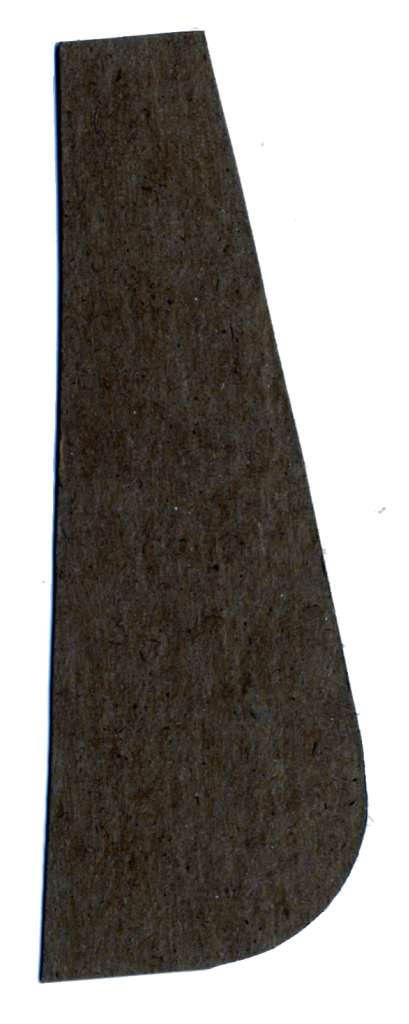
I started by creating a template made from lightweight chipboard.  Below is a scan of the template I used.  Feel free to download it and use it if you wish.
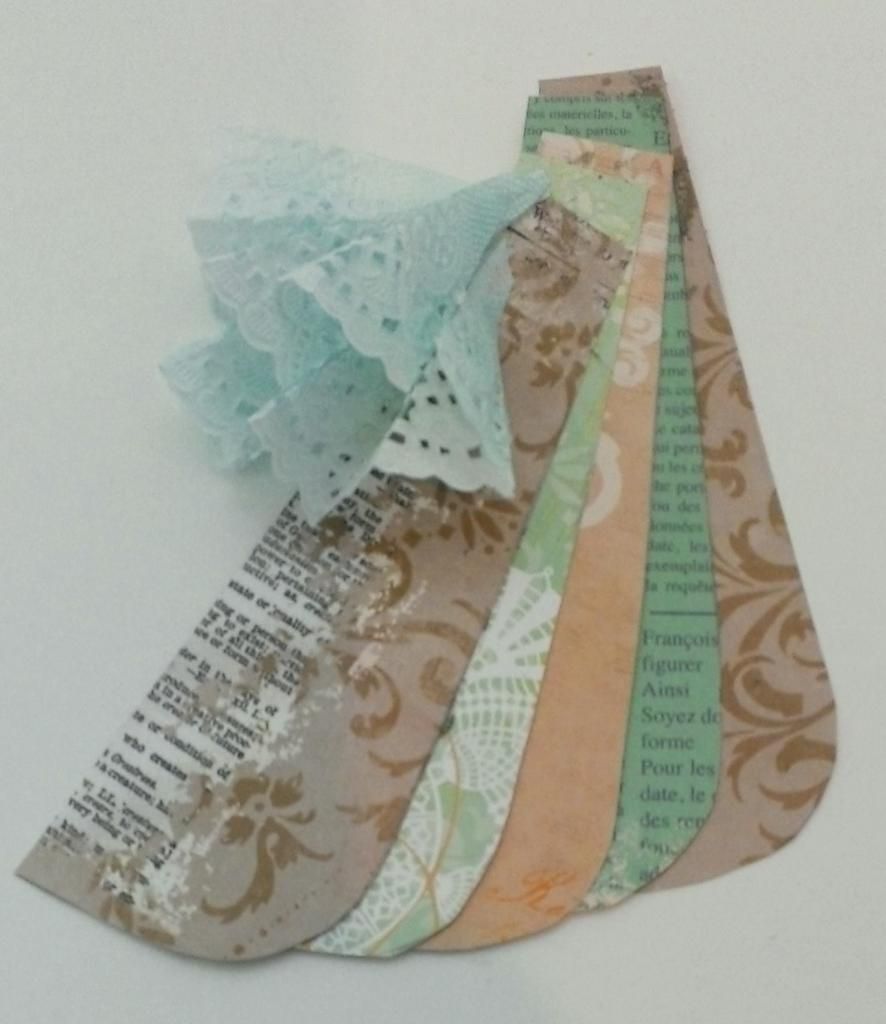
Using the pattern, I cut 5 panels from various patterned paper and glued the panels together.  In deciding on their placement I used the bottom of the bodice as my guide.
Next, I attached the paper doily bustles to the panels again using the bodice as my guide.
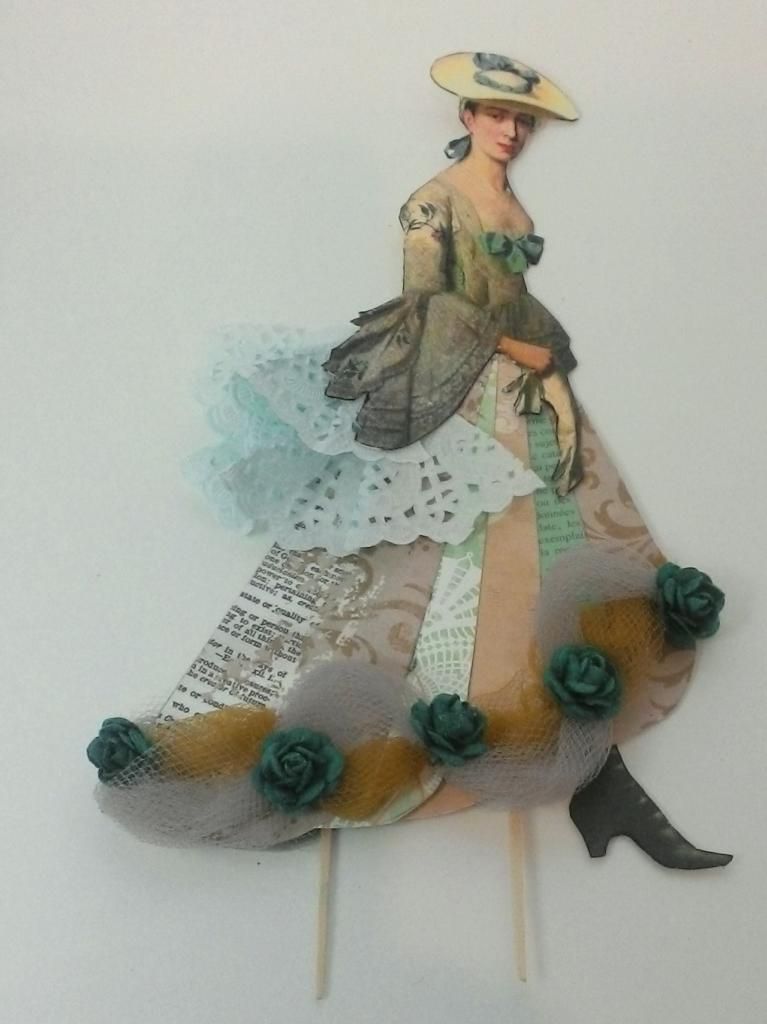
To decorate the bottom of the skirt I used two pieces of different colored tulle netting gathered by wrapping thin wire around the tulle.  I made the spaces between the gathers wider on one piece of tulle than on the other piece of tulle.  The difference in spacing was because the wider-spaced tulle was going to be placed on top of the other piece of tulle and I wanted it to puff out more.
I attached the darker or shorter piece of tulle by gluing down each wrapped wire and then gluing the rough ends behind the skirt.
Next, I glued the longer tulle piece on top of the shorter one in the same manner.  I used paper roses to add more decoration and to cover the wire.
In order to attach the woman to the base of the diorama, I glued flat toothpicks to the bottom of the skirt.  I also glued additional paper panels to the back of the skirt to support the toothpicks and to hide the rough edges of the tulle.
Making the Doily Parasol
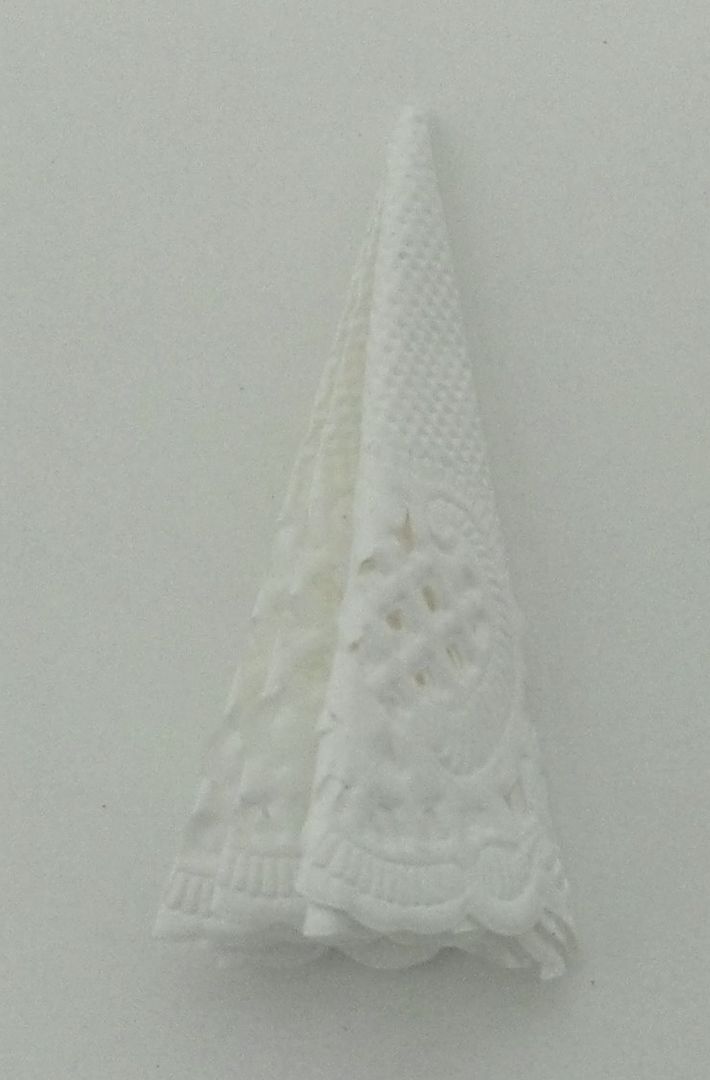
After playing with the doily to make the bustle I decided it would make a lovely parasol.  First, I folded a full doily in half, then in half again 3 times which was about as many times as you could fold it.
Next, I opened up the doily and used the fold lines as a guide to help me accordion fold the doily (just like with the bustle).  Just pick a place to start and keep folding until you come full circle.
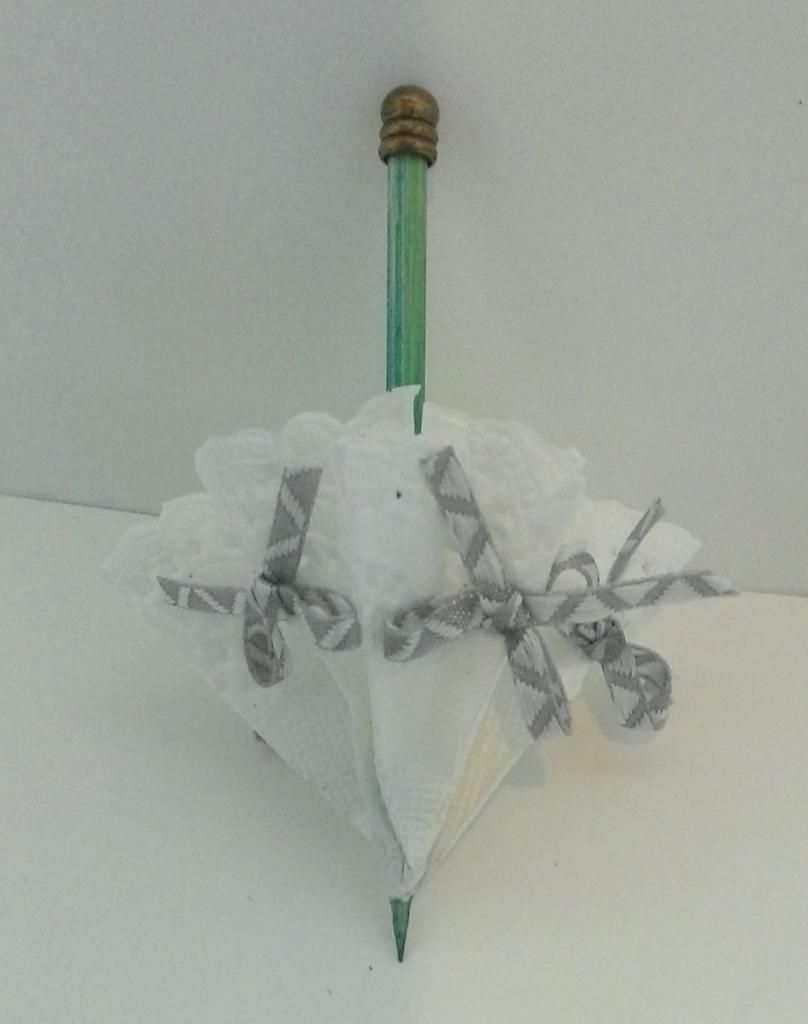
To jazz up the parasol, I used tiny ribbon bows.  The handle is a wooden skewer and the end is a brass box foot that just happened to fit the skewer perfectly.  When gluing the handle to the doily I pinched the bottom of the doily to the skewer and glued it in place inside.  This helped keep the parasol partially closed.
Finishing Touches
Whenever I’m working on a project and I’m almost finished I invariably decide that it needs more touches here and there.  In the pictures below you can see that I decided to add a chipboard foliage piece accented with a piece of brass filigree behind the clock.  I also glued tulle to the top and wrapped it around the column.  At the point of attachment, I wrapped a brass leaf and bird piece around the column.
Using the box lid for the top of the diorama provides a great place to hang stuff as you see with the birdcage below.  At the base of the piece, I added rondelles threaded with two different colors of seam binding.  I also added gold metallic Dresden to the top and bottom to trim up the pieces.

I poked holes into the bottom of the box to accommodate attaching the lovely Victorian lady.  I used a very liberal amount of E6000 glue underneath the box to keep her in place.
I hope I have demonstrated to you how easy it is to create the base for a diorama that can be customized for any theme and that you are ready to create one for yourself!