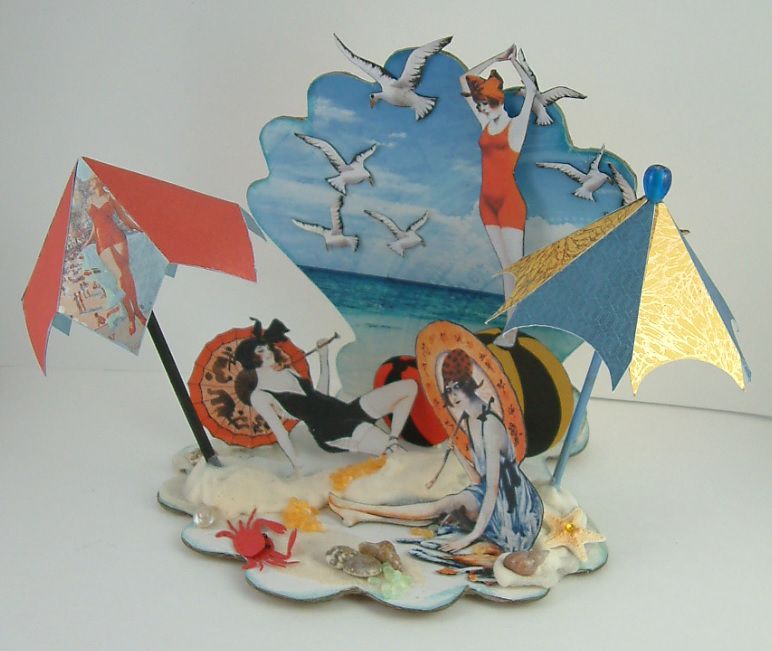
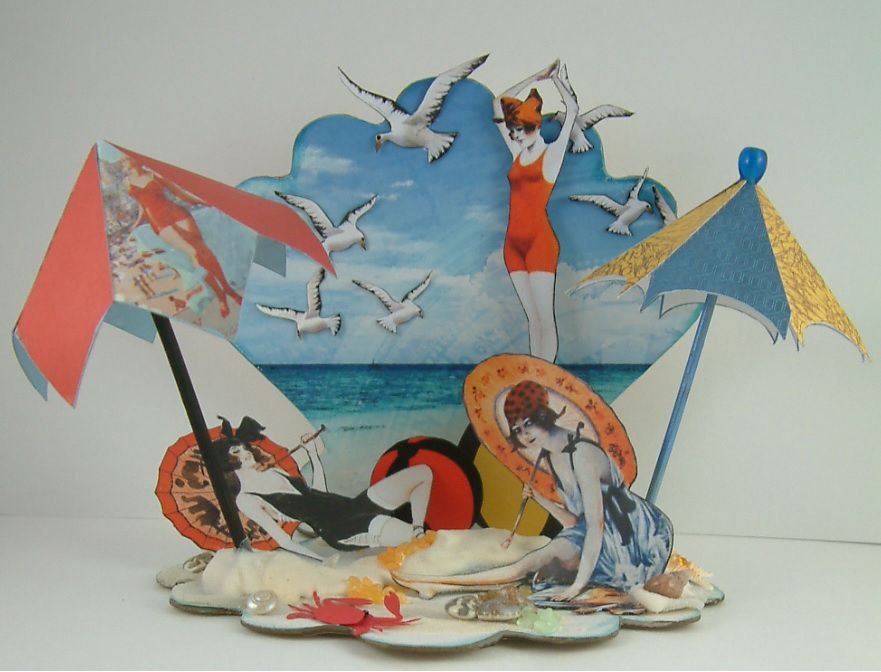
Lately I’ve
been itching to build a diorama. I think
the last one I built was the Mermaid
Sandcastle in the spring of 2012.
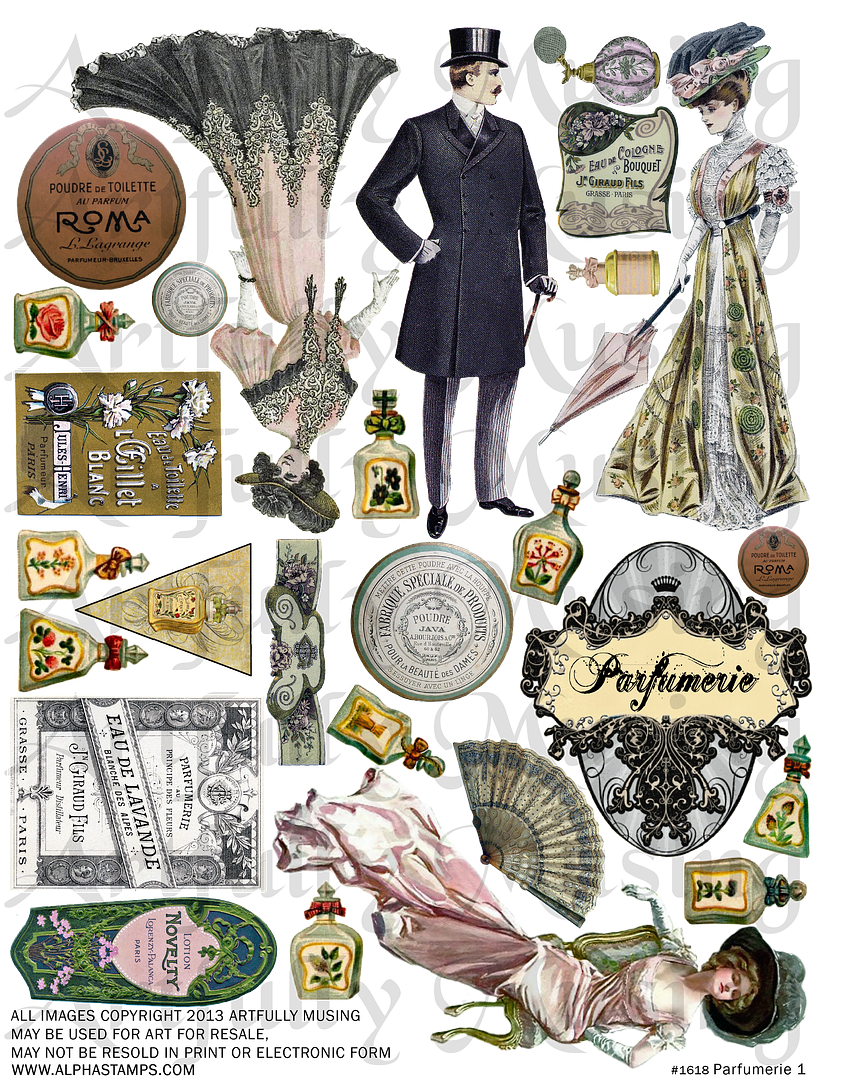
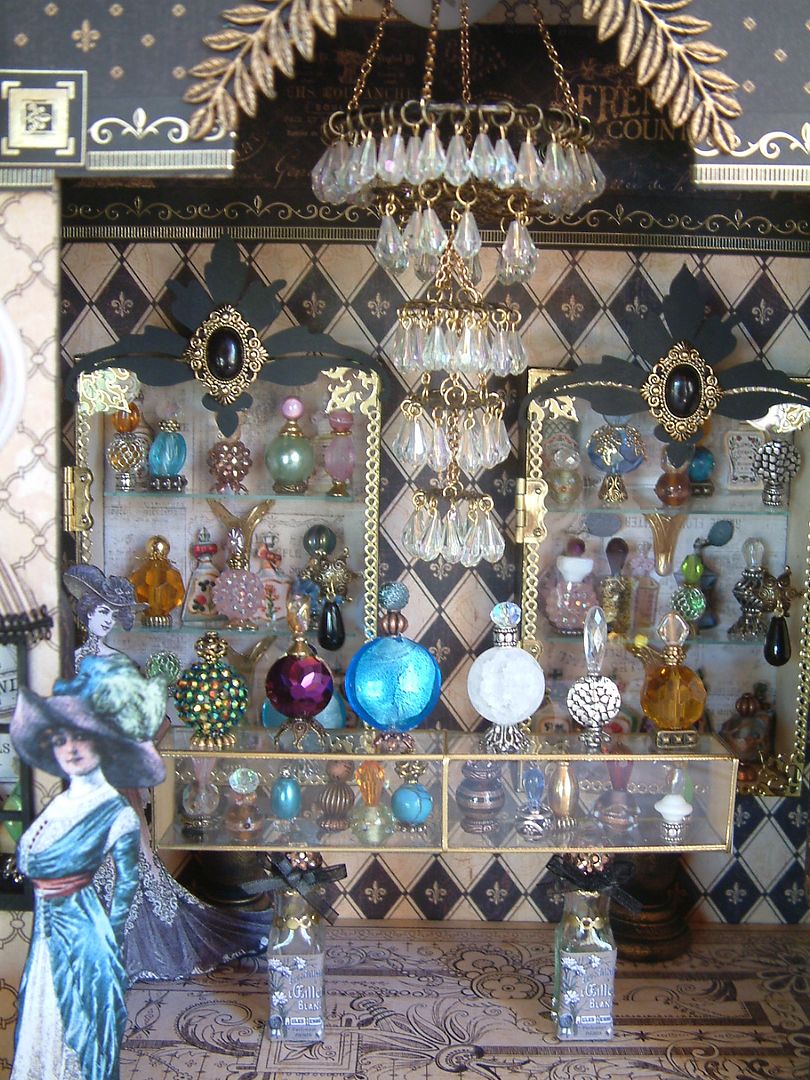
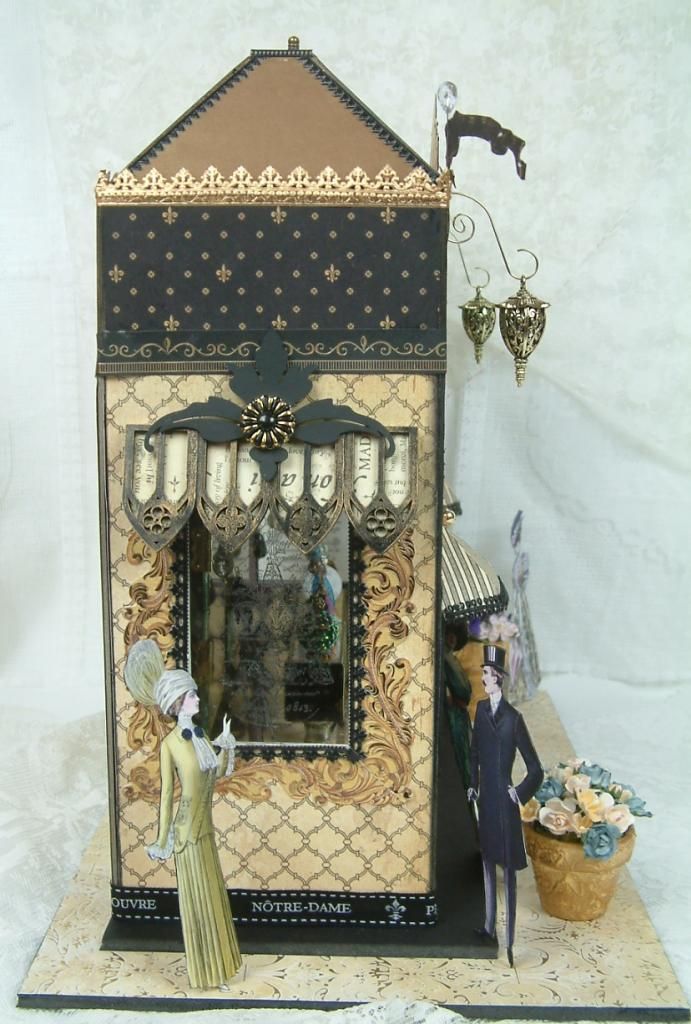
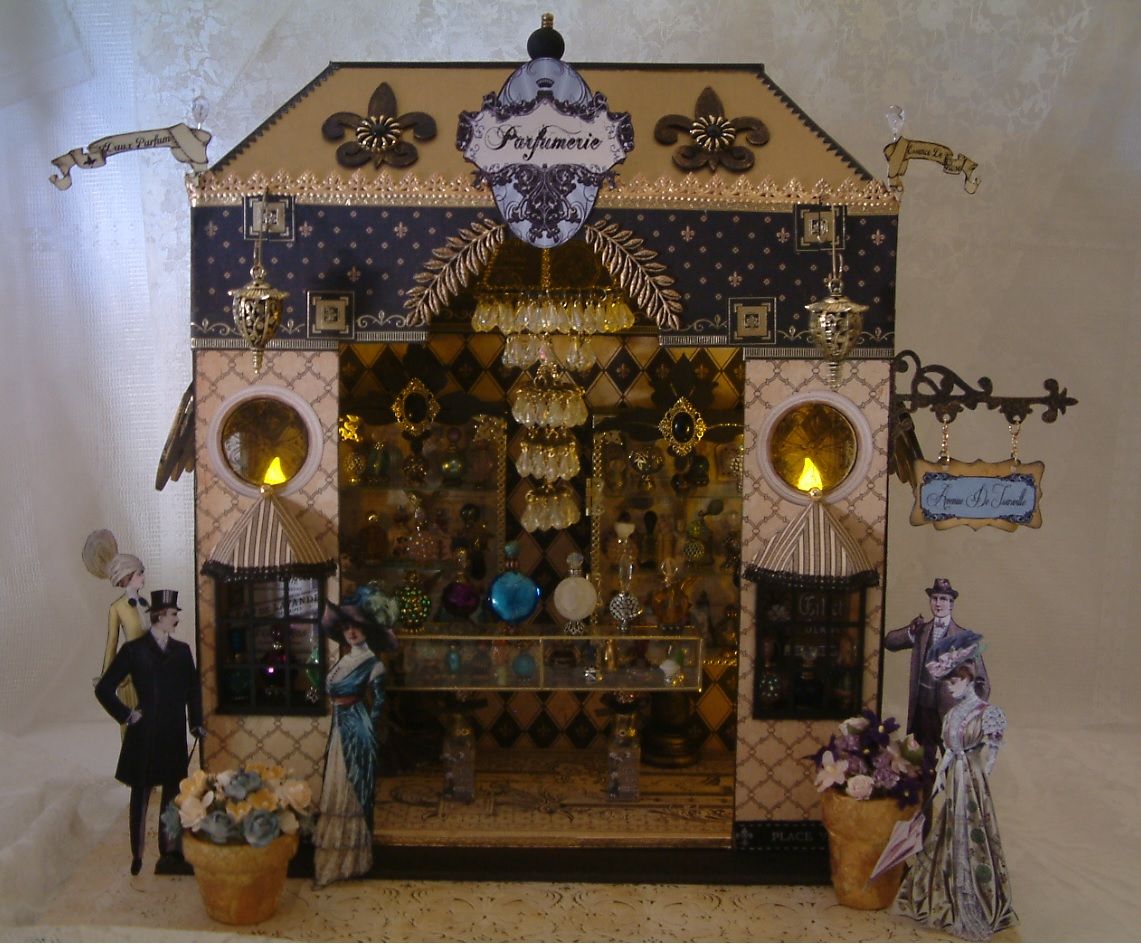
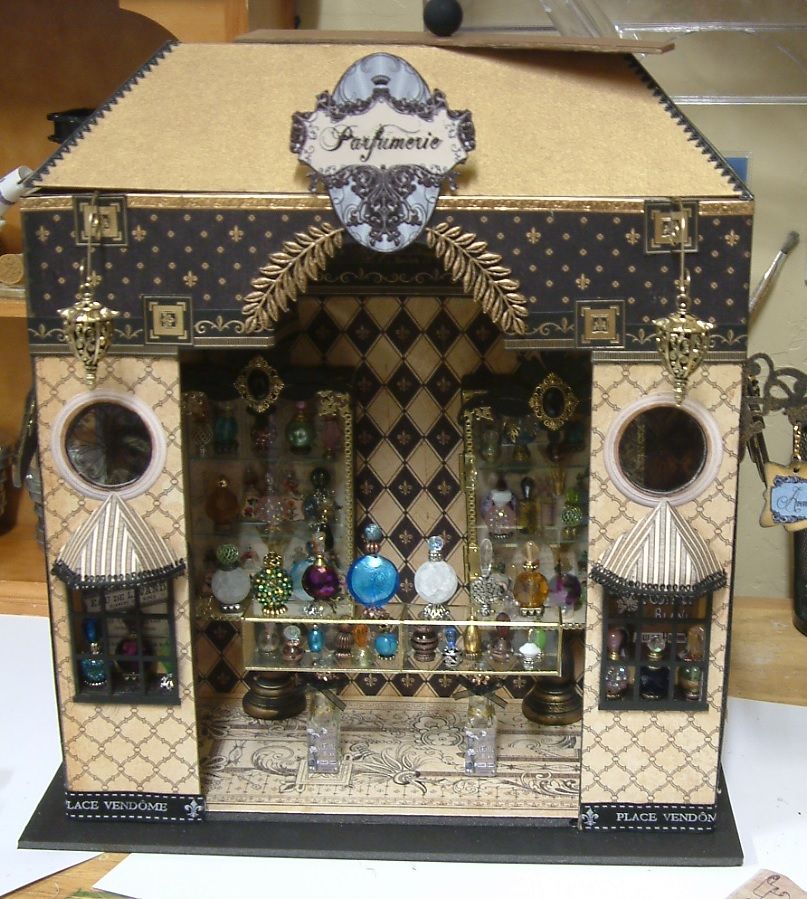
I’m a big fan of Downton Abbey and Selfridges so I decided to use Edwardian
fashion as my muse and create a French perfume shop complete with a beaded
chandelier, perfume bottles made from bead caps and beads and glass cases for
their display. To go along with the
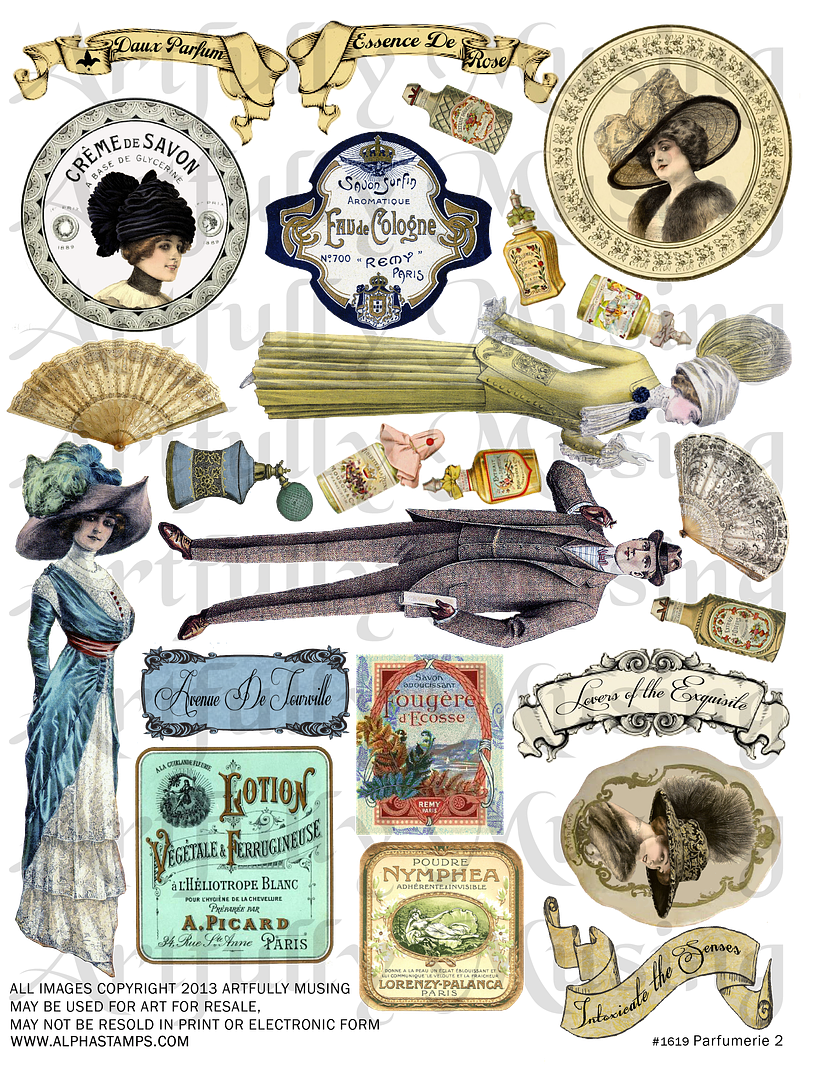
project I’ve designed two new collage sheets; Parfumerie
1 and Parfumerie
2.
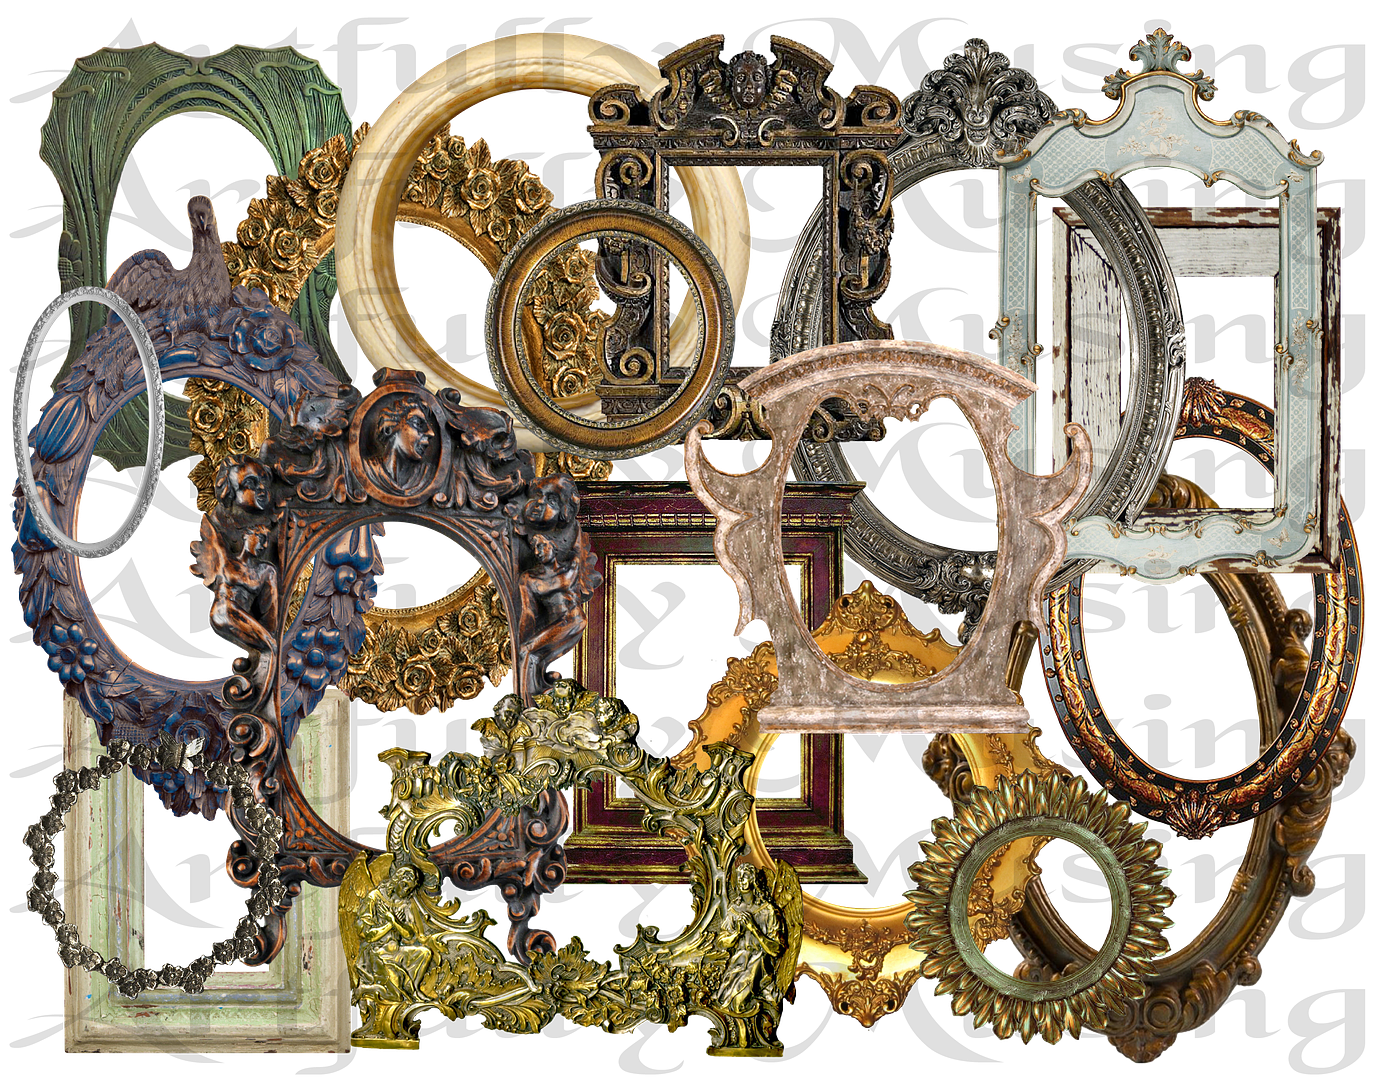
In addition to the new collage sheets I’ve designed my first
digital set of Antique
Frames. This is a set of 20
individual frames. Each frame is 300 DPI
in a .png file format with a transparent background. With each image being a separate file, it
makes it easy to size them to your needs or to use them in digital artwork.
In this
post, I’ll walk you step by step though how I constructed this piece. I’ll also show you how to make the chandelier,
perfume bottles and glass cases. If
creating a diorama is not your thing, you might enjoy making some bead perfume
bottles and a glass case to display them.
This
isn’t the only project I created for this theme. If you love hot air balloons you’ll want to
stay tuned for the next post.
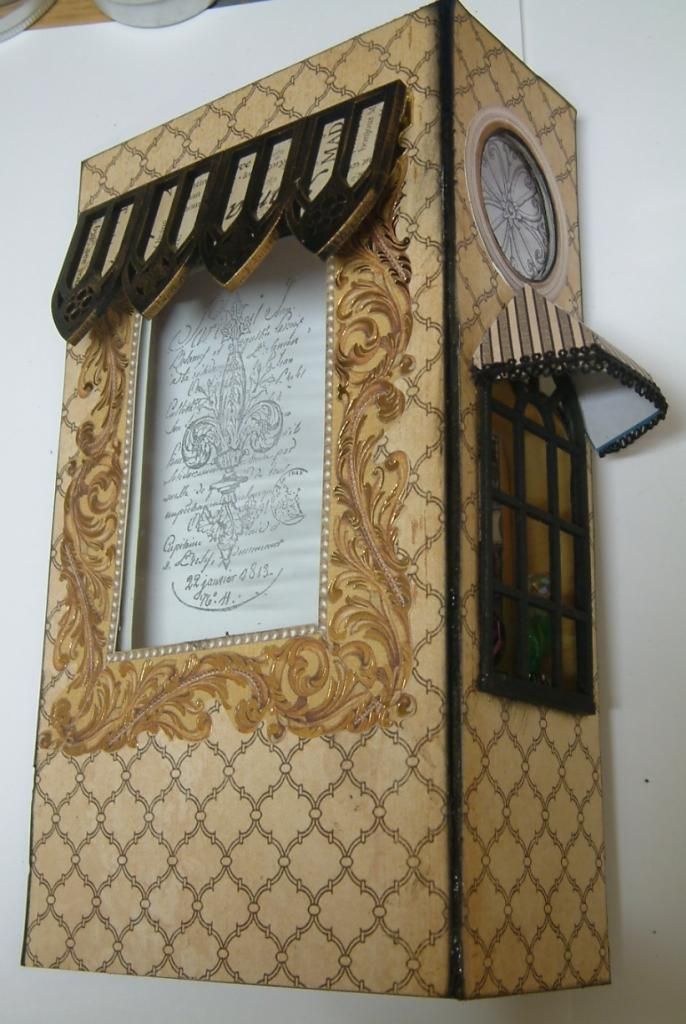
The
overall size of the piece is 16” x 16”.
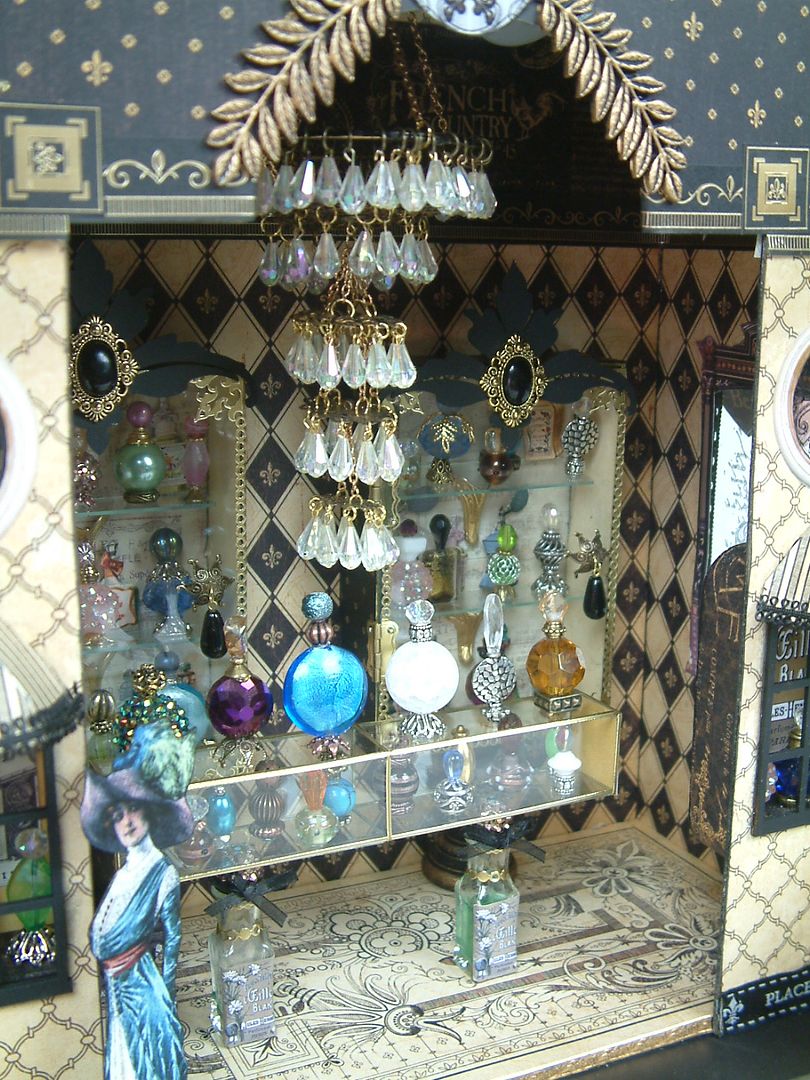
The
chandelier is made from filigree, beads, jump rings and chain.
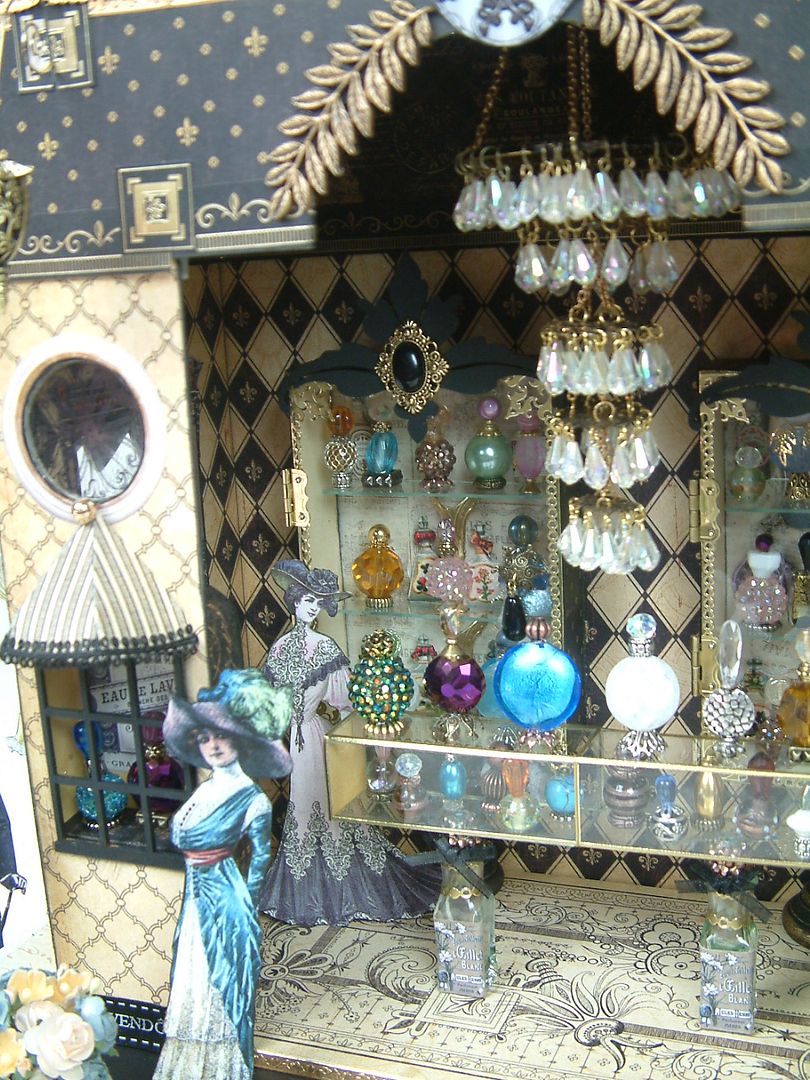
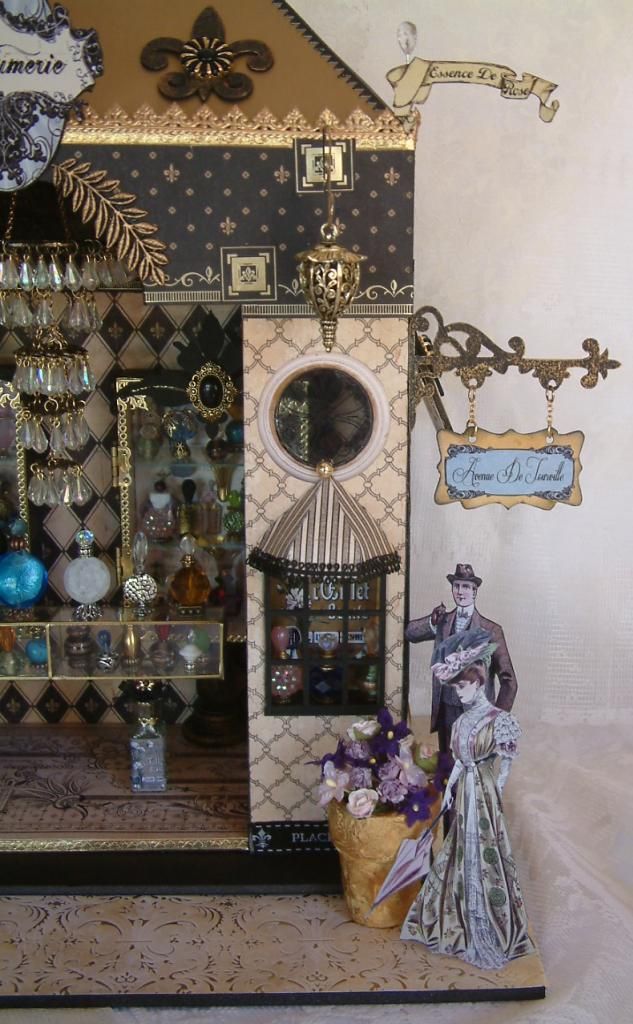
The
oval window at the top is a transparency.
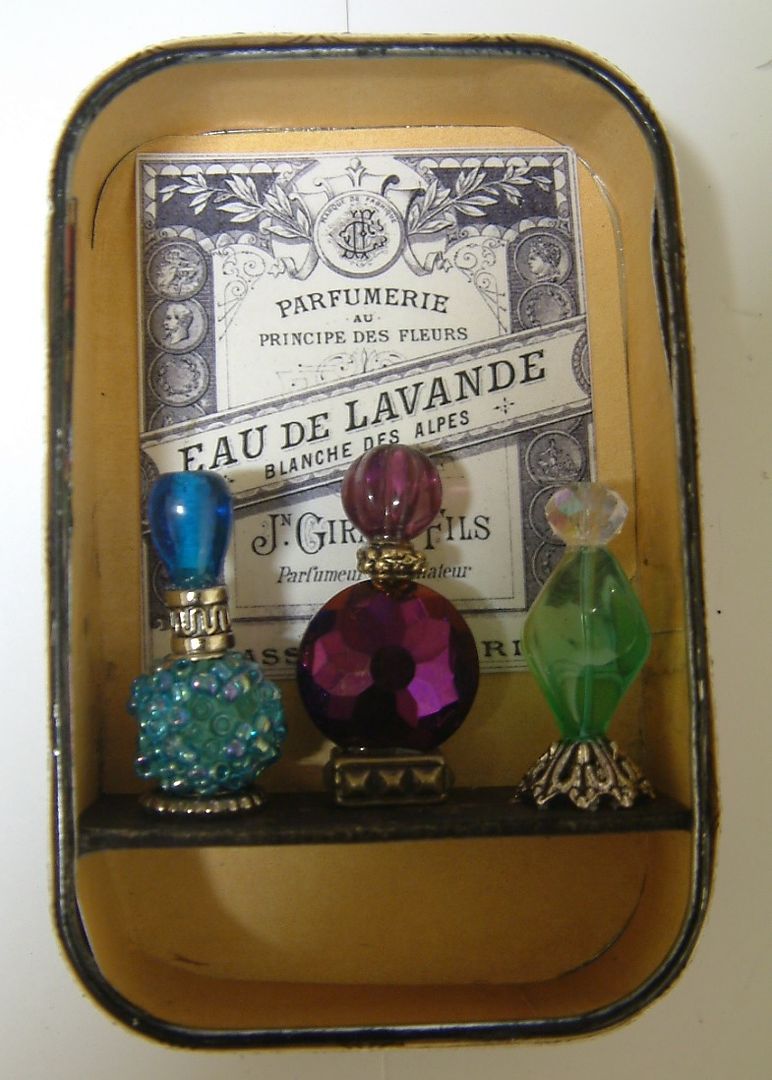
The box window display for the perfume bottles is Altoid’s tin mounted behind
the window.
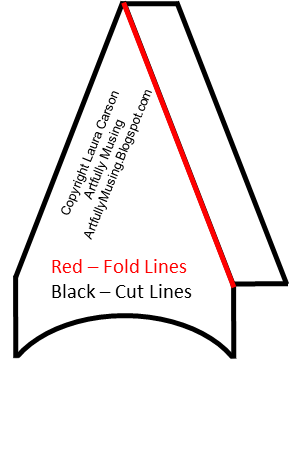
The awnings
on the sides of the shop are made from four arched windows glued together and
turned upside down.
Yes,
this diorama is lighted with LED
Tea Lights. I’ll show you in the
tutorial below how I mounted three of them inside the roof.
The
fronts of the large cabinets are glass and I used glass microscope slides to
make the glass case in front.
DIORAMA TUTORIAL
In the
tutorial below I’ll walk you through how I constructed the diorama and the
inside pieces. I find if I break the
project down into each component then the process becomes much easier.
IMPORTANT NOTE
The way
I approach building something like this is to measure and cut each section as
I’m working on it, rather than cutting the pieces all at once. I find my method has two advantages. First by cutting, decorating and assembling
each piece one at a time, I get a better fit.
Adding paper and other materials can change the measurements. Second, it makes it easier to change your
mind about a particular element; which you will see that I did in this project.
- I
approached the project by first making a decision about the size of the floor. I chose to go with a 12” wide floor as I
could use 12x12 paper for the floor The
depth of the floor is 5 ½” wide. This
was a decision based on accommodating the glass cases and chandelier.
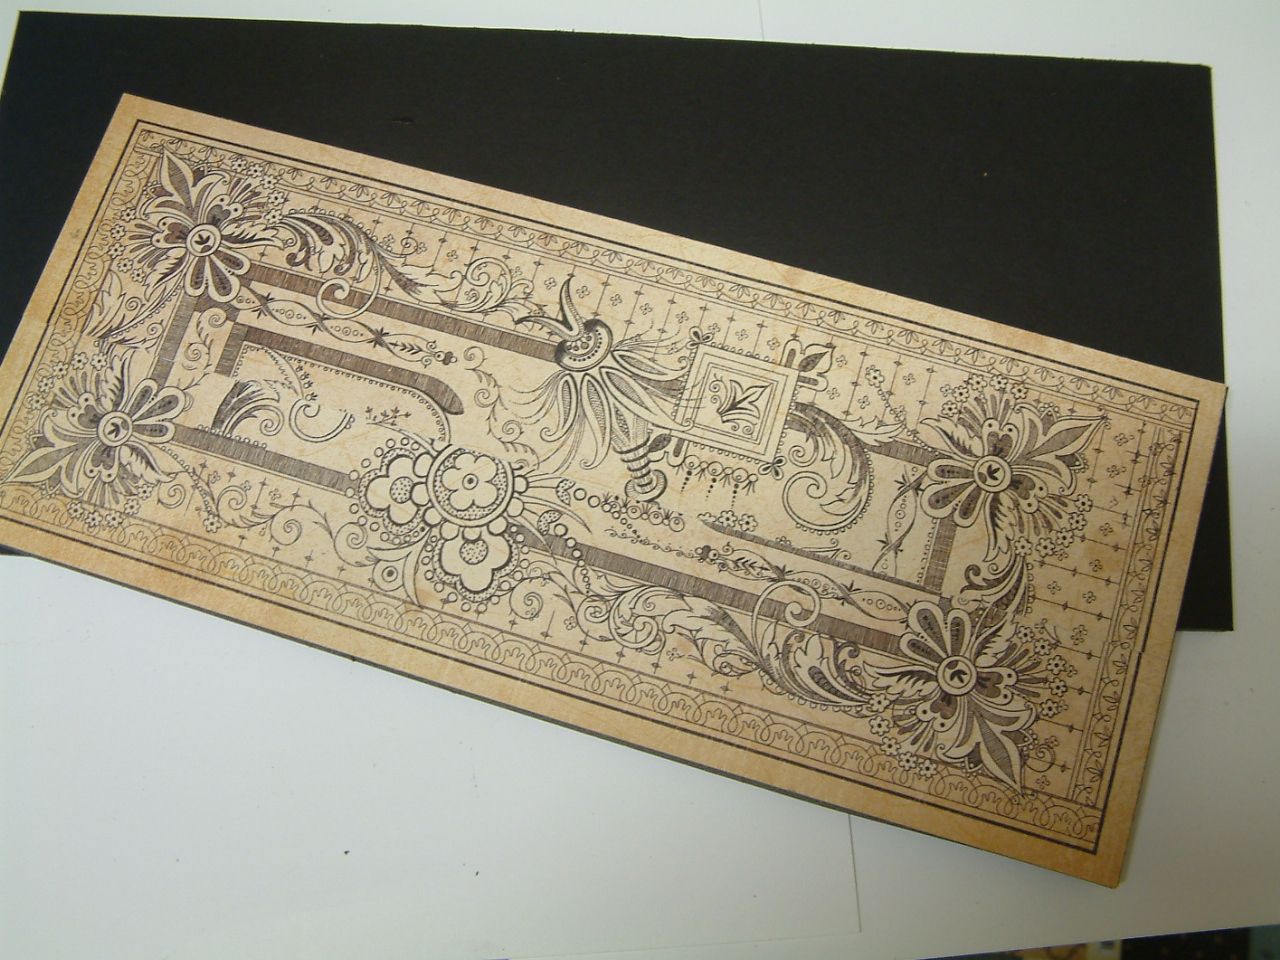
- The floor is cut from foam core and covered with
decorative paper. The paper is Olde
Curiosity Shoppe Collection Mercurial Masterpiece from Graphics 45. Unfortunately they have now discontinued the
pattern but you might find some at online stores or on eBay. Since I wanted to add people and flower pots
on the outside of the store I cut two more pieces of black foam core to glue
under the floor. The pieces were larger
than the measurements of the floor and one piece was larger than the other.
Front Panels

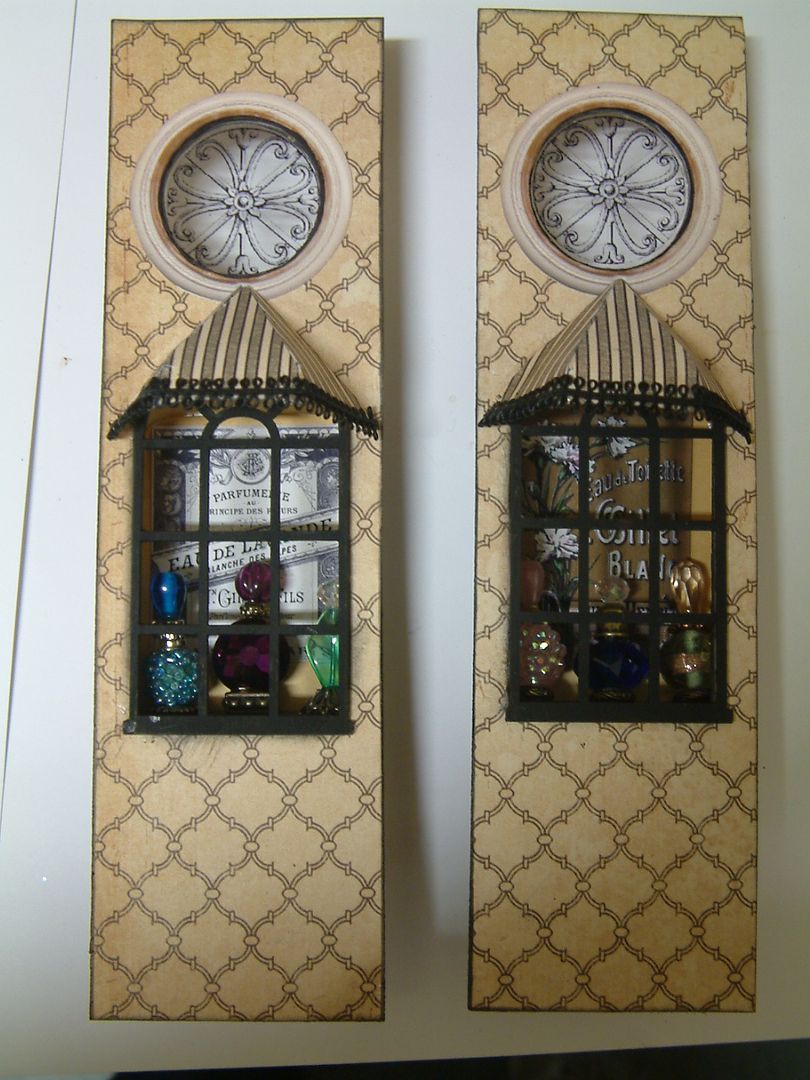
- Next, I
decided that I wanted small panels in the front of the shop that would contain display
windows. The height of the panels is 8”
and cut from heavy chipboard.
- I cut
two holes the chipboard to accommodate windows.
The oval window is made from Masonite which I painted black. You’ll notice that the openings are rough cut
as when the other components are in place you won’t see the edges.
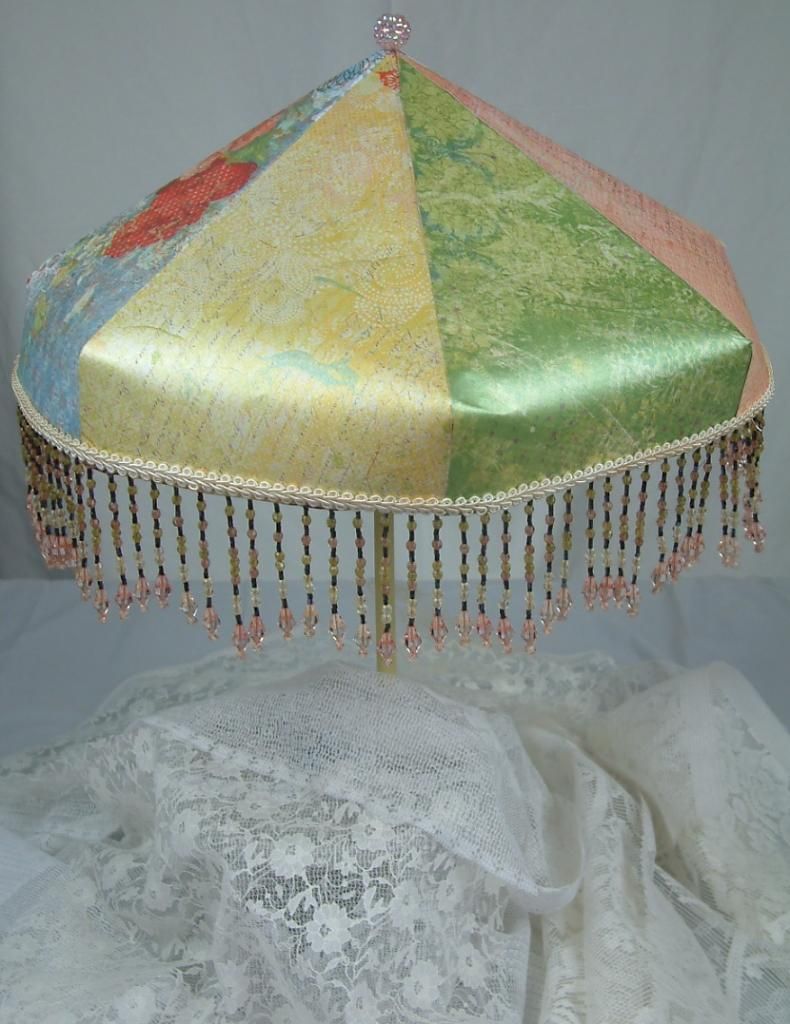
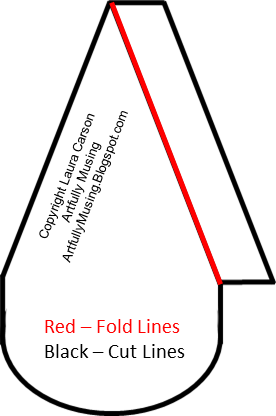
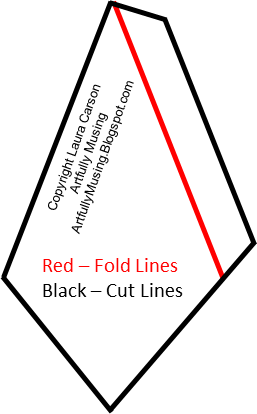
- The
awning for the window is made from paper.
I’ll be posting a video tutorial for you later this month showing you
how to make paper umbrellas and awnings.
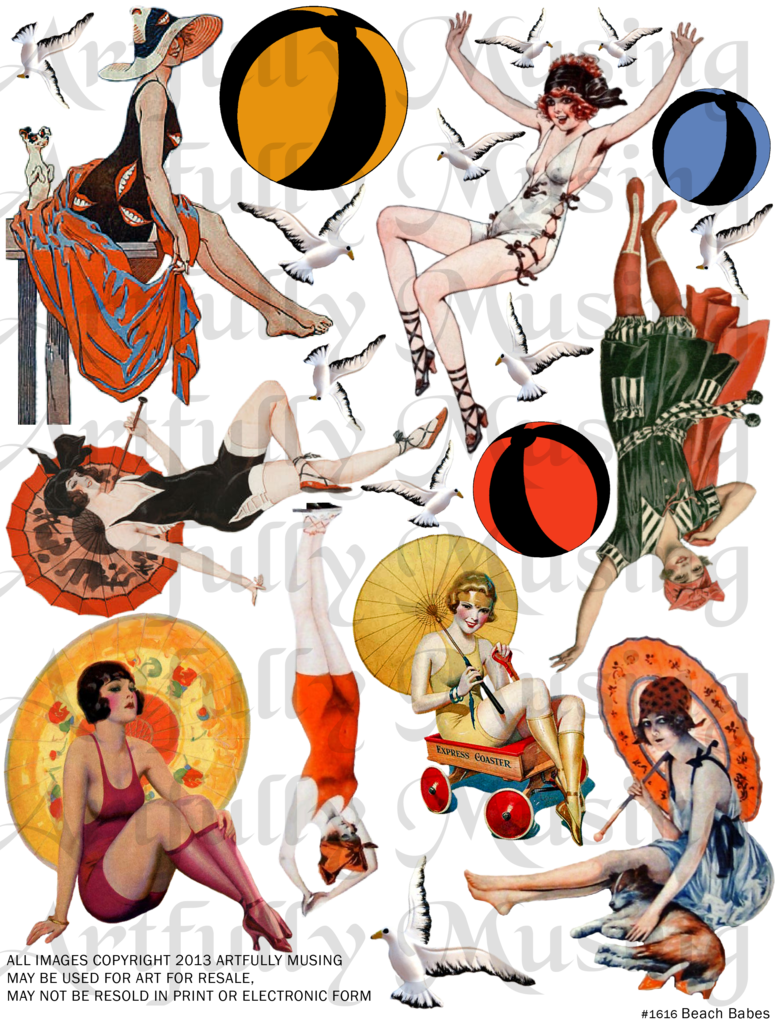
- I used
an image from a transparency collage sheet called “Round
Things” for the round window at the top.
- The box
window that will display perfume bottles is made from an Altoid’s tin (covered
in decorative paper on the inside and outside.)
I used the width of the Altoid’s tin to determine the width of the
panel. I made the panel ½” wider on each
side than the tin.
- I also cut a shelf
from heavy chipboard and covered it with decorative paper.
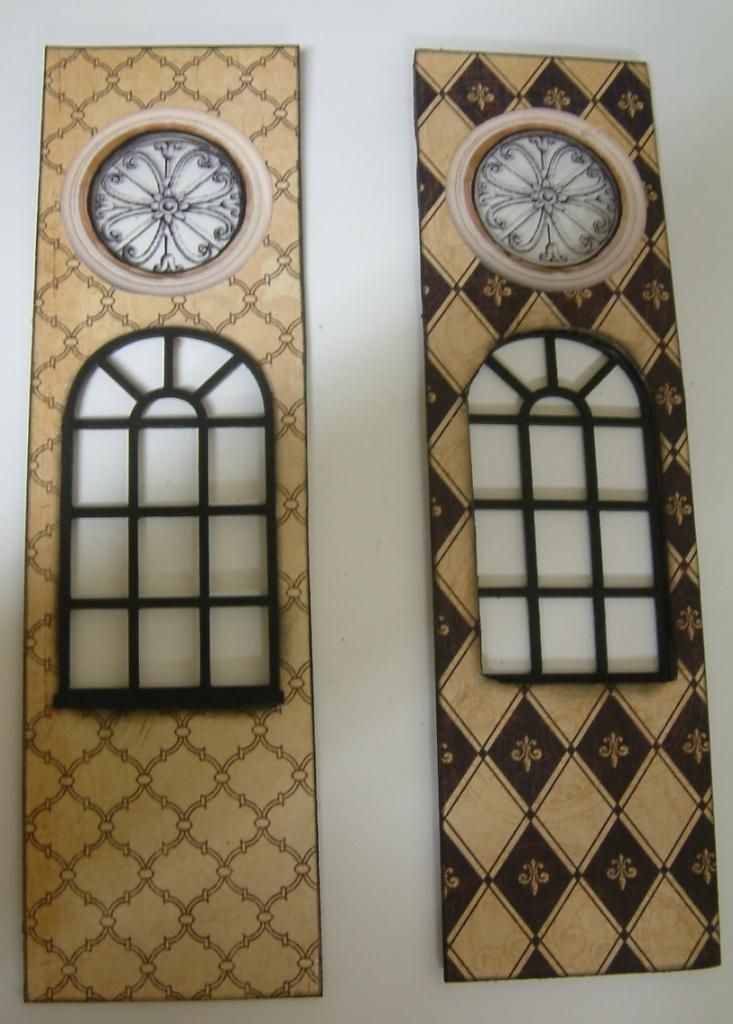
- I
covered the front of the panels with decorative paper. I also pre-cut the paper for the back of the
panels; cutting the holes for the windows but not attaching the paper to the
back of the panels.
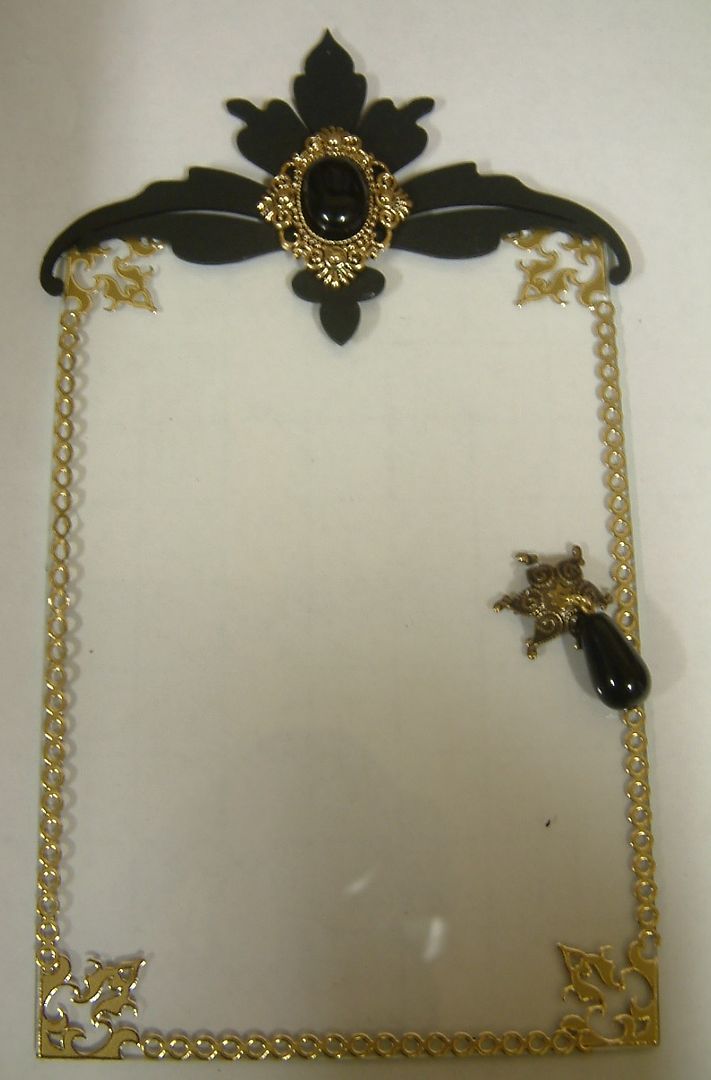
- Next, I
glued a paper frame around the round window.
The paper frame is from my new Antiques
Frames Set.
- I
continued by gluing the Masonite window to the font of the panel.
- Next I
glued the transparency to the back of the panel then I glued the pre-cut
decorative paper to the back of the panels.
- I glued
images from the Parfumerie
collage sheet inside the Altoid’s tins and glued the shelf inside the tin
using E6000 glue. Once the glue was dry
I used E6000 to attach the perfume bottles to the shelf.
- You’ll
notice that the edges of the Altoid’s tin are ragged looking. I didn’t bother to pretty them up as you
won’t see them when I attach the tins to the back of the front panels.
- The
last step was to attach the tins to the back of the oval windows using E6000
glue and to attach the awnings. I used
Black Double-Loop Ribbon to dress up the edges of the awnings.
- I inked all of the edges of the panels with black Staz-On
ink.
Alpha Stamps Products Used on the Side
Panels:
Side Panels

- I used
the measurement of the side of the floor to determine the measurement of the
side panels. The height is 8” (the same
as the front panels).
- I
decided to insert a glass window in the side panels. I purchase lots of frames to frame ATCs. Because the ATCs usually have dimensional
embellishments I don’t use the glass. I
used two pieces of leftover glass from picture frames for the side panels. The image you see on the glass is stamped and
embossed onto the glass.
- Click
here for a tutorial on how to stamp and emboss glass.
- The
core of the panel is cut from heavy chipboard.
I cut a hole in the heavy chipboard the same size as the piece of glass.
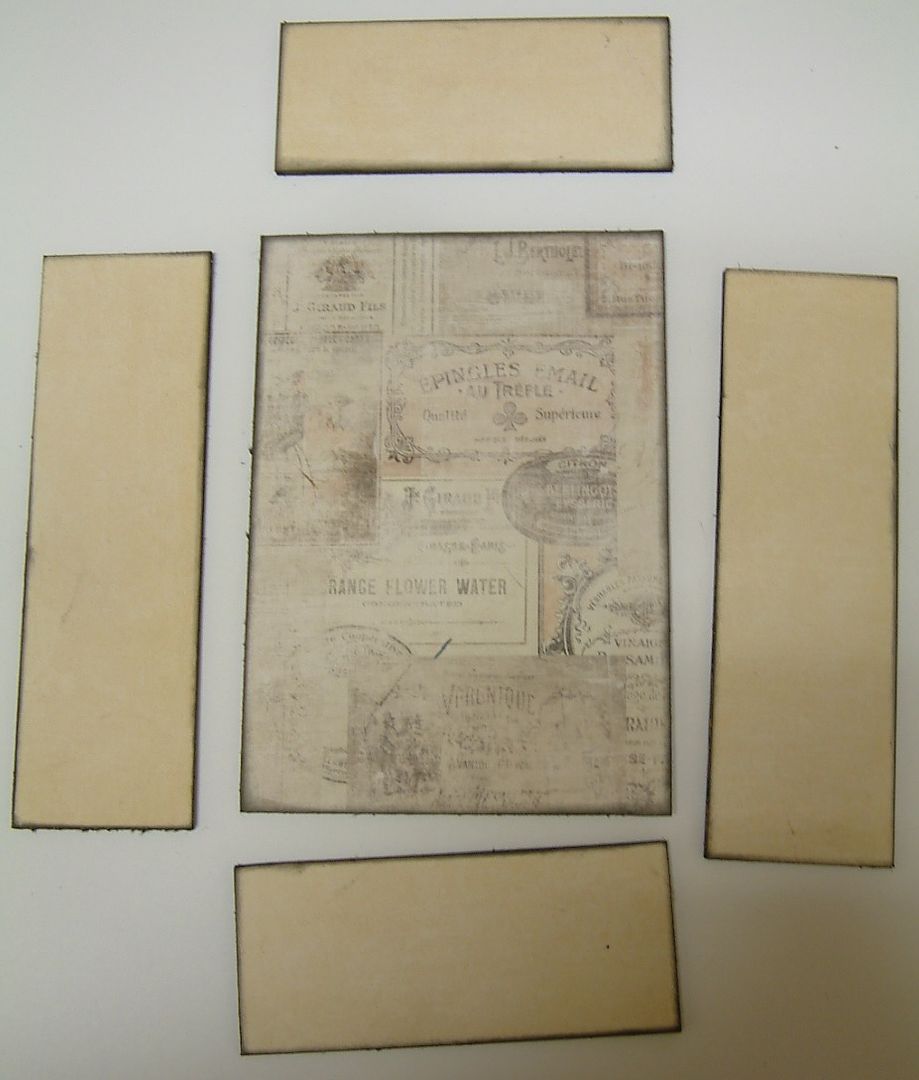
- Next, I
cut two pieces of lightweight chipboard with a hole smaller than the piece of
glass. I covered one side of each of the
lightweight chipboard pieces with decorative paper. You can’t see the paper in the photo as it is
on the side facing down on the table.
- I glue
one piece of the lightweight chipboard to the heavy weight chipboard.
- Now it
is time to sandwich the glass between the pieces of chipboard. I insert and glue the glass to the combined
lightweight and heavyweight chipboard then glue the other piece of lightweight
chipboard in place.
- The
glass is now snuggly sandwiched between the pieces of chipboard. I made a panel for each side of the shop.
- I inked
the edges of the side panels with black Staz-On.
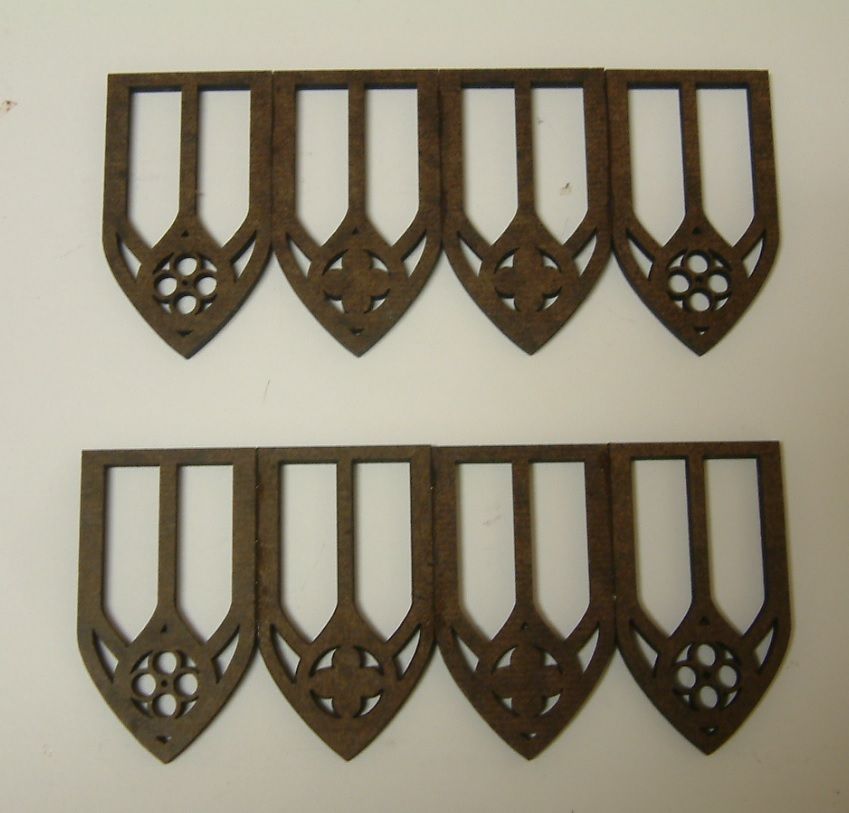
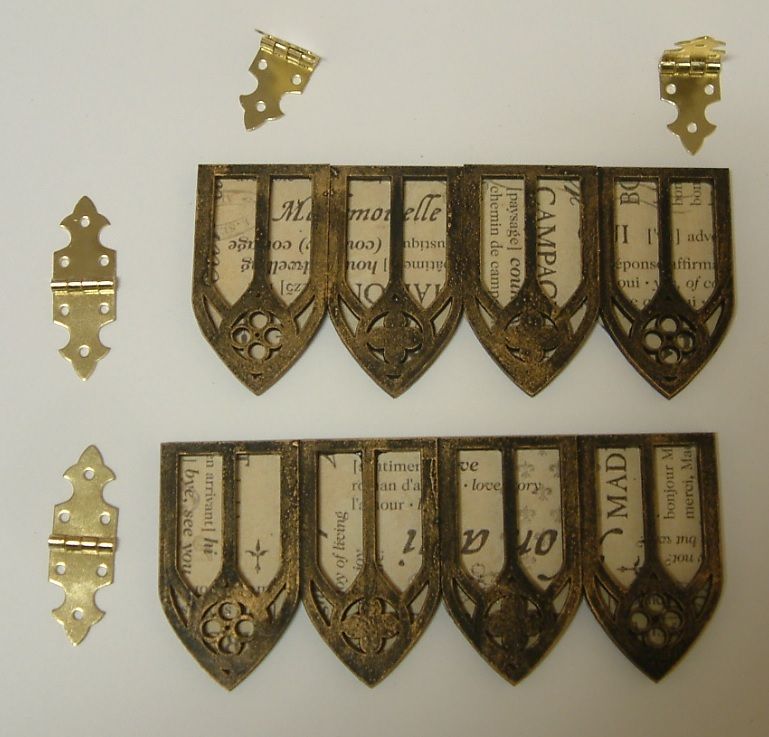
To
create the awnings I started by gluing together Masonite
Gothic Windows. These come 12 to a
set. I painted them black then used Inca
Gold Gilders Paste to add color. Next, I
glued decorated paper on the back of the windows.
- I used Brass
Gate Hinges to attach the awning to the side panels. These hinges are a little stiff so they
worked great to keep the awnings in place at an angle.
- I
attached the hinges first to the awning using E6000 glue.
- I
decided to add a decorative border to the side panels before attaching the
awnings.
- Next, I
attached the awnings to the side panels again using E6000 glue.
I now glued the front
panels to the side panels using E6000 glue.
Alpha Stamps Products Used on the Side
Panels:
Once I
had assembled the walls etc. I decided to add more embellishment to the side
windows.
Once
the panels were dry I glued them to the corners and sides of the floor. I measured the back of the floor and cut a
piece of heavy chipboard for the back. I
covered the back in decorative paper on both sides, inked the edges and glue it
in place.
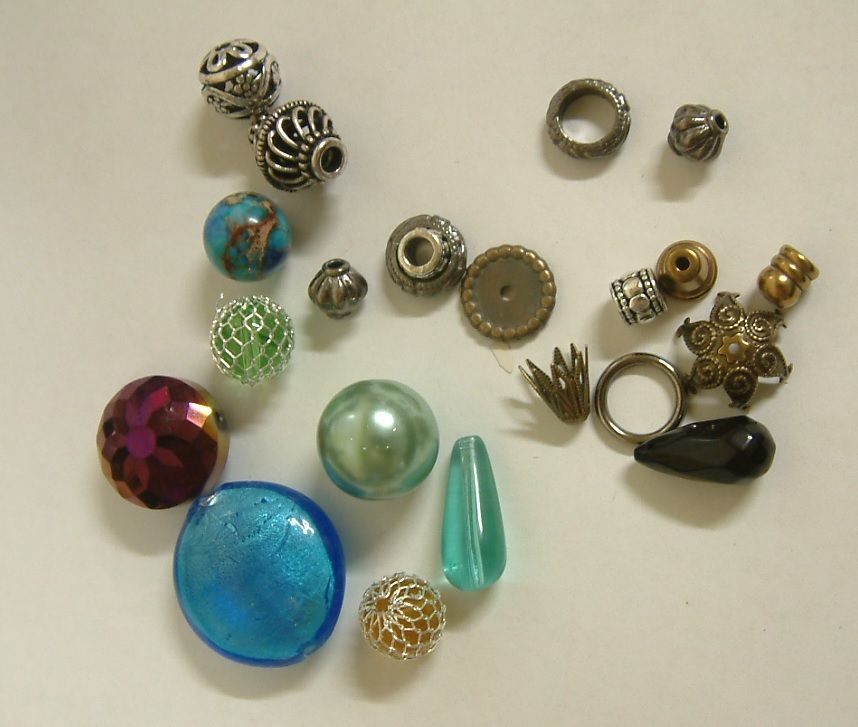
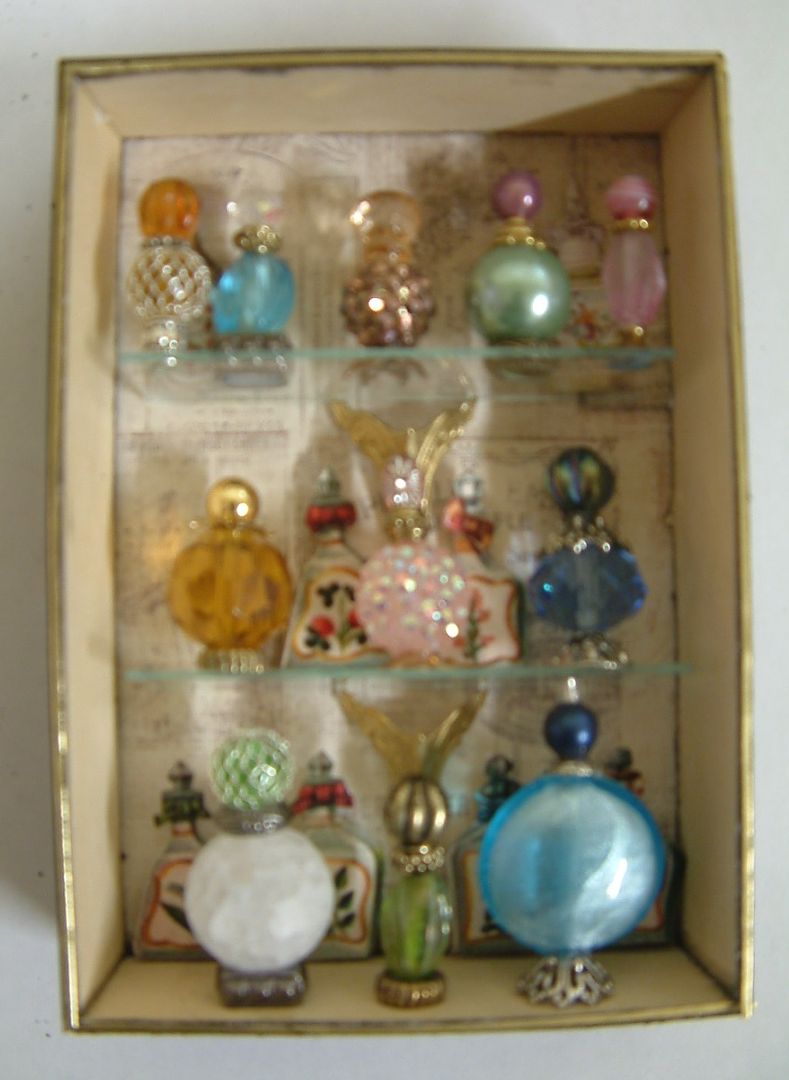
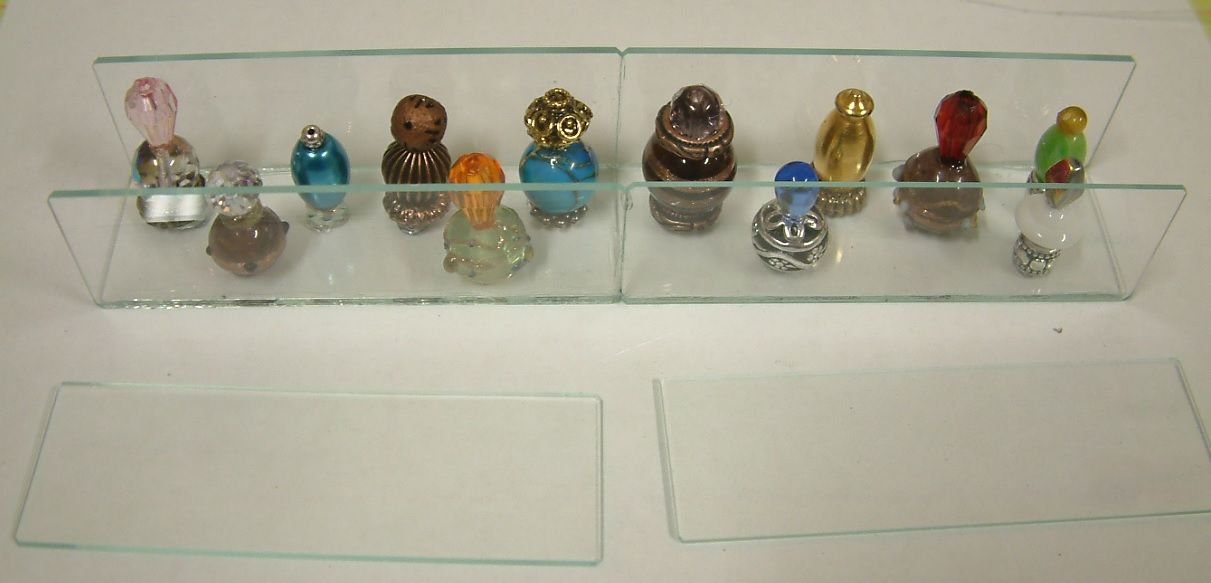
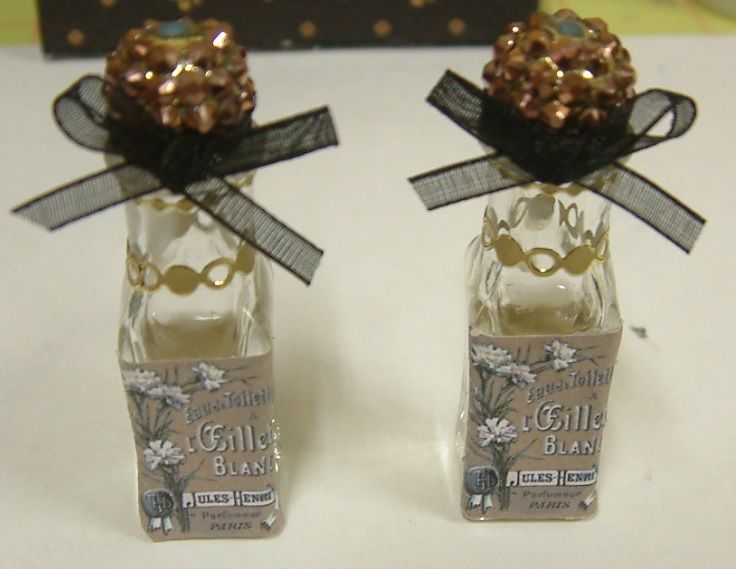
Perfume Bottles
These are sooooo easy to
make. All you need is glue (I used
E6000) and a pile of beads,
bead
caps and spacers.
For most of the bottles
I made I used a bead cap for the base. I
then attached a bead. Next, I added a
spacer or smaller bead cap and then another bead for the top.
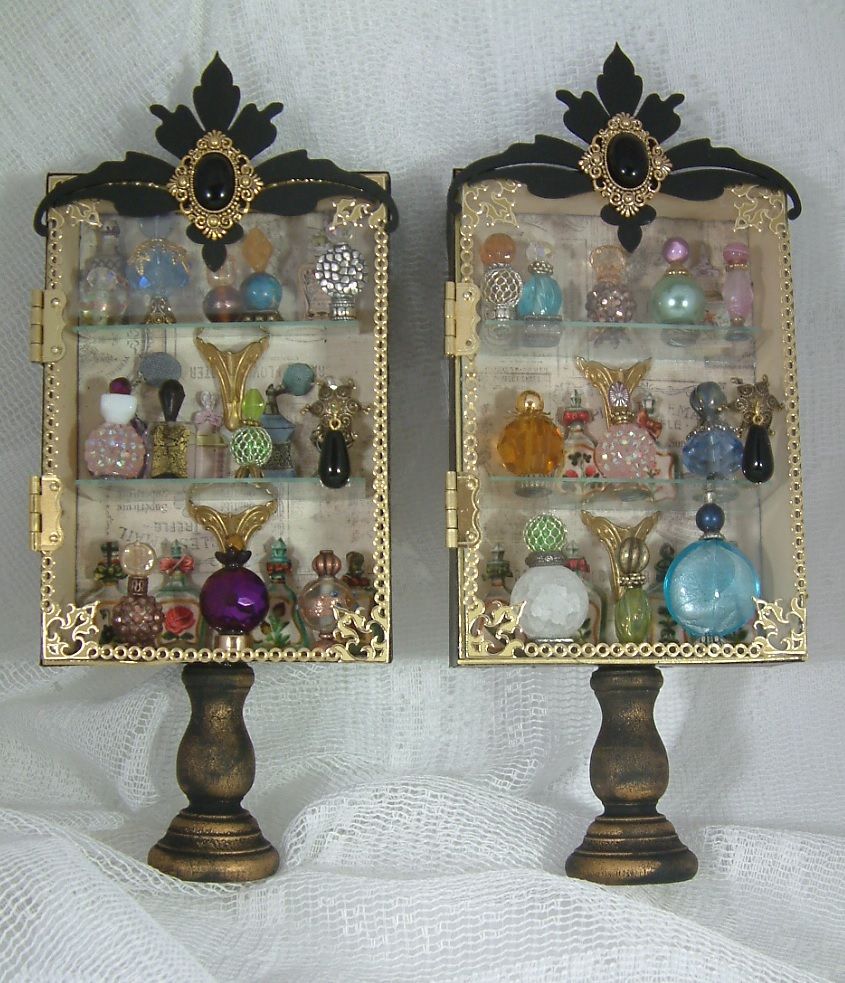
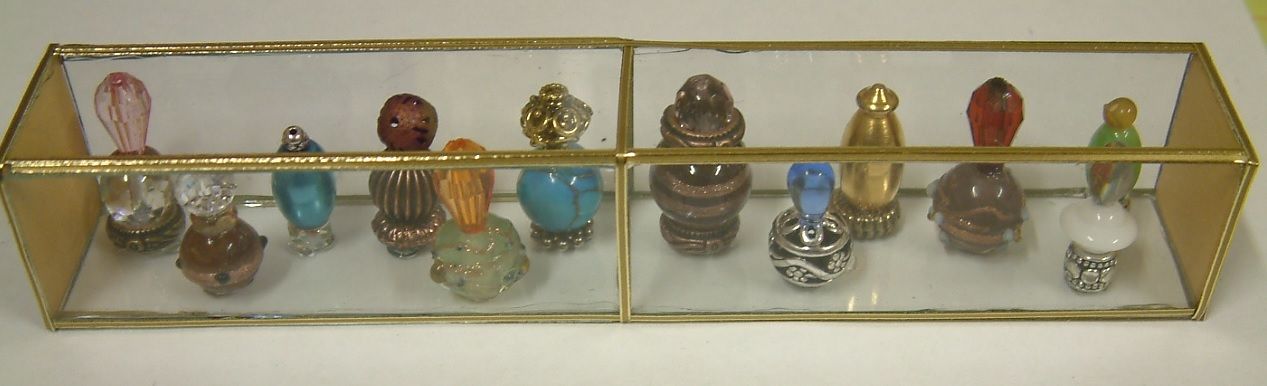
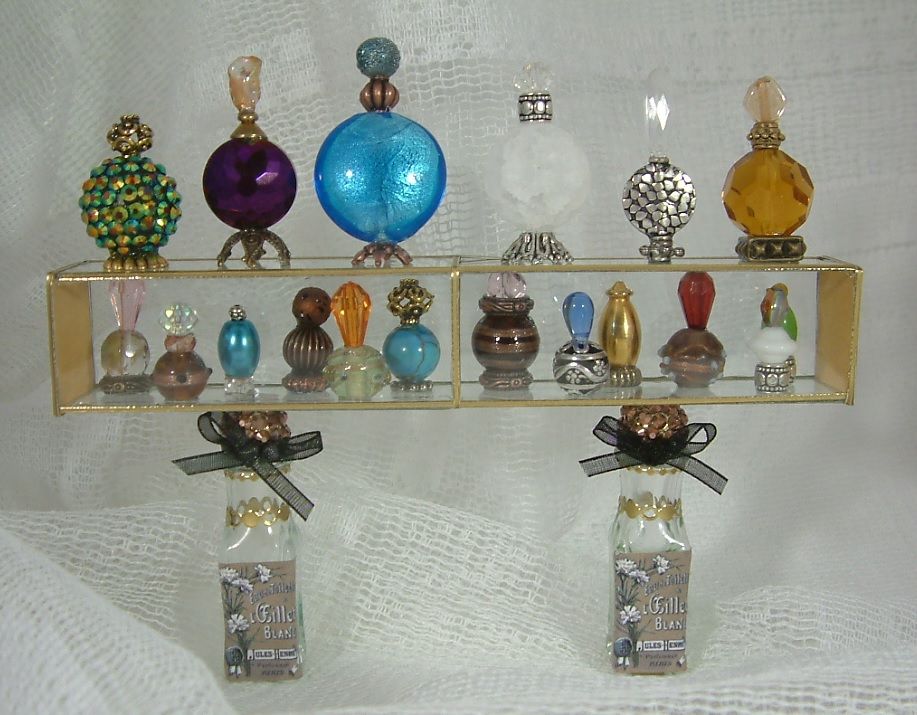
Glass Cabinets
- There
are a couple of options for making the glass cabinet. I decided to use more pieces of glass that I
had left over from pictures frames like I did for the side panels. In order to have the cabinet fit the glass I
had to build my own box.
- I cut
the back piece the same size as the glass.
I cut the side panels the length of the back panel. I made the sides 1 ½” deep to accommodate the
size of the perfume bottles.
- I glued
the panels in place. Note – I didn’t glue the panels against
the edges of the back I glued them along the edges on top of the back
piece. This is because the back is the
same size as the glass so that when the sides are glued in place they will form
a surface that is smaller than the back and will provide a surface for the
glass to attach to.
- As you
can see from the picture I inked all of the edges before gluing the box
together.
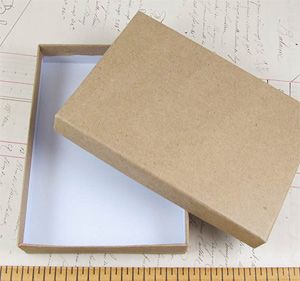
Another option is to use the bottom of a kraft
box which would eliminate the need for constructing a box.
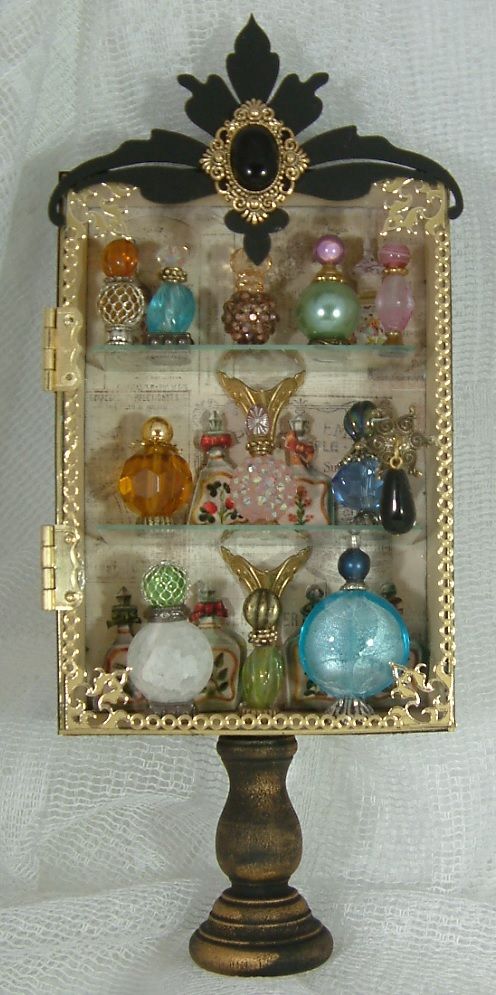
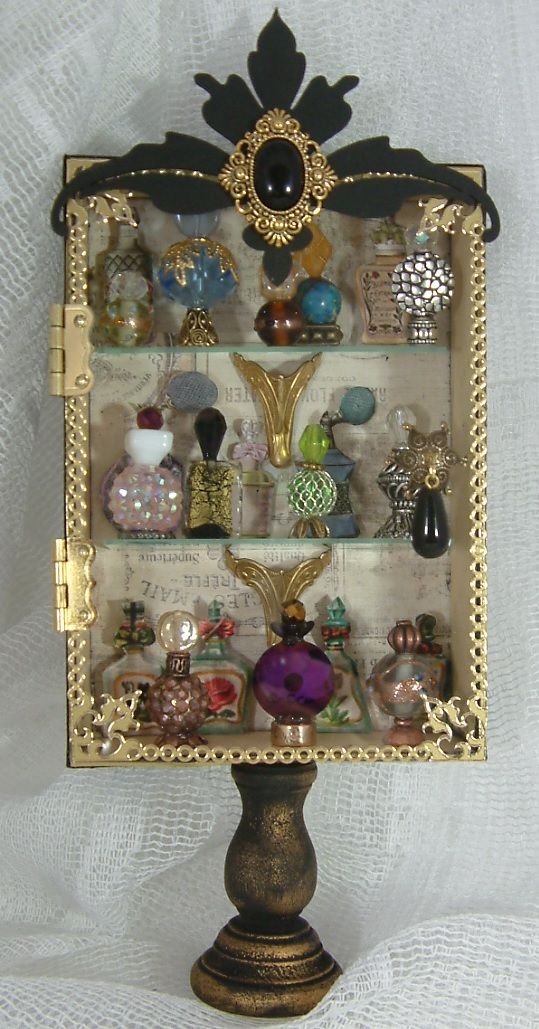
I edged
the glass with gold
stickers. The handle is made from a
bead cap and bead. At the top I used a
chipboard flourish painted black and accented with a button.
- I edged
the box with more gold
stickers.
- The shelves inside the cabinet are microscope slides
glued in place with E6000. I also glued
on brass box feet to help support the shelves and for embellishment.
- Once
dry I added paper perfume bottles from my Parfumerie collage sheets. I attached them to the back of the box using
foam double stick tape which popped them out from the back.
- I used
E6000 to glue the bottles to the shelves.
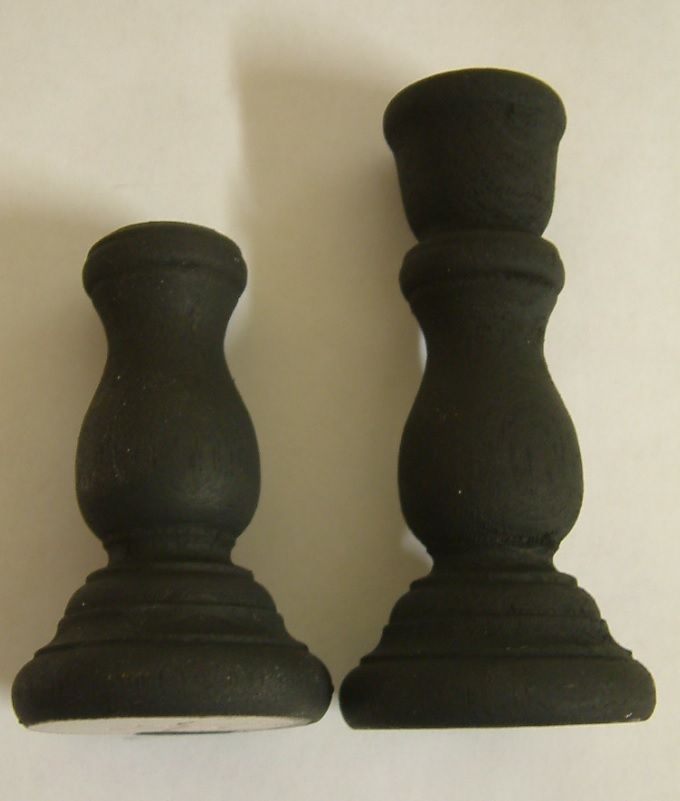
- The
cabinet bases are made from 3
inch tall wood candlestick holders.
They were a little too tall so I cut part of the candlestick off.
- I painted them black
and used Inca Gold Gilders Paste to add color.
I glued
the glass to the cabinets and attached curved
brass hinges to make it look like the glass could be opened. Lastly, I attached the candlesticks to the
bottom to complete the cabinet. This
would make a great standalone project.
Instead
of glass you could use transparency film.
- I made
the glass case by gluing together glass microscope slides. I used E6000 to glue everything in this
piece.
- After
gluing together the bottom and sides I glued perfume bottles to the
bottom.
Next, I
glued on the top.
- The
sides are made from chipboard covered with decorative paper.
- To
dress up the edges I used more gold
stickers.
The
base of the cabinet is made from bottles.
Alpha Stamps Supplies Use for Making the
Cabinets and Case:
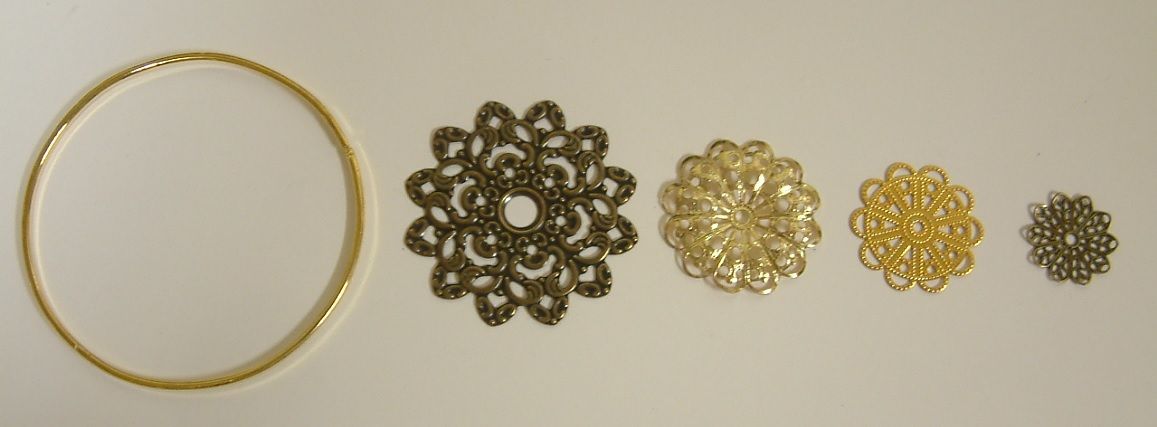
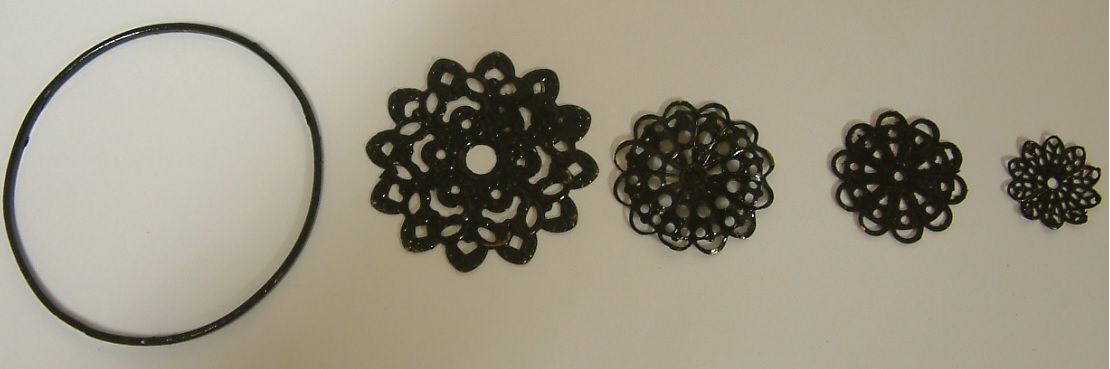
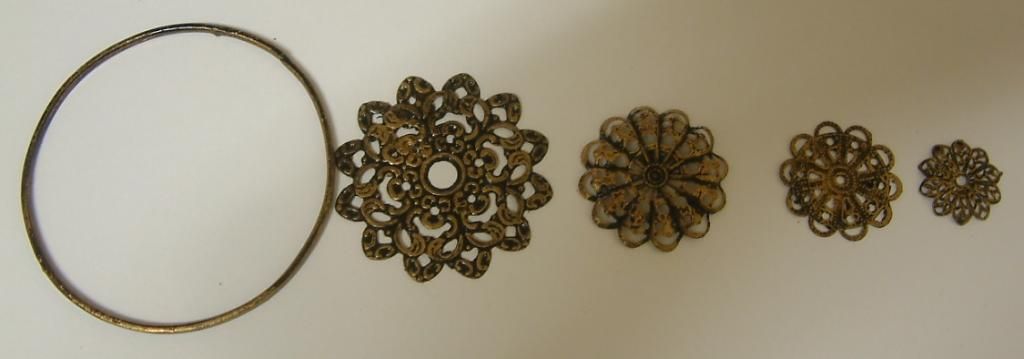
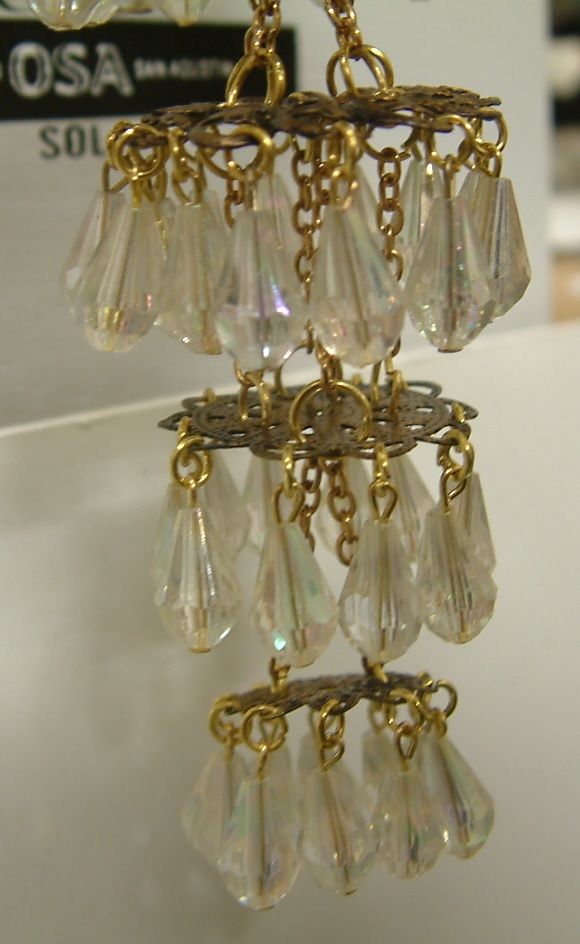
Chandelier
The base of the
chandelier is made from a bangle and four pieces of filigree.
As each piece was a
different color gold, I started by painting all of the pieces black.
Next, using my finger I
lightly applied Inca Gold Gilders Paste to all of the pieces.
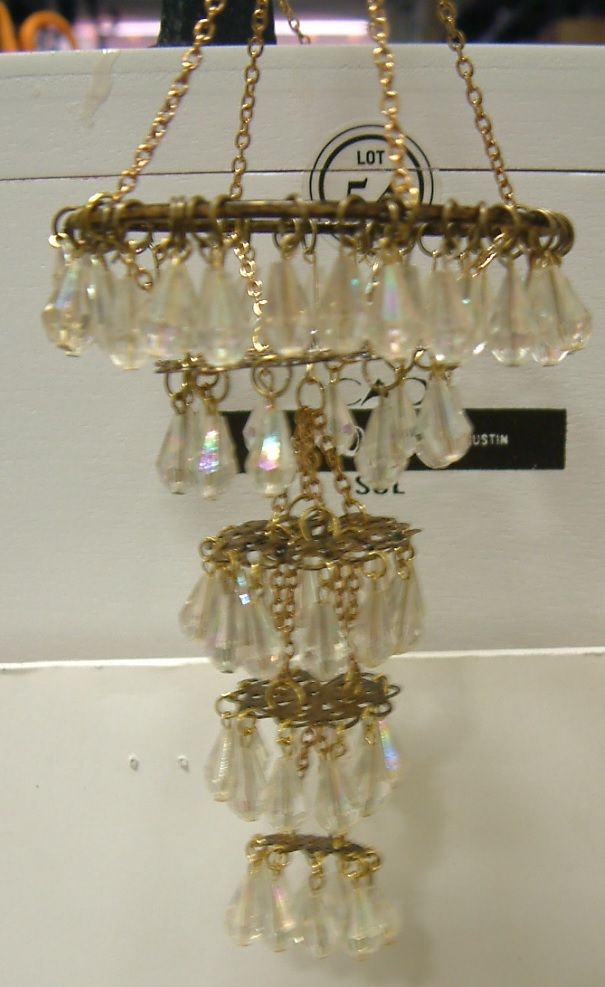
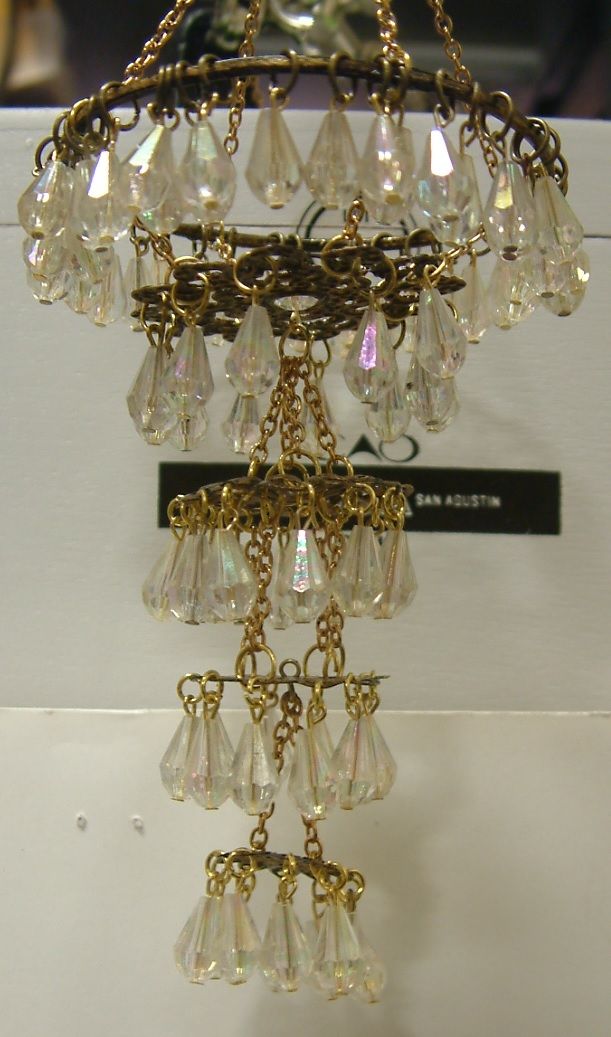
I attached beads to the filigree using eye pins and jump rings.
I attached the filigree
to the other filigree and the bangle using chain. Depending on the shape of the filigree and
the hole positions I used either 2, 3. or four chains for the attachment. To keep the chains on the bangle which are
used to hang the chandelier from sliding around on the bangle, I used a little
dab of E6000 glue to keep them in place.
Alpha Stamps Products Used to Make the
Chandelier:
Top Section
This is
one of those areas where I deviated from original plan. Once I made the chandelier it ended up being
so long that it would have hung too low with just a roof and the 8” walls. I needed to make the walls taller so I
decided to add another section to the top of the walls thereby raising the roof
to accommodate the chandelier which I loved and could not bear to change.
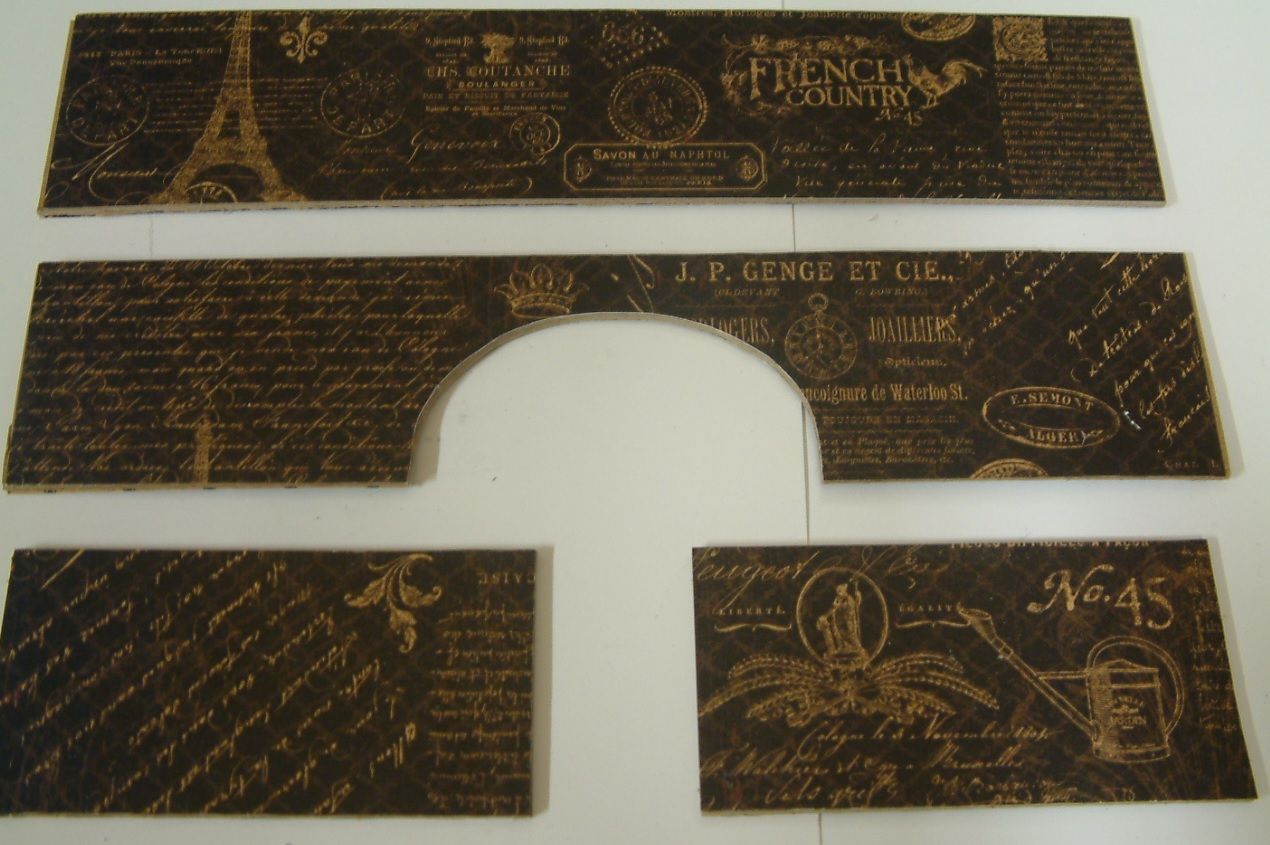
- I cut 4
pieces of heavy chipboard for the front, back and sides.
- Note
the curve cut in the front piece. I
added this so you could see the chandelier hanging from the roof. I also thought it added interest.
- I
covered all of the pieces front and back with decorative paper.
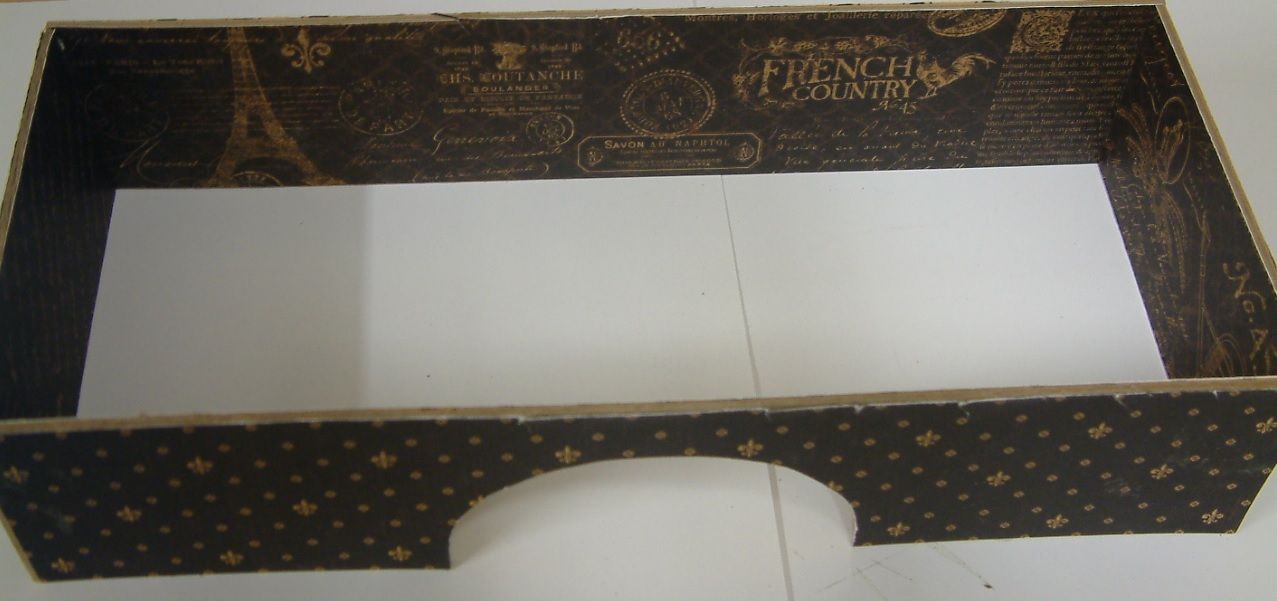
- I glued
all of the pieces together and then glued it to the top of the walls.
- As it
turned out I think my change of plans made for a better looking structure.
- Here
you can see the section attached to the top of the wall. I used a border to hide the seam between the
walls and the new section.
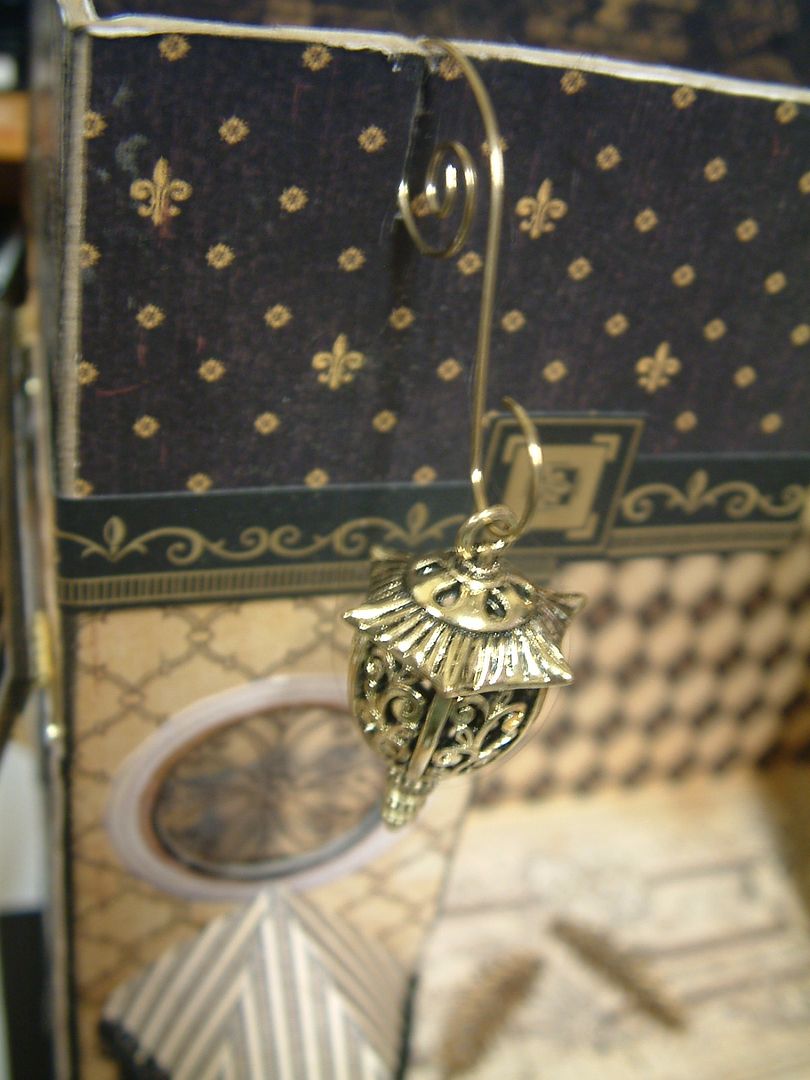
- Next I cut a slit in the top section to accommodate a
Swirl Ornament Hook and Lantern. I glued
the hook in place.
Roof
To
create a roof I cut 4 pieces of heavy chipboard using the measurements of the
top of the shop (a piece for the back and the front and two pieces for the side). Since this is a French shop, I decide to go
with a Mansard style roof. This is where
the sides of the roof slope upward but don’t meet at the top. To close the roof there is a flat piece which
joins it all together. This is one of
the easiest roofs to make. To create the
proper angle I measured 2” from each side of each piece and then drew a line
from the bottom corner to the top where the 2” mark was. I then cut along the lines.
- I
covered all of the pieces back and front with gold paper.
- Next, I
made holes in the back piece to accommodate the switch for the LED lights. This way I can turn the lights on and off
after the roof is glued in place.
- I then
glued all of the pieces together along the sloped edges. Note the hole in the top.
- I used
Dresden or German Scrap along the seams to add more detail.
Next, I glued
the LED lights in place.
- I cut a piece of heavy
chipboard to fit across the hole in the top of the roof.
- I covered the piece with
decorative paper.
- I poked a
hole in the middle to accommodate the chandelier. I used jump rings a bead and more chain to
hang the chandelier.
- Finally I glued the roof
onto the top section. I added more
Dresden to the seam between the roof and the top section.
- I added resin
stamped leaves to the arch and the sign to the top.
- I added more
German Scrap to the roof for décor.
Once I
had the main structure completed I worked on all of the exterior details. I added more Dresden Scrap, ribbon to the
bottom, banners and signs.
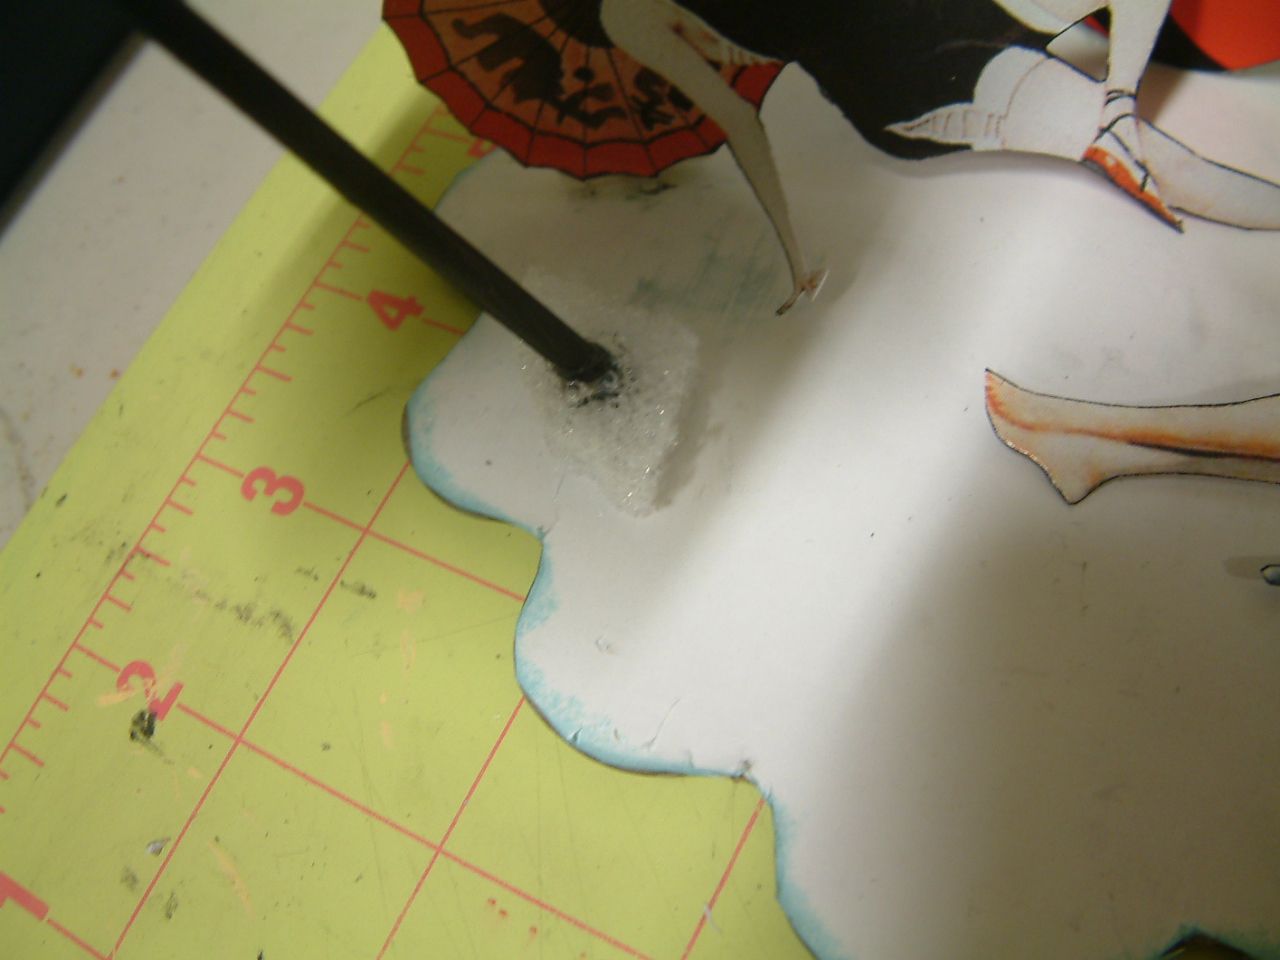
Since
the base of the piece is foam core I glue a straight pin (with the head cutoff)
between the layers of the images of people.
I can then stick the pin into the foam core to make the people stand in
place.
Alpha Stamps Products I Used For the Roof and
other Outside Decor
Raw
Brass Box Feet – Rounded - Attaches chandelier to roof – Used on top of the
black bead
Papers Used Throughout the Project:
Collage Sheets Used Throughout the Project:
Round
Things Collage sheet