I love answering your questions. If you ask them in the comment section, I have no way to answer you (if you haven't heard from me, that is why). If you use the "EMAIL ME" in the left column of this page, I will be able to respond to you. You can also use it if you want to be added to my newsletter. Laura
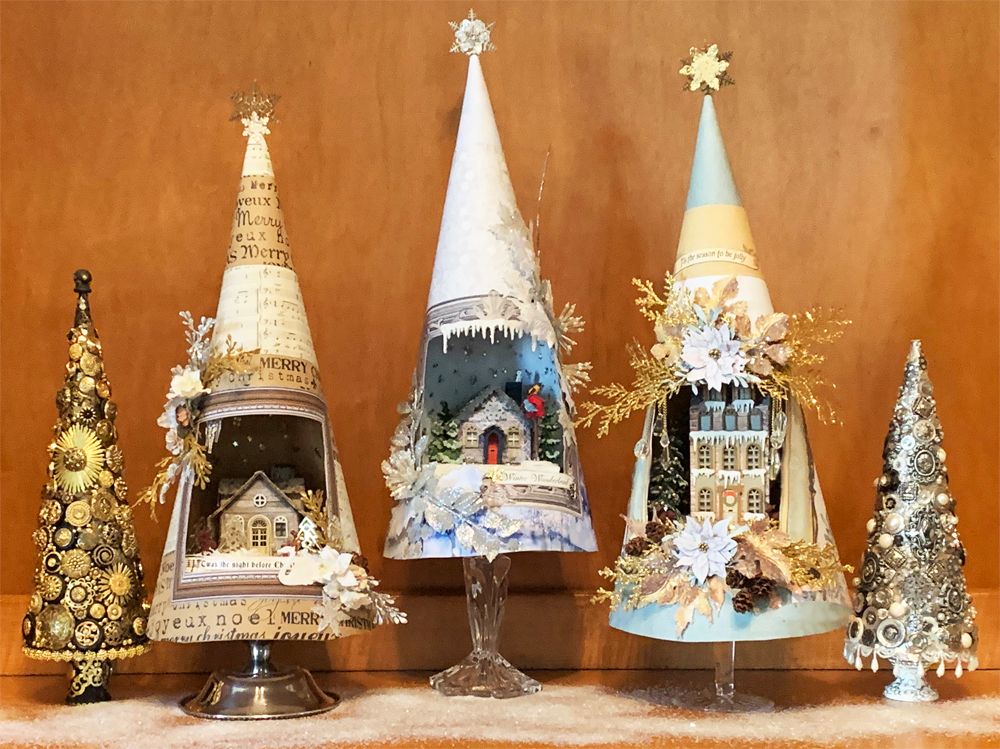
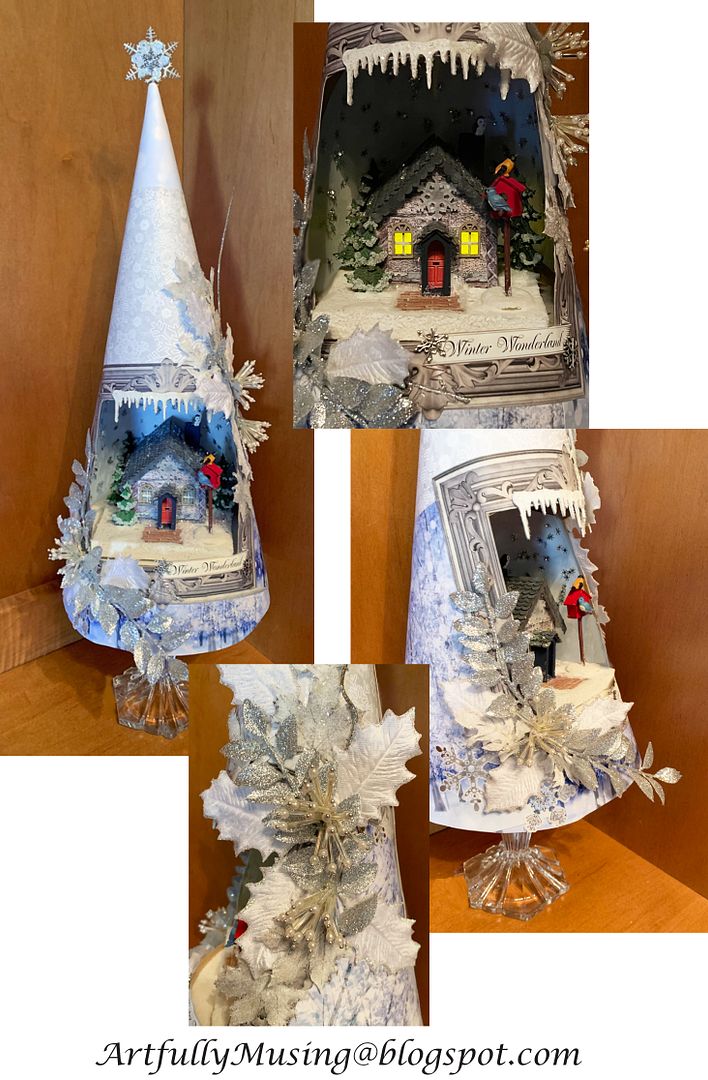
If you are looking for a Christmas project that is on a larger scale, this might be it. In 2016, I made my first Christmas tree with a cutaway revealing a lighted winter scene. I decided to revisit the project, create two more trees, and make a video tutorial.
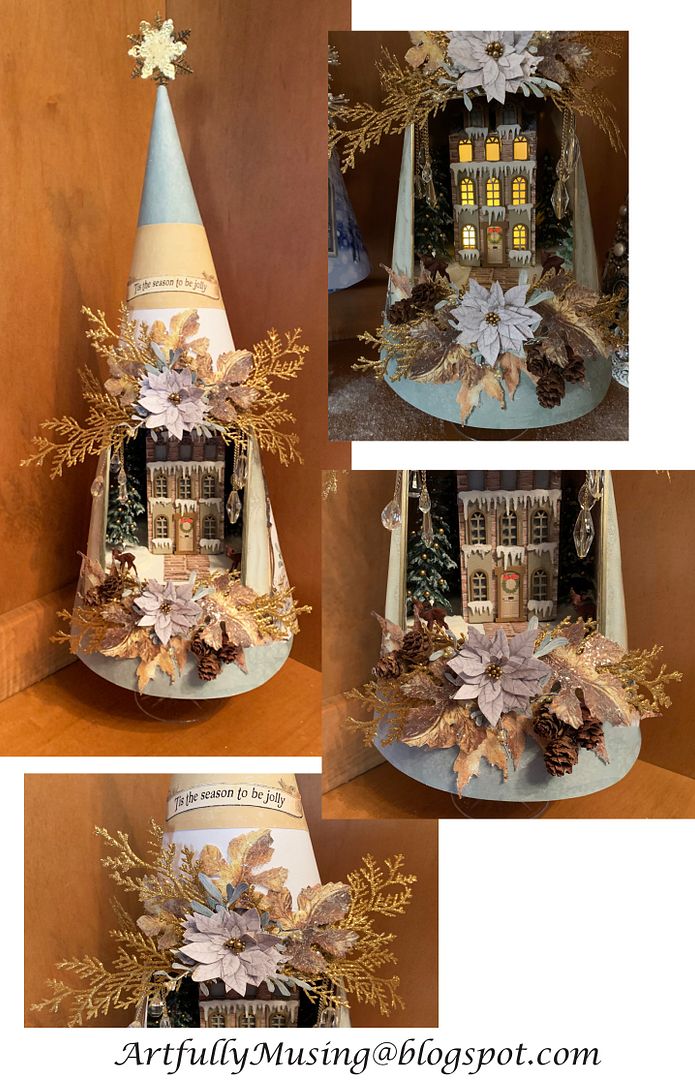
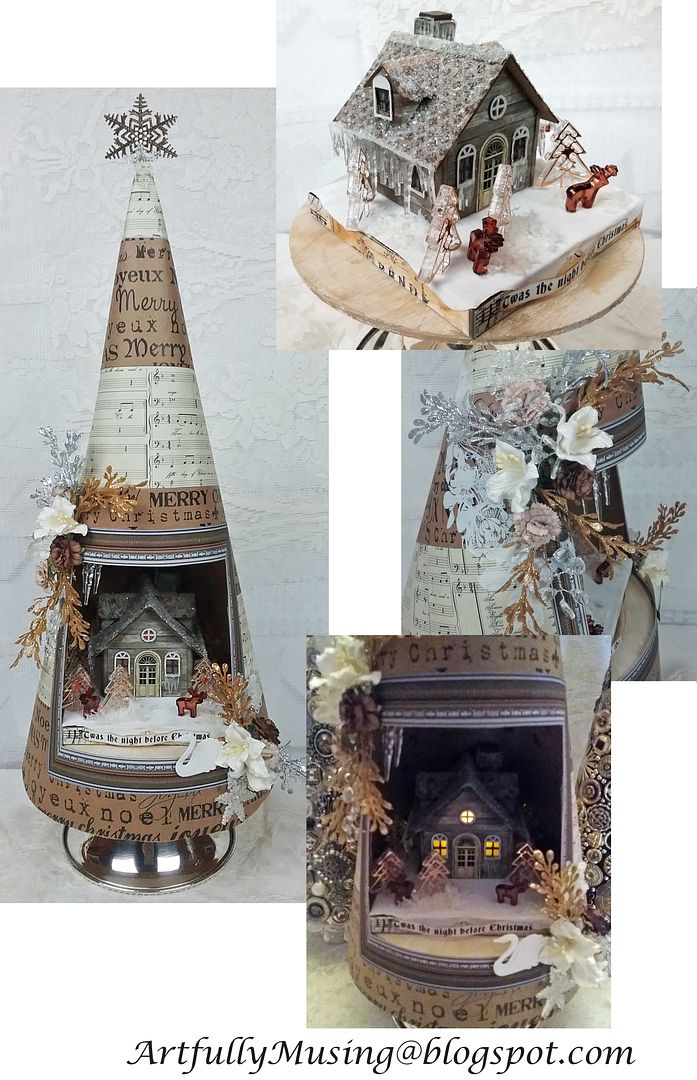
I thought a series of these trees would look lovely arranged on a fireplace mantel paired with my Jeweled Trees from a previous project (see a link to the project below). These would also be lovely for a table centerpiece. Each tree features a different color scheme, decorative embellishments, and the house inside.
As an extra touch, they are lighted (battery operated), giving off a soft glow.
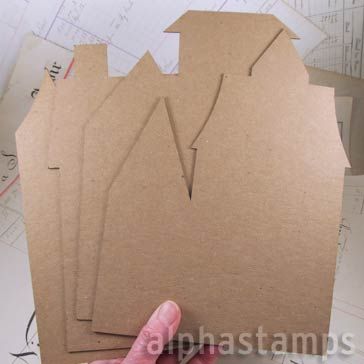
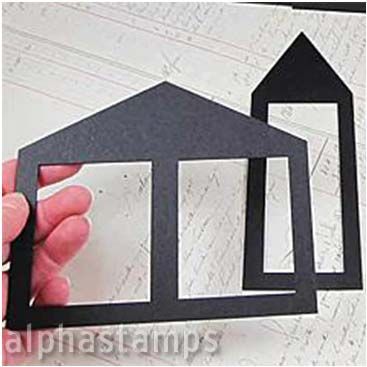
Like many of my projects, I use various chipboard kits from AlphaStamps to create houses inside the trees. In the video tutorial below, I cover how to construct the trees and the supplies I used. Except for a few items from my stash and the papers for the original tree, AlphaStamps is carrying everything else I used.
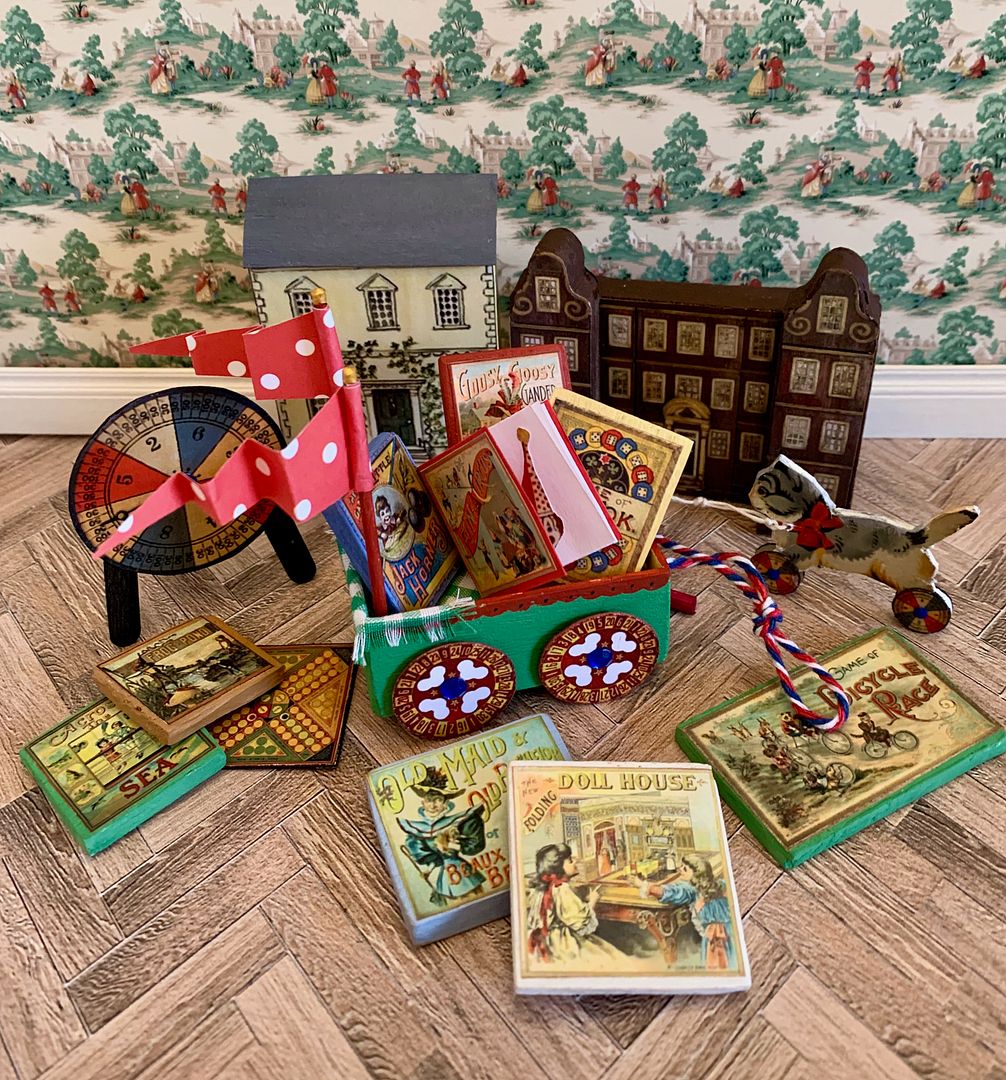
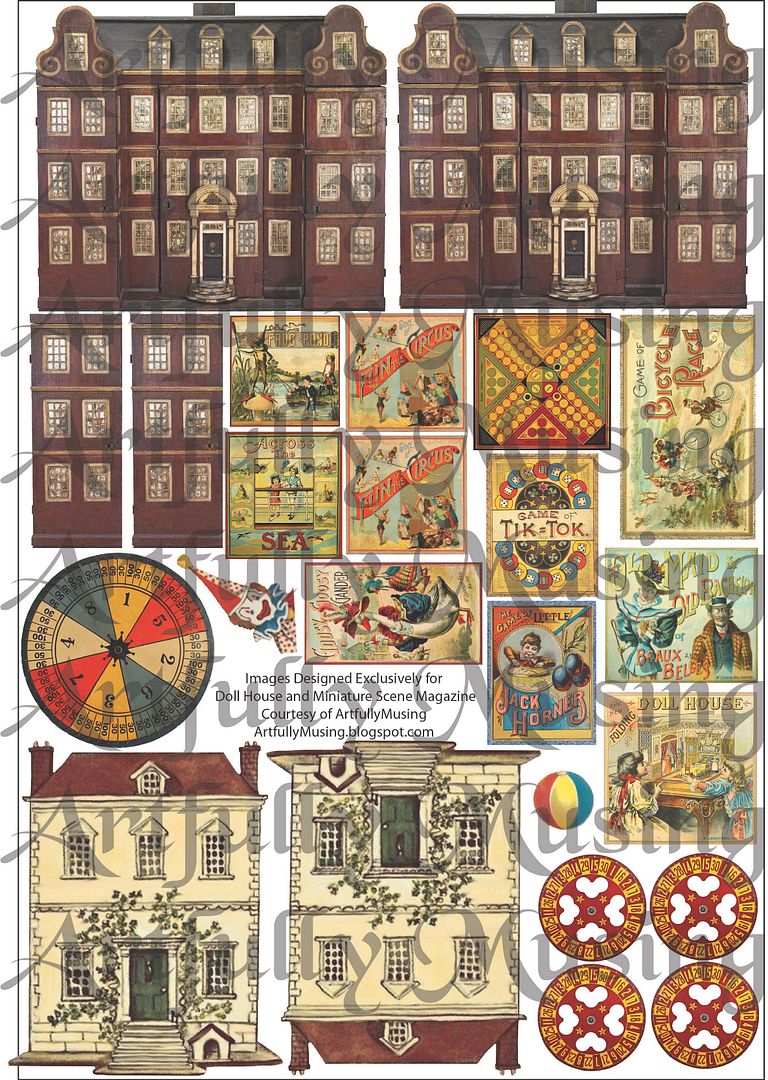
In the November 2022 issue of Dolls House & Miniature Scene magazine, you’ll find a feature on how to make vintage toys with a printable collage sheet of images that I designed exclusively for this issue of the Dolls House & Miniature Scene magazine.
Moi Ali (writer for Dolls House & Miniature Scene magazine) walks through how she constructed the toys with detailed instructions, pictures, and the tools and supplies needed.
Moi says...
“When I see gorgeous 2D images, I wish I could take the flat pictures from the page, apply a little mini alchemy, and magically transform them into three-dimensional items for my doll house. Well, now you can! Use this exclusive sheet of free cutouts by Laura Carson to create vintage-style toys and games for your dolls house. Make lovely gifts to go under the Christmas tree, to sit in a nursery scene, or to fill a toy shop- or even an antique shop. Set up a game on a table by the fireside, just as families will be doing across the land this Christmas. It’s so easy and cheap, yet so very effective.”
Doll House & Miniature Magazine is a UK-based publication produced in print and digital forms.
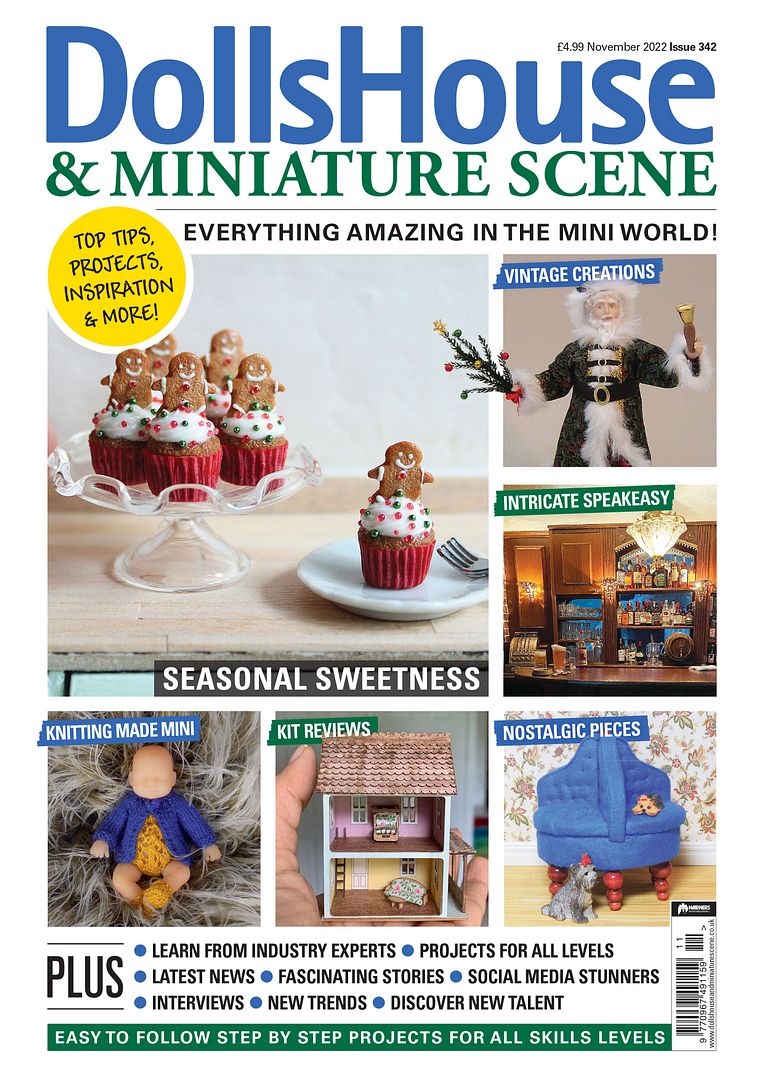
In addition to the feature containing my exclusive toy image sheet, what’s in the November issue?
The festive season is upon us! It’s time to begin taking your dolls houses and miniature scenes from autumn to winter and into Christmas.
We have a copious amount of projects for you to try your hand at, more so than a usual issue, so let us guide you on your festive journey! First up, Maive Ferrando’s gingerbread men on page 6 will make a cute addition to your kitchen; for a more vintage Christmas styling, we have some toys you can make using a free cut-out sheet on page 19, then on page 28, you must try the vintage Santa Claus to complete your scene.
Also, this issue takes a look at some inspiring finds in the mini world, both old and new; be transported back to the era of Prohibition in the USA with the Speakeasy, as Sadie Brown investigates this fabulously made in-miniature by Mary Broaddus, then leap forward in time to our Instagram Identities feature starring skater-style and urban graffiti miniature creations by Nathan Ross – we certainly have something for all tastes!
All this and more, including top tips, fascinating features, competitions, and reviews - happy festive mini-making!
Get digital copies to read on your favourite device with bonus features, or printed copies delivered to your door here:
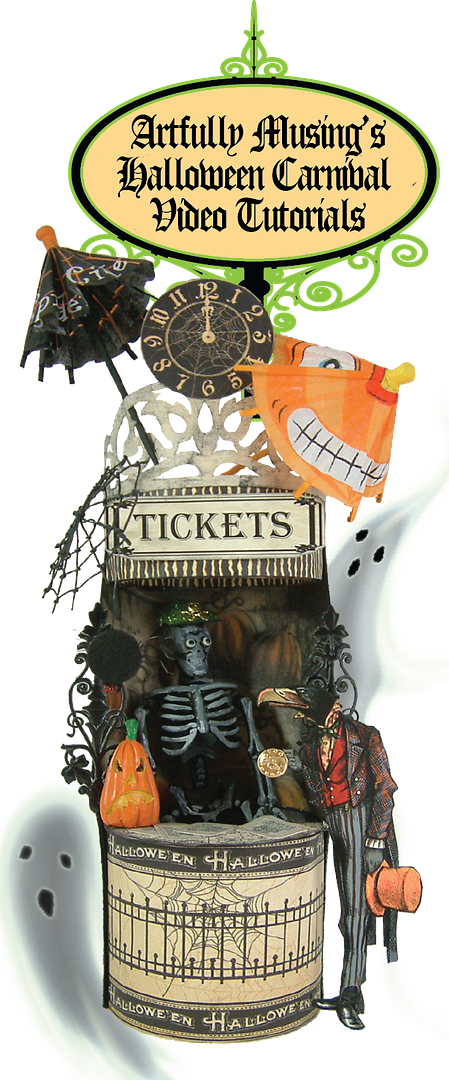
I'm excited to announce that Doll House & Miniature Magazine has featured my Grimsley Village and Halloween Carnival pieces in their October issue in a six-page spread in the middle of the magazine.
Along with featuring my pieces, they also include an interview with me focused on how I got started and where my inspiration for Halloween projects comes from.
Doll House & Miniature Magazine is a UK-based publication produced in print and digital forms.
In addition to my feature, what's in this Issue?
Get set for an abundance of spooktacular inspiration! From wickedly good projects with simple step-by-step for you to follow to artisans who enjoy more of the macabre, if Halloween is a season you enjoy, there will certainly be something for you. Maive Ferrando’s cupcakes have a wicked witch diving head first into the ‘buttercream,’ and Louise Goldsborough Bird creates a witch’s outfit complete with the patterns you need, inspired by Steampunk.
Elsewhere, Moi Ali strolls down Memory Lane, in the world of IT, with creations I’m sure will be conversation starters… from a Spectrum ZX81, a Commodore 64 to an Apple Macintosh, this will be a wonderful piece of nostalgia.
We hope this copious amount of inspiration, top tips, and fascinating features get your creative juices flowing – happy mini-making!
Get digital copies to read on your favorite device with bonus features or printed copies delivered to your door here:
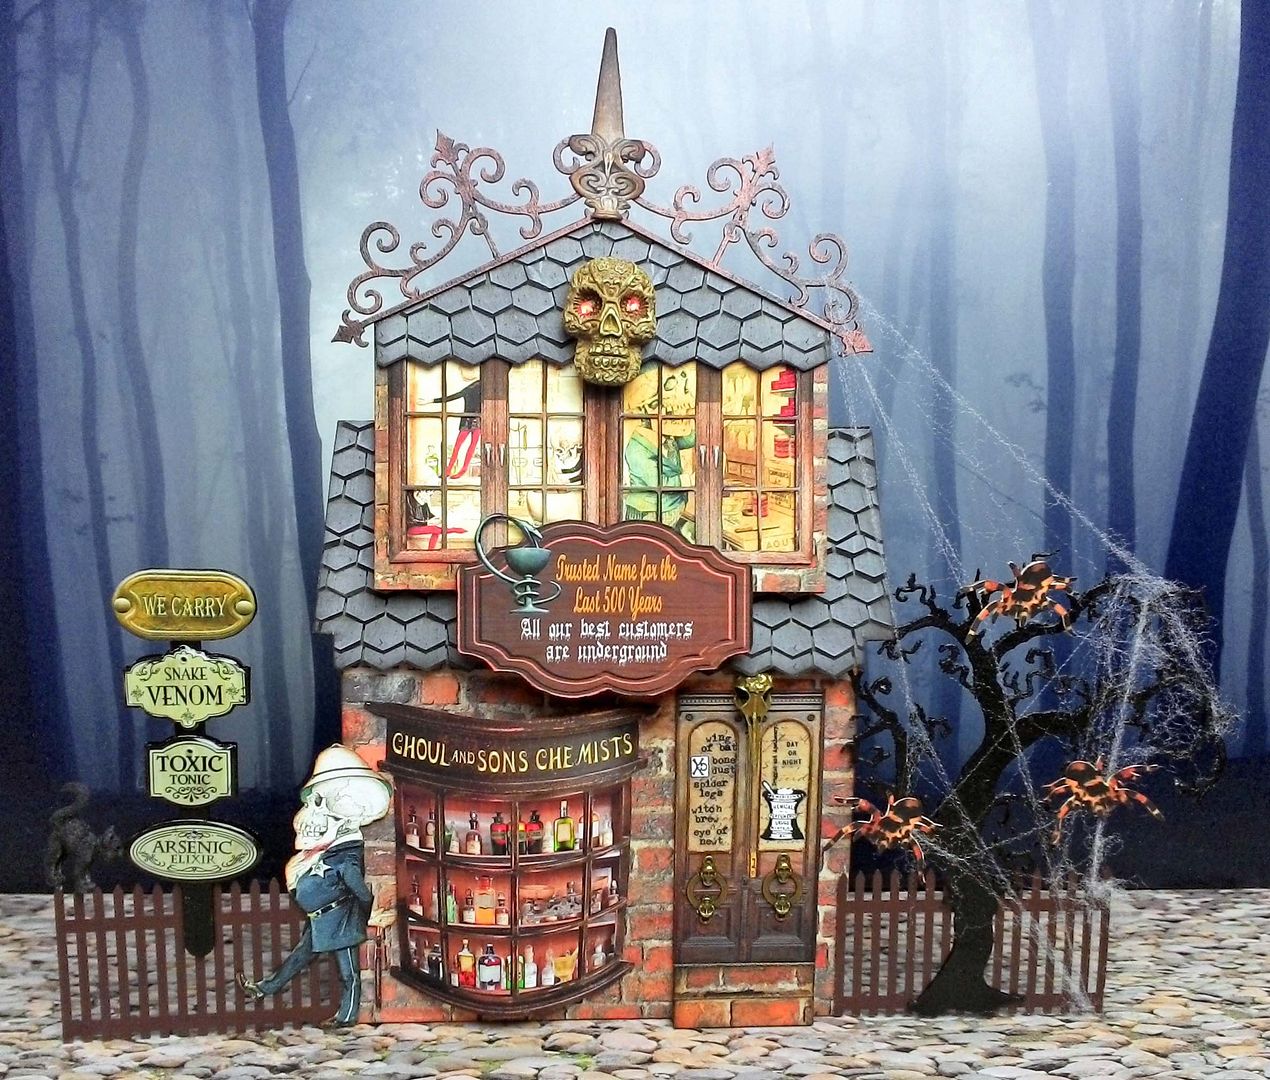
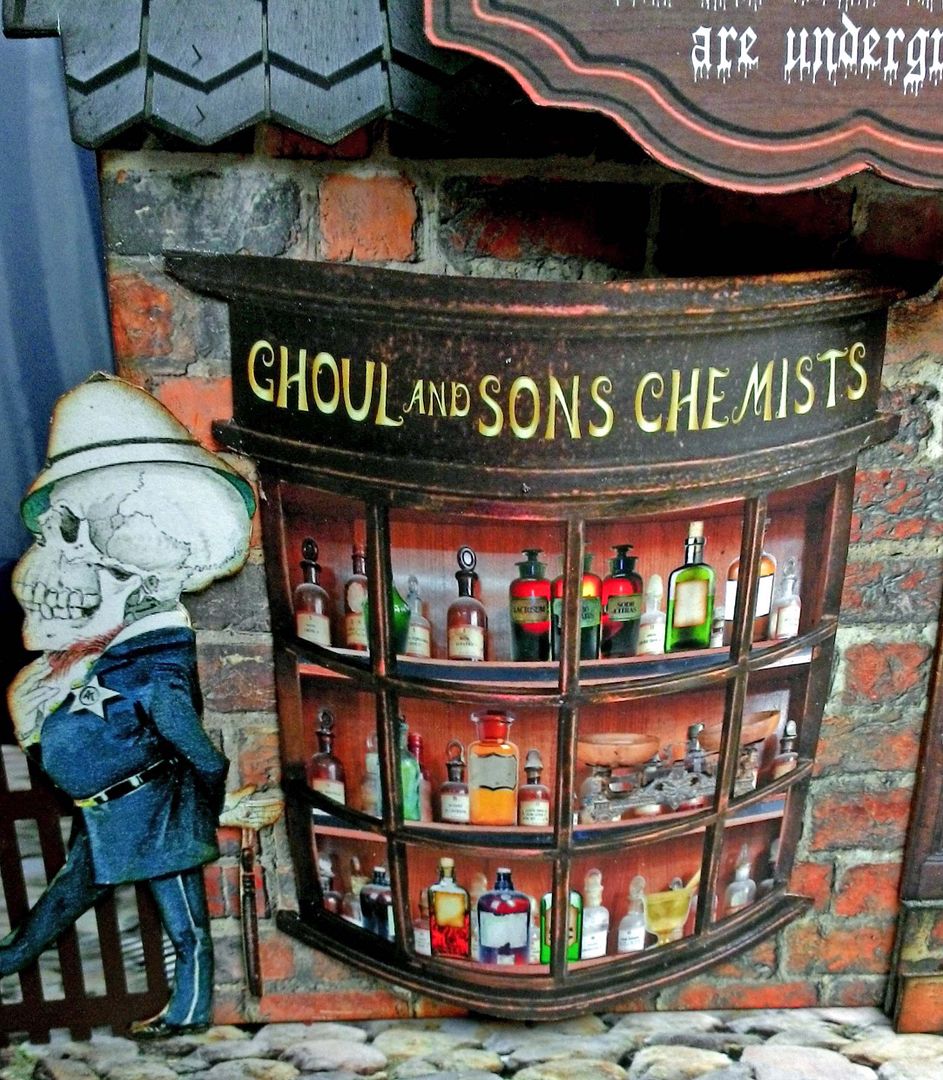
Ghoul & Sons Chemist, a trusted name for 500 years. All of their best customers are underground. You can see the boys are hard at work in the lab. Inside, Mr. Ghoul is busy creating who knows what, and I think he's got a skeleton in his cabinet, maybe a secret ingredient of one of his potions.
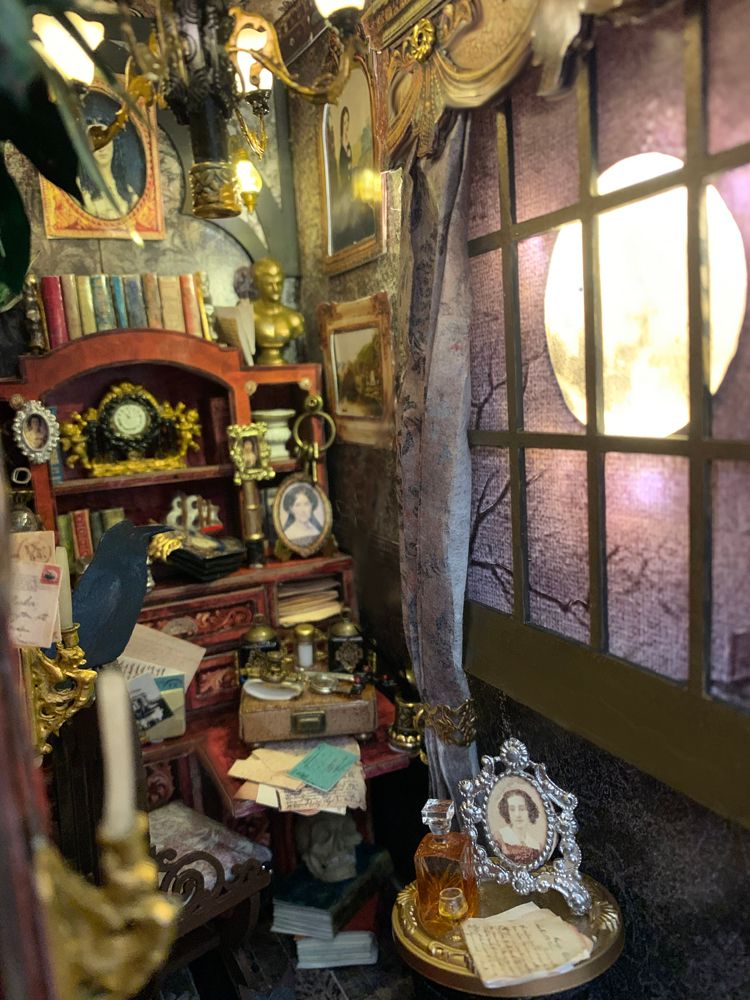
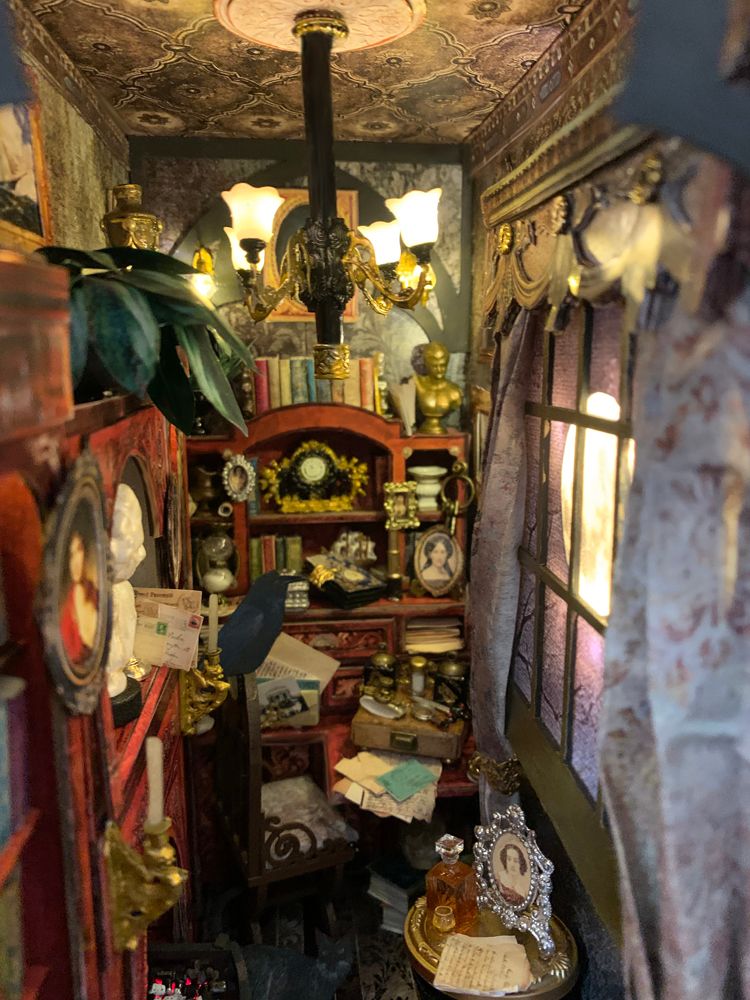
Drowsy from too many brandies, Poe looks
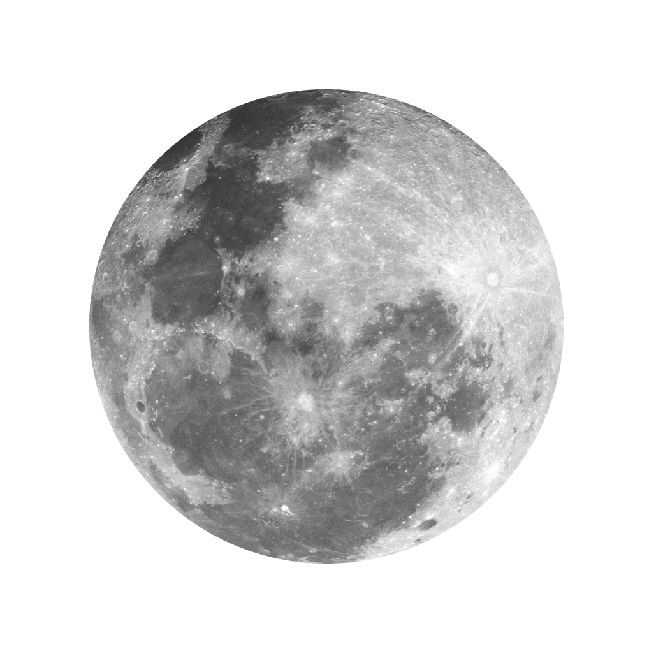
bleary-eyed at the chiming clock and rubs his eyes. His cat Cattarina jumps on his lap. He pauses and thinks, where did that raven come from? Did it just say nevermore?As moonlight streams through the open
window, he reaches to pour another drink. Staring at his love Annabelle Lee's portrait, filled with sadness and longing, he begins again to put pen to paper.
Yes, Poe had a black cat named Cattarina, and he was "seldom without a bottle of Benny Haven's best brandy!"
Yes, that moon is glowing (I’ll show you how it is done in the tutorial.)
One thing I discovered is that book
nooks need lights. How about a
chandelier made from 4 tulip sconces and a drinking straw to house the wires.
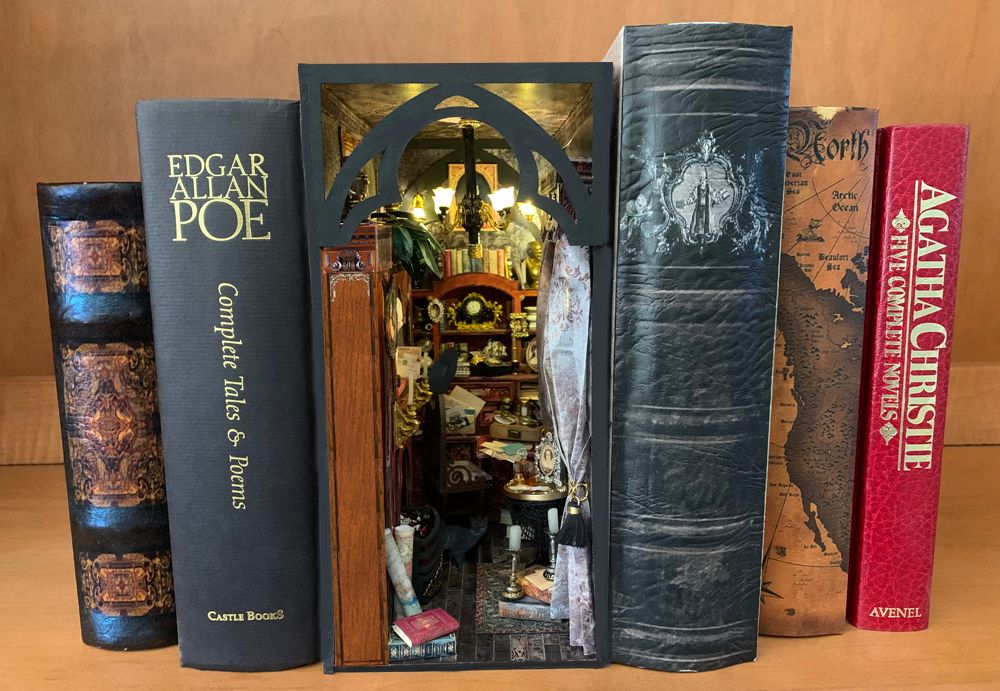
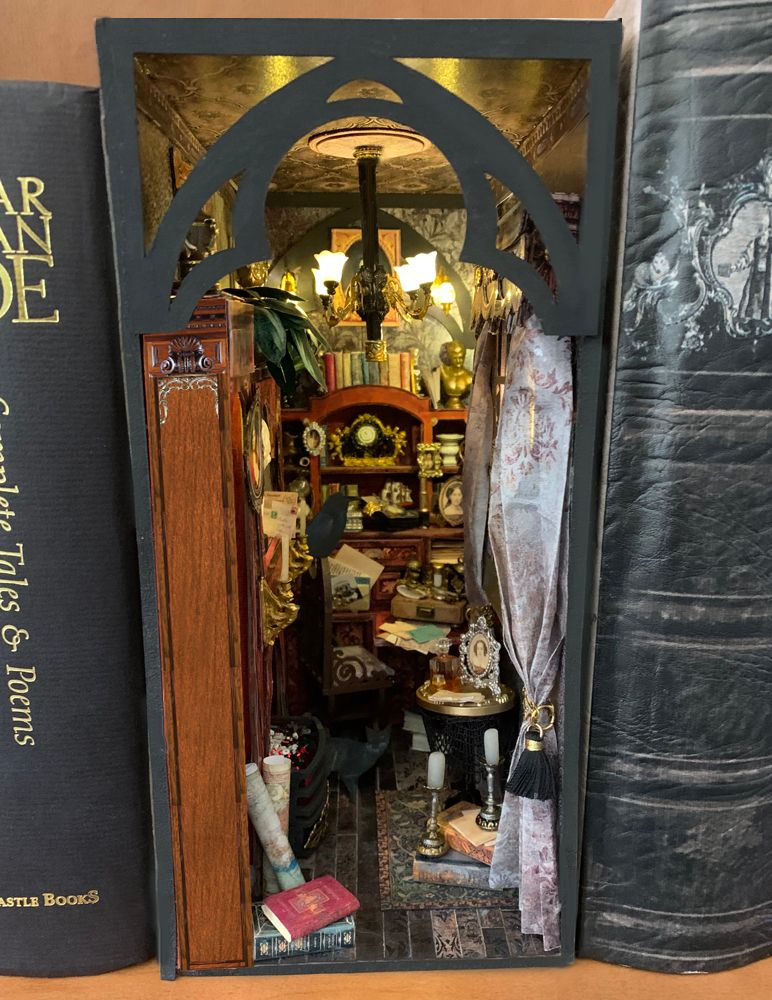
I’m excited to share my
first book nook with more to come. Since Halloween is not far away and it
is my favorite subject, the theme I chose was Edgar Allen Poe’s study. I
absolutely loved this project. The small working space posed new challenges
for me that I share with you in my video tutorial (further down in the post). With this project, I think I set a new
record for new image sets (10). And I promise you that I
have packed as much stuff as humanly possible in this small space.
As usual, (particularly
with a project of this scale), I have created some free images for you and
a free collage sheet. AlphaStamps has created new furniture kits
designed to fit into book nooks (although you could use them for other
miniature projects.) They also carry new items perfect
for a miniature library or study (check out the gothic arches).
Whether or not you want
to tackle a book nook, I hope this project gives you ideas and inspiration for
your own miniature projects.
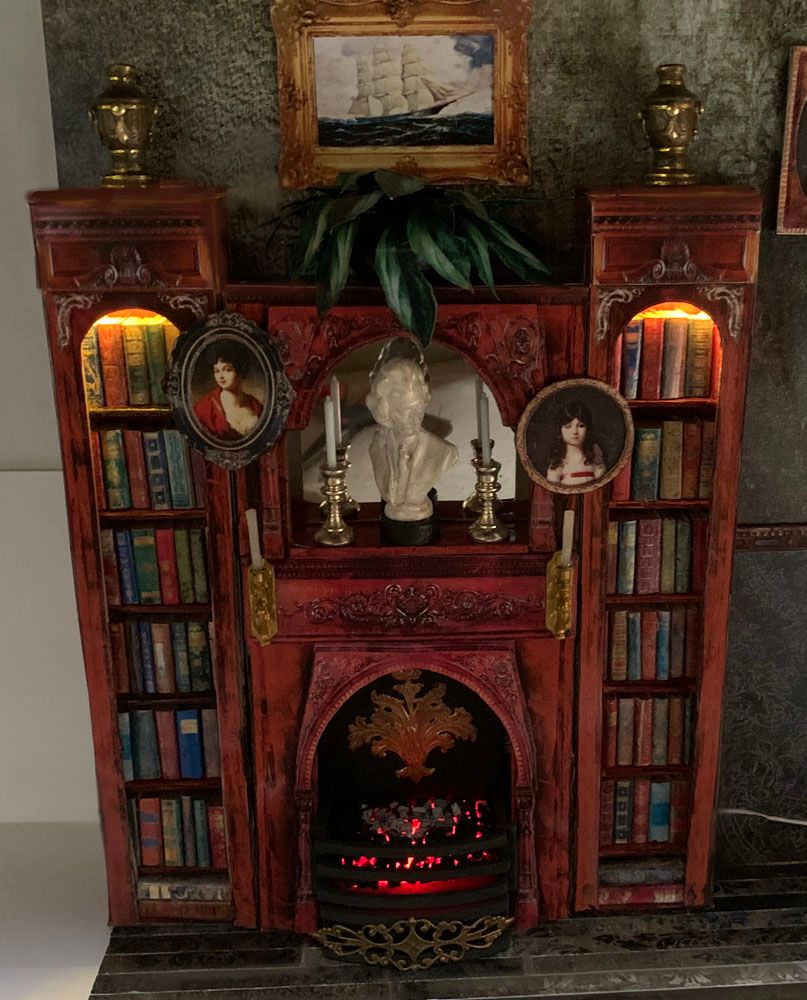
The bookcases, fireplace, and overmantle
are some of the new kits for this project.
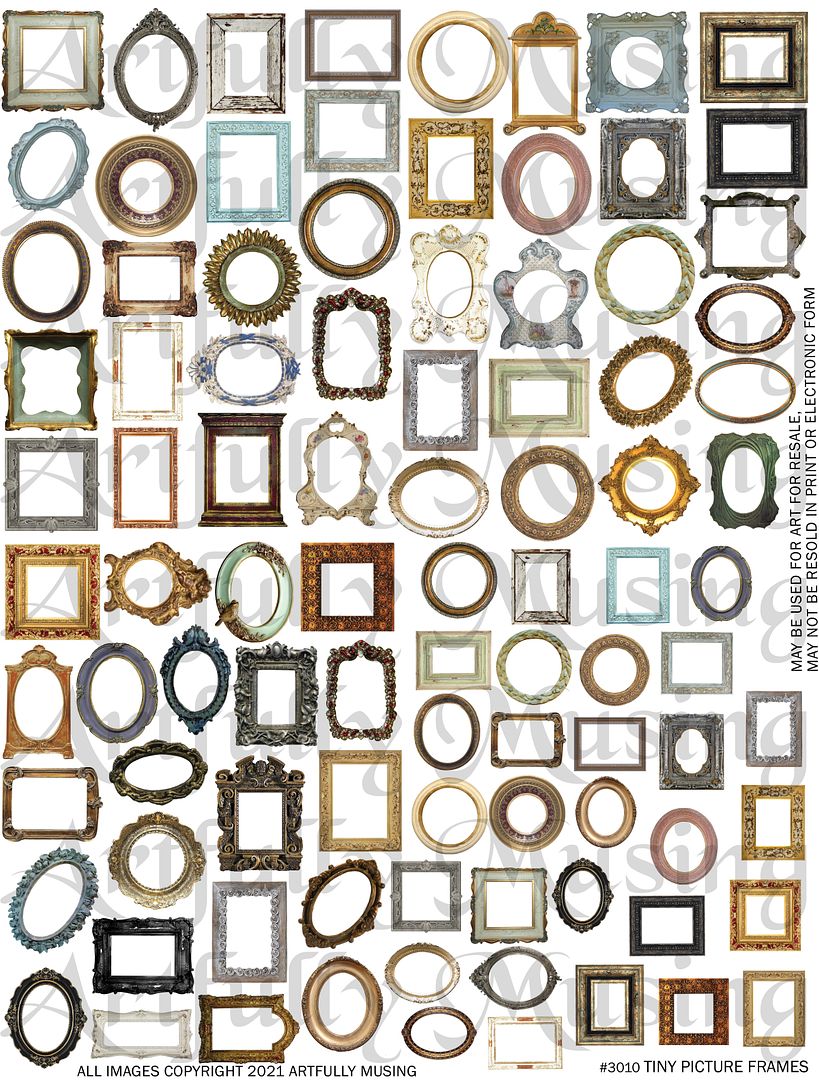
This sheet contains 87 picture frames
with 54 unique frames and 33 duplicates of different sizes. The
sizes of the frames range from approximately 1” x 1“ to .75” x .5”. These images work well
with 1:12 or 1:24 projects.
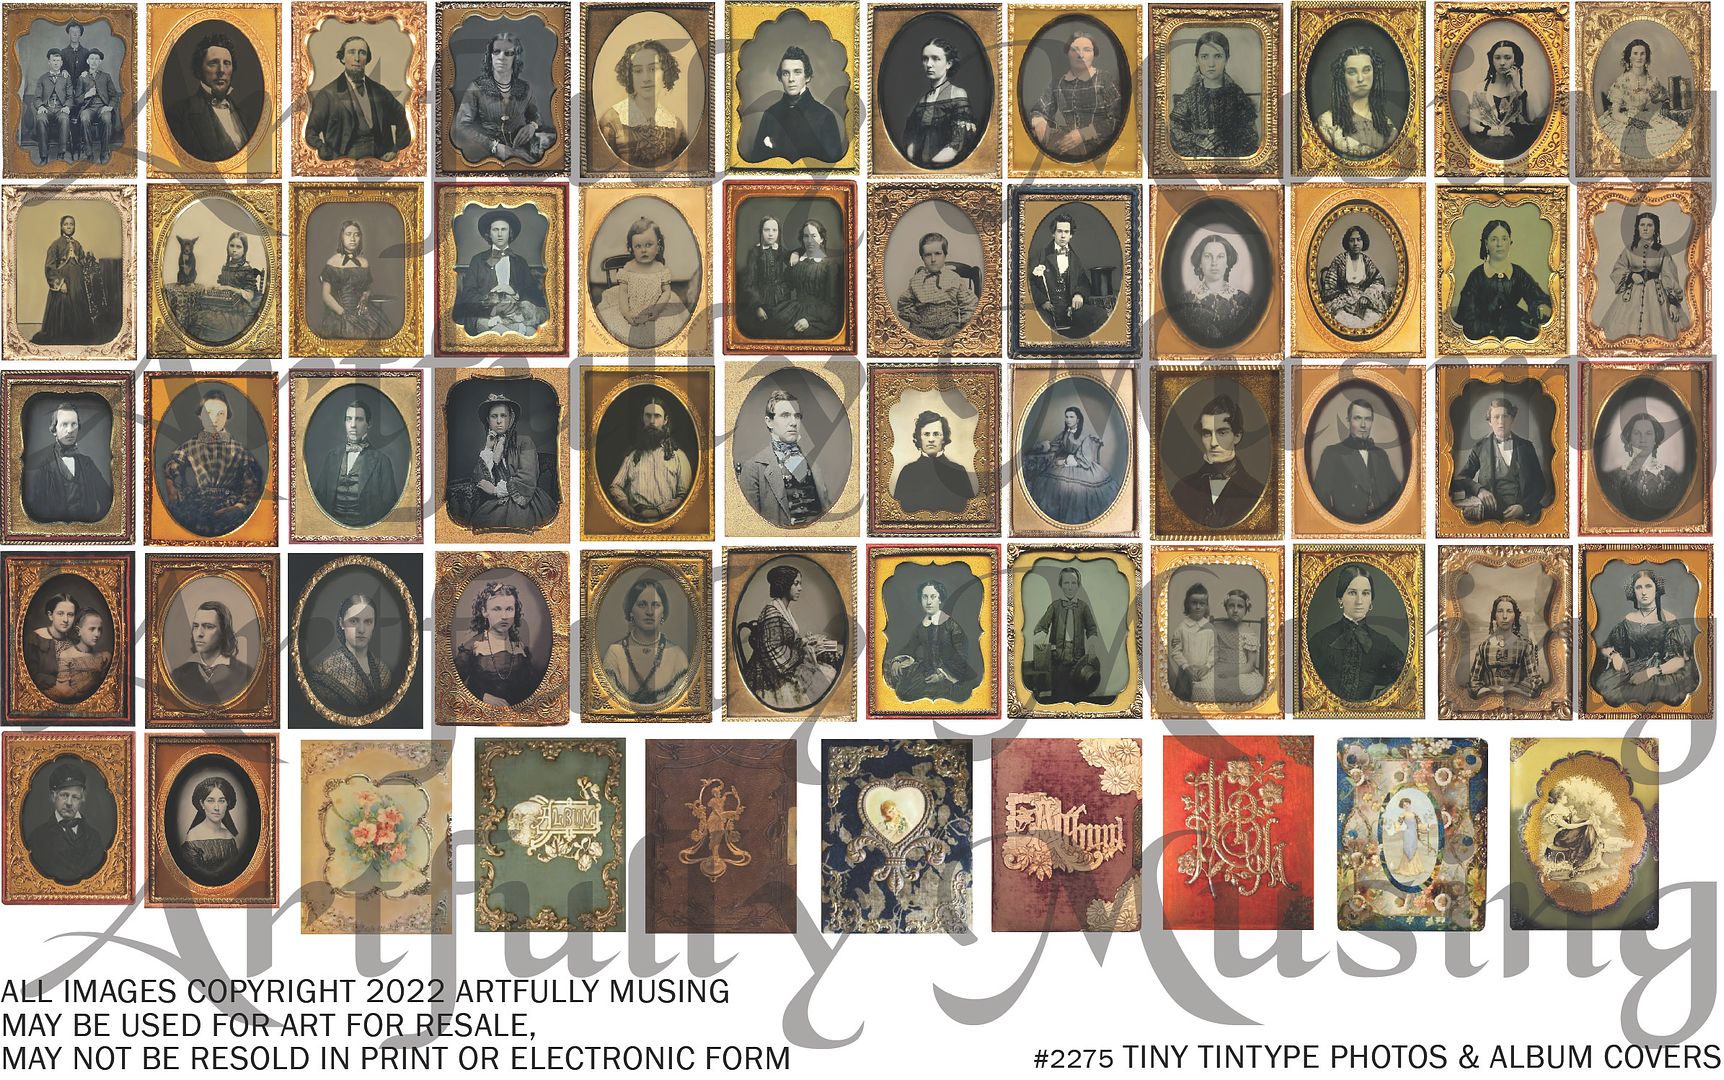
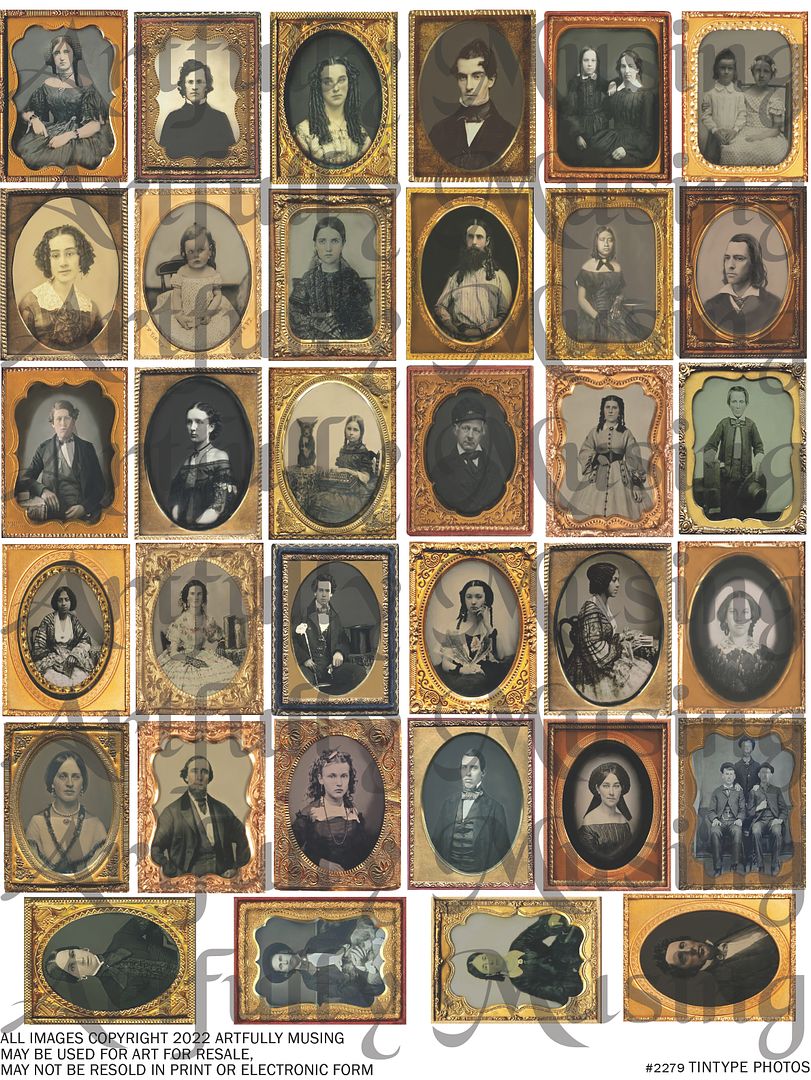
This sheet contains 50 tintype photos
and 8 album covers. These images are
sized to fit the Black Photo Album Accordion Book & Mats – for 1 Inch Covers carried by AlphaStamps. The images also work well with my Tiny
Picture Frames Collage Sheet and 1:12 scale projects.
This sheet contains 21 beautiful window
cornices of various colors and styles with 14 unique designs. These
images will fit windows sized from 4 ½” to 1 ¼” wide.
This sheet
has all of the pieces to cover the surfaces of the Tall Bookcase Kit.
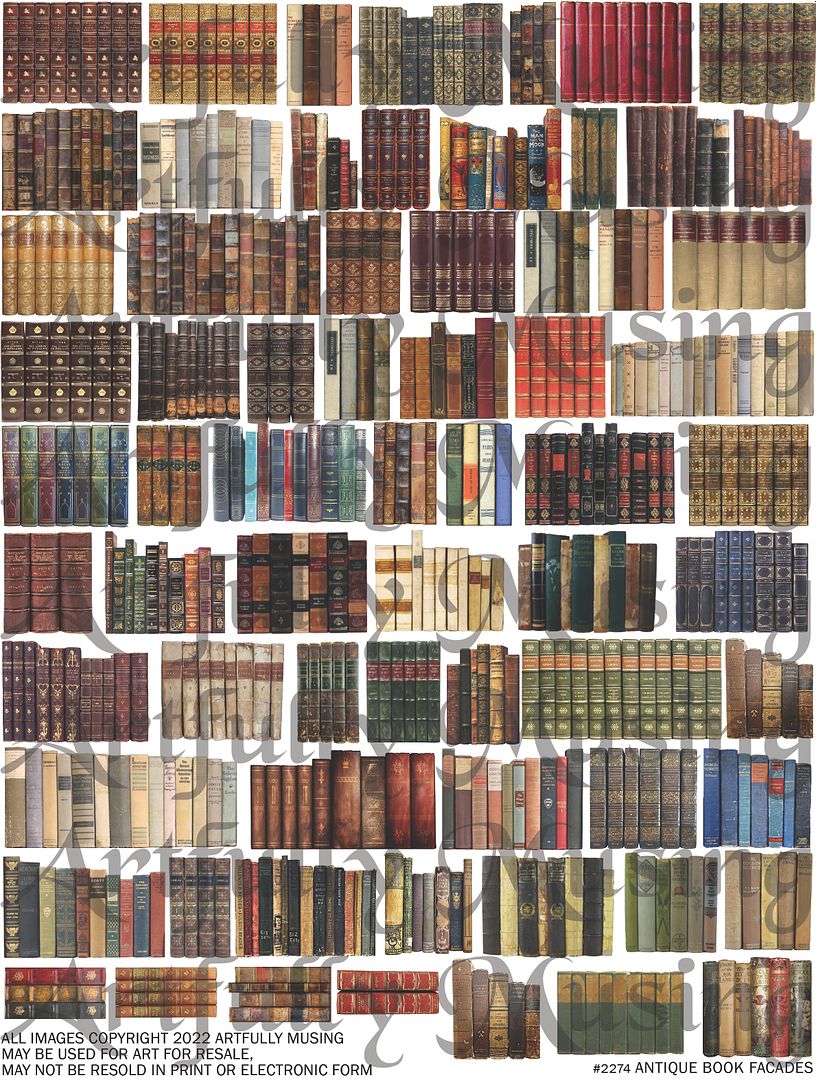
As this bookcase is shallow, I’ve included faux shelves with books and
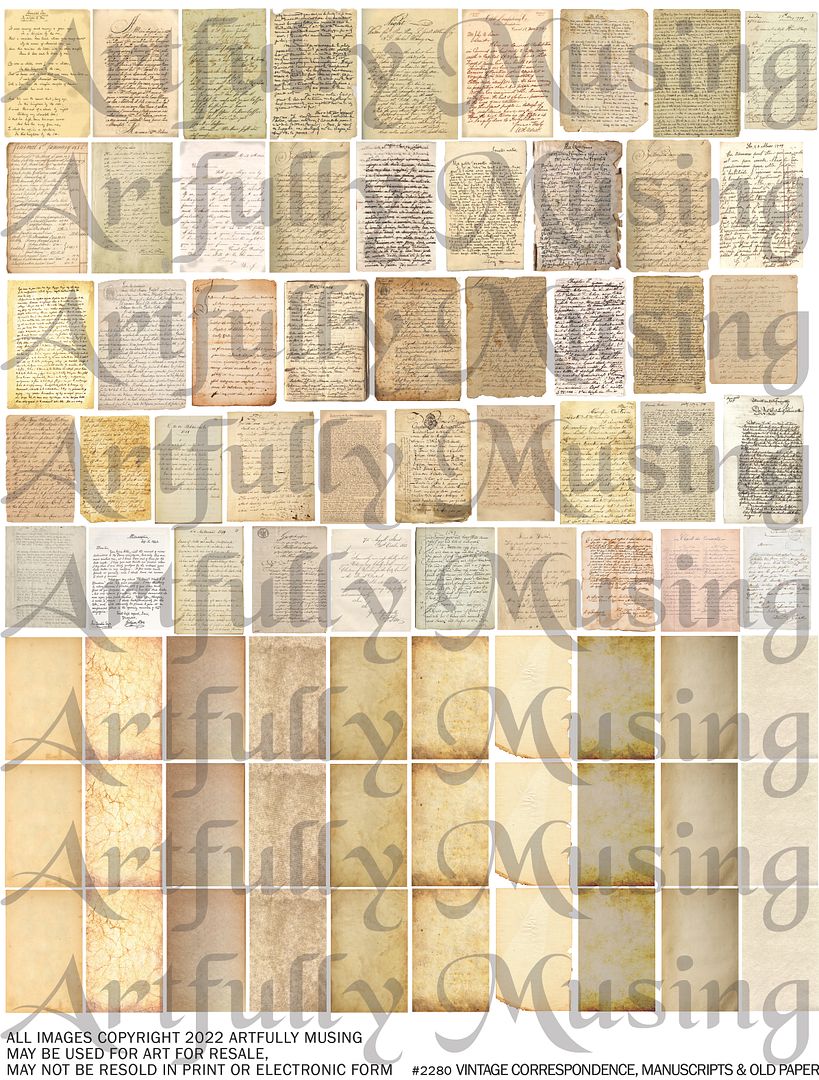
decorative items that can be glued inside the bookcase. If you wish to make faux books for the
bookcase, see the Tiny Antique Book Covers Collage
Sheet. I’ve also included wall-mounted
lamps and extra wood and trim pieces.
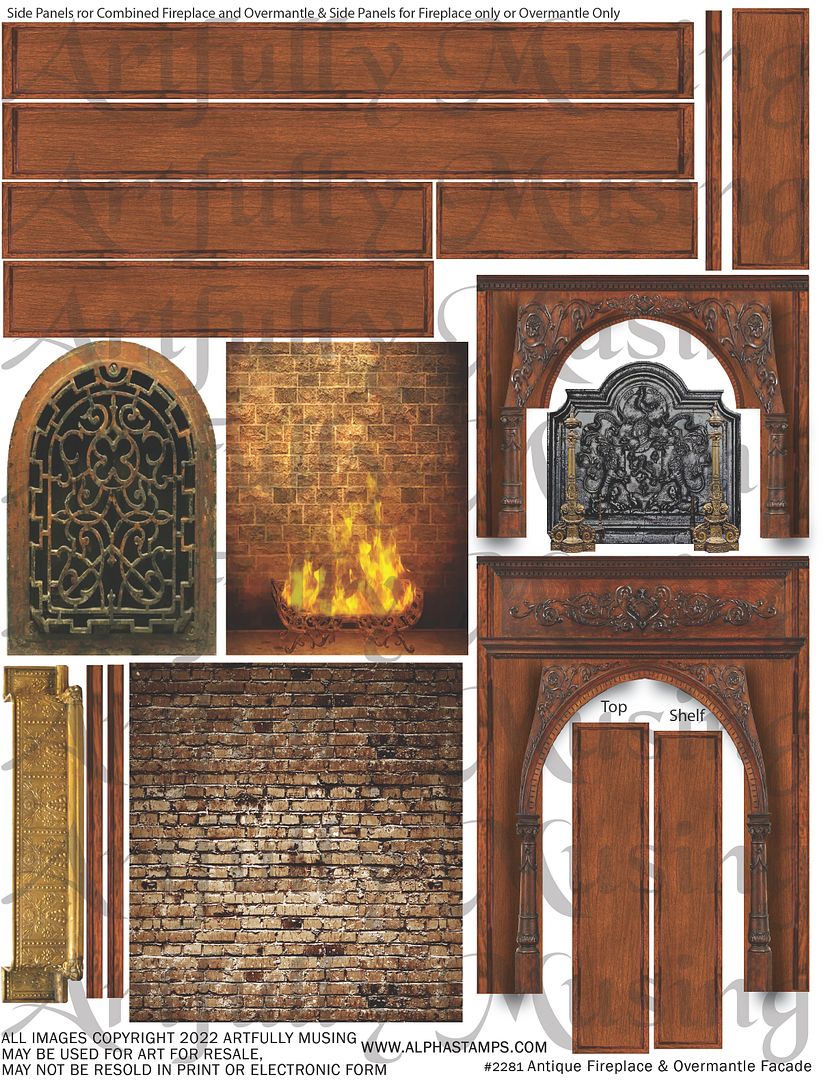
This sheet
has all of the pieces to cover the surfaces of the Shallow 3D
Fireplace and Fireplace Overmantle – 1 Arch.
In addition are bricks for the interior, bricks with fire, fireplace
screens, fireplace fender, and extra trim pieces.
This sheet
has all of the pieces to cover the surfaces of the 3 Panel Hutch 3D
Chipboard Kit and the 4” Wide Hutch Base 3D Chipboard Kit. I’ve
included an extra piece of wood (which I used for the desktop) and a desk pad.
Because the supply list for this project is
extensive, I have broken the list into sections based on the individual pieces
of the project. Clicking on the title of
a section will take you to the list of supplies for that section at
AlphaStamps. Clicking on an item in a
list will take you to that item at AlphaStamps.


.jpg)