It’s another
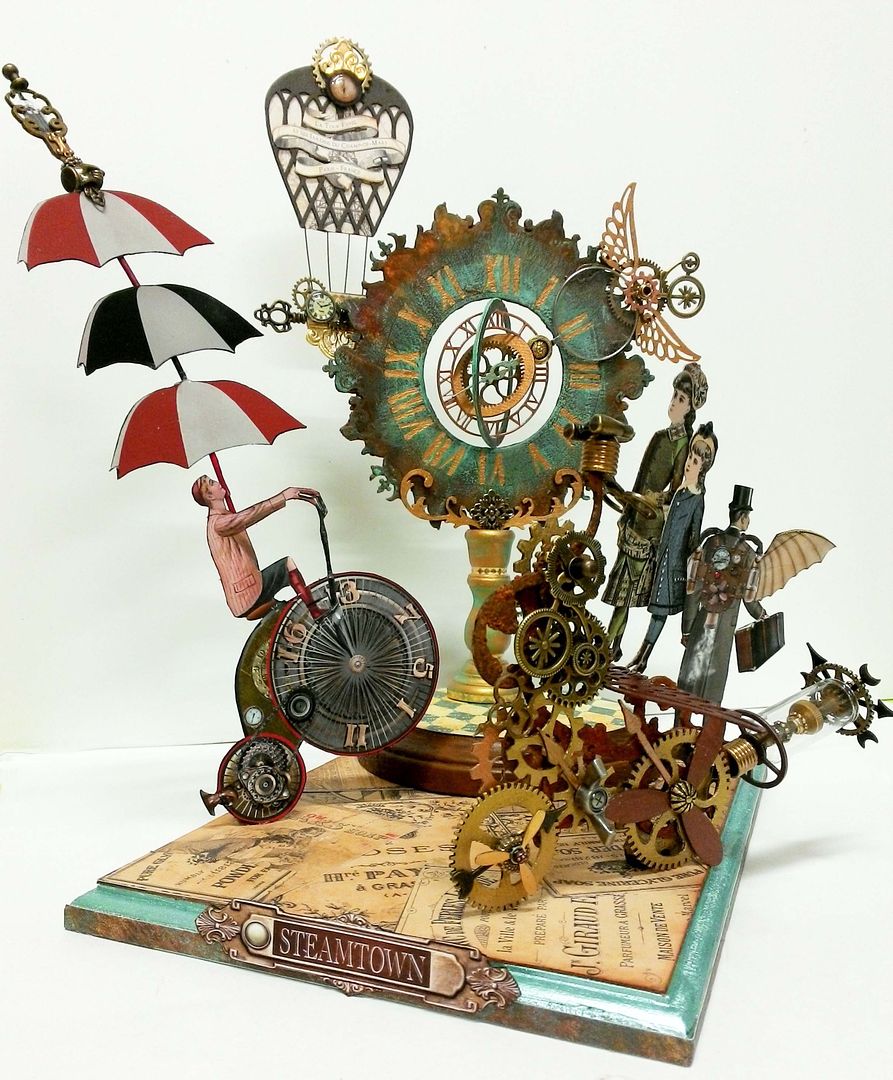
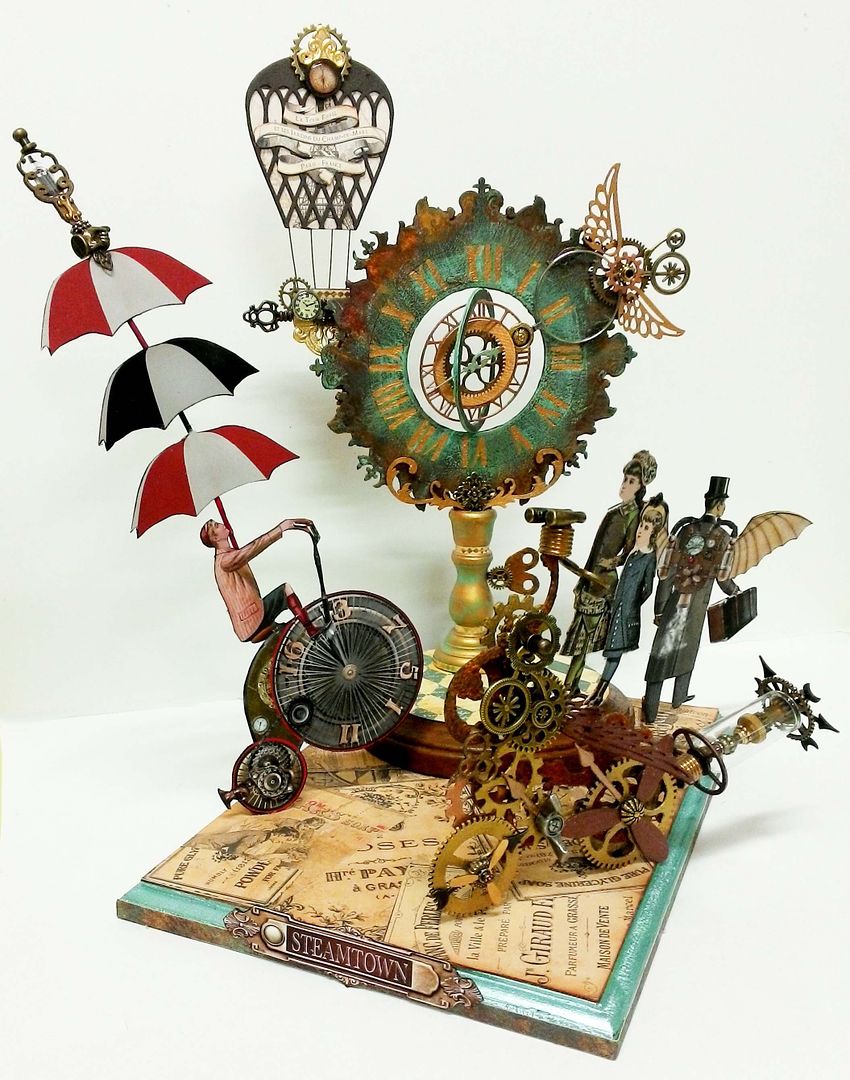
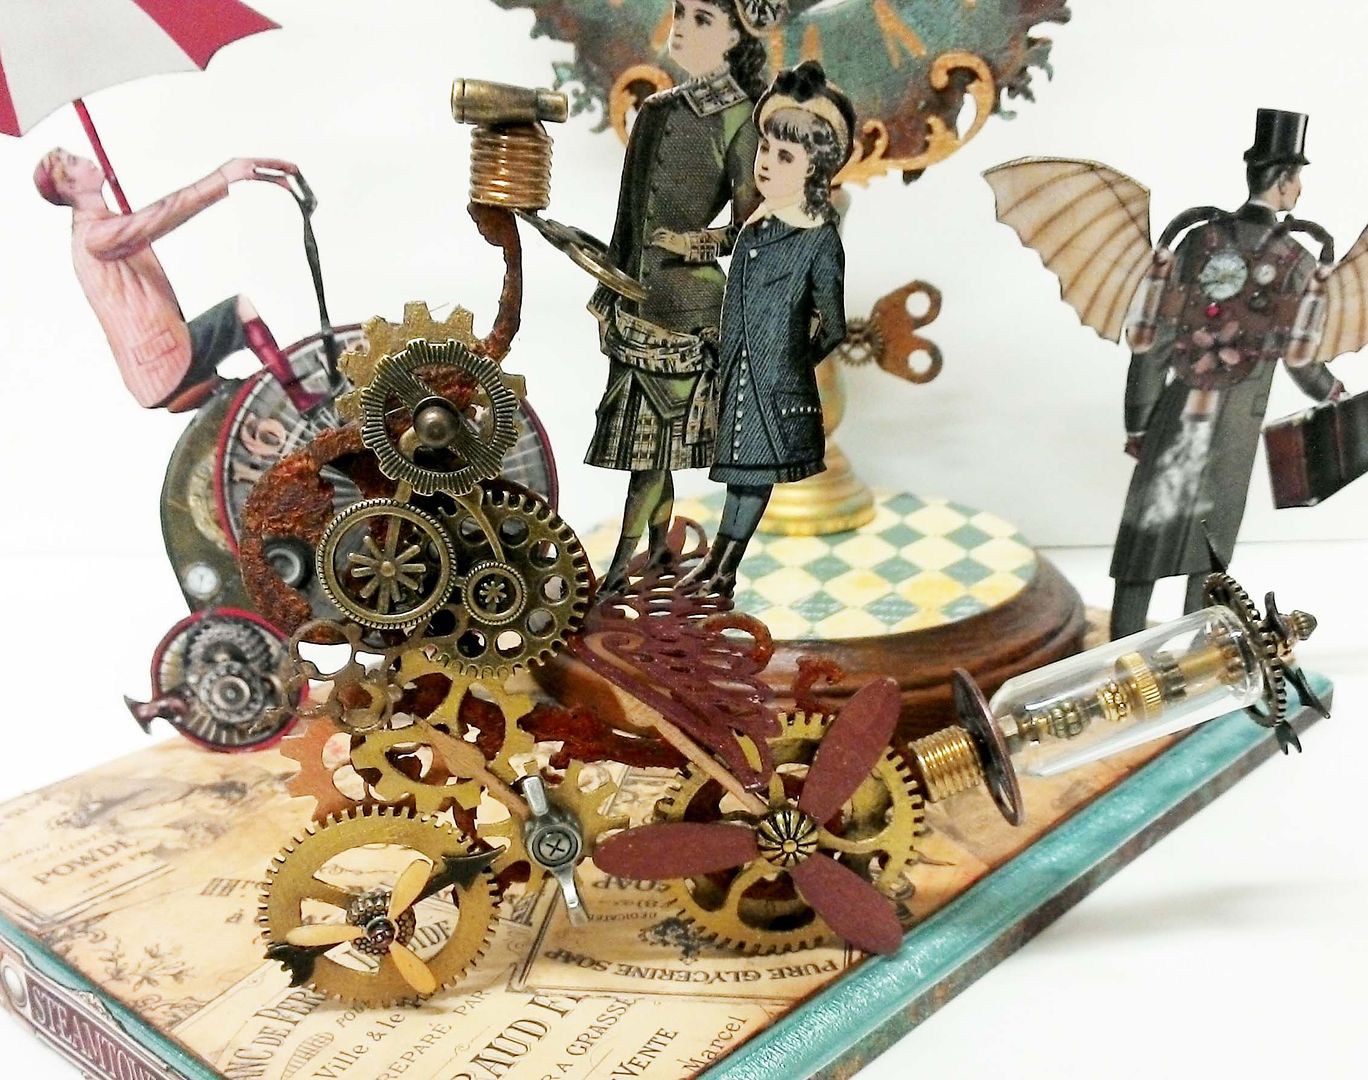
glorious day at the main square in Steamtown.
The astrolabe is a popular place to gather. Looks like a man with a steam-powered backpack is ready to take off, and there is a boy on a bicycle who is launching into
the air.
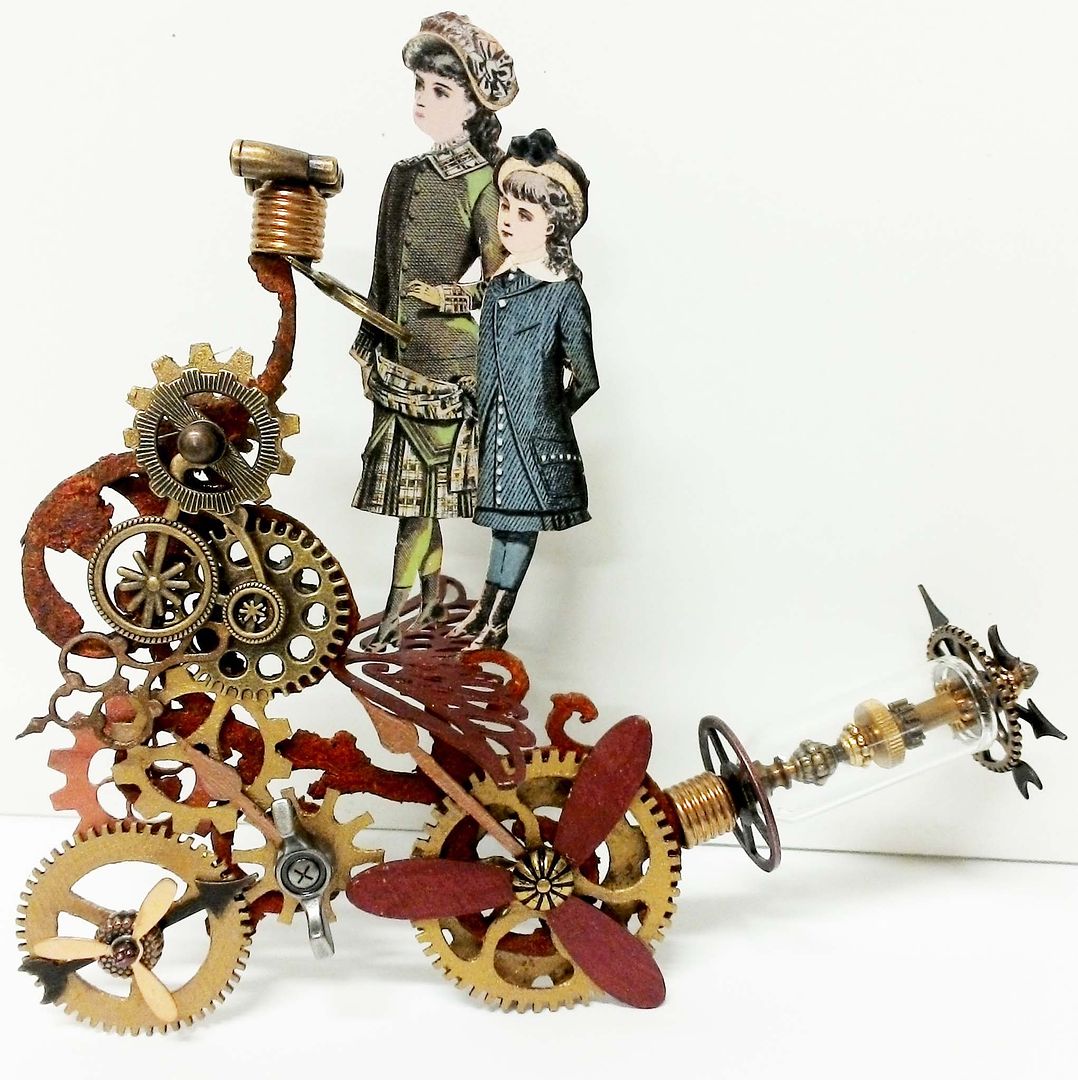
You can also see two young girls riding around on a steam-powered Victorian version of the Segway.
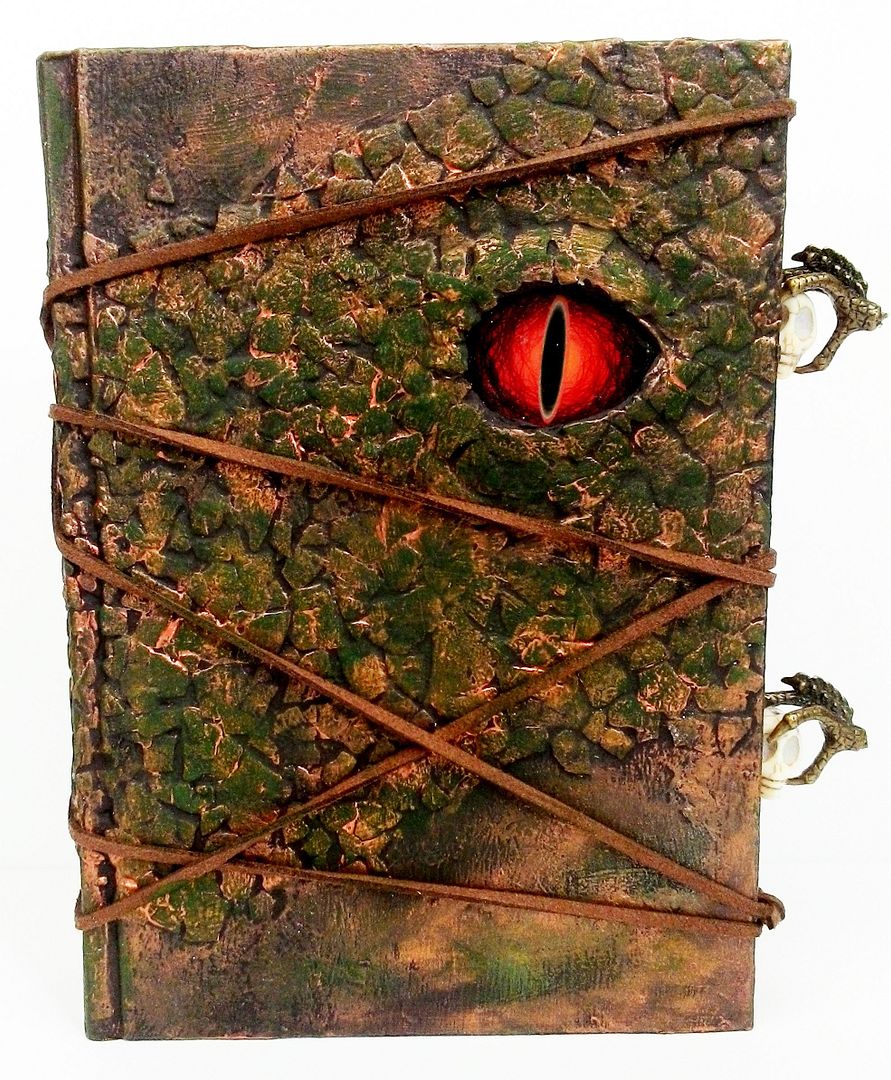
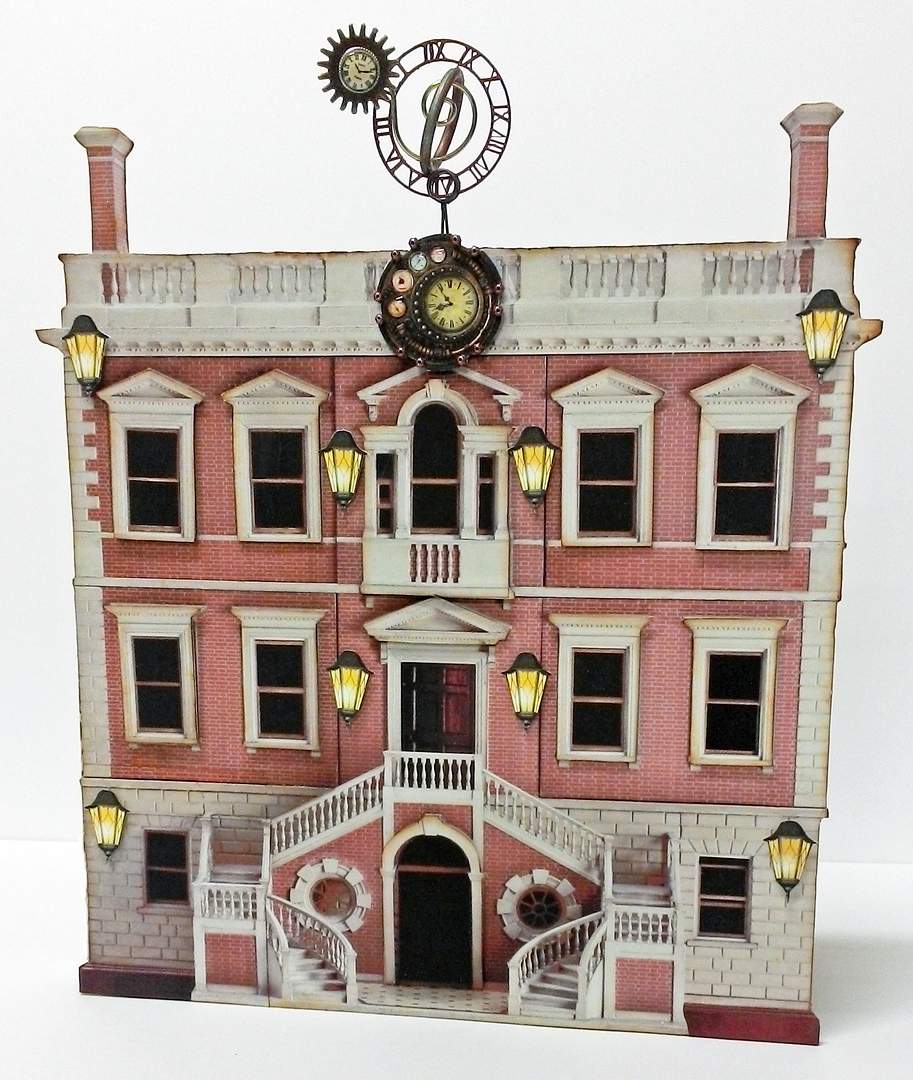
Out in
the suburbs of Steamtown, a drama is unfolding behind an innocent-looking Victorian
façade.
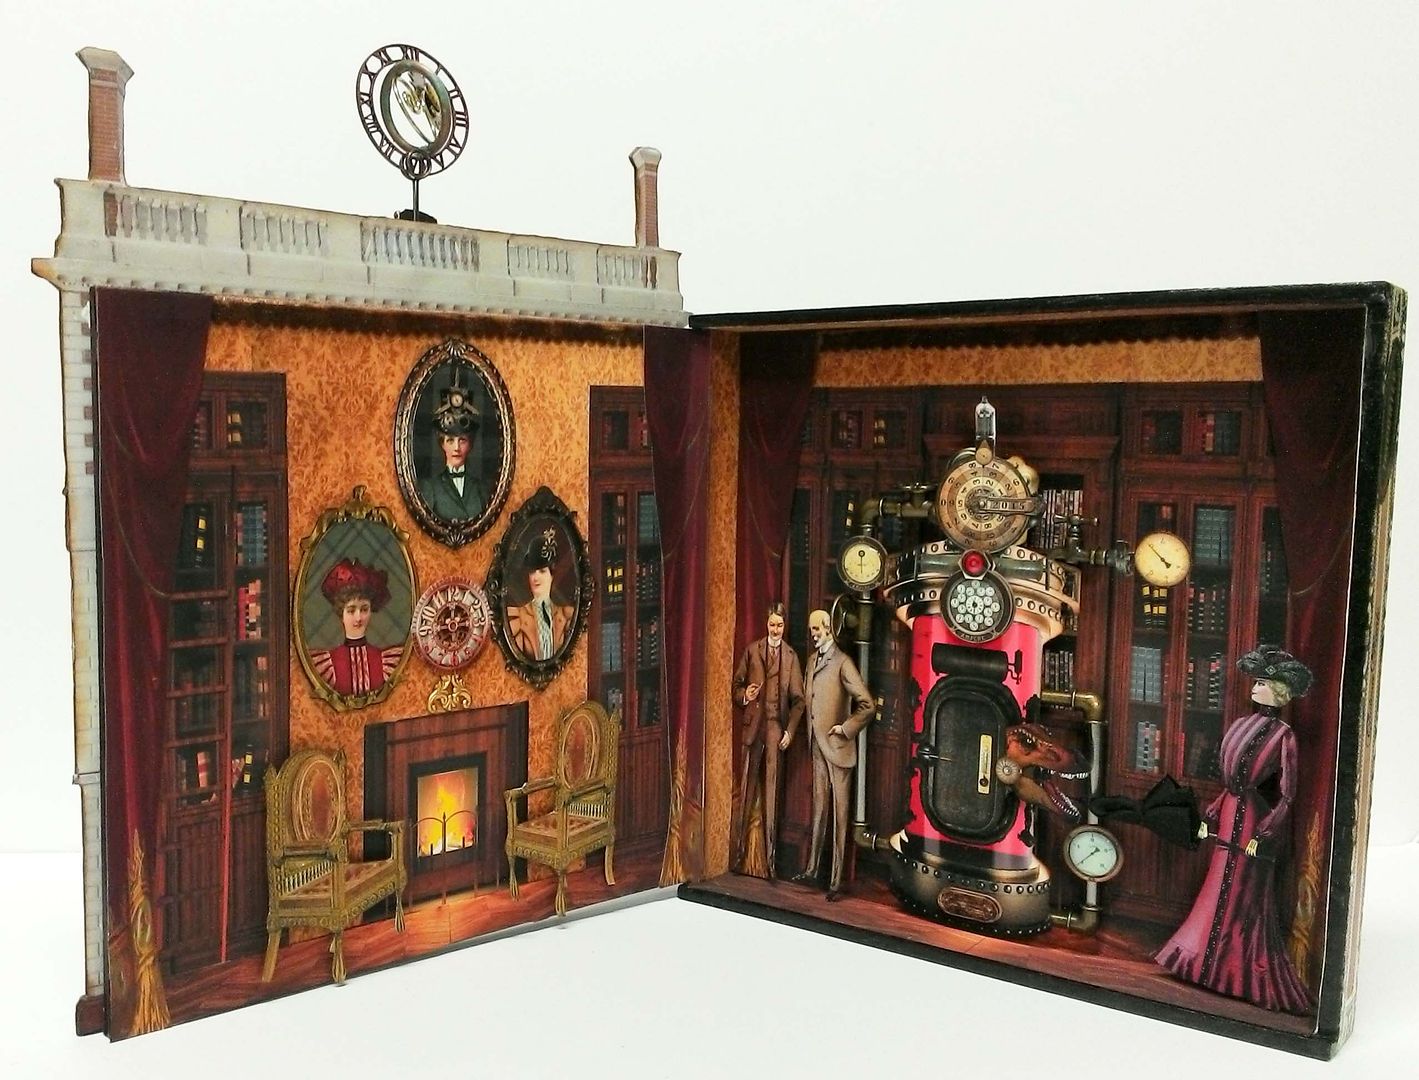
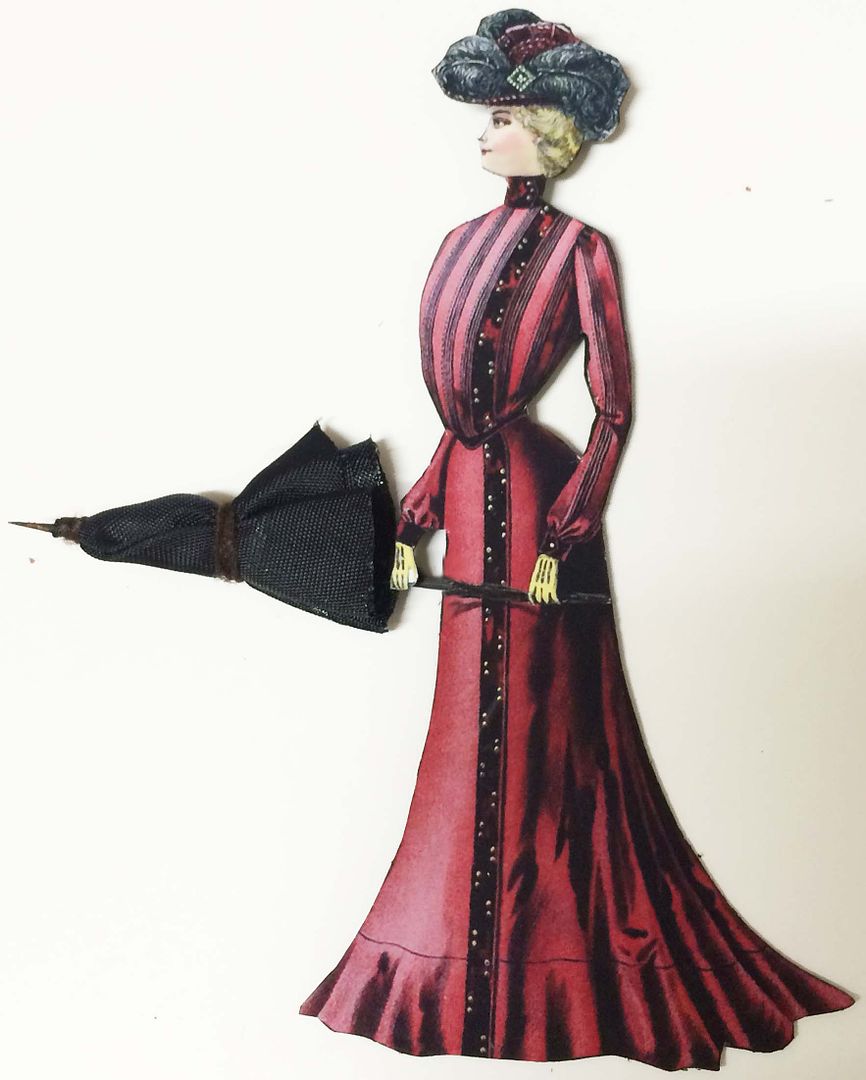
In the
library, Henry and George await the return of their colleague Roger. Unbeknownst to the men, something else has
moved forward in time. Not to worry, as Amelia
makes short work of the problem using her trusty umbrella, dispatching the
creature to the year 2015, where it is now starring in a movie titled “Jurassic
World”.
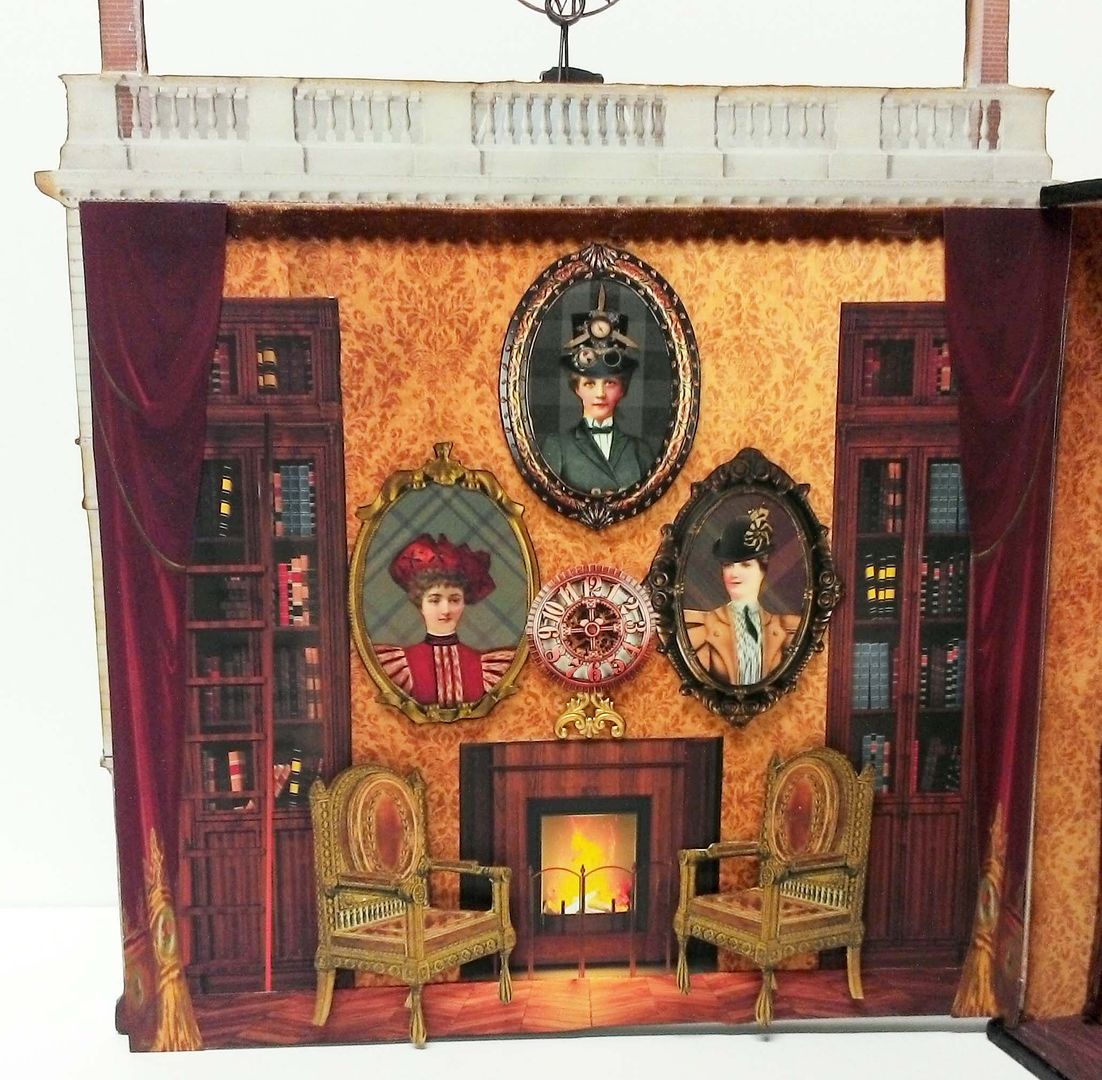
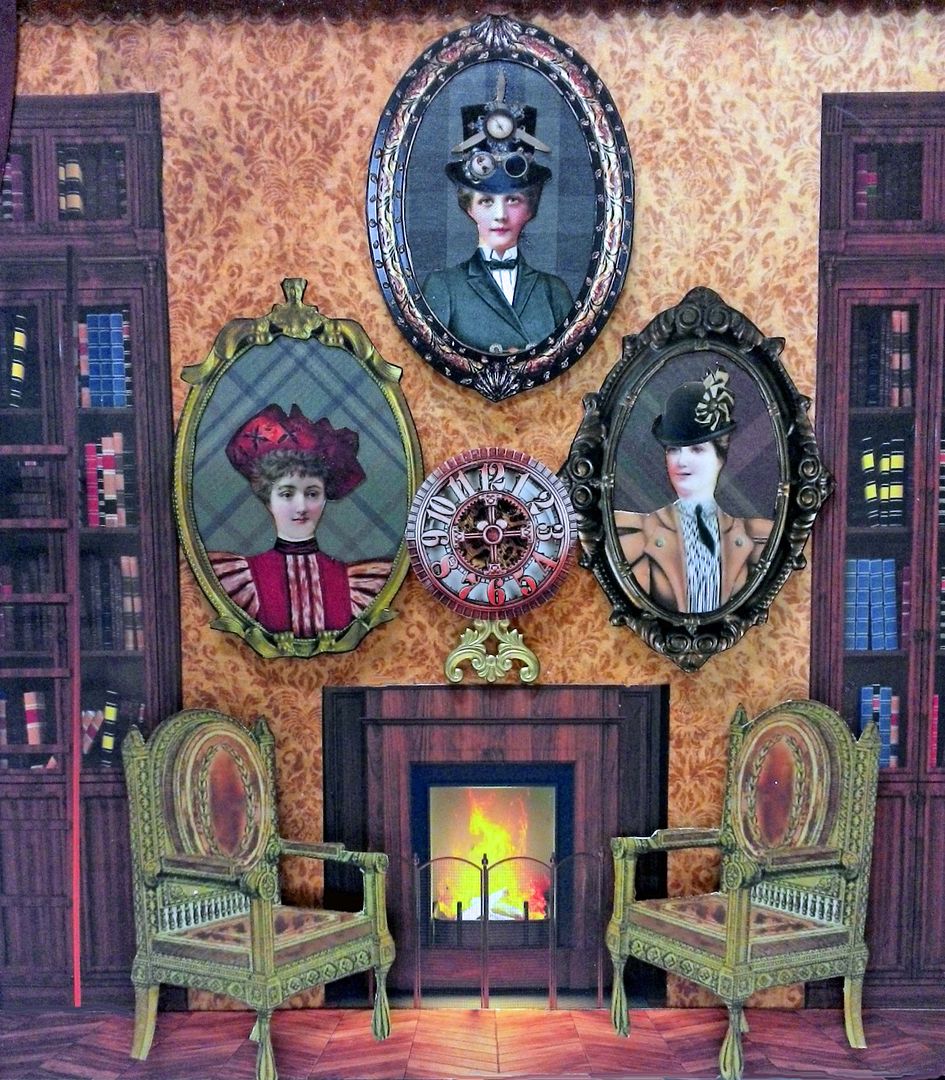
On the
walls of the library are pictures of some of the lovely ladies of Steamtown.
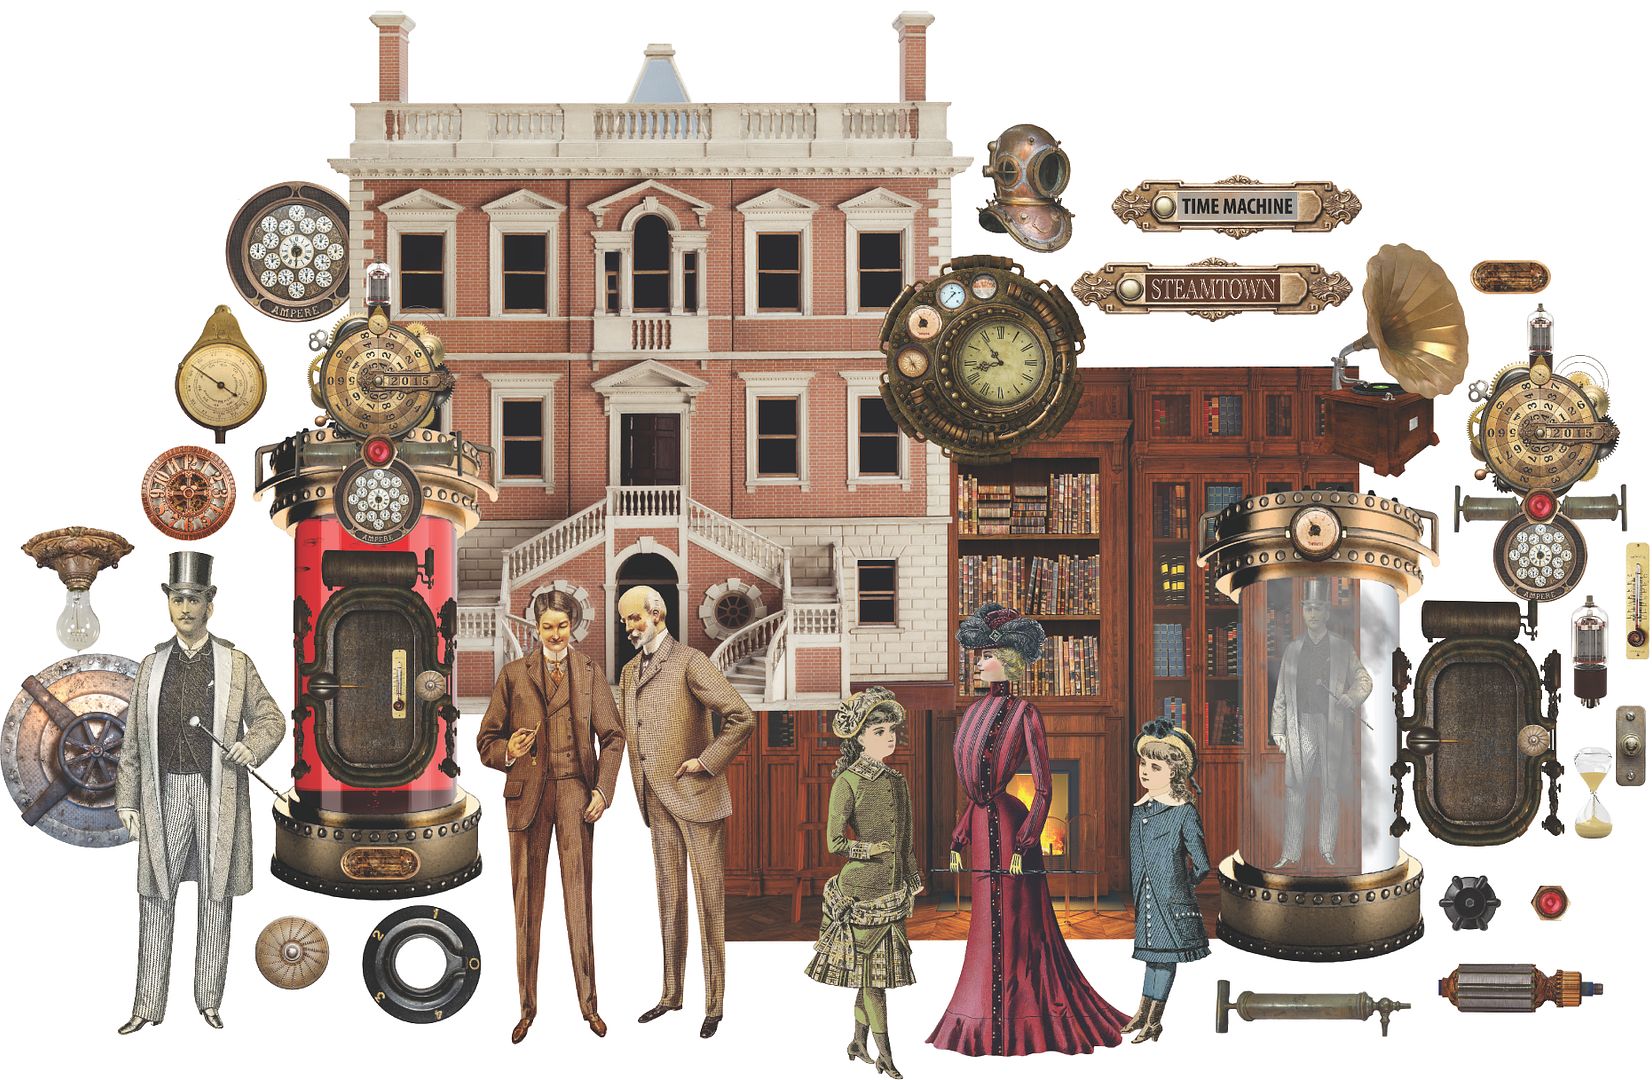
In addition
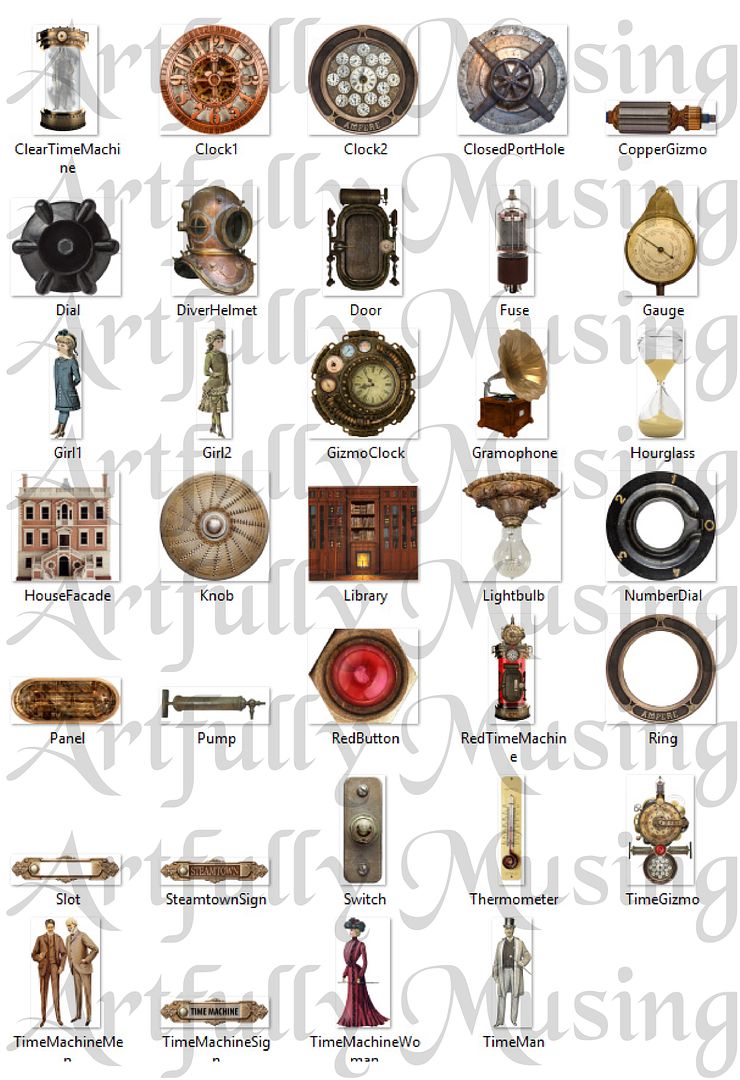
to the two Steampunk-themed projects, there is a new “Time Machine” collage
sheet and digital image set. Most of the
images you’ll see in the new project come from these new image sets and also
from my other recent Voyages
Extraordinaires image sets.
In the
post below, I’ll walk you through how I created each piece and have included the
list of supplies I used.
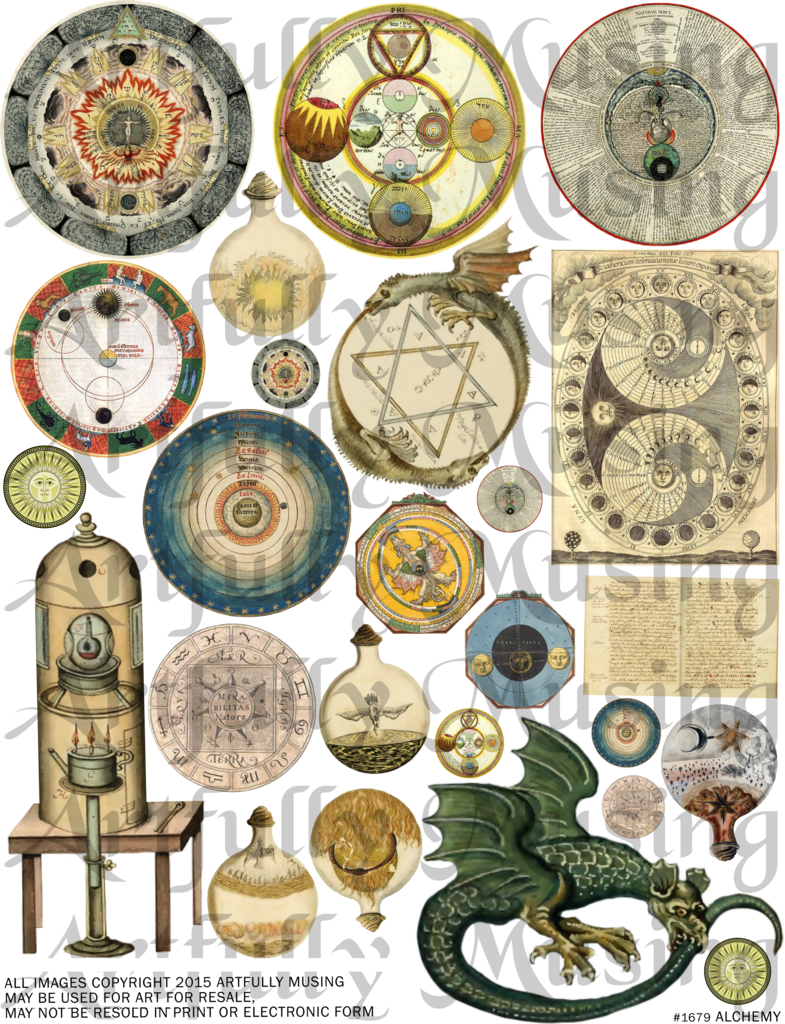
Click on the image below to purchase this sheet. This sheet includes all kinds of goodies to create your own time
machine.
Click on the image below to purchase this digital image set.
This digital image set is filled with all kinds of images of people and mechanical parts to assemble a time machine and setting for a total of 34 separate images. These work well for a 1:12 scale miniature project.
STEAMTOWN - Tutorial
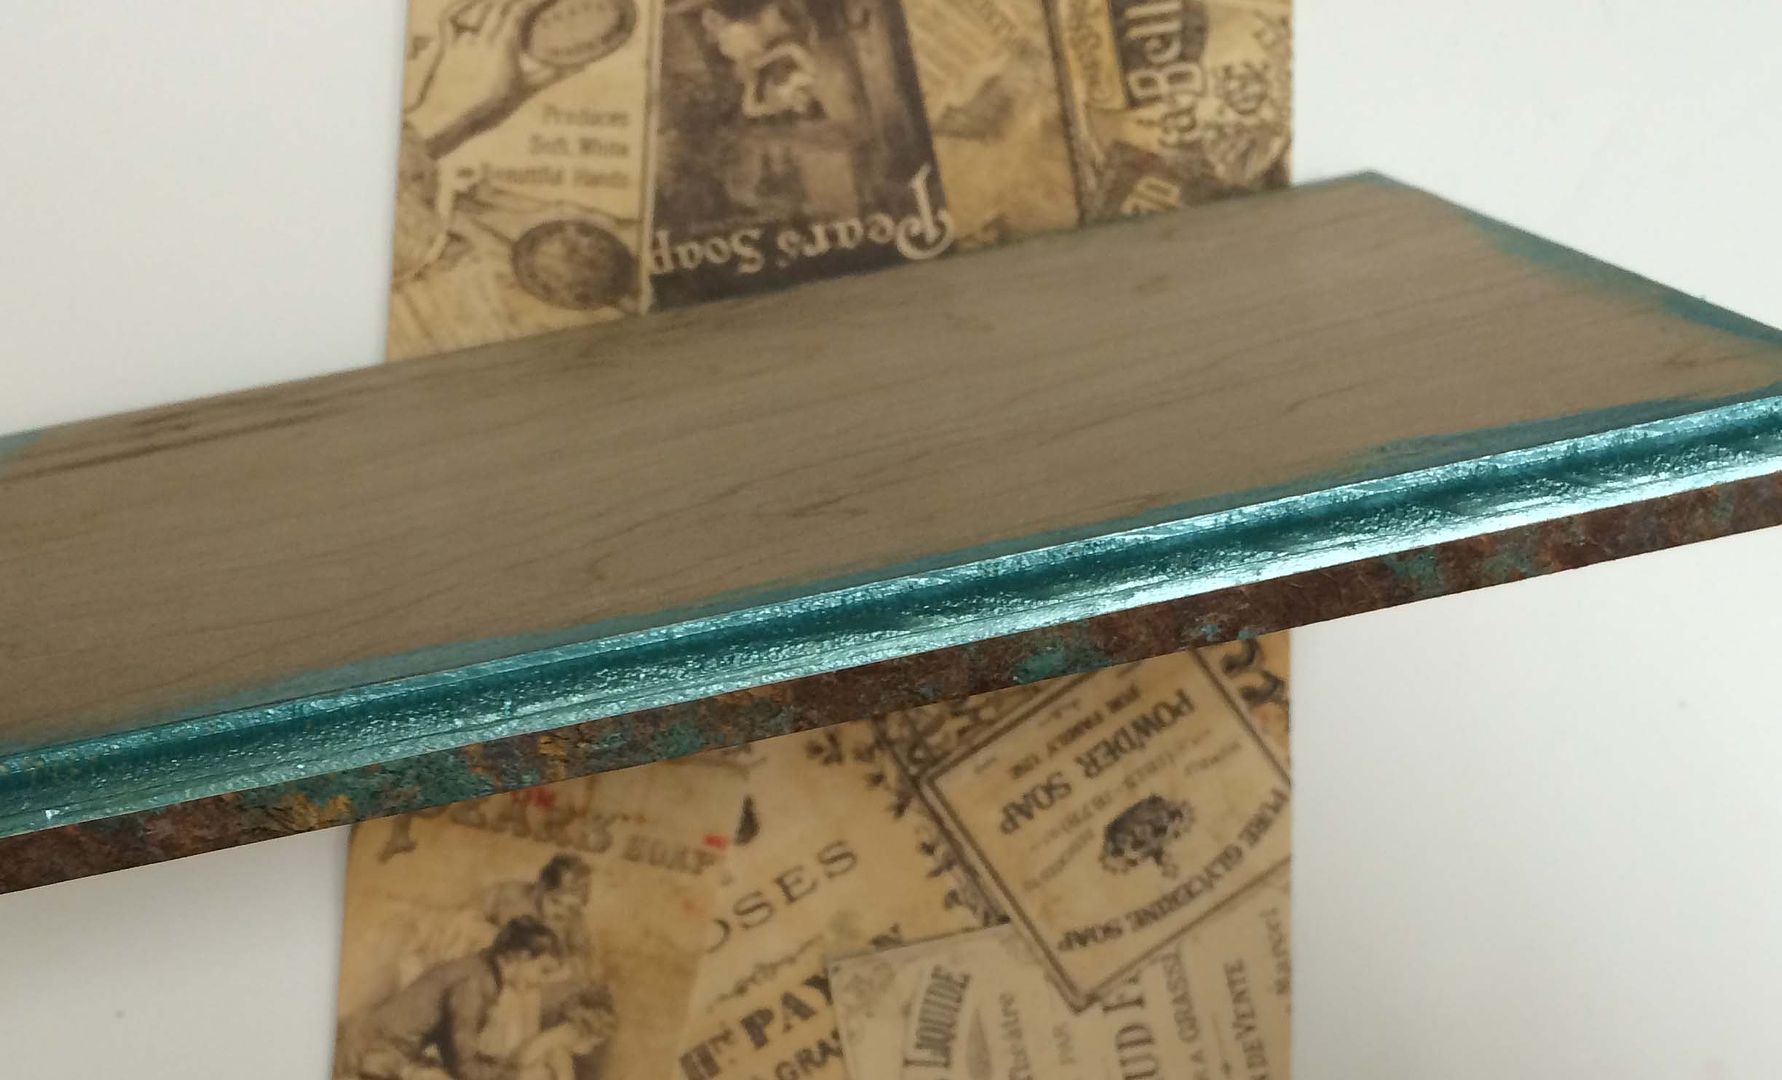
The
base of Steamtown is made from a piece of wood I bought at the craft
store. The edges are painted and
papered. On the top is a collage of
paper from the Carte
Blanche Junque Gypsy Scrapbook Paper.
I
attached the boy and girls on the bicycle to the base using small square beads
that are glued to the back of the pieces and then to the base.
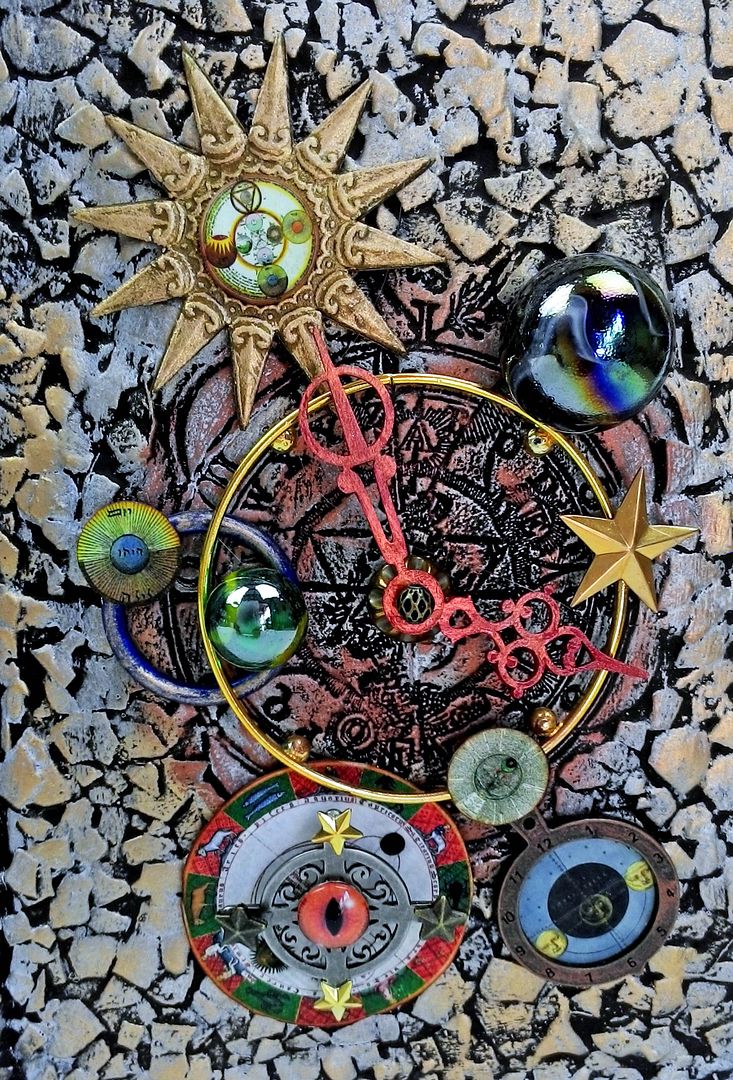
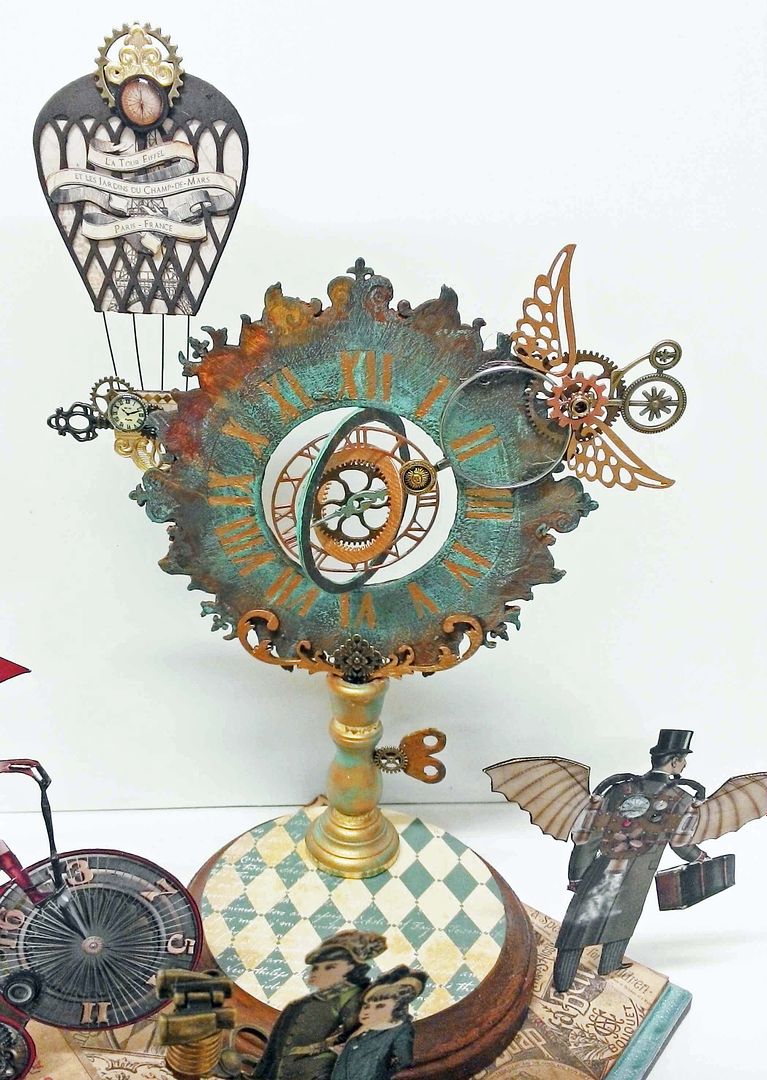
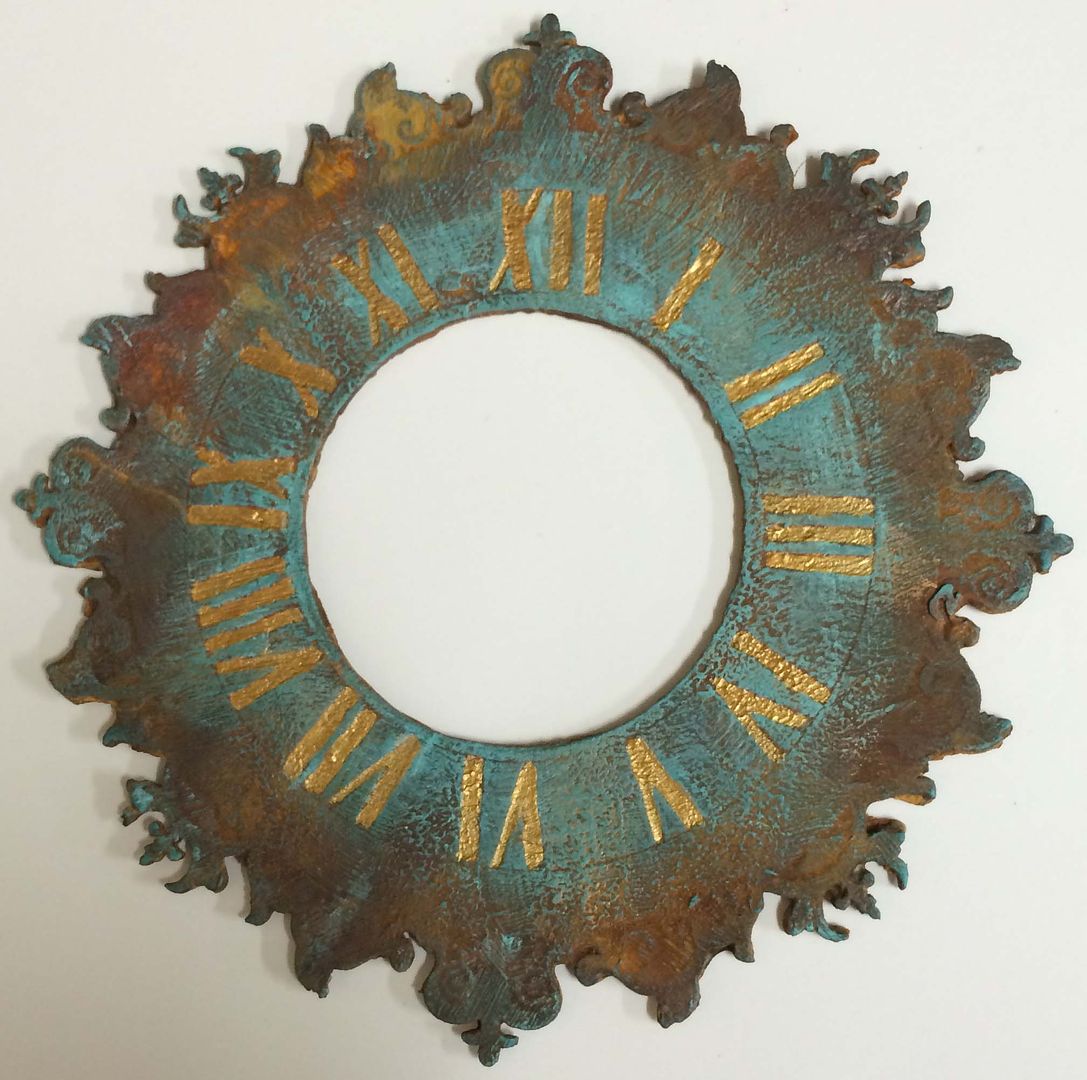
ASTROLABE CLOCK
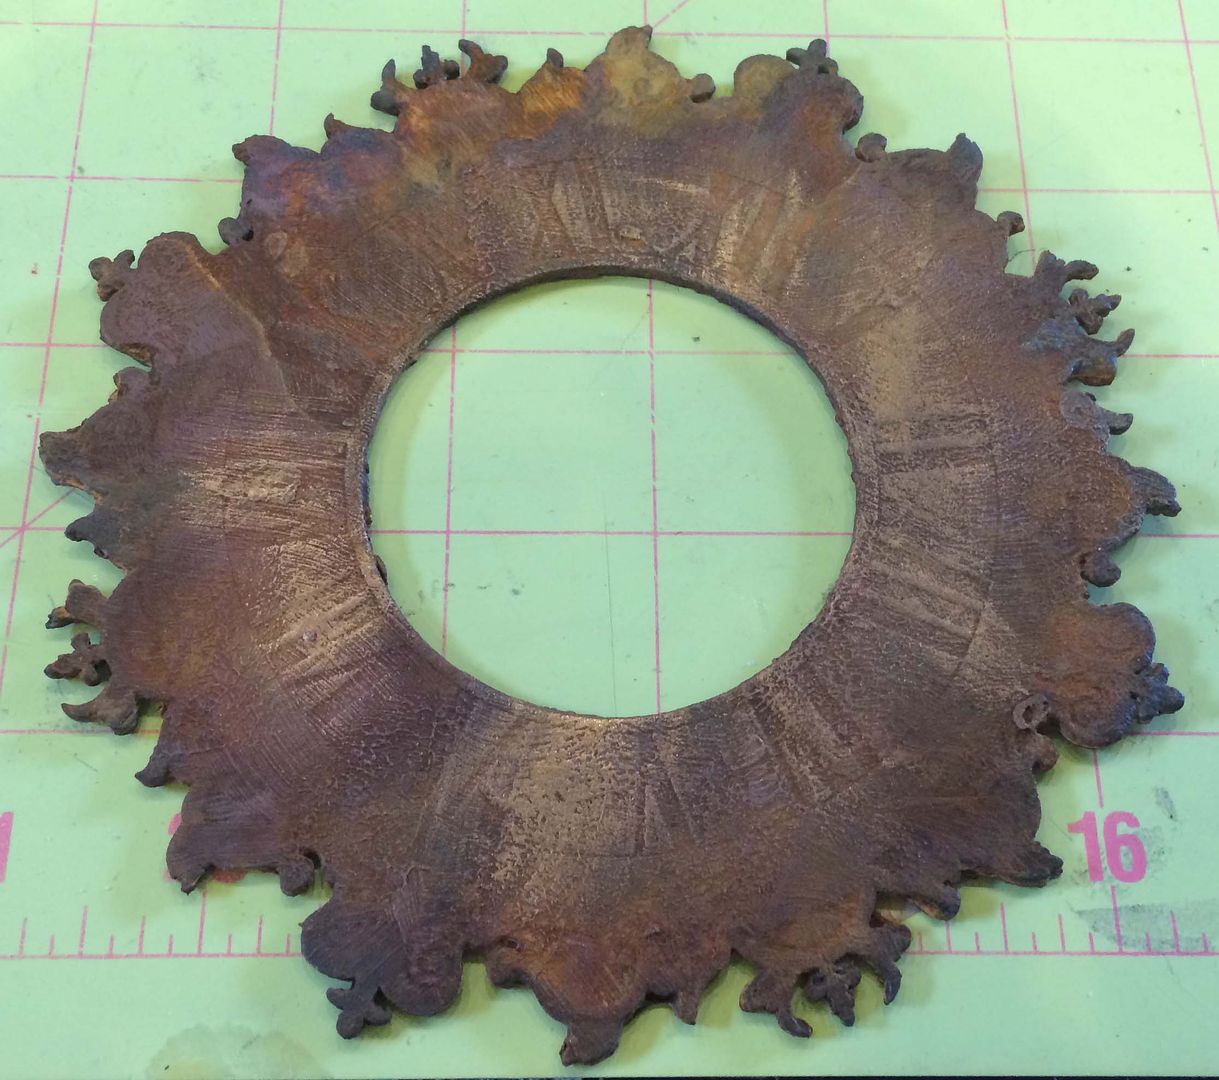
The
astrolabe clock is made from laser-cut wood.
To
create the clock patina, I started by applying a rust treatment to the
clock. I’m not going to cover the rust treatment
in this tutorial as I have two other tutorials devoted to this patina technique. If you missed them, they are:
Next, I
rubbed on some Inca
Gold Gilders Paste and then some Patina
Gilders Paste. The final touch was
to paint the indented numbers on the wood with gold paint.
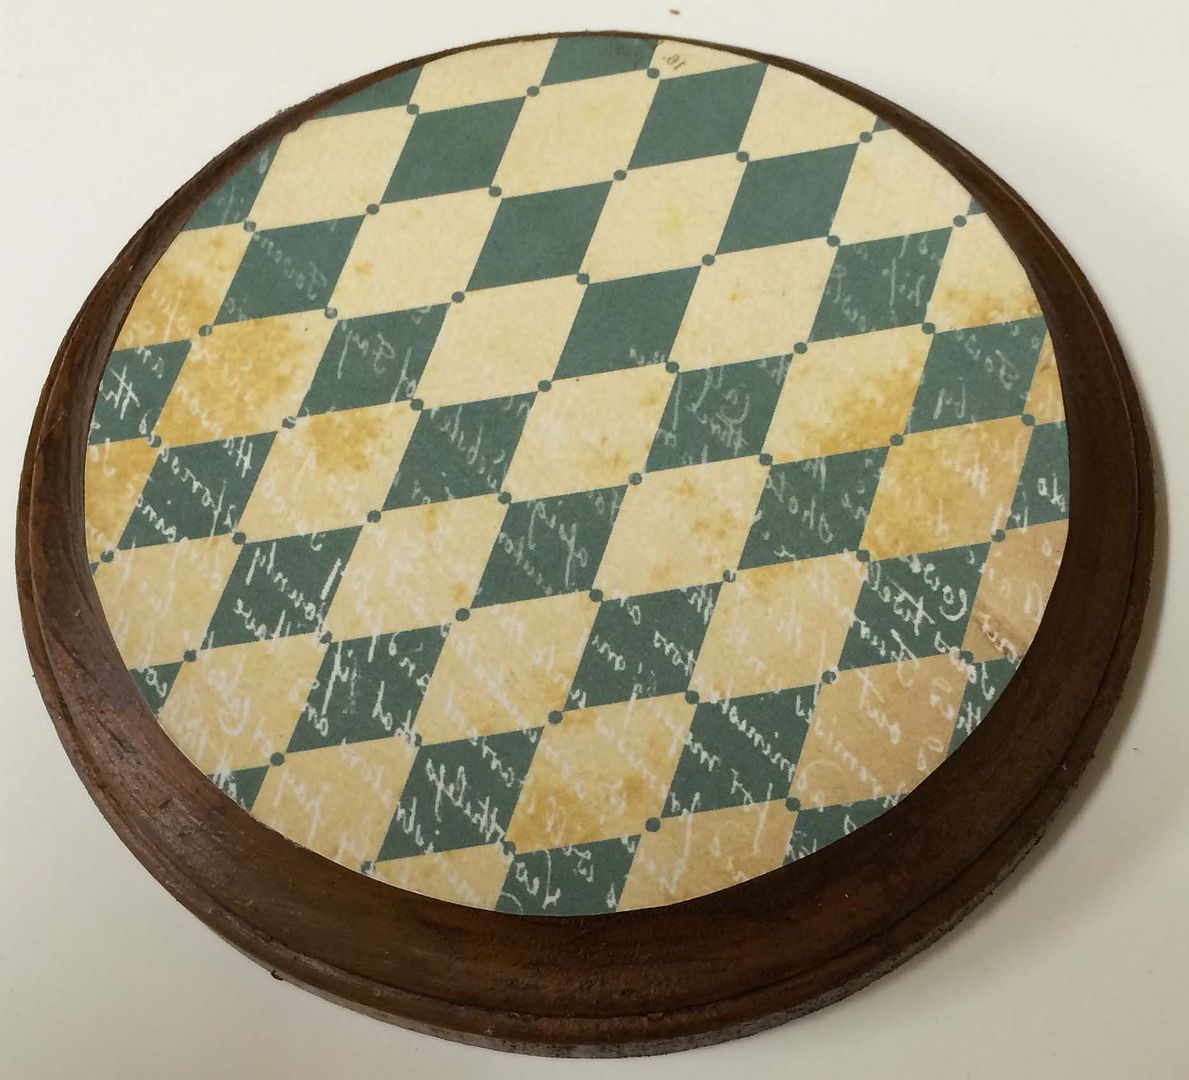
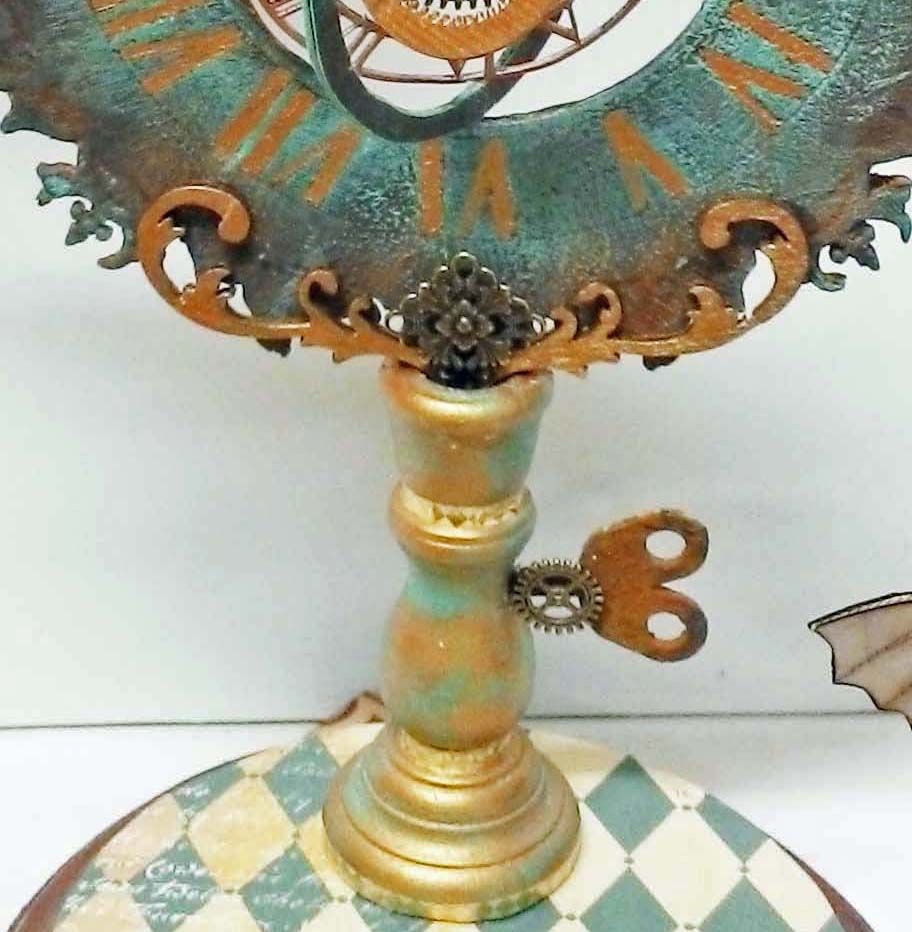
The base
of the astrolabe is made from a round wooden plaque. The edge is painted, and once again, I used the
Carte Blanche paper on the top.
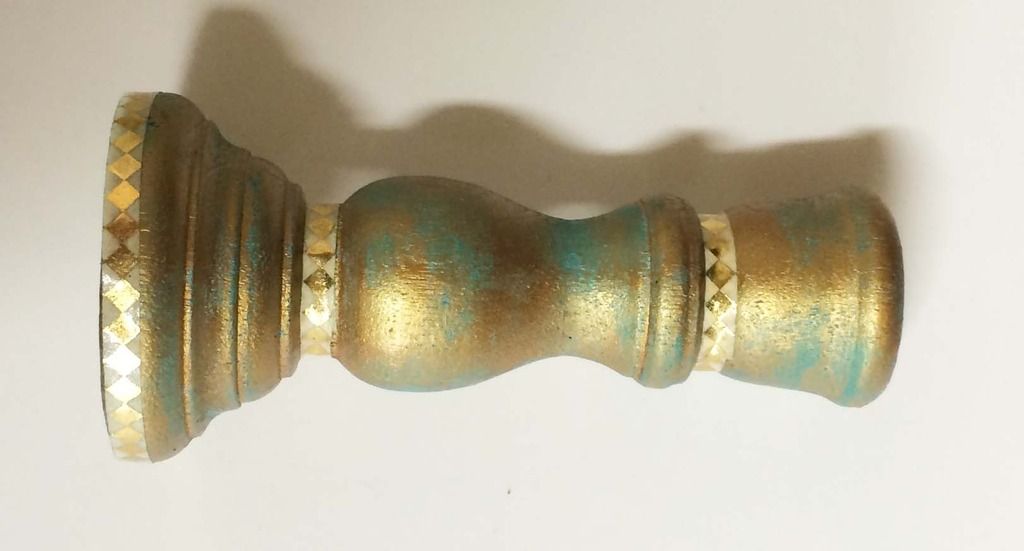
The
stand is a candlestick
holder painted gold, rubbed with Patina Gilders Paste, and accented with diamond
tape.
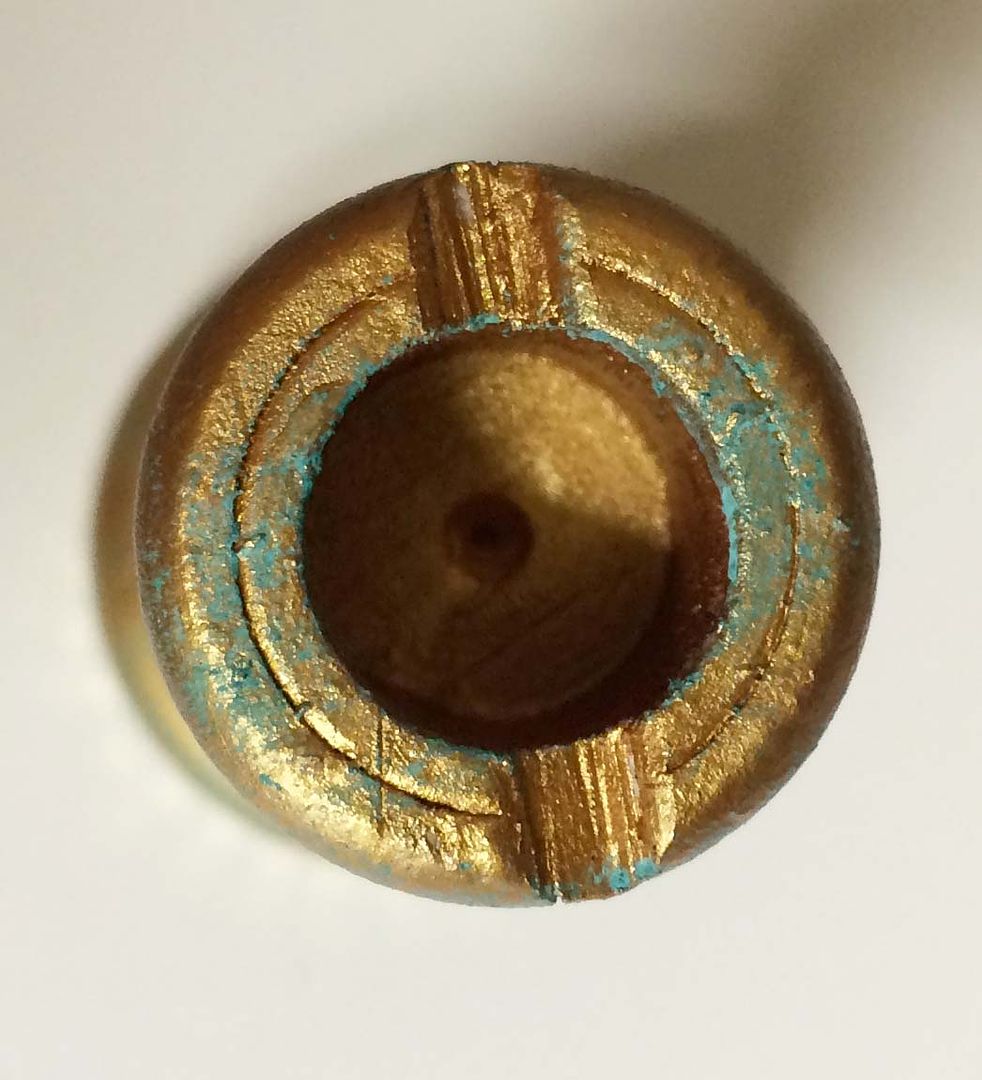
I cut a
notch in the top of the candlestick holder to hold the clock.
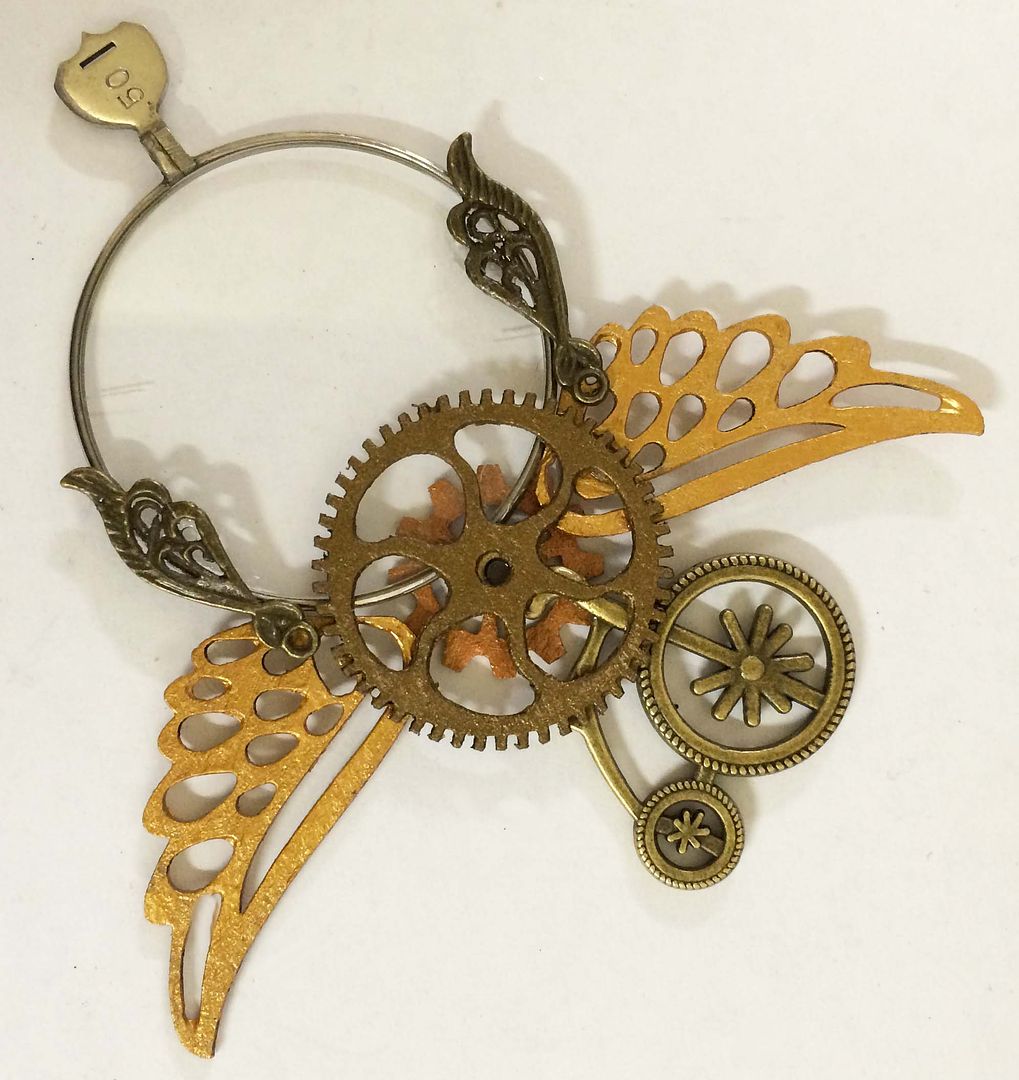
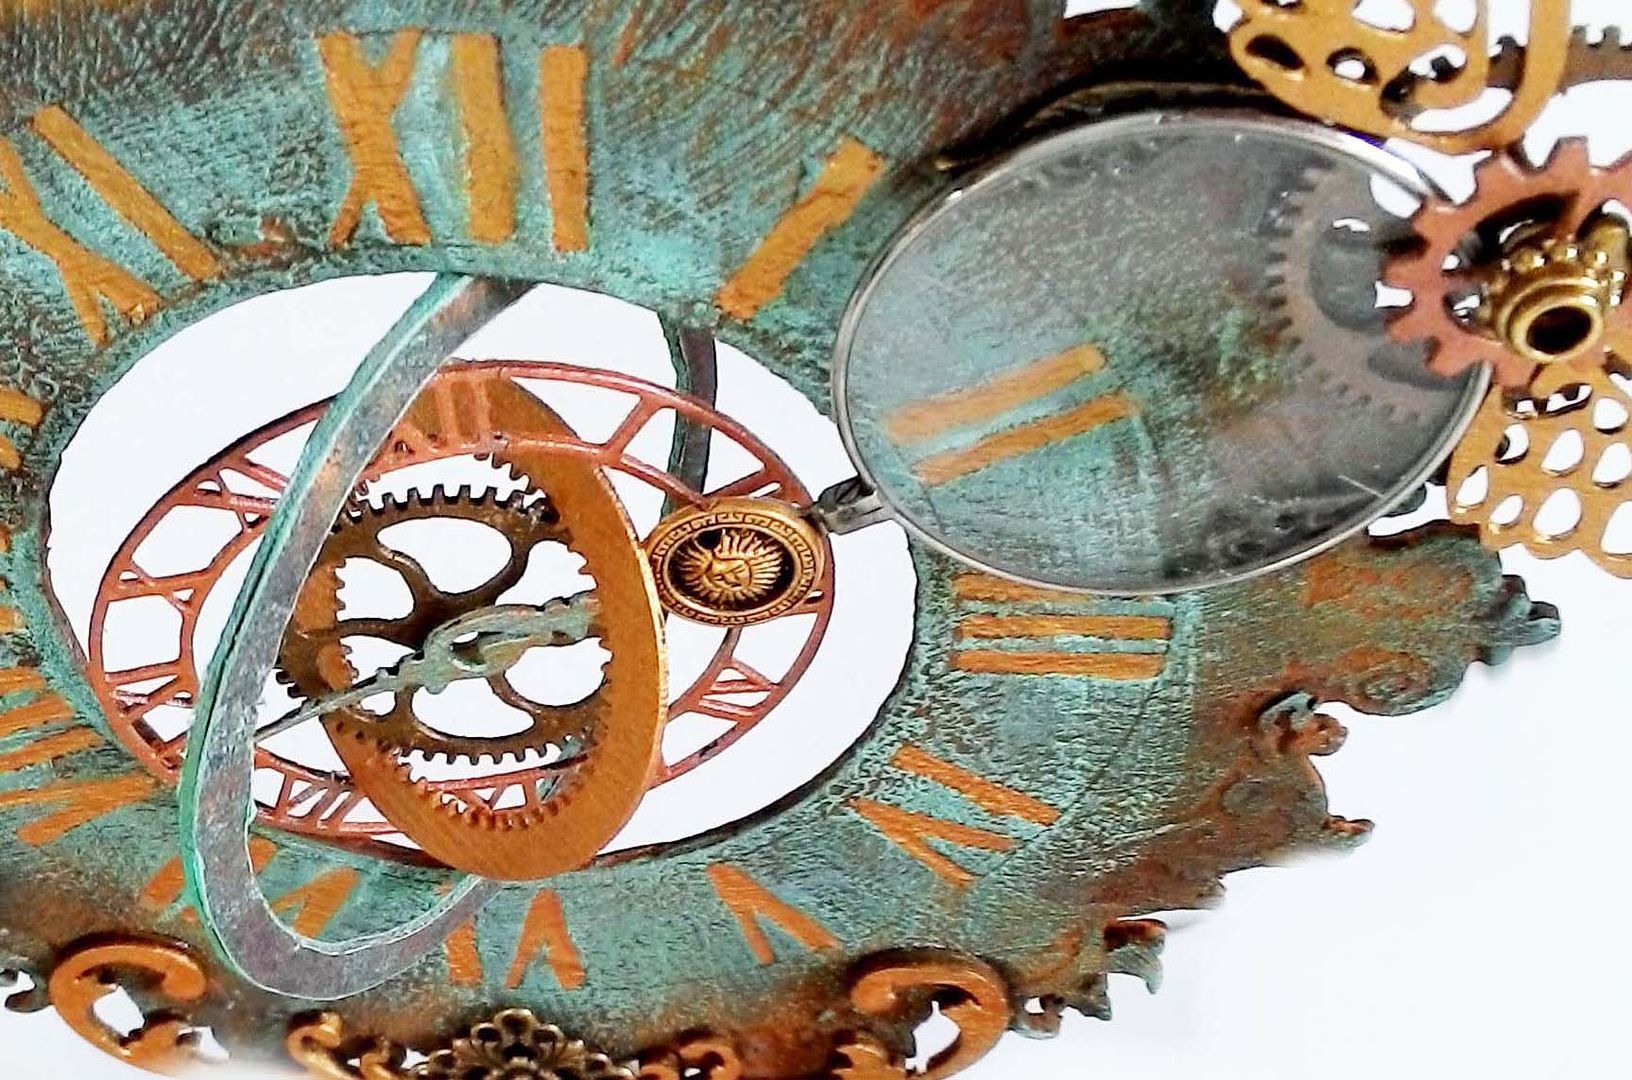
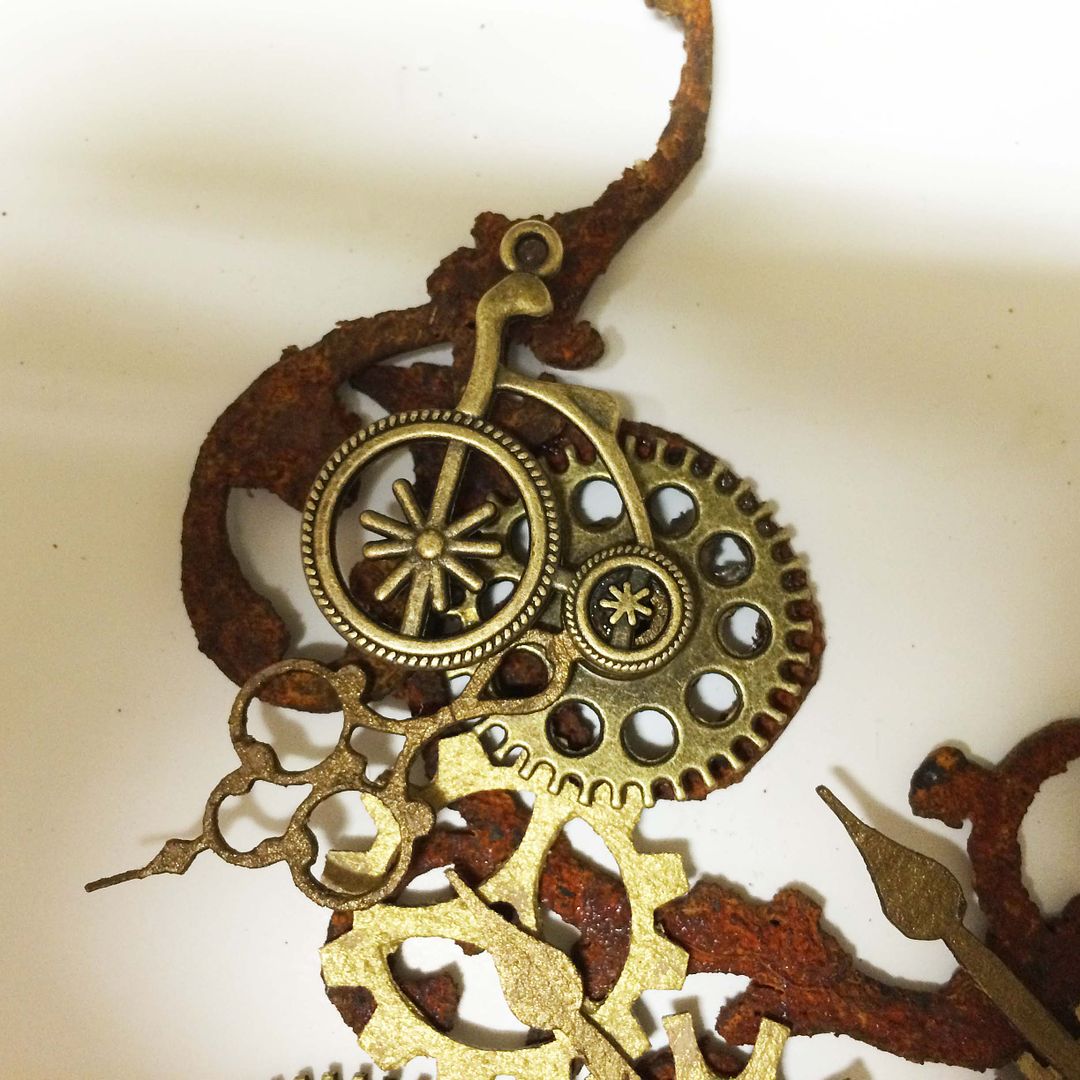
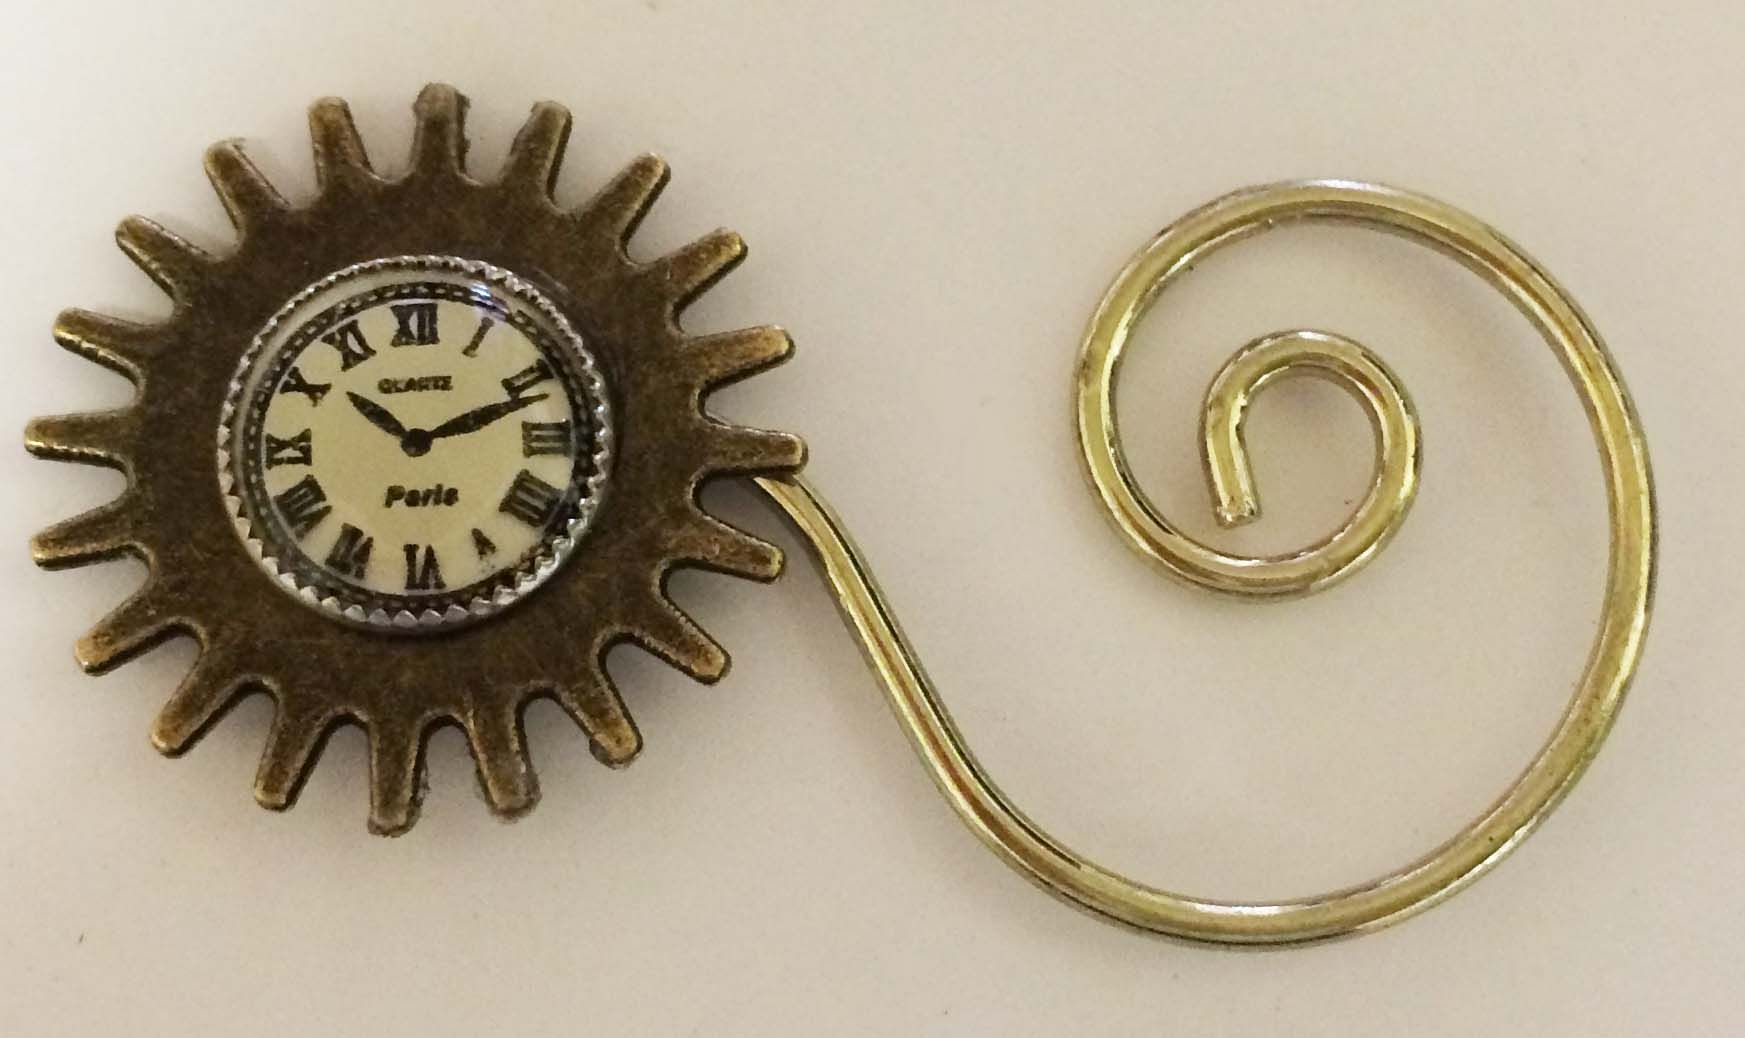
The
mechanical-looking piece on the circle of the clock is made from an optometrist
lens from my stash, gears and wings from the Steampunk
Shapes Set, a Victorian
bicycle charm, brass leaves, and a rondelle.
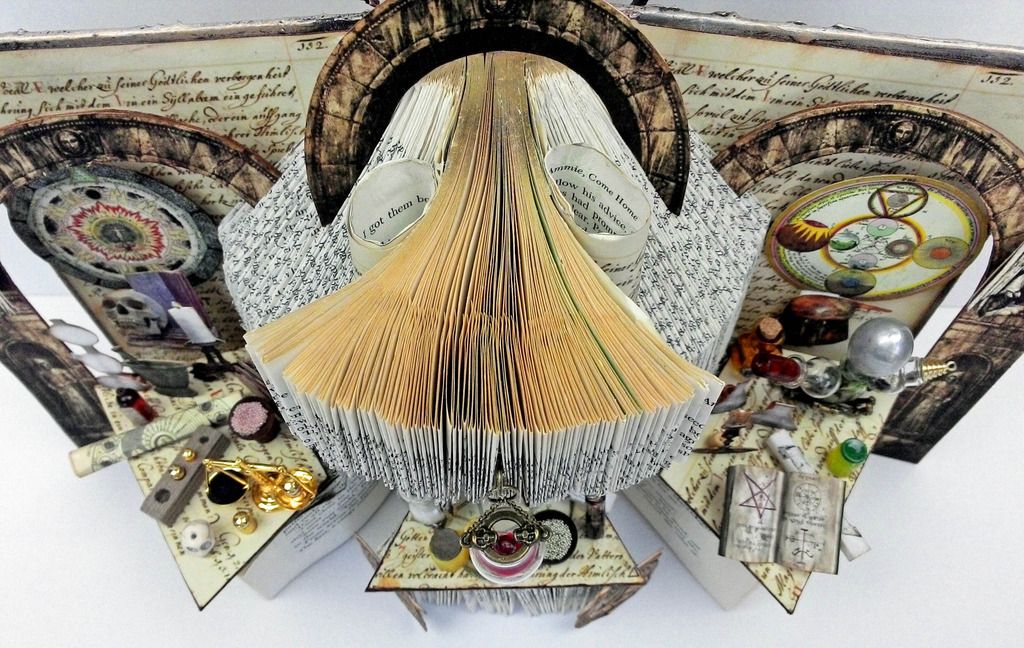
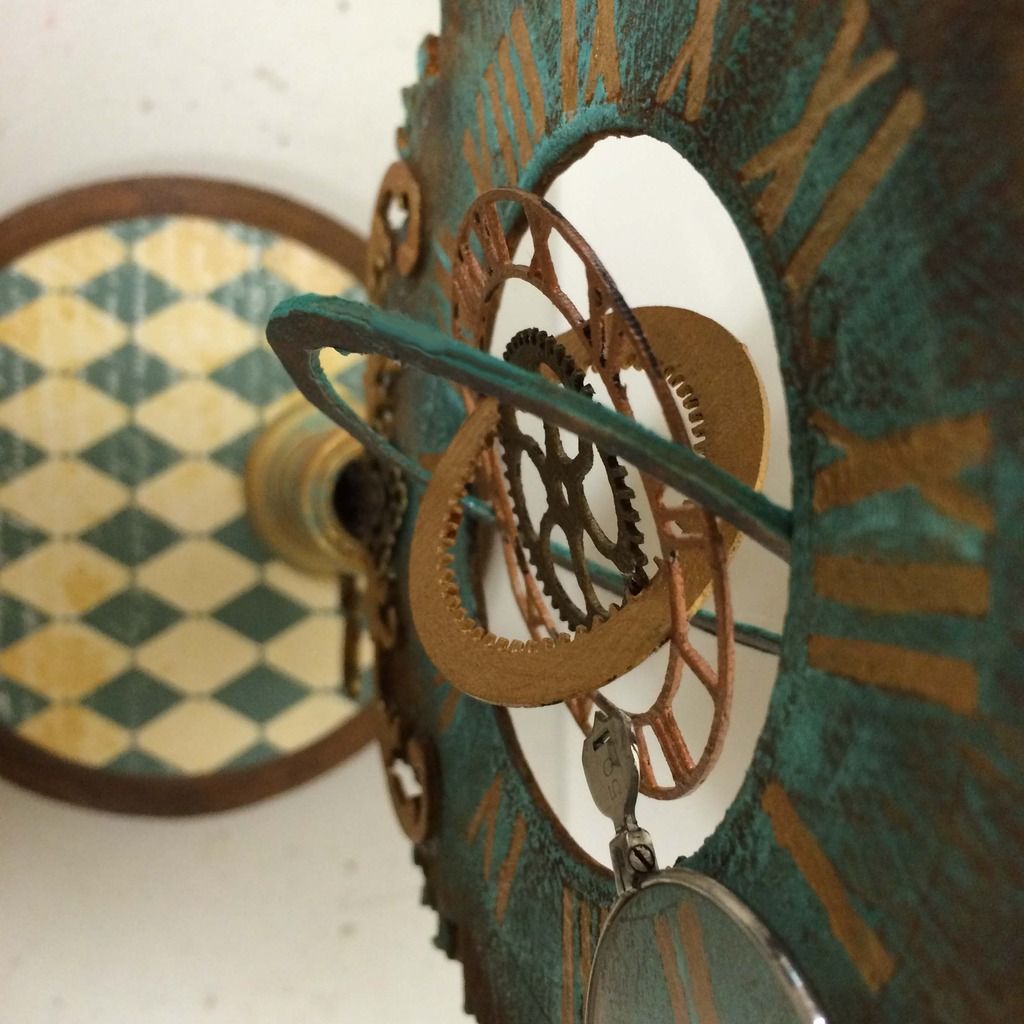
The two pictures below are views from the back and front of the piece.
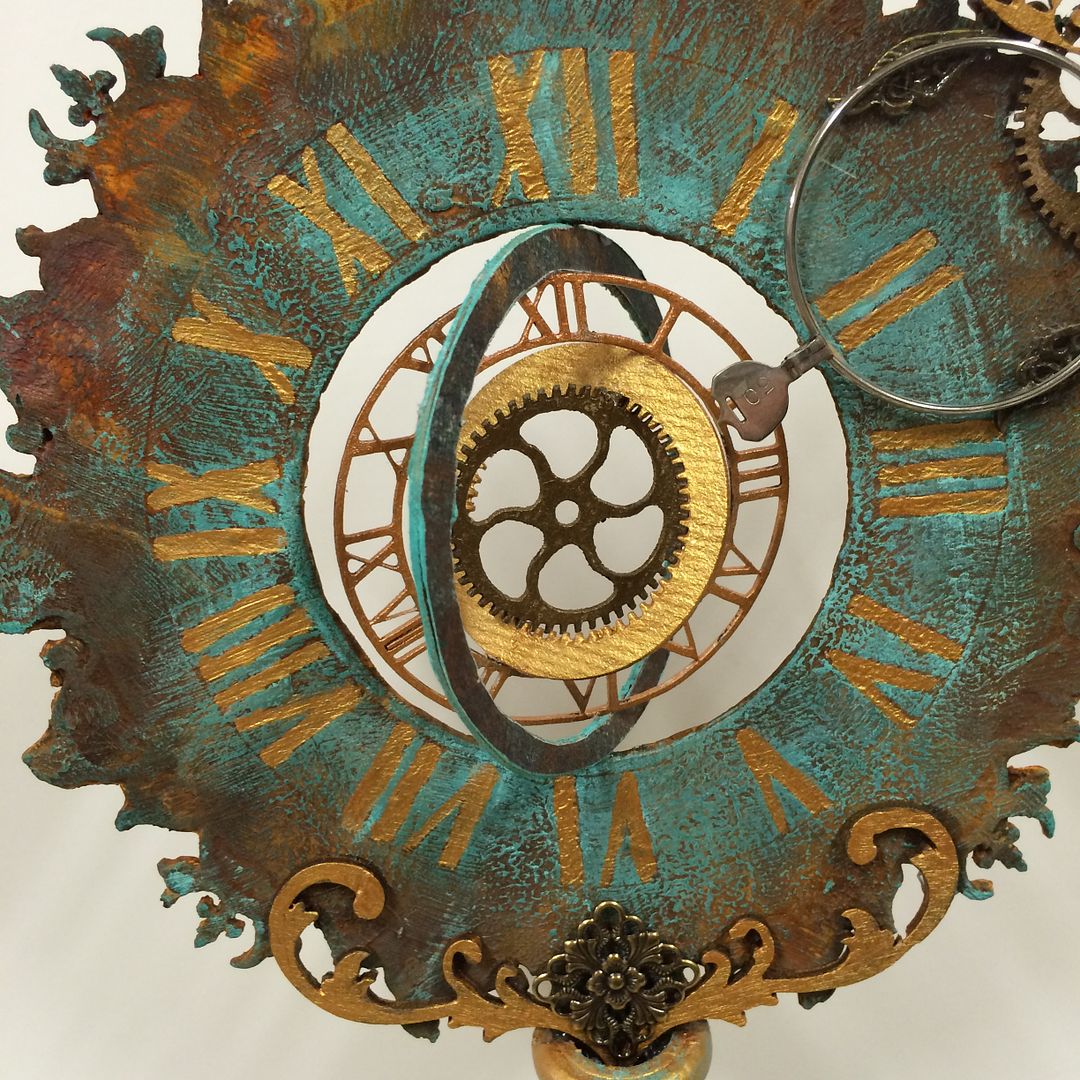
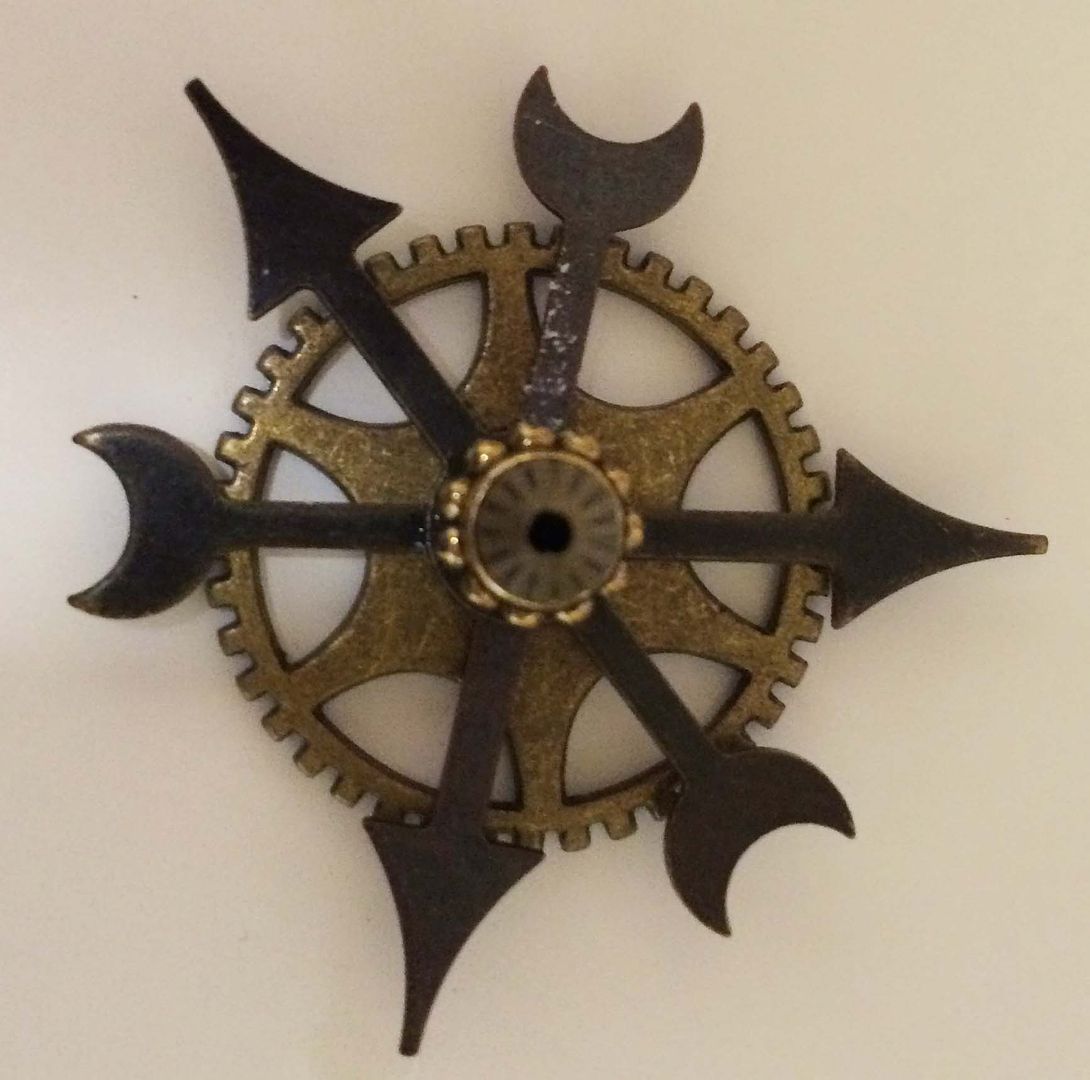
In the center
of the clock is the astrolabe. I used
gears from the Steampunk Shape Set – Hot Air Balloon and a clock from the Steampunk
Shapes Set – Hats for the 3 centerpieces.
The larger outside piece is made from multiple layers of paper cut to
fit inside the hole in the clock. I used
the hole of the clock as the guide for size.
The trick is to find pieces that fit snugly inside the other piece. Each piece is glued in place (with E6000) at
an angle to the previous piece.
You can
see in the pictures how I have attached the optometrist glass mechanical piece
to the clock. I used the brass leaves mainly as a surface to attach the piece to the clock without
getting glue on the glass.
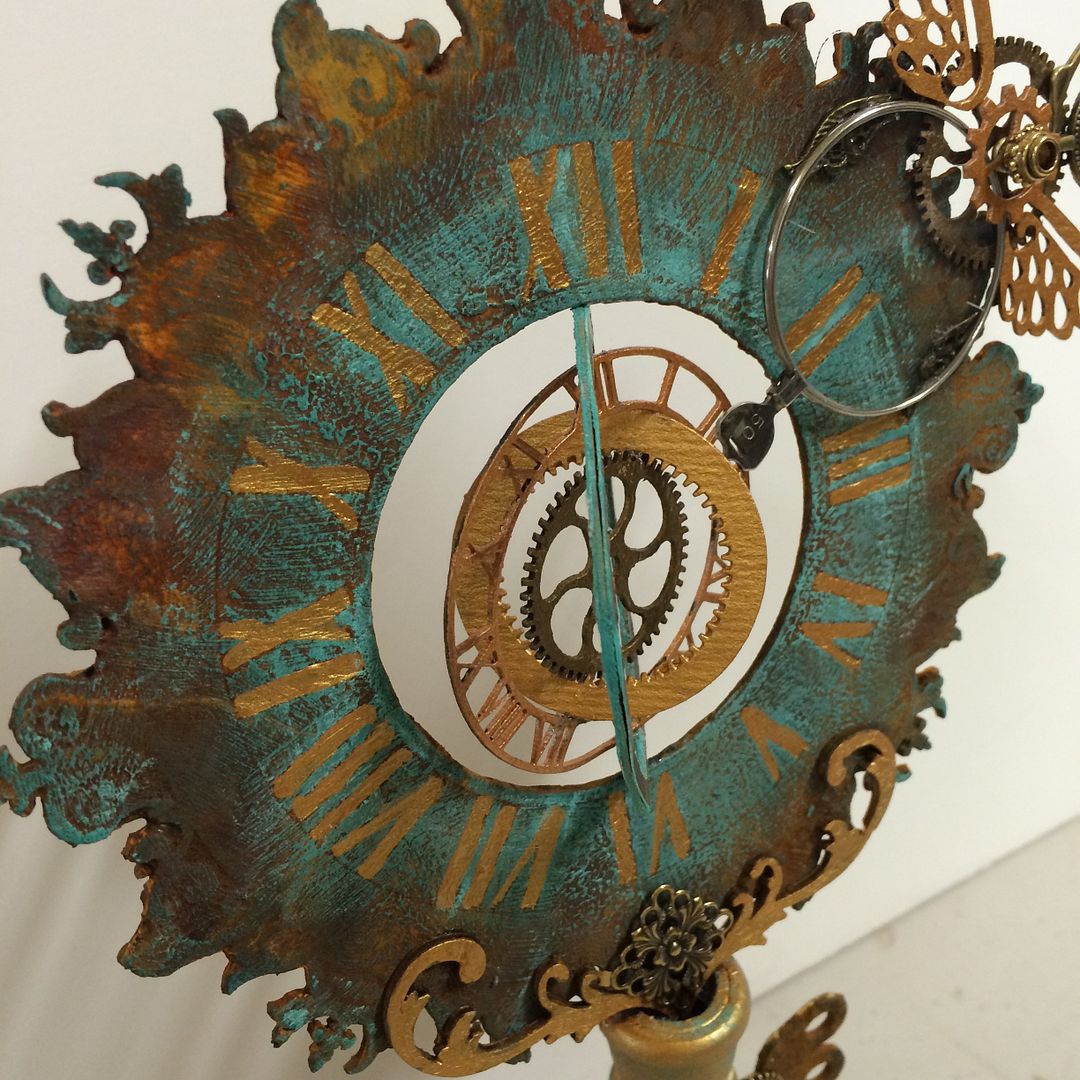
To the
handle of the optometrist glass, I added a watch hand that goes through the
astrolabe and is decorated with a small sun disk from my stash.
To the
base, I added a chipboard key (from the Shapes Set) and brass gear.
At the bottom of the clock, I added wood swirls and a piece of filigree.
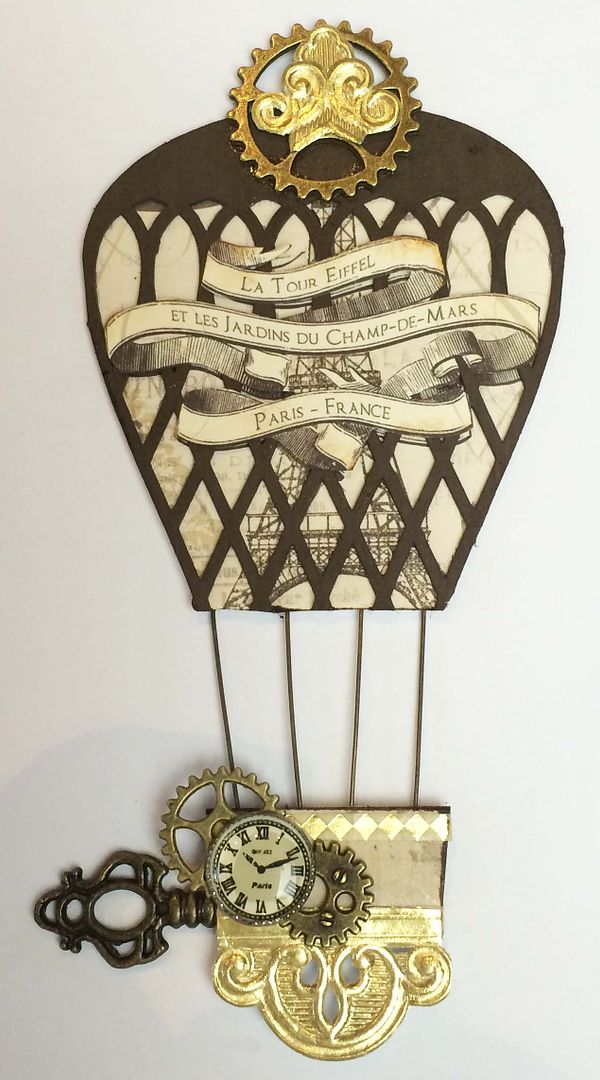
BALLOON
The
balloon is made from the Steampunk Shape Set – Hot Air Balloons. The paper behind the balloon and the banner
on the front is from the Sweet Paris 8x8 paper set.
At the
top of the balloon and on the basket, I added brass gears, a clock button, and a key. The basket and balloon are connected using
eye pins glued to the backs of each piece.
Other options are string, thread, toothpicks, or ribbons. Hanging from the bottom of the basket is a
piece of Dresden from my stash.
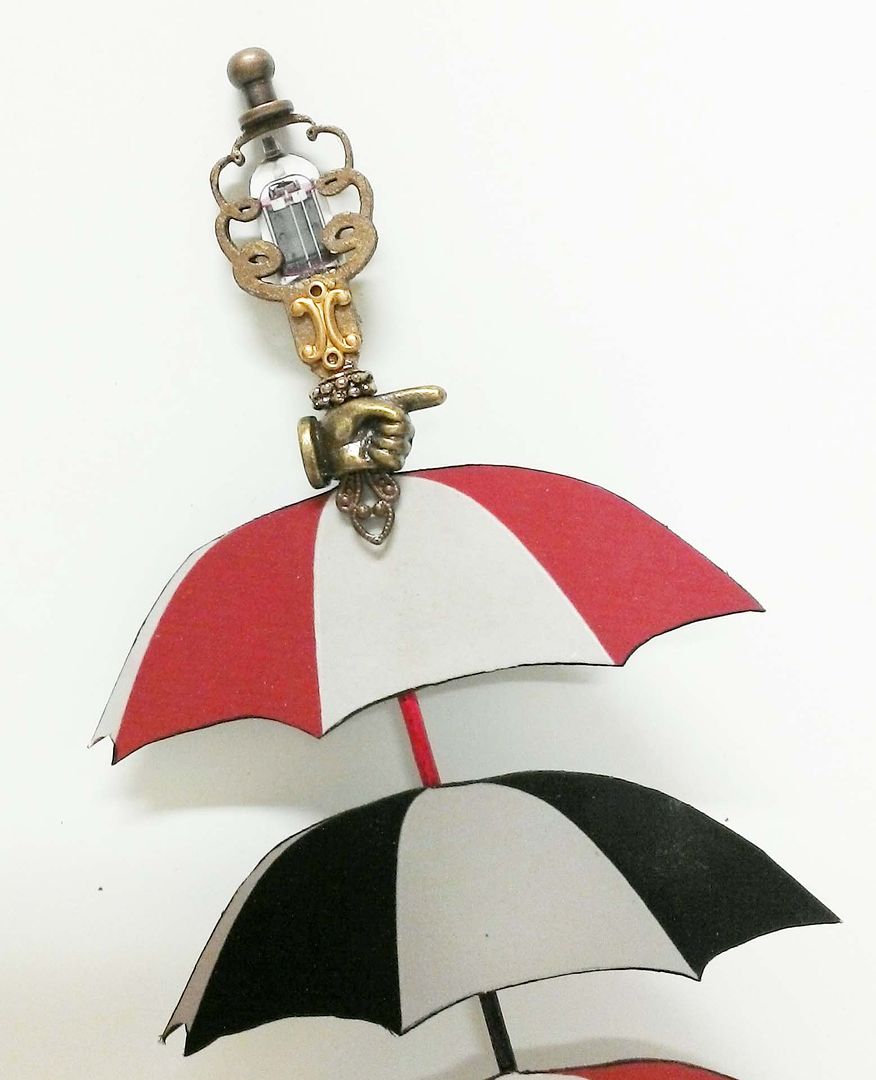
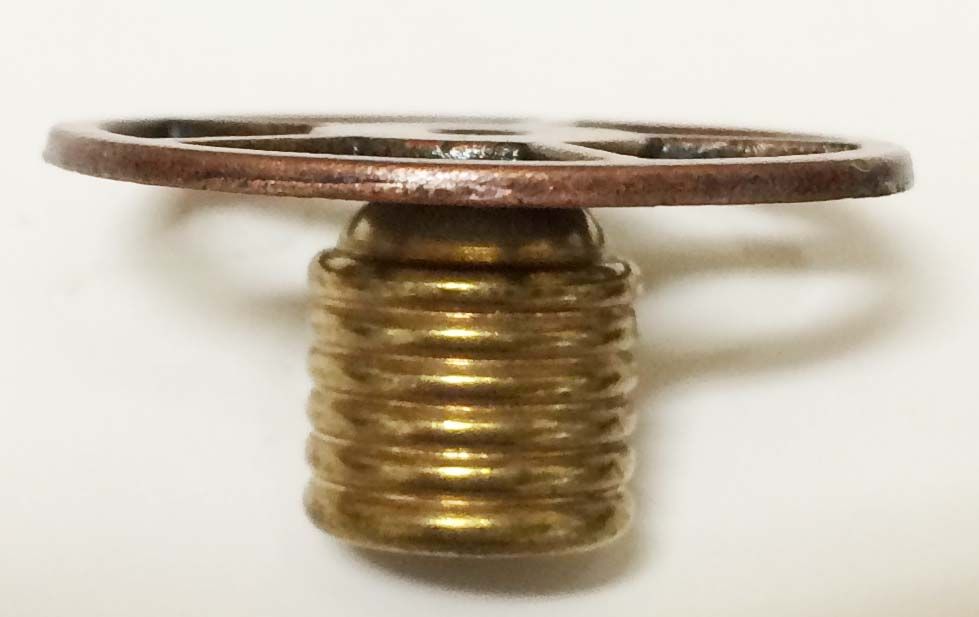
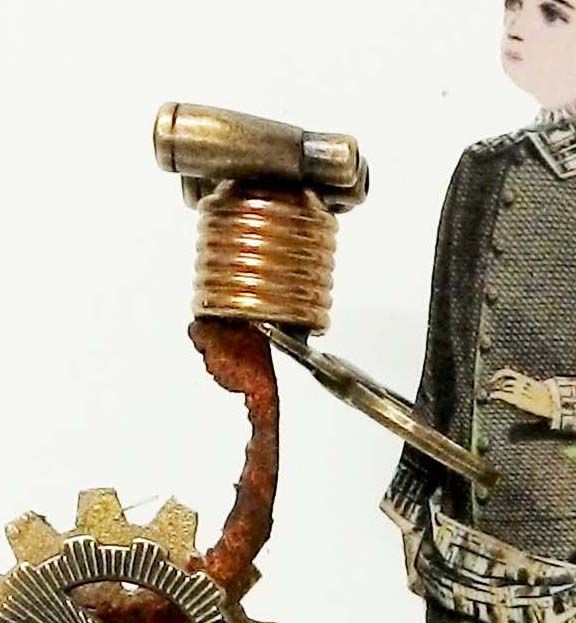
At the top of the umbrellas is a wooden light bulb, a fuse from
the Time Machine collage sheet, a hitch fastener, and
a bronze hand. I
trimmed the bottom of the light bulb so it would fit into the hole in a
rondelle. I then folded a bail and
glued it into the hole in the hand. The bail gave me a way of attaching
the gizmo to the umbrellas.
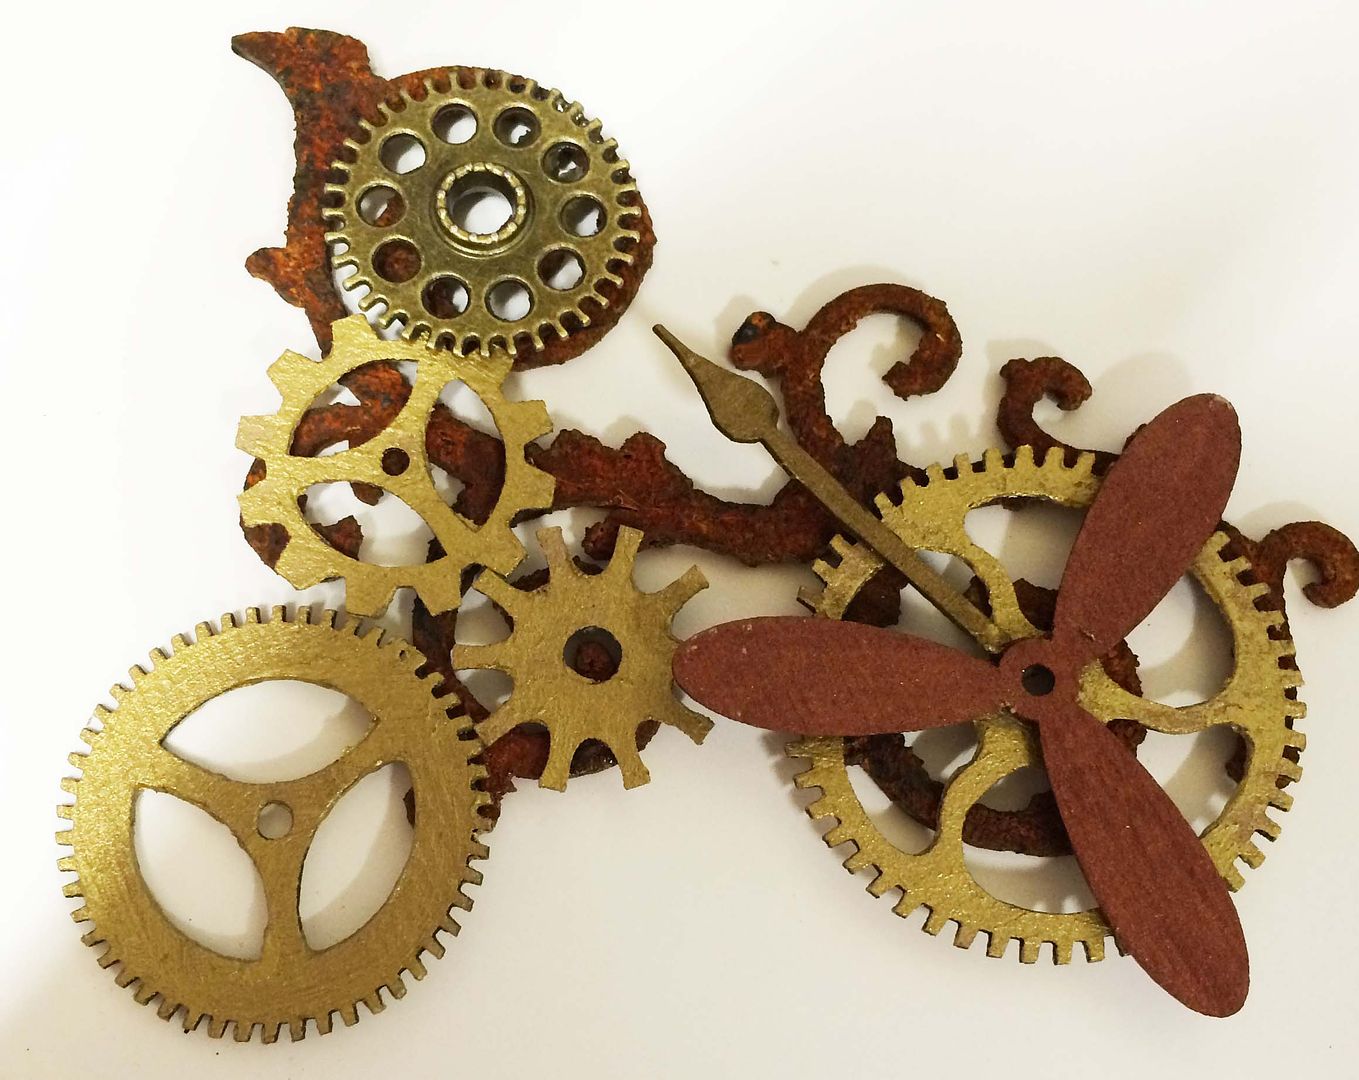
The
frame of the bicycle is made from swirls that are part of the ClockworksLaser-Cut Wood Embellishments. I used
the same rusting technique on the swirls as I used on the clock.
I
painted a variety of pieces from the Steampunk
Shapes Sets.
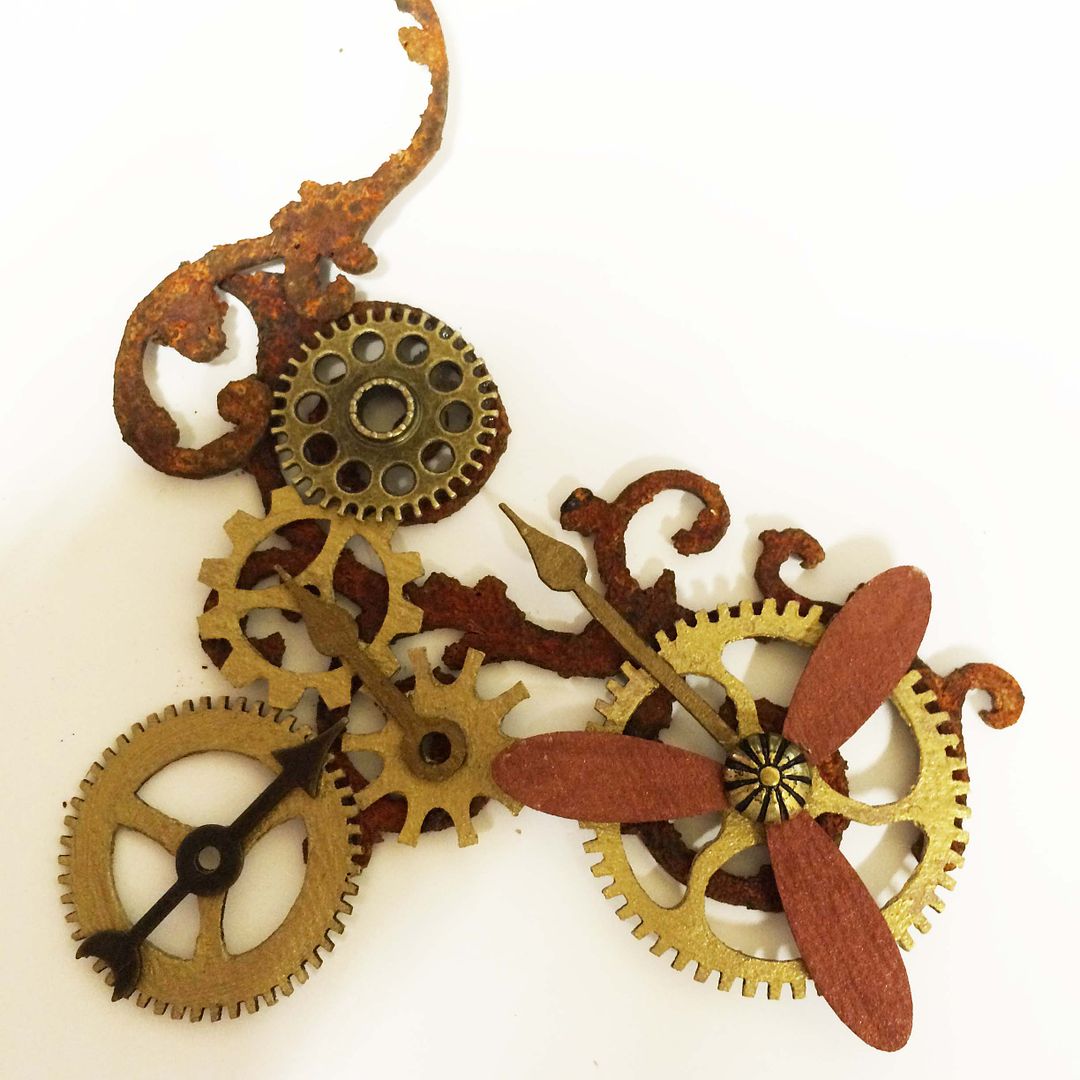
Next, to
the larger swirl, I started attaching the pieces I painted and, at the top left,
a bronze gear.
I then
added the smaller swirl to the larger one to serve as the handlebars. I also added a game spinner and a furniture nail (with the pin removed).
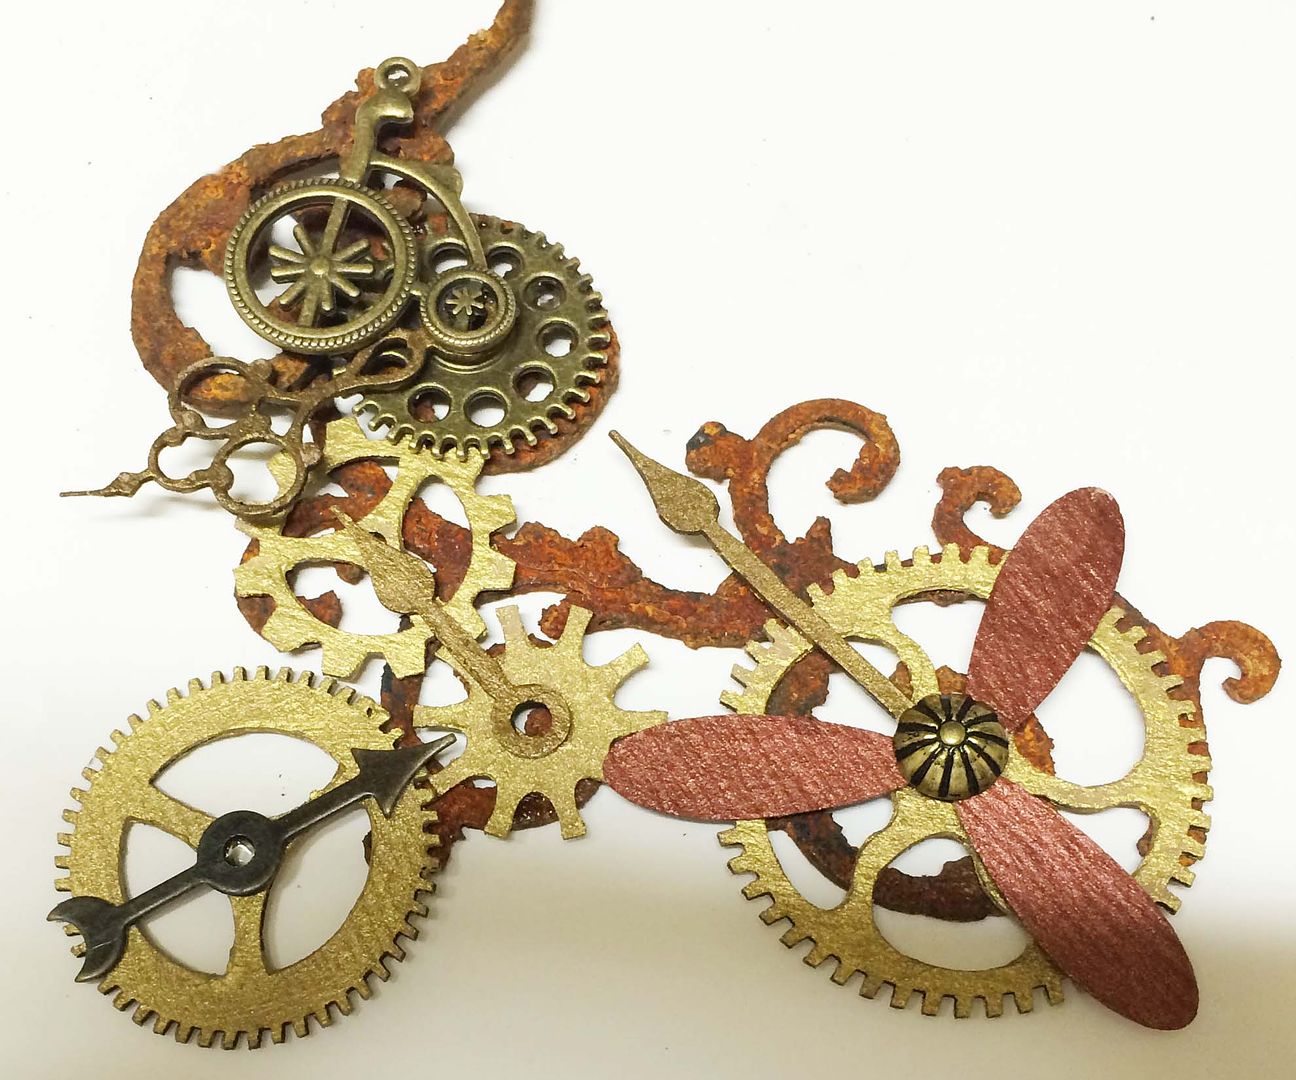
I continued
to build up the bike with a bicycle charm.
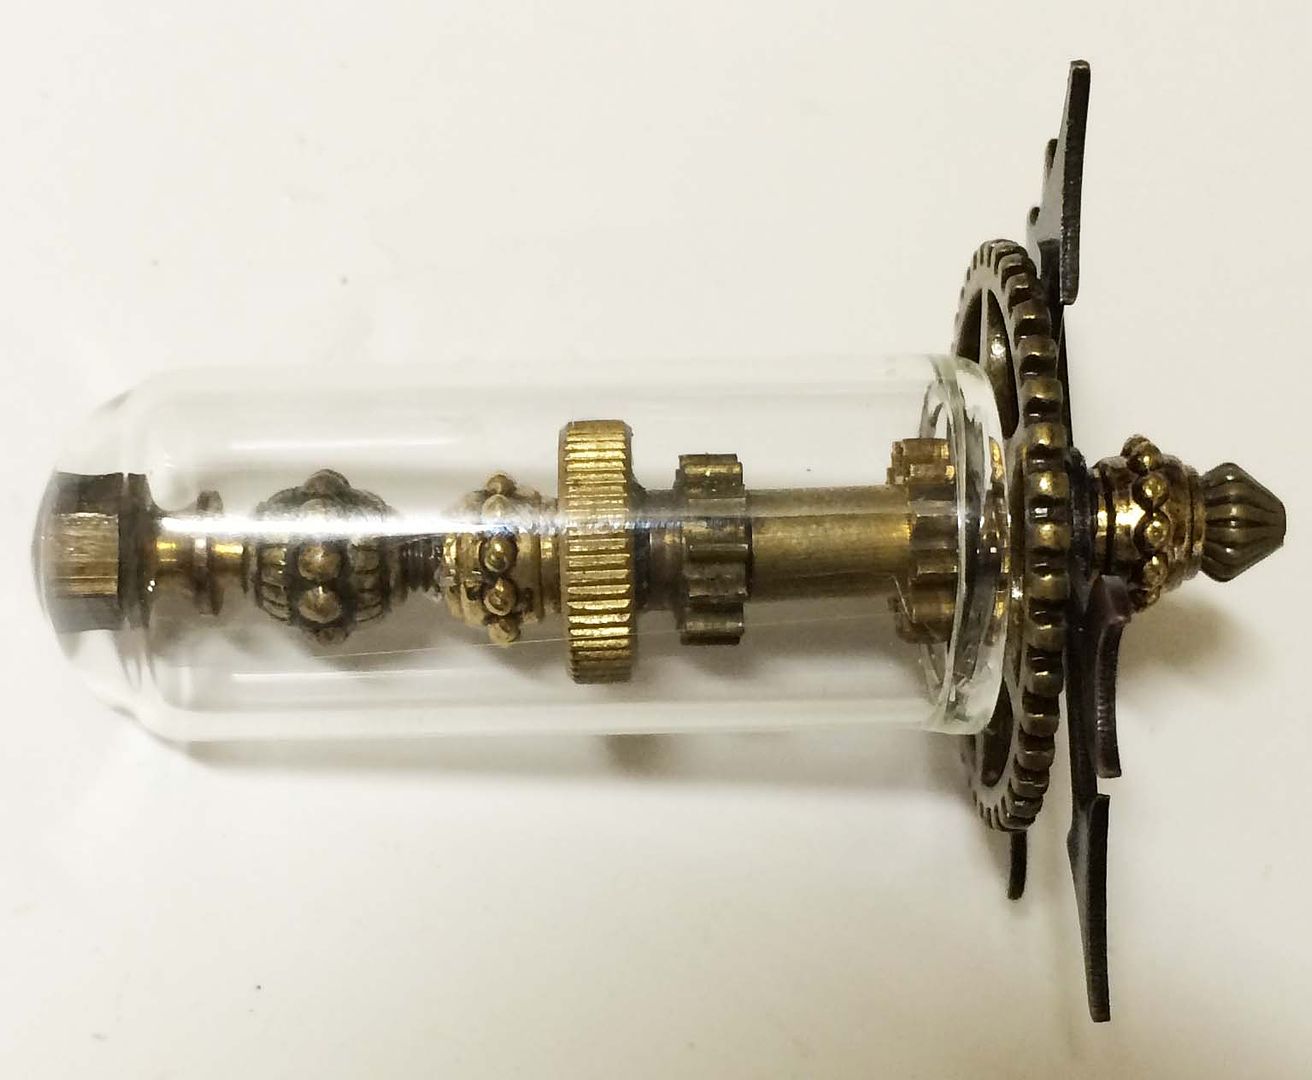
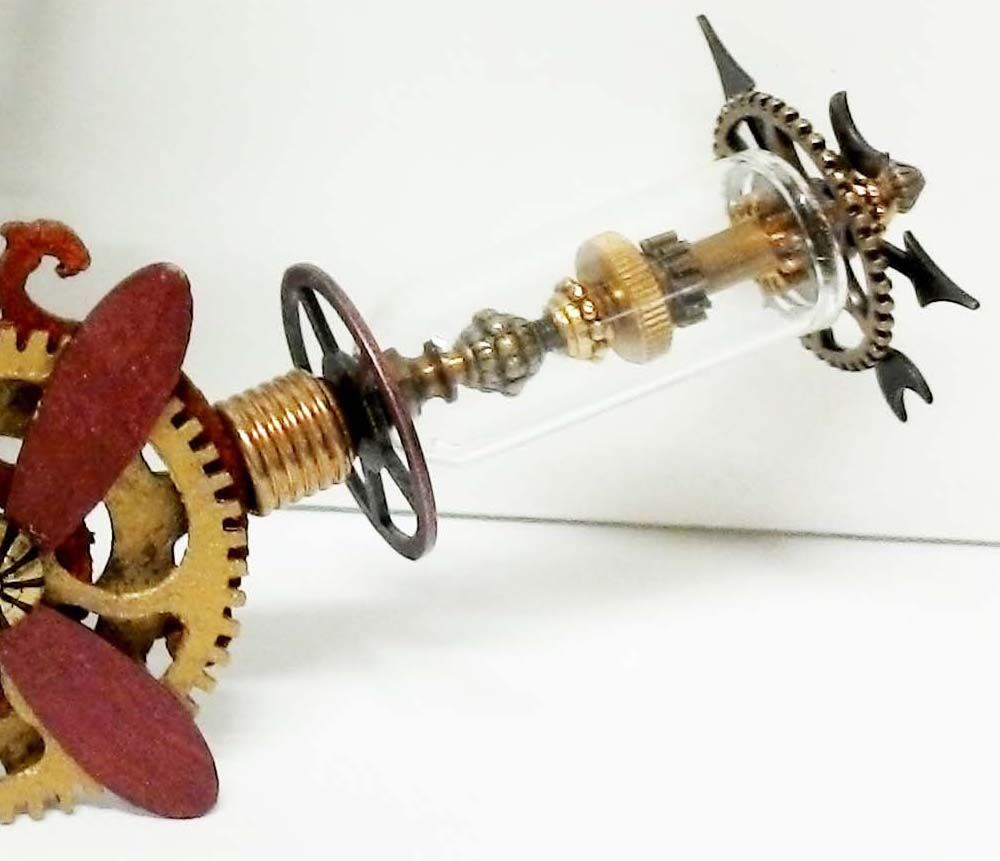
For the
gizmo that comes off the back of the bike, I started by gluing a beehive box foot to metal gear. I used the box foot as it
will fit over a piece of the swirl so that I can attach the gizmo to the
bike. I used the gear to give me
something to glue the bottle to.
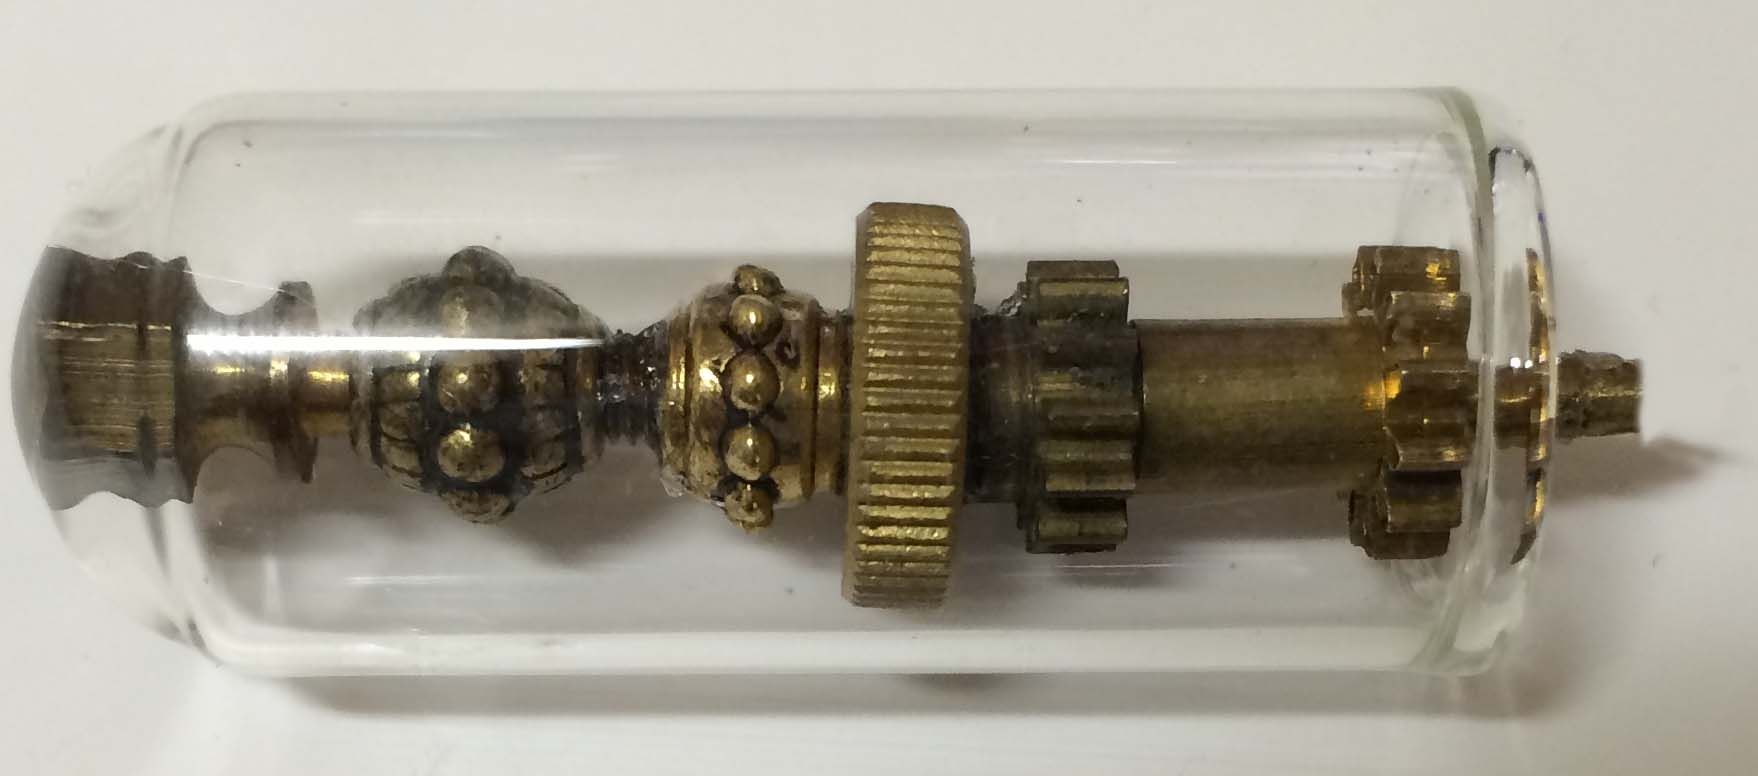
I glued
together a metal gear, 3 spinners, a rondelle, and a bead.
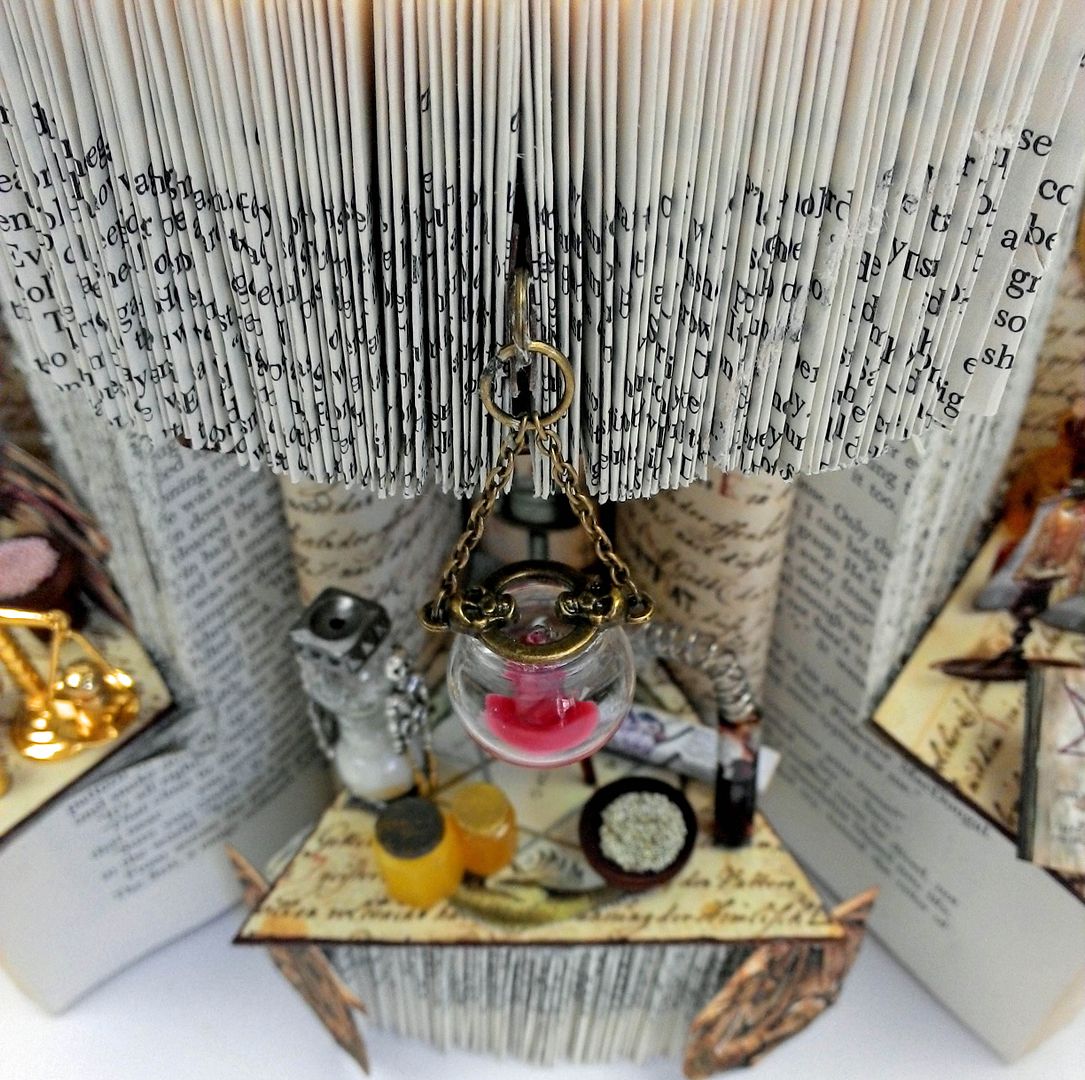
In a
domed apothecary bottle, I assembled some rondelles and watch parts from my
stash.
To the
open end of the bottle, I attached the brass and spinner piece that I previously
assembled.
Lastly, I glued the bottle to the box foot and brass gear and then glued the box foot
over a piece of the swirl at the back of the bike.
Next,
use a pair of chipboard wings from the Shapes Set to serve as a seat or place
to stand.
At the
top of the handlebar, I attached a scissor charm to serve as hands to hold (the
blades of the scissors fit nicely on each side of the handlebar), a beehive
box foot, and a pair of binoculars.
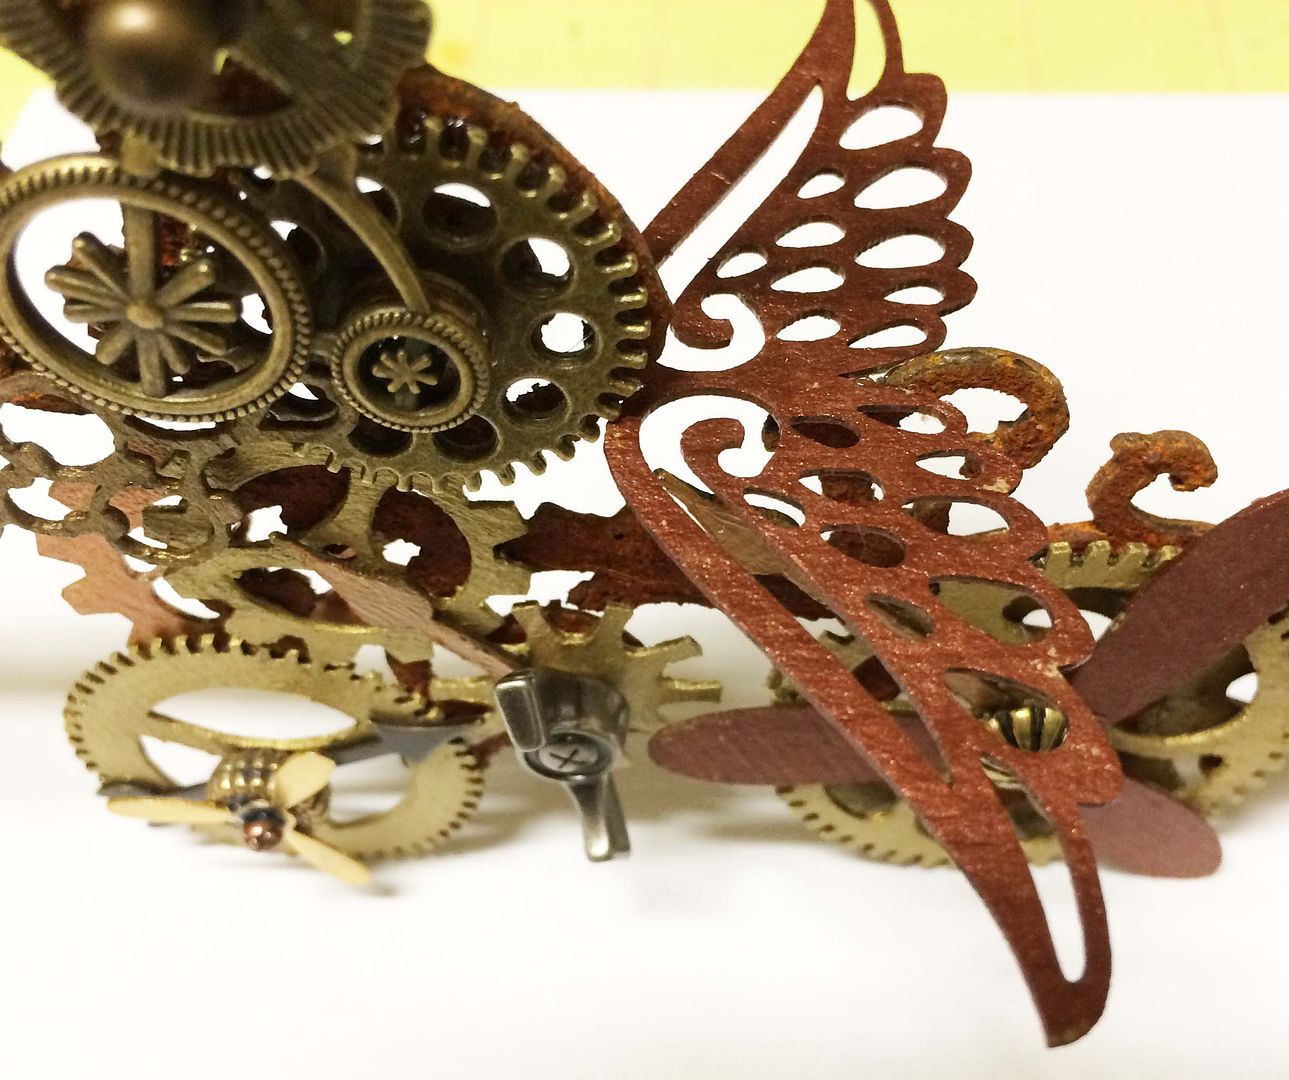
I then
added more stuff! More gears to the top
on the handlebar with a hitch fastener, in the bottom middle a handle turn, and
on the front wheel a brass propeller and bead.
I also added a gear on the back side handlebar and a gear on the back
side of the back wheel.
The
final touch is adding the girls to the bike.
Alpha Stamps Supplies
for the Girls on the Bike
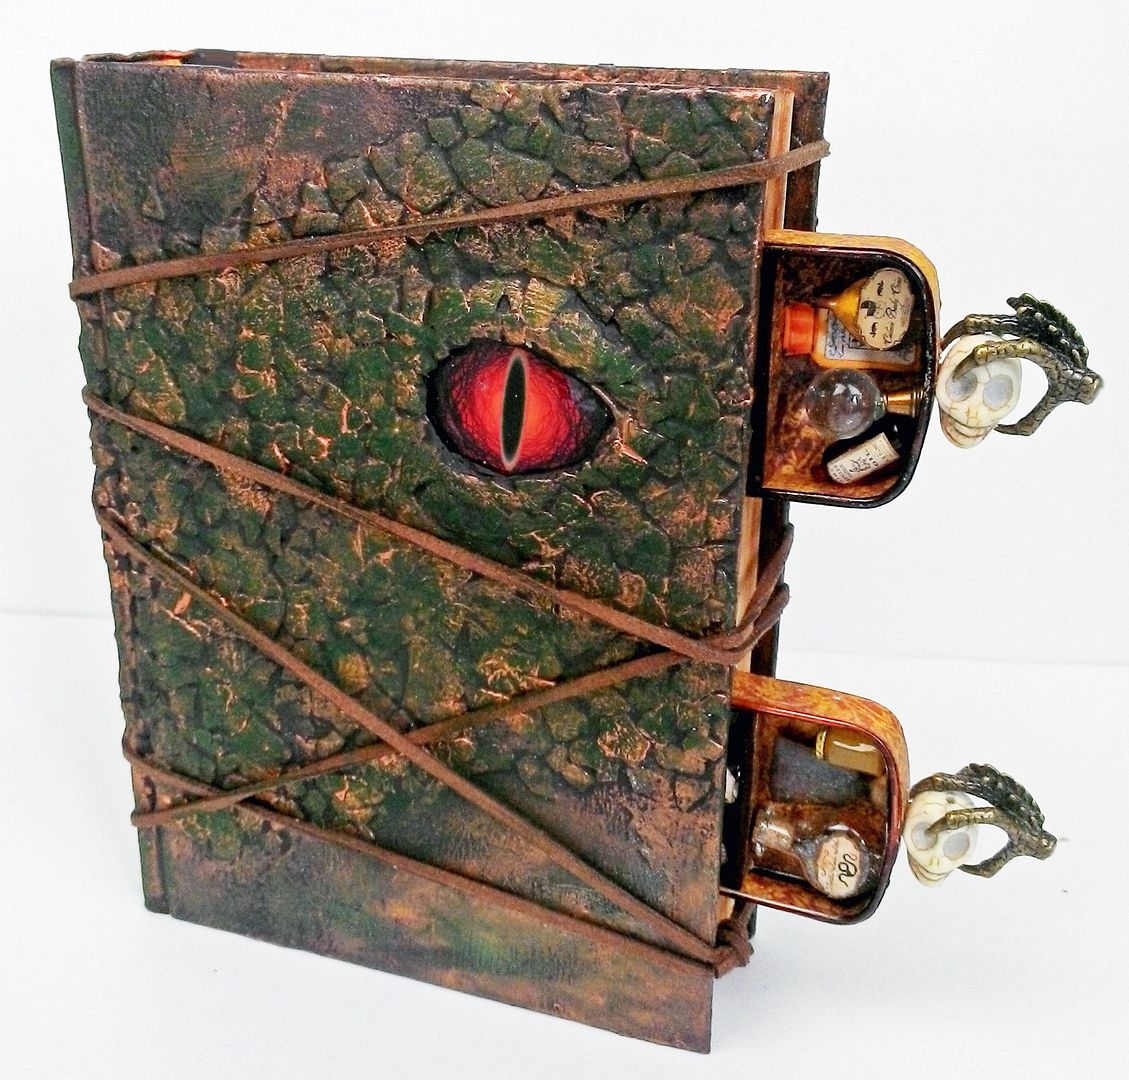
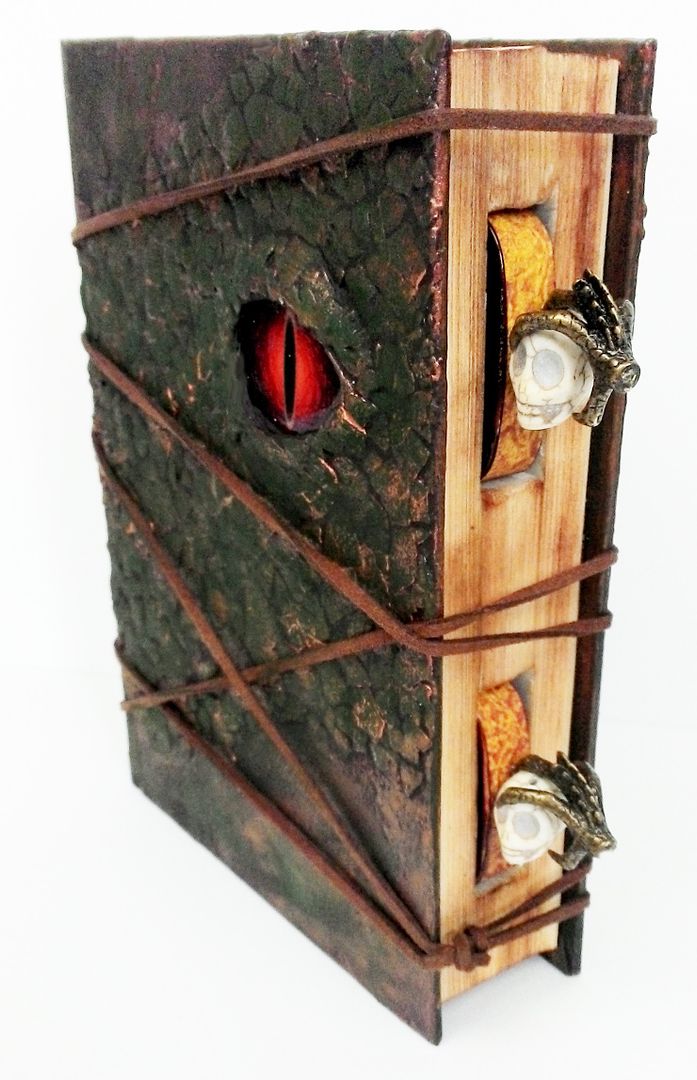
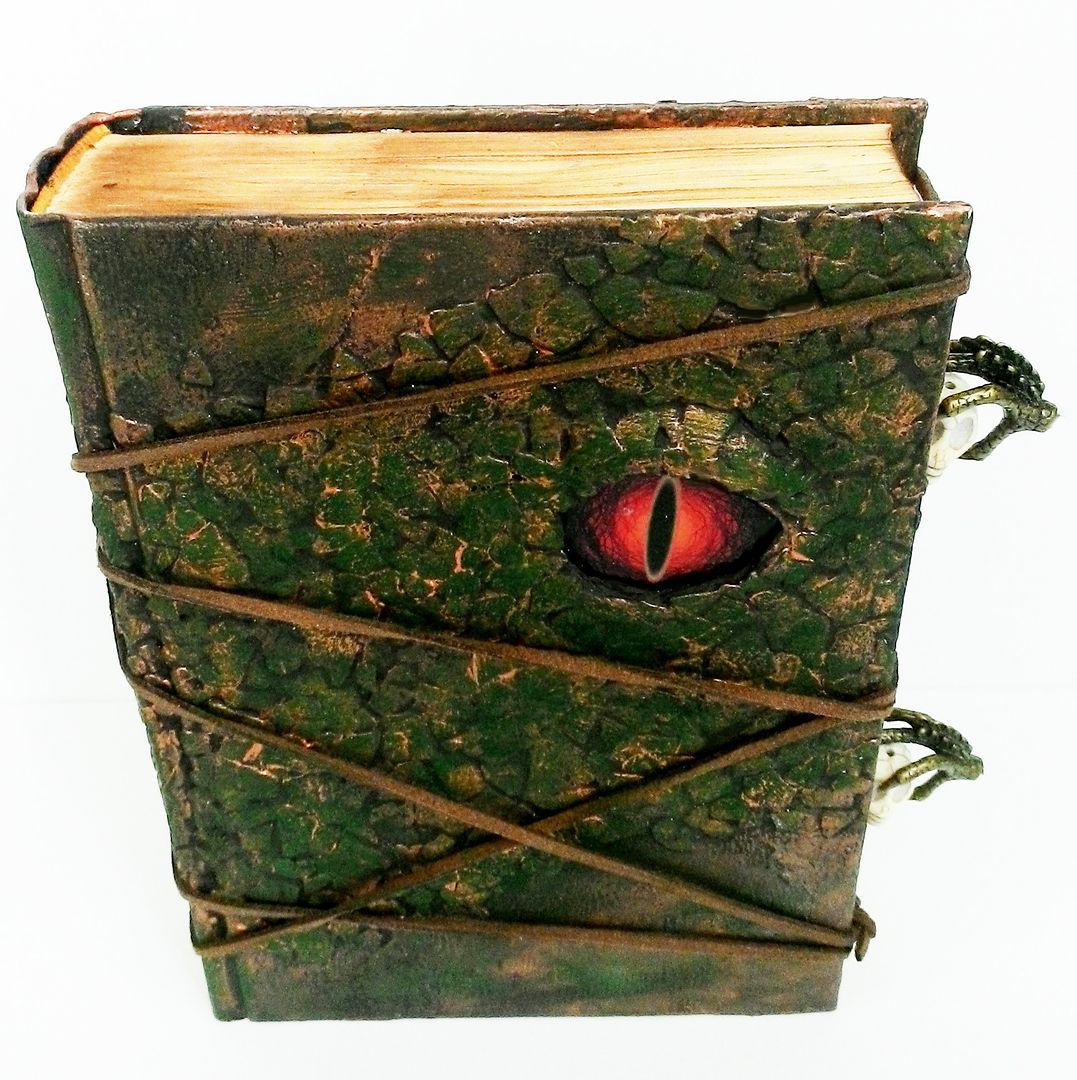
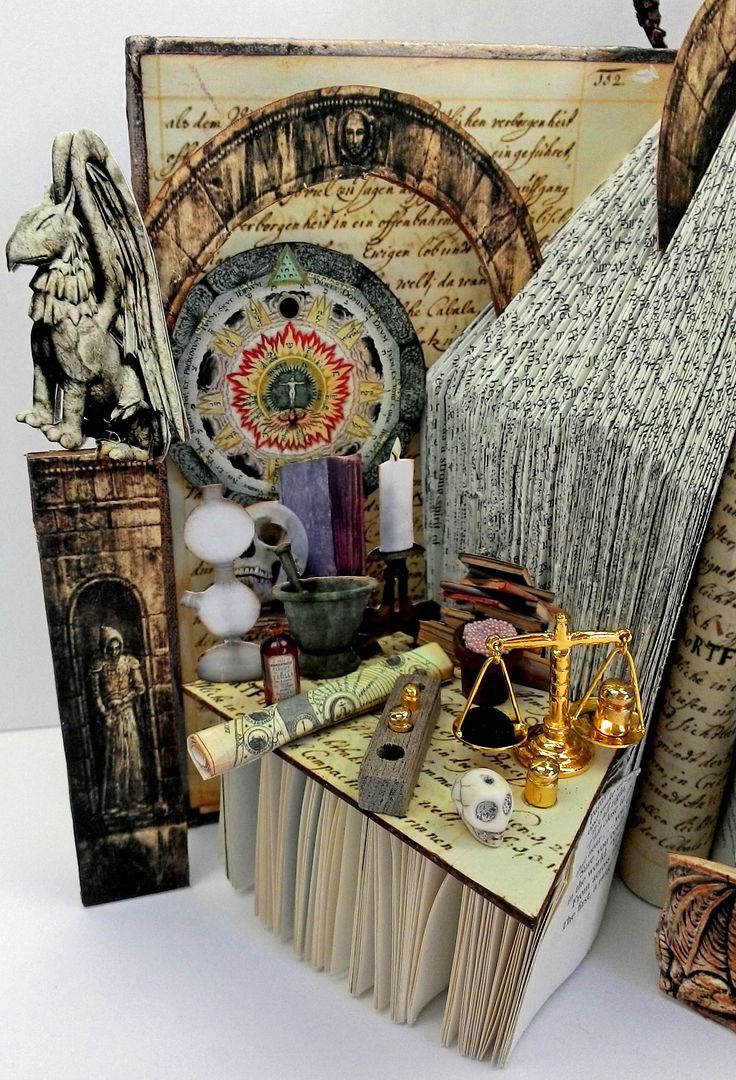
TIME MACHINE - Tutorial
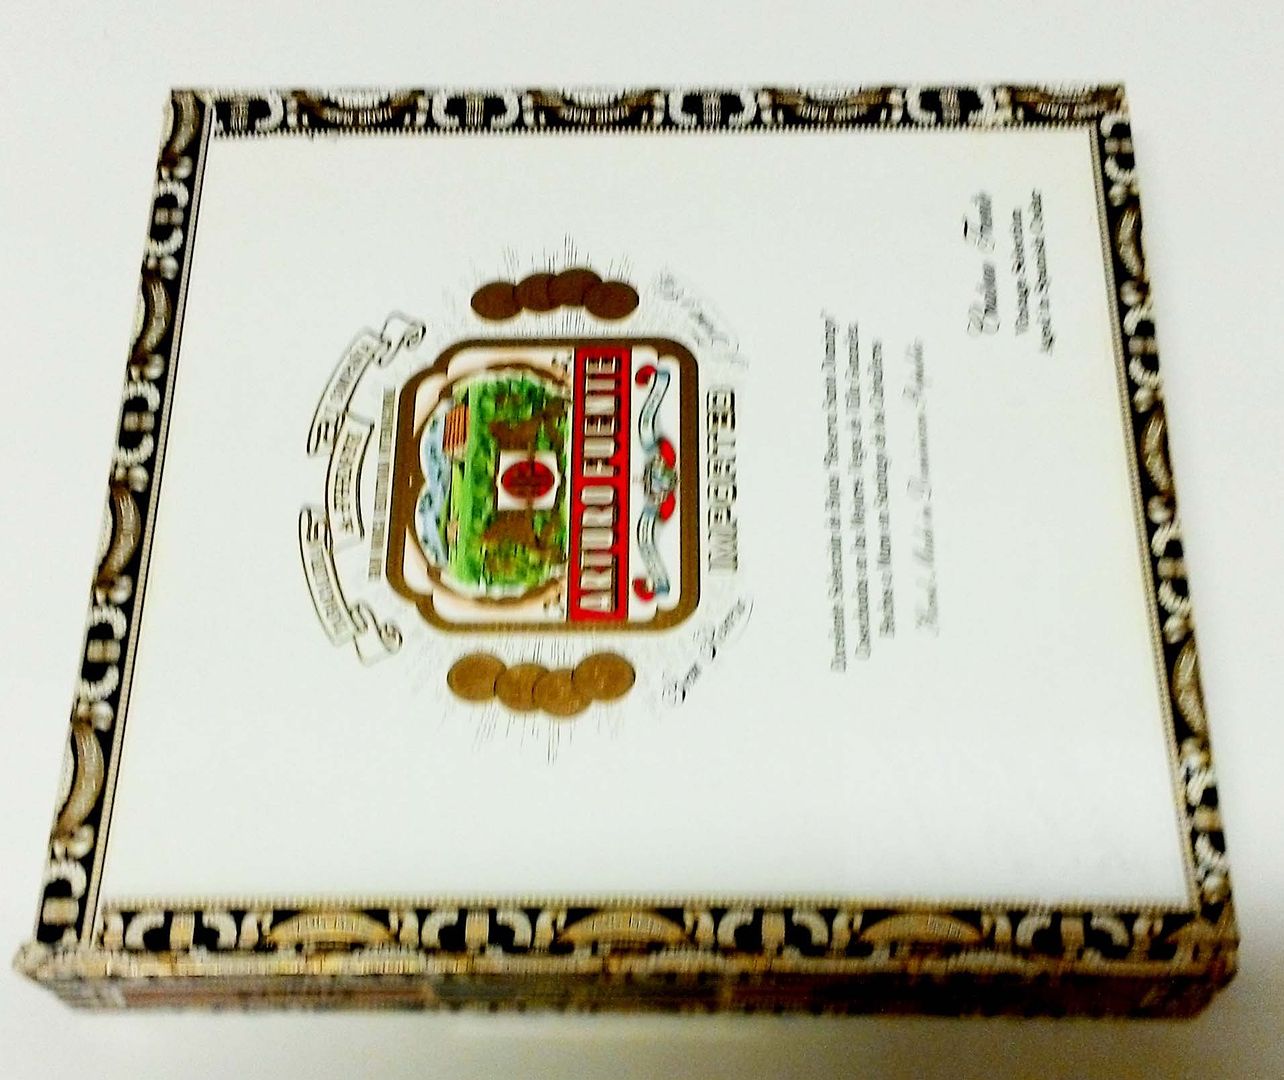
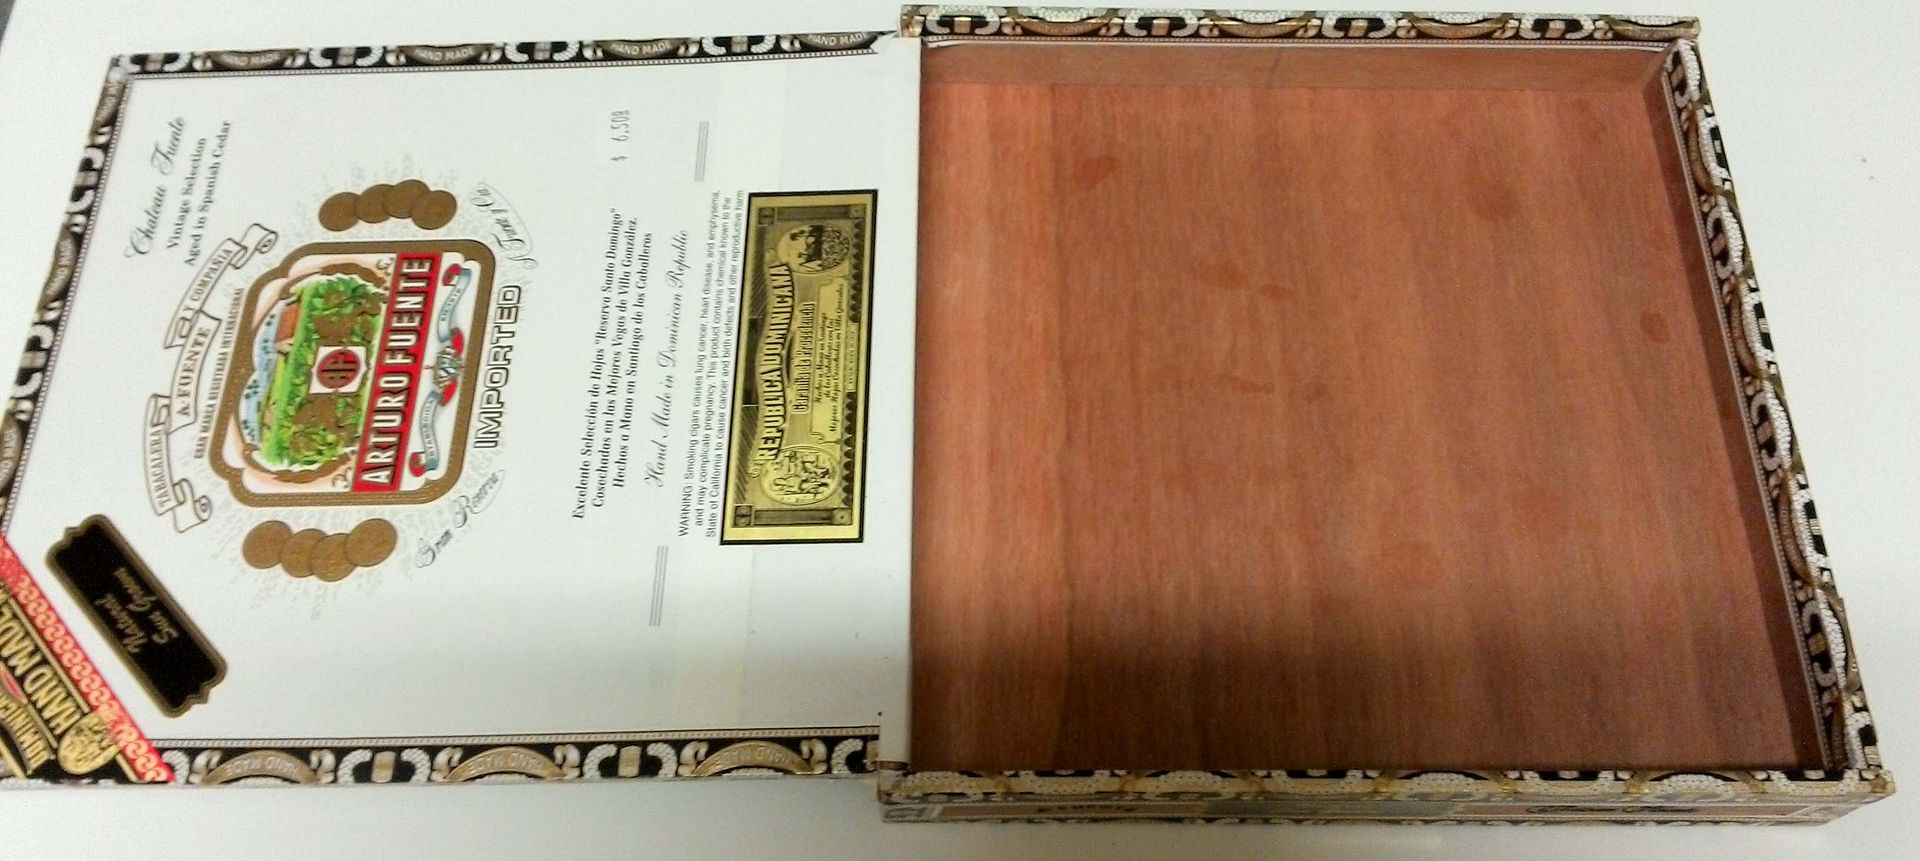
The
Time Machine shadowbox is made from a cigar box.
I
started by inking the edges of the box and then papering the parts of the
inside of the box that would be seen once I added all of the other elements.
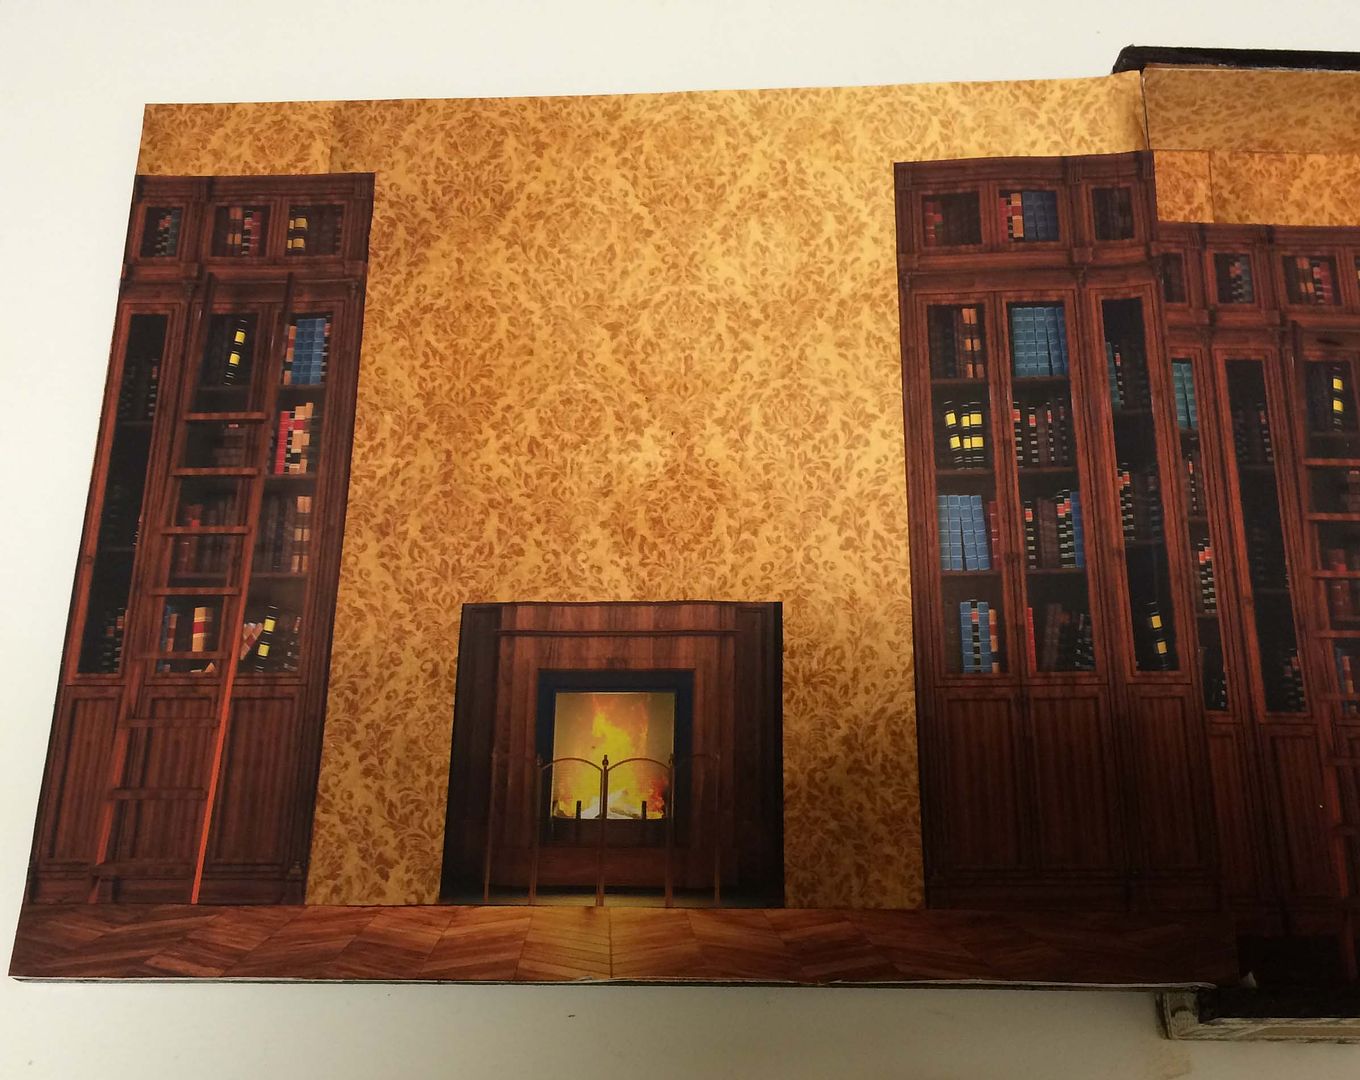
On the
inside of the box, I added the library image.
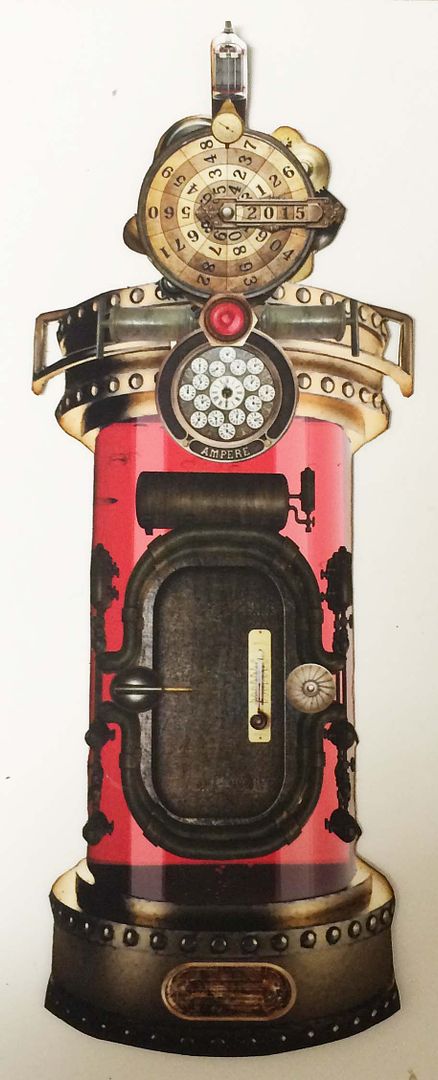
For the
time machine, I printed the image twice.
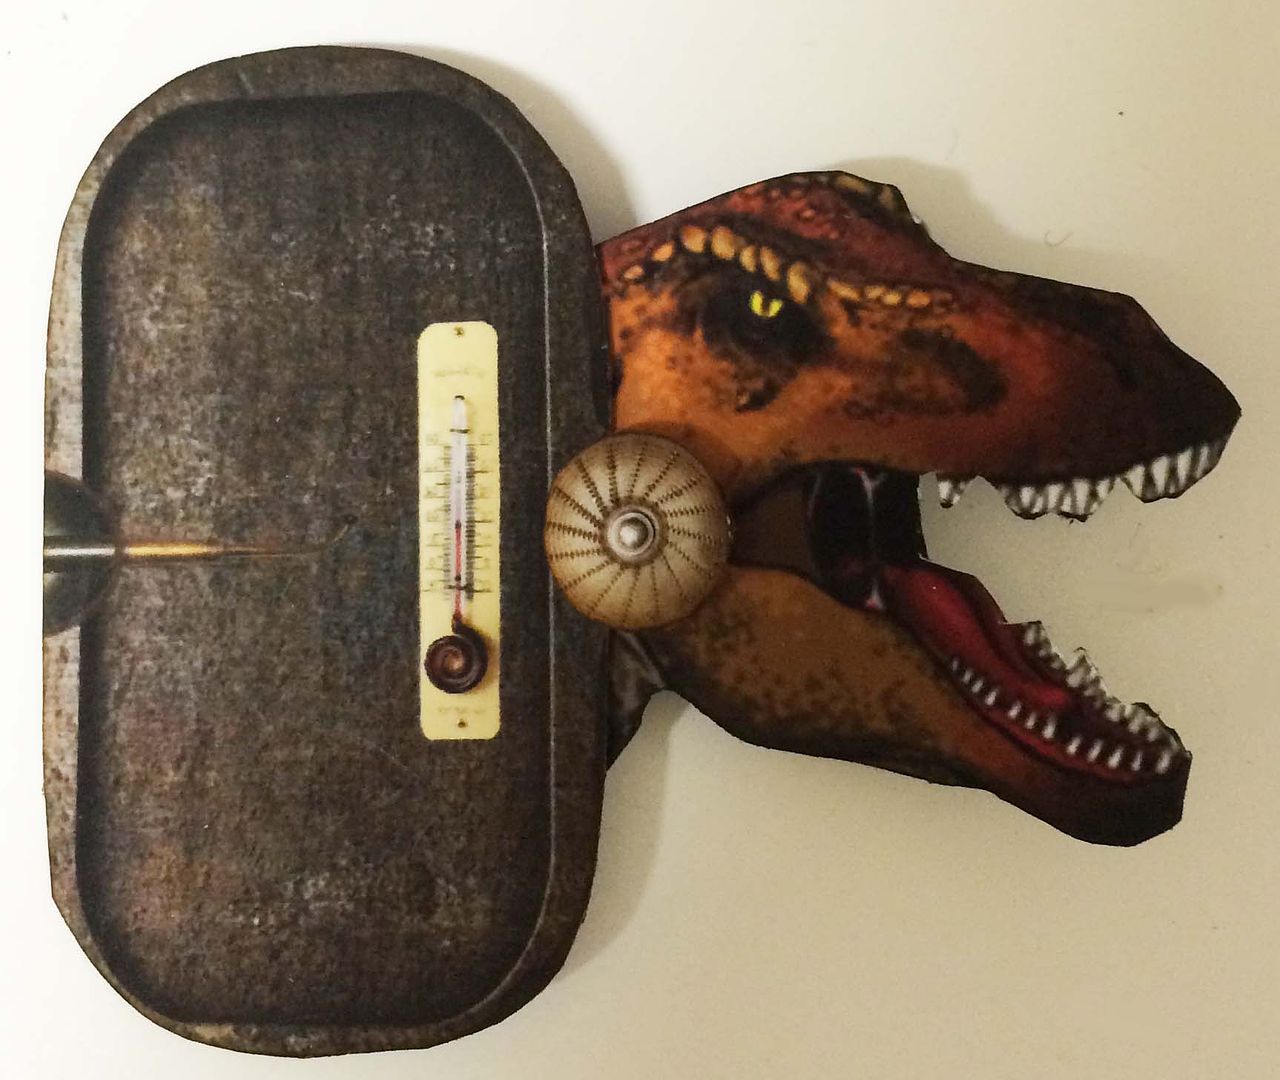
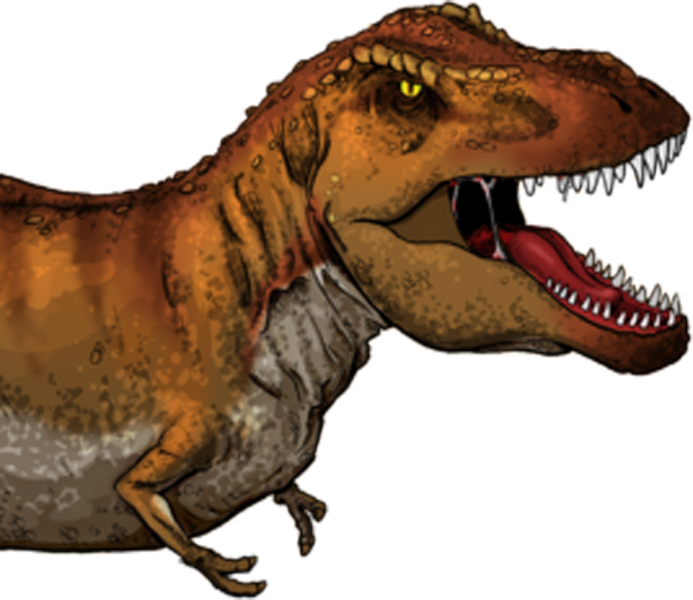
One of the images I used as the main image, and the other one, I cut out pieces of the image that I popped up from the main image to create depth. I cut out a piece of the door and attached the
dinosaur to the back of the door.
You can
below how the pipes, gauges, and door with a dinosaur are attached.
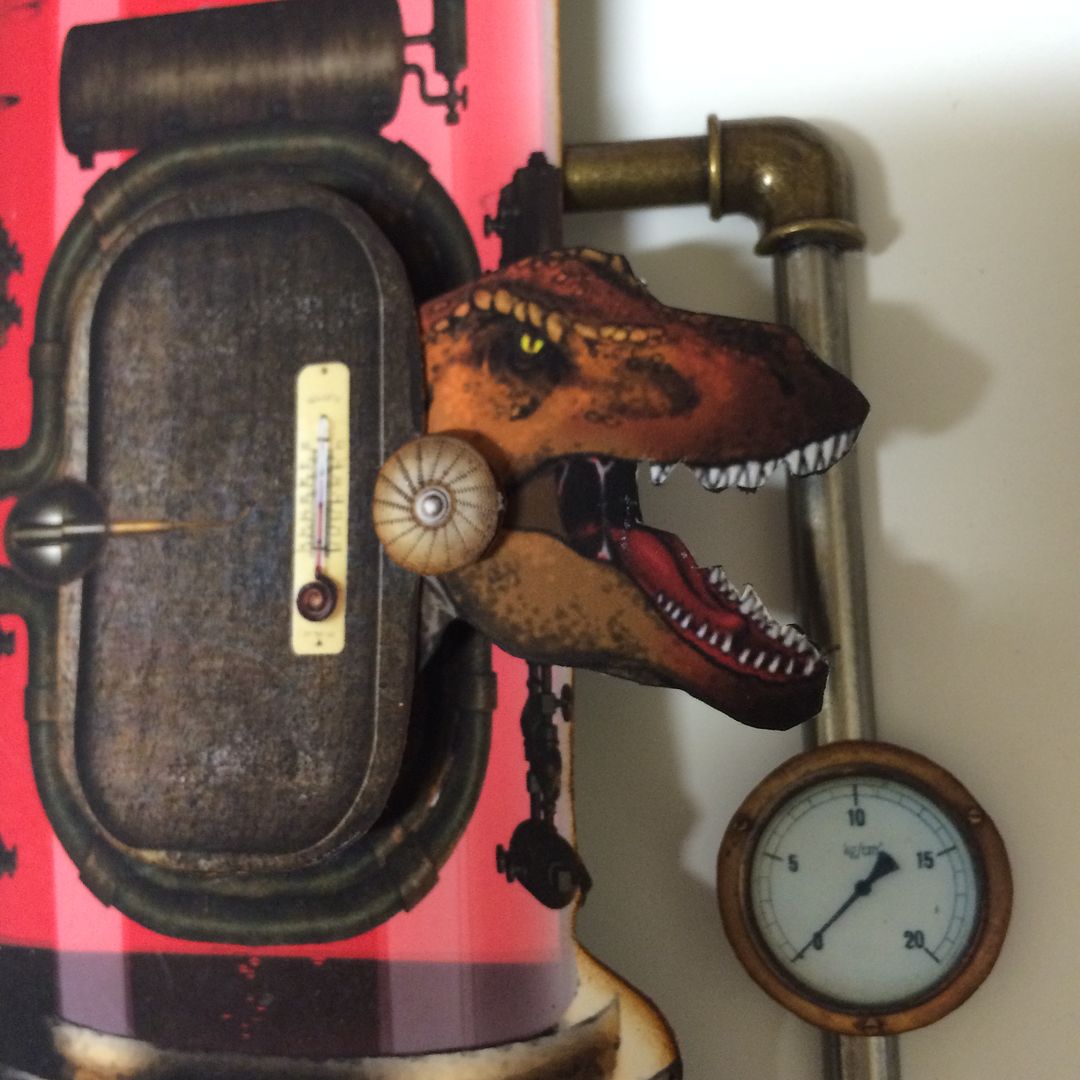
To add a further dimension, I added Glossy Accents to the gauges to give them a domed and
glassy appearance.
Also, note how I added the handle and gear to the pipes. To create the space for them, I used several
layers of double-stick foam tape to pop the time machine out from the wall.
For the
dinosaur, I used multiple layers of double-stick foam tape behind the right
side of the door (only) so that the left side is flush with the time machine
and the right side is popped out. This
makes it look like the dinosaur is pushing the door open on the right, but the
door is still on its hinge on the left.
When I cut out Amelia, I cut away the walking stick that is in her hand. I glued the miniature umbrella behind her
body and hand, then used a fine-point black pen to widen the part of the
stick that goes across the skirt of her dress to match the width of the
umbrella shaft.
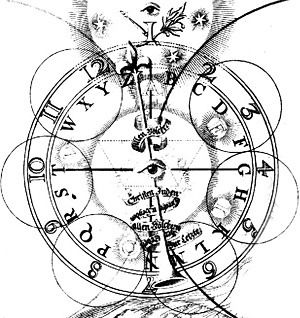
DINOSAUR - FREE IMAGE - DOWNLOAD
Below
is the dinosaur image I used. Feel free
to download the image and use it in your art.
It is sized to fit the dinosaur is sized to fit the time machine on the
collage sheet or the large one in the digital image set.
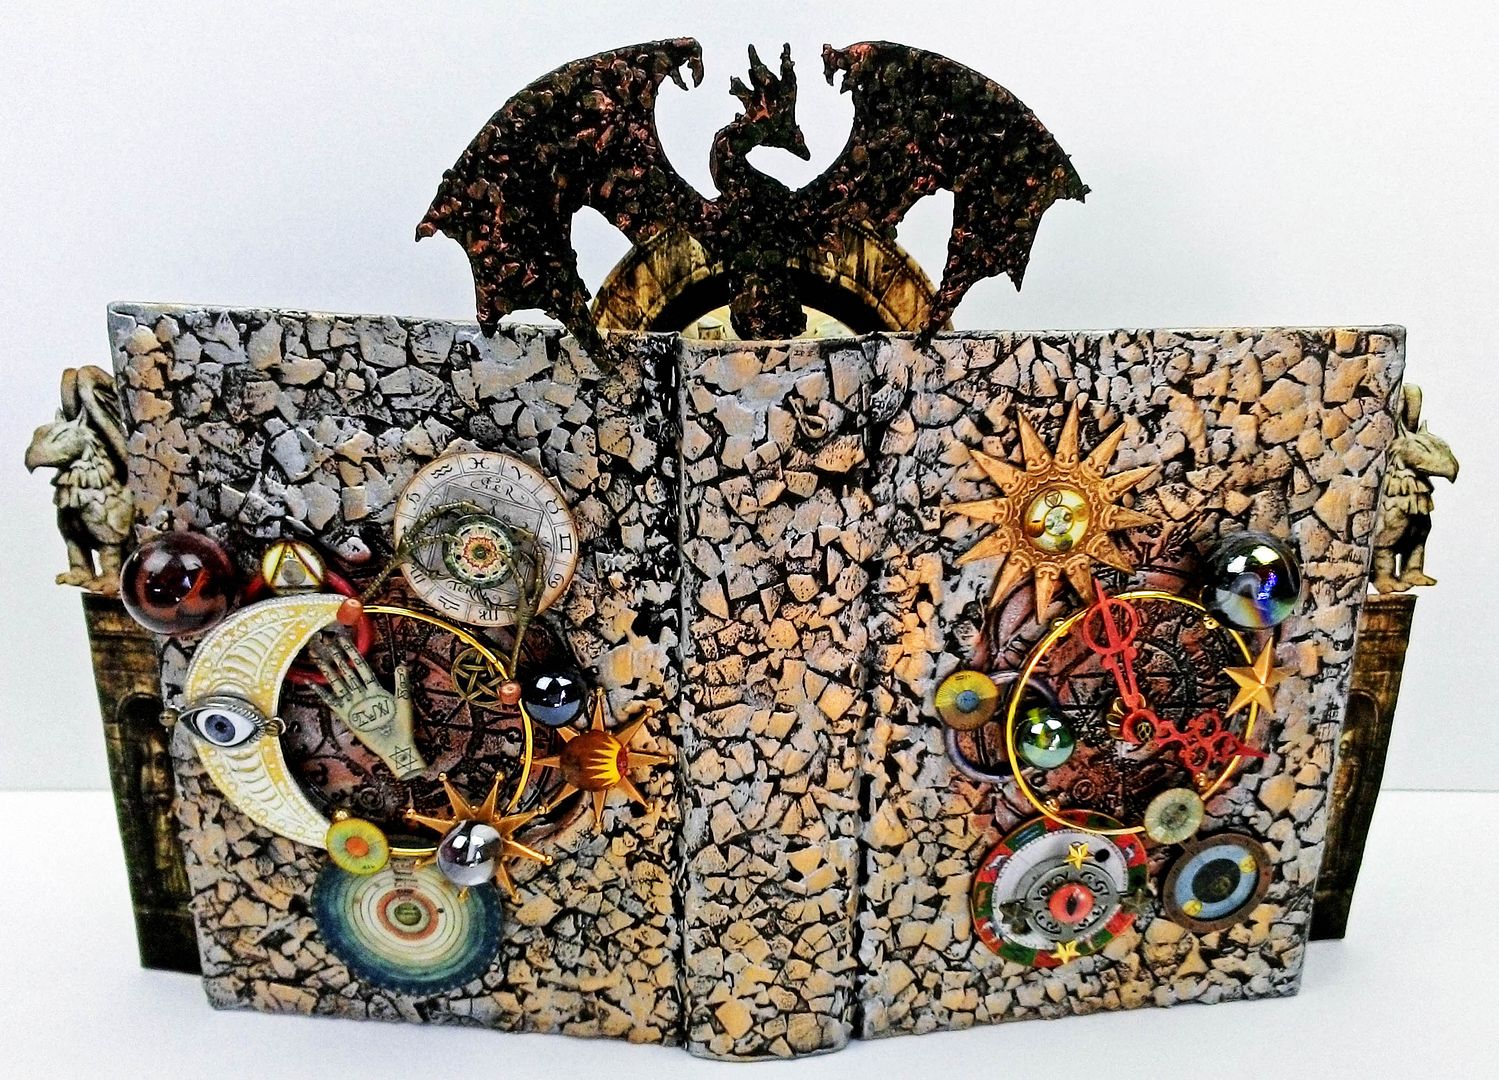
The
final touch was to add the men. Also, note that I used the same curtains that are on the lid side of the box.
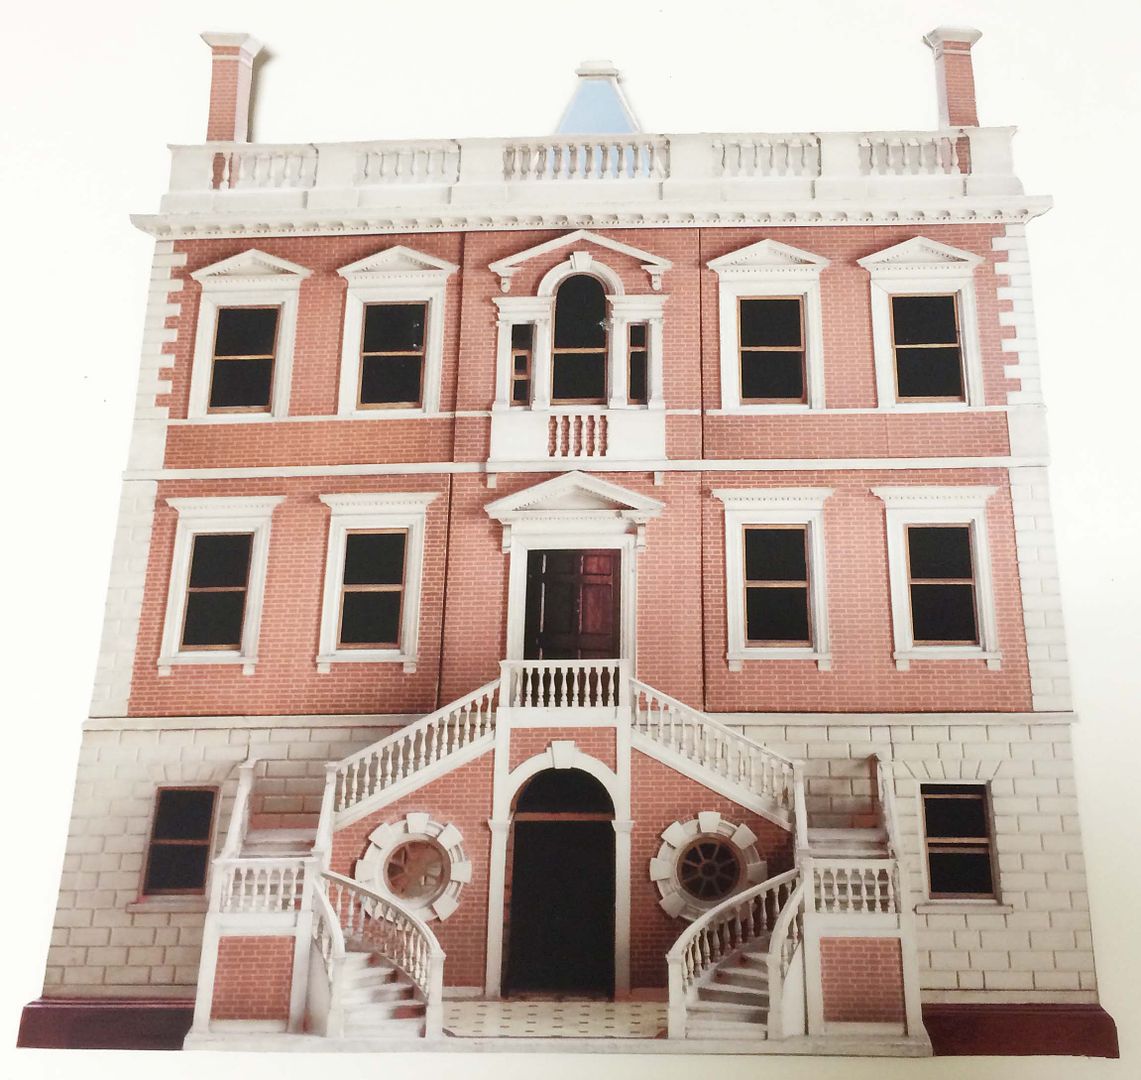
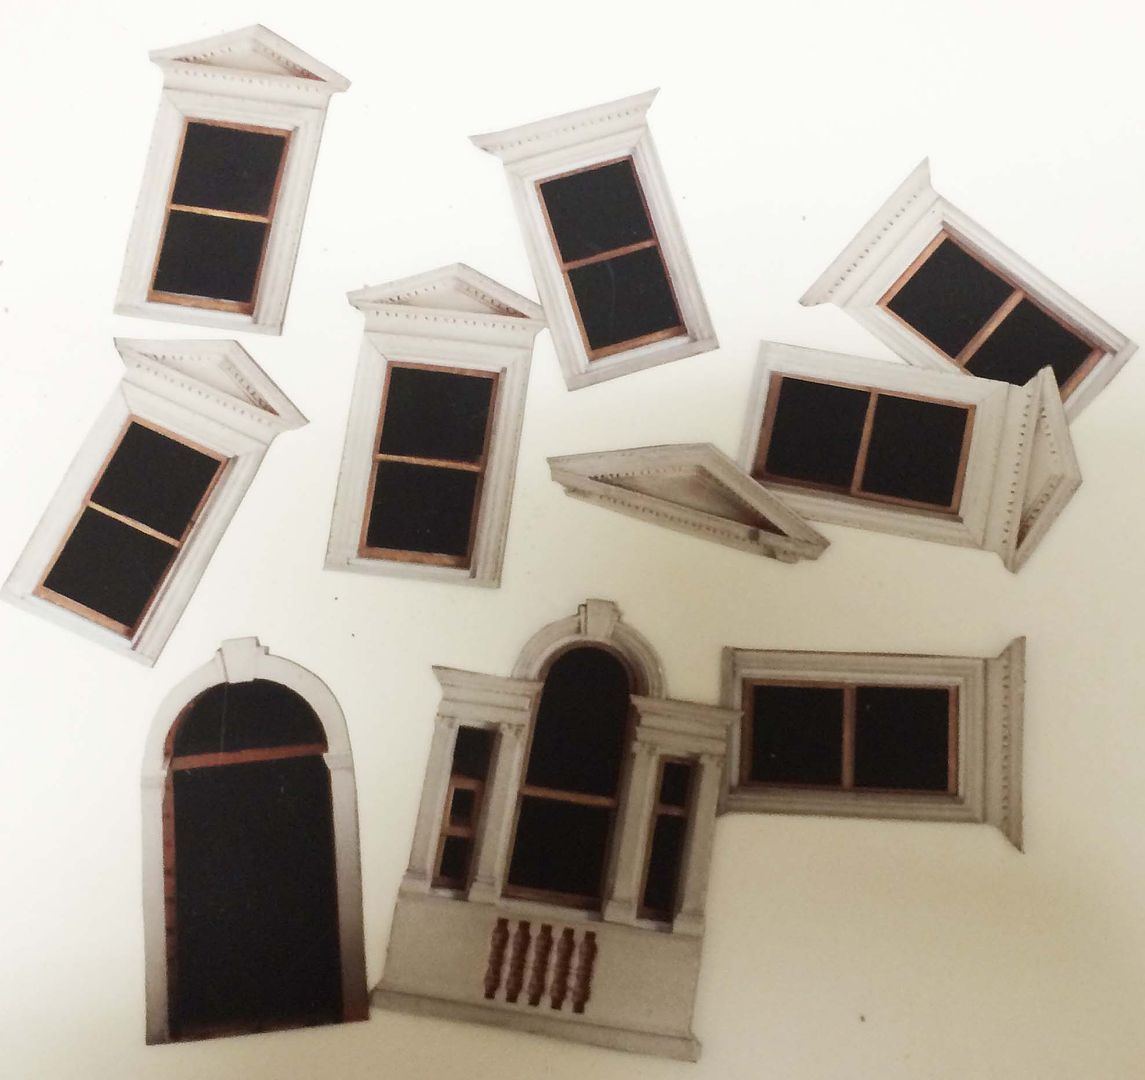
The Victorian
façade is from the Time Machine digital image set. I printed it twice, with one copy being
reversed. I glued one copy to a piece of
lightweight chipboard and cut it out.
Next, I cut out the other copy and glued it to the back of the
chipboard. The reason for reversing one
of the copies is that the façade is not perfectly symmetrical, so if you don’t
reverse the second image, they won’t fit together as well.
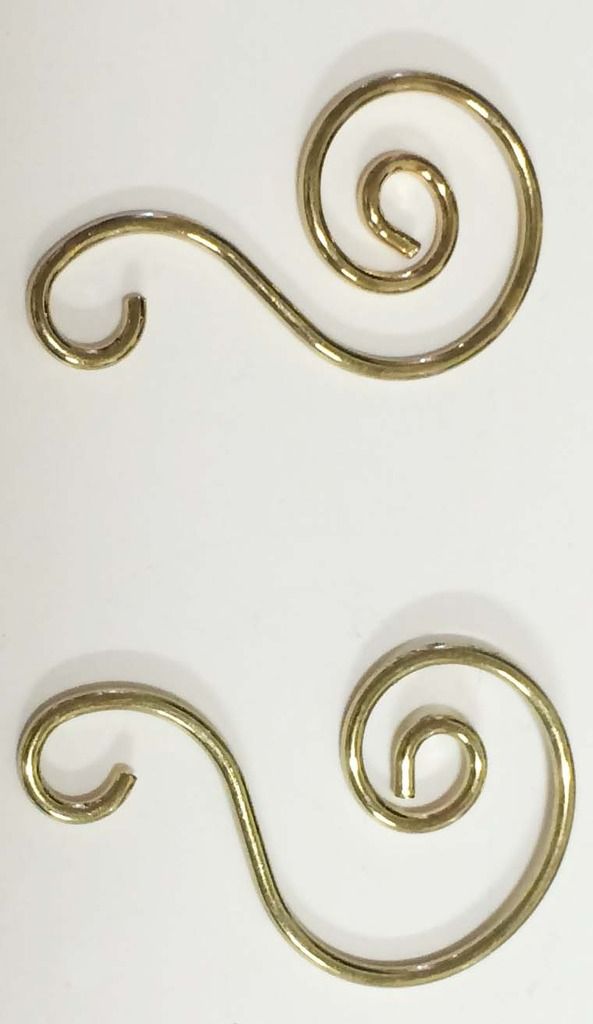
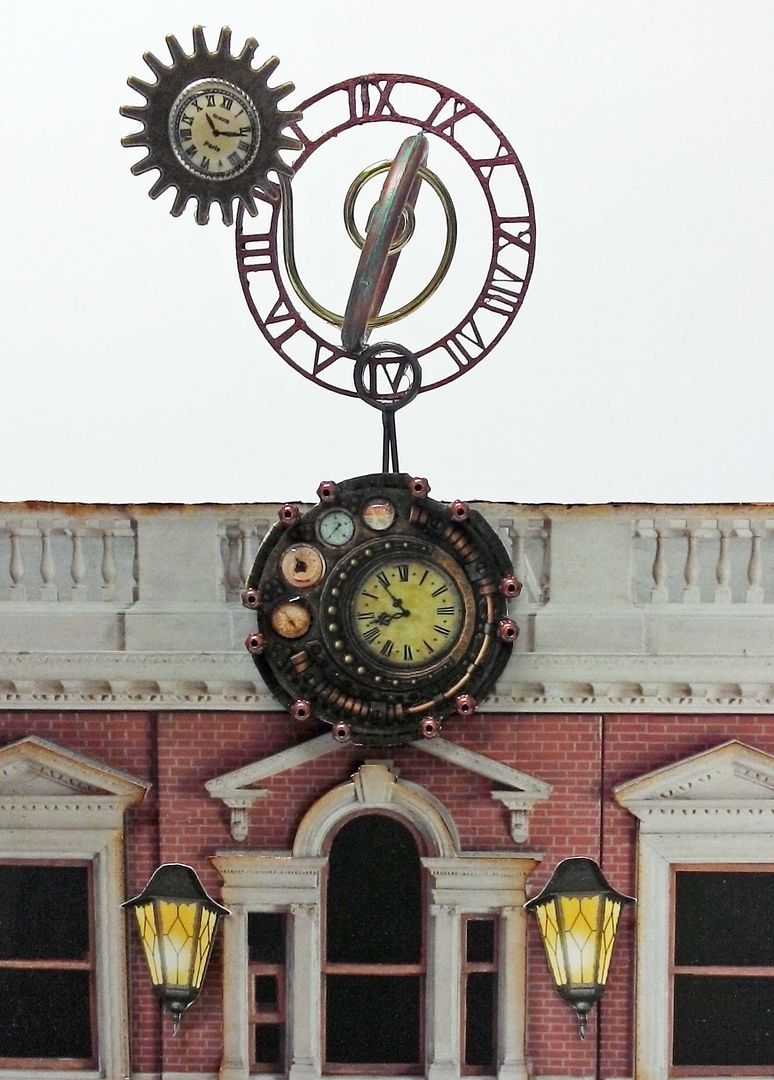
For the
astrolabe at the top of the house, I started by bending an ornament hook. Note in the picture below that the second
hook is the one that is bent, and the first is how it looked before
bending.
To the
hook, I attached a brass gear and a clock button. I attached a button to the back as well.
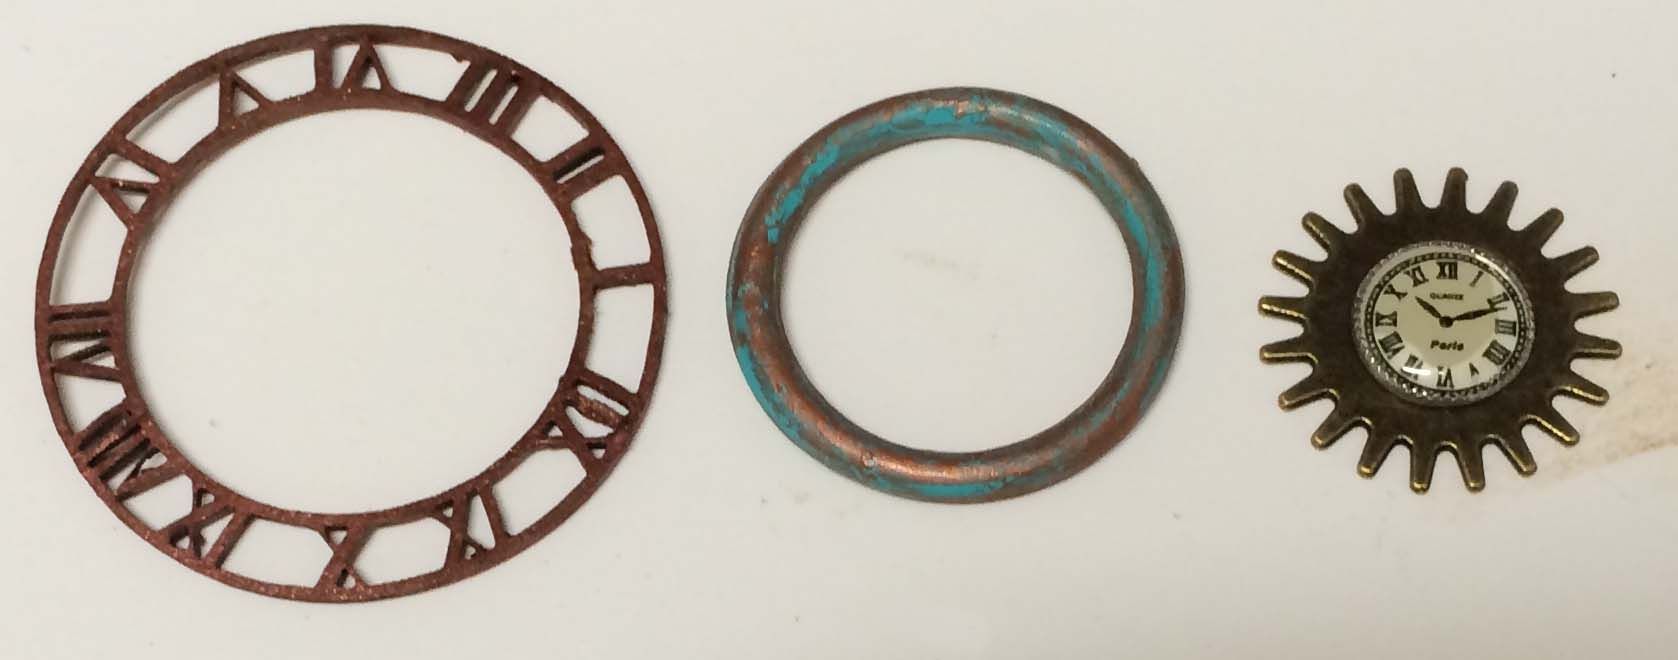
The
other pieces of the astrolabe are a clock from the Steampunk Shapes Set – Hats, and
a white ring that I painted a copper color and then brushed with Patina Gilders
Paste.
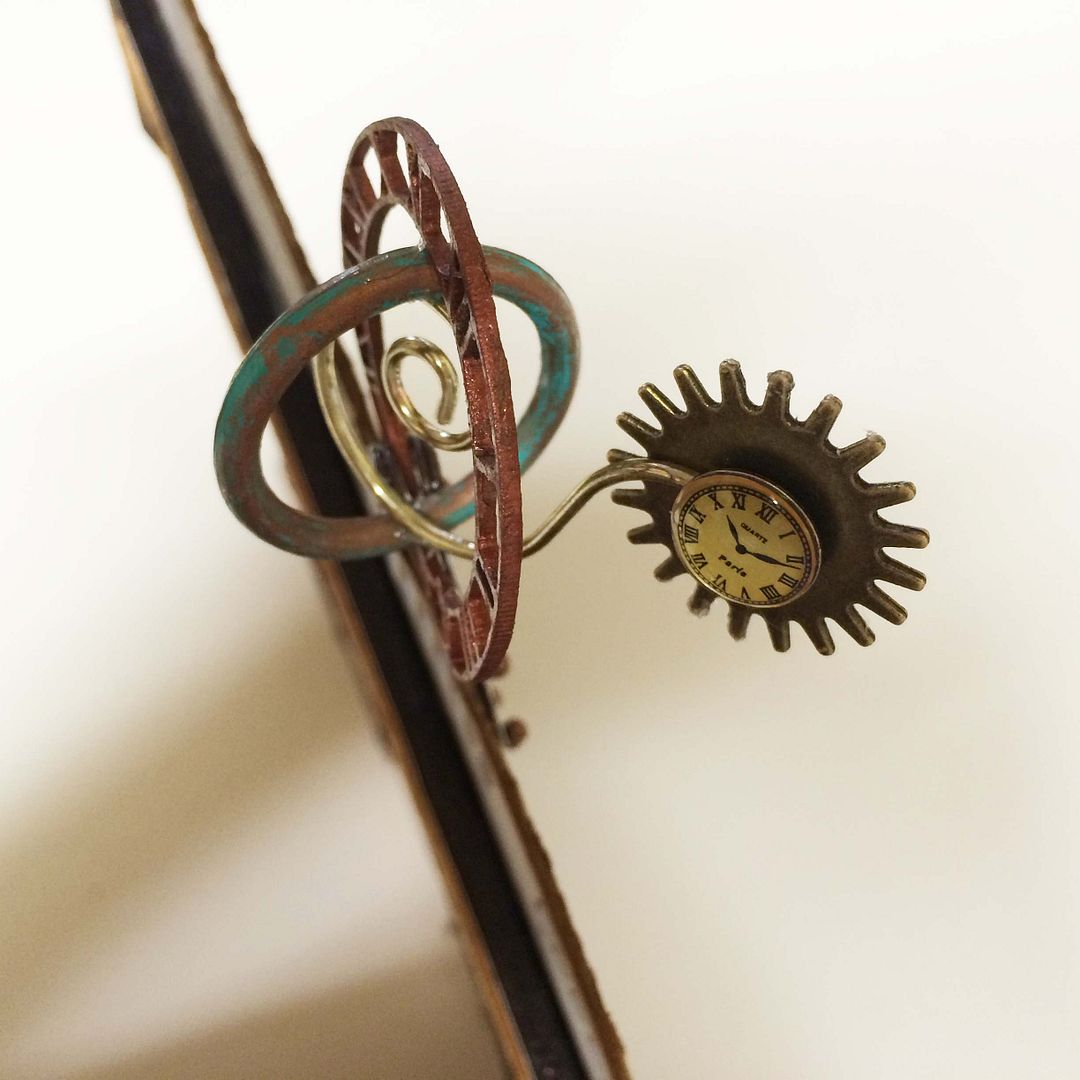
I then
glued the hook into the ring at an angle.
You can now see why I bent the hook to make it larger so that it would
fit snugly inside the ring. Next, I
glued the ring inside the clock.
On each
side of the clock, I attached memo pins.
I poked the pins through the top of the façade to hold the astrolabe in
place.
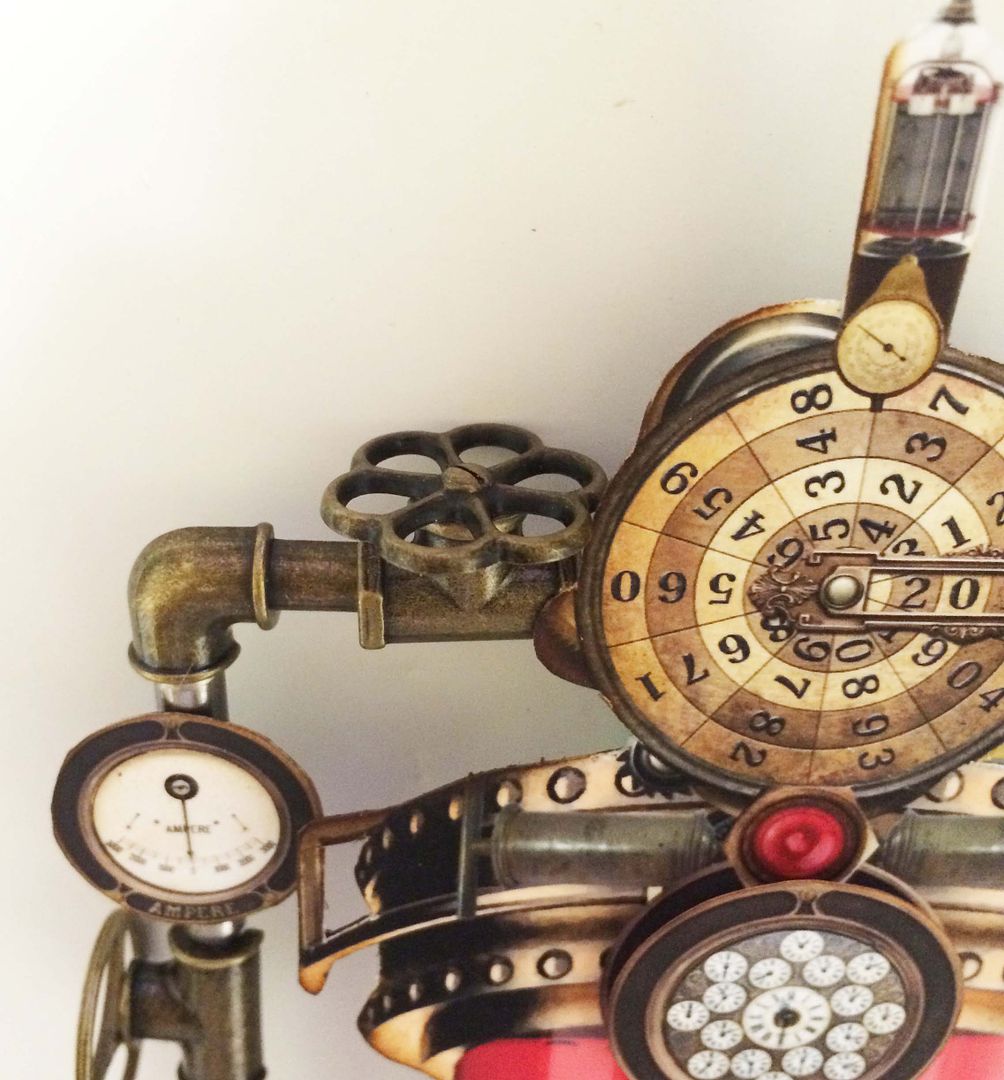
Below the astrolabe is a gizmo piece from the Time Machine collage sheet. I used Gloss Accents to make each of the gauges
pop and small copper beads to dress up the gizmo and hide the small white
areas that were too small to cut out.
To give
the façade more dimension, I printed a third version of the façade and cut out most of the windows and doors, attaching them to the façade with double-stick
foam tape to pop them up.