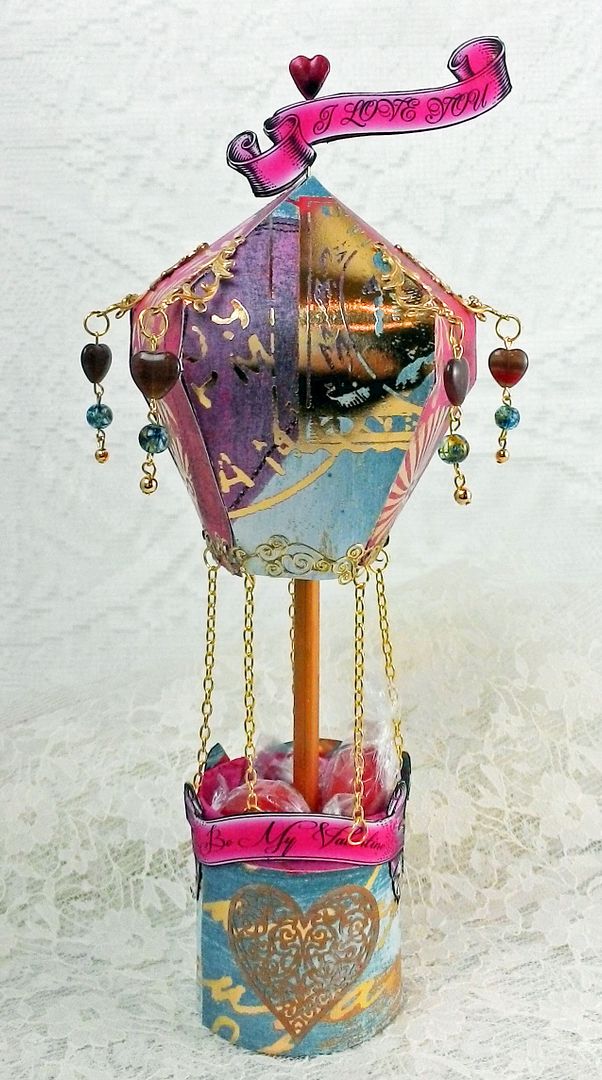
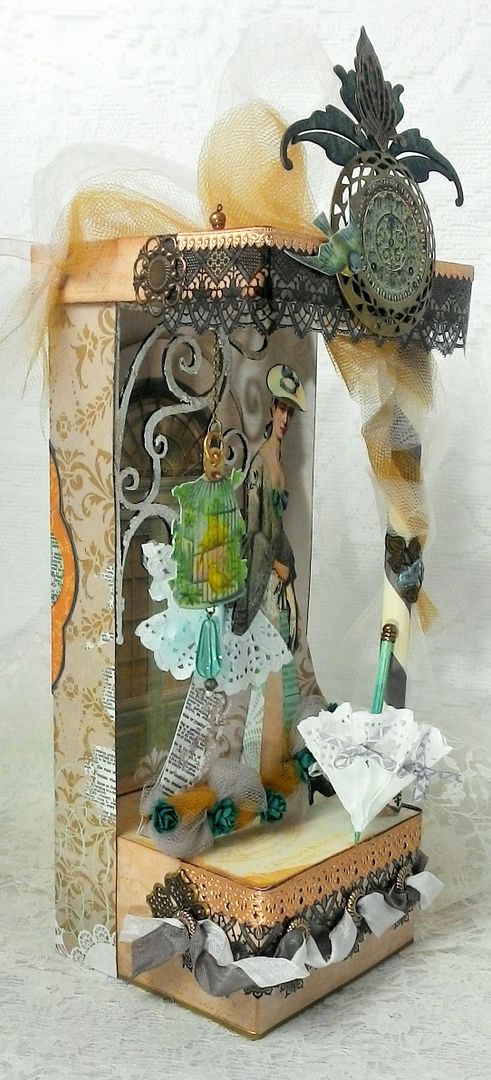
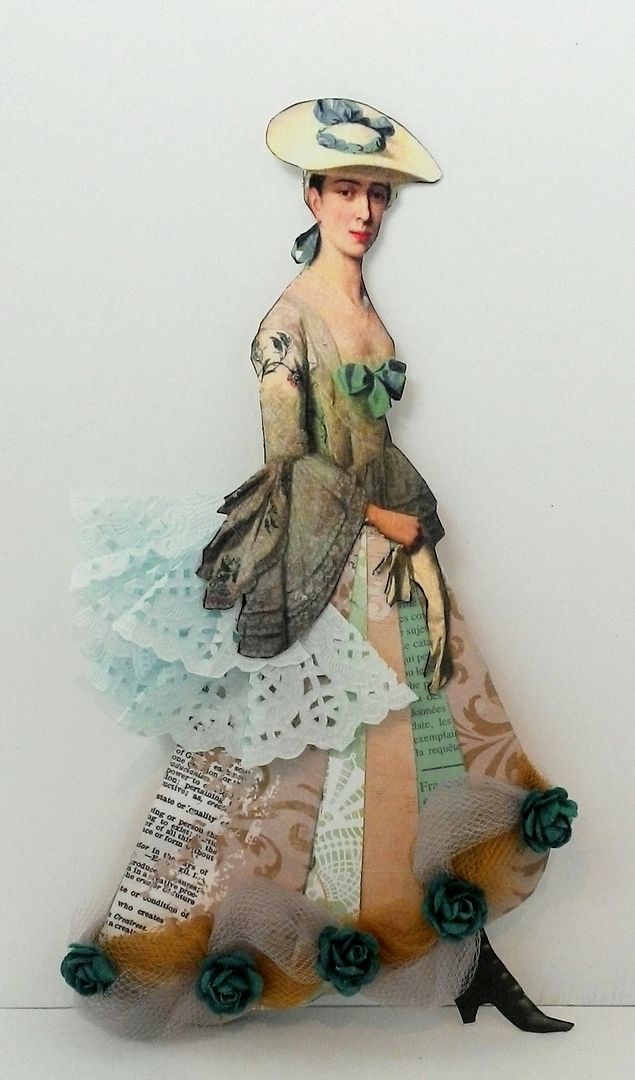
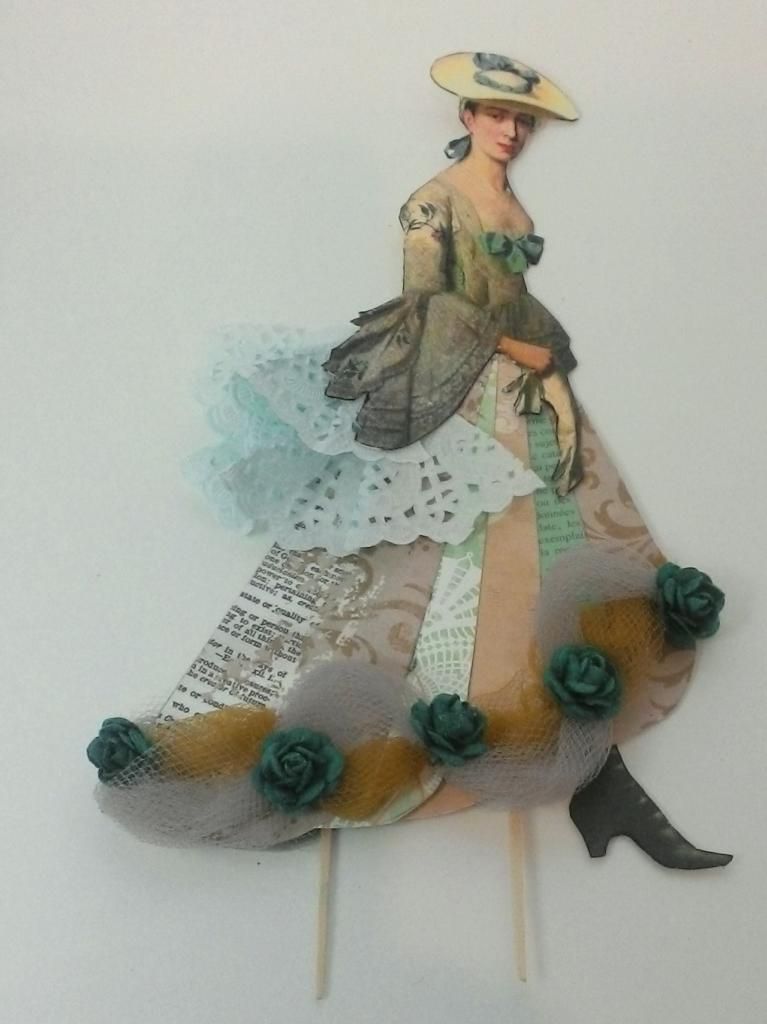
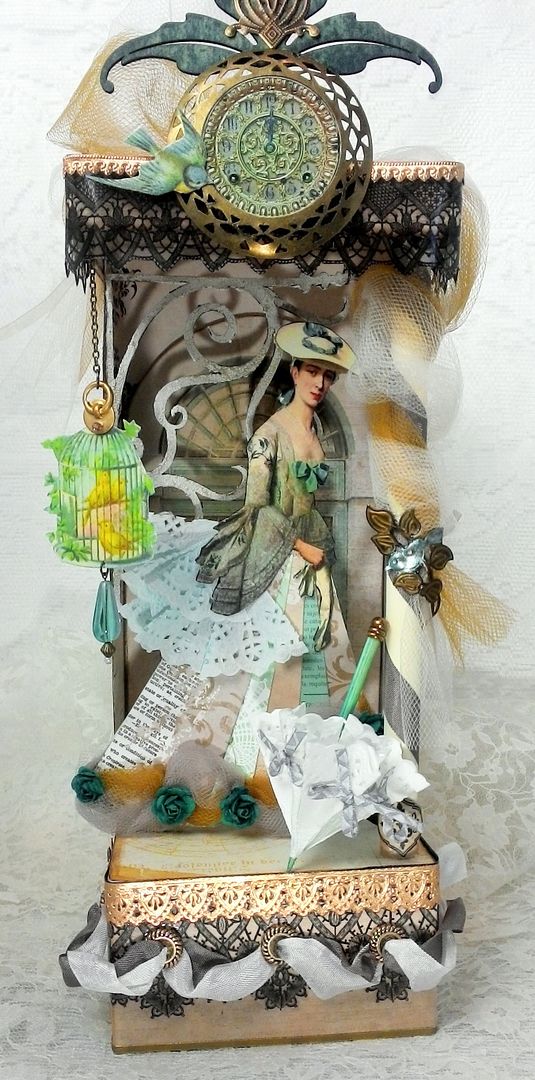
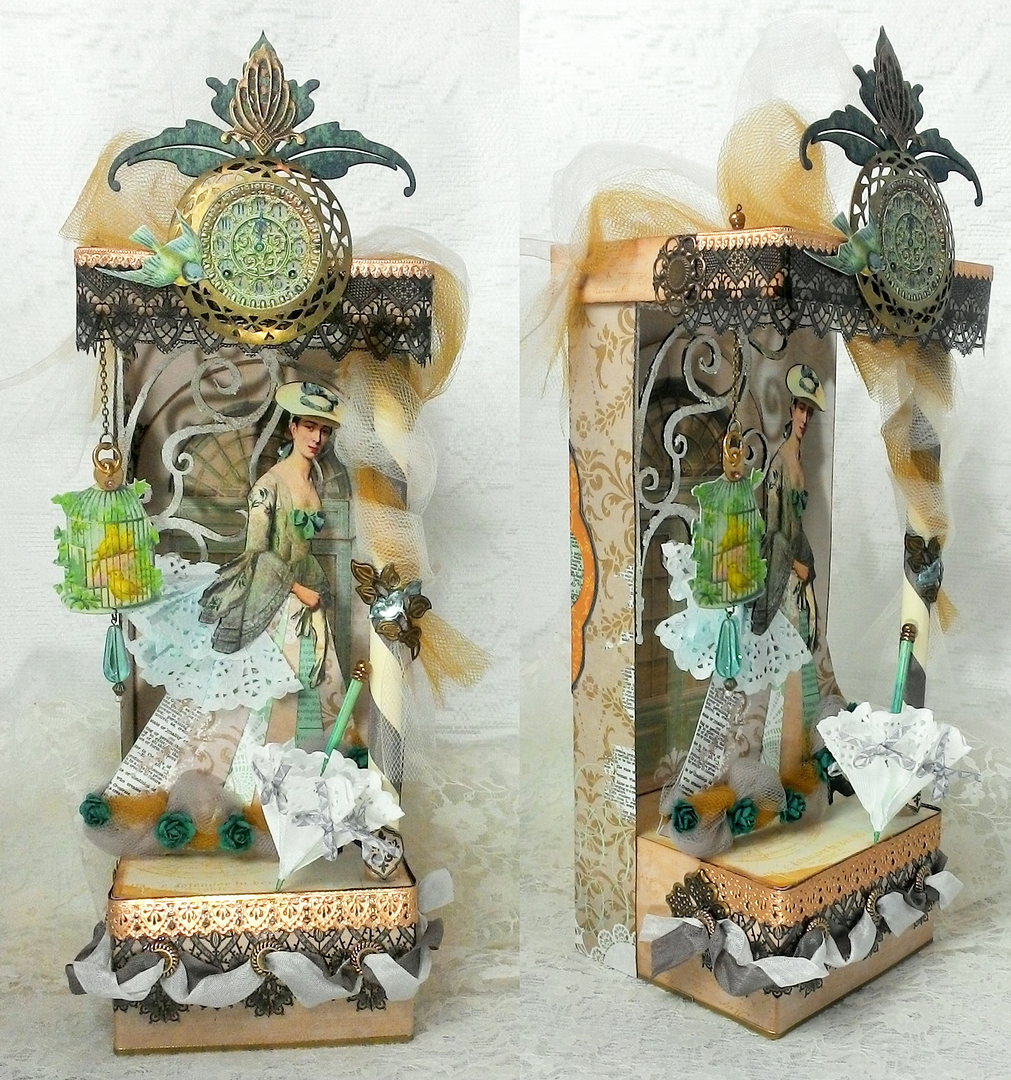
This diorama
showcases a lovely Victorian lady leaving her home perhaps to meet a friend in
the park. You can see that she is
standing outside a door pulling on her gloves. Her lovely parasol (made from a doily) is
leaning against the column waiting for her to pick it up. The overall size of this piece is approximately 13 ½” x 4 ½”
which includes all of the embellishments.
You all
know I love creating dioramas and of course I’m always looking for different
methods and materials to use. If you
love them too but have been thinking that they are too complicated to construct,
I hope this project changes your mind.
The the base of this piece is nothing more than a box and some paper. Yep, that is all it is. The rest is just glue and embellishments.
In the tutorial below I walk you through how easy it is to create a diorama using a
paper mache box and decorative paper.
I’ll also go over all of the embellishments I used and how I created the
Victorian woman’s skirt and doily parasol.
Assembling the Basic
Structure
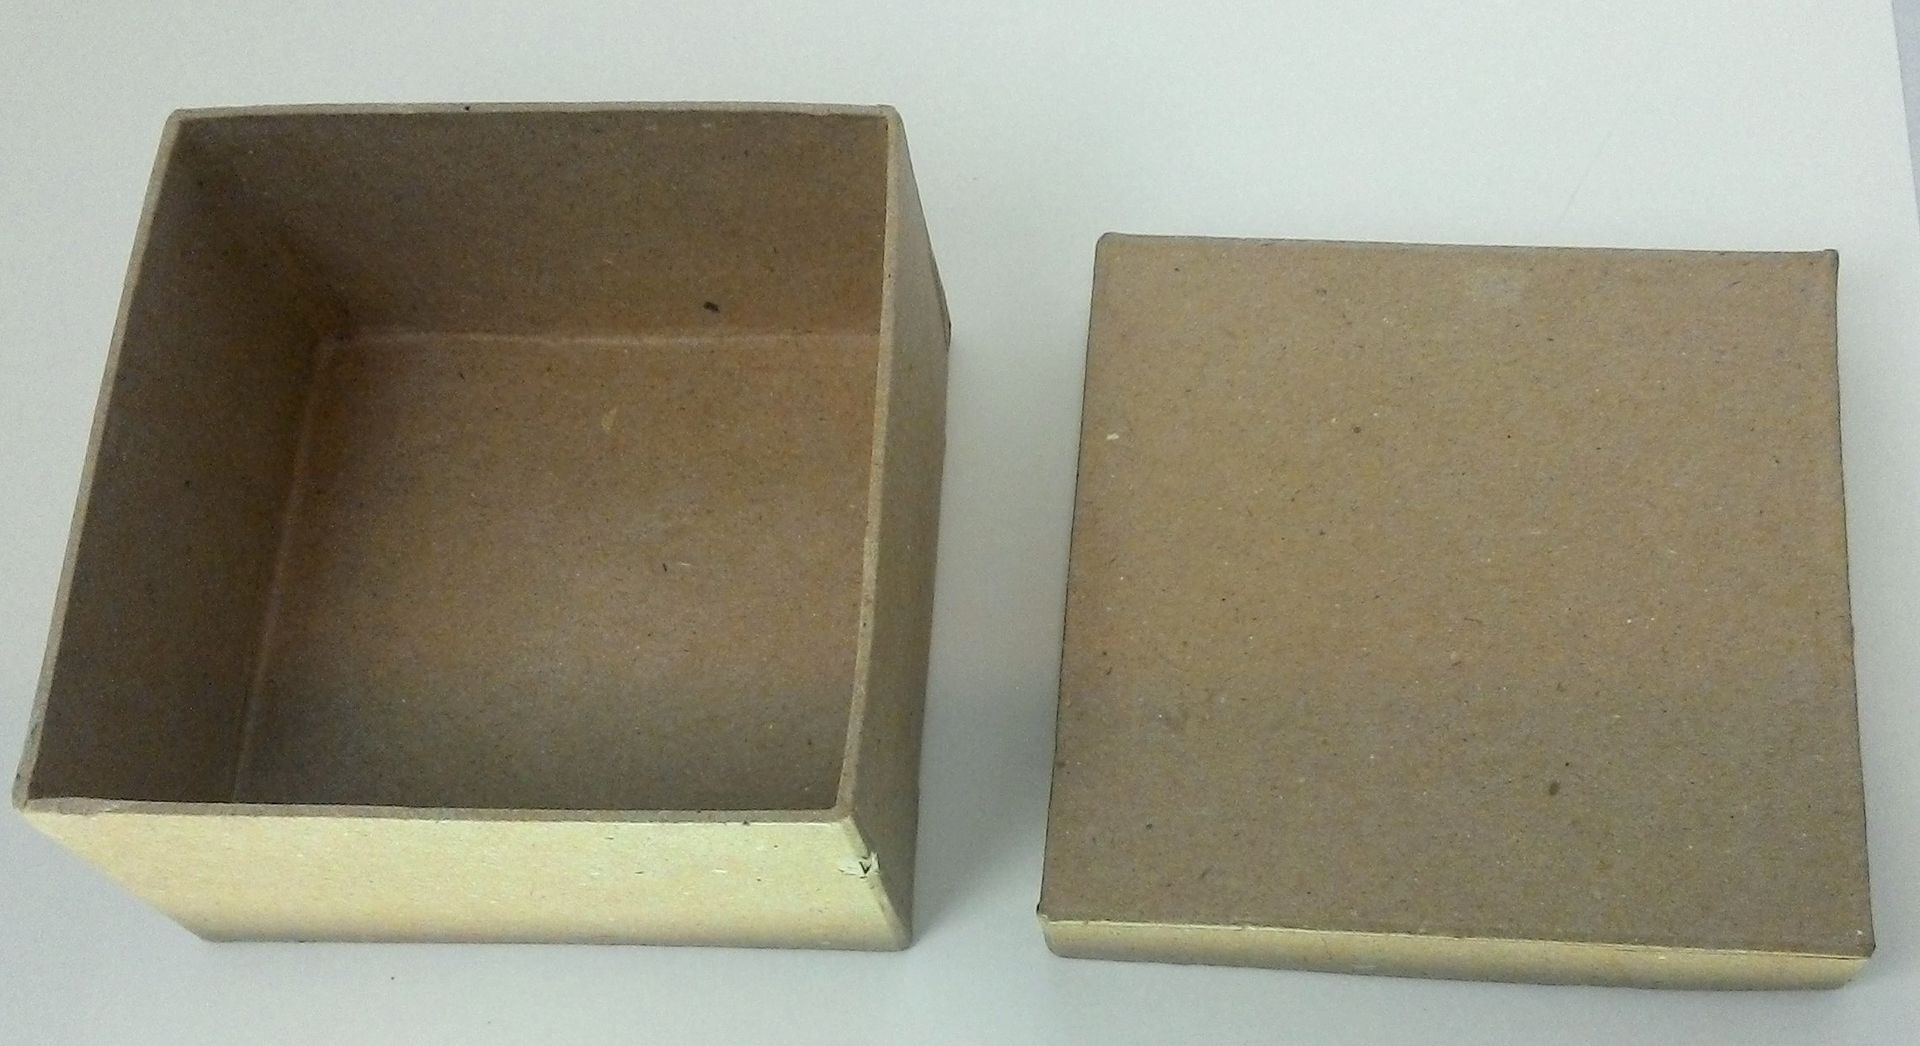
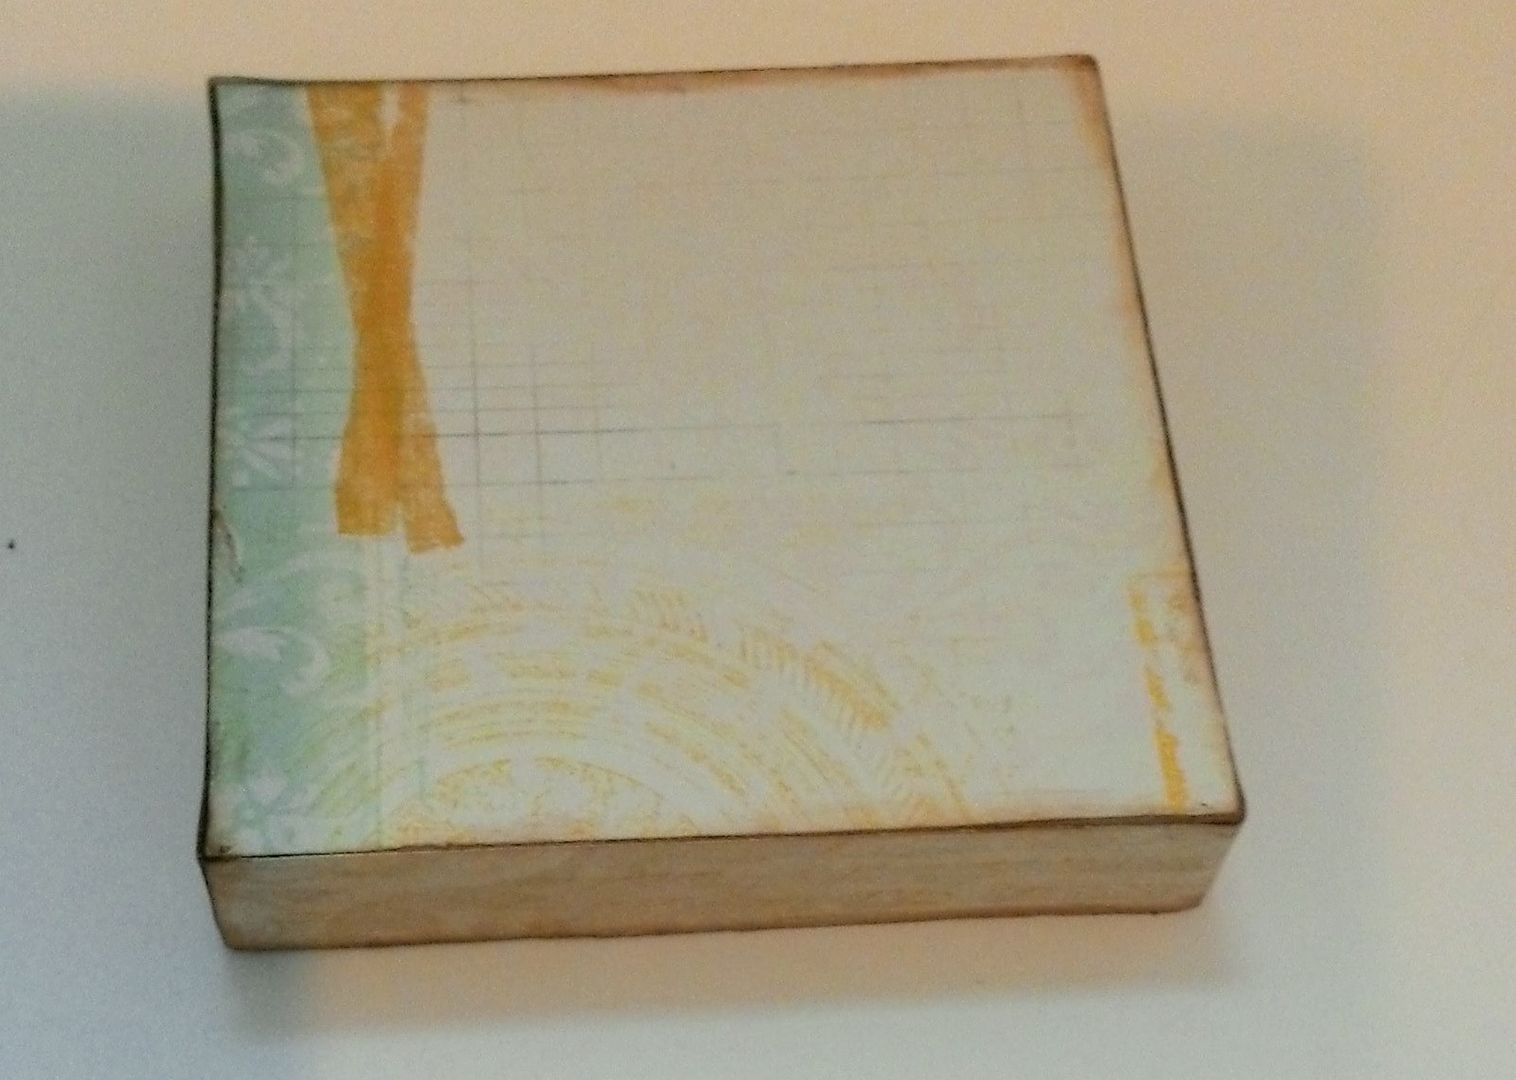
The
base of the piece is made from 4”x4”x2”
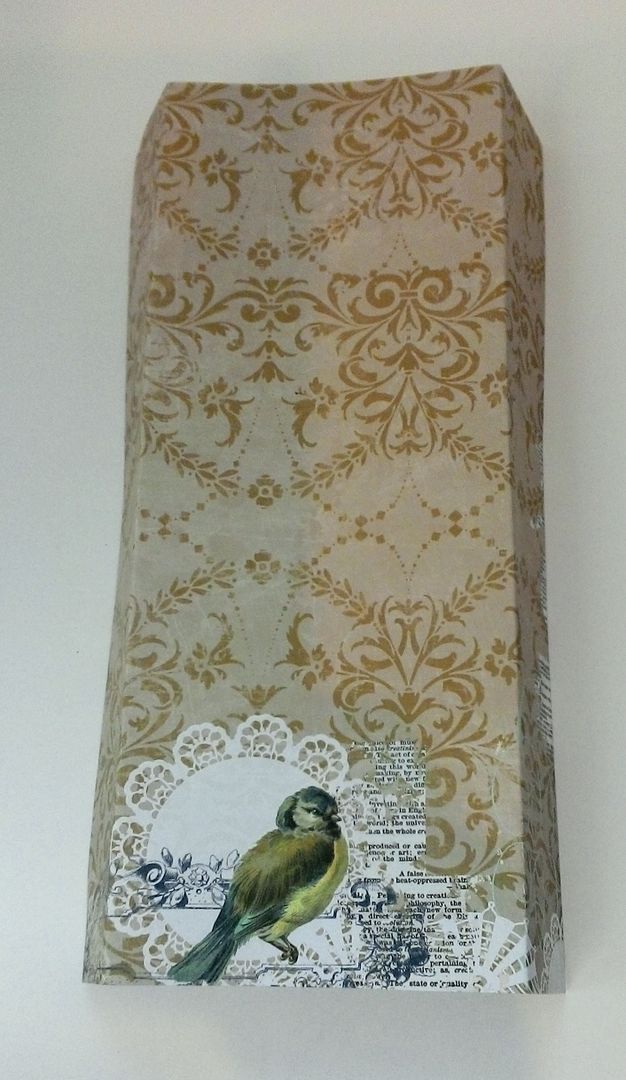
paper mache box. I covered all of
the surfaces of the lid of the box and the outside of the bottom of the box
with decorative paper. I also inked all
of the edges. There is no need to cover
the inside bottom of the box as you will not see it. Of course, painting the boxes is also an
option
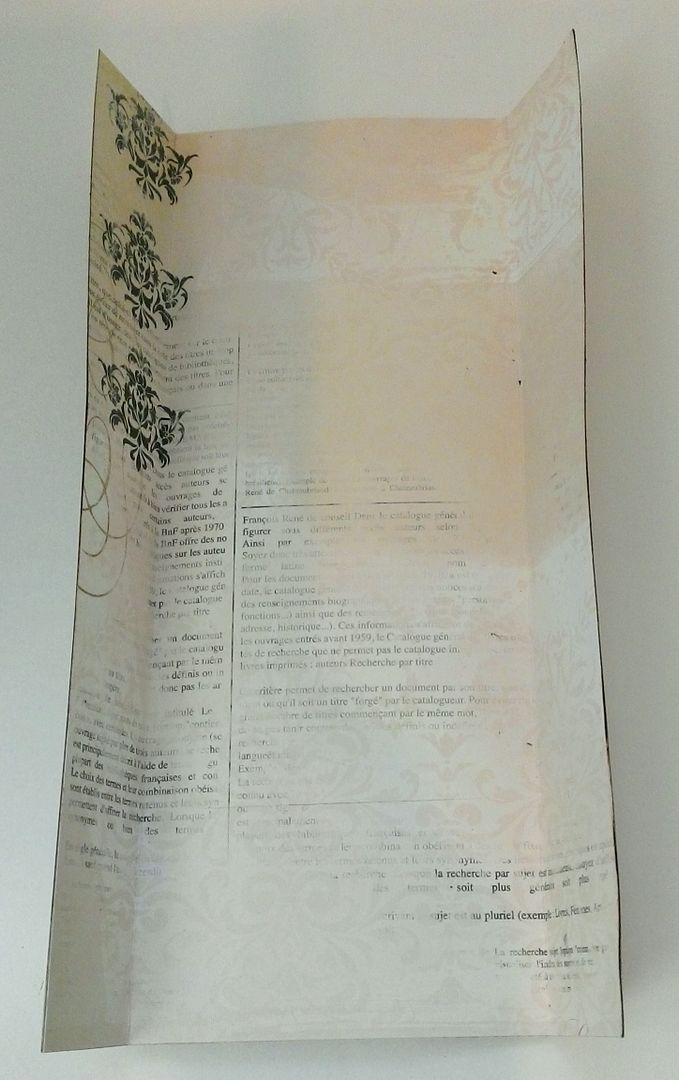
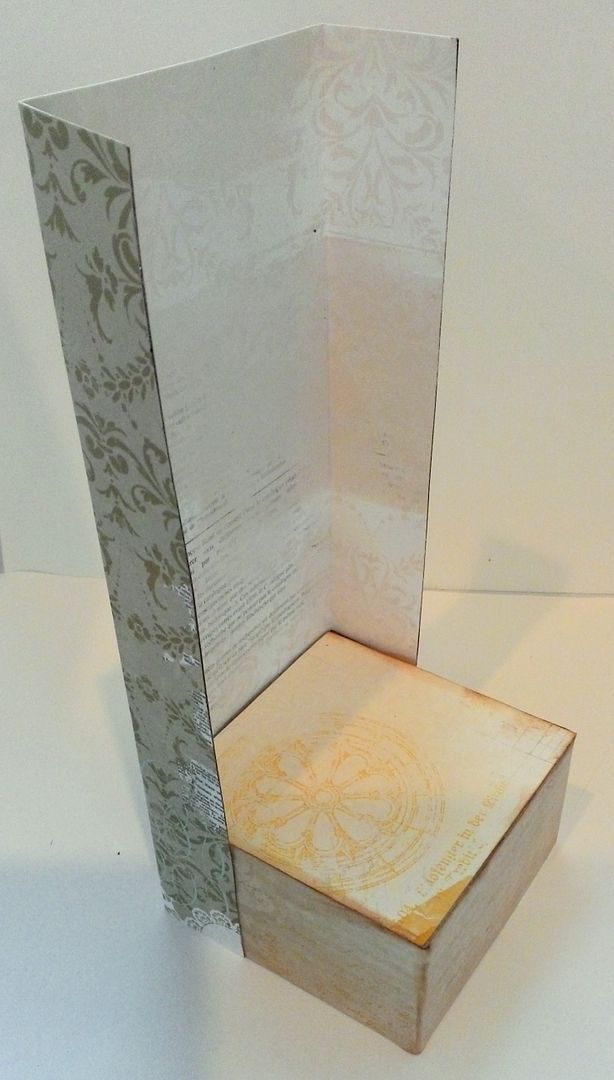
Next, I
cut out pieces of decorative paper to serve as the supporting back and
sides. To determine the size of the
paper, I used the finished size of the paper Victorian doll (which is 7” tall)
plus some extra headroom (3 ½”) for the height. To determine the width of the paper I used
the outside measurement of the bottom of the box (4”) plus 1 ½” for each side
of the box for a total of 7”.
The end
result was that I cut two 10 ½” x 7” pieces of decorative paper and glued them
together mindful of which designs I wanted to expose on the inside and the
outside. Next, I scored and folded two
lines on the paper 1 ½” from the long edge of the paper. This will make it easier to glue the paper to
the box.
I then
glued the paper to the outside bottom of the box. If you are going to decorate the inside of the
paper you might find it easier to add your embellishments before gluing the
paper to the box Note that the paper
only wraps partially around the box.
This will create support for the lid (which will be the top) but allows
the base of the box to be exposed so that you can see the items inside.
The top
of the paper is then glued to the inside of the lid of the box creating the
top. I also glued a wooden dowel in
place at the same time as attaching the lid.
The dowel is used to create more visual interest and to add more support
to the top. I painted the dowel cream
color paint and wrapped it with seam binding.
At the ends of the dowel, I added pieces of decorative paper. To determine the length of the dowel, I measured
the distance between the top of the base to the top of the paper that is
attached to the base. In the case of
this piece, it measures 8 1/8”.
In the
picture below you can see the lid attached to the top of the paper (note the
paper is inside the lid) and the dowel is attached to the base and to the
inside of the lid. That’s it; you have a
basic diorama structure!
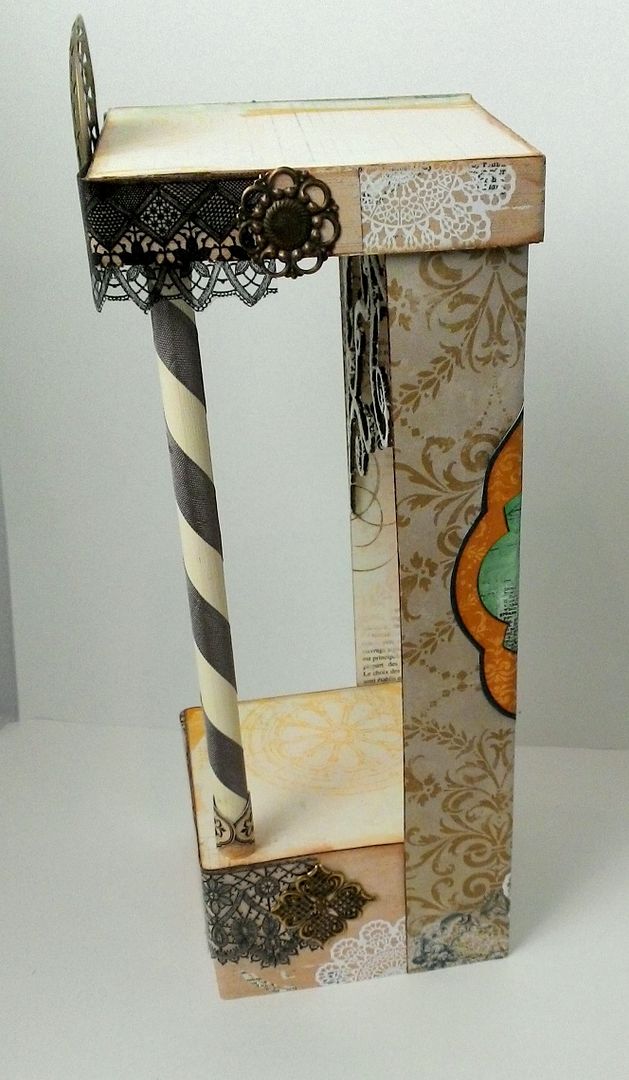
Of
course, there all kinds of embellishments that you can add to the basic
structure. Based on what you plan to
add, you might want to attach it before or after you assemble your structure.
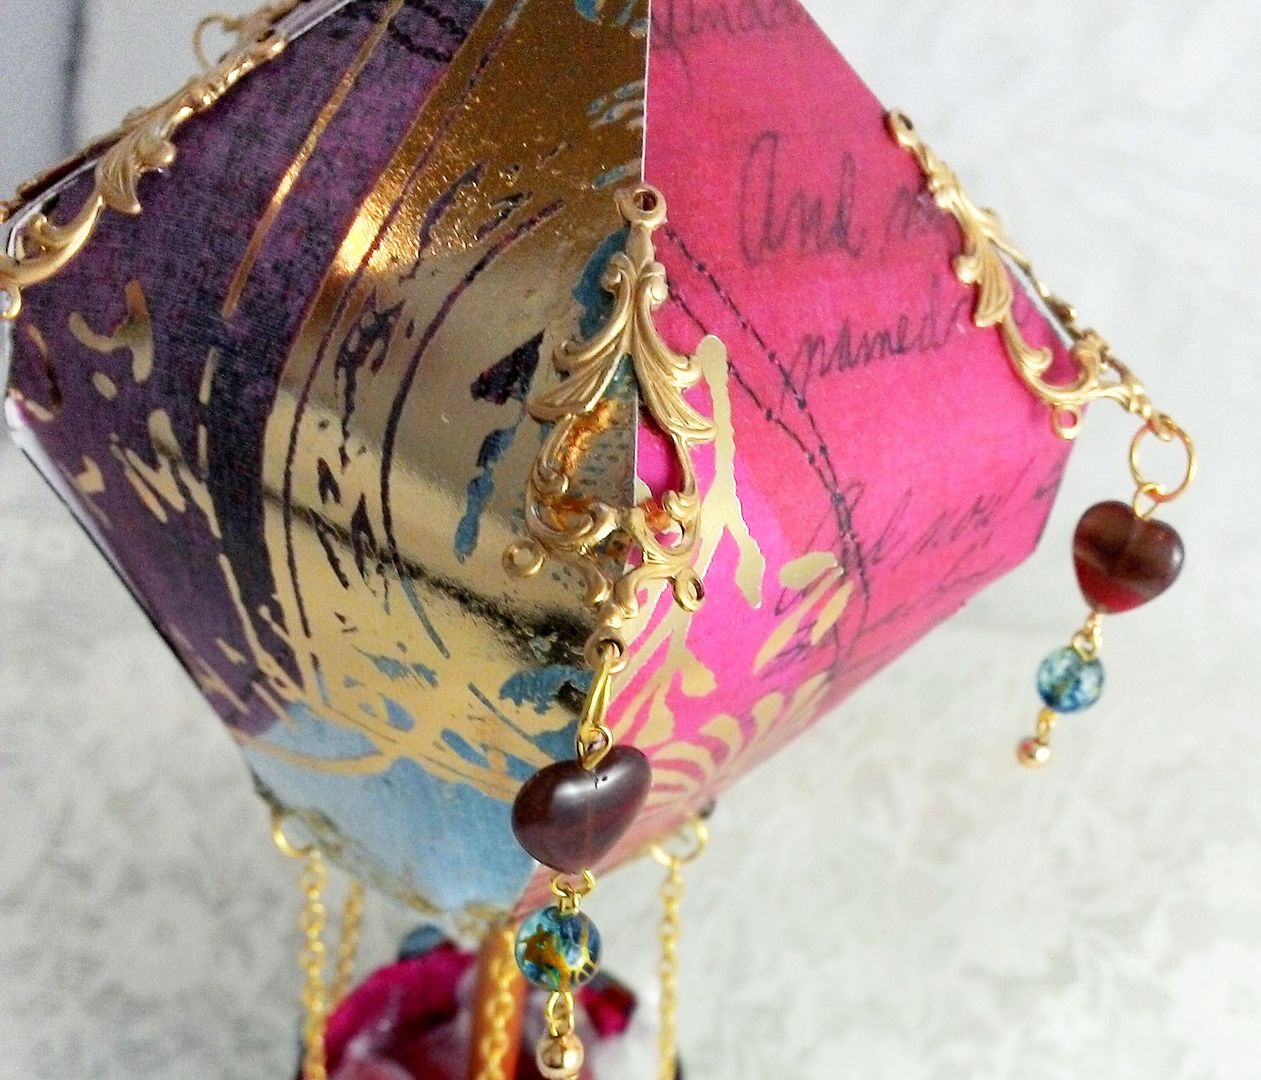
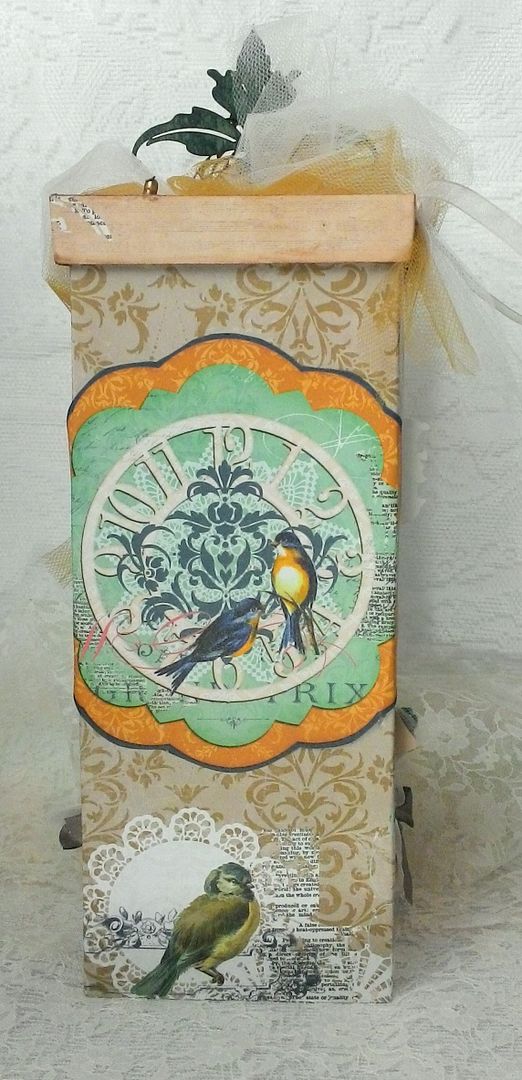
To the top and bottom, I added images of lace printed on transparency sheets. I used brass pieces to finish the edges. To the top, I added a clock from my Tick Tock Collage Sheet and framed it with a circular brass piece.
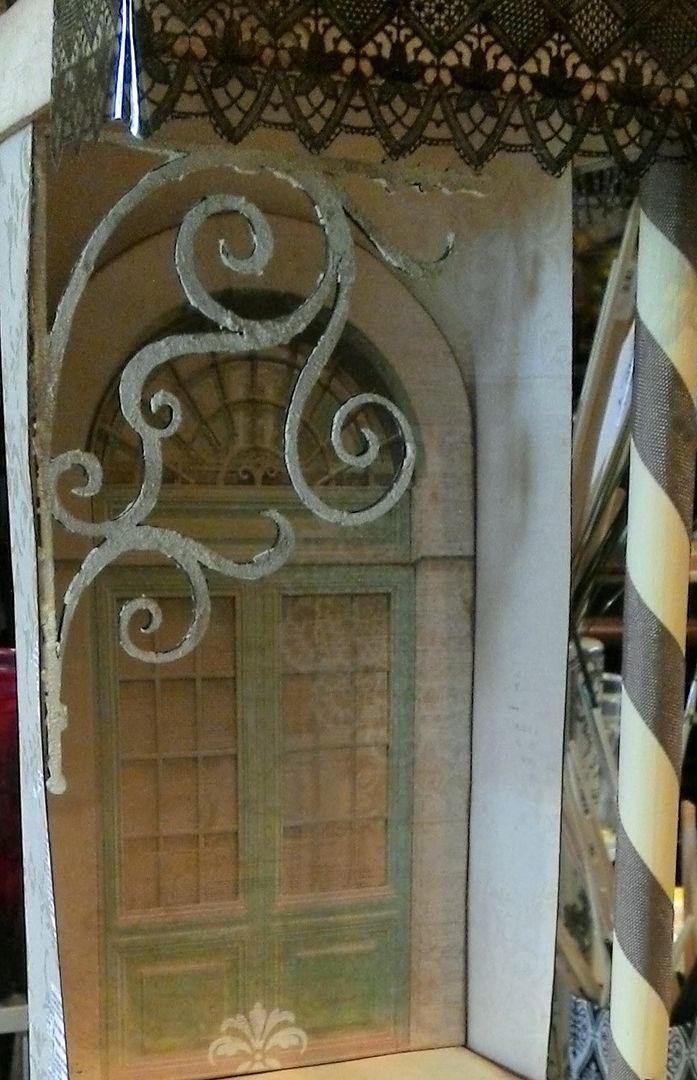
On the
inside edge I added a chipboard
corner scroll painted with Ranger
Picket Fence Crackle Paint. I cutout
a door from one of the decorative papers and attached it to
the inside, popping it out slightly with the use of double stick foam core
tape.
On the
back I added another image from the decorative papers.
Making the Skirt
Since
the image I was inspired by had only the top half of a dress, I needed to
create a skirt. First, I set out to make
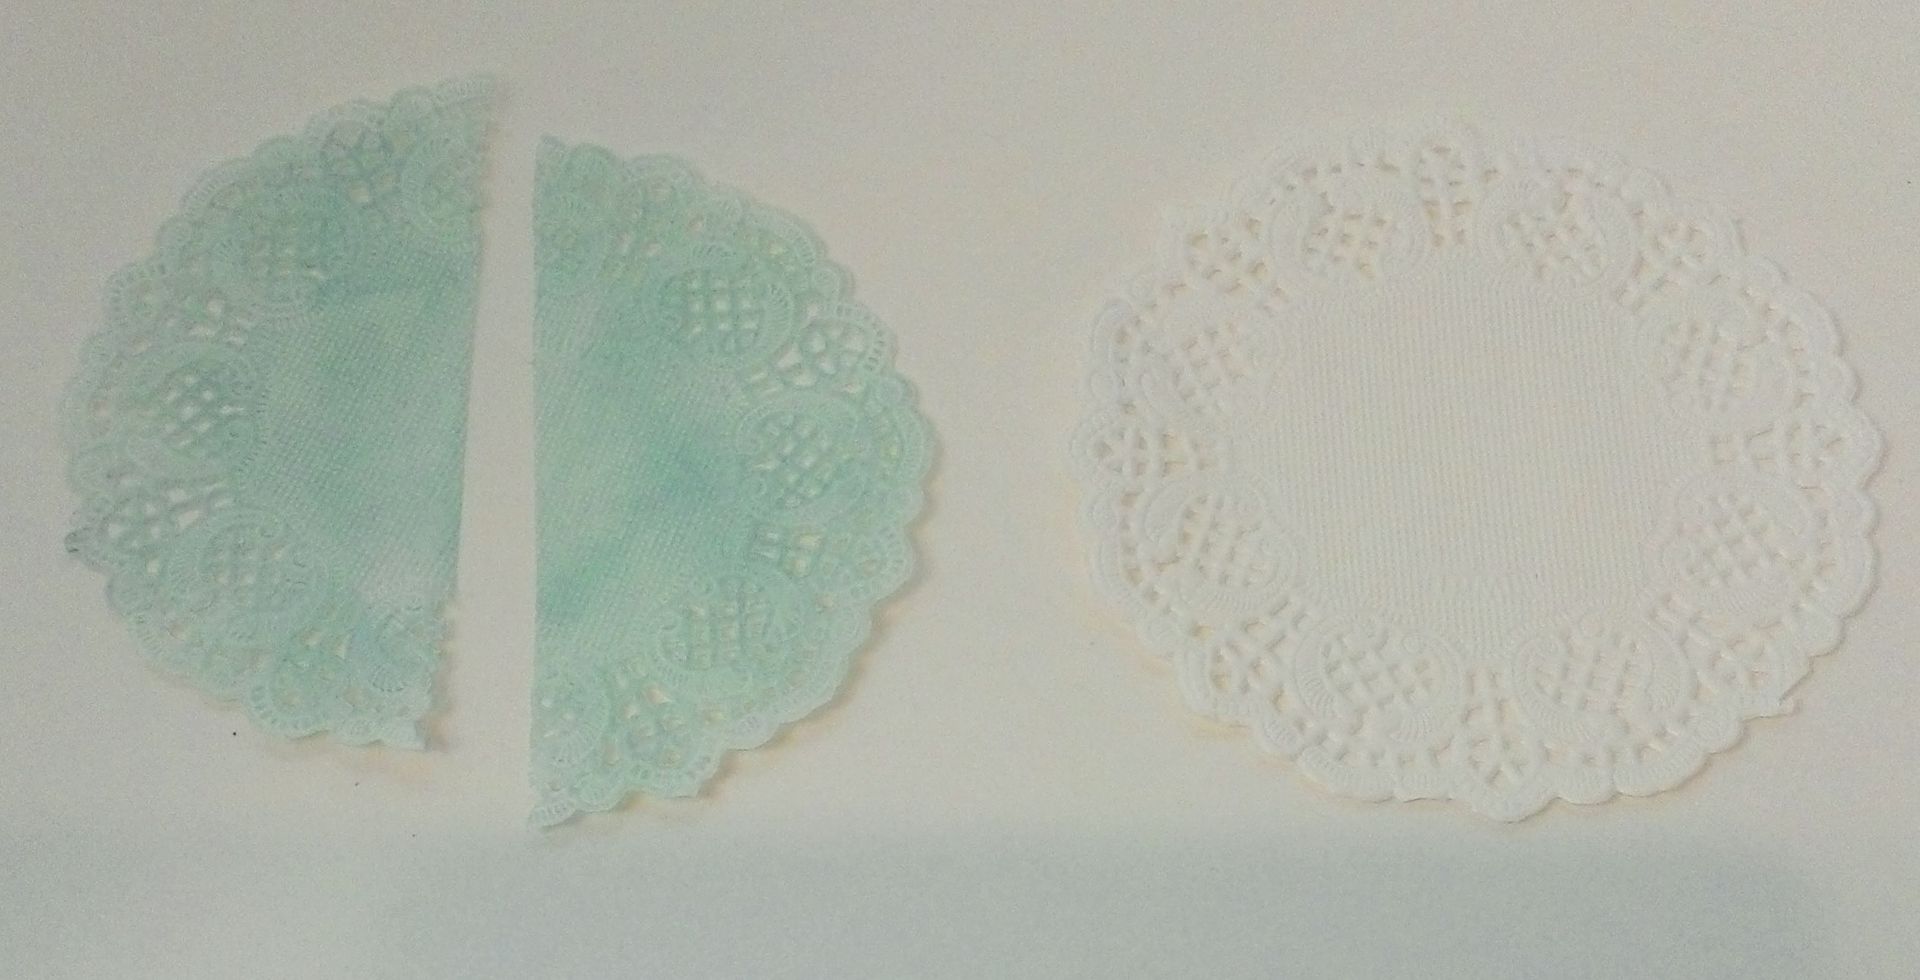
a bustle from a paper
doily. I inked both sides of the white doily with Tumbled
Glass Distress Ink and cut the doily in half.
Starting with 1/2 or the doily, I
folded the doily in half.
I
folded the doily in half again.
I
folded the doily one last time. The
doily is now folded three times.
Next, I
unfolded the doily. The purpose of the
folding was to create fold lines to make it easier to accordion fold the
doily. Folding it first created equally
spaced fold lines which would have been hard to make if you tried to accordion
fold the doily with no fold lines.
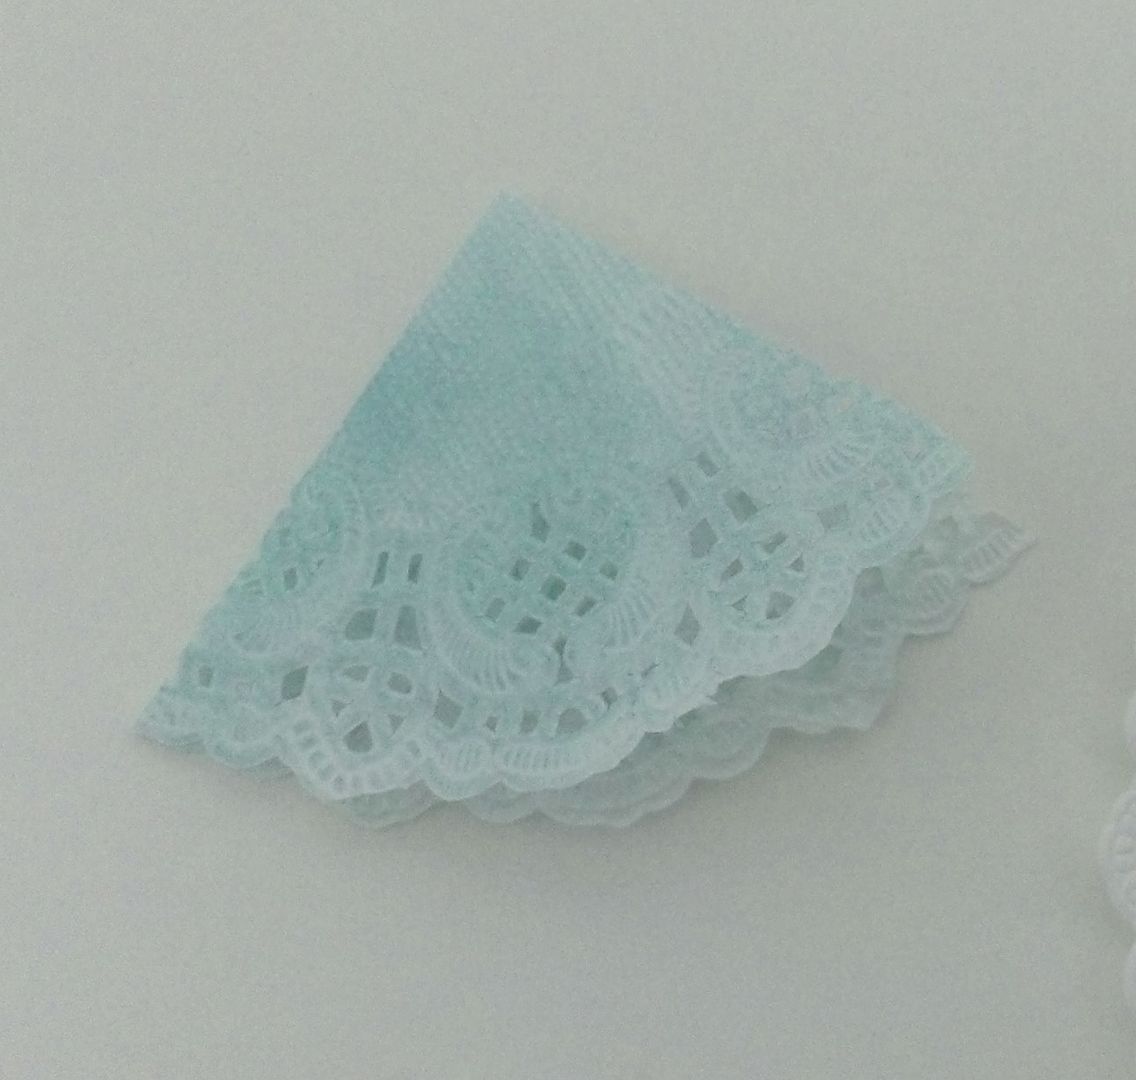
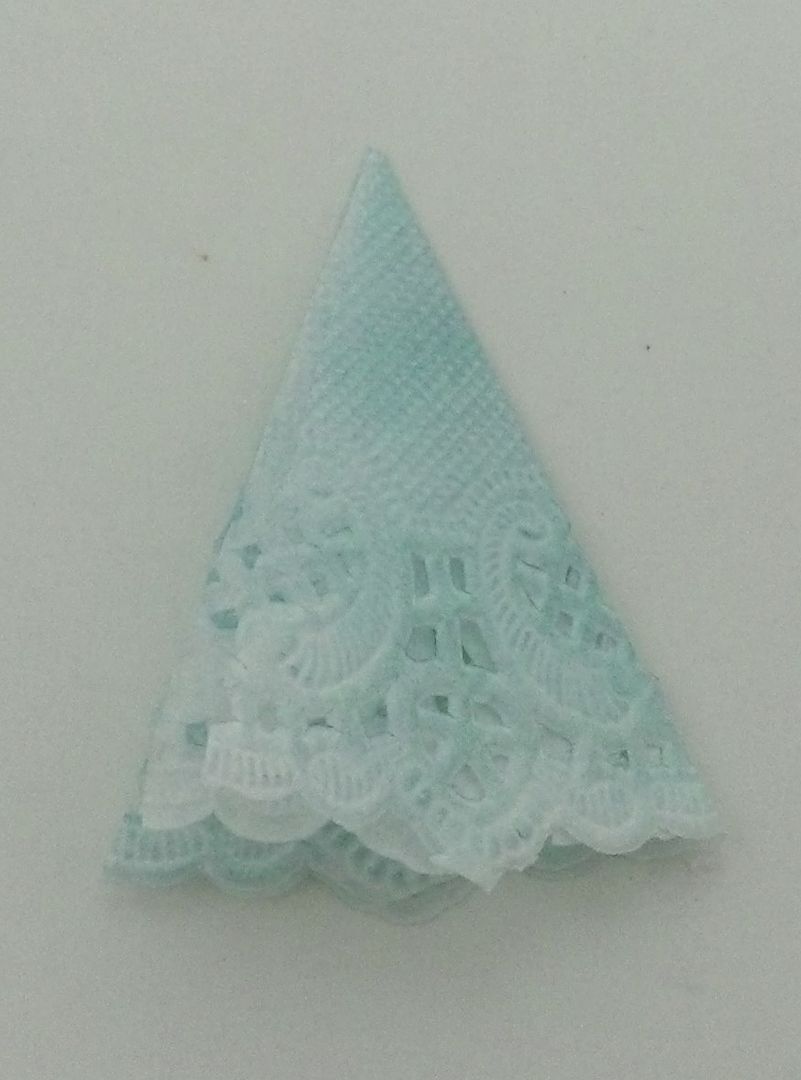
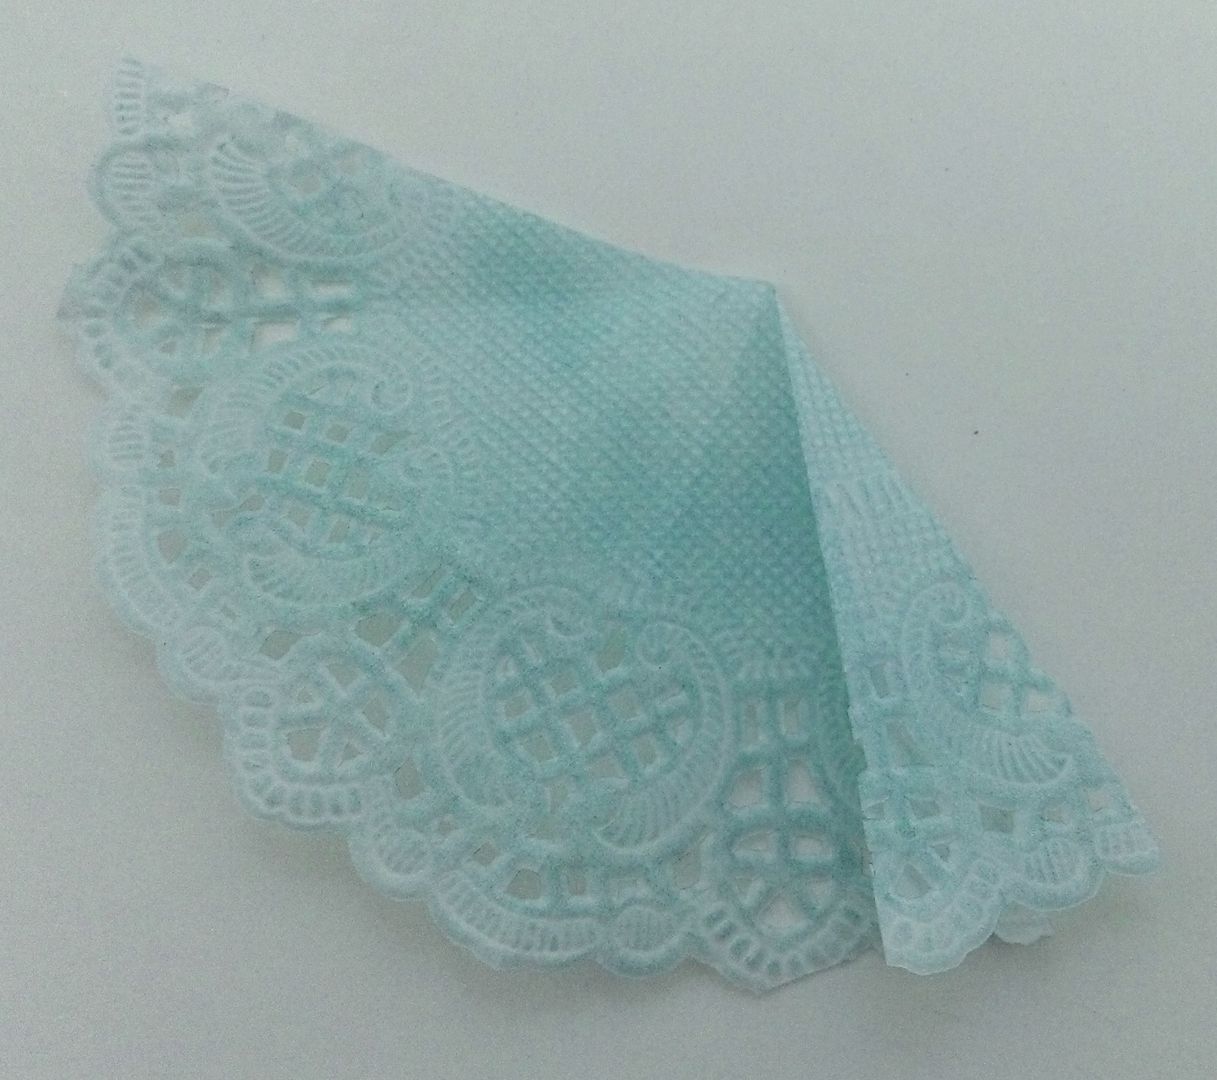
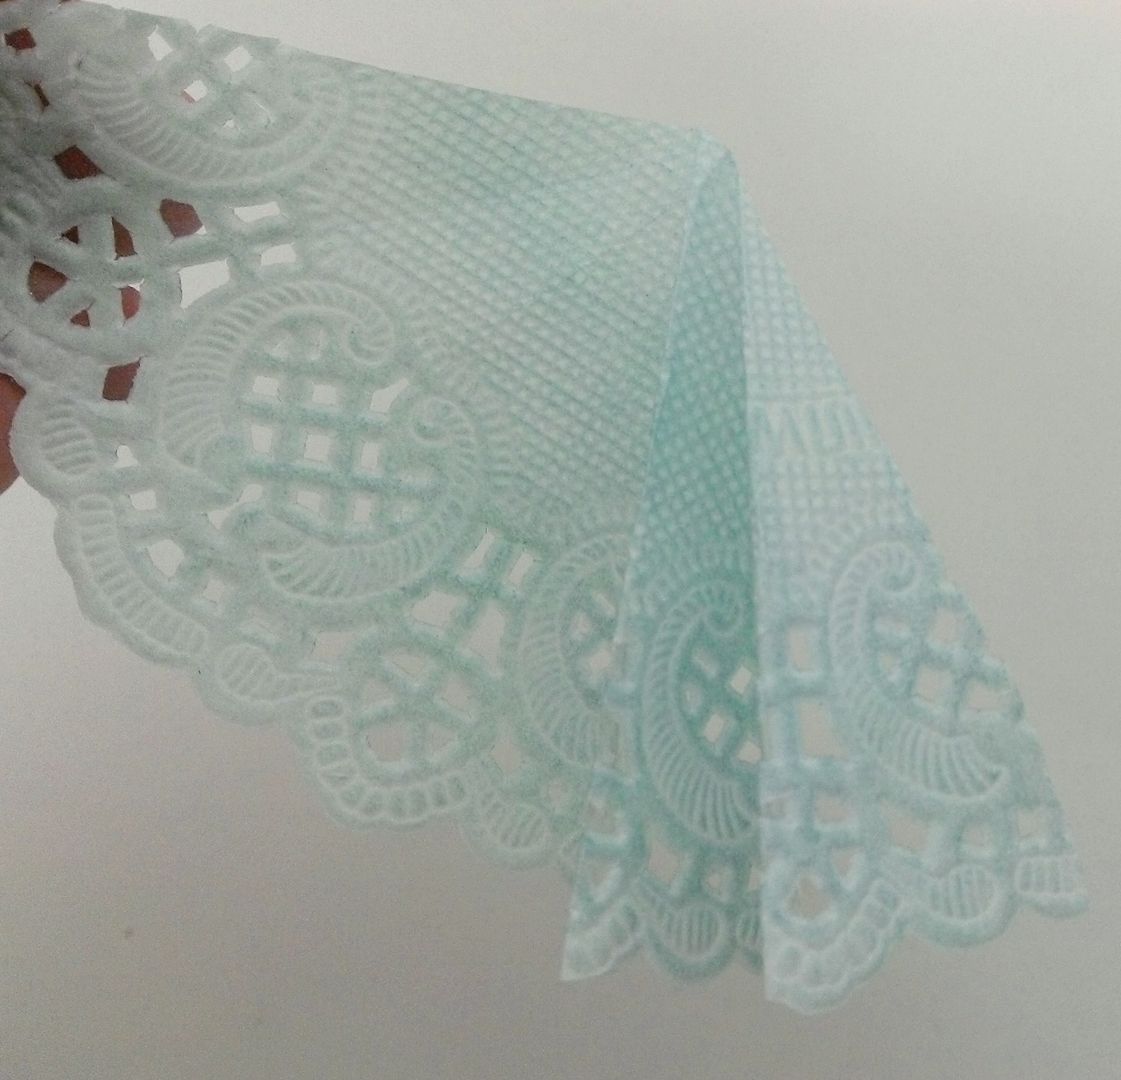
I
started accordion folding the doily starting at one end using the pre-folded
lines as a guild.
Continue
accordion folding the doily along the guide ines until you reach the end. You should end up with a half doily that
looks like the picture below. I repeated
the same process for the 2nd half of the doily.
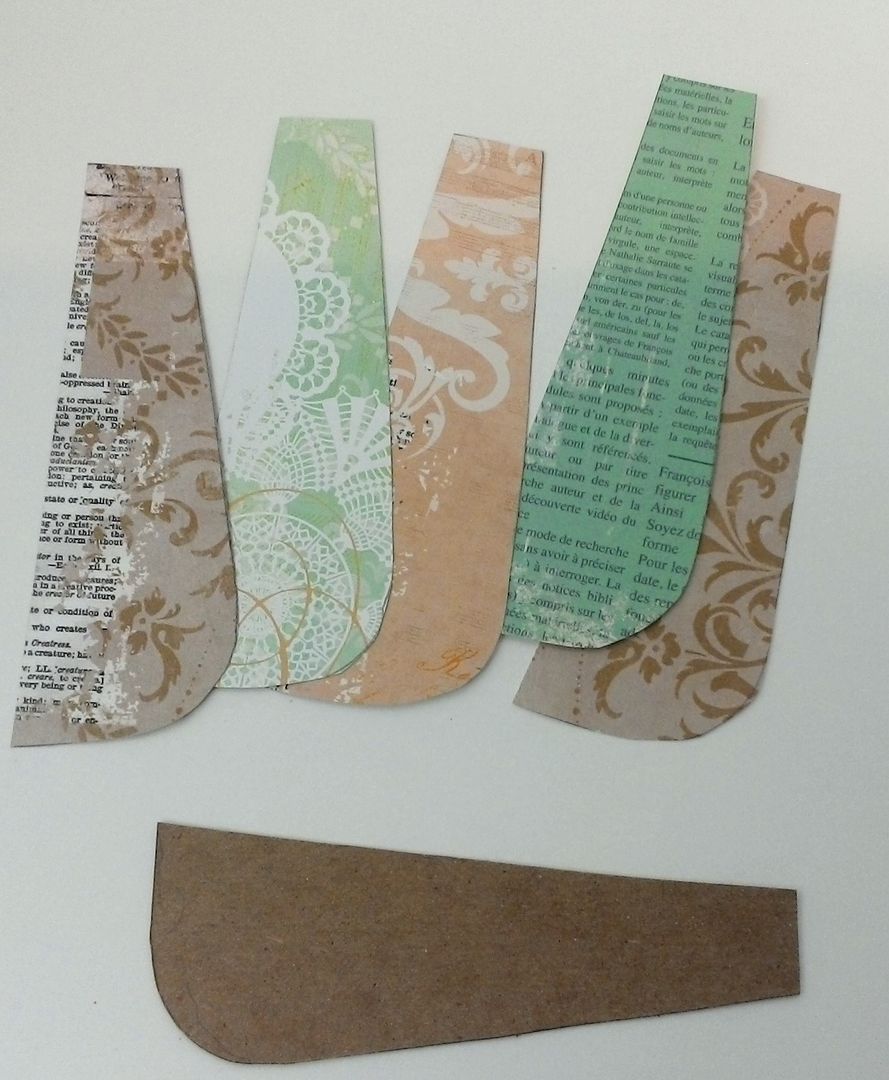
Next, I
made panels for the skirt.
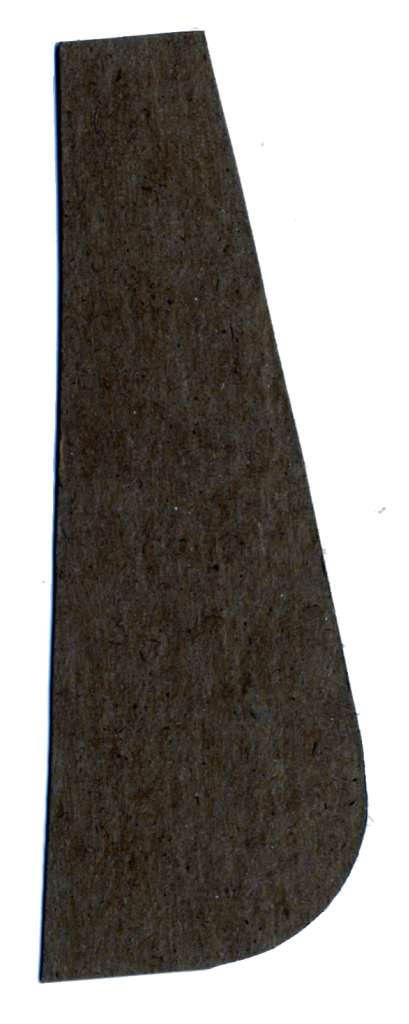
I
started by creating a template made from lightweight chipboard. Below is a scan of the template I used. Feel free to download it and use it if you wish.
Using
the pattern, I cut 5 panels from various patterned paper and glued the panels
together. In deciding on their placement
I used the bottom of the bodice as my guide.
Next, I
attached the paper doily bustles to the panels again using the bodice as my
guide.
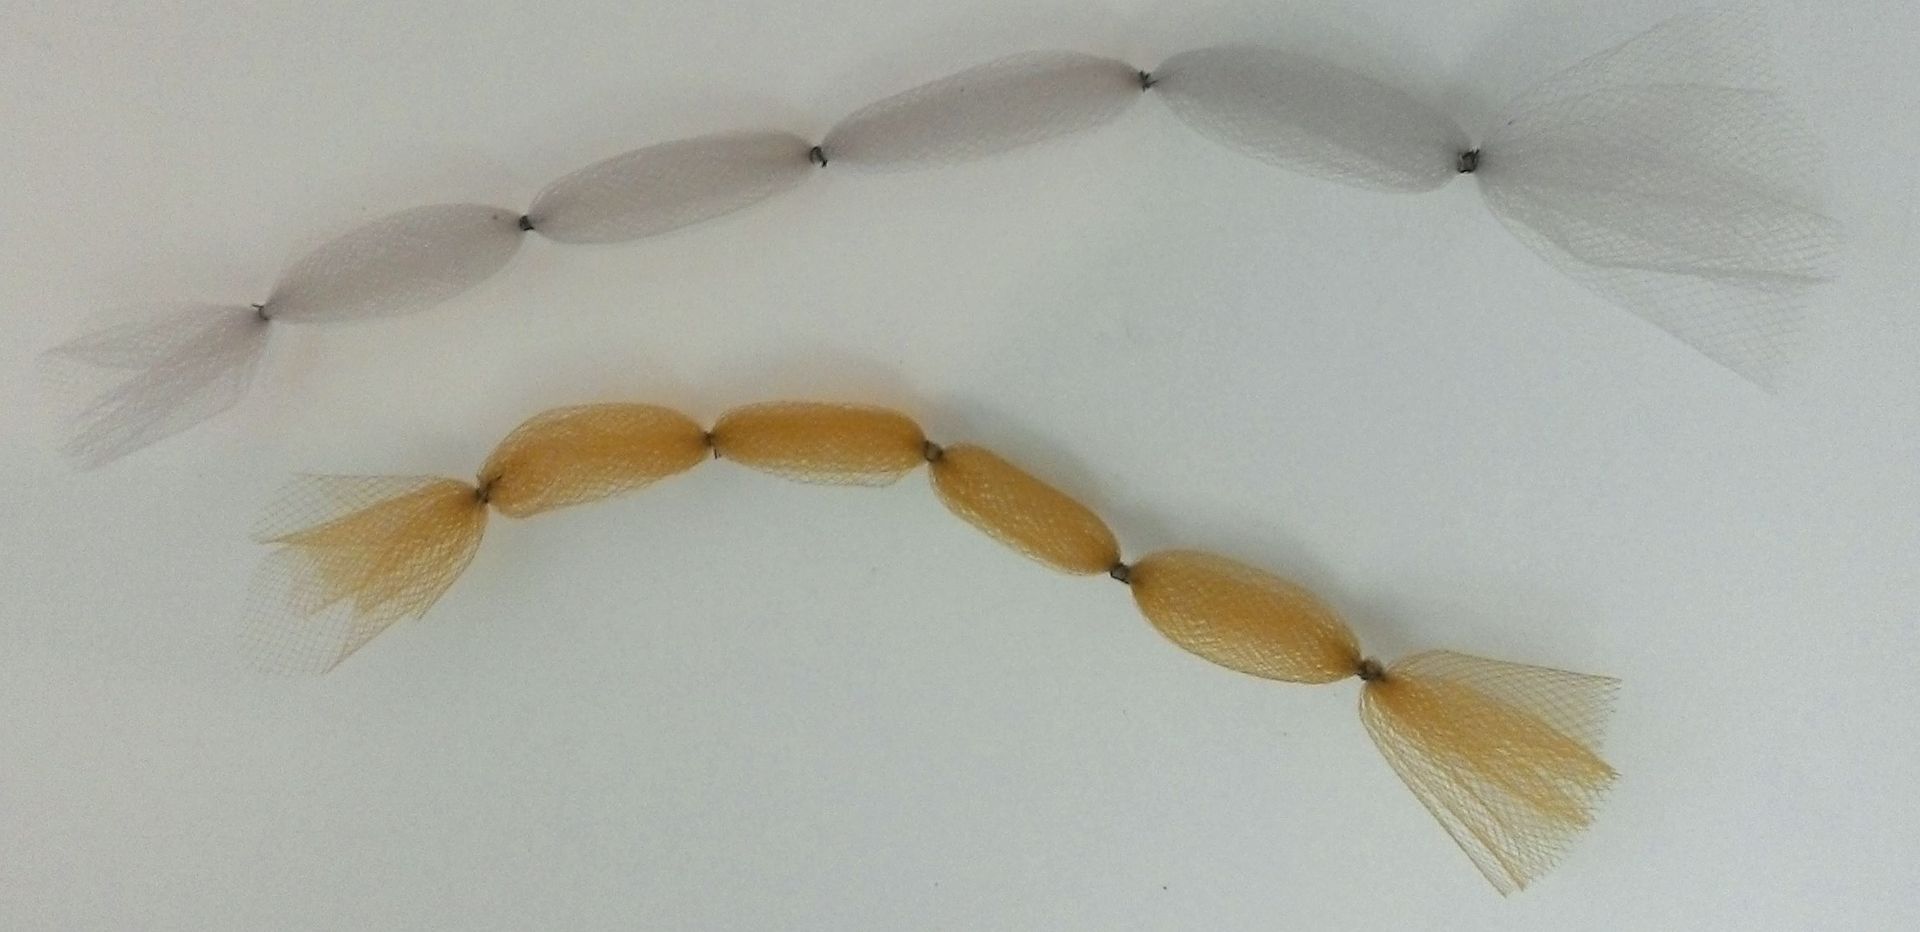
To
decorate the bottom of the skirt I used two pieces of different colored
tulle netting
gathered by wrapping thin wire around the tulle. I made the spaces between the gathers wider
on one piece of tulle than on the other piece of tulle. The difference in spacing was because the
wider-spaced tulle was going to be placed on top of the other piece of tulle
and I wanted it to puff out more.
I
attached the darker or shorter piece of tulle by gluing down each wrapped wire
and then gluing the rough ends behind the skirt.
Next, I
glued the longer tulle piece on top of the shorter one in the same manner. I used paper roses to add more decoration and
to cover the wire.
In
order to attach the woman to the base of the diorama, I glued flat toothpicks to
the bottom of the skirt. I also glued additional
paper panels to the back of the skirt to support the toothpicks and to hide the
rough edges of the tulle.
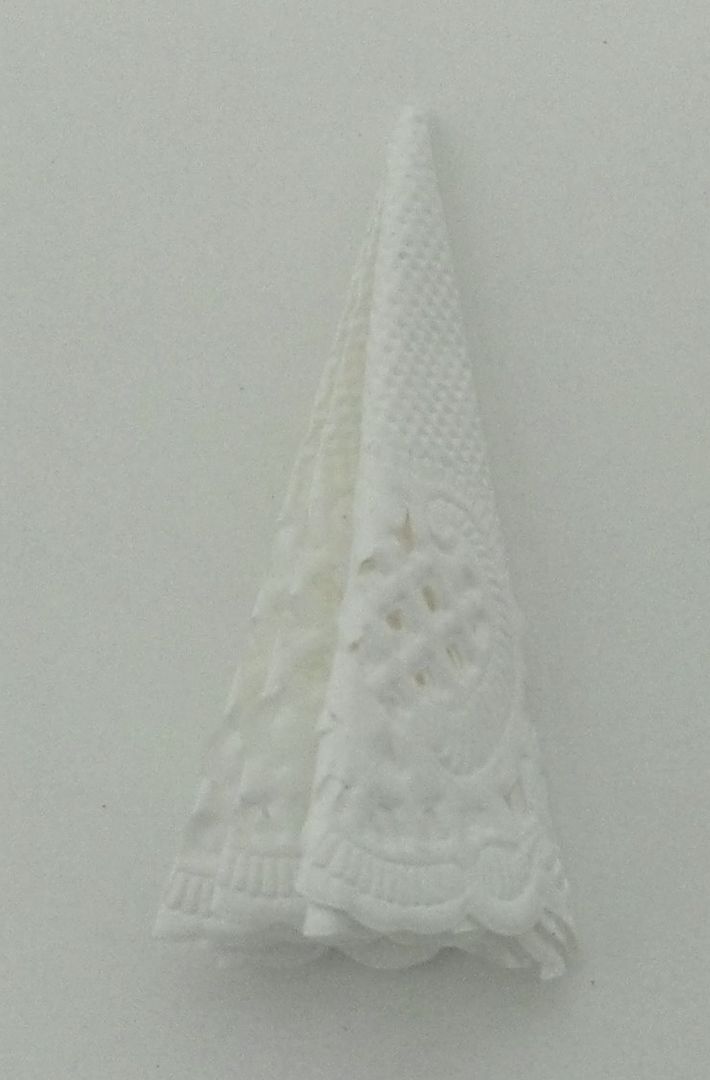
Making the Doily
Parasol
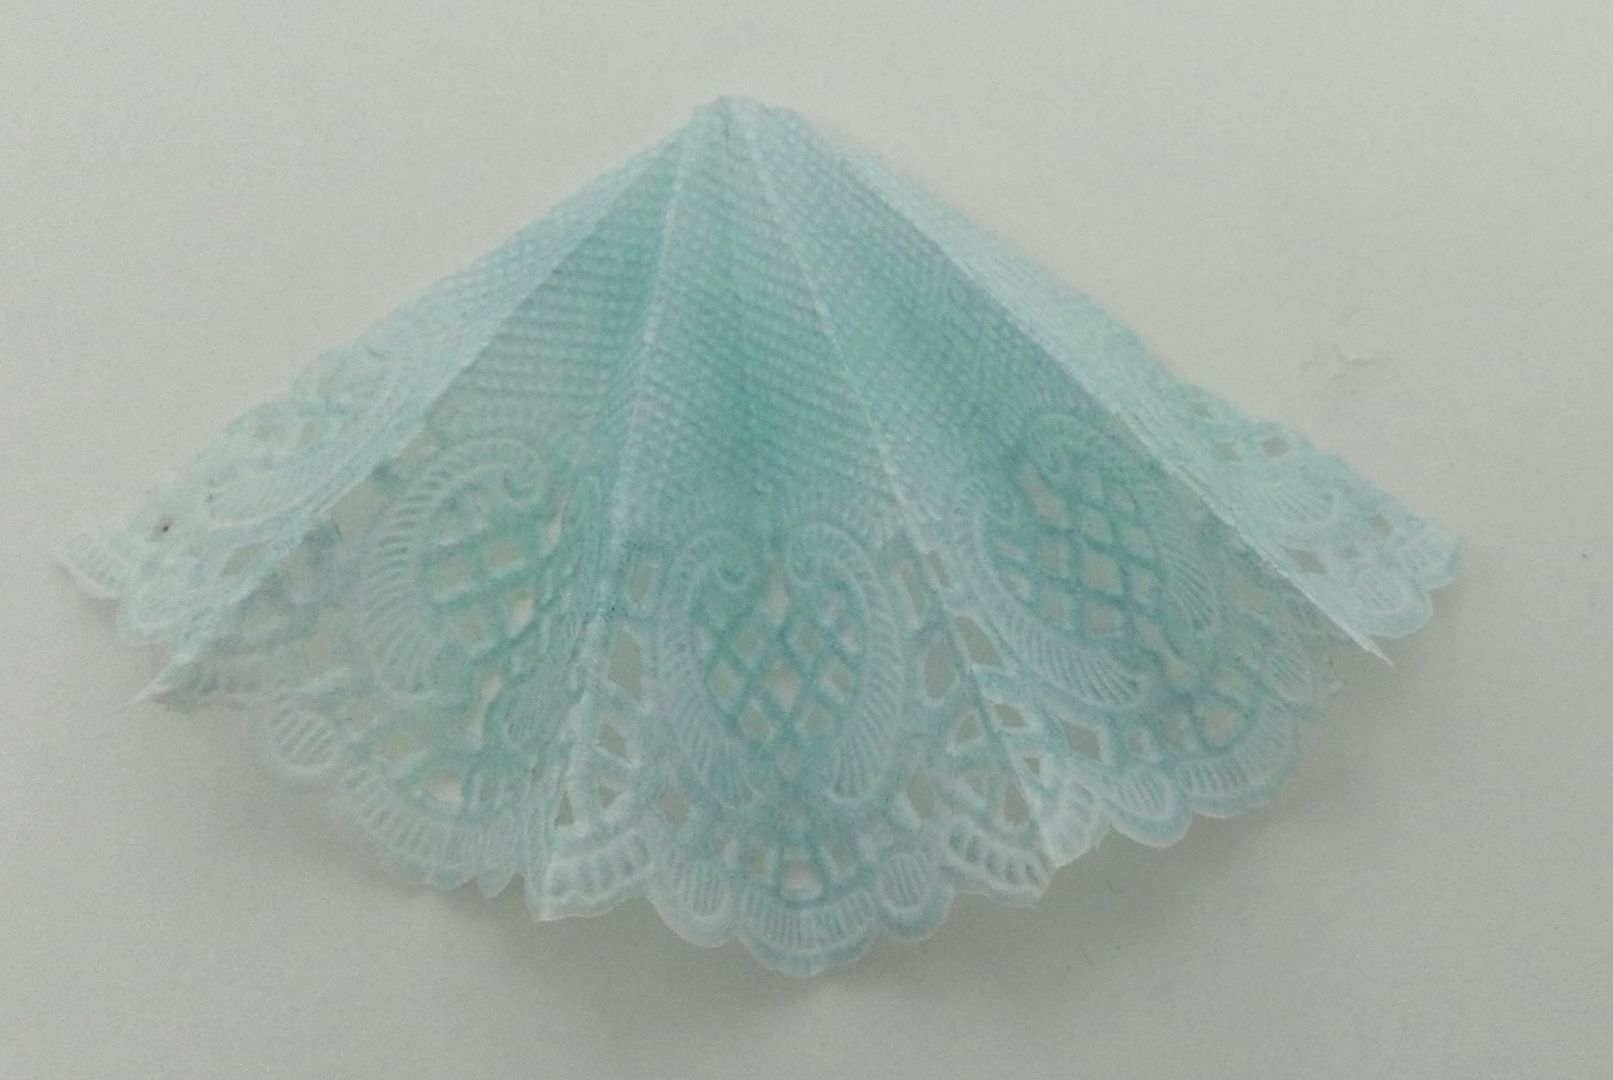
After
playing with the doily to make the bustle I decided it would make a lovely
parasol. First, I folded a full doily in
half, then in half again 3 times which was about as many times as you could
fold it.
Next, I
opened up the doily and used the fold lines as a guide to help me accordion
fold the doily (just like with the bustle).
Just pick a place to start and keep folding until you come full circle.
To jazz
up the parasol, I used tiny ribbon bows.
The handle is a wooden skewer and the end is a brass box foot that just
happened to fit the skewer perfectly.
When gluing the handle to the doily I pinched the bottom of the doily to
the skewer and glued it in place inside.
This helped keep the parasol partially closed.
Finishing Touches
Whenever
I’m working on a project and I’m almost finished I invariably decide that it needs
more touches here and there. In the
pictures below you can see that I decided to add a chipboard foliage piece
accented with a piece of brass filigree behind the clock. I also glued tulle to the top and wrapped it
around the column. At the point of
attachment, I wrapped a brass leaf and bird
piece
around the column.
Using
the box lid for the top of the diorama provides a great place to hang stuff as
you see with the birdcage below. At the
base of the piece, I added rondelles
threaded with two different colors of seam
binding. I also added gold
metallic Dresden to the top and bottom to trim up the pieces.
I poked
holes into the bottom of the box to accommodate attaching the lovely Victorian
lady. I used a very liberal amount of
E6000 glue underneath the box to keep her in place.
I hope
I have demonstrated to you how easy it is to create the base for a diorama that
can be customized for any theme and that you are ready to create one for
yourself!