-->

Welcome

I love answering your questions. If you ask them in the comment section, I have no way to answer you (if you haven't heard from me, that is why). If you use the "EMAIL ME" in the left column of this page, I will be able to respond to you. You can also use it if you want to be added to my newsletter. Laura

Monday, October 31, 2016

HAPPY HALLOWEEN - FREE COLLAGE SHEET


My treat for you on this spookalicious day is the Halloween Spooky Background collage sheet pictured above.  The backgrounds are ATC sized but would also work for cards and other collage projects.  Feel free to download it and use it in your artwork.  
HAPPY HALLOWEEN!!!!

Saturday, October 22, 2016

MOONLIGHT SERENADE 3D GRANDFATHER CLOCK – NEW COLLAGE SHEETS

I thought I would take a short break from Halloween projects with this moon-themed 3D grandfather clock.  Clocks lend themselves to all kinds of creative possibilities and themes, which caused me much angst in deciding which way to go before I settled on the moon theme.  No doubt you'll see me do something else with this clock in the future.

The clock is made from a chipboard kit, making assembly easy.  In addition to the large clock kit I used in this project, Alpha Stamps is also carrying a smaller version that is 1:12 scale in size. 

I’ve created a new Large Grandfather Clock Facades Collage Sheet to complement the clock kit.  The moon-themed images I used from the sheet are just one of four different themes to choose from, which also include Alice in Wonderland, Steampunk, and Halloween.
To add more whimsy to the clock, I created a new collage sheet of costumed characters dressed as Harlequin, Columbine, and Pierrot.  You’ll notice that Pierrot appears on the front of the clock serenading the moon.

This sheet contains four different themed facades, sized to fit the large 3D grandfather clock.  The themes are Alice in Wonderland, The Moon, Halloween, and Steampunk.  There are clock face images, front panel images, and decorative borders for each of the themes.
This sheet includes 9 men, women, and a cat dressed in Harlequin, Columbine, and Pierrot costumes.  Click on the image below to purchase this collage sheet.

THE CONSTRUCTION

CLOCK CABINET ASSEMBLY
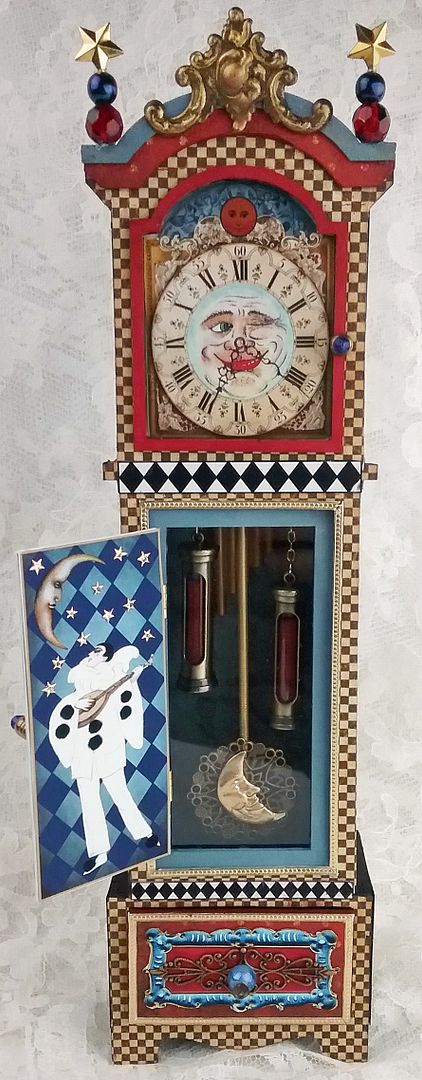
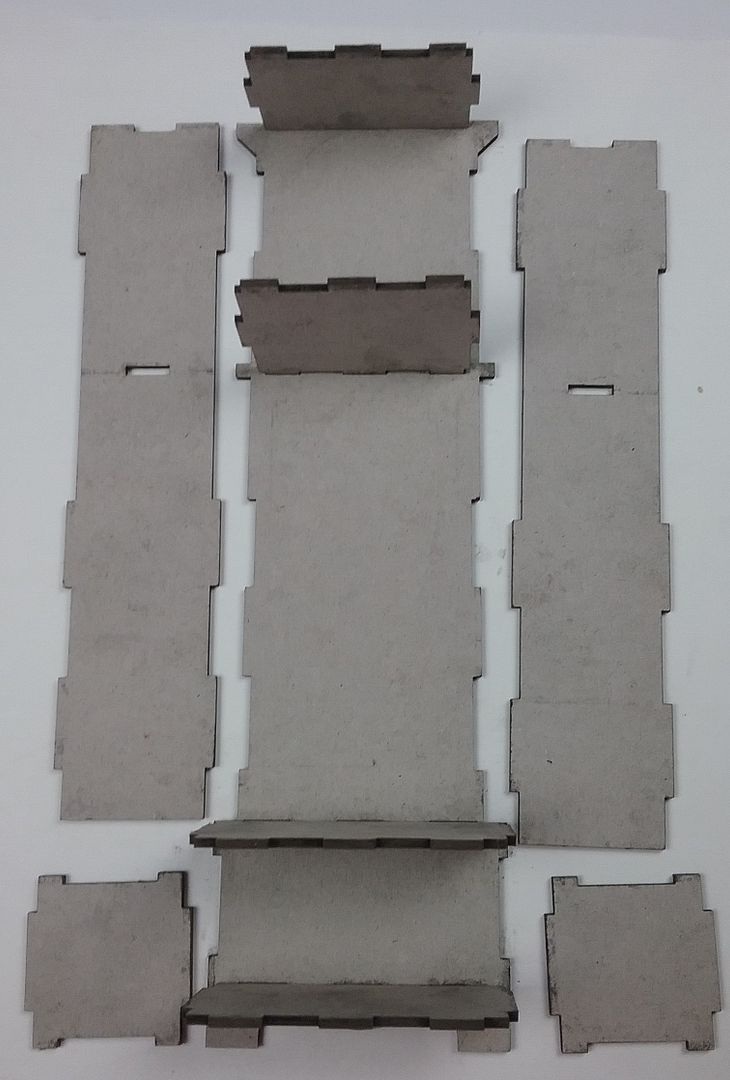
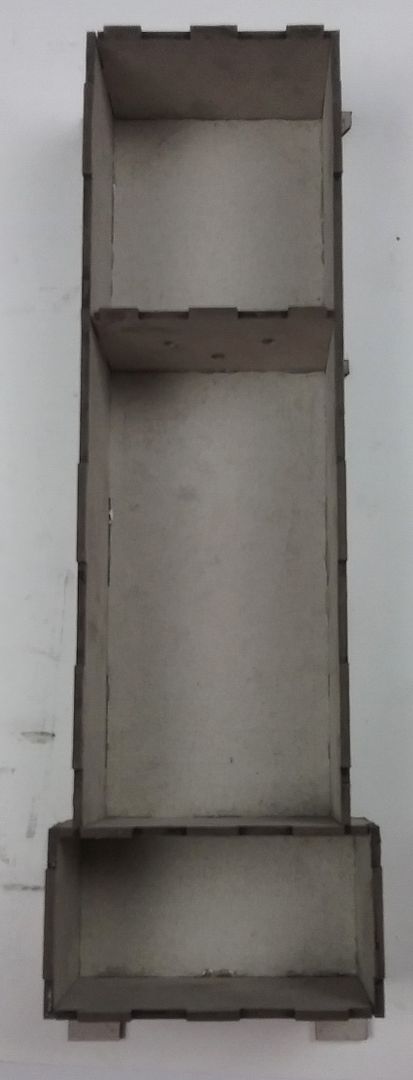
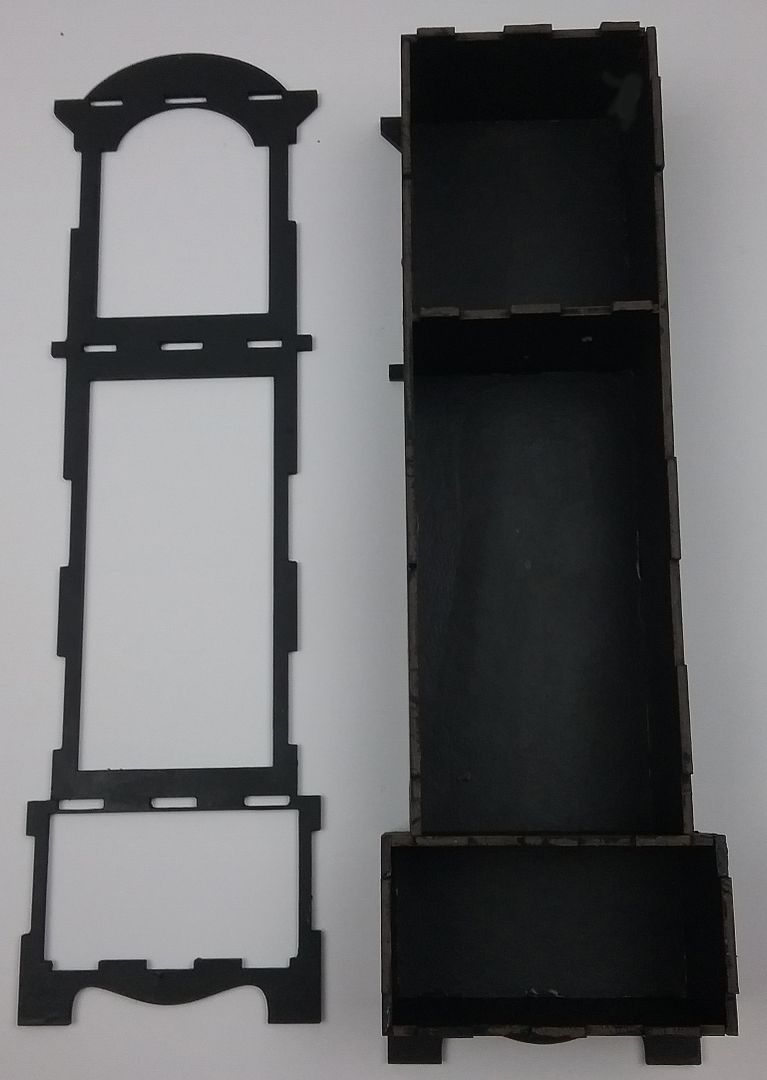
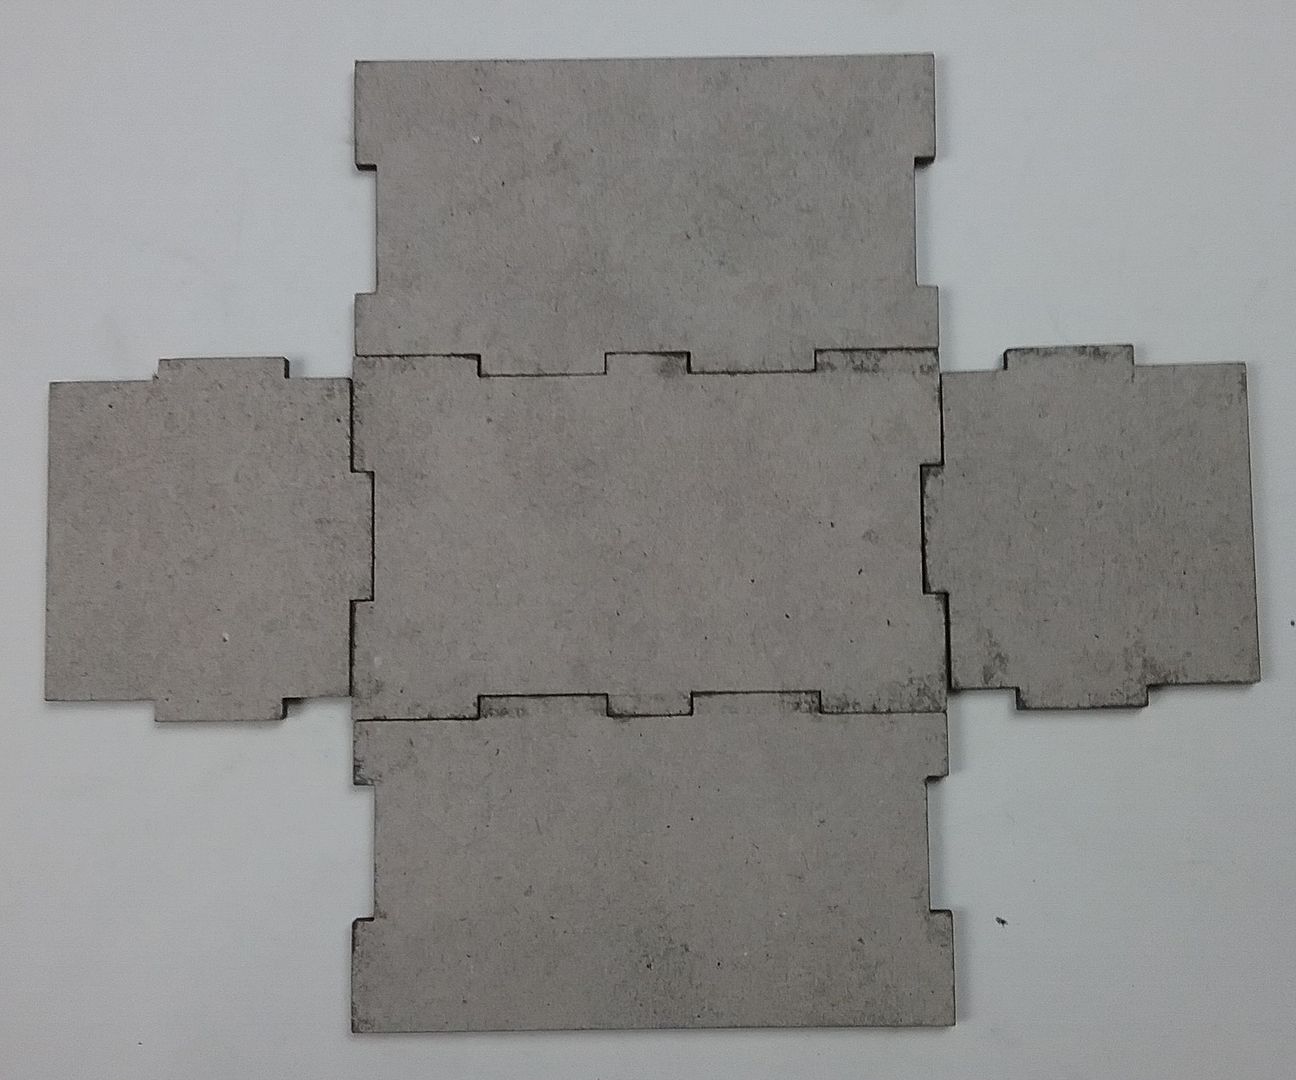
I started by assembling the clock cabinet.  Below are pictures to help you see how the pieces fit together.  
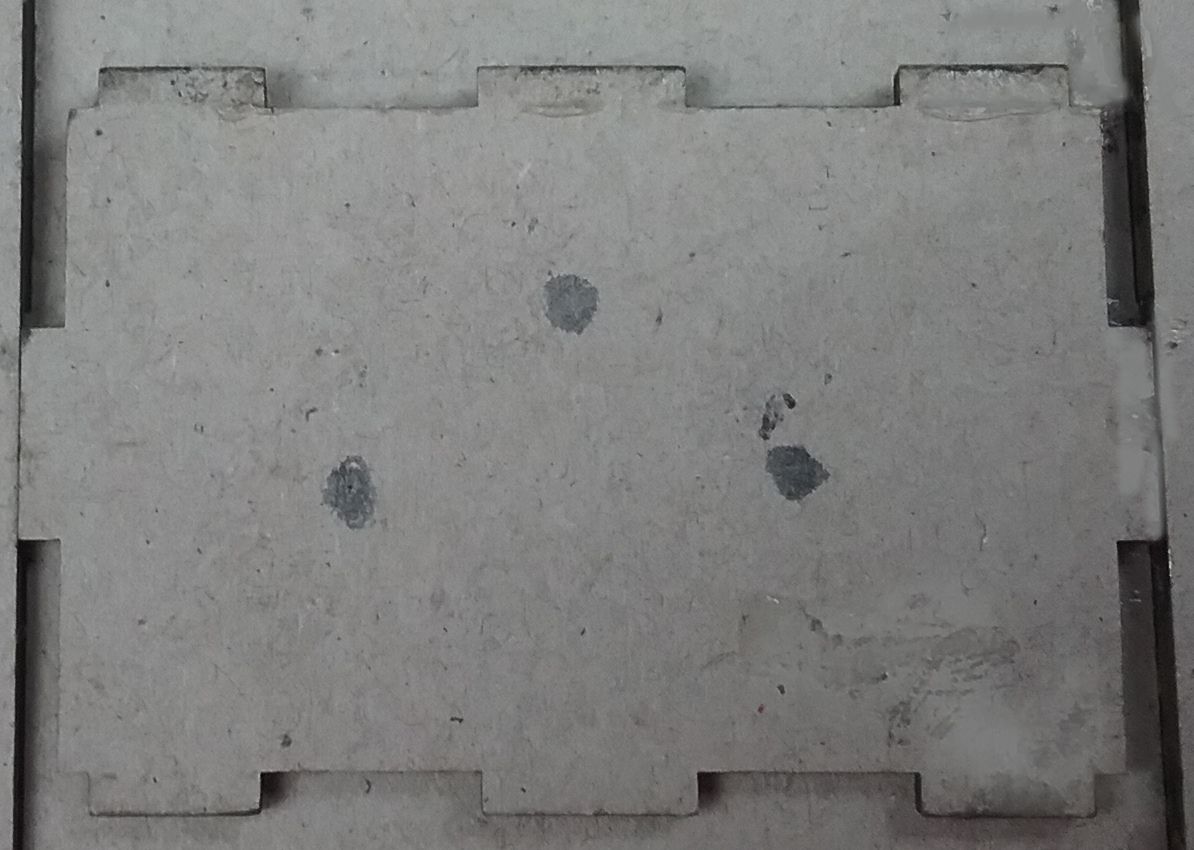
Before assembling the cabinet, I marked and punched holes for the clock weights and pendulum. 
Next, I assembled the cabinet and painted it and the clock front black. 
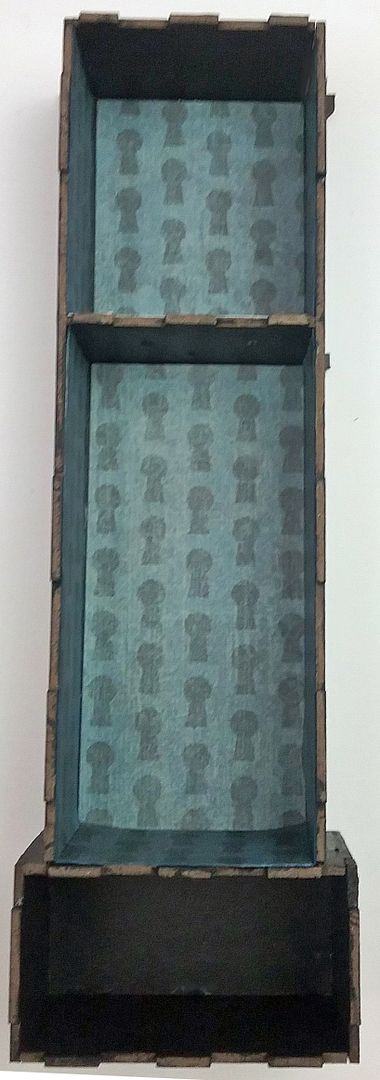
I then papered the inside of the clock cabinet and re-punched the holes.

CABINET MIDSECTION
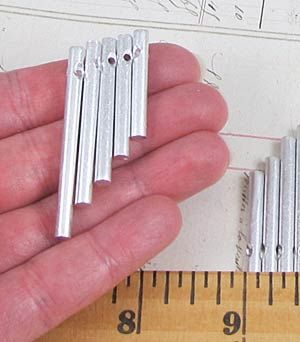
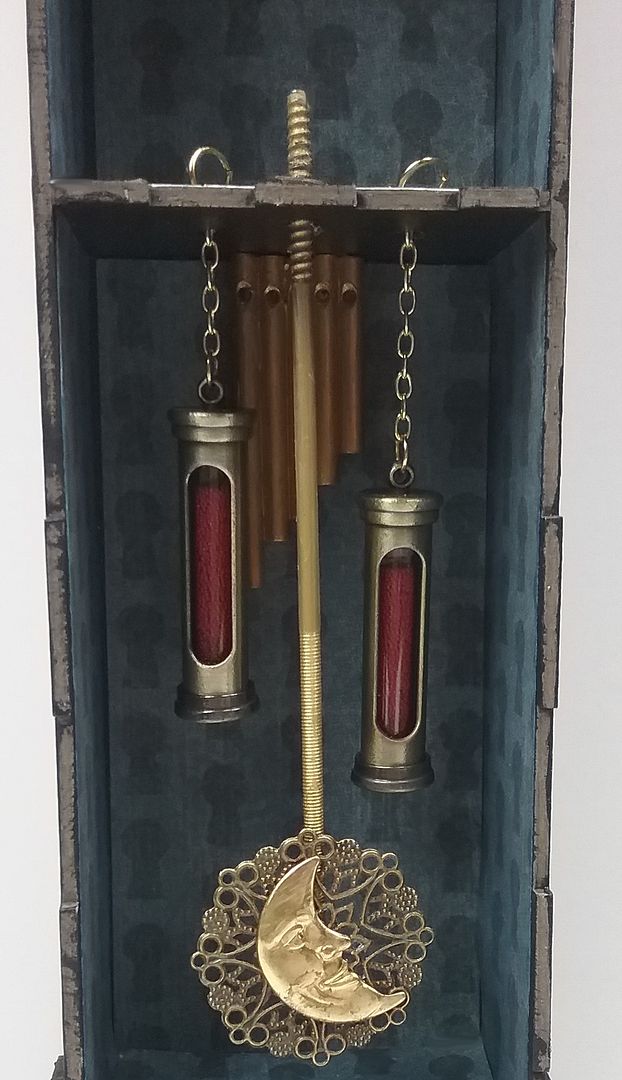
For the inner workings of the middle section of the cabinet, I started by gluing chimes that slightly popped up from the back of the cabinet.  The chimes are made from Mini Silver Wind Chimes that are glued together and painted gold.  
The weights are Mini Glass Tube Pendants filled with microbeads.  You can pull off the bottom of the tube pendants to access the glass tube inside.  I hung the pendant weights on chains and then used a jump ring on the other side of the chipboard divider to keep the chain in place.  To ensure that the pendant's opening faced forward (so you could see the beads inside), I added glue to the jump ring, which keeps the chain from twisting.
The pendulum is a metal rod from my stash, filigree, and a brass moon.  I inserted the rod through the hole and glued it in place.  For extra support, I slid a rondelle onto the rod and glued it in place. 

If you choose to hinge the clock face to the clock cabinet, you will want to hide the area with the jump rings and rod.  An option to cover that area would be to use the drawer of a matchbox turned upside down.  The compartment is deep, so there is plenty of room for the matchbox drawer.  In the case of my moon clock, the clock face is glued in place, so there was no need to hide the jump ring and rod or to worry about the ugly-looking glue.

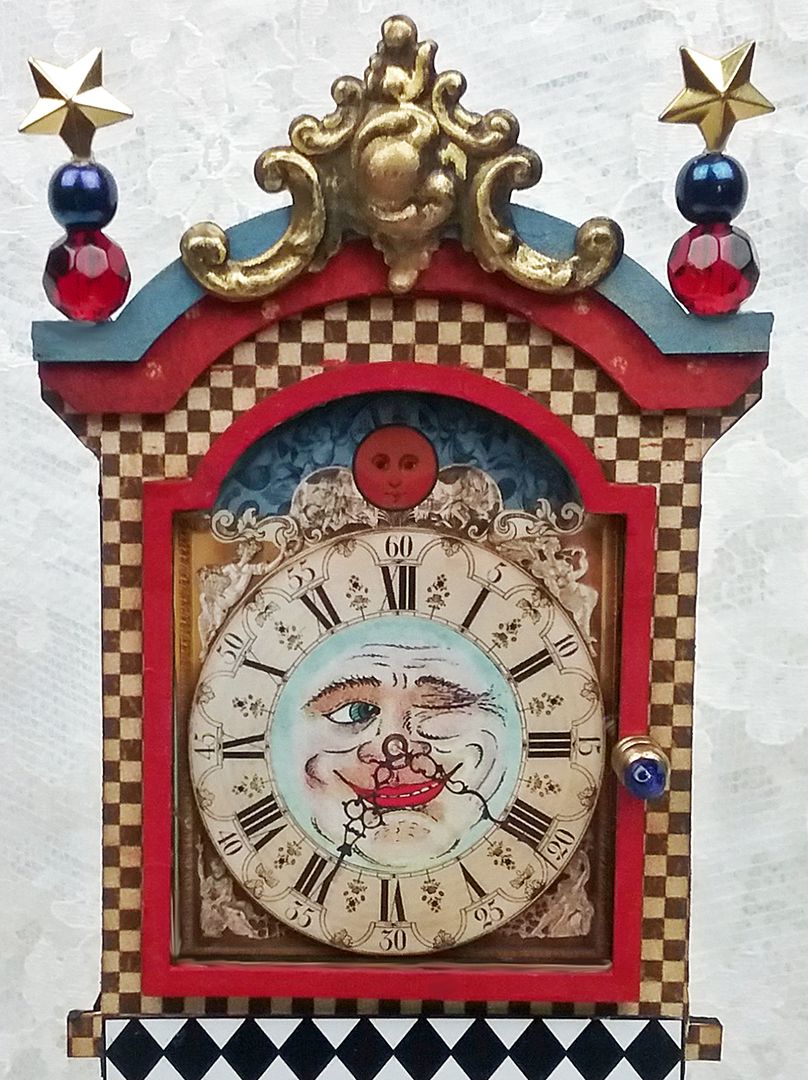
CLOCK FRONT - CLOCK FACE

I started by papering the front side of the clock front with tan and brown checkered paper from my stash (the back side is painted black).

With this kit, you can have the clock face fixed in place, or you can hinge it to the clock front, which then gives you access to the clock face compartment.

If you were going with a Steampunk theme, it would be cool for this section to open and see the clock's inner workings.

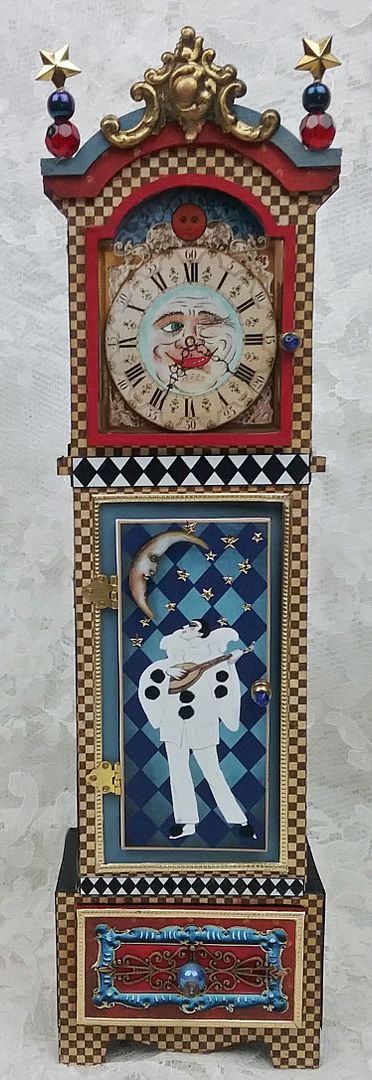
For my moon clock, I chose to glue the clock face and frame to the clock front.  

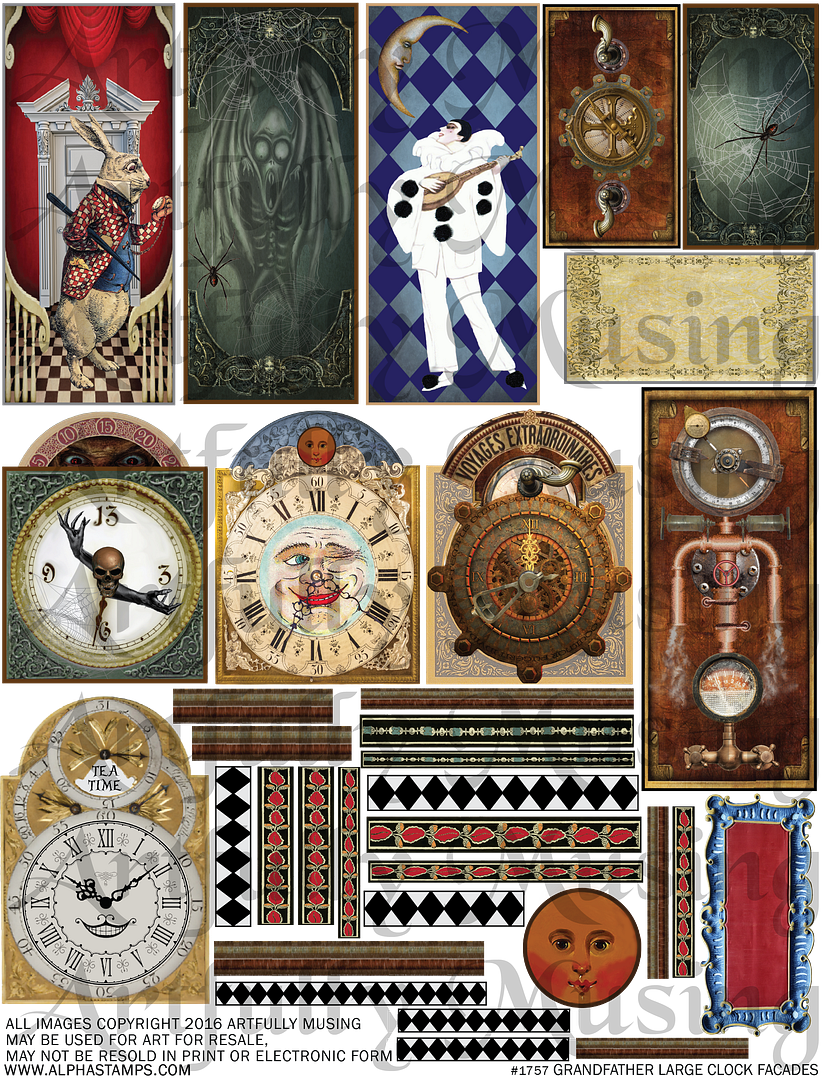
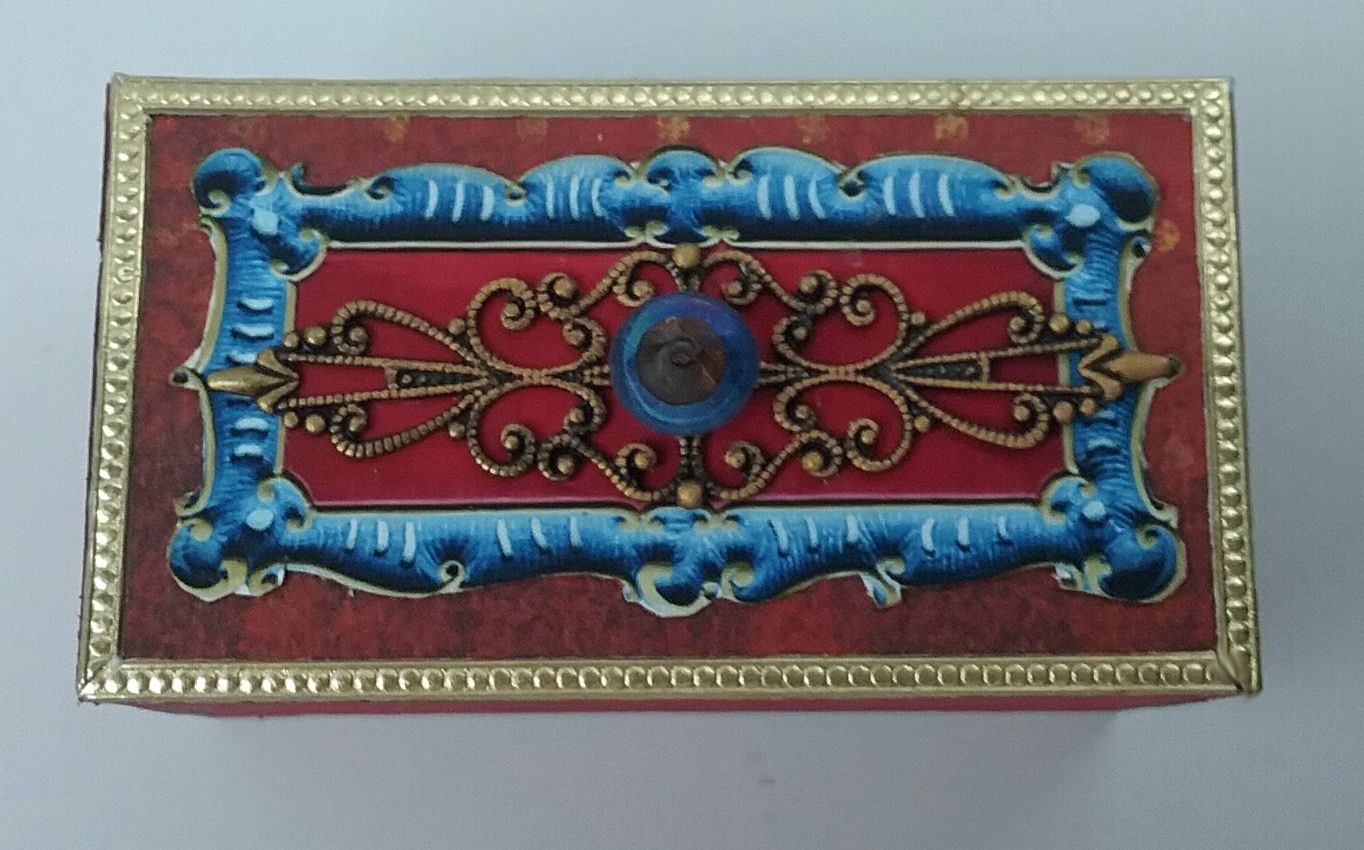
Between the image of the clock face (which comes from the Large Grandfather Clock Façade collage sheet) and the clock face frame (painted red), I glued a piece of clear plastic to serve as faux glass.  I used a raw brass box foot and a bead as a faux pull.

The kit comes with two chipboard trim pieces to dress up the top of the clock.  I papered one with Double Dot Vintage Wild Berry scrapbook paper and painted the other blue.

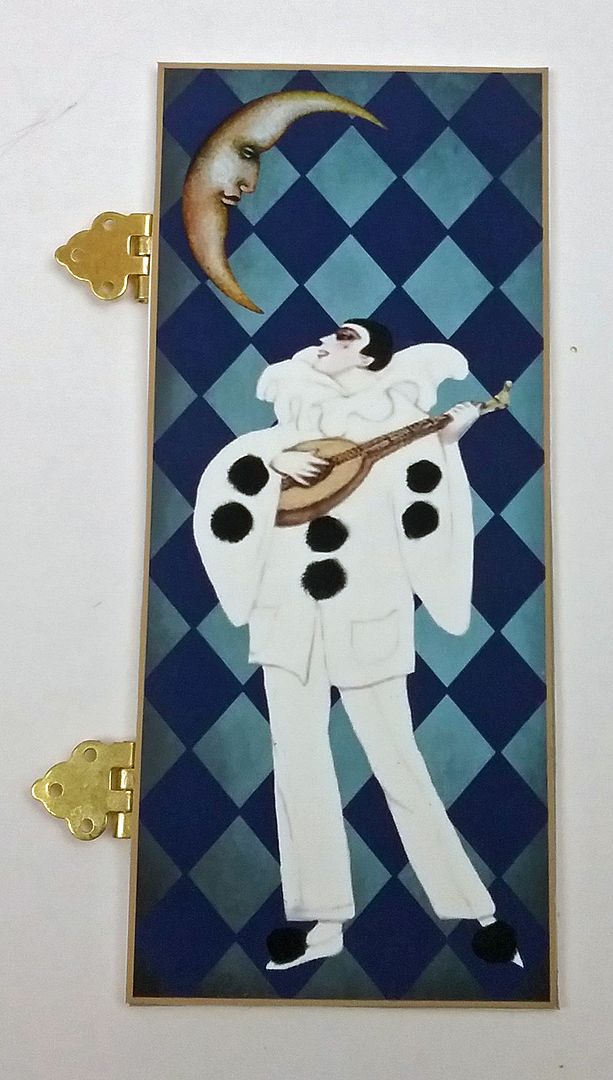
CLOCK FRONT – MIDSECTION
Just as with the clock face area, you have an option as to how you want to view the middle of the clock case.  You could just glue the frame in place and leave it open to view the weights, pendulum, and chimes, or you could add a hinged panel that opens to view the area.

For my moon clock, I decided to add a hinged door using an image from the Large Grandfather Clock Façade Collage Sheet.  I cut a thin piece of chipboard and glued the image to one side.  To the other side of the chipboard, I glued small hinges.  Next, I glued a second version of the image on the other side of the chipboard, thereby covering the hinges.  
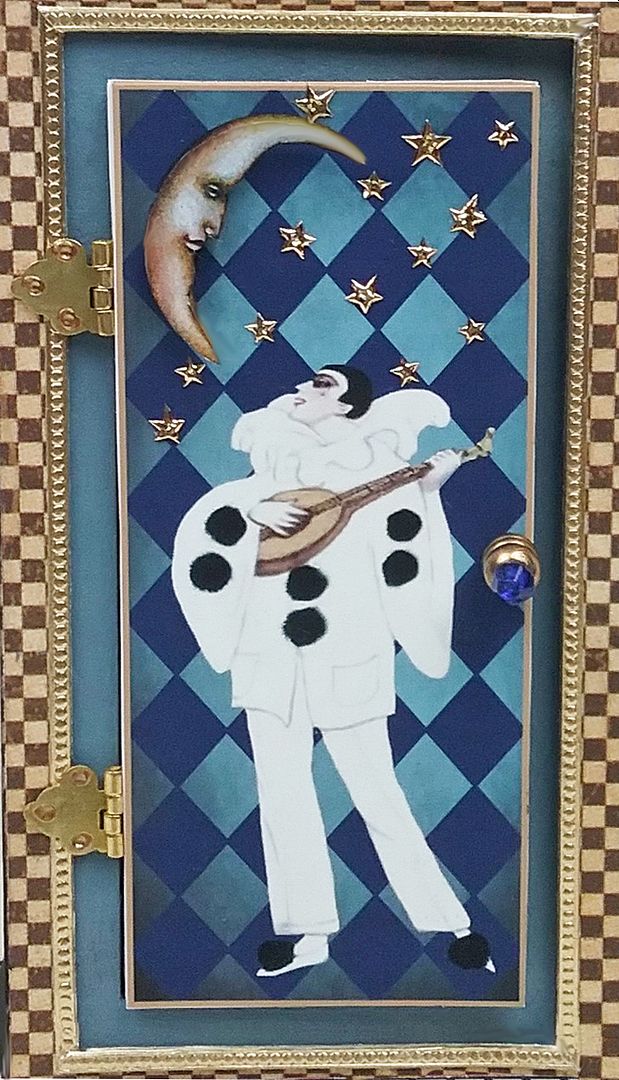
The kit includes a frame for the midsection of the clock front.  I painted this frame blue and then glued a piece of clear plastic behind the frame to serve as faux glass.  Next, I glued the frame in place.  The frame fits flush with the opening.  I trimmed the frame area with tiny gold dot Dresden borders. 

Finally, I glued the hinges to the front of the clock over the opening in the frame.  I used a raw brass box foot and a bead as the door handle.
Next, I glued the front of the clock to the clock case.  If you choose to use a panel for the bottom section, you should glue it in place before gluing the front of the clock to the clock case.

CLOCK FRONT – BOTTOM SECTION
For the bottom of the clock, you can either use the panel or drawer from the clock kit.
Below you can see a picture of how the drawer pieces fit together.  I painted the drawer red, then papered the front of the drawer with Double Dot Vintage Wild Berry scrapbook paper.  I didn't paper the sides or bottom of the drawer as I didn't want to create too much bulk that would get in the way of sliding the drawer in and out.
I added a panel from the new collage sheet, plus a piece of filigree, and trimmed the front with tiny gold dot Dresden bordersI used beads for the drawer pull.


CLOCK FRONT – BOTTOM SECTION
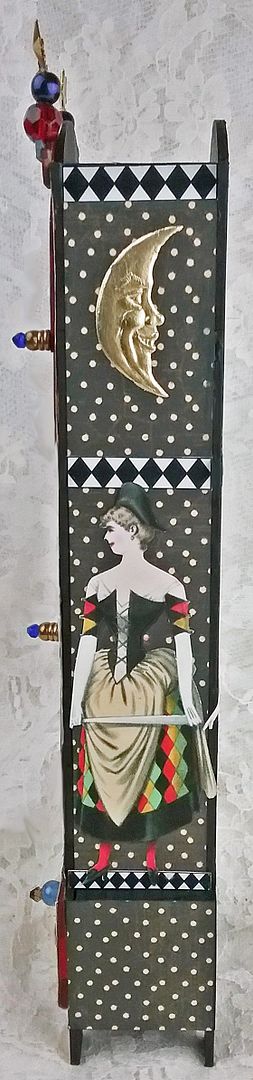
I papered the sides and back with Halloween in Wonderland – Wonderland Classifieds scrapbook paper. Waiting to paper the sides and back until after attaching the clock front to the clock case allowed me to cover up the tongue and groove areas where the two pieces fit together. 

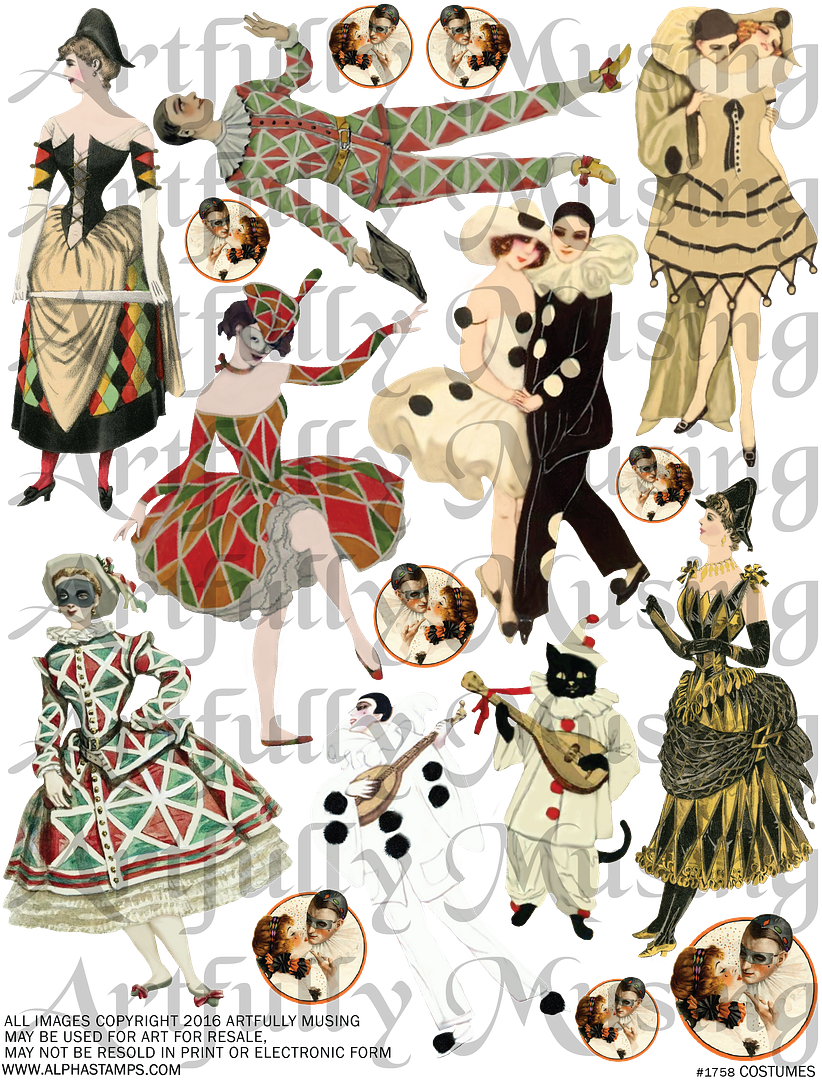
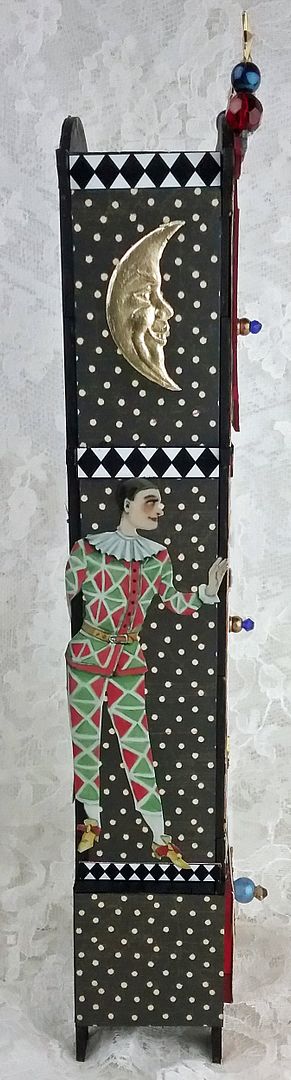
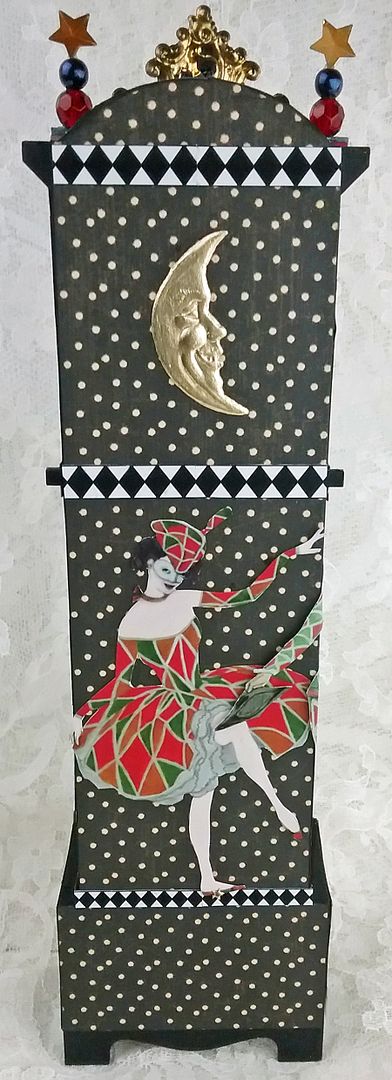
Next, I added black and white diamond trim from the new collage sheet to the front, sides, and back.  I added Dresden moons and figures from the Costumes collage sheet.


CLOCK TOP
I added a decorative brass piece from my stash to the top center of the clock.   To serve as finials, I stacked beads and gold star studs.  

DETAIL MASTER SUPPLY LIST
Double Dot Vintage Wild Berry Scrapbook Paper
Halloween in Wonderland – Wonderland Classifieds – Backside
3D Grandfather Clock Large
12x12 Clear Plastic for Windows
Mini Glass Tube Pendant
Mini Silver Wind Chimes
Flat-Back Gold Star Studs – 12mm
Red Faceted, Fire –Polished Glass Beads – 10mm
Man in the Moon – Raw Brass
Gold Dresden Moon
Tiny Curved Hinges
Thin Ornate Filigree
35mm Round Flower Filigree
Tiny Dot Dresden Borders - Gold
Raw Brass Box Feet - Rounded

Wednesday, October 5, 2016

MADAM RUE GYPSY FORTUNE TELLER - VIDEO TUTORIAL AND NEW IMAGE SETS

Welcome to the mystical world of Madam Rue.  She has the gift of sight, which can reveal your future and explain your past.  Only she can lift the veil of mystery and connect to the regions beyond.
If a revelation is not what you seek but instead a charm or potion, you have come to the right place.  Is it love, fame, fortune, or perhaps release from a curse?
Or maybe the sound of her tambourine and her melodious voice drew you here.  Be not afraid; step inside, and your destiny awaits.
Here comes another Halloween project, although I’m thinking gypsies are never out of season. 
For those who have built or are building the Halloween Carnival, this is a piece you might want to add to your display. 

My choice of a jeweled-toned color palette comes from looking at pictures of gypsy caravans, where I noticed bright colors, fabrics, beading, fringe, and bling.
 Image result for gypsy caravan
Image result for gypsy caravan inside
What did I love the most about this project?  I think the mini globe lighting is right at the top.  I wish I could go back to some of my older pieces and use the lighting.  It would also look cool with the Mad Scientist Lab from earlier in the summer.
I also love the furniture made from either a kit or unfinished wood items.  My particular favorite is the 3 Panel Hutch sitting on top of a Library Table.  The furniture pieces could easily work stand-alone or as part of another one of your projects.
Don’t sweat the details; there is a video tutorial where I’ll walk you through creating Madam Rue’s tent.

I’ve cooked up some new gypsy fortune-teller-themed images for this project.  I also used some of my Old Books & Papers Digital Image Set.

GYPSY FORTUNE TELLER COLLAGE SHEET

This sheet is a collection of mystical items.  There are books on palm ready, fortune telling, crystal ball reading, and more.  A seer into the beyond might need various business signs, tarot cards, and other odds and ends.

This set is a collection of mystical items that a seer into the beyond might need.  In addition, the set contains images that you can use to create and outfit a gypsy tent.  All of the images in the Gypsy Fortune Teller Collage Sheet are included, plus a tent top panel, tent side panel, and images to decorate a table, curtains, and rugs for a total of 38 images.
All of the images in the set can be re-sized for your project as they are high-resolution (300dpi) PNG formatted images.

This collage sheet contains 15 different lanterns, with two of each style the lantern, for a total of 30 images.


VIDEO TUTORIAL

COLLAGE SHEETS & PAPER

Gypsy Fortune Teller #3 Collage Sheet
Games & Spinners Collage Sheet
Wood Flooring Scrapbook Paper
Double Dot Vintage Gingerbread Scrapbook Paper
Love & Lace Cherish Scrapbook Paper
Mysterious 6x6 Paper Pad
CHIPBOARD KITS, FURNITURE & LIGHTING
Platform with Steps - 1:12
3 Panel Hutch
Library Table
Unfinished Round Table – Spindle Legs
Gold Dark Sweeper Fringe
Armchair with Red Velvet Upholstery
Hinged Wood Chest with Clasp
Antique Brass Mini Fleur de Lys Handle
Antique Brass Mini Oval Drop Handle
Cleveland Vintage Mini Globe string lights
EMBELLISHMENTS
Wood Finial Chess Pawns
American Crow
Black 3-Piece Candleholder Set
Fancy Swirl Bead Caps
Mini Glass Domes - Bronze
Iridescent Crescent Moon Beads
10mm Clear Glass Marbles
Silver Cup Box Feet
Row of Old Books – Resin
Eyeball Cabs in Settings
1 Inch Fancy Gold Filigree Base
Fancy Looped Gold Filigree Base
4mm Beaded Chain – Red & Green
Miniature Wine Glasses - Set of 4
Miniature Pumpkin
Tiny Paper Roses - Orange
Mini Rose Buds - Red
1 Inch Mini Tassels - Gold
Star Trellis Filigree – Raw Brass
Silver Crescent Moon Dimensional Stickers
BOTTLES
10mm Square Glass Bottle with Lid
12x8 Amber Glass Rectangular Beads
12x8mm Green Glass Rectangular Beads
Mini Clear Resin Whiskey Bottle
Miniature Gin Bottle
Amber Resin Potions Bottle
Tiny Round Bottles
Even Tinier Bottles
PAINTS & INK
Metal Patinas – Antique Window
Metal Patinas – Weathered Copper
Metal Patinas – Treasured Heirloom
Alcohol Inks – Purple Twilight
Alcohol Inks - Indigo
Alcohol Inks – Wild Plum & Red Pepper