

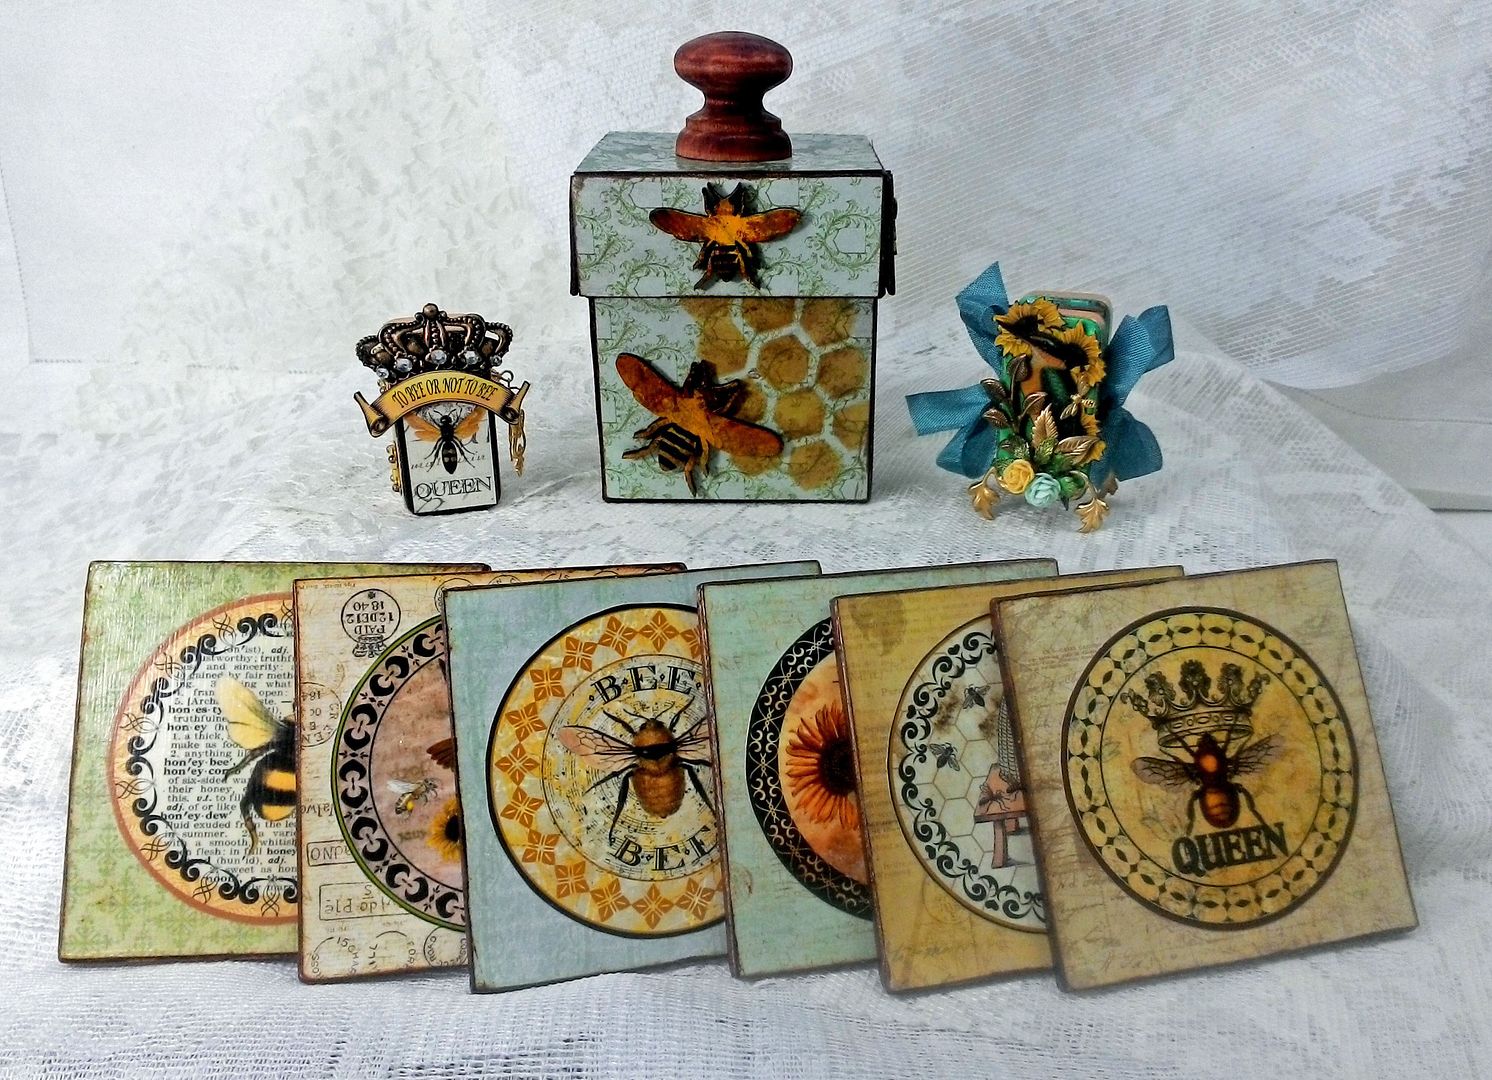
The projects include two different
domino books; which I’m giving away (details below), an accordion folded book
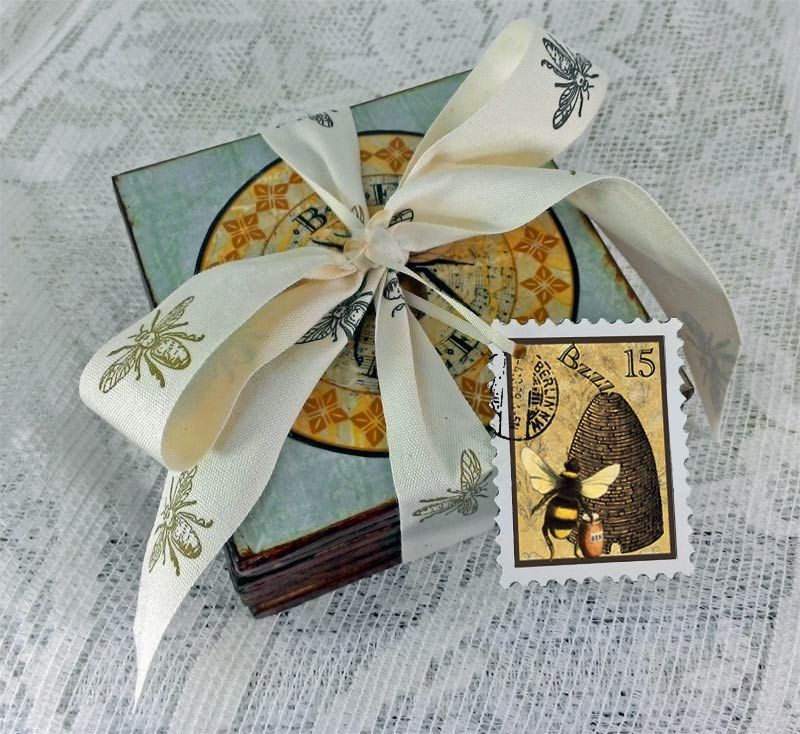
in a box and a set of coasters. I’m
thinking any of these projects would make great gifts.


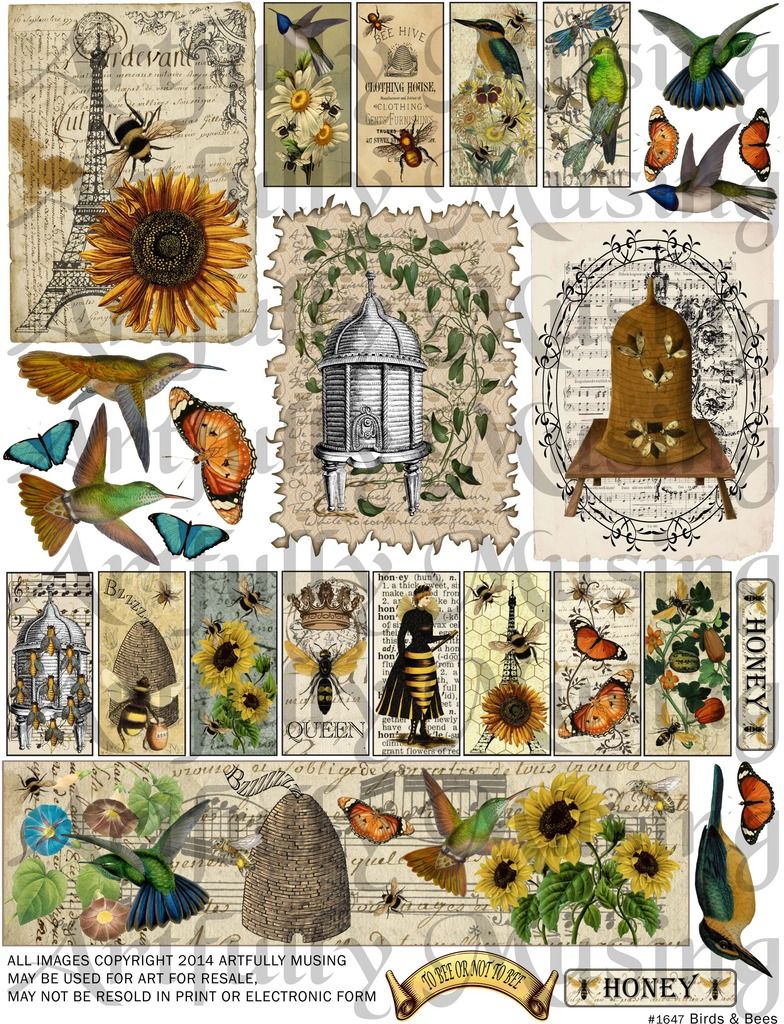
NEW – Bee Themed Collage
Sheets
Colorful bee themed medallions and faux postage fill
this sheet. The medallions make great
labels for bottles, jar lids and on coasters. The faux postage can be used as
ephemera on your artwork or to jazz up envelopes.
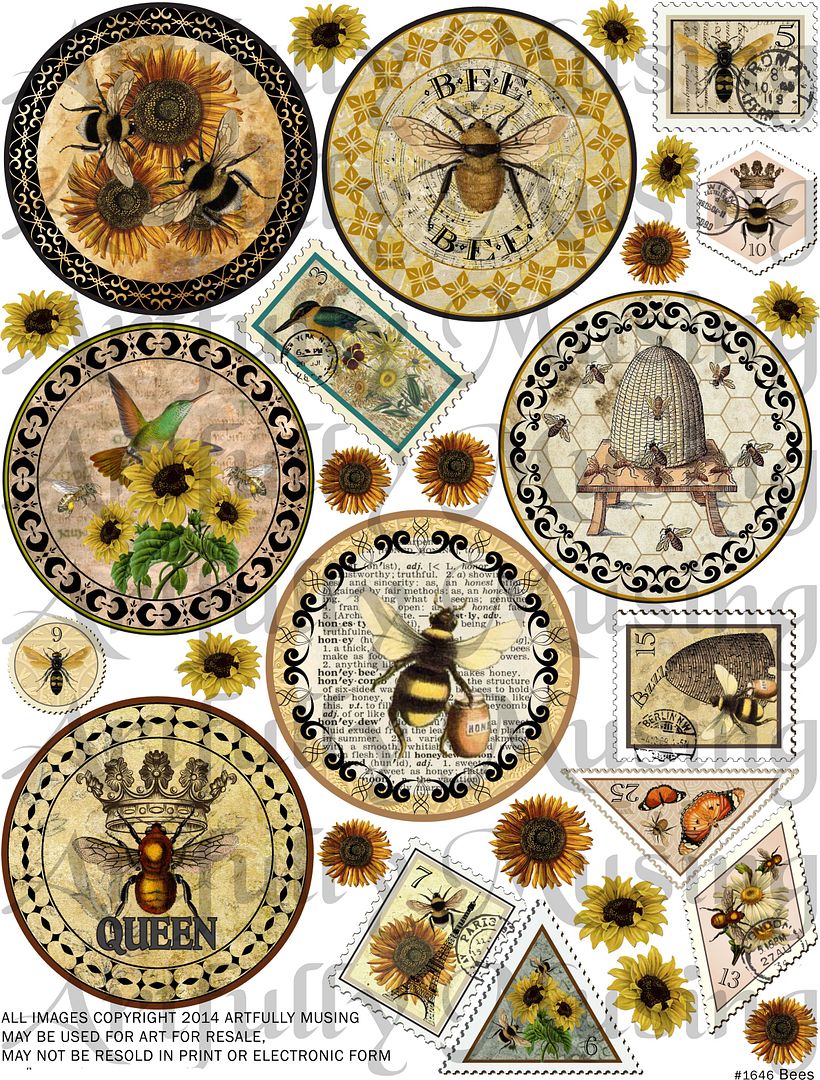
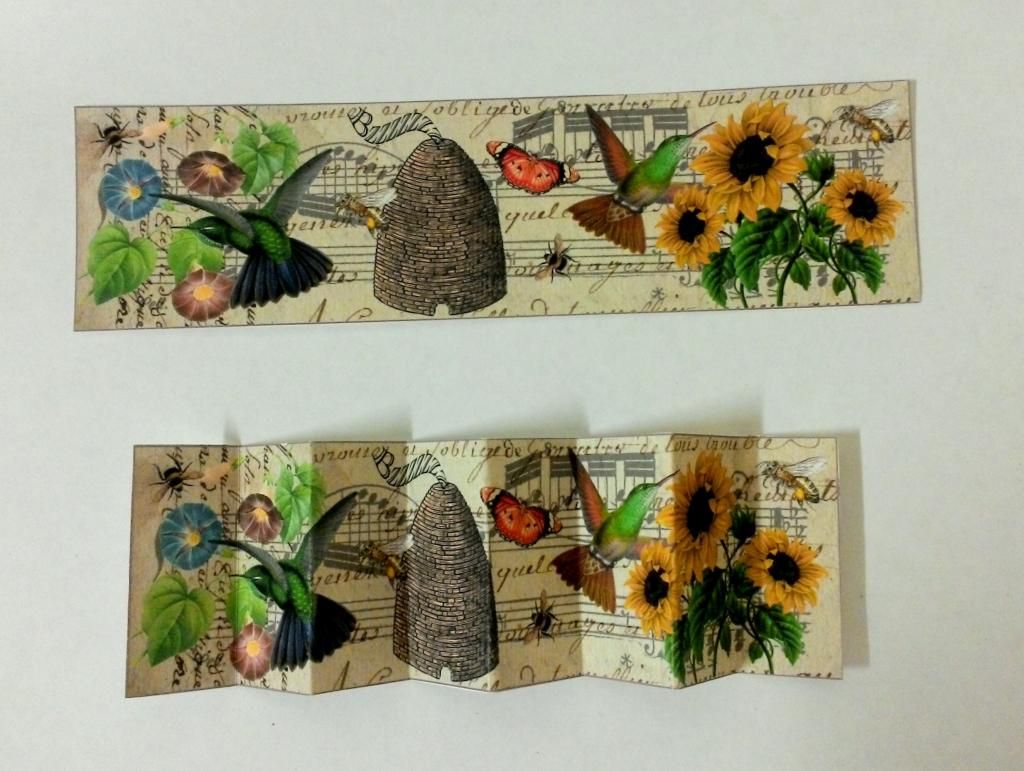
This sheet is loaded with bird and bee themed
art. Included are 12 small panels are sized to fit on a 1” x 2” domino and a long panel that can be accordion folded to fit inside two 1”
x 2” dominoes like a book. There are also
ATC sized collaged images and extra birds and flowers.
TUTORIALS
Accordion Fold Domino Book
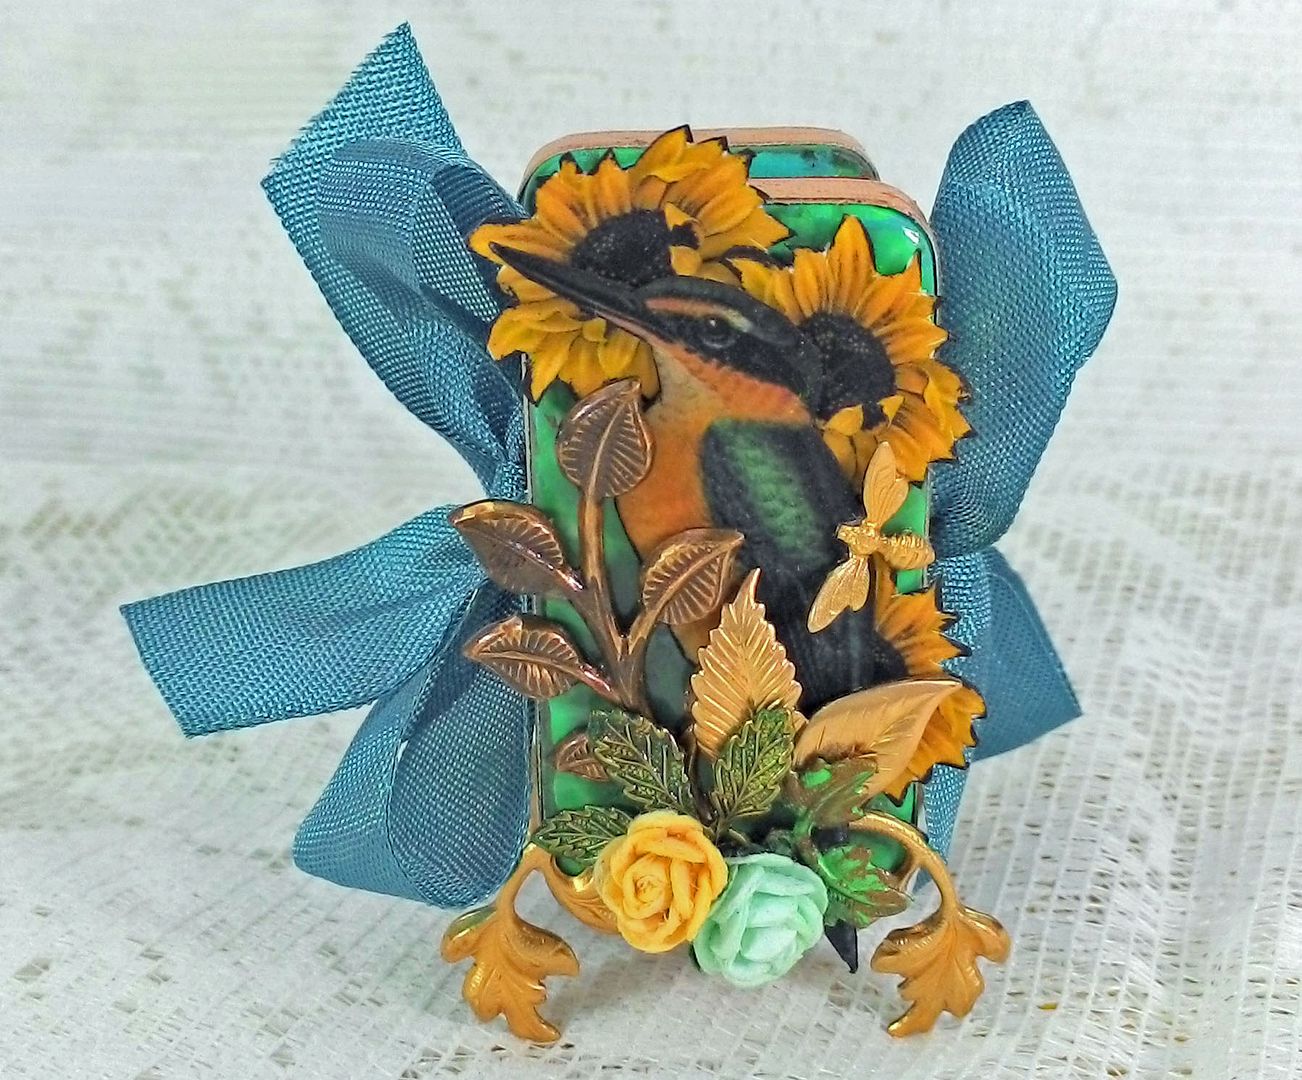
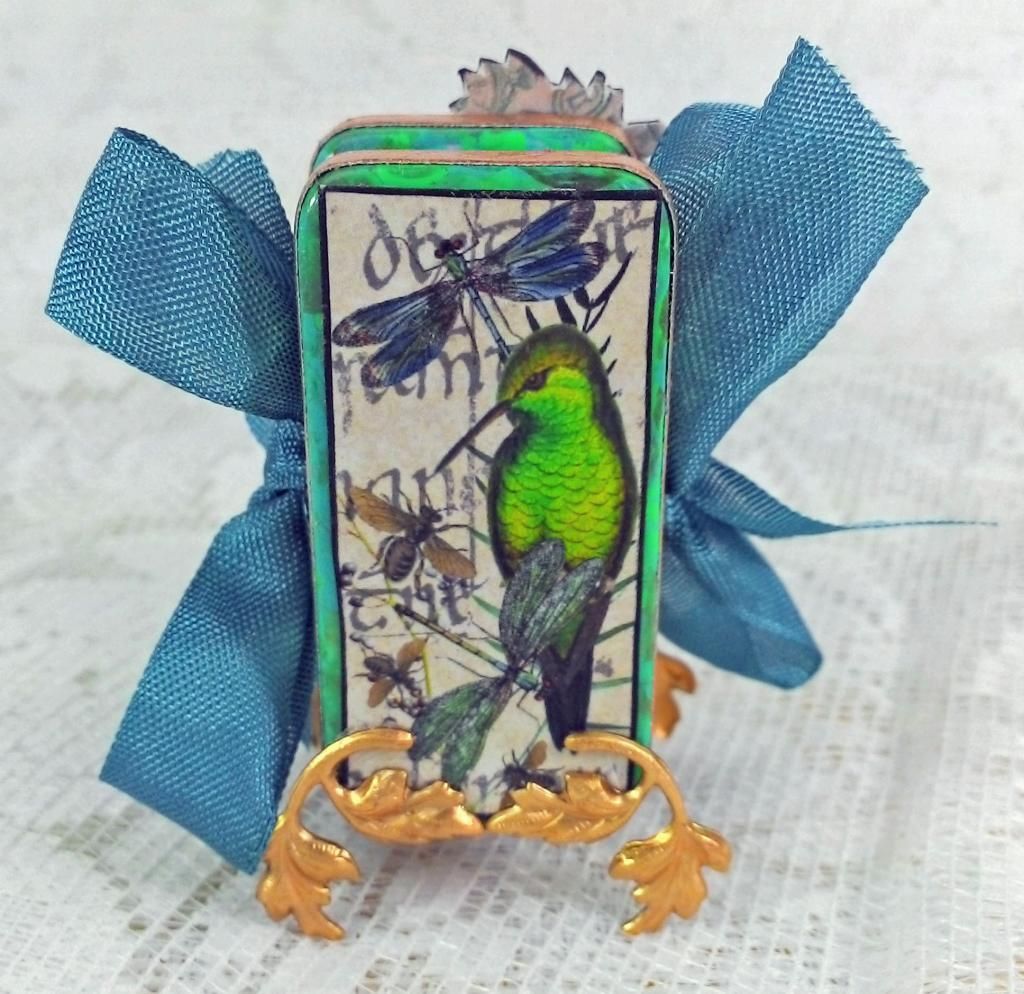

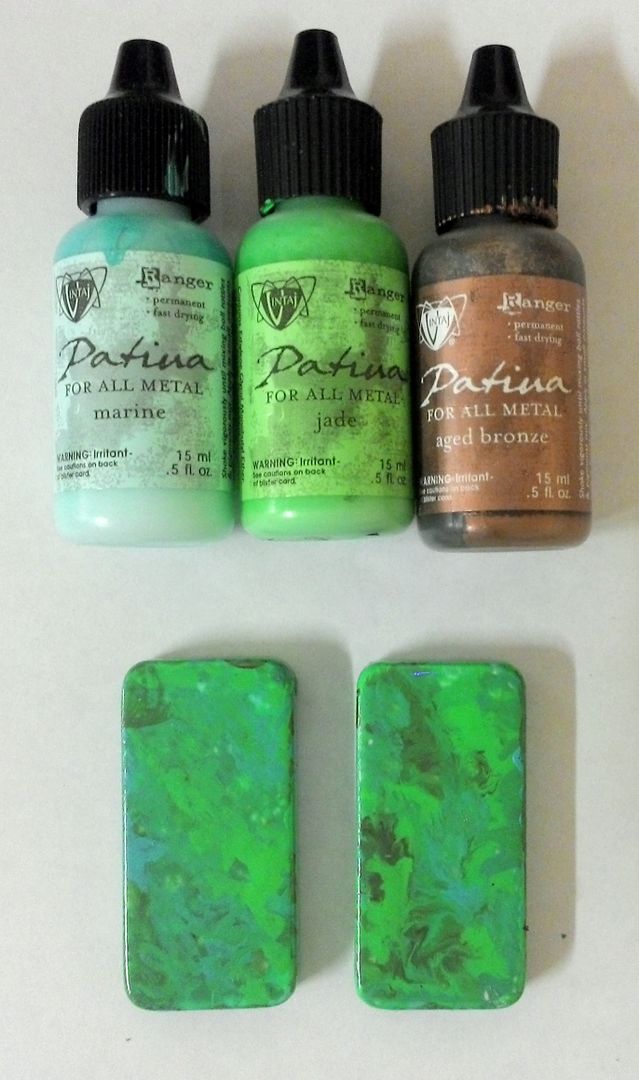
I started by painting the domino's front, sides and
edges of the backs with a combination of Patina Paints.
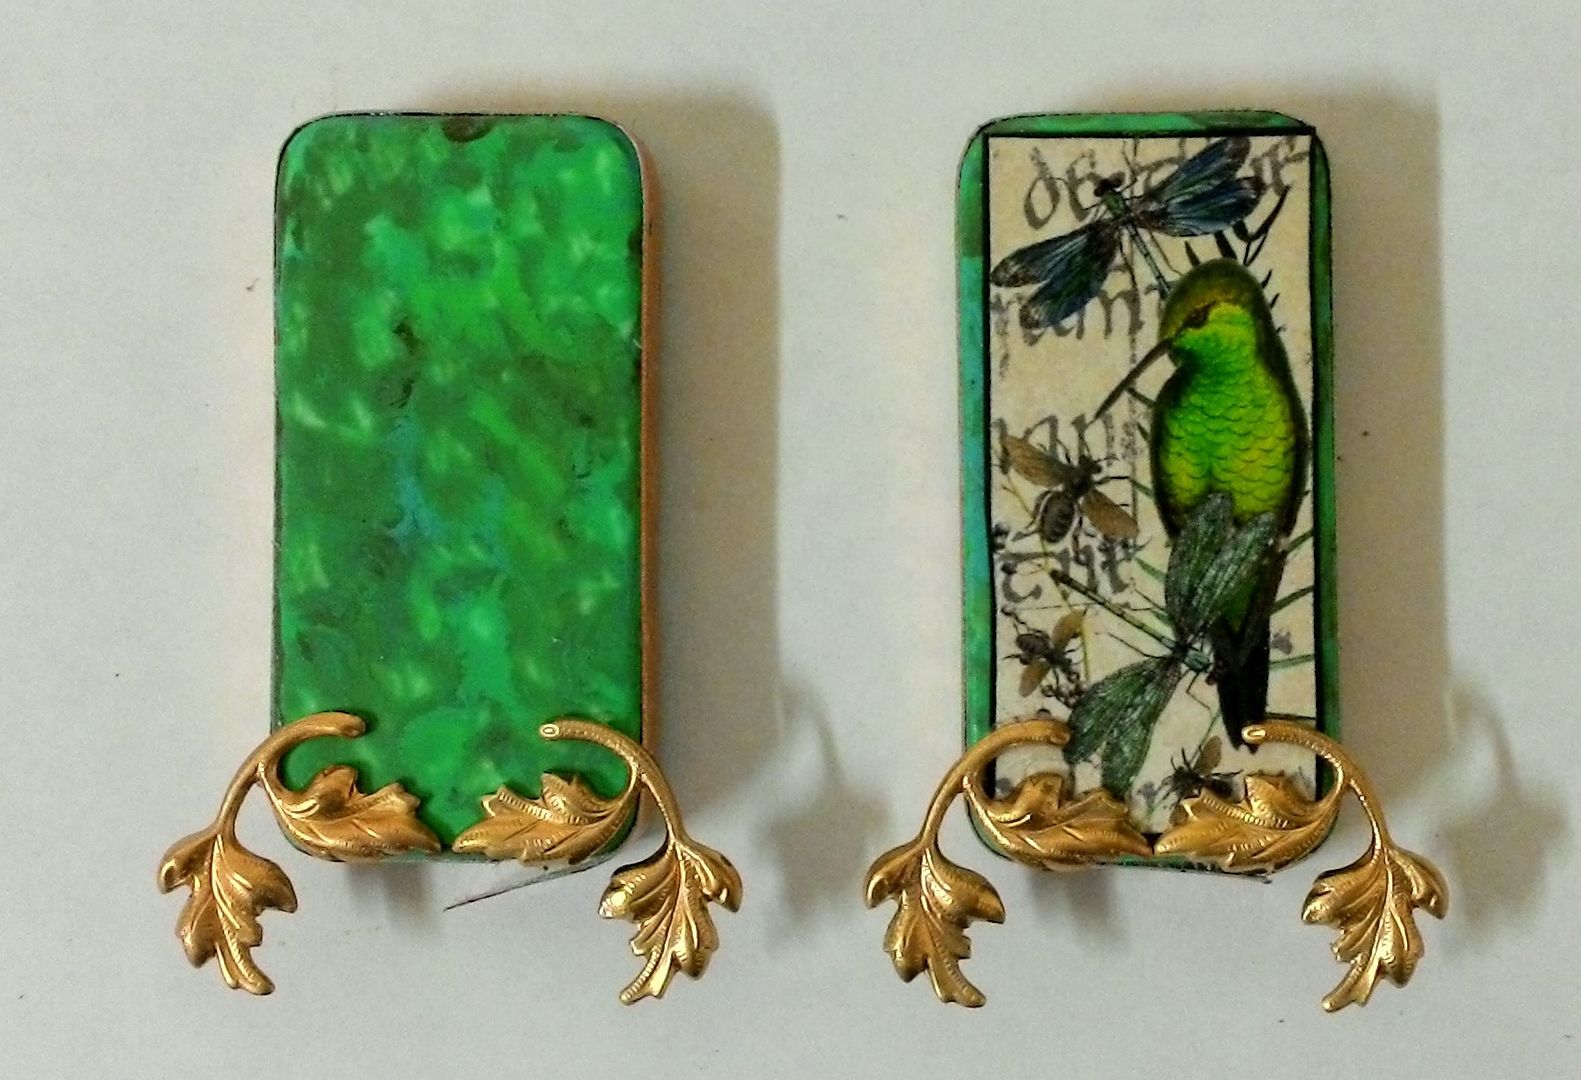
Next, I glued a panel from the collage sheet onto
what will become the back of the book and glued a strip of Dresden around the edges of each domino.

Using E6000, I attached the brass leaves to the bottoms of the dominoes to serve as feet.
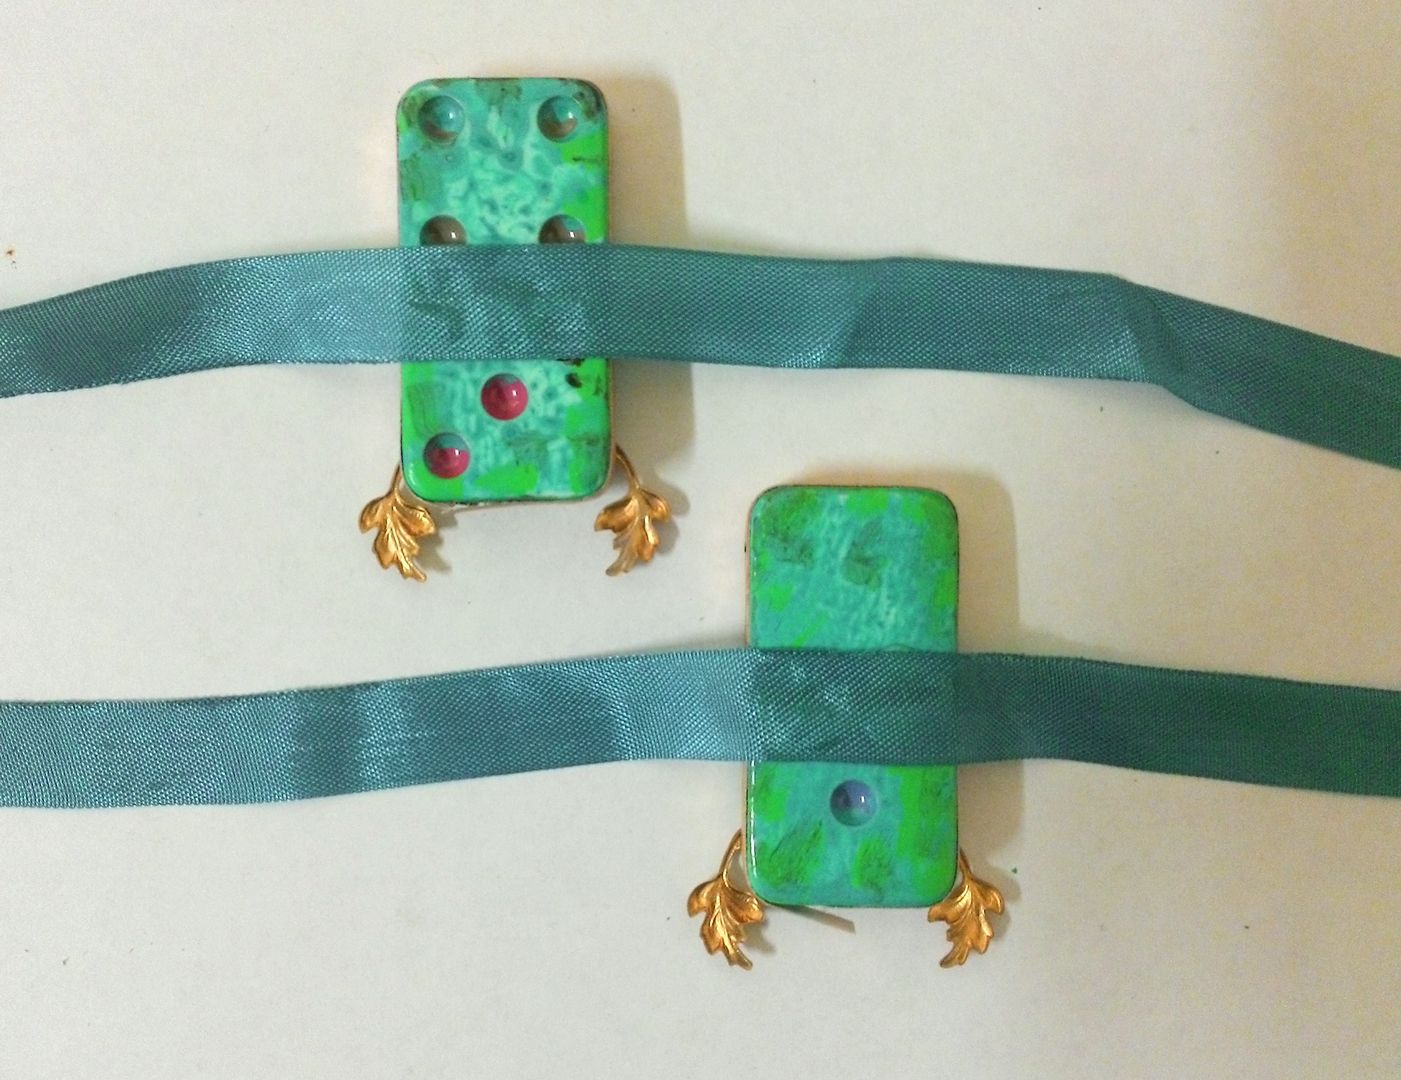
To the backsides of each domino, I attached ribbon
which is used to tie the book closed.
Don’t worry if you see the glue seeping through the ribbon as it will be
covered with the accordion folded pages.
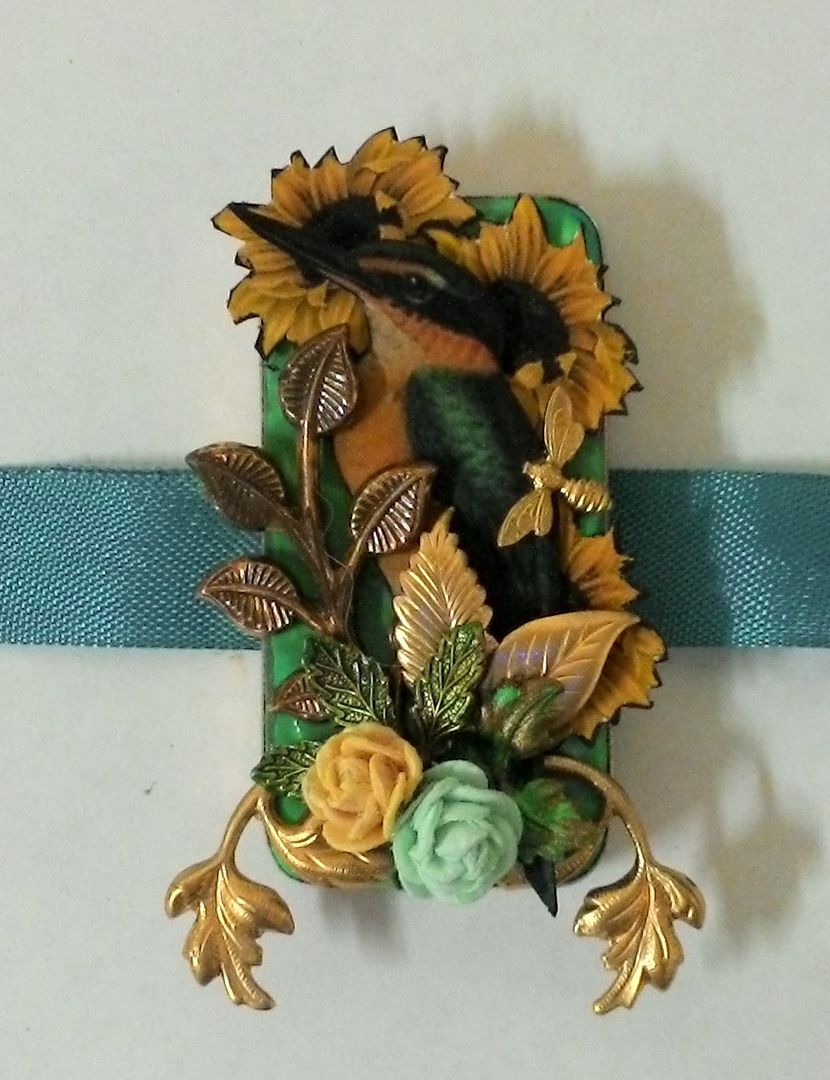
On the front domino I collaged images from the
collage sheet (flowers & bird), various brass leaves, paper roses and a
bee.
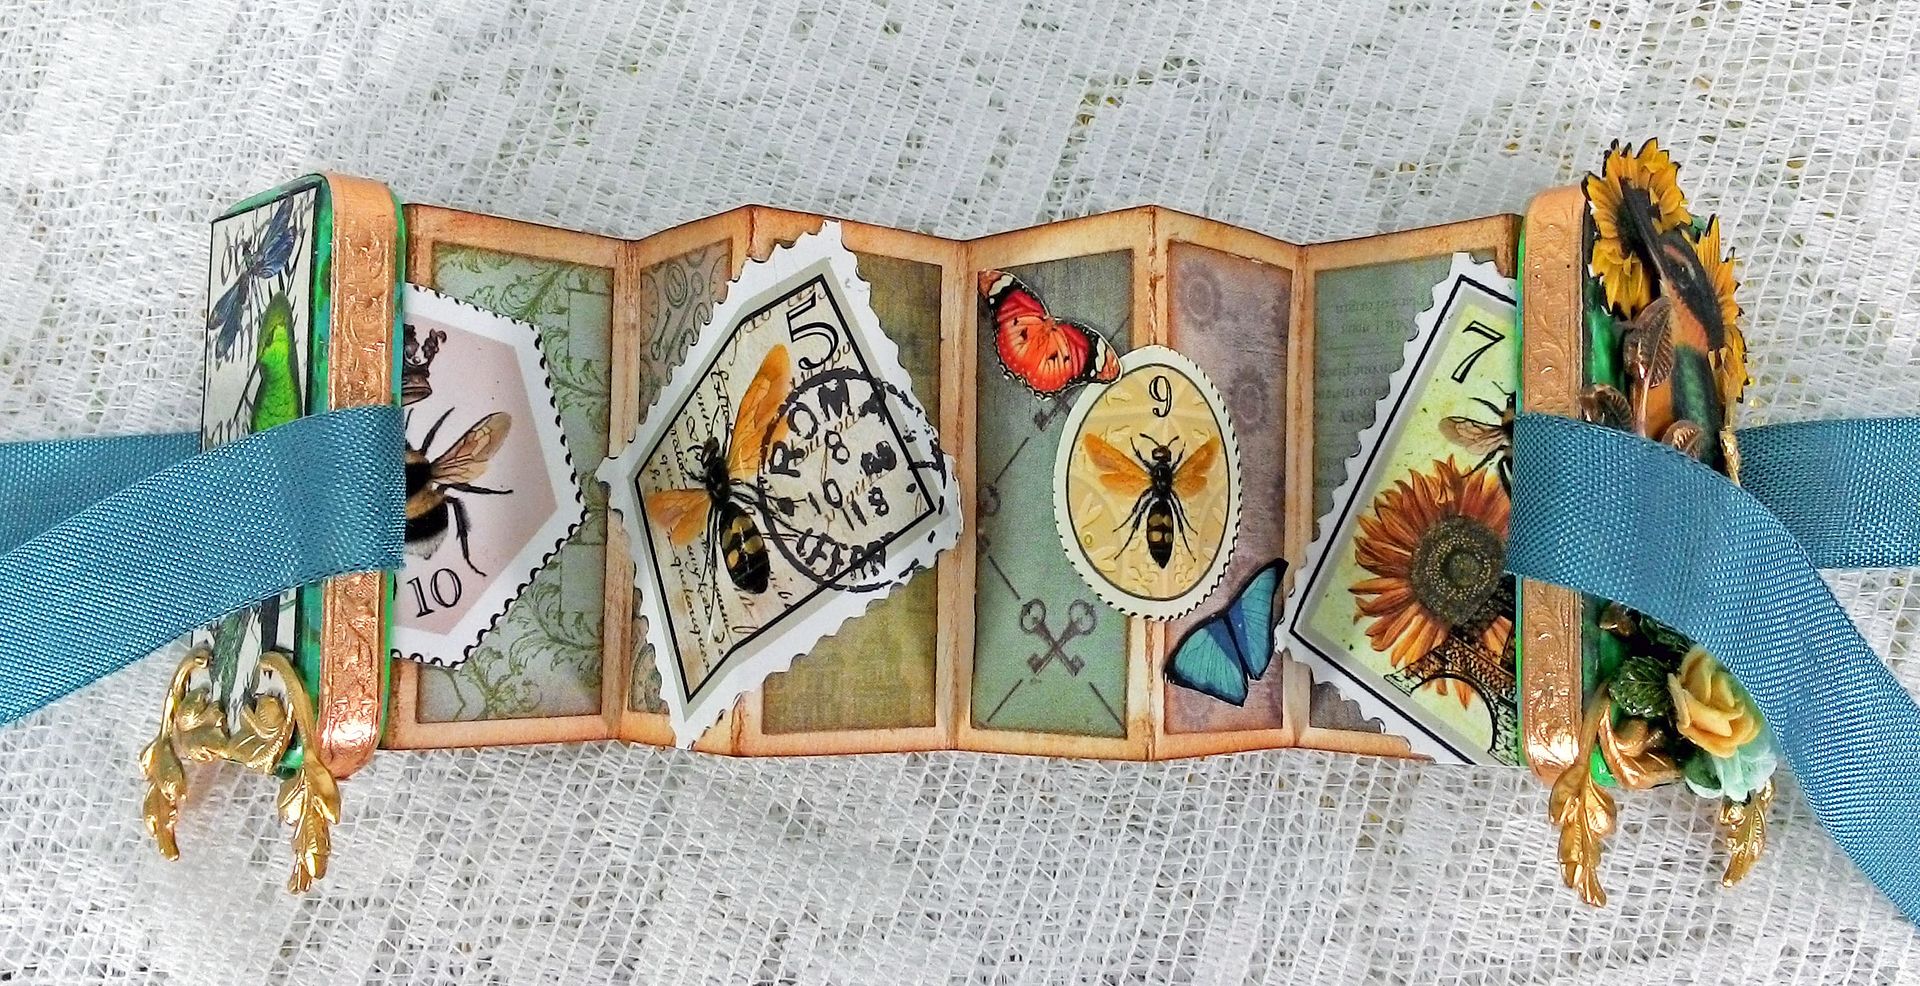
The long panel on the collage sheet measures 1 7/8”
x 7” which is slightly shorter than a standard 2” tall domino and long enough
to create an accordion folded strip with 8 panels. If you are not using the image from the
collage sheet for your book just be sure that when you fold your strip you end
up with an even number of panels (to facilitate attaching it to the domino
covers).
Mark and score along the panel every 7/8” and accordion fold the panel.
Ink the edges and the back of the panel. I used Vintage Photo Distress Stain. Cut 8 panels from decorative paper and glue to the
back. I cut my panels 1 5/8” x 6/8”. You could also use the small panels on the
collage sheet but you would need to reduce them first.
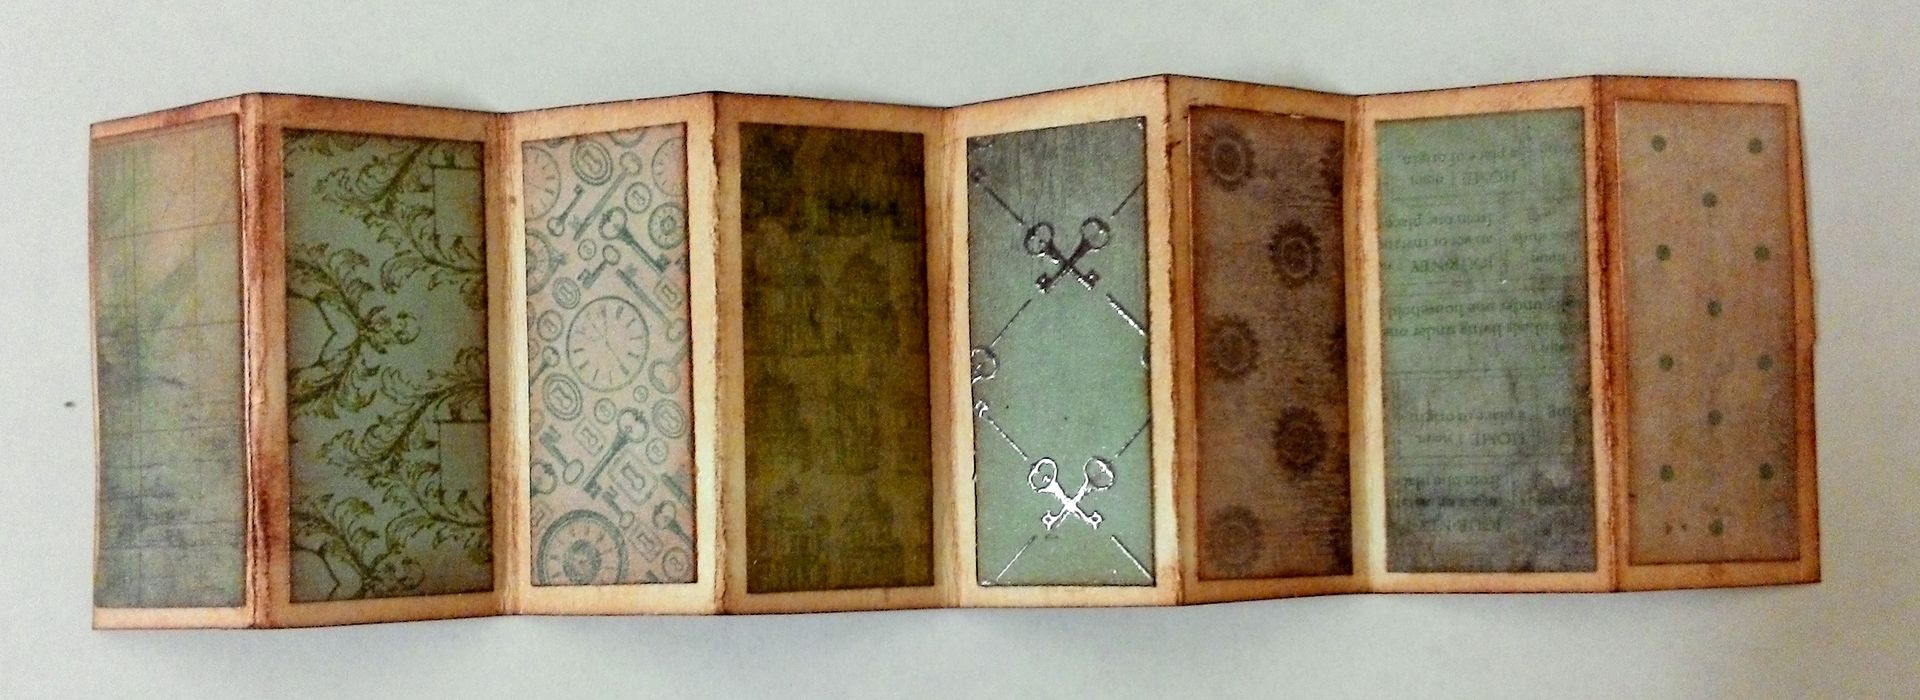
The final touch to decorate the back is the addition
of some of the faux postage from the collage sheet.

The last step is to glue the end panels to the
inside of the dominoes and you are finished!
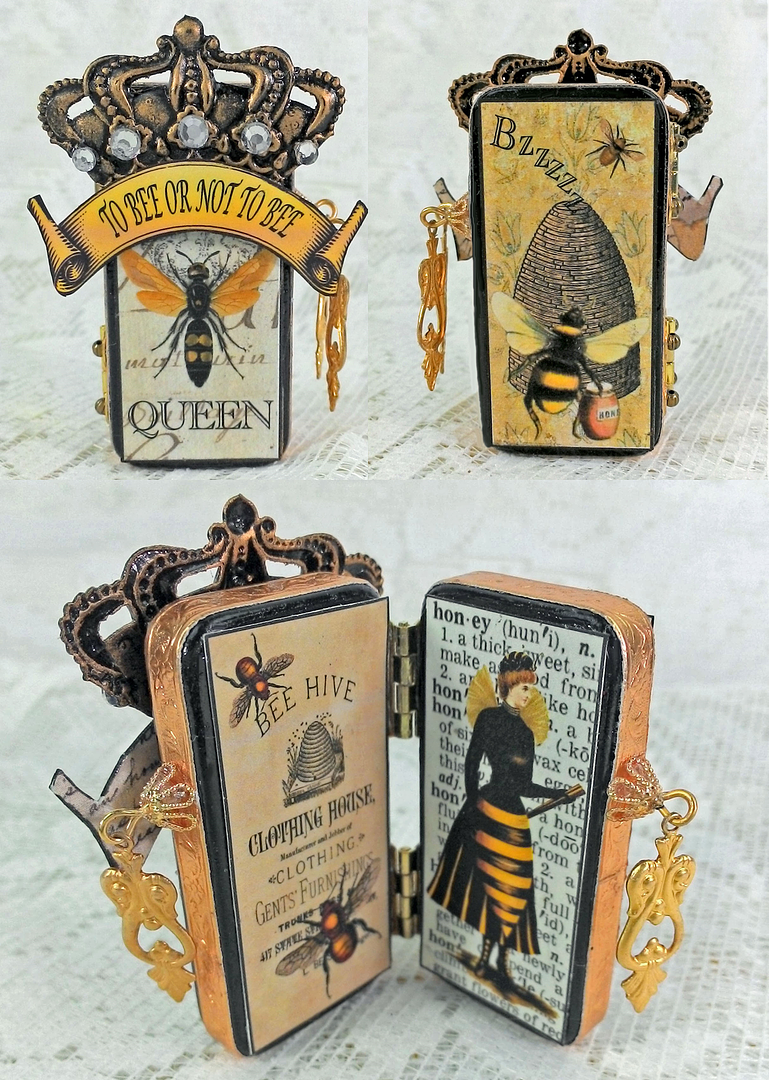
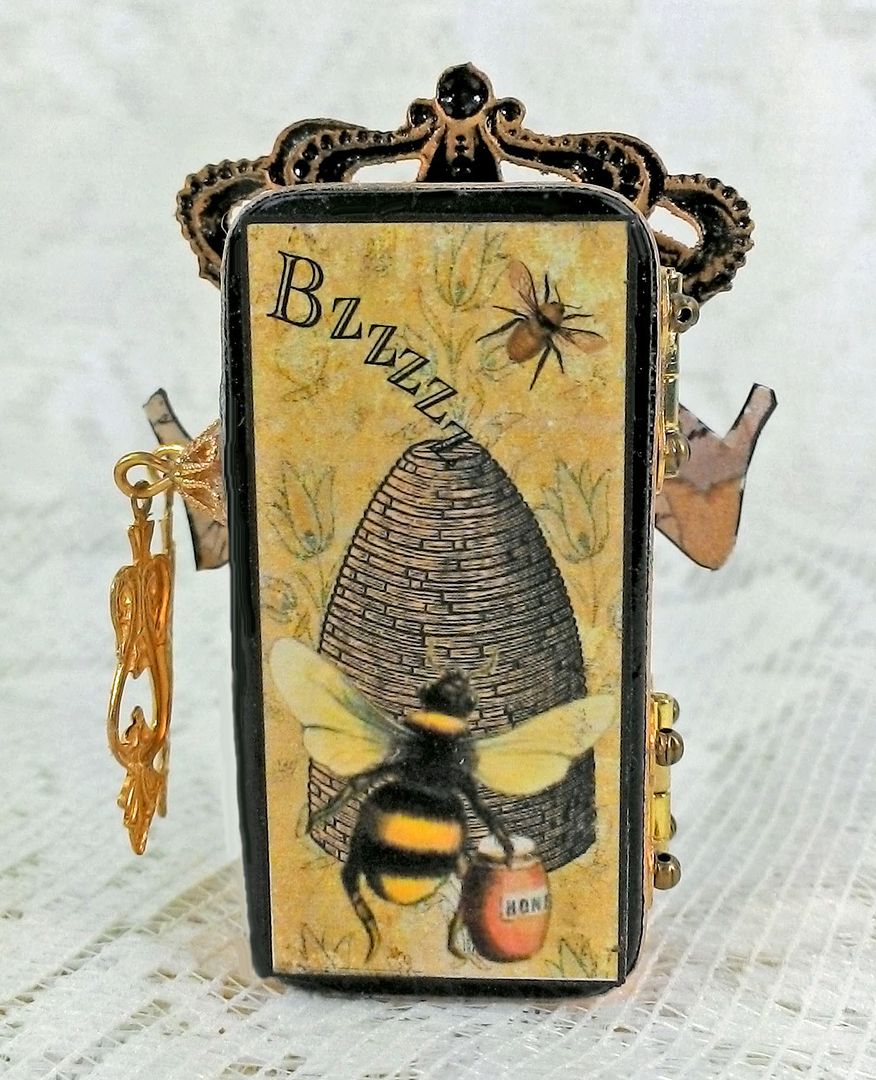
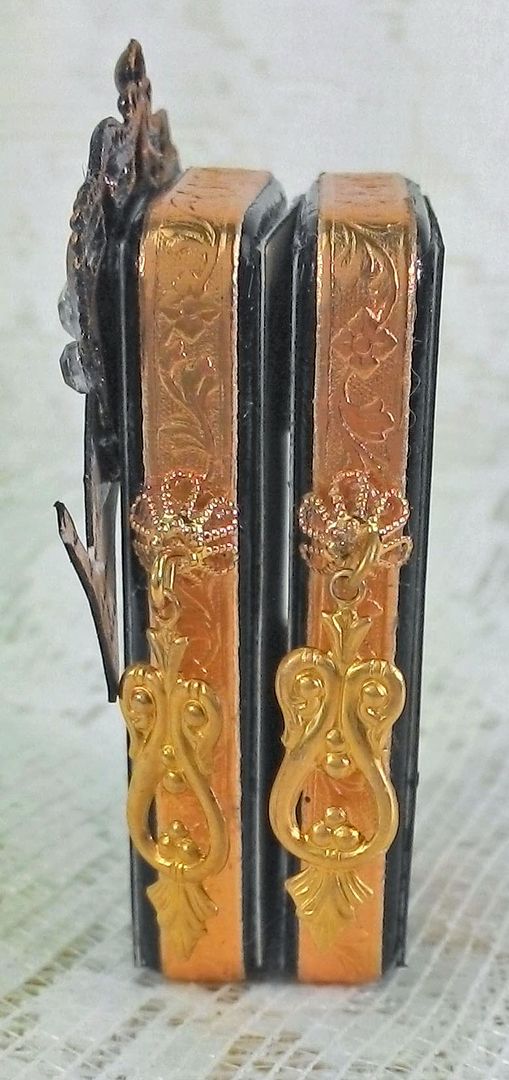
Hinged Domino Book
To Bee or Not to Bee…Queen
(always a tough decision)
This type of domino book is much simpler to put
together as it consists of simply hinging two decorated dominoes.

Start by coloring your dominoes on all of the
surfaces that will remain exposed after embellishing. I used Onyx Patina to paint
mine. I used panels from the collage
sheet to cover the backs and fronts of both dominoes and glued Dresden around
the edges.
Dresden Note: In the case of a hinged domino book use
sturdy glue like E6000 to attach the Dresden so that when you attach the hinges
to the sides (onto the Dresden) the Dresden won’t pull away from the dominoes when you open the book.
I also added the crown (with jewels) and the bee
banner from the collage sheet.
Once I had finished decorating each of the dominoes,
I glued two small hinges to the sides of the dominoes (using E6000). In the hinge holes I glued small brass beads. Make sure you let the glue dry completely
before trying to open the book.

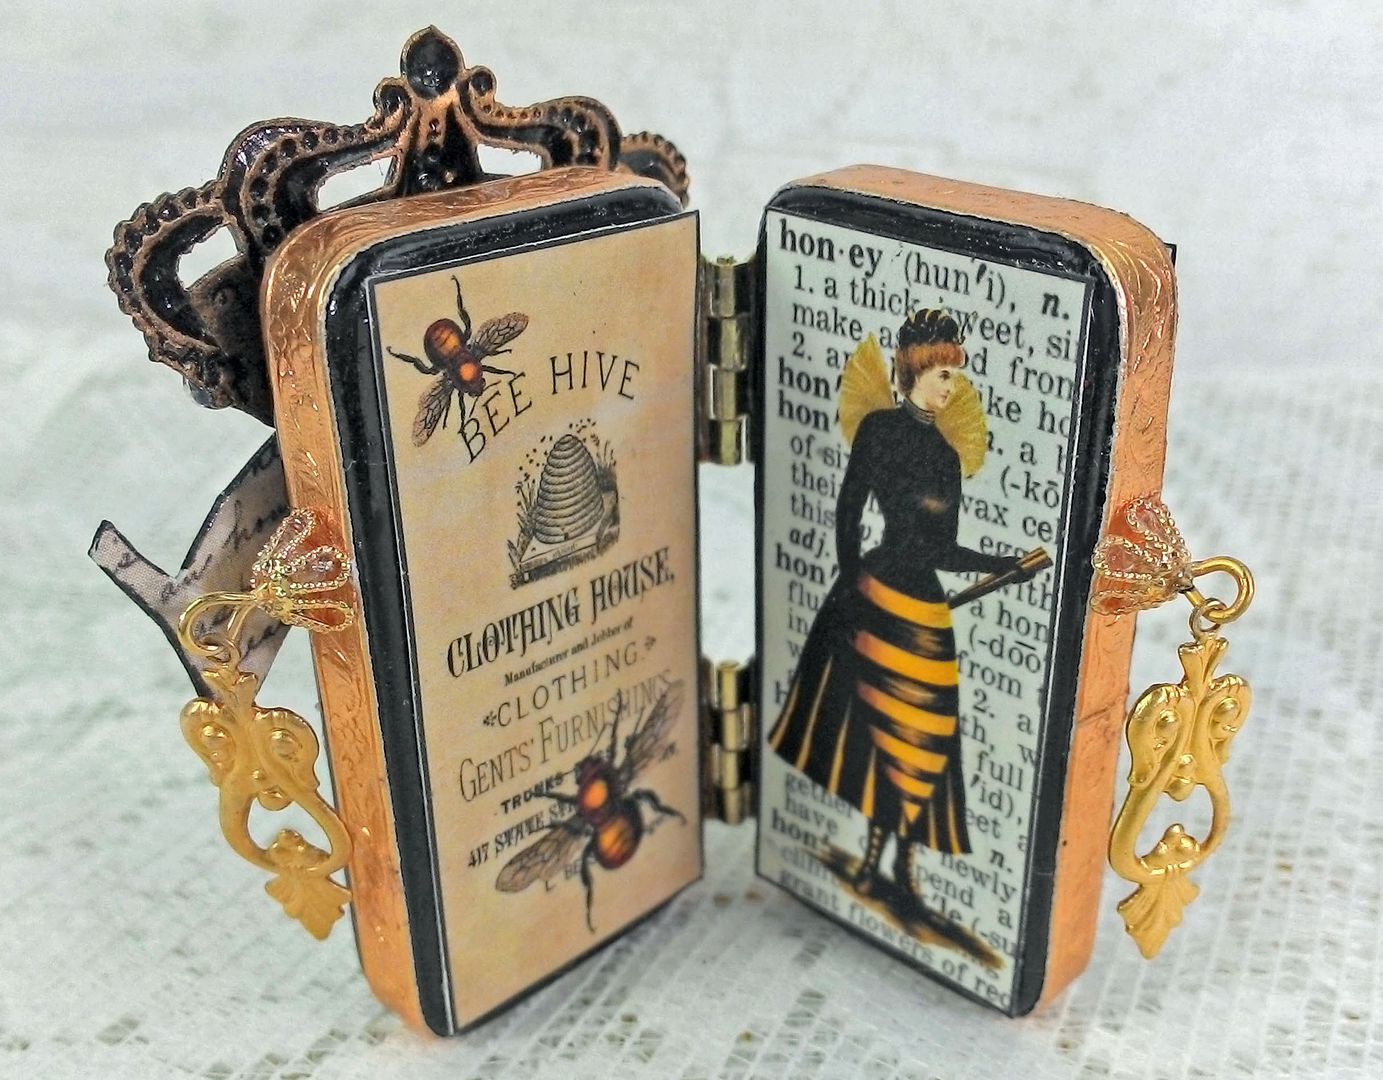
The final touch are handles (glued in place with
E6000), which are made from bead caps, eye pins and Victorian drops.
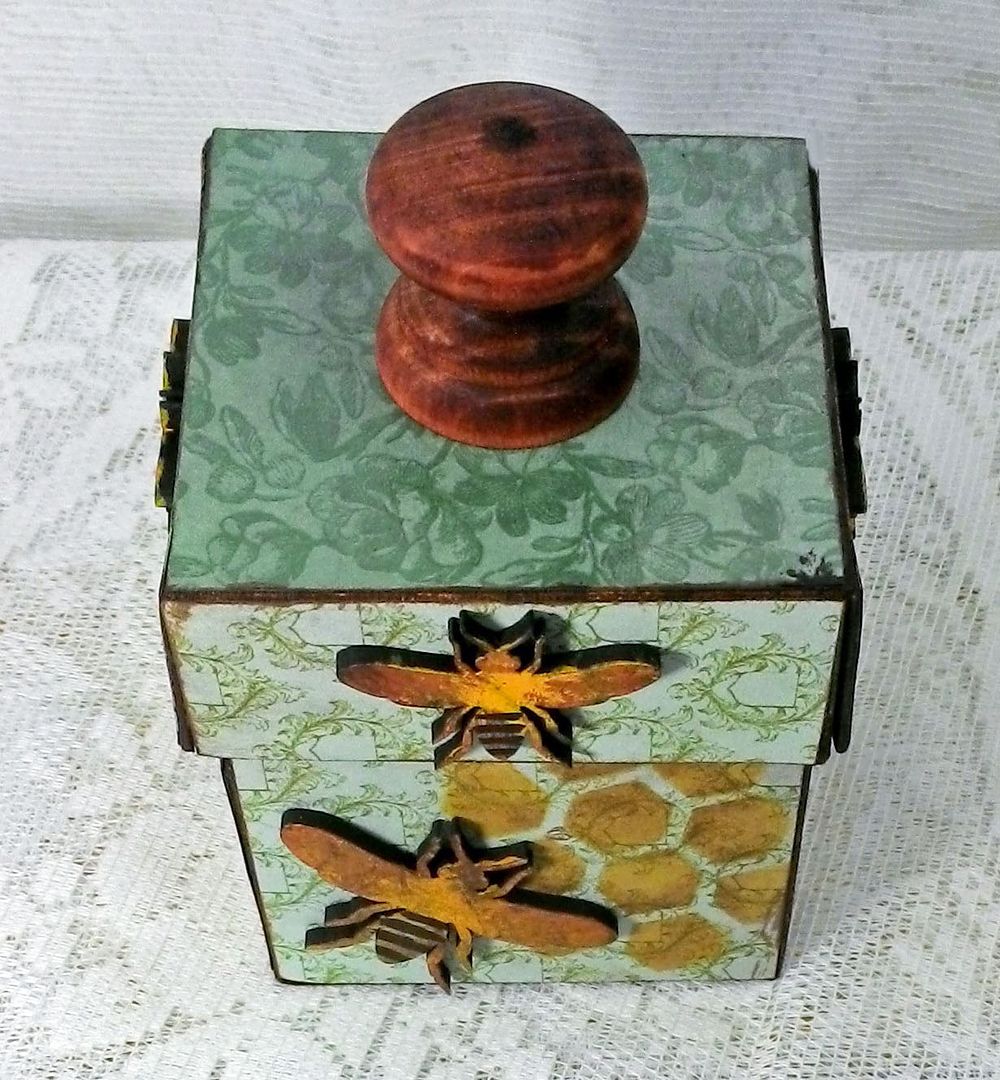
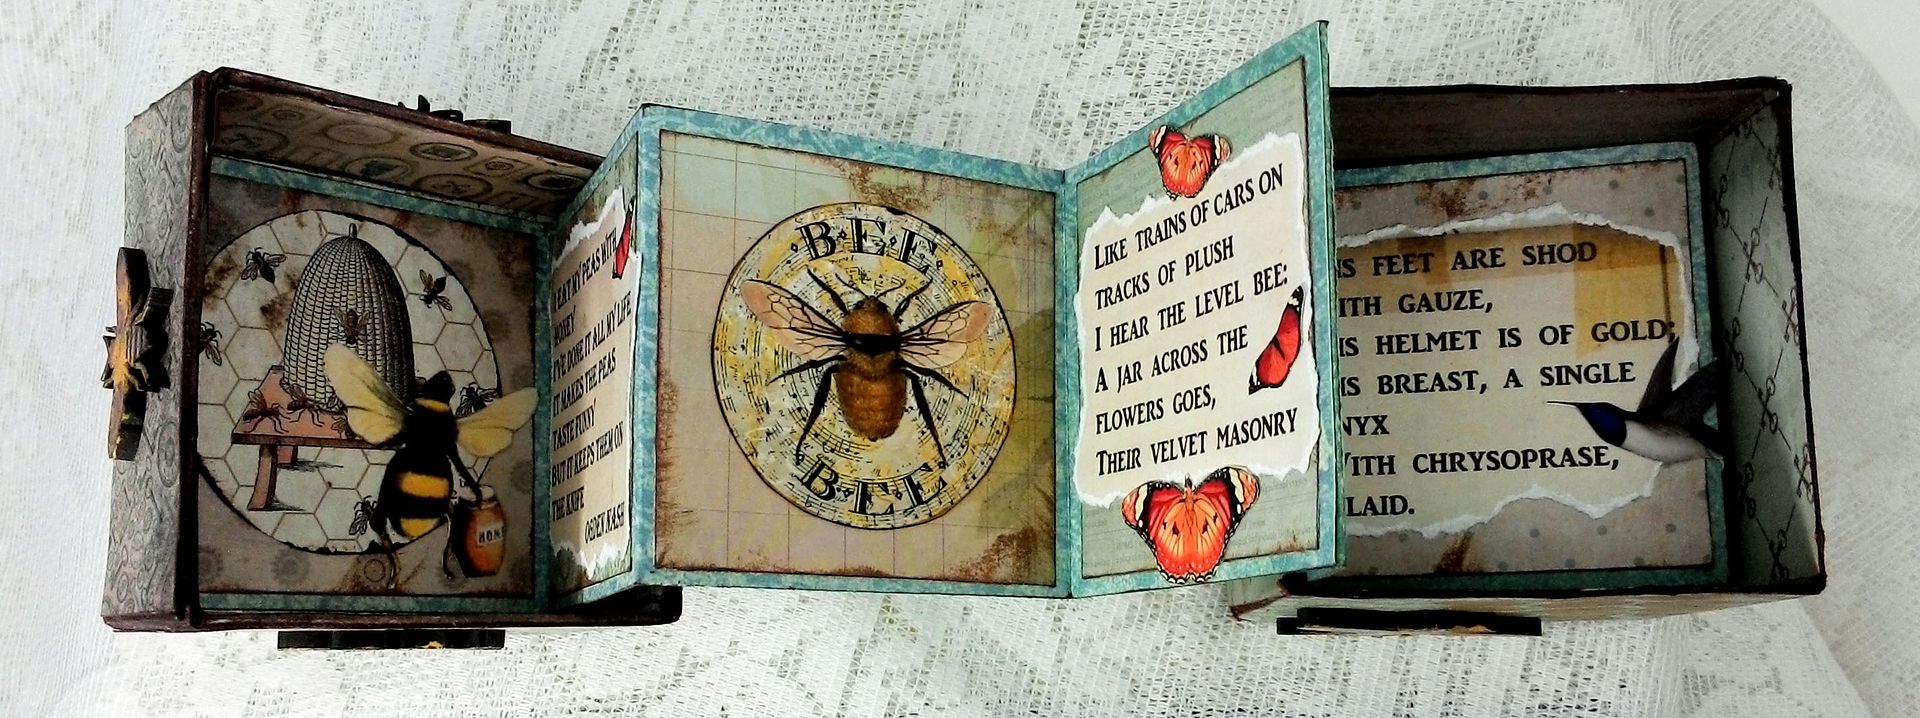
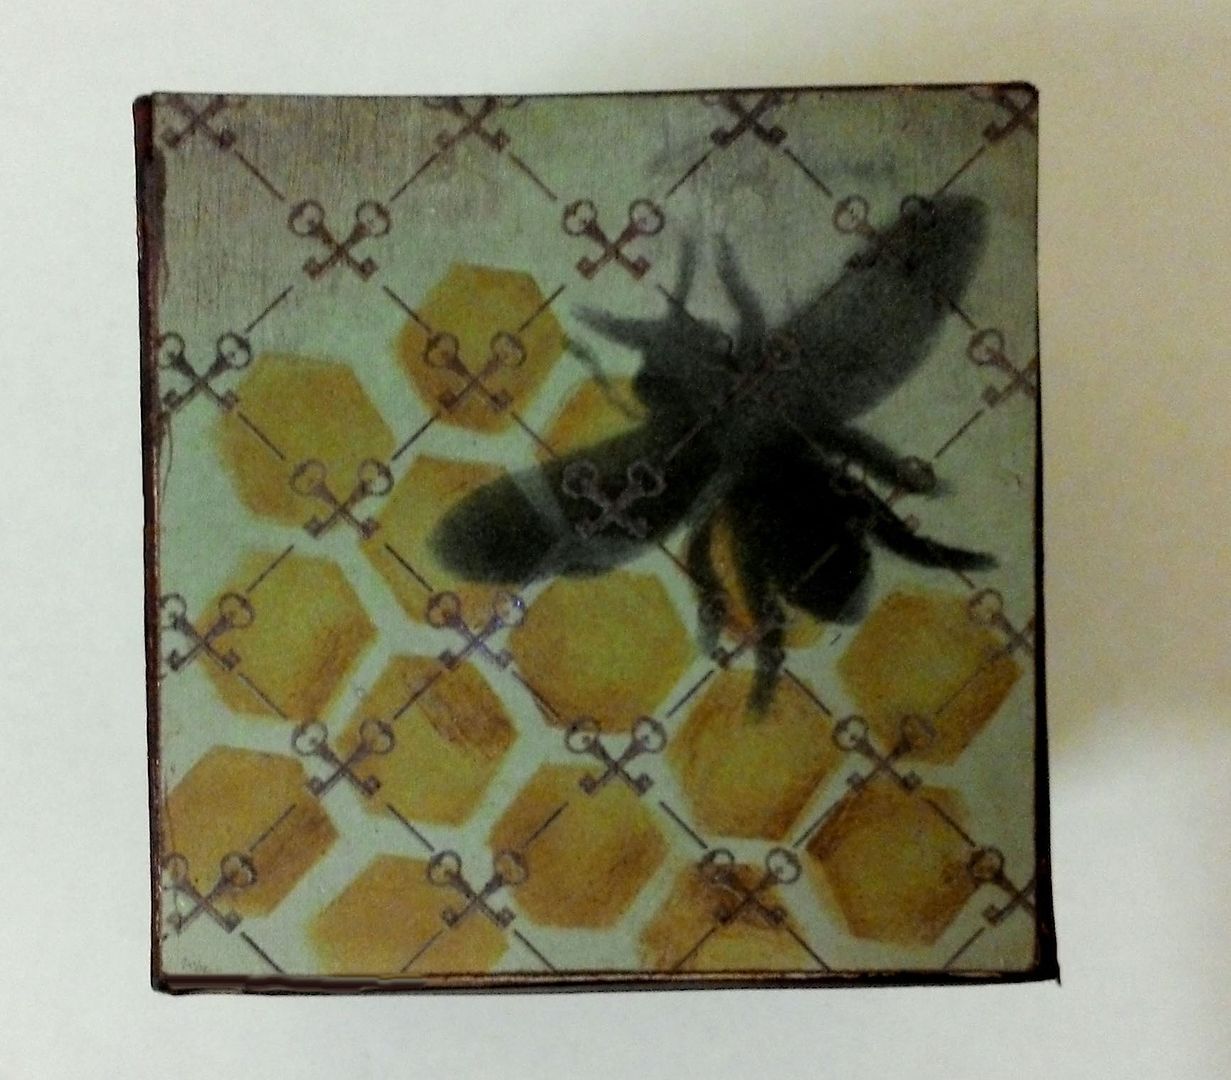
Accordion Fold Book in a
Box
The idea with this project is to use the box as the
covers for an accordion folded book.
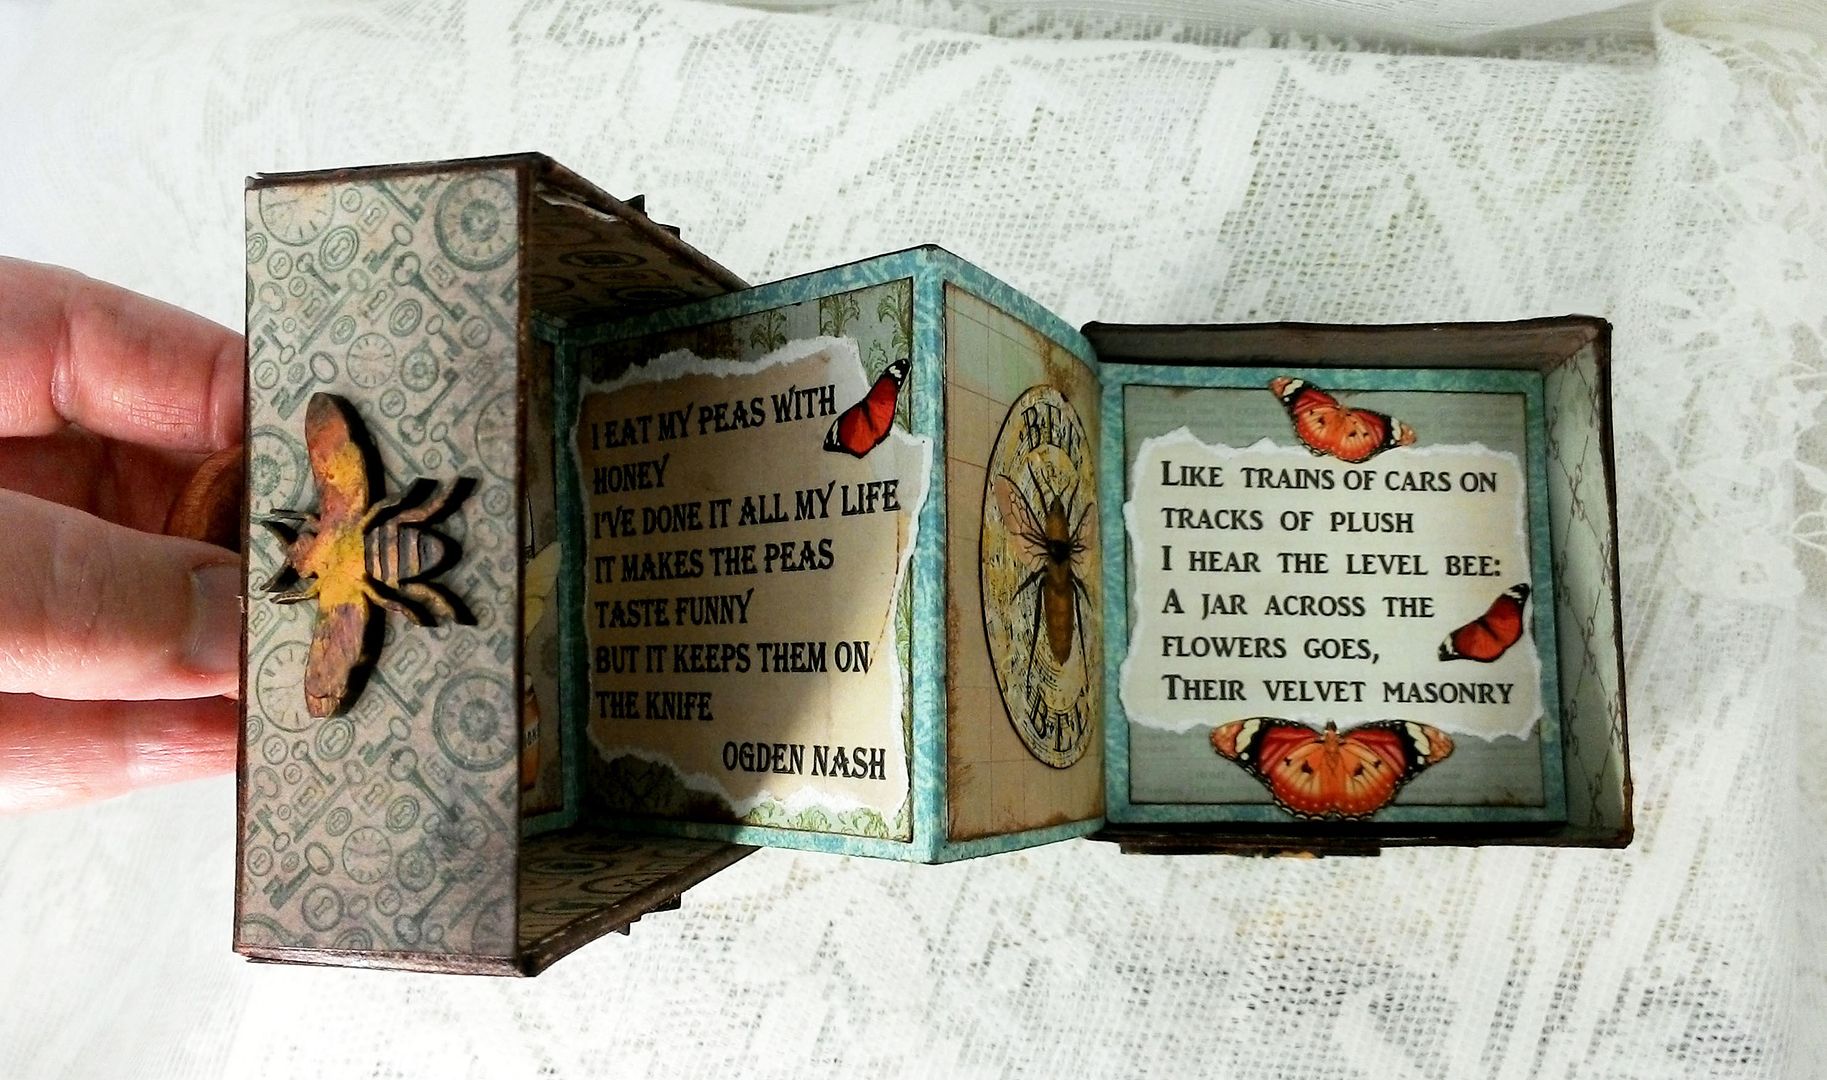
When you lift the cover off of the box it opens the book. The book is attached at one end to the inside
lid of the box and at the other end to the inside bottom of the box. The box I used measures 3" square.

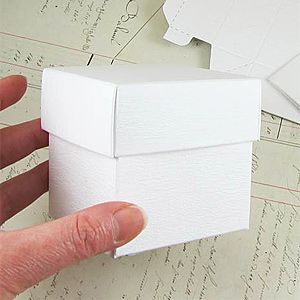
Start by assembling the box.
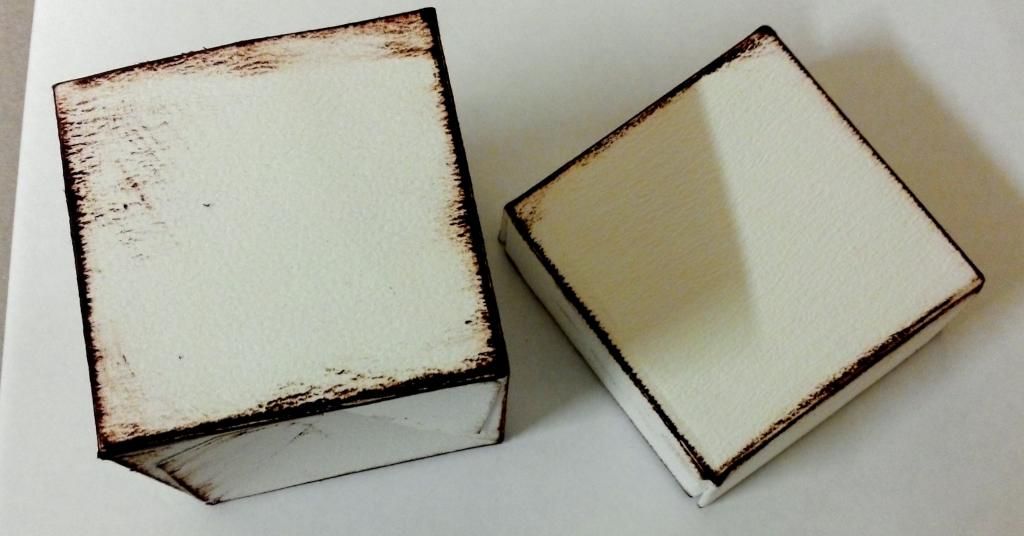
Next, I inked all of the edges inside and out. Tip: to get in the box crevices use alcohol
ink and a brush. I have brushes dedicated
to using the ink as once they are use with ink you can’t use them with other
products. I used a combination of
Vintage Photo Distress ink and Caramel alcohol ink.
I applied decorative paper to all of the surfaces,
inside and out. Be sure to glue the
paper down securely so that when you open and close the box it does damage or
lift the paper. Don’t use thick paper or
card stock as the lid won’t fit back on the box.
I used Distress Ink and a honeycomb and bee stencil
to decorate the sides.

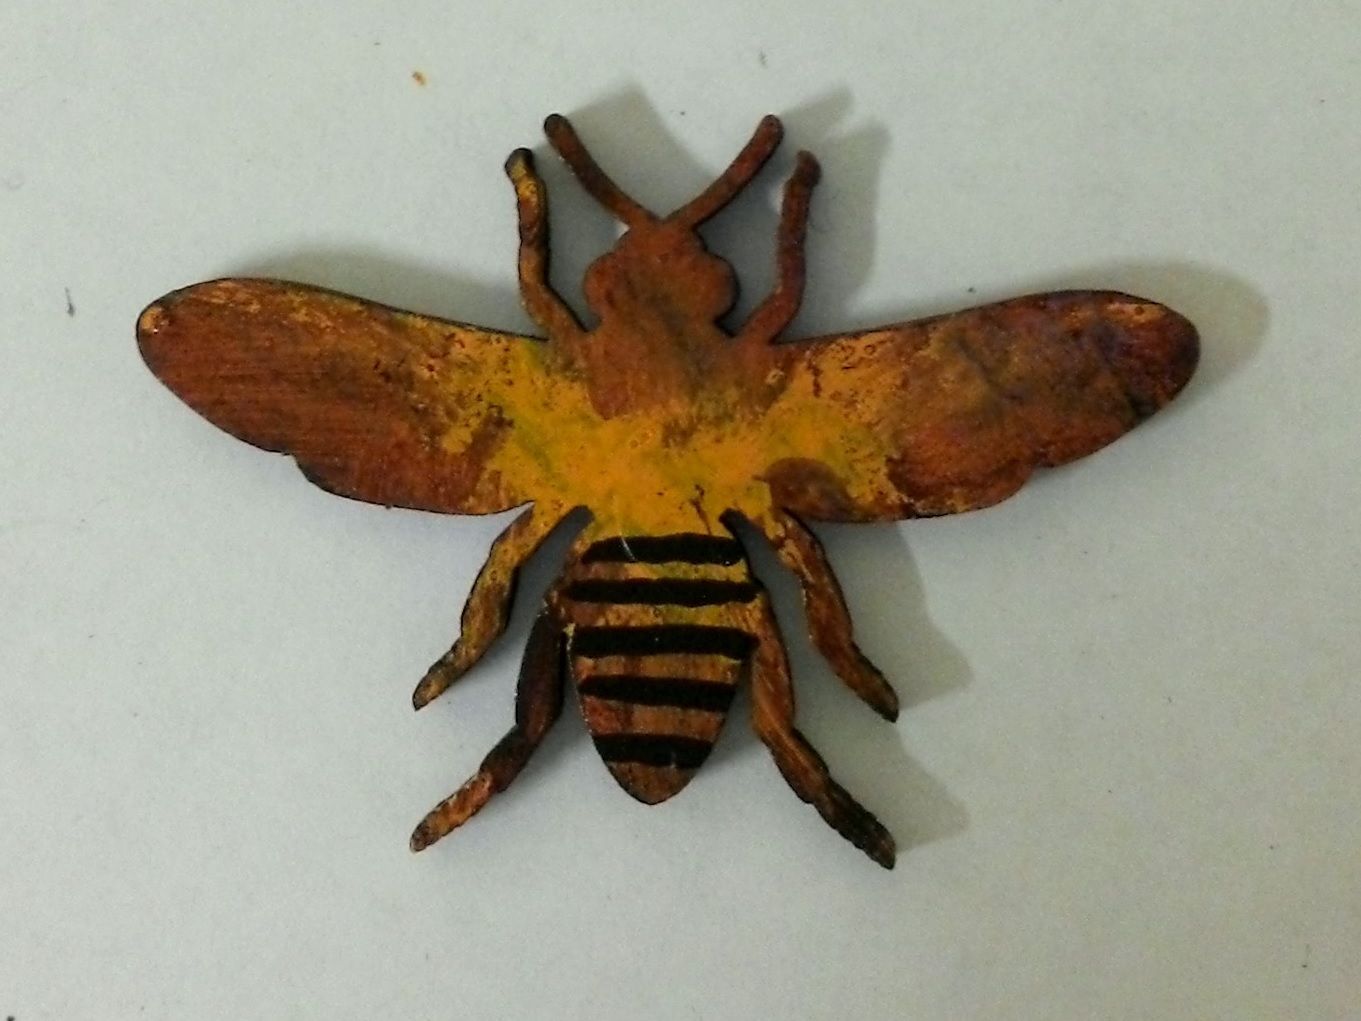
MASONITE BEES
For an additional decorative touch I used Masonite bees.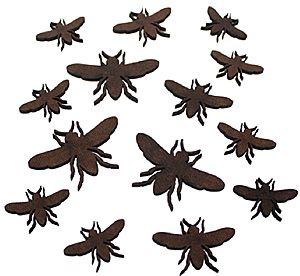
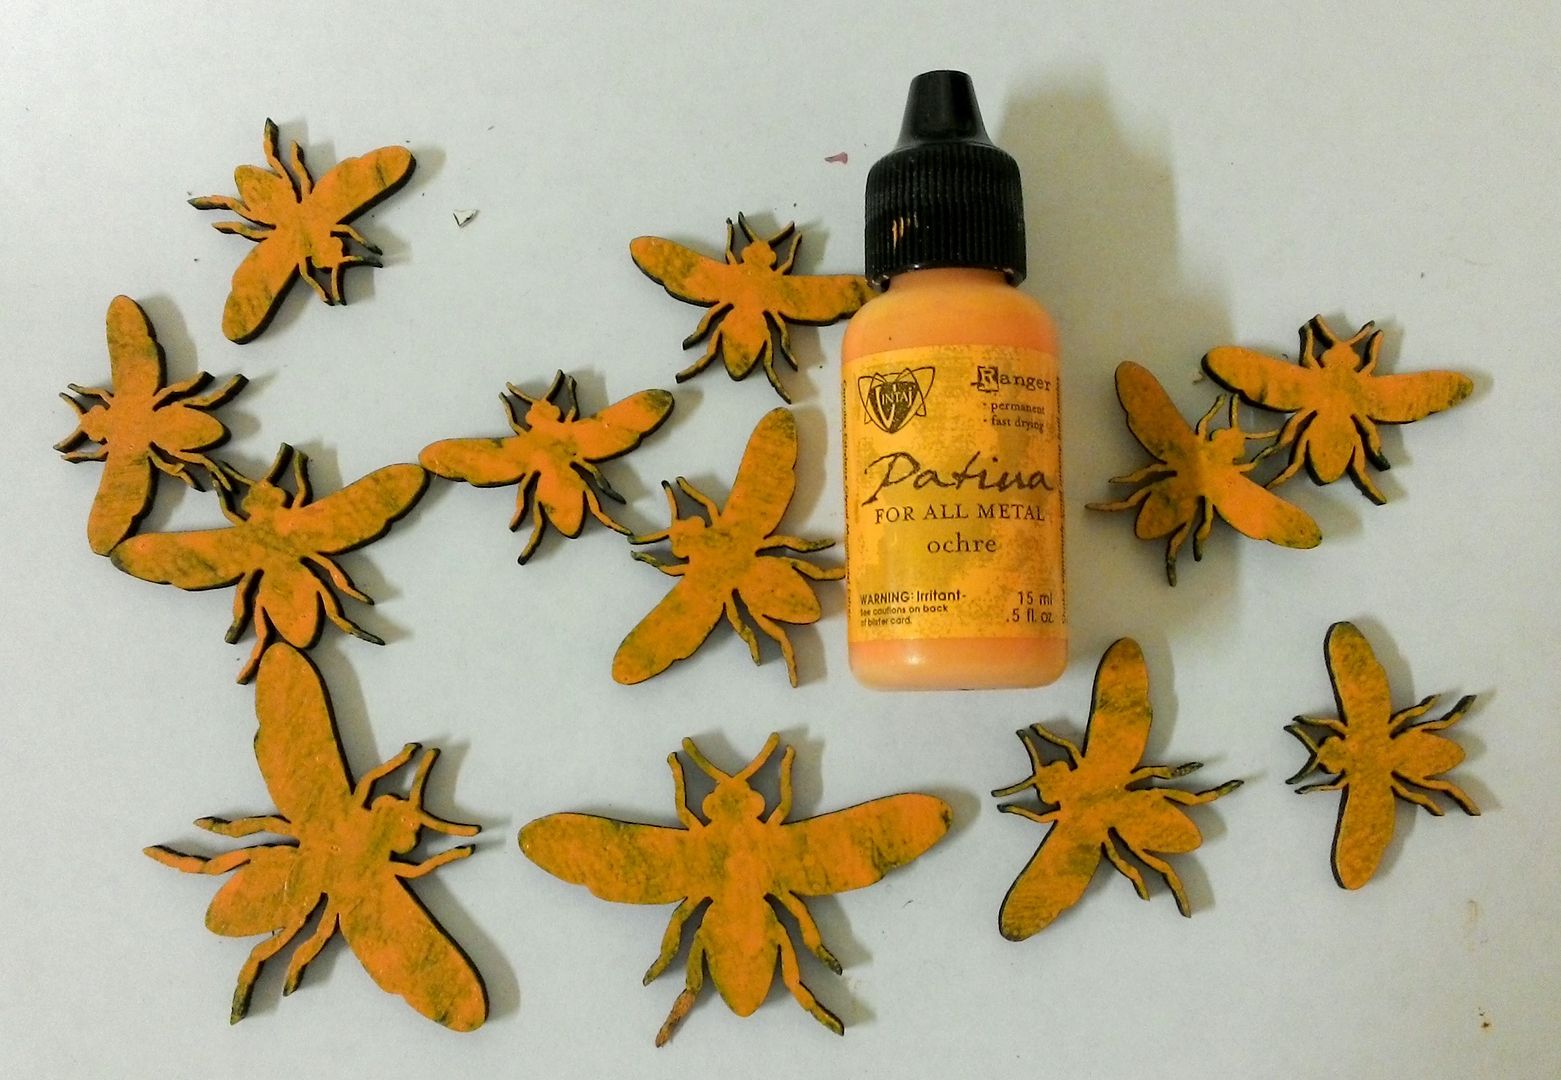
I started by painting the bees with Ocher Patina
paint. I didn't completely cover up the brown of the Masonite but tapped the paint on with a brush.
Next, while wearing a rubber glove, I used my finger
to lightly brush on Espresso Alcohol Ink.
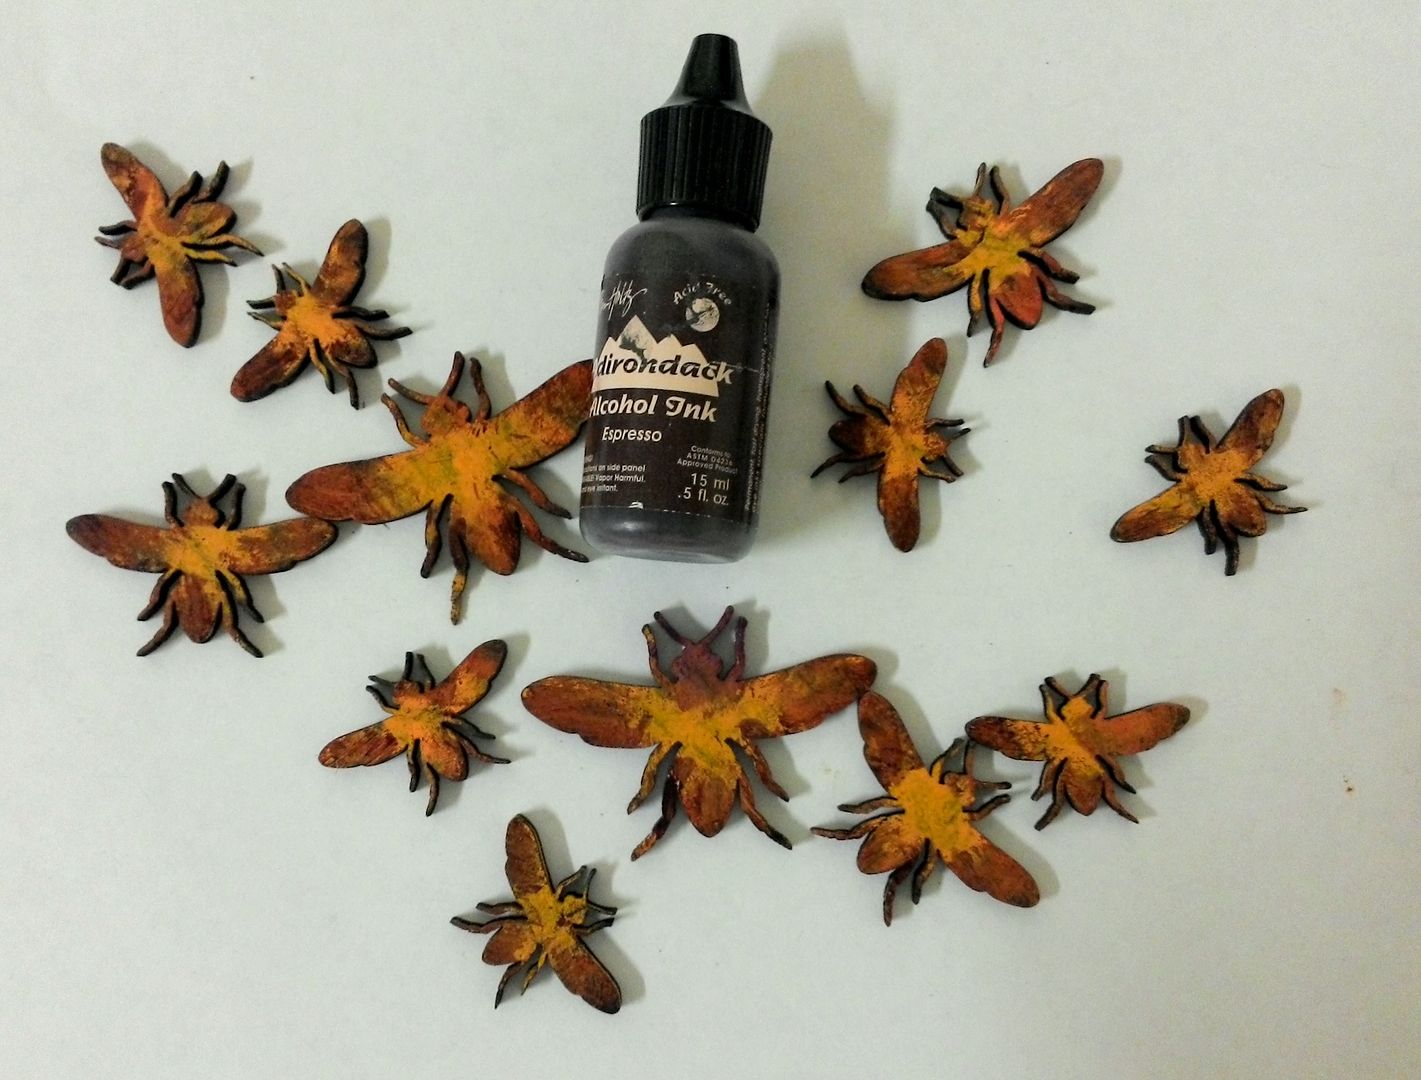
For a final touch I used Onyx Patina paint to paint
black stripes.
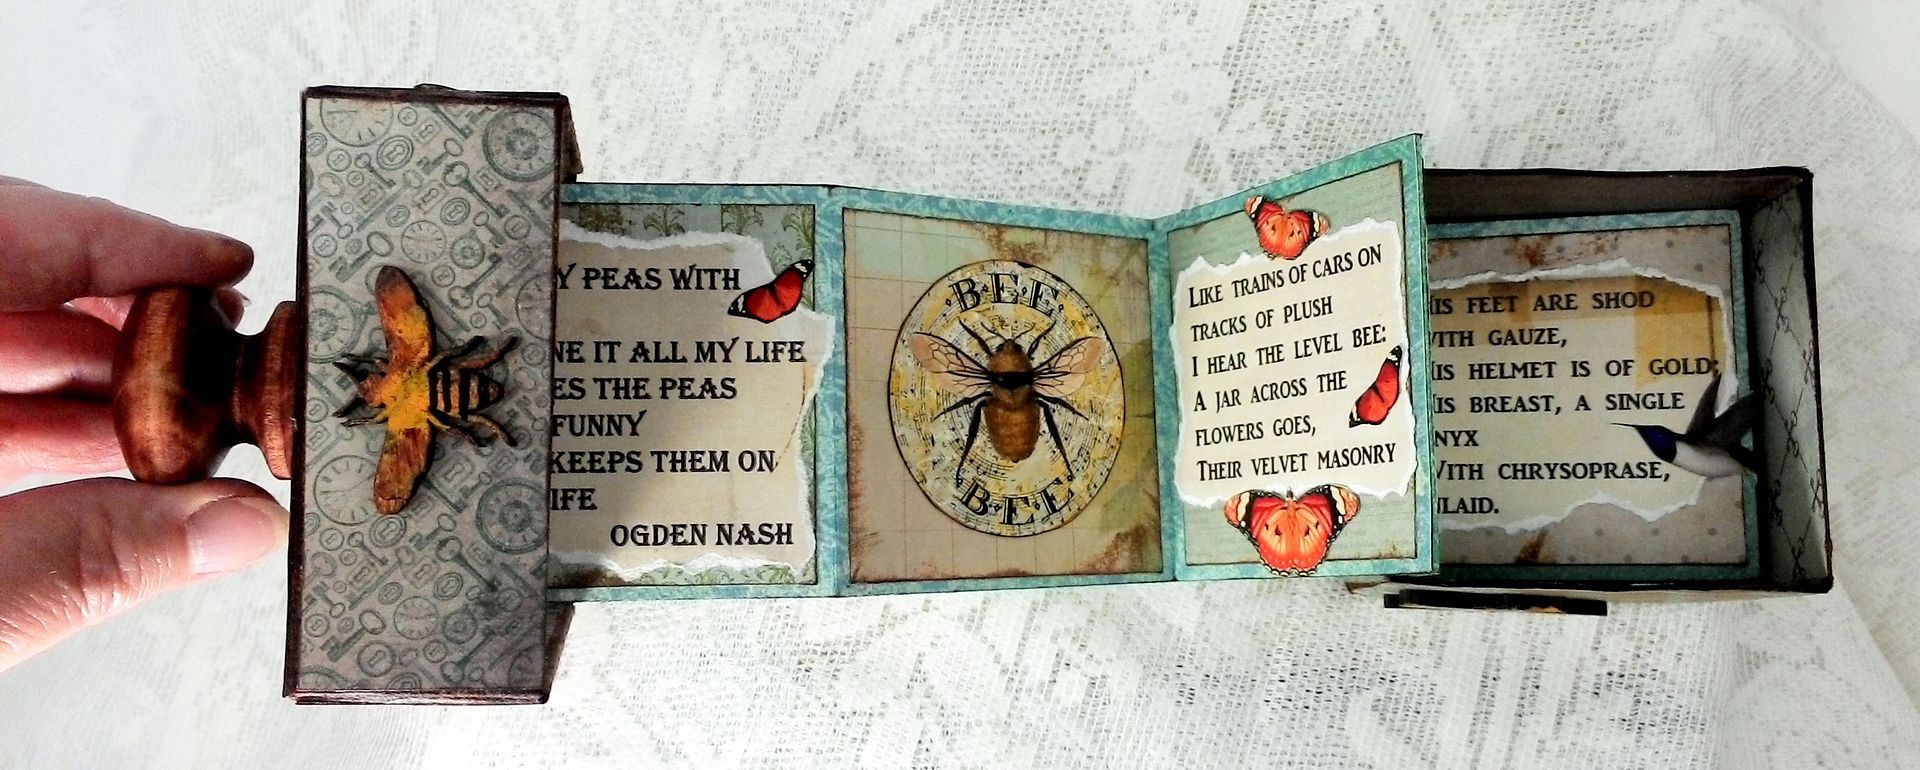
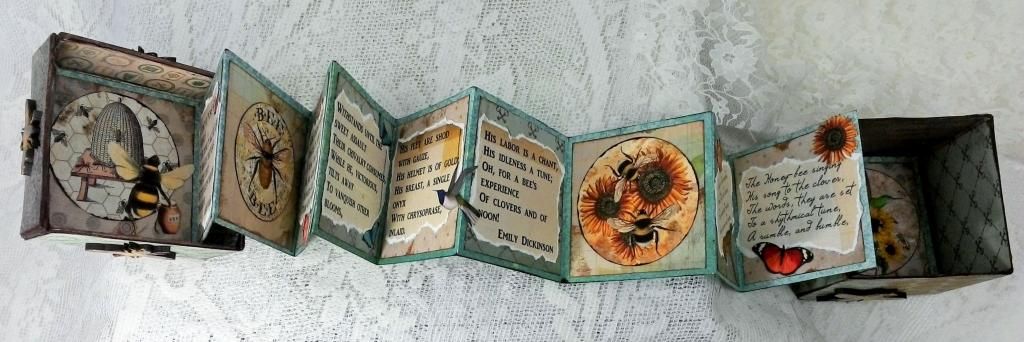
To make the book, cut strips of decorative paper 2
7/8” tall and as wide as the paper. Cut
as many strips as you like based on how many panels you want in the book. The only restriction to the number of strips is
the size of the box and you must have an even number of panels to facilitate
gluing the book to the box. I suggest
using 12x12 paper as the strips will be longer and you will have to cut and glue fewer together.
Score and fold the paper strips every 2 7/8". You should end up with a short
piece at the end of each strip which will be used to connect the strips together. For the sample piece, I cut 4 strips.
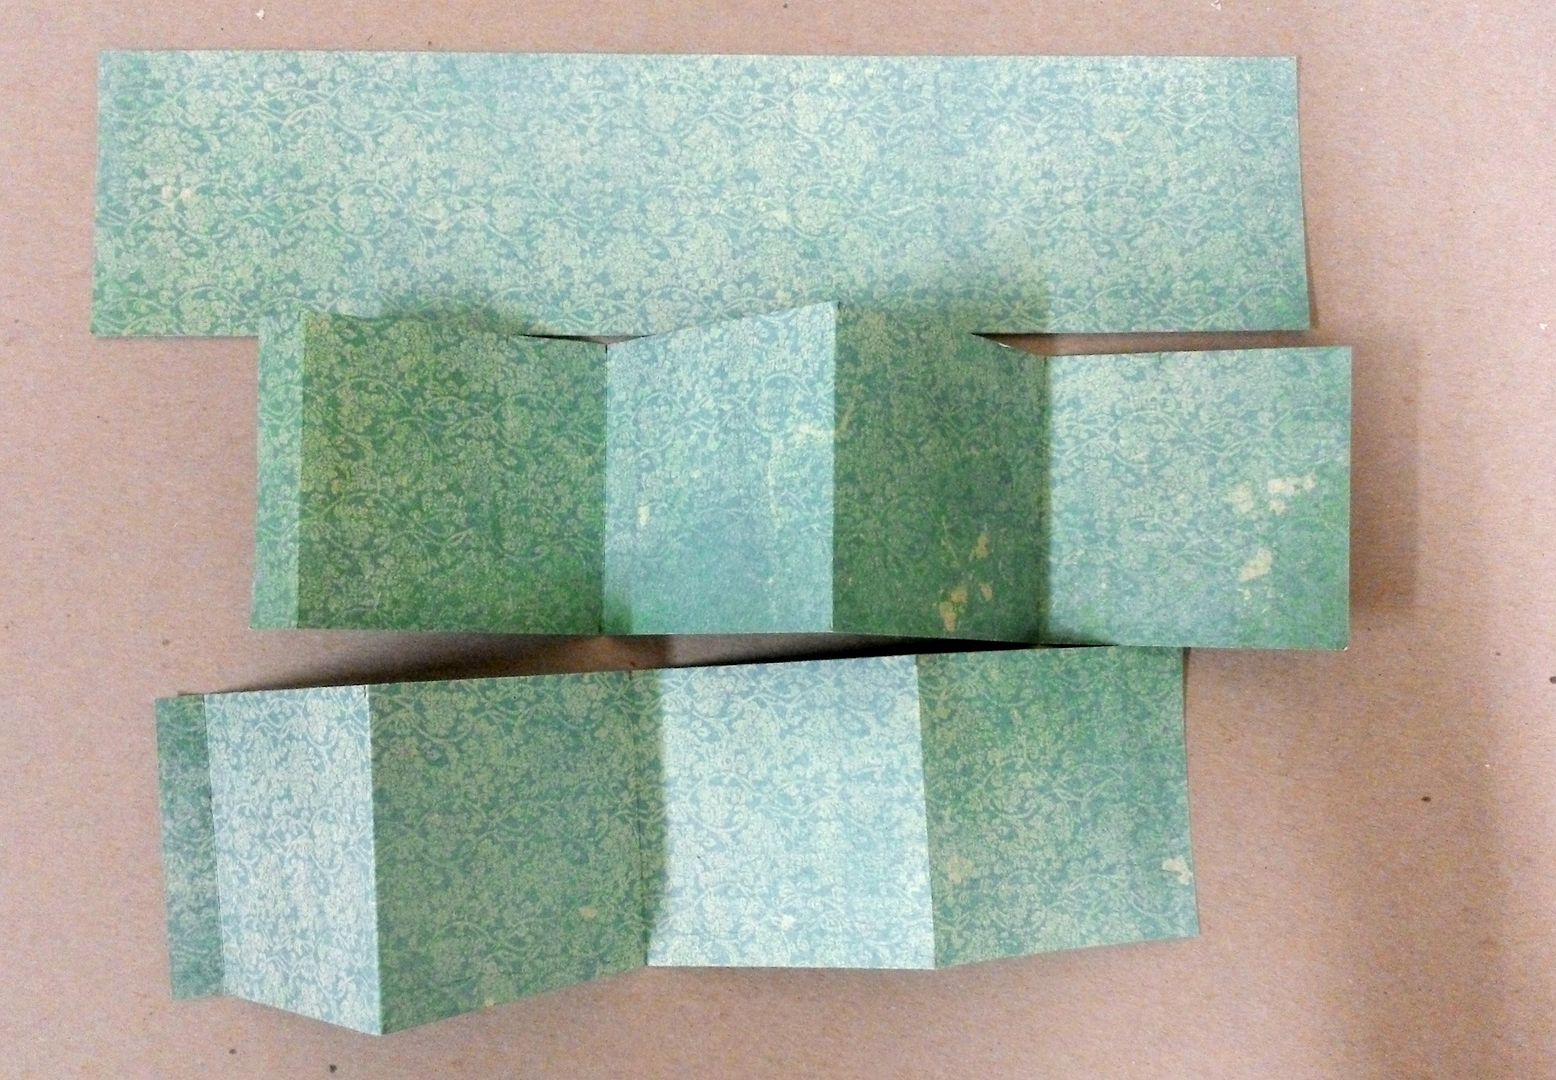
Connect the strips together. Cut away any short sections that you didn’t
use to connect the strips. I decided to go with 14 panels. Notice the direction of
the folds and how the end pieces lay flat on the surface (this means the book is folded in the right direction.
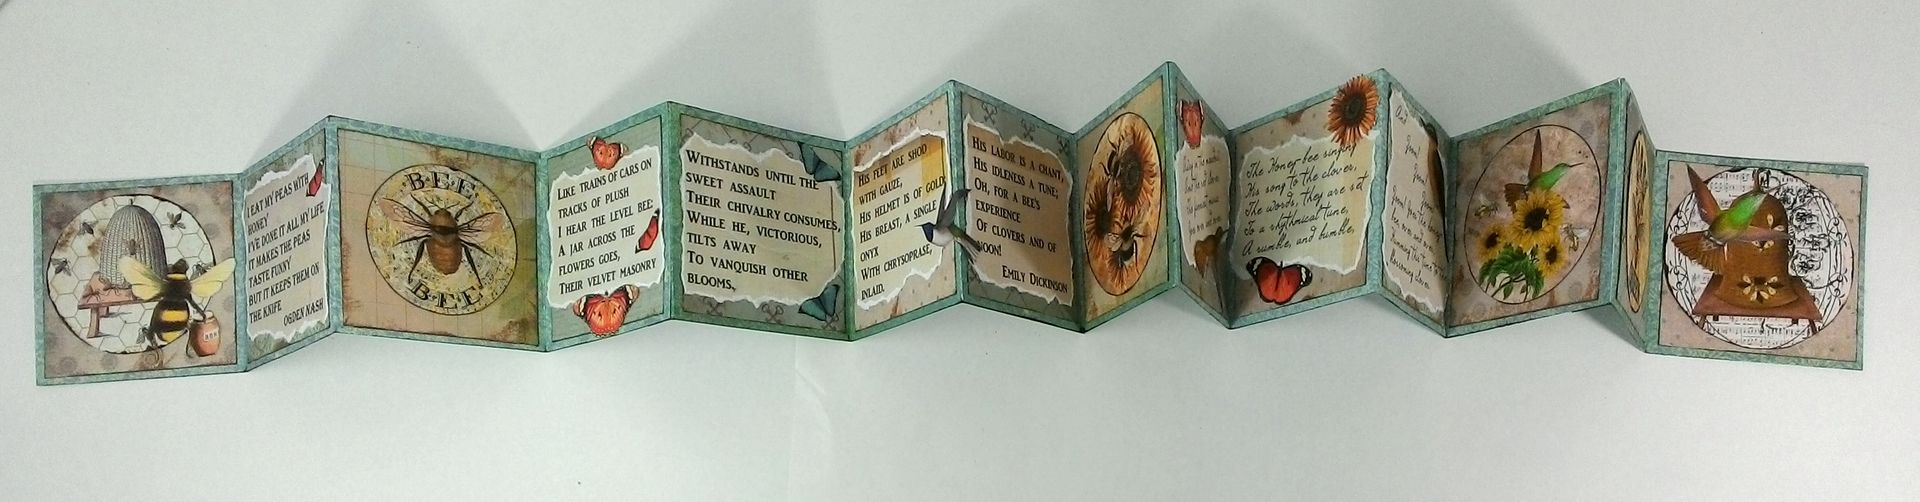
Glue one end of the book to the inside bottom of the box
and the other end to the inside lid of the box.
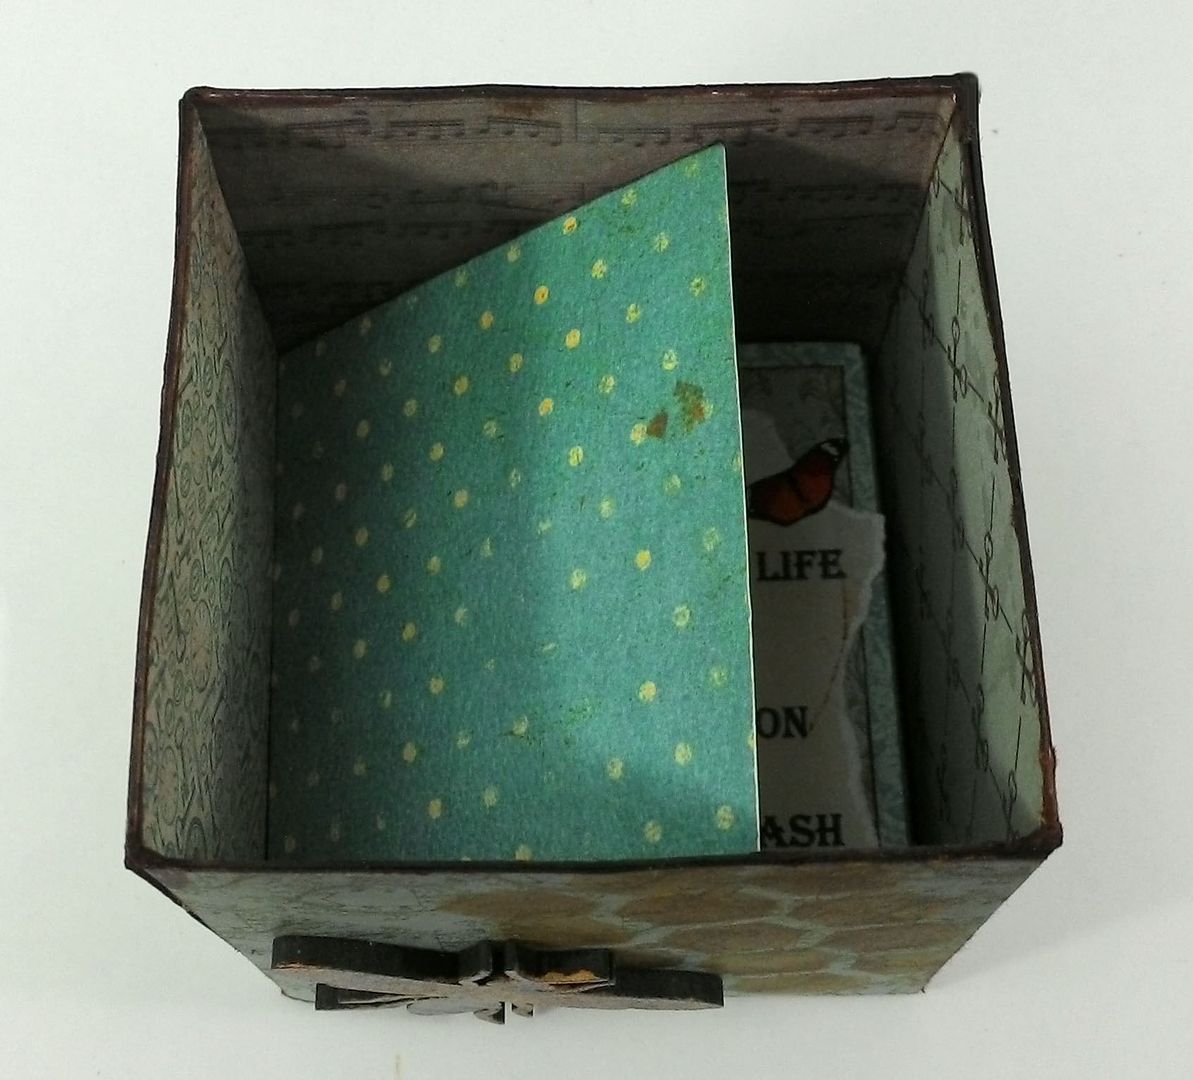

Lastly, I added a stained wooden knob to the top of
the box.
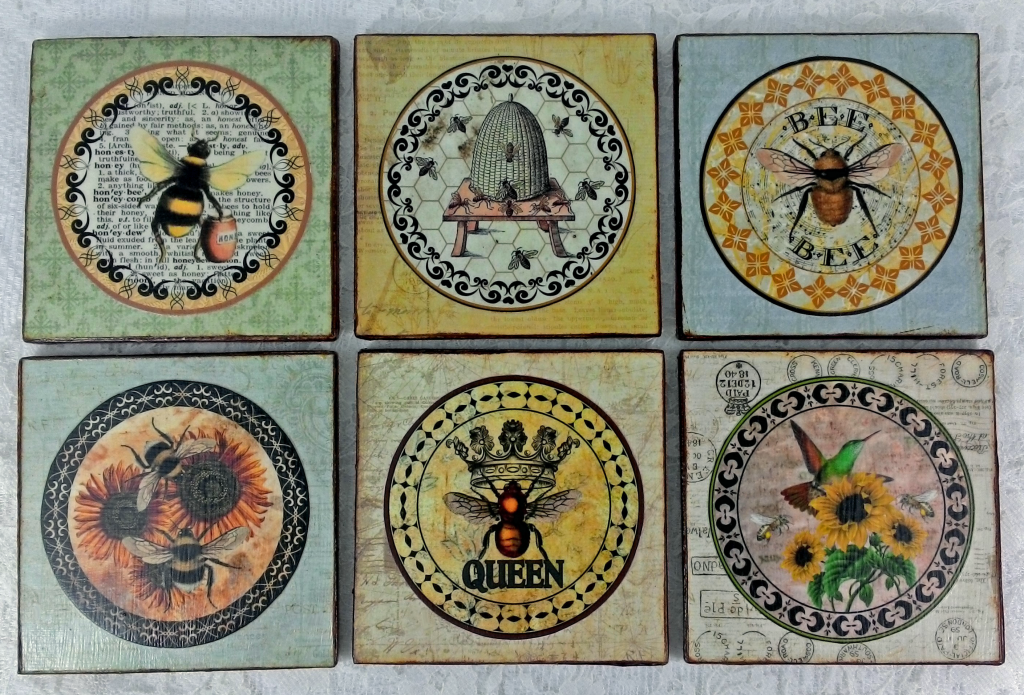
Coasters
After creating the Bee collage sheets
with the round medallions, I was thinking that they would be perfect for coasters
(I need a new set of coasters). I think
they would also make a great gift.
To make each coaster I cut 3 pieces of
heavy chipboard 3 ½” square. I glued the
3 pieces of chipboard together to form one coaster.
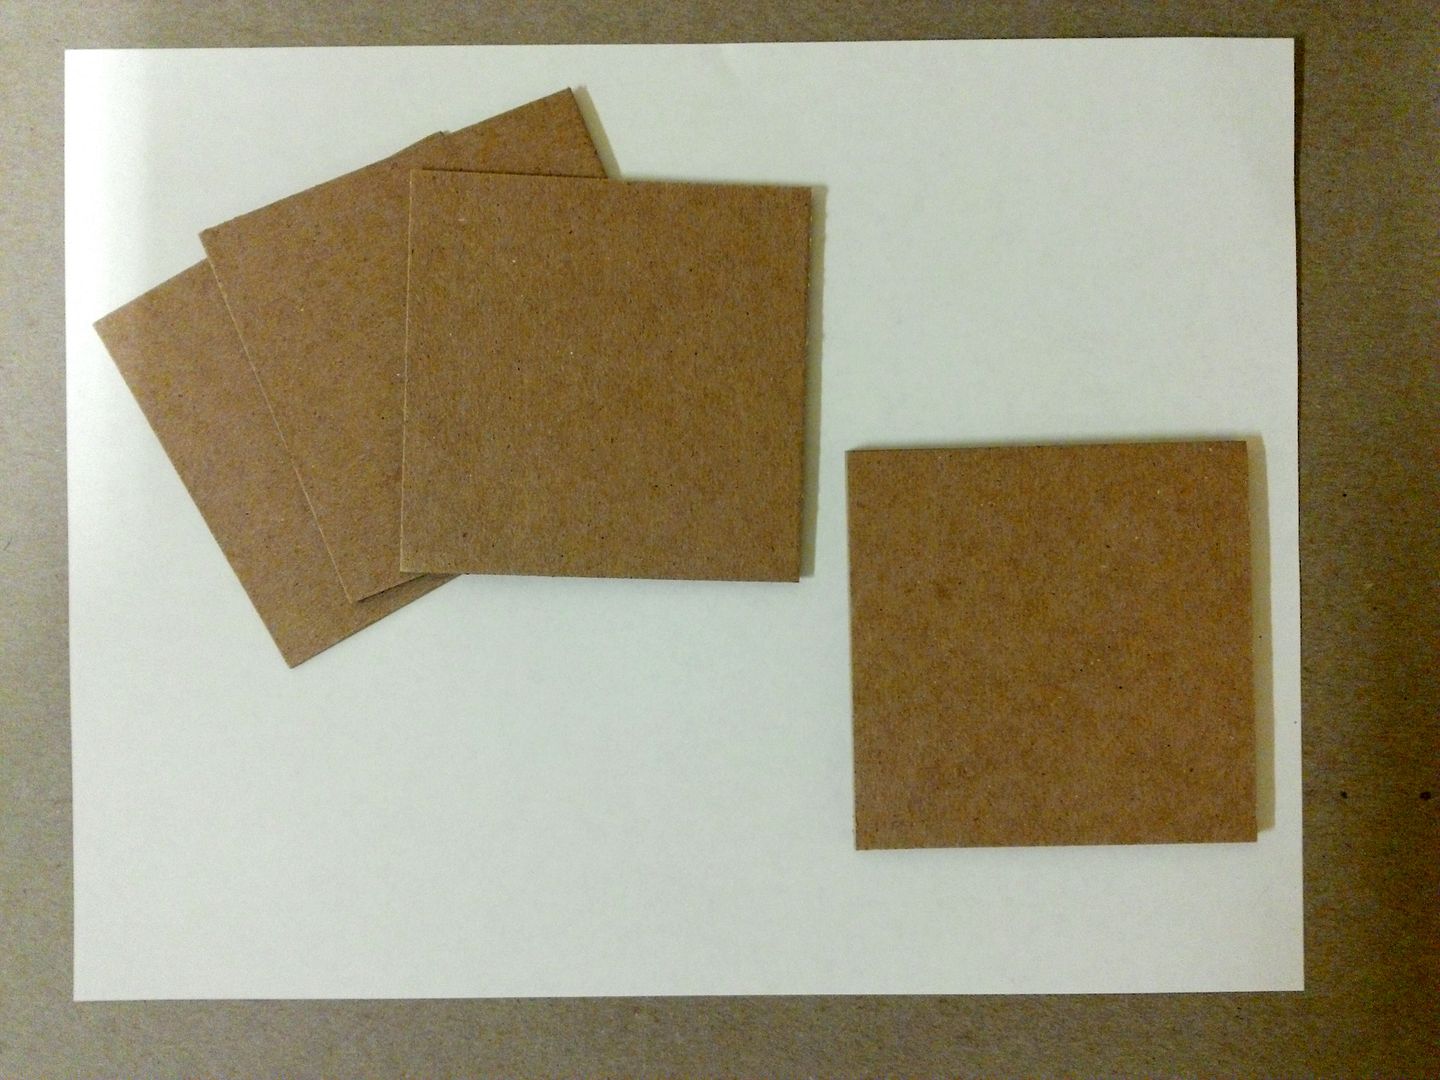
I sanded the edges to make sure
they were even and that there were no loose bits. Next, I applied a product called Texture
Magic to the edges so that you could not tell that there were 3 pieces layered
together. I used this product because it
was handy but you could use anything that you might have like Gesso, wood
filler, embossing paste etc.; anything that hides the layers.
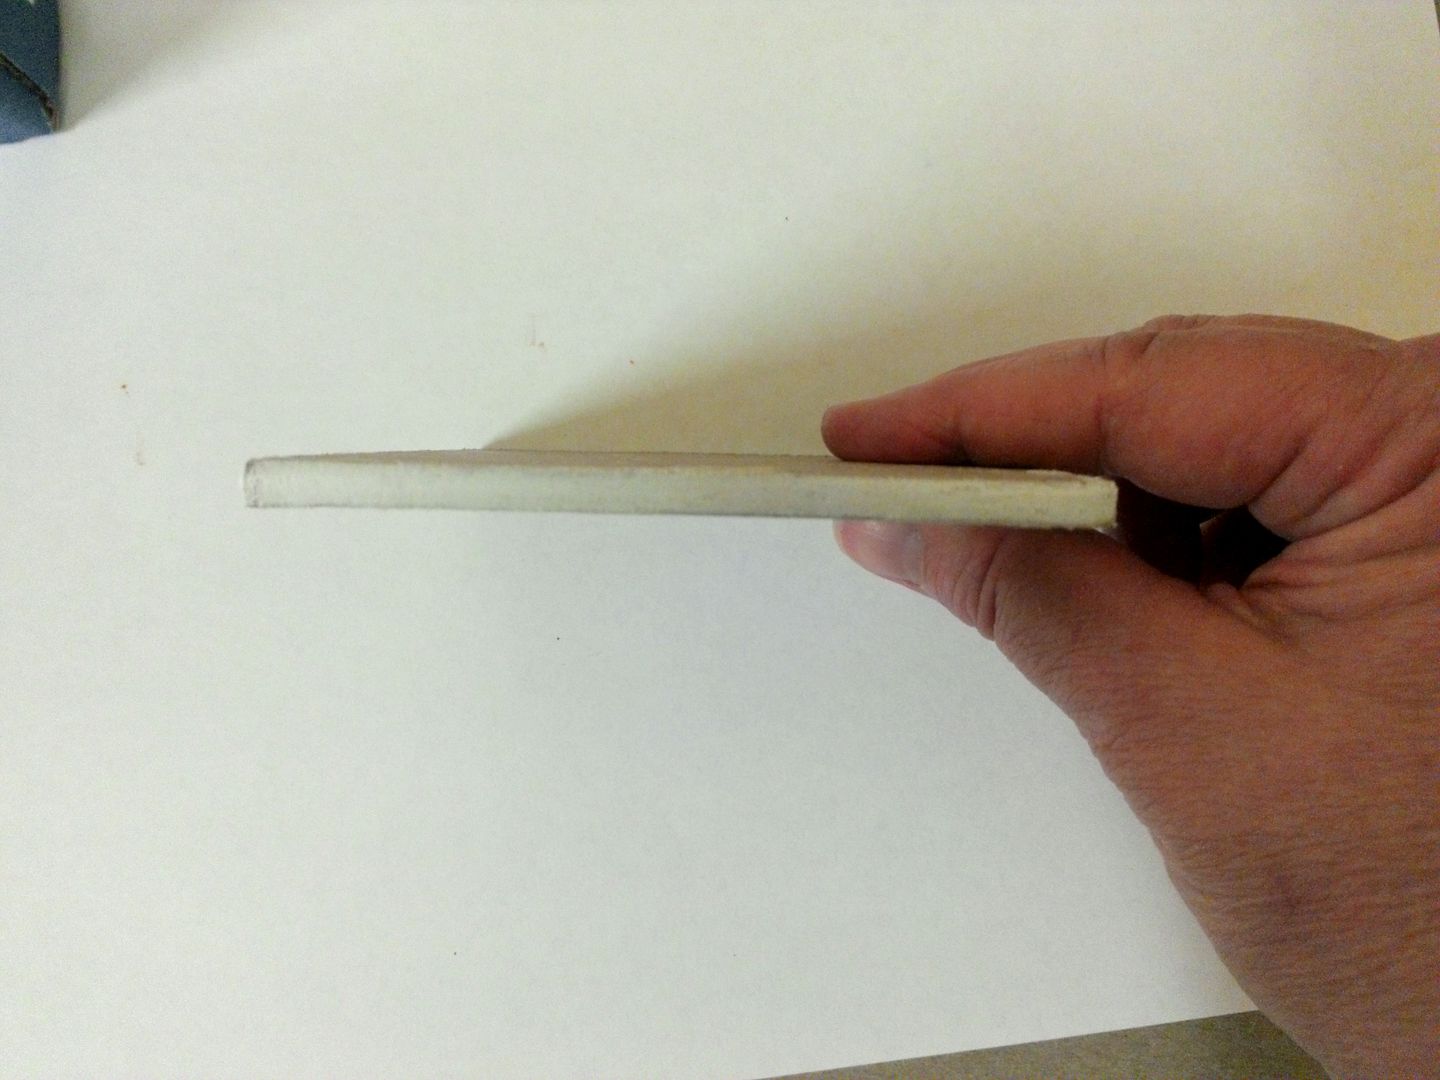
I lightly sanded the edges one
more time to make sure they were smooth.
Next, I used Vintage Photo Stain to
color the edges (you could also paint them).
Depending on the product you used to cover the edges, you may or may not
be able to stain them. I glued
decorative paper to each side and then the medallions from my Bees collage
sheet. I sealed the coaster by painting
it with multiple layers of Mod Podge.
59 comments:
How sweet of you! I would be so happy to win these. Thanks for the tutorials too! You always make things seem doable! Enjoy your week! Hugs, Diane
Thank you for sharing the details for making these projects. It would be difficult to select a favorite as all three are exceptional. Wouldn't be a thrill to actually hold one!
Fantastic tutorials and inspiration.
Thank you for the chance to win.
Love these! Thank you for sharing the tutorials!
Wow! Absolutely stunning work Anita! To bee or not to be! Said the Queen! What a delightful domino book. In Tasmania Australia they have the most delicious bumble bees they are HUGE. I would love to capture some and keep them for my own enjoyment. Thanks for the chance to win. Your work is BEEUFIFUL! Karen.x
So sorry I meant to put Laura. That will teach me for multi tasking. Karen.x
Wonderful bee creations Laura, where would we bee without our busy, helpful friends? The box book is brilliant, love it! Thanks so much for the opportunity to win one of your amazing creations and looks like I'm off to Alpha Stamps to buy some new collage sheets! Deb
Stunning and inspiring creations. I adore bee's too and your projects have depicted them beautifully in such a regal way. Thank you so much for sharing the tutorial and for the chance to receive one of your gorgeous makes.
Crafty hugs Annie x
Love the new sheets and what stunning projects! Thank you for sharing the details and a chance to win a Laura original!
I can't believe that you can part to give away the very, very creative books. I love the bee sheet and especially appreciate the time it took you to create the tutorials. Thank you!
I would love to win the drawing for anything you ever make!
Fantastic tutorials! I love bees too and dominoes! Great projects!
wow what a tutorial, gotta try some of these, you are so great for sharing so much to us. A giant thanks and please put my name in the hat for the drawing. I know we don't put names in hats anymore but love the saying oxoxoxox
As always these are beautiful. The details are wonderful and I love the new Collage Sheets. Just love your style. Thanks for the tutorials and the Give Away!
You always have the most wonderfully creative ideas. Very inspiring. Thank you.
Your projects are just gorgeous. I can't wait to get started. I am going to place an order right now.
thanks for the inspiration and you are very generous in sharing your know how.
Hugs
FredaB
Oh my goodness! It would Beeeeeeeeeeee so awesome to win one of these incredible and adorable creations!!! I bet your comments and email will be buzzzzzzzzzzzzzzing with responses to your giveaway!! As soon as I saw that you were giving them away I thought it WASP a wonderful thing!
fingers crossed and good luck to everyone!
I love these, Laura! They are bee-utiful! : )
I love these, Laura! They are bee-utiful! : )
Wow--incredibly beautiful! Just stumbled onto your blog today and am absolutely flabbergasted. What wonderful projects!
I love all of these projects, but the To Bee or Not to Bee book just makes my heart sing. (And I'm dying to try my hand at a set of Bee Coasters!) Beautifully done my dear.
Love these projects and thanks so much for the tutorials. I have always loved bees.
Bee-utiful Laura! What great projects; just love the Birds and Bees themes. Your images are so lovely - and your tutorials so easy to follow. Thank you for sharing your ideas with us!
Oh my gosh, everything is so bee-yoo tiful!
The colors and themed techniques are inspiring.
Laura you are amazing I love your beautiful bee projects and I a definitely buying the new collage sheets. I am also looking forward to this years Halloween project-can't wait to see what you have in store this year. Thanks for all your inspiration.
Your beeautiful bee projects are wonderful. I love everything about bees. Your domino books are so adorable. I have to run over to Alpha and purchase them now!
Thanks for the opportunity to win.
DianeD
What great projects you've created with this collage sheet. I would love, love to win one of your domino books; they are so very cool. All of your art is.
That bee book is SO cool! Thanks for the chance to win!
Wonderful projects. Mi love the bee domino books, would love to win!
More fun project Laura! Sure would love to win one! I am hoping to make at least one new piece for my Halloween Carnival this year!
hugs Karen
Amazing and beautiful creations as always, Laura! And how generous to offer them as a giveaway. It would indeed be an honor to own one of your works of art! Thanks so much!
I love all your project and I would be thrilled to own one so thank you for a chance to win, Hugs,
I love all your project and I would be thrilled to own one so thank you for a chance to win, Hugs,
How exciting to have the chance of owning one of your projects!! I'd be over the moon if I won. . .or over the bush? Hive?
You have a super way of incorporating natural history into art!
Wonderful dominoes and tutorial, it's really inspiring! Gosh, I'm such a fan of your work, you're my muse <3 I was to shy for posting comments but I will not be shy anymore!
And thank you for the chance to win those gorgeous pieces of art!
Virginie
Recently subscribed to your blog. I absolutely love the richness of your art. Thank you for sharing.
I have just made my 1st domino book, thanks for the tutorial giving me more ideas how to decorate the dominos ! Such lovely works you do, it will be great to see them in person, hope I will be lucky!
These are all so lovely! Such beautiful detail. Thank you for a chance to win!
I love your domino books! Thank you so much for the tutorials.
Wonderful projects! I love the bees and the colors used in these.
Laura... These tutorials are awesome. Gosh a lot of details. You are so clever and you are making fabulous ART !!!
Thank you for a winner option... How sweet of you.
Hugs from SPAIN
Your creations are always so beautiful, Laura. And I would love to win one of your stunning domino books! Thank you so much for sharing your tutorials with us and the collage sheets are wonderful. I just love bees! I want to make coasters like yours too!
Laura, these have to go to my top of Laura's Art favorites!! I adore Bees and the Bee theme! They are so good for us and they are as cute as a bugs bottom!! thanks for the chance! xoxo
Such fantastic pieces! I always love your work and these are right up there in your top 3!! What a great giveaway too - whoever wins will be really lucky :o)
Always look forward to your projects and tutorials. You have such a great eye for detail, I'm impressed as usual.
ps, anything exciting for Halloween 2014?
I am blown away by your gorgeous creations. the subtlety and beauty in color and design frankly make me drool. I also greatly appreciate the explanations. I would be so honored and thrilled to win some of your amazing art. thanks for the chance to win! xo
What bee-utiiful and inspiring creations Laura! I especially love the bee-woman. It is always so intriguing to see humans and nature combined. I hope you keep a copy of your artwork for yourself--but then no two pieces are exactly alike. I would be so honored to own one of your creations for display and future inspiration!
Hi Laura,
Yes I spent most of my time on planet earth. Count me in
Can you hear me squealing??? Bees are one of my favorite motifs and this work is beyond fantastic. Love the little domino books and the sheets are beautiful too. Hope I'm lucky....crossing fingers and toes!
Mary
Love your artistic flair!
RJ
Love these! THank you for your generosity in sharing your methods.
What great directions you give! I also appreciated seeing those patina paints in action. Thanks for the opportunity to win such beautiful work!
All your stuff is just bee-u-tiful' Makes me want to do some bee-thing.
How sweet!
Your tutorials have my buzzing with excitement! Thank you for the chance to win one of your creations.
Laura, as always you have created some amazing projects. Thank you for sharing your talent and tutorials.
Wow! I have just found your site and your work is amazing. I watched the altered book clip using tissue paper and was so impressed i will have to try this.
I am SO inspired! Thanks for the BEE-utiful ideas with exquisite crafts(wo)manship!
Laura, absolutely spectacular. The bee theme is a delight. The books are beautiful and perfectly done...as usual.
Post a Comment