

To kick off this Christmas season I have some ornament ideas for you and a new collage sheet titled “A Child’sChristmas” featuring vintage children and toys.
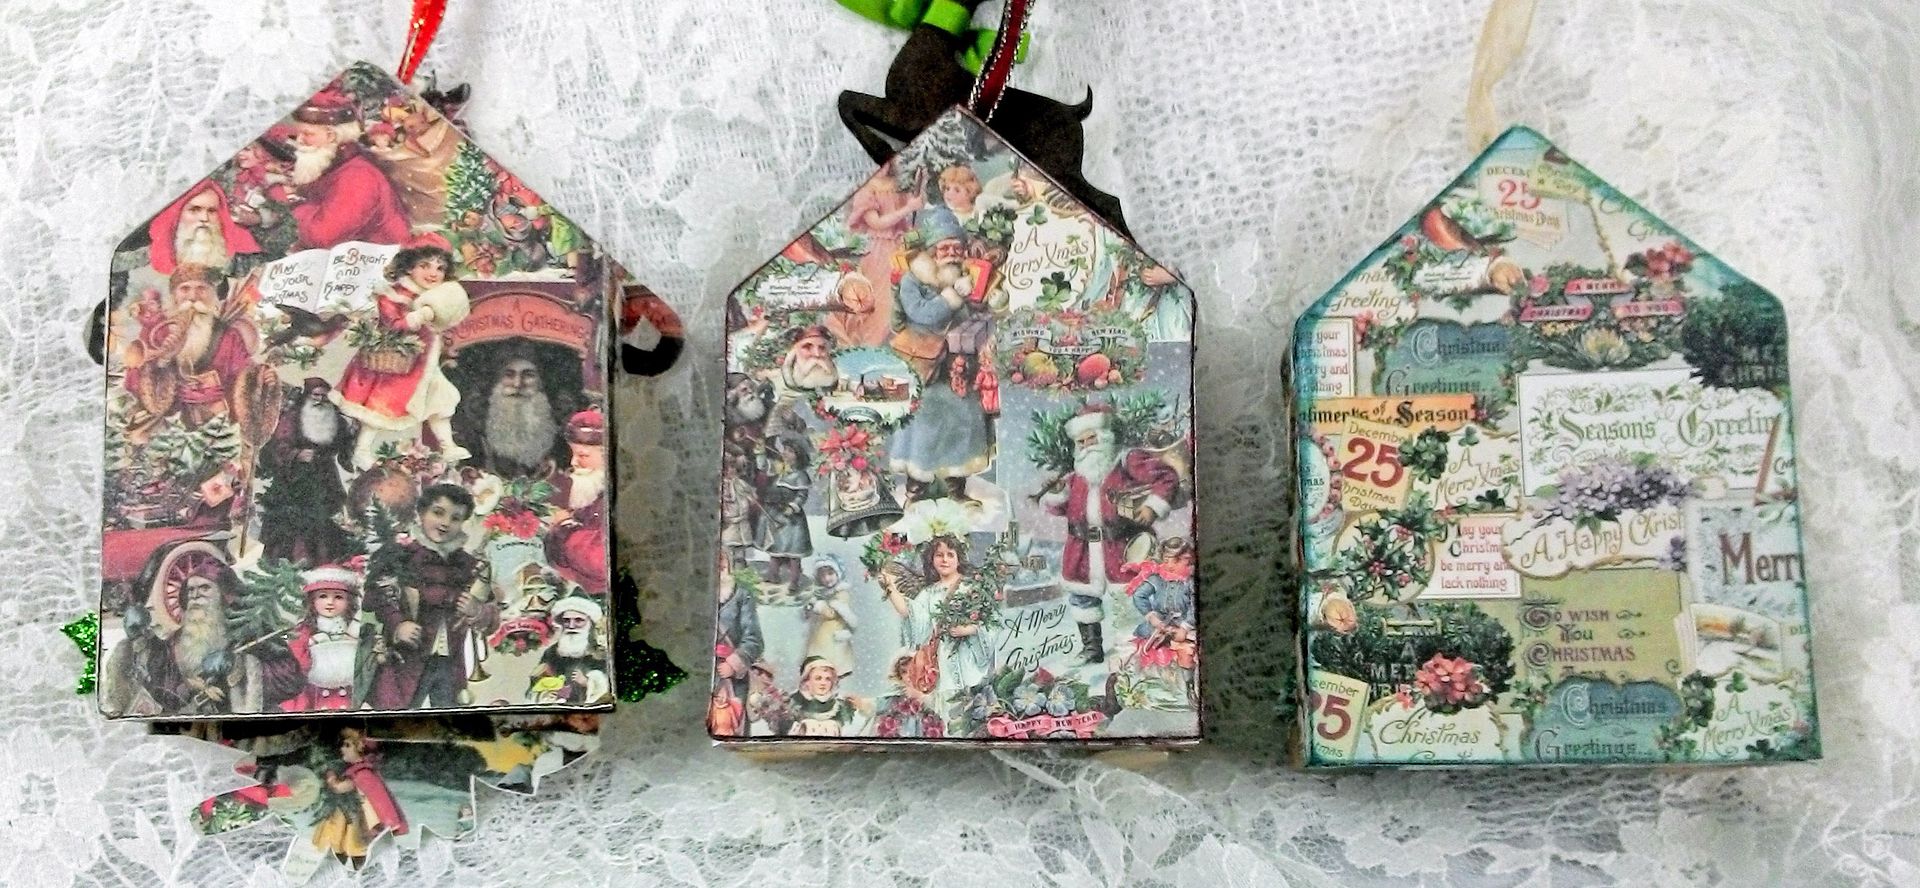
Three of the sample ornaments are little houses made from paper mache and chipboard and three wreaths made from plastic lids. All of these ornaments are easy projects and would make nice gifts.


This collage sheet features vintage children and toys. 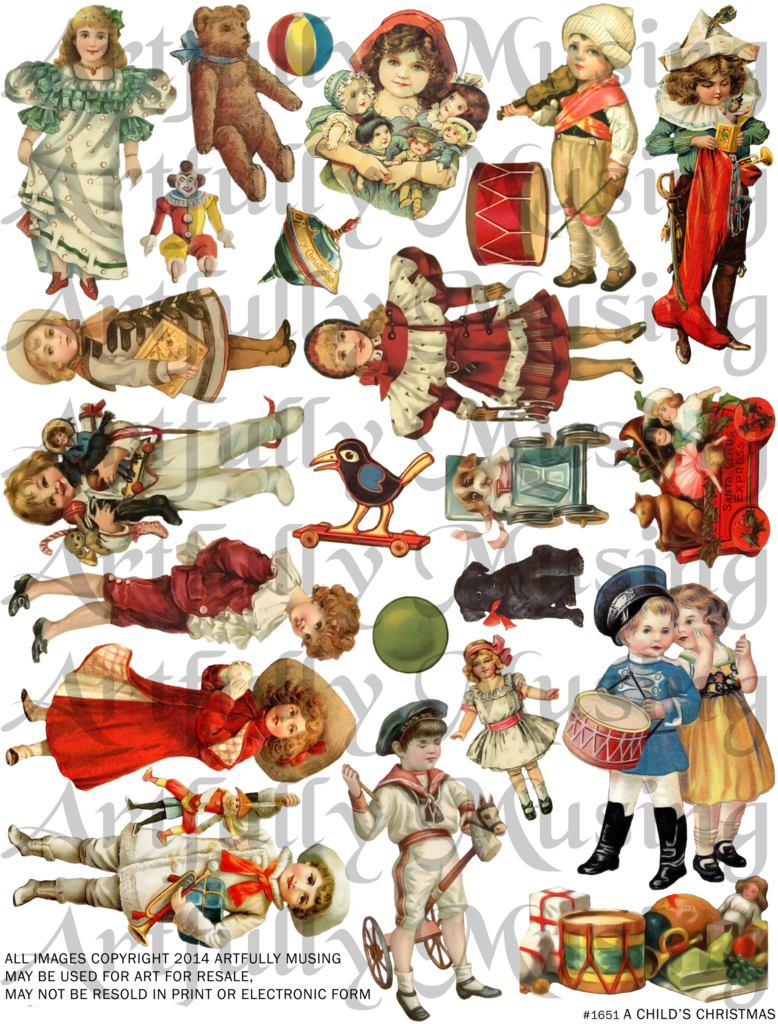
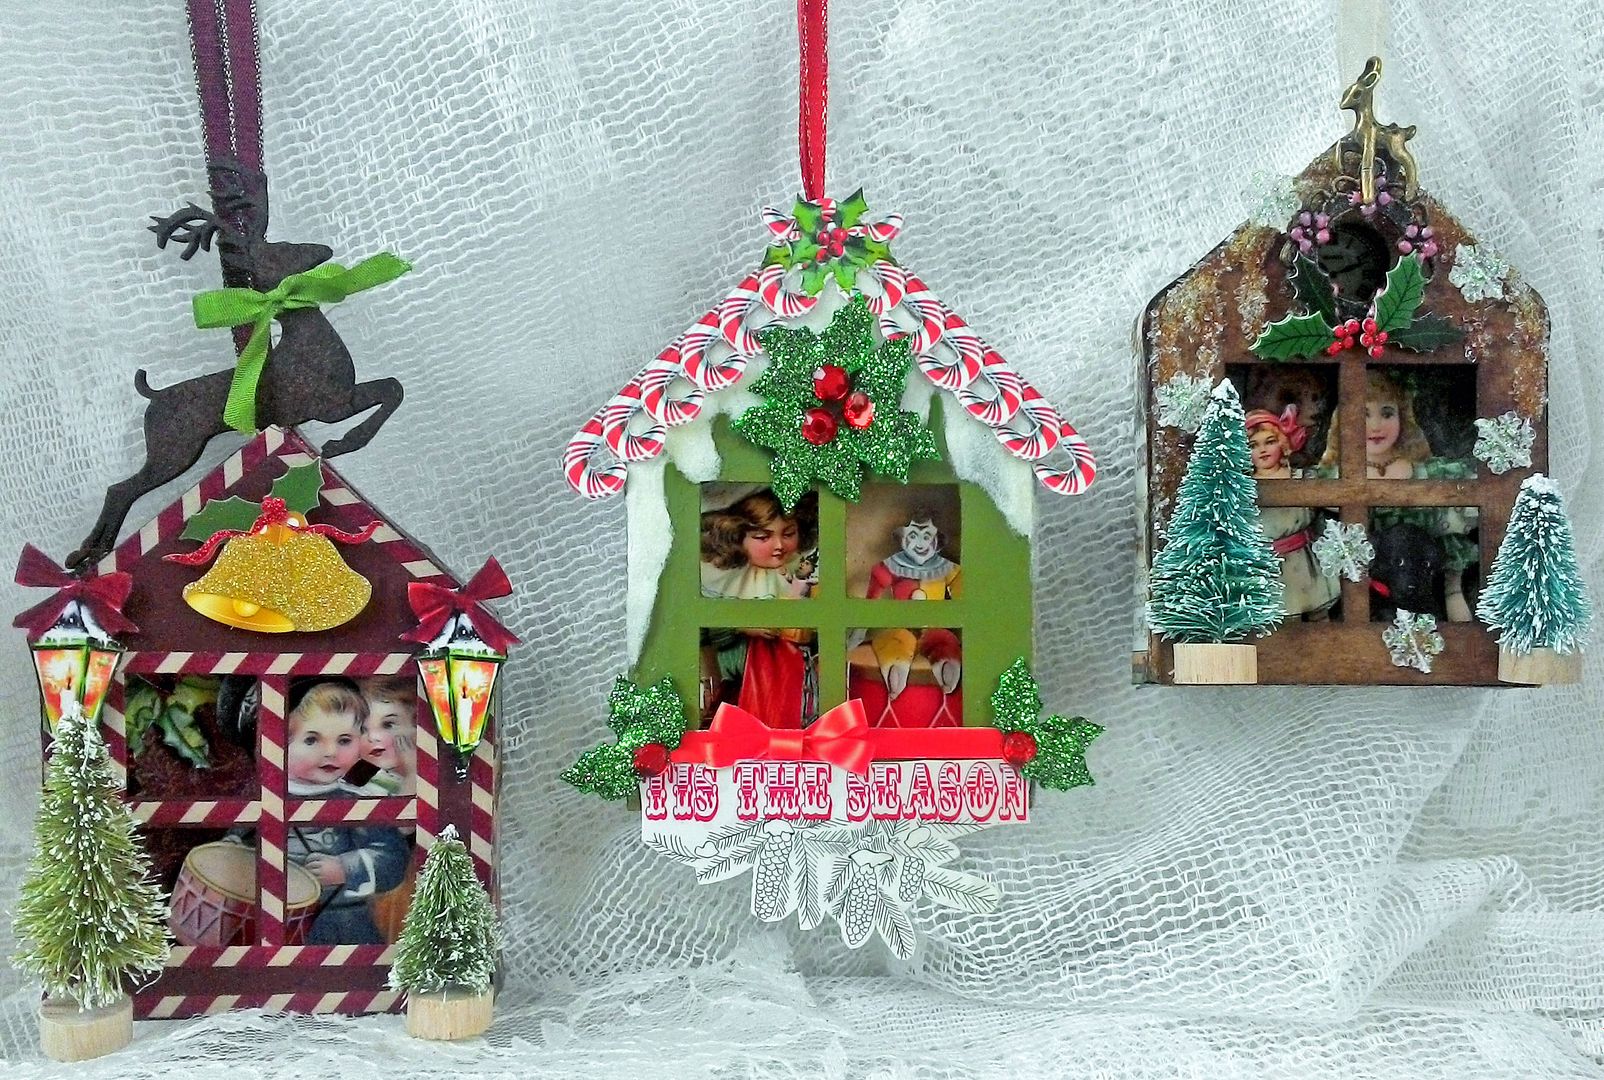
HOUSE ORNAMENTS
For the back of the house ornaments, I used the lid from a paper mache house box (I’ll be using the other piece in a project next month.

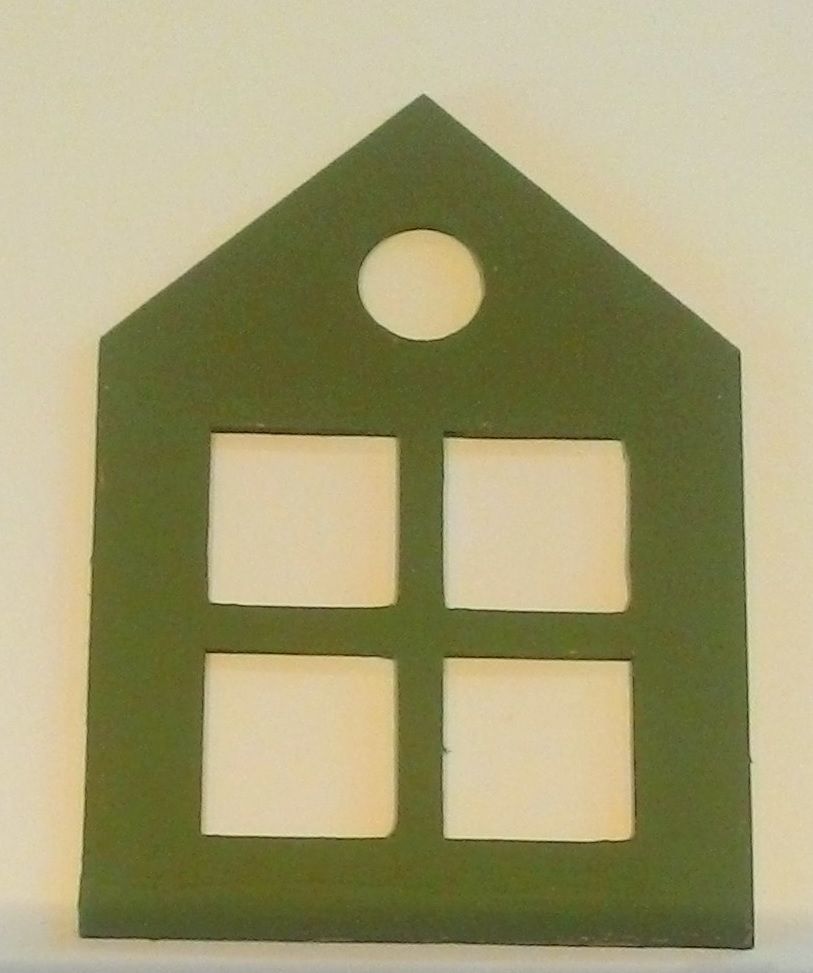
To the lid, I attached die-cut chipboard houses with a window.

On the inside, sides, and backs of the houses, I used a gorgeous Victorian Christmas paper pack which you will see me use more of in future projects.
To decorate the ornament pictured below, I first painted the chipboard window using a burgundy acrylic paint. I trimmed the house and window using 3mm red & cream stripes paper tape. The lanterns are from the “Christmas House Trims” collage sheet. On the top of the house, I mounted a Masonite reindeer cut-out. The glittered bell is a Jolee embellishment. Peeking through the window are children from my new “A Child’s Christmas” collage sheet.

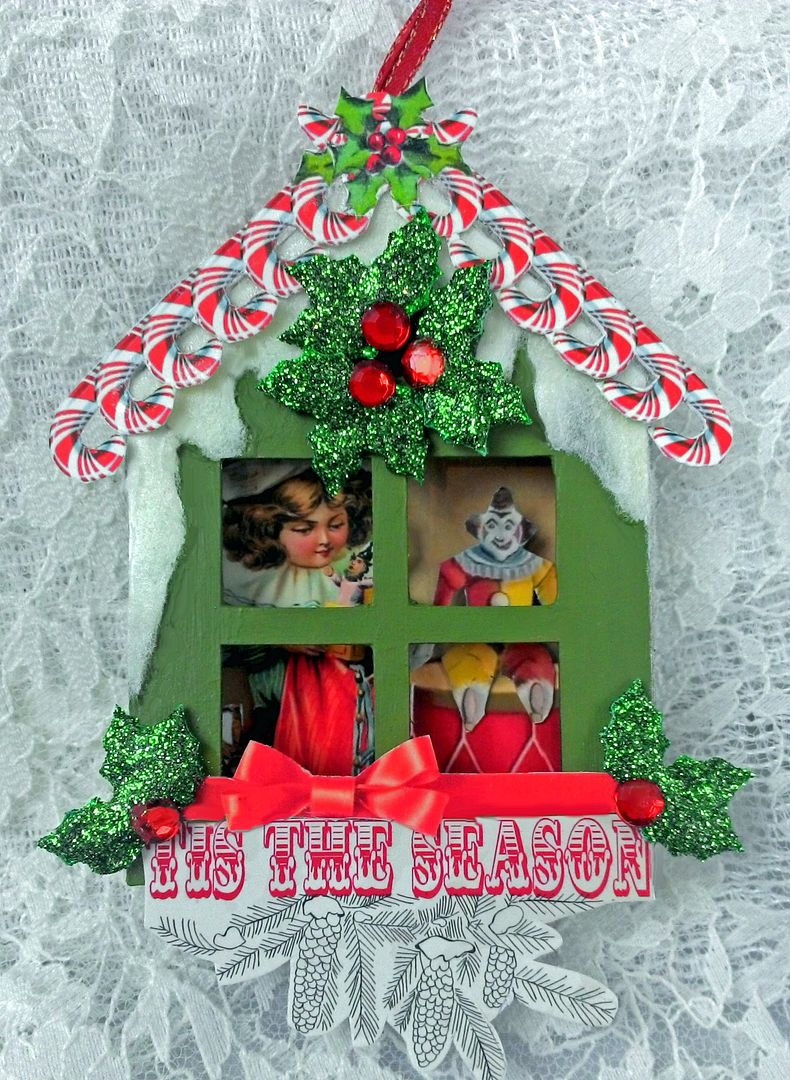
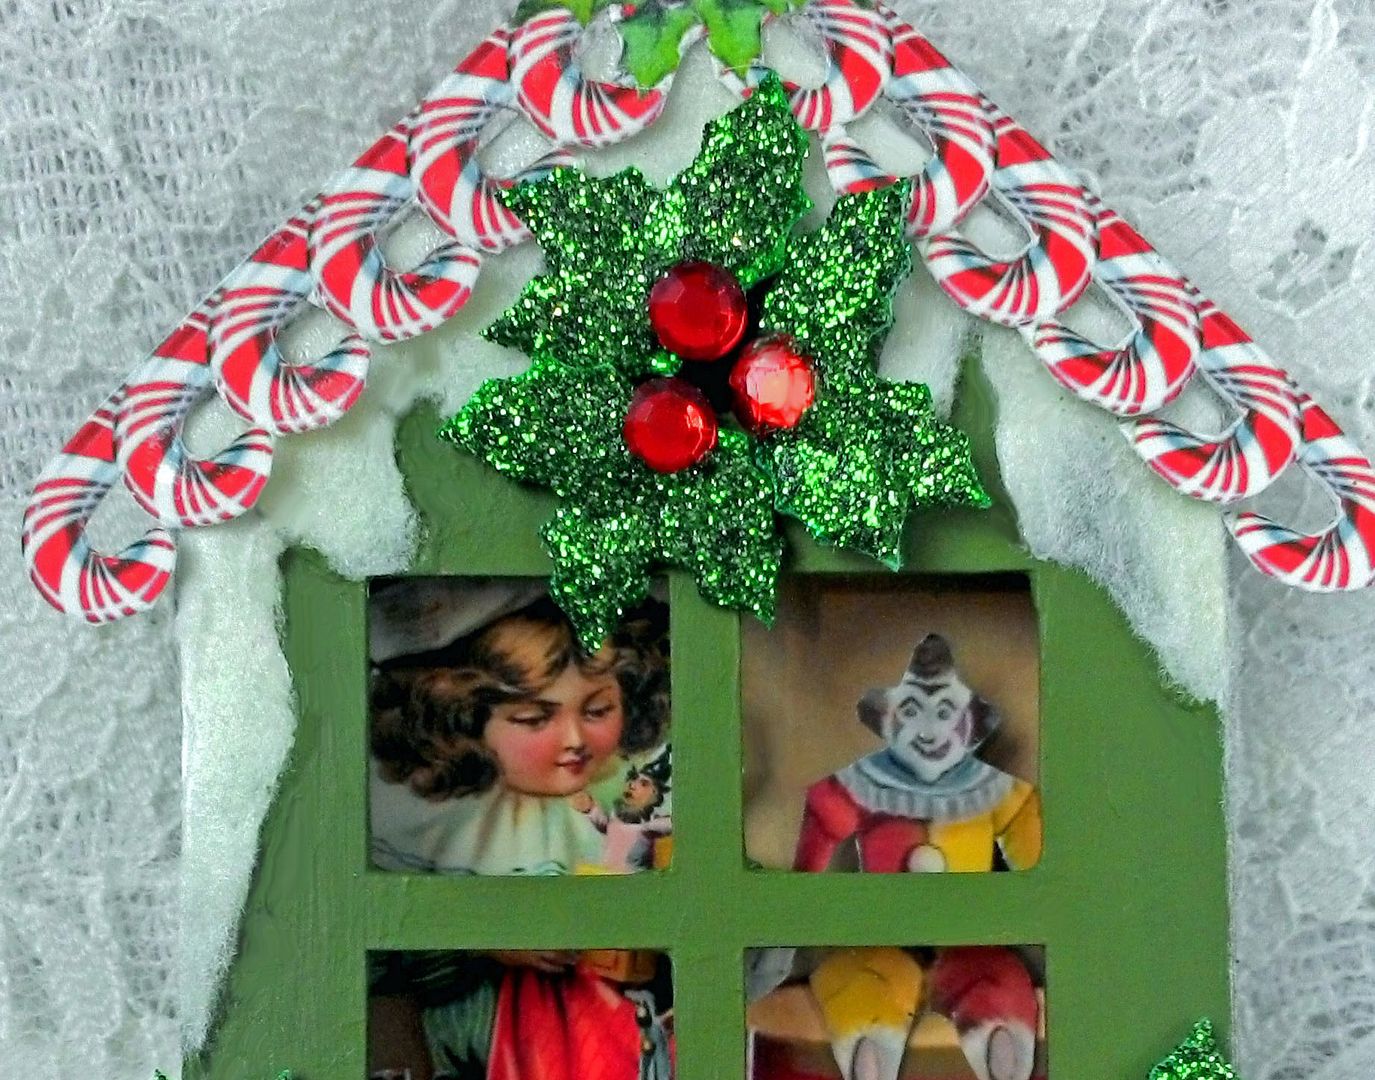
On the ornament pictured below, the candy cane roof and red bow are from the “Christmas House Trims” collage sheet and the “Tis the Season” phrase is from the Holiday Phrases Collage Sheet. The glittered holly leaves with rhinestones are a Jolee embellishment. Again, you can see a child with toys behind the window.
I painted the chipboard window using a green acrylic paint.
Next, I added white acrylic paint in the areas where I planned to apply white flocking. The white paint blocks out the green paint. Although the flocking is white, dark colors will show through.
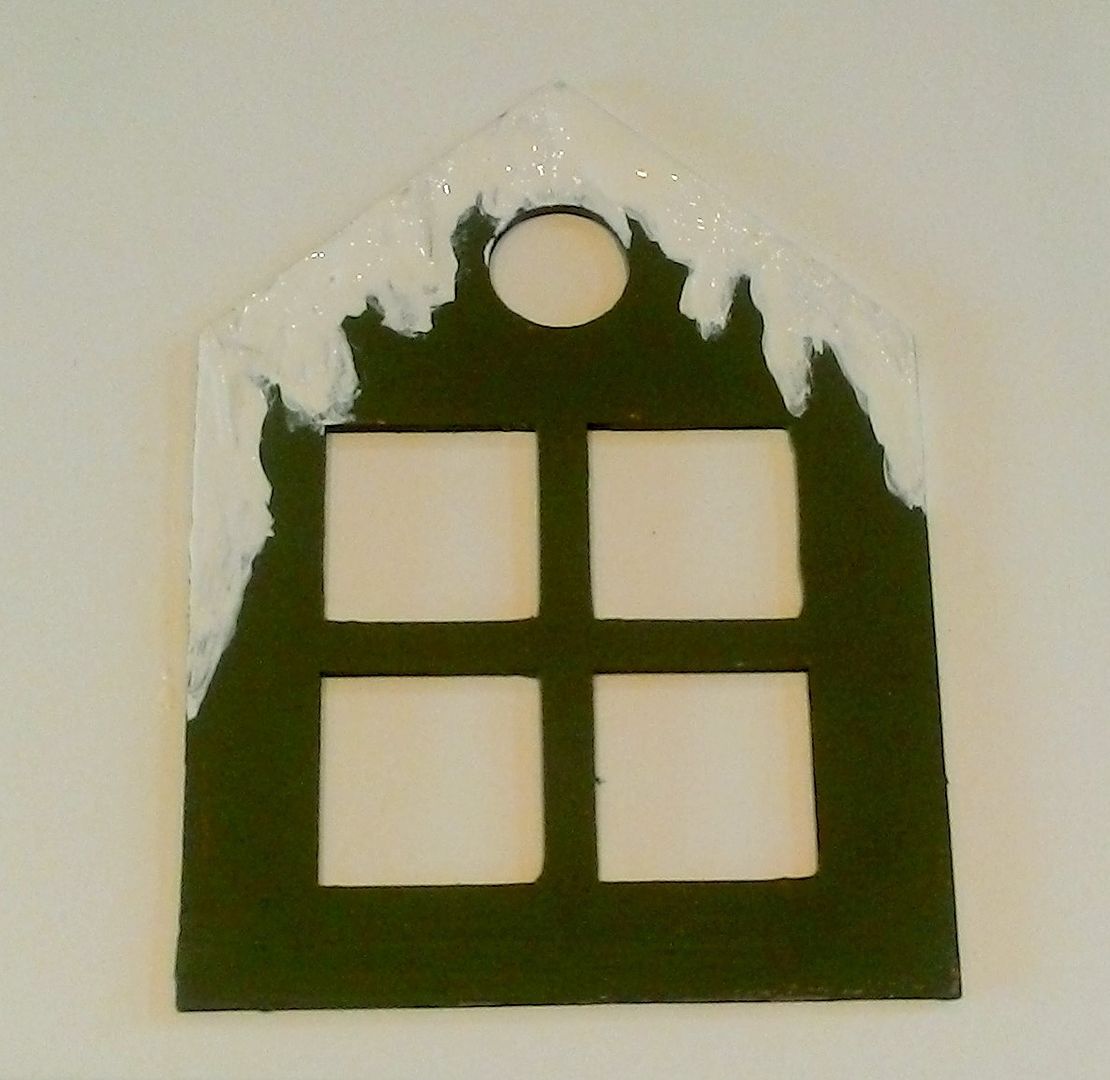
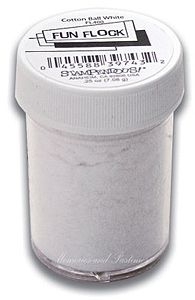
To apply the flocking, I spread Glossy Accents on the white painted area and then sprinkled on the flocking. Once the glue is dry you can tap off or carefully dust off the excess.
To decorate the ornament pictured below, I first took a Vintage Photo Distress ink pad and rubbed it on the window.

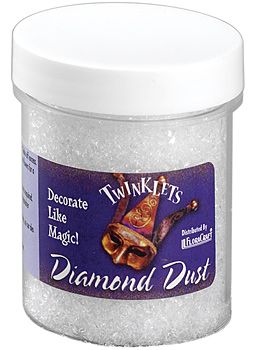
Next, I applied Glossy Accents to the areas where I wanted it to look icy and sprinkled on Diamond Dust. Once the glue is dry you can tap off or carefully dust off the excess.
Embellishments include a wreath and deer charm, Jolee holly leaves, a clock face button (seen through the hole in the window), snowflakes I cut from a garland and bottle brush trees. Behind the window is a little girl with her doll and bear.
COLLAGE SHEETS USED IN THIS PROJECT
Christmas House Trims Collage Sheet
Holiday Phrases Collage Sheet
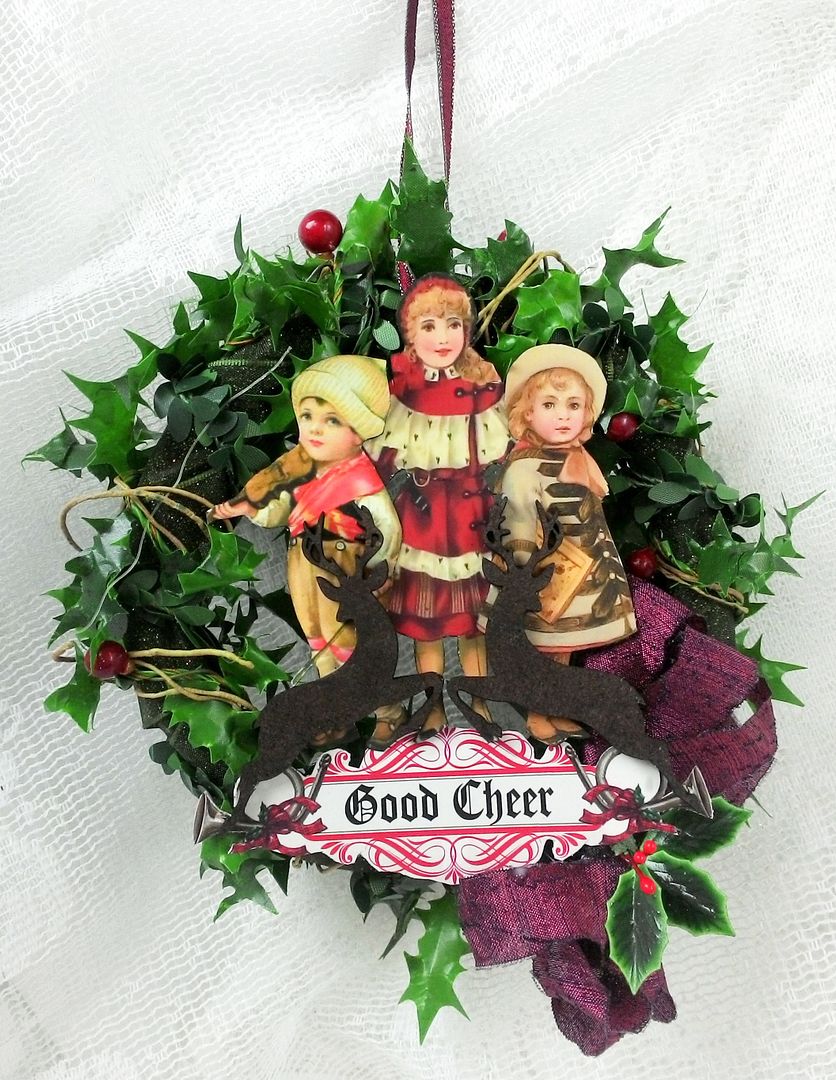
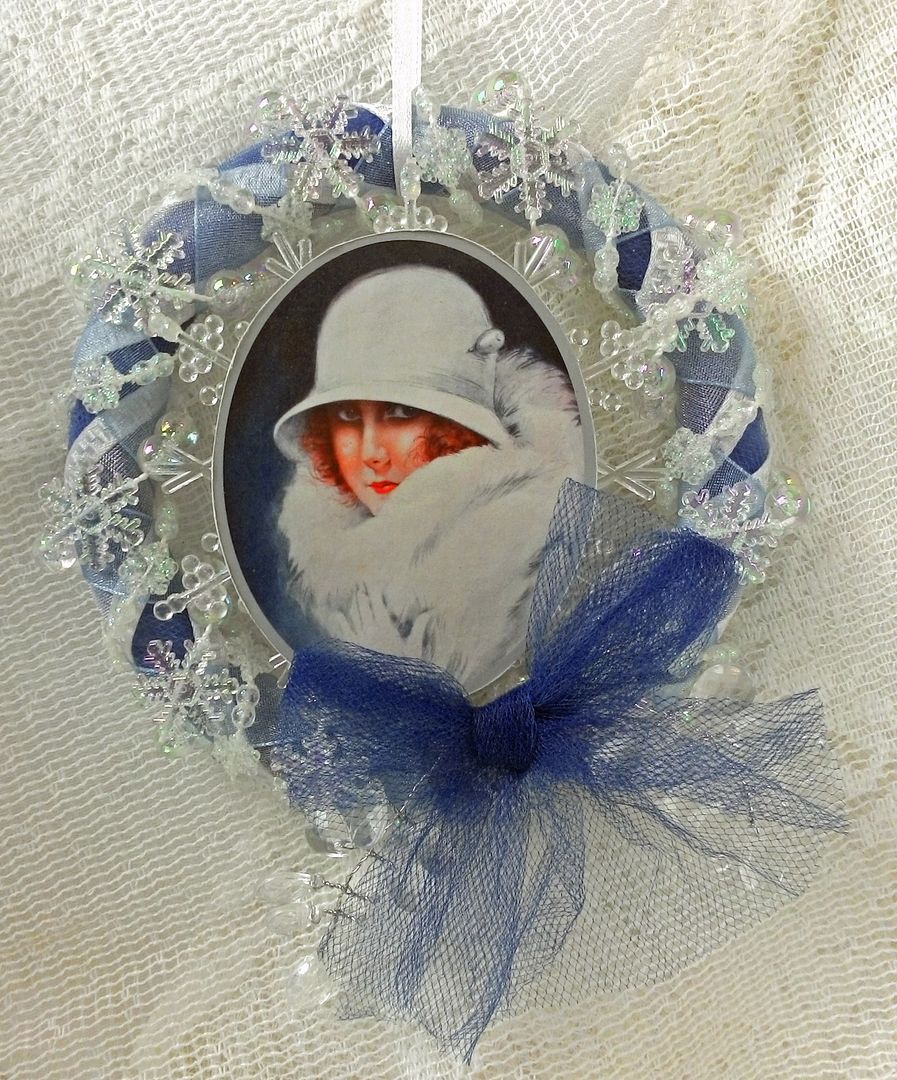
WREATH ORNAMENTS
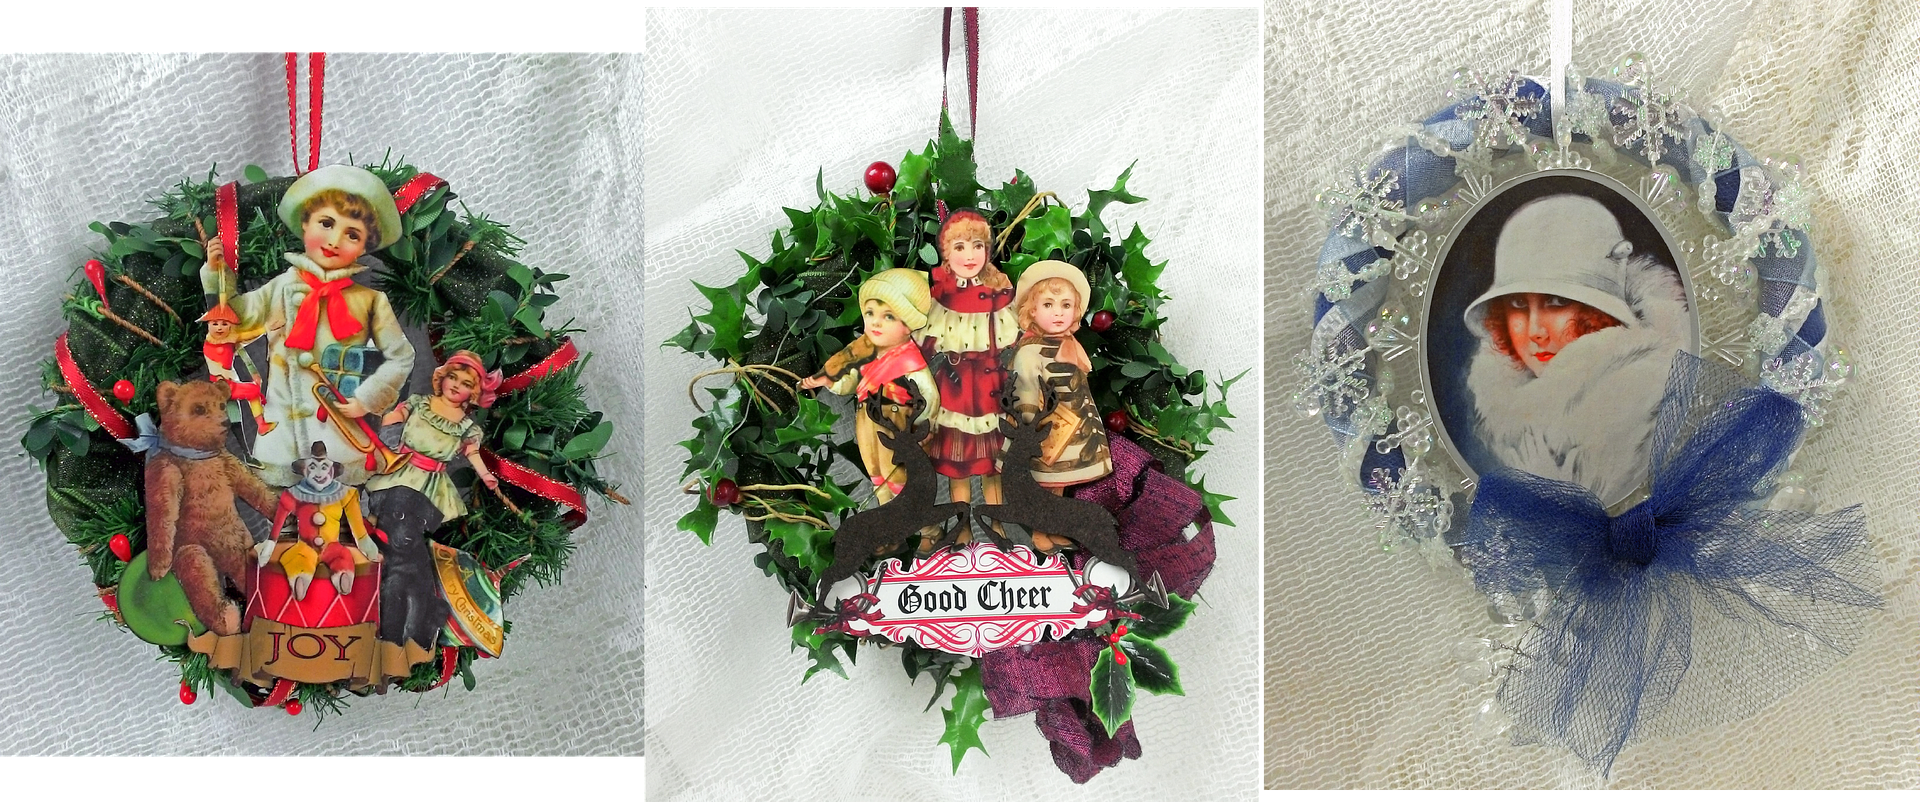
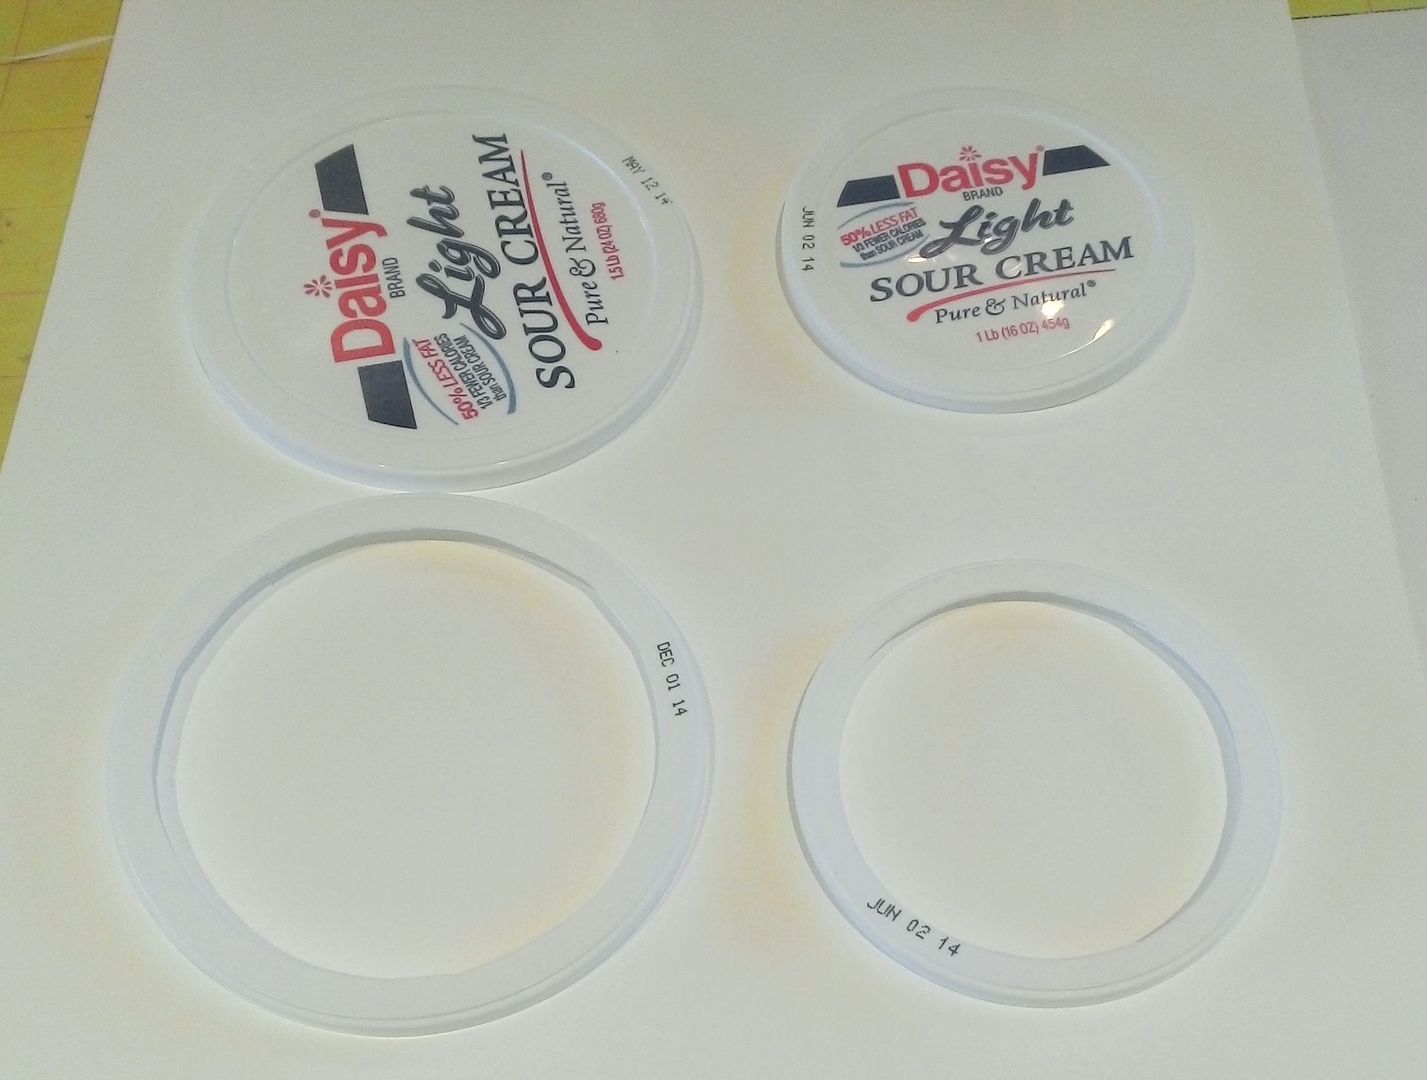
The base for all of the wreaths are plastic lids with the centers removed.
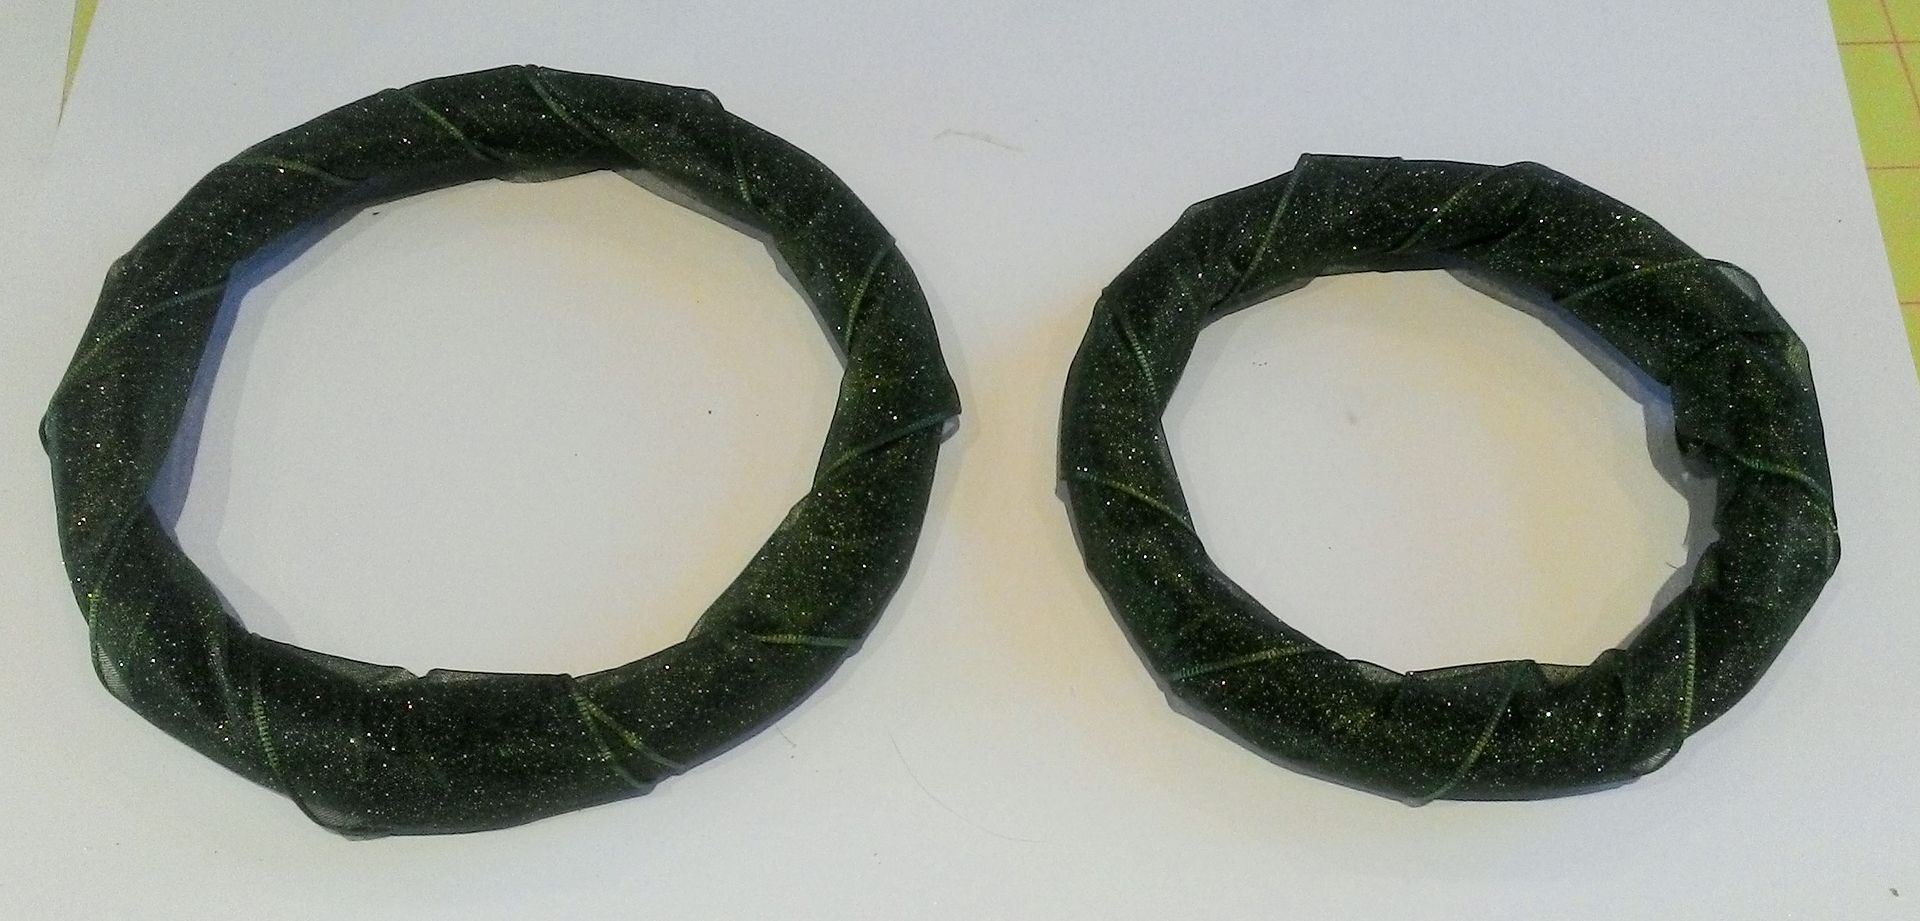
For the green leaf wreaths, I first painted the plastic with green acrylic paint so that none of the white would show through.

I wrapped the plastic with ribbon to make the shape more rounded and to create bulk.
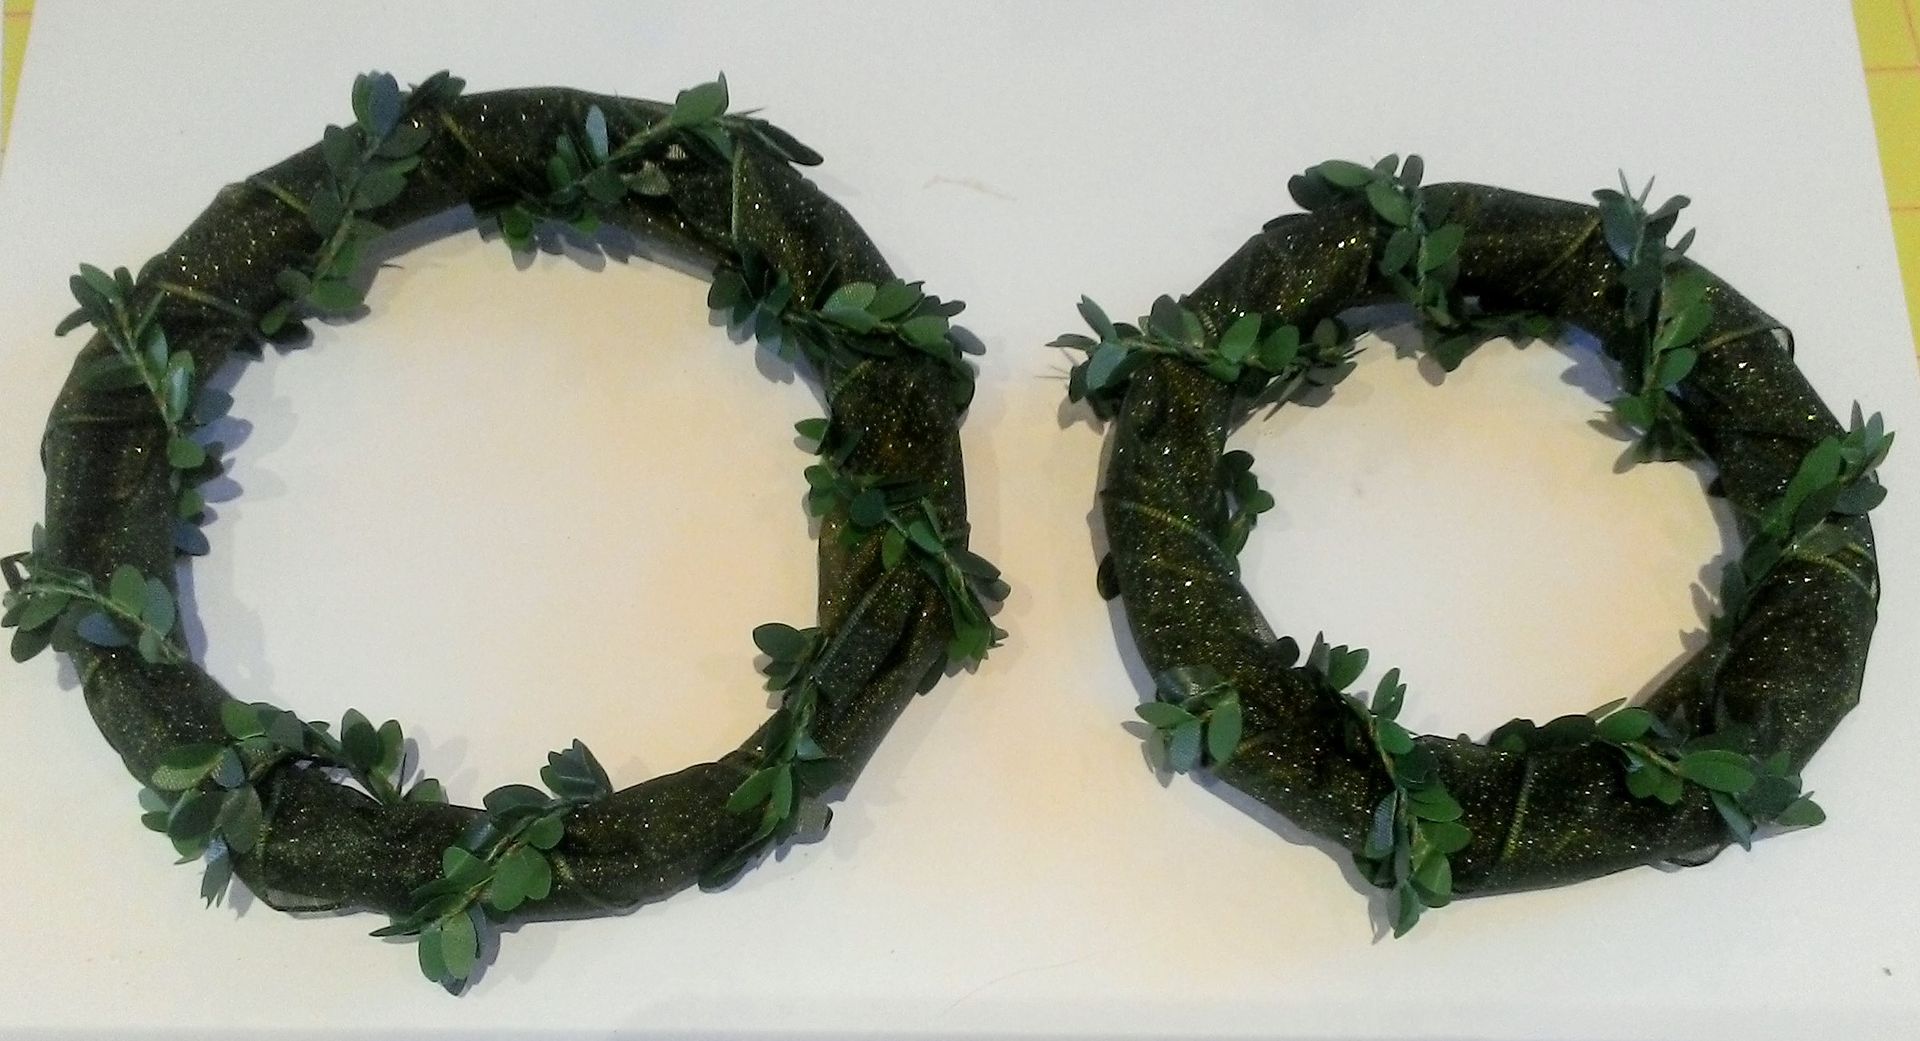
I then wrapped the wreaths with tiny green leaf garland.
Next, I wrapped the larger wreath with holly berry garland and the smaller wreath with mini pine & berry garland.
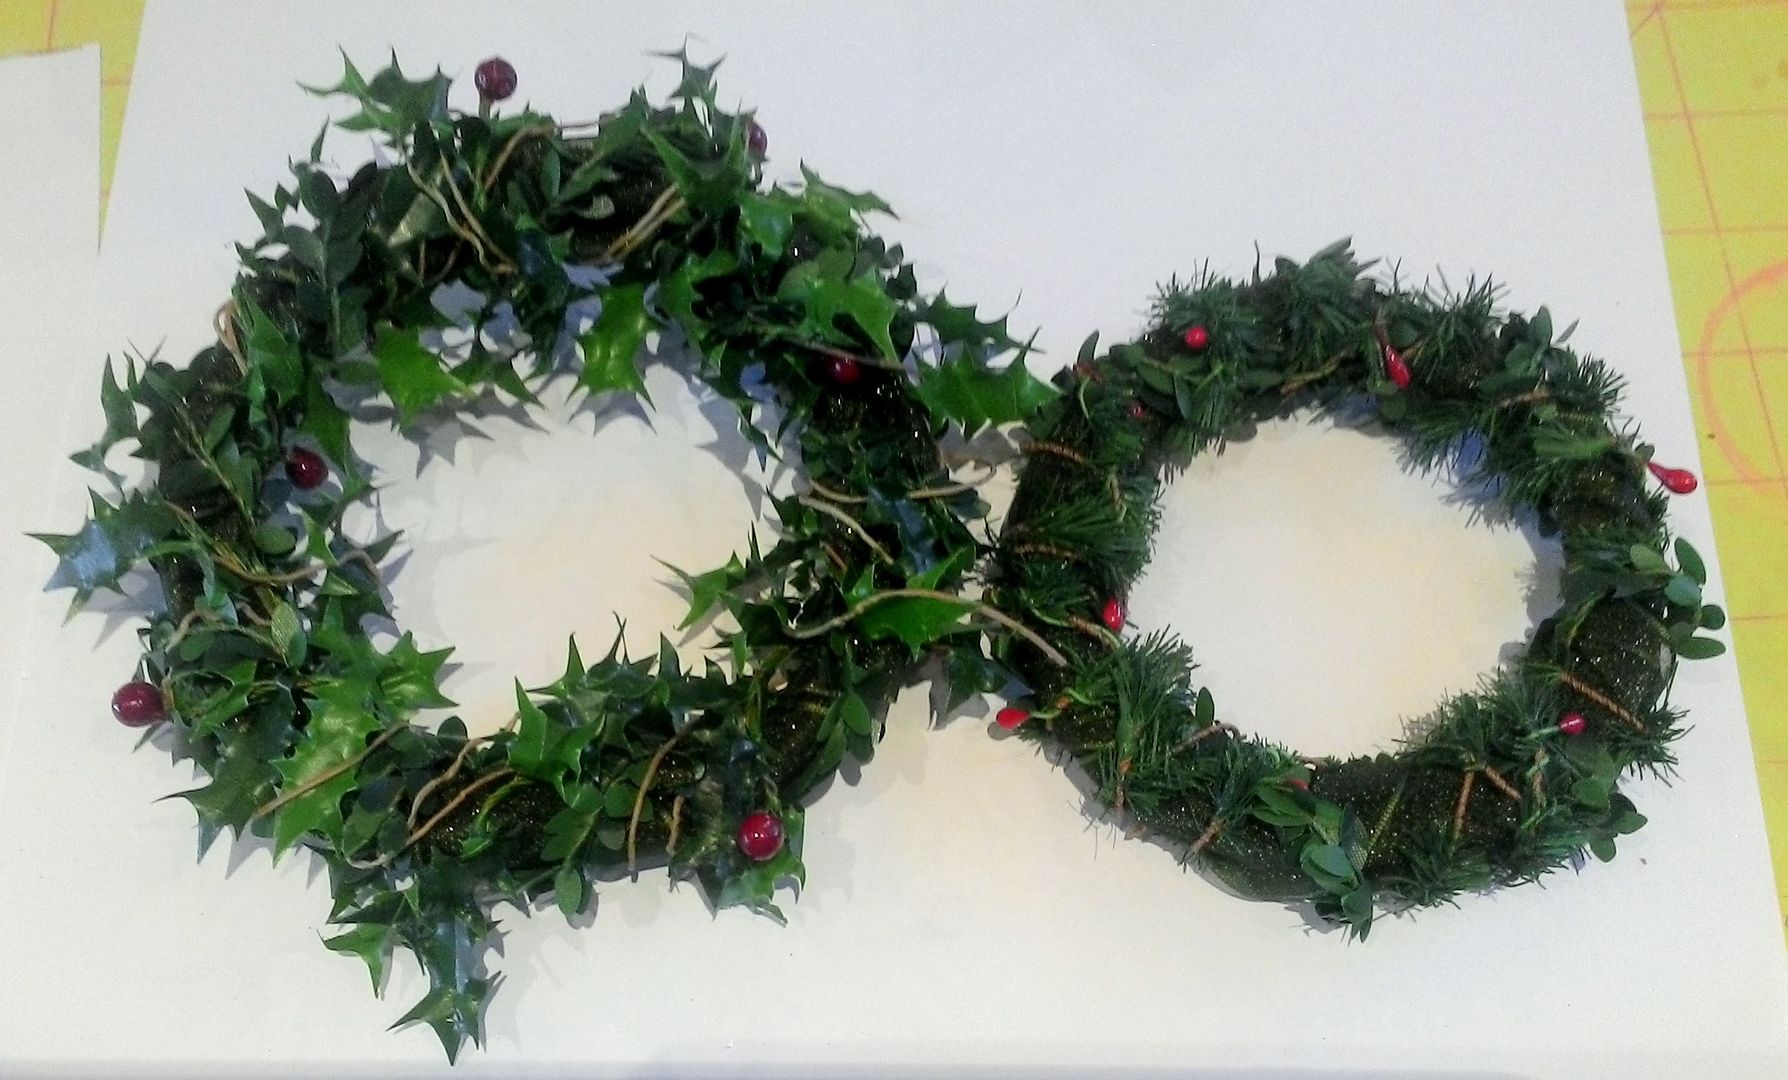
I wrapped the smaller wreath with red ribbon.

The small wreath is decorated with a collage of images from the “A Child’s Christmas” collage sheet and the “Joy” banner is from the Holiday Phrases Collage Sheet.
The larger wreath is a collage of images from the “A Child’s Christmas” collage sheet and the “Good Cheer” banner is from the Holiday Phrases Collage Sheet. Additional embellishments include Masonite reindeer cut-outs, burgundy ribbon, and a holly leaf pick.
For this wreath, I started by wrapping the plastic in blue netting. Next, I wrapped the wreath with two different ribbons; one white and one light blue.
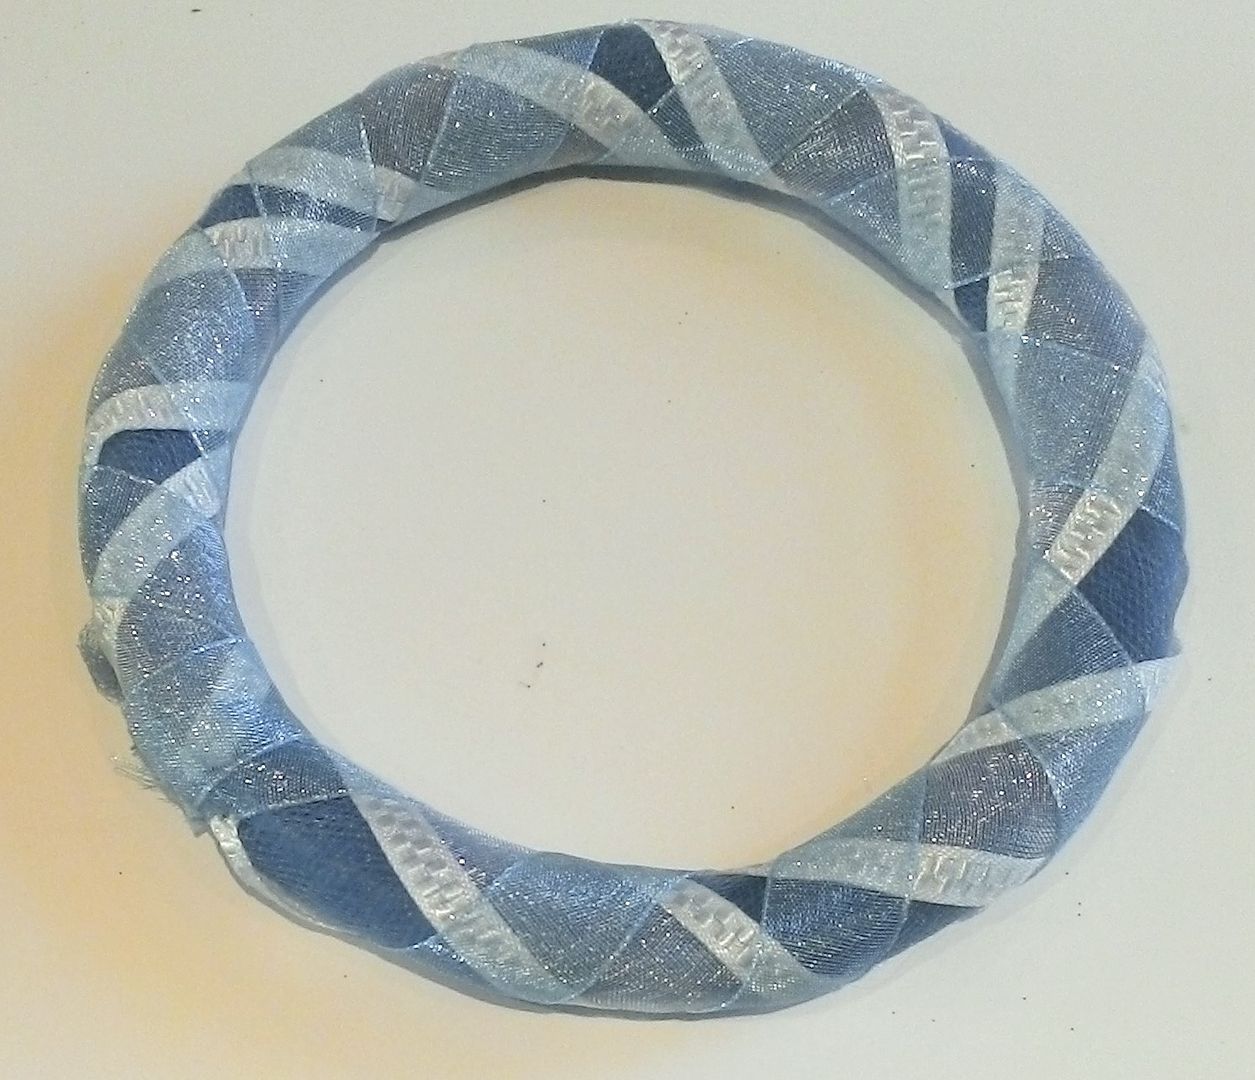
Next, I wrapped the wreath with iridescent snowflake garland and then iridescent mini snowflake garland.

In the center, I glued a 4-inch snowflake.

Final touches are the woman’s image from the Baby It’s Cold Outside collage sheet, more of the netting and clear acrylic bead sprays.
COLLAGE SHEETS USED FOR THIS PROJECT
A Child’s Christmas Collage Sheet
Holiday Phrases Collage Sheet
Baby, It’s Cold Outside Collage Sheet
9 comments:
First, you know I am a fan!
2nd, lovely and special ornaments, THANK YOU for the pics and info!!!
These are all so COOL! Nice work....
I have been creating some ornaments, too = )
If you get some time. check out my BLOB:
www.suemarrazzo.blogspot.com
Thanks!
These are lovely ornaments. Such great ideas.
Your projects never disappoint, Laura....and today's are no exception! Just delightful.
Adorable ornaments Laura! Love that you showed the steps! tfs!
Gorgeous. All of them. Thank you for the info on how you made them. I think these would be a wonderful project for a little group to make.
Really wonderful! Thank you for sharing!
Wow, always speechless in front of your infinite creativeness and inventiveness Laura!!! All three made from scratch are just totally amazing!!! Gorgeous Christmas ornaments, I love them!... Hugs, Coco
Thanks for sharing this quality information with us. I really enjoyed.
Post a Comment