

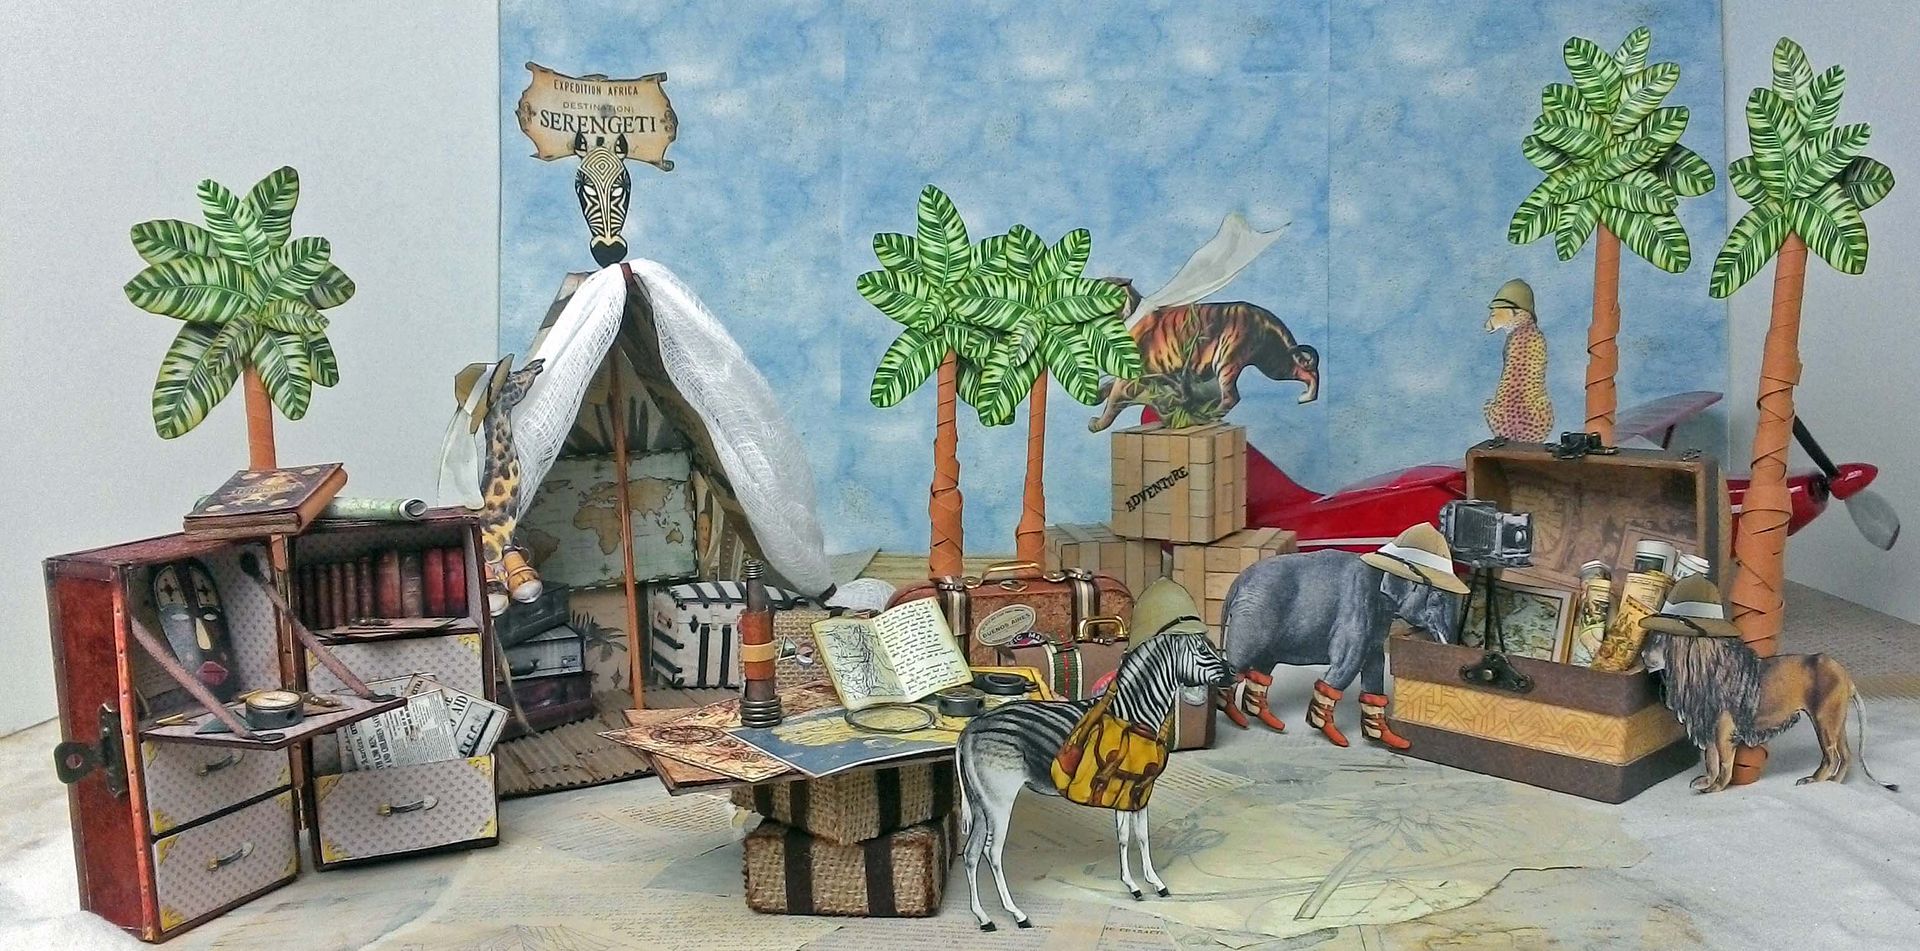
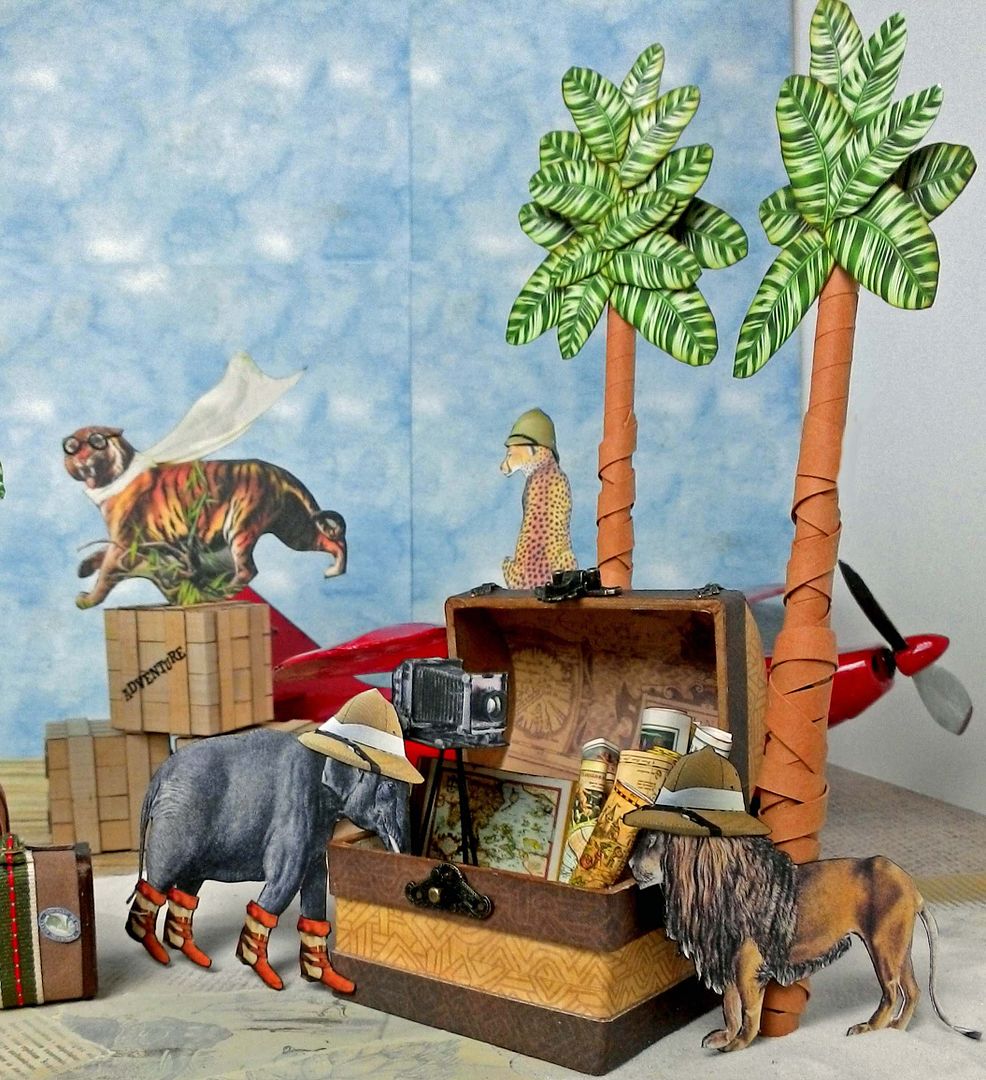
Perhaps
you would like to join a group of intrepid explorers armed with only cameras
and an adventurous spirit. In this scene
they are setting up base camp in preparation to delve into the heart of the Dark
Continent.
Let me
introduce you to the group. First, there
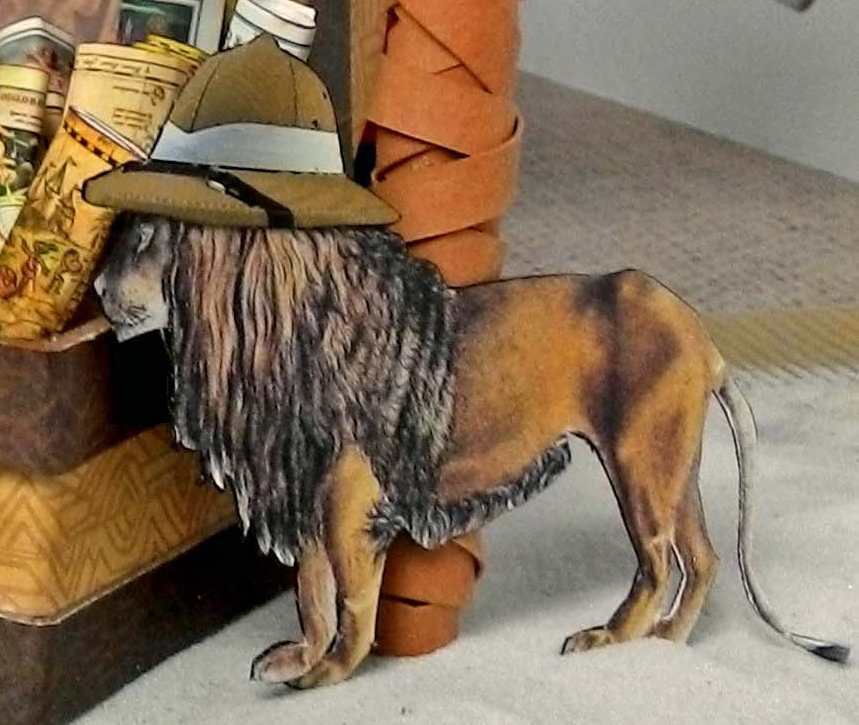
is Sir Stompington III, the expedition leader, and his lovely wife, Lady Tallia
Necker.
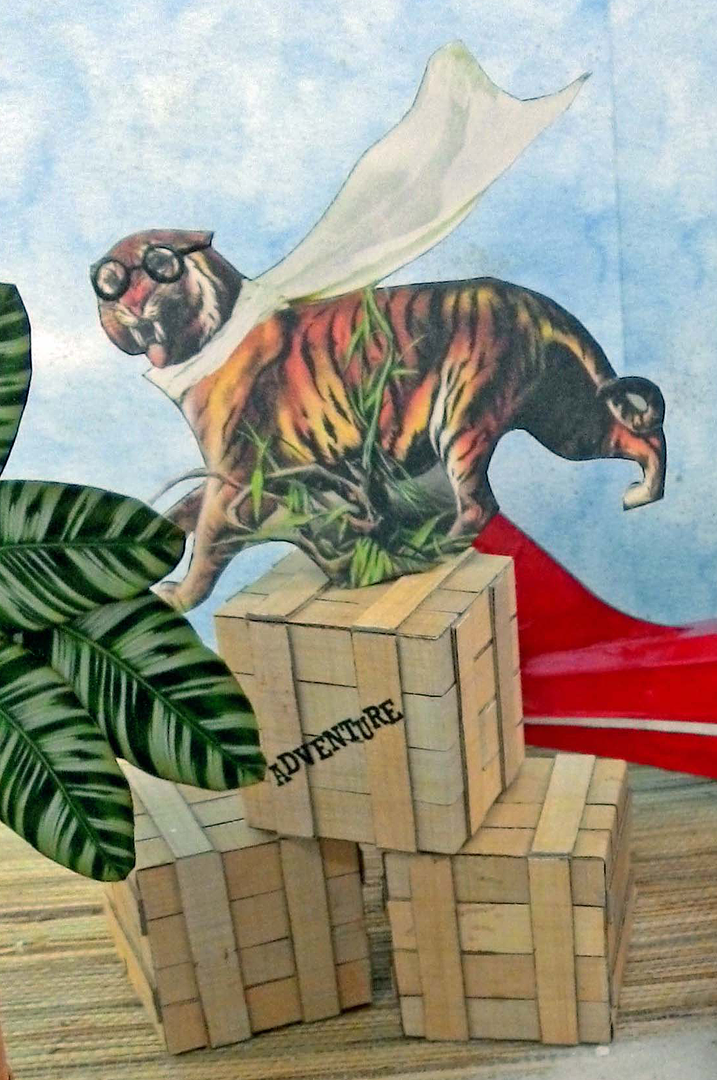
Monsieur
Chromatic is a great asset to the group as he is a biologist and author of the book
“Primitive Humans and their Habitat.”
Next,
is the world-renown adventuress Rita Swiftness.

Colonel
Rory McPherson is serving as the expedition guide and the dashing Wing
Commander (Ret.) Whelan Offcourse flew to the campsite just this morning from
Punjab.
All are
preparing in anticipation of future discoveries. The pentacle of success would be the spotting
of the elusive human.


Most of
the images you see in the scene are from my new collage sheets and digital
image set. Plus, Alpha Stamps has some new travel-themed sheets. There are a few images that
are not part of the new sheets, but you will find them at the end of the post, so
feel free to download them and use them in your art. I’ll walk you through how I made each of the
pieces in the scene, and I have included the template I used to make the
tent. As always, at the bottom of the
post, you’ll find the supply list for all of the products I used.
And a special note, the airplane was not made by me but by my father. I guess that is where I get my love of
engineer things.
Click on the image below to purchase this collage sheet.
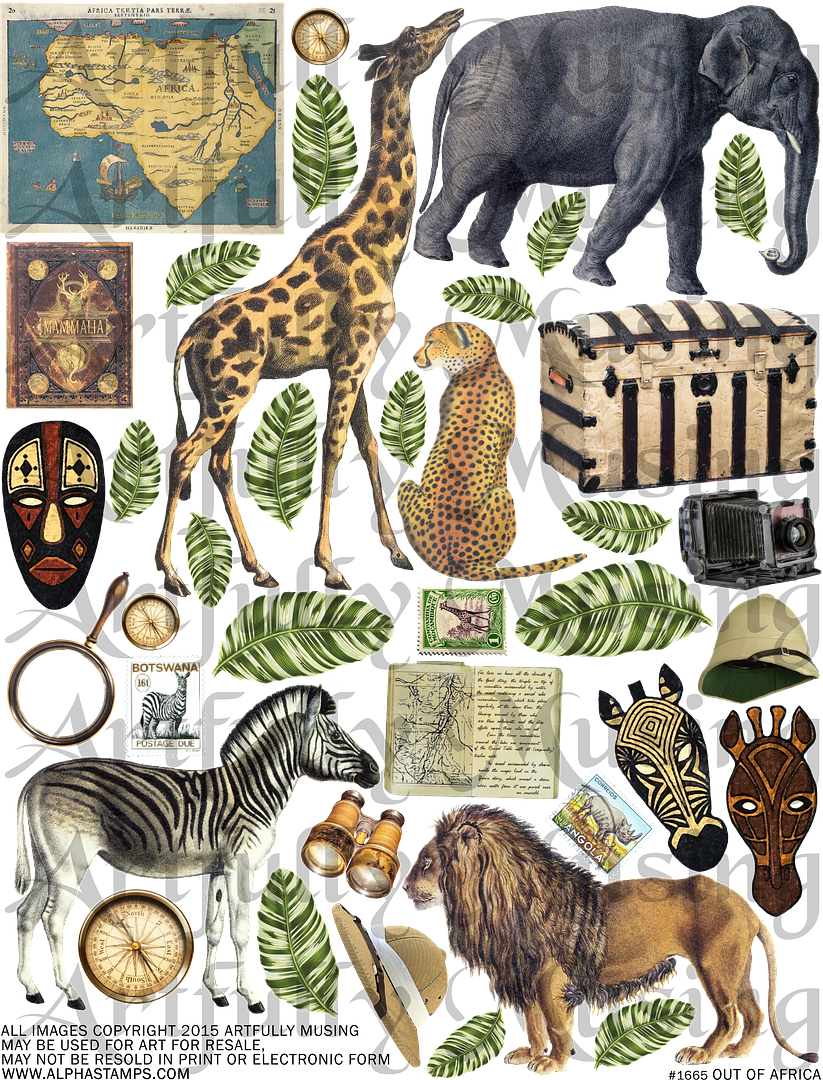
Click on the image below to purchase this collage sheet.
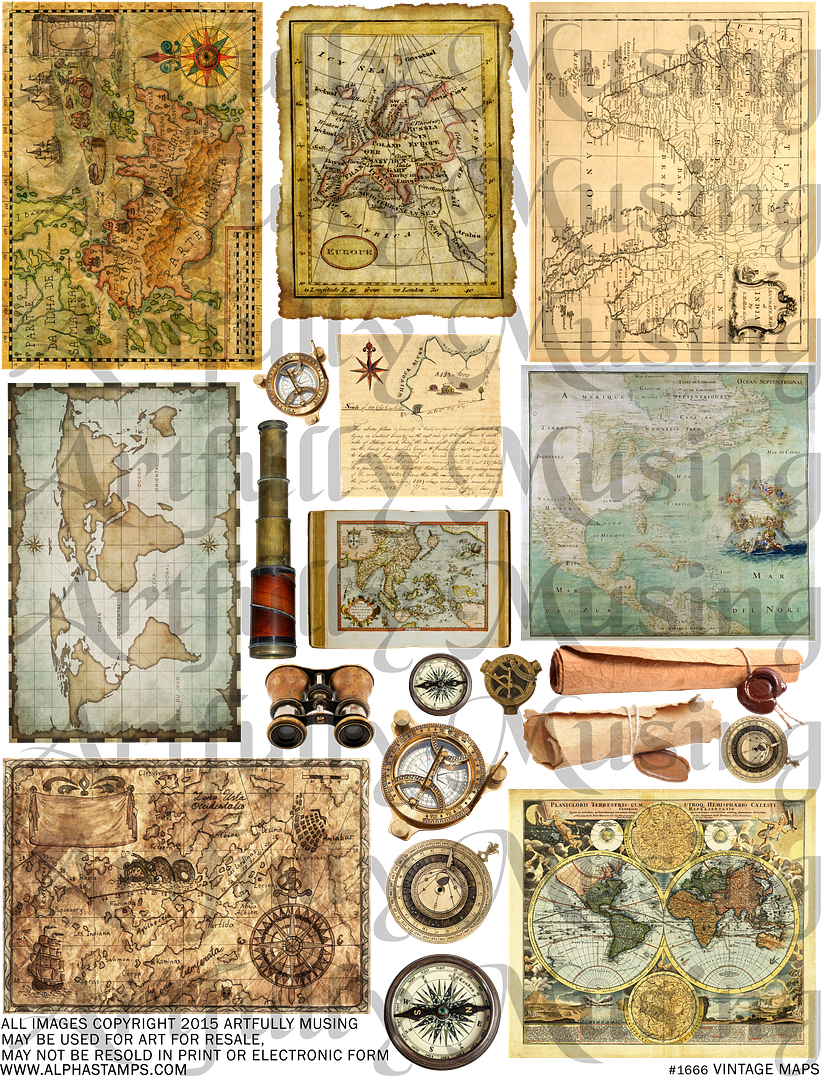
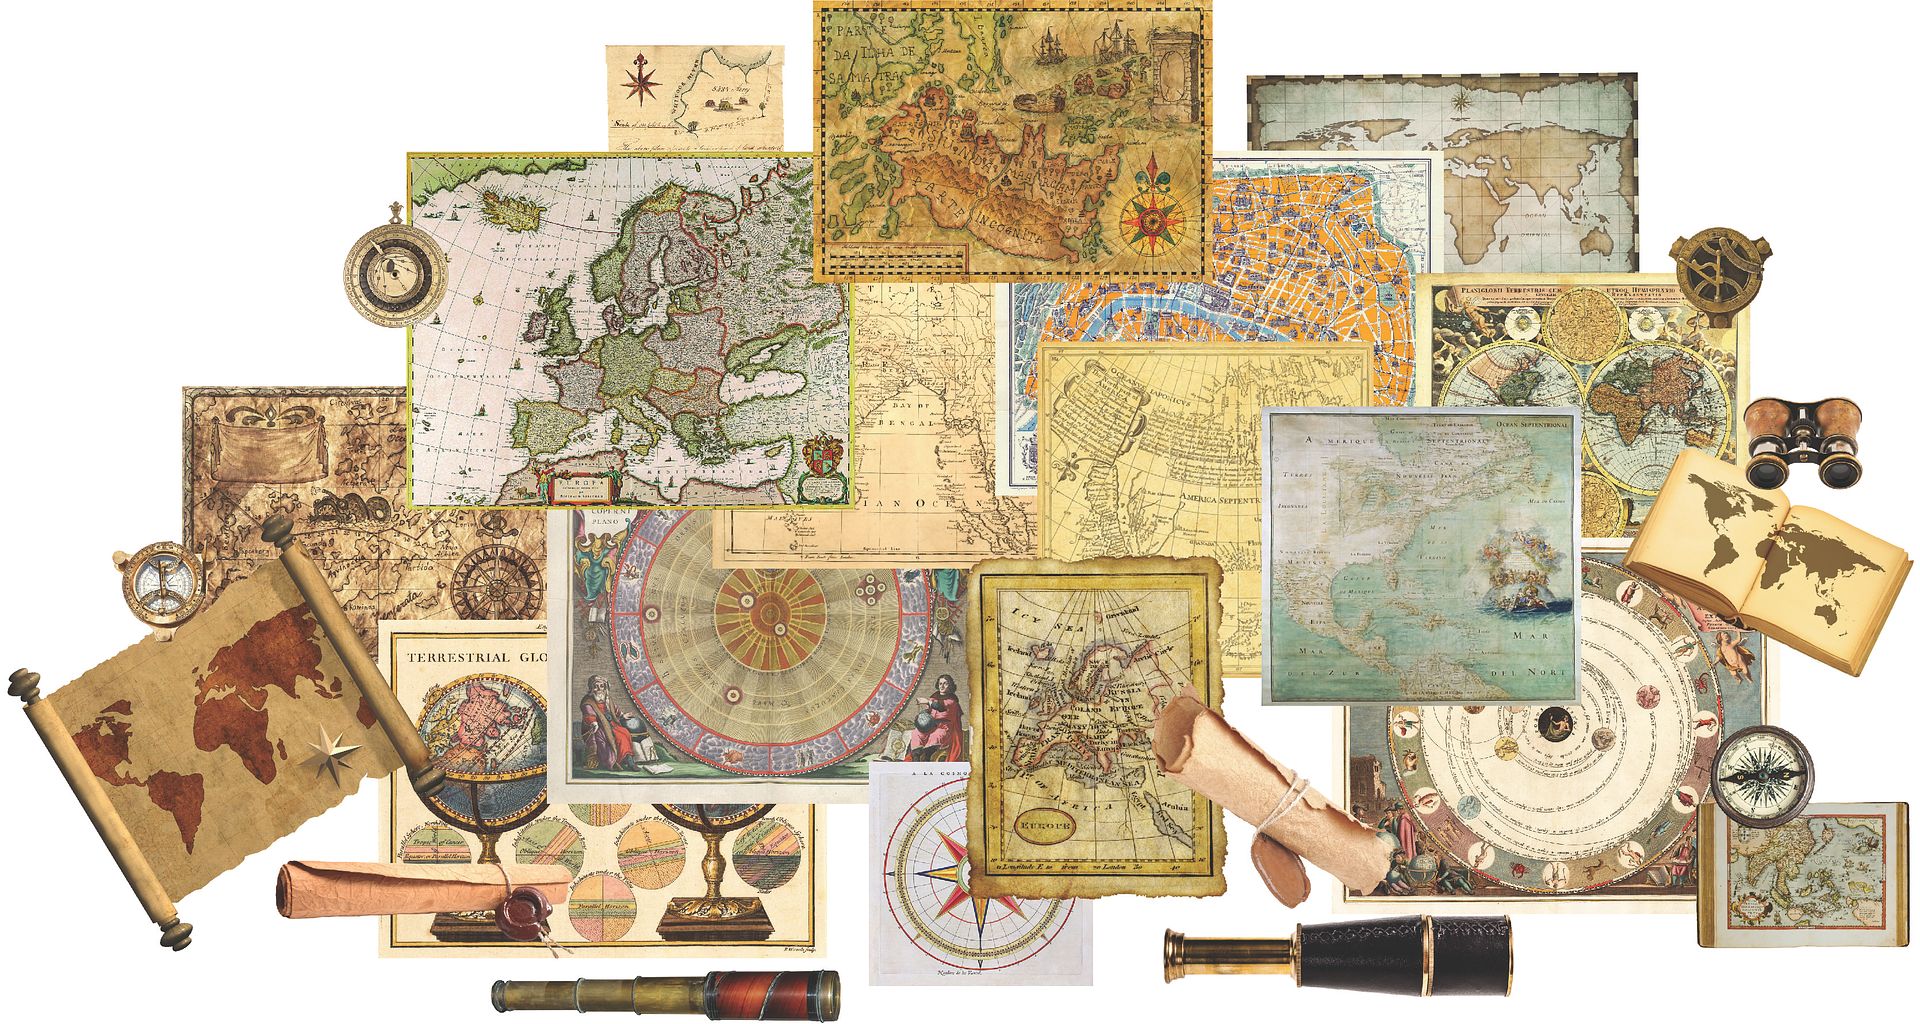
Click on the image below to purchase this digital image set.
The digital image set contains 50 images. There are 27
unique images. All of the images on the collage sheet are contained in the digital
set, plus more that are only part of the digital set. Many of the images have
both a small and large version. The large
version of the maps would make nice backgrounds for larger pieces. There are:
1 Binocular
2 Spyglasses
1 Document
2 Books – Large and Small version for a total of 4 images
3 Scrolls – Large and Small Versions for a total of 6 images
5 Compasses – Large and Small Version for a total of 10 images
13 Maps – Large and Small Versions for a total of 26 images
Digital
files can be resized, rotated, or flipped as needed. The files are in a .png format. PNG formatted
files have a transparent background
making it easy to layer an image over other digital images. You can open .png files using graphic
programs like Photoshop Elements.
Digital collage sheets and digital images can be saved to your computer
and printed as many times as you wish.
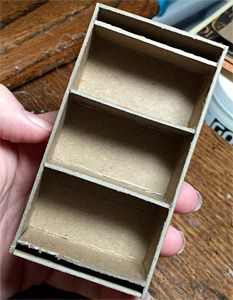
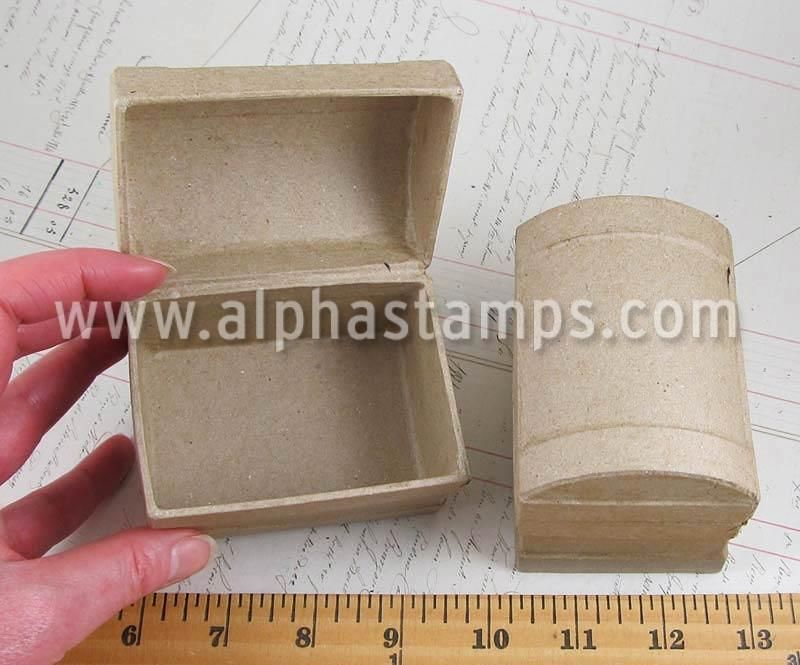
TRAVEL TRUNK
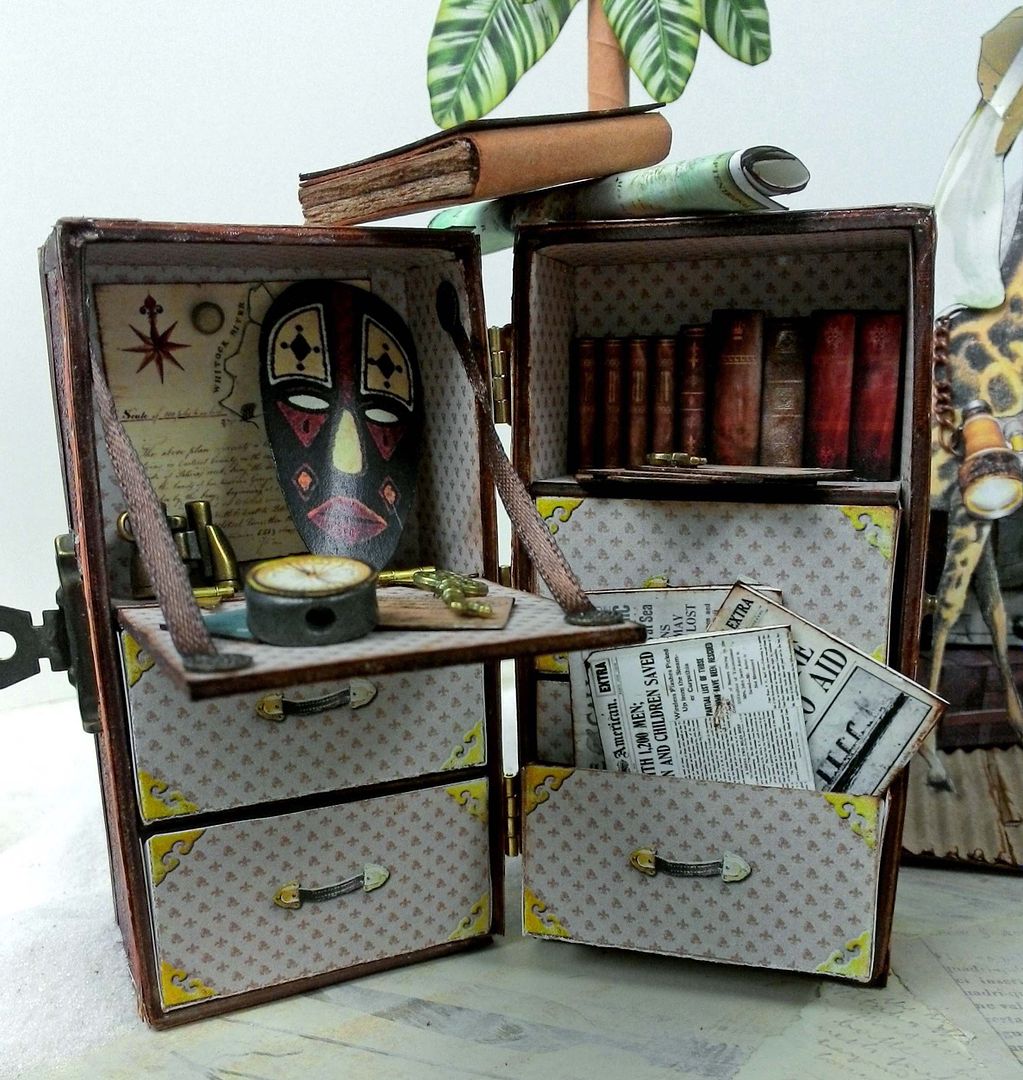
The
travel trunk is made from an Alpha Stamps chipboard kit. The kit comes with the chipboard to make the
trunk, detailed instructions, and a collage sheet of drawers for the trunk. You can also purchase the chipboard separately
and the collage sheet of drawers separately.
Since there are detailed instructions for assembling the trunk, I’m not
going to include those steps in this post but instead, focus on the outside of
the chest and the change in configuration
I made to the inside of the chest.

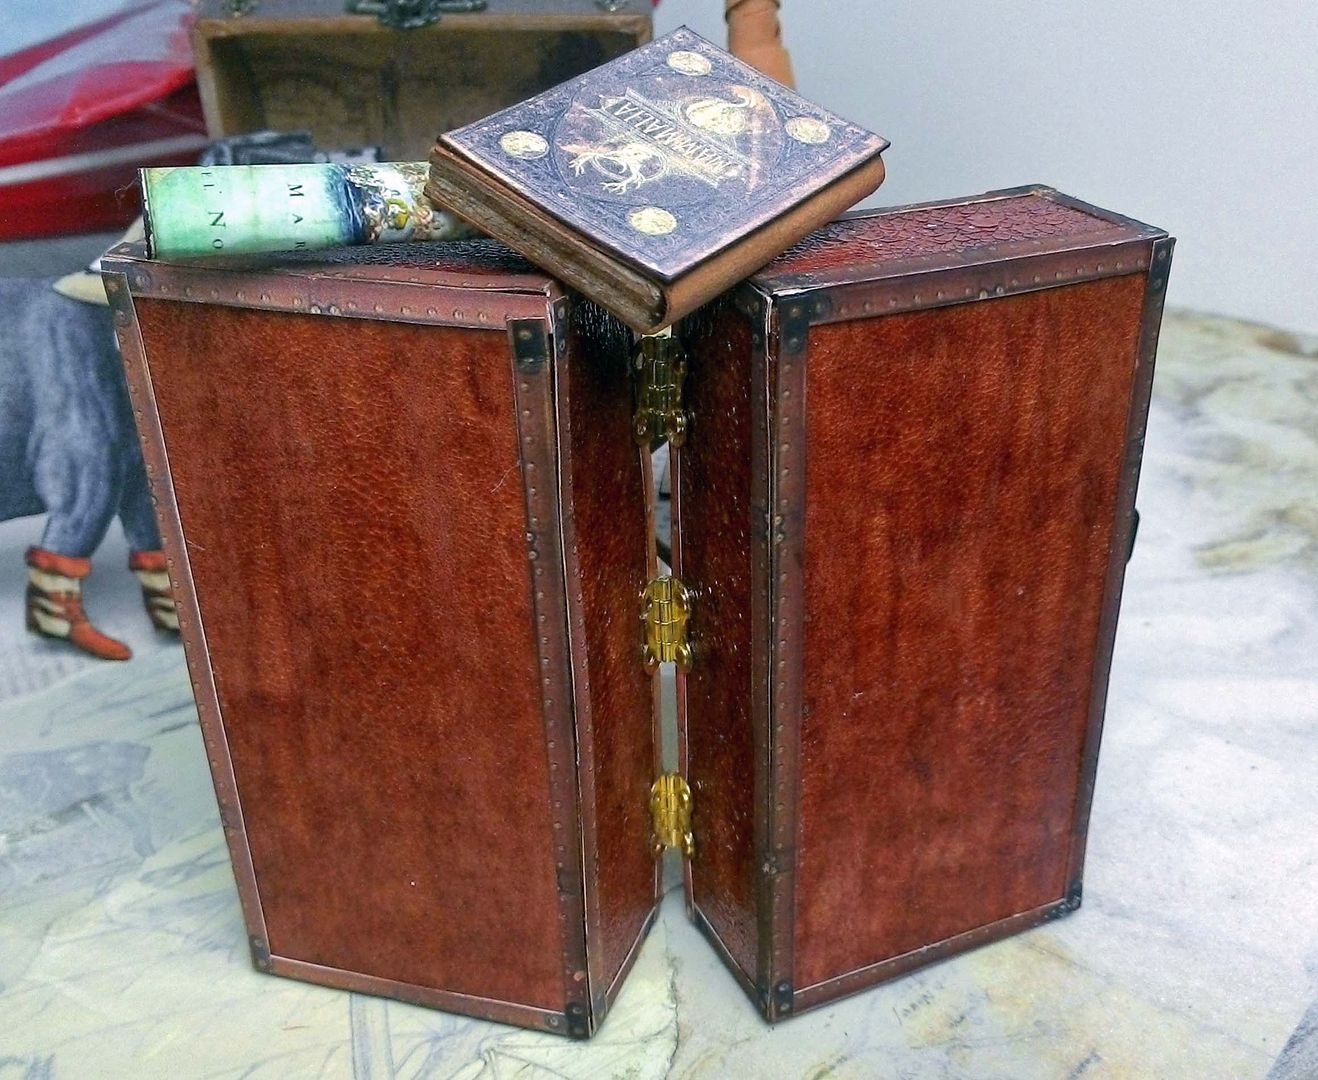
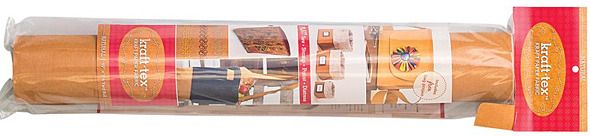
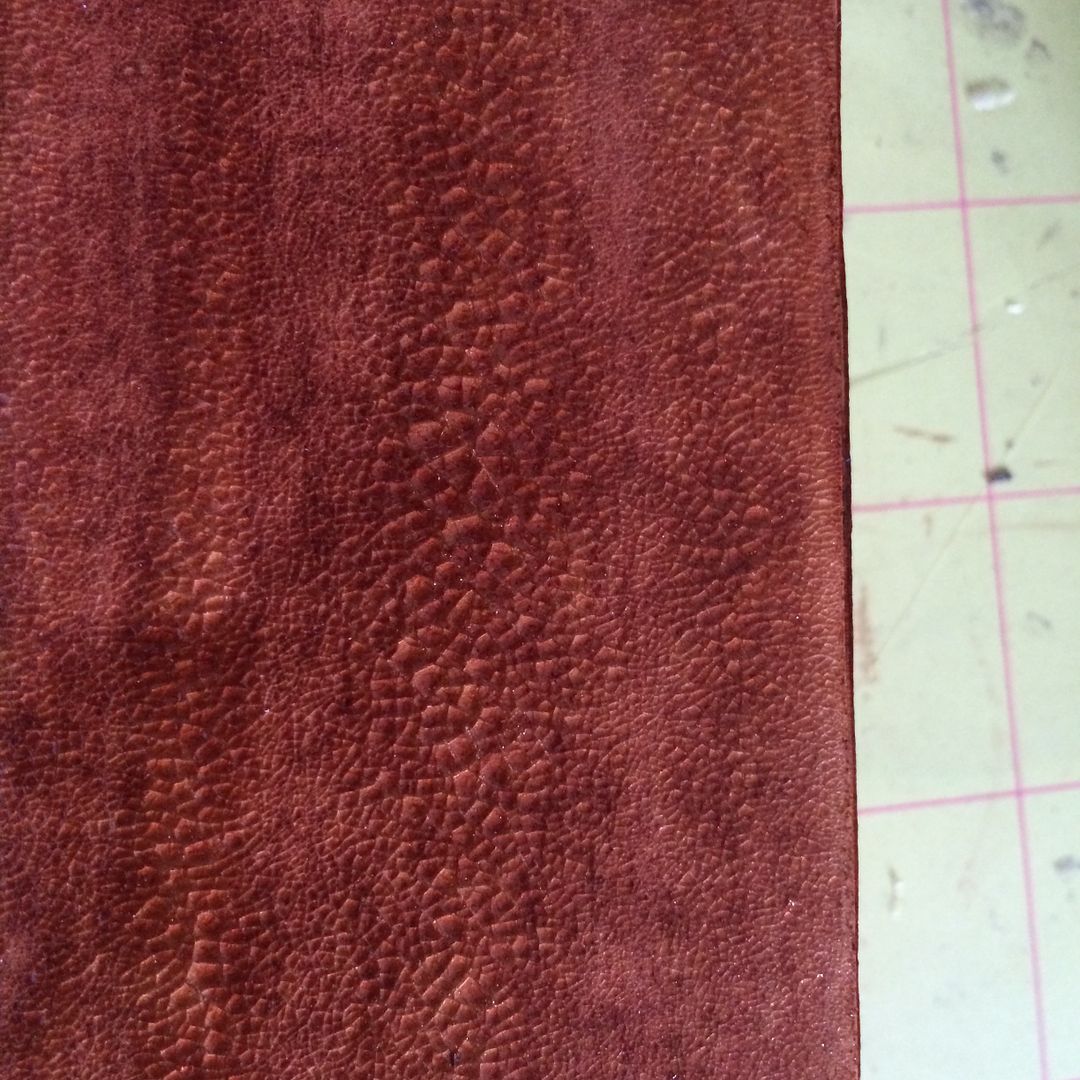
After
assembling the trunk, I covered the outside with Kraft-Tex
Paper Fabric. This stuff is thick
and strong but flexible. Once I had the
trunk covered, I used Vintage Photo Stain on the paper fabric.
I
allowed the stain to dry, then I coated the outside with Rock Candy
Crackle. You can see that the crackle
made the stain darker, slightly shiny, and the paper fabric looks like
leather or animal skin.
For the
inside of the trunk, instead of having all drawers on both sides, I left out the
top drawers on each side and spaced the bottom two drawers closer
together. This left me room at the top
of each side. On the left side, I cut a
piece of chipboard to make a drop-down front.
The chipboard is glued to the trunk. I used small hinges to give
it the appearance of being hinged. I
used ribbons and 7mm
Hammered Metal Disks
to complete the look.
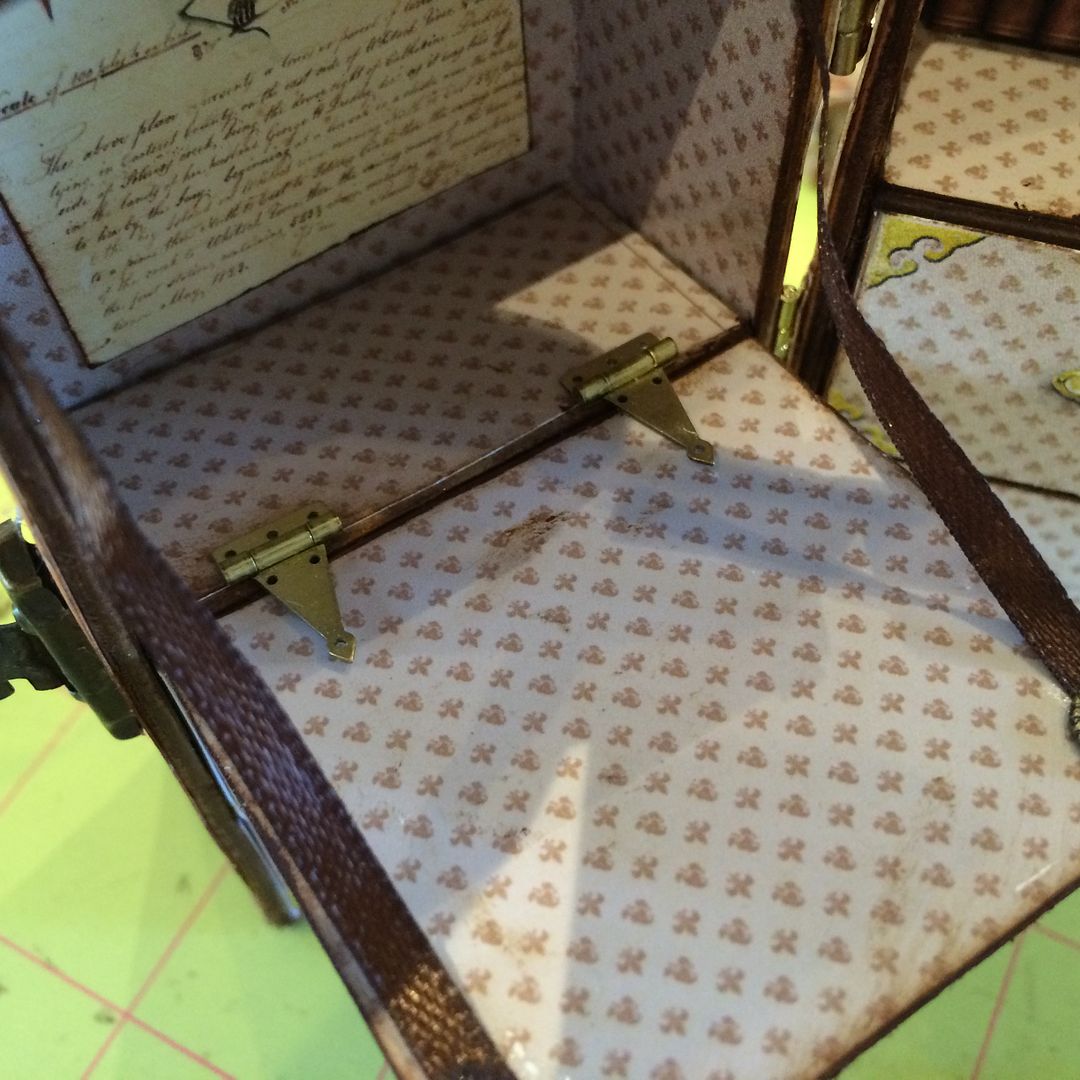
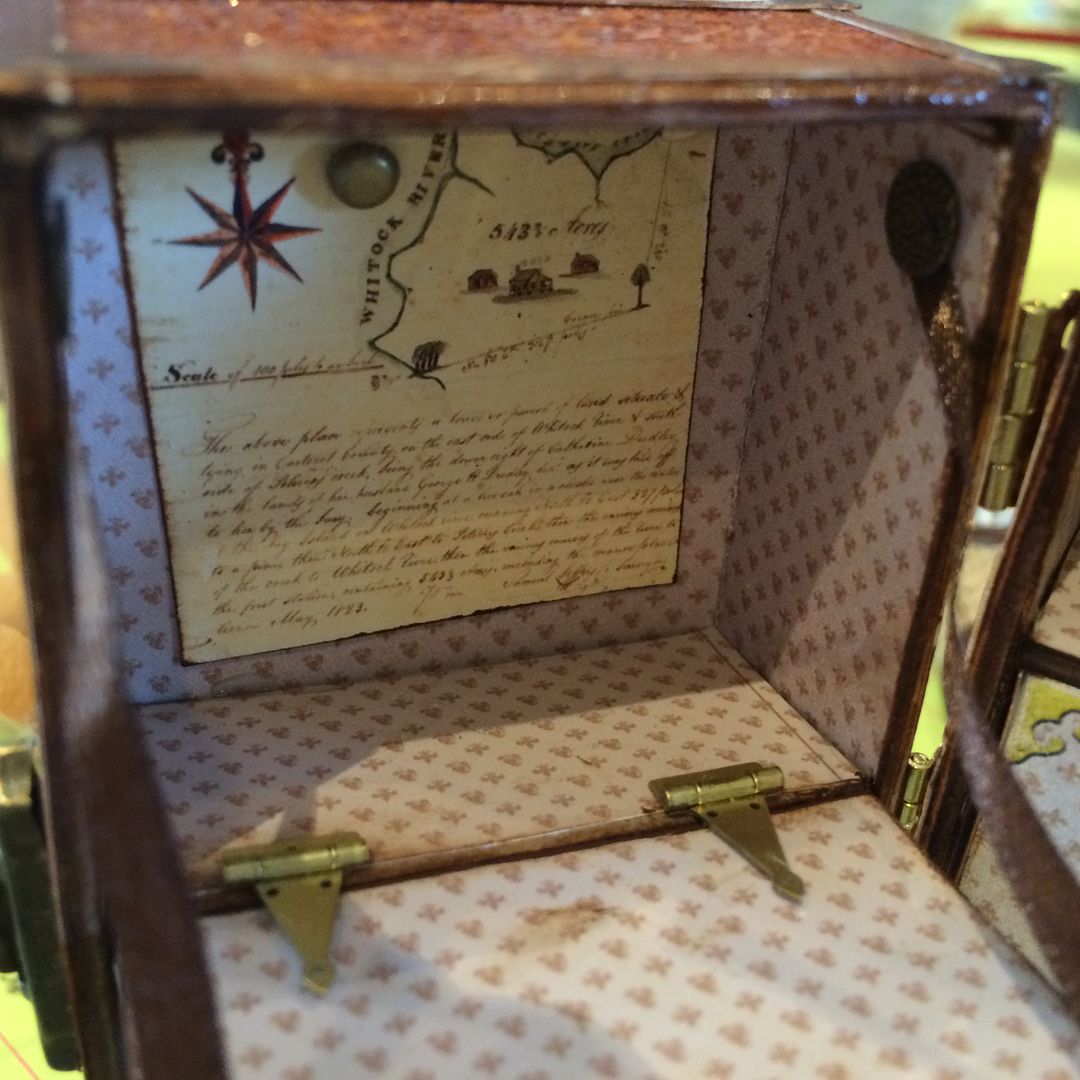
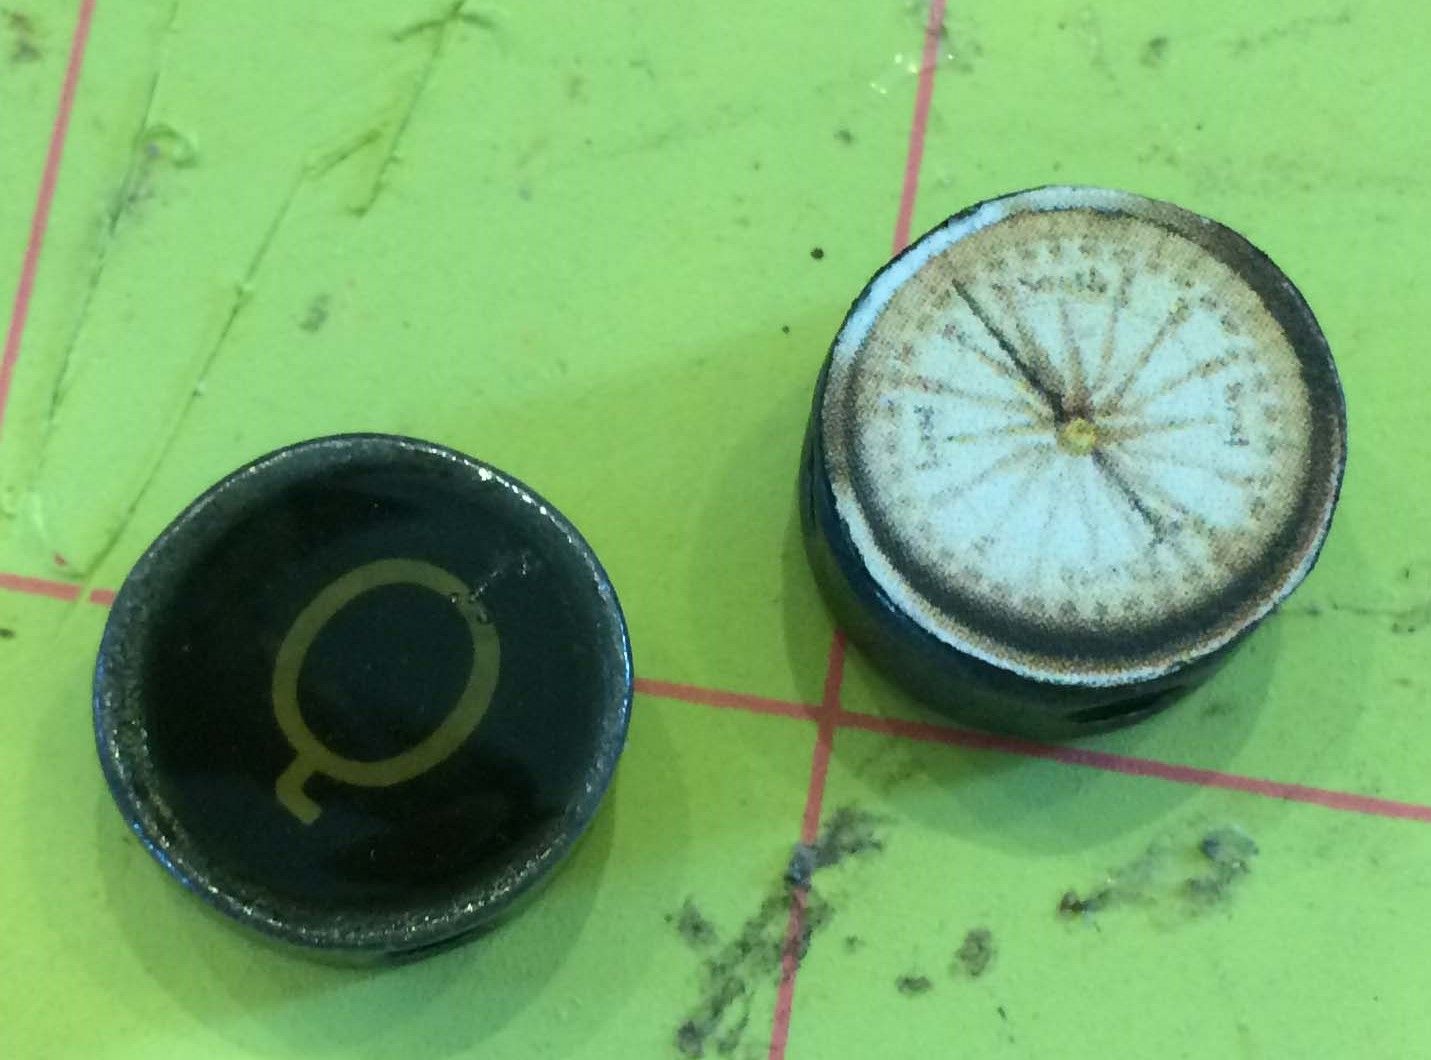
The
compass you see on the in the trunk and on the desk is made by using one of the images from the Vintage
Maps collage sheet and gluing it to the bottom of a typewriter key. I used the bottom side as the top side is
curved.
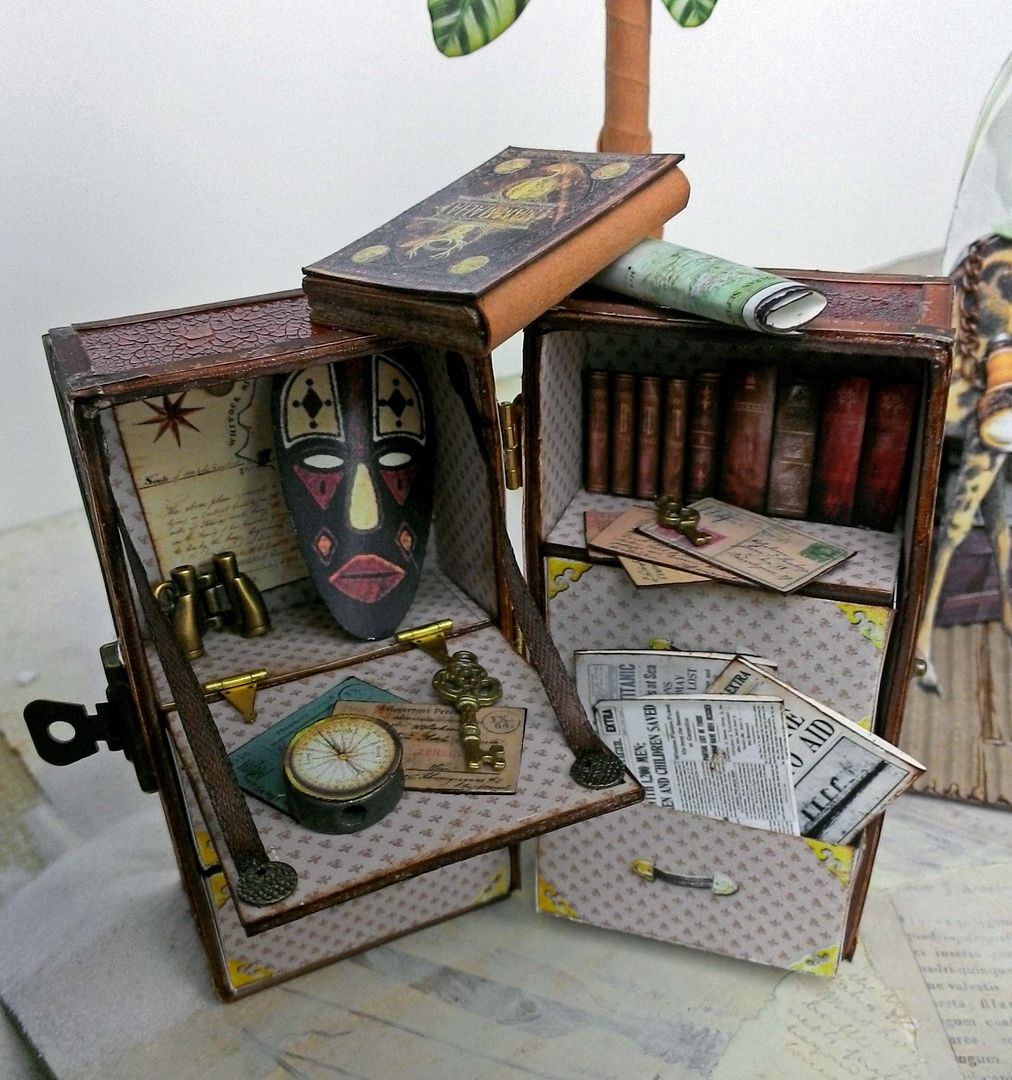
On the
right side, I added some books that are popped up from the back of the trunk and letters. Stuffed in one of the drawers is newspapers. On the left is a set of binoculars, letters, and a key.
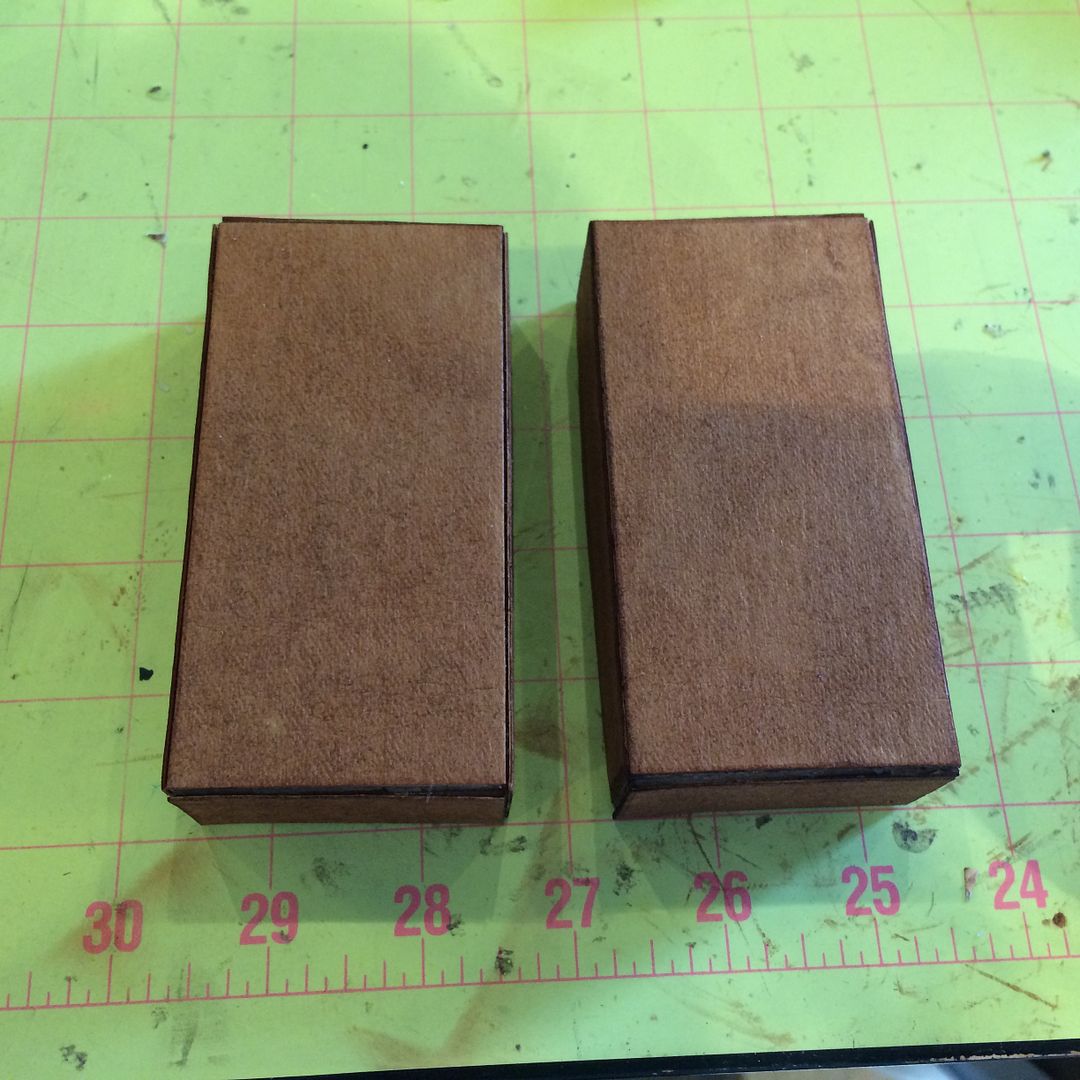
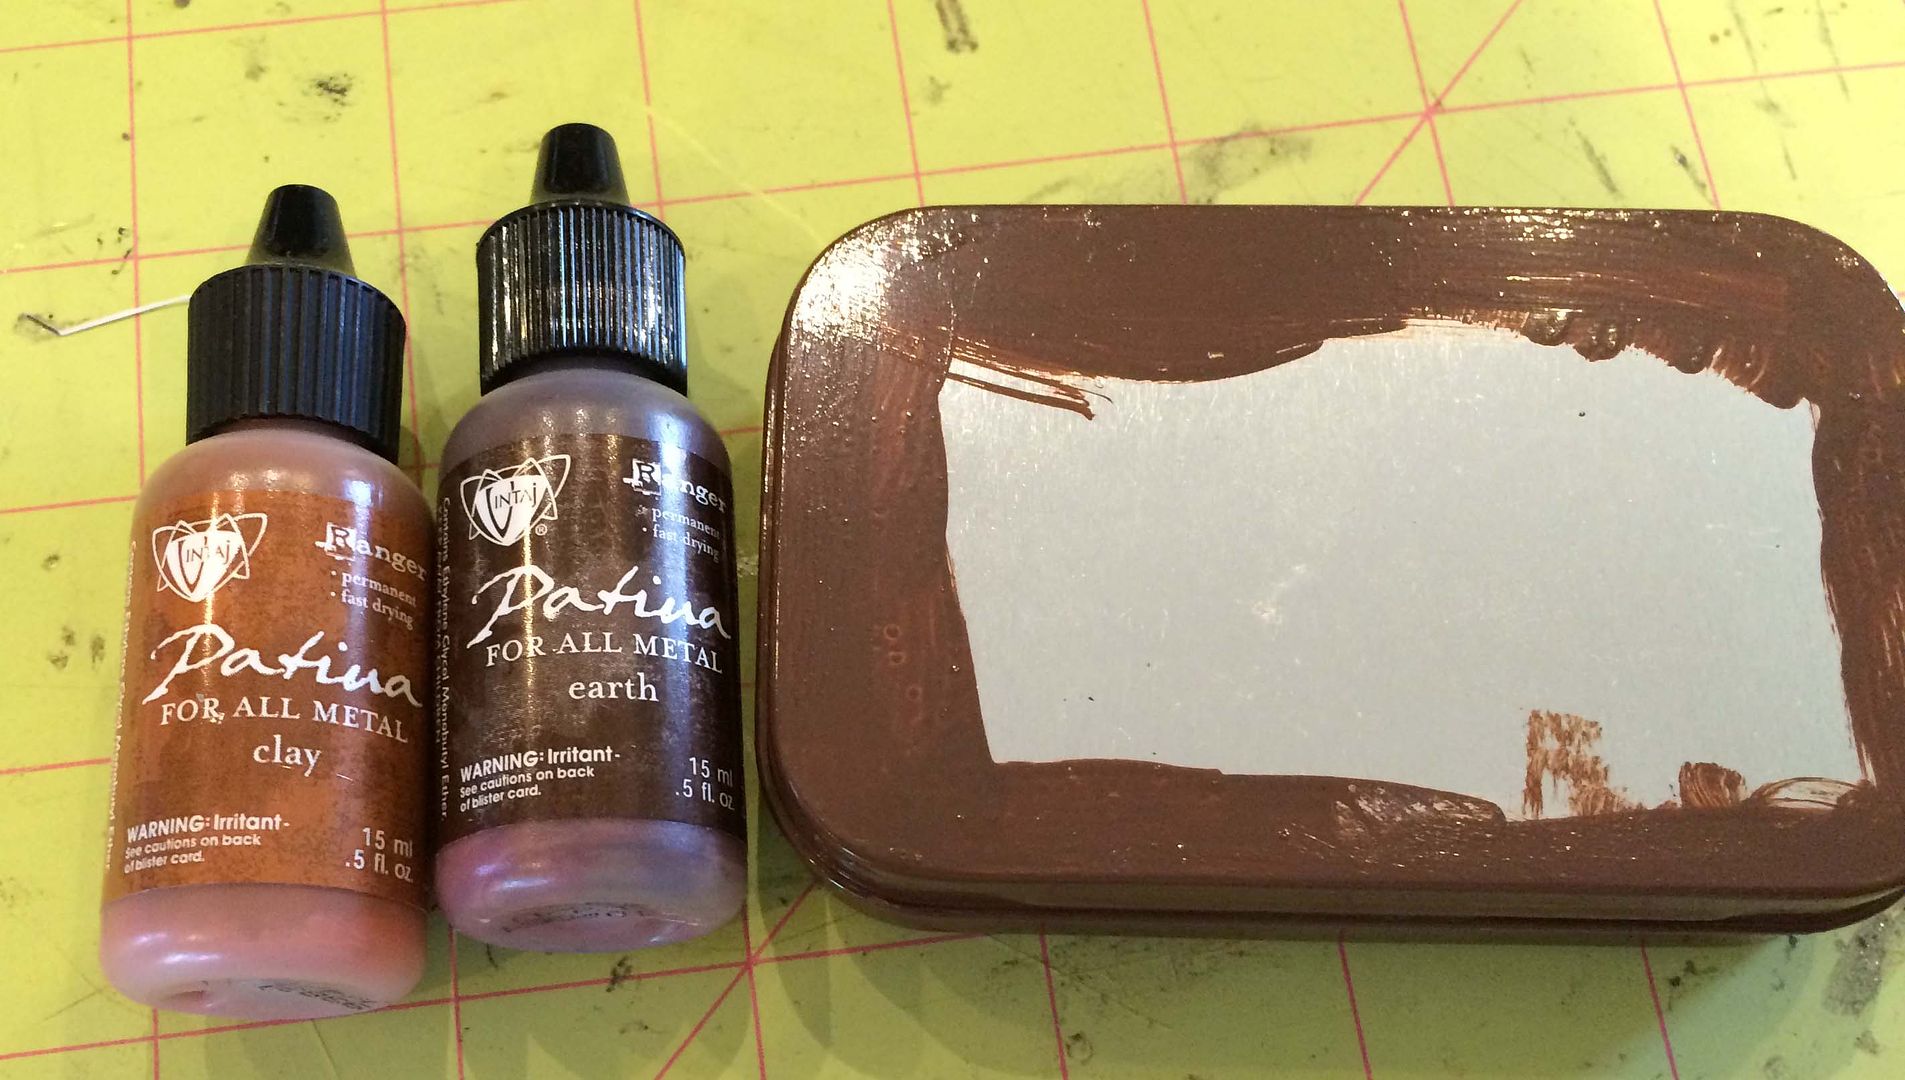
ALTOIDS TIN SUITCASES
Two of the suitcases are made from Altoids tins.

For the
larger tin I first started by painting all of the edges with a mixture of Clay
& Earth Patina paint.
Next, I
used a cork sheet from the Tim
Holtz Texture Surfaces pack to cover the front and back of the tin.

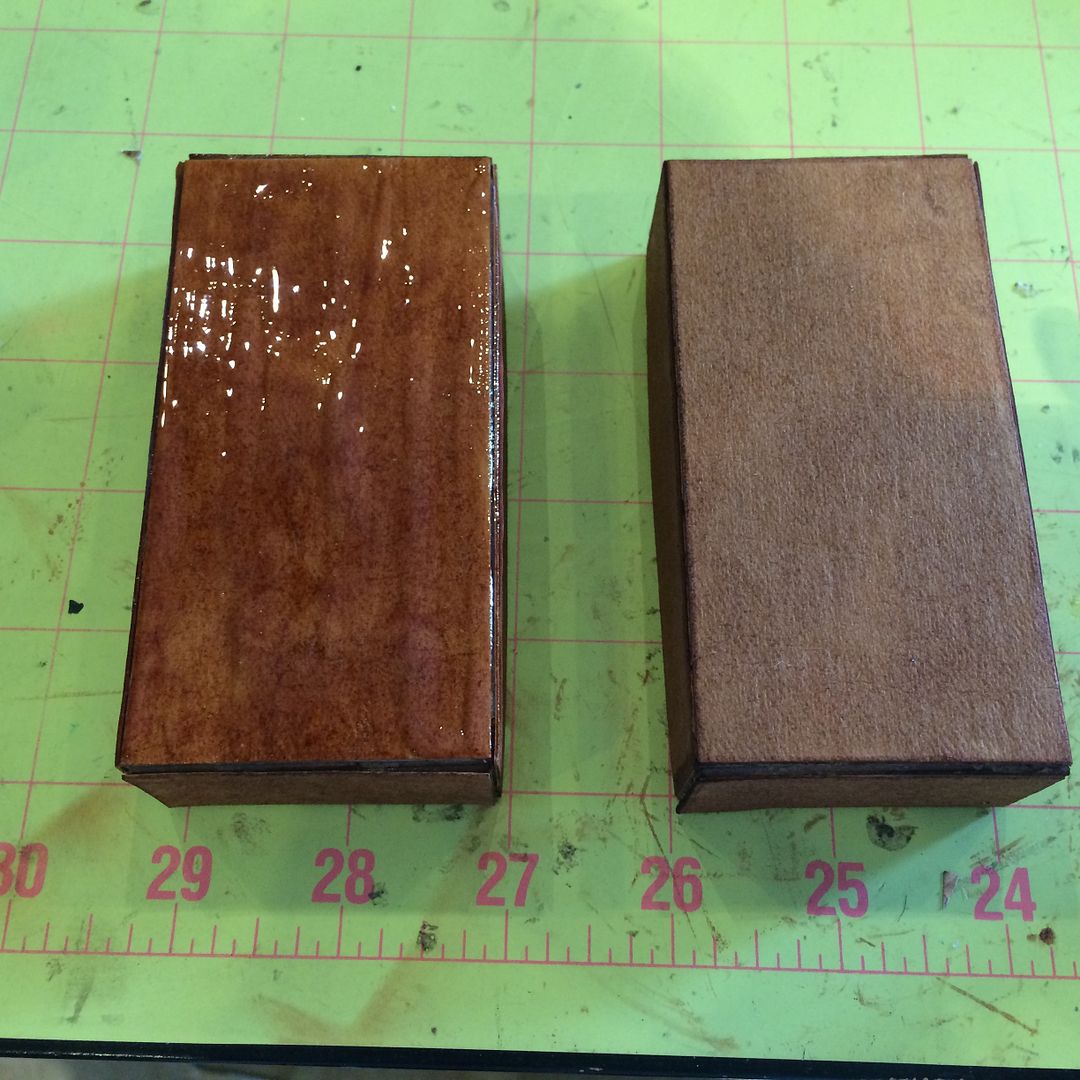
For the
sides, I used more of the Kraft-Tex Paper Fabric. This time I crackled the paper first then
stained it. You’ll notice that this
caused the paper to be a lighter shade than the paper on the trunk.

I
trimmed the trunk with ribbon and other metal bits for the lock and handle.

For the
smaller tin, I covered the sides with Faux
Suede from the sheet pack, which contains 6 different colors. Since the ends of the tin are indented, I cut out and covered pieces of chipboard the size of the ends.
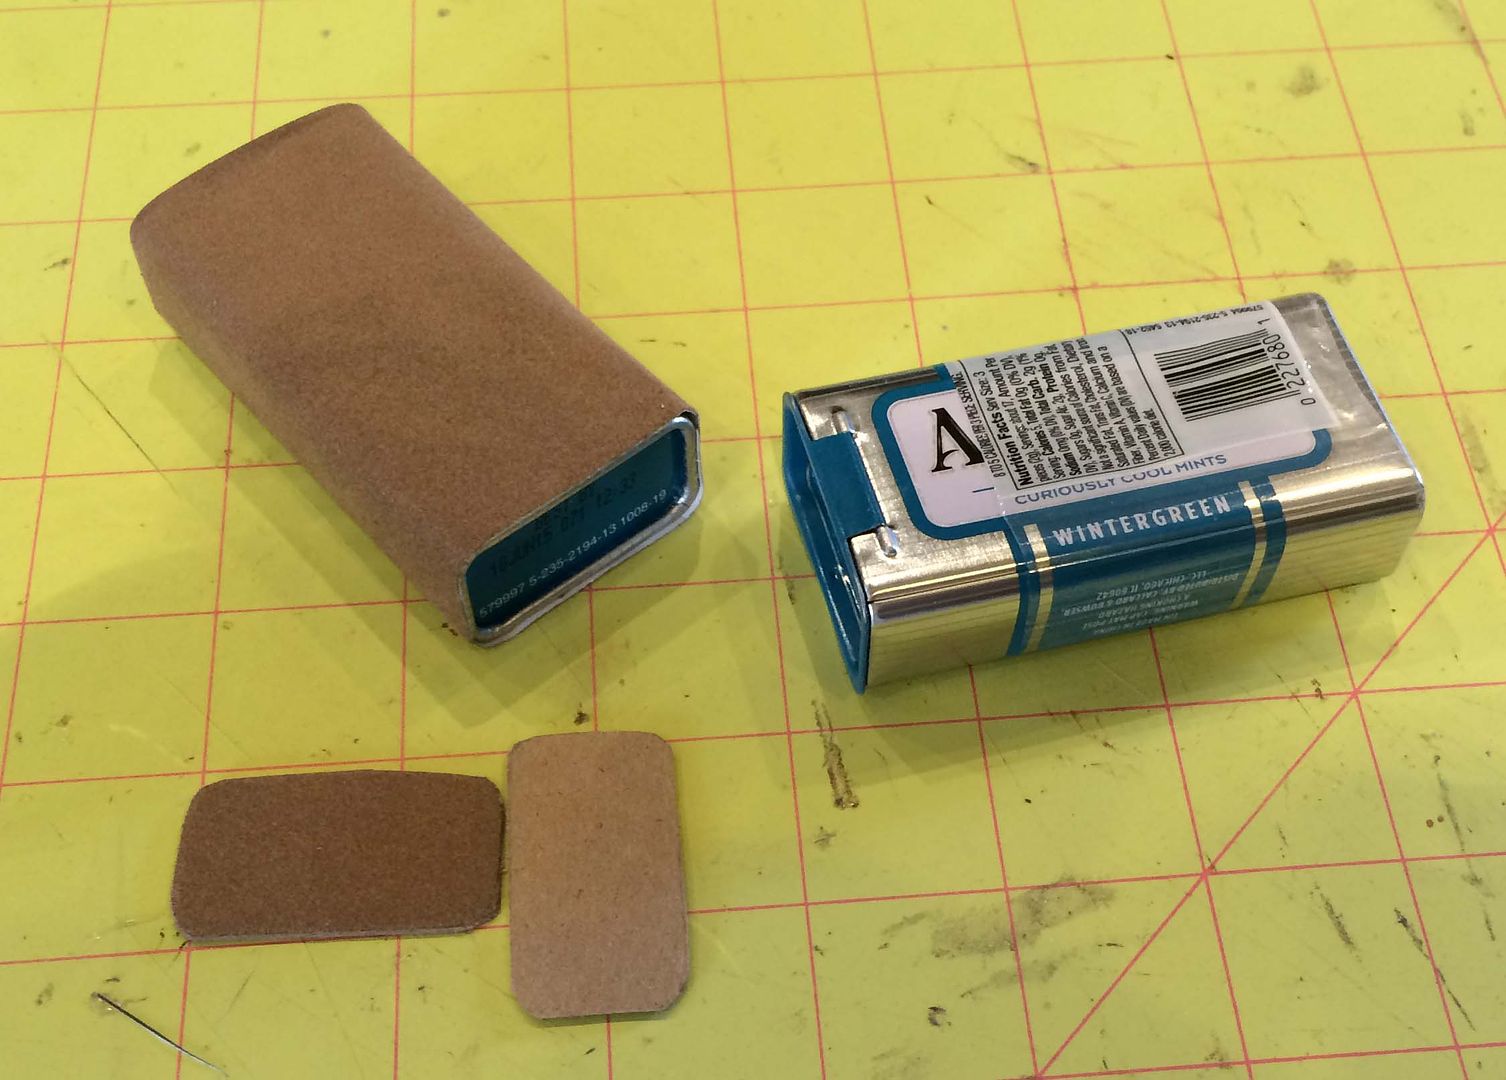
I inked
the edges and trimmed them with ribbon.
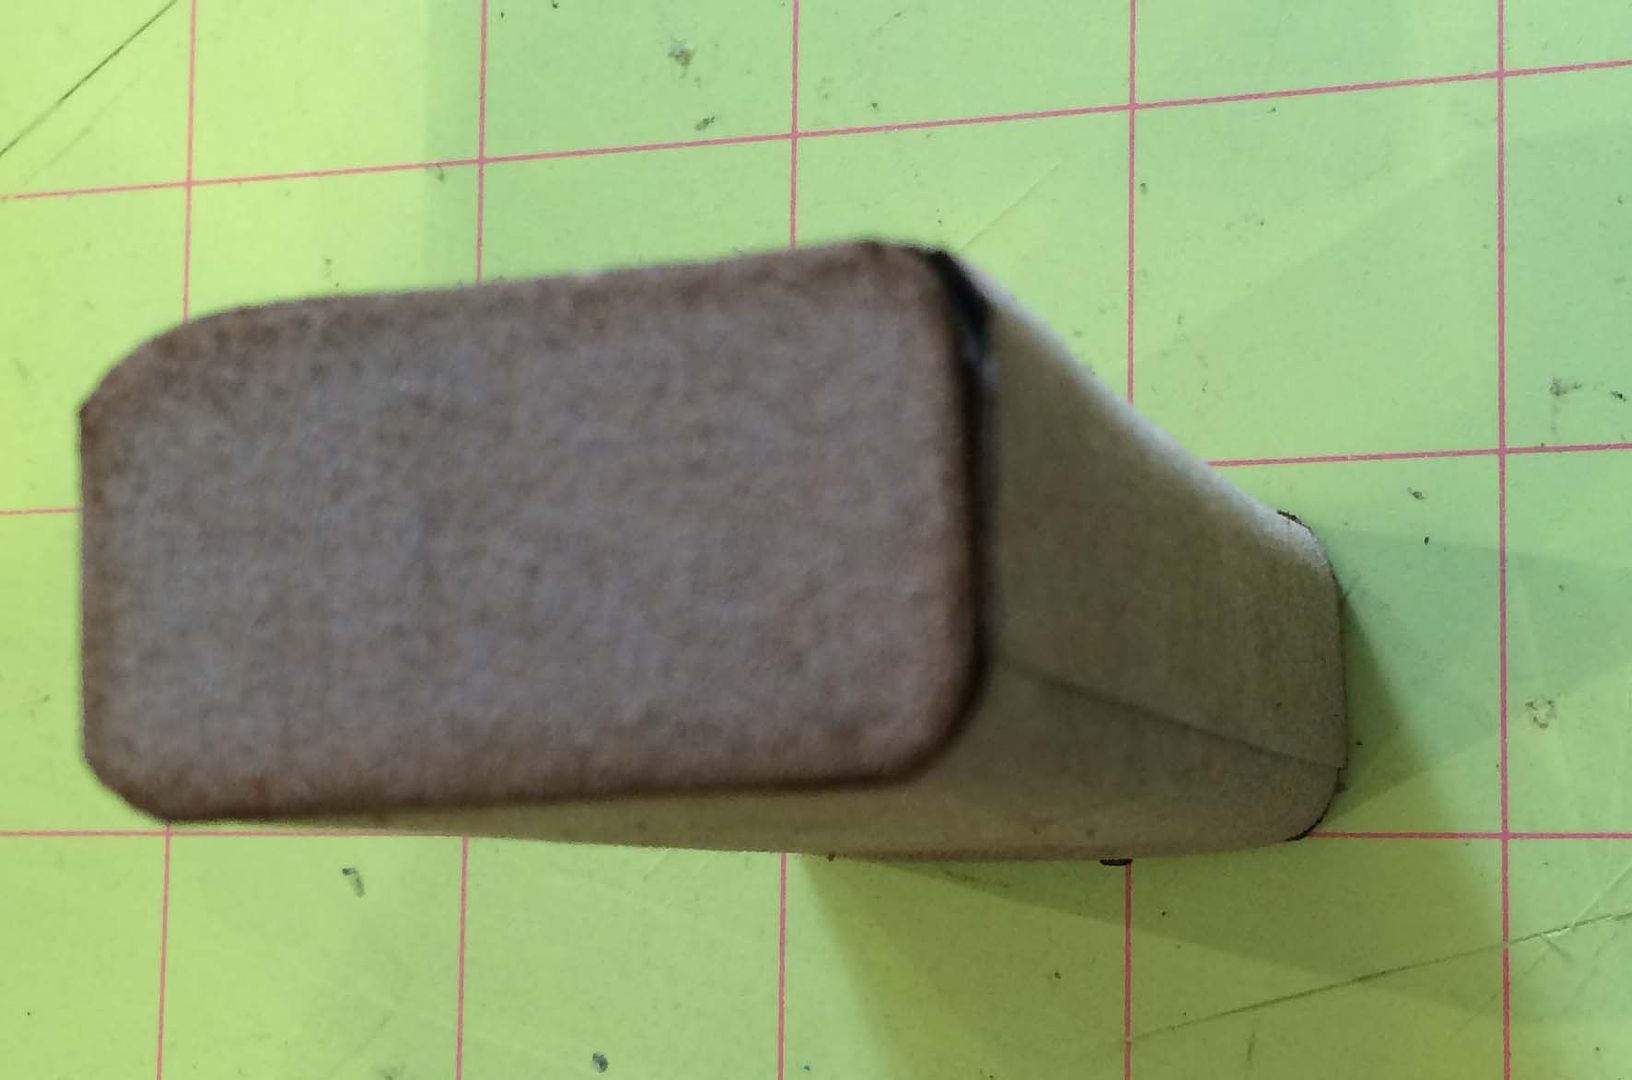
MATCHBOX SUITCASE
For the
matchbox suitcase I used a sheet of burlap from the Tim
Holtz Texture Surfaces pack to cover the box and the ends of the
drawers. The straps and handle are made
from the Faux Suede.
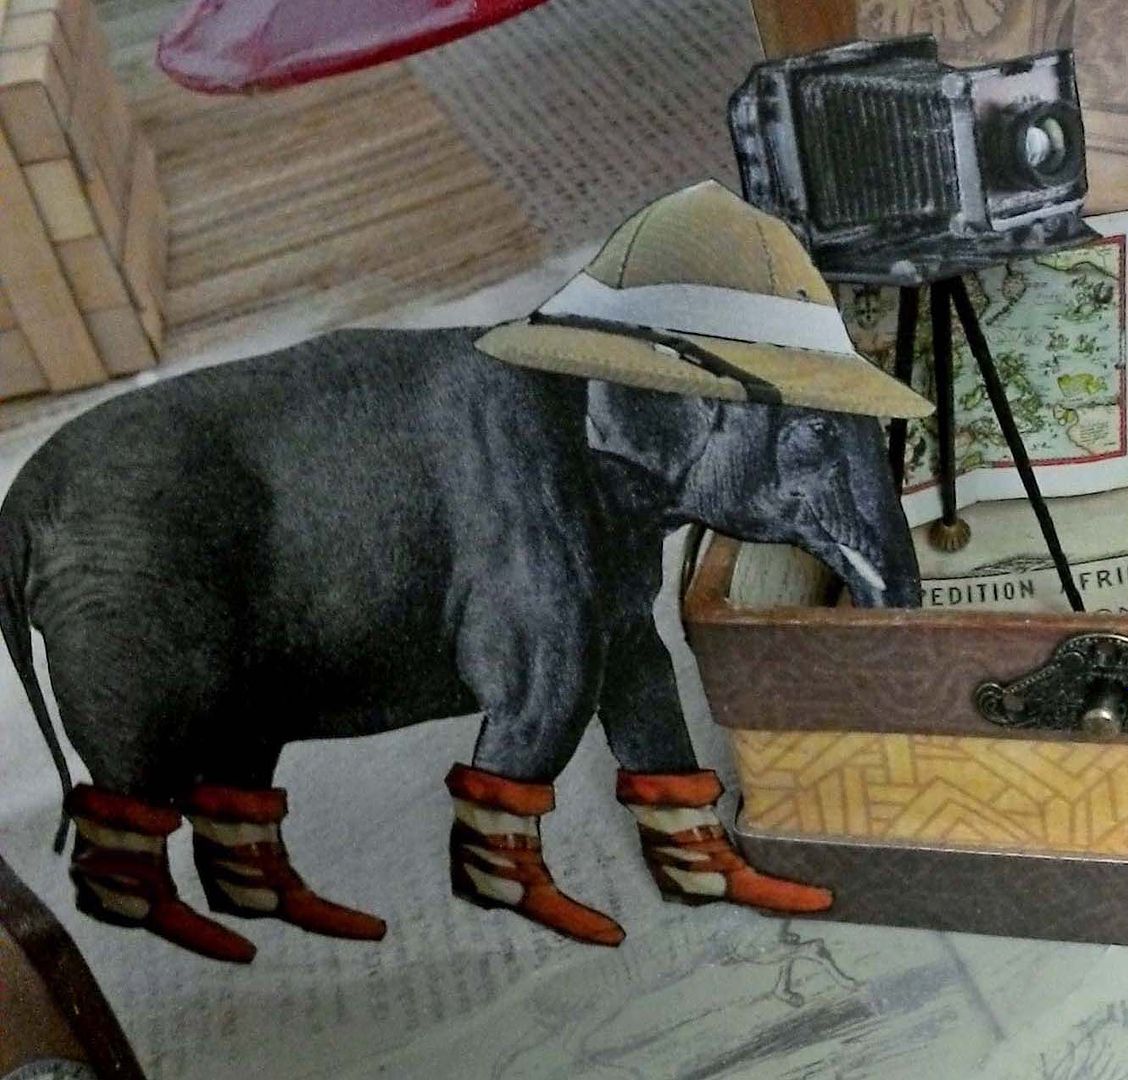
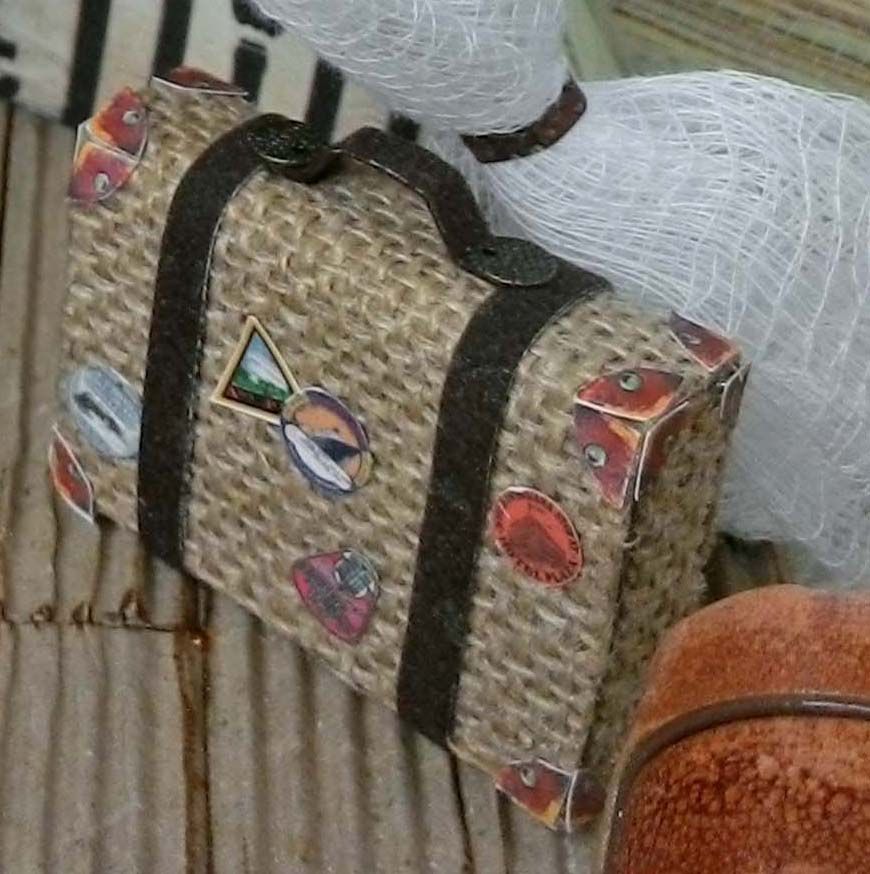
CHEST
The
chest is made from a paper
mache chest and covered with paper from the Serengeti
Paper Pad. This is the paper I used
for the entire project.
Inside
the chest are rolled-up maps and a camera on a tripod.
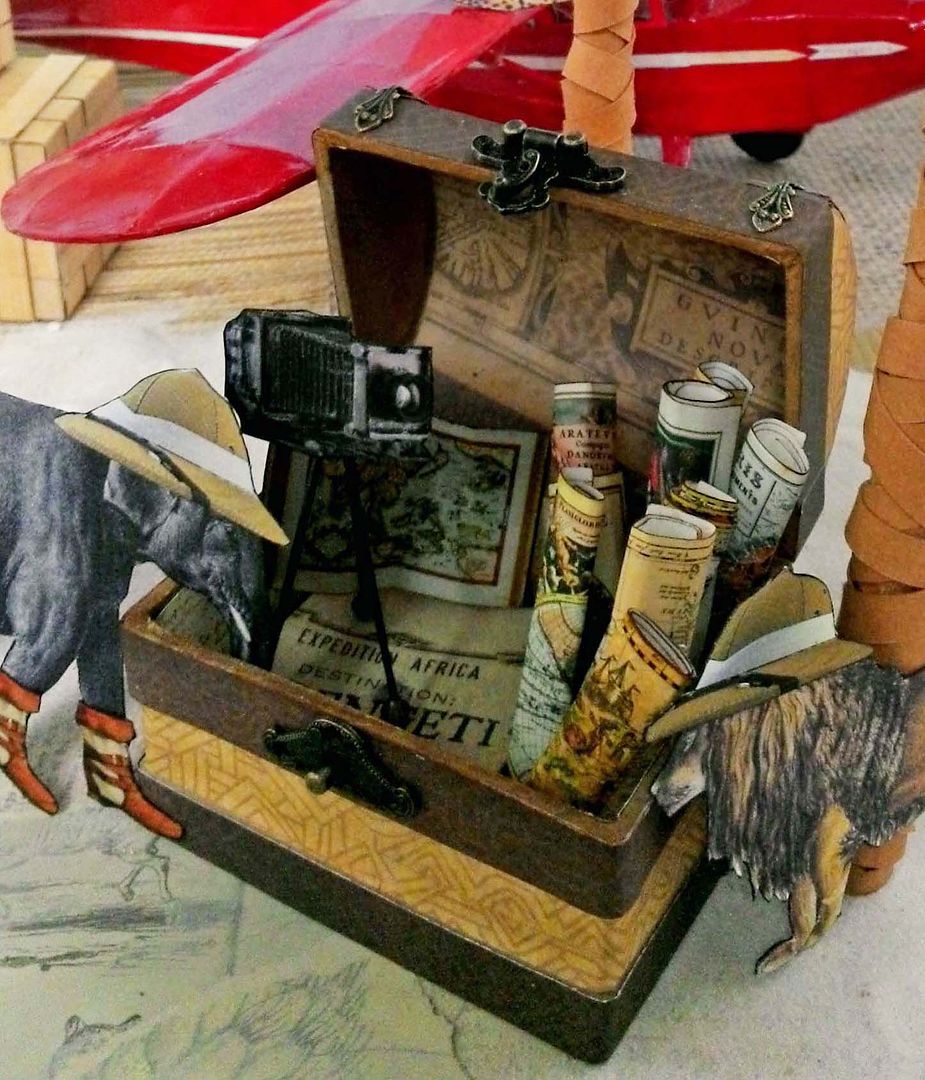
To make
the tripod, I glued together three flat toothpicks. I stained the toothpicks added the metal
beads and the camera.


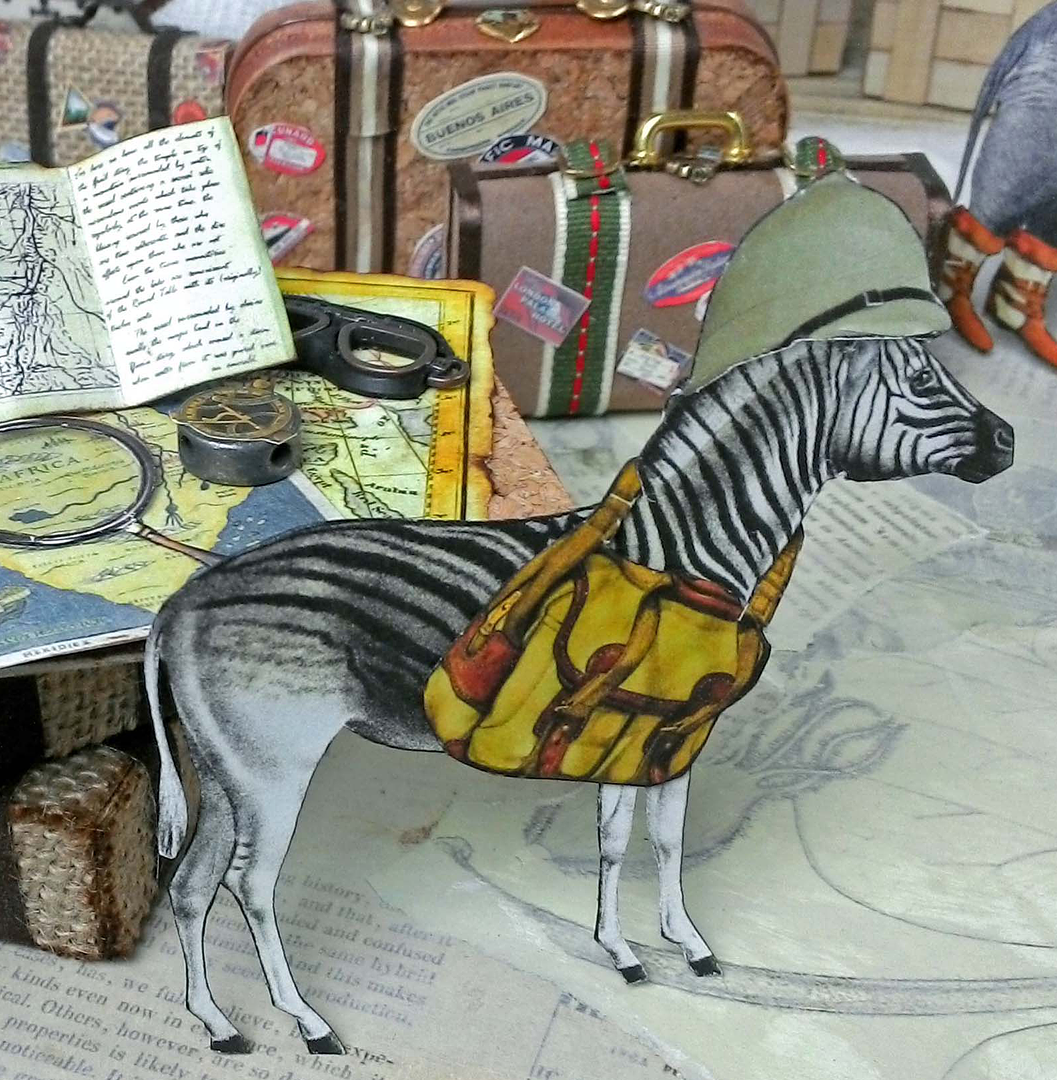
TABLE
The
table is made from a piece of chipboard covered with cork. The base is made from pieces of wood from
my stash covered with burlap and trimmed in Faux Suede.
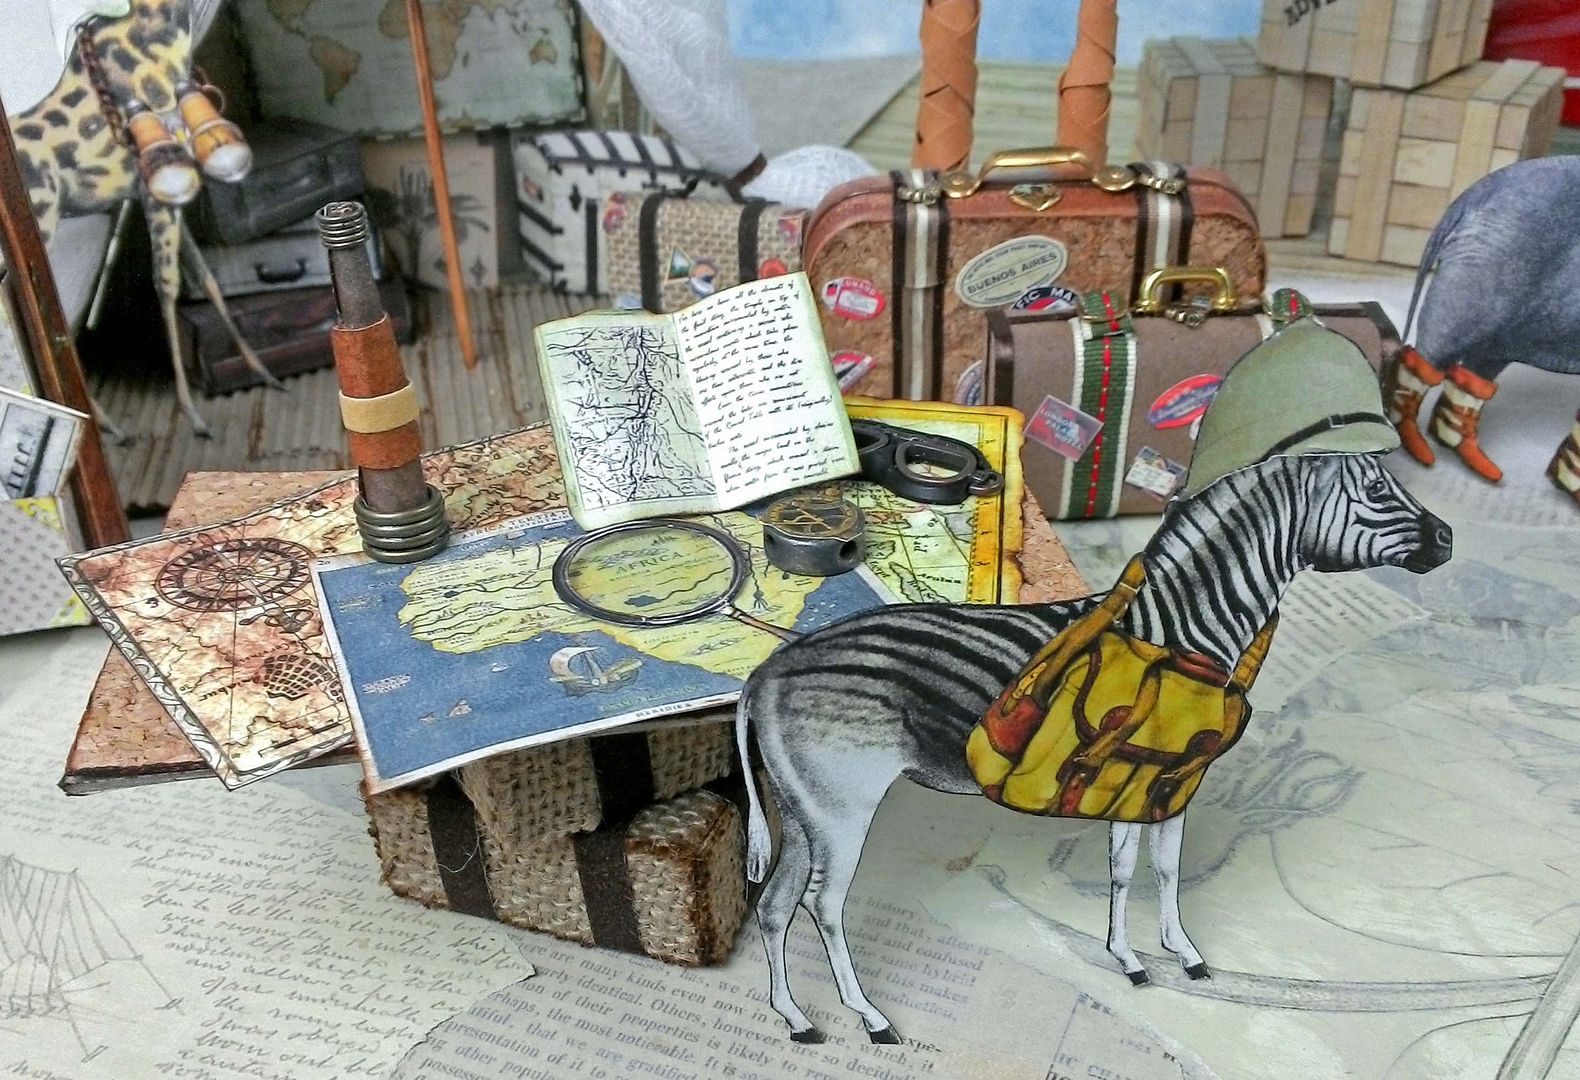
The spy
glass on the table is made by rolling a scrap piece of paper into a cone shape.
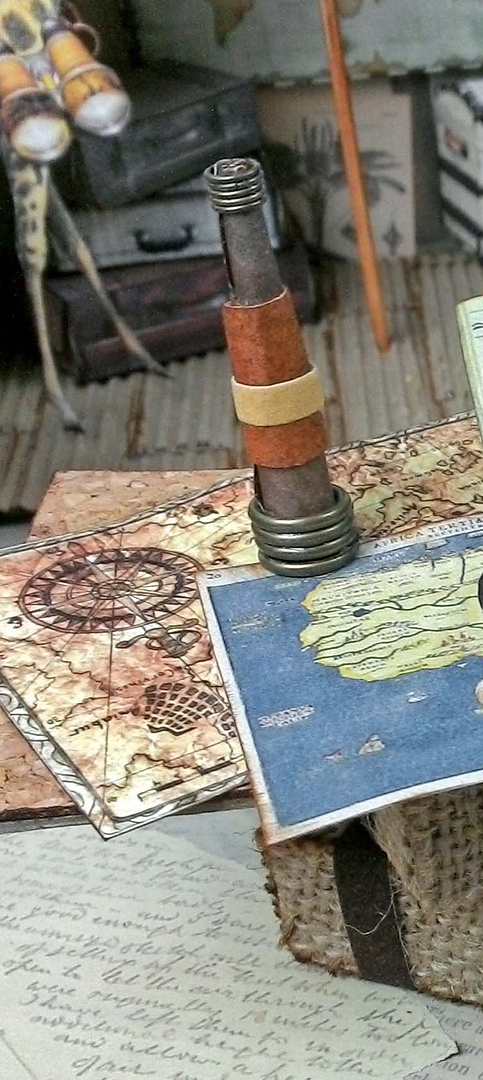
I glued
the paper in place and cut away the excess.
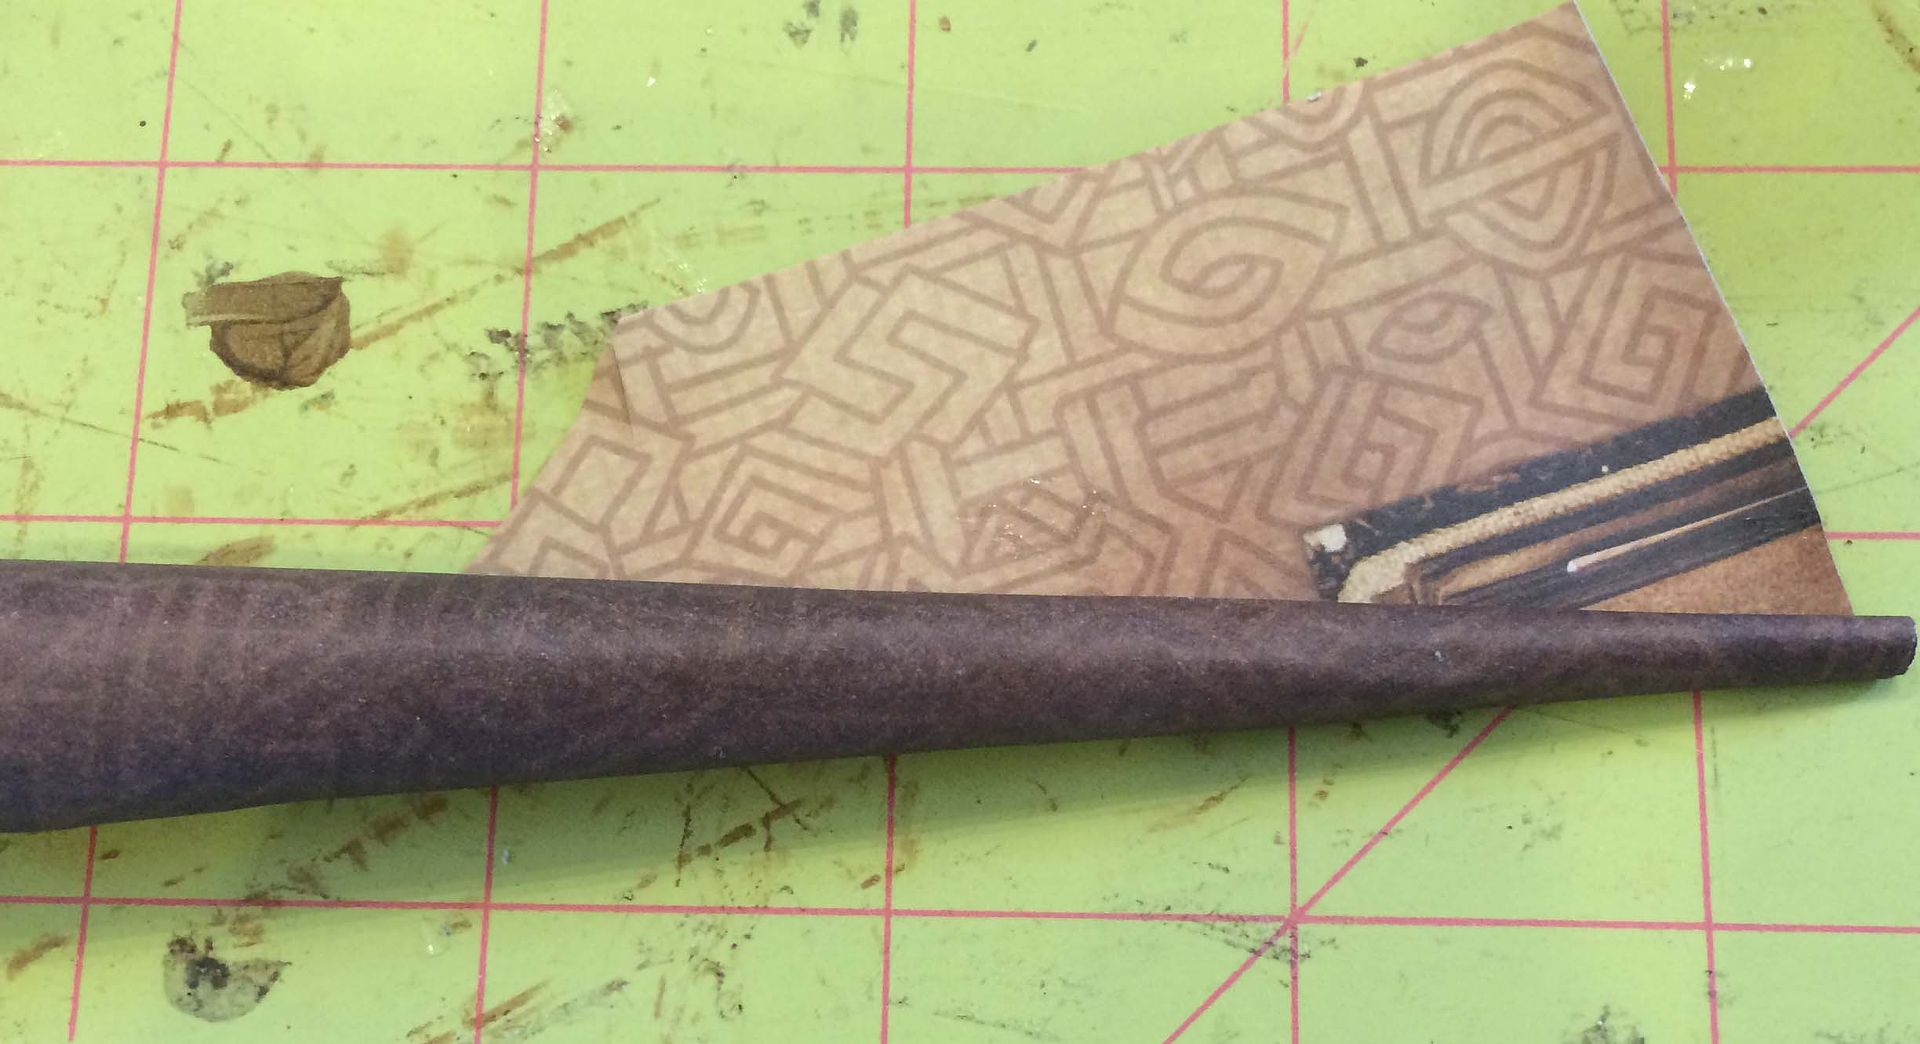
I slid
different-sized jump rings on each end and marked where to cut the paper. After cutting the paper away, I glued the jump
rings onto the cone. I trimmed the spy
glass with Kraft-Tex fabric paper and Faux Suede.

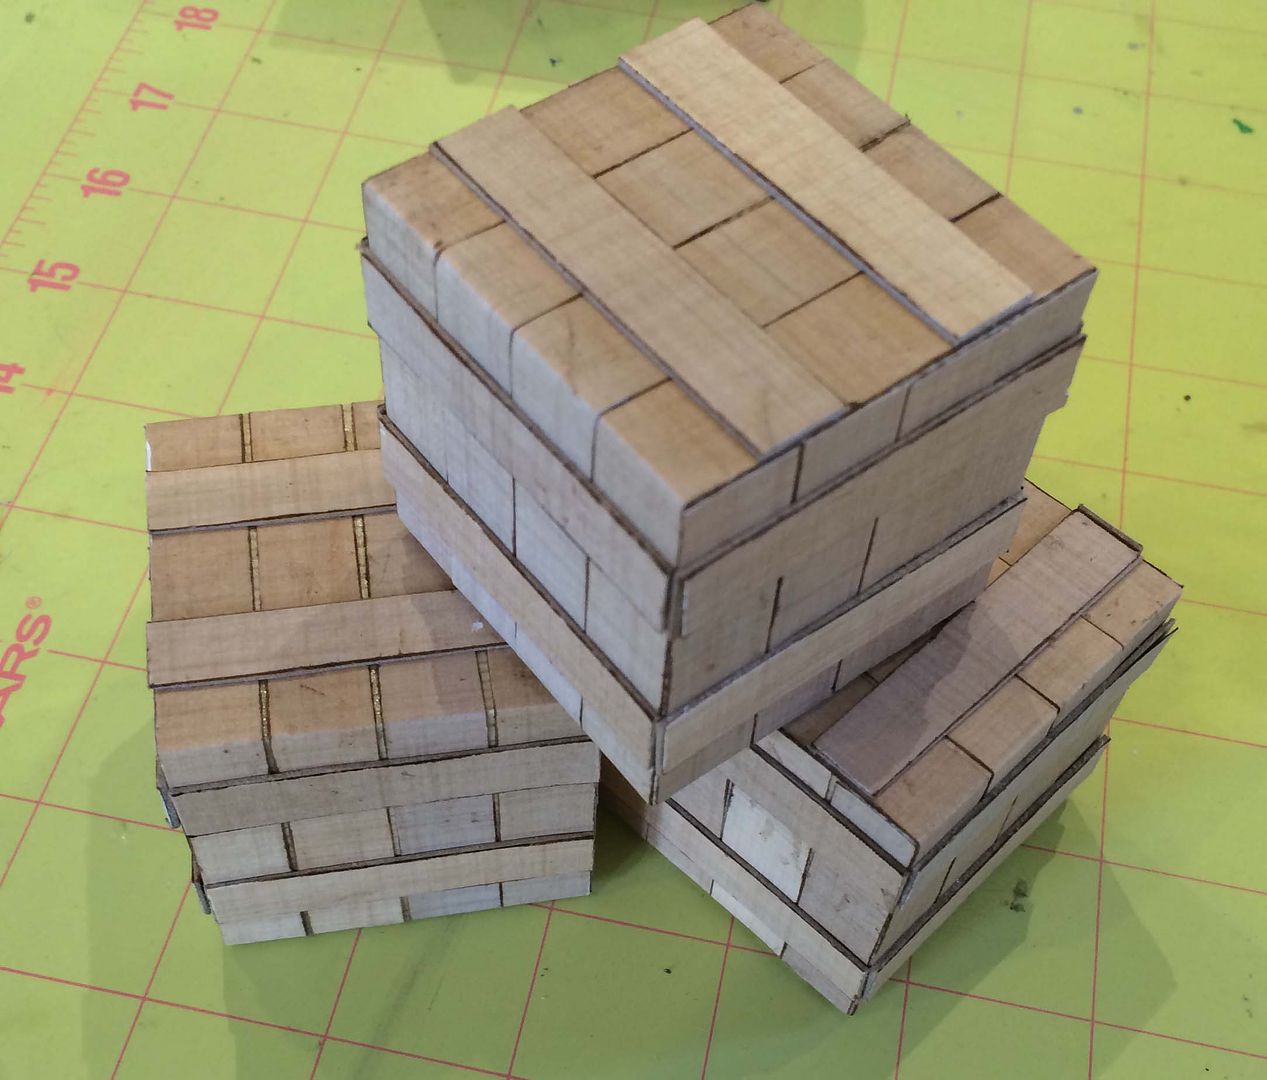
CRATES
The
crates are made from 2” blocks of wood. I
cut long strips of paper and inked the edges so that each strip would stand
out and look like planks of wood. I wrapped the wood with the paper, starting from the edges, which helped keep the edges straight.


I cut
short strips of paper slightly narrower than the long strips and 2.”
long and glued them to chipboard, inked
the edges, and then attached them to each side of the blocks. This made pieces looked raised.
TREES
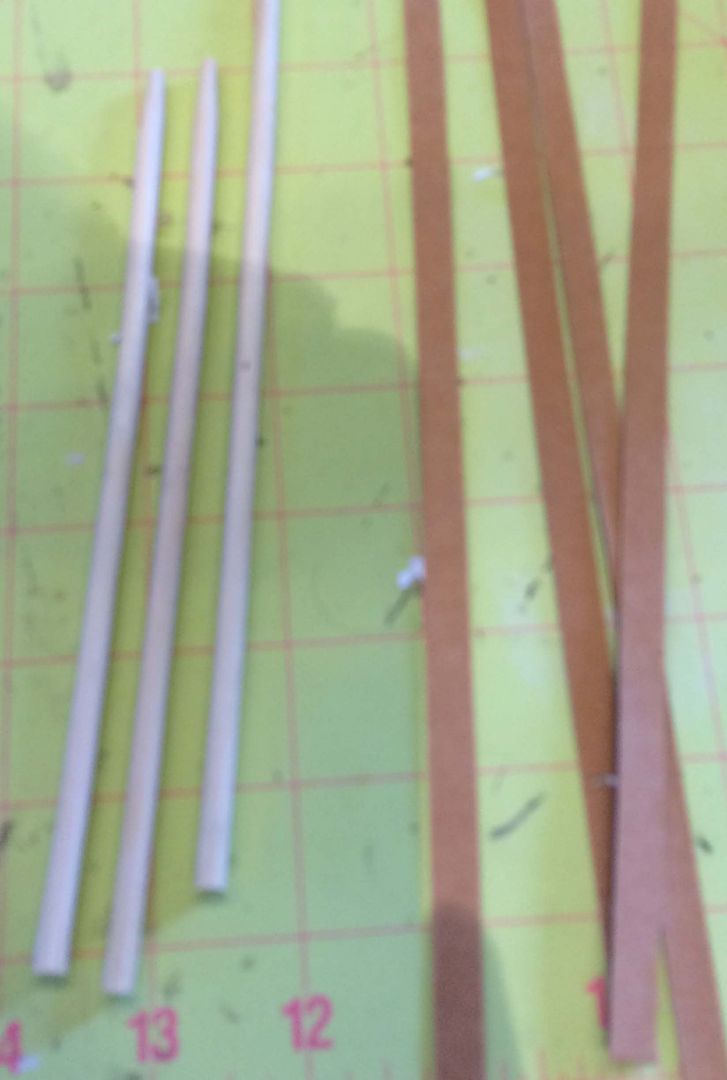
The trees are made by wrapping wooden dowels with the Kraft-Tex Fabric
Paper. I cut the paper into strips and
then started wrapping the dowels and gluing the paper in place. For the first wrap, I covered the
entire dowel by wrapping the paper against each edge of the paper. For the next wrap, I left gaps between the
edges of the paper and wrapped it in the opposite direction of the first
wrap. Also, notice that I didn’t go all
the way to the top with the second wrap.
For the third wrap, once again, I left gaps and wrapped the paper in a different
direction than the second wrap. I
continued with more wrapping until I felt like the trunk was thick enough.


THINGS TO NOTE
The
point with not going all the way to the top with subsequent wrappings is to
make the trunk thicker at the bottom than at the top. With each wrapping, I stopped lower and lower
on the trunk. The point of wrapping in opposite
directions is to make it look more like a real trunk.
Don’t worry about
wrapping the paper perfectly as trunks don’t grow perfectly. The Kraft-Tex Paper really worked great for
the trees as it is thick and pliable. If
you were to do this with regular paper, it would take a long time to wrap the
trees to get them thick enough.
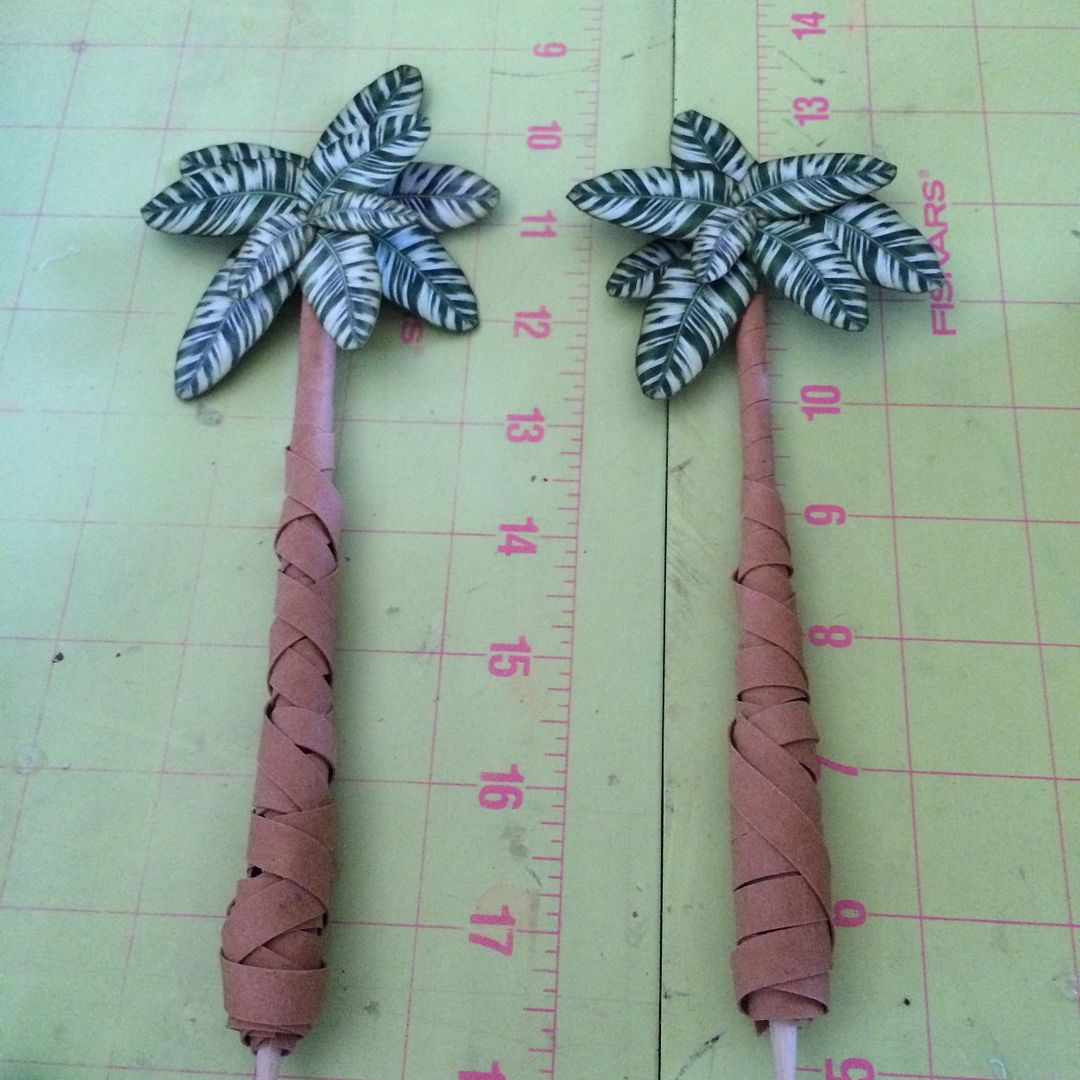
I left
part of the bottom of the tree exposed, which will be inserted into and glued to
the foam core base.
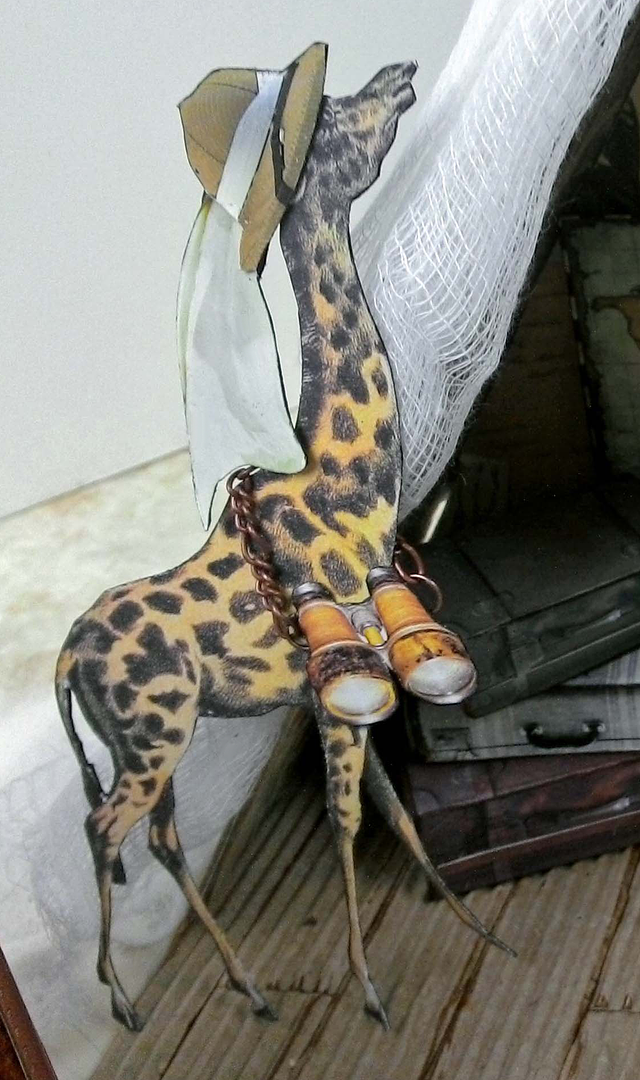
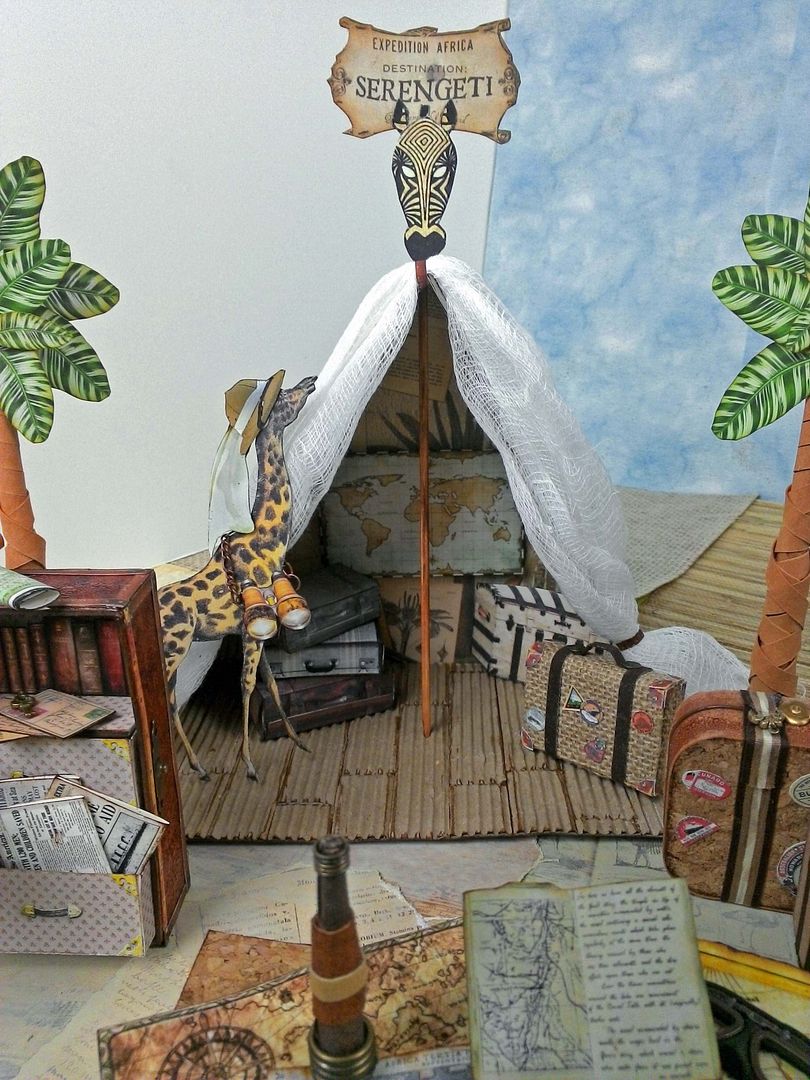
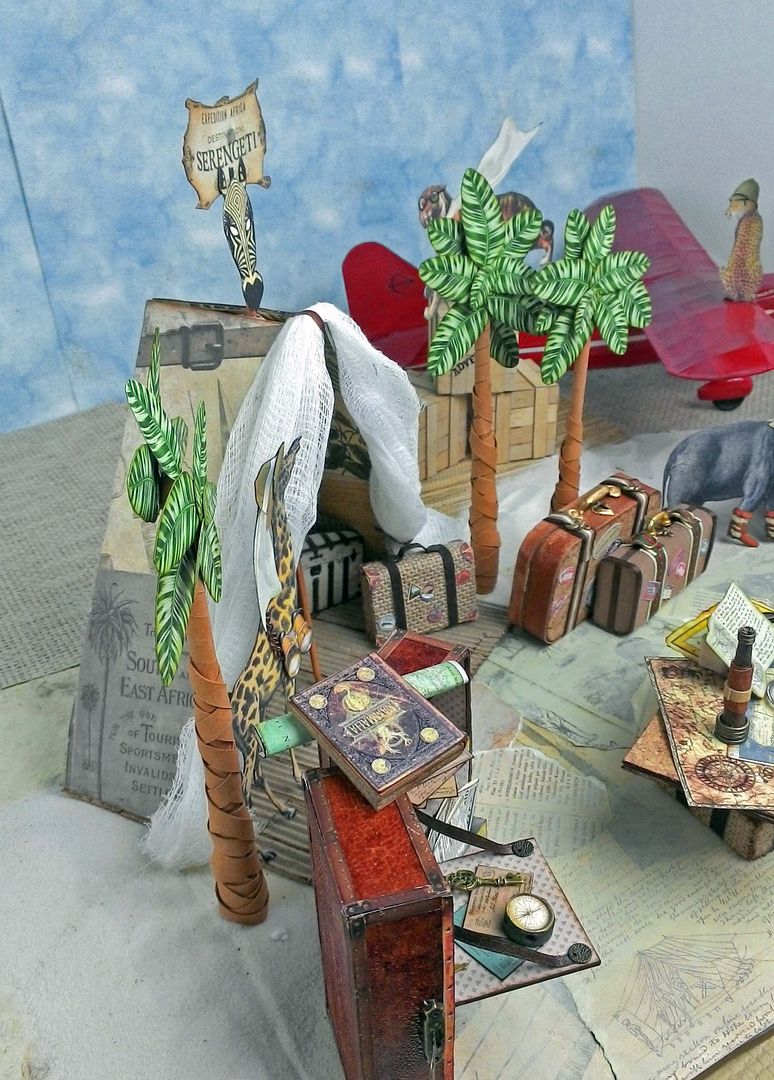
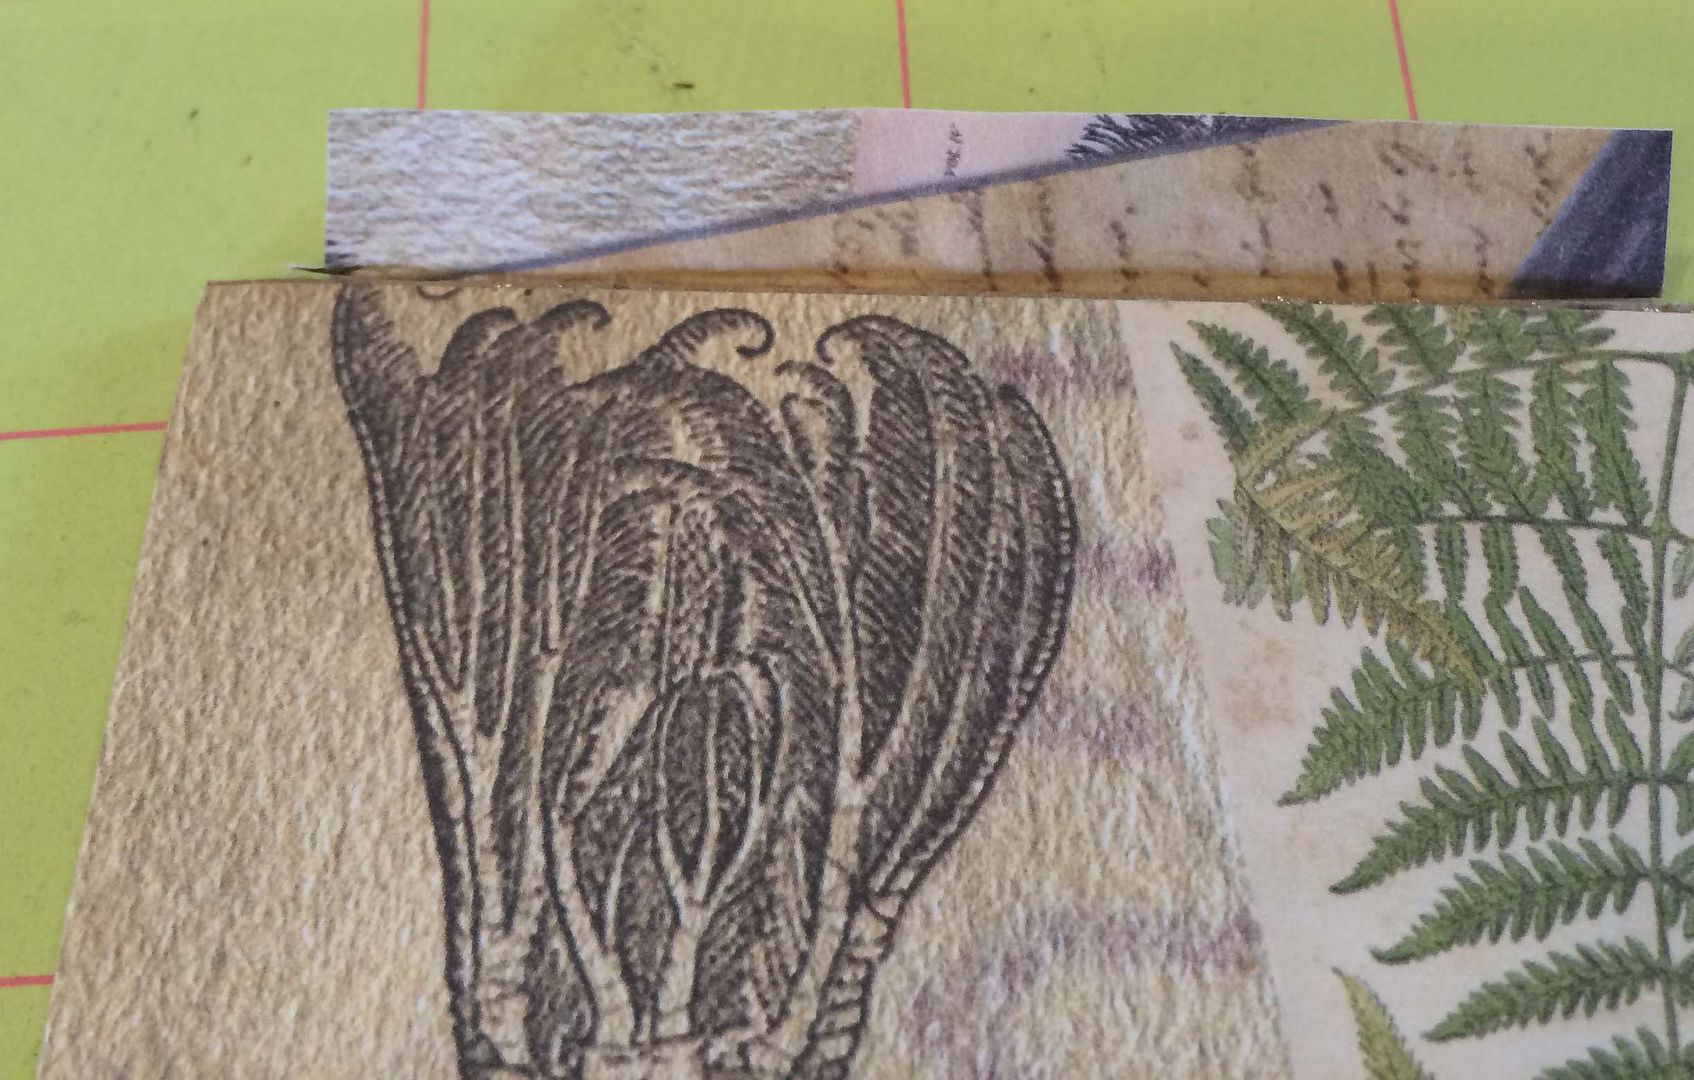
TENT
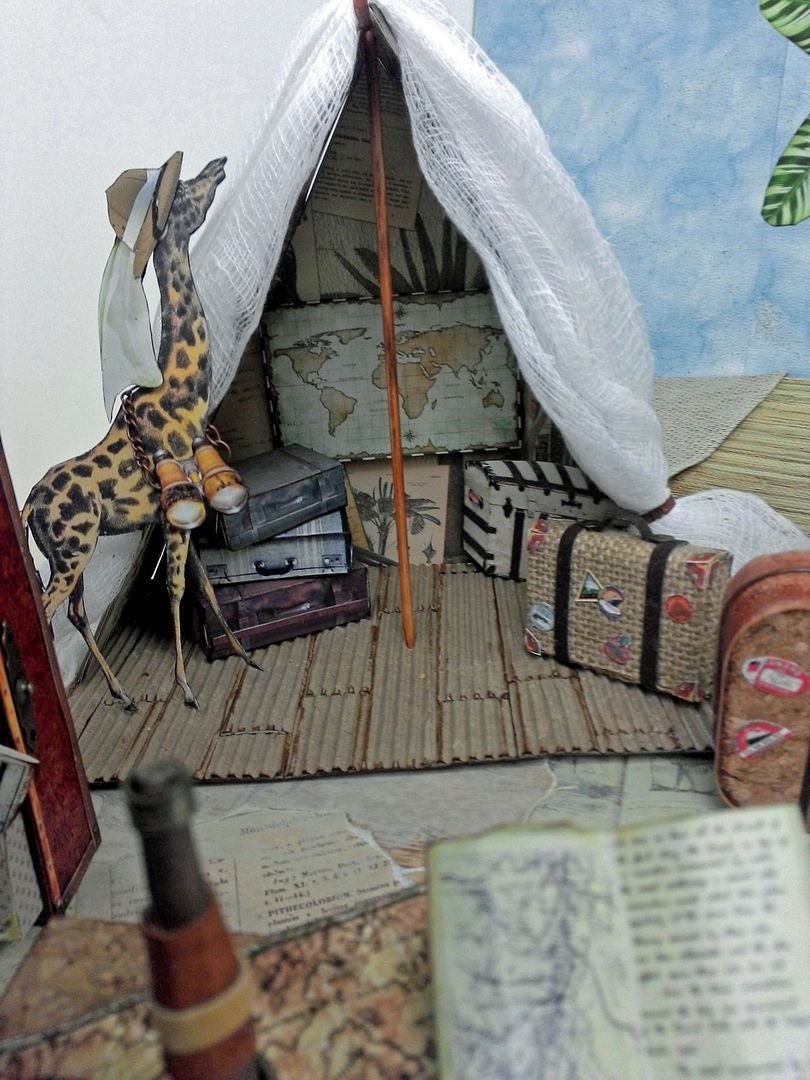
I made a
template to construct a simple tent which consists of a back and two sides.
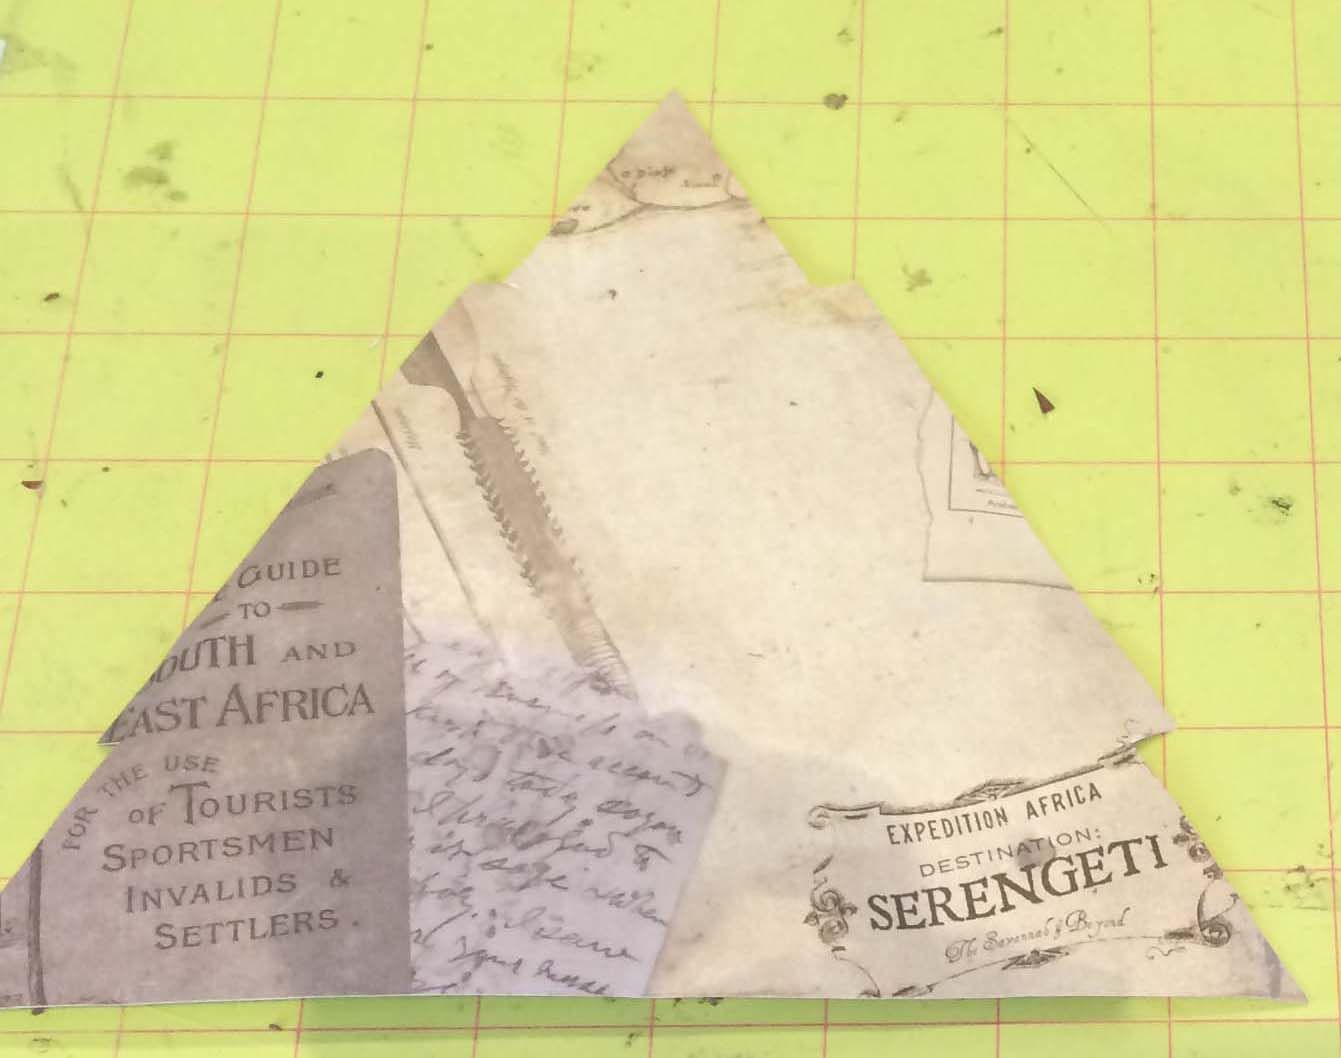
Both of
the side pieces and back pieces consist of a piece of decorative paper, a piece
of chipboard, and another piece of decorative paper. Sandwiching the chipboard between the decorative paper made the tent sturdy. Don’t cover the tabs with chipboard as it
will make them hard to bend. I covered the tabs with the decorative paper (on one side) so that there would not be a white line when
pieces were glued together.

Feel
free to use the template below.
TENT SIDE - CUT 2

TENT BACK

A
wooden skewer goes from the top of the tent through the floor, and the foam core
base of the scene, which helps keep the
tent in place.
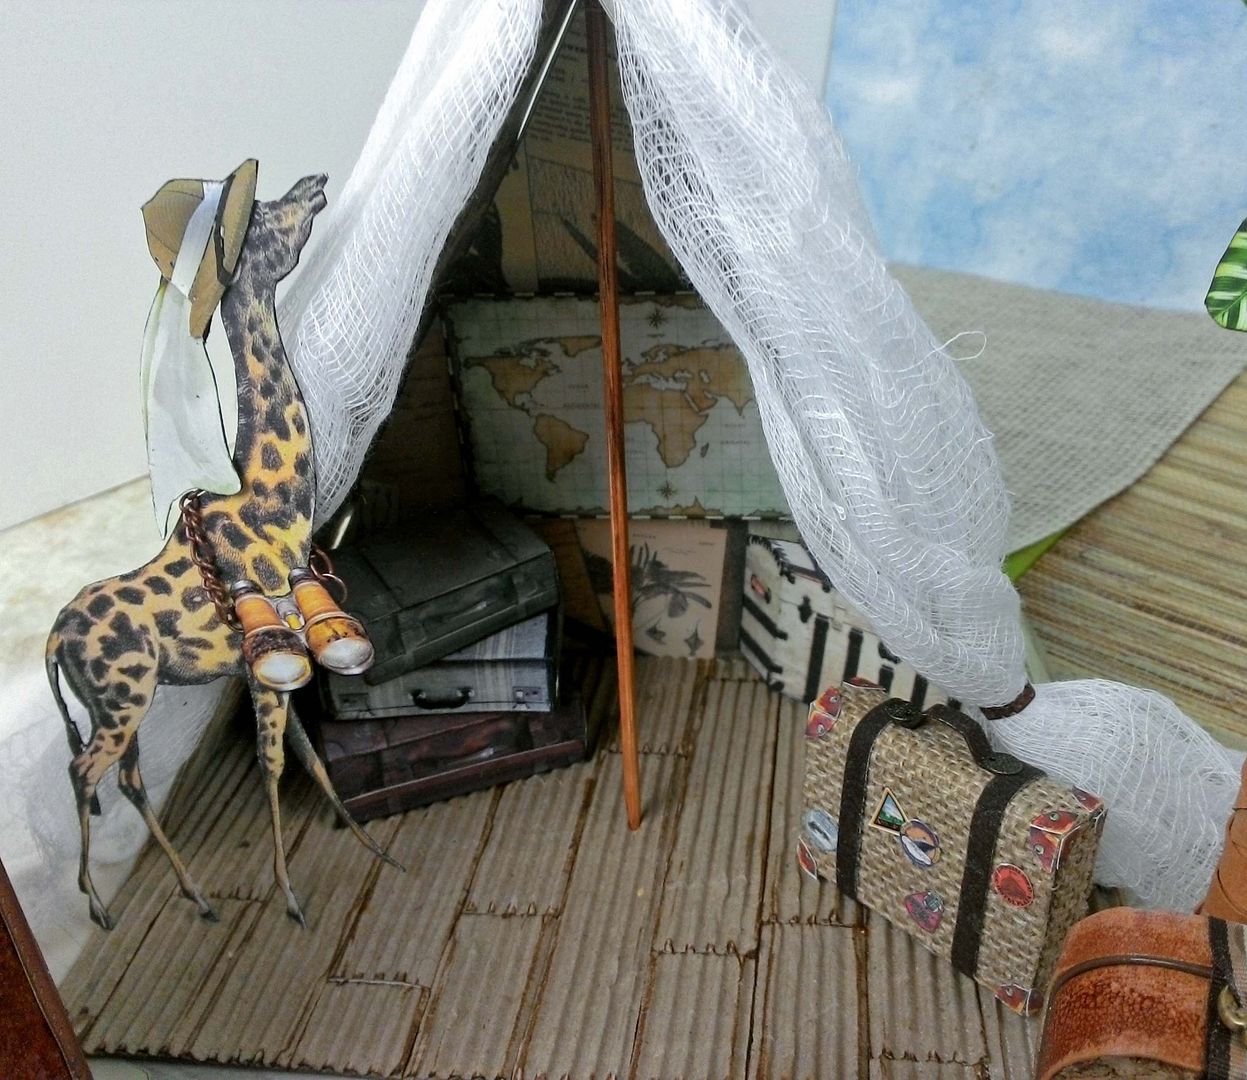
At the
front of the tent, I draped cheese cloth.
Inside the tent is a map and faux suitcases. The
floor of the tent is made from strips of corrugated cardboard cut into strips,
inked and glued on a piece of cardstock.

I cut
the strips into two different lengths and then staggered the lengths as I glued
them in place.
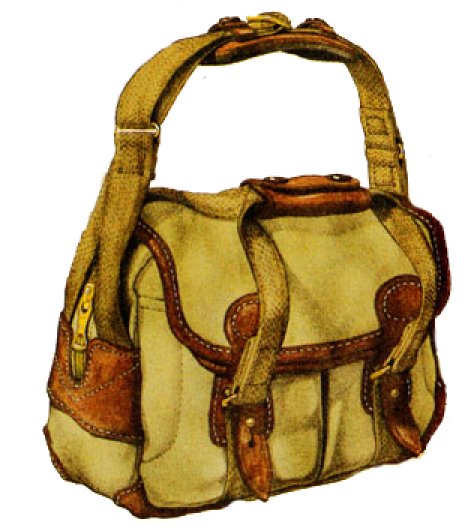
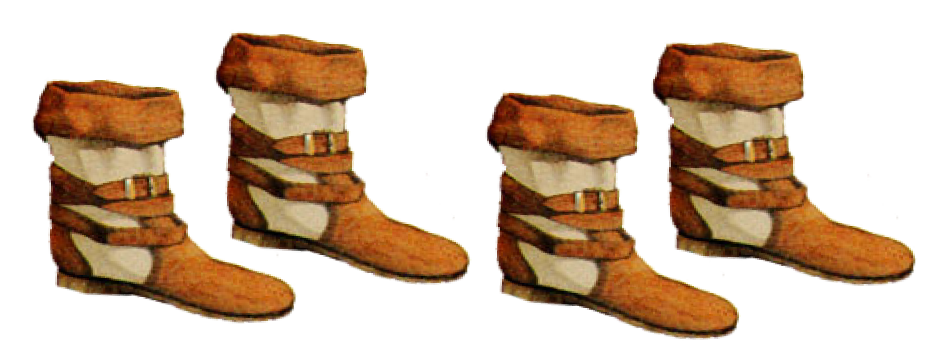
EXTRA IMAGES
Some of
the images I used are not on the collage sheets, but I have them for you below, so feel free to use them in your art.
The shoes and satchel are sized for the elephant and the animals on the
collage sheet.
15 comments:
Oh my gosh, you are too amazing for words! Love all your wonderful animal characters (their names are fabulous!) and your safari scene is spectacular as always. Thanks so much for sharing your amazing talent Laura (and your Dad's plane is wonderful!)
Hello Laura
You allways surprise me! I love this new fantastic project, so amazing and full of humor!
Congratulations!
Hugs and kisses
succesful, i love it
Wow! What a treat to see all the details in your creations! Amazing creativity and ingenuity!
Another jaw dropping, amazing creation. This is so whimsical with the animal characters and the scene itself is perfection. Thanks so much for sharing. Again, your talent is endless.
My goodness...that is amazing! A beautiful work of art. It should be in a museum! WOW!
You are so very creative. Just love watching your "work".
OMG!! I love your project. You are such an amazing creative person. I love this theme -Alpha Stamps is the BEST!! The designers are awesome and I am always amazed at what you all come up with. I love seeing whatever you create I would love to have all your creations displayed in my home. Thanks for sharing. =^-^=
Excellent as always! You never cease to amaze! We'll done and so creative. Awesome!
Your project is fabulous. I need to purchase my tickets to Africa before the safari is overbooked.
I'm in love with your suitcases and trunk. Can't wait to try and make my own. Thanks for another great project.
Wow. I've seen your projects before and every time I think the same thing! How on earth to you 1.)come up with these fabulous ideas of creation and 2.) how wonderful your mind works to use everyday items and make them into something else with such pizazz! Congrats on another wonderful project!
Oh my goodness!!! This is fabulous!!!
What an incredible imagination you have! I love this but don't know where I would keep it if I made it. So many wonderful things to make and no where to keep it.
Holy Cow! I was simply blown away by this project on Alphastamps! You raise the crafting bar! Amazing project.
Post a Comment