


Accordion folded books are simple to make and require no sewing. Everything is assembled with glue. You can make them any size you want and can use them to display art, as a journal, as scrapbook or as a piece of art. The new Rectangular Fleur de Lys Frames carried by Alpha Stamps make perfect book covers. I also thought that Alpha Stamp’s new humorous “How’s My Hair” rubber stamp set and collage sheet would make a fun topic for a book.
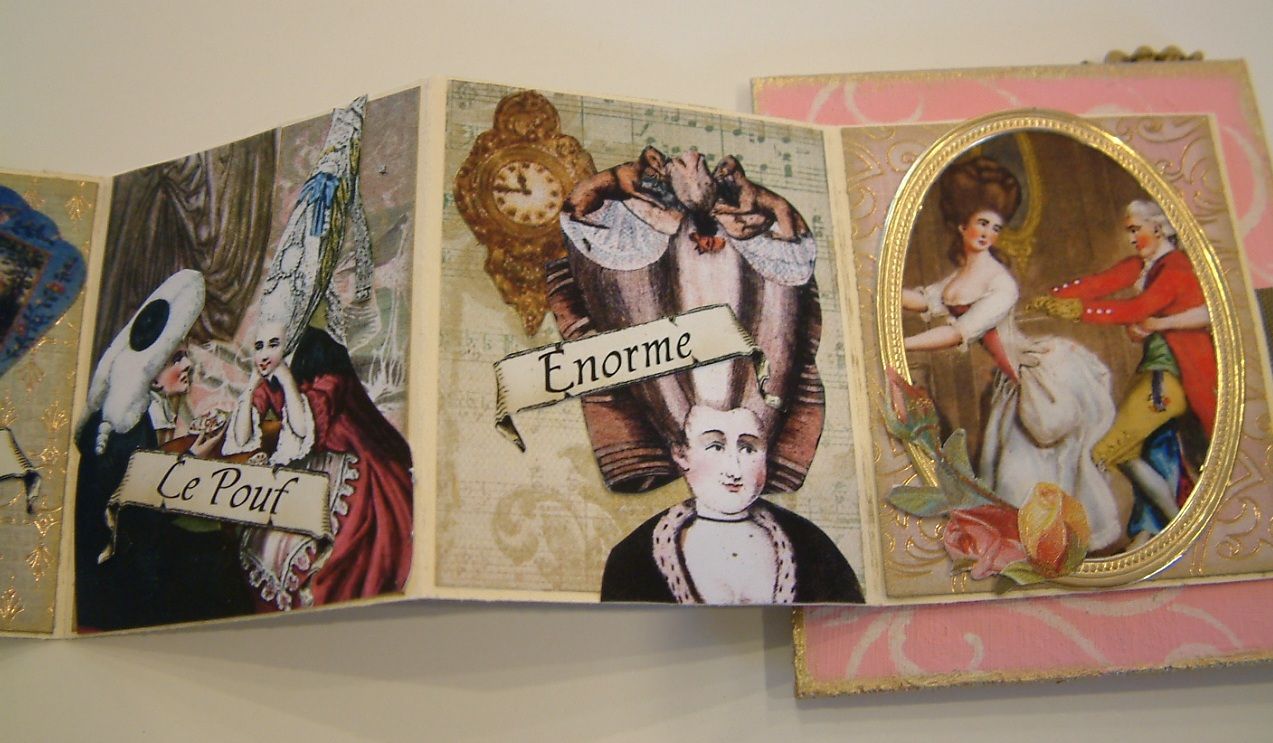
The new stamps and images are based on the craze of the French court in the 1770s (Marie Antoinette’s time) of creating huge hairstyles called “le pouf”. Hair dressers used cushions made of fabric or cork and the woman’s own hair as well as added hair pieces that would be combed over and piled on top of the cushions. Next were added enormous curls, feathers, lace, flowers and other ornaments. The bigger the hair the higher the status!
What you will need:
2 Pieces of Thin Ribbon 18” Long
1 Sheet of 12 x 12 Cardstock.
A Piece of Chipboard at Least 2 ¾” x 3 ¼”
Decorative paper, embellishments and images for the covers and pages.
Scoring Tool
Scissors
Glue
Creating the Book Pages
The first step is to create the inside pages of the book. I suggest using cardstock because decorative paper usually has a white interior that is exposed when folded so your book pages may end up with a white edge. Once the pages are created you can add decorative paper, images, embellishments, etc.
Cut Cardstock Strips
From a sheet of 12 x 12 cardstock cut 2 strips of paper that are 2 5/8” wide.
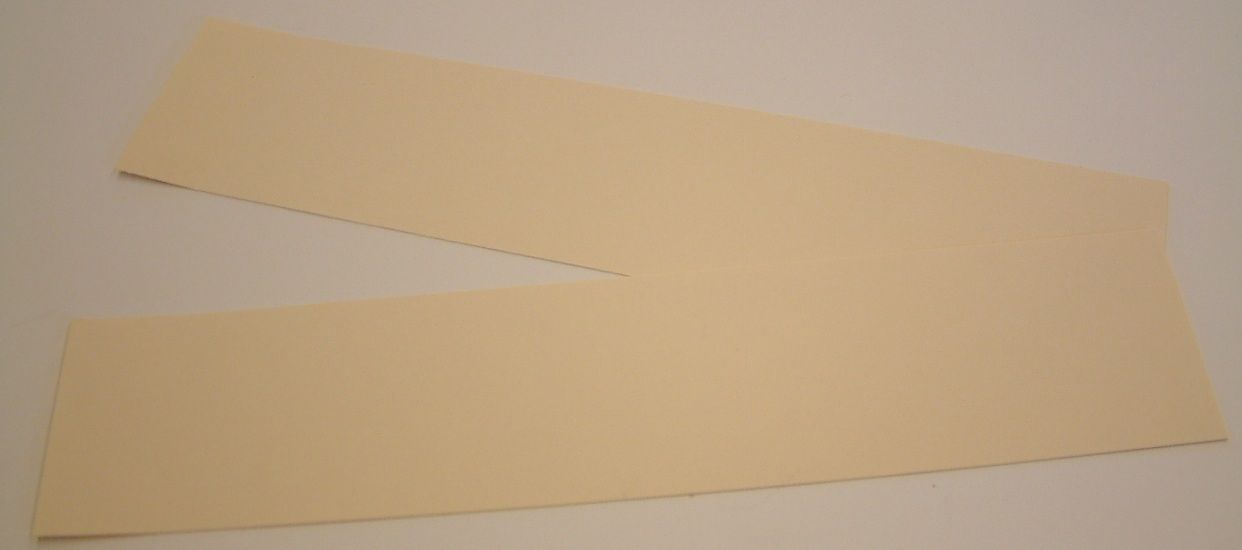
Score and Fold the Strips of Cardstock
Score the first strip of paper at intervals of 2 1/8”. You should end up with 5 score lines. Fold first strip of paper along the score lines. Score the second strip of paper at intervals of 2 1/8” creating only 3 score lines. Fold the second strip of paper along the score lines. The first strip should have 5 panels or pages and a partial page at the end. The second strip should have 3 panels or pages and a large extra piece at the end.
Cut away the large extra piece at the end of the second strip along the last score line. This should leave you with 3 pages.

Join Together the Cardstock Strips
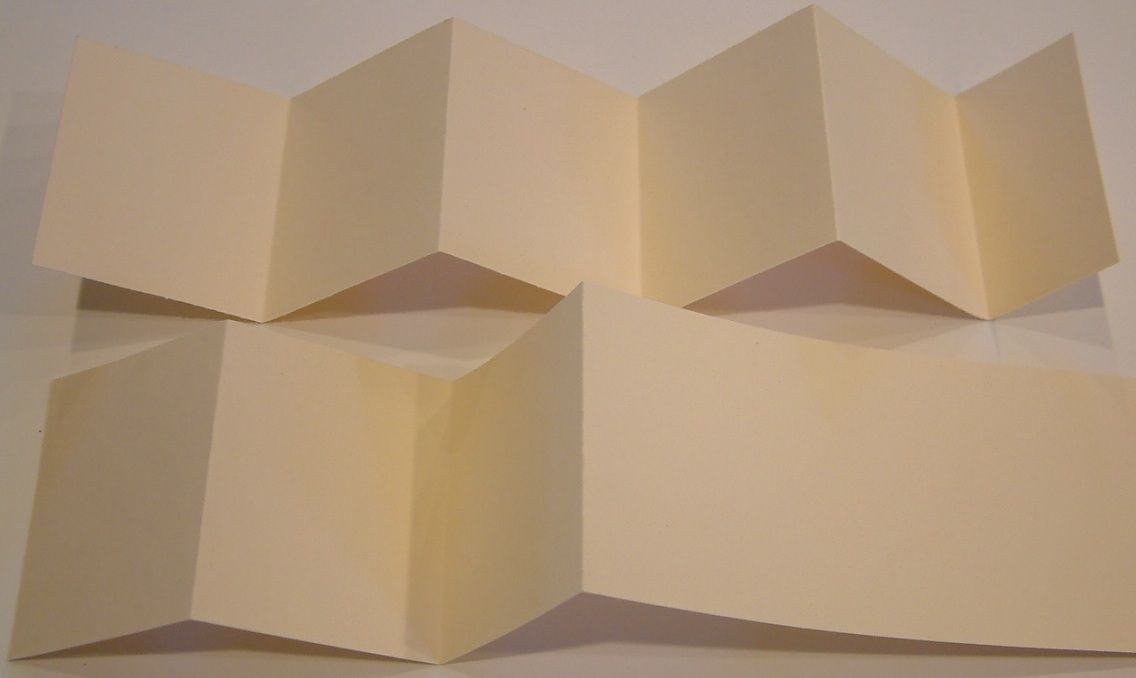
Glue the two folded strips of paper together by attaching the short page on the first strip of paper to the first page on the second strip of paper.

Below is a picture of how your cardstock strips should look when they are combined. There should be a continuous folded strip of paper with 8 pages.
Decorate the Book Pages
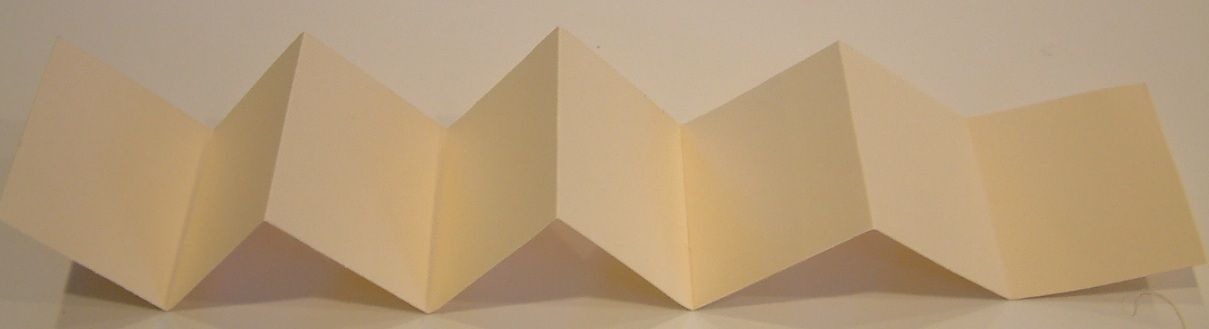
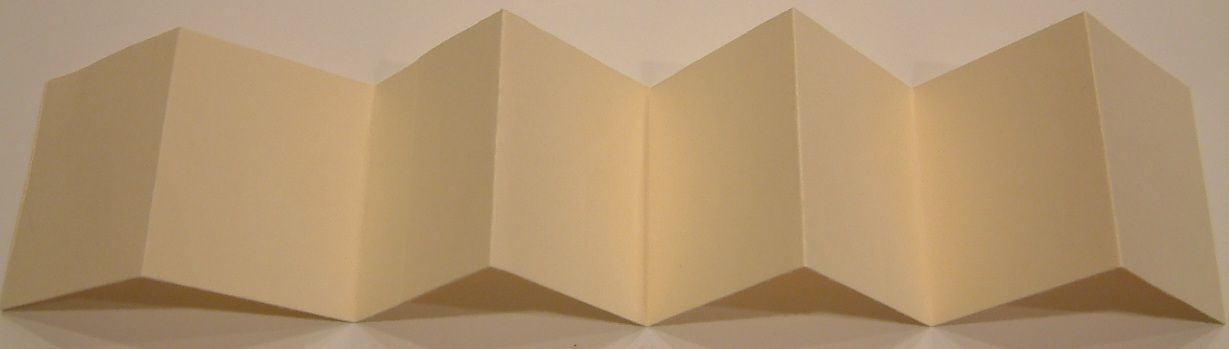
First, decorate the inside pages. You must be careful to decorate the correct side. Lay the accordion folded pages in front of you. The side that is the “inside” of the book is the one where the last page on each end lays flat if you press it down to a surface without undoing the folds (see the picture below). The side that is the “outside” or back of the book is the one where the end pages don’t lay flat and form a hill with the next page (see the picture below). Also be careful to pay attention to direction when decorating both sides. You don’t want your images going one direction on the inside and another direction on the outside.
INSIDE
OUTSIDE (Back)
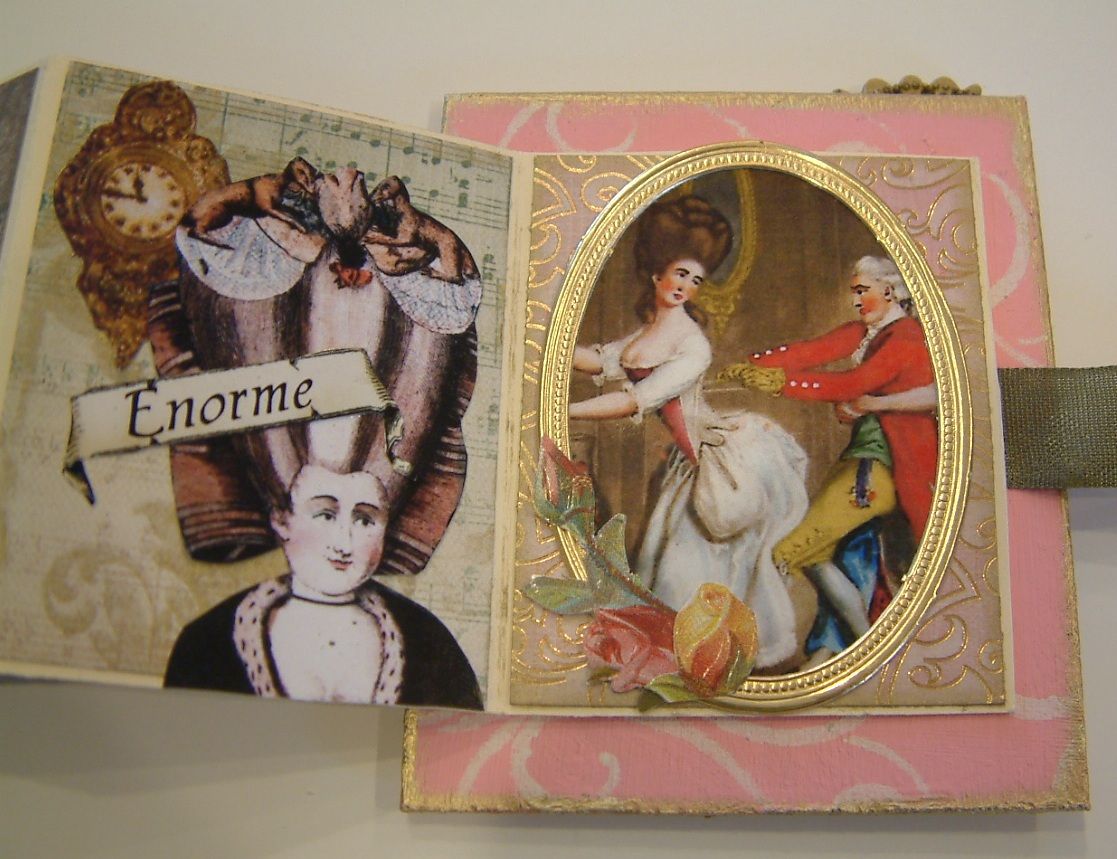
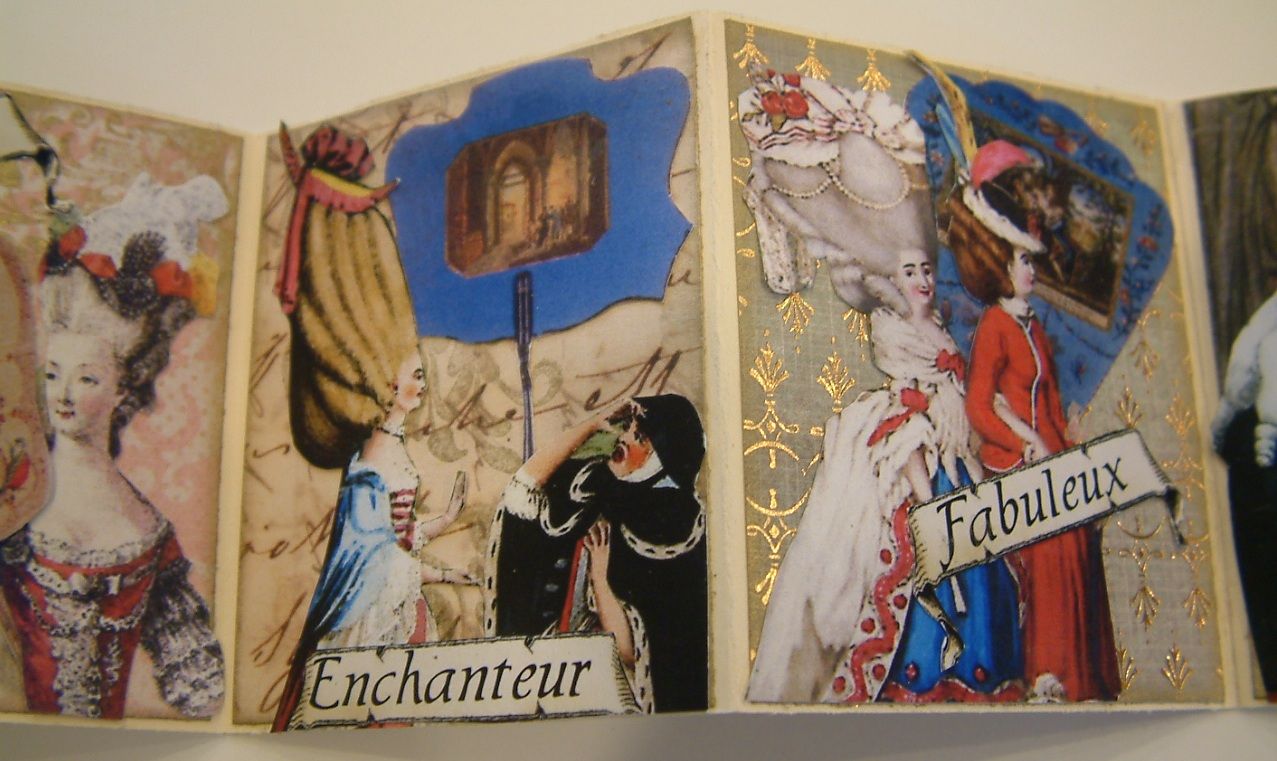
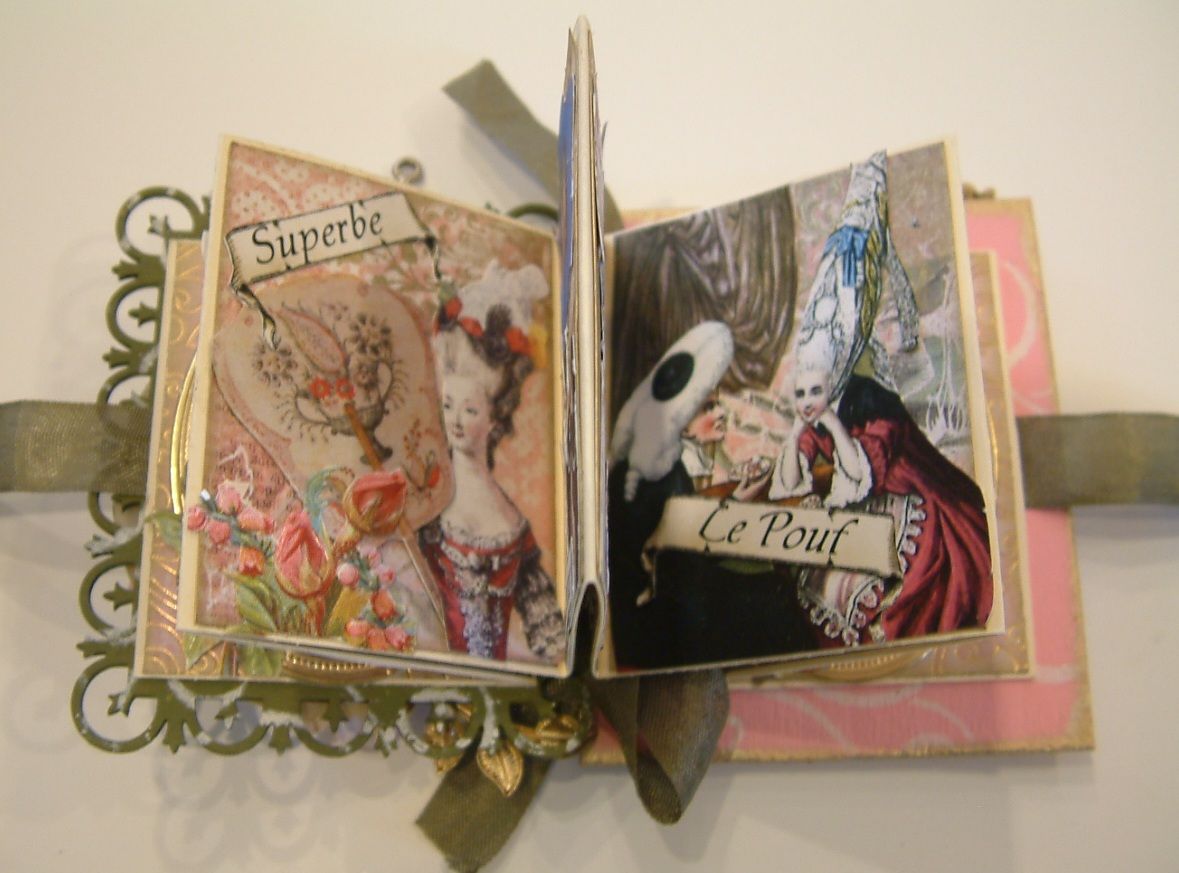
I started decorating the inside pages by cutting pieces of decorative paper that I then glued to each page. I like to cut the paper slightly smaller than the page so that the cardstock acts as a frame for each page. I used papers from the Sweet Nothings Paper Pad. Before gluing the paper to the pages I stamped and edged the paper using gold ink and a rubber stamp with an image of swirls. After attaching the paper to each page I added images from the Alpha Stamps How’s My Hair and Paper Doll Fans collage sheets. I finished up with the banners of French words and flowers from the Pink Roses Dresden Scrap. The images at each end are framed with Small Dresden Oval Frames. The thing to remember about decorating your pages is not to use anything that is too bulky.

Decorate the Outside (Back) Pages
When you decorate the back you can do something as simple as just adding decorative paper or you can also add images etc., it’s up to you. When decorating the outside or back don’t decorate the first and last page. The first and last pages are used to attach the accordion folded pages to the covers of the book. As you can see below, I only decorated the six pages in the middle.
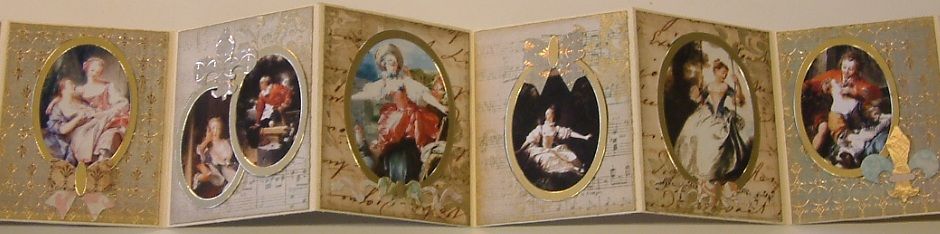
I decorated the back of my book with paper from the Sweet Nothings Paper Pad and Scripty Scrapbook Paper; edging and stamping the paper as I did for the front. I then added images from the Alpha Stamps Fragonard’s Lovers and Stolen Moments collage sheets. Lastly I added bows and fleur de lis that I punched from the Sweet Nothings Paper Pad.
Creating the Book Covers
Cut the Back Chipboard Cover
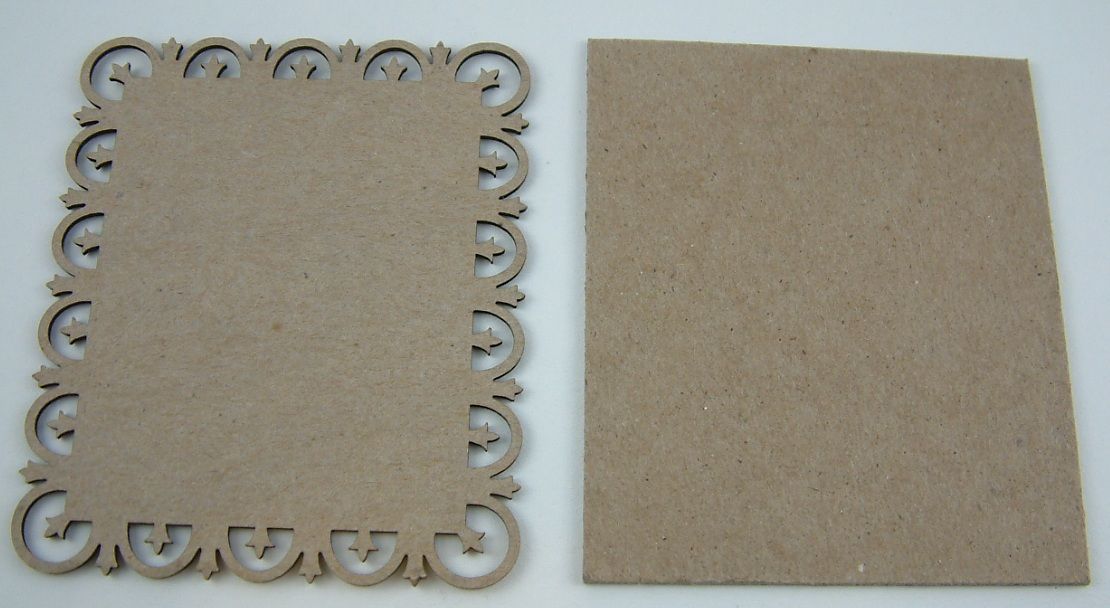
For the front book cover, I used the small Rectangular Fleur De Lys Chipboard Frame that measures 2 ¾” x 3 ¼”. This chipboard set of frames is great for making book covers.
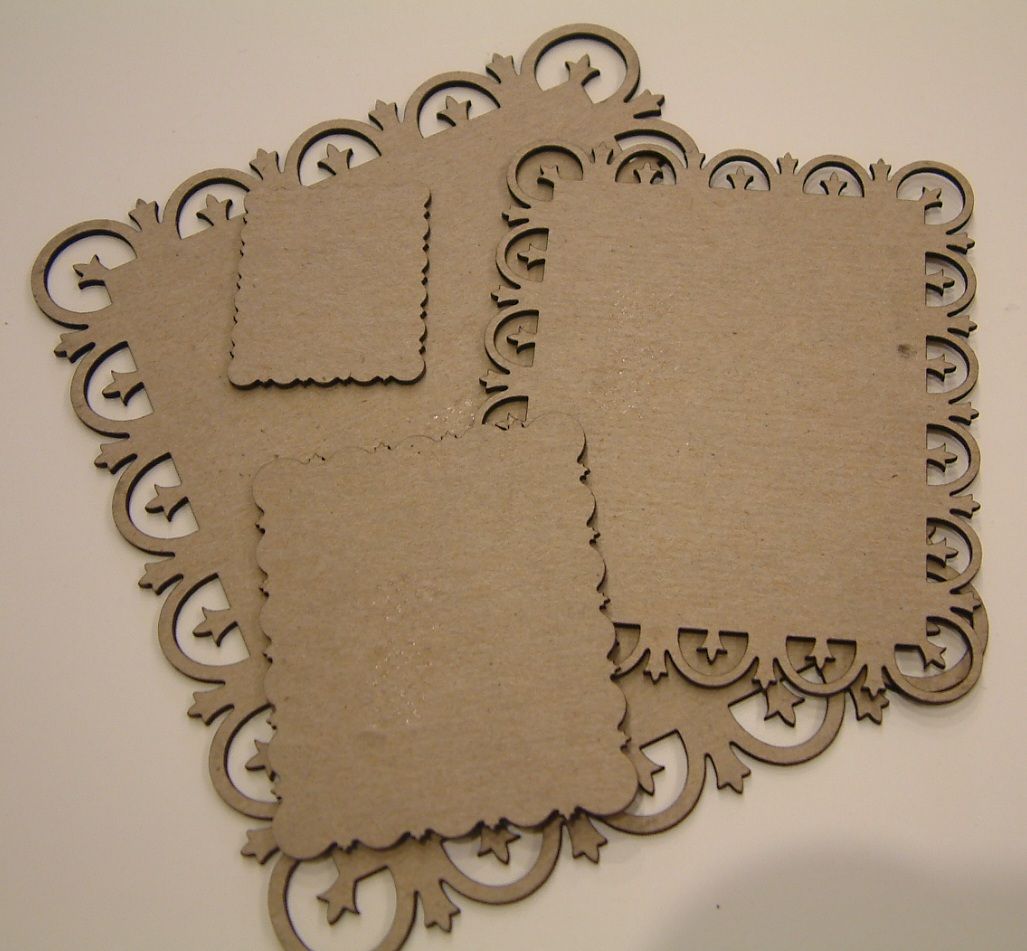
For the back book cover I cut a 2 ¾” x 3 ¼”piece of chipboard. The chipboard was about the same thickness as the Fleur De Lys frame. If all you have is thin chipboard you can cut more than one piece and glue them together.
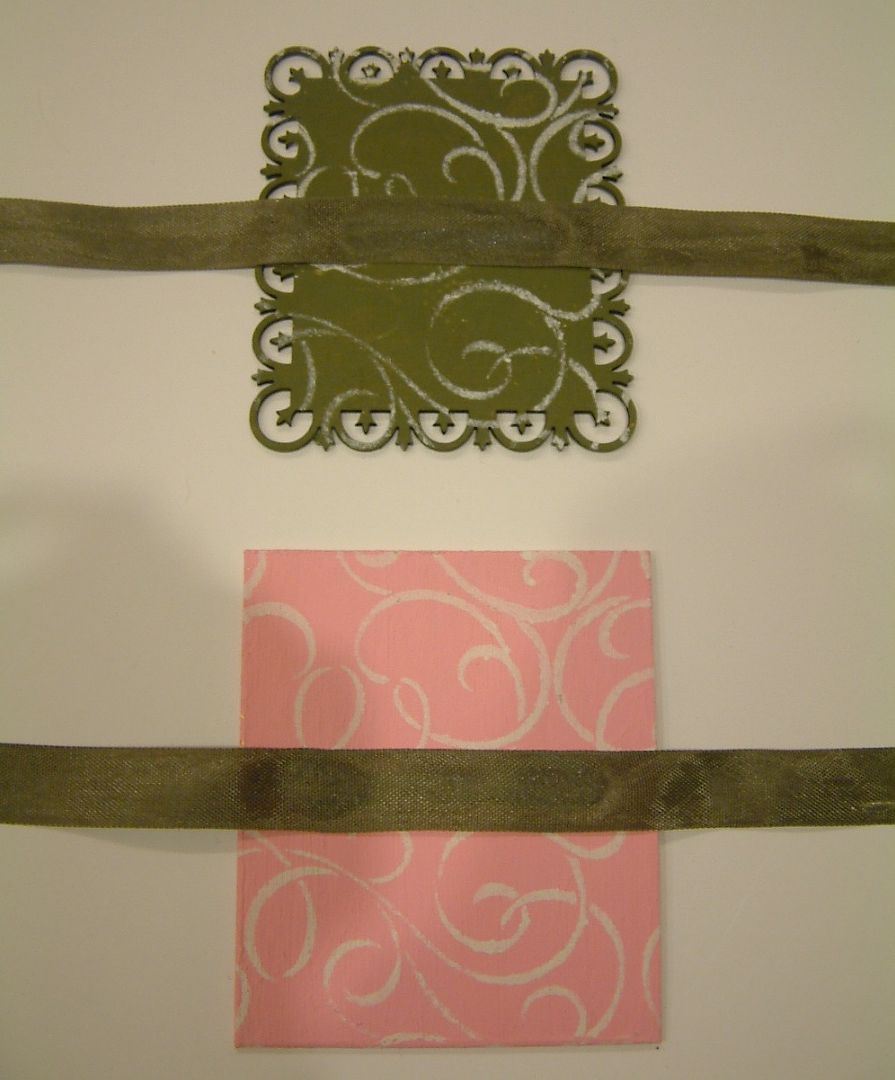
I painted and stenciled the front and back covers on both sides. You could also add paper, ink, rub-ons or any other flat embellishment at this time. I don’t add any dimensional embellishments until after the book is assembled as it makes it hard to attach the pages to the covers.

Glue a strip of ribbon to center of the backside of each cover. The ribbons are used to tie the book closed. For this book you will need two pieces of ribbon approximately 18” long. Use ribbon that is thin and not stiff. For this book I used Seam Binding from Alpha Stamps. The ribbon is nice and thin, feels like silk and is easy to tie. Don’t worry if the glue shows through the ribbon as the inside pages will cover the ribbon.
Glue the first page of the book to the inside of the front book cover. Center the page on the cover (see below).

Glue the last page to the inside of the back book cover. Center the page on the cover (see below).
Add Dimensional Embellishments
Now that the book is assembled you can add dimensional embellishments to the covers.
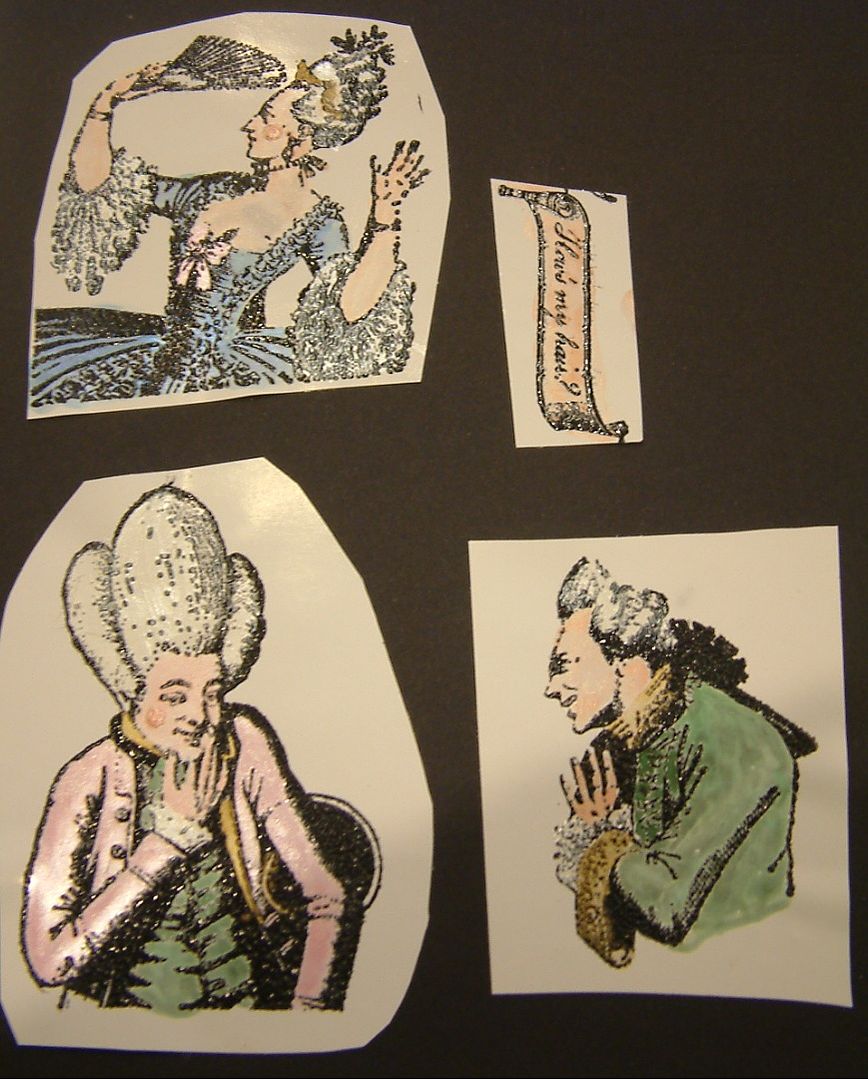
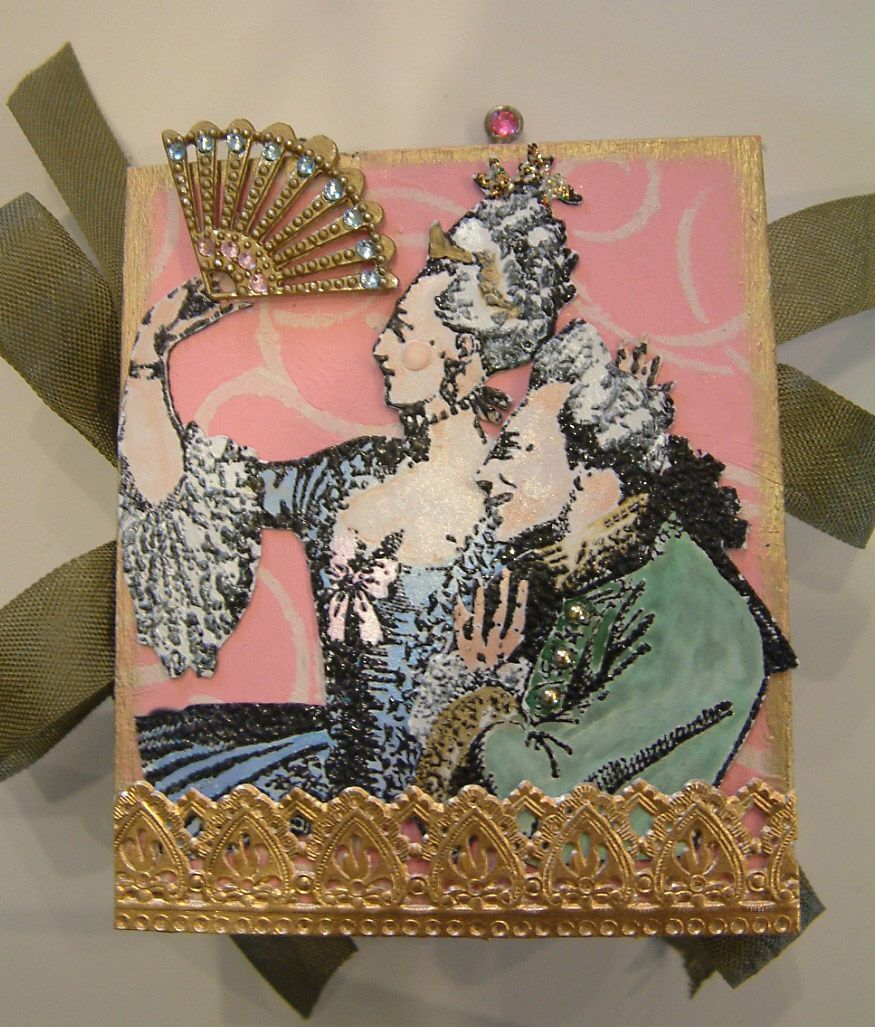
The images on the front and back of my covers are from the Alpha Stamps How’s My Hair Rubber Stamp Set. The set includes 11 different images. I stamped the images on glossy paper using Black StazOn and then embossed the images using clear embossing powder. Next, I backed the stamped images with cardstock to give them more support, particularly since the image on the front of the book is attached to the outside of a frame and is not flat against the cover. I painted images with Twinkling H2O paint. I then added gold trims and rhinestones and pearls.
After attaching the images to the front and back cover I then added dimensional embellishments like the flowers, leaves, crown, mirror, and fan
FINISHED FRONT COVER
To close the book, fold the accordion pages together and tie the ribbons together on each side of the book.
FINISHED BACK COVER
FINISHED INSIDE FIRST THREE PAGES

FINISHED INSIDE MIDDLE TWO PAGES
FINISHED INSIDE LAST THREE PAGES
Opening the Book
Since the ribbons are used to tie the book closed on each side. To open the book you can untie both ribbons or…
Front Cover
Rectangular Fleur de Lys Frames
Ornate Resin Frame Set (Ivory)
How’s My Hair Rubber Stamp Set
Seam Binding
Brass Branch with 6 Leaves
Crown
Brass Hand Mirror or Fan
Mauve Satin Ribbon Gold Edges
Back Cover
Antique Silver Fan Charm
How’s My Hair Rubber Stamp Set
Ornate Gold Dresden Borders
Inside Pages
Sweet Nothings Paper Pad
How’s My Hair Collage Sheet
Paper Doll Fans Collage Sheet
Small Dresden Oval Frames
Pink Roses Dresden Scraps
Back Side of Pages
Sweet Nothings Paper Pad
Scripty Scrapbook Paper
Fragonard’s Lover Collage Sheet
Stolen Moments Collage Sheet
Larger Accordion Fold Book
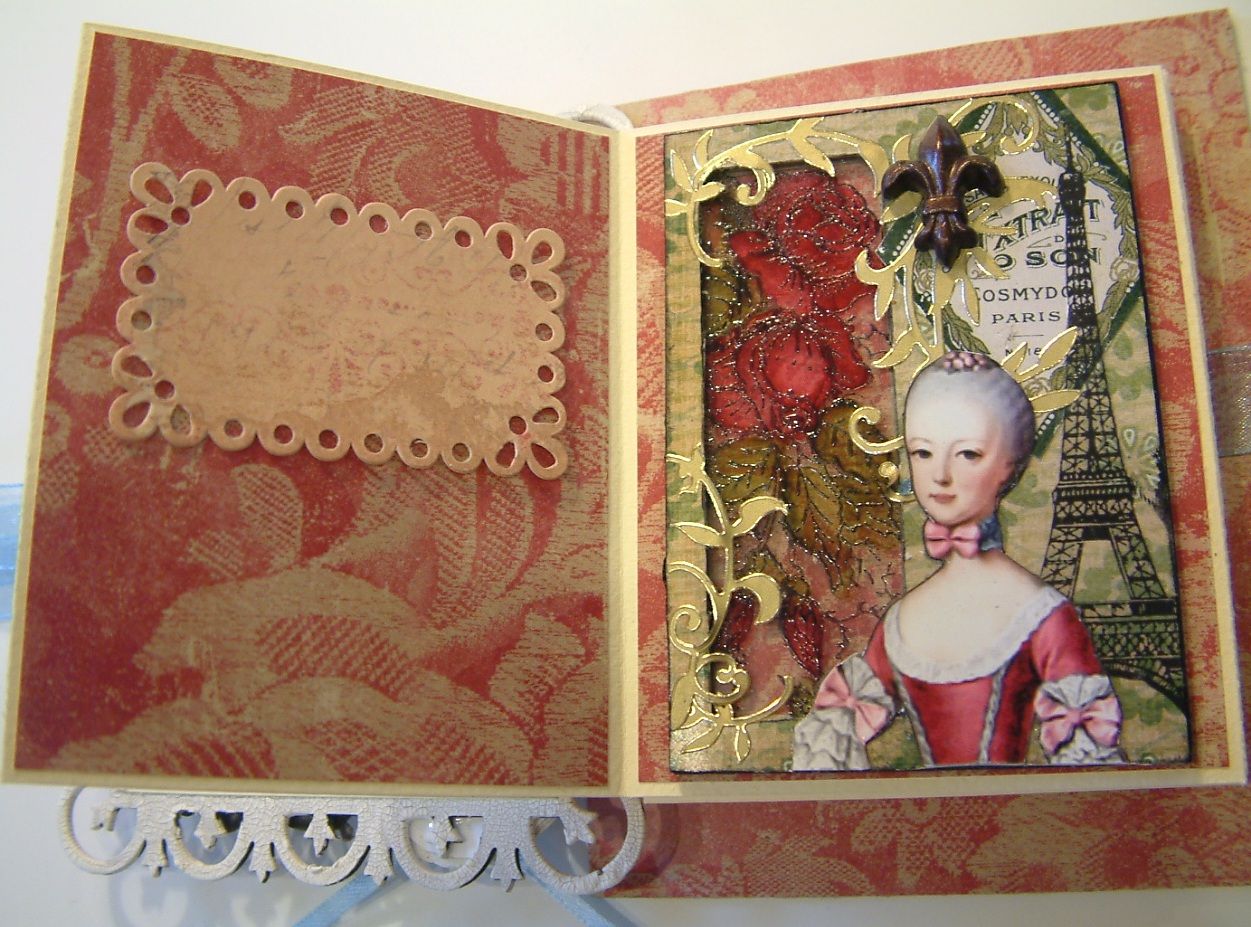
For the book below I used the larger Rectangular Fleur de Lys Frame that measures 4” x 4 3/4”. The inside pages measure 3 x 3 ¾” which makes them the perfect size to display ATCs. 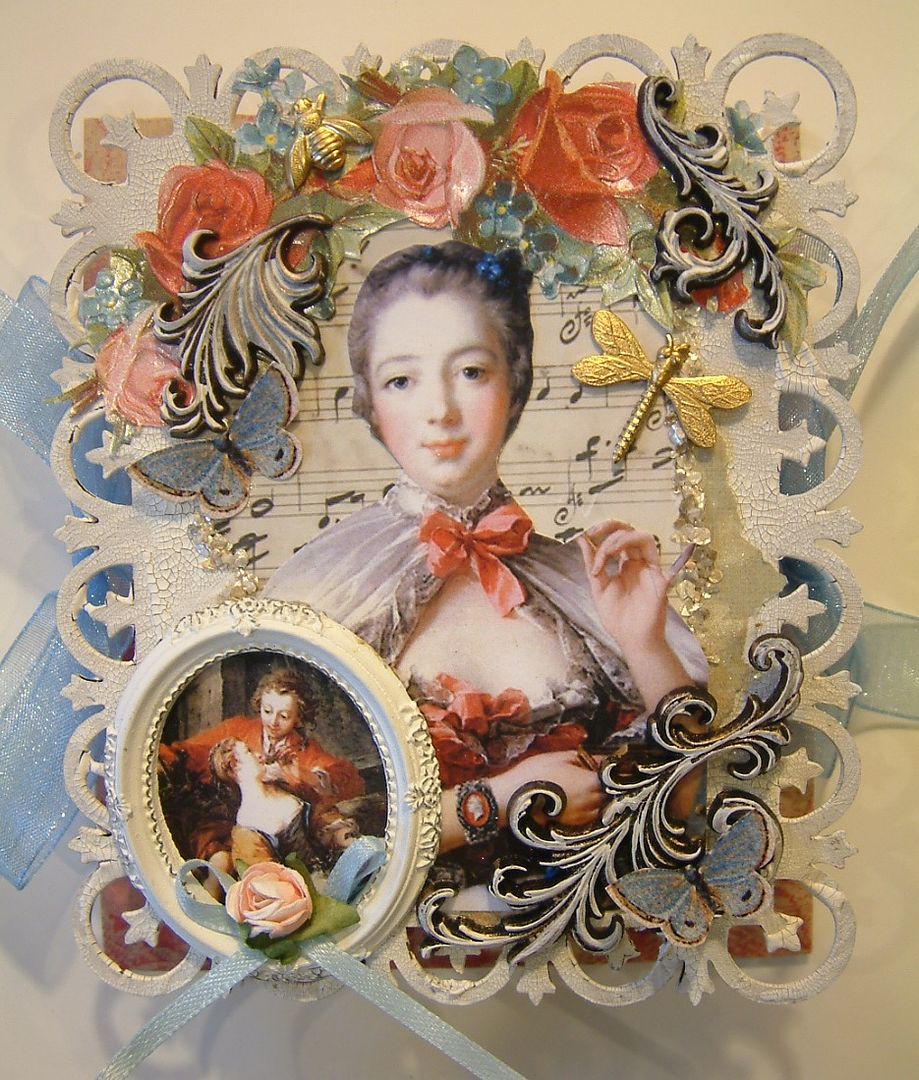

Alpha Stamps Products Used in This Book:
Rectangular Fleur de Lys Frames
Green Foil Damask Scrapbook Paper
Madeline Pink Textiles Scrapbook Paper
Jeanne Antoinette Poisson Collage Sheet
Stolen Moments Collage Sheet
Pink Roses Dresden Scraps
Stamped Flourishes
Brass Dragonfly Charms
Medium Bee Charm
Click here to download a PDF version of this tutorial.
27 comments:
Love it , and so many thinks for the tut. You are just to generous to us. xoxo
Your books are stunning! Very, very cool...thanks for the tut...I want to try one myself!!
Wow, what a gorgeous book, Laura! It looks great!
Thank you so much for the tutorial!
Another beautiful book from you. Thank you for providing a pdf and the supplies necessary to make one of our own.
Smiles~
Marilyn
wow. what a tutorial. I love the comedy of How's my hair..I know you put alot into this and it is absolutely wonderful.
susan s.
Your little books are so beautiful. They would be perfect in those expensive museum gift shops. Thank you for sharing your techniques. Very beautiful artworks...
Love these books Laura and thanks for sharing the tutorial. You always use such beautiful images in your books xx
Thank you for so wonderful tutorial!!!!!! And the works are georgeous!!!!!!!!!!!!
You have an outstanding ability to give a fabulous tutorial! (That's a mouthful.) I'd love to try this, and you make it look like I could succeed! Thank you.
Absolutely gorgeous Laura. Thanks for showing us "how to".
Hi Laura, What a wonderful tutorial! Thank you so much, I want to make some for my ATC's. Yours are beautiful, your art is always amazing. Thanks for sharing and have a wonderful week. Hugs, Terri
Wow what an absolutely stunning book and another great tutorial. thanks so much for sharing.
What a little fun beauty of a book! As always the step by step tutorial is fabulous - thank you so much for sharing that. Hugs,
Fabulous book Laura. What an awesome tutorial. I know how long it takes to put one of these together. No doubt AS is thrilled you did this!
Hugs Lynn
Brimming with loveliness. So generous of you to provide this tutorial. It is goosing me into my studio today to make one. Thank you Laura!
Laura -
These are both so beautiful! So much detail, I really love how they turned out. Thank you so much for the tutorials.
Elaine Allen
Your two books are wonderful Laura. Love the idea of making one for my ATC's. Will definitely give this a try!! Thank you for the tutorial!
Laura, The books are really great and so much fun to look at. Always a pleasure to stop by and see what you are creating!
Gorgeous tutorial, I think I will have to have a go at making one of these. Maureen.
I love "How's My Hair!" What a great project, funny and beautiful at the same time. Where did you find the French words in banners, or how did you make these? I loved "enorme!"
My very first 'mini album' was made like this, years ago, but you take it to new levels, I love the pictures you have used Laura, too beautiful!
Hugs
Cxxx
Thanks ever so much for the Tutorial,always easy to understand.
These are very pretty.
Hugs
What a beautiful book, and I love the tutorial, thanks so much!
enJOY a beautiful Sunday,
Kimberly
Another fabulous inspirational tutorial, thank you so much.
Oh, this is fabulous! Thank you so much for sharing the techniques and the links to the products. I love the stamp set and the collage sheets. I'm just now working with the dominoe instructions to make a book, and I'm having such fun! Thanks again for showing us "how it's done".
Hello dear Laura! Today I am making accordion books inspired by you, for the cast and crew of The Swiss Family Robinson play (I rewrote and co-directed). I think they will be perfect!!! Thank you again for being such an inspiring person, and for sharing! ~gayl
I am so inspired by your work, I have been studying it for days now. I finally got the nerve up to go buy some supplies to make something like this. Wish me luck! :)
Post a Comment