


In this tutorial I’ll cover how to construct a picture stand using chipboard shoes and a chipboard nametag. These stands are simple to make with endless style and theme possibilities.
What You Will Need
Ruler
Pencil
Glossy Accents Glue or Glue That Works With Metal
X- Acto Knife
2 Small Hinges
Decorative Paper and Embellishments

Constructing the Back of the Stand
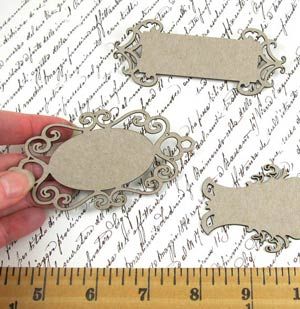
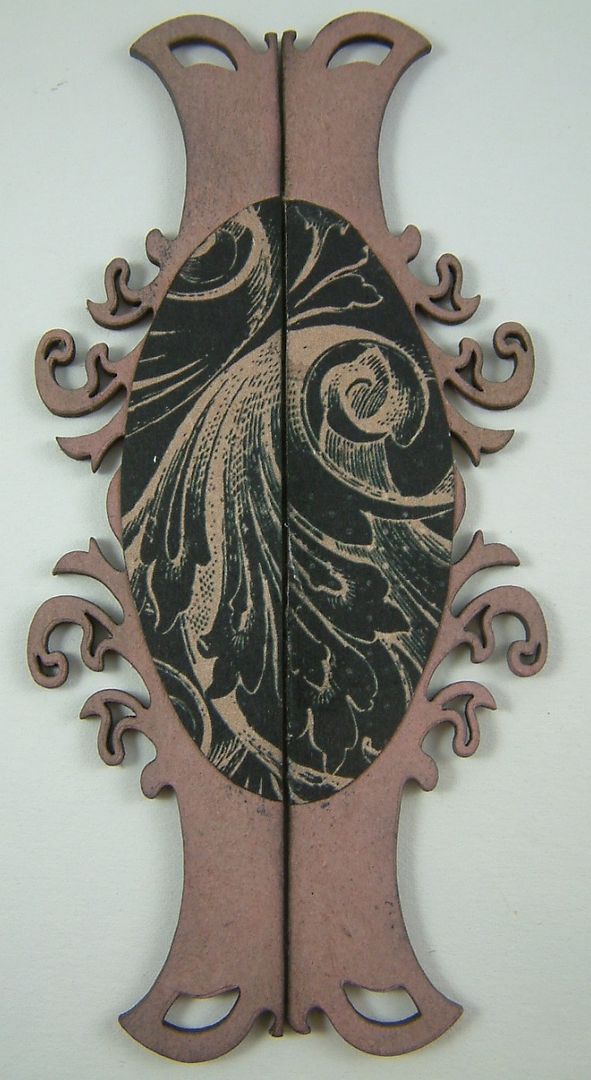
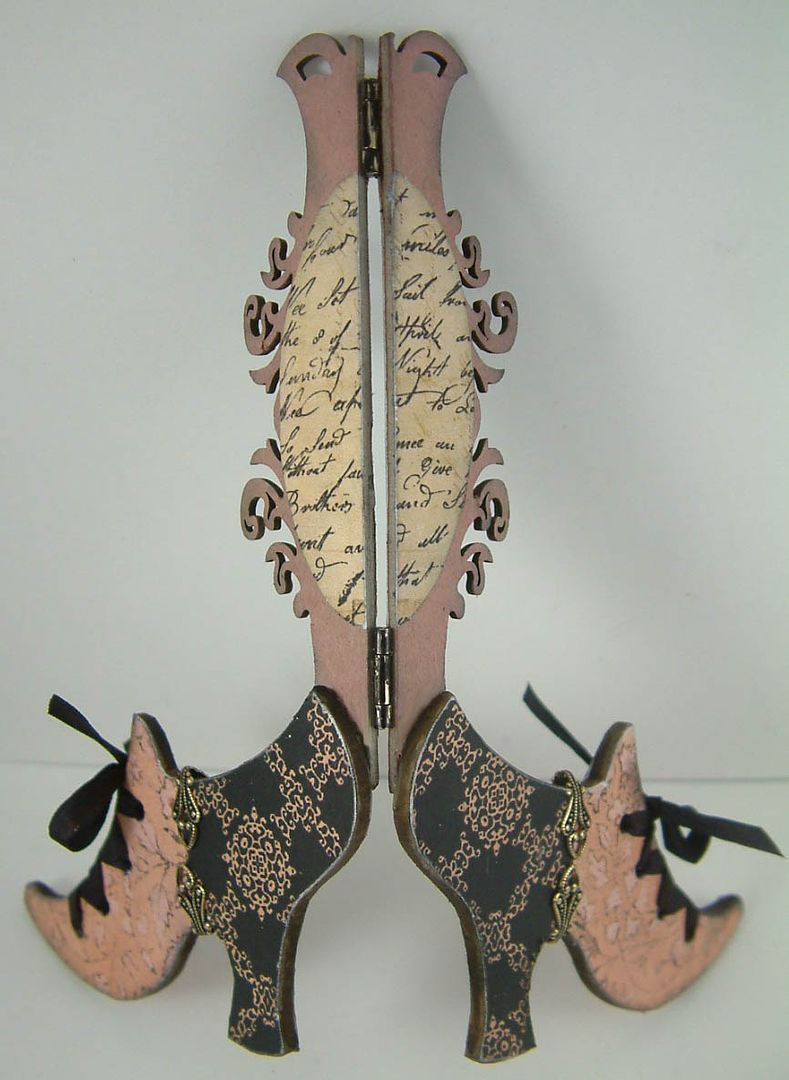
Select one of the chipboard nameplates. I chose the longest one (the package comes with three different designs). Using a ruler and pencil, draw a line through the center of the nameplate.
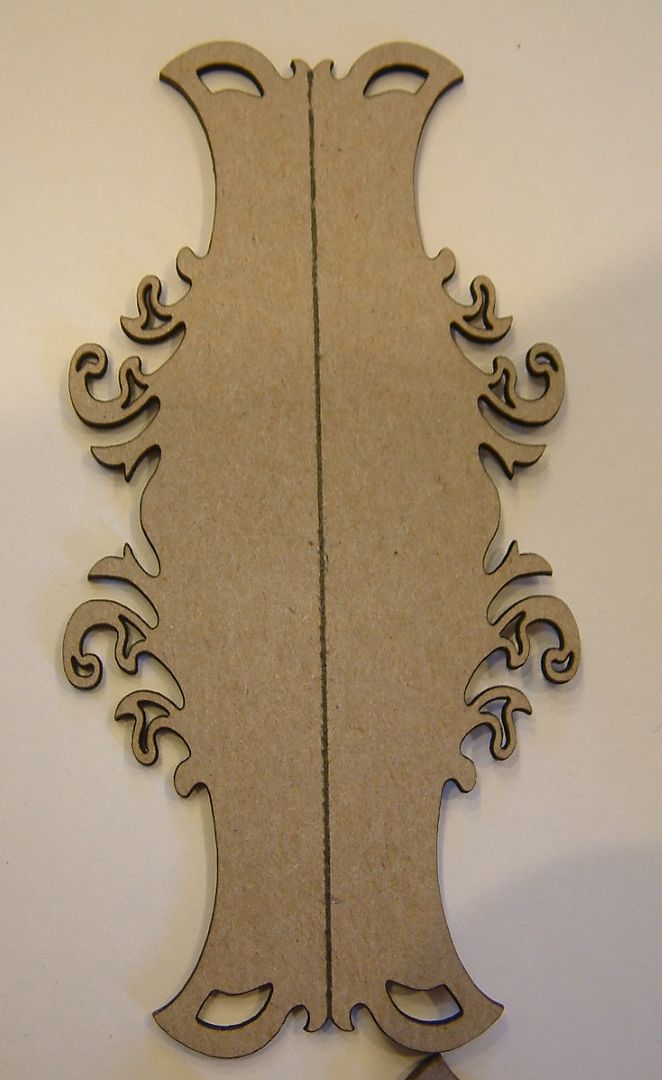
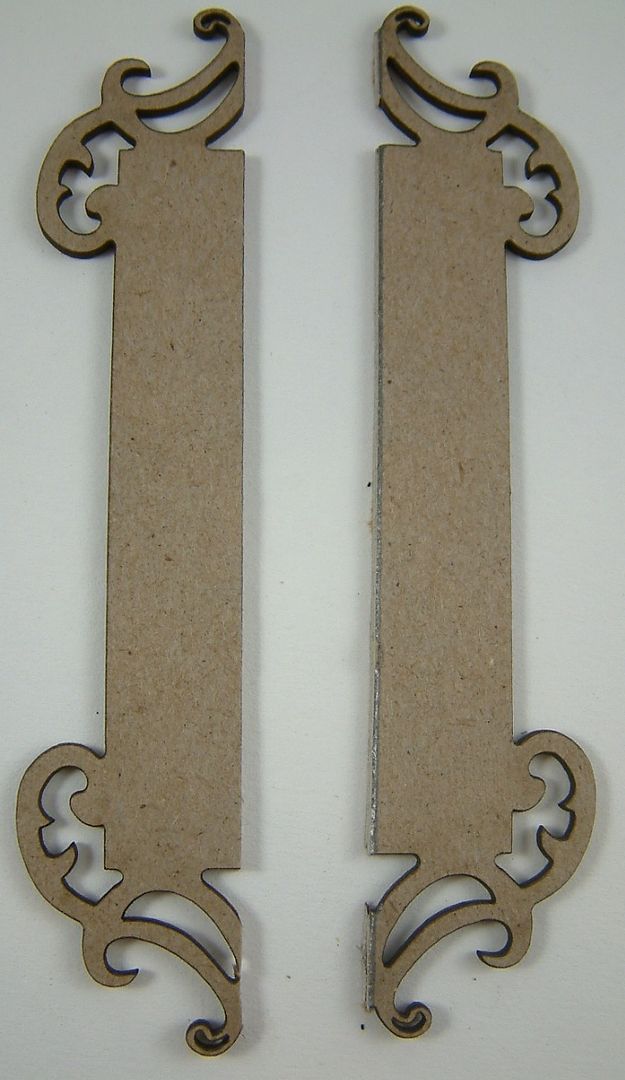
Using a ruler and an X-Acto knife, cut along the line.
Next, decorate the nameplate. I used liquid chalk to color my nameplate and then papers from the Almanac 6” x 6” paper pad to decorate the front and back.
Place the nameplate on your table with what will be the front of the picture stand facing toward you and what will be the back of the picture stand facing the table. I chose to use different paper on the front and the back so the side mattered. It’s up to you if you want the sides to look different or not. Next, note the placement of the hinges in the picture below. Glue the hinges to the nameplate using Glossy Accents or a glue that works with metal. The hinge pin should be facing down towards the table. My hinges were originally gold. Before gluing the hinges in place I used Ranger Black Alcohol Ink to change the color.
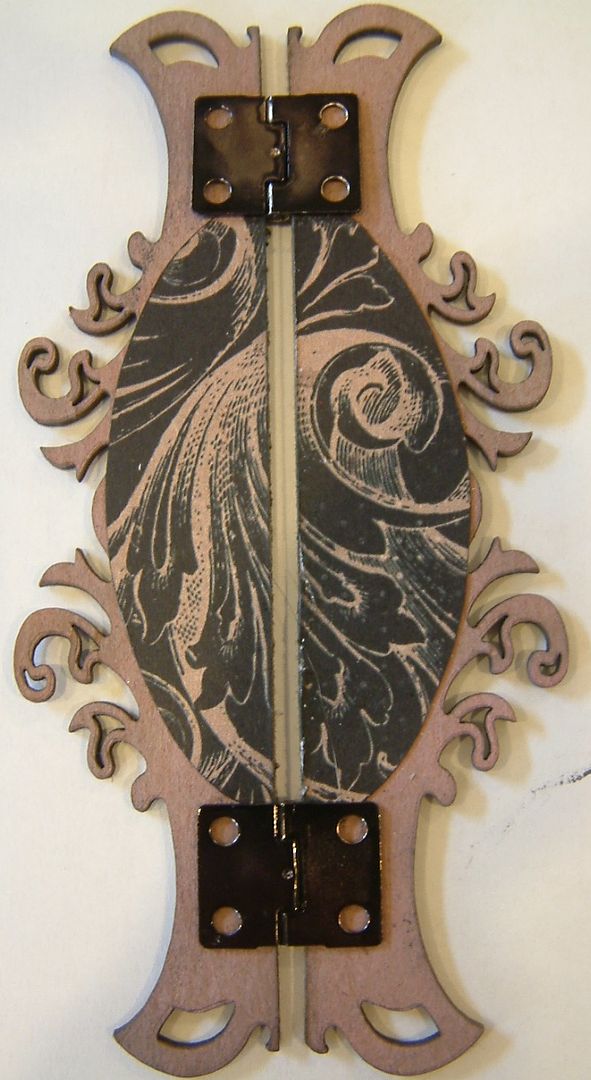
To cover the holes in the hinge, I used metal beads. Other options are; faux pearls, rhinestones or the heads of brads with the prongs removed. Just be careful not to use anything too bulky or you will not be able to bend the stand.

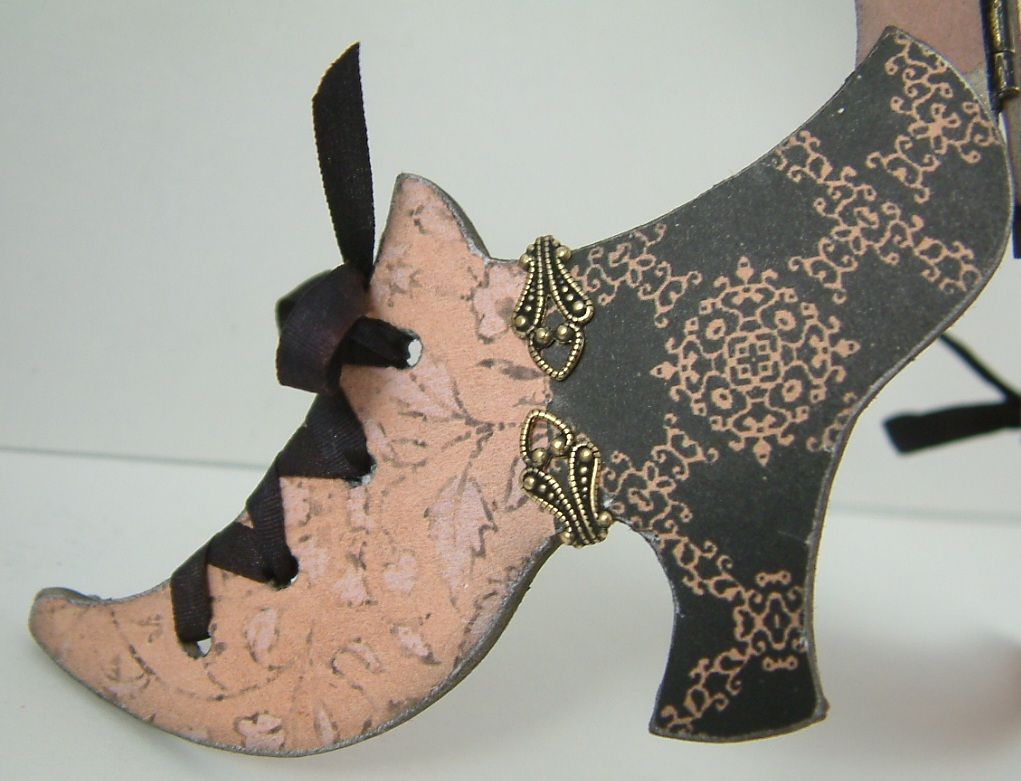
Decorating the Shoes
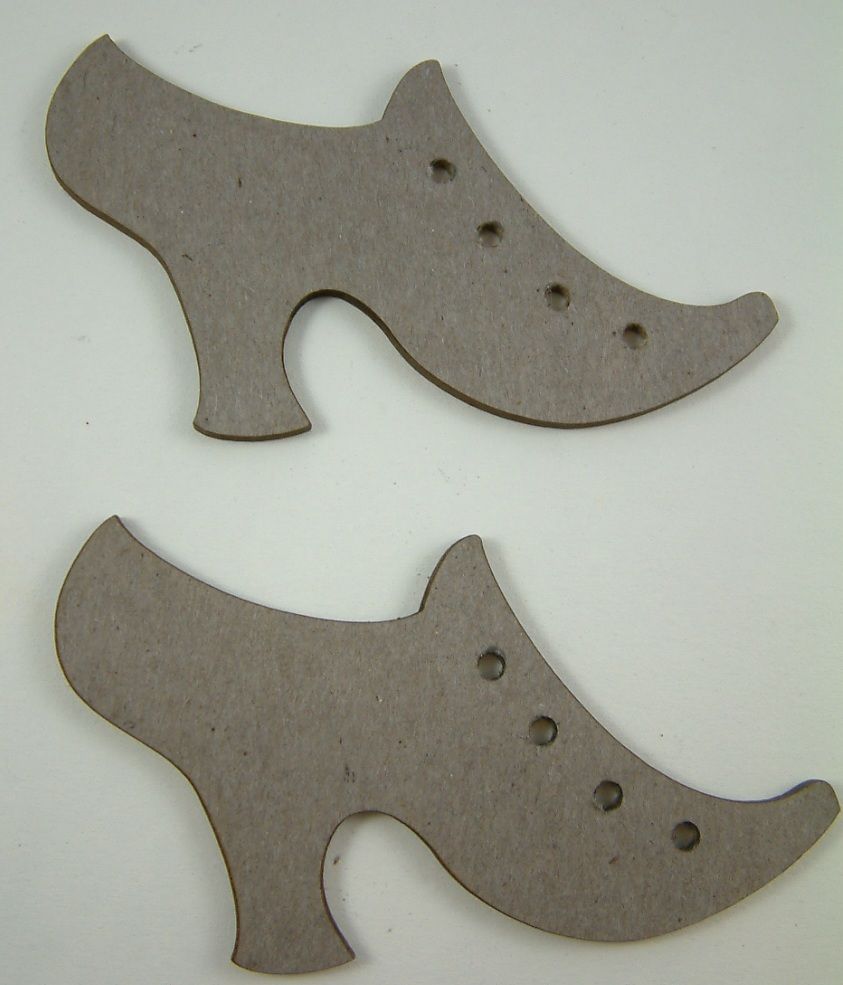
I started decorating my shoes by punching holes for ribbon using a Crop-A-Dile hole punch. It punches through thick chipboard as if it was butter.
I used two different papers from the Almanac paper pad to decorate the shoes. Notice, I re-punched the holes after attaching the paper. Using a makeup sponge, I edged the shoes Black Soot Distress Ink.
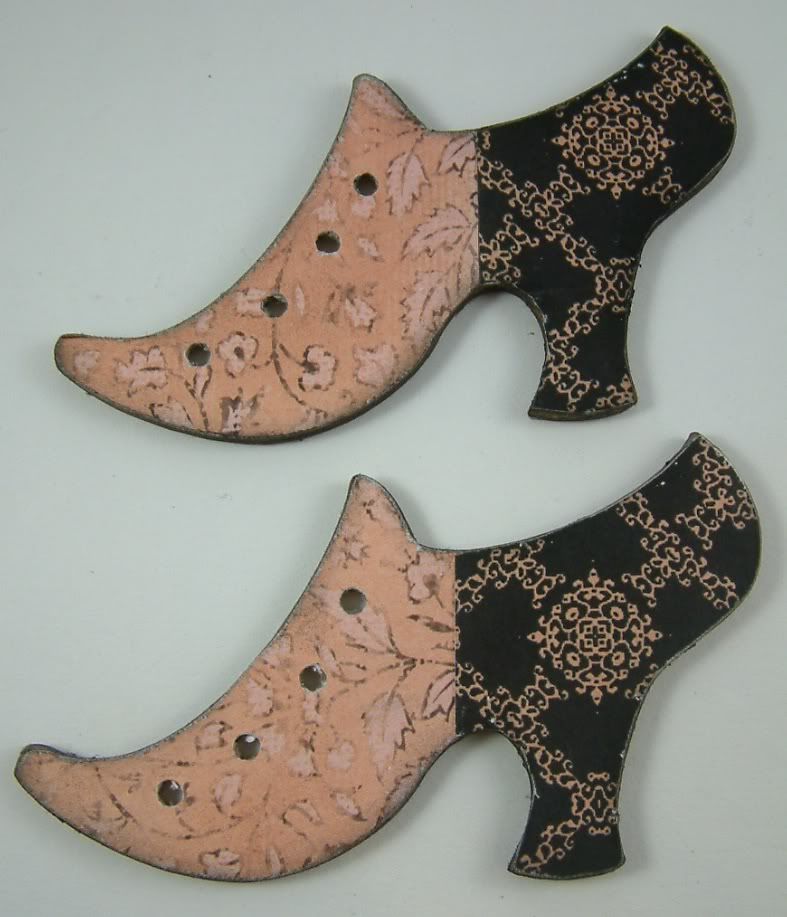
I added antique gold fold-over bails and black silk ribbon to the shoes.
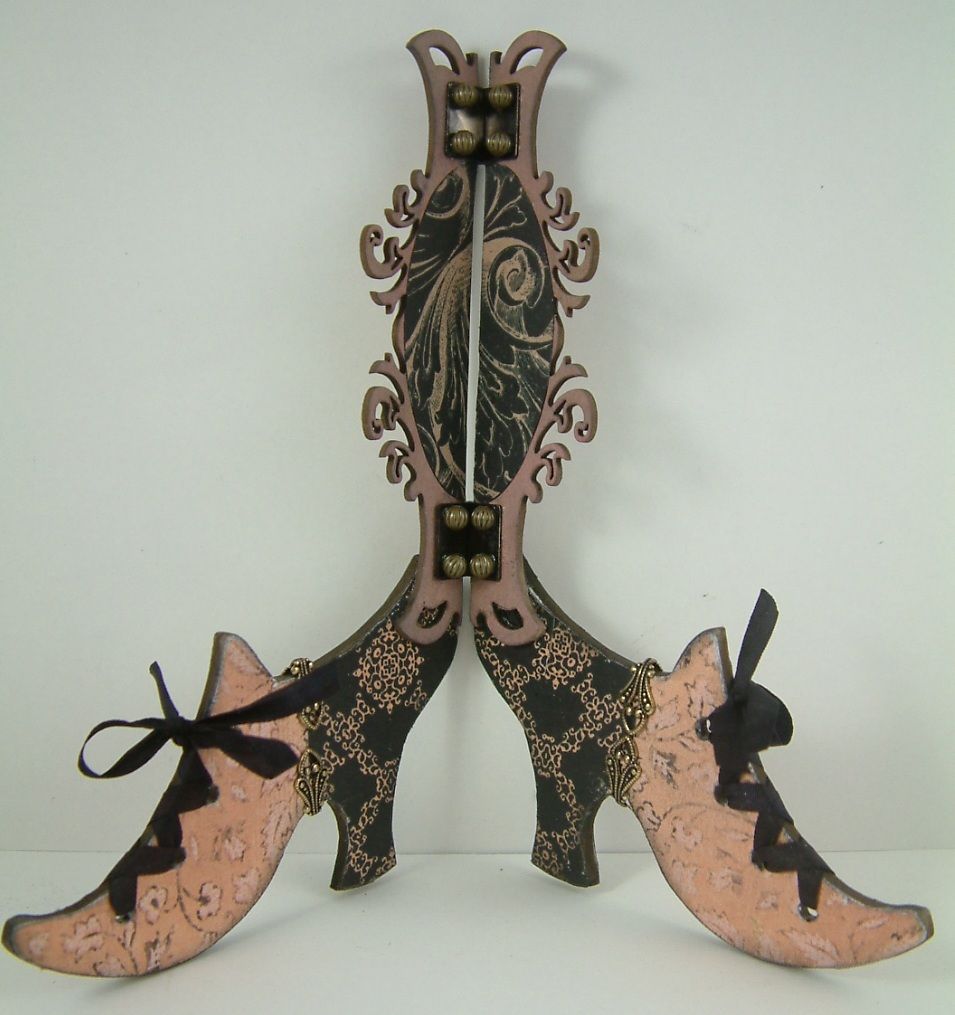
Once your shoes are decorated, you can glue together the hinged nameplate and the shoes. I used Glossy Accents. Note the placement of the nametag on the shoes in the picture below. Make sure that the shoes are even so that you don’t end up with a lopsided stand. I suggest placing the shoes along a ruler.

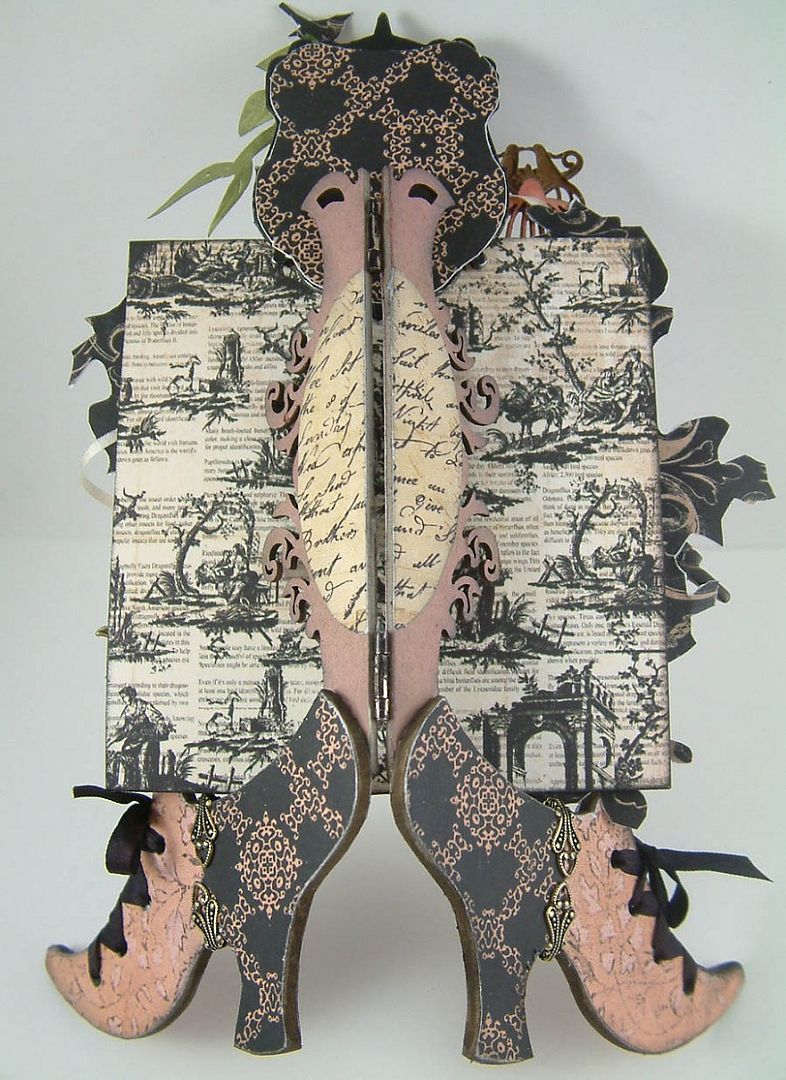
View of the back of the picture stand.
I’ve used several of the papers from the Almanac paper pad to decorate the back of the art piece.
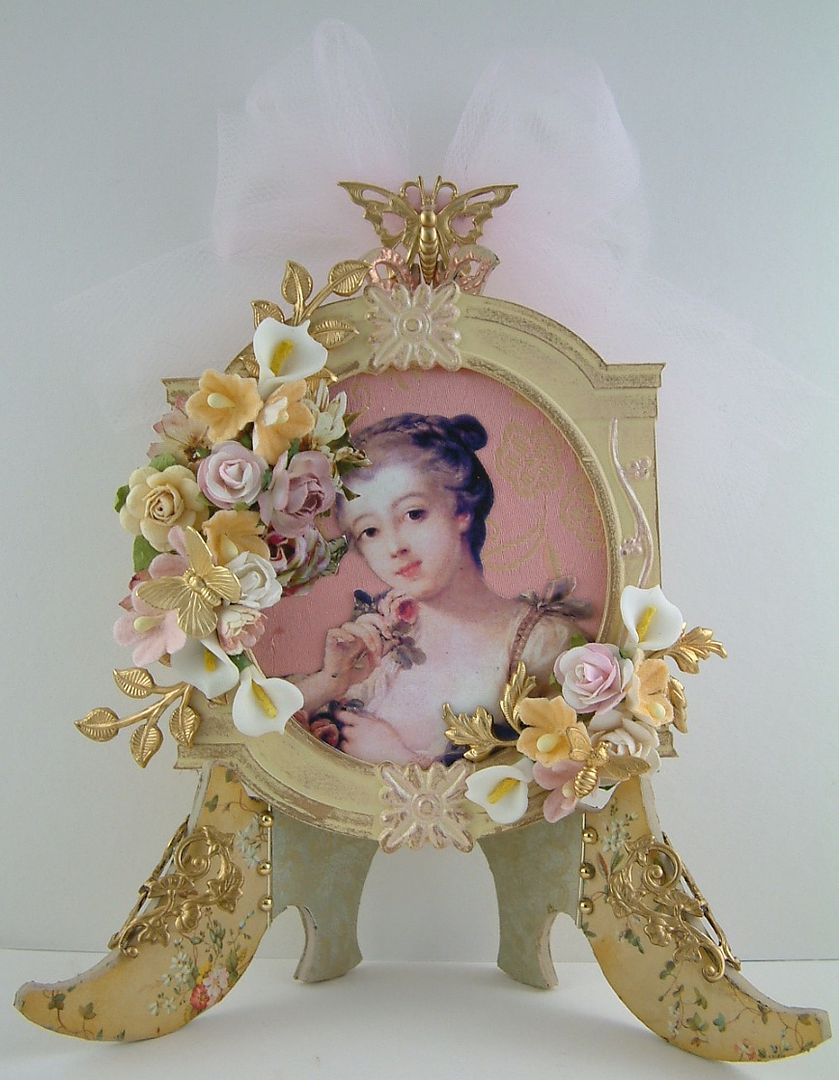
To create the art piece displayed on the picture stand, I used two of the frames from the London Ornate Resin Frame Set. I mounted the small frame on the back of the large one. The image comes from the Drama Queens Collage Sheet.

Below is a complete list of the Alpha Stamps Products used in the project above:
Marie Antoinette Inspired Picture Shoe Stand
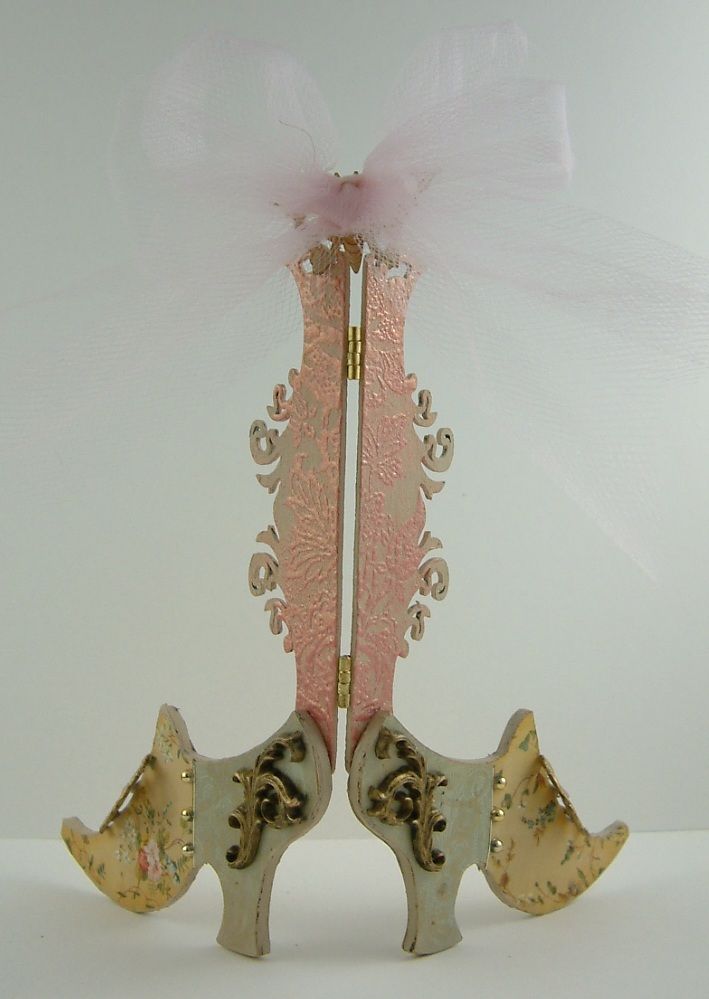
In this version, I decided to keep the original color of the nameplate and I embossed it with pink roses. To the top, I added a metal butterfly and a pink tulle bow.

The shoes are decorated with various papers, gold beads and a metal heart filigree that I bent before attaching. I also added stamped flourishes on the back of the shoes. If you add heavier items to the shoe stand as I have in this version, you need to make sure that they are balanced or your stand will fall over. For example, if I had just added the butterfly and tulle to the top and not the heart filigree to the bottom, the stand would fall backwards.

Below is a complete list of the Alpha Stamps Products used in the project above:
11 comments:
Laura you continue to blow my mind with your creative and beautiful art. This shoe stand is over the moon fabulous. Thank you for sharing your technique. I must make one of these...or two...or...
As always I am (almost) dumbstruck by your amazing creativity. This shoe stand is just so absolutely gorgeous as is everything you do. Really want to try this one out...
Laura -
Thank you so much for this wonderful tutorial!
Elaine Allen
This is incredible! Thank you for sharing the process!
I love this shoe stand, it is AWESOME. Thanks for sharing.
The things you do!!
Amazing, complexly amazing to me.
Keep smiling and creating
Oh my word that is gorgeous - I love it! I think while I am here in the States I will see if I can find some 'ingredients' and make one for myself! Thank you for always being so generous and sharing and always so inspiring you are amazing!!!!
Hugs
Cxxx
Oh my goodness! Your chipboard shoes are just wonderful, dear Laura! Beautifully done!
Laura, your shoe stands and art pieces are STUNNING! Your work is always so amazing!!
I adore your shoe stands!!! You are SO creative! xo
this is gorgeous. I love the way you list all the products used and where to get them. That comes in handy for newbies like myself. thank you
Post a Comment