

The Metal Effects product is a two-step rusting process. The process involves applying paint containing iron flakes to your project surface, then applying an acid to rust the iron in the paint. The end result is a real rusted surface not a faux paint treatment. It’s very simple and can be used on any surface to which the paint sticks. I’ve used this product on metal, glass, clay and paper. I liked the result so much I even rusted a wall in my house.
What You Will Need:
- Modern Masters Metal Effects Reactive Paint – Iron (it comes in various sizes and can be purchased at several online stores). Be sure to purchase the Iron paint as they sell other reactive paints.
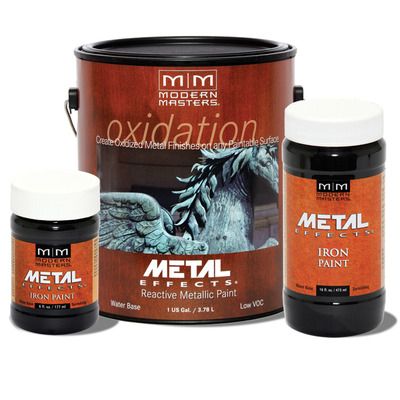
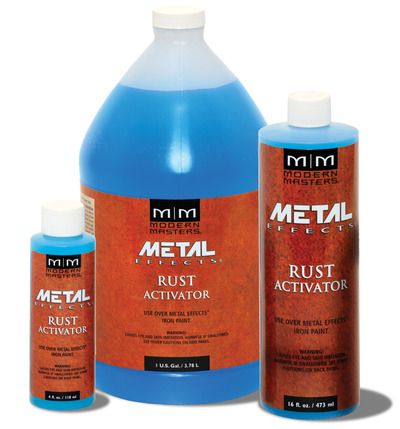
- Modern Masters Metal Effects – Rust Activator (it comes in various sizes and can be purchased at several online stores). Be sure to purchase the Rust Activator as they sell other activators for other metals.
- 2 Paint Brushes – a foam brush works great
- Something to protect your work surface such as a non-stick craft mat, tin foil, Styrofoam plate, or wax paper. Its purpose is to protect your work surface from the Rust Activator which is a mild acid.
- Optional - Primer product to seal the surface before the rust treatment. If you are concerned about the rusting process damaging the surface underneath you can use a priming product. This would be more of an issue in very damp climates or where the object is out in the elements. For most art projects priming is probably not necessary. Modern Masters sells a blocking primer. For paper surfaces you could use Gesso as a blocking primer.
- Optional - Product to seal the surface after the rust treatment. If you live in a very damp climate or if the object is out in the elements you may want to seal the surface at the end of the process to prevent further rusting. For most indoor art projects this may not be necessary. Modern Masters sells a sealer or you could use other sealing products.
In this tutorial I’ll be rusting paper. The process is the same for any surface. At the end of the tutorial I’ve included pictures of other types of surfaces that I’ve rusted. One thing to note is that although the paint sticks to non-porous surfaces (glass, plastic and metal) it is not absorbed into the surface so it is easy to scratch.
Step One – Applying the Metal Effects Reactive Paint (Iron)
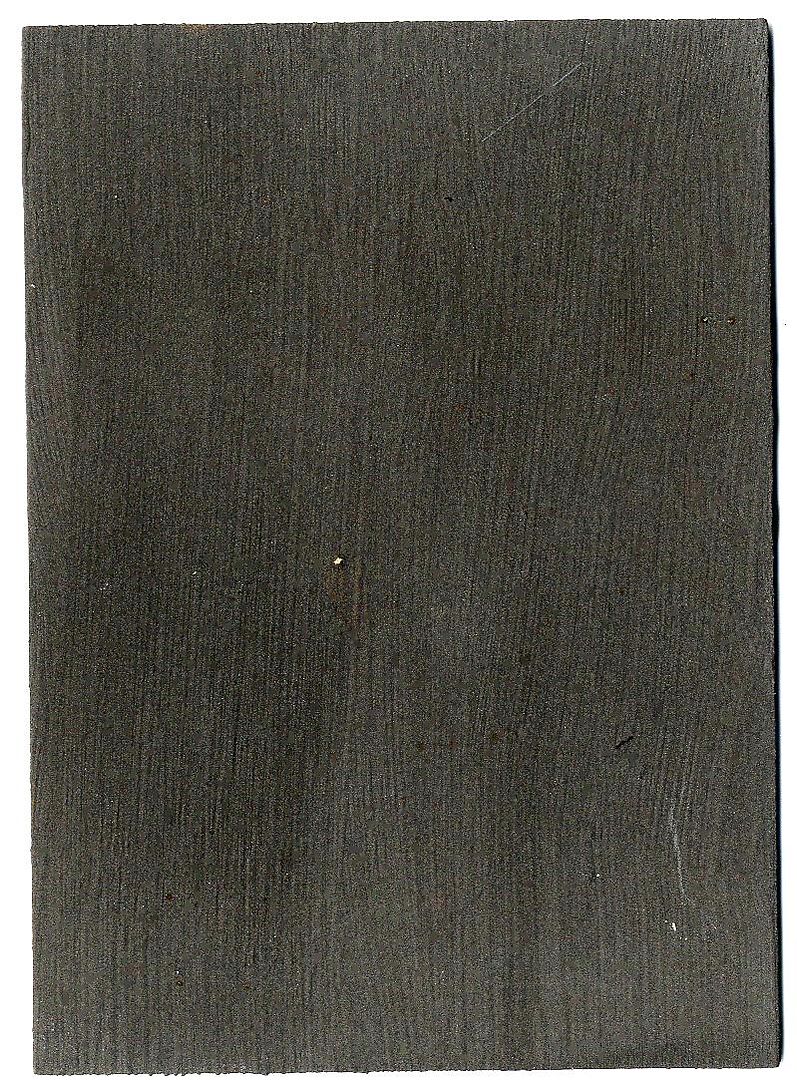
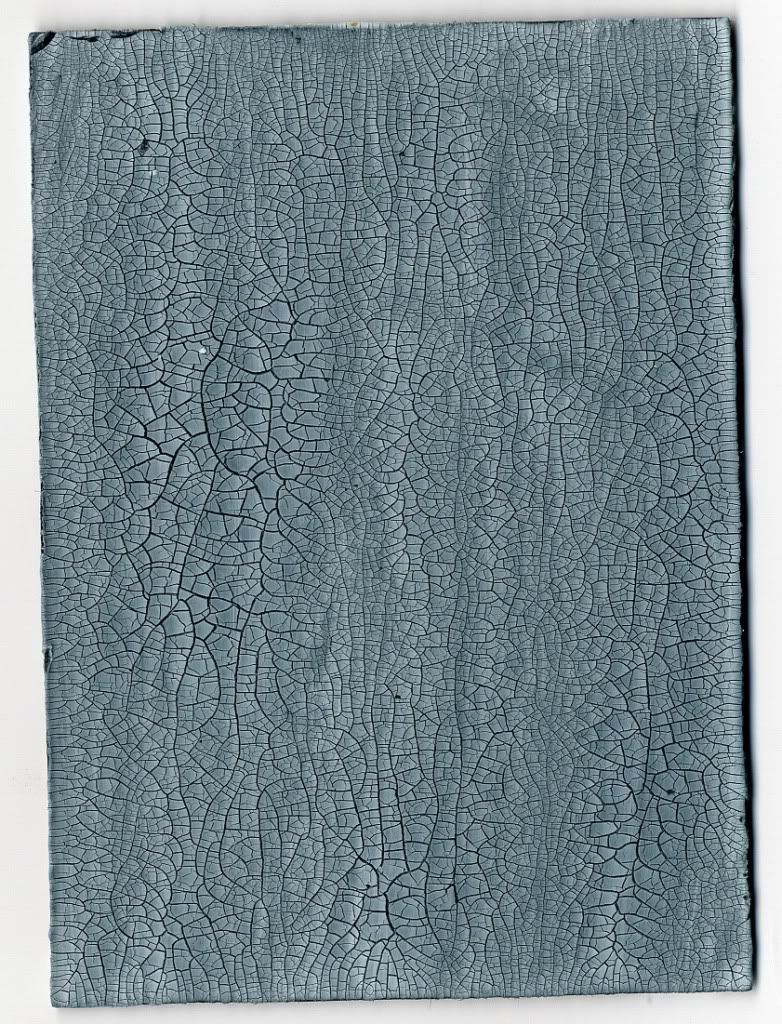
- Apply primer to your surface and allow the surface to dry (optional). In this example I started with a piece of white cardstock backed with chipboard. I did not apply a primer.
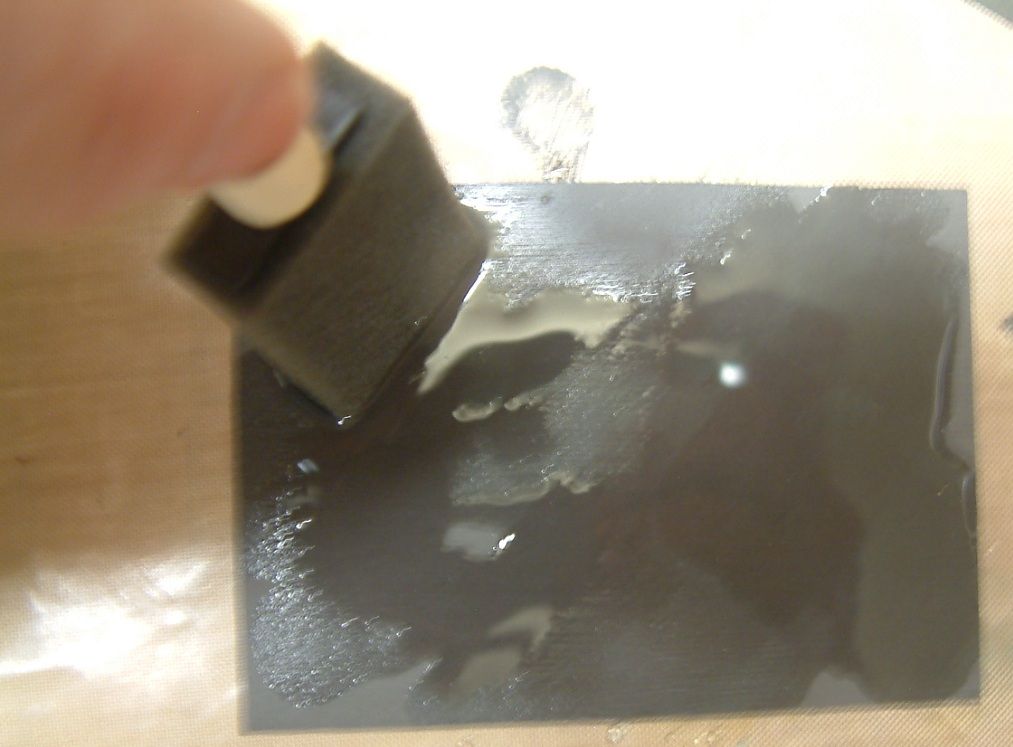
- Stir the Reactive Iron Paint to insure the iron flakes are distributed throughout the paint.
- Paint the surface of your piece with the Reactive Iron Paint. You may need two to three coats to insure complete coverage. If you don’t apply enough paint you won’t achieve a good result.
- Allow the Reactive Iron Paint to dry between coats.
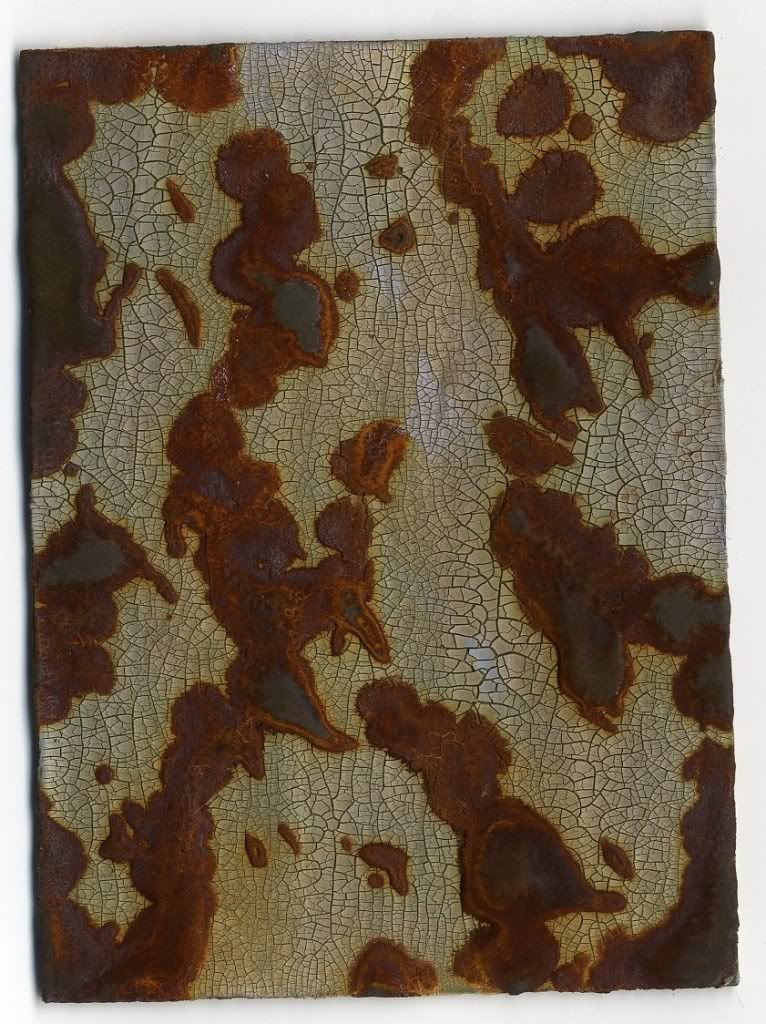
Step Two – Applying the Rust Activator
- Coat the surface with the Rust Activator. To achieve a varied appearance (rusting more in some areas than others) allow the Activator to pool on the surface.

Another option is to prop up your surface, then apply the activator to the top, allowing it to drip down the paper creating streaks of rust.
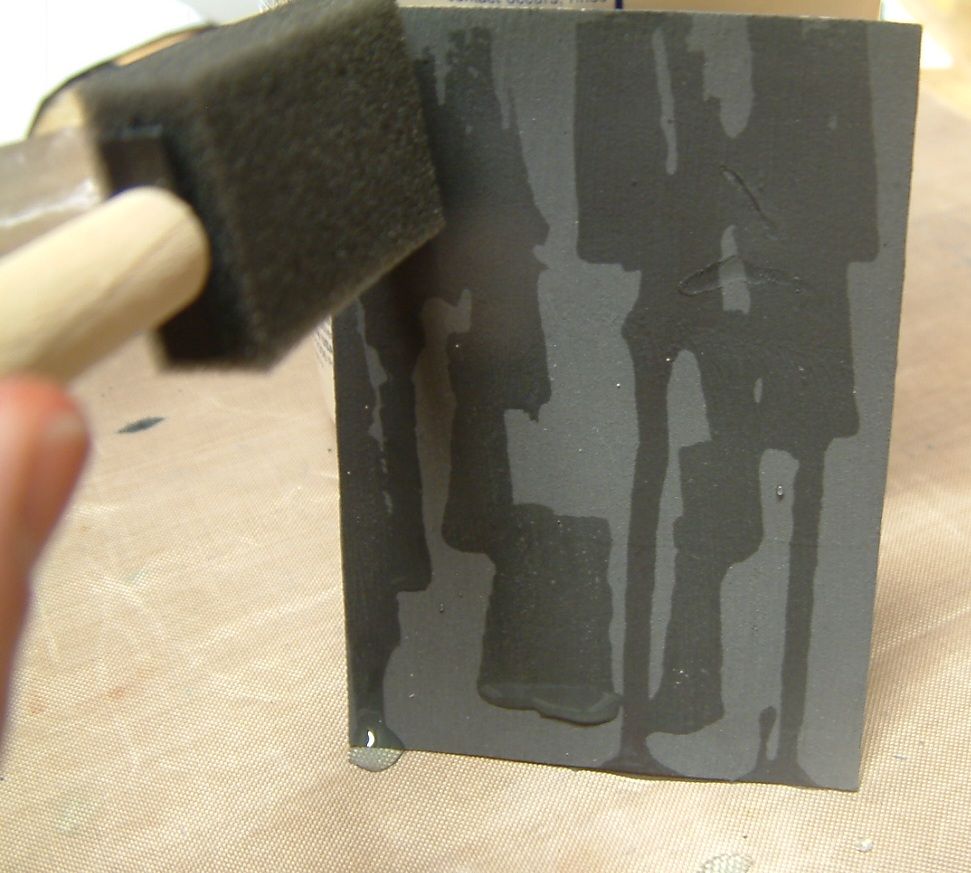
- It will take some time for the rusting to begin. As the Rust Activator dries, apply more Activator to the parts of the surface were you want more rusting.
- Continue reapplying Activator to the surface until you have achieved the desired level of rusting.
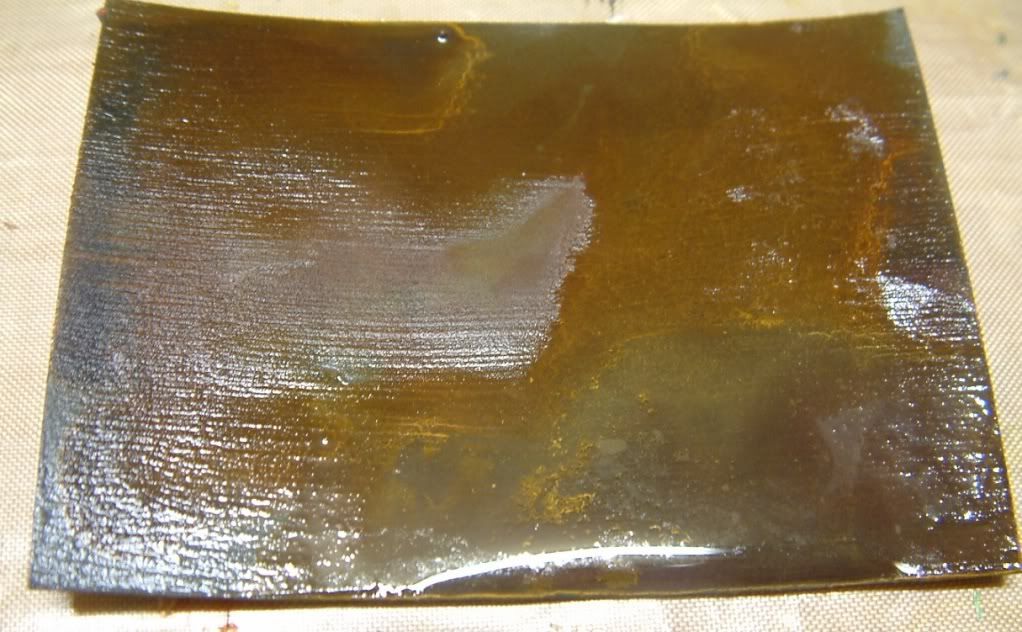
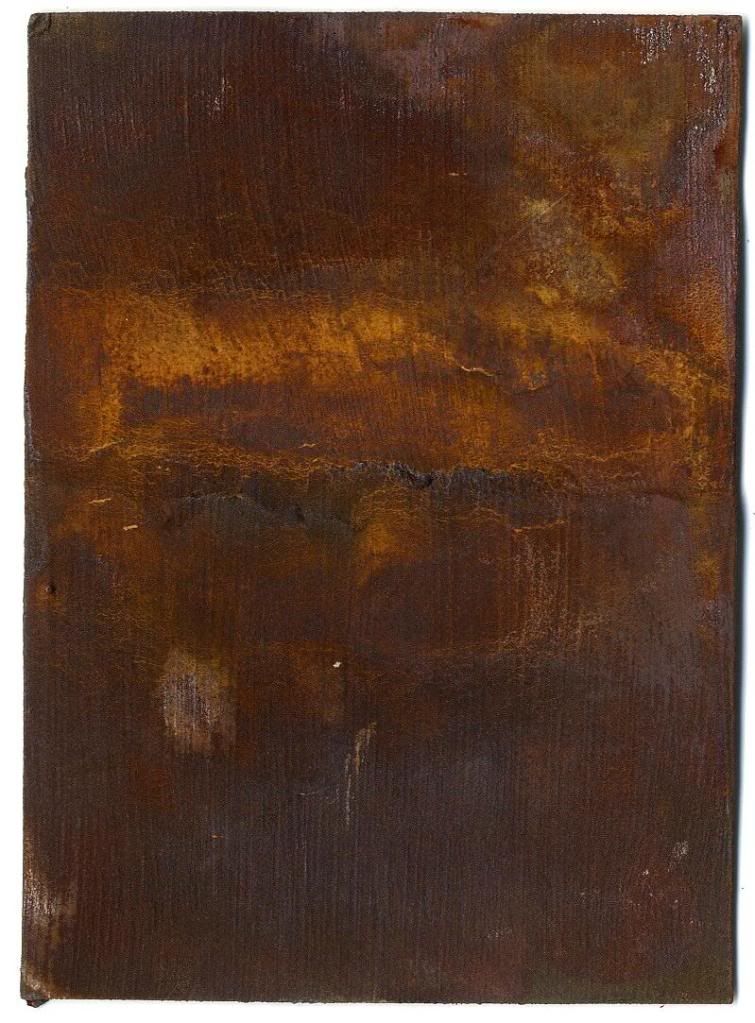
THE END RESULT
You can see in the two examples below, that the results will differ depending on how much Activator you use and where you let it puddle.

Step Three – (Optional) – Apply a Sealer
If you live in a very damp climate or if the object is out in the elements, you may want to seal the surface at the end of the process to prevent further rusting. For most indoor art projects this may not be necessary. Modern Masters sells a sealer or you could use other sealing products.
Other Ideas
One of the great things about this product is that you can choose to rust only certain areas your surface. In the example below, I started with a piece of chipboard backed cardstock that I crackled with Ranger Crackle Paint. Next, I dripped globs of the Iron Paint onto the surface. Lastly, I applied the Rust Activator. As you can see, only the areas with Iron Paint are rusted. As the Rust Activator sits on the surface of your piece, you’ll notice the liquid becoming rusty. In the example below, I liked how the rusty liquid bled onto the blue.
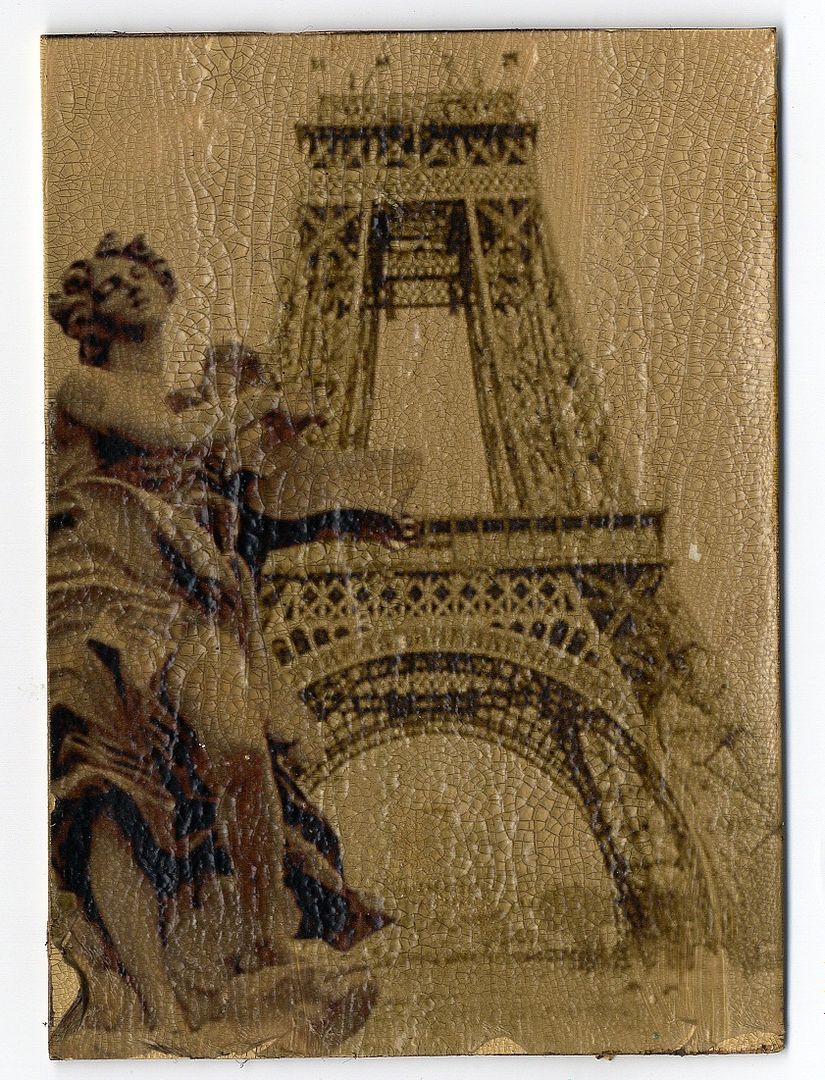
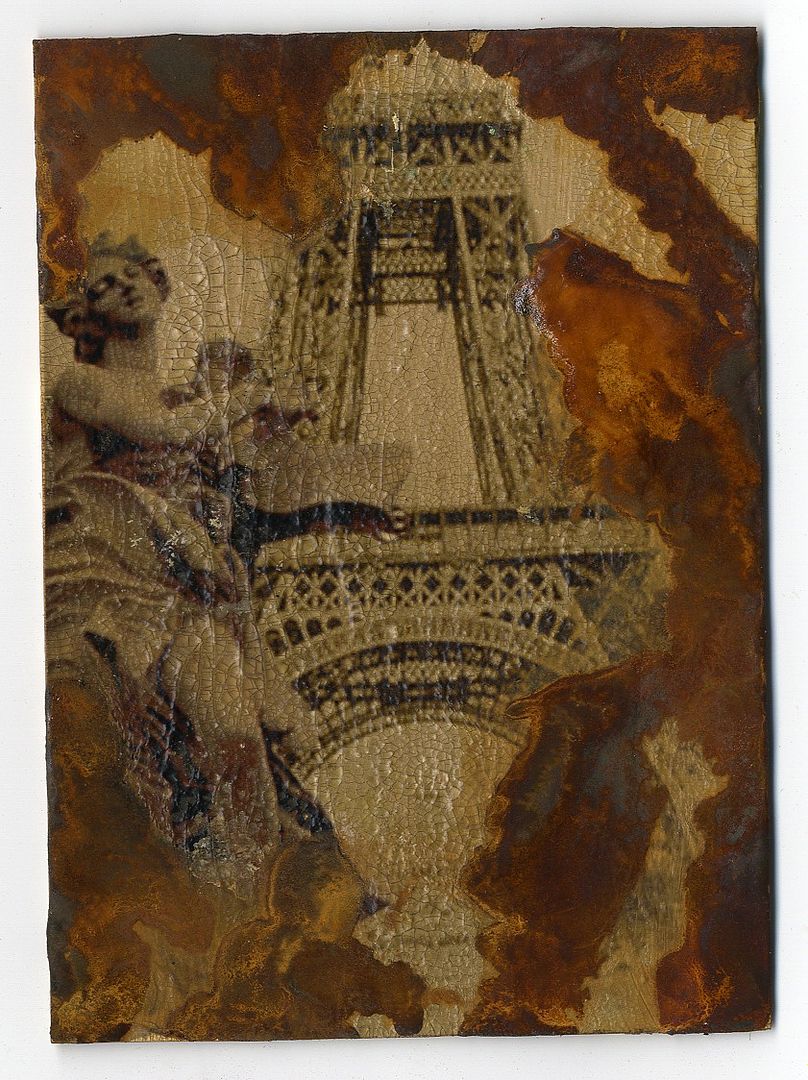
In the example below, I started with a piece of chipboard backed cardstock that I crackled with Ranger Crackle Paint. Next, I applied a rub-on-on transfer image I created with Grafix Rub-Onz (click here for the tutorial on this process). Then I applied the Iron Paint and finally the Rust Activator.
Below are examples of different surfaces I’ve rusted using this product.
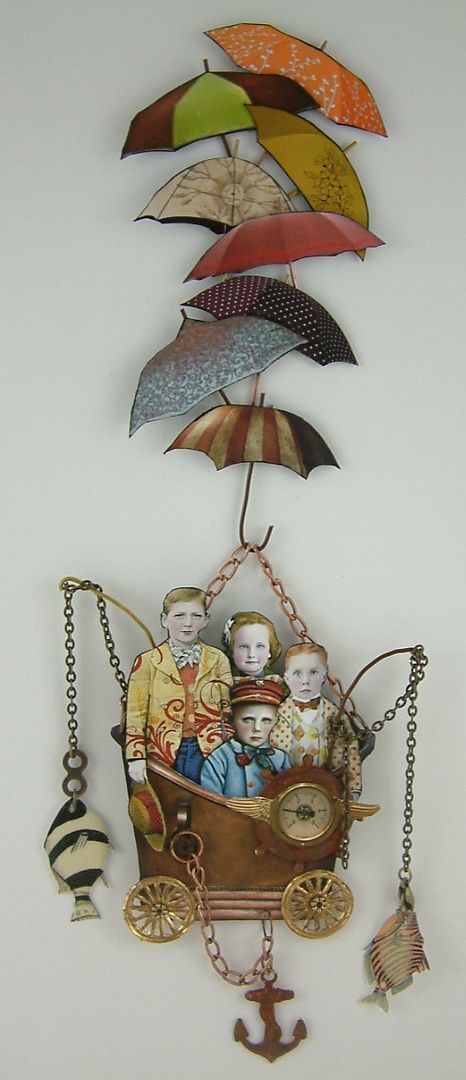
Rusting a Paper Border

Artwork Using the Rusted Paper Border
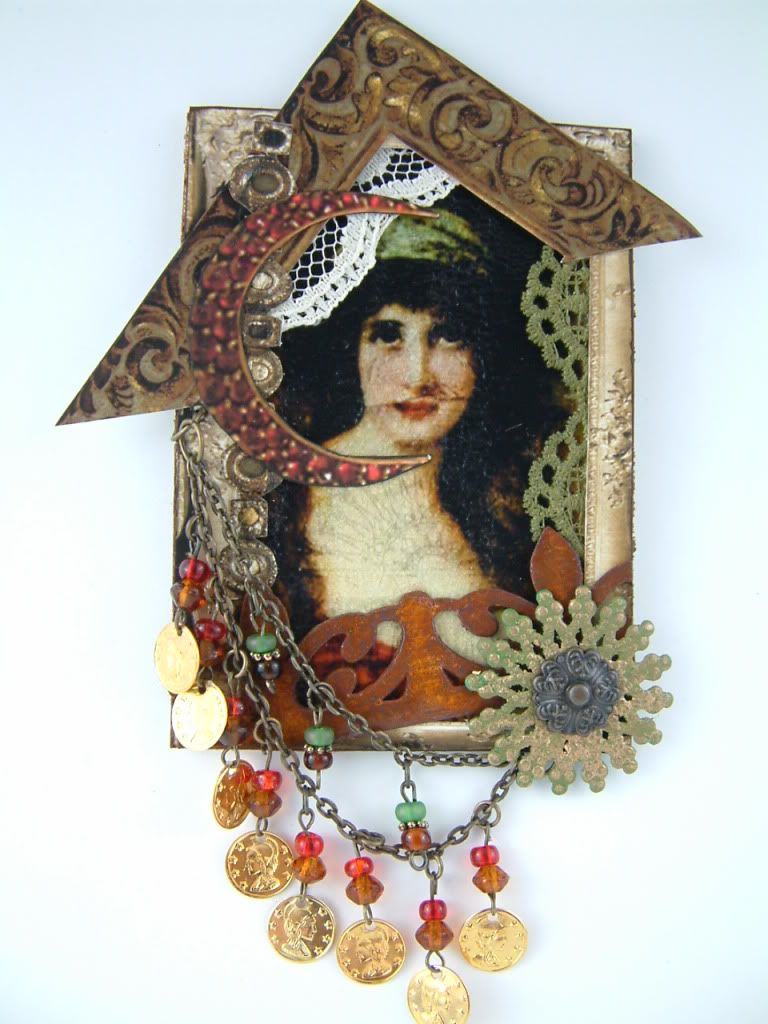
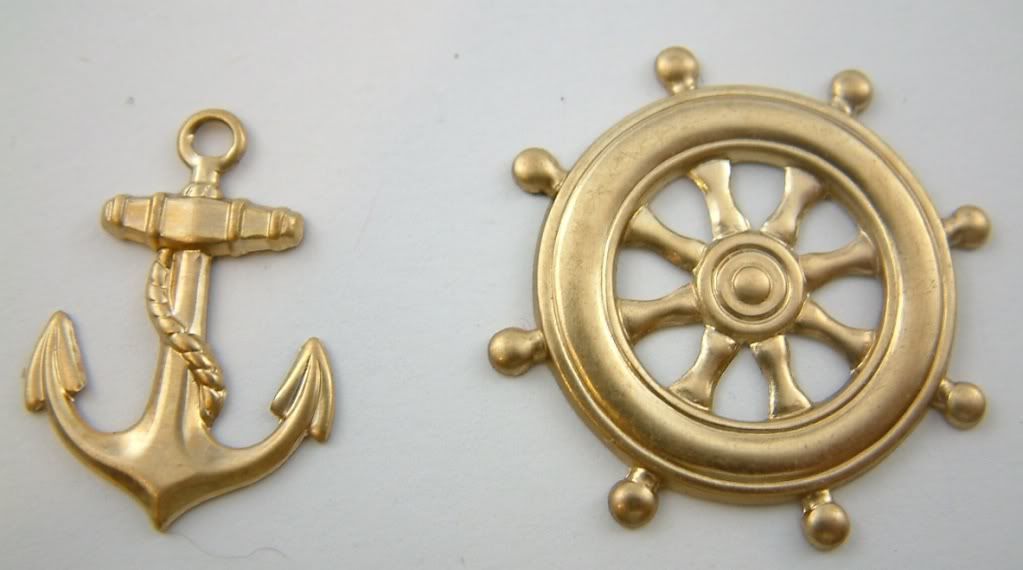
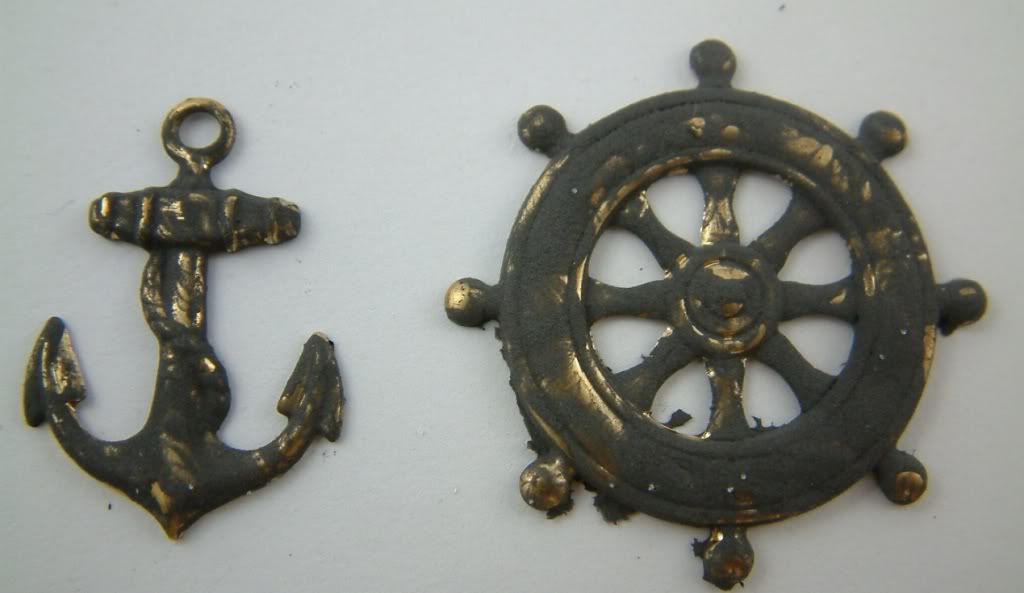
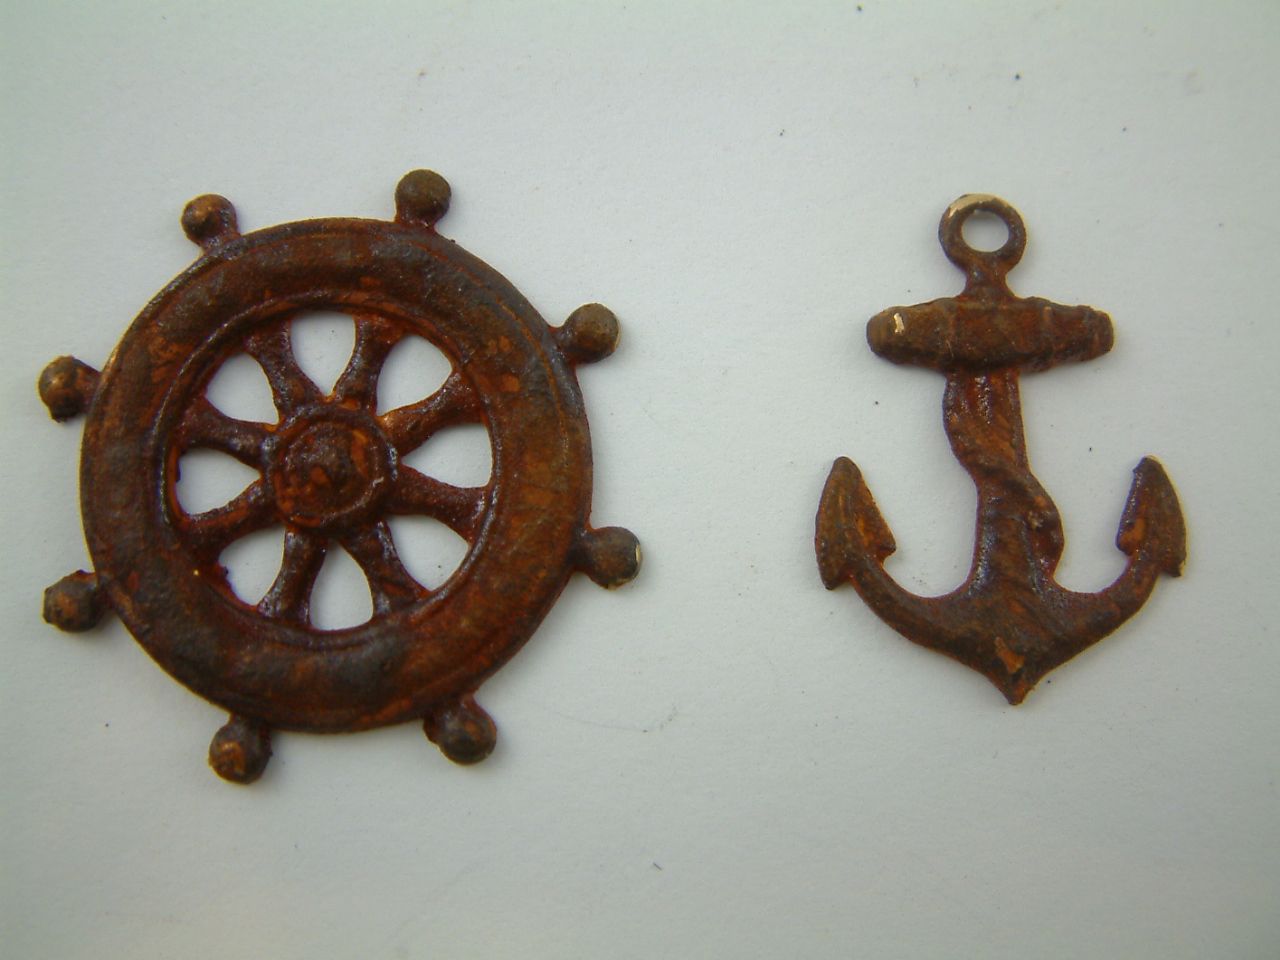
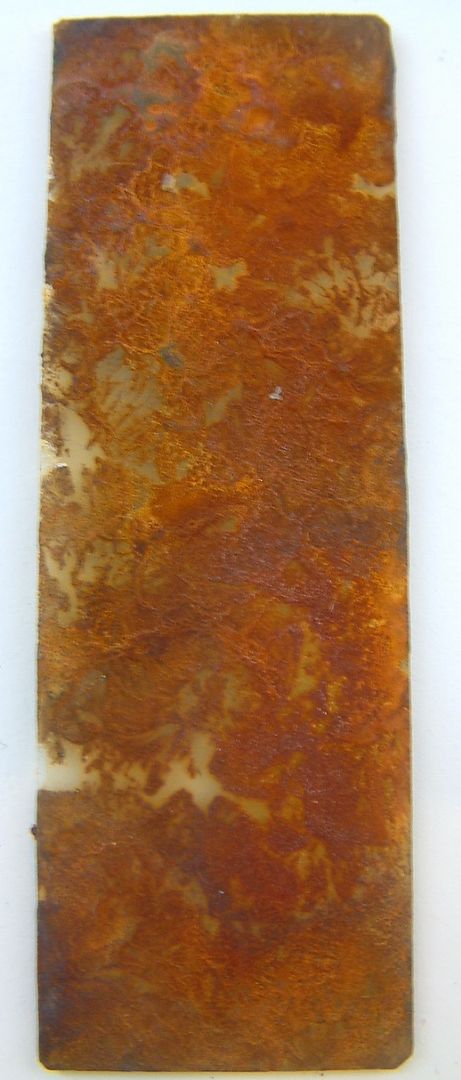
Rusting Brass
Artwork Using the Rusted Brass
Rusting Clay
The paper clay was first embossed with a rubber stamp, and then rusted. This process works with any type of clay.
Before apply the Reactive Iron Paint

After Appling the Reactive Iron Paint
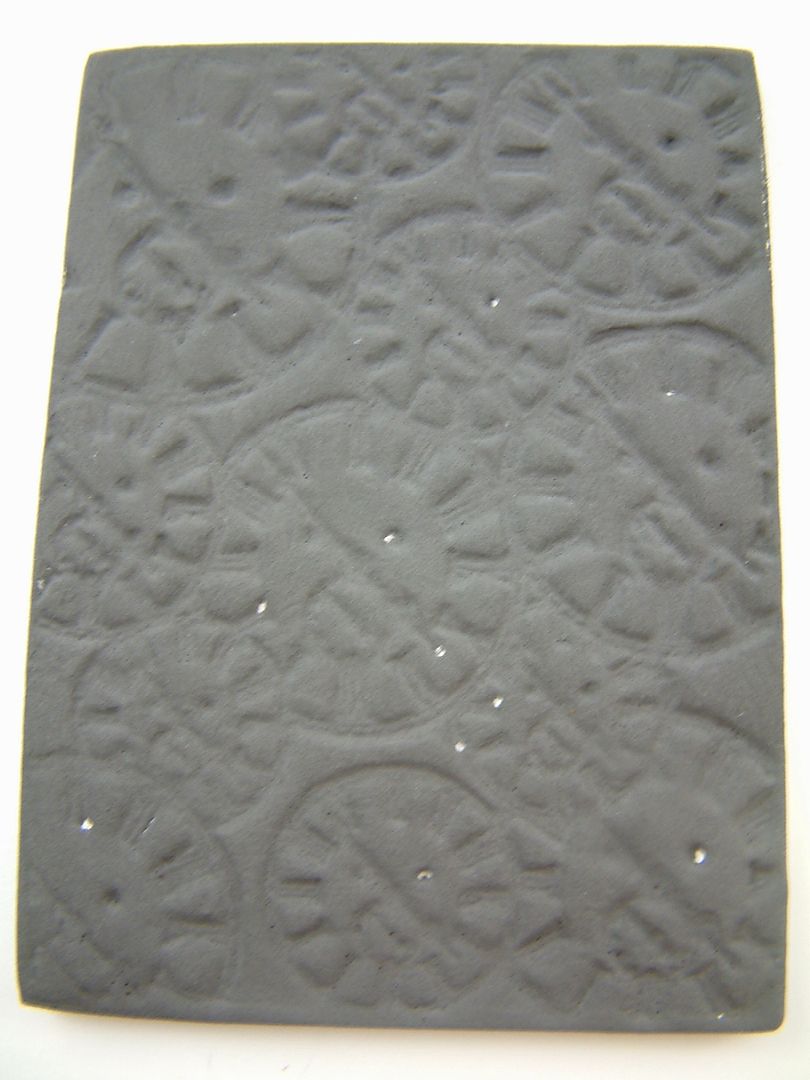
After Appling the Rust Activator

Artwork Using the Rusted Clay
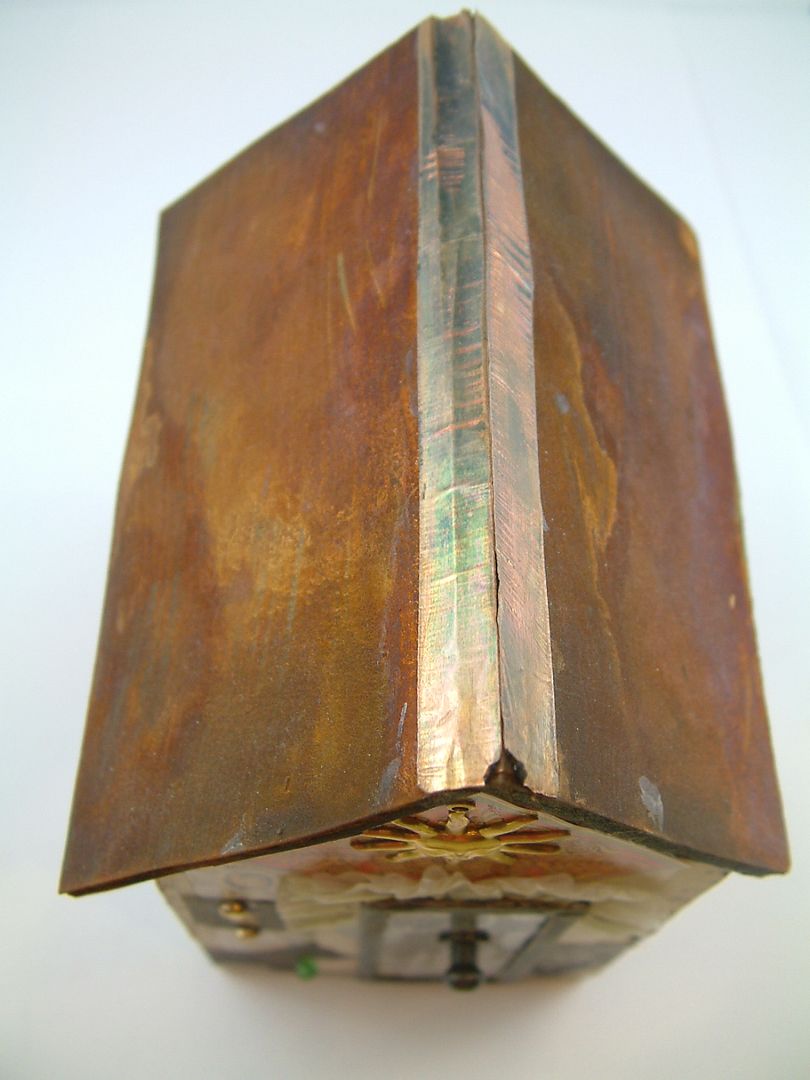
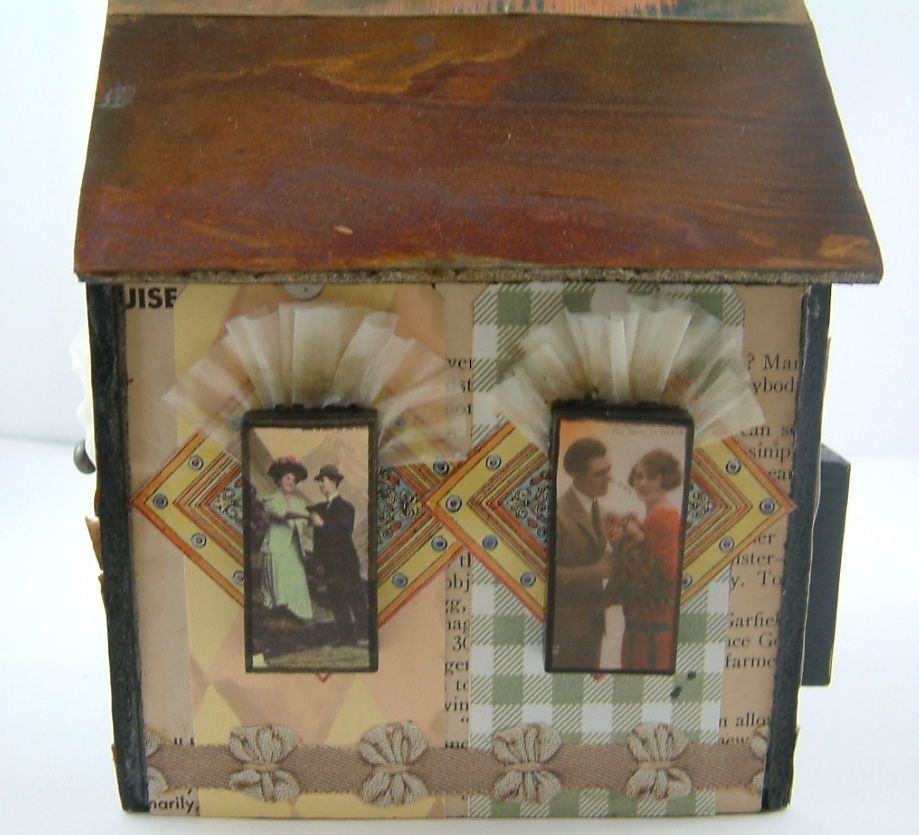
Rusting Foam Core Board
The roof of this house is made of foam core board.
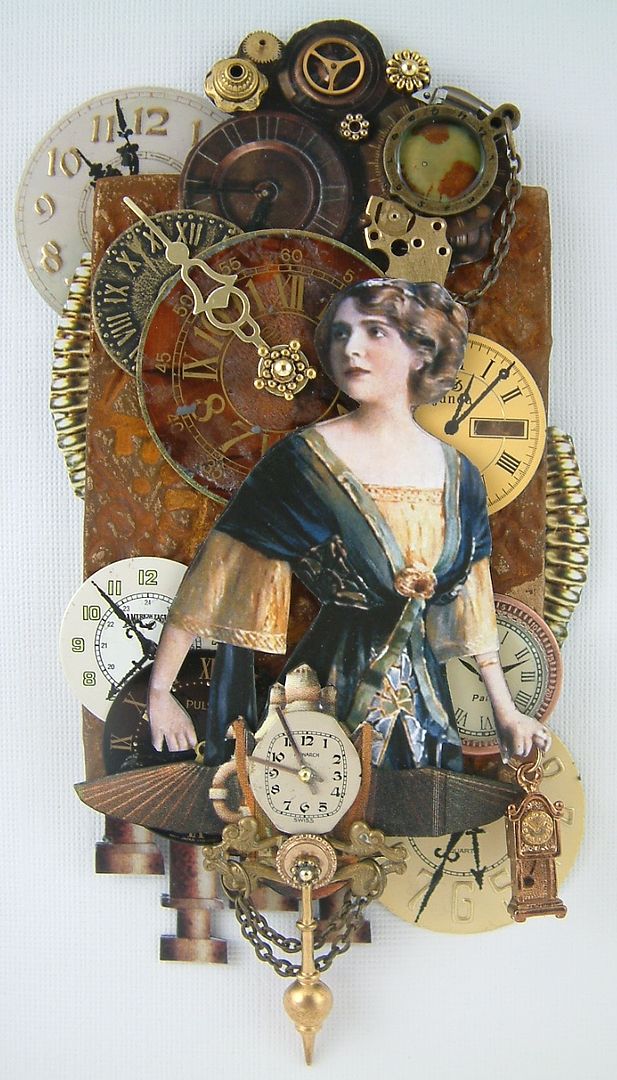
Rusted Chipboard Gears
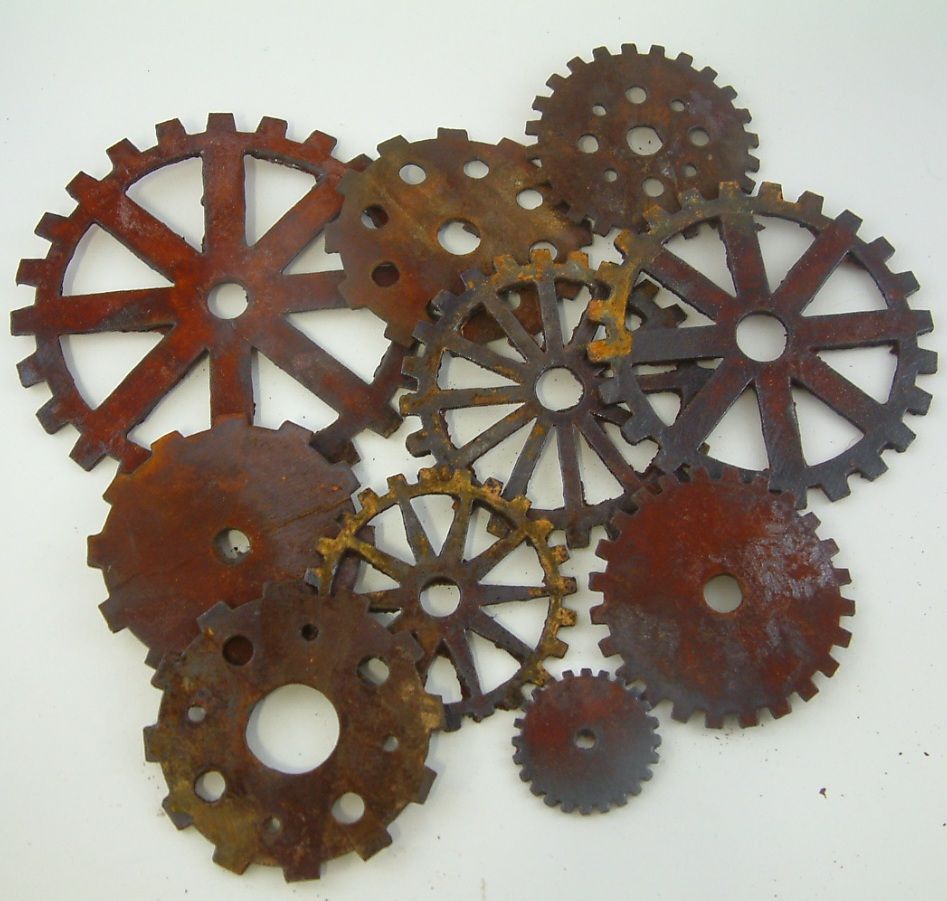
You'll have to wait to see what I do with the gears.
Rusted Glass
I applied the paint to only some of the surface so that you could still see that the surface is glass.

I liked this product so much I rusted a wall.
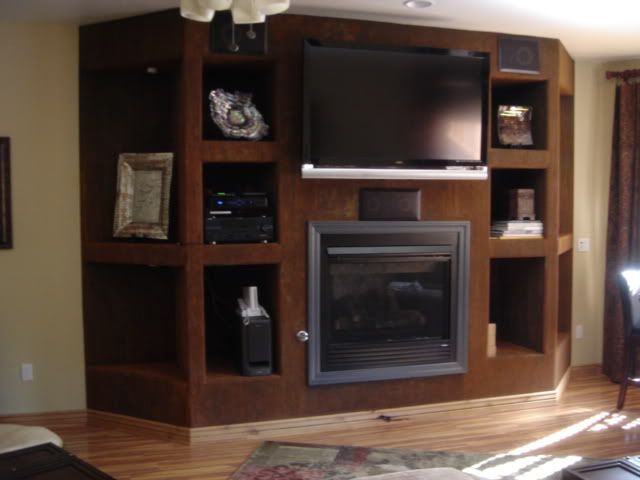
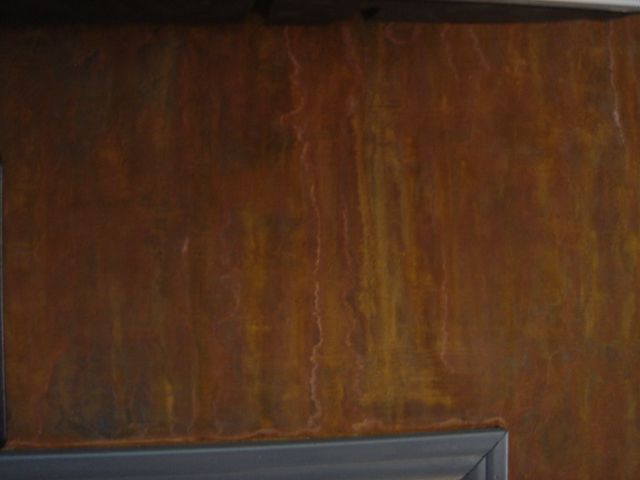
Below you can see the result of letting the Rust Activator drip down the surface.

12 comments:
Your end results are very professional looking. I would have been daunted by the task of rusting a whole wall. I think I'll stick to something smaller.
There is something about rust that makes me go gaagaa!!What an amazing tutorial and I am sooooo inspired to create after looking at your projects.I have rusted many items before but they always end up so brittle..I need to do the sealer part!!Thanks for the tutorial and inspiration!!Hugs,Cat
Just had to let you know that I added your link to my sidebar!!Love this tutorial!!Hugs,Cat
I read about this stuff in a book I got recenly,It was already on my wish list, but its even better seeing in done, Very cool, great projects and tutorial.
hugs Lynn
Oh, that steampunk card is my all time very favorite so far! It's fabulous! Thanks for the great "rusting" tutorial. I can tell you put a lot of work into it, and, you make it sound so easy but I know it isn't, lol. Thanks for sharing! Hugs, Maggie
Your wall looks just amazing. I would definitely have that in my home. Great job.
Laura -
Thank you so much for the tutorial.
Elaine Allen
Thanks so much for posting such a wonderful tutorial. Do you know of any retailers selling MM iron paint and activator? I found them on Amazon.com but the shipping is high. I can's seem to find this product in craft stores like joanns and michels ect.
Thanks!
maya
Thanks for the inspiration i have this product and have used it in my craft work so its great to pick up a few new ideas on how to use it x
Wow, thanks for the idea to try the Modern Masters Metal Effects on glass, as I just bought the Krylon mirror spray, and am hoping the combination will give me that antique mirror look.
God bless
What does the activator spray actually contain? Acid?
Hi there. I am Australian based and can get a different branded product here. The results of your product is a lively rich red rust but the examples with products here are more yellow based. Is this likely a difference of number of
paint layers and activation products not being thick or liberal enough?
Post a Comment