

INSIDE OF THE BOOK
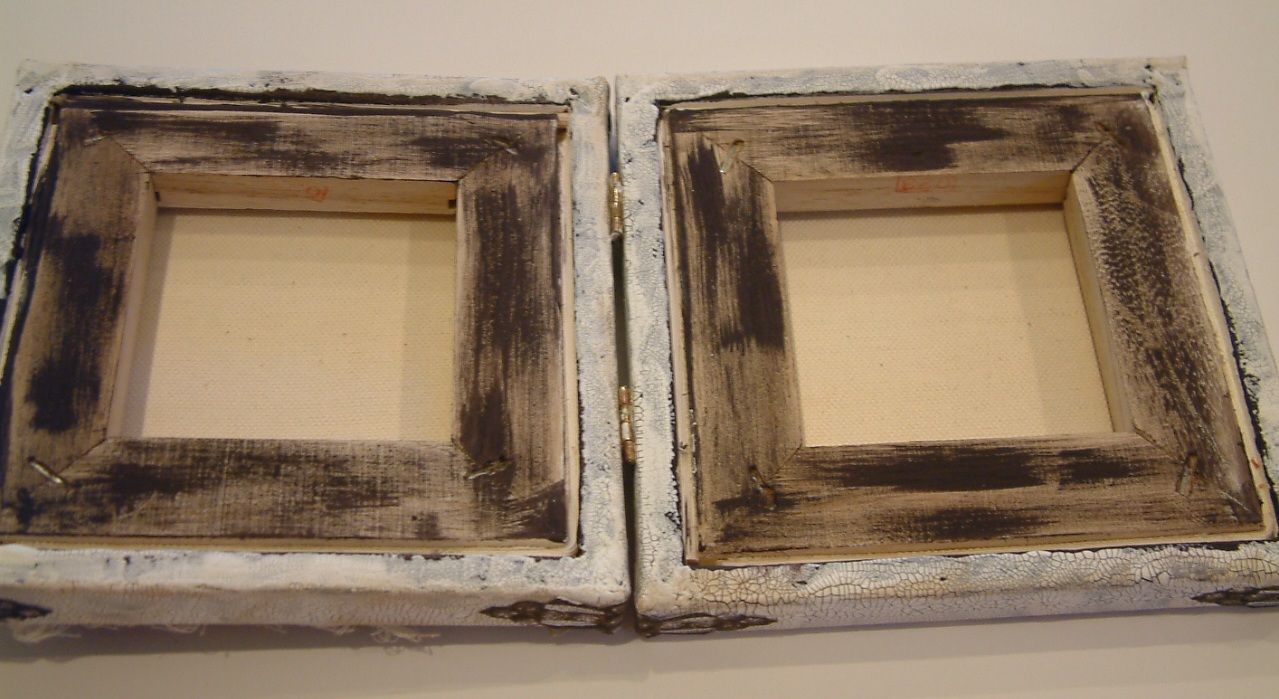
I started with two blank 6” x 6” painters canvases. You can use any size you like just make sure that wooden frame creates open spaces in the back. Some really small canvases don’t have much of a niche in the back.
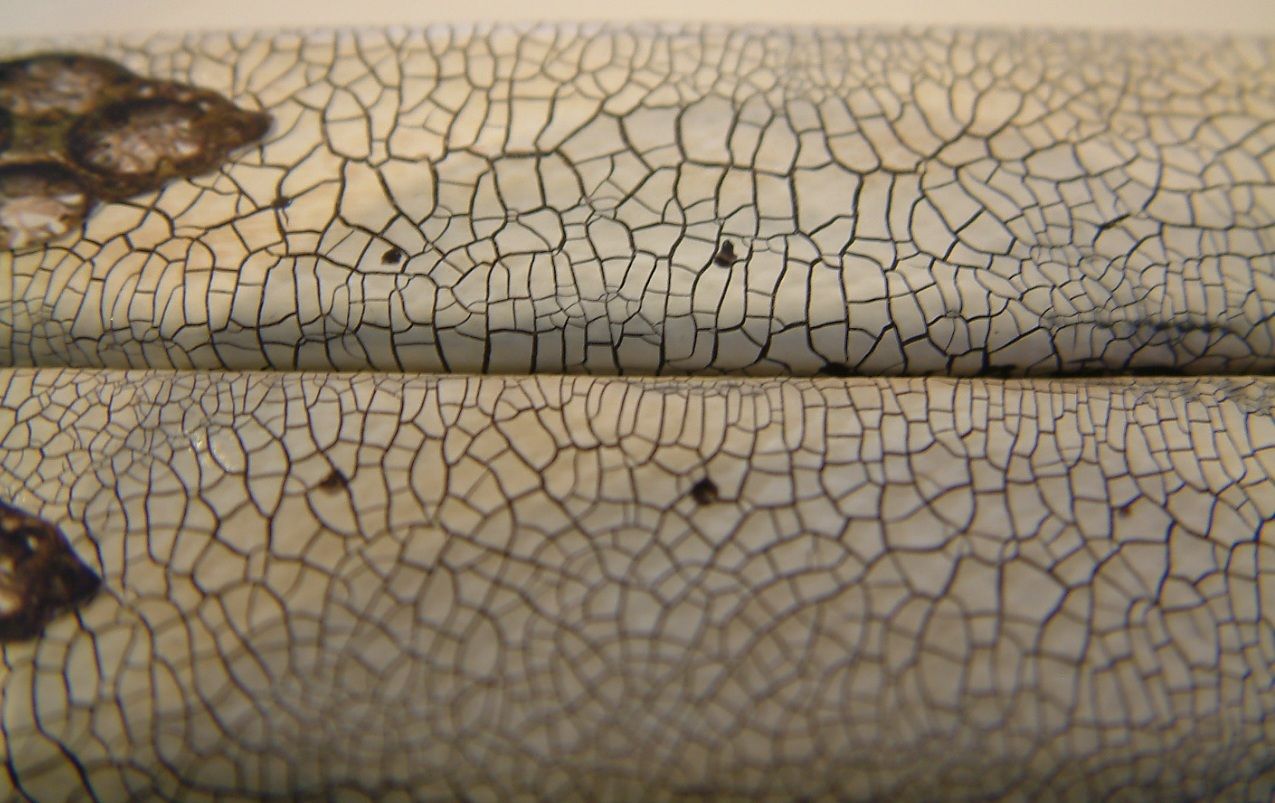
Before you hinge the canvases together, paint, stain, ink, paper etc. all of the edges on both canvases. If you want to paint, stain, ink etc. the entire surface of the canvases, go ahead and do that now, but don’t add any dimensional objects to the front or back of the canvases until they are hinged together. Creating bulk at this stage makes the hinging process more difficult. I decided to use a vintage aging technique on the edges of the canvases and paper for the front and back of the canvases.
Hinging the Canvases Together
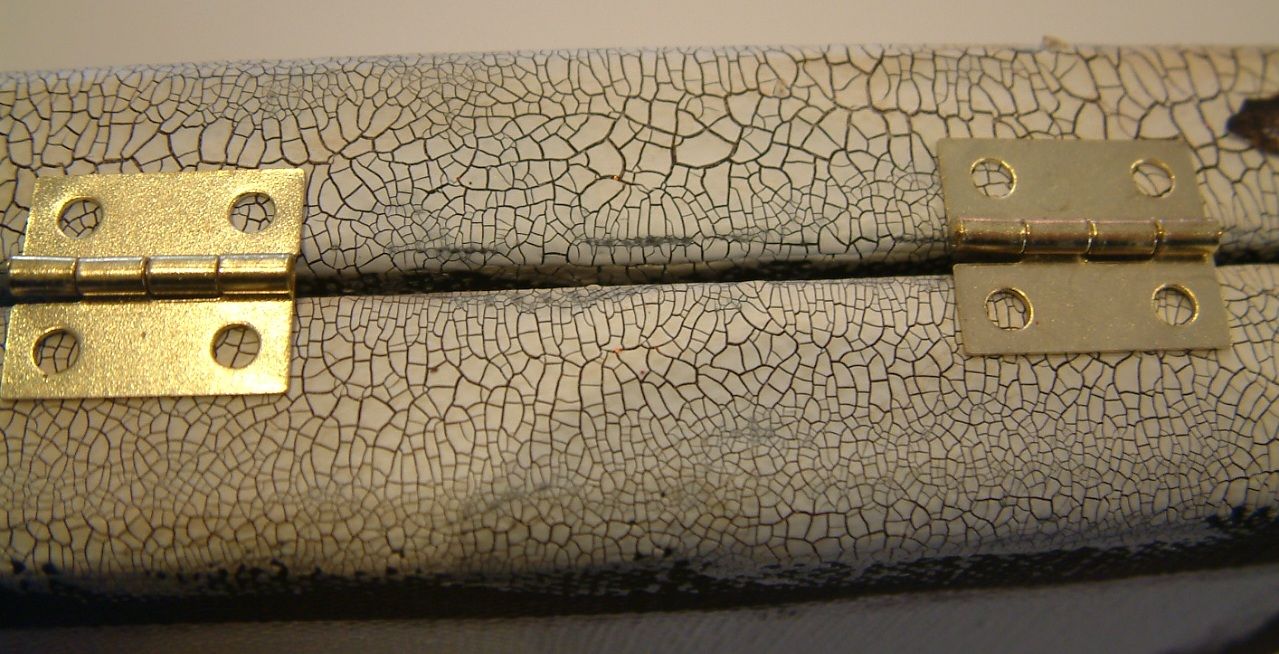
Once you finish decorating the edges, hold the two canvases together with the niches facing each other (backsides of the canvas facing each other). You can see in photo below there is a slight gap between the canvases. When you decorate the edges and backsides of the canvases, it creates a little extra bulk. Having a slight gap insures that the book closes properly.
With the canvases held together (with a slight gap), place your hinge or hinges along spine of the canvases (as in the picture below). The number of hinges you use depends on the size of the hinge and the size of the canvases. I used two hinges that are 1/2” long by 5/8” wide and the center of the hole is 1/4” from the edge of the canvas.
Using a pen or pencil mark the placement of the hinge holes.
Remove the hinges and pre punch the holes using an awl and hammer. Pre-punching makes it a little easier to insert the screws.


The embellishment at the corners my canvases are images of vintage jewelry.
Decorating the Insides of the Canvases
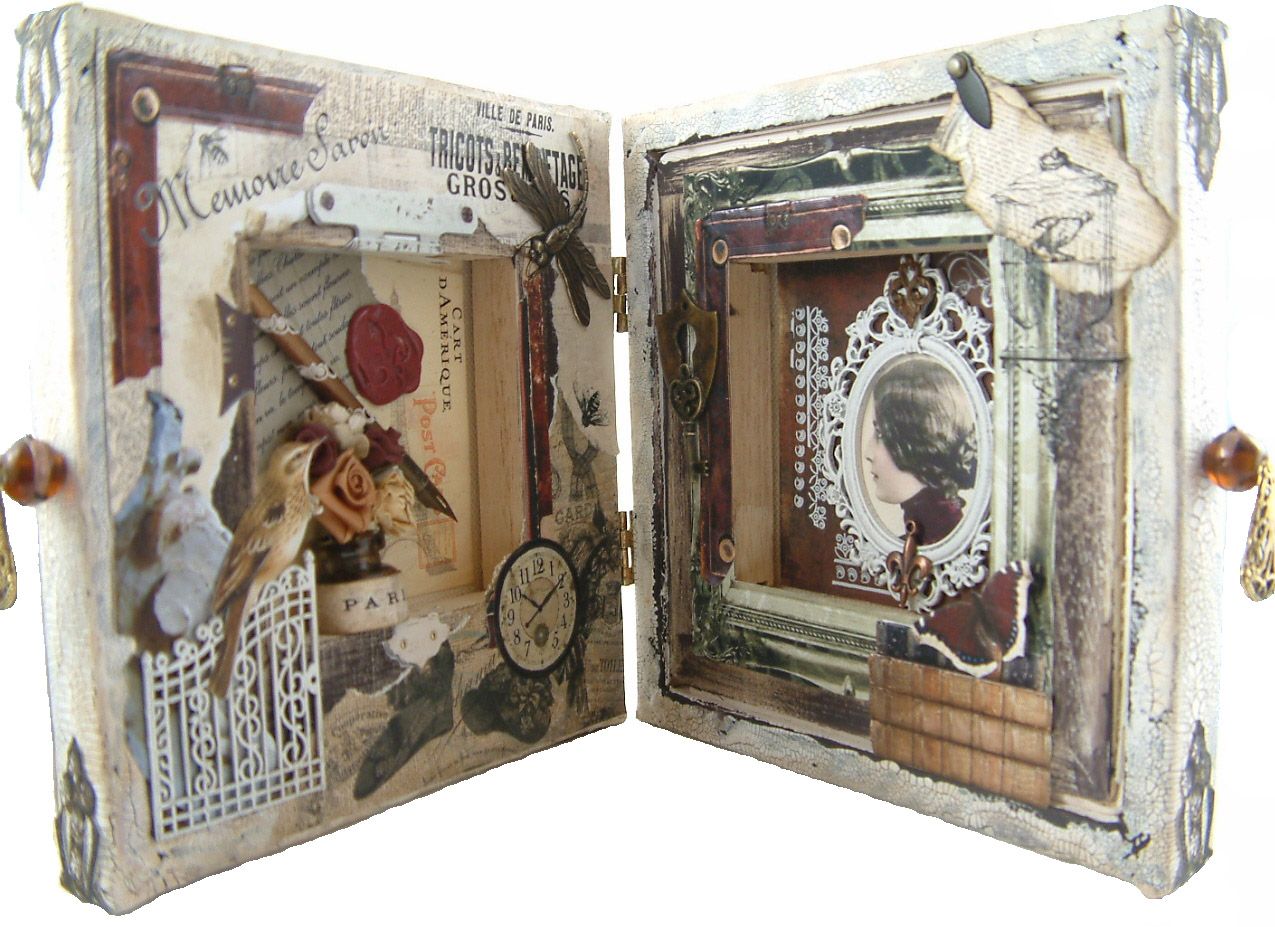
After you have hinged the canvases together, I suggest decorating the inside of the canvases first. If you start with the outside of the canvases they won't lay flat on your work surface when you get ready to work on the inside, making it harder to paint, ink, apply rub-ons, paper and other embellishments. On the inside of my book I dry brushed brown paint on the wood frame.
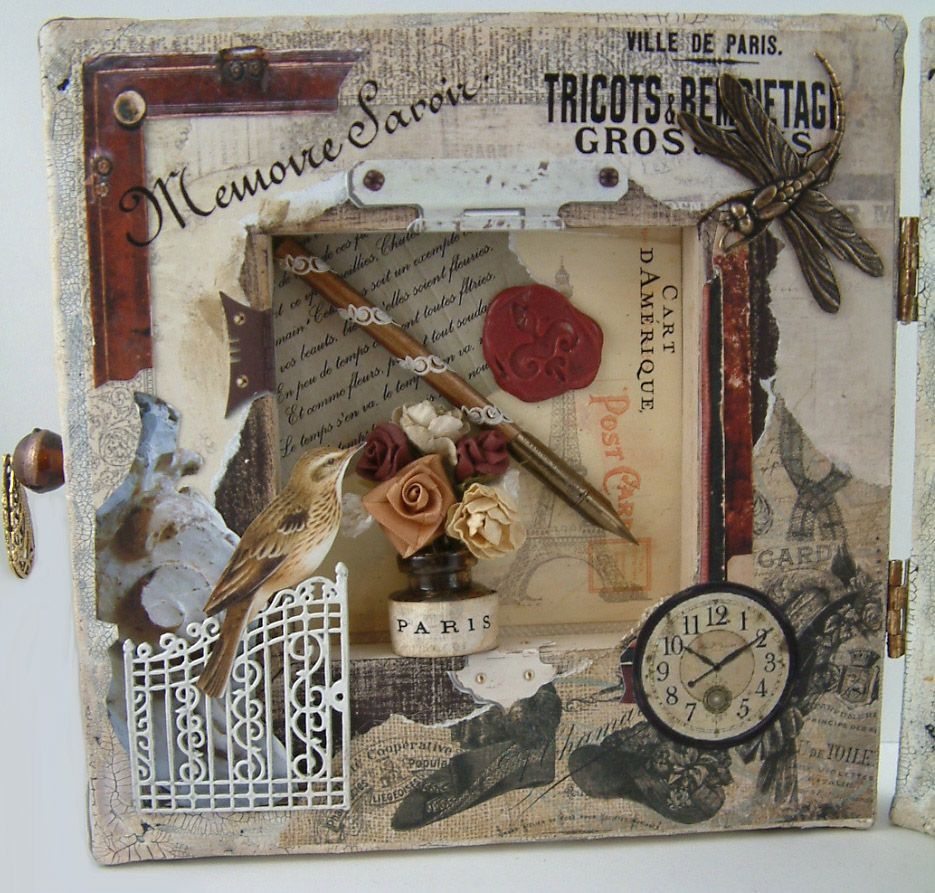
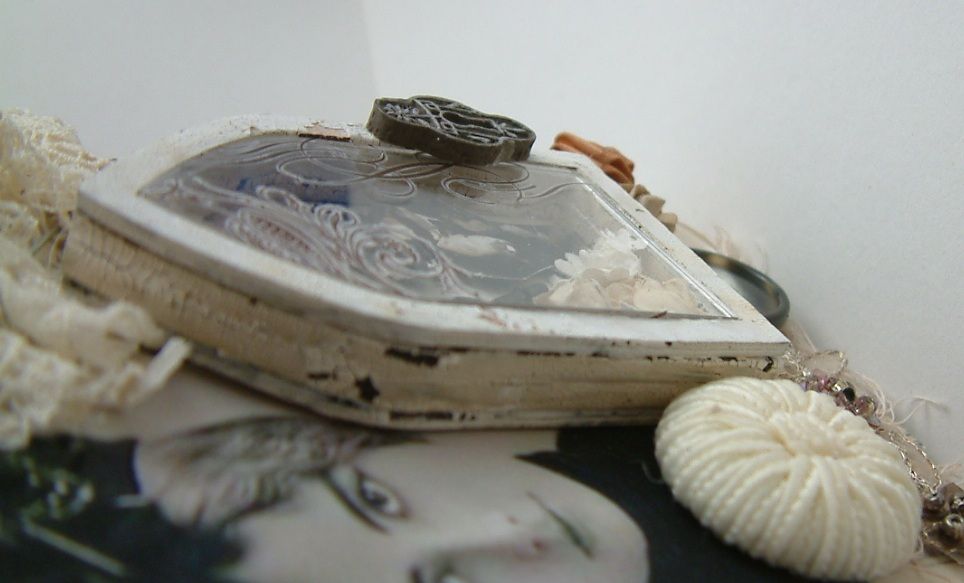
To the inside surfaces I added decorative paper, paper images, rub-ons and flat metal embellishments. I kept the elements I added to the outside edges as flat as possible to make it easier to close the book. In the niches I added the bulkier elements like a mini glass inkwell, a pin nib attached to a wooden skewer, a wax seal, flowers and a metal frame and gate.
Niche on the left side of the book
Niche on the right side of the book
Decorating the Front and Back Covers
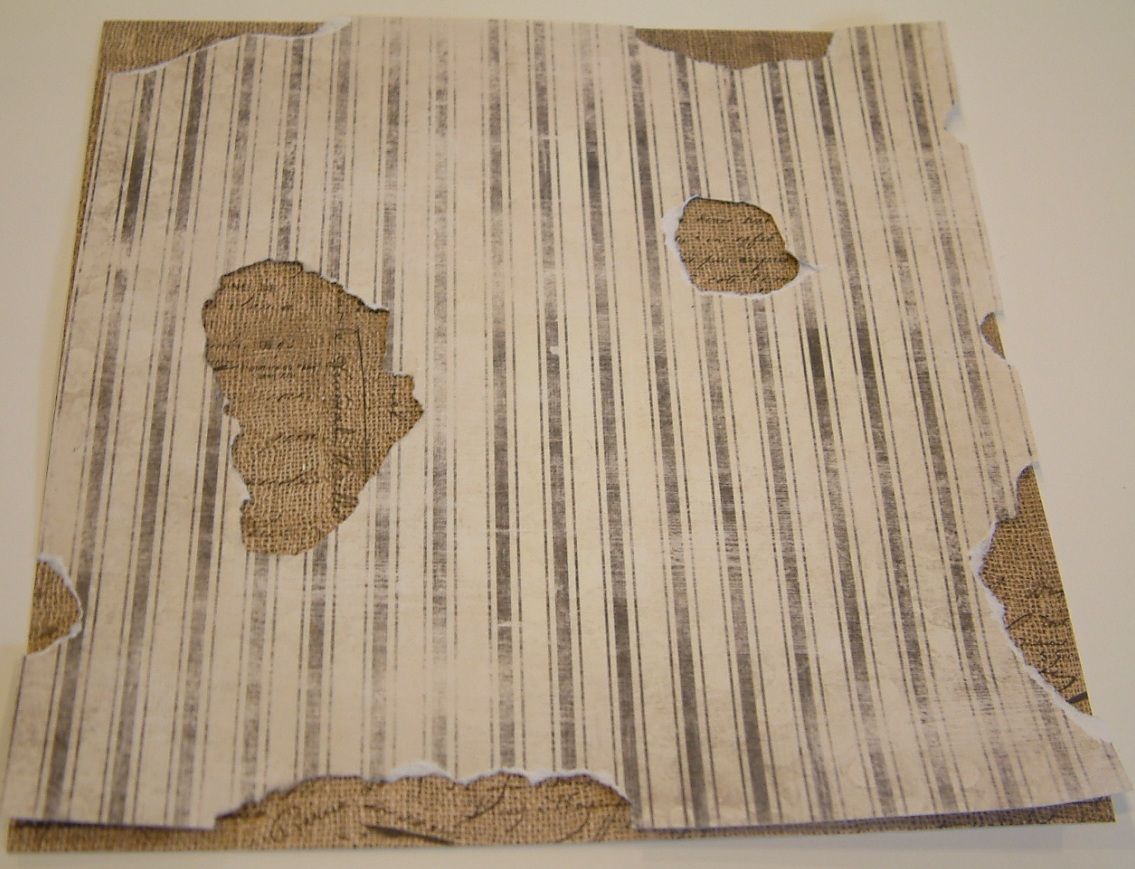
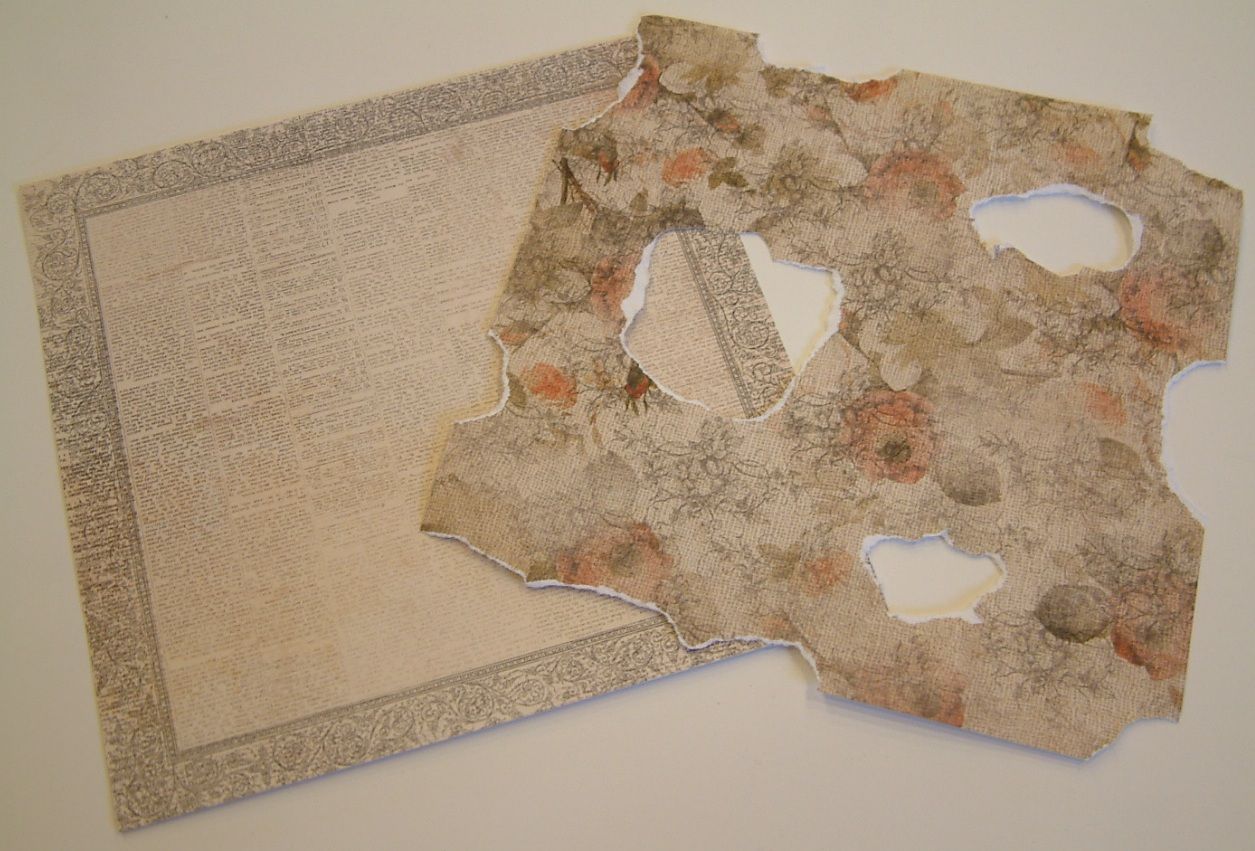
The key to creating the look of this book is lots of layers. I decided to use paper as my base layer for both the front and back covers. I started by choosing two papers from the French Kiss paper pack. I tore holes in the middle and sides of the top paper then glued the papers together. This technique allows the paper on the bottom to show through the paper on the top and gives them a worn look. Then I used a technique to make the paper look even more worn and tattered.
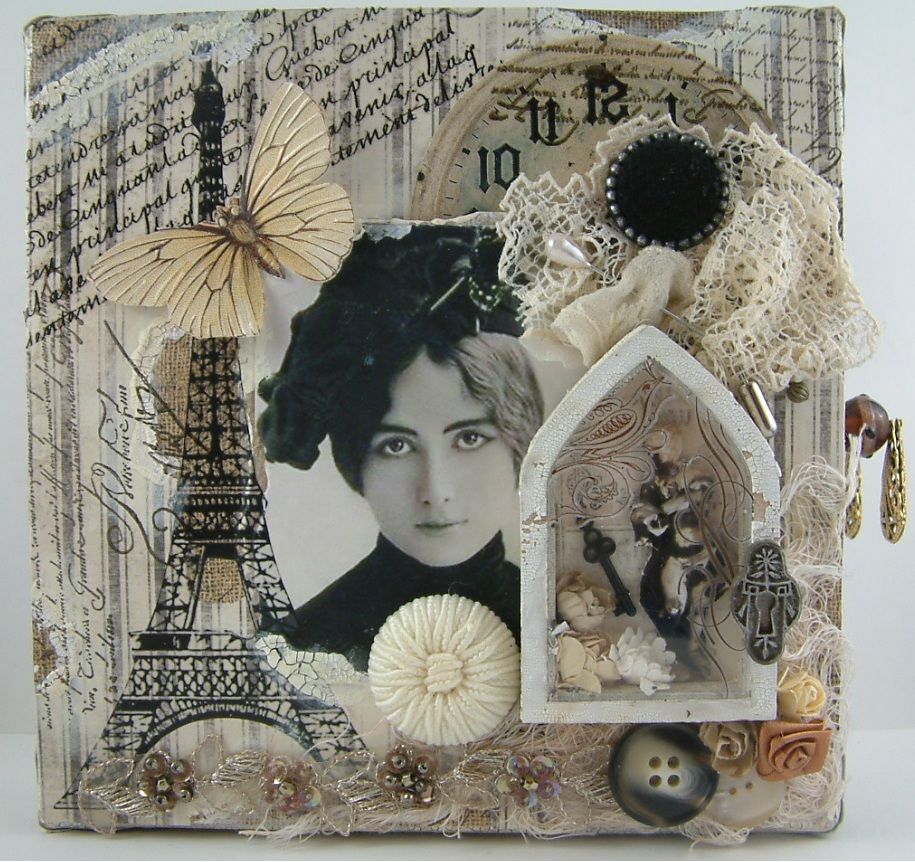
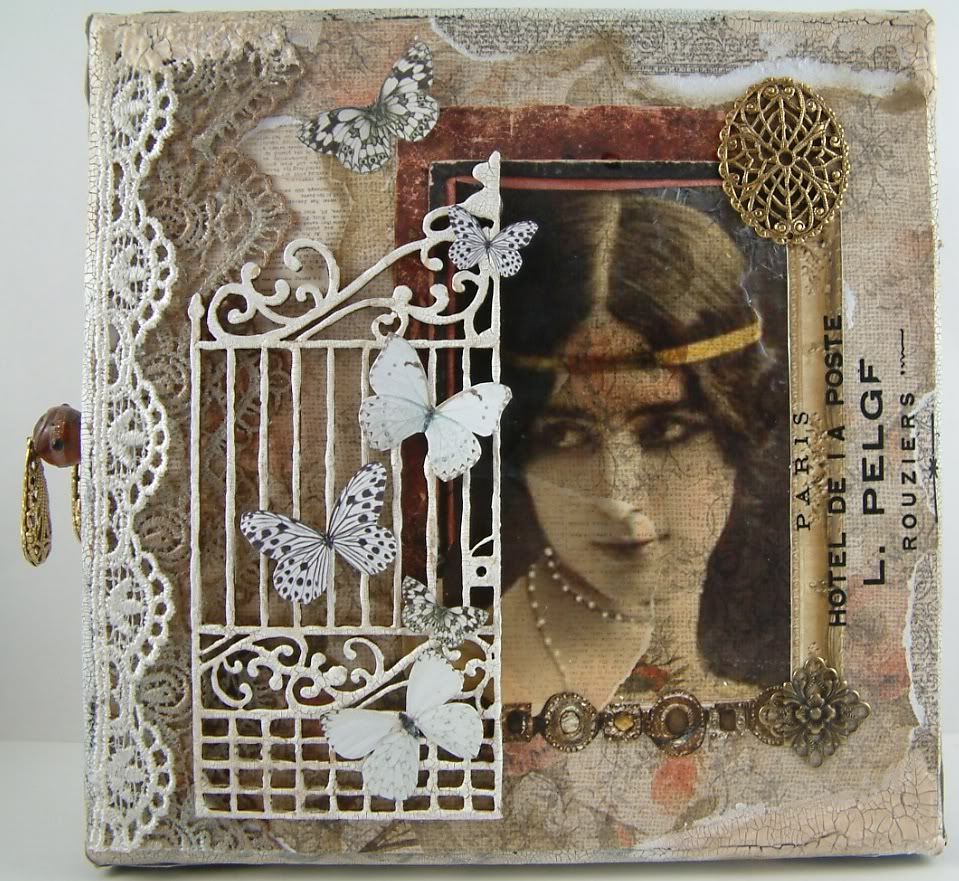
Front Cover Décor
For the next layer I added the focal point image (Cleo), a paper clock, various rub-ons (French writing and the Eiffel Tower), and rubber stamped designs and writing. The next layer consisted of dimensional items such as died cheese cloth, buttons, vintage lace, decorative straight pins, flowers, beaded trim and a butterfly.
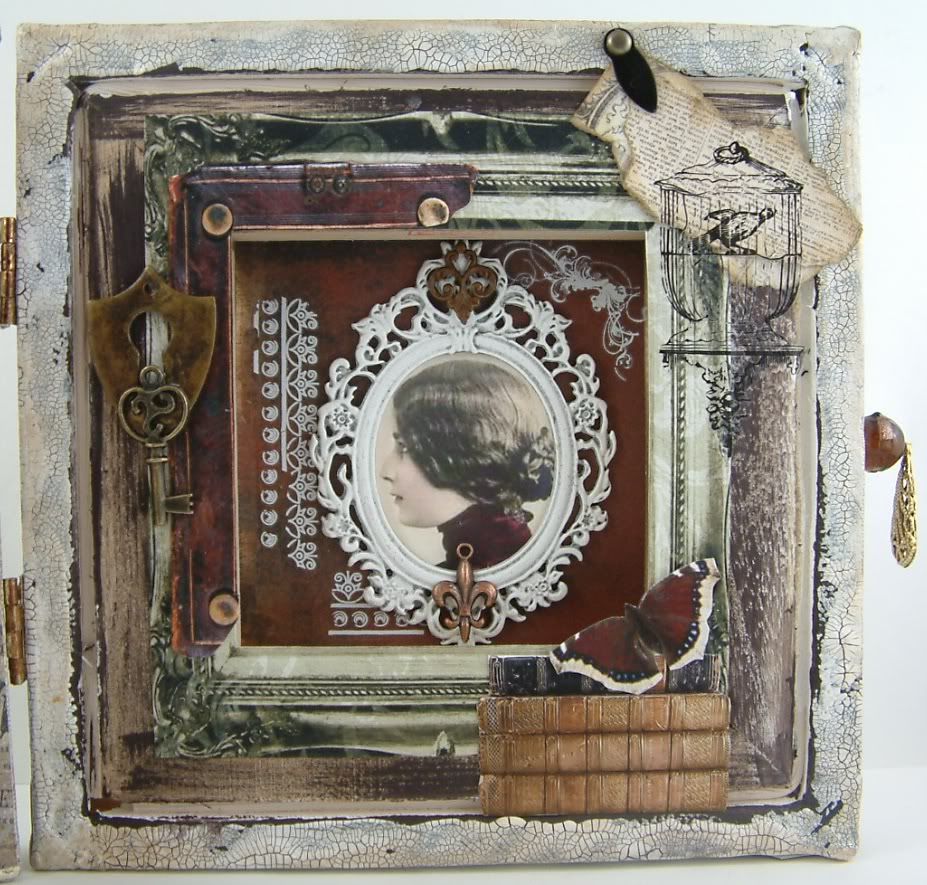
Lastly, I added the Shadow Box Shrine. I used a distressing technique on the frame and applied rub-ons to the glass. I backed the inside of the shrine with the French Kiss paper, then added an image of a weathered statue, paper flowers and a key. The final touch is the key hole of the front.

After assembling the décor for the front cover, I glued it to the canvas and married the distressing technique I used on the edges of the canvas, to the edges of the paper on the front cover.
Back Cover Décor
Just as in the front cover, I choose two papers from the French Kiss Paper pack, tore holes in the middle and sides of the top piece of paper and glued them together.
I added the focal point image (Cleo), paper images, rub-ons, lace, a wooden gate and pieces of filigree. Once the décor for the back cover was assembled I glued it to the canvas. The image of Cleo is a rub-on I made using the Alpha Stamps Cleo Collage Sheet. Click here to see the tutorial on how to make your own rub-ons.
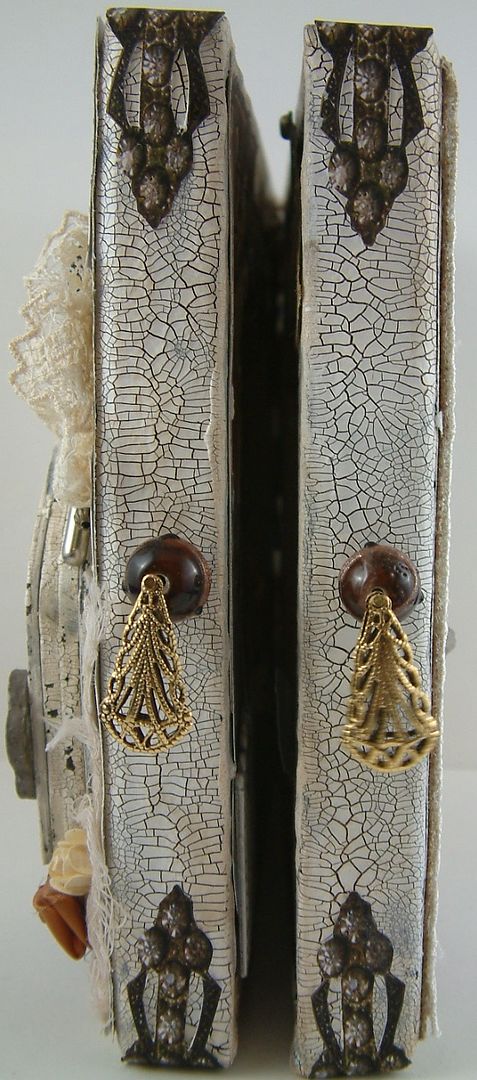
Opening the Book
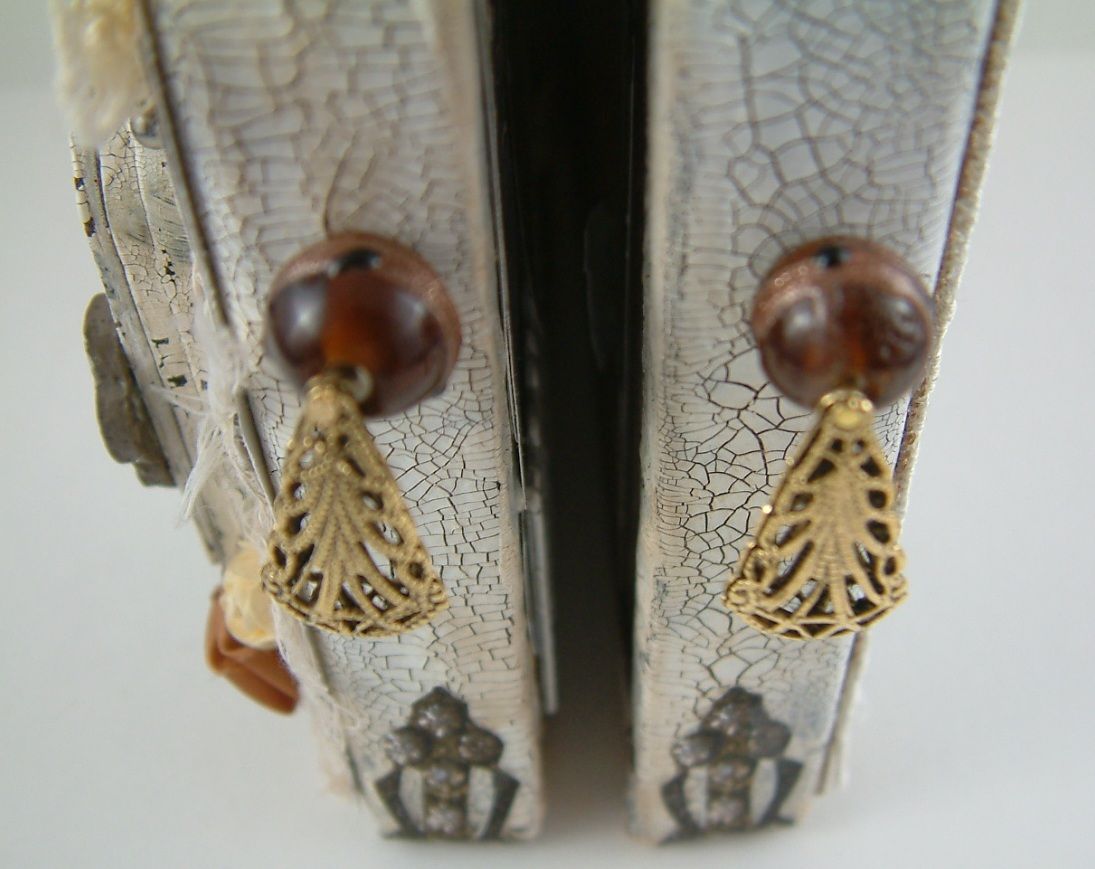
On the edges where the book opens I added beads with filigree drops. I used the awl to poke holes into the canvas. Next, I inserted a metal pin through the filigree drop and bead, and glued the end of the pin into the hole.
A Complete List of the Alpha Stamps Supplies Used in this Project
I know you are going to want to know all about the aging and distressing techniques I used and referred to in the tutorial. Well stay tuned as all will be revealed!
43 comments:
Laura, An absolute marvel to look at. Really stunning.
This is absolutely stunning Laura.
You always do such a wonderful job of telling everyone how to make your creations . I quite often feel as if I'm sitting beside you as I learn new tecniques.
Thank you & Hugs, Amy Jo
OMG! Such a precious artwork! So beautifully done! :)
Have a nice day!
OMG! Such a precious artwork! So beautifully done! :)
Have a nice day!
GORGEOUS!! No other words!
You have really inspired me with this one Laura. I have seen this idea before and filed it away, but this one has me wanting to create! I see a steampunk themed one of these coming to fruition soon! Thanks for sharing your process.
Wow-this is amazing! I love all the layering and I will stay tuned for aging and the distressing! Beautiful work as always! ;)
Hugs,
Sonya
Thank you so much for creating such a wonderful project! I have a couple of canvases and this is so beautiful and perfect!
OMG, Laura! This is totally divine .... I cant take my eyes away from it ... super awesome!!!!
Laura, this is brilliant!!!!!!!!!! I love this work!!!!!!!!
Stunning!!! Thank you so much for going through the process stage by stage, it is so fascinating to see how you create your exquisite pieces.
Oh wow Laura your canvas book is fabulous. Thank you for a brilliant tutorial and for listing the items you used, most helpful. x
Congratulations-first to the lucky winners....
And Laura , this book is so stunning, I think I have never seen anything as fantastic as this.
Thankyou for your tutorial,-- I don`t know if I would ever try to do this after seing your gorgeous example,-- but so sweet of you to offer it for us.
Hugs,Dorthe
wow another stunner and they just keep getting better
hugs
This is a genius idea, and can go so many directions. Thanks for sharing. TTFN
Laura -
This is simply a gorgeous masterpiece! The more I look at it, the more I realize I missed on the first glance. Beautiful, you are such a talented artist. I really appreciate the in-depth tutorial on how you created this wonderful piece of art.
Elaine Allen
P.S. Congratulations to all the winners. That includes me - YippEE!!
Laura this is super gorgeous, I love the pps and everything you have use.
How beautiful does the little shrine look such a beautiful touch.
Beautiful book! I have got to give this a try. There are currently some of these mini canvases in my stash calling my name.
You are so inspiring!
Smiles~
Marilyn
Wow, this is amazing! Never seen this idea before. Can't wait to make one!
Laura, what an amazing idea ! and the result is exquisite !!! You are extremely gifted xoxo
And thank you sooooo much for the giveaway last month, I cannot wait to receive the Domino book in the mail....I linked to you about this in my latest blogpost , thank you thank you !
Laura this is over the moon stunning. It looks like a fine treasure you luckily found in Grandma's attic. Your attention to detail is what really draws me in and I am swooning.
Congratulations to every winner of your February art.
Joyful creating...
Hi Laura, This is an awesome idea and your book turned out just gorgeous. There are so many wonderful details to discover and the theme is just along my alley.
Hugs,
Julia
Wow!! What a great idea to use two canvases as a book. You did such a wonderful job, too! Absolutely love it-course all of your work great!
Faye
What a treat to stumble upon your blog. I came over from Gingersnap Creations. So looking forward to following your work - absolutely fabulous!
This book is stunningly beautiful, thank you so much for sharing your creative process!
Absolutely gorgeous piece of art. Thank you sharing your creative soul with us. What an inspiration you are.
denise :D
Sooo kind of you to share this tutorial. I love how your book turned out!!! Just beautiful!
I was wondering how you got your little ink bottle to be so dark? So many details...love them all.
Oh Laura...this is fantastic. I have just pulled out 2 canvases and will give it a try. Great of you to share a tutorial. Thanks so much for sharing your talents.
This is gorgeous! Thanks for the how to, I can't wait to try this!
Spectacular work. so glad I found your site. WOW!
Absolutely fabulous!
Absolutely wonderful. Cna't wait to try it and I even have two canvases thinking what do they want to do. Now I have a guide to help them become discovered. xo
Laura, my jaw hit the floor when I saw this beauty! Absolutely stunning!!!
I love your easy-to-follow instructions on creating your wonderful masterpieces. You never cease to amaze me with your beautiful creations. I want to be just like you when I grow up!
Your canvas book is STUNNING Laura!!! Thank you for including all the details on how to make this incredible piece.
Have a great weekend.
Donna
STUNNING!!!!!
Thank you for such detailed instructions....can't wait to make my version!
Thank you so much for sharing!
Wow!!!! What a wonderful piece! and a great idea. This is something I'm going to have to do!!!
Gorgeous! Thank you for the awesome photos too :) ~Alicia
This is absolutely stunning. Thanks for sharing the details. Just beautiful!!!
It's a wonderful creation, I love it
Thanks a lot to share with us
Kiss from France
Véro
Oh! Gosh! This one is amazing! I am working on and inside-out collage with a canvas and have only seen using the back side of a canvas twice. I am making an Alice in Wonderland collage using modeling paste for some of the 'scenery'. But this beautiful French confection is absolutely gorgeous! Thank you for the tutorial! (will there be a pdf.? Yes? Yes?)
Teresa in California
Que dire ? il me manque les adjectifs, c'est splendide, c'est un petit chef-d'oeuvre. Toutes mes félicitations. Bisous
Wow! Amazing! I love it!
Thank you for sending the link although I am now confused as to who Naomi is. Lol
But that doesn't matter. I got here & omg, seeing all these close ups, can't believe it's all part of ONE project ??
I am not going to even try to comment on all the aspects I am amazed by, would still be here days later.
Truly, every so often I use expression of "gob struck" - this is another of those. It is absolutely incredible!! Blows me away. To be honest it will take a few days to really absorb it all.
One of those works of art I can only dream of doing. So, enough gushing (do that a lot at this site, lol).
Now to save pics... Thank you!! Caroline :)))
Post a Comment