

Last month I created this tutorial for Gingersnap’s Creations as their muse for March. I thought I post it here in case some of you missed it.
VIDEO TUTORIAL – There is now a YouTube video tutorial for this project. The video also covers 5 other altered tin projects. You’ll find the segment about this project at minute 12:59 in the video below.
WRITTEN TUTORIAL & SUPPLY LIST
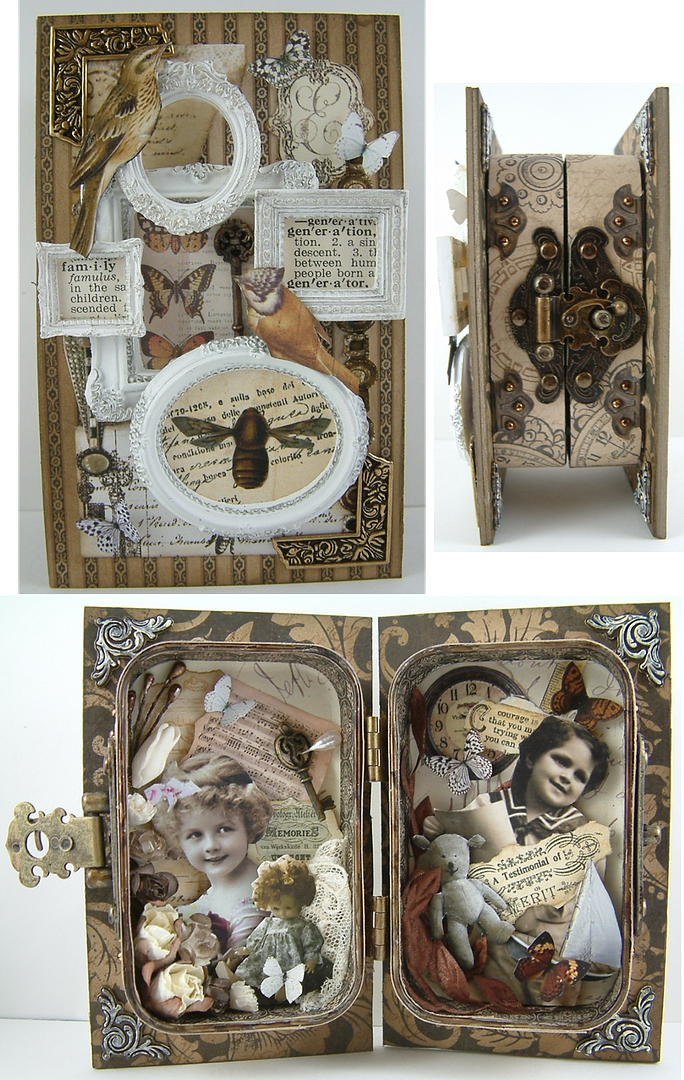
In this tutorial, I’ll walk you through creating a vintage Altoid’s Tin book using chipboard and two Altoids tins. The fun part of this project is that by hinging two tins together it creates niches that you can load up with all kinds of embellishments.
What You’ll Need
Chipboard
Two Altoids Tins
A glue that works with metal – I used Glossy Accents
A tacky paper glue – I used Tombo Multi
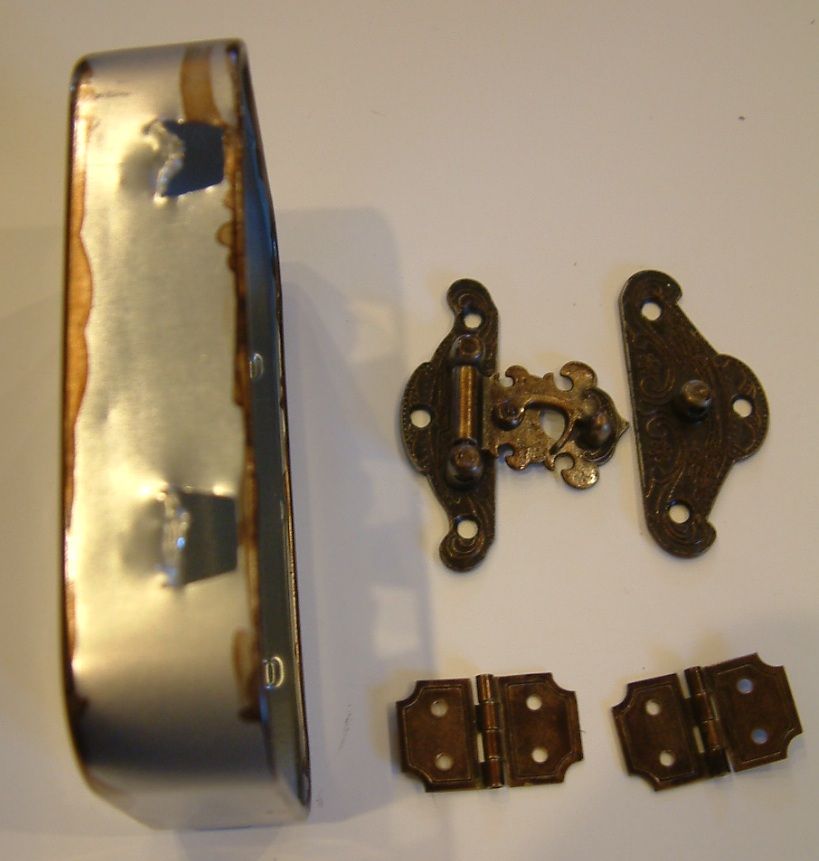
One large or two small hinges
A latch
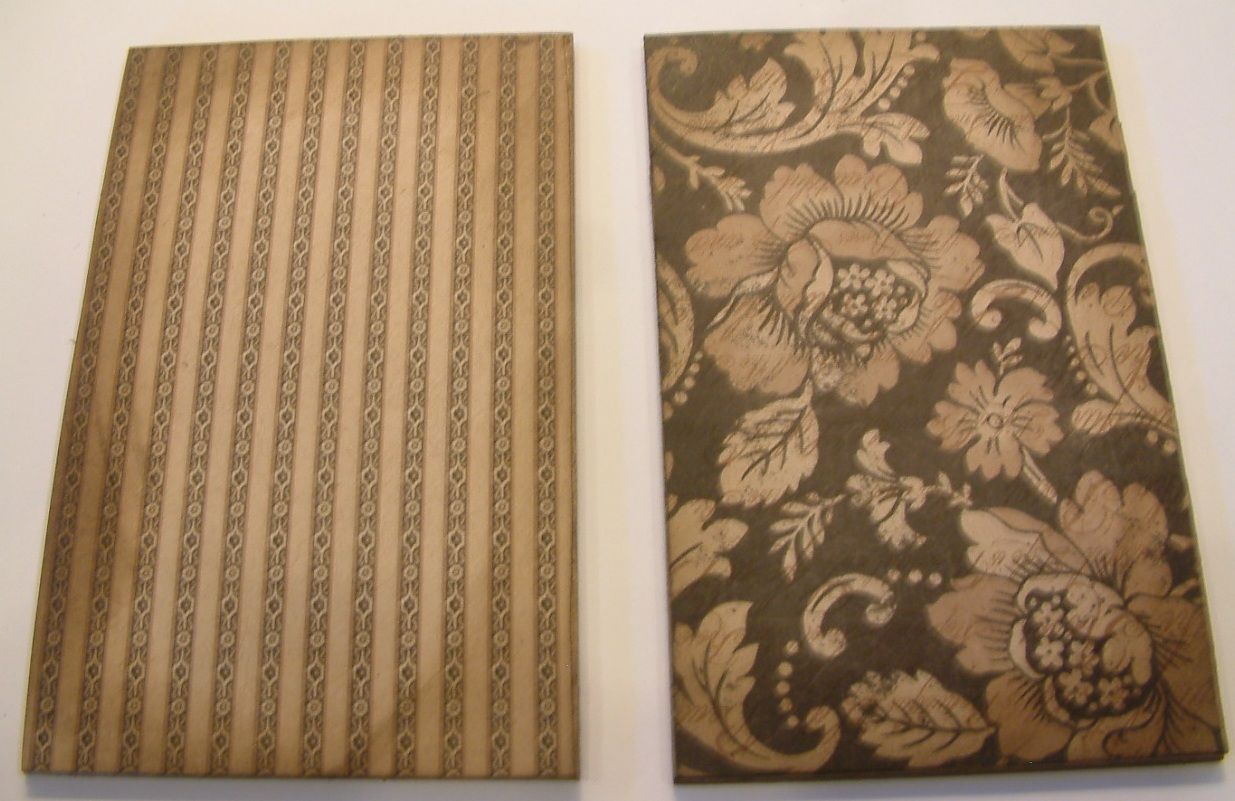
Decorative Paper
Staz-on Ink or Ranger Alcohol Inks
Pencil
Ruler
Scissors
Paper Cuter
Embellishments and Ephemera
Vintage Images
GATHER YOUR SUPPLIES
Start by collecting paper, embellishments and the vintage photos you want to use. You can see in the image below that I’ve pulled several items that I thought I might use for my book.

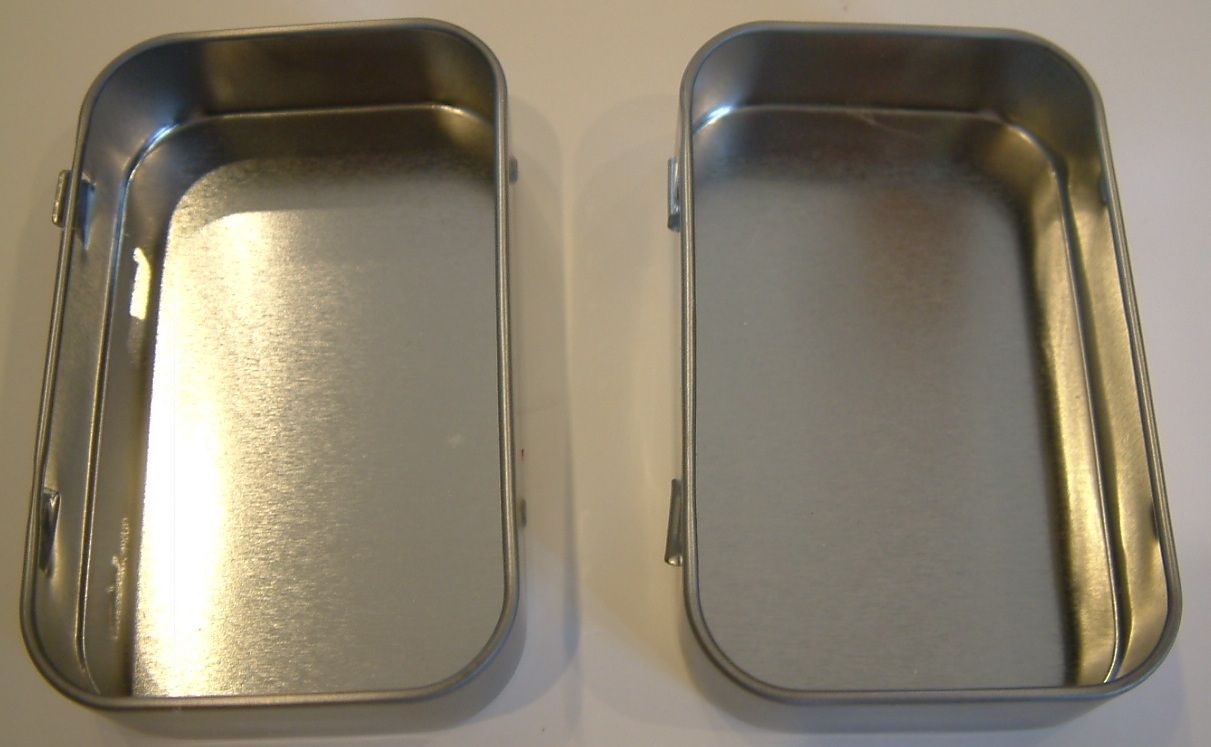
THE TINS
I used blank Altoid’s tins for my book that measured 3 11/16" long by 2 1/4” wide by 3/4" deep (without the lid). I purchased my tins at Alpha Stamps. All the measurements in this tutorial are based on these tins. You can use any tins you like just as long as you have two of them.

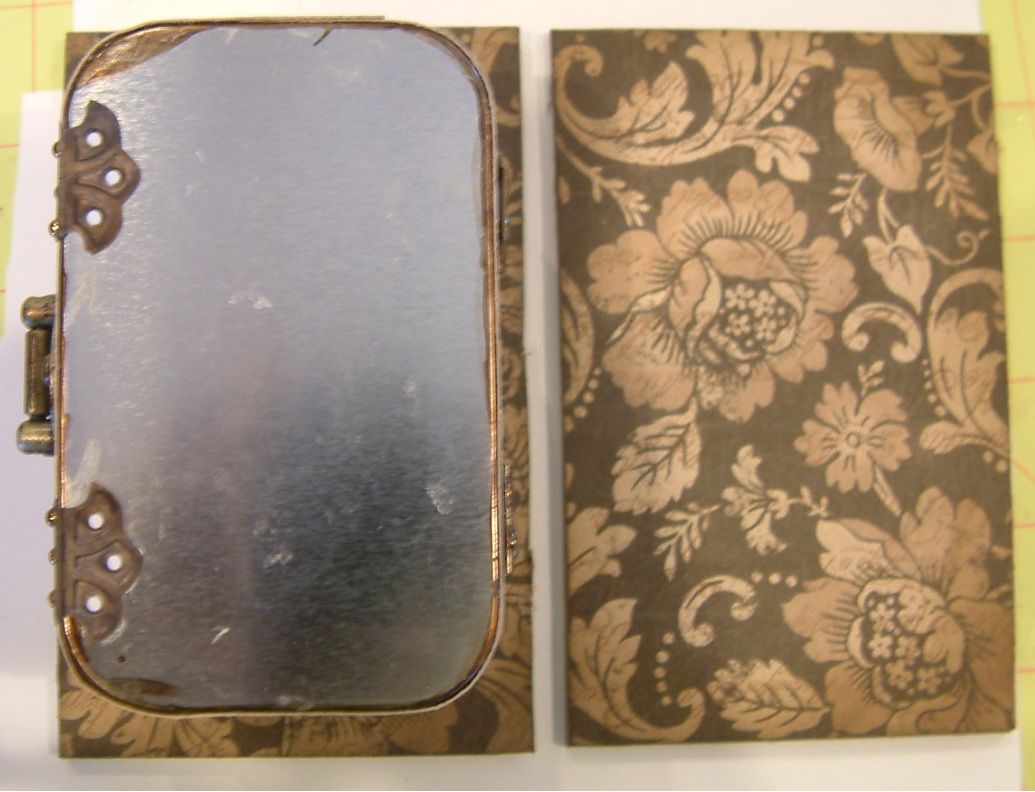
First, remove the lids from the tins and set them aside. You will not need them for this project.
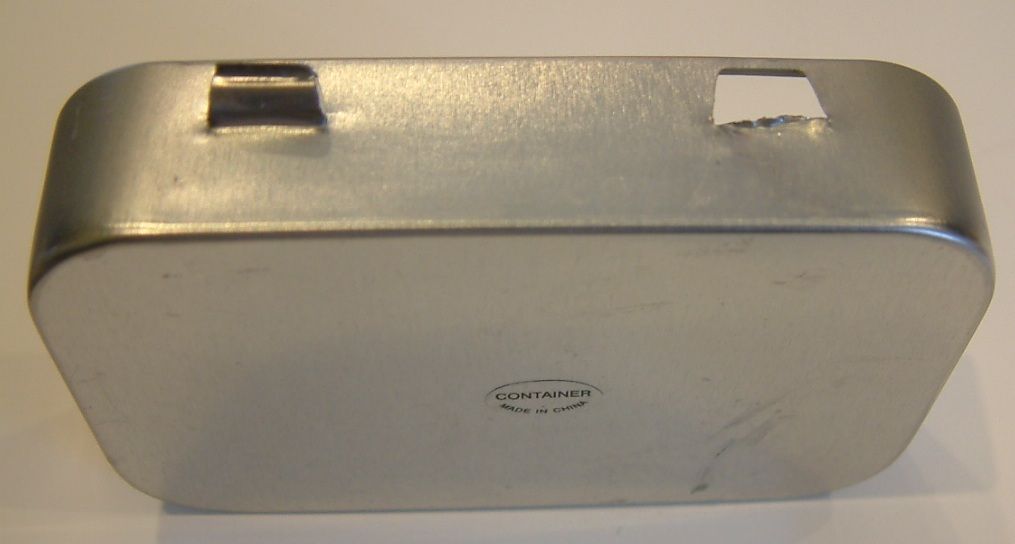
Next, either snip off the hinges or bend them flat. You will be covering the sides of the tin with paper so you don’t want the hinges sticking up.
You’ll be covering most of the surface of the tin with paper except for the edges. Ink the edges of the tins using Ranger Alcohol Ink or Staz-On. Both products adhere to metal. You can always choose to keep the original color of the tin if it works with your color scheme. I used Mushroom Ranger Alcohol ink to color the edges of my tin, my hinges and my latch.
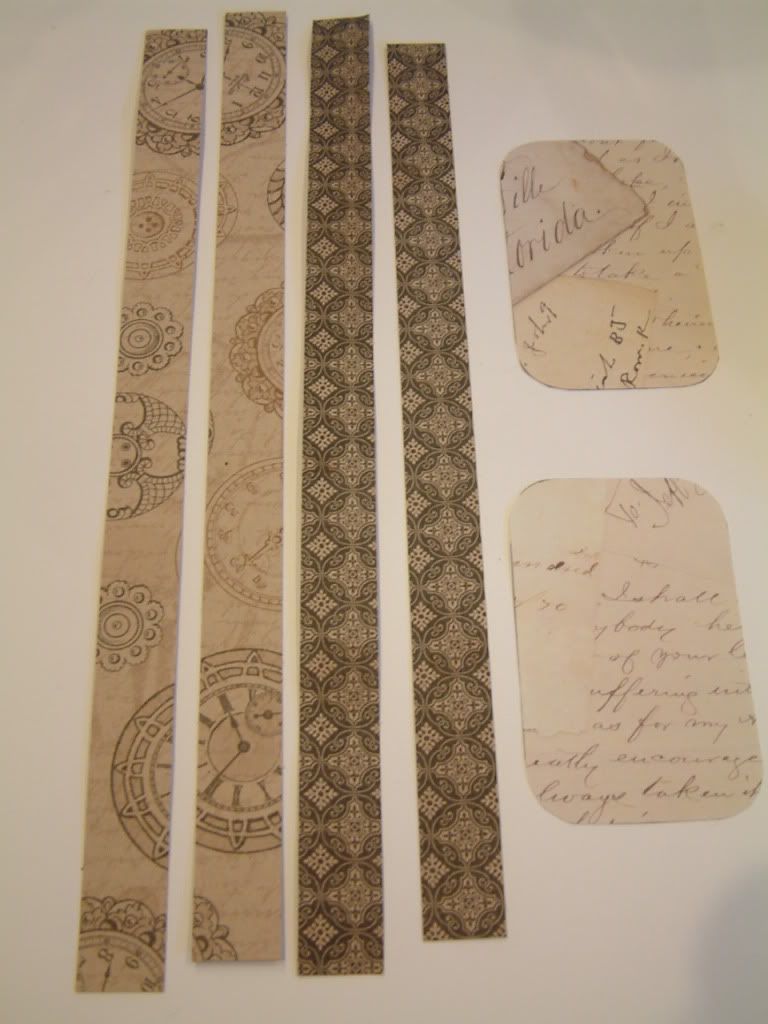
You will be covering the outside sides, the inside sides and the inside bottom of the tins with paper. You don’t need to cover the outside back of the tin with paper as it will be glued to your covers. If you are using the same tin as I did, then below are the paper measurements:
Inside sides – cut two strips of paper ¾” wide by 12” long.
Outside sides – cut two strips of paper ¾” wide by 12” long.
Inside bottom - Use a sharp pencil and the bottom of the tin as a template. Trace the shape on your paper twice and cut.
Glue the paper to the tins. To glue the paper I used Tombo Multi glue which is a very tacky paper glue. Glue the strips to the outside of the tins. Next glue the strips to the inside of the tins, and lastly glue the paper to the bottom inside of the tins.
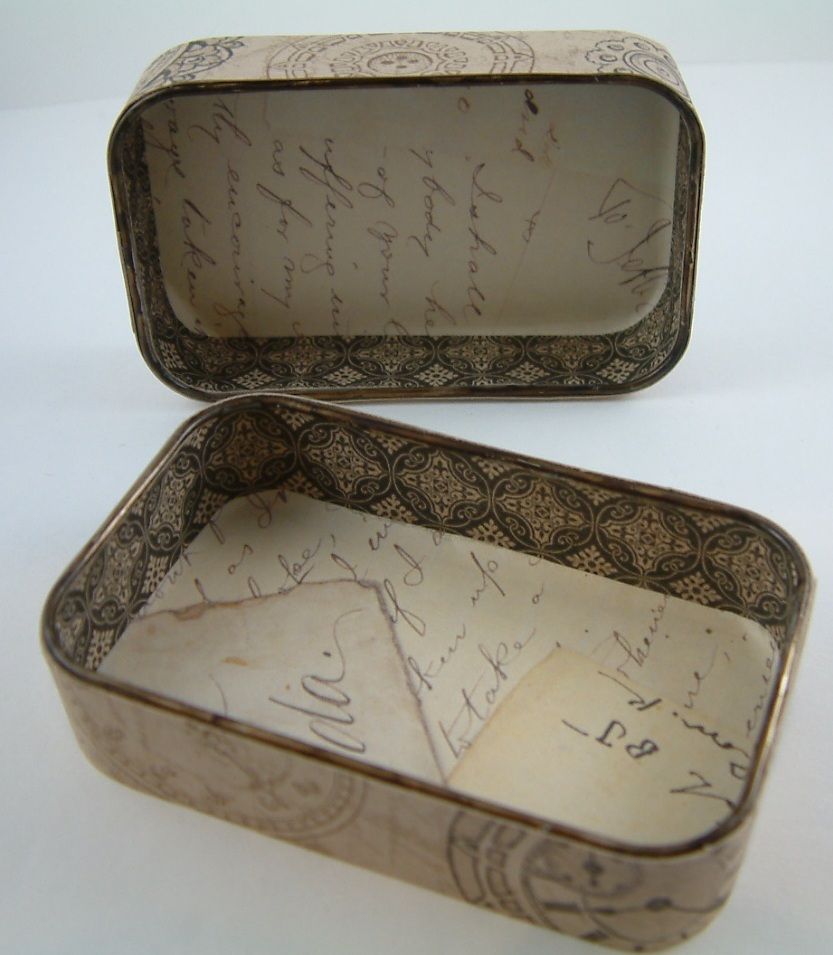
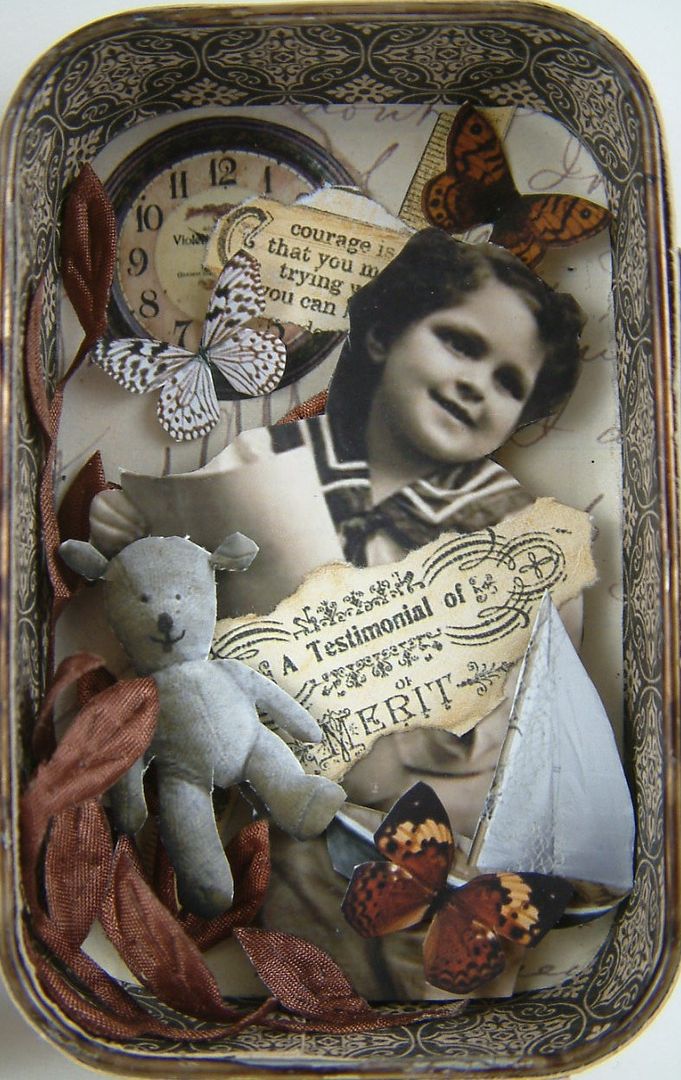
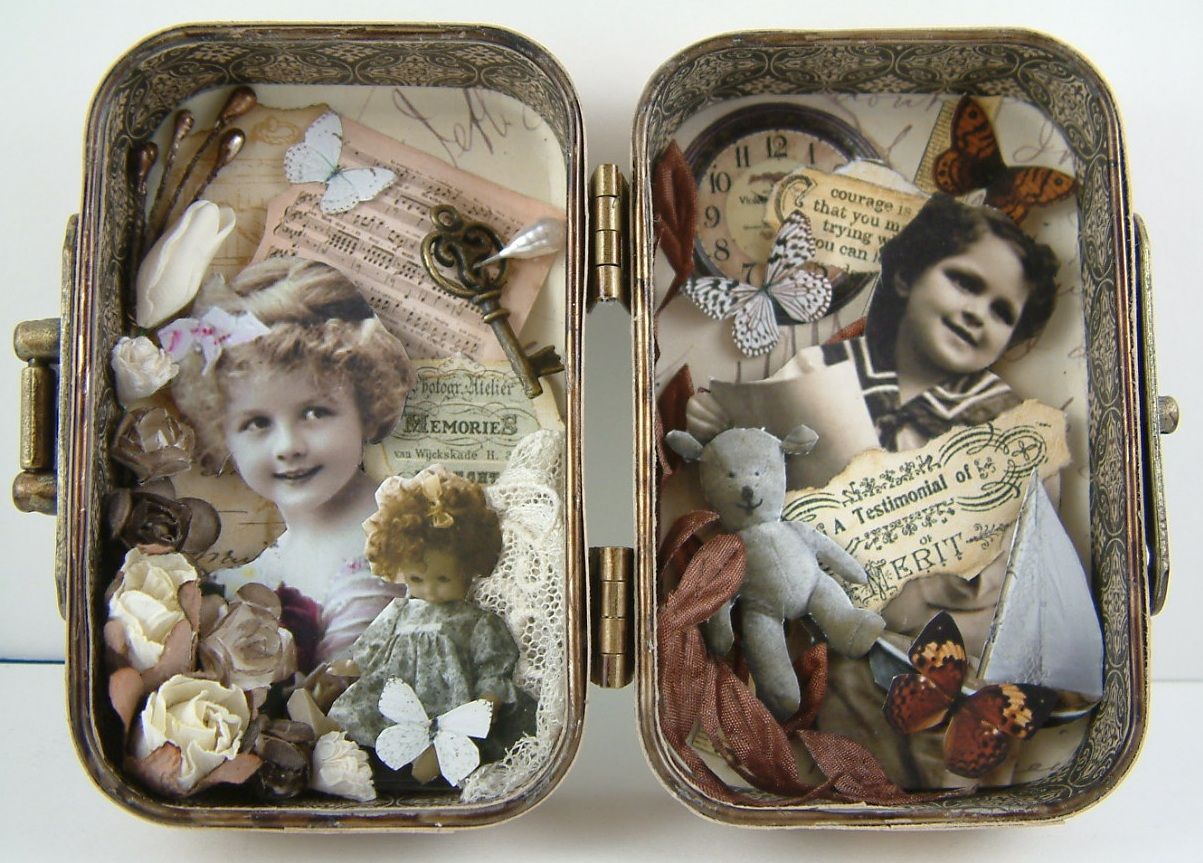
Decorate the insides of your tins. I started with the background elements.
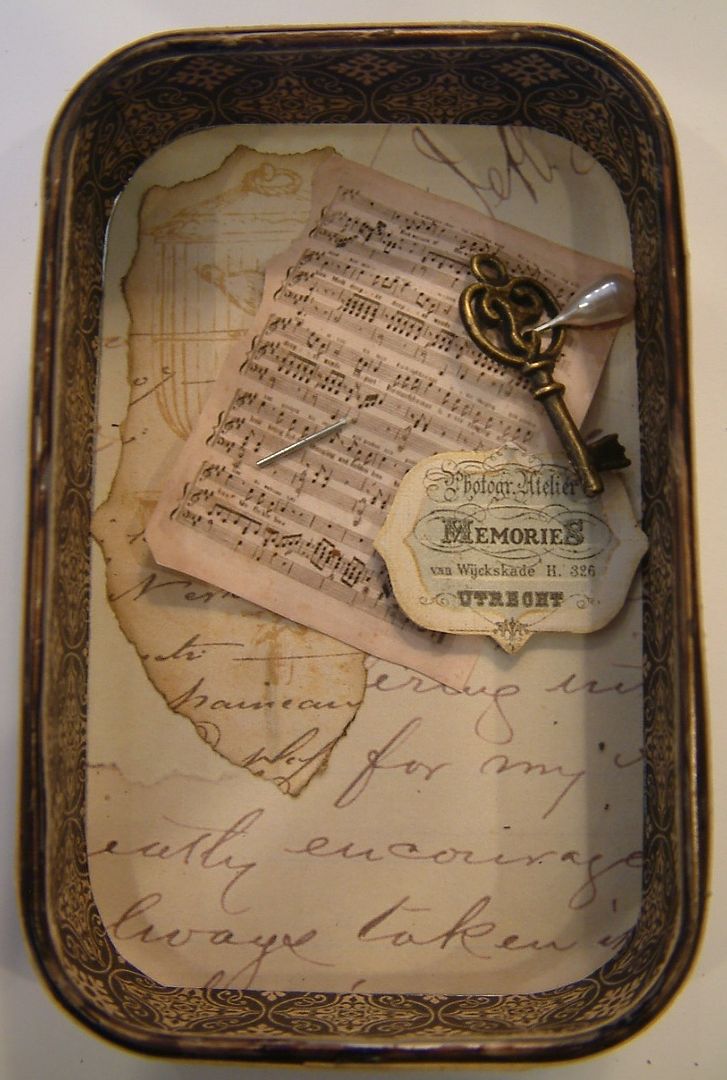
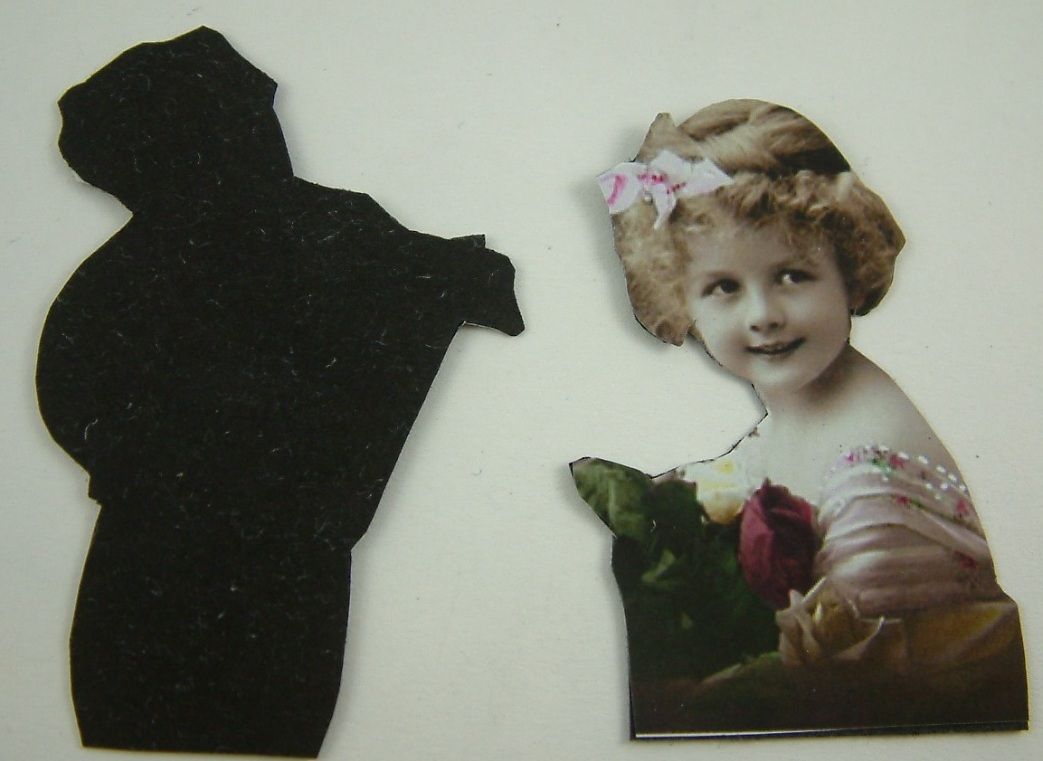
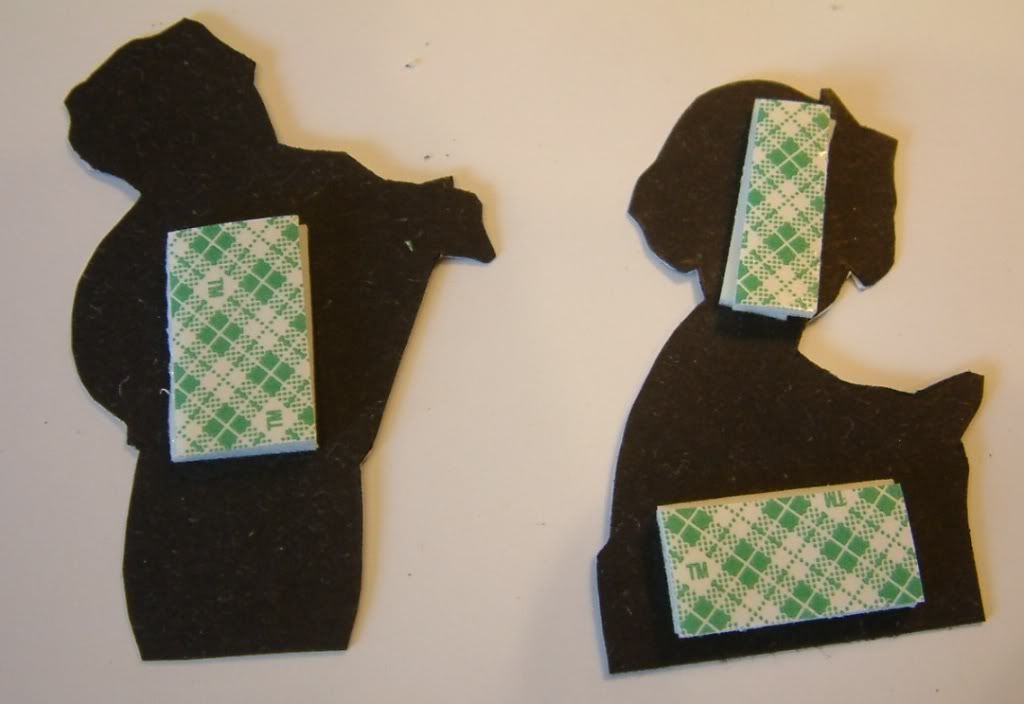
Next, I prepped my pictures. To popup the images, I first backed them with heavy cardstock for support and then added two layers of double stick tape.
After adding my photos I added images and dimensional embellishments.

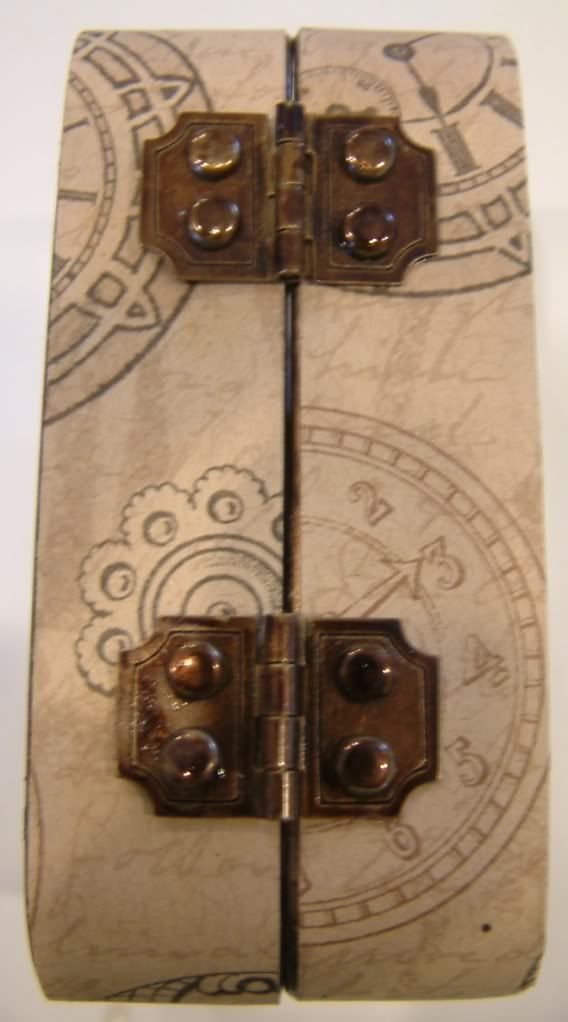
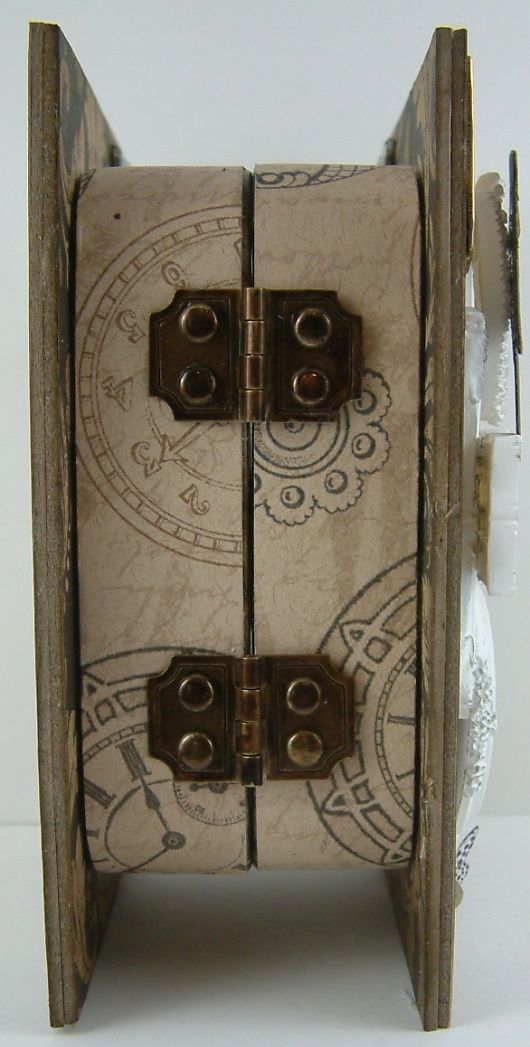
To attach the tins, put your tins together with the decorated insides facing each other. Attach your hinge or hinges to one side of the tins. I used Glossy Accents to glue on my hinges. Be sure your tins are facing the right direction and that you are gluing your hinges to what will be the back of your tins. You don’t want to glue on your hinges, then open the tin, only to find that one of the tins is upside down or the tins are hinged on the wrong side (been there, done that).

Once the glue from the hinges was dry, I glued brads with the prongs removed, to the holes on the hinges. The brads are colored with Mushroom Alcohol Ink.
On the front side of your tins (opposite side from where you glued the hinges) glue a latch to your tin. Another option for a closure is to use ribbon. Glue ribbon to each undecorated back of the tins (in the middle of the tin).
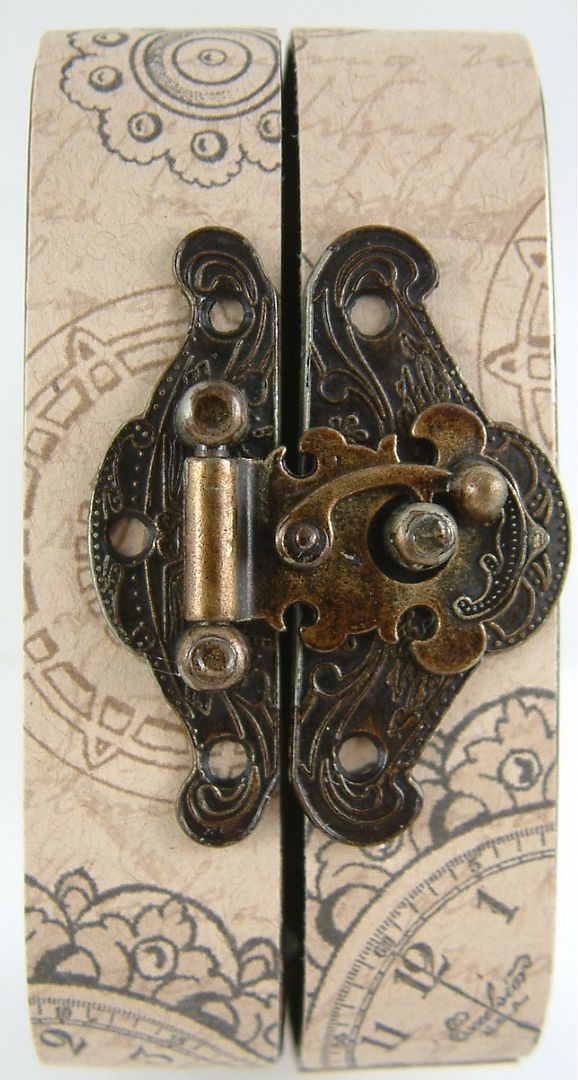
For additional decoration I added paper hinges and brads with the prongs removed to the holes on the latch and paper hinges.

Below are the finished hinged tins with latch.
THE BOOK COVERS
For the front and back book covers, cut two pieces of chipboard that measure 3” wide by 4 3/4” wide. The covers will be about 1/2” larger than the tins on each side. If your chipboard is thin or you just want thicker covers you can glue layers of chipboard together. You want the covers thick enough that they won’t bend when you stand up the completed book.

Cover your chipboard with decorative paper on both sides. You can add flat elements at this stage like images, rub-ons, stamping etc. but don’t decorate the covers with dimensional embellishment as it will make assembling the book harder. In addition to covering my chipboard with paper, I also inked the edges with Ranger Distressed Ink.
Assemble the book by gluing the tins to the chipboard covers. Start by gluing the tins to the center of the front cover. Next, glue the tins to the center of the back cover. Before gluing, make sure that your covers and tins are facing the right direction. I used Glossy Accents to glue my covers to the tins.
Decorate the front cover. I started with bits of paper ephemera to create a frame.
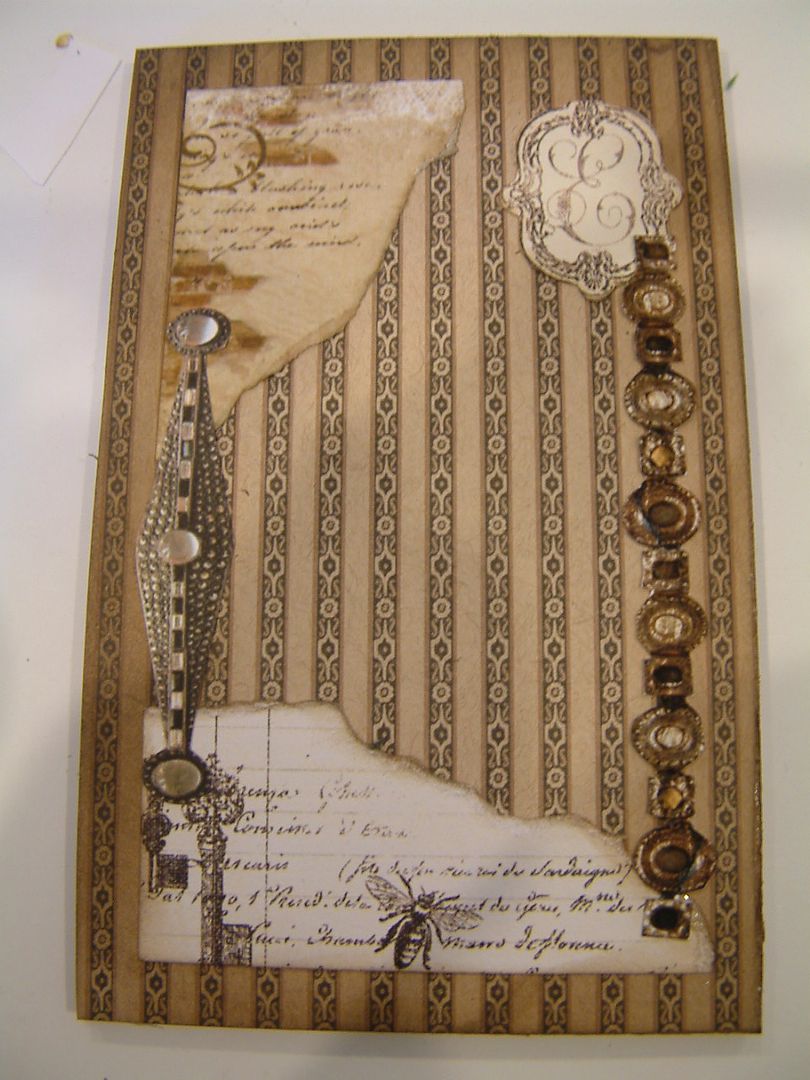
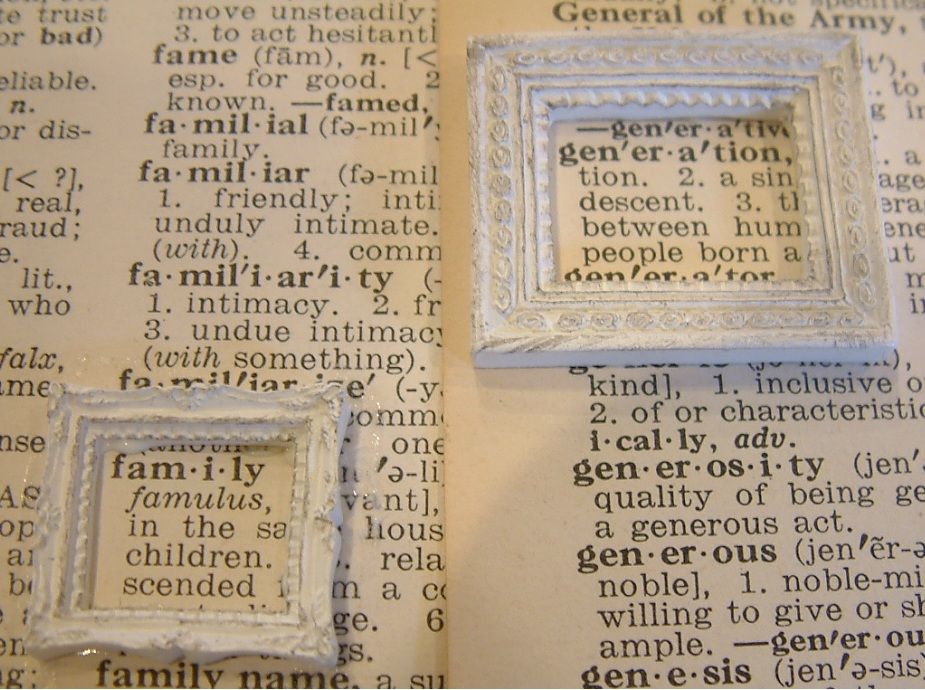
I glued resin frames to words from a vintage dictionary.
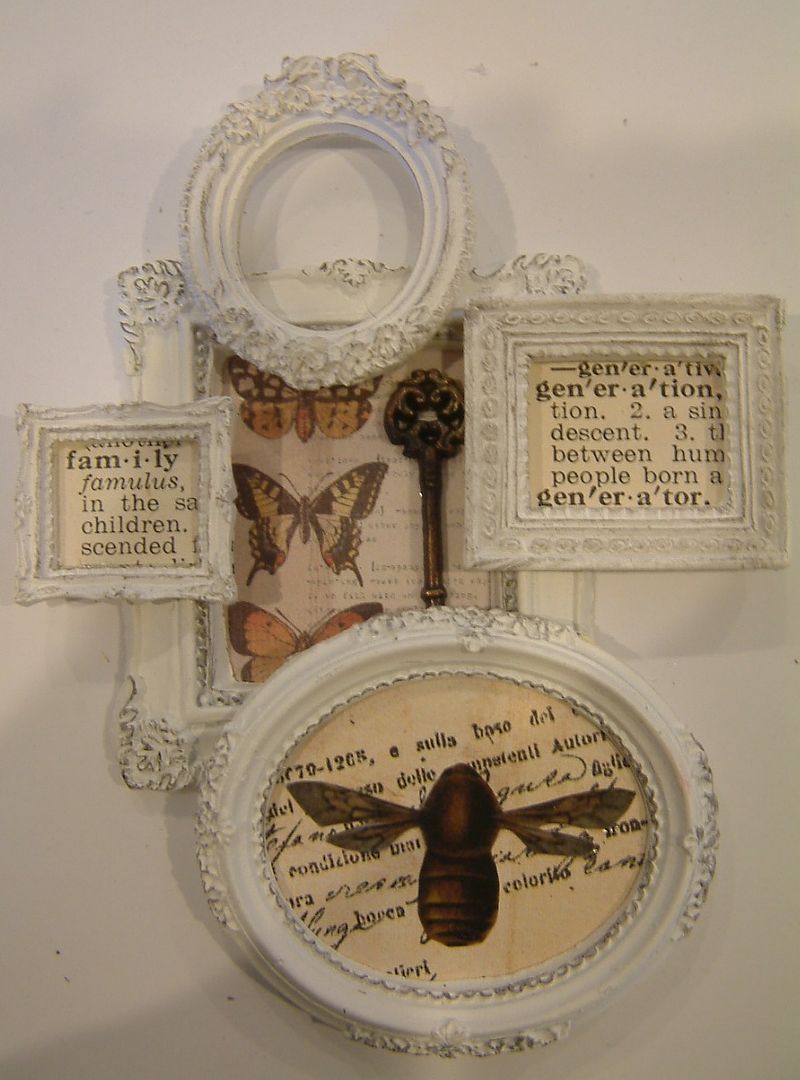
I collaged together resin frames, paper ephemera and a metal key.
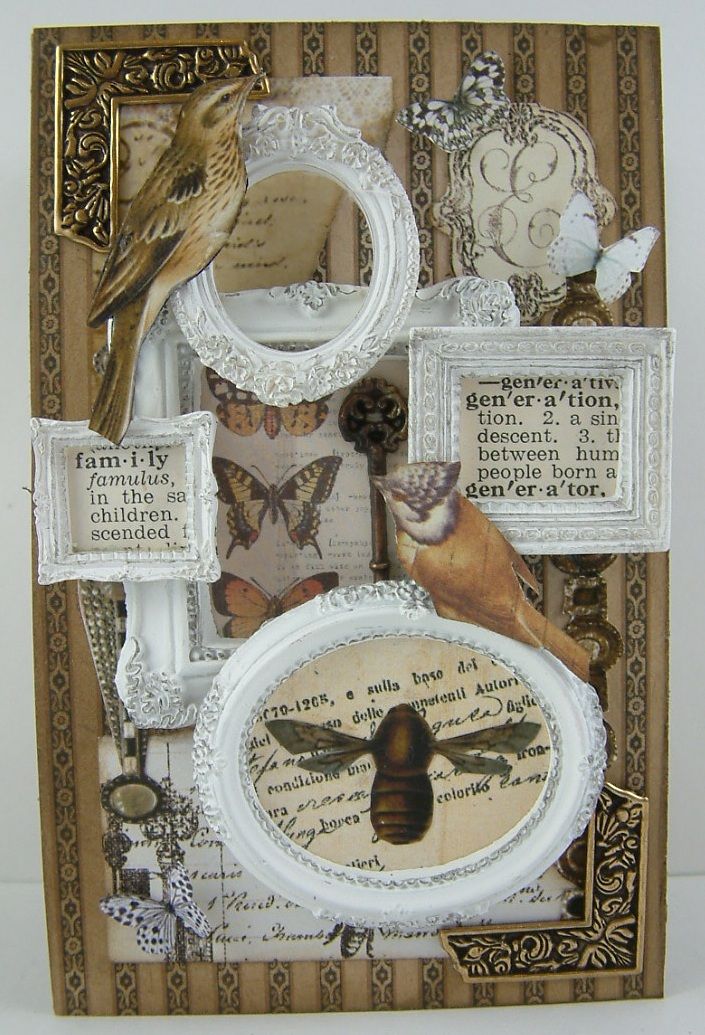
After attaching the resin frame collage, I added other paper and metal elements to finish the cover.
Finished Front Cover
You can also decorate the back cover, inside covers and outside of the tins if you wish. Just make sure that anything you add does not get in the way of opening and closing the book.
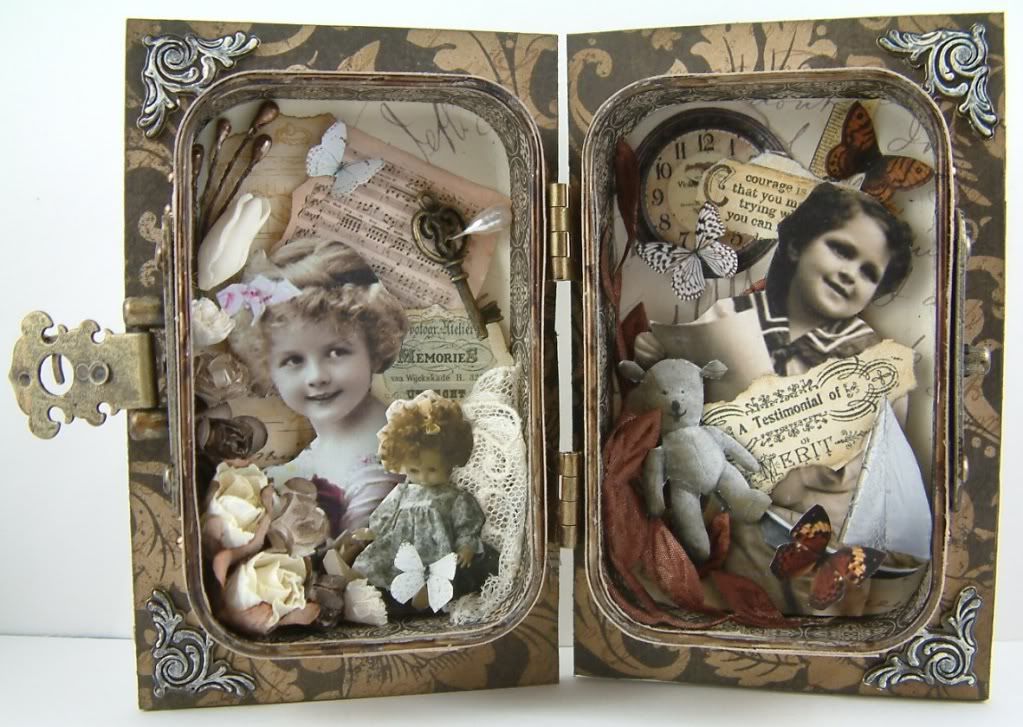
Finished Inside
Finished Latched Side

Finished Hinged Side
36 comments:
Hi Laura,
Wow really love this it is a beautiful place to keep that special small keepsakes. Thank you so much for sharing and including a PDF version of the tutorial as allot of trainers are unaware that there is a whole other market out here on the web of people who are hearing impaired. So subtitles and PDF's are really fab. Hugs Julz
Thanks so much for this. I've learned a lot from your blog and have been inspired loads. Thanks! :)
Thank you so much for a wonderful tutorial!!
Hi Laura, I love this, thank you for sharing your tutorial. Your work is amazing! This would be a wonderful swap with our group. I hope you are doing well, have a wonderful day. Hugs, Terri
I am MAD for this piece!!! Thank you for the tutorial. I will be making this as soon as I get home from work!!! I LOVE IT!!!!
Laura -
Thanks for posting this on your blog. It is just such a wonderful piece. I really love this.
Elaine Allen
Dear Laura, you are an amazingly talented artist, how very beautiful, -and thankyou for posting your tutorial,- this box is so lovingly made,so wonderful.
Hugs,Dorthe
I love your beautiful book! Wonderful tutorial!
That is just plain too cool for words! Simply amazing!
Thanks for the inspiration!
Rose
Laura I so appreciate your Tutorials. I have pinned this on pinterest and hope you gain many new followers. Your work is amazing! I can't wait to get started on one of these I have been saving some Graphics 45 paper that I know will be just wonderful for this project. Have a wonderful weekend.
XXX
Becky
your tutorials are amazing Laura as is your stunning art, I'm following the fan tutorial at the moment....nearly finished. I am so going to have to have a go at this now.....
many thanks
hugs
Thanks for this amazing tutorial. I use old sardine tins (cleaned of course) and love making small pictures with them. I am now following you, thanks again.
I love this! Thank you so much for sharing this tutorial...your work is wonderful. Where did you get that tiny music sheet that is on the left inside tin? It is adorable.
Hi Laura, looked through your tutorial wityh great pleasure and amazement - you always to take things just that little bit further! Thanks for sharing, now where did I put that altoid tin...
Cindy
So cute!
This is so adorable! My little girl loves collecting "treasure boxes" so this would be perfect for her. I'm really impressed with the hinges you put on it. Was it hard to find the right size?
Thanks so much for sharing your beautiful art work. Absolutely gorgeous.
DianeD
just beautiful!!! where did you find the latch? I need to get over to alpha stamps and get me some supplies! :O)
Oh my gosh, Laura, what an amazing piece of art you've created! Truly a treasure to behold... I love how easy to follow your tutorial is (thank you!) - but then, you make everything look so easy ...lol... and somehow, my pieces never quite look as gorgeous as yours! :)
Laura, your tin is so beautiful! Thank you for sharing this wonderful tutorial.
Je suis en admiration, merci pour ces explications. Bisou
I absolutely adore this piece, dear Laura! Really great art work!
Oh My Gosh! Absolutely Love this beautiful tin book! And thank you so much for sharing with instructions too! Can't wait to make mine!
Thank you!
I totally adore this work of art !!!
What a generous heart to share a tutorial such as this ... absolutely beautiful work as always Laura.
Stunning work, thanks sooooo much for the tutorial.... Fabulous.. Hugs May x x x
Love this, cant wait to make an altered tin...you are so very inspiring to me! Please also enter me into your contest! Thanks...Robin
Laura, you create the most beautifully inspiring pieces!
Thank you so much for your generous and detailed tutorial. Beautiful project!
Wow, I love this. Thanks for the tutorial, I can't wait to make one!!
Thank you so very much! Laura! For this amazing pdf. for the Altoid book. It is so very special!
hugs,
Teresa in California
thank you so much for sharing this! I can't wait to make one...
Hugs,
Beth P
I love written tutorials. Well done. Your work is stunning. I can't wait to give this a try. Your colors and creativity are simply beautiful. Thank you!
This is the best mint tin upscale I have ever seen. Great job. Thank you for sharing.
Love this! It looks so vintage!
Post a Comment