

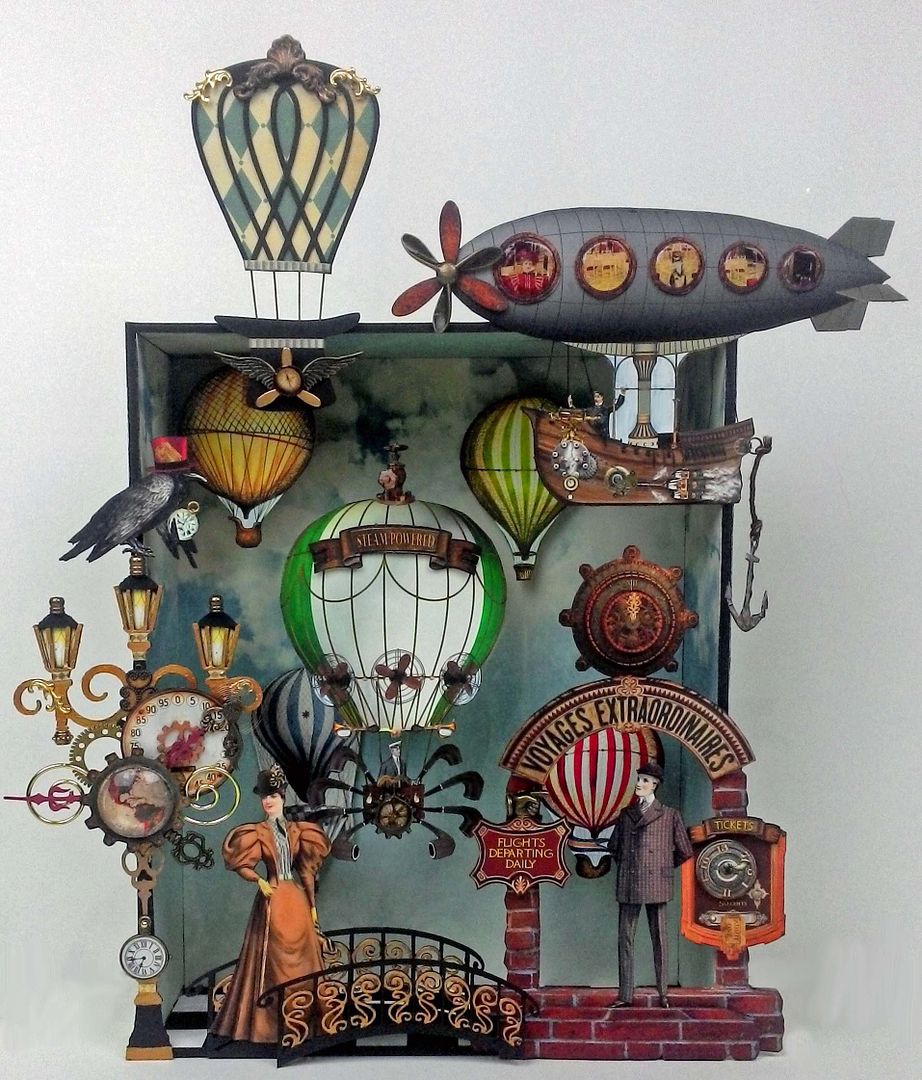
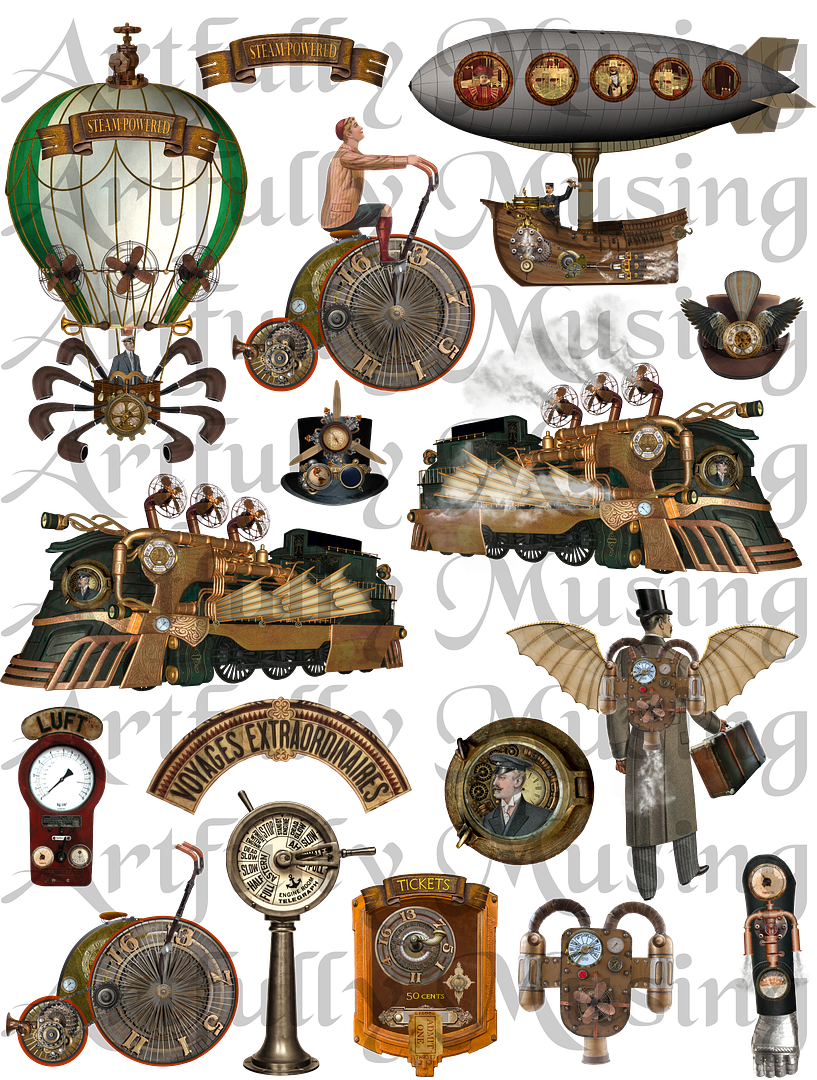
While planning your summer vacation you might want to consider taking a “Voyage Extraordinaire”. Several modes of transportation are available, all steam powered. You could travel by dirigible, balloon, steam-powered flying backpack, flying bicycle or flying train.

All modes of travel depart from either the Skyport or Train Station.
Looks like both the Skyport and Train Station are busy today.

Have I piqued your interest? If so, I have two steamalicious projects for you along with 5 NEW Steampunk Themed Collage Sheets and 3 NEW Digital Image Sets. The sheets and image sets are loaded with the images I used in these projects. First, I'll cover the new images and then I'll walk you through how I constructed the Skyport and Train Station.
NEW COLLAGE SHEETS
Both of the projects in this post feature the new images. All of the images in the collage sheets are in one of the digital sets. Plus each of the digital sets contains images that you won’t find on the collage sheets. I’ve also added multiple sizes of many of the digital images to the kits.
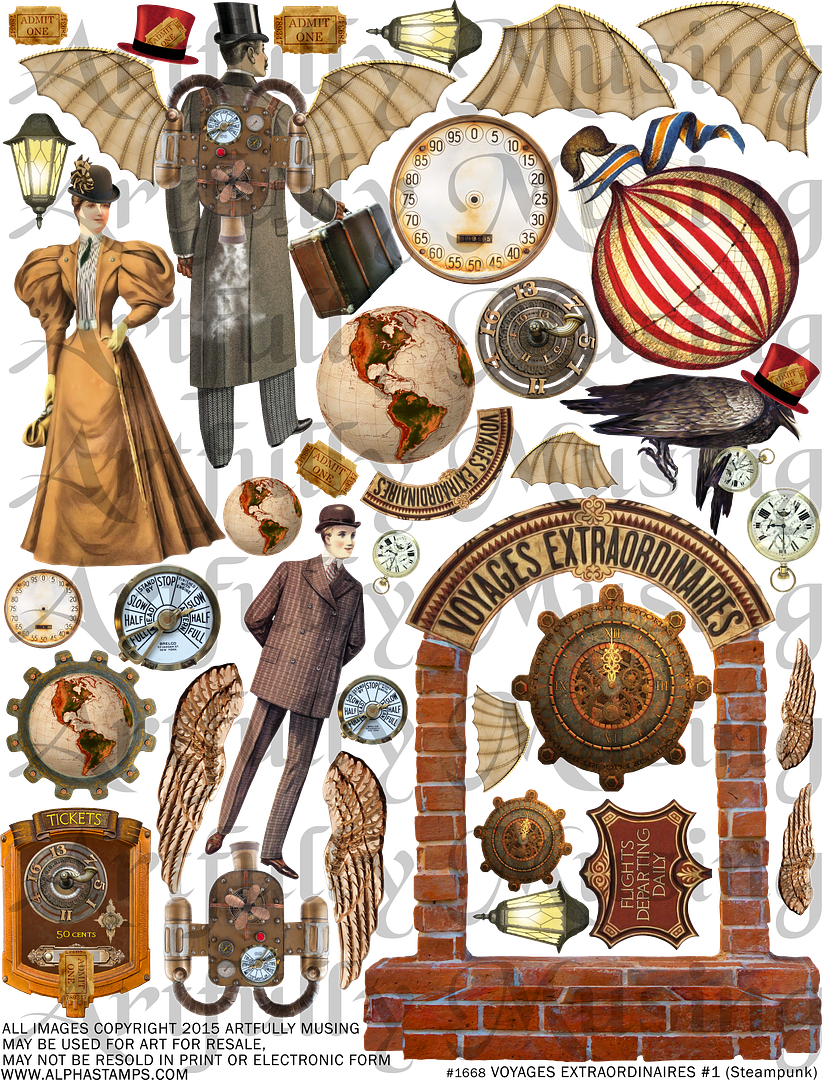
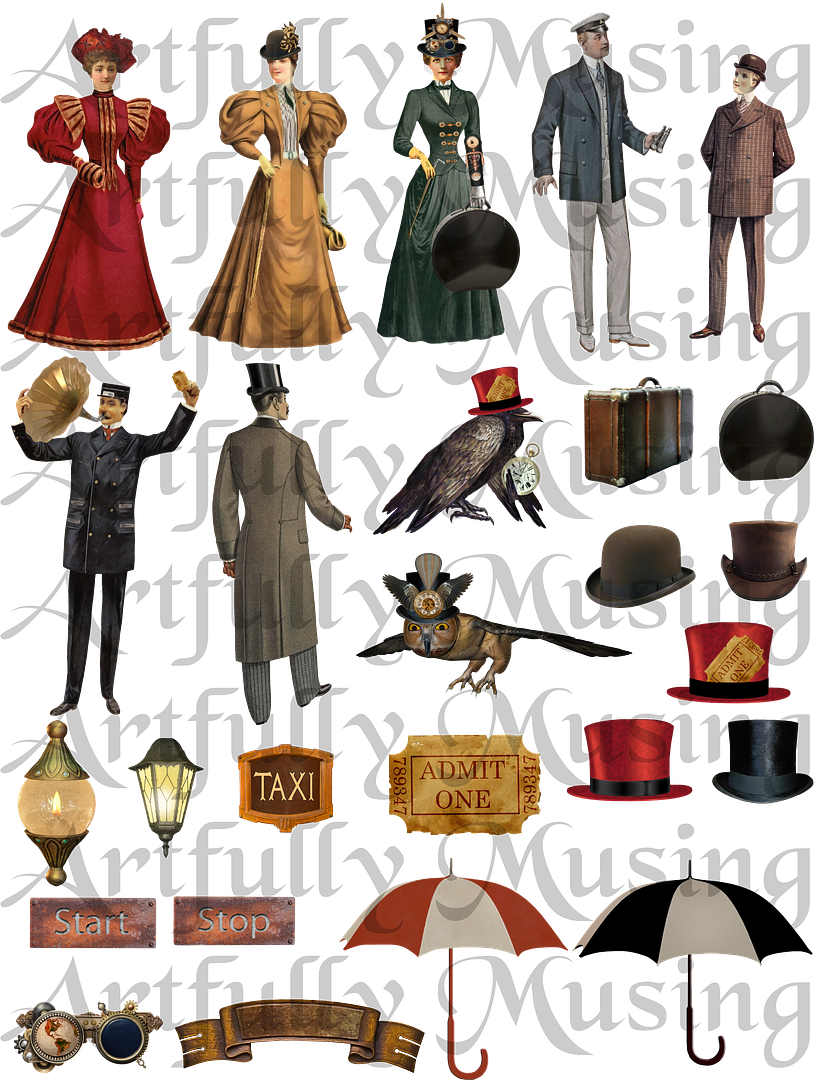
VOYAGES EXTRAORDINARIES #1 Collage Sheet
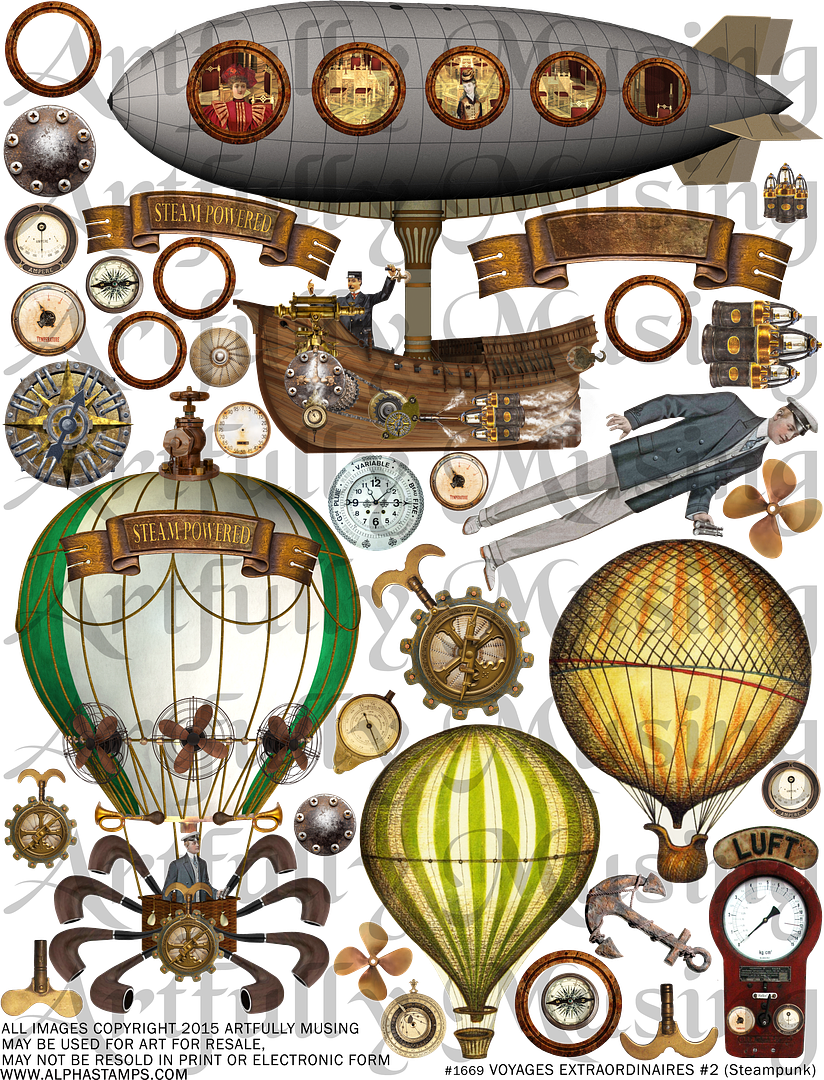
VOYAGES EXTRAORDINARIES #2 Collage Sheet
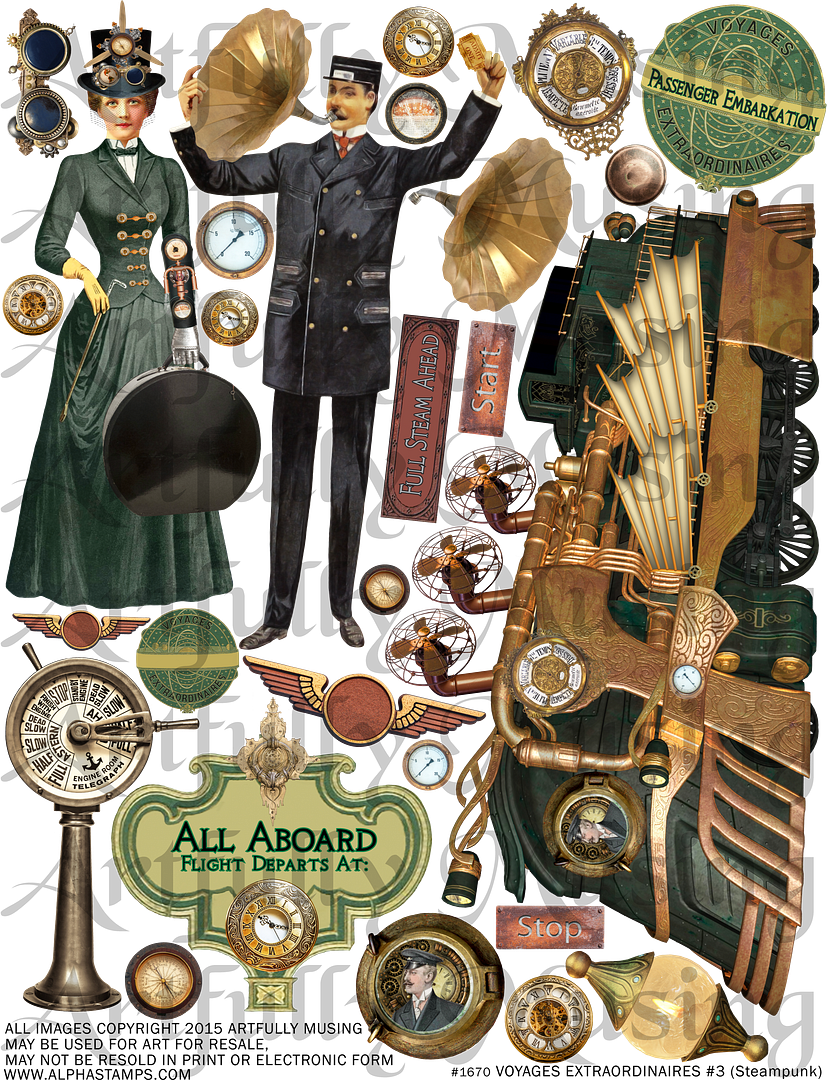
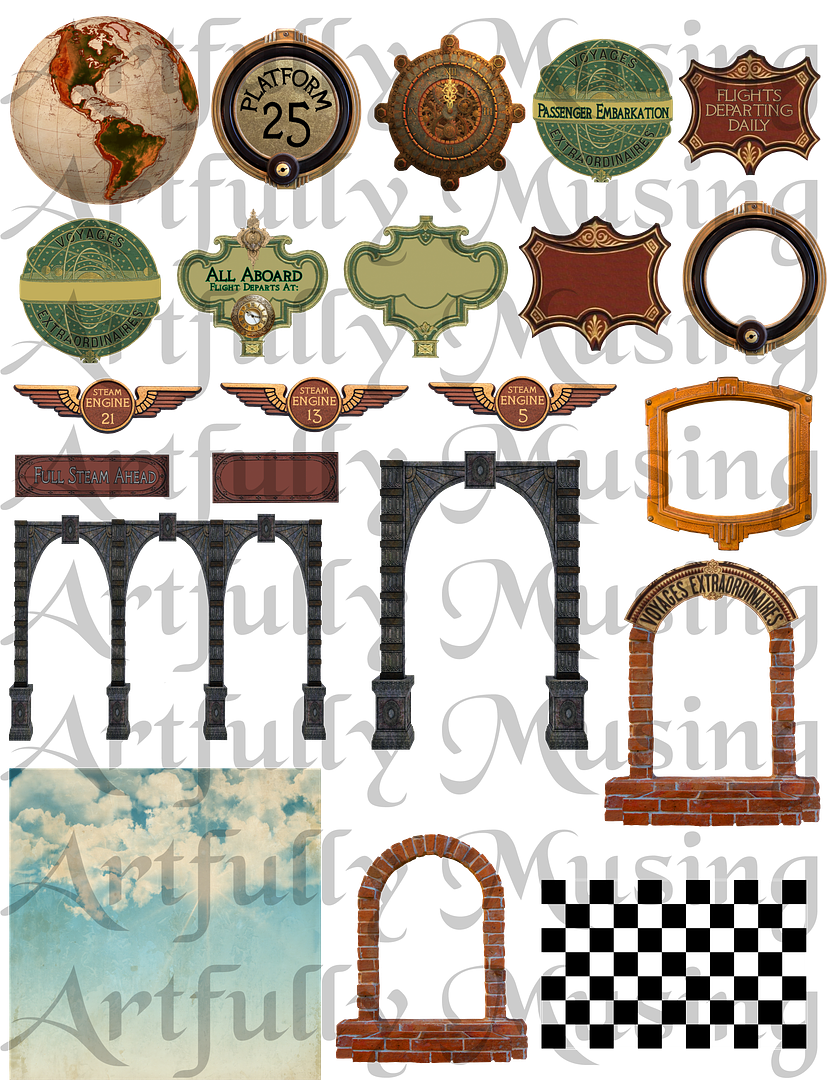
VOYAGES EXTRAORDINARIES #3 Collage Sheet
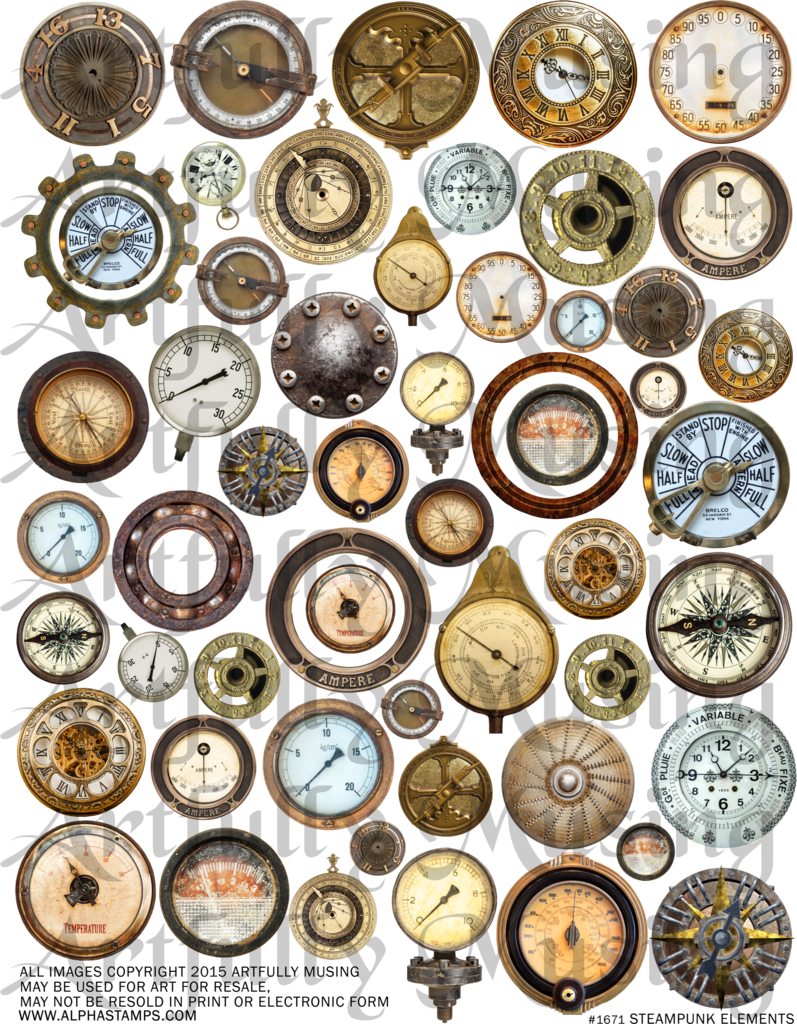
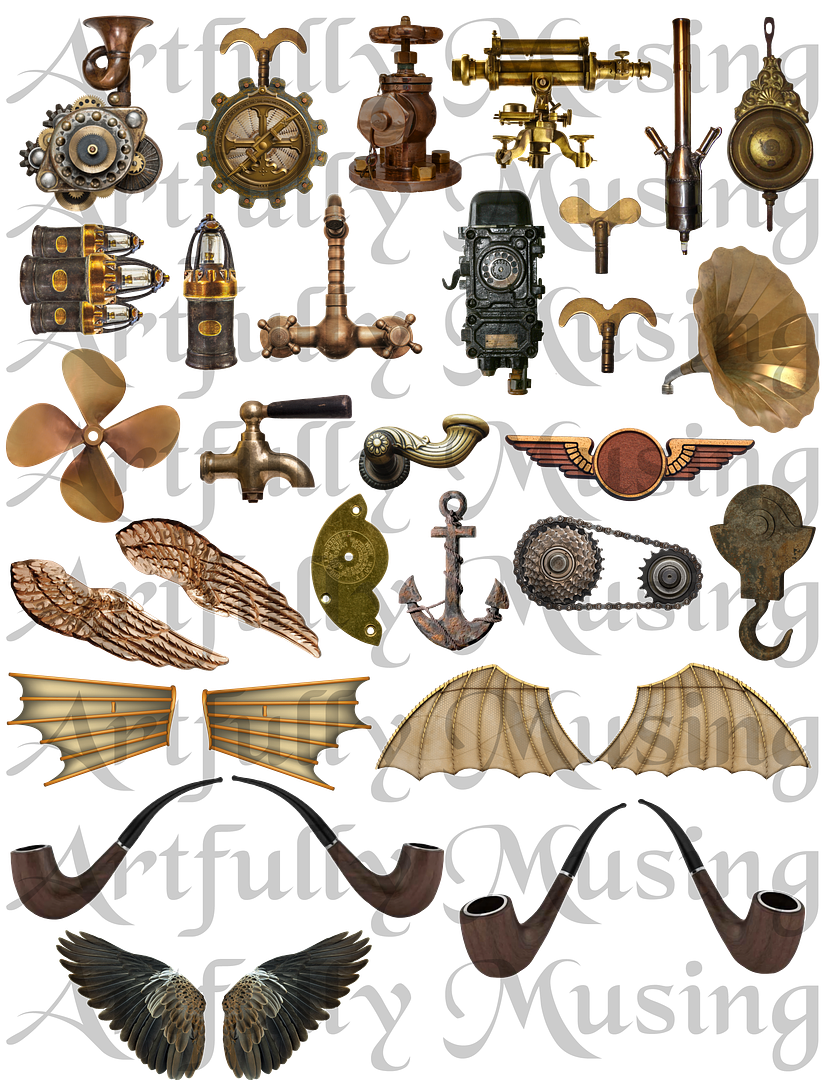
STEAMPUNK ELEMENTS Collage Sheet
UP, UP & AWAY Collage Sheet

NEW DIGITAL IMAGE SETS
Digital files can be resized, rotated or flipped as needed. The files are in a .png format. PNG formatted files have a transparent background making it easy to layer an image over other digital images. You can open .png files using graphics programs like Photoshop Elements. Digital collage sheets and digital images can be saved to your computer and printed as many times as you wish.
The kit includes most of the images on the three Voyages Extraordinaries Collage Sheets plus images that are unique to the digital kit. There are a total of 107 images with 65 unique images and 42 images that are a different sized version of some of the images.
The pictures below include the 65 unique images but not the various sizes of each of the images.
STEAMPUNK ELEMENTS
This kit is loaded with gauges, clocks, compasses, gears, wings, gizmos and more. The kit includes some of the individual images from the three Voyages Extraordinares Collage Sheets and images that were used to construct the machines in the Voyages Collage sheets. It also includes the images from the Steampunk Elements Collage Sheet. The kit also contains images that are not on any of the collage sheets.
There are a total of 132 images with 69 unique images and 63 images that are a different sized version of some of the images.
The pictures below include the 69 unique images but not the various sizes of each of the images.

UP, UP & AWAY
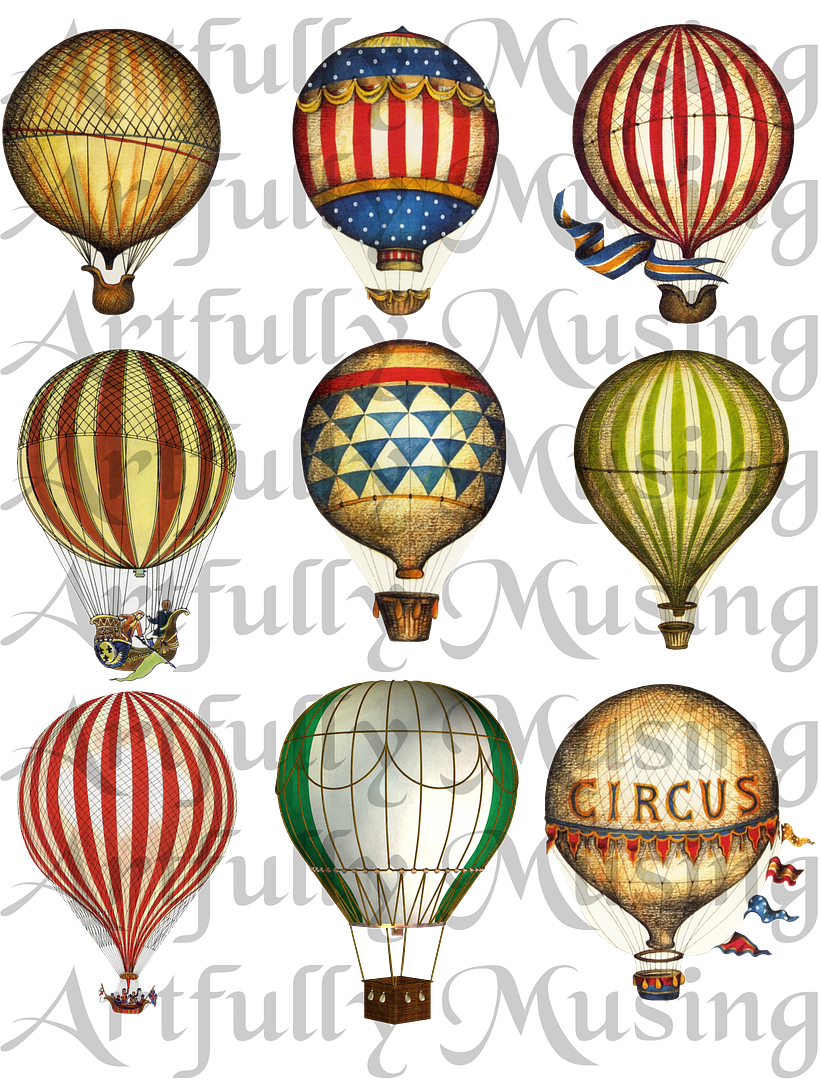
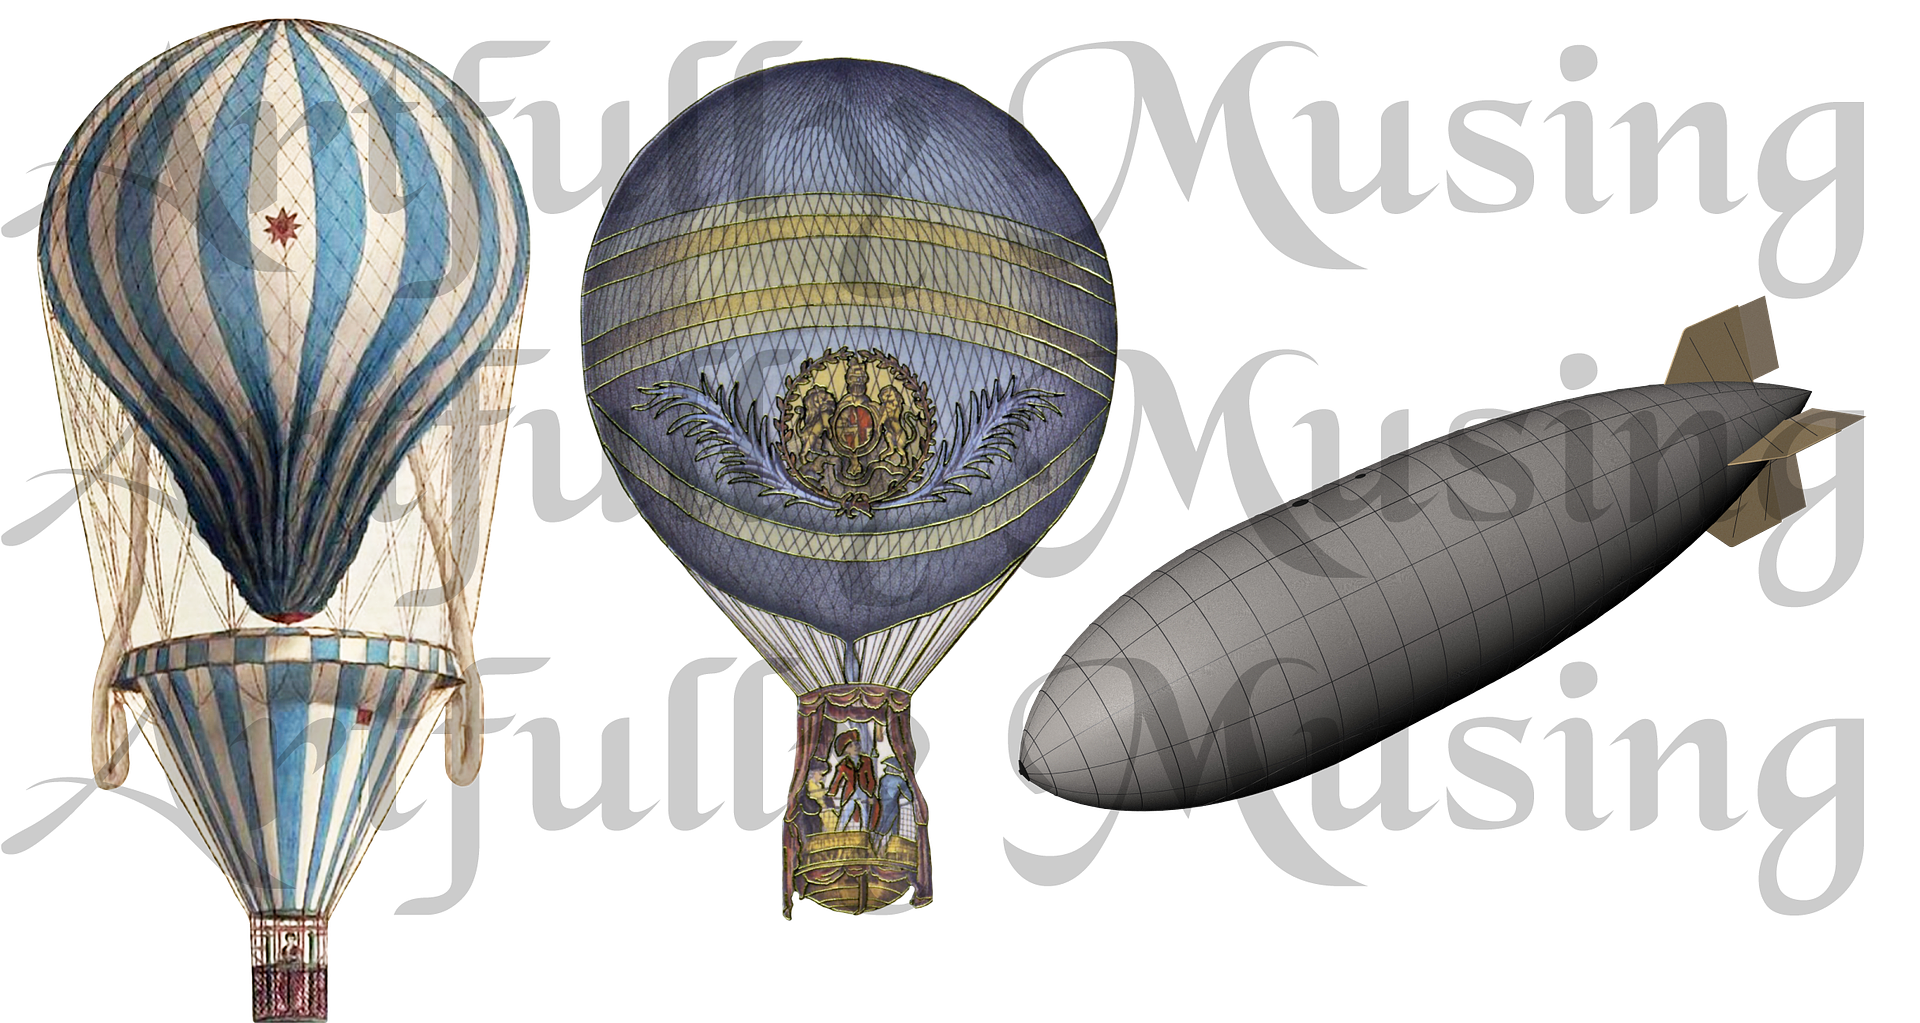
This kit includes 11 balloon and dirigible images. Some of these images are on the Voyage Extraordinares Collage Sheets and some can only be found in this kit.
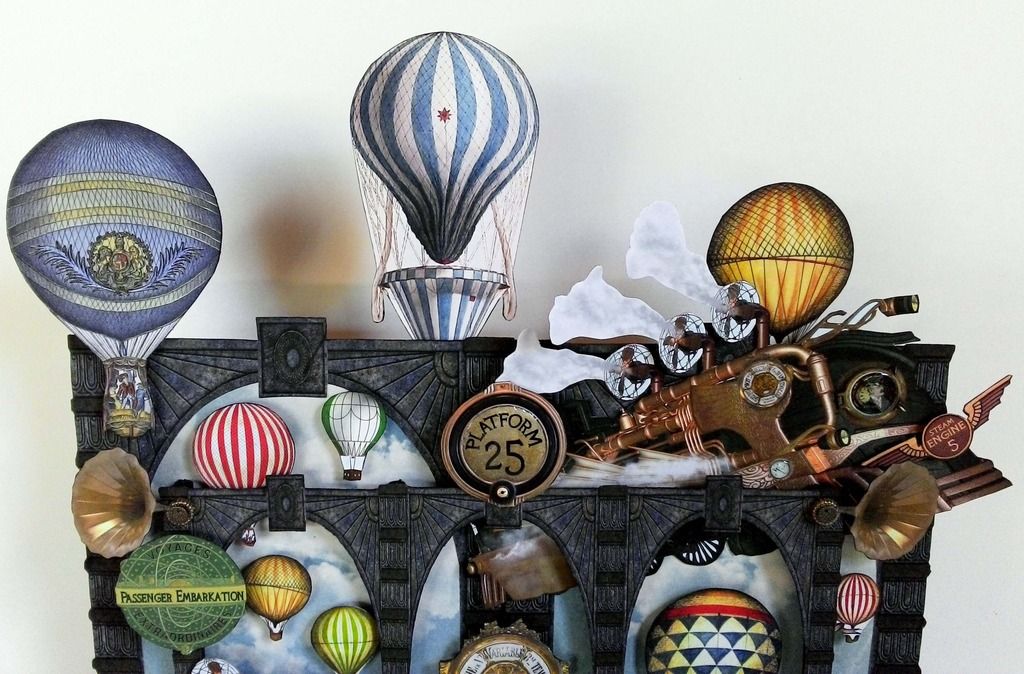
SHADOWBOX SKYPORT
SHADOWBOX
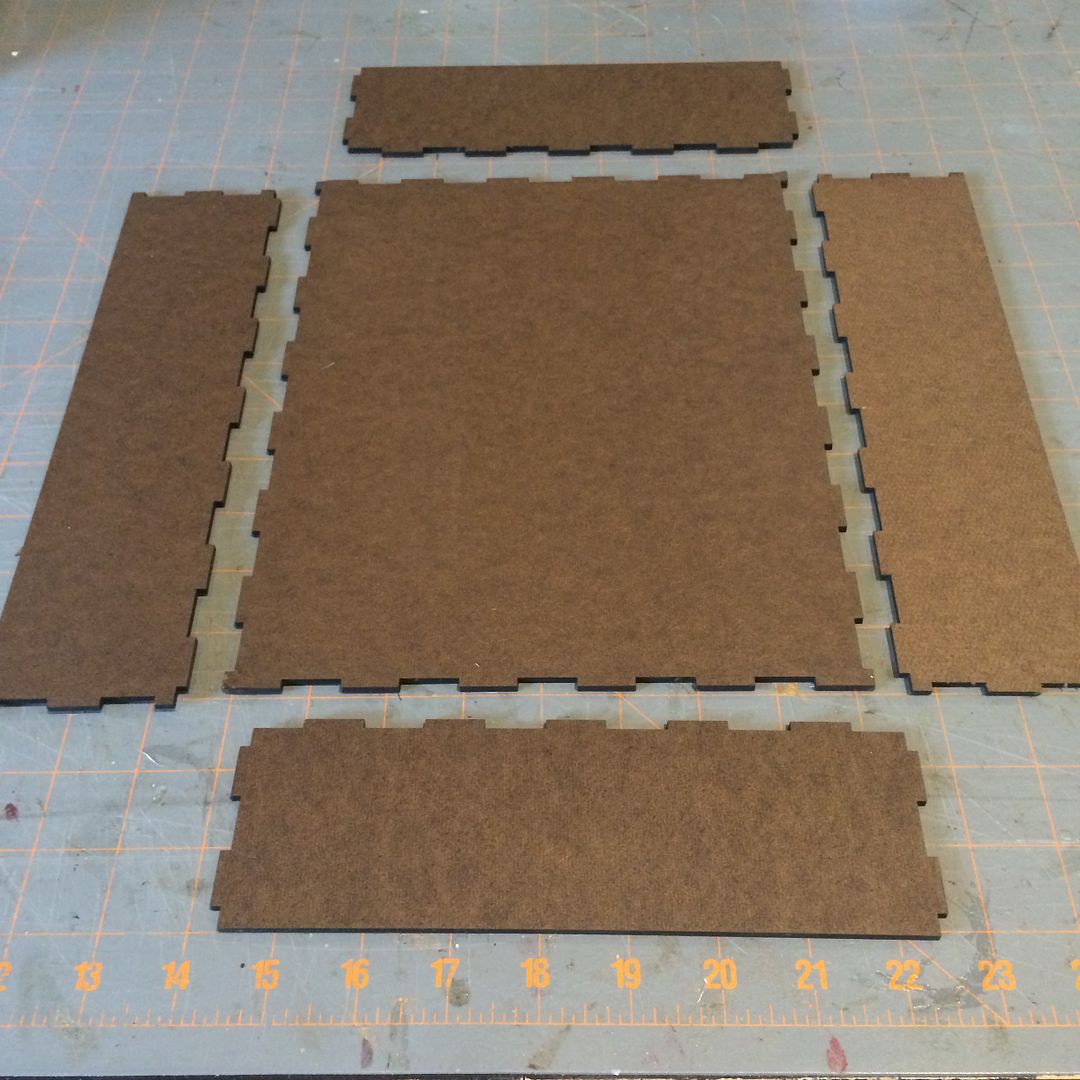
The shadowbox is constructed from an 8 x 10 easy to assemble Masonite box.
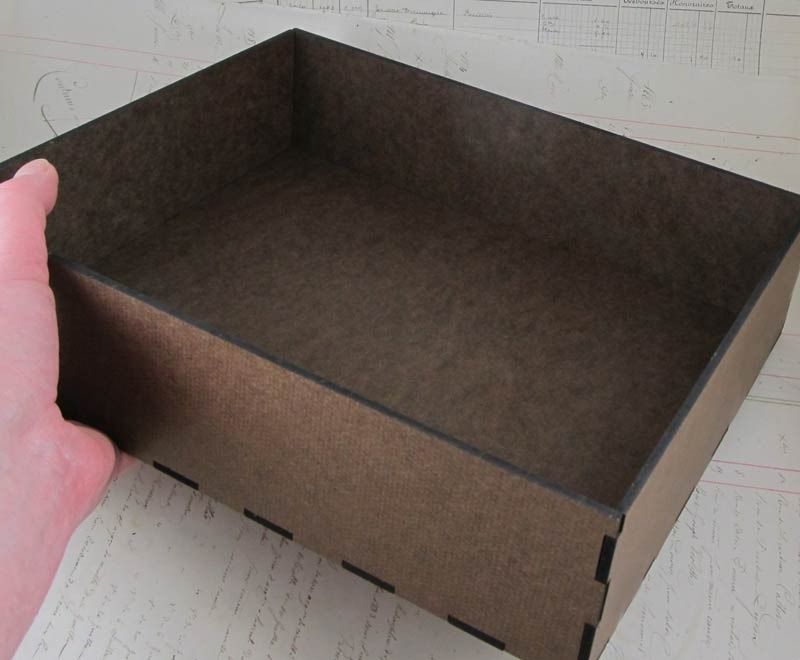
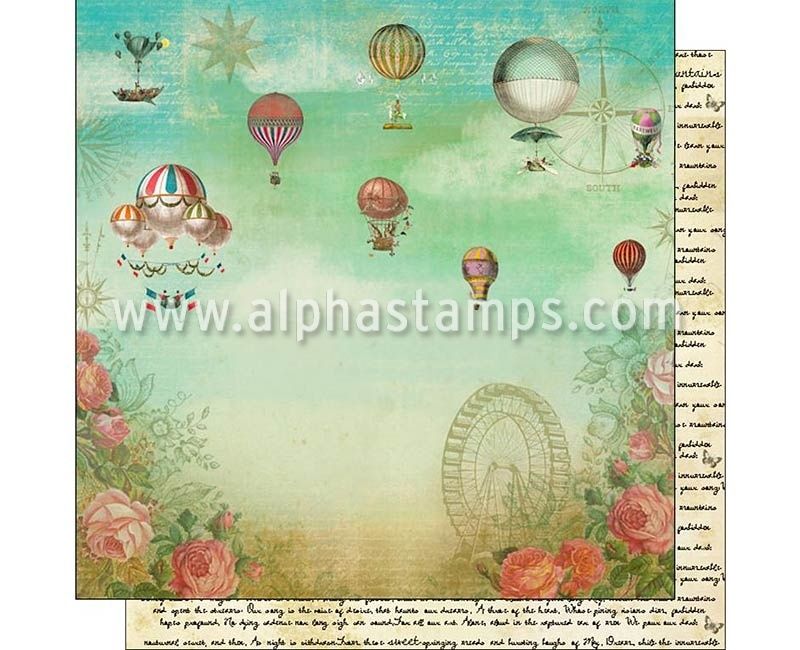
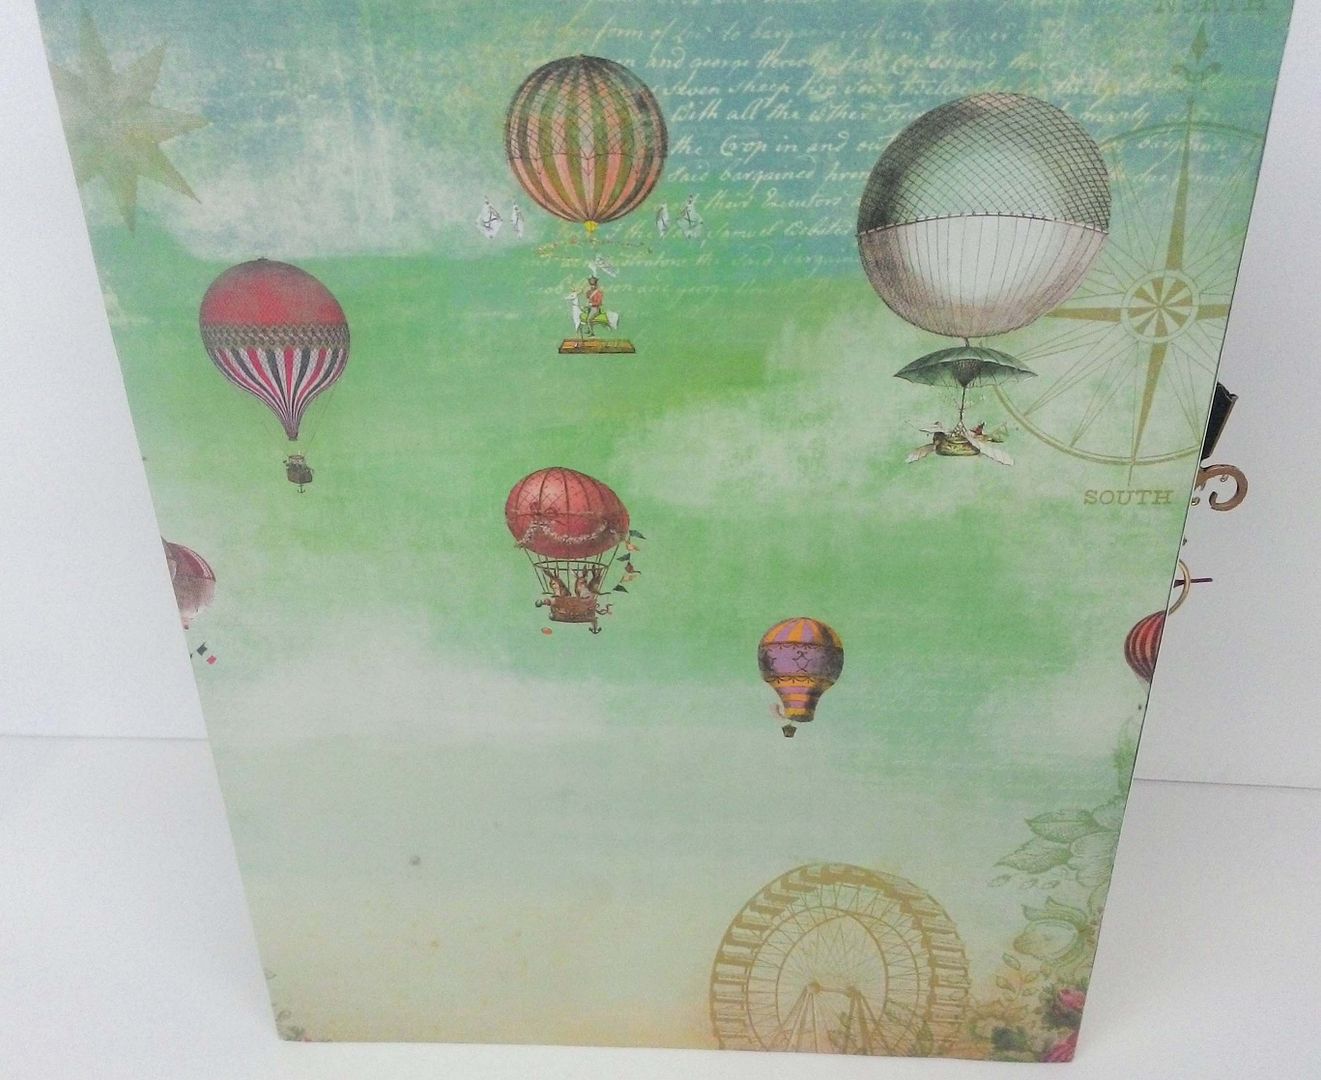
Before gluing the Masonite pieces together, I papered the inside of the box. The sky paper is from the Voyages Extraordinaries digital kit. If you don’t have the image kit another option is to use the Carpe Diem Junque Gypsy Scrapbook Paper. I used this paper to cover the outside of the box.
The checkered floor also came from the digital kit but another option is Black and White Checkerboard Scrapbook Paper.
Notice that I did not apply paper over the cutout pieces on each edge.

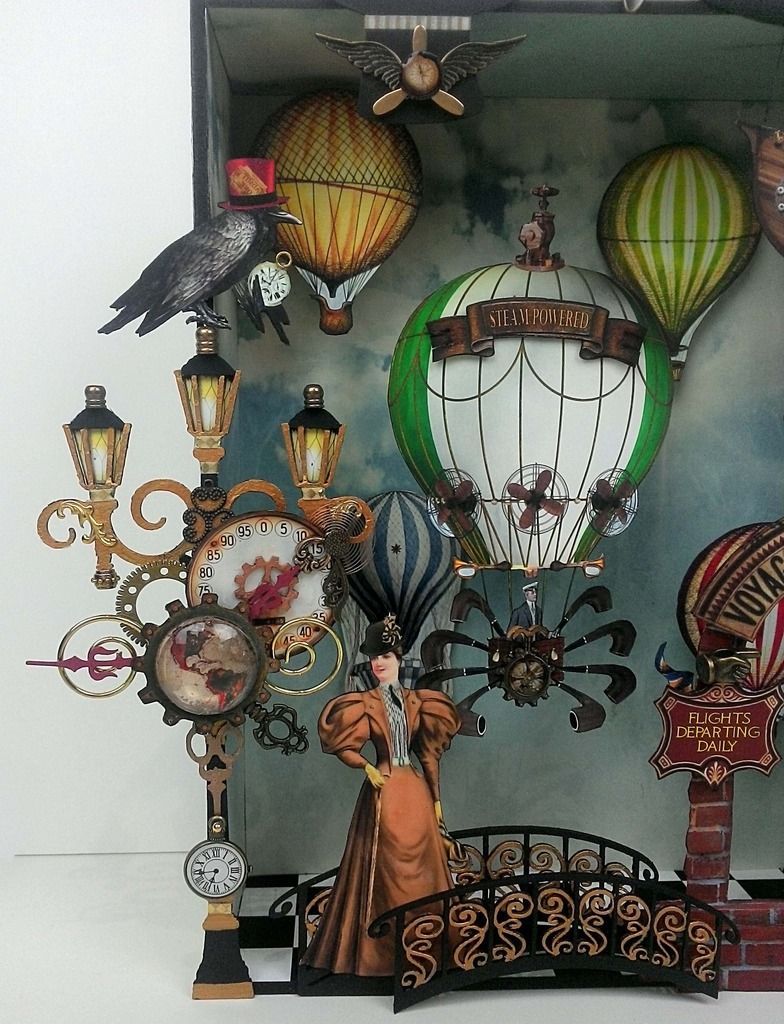
LAMP POST
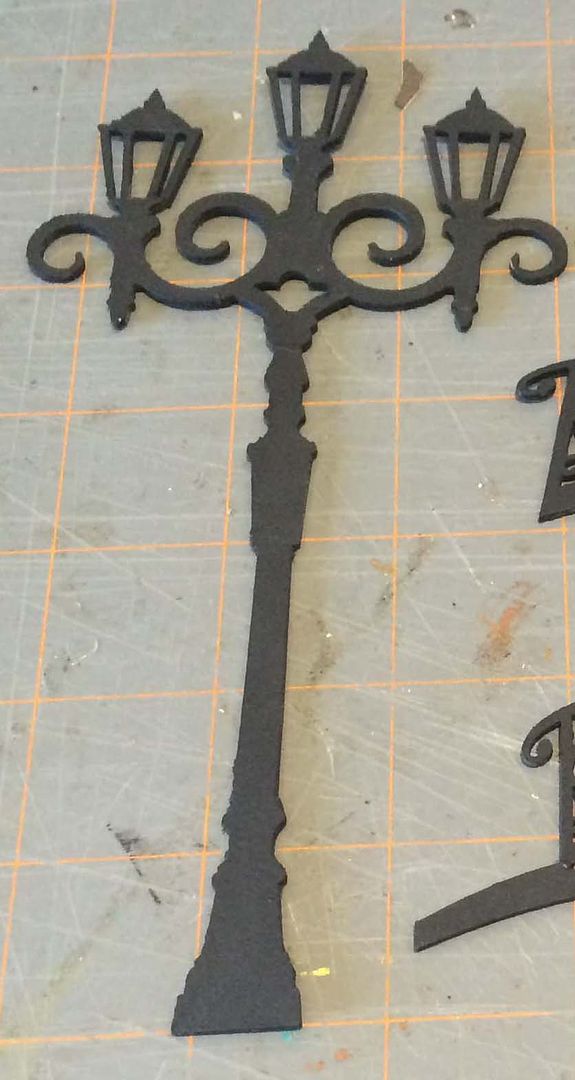
The lamp post is one of those pieces that you could pare with a few other images and make a smaller standalone piece. The base is a chipboard die-cut which I painted black.
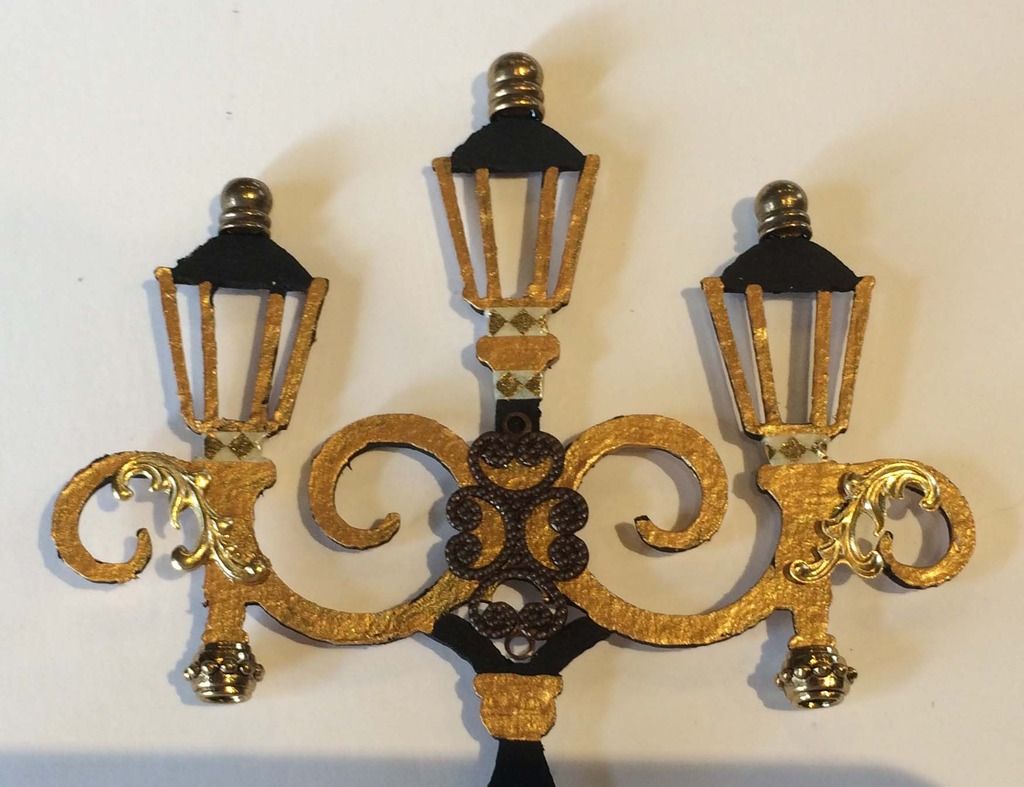
I then painted some areas of the lamp post gold and added diamond tape, brass flourishes, round box feet (to the top of the lanterns), brass connector and gold rondelles.
On the post of the lamp, I added a chipboard watch hand and a stopwatch.
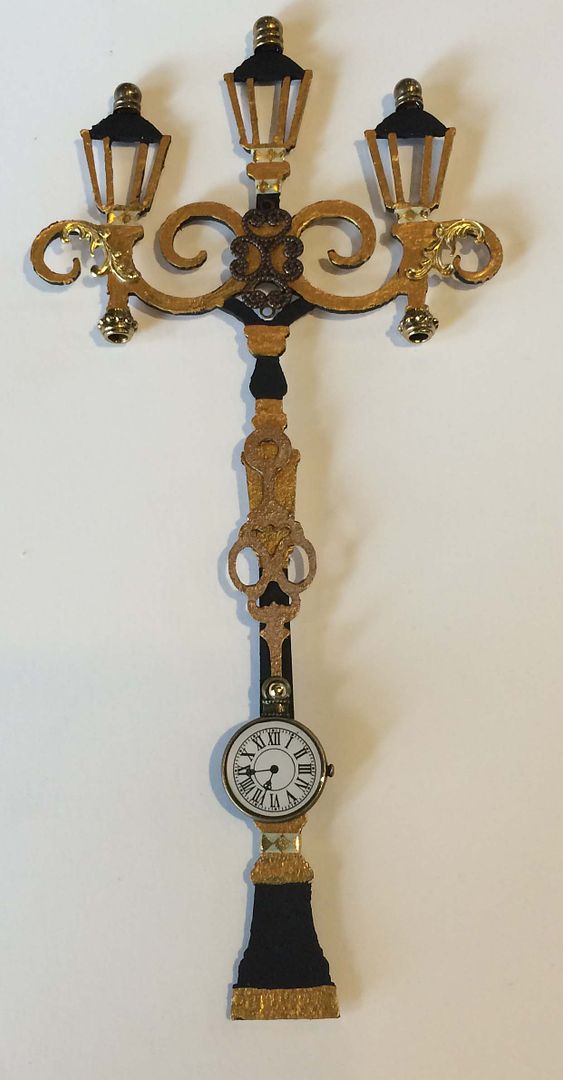
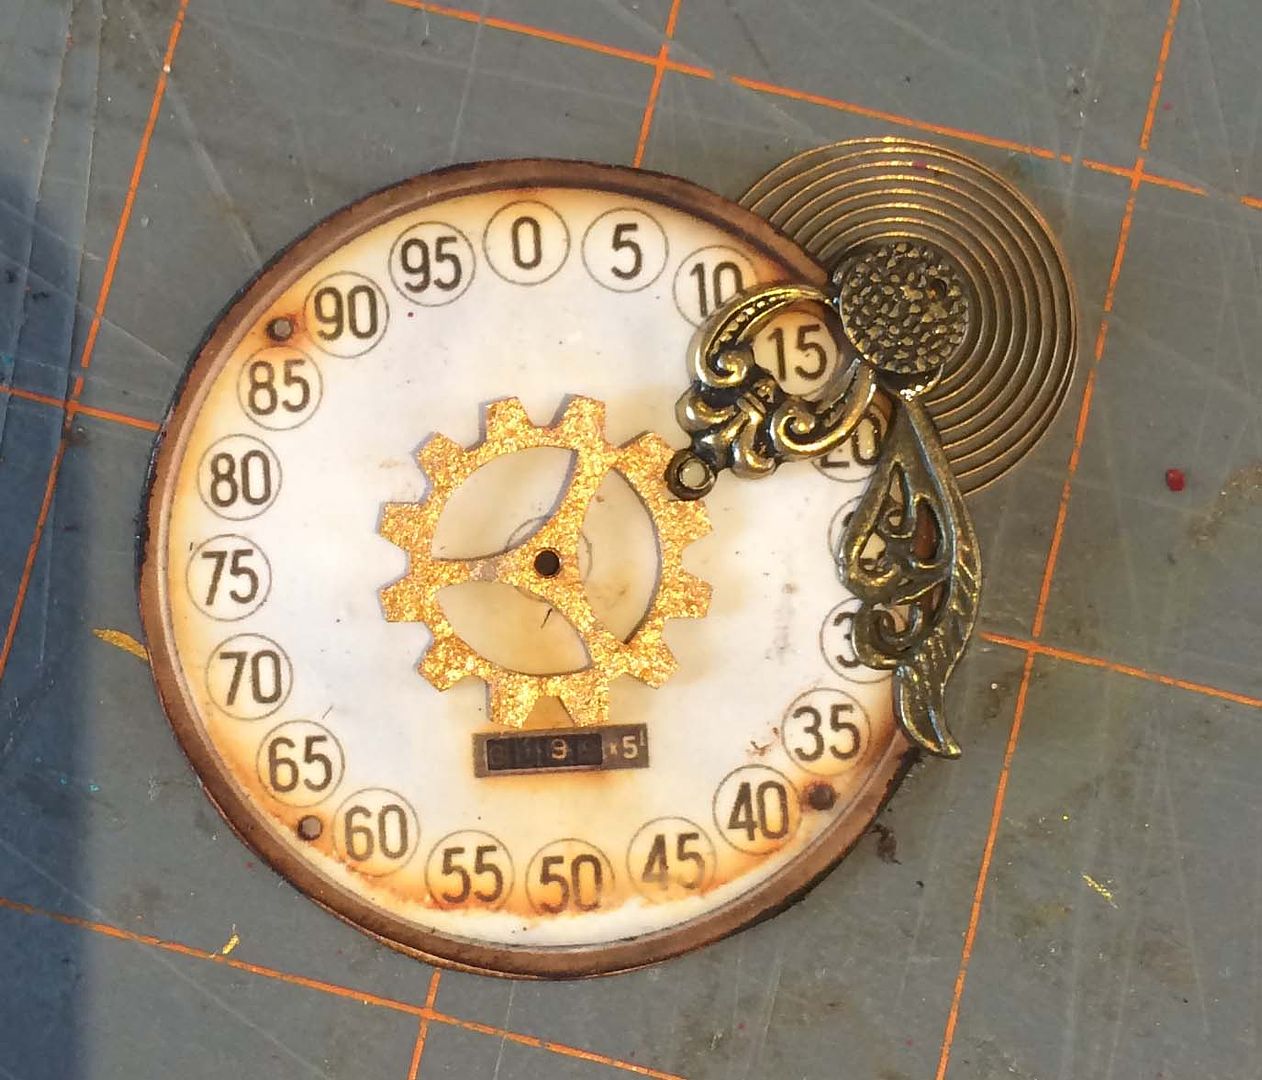
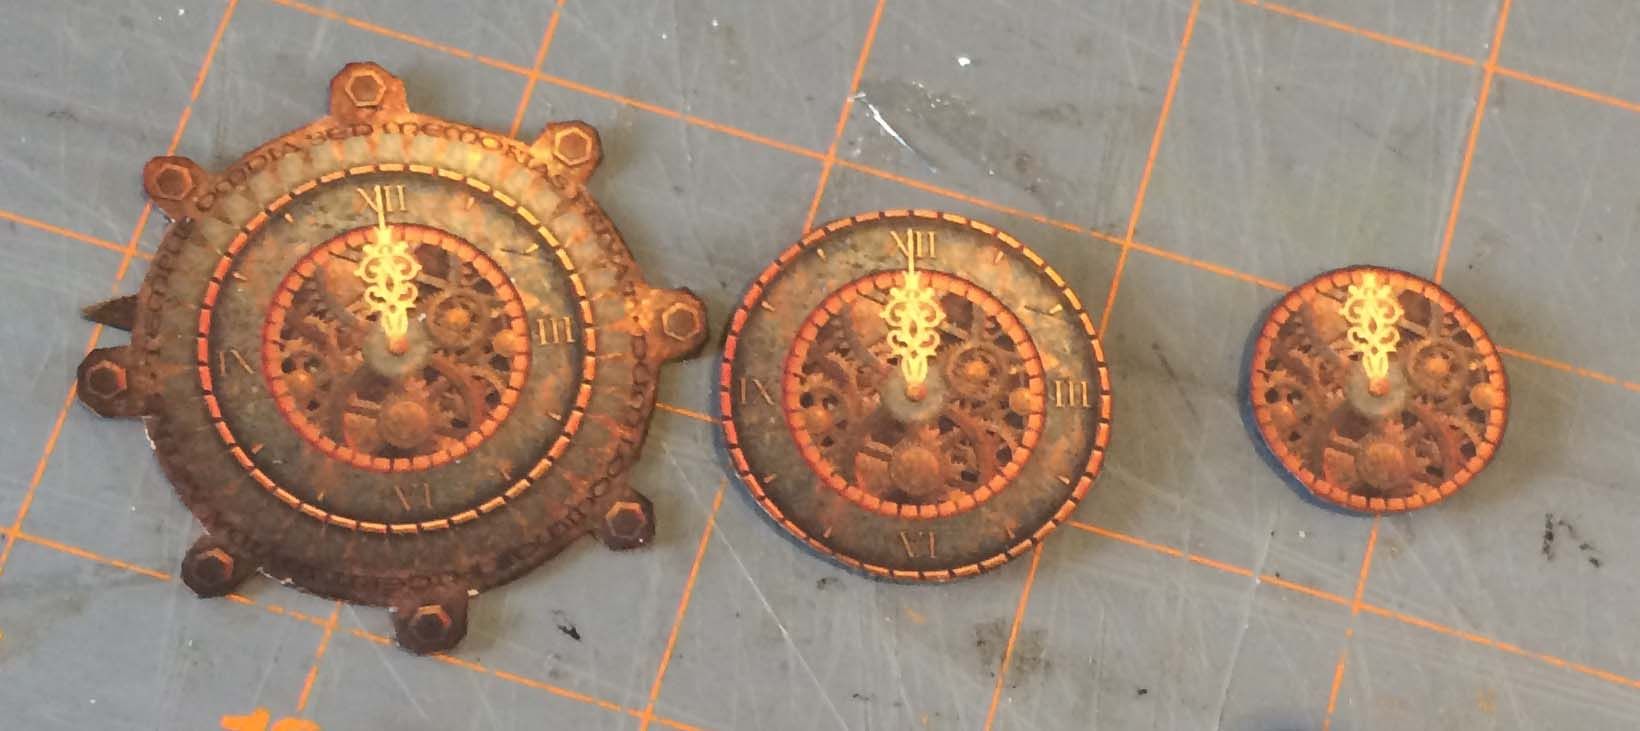
Next, I started working on the main mechanical piece. The numbered dial comes from the Voyages Extraordinaire #1 Collage Sheet. To it, I attached a chipboard gear, a fleur connector, brass leaf, a metal disk and a watch spring from my stash.

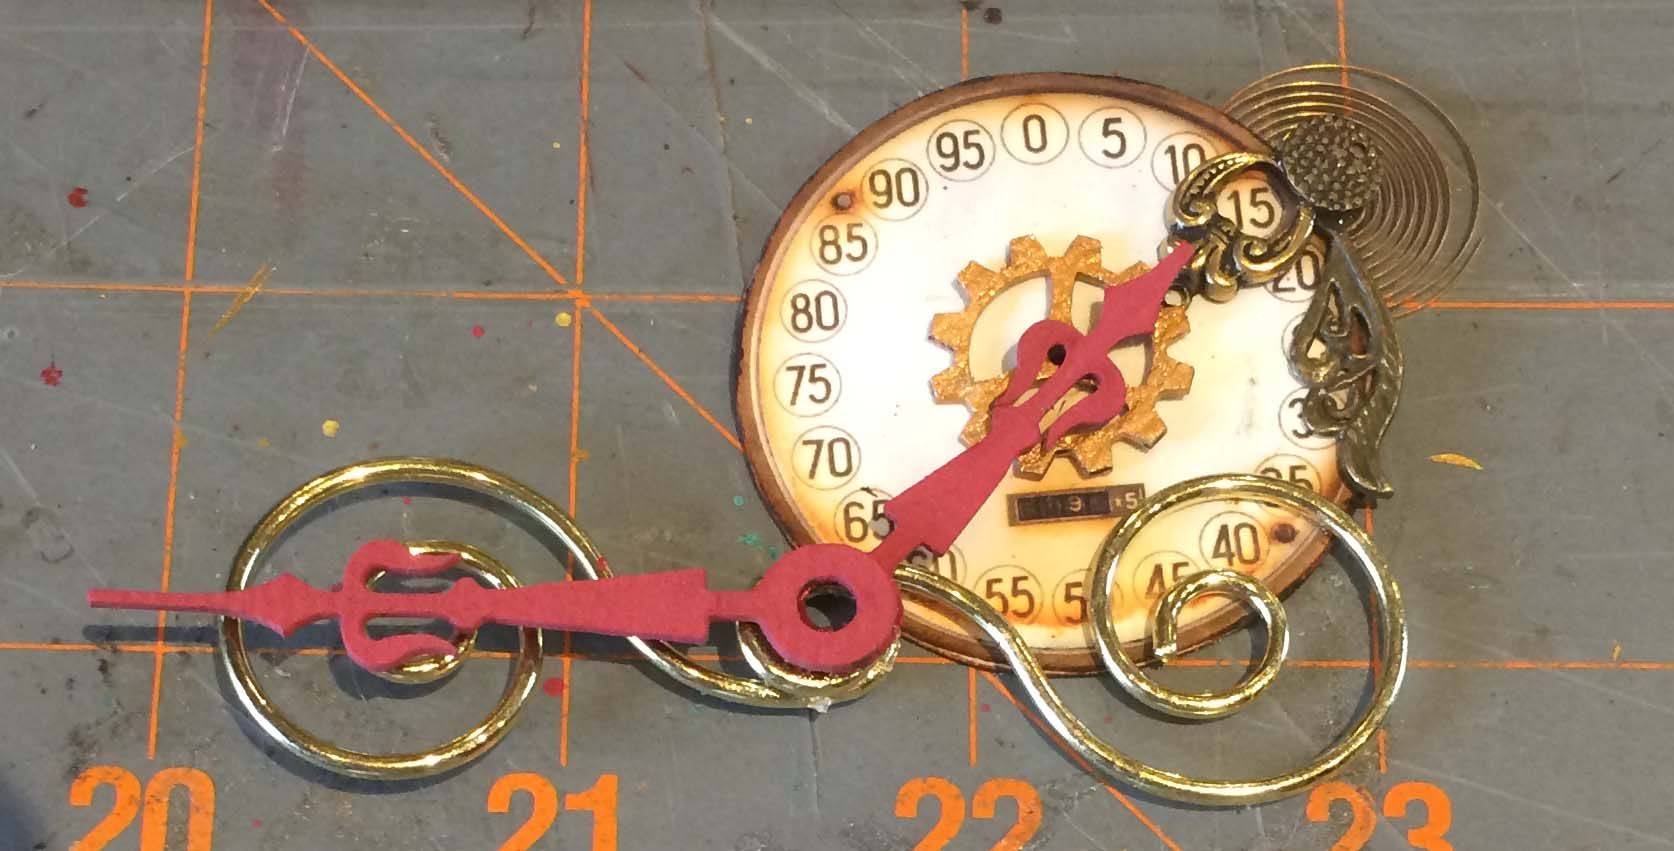
Then, I added swirl ornament hooks and chipboard watch hands. The final touch was a globe to which I glued a cabochon to make it dimensional.

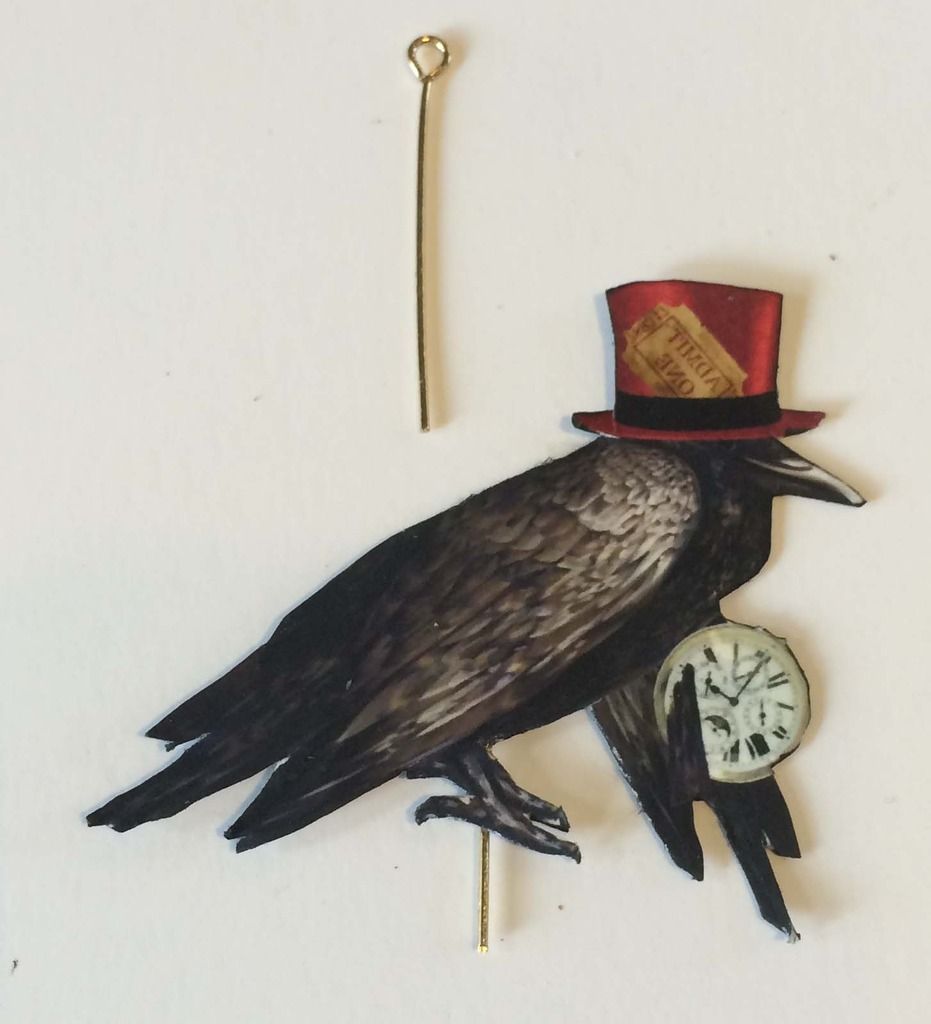
To the top of the lamp, I added Mr. Crow using an eye pin. The eye pin is glued to the back of the crow and attached to the lamp post by inserting the pin through the hole in the top of the round box feet.
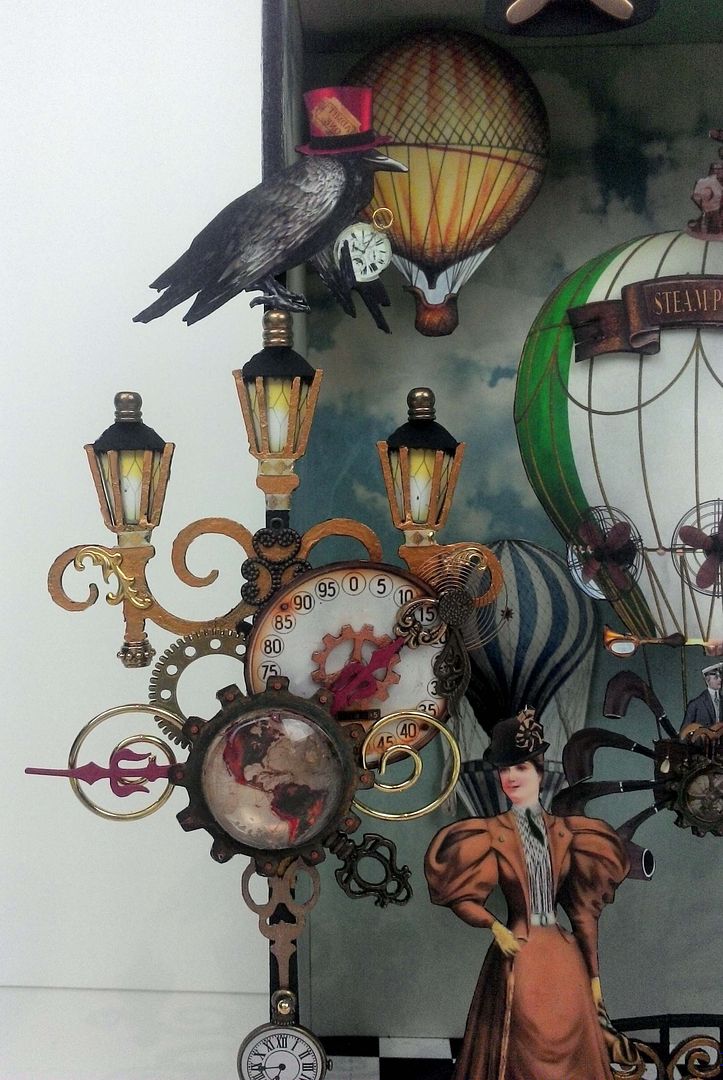
Below you can see the finished mechanical (junked up) lamp post. Per usual, once I looked at the piece put together, I decided it needed something else, so I added the metal key and bronze gear.

Note in the picture below that I added lights to the lamp post. You’ll find these on the Voyages Extraordinaries Collage Sheet #1 and they are sized to fit the chipboard post.
Alpha Stamps Supplies Used on the Lamp Post
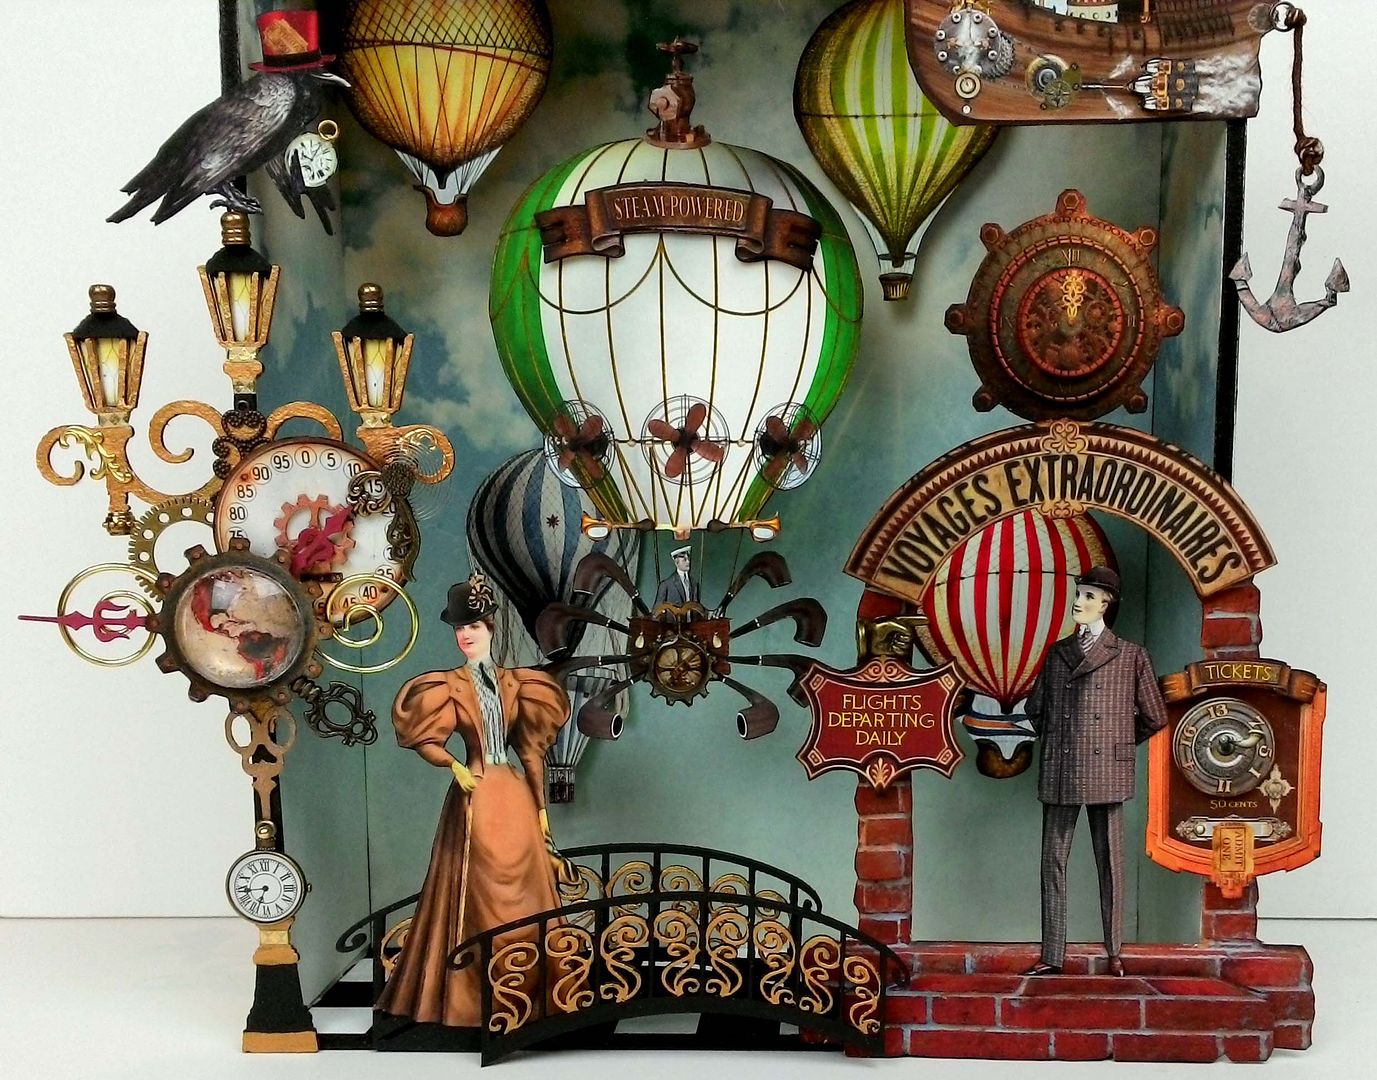
ENTRANCE
To give dimension to the entrance, I printed some pieces of the images multiple times and then popped them up using double stick tape.
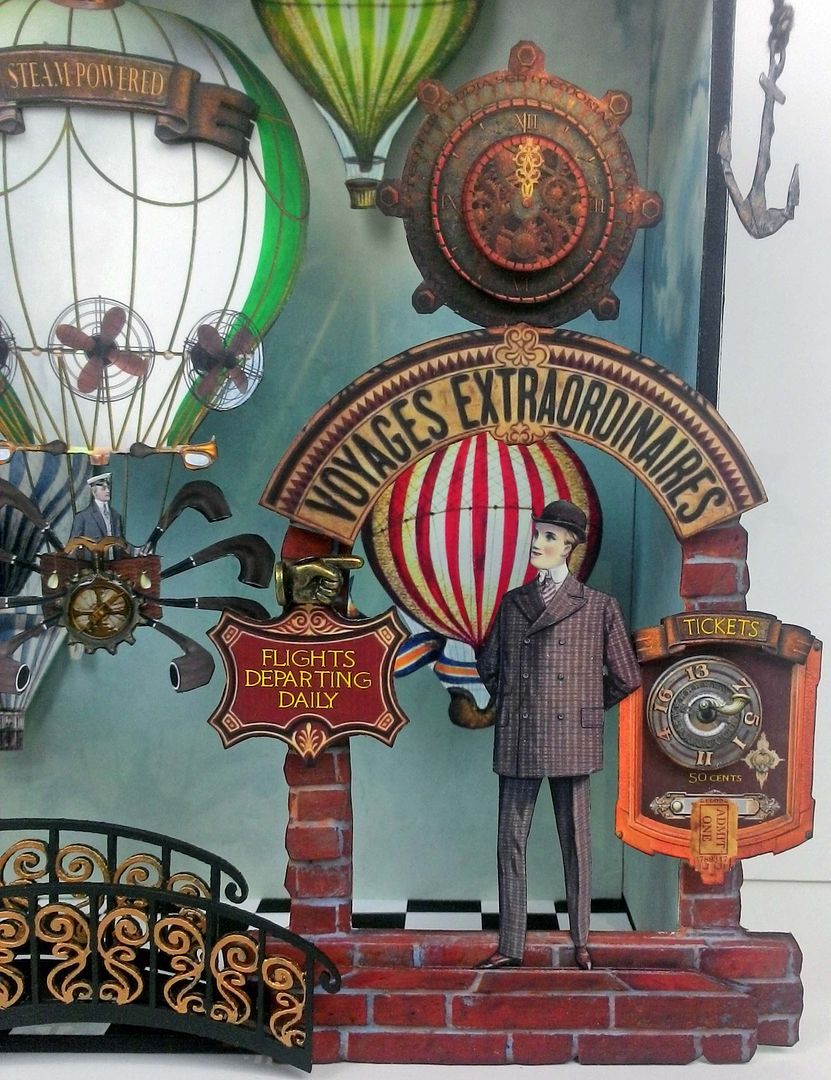
For the ticket machine, I popped up a second tickets sign and a second gizmo with handle.

For the clock, I popped up each section of the clock.
For the stone arch, I popped up the sign and bottom step.

You may not be able to see it that well in a flat picture, but in reality it looks very dimensional. I also popped up the sign and ticket machine when I attached them to the arch.

BRIDGE
The bridge is die-cut chipboard which I painted black and then painted the detailed scrolls gold.
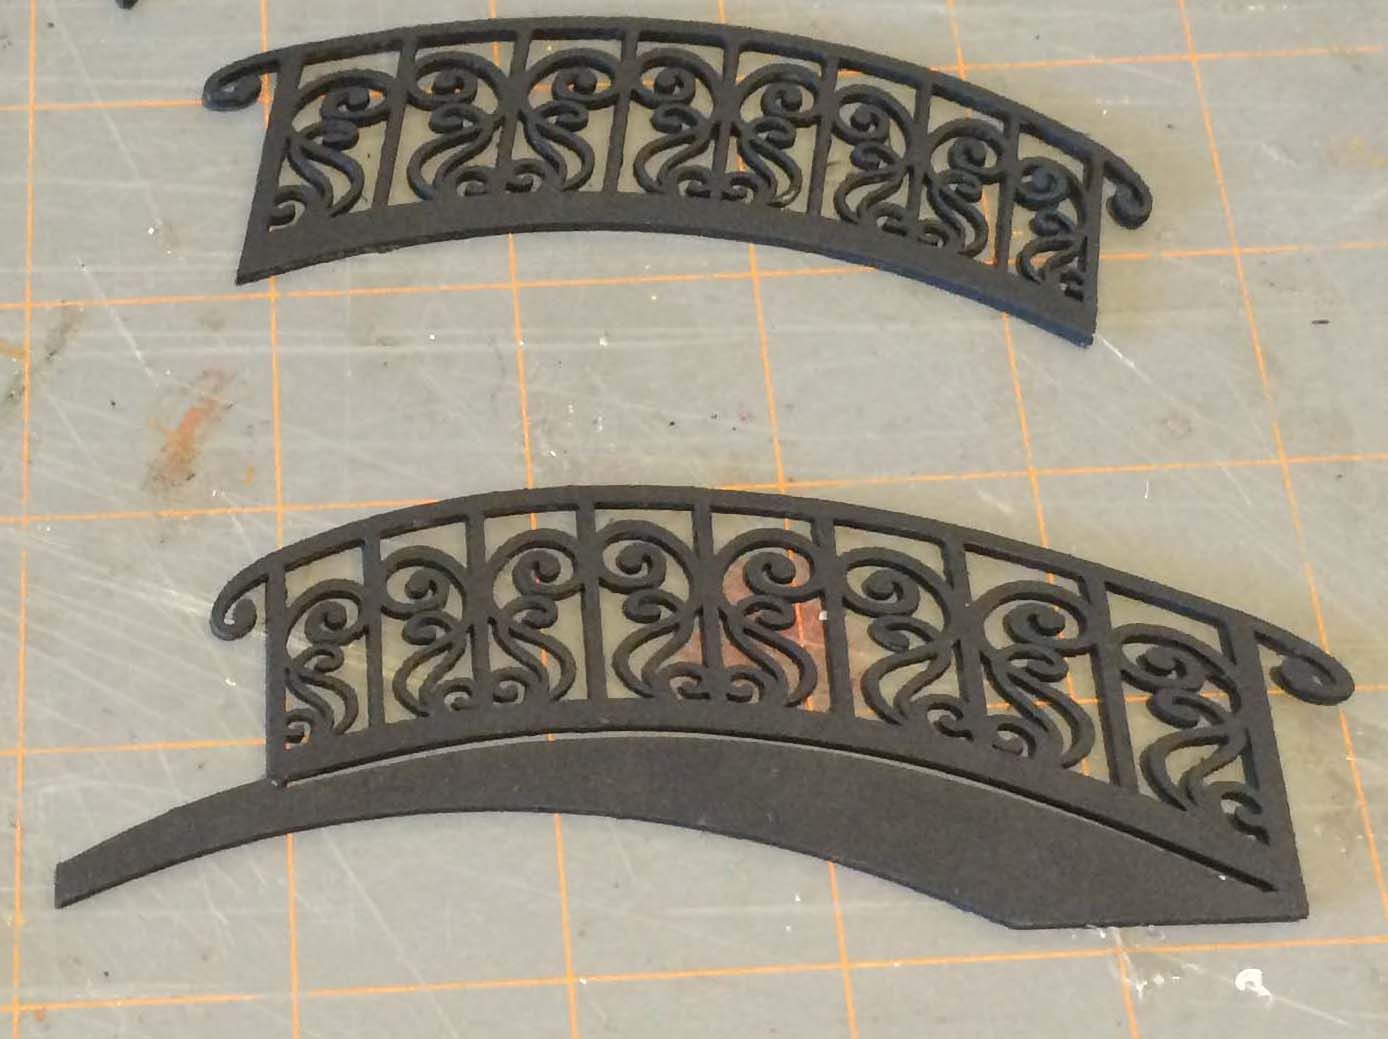
The two pieces give to make the bridge 3D. To separate the two pieces and create space between them, I attached beads to the back piece and then glued the front piece to the back. I used beads because there wasn’t enough space to use pop dots or double stick tape.
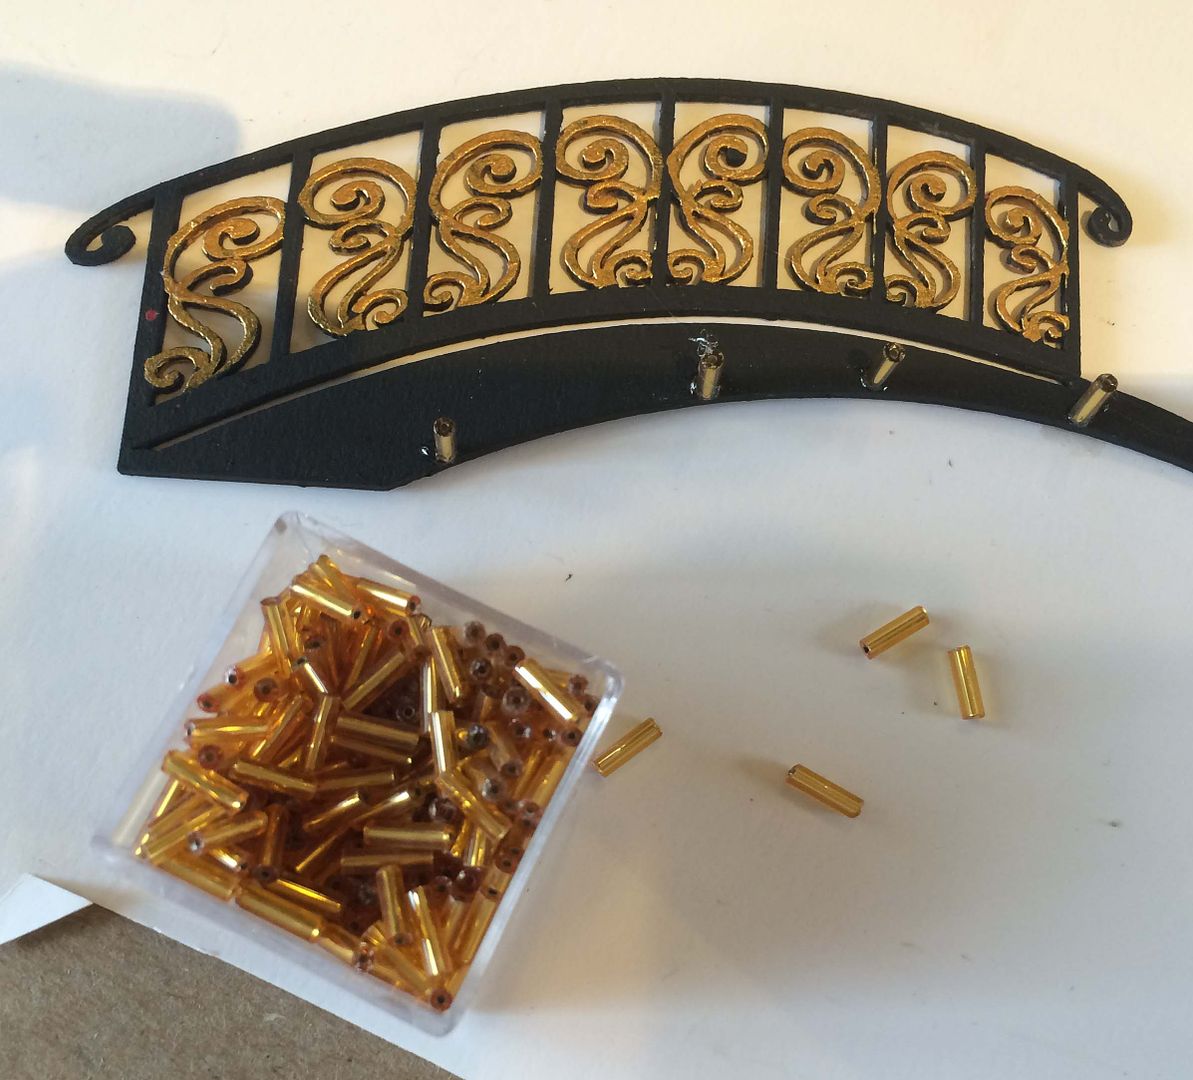
In the picture below you can see one of the ladies standing on the bridge in the gap the beads create. She is attached to the back of the bridge.
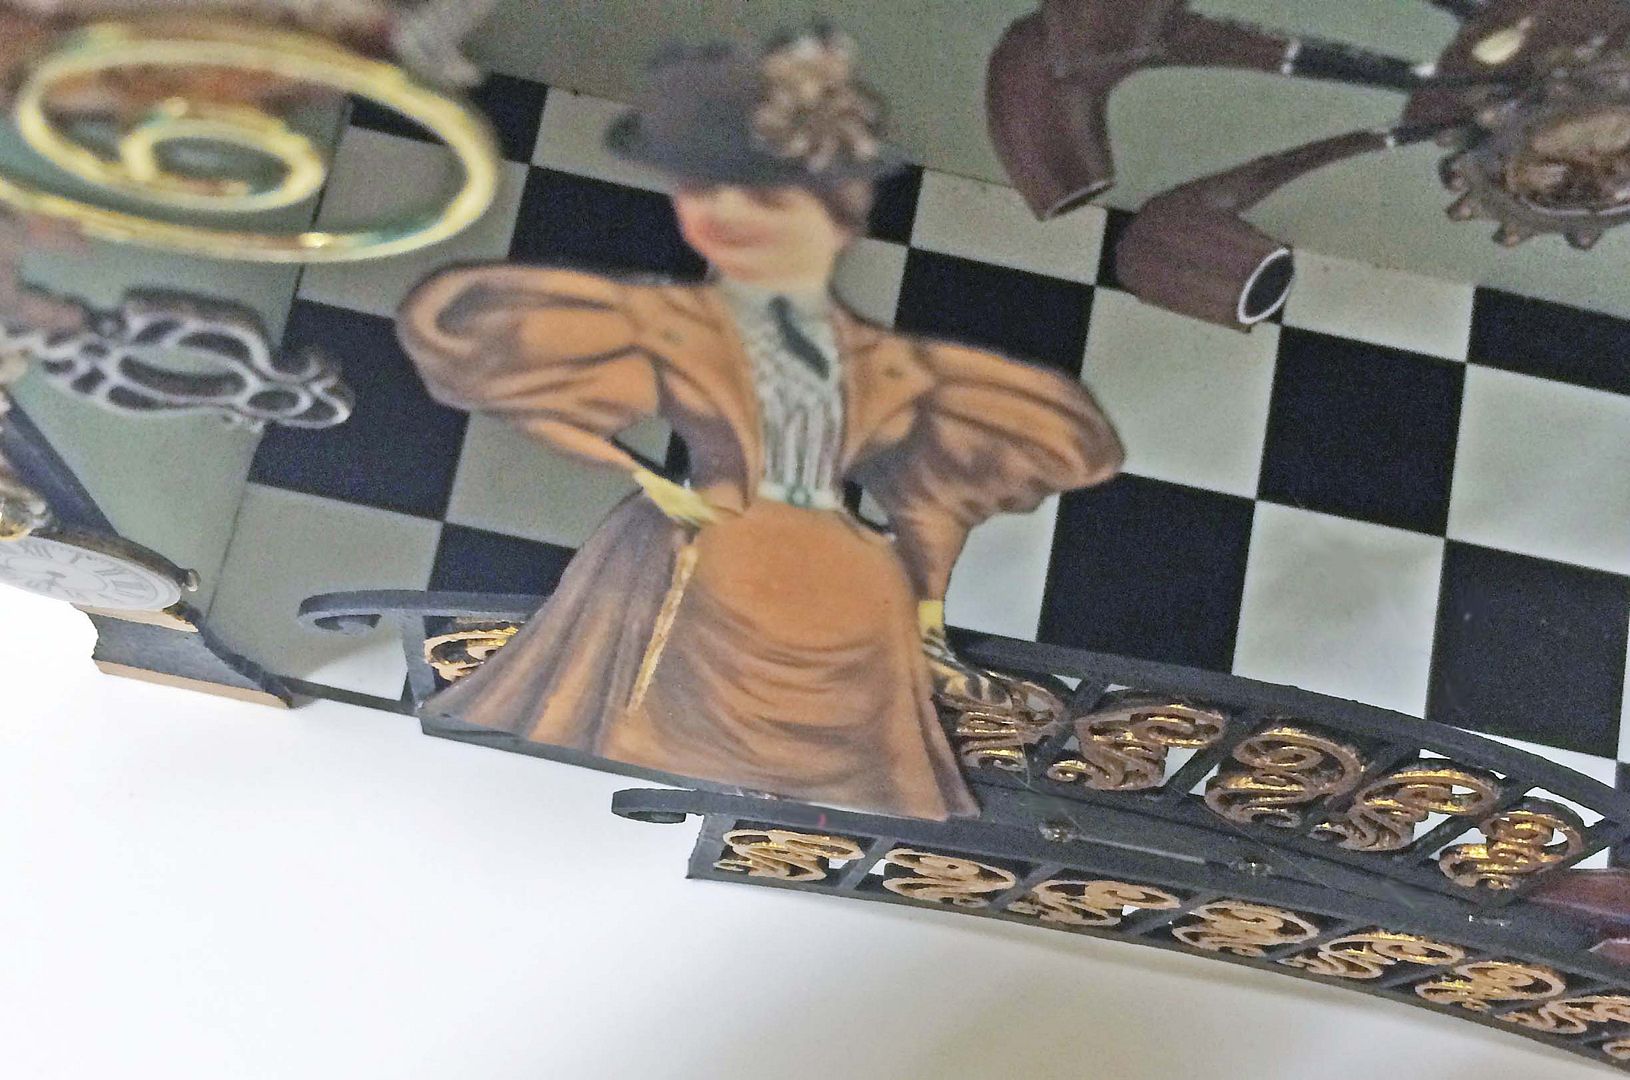
You can see by the pictures above and below that the entrance of the bridge starts outside of the shadow box and then connects to the entrance of the Skyport. I glued the back side of the bridge to the outside edge of the shadowbox.

I could have added some mechanical bits to the bridge but I decided there was so much going on with everything else it would just be too much; one of my rare moments of restraint.
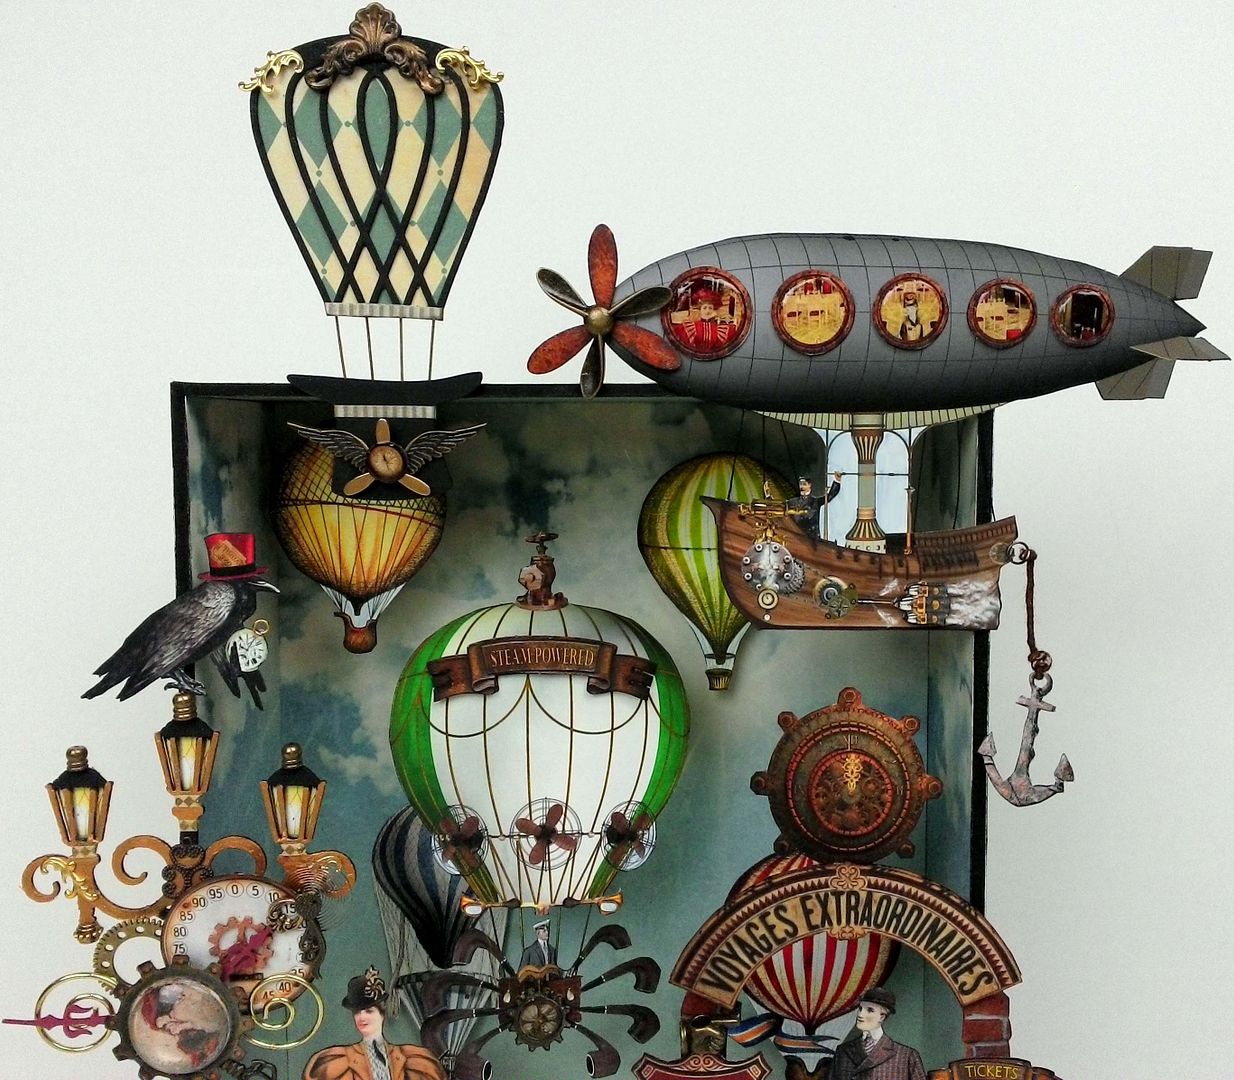
BALLOONS/DIRIGIBLE
For many of the components of the Skyport and the Train Station (which I cover after the Skyport), I used elements from two chipboard die-cut sets. You can see in the photos below, each set contains lots of steampunk themed pieces.


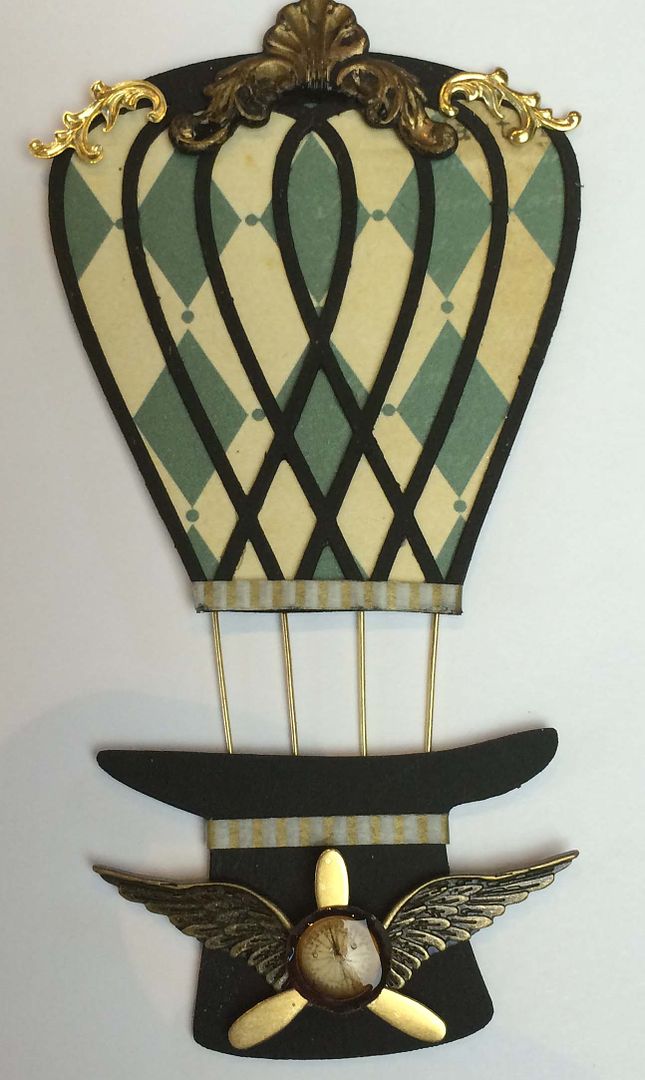
I used one of the die-cut chipboard balloons for the piece below and one of the hats turned upside down for the basket. The paper in the back of the balloon is Junque Gypsy Scrapbook Paper – Carte Blanche. To dress up the balloon I used striped paper tape, brass flourish, brass shell corner, brass propeller, and wings.
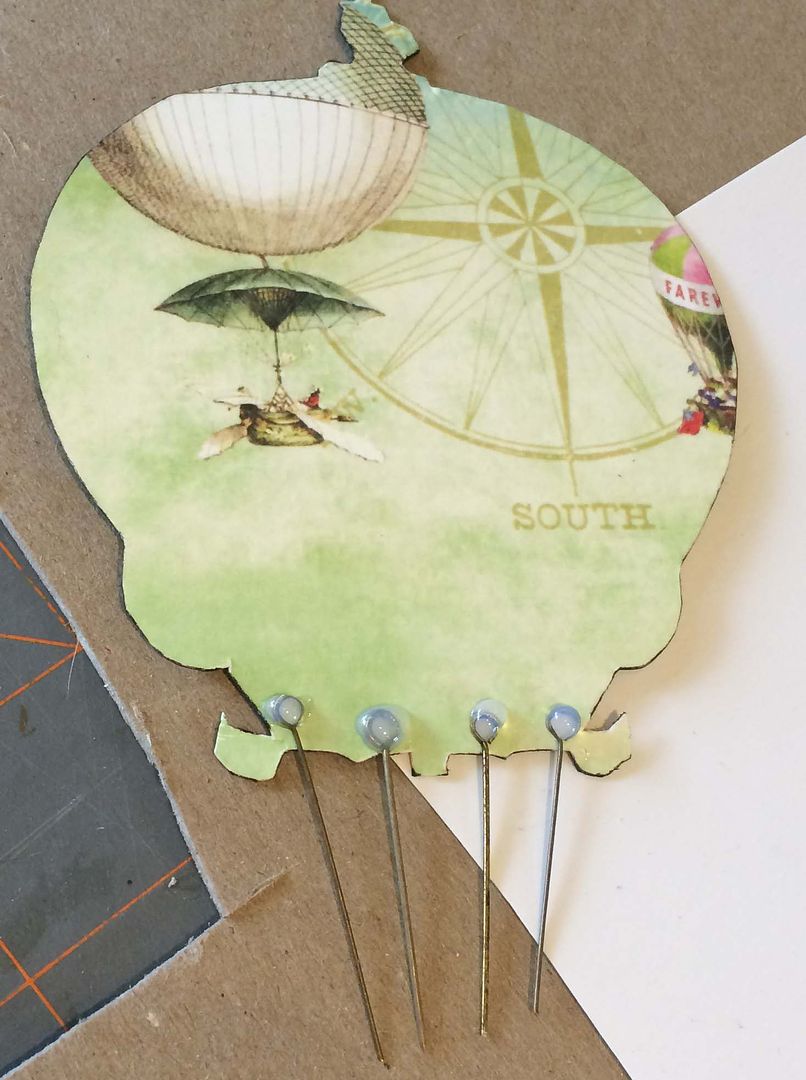
To connect the balloon to the hat basket I used eye pins.
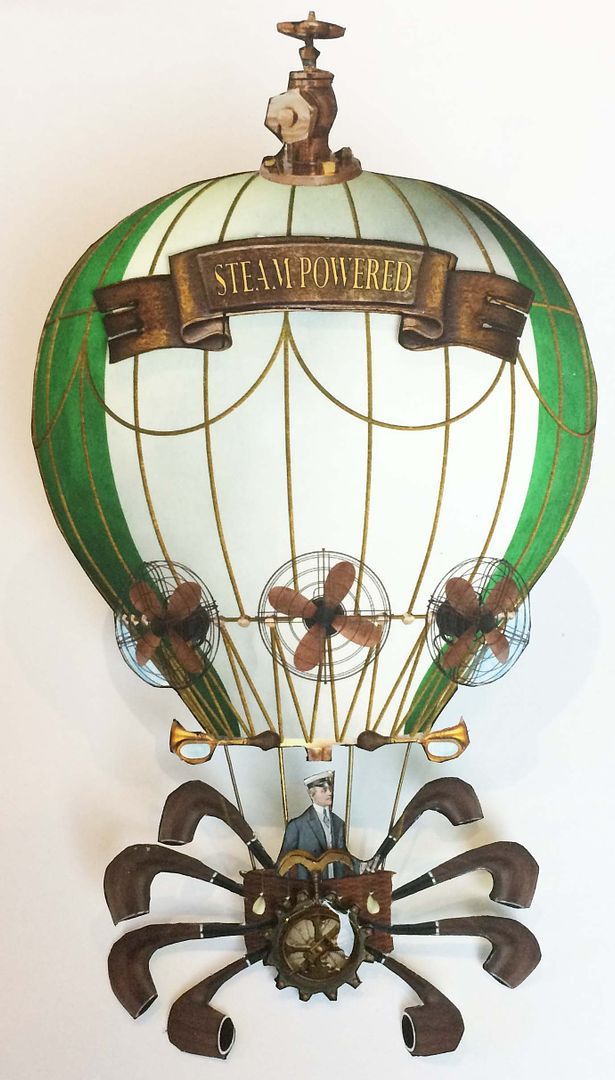
For the large mechanical balloon, I also used eye pins to connect the balloon to the basket. The lines in the image are far too small to cut out so this makes a good substitute. You could also use toothpicks, thread, string or ribbon.
If you are thinking that the curved brown pieces going around the basket look like tobacco pipes you are right! The pipes are the exhaust for the seam. I used Glossy Accents on the center navigation piece to make it pop.
To jazz up the dirigible I added a brass propeller and a chipboard propeller that I rusted. In the portholes of the dirigible, you see lovely Victorian ladies looking out with an elegant dining room in the background. To give the portholes dimension and to make them look like glass I used Glossy Accents.
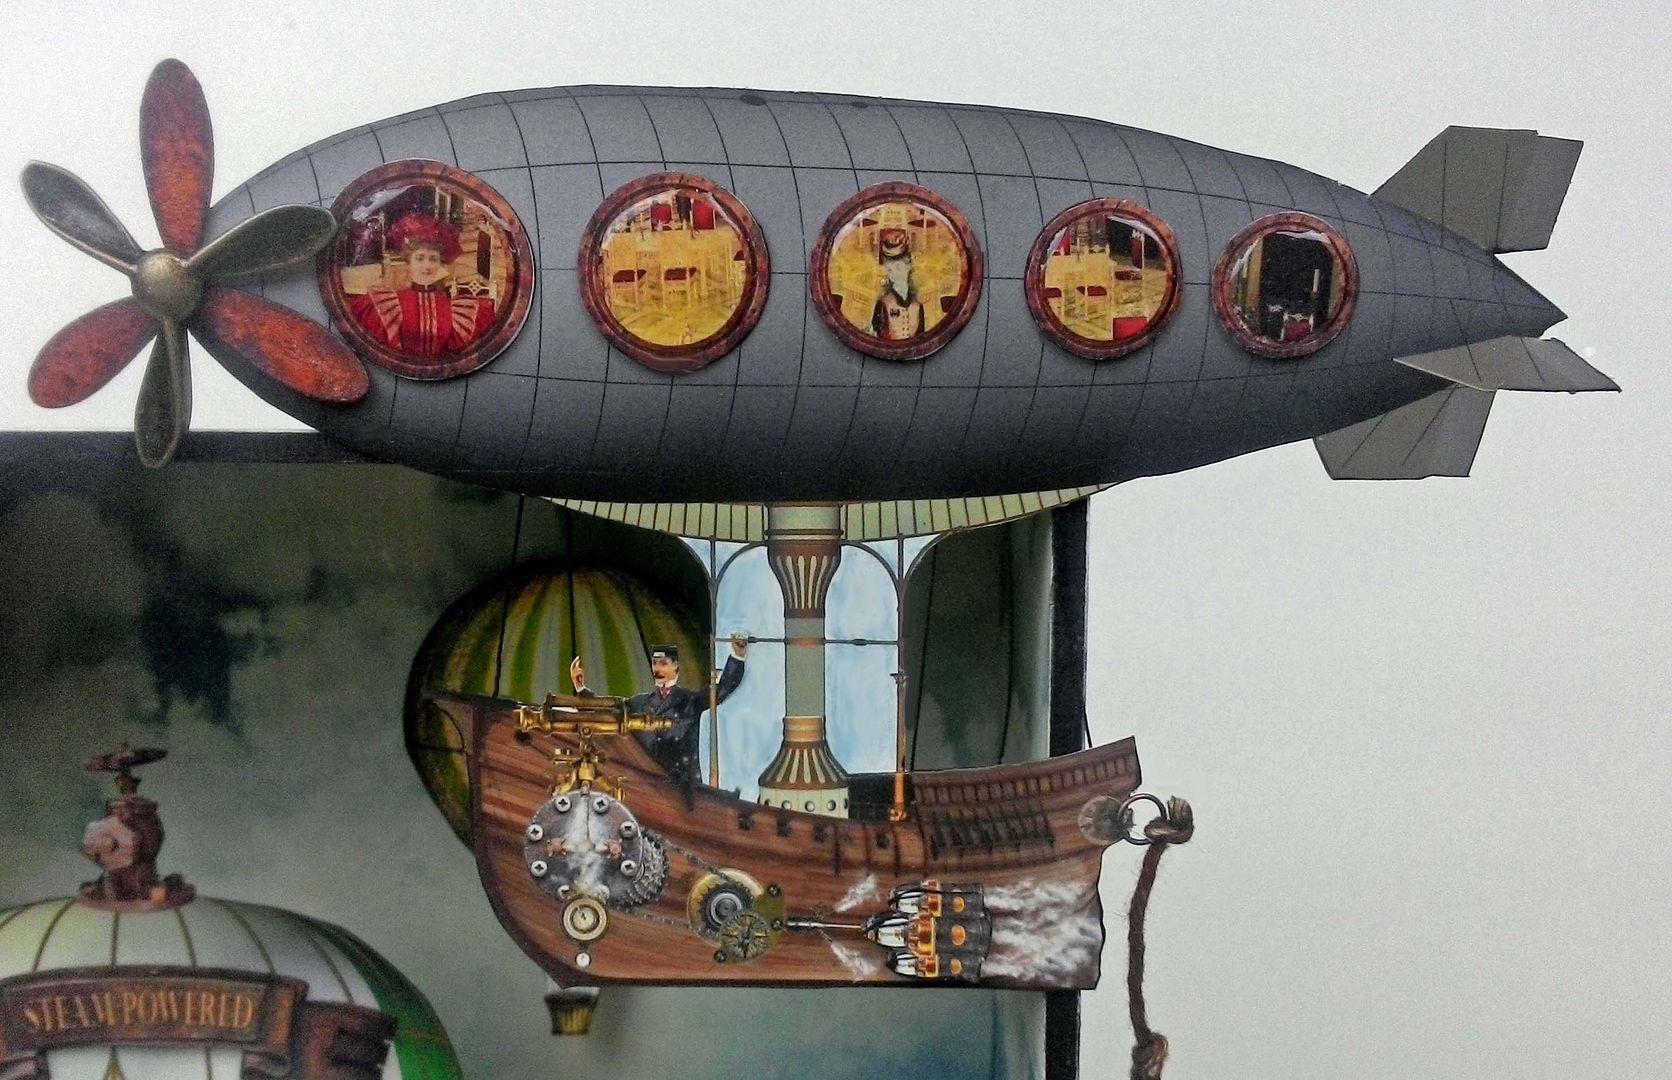
You might notice that the center section of the dirigible in the shadow box is different than the on collage sheet and in the digital kit. This is because I decided the center section was a pain to cut out so I simplified it.
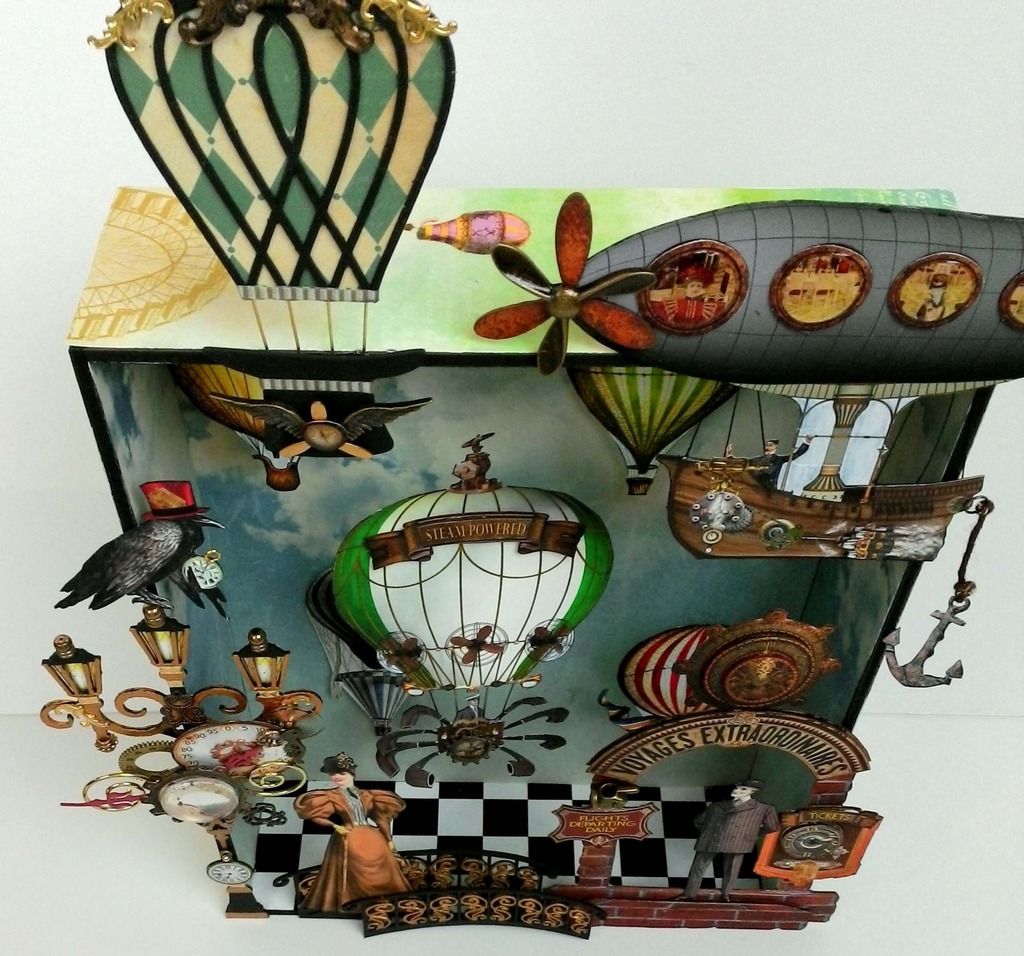
To complete the scene I used several balloons inside the shadow box. Everything inside is popped up from the back at different distances using double stick tape.
ALPHA STAMPS SUPPLIES USED FOR THE SHADOWBOX SKYPORT (including the lamp post)
Or
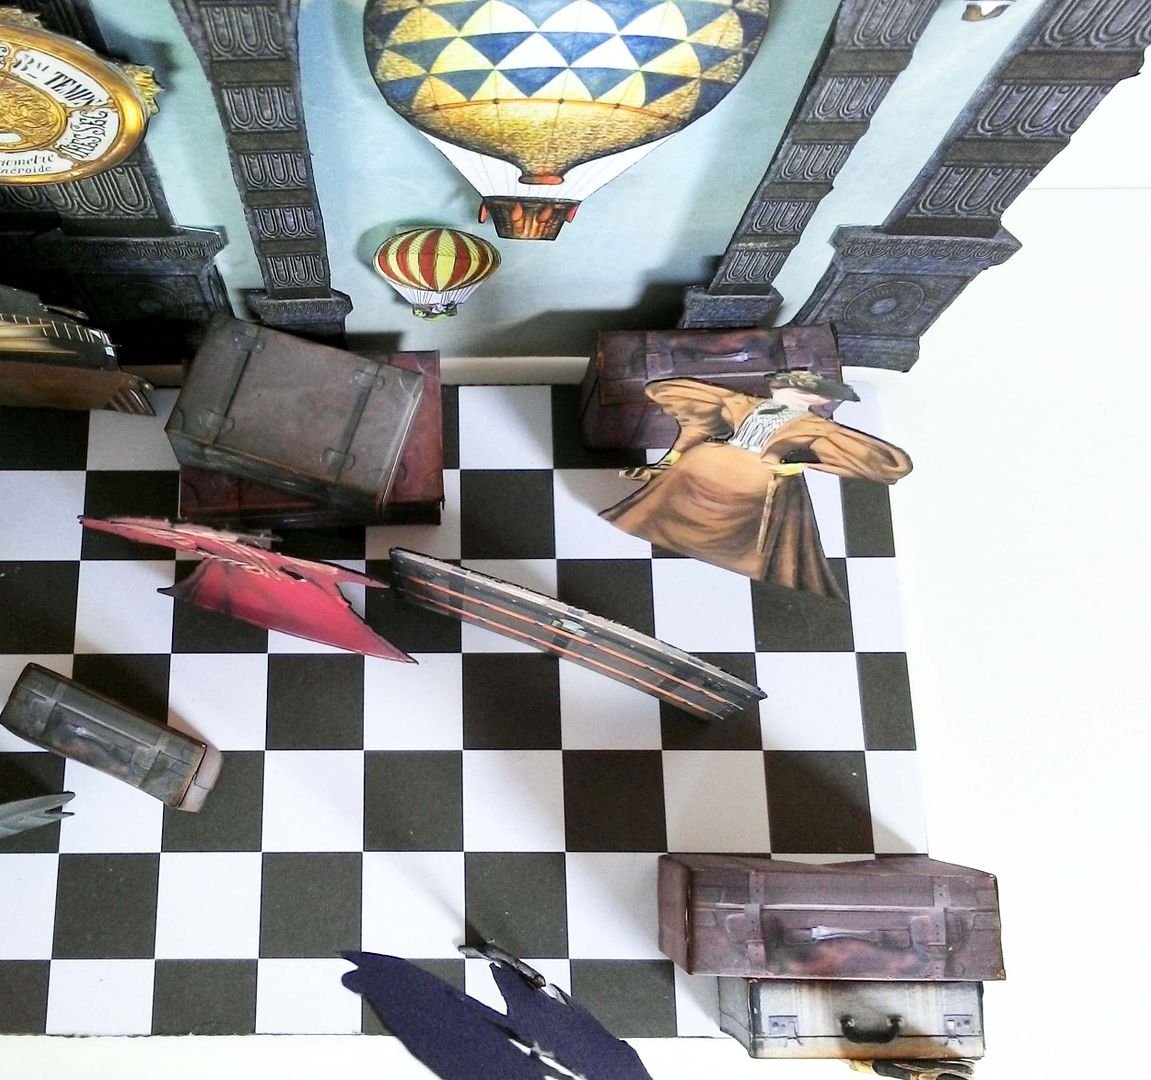
TRAIN STATION
In my fantasy world of travel, trains fly.
BASE & ARCH BACKDROP
The base of the Train Station is a 12” x 5” piece of foam core covered on one side with black and white checkerboard paper.
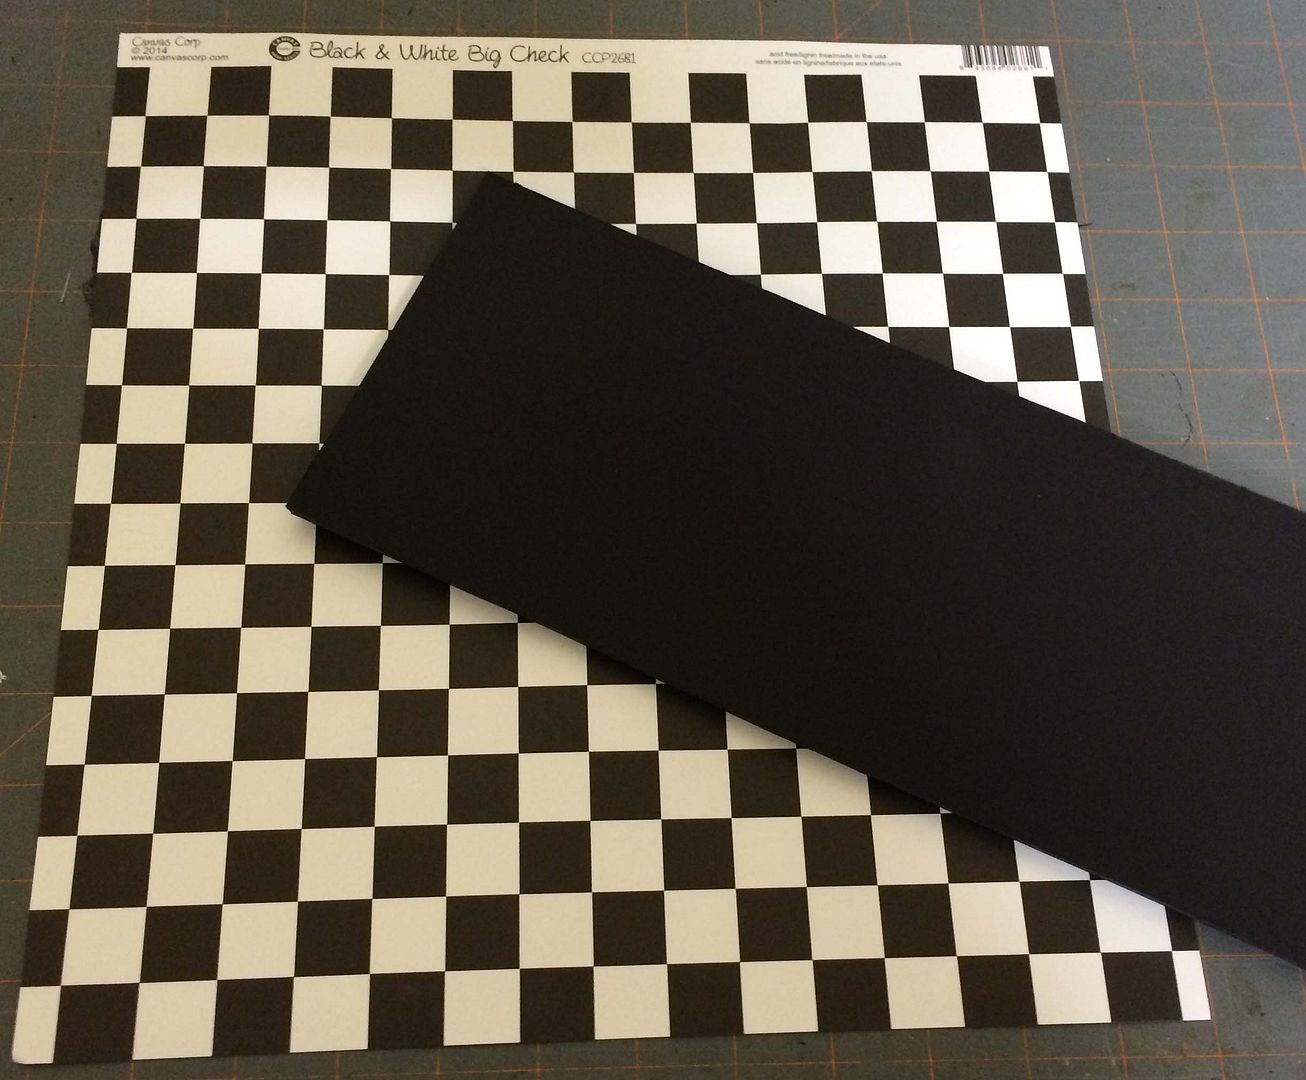
The backdrop of the Train Station is made from two sets of arches that are in the Voyages Extraordinaries digital image set. The three arch piece is a sandwich of the image, a thin piece of chipboard and a piece of cardstock. The point is to make the image sturdy by adding the layers. Notice how I did not cut away the excess from the bottom of each column. I will be using the excess to attach the arches to the back side of the foam core so that the bottom of the columns will be flush with the top of the base.
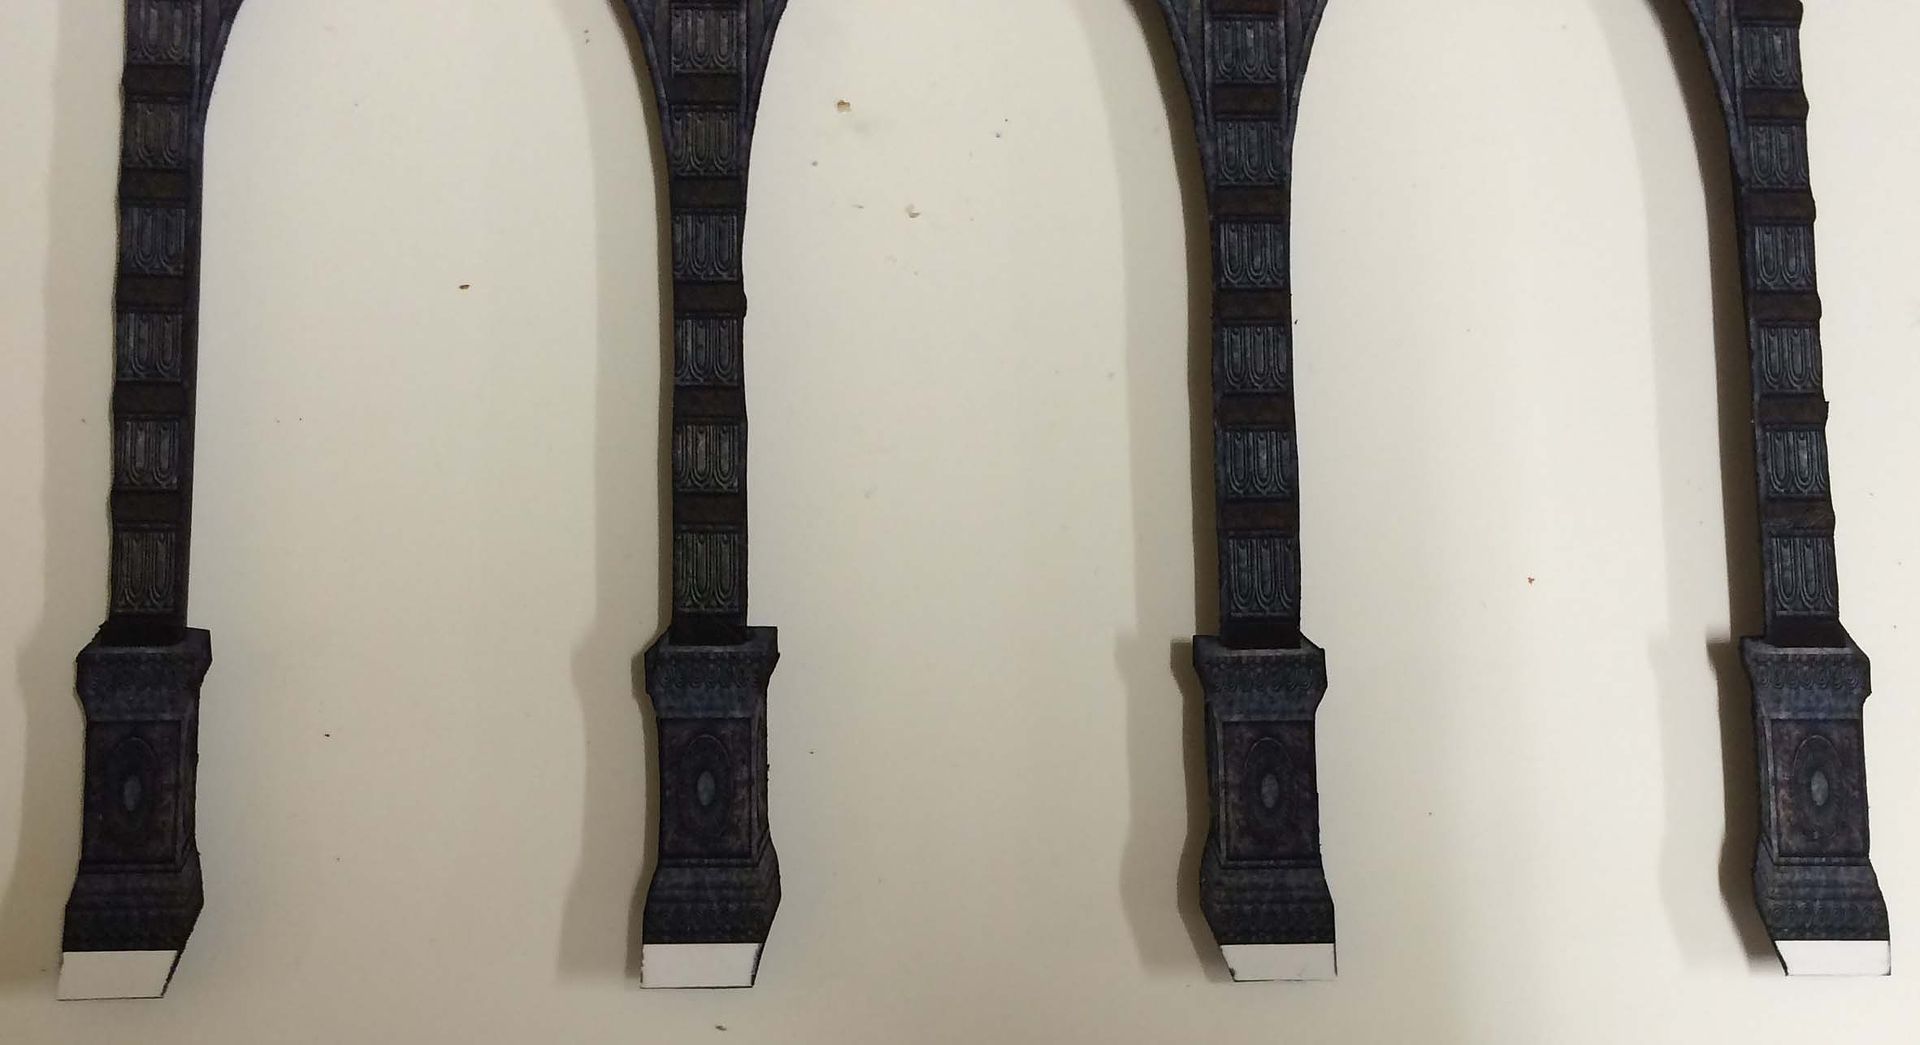
For additional support, I added a wooden dowel painted black to the back of each column. Make sure that the dowel of goes all the way down to the bottom of the column including the excess part. Another benefit of the dowel is that it will create space between the two sets of arches and make the backdrop look dimensional. You can use whatever size of dowel you want just as long as it is hidden by the arches.

Just as with the Skyport you could use the Carpe Diem Junque Gypsy Scrapbook Paper. The arches are a sandwich of the arch image backed with thin chipboard (cut out first) and then backed with the sky paper.
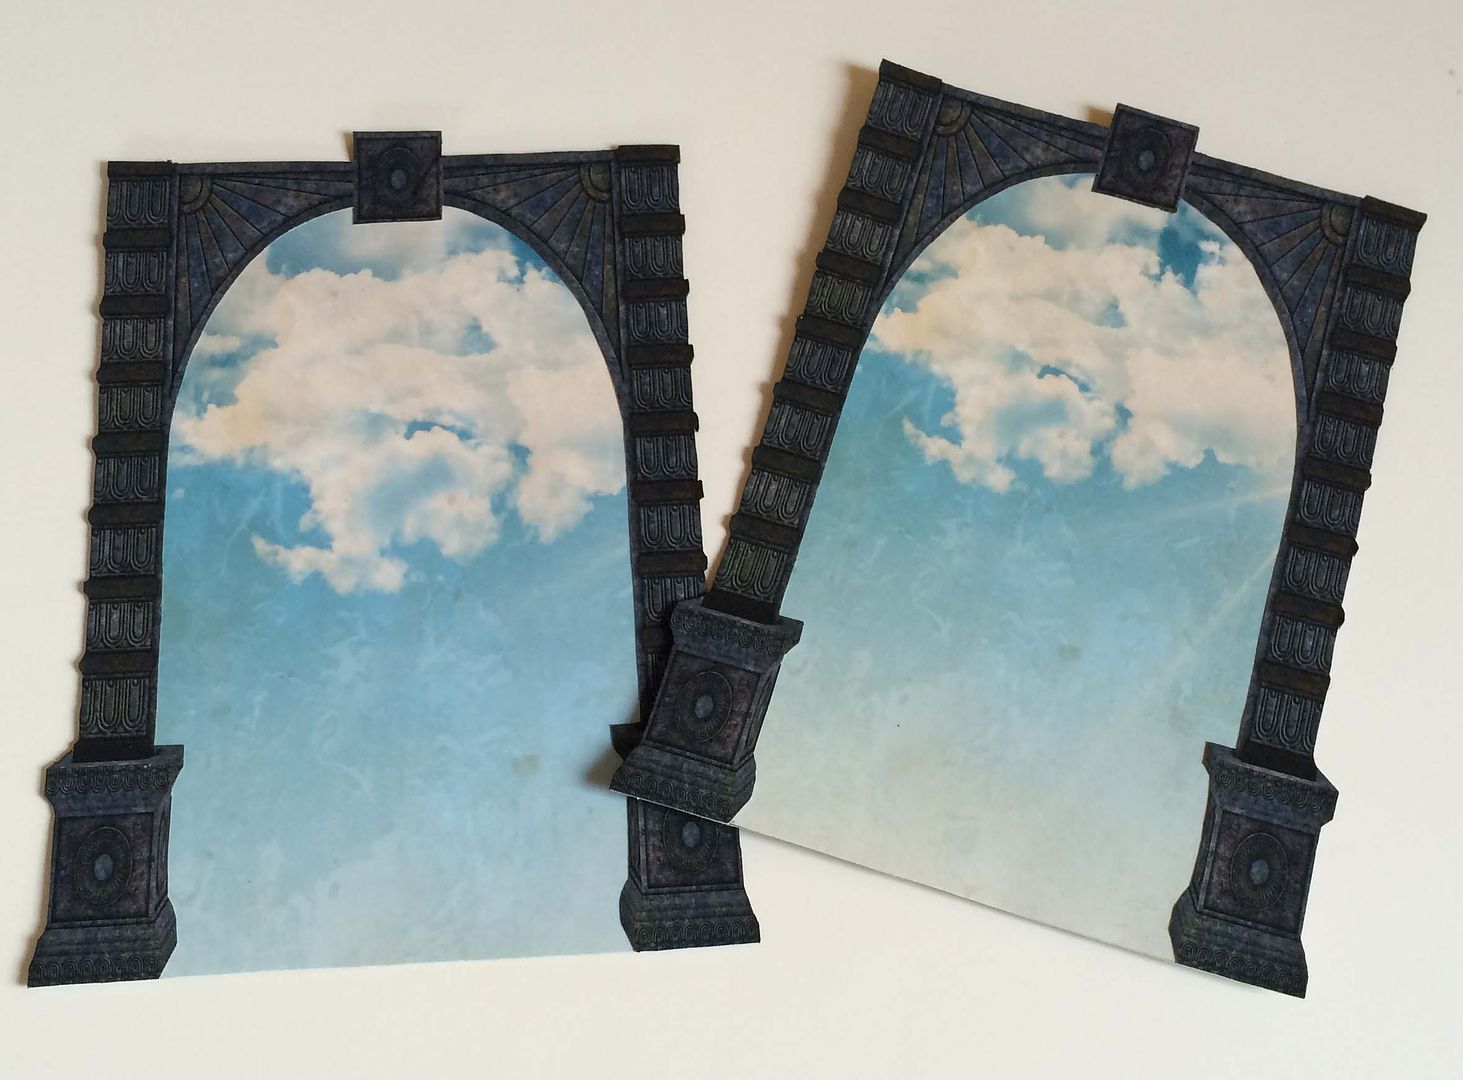
Finally, I glued the two arches together with the center columns overlapping.
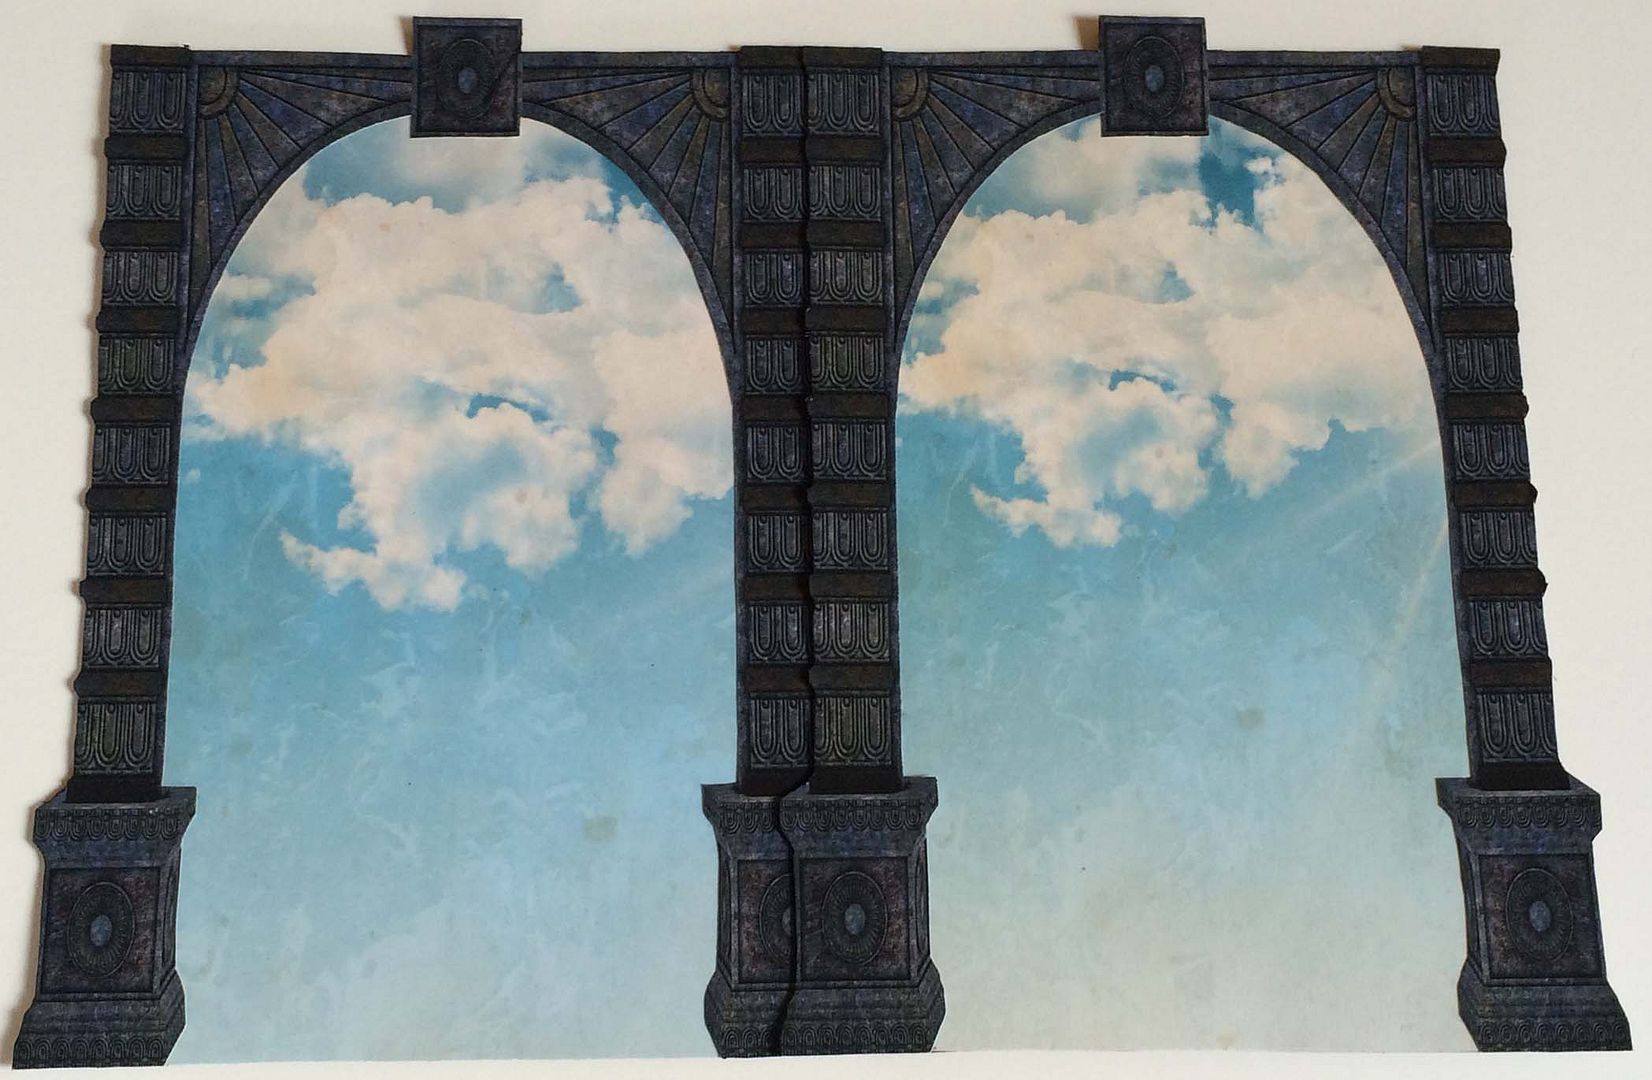
First, attach the shorter 3 arch piece to the back of the foam core (I suggest using E6000).
Next, attach any images you want to be in between the two sets of arches. In the case of the sample, I attached the steam version of the train flying off into the sky.
You might need to provide support to the arches until you have the everything assembled.
You can see in the photo below that I started adding other stuff before I had the back set of arches in place. That's something I recommend you wait on until you get the backdrop assembled as the images just get in the way.

Finally, attach the double arches to the back of the triple arch piece by gluing it to the wooden dowels in back of the triple arch piece. The two sets of arches together not only looks cool, but the second set adds more stability to the backdrop.
Unfortunately, I didn’t take a photo of the back arches attached without all of the balloons, but that (adding the balloons) is something you would also wait to do.
Just to reiterate, the best order for construction is:
- Make your base.
- Add the front arches.
- Attach anything to the front arches that will be between the two sets of arches. In the case of the sample, it is only the steam version of the train. None of the balloons you see are in between the arches. They are either attached only to the back arches or the sky.
- Add something dimensional that attaches to both the floor and the front arches. In the example, it's the suitcases. By doing this you will add more stability to the backdrop.
- Now you can add all the other elements.
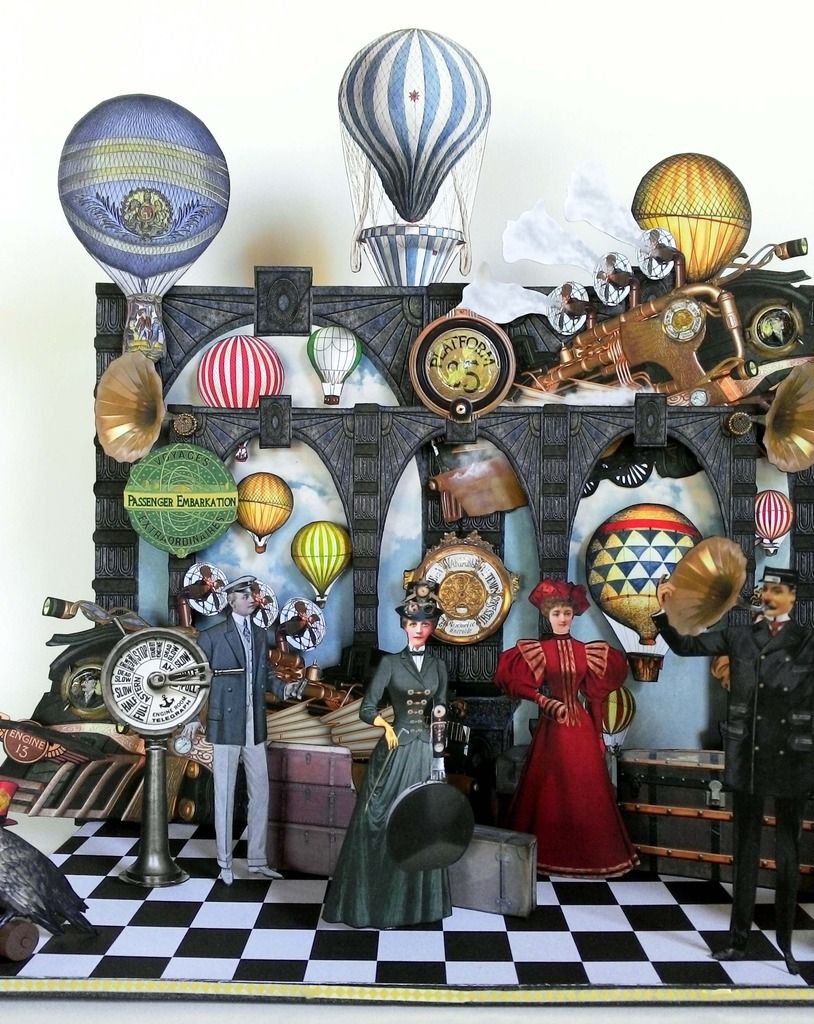
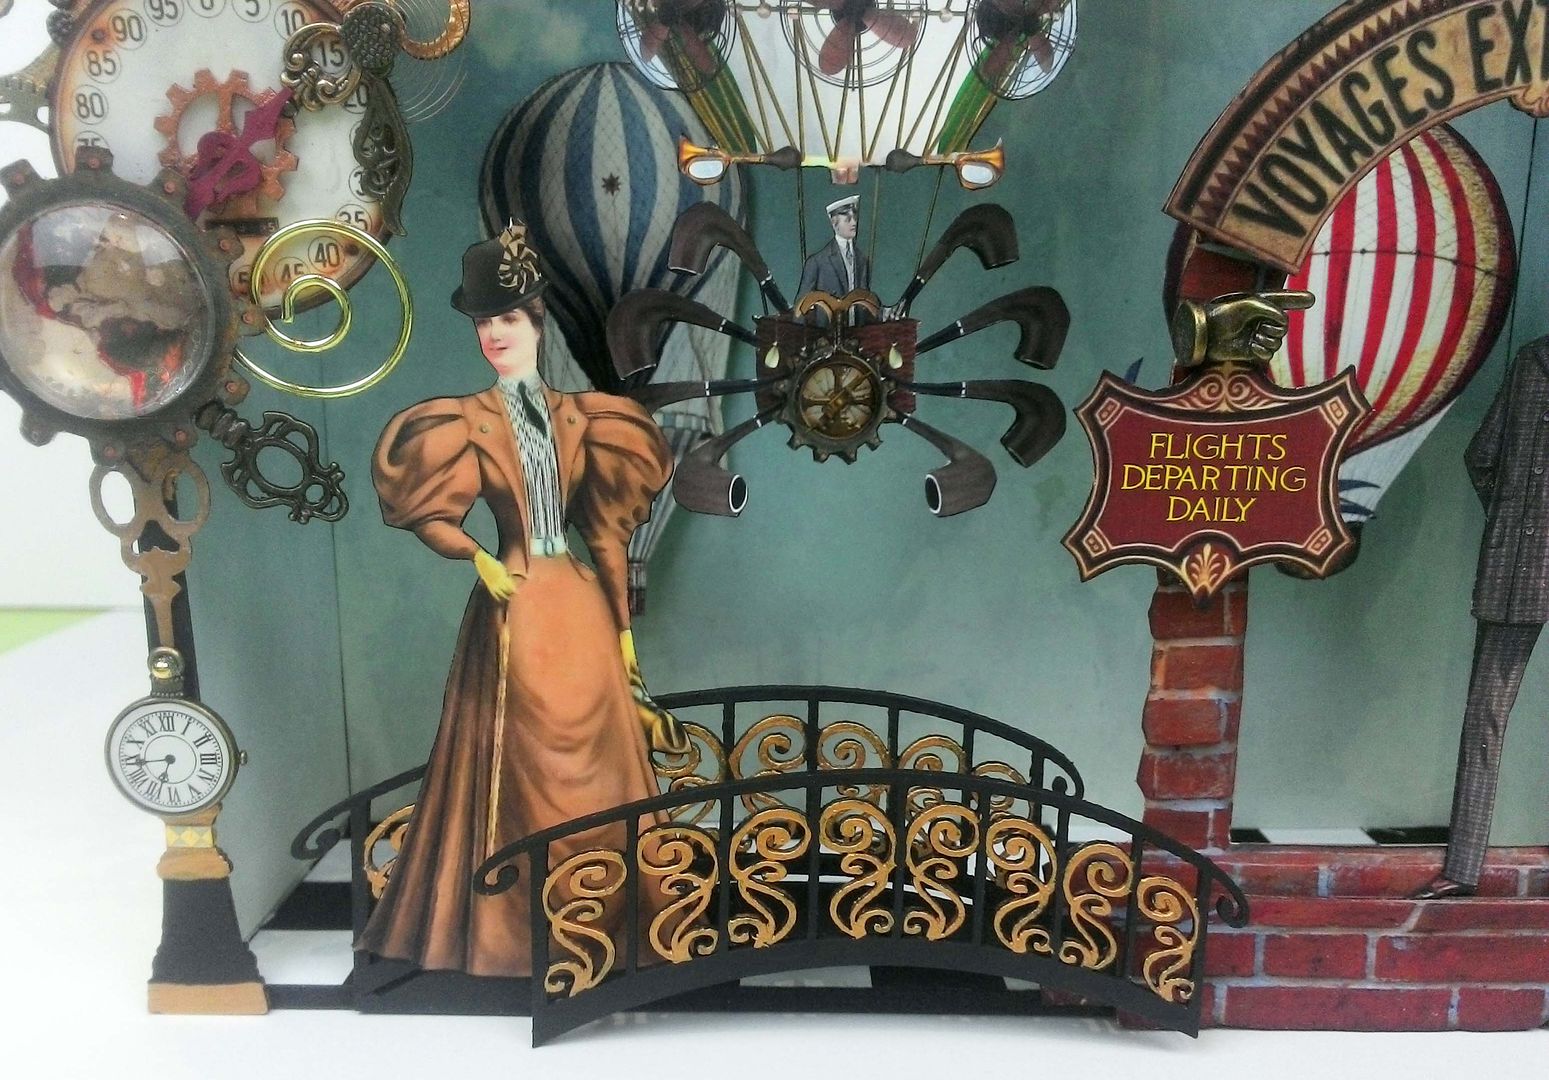
Notice in the picture below how I anchored the foam core base to the arched backdrop by gluing 3D suitcases to the floor and to the backdrop. There is one suitcase behind the woman and two others stacked at the arch to the left. The paper suitcases are from the Haunted Travel Ship Collage Sheet and Vintage Travel Tags Hardware Collage Sheet
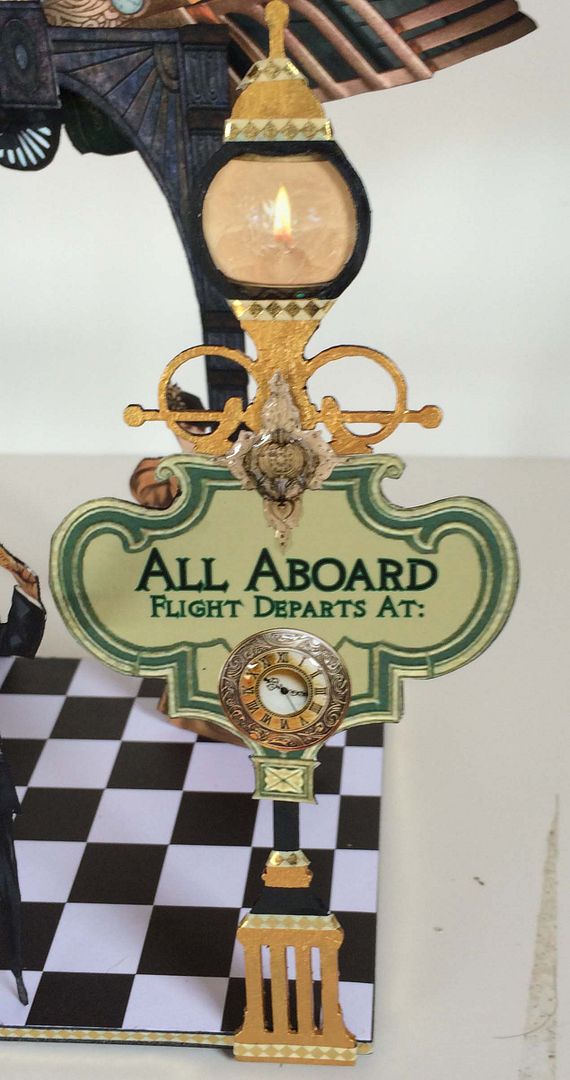
STREETLIGHT
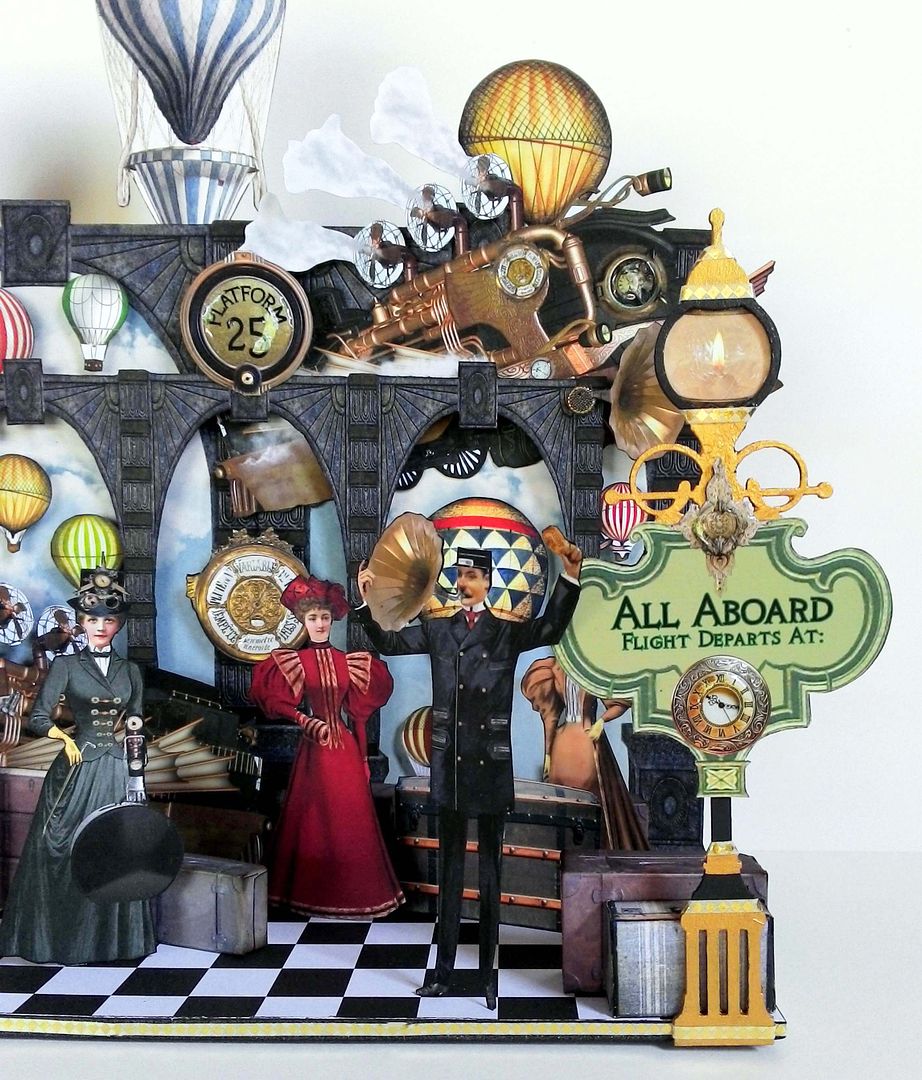
The streetlight is made from die-cut chipboard painted black and accented with gold.

Attached to light is the “All Aboard” sign. I added Glossy Accents to the clock to make pop. As a final touch, I added gold stripped tape to various areas on the light. The image of the light is from the Voyages Extraordinaire #3 collage sheet and is sized to fit the chipboard.
I used E6000 to glue the streetlight to the front of the foam core and then glued paper suitcases behind the light and to the base to support the light.

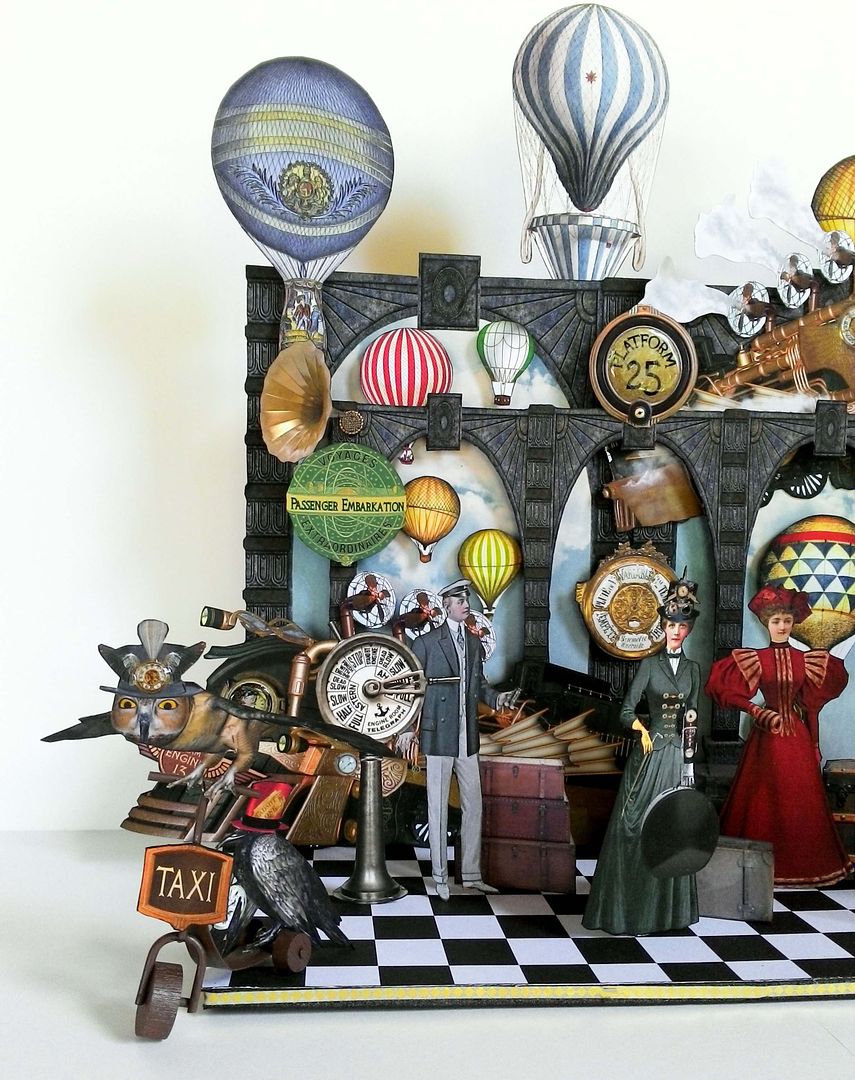
Next, I started adding signs, balloons, another train and people to the scene along with more suitcases. The balloons are popped up from the front or back of the backdrop.
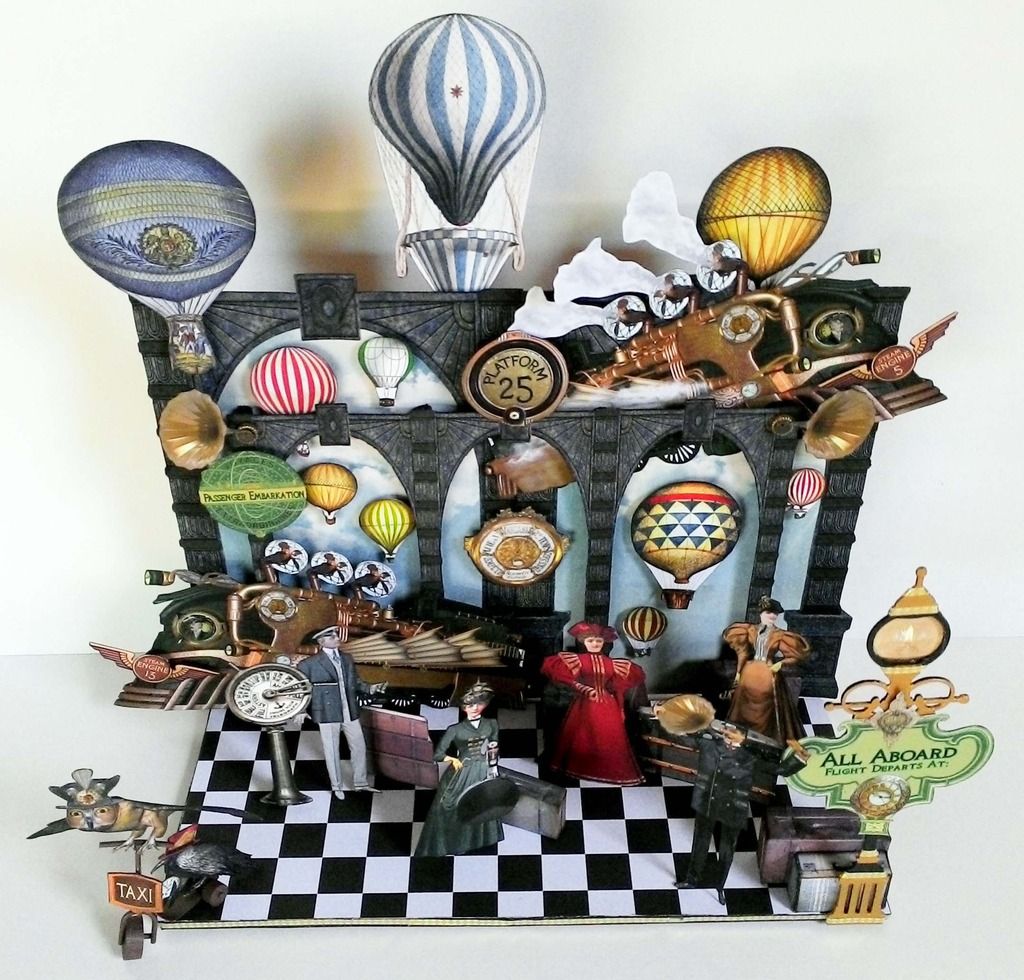
The people are attached to the base using either a toothpick glued behind the person (poked through the foam core and glued in place) or a square bead glued at the bottom of the person and then to the base.

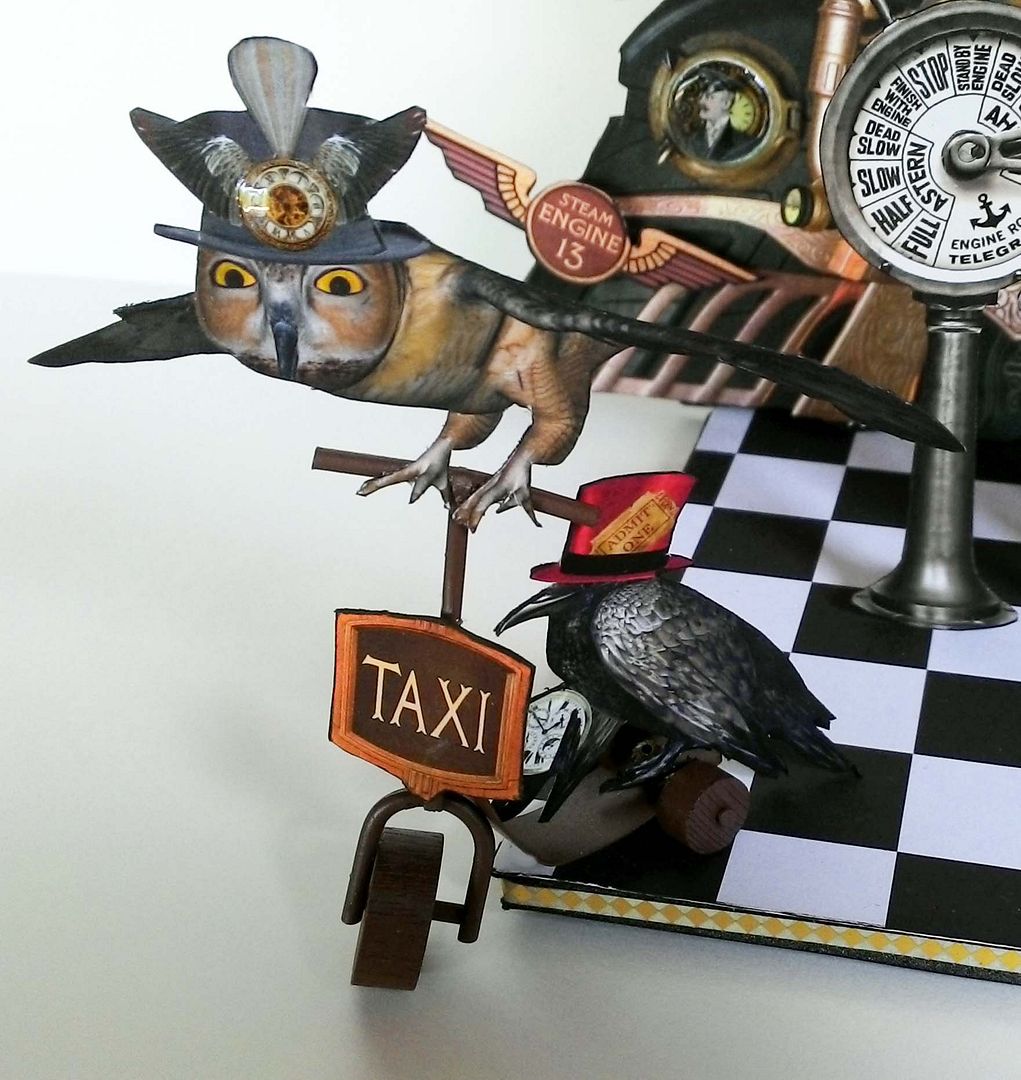
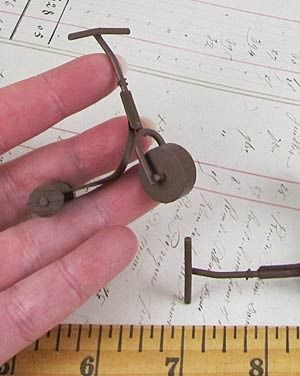
The final piece is the owl taxi flying away from the station with Mr. Crow in tow. The taxi is made from a rusty scooter.
Alpha Stamps Products Used for the Train Station
Or
I hope you have enjoyed my whimsical creations and are inspired to make some of your own!
6 comments:
Hello
Wahoo Laura it's completly amazing! I love your "voyages extraordinaires" exactly like a Jules Verne picture!
Wonderful imagination!
Hugs and kisses
You do such amazing Art! I love your YouTube , and all your creations! You Inspire imagination! Thank you! xDebi
Amazing! This one is gorgeous.
OMG Laura! I'd need an engineering degree to create this amazing piece! You are just amazing! This is truly an award-winning project.
Laura, you have done it again, what a fantabulous steampunk extravaganza! Love every element of your station and love to see dirigibles and hot air balloons back in your wonderful creations again. Your new steampunk digital sheets are fabulous, off to Alpha Stamps I go!
Wow Laura, I am completely overwhelmed by these wonderful projects! The amount of work you have put in, and they are vibrant and alive, and make one want to take an immediate steampunk journey to who knows where? You must have had such fun making them.
Shoshi
Post a Comment