


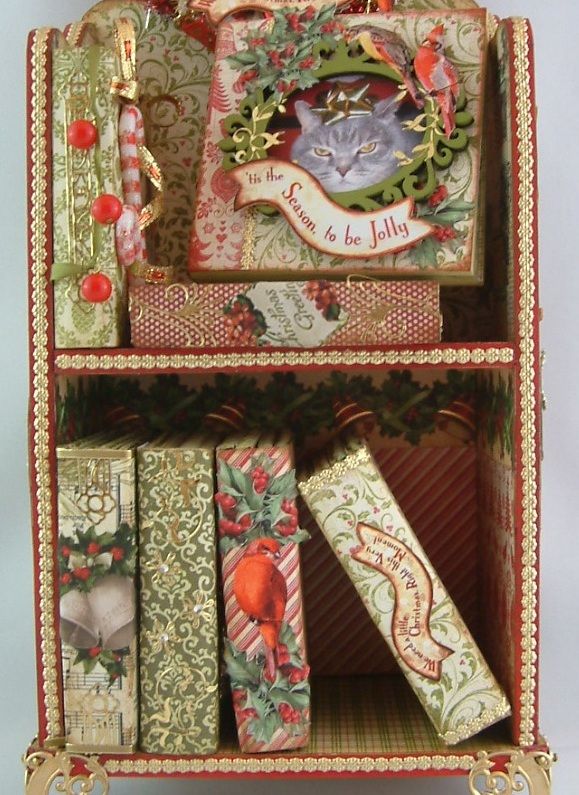
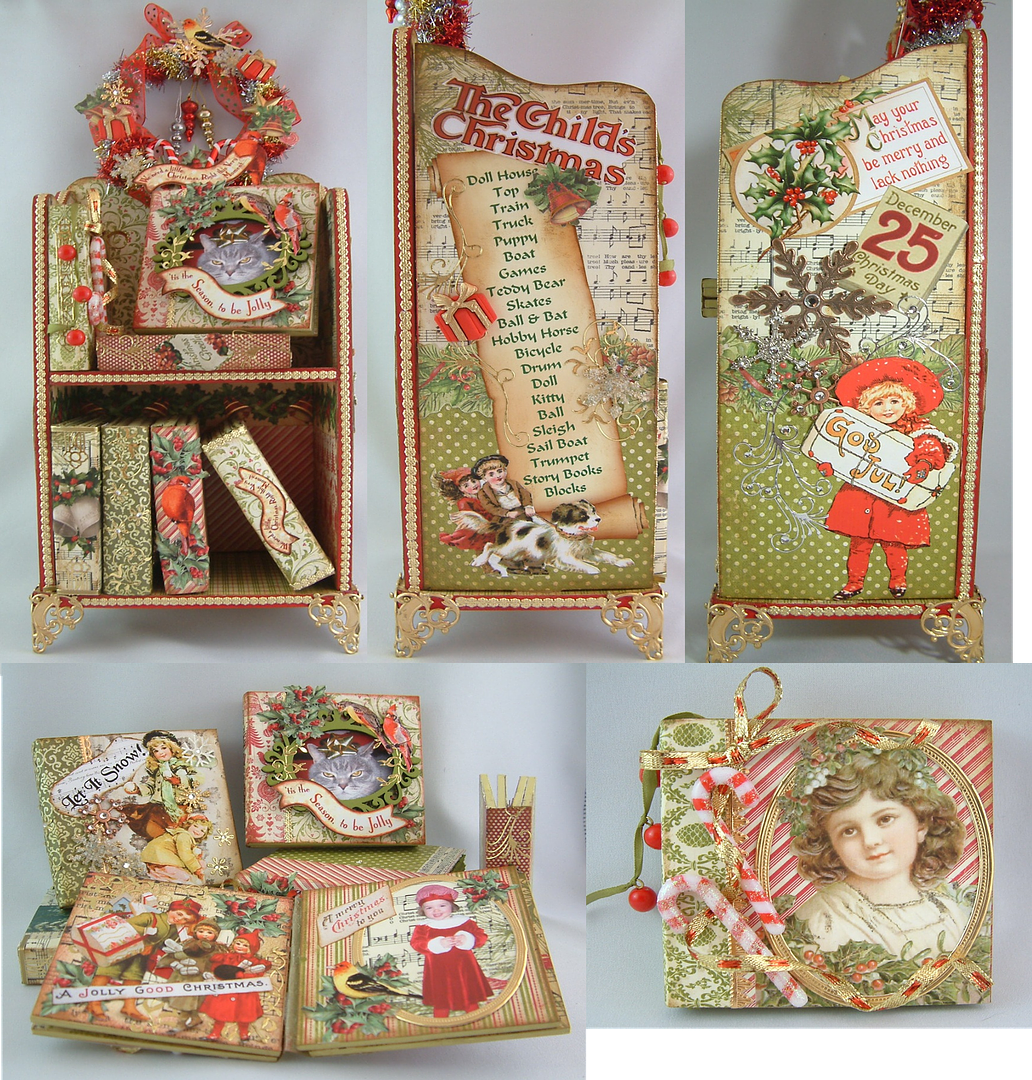
The
bookshelf holds several mini albums depending on the thickness of each album. The albums are also made of Masonite and come
in packages
of 3 albums.
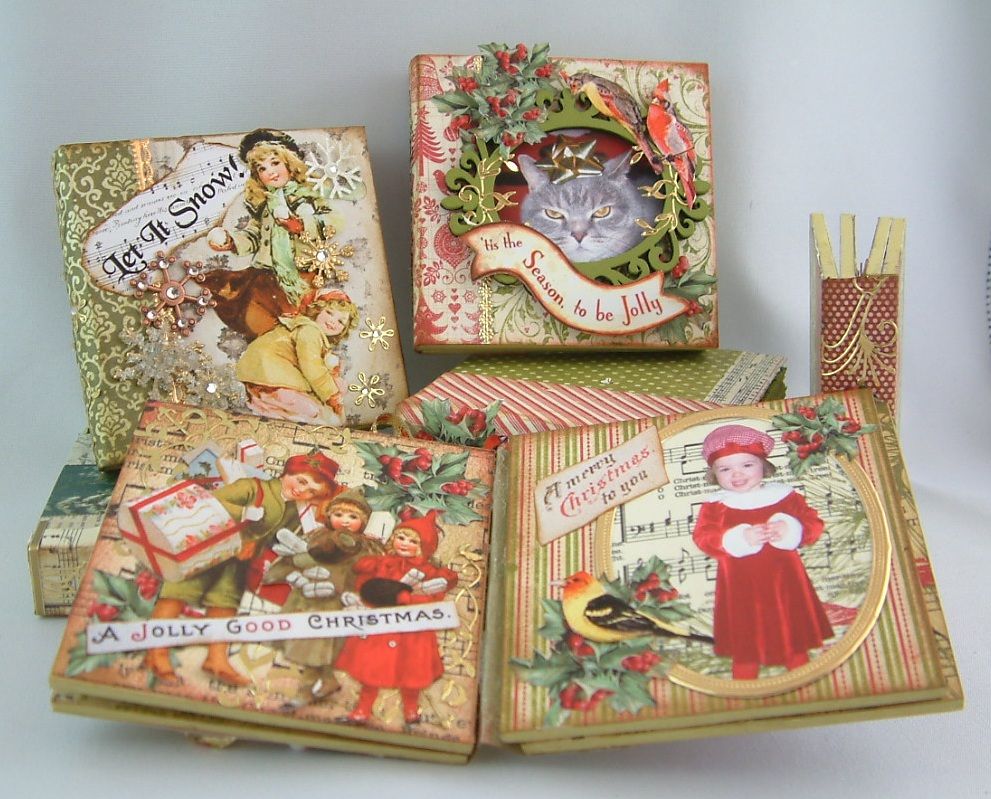
Below
are some tips on assembling and decorating the bookshelf and mini albums and a
supply list.
Decorating and
Assembling the Bookshelf
- Before I started decorating the bookshelf I figured out how it was assembled. Familiarizing yourself with the assembly helps when deciding where you want different pattern paper to go and to make sure it’s on the side you want and going in the direction you want.
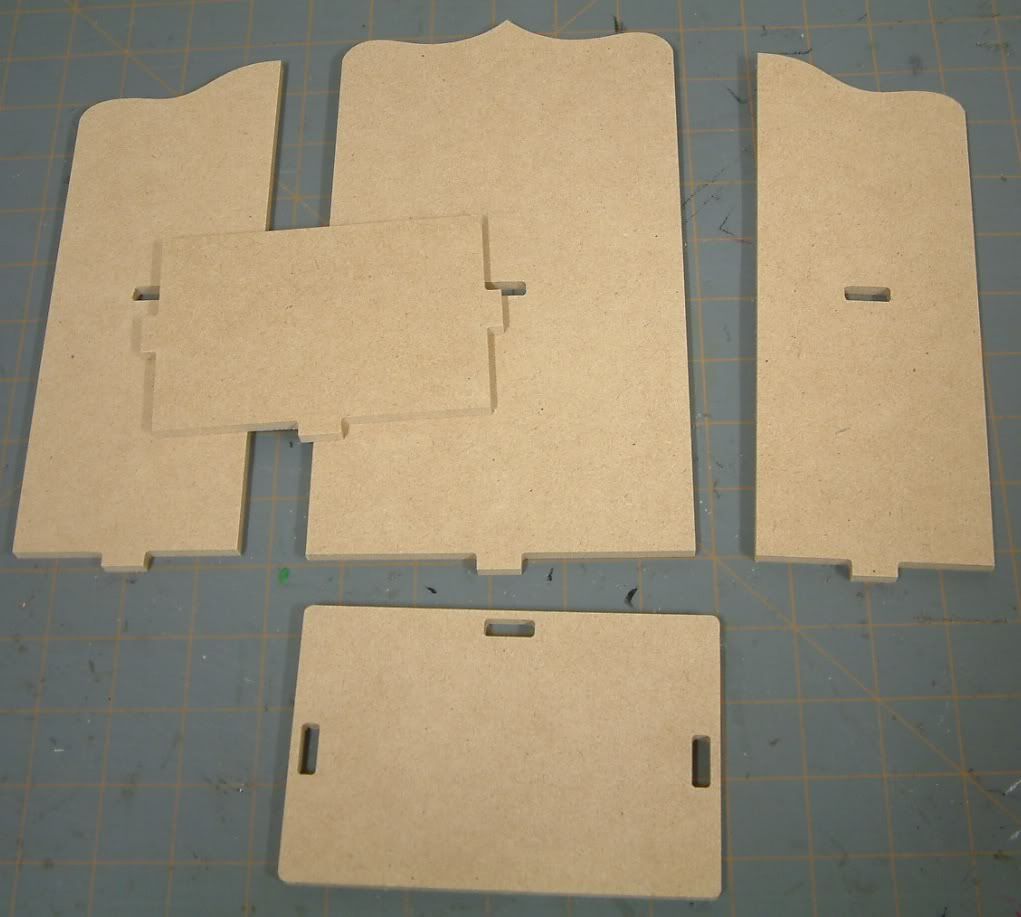
- You’ll also want to do as much decorating as you can before assembling the bookshelf, as it is much harder to decorate once the piece is assembled. I painted, added all of the paper and borders before assembly.
- I started by painting what will be the visible edges of the bookshelf red and the pages of the mini albums green.
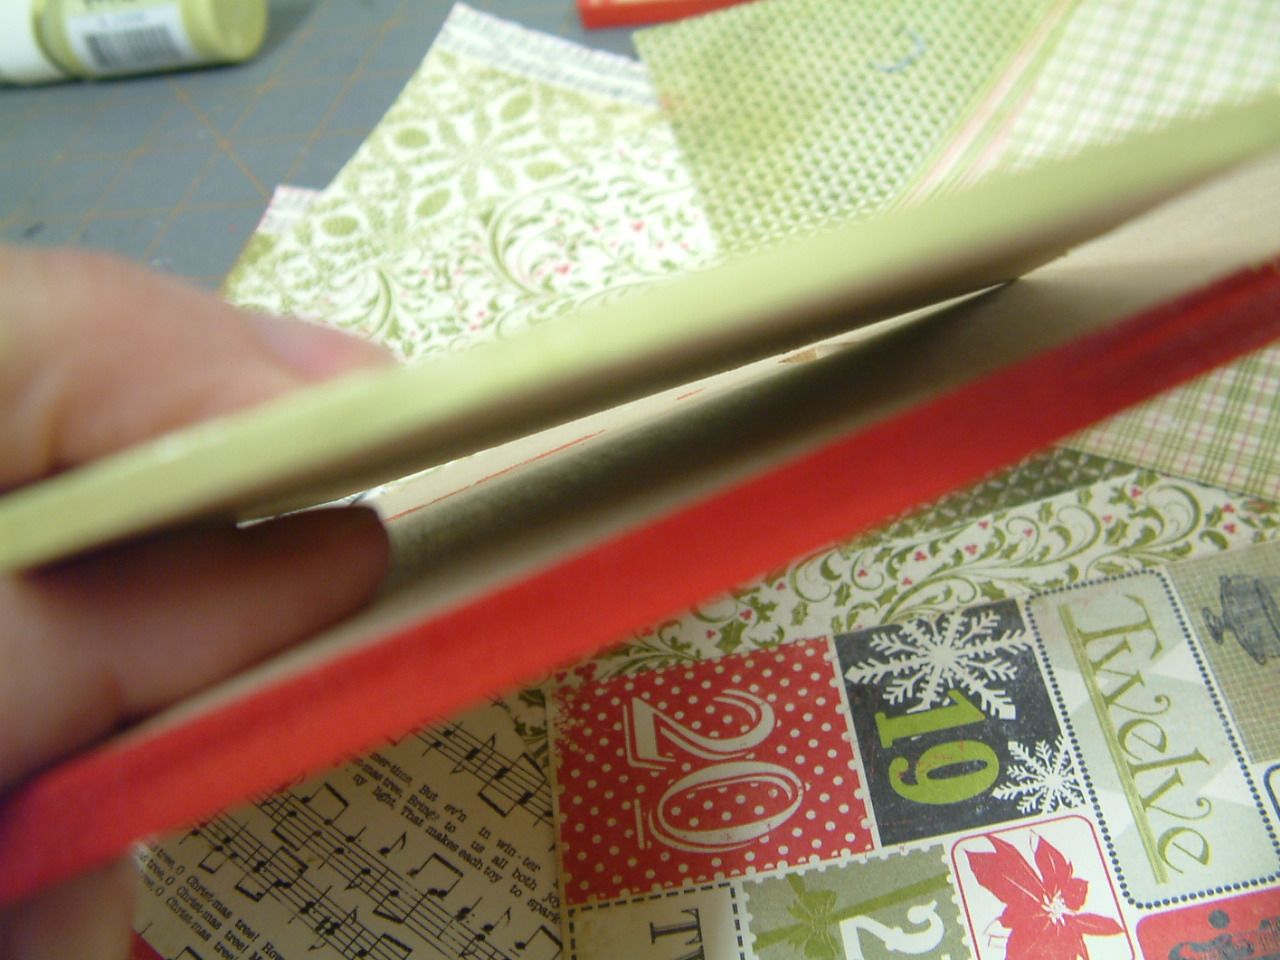
- Next, I glued paper on all of the visible surfaces of the bookshelf. I used an X-acto knife and sandpaper to trim the paper from the edges.
- If you use paper to cover the surfaces you will need to reopen the holes used to assemble the bookshelf. Reopen the holes on the inside of the pieces not the outside so that the outside paper hides the construction.
- To give the piece a more vintage look and to cover the white edge of the paper I used Ranger Distress Ink (Brown Corduroy) on the edges of the paper.
- I added Visions of Christmas Foiled Die-Cut Cardstock Borders to the outside and inside of the pieces. I love these borders. Some of the patterns can be used for non-Christmas projects.

- I glued the bookshelf pieces together.
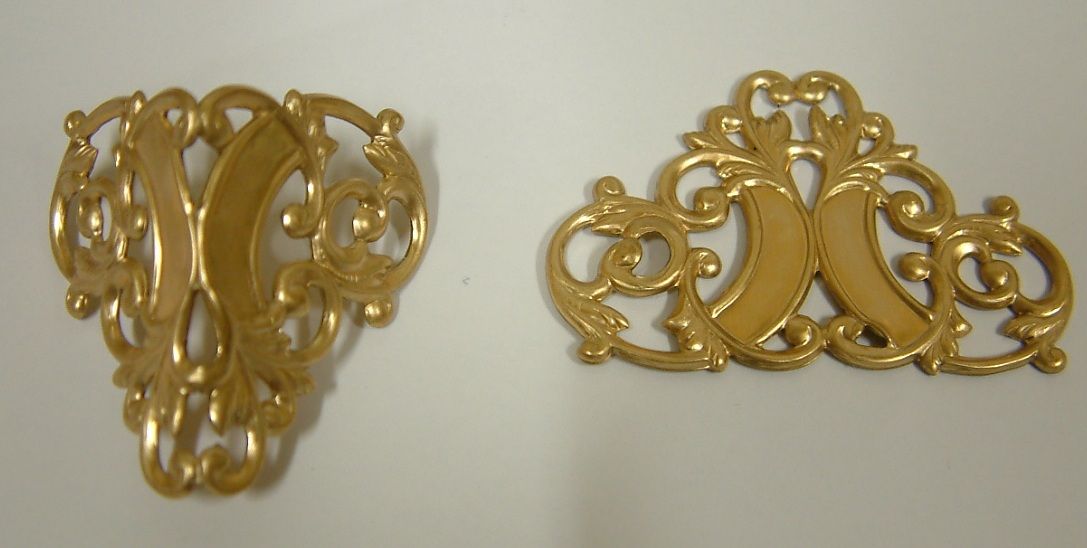
- For feet I bent Brass Filigree Corners and attached them to the bookshelf using E-6000 glue. You need to use a strong glue to support the weight of the bookshelf. I also used tiny brass nails to add extra support to the feet.
- Next, I added collage sheet images and other decorative embellishments to the outside of the bookshelf and trimmed the edges with Dresden borders.
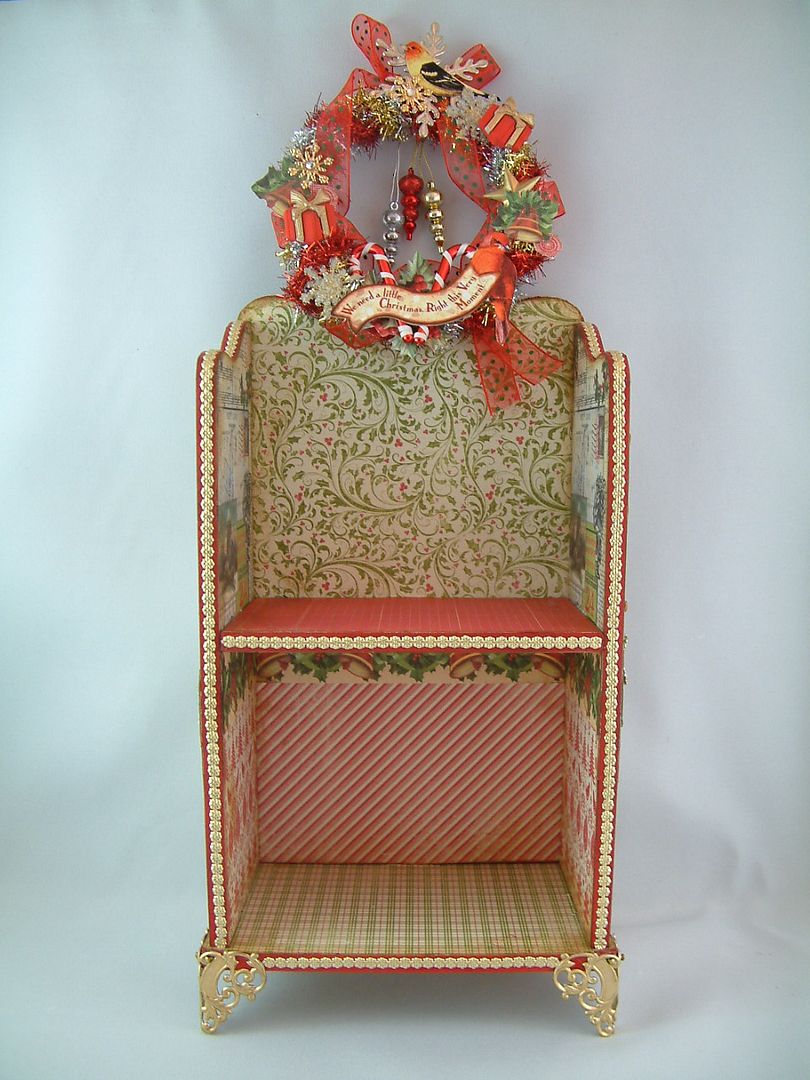

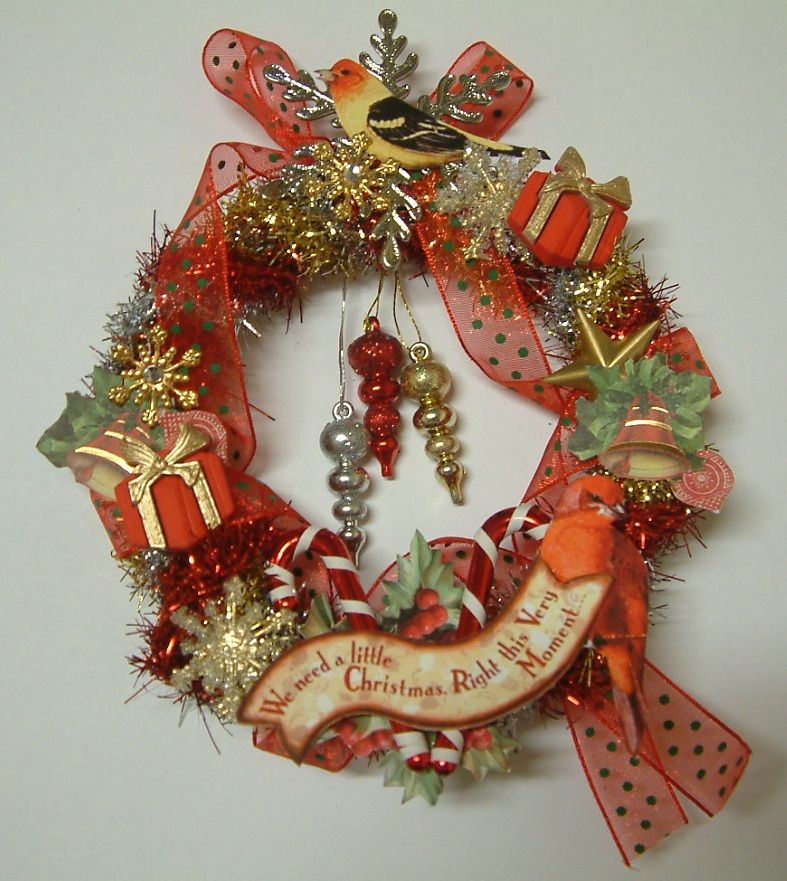
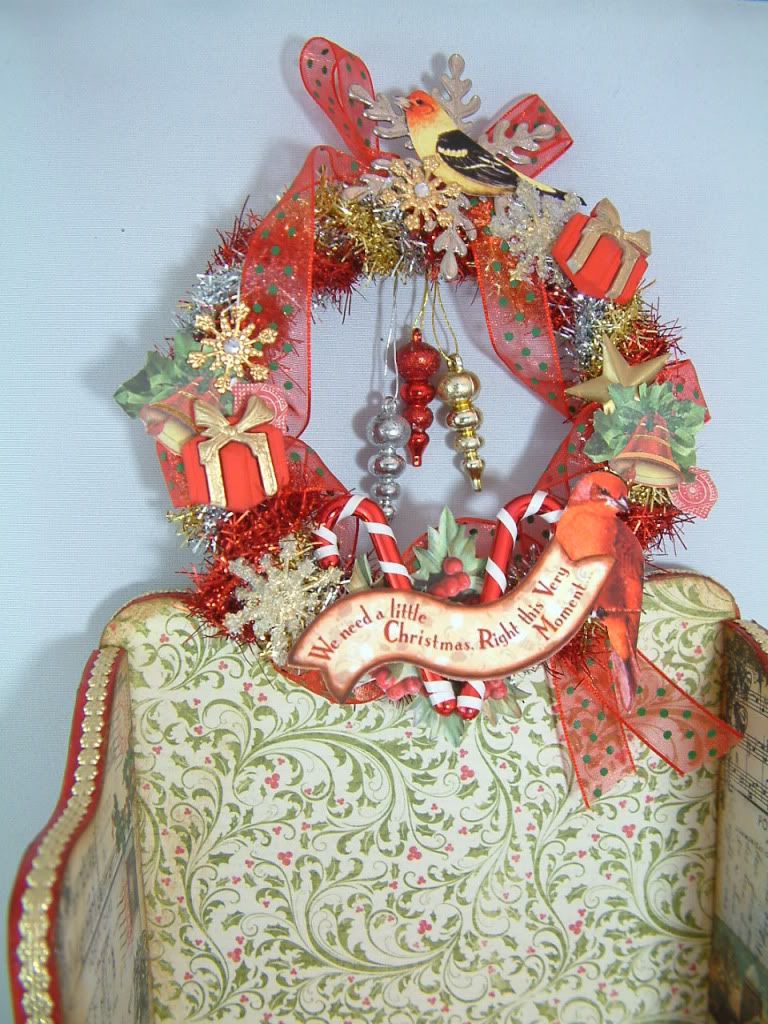
- To create the wreath at the top, I cut the center out of a plastic lid so just the edge remained. I then wrapped the edge with gold, red and silver tinsel. And of course added lots of embellishments. I glued the wreath to the bookshelf with E-6000 glue.
Decorating and
Assembling the Books
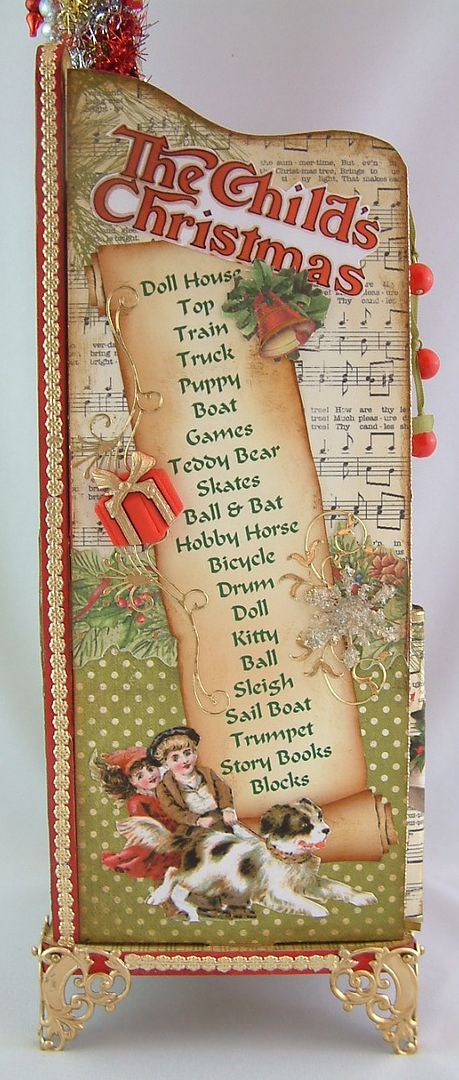
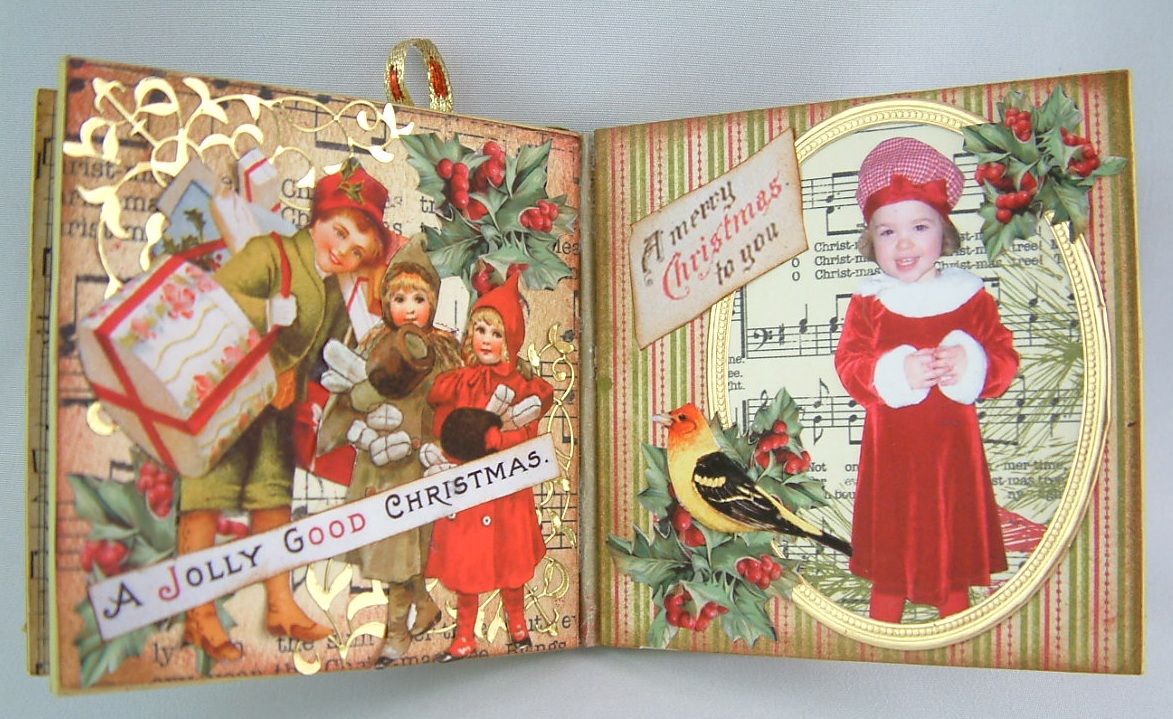
The mini
album pages come in a sheet. I broke the
sheets apart, clipped the tabs off with a pair of sturdy scissors and then used
sandpaper to file away the excess.
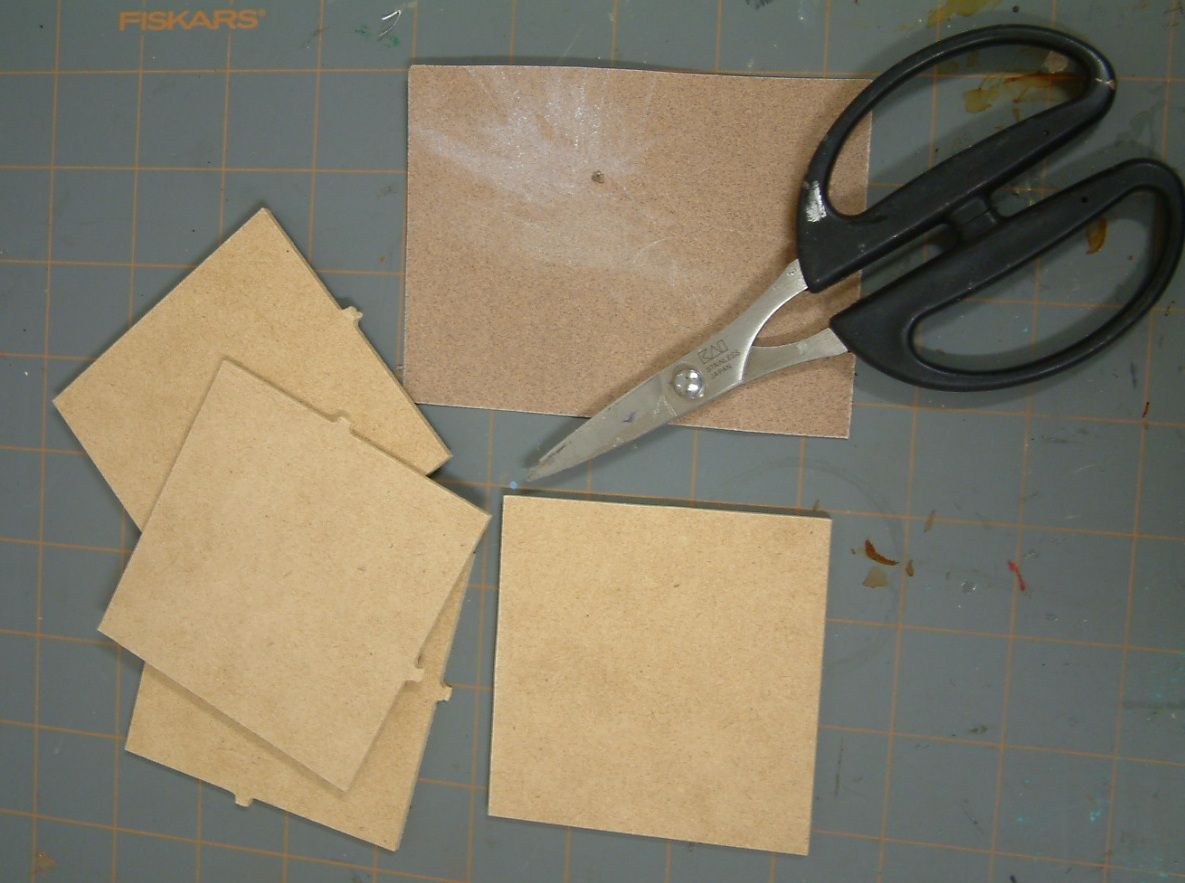
- There are different ways you can assemble the album pages. You could use paper to create an accordion fold album or you could glue the pages to a spine (which is what I did).
- If you are going to glue the pages to a spine you need to decorate the pages first and stick to flat embellishments (paint, paper, rub-ons stamping etc.). Whatever you add will create bulk. If you attach the spine before decorating the pages the book won’t close.
- I covered each page back and front with decorative paper. I inked and embellished the inside pages.
- I cut a piece of paper to act as the spine.
- I glued the front page to the spine paper.
- Next, I glued just the edge of the two inside pages to the spine. I used E-6000 glue as you need to have a strong bond between the Masonite pages and the paper spine so that when you open the book the pages won’t separate from the spine. Alternatively you could use fabric tape (bookbinding tape) as a spine.
- I glued the back page to the spine paper.
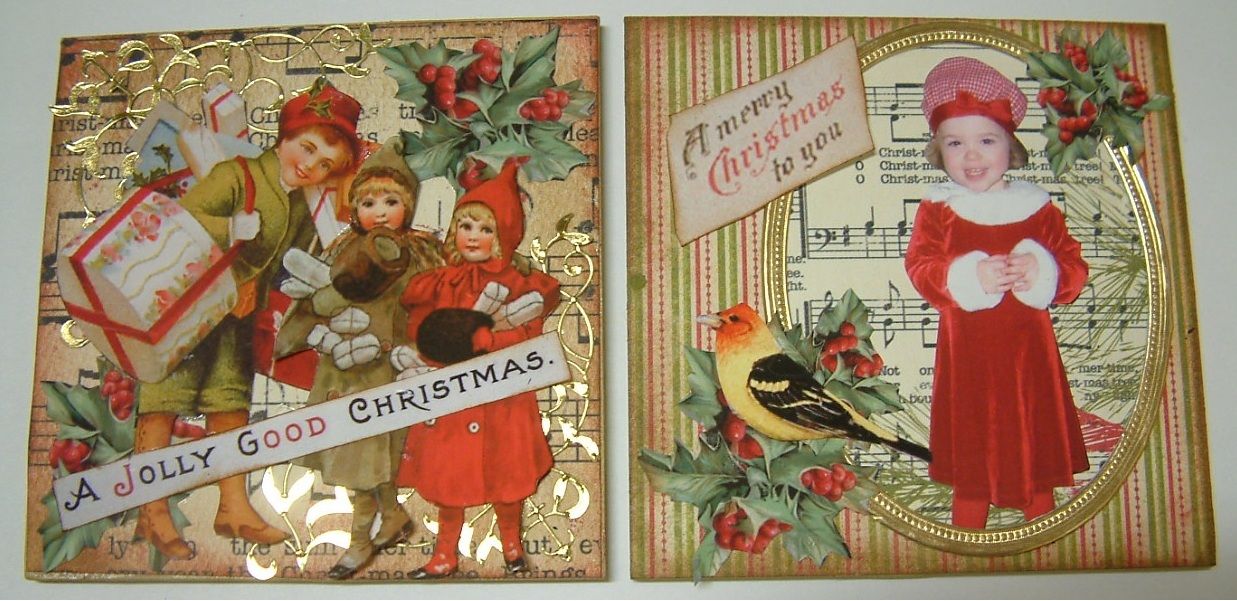
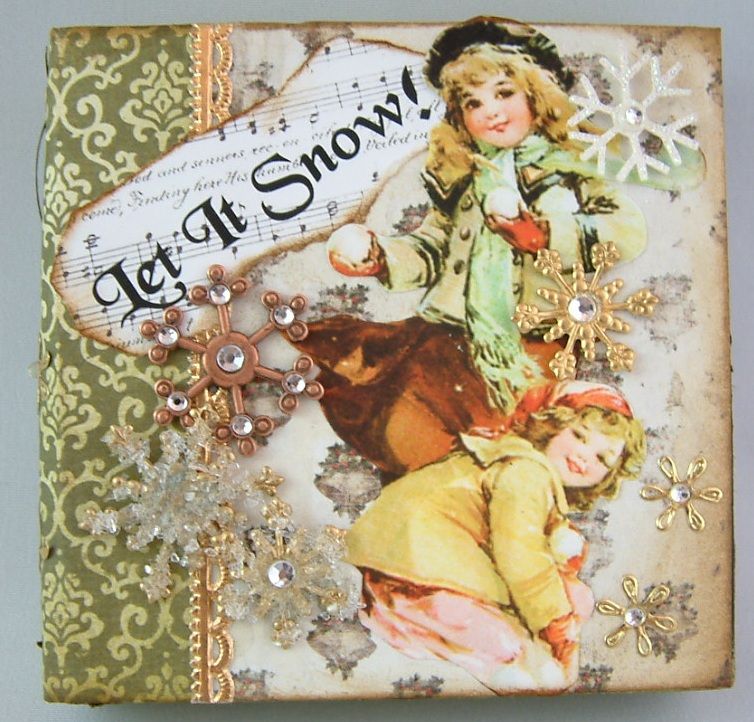
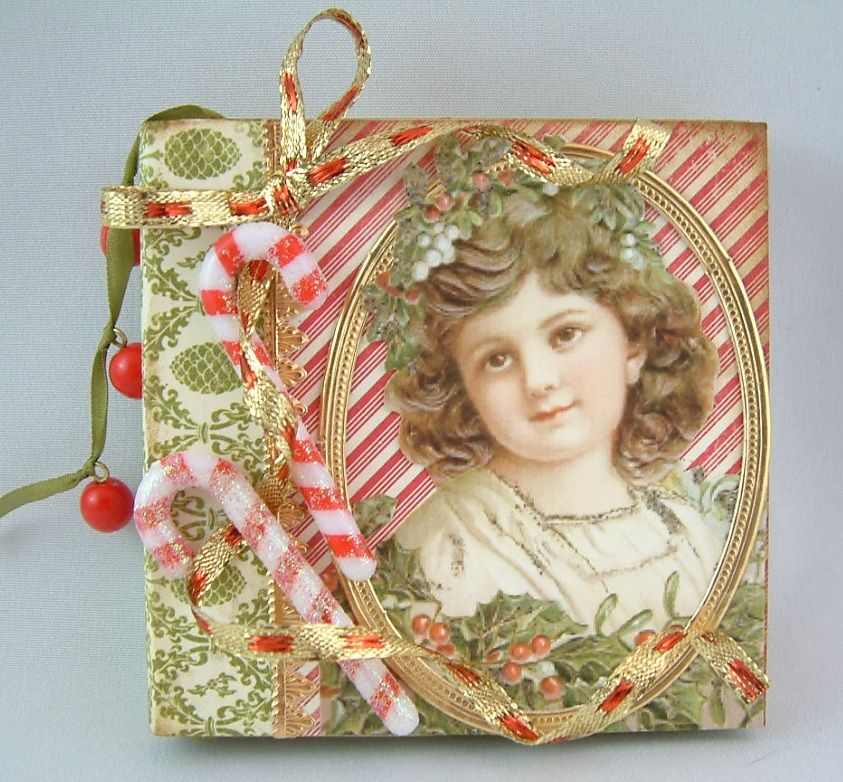
- Lastly, I decorated the covers of the albums and the spines.
Book Covers

Spines
Inside Pages

Alpha Stamps entire line of Christmas
collage sheets are on sale plus all of the Christmas paper. This includes the collage sheets and papers I
used in this project.
Alpha Stamps Products Used in This Piece
Brass
Filigree Corners – Bookshelf Feet
Visions
of Christmas Foiled Die-Cut Cardstock Borders – Bookshelf & Wreath
Tinsel
(Gold/Silver/Red) - Wreath
Brass
Snowflake Charms Wreath
Large
Brass Snowflake with Hole - Wreath
Gift
Box Buttons - Wreath
Christmas
Filigree Set – Wreath / Bookshelf
Red
Sheer Dots Ribbon (Red/Green) - Wreath
Metallic
Stickers – Fans – Gold & Silver – Bookshelf
Metallic
Stickers – Vines – Gold – Bookshelf
Gold
Mini Rosette Dresden Borders Bookshelf and Books
Gold
Zig Zag Dresden Borders – Mini Album
Cameo
Frames: Ovals – Mini Album
Small
Dresden Oval Frames – Mini Album
Red
Round Beads with Brass Loop – Mini Album
Collage Sheets
14 comments:
As always, your attention to detail is magnificent!! A beautiful project ~
What a gorgeous keep-sake, love the papers you used and all the amazing embellishments.... thanks for the tutorial.
What a STUNNINGLY gorgeous piece this is!!How helpful to have the instructions too.Thanks.
Quel magnifique Noël magique......
C'est tout simplement merveiulleux, je suis éblouie. Bravo
This is all so special I don't know where to begin to comment on it. Thank you for telling us how you made it all--I so enjoy seeing your work.
Love Chrissie xx
This is so fantastic - amazing x
What can I say, you have outdone yourself again!!! Gorgeous. Alpha is so lucky to have you on their team.
DianeD
Hi Laura, Another jaw dropping piece of art. Your work is just amazing. When I saw this, there were so many different uses I could think of, one was doing something like this for Halloween and using the Mini Albums and filling the pages with Potion Recipes, etc...... I just love everything you create!!! But, my pocketbook it definitely NOT liking it, LOL.....
Warmest regards, Diane
Oh my! The little bookshelf! what an adorable thing! How on earth did you manage to make me feel Christmassy in July, when it's 106 f outside? Now I want eggnog and gingerbread! The brass corners I need to look at for Hubby's Steampunk Study. They look so delicate and 19th Century.
Absolutely adorable! I may have to make one myself :)
xo,Teri
STUNNING, AMAZING This is gorgeous. You amaze me with all your details.
What a wonderful post, I love Christmas in July and this project will definitely be one I'll have to try :-) I'm new to your blog and look forward to seeing more!
Angela
http://www.whimsyways.blogspot.com
How absolutely quaint and adorable! Love the little books sprinkled with good cheer of olde time ephemera! Great work...and yes, would make a wonderful gift! Thanks for the inspiration and reminding us of the 'joy of Christmas'!
Ditto to what everyone has already said! Laura, this is just darling, and your tutorial is so complete and easy to follow. Thanks for another great project and fabulous inspiration!
Post a Comment