

In the
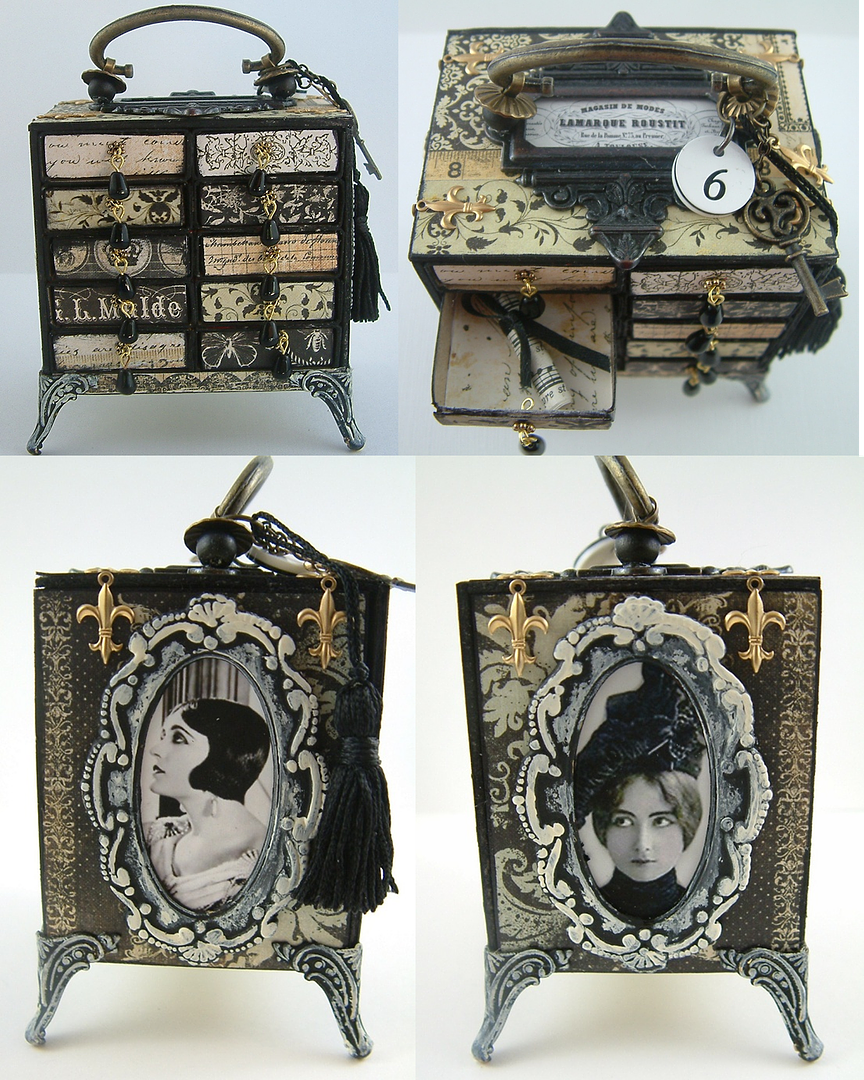
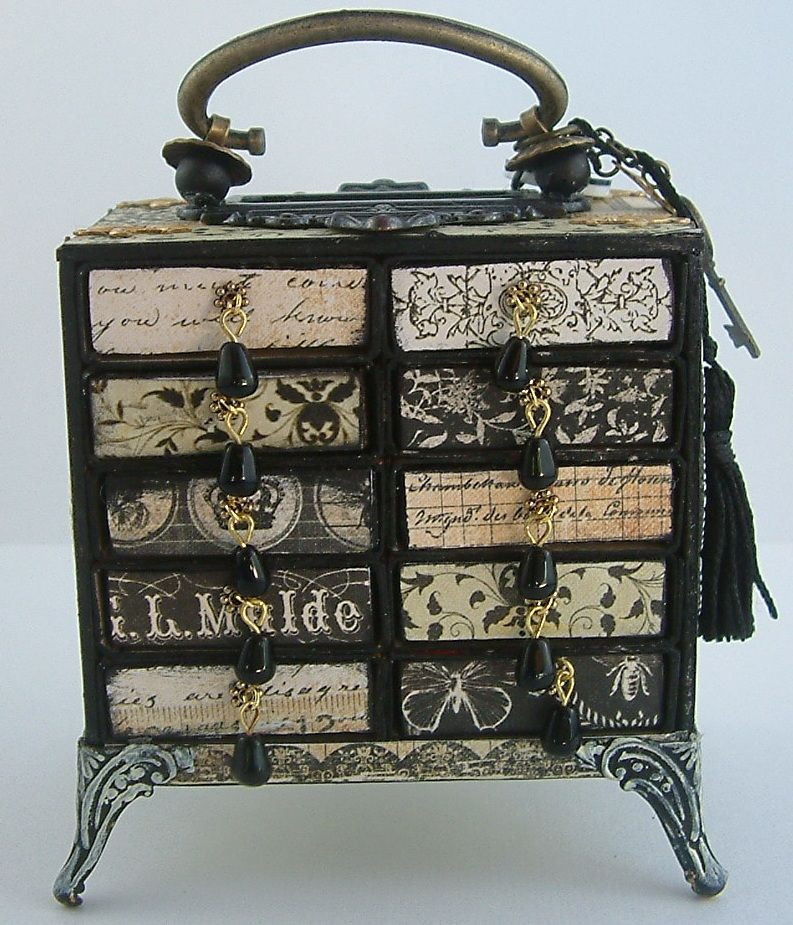
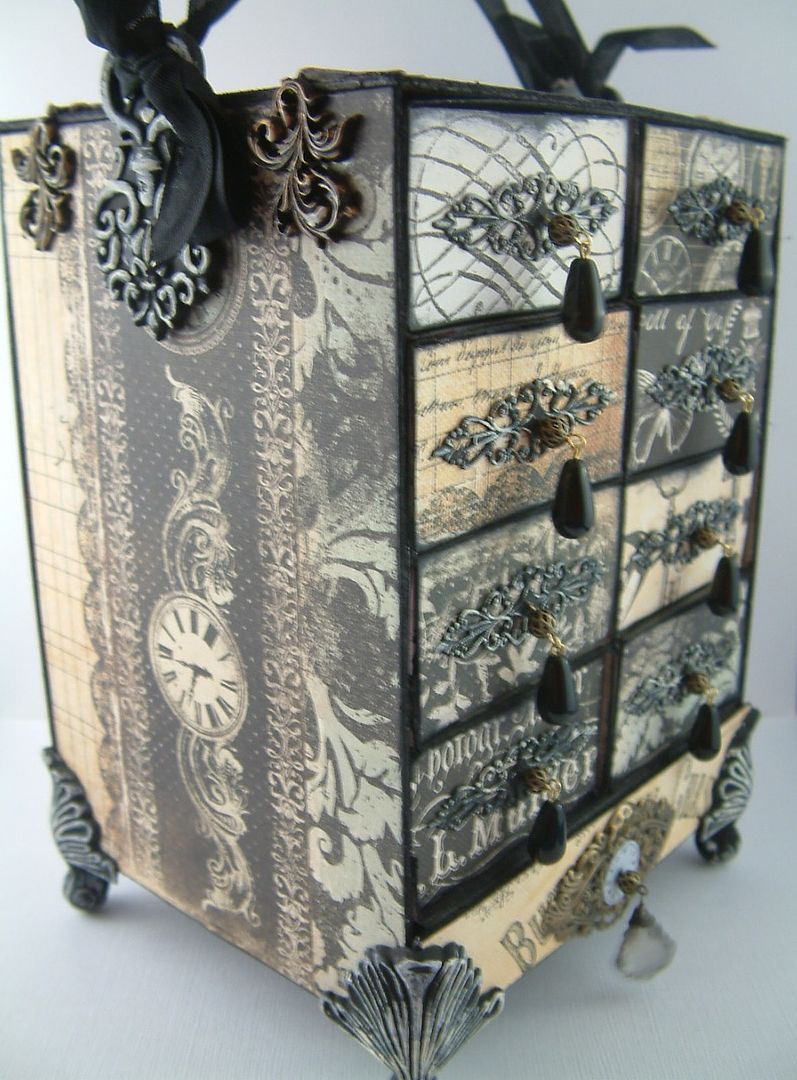
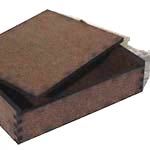
tutorial I’ll cover the supplies you’ll need and the steps to create this matchbox
chest. I’ve also created two other
versions of the chest to give you even more ideas of what you can do with
matchboxes.
So sit back and relax and enjoy learning how to make a
chest out of matchboxes.
VIDEO PART ONE
Be sure to watch part one before watching part two.
VIDEO PART TWO
Products I Used That You
Can Find At Alpha Stamps
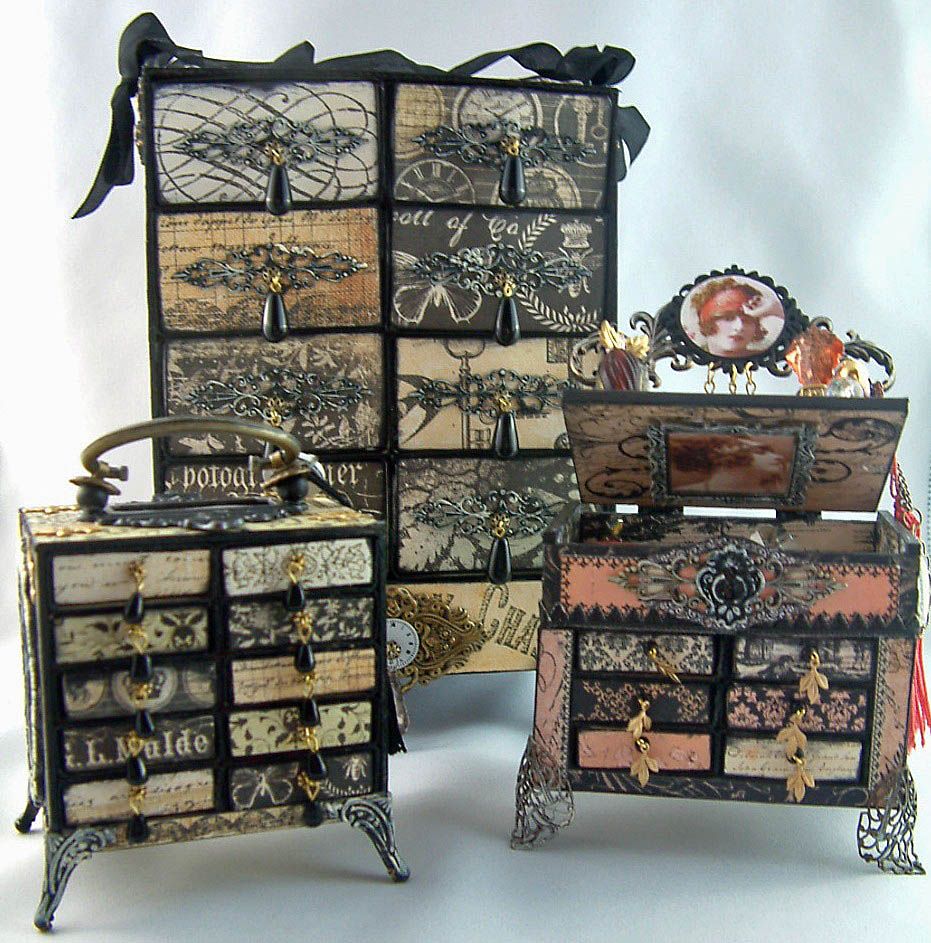
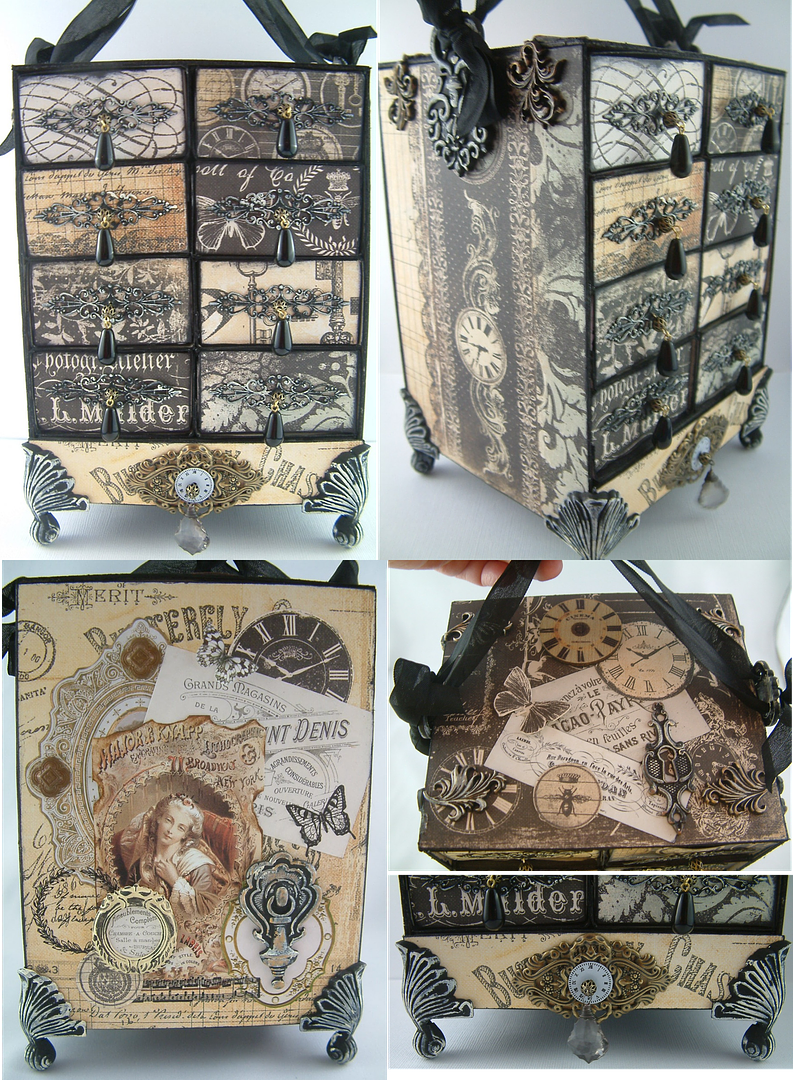
It’s really easy to scale the chest up in size. This larger version of the chest is very similar the small version except that I used matchboxes that measure 4 ½” x 2 ½”. This size of matchboxes is sometimes referred to a kitchen matches.
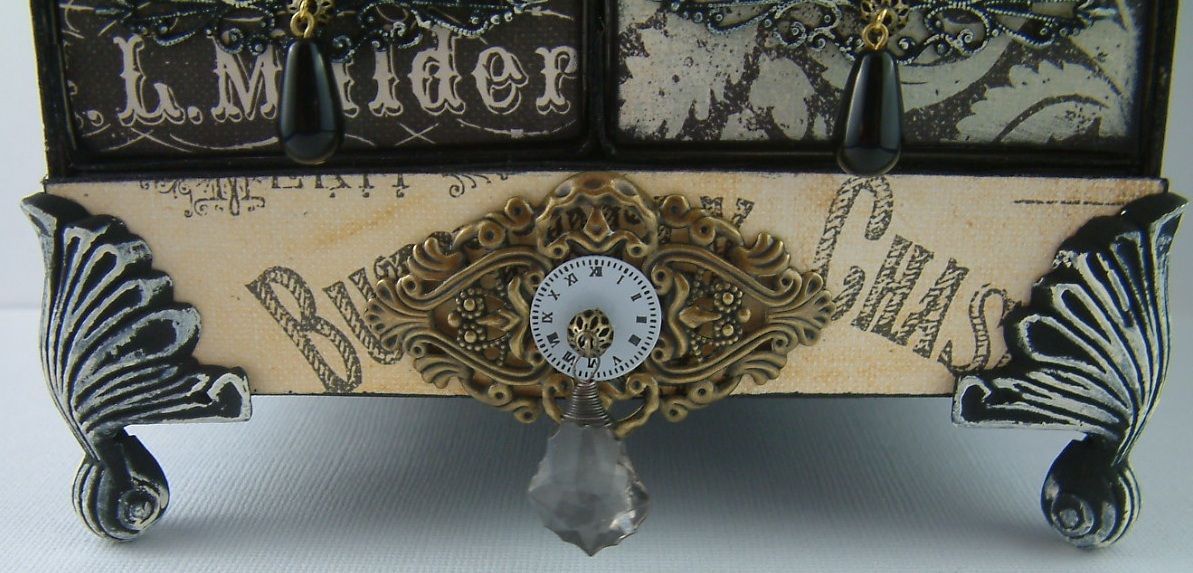
The base is larger than the one in the small version. This is to accommodate the larger feet. The feet I used are no longer available but Alpha Stamps carries feet that would work great for a chest this size and I think they are even prettier than what I used.
Instead of a metal handle I used ribbon.
In
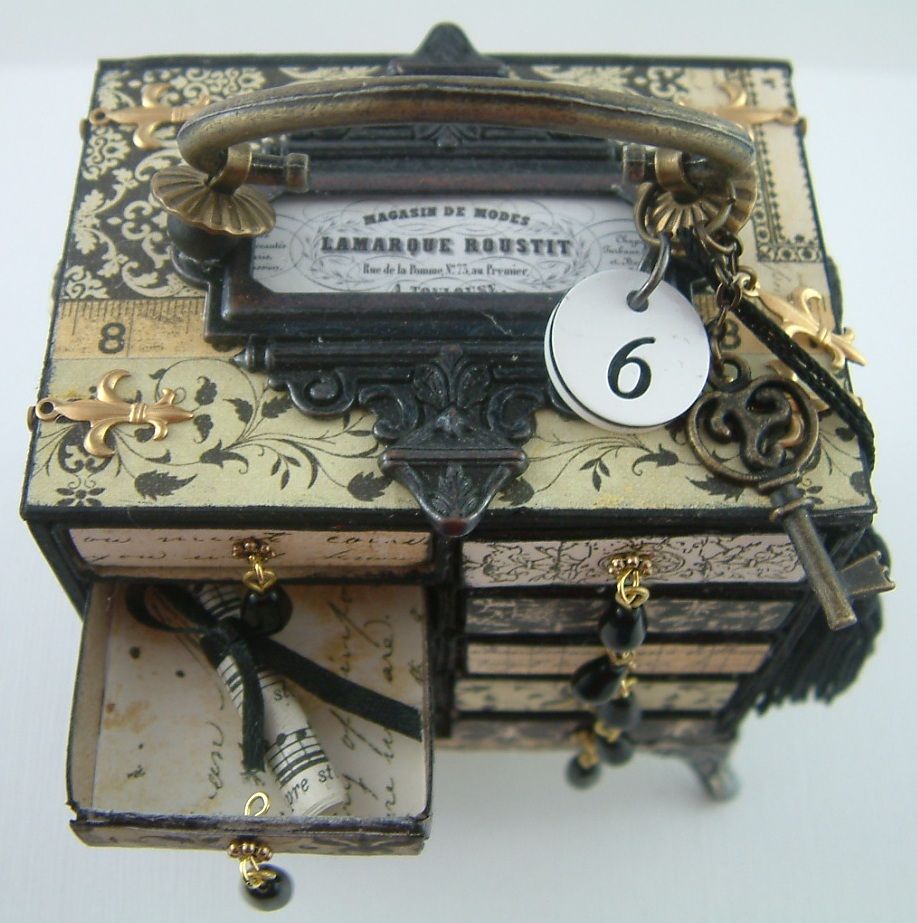
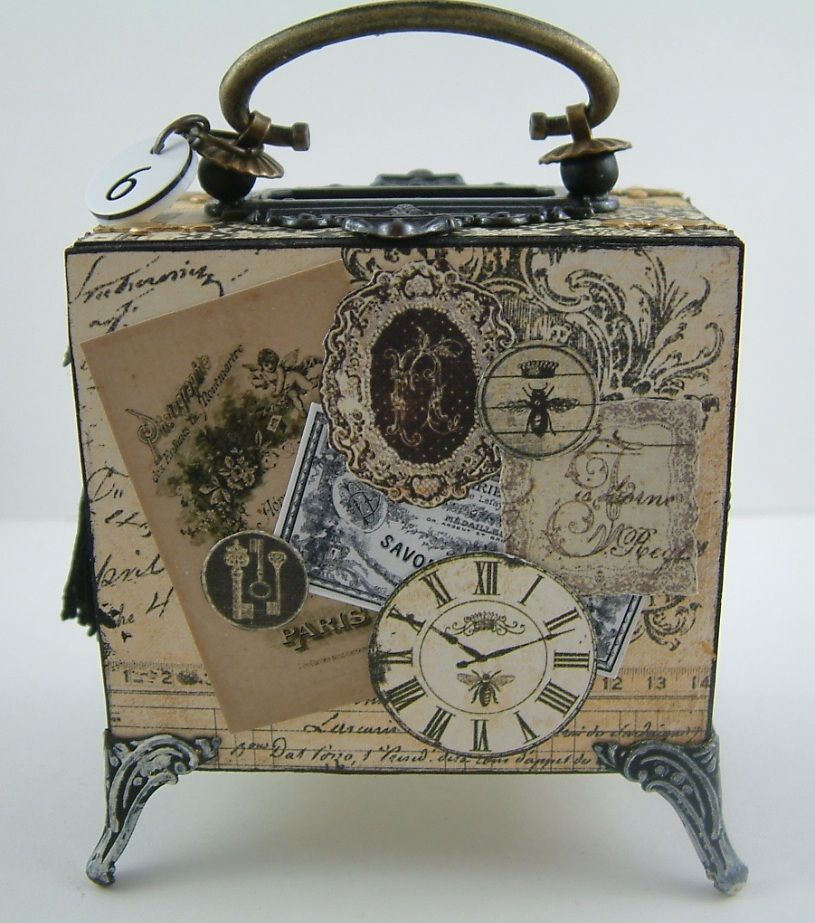
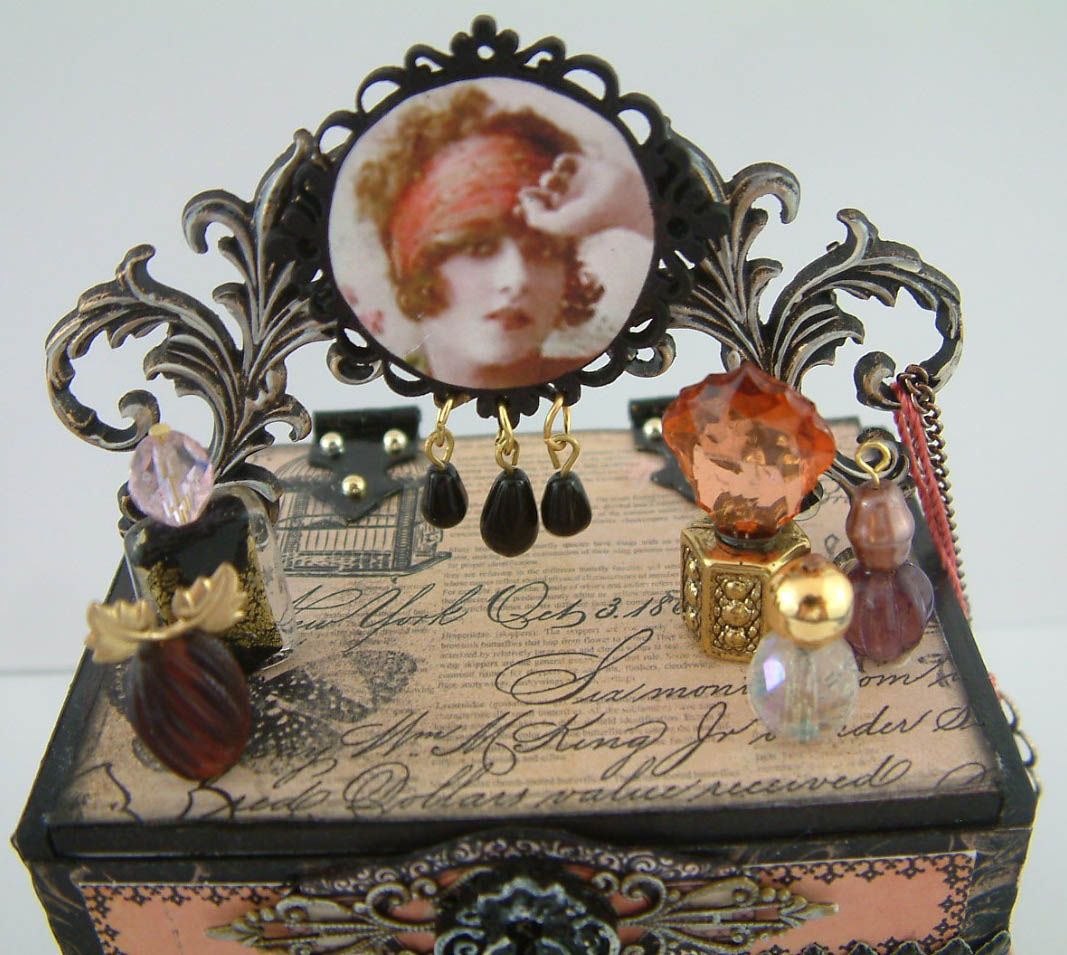
honor of my matchbox chests and this tutorial, Alpha Stamps is offering two NEW Collage Sheets full of French
ephemera. I’ve used some of the images
on the top and back of the chest. One is
the Vintage
French Ads Collage Sheet and the other is the French
Labels Collage Sheet (you can see the fabulous images on the sheets pictured
below.)
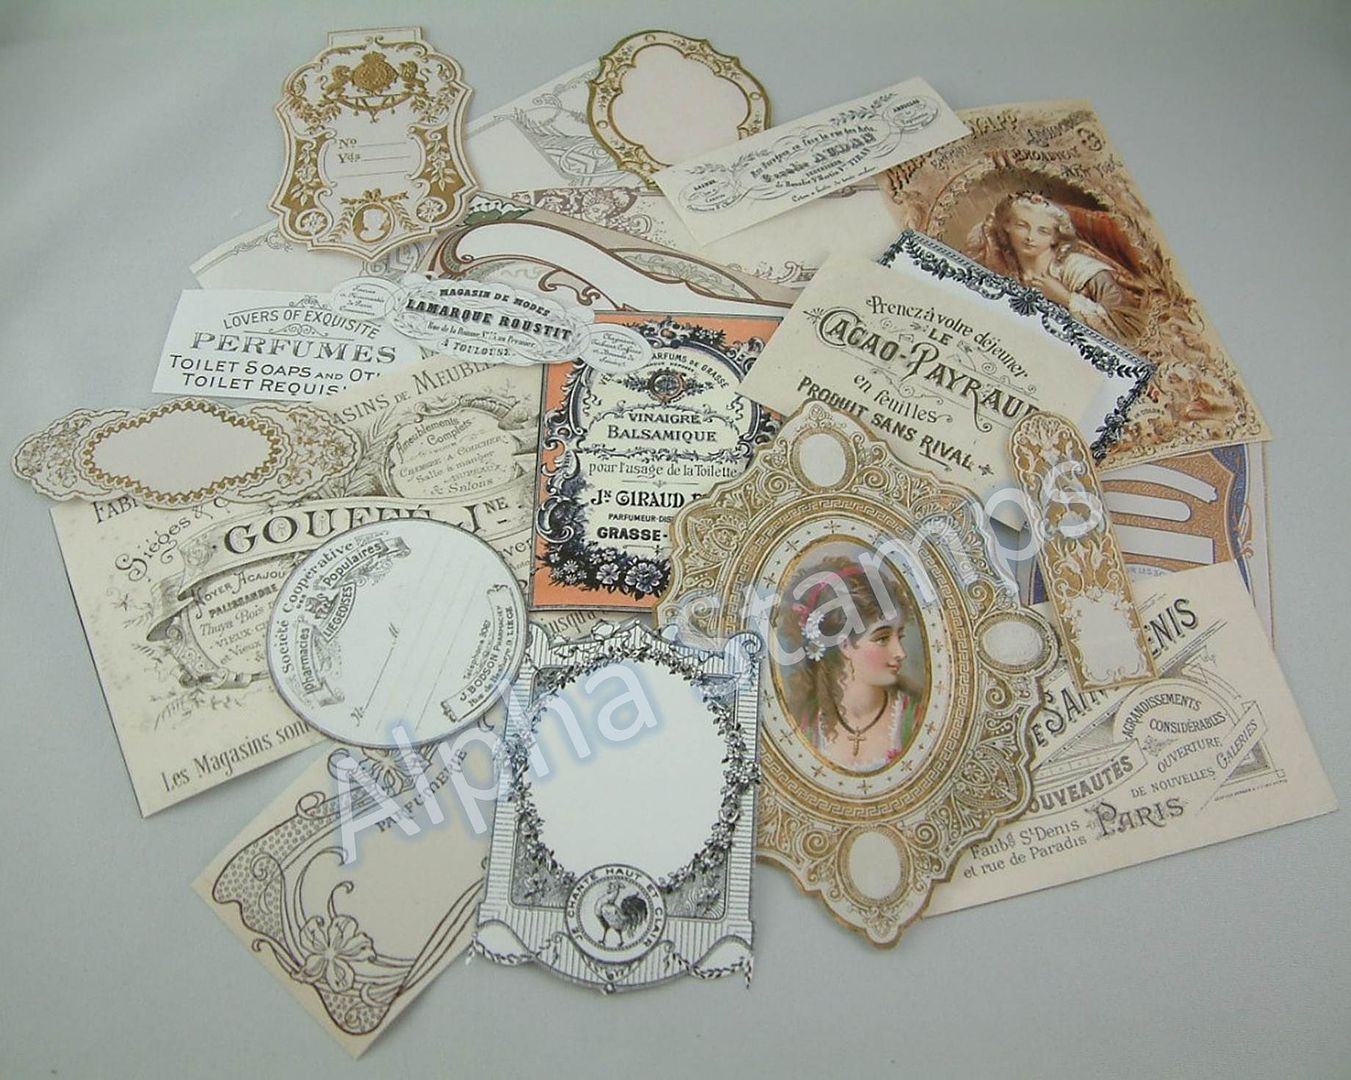
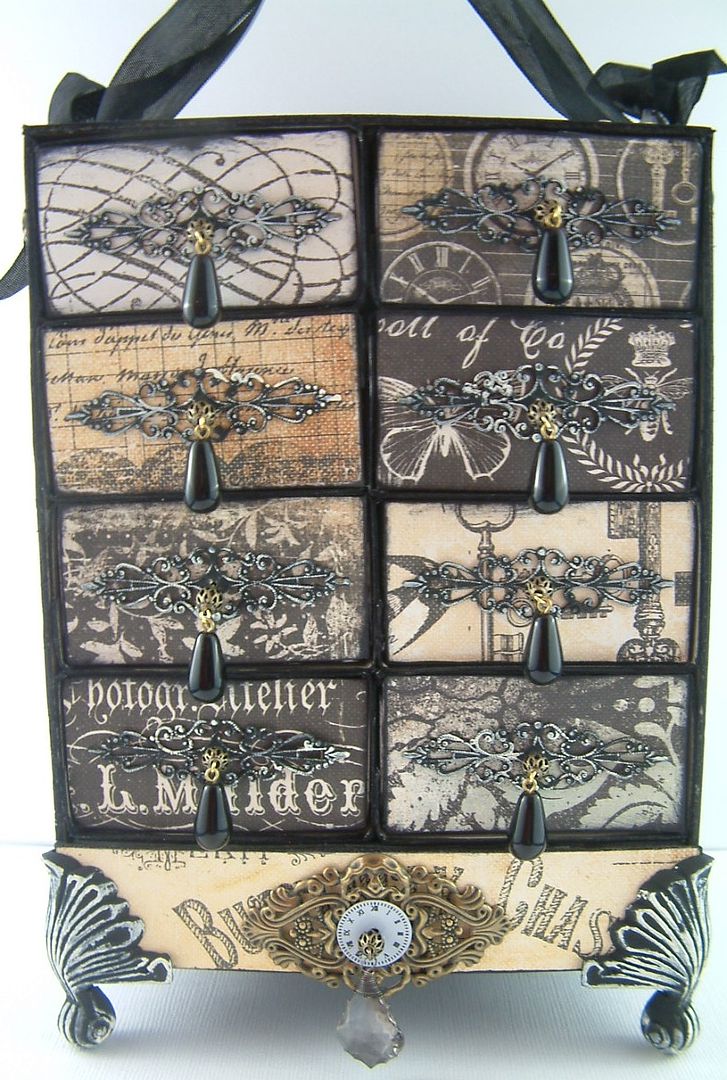
I’ve used some of the images from the new collage sheets on
the top and back of the chest.


Products I Used That You Can Find At Alpha Stamps
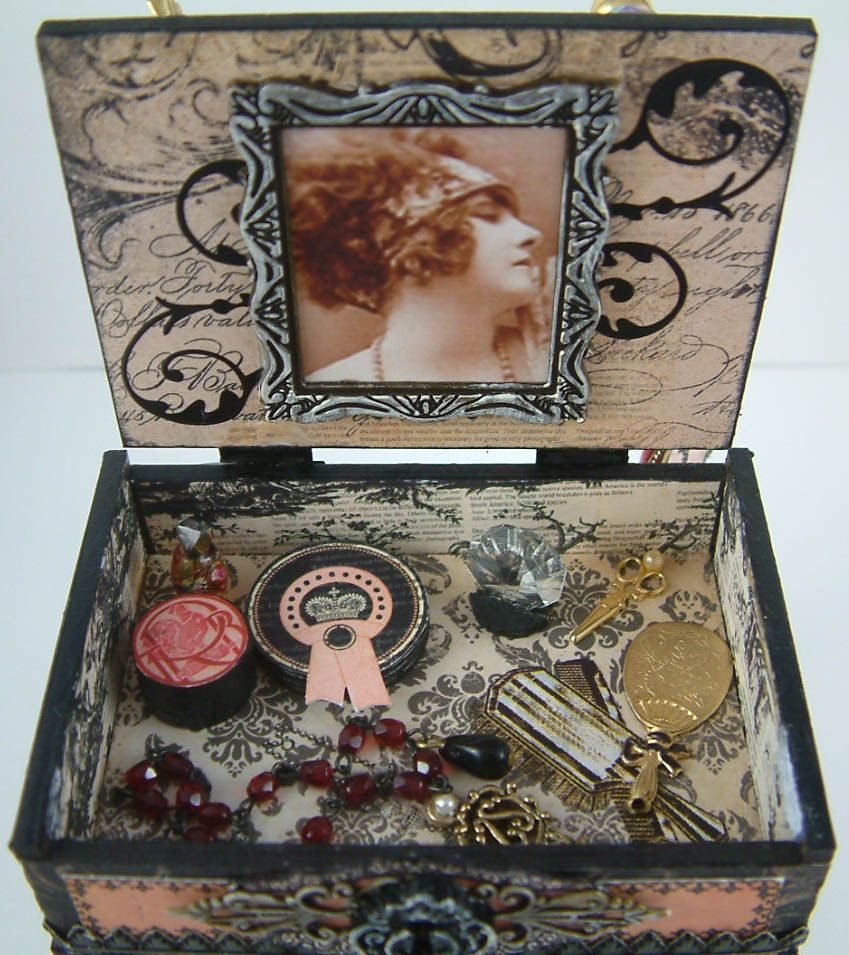
Vanity Chest – Made with a Cigar Box Top
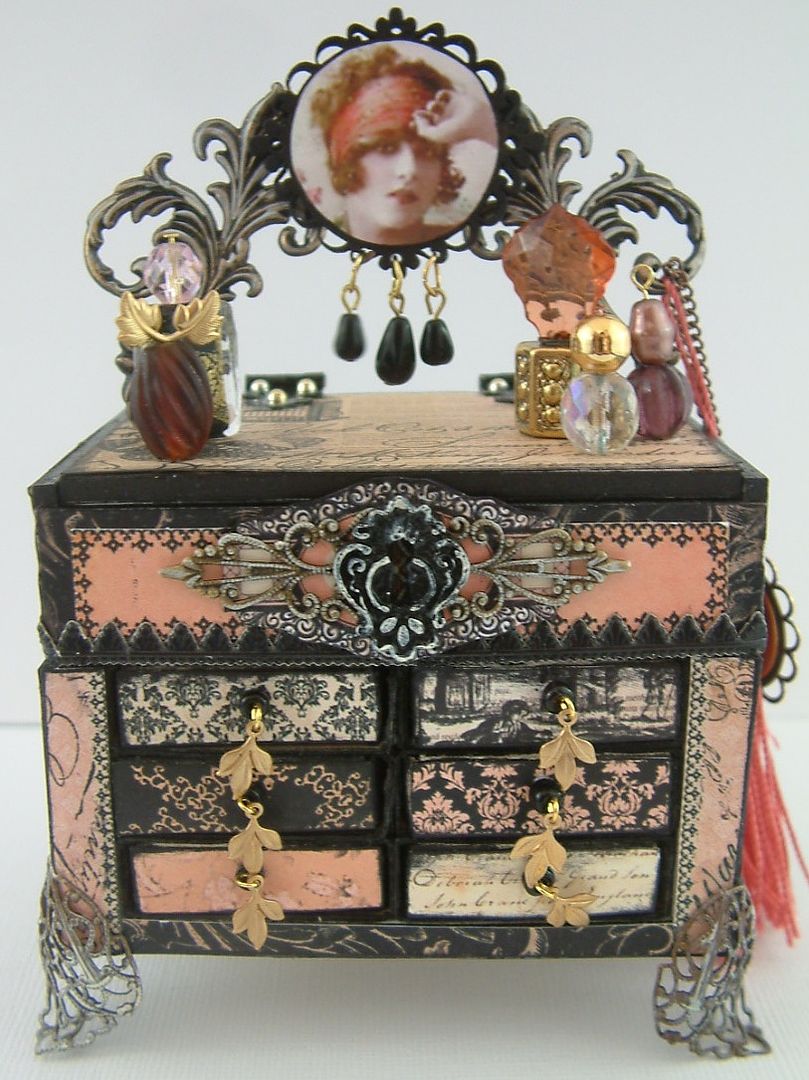
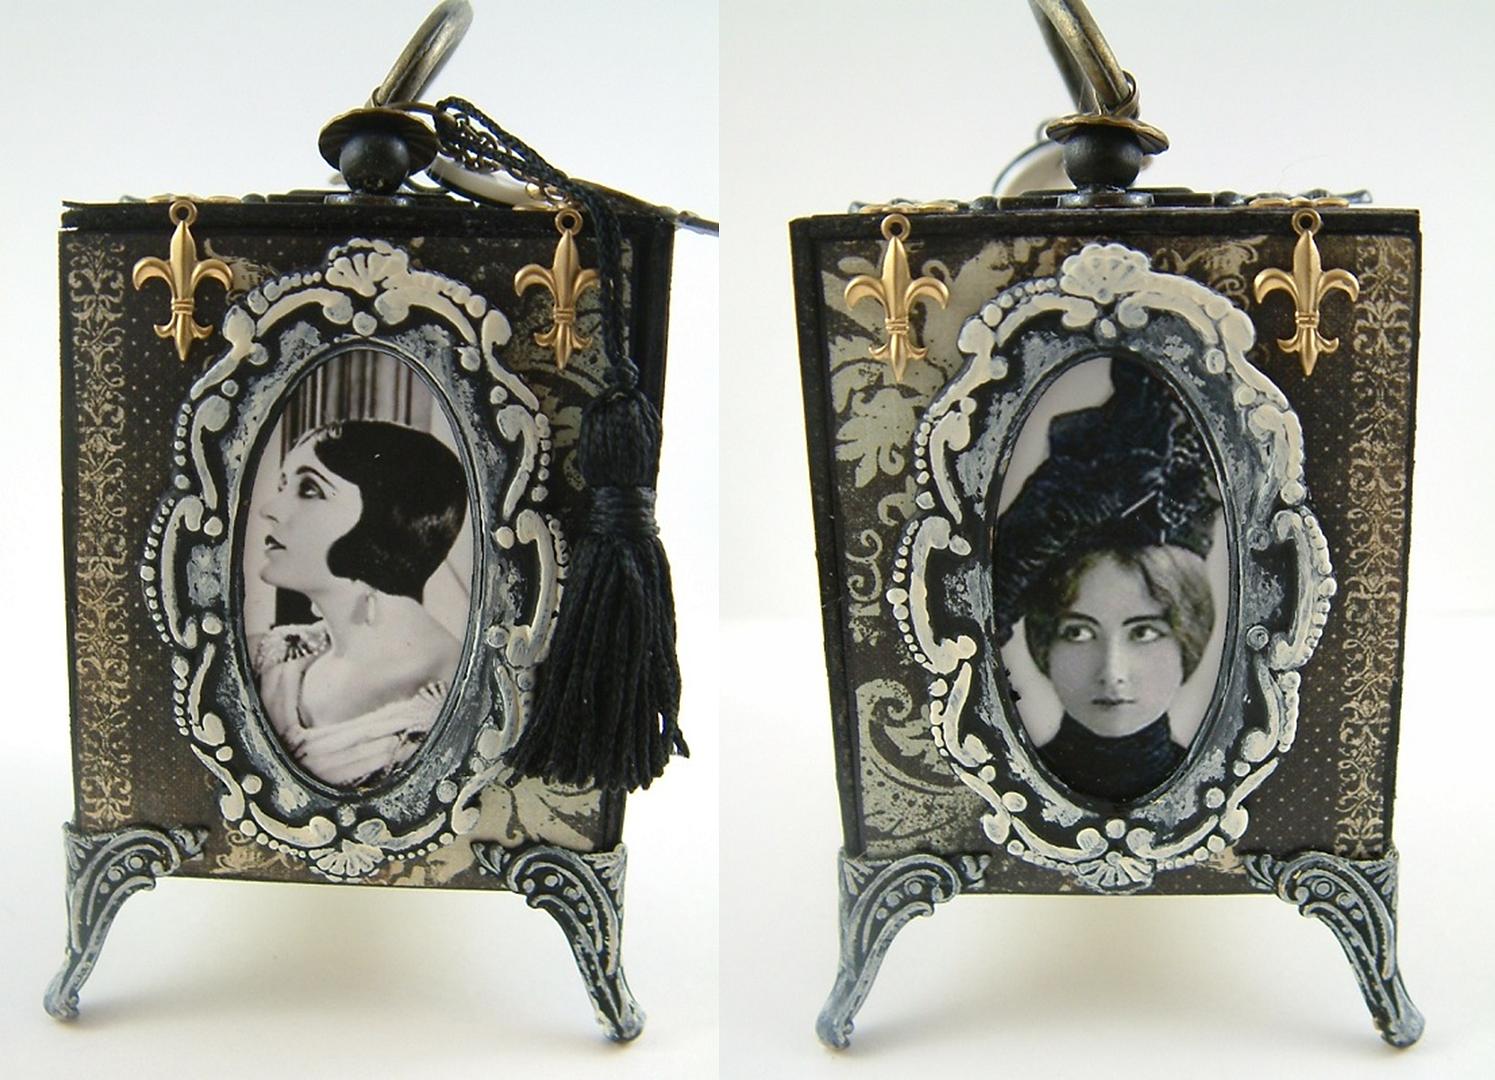
After creating the first chest I decided to build this version using a combination matchboxes and a tiny Masonite cigar box creating a hinged vanity. The overall dimensions are 6” tall by 4” wide.
Inside the vanity you’ll find perfume bottles, powder boxes, brush and comb, a mirror, jewelry and a key to perhaps a secret diary.


Mini Chandelier
Crystals
I hope
you have enjoyed this tutorial and have fun creating your own Matchbox Chest!!
48 comments:
OMG! Such an incredible pieces of art! I am speechless.
Michelle
OMG, WOW.....amazing
hugs
Laura these are amazing! I loved the video tutorial and so appreciate you taking the time to do this for us.
Pat yourself on the back! Your video tutorial was excellent, thorough and very professional looking. Great job, Laura.
Laura, that was one of the best video tutorials I have ever seen, many congratulations! All the boxes are stunning too. Thank you for doing the PDF as well. A x
Dear Laura,
this is (like so many others) a most stunning piece, you can surely maKE fantastic creations, and this chest is a new example of that. How wonderfully and gorgeous made- I have not seen the videos, but will later.
I`m sorry that I have not so much time to visit now, but follows you anyway, and come looking now and then, and am alwayes leaving with an applause for your wonderful creativety, and gorgeous creations.
Hugs,Dorthe
Laura, this is beyond amazing. It is so gogeous. Thank you for sharing and AS here I come, again. Again and again, they have great stuff and you and the other members take my breath away with all your creations....Theresa Goldman
Laura, this is precious. I haven't watched the videos yet, but I think you for making a tutorial. I always appreciate it when an artists takes the time to share in this way. Very generous. Alpha Stamps should never let you go.
OMG Laura! All of the matchbox chests are fabulous! Your talent never ceases to amaze me. Wonderful video tutorials - very thorough and easy to follow. Congratulations! Just awesome!!
oh wow Laura! that is a beautiful piece of work!! i haven't watched the tut yet but ... gosh!! you have such a generous heart sharing what you know with everyone else, and taking all that effort to do the vid and the pdf. i hope you dun mind if i pin this in my pinterest. but i'll link it back here. you have such a big heart my fren ... xo
You have really outdone yourself this time. How absolutely amazing and gorgeous to boot!
Smiles~
Marilyn
I haven't been around as much as I would like and I came by tonight to say...OMGoodness, this is amazing. Laura you keep outdoing yourself with all these wonderful creations and thank you for sharing how to do them. I must put this on my to do list.
Thank you for the PDF because I will never remember all the steps.
Lesley
happy summer♥
These are just beautiful. You have definitely inspired me to think outside the box.
Dear Laura, this box is absolutly wonderfull!
Ces petites commodes miniatures sont splendides, félicitations, quel beau travail de minutie , de délicatesse et de classe.
Just stunning and the thank you for the visual tutorial. One day I may be able to make one-I would love to be able to make one lol
Chrissie xxxx
Laura this is simply an amazing video! You cover every detail so perfectly down to cleaning the E6000 tip! I love matchboxes and someday will gather up the courage to make your beautiful chest...thank you for all the inspiration.
Hugs Karla
Talent Dear Friend Laura,
oh this matchboxes are perfect, I love them !!
I have seen this fabulous tutorial of them and I am enjoying my journey around here so much!
Your unique art work is gorgeous.
Biggest Hugs, MARTINAoxo
Laura my friend, I´ve missed my words.
Your matchboxes are devine.
I love them all. Everthing from you is a inspiration for me. Thanks for this tutorial. I hope I can make them. I write on my ToDo List. Thanks.
Have a wonderful sunday my dear. xoxo
What an amazing post! I watched the tutorial and I cannot wait to create one. Your instructions are just perfect.
Beautifully done Laura!
So lovely! My mother (now 90) was a miniaturist, so I grew up with tiny objects of beauty all my life. I showed her your matchbox chests and she thought they were so elegant.
Hi Laura, OMG!! Perfect!! This video was so instructional and detailed showing every single step to creating your masterpiece!! I can't thank you enough for doing this for all of us!! I await anxiously for your next video. Off to Alpha Stamps to spend another fortune on supplies, LOL
Regards Diane
Laura -
All I can say is STUNNING!! You my dear are a creative genius! Thank you so much for the wonderful video, the PDF, and your generosity!!
Elaine Allen
Thanks for the tutorial.
Beautiful matchbox.
Absolutely adorable! Thank you so much for the easy step by step tutorial. I will definitely give this a try.
Maricelle from Sweden
wonderful tutorial!!
these are just marvelous pieces of art!!
thanks so much for sharing ..the videos are great!!!
What a fantastic and inspiring tutorial! I love the attention to detail and emphasis on avoiding mistakes. The chests are absolutely exquisite, thanks so much for taking the time to share the steps!!!
I'm just flabbergasted! This is such a great turotrial, I actualy think I could make one of these. Thanks Laura!
I've just watched the videos - wonderful - but yesterday I printed the pdf and ordered all the papers and bits and bobs from Alpha Stamps, today I managed to buy the matchboxes. Can't wait to start my matchbox chest. Watch this space for my version later in the year. Thank you so much for the tutorial.
Hugs Joanne xx
Oh my dear Laura, you have truly outdone yourself this time! This piece may be my favorite of anything I've seen on your blog (which is really saying a lot!!). Thank you so much for sharing this amazing tutorial and this jaw-dropping piece of art!
You are so incredibly talented! I haven't had the time to watch the entire video yet, but I will!
hugs Lynn
Oh Laura, I am spellbound by the beauty of these chests! Your videos are so amazing that I am going to give this a try. Thank you so much for sharing your talents. Hugs, Mina
Hi Laura! Just completed the first and second video. Great show!! It made everything very clear and understandable. Your the best...
Absolutely fabulous, you are sooooo talented!!!
This is so pretty! My daughter wants interesting objects that can be explored or played with on her wedding tables instead of flower arrangements, this is ideal. Thank you. I just have one thing to check on; when glueing the back onto the matchbox chest wouldn't it be better not to have glue all over, or the drawers pulled out slightly? Just so the the back of the drawer doesn't become fixed and the drawer canot be opened. I can't see how you avoided this in the video.
Wow!! These are amazing :0) Thank you for sharing x
I'll start by saying that I could this on Pinterest - don't you just love pinterest!
These are beautiful - I love all the details and I watched you videos and your directions are fantastic! I want to make one with the larger match boxes - a place to story your trinkets and such... Fabulous, really fabulous!
Laura I am speechless! This is absolutely beautiful! I love the concept and your eye for beauty!!! Wow can't wait to try your tutorial! Simply beautiful!!!
How beautiful-I love the details!
Thank you so much for posting this with a video! Amazing!
I just found this on Pinterest.. and I just need to say ohhh my.. this is such wonderful work of art.. thx so very much the wonderful inspiration...
Speechless!! Unbelievable, Astonishing, Amazing, Sensational... Just a few words that came to mind when I saw these!! YOU are a major talent!! Very jealous! Joined site, following on Pinterest - now off to videos. Thank you. Caroline :)
I love these matchboxes. I have made a number of them myself after viewing your fantastic tutorials. I purchased a sizzix die that makes candy boxes in hopes of making them w/o having the 1000's of matches I have accumulated after making so many but the matchboxes are so much better and at the price of the matches it is so much cheaper than the die. Thanks so much for all your wonderful projects and tutorials they are greatly admired and appreciated. Traci
Hi I loved the easy to follow tutorial and set about making a mini chest...now all was fine, I measured carefully and took my time to make sure it was all square etc etc.
My problem arose when I tried to pull out the drawers after I had glued on the back. In the video you glued the back on while the drawers were in the unit but surely that means that the backs of the drawers get stuck to the back hence not being able to be pulled out. Am I missing something here? Would appreciate a reply if you could please so I can master this fantastic project.
I can be contacted via my blog,
http://crafteeowls.blogspot.com
Many thanks
Elaine
Beautiful!! I love it!
I love it! Love the paper and the style. The entire thing just screams out my name. This would fit perfectly in a doll house. I'm so glad I did not start making my match box drawer chest before seeing your tutorial. I have so many ideas now. Thank you!
The matchboxes and the paper to decorate it with I have. Just have to hunt down all the other needed things for it here in Sweden.
These are all absolutely fabulous and phenomenal. Thank you so much for the photos, the tutorial pdf and for the videos - so generous of you! On my list of THINGS TO MAKE and pushed towards the top. ;-) (((hugs)))
Thank you for sharing! This is just beautiful, love this!
Post a Comment