-->

Welcome

I love answering your questions. If you ask them in the comment section, I have no way to answer you (if you haven't heard from me, that is why). If you use the "EMAIL ME" in the left column of this page, I will be able to respond to you. You can also use it if you want to be added to my newsletter. Laura

Saturday, July 21, 2018

OVER THE SUMMER SEA - DOUBLE EXPLODING BOX - NEW COLLAGE SHEET

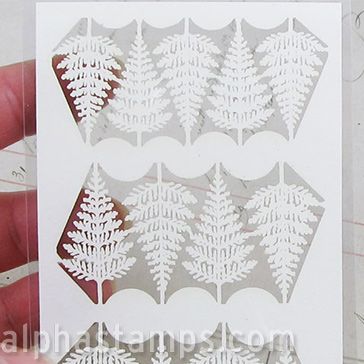
This month’s kit theme at AlphaStamps is Vacation Memories.  For my project, I chose to go with vintage children by the sea theme.  The initial inspiration is from the Seaside Victorian Children collage sheet in this month’s kit (you’ll find a picture of the sheet further down in the post).
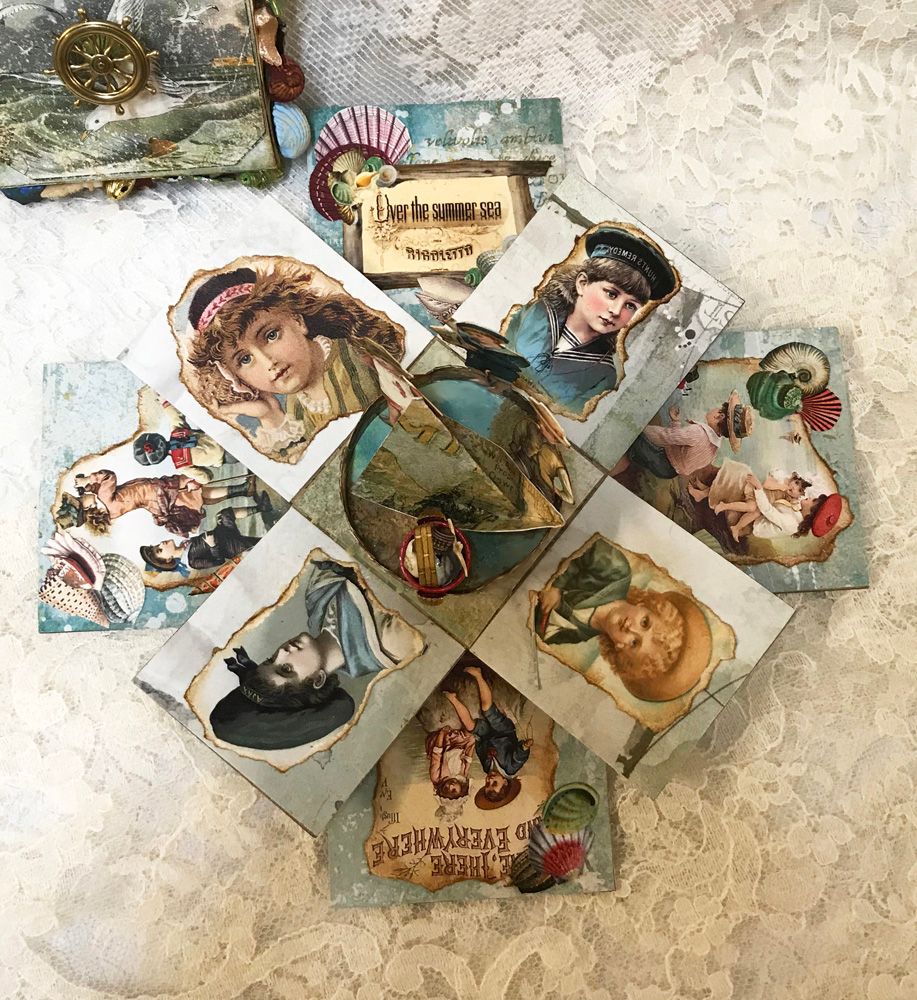
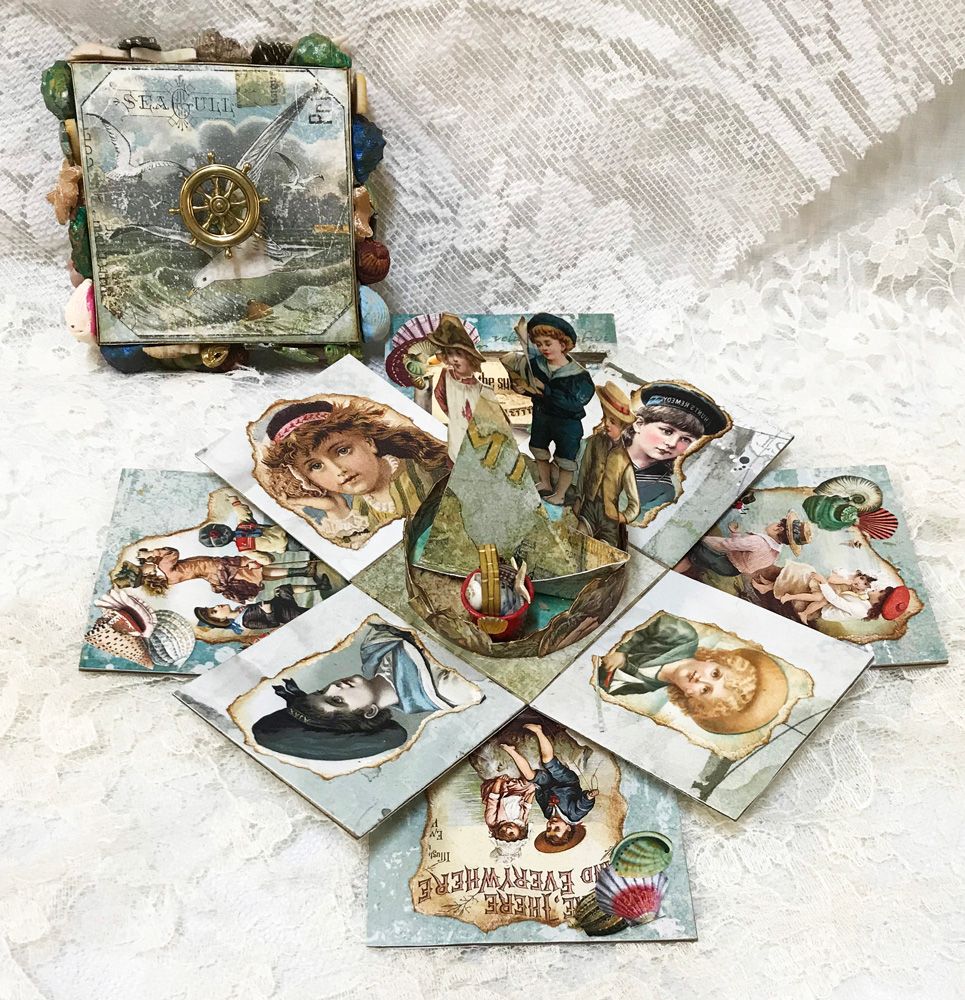
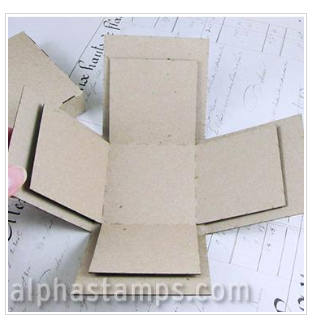
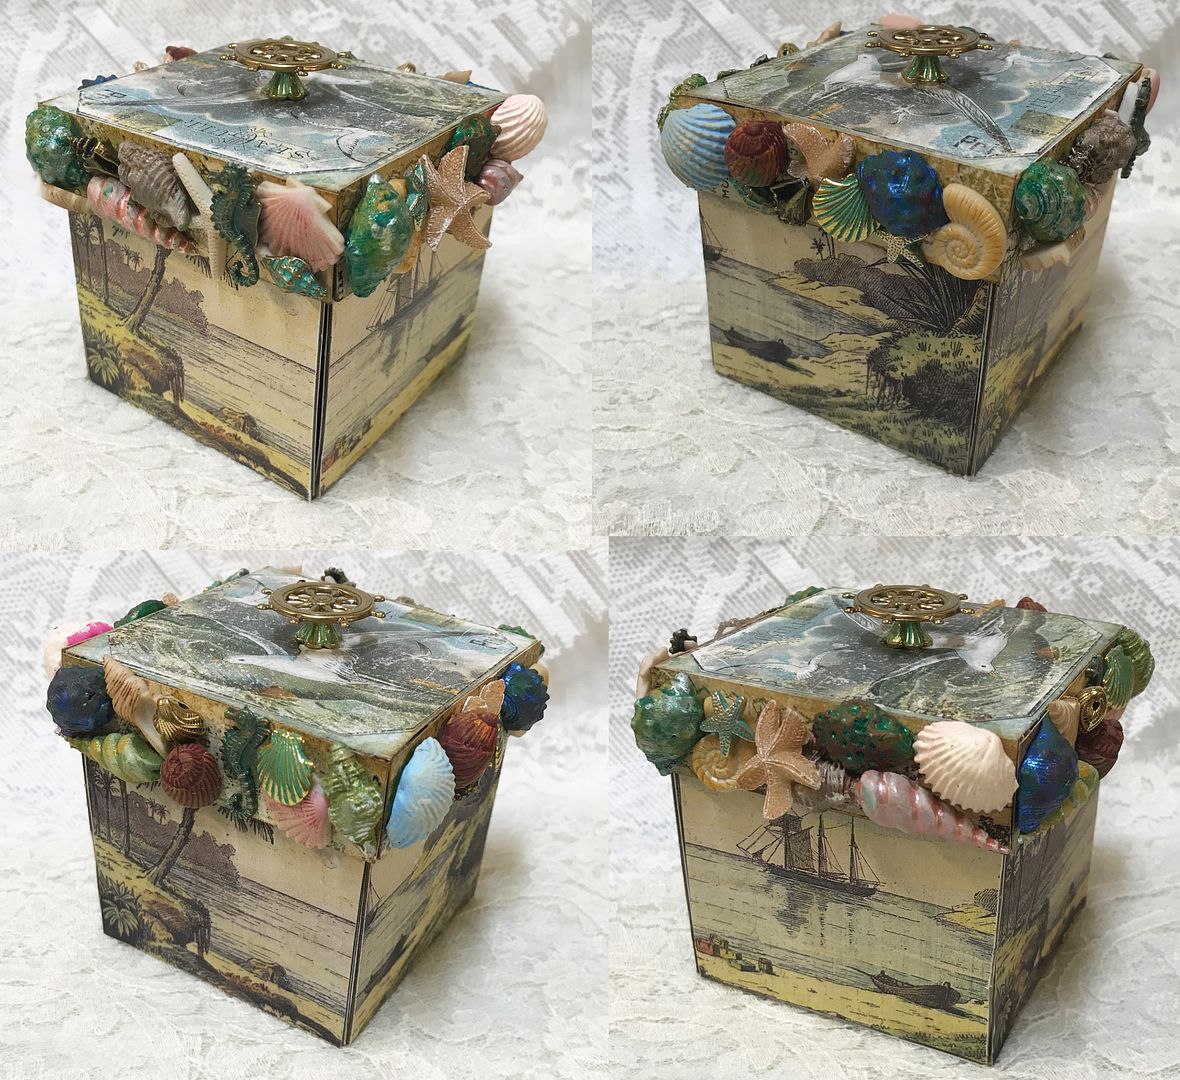
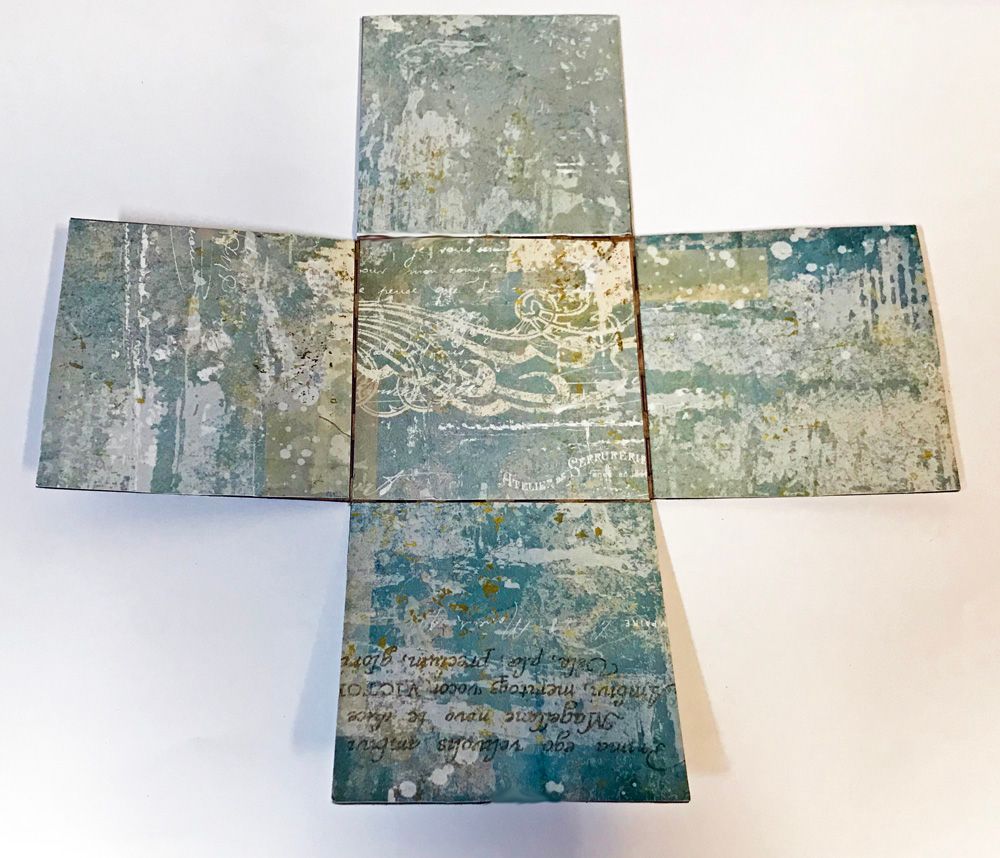
For the project, I used the double exploding box pictured below.  
Because there were a  lot of surfaces to cover, I create a new collage sheet titled “Over the Summer  Sea”  to complement the Seaside Victorian Children sheet.

This sheet contains vintage images of children playing by the sea, several coordinating seashells, and a framed “Over the Summer Sea” sign.  To purchase the sheet below, click on the image.
I used a ship wheel as a knob and decorated the sides of the lid with various metal, plastic, and clay shells made from a mold.

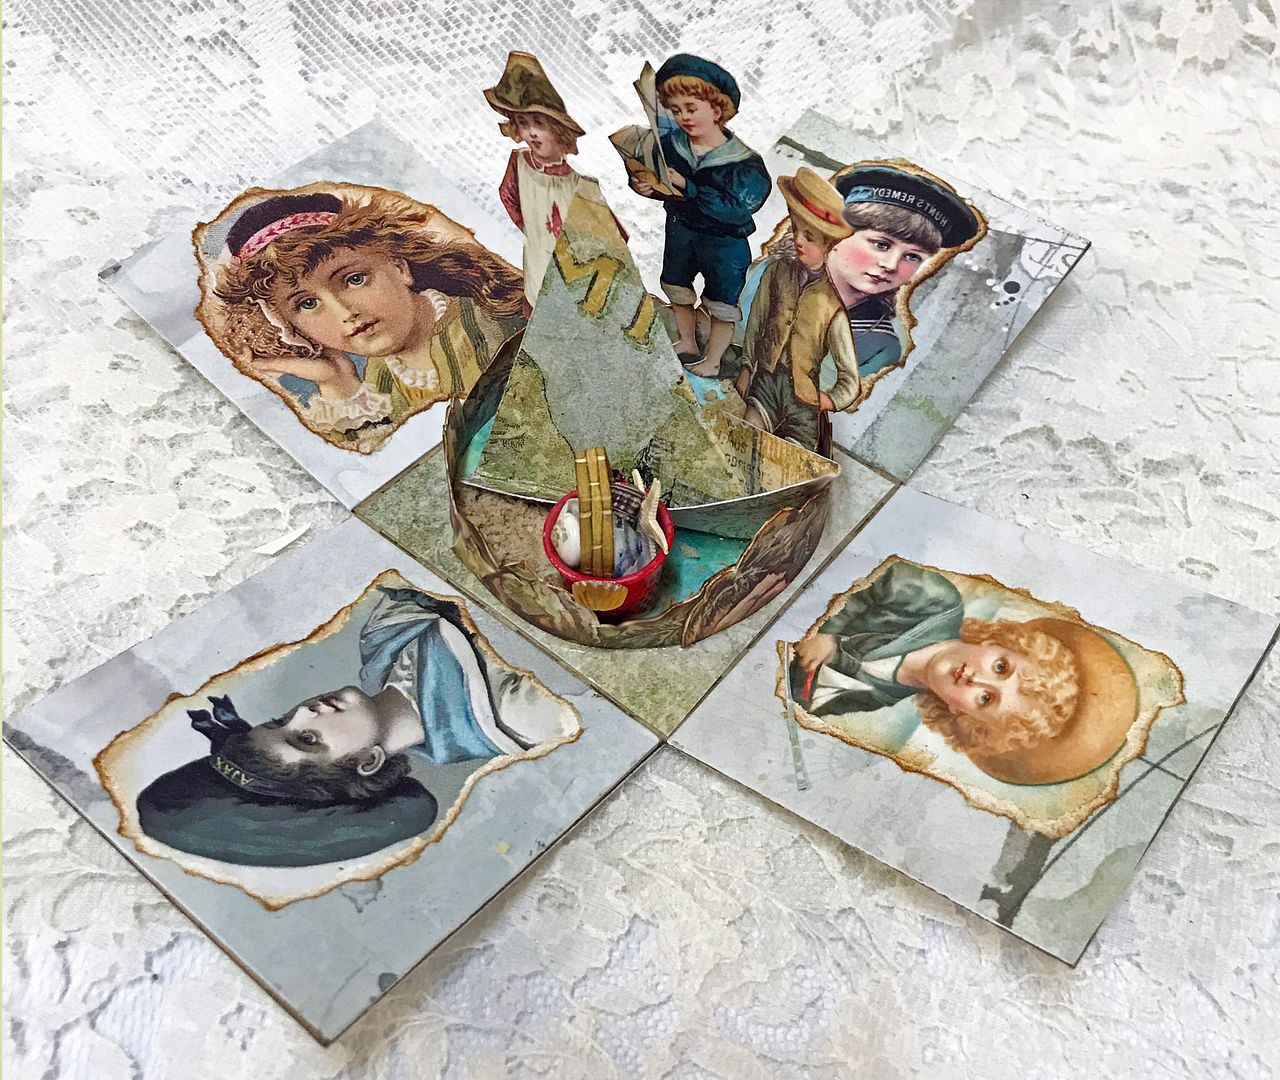
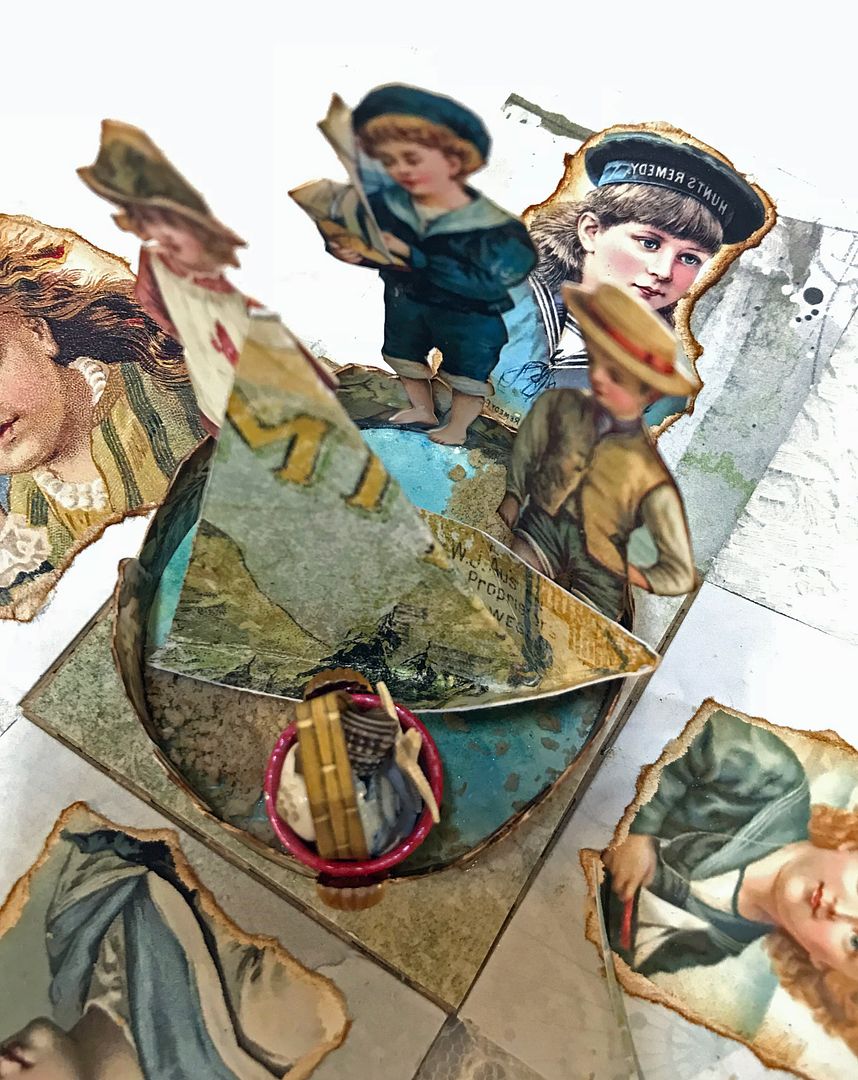
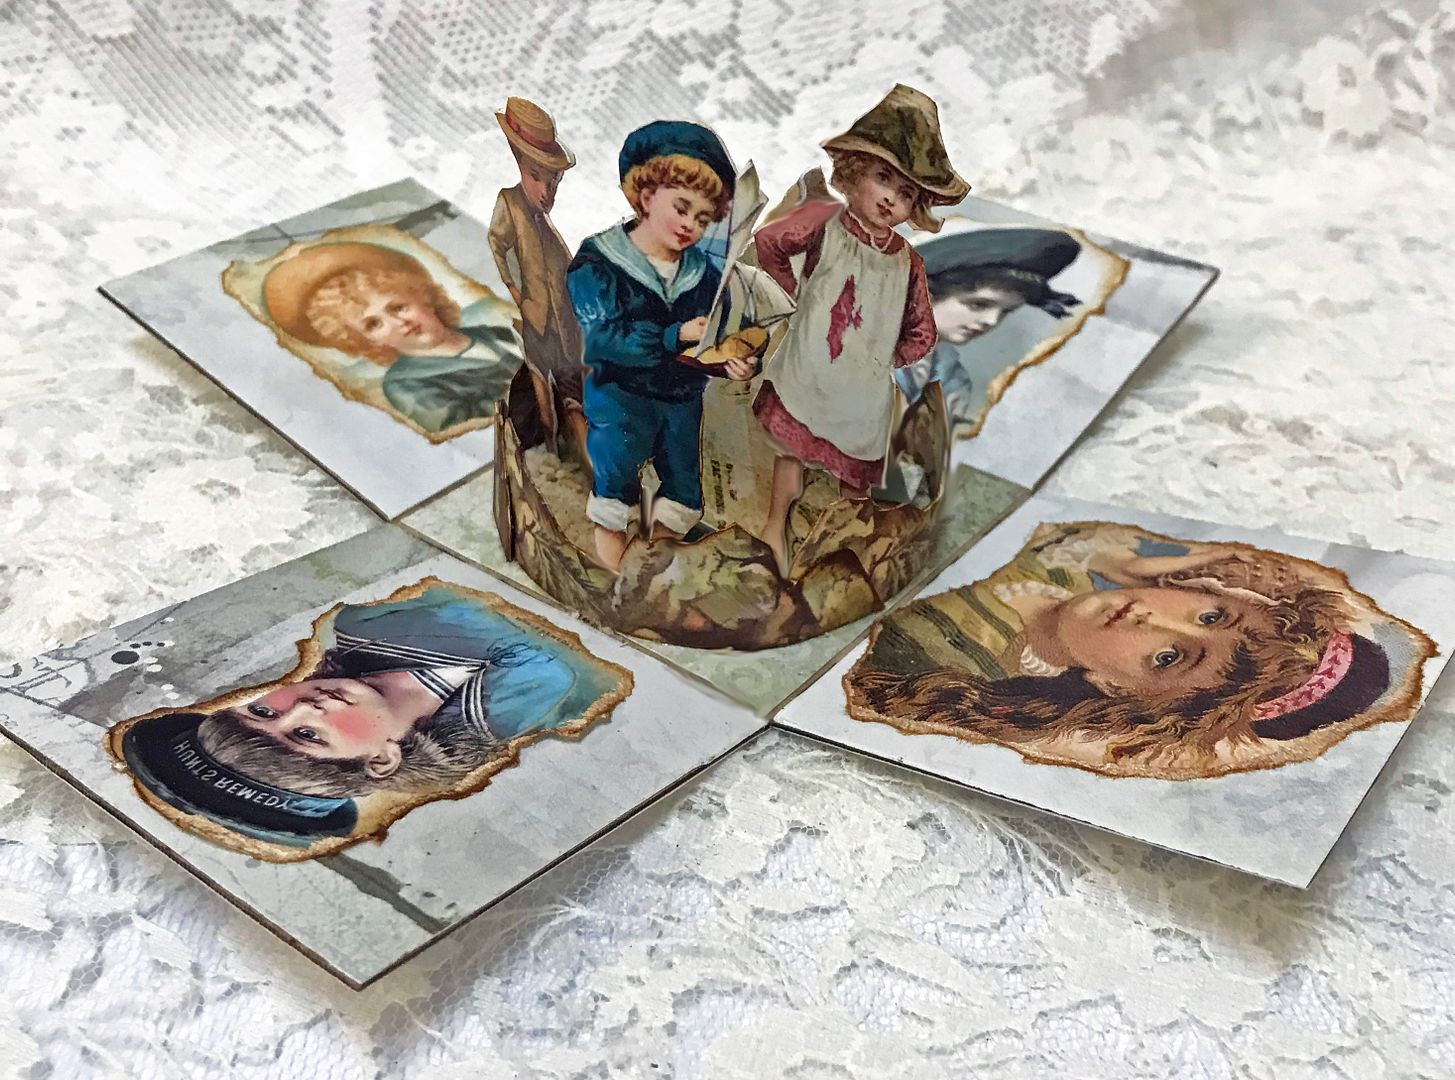
Inside, you can see all of the pictures, I used the two collage sheets as well as a scene in the center with a paper boat, a pail full of shells made from a thimble, and three children.  I flipped the images of the children and printed them twice so I could glue them back to back so that you could see them from every angle.

THE DETAILS
In addition to my new collage sheet pictured below are the other sheets I used for the project.
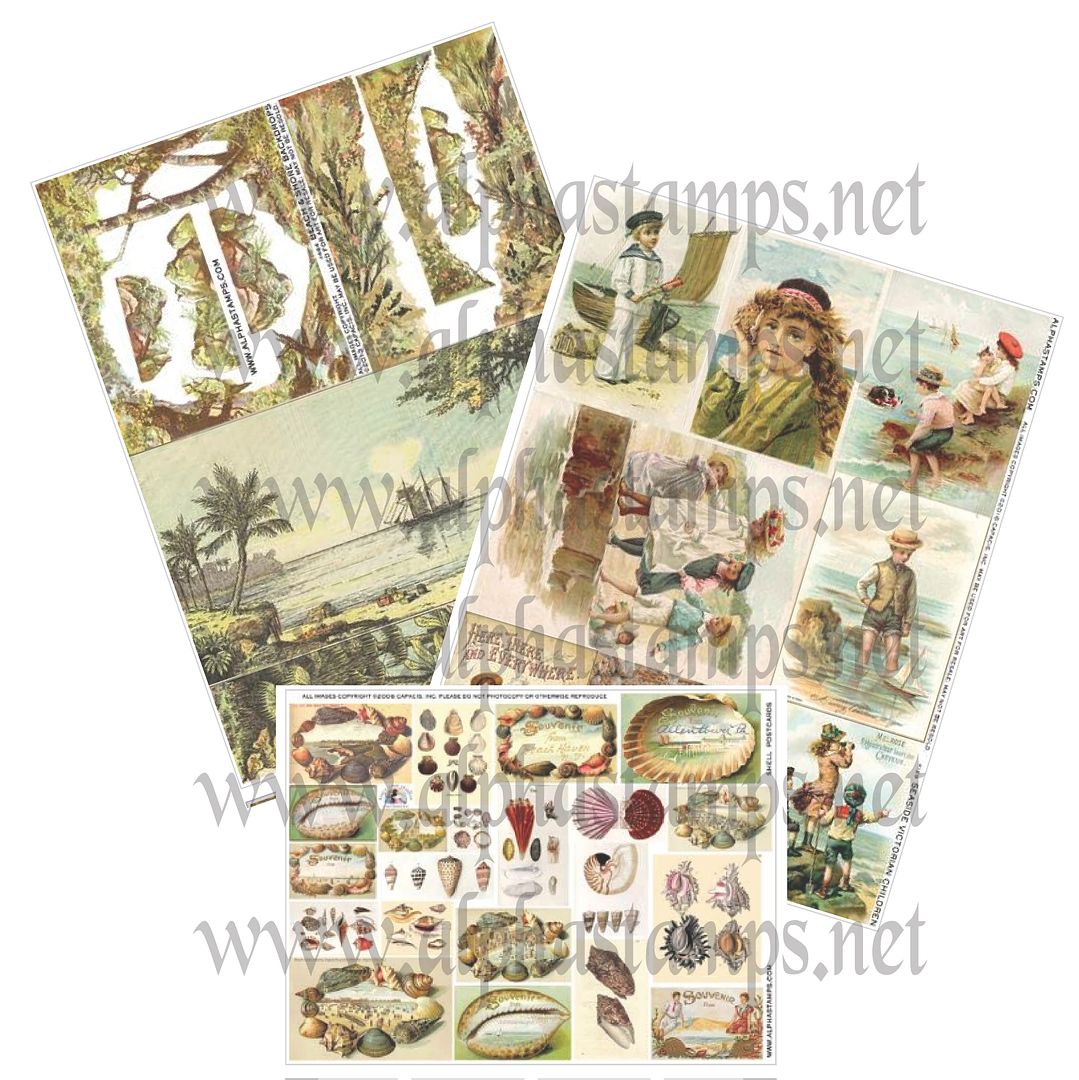
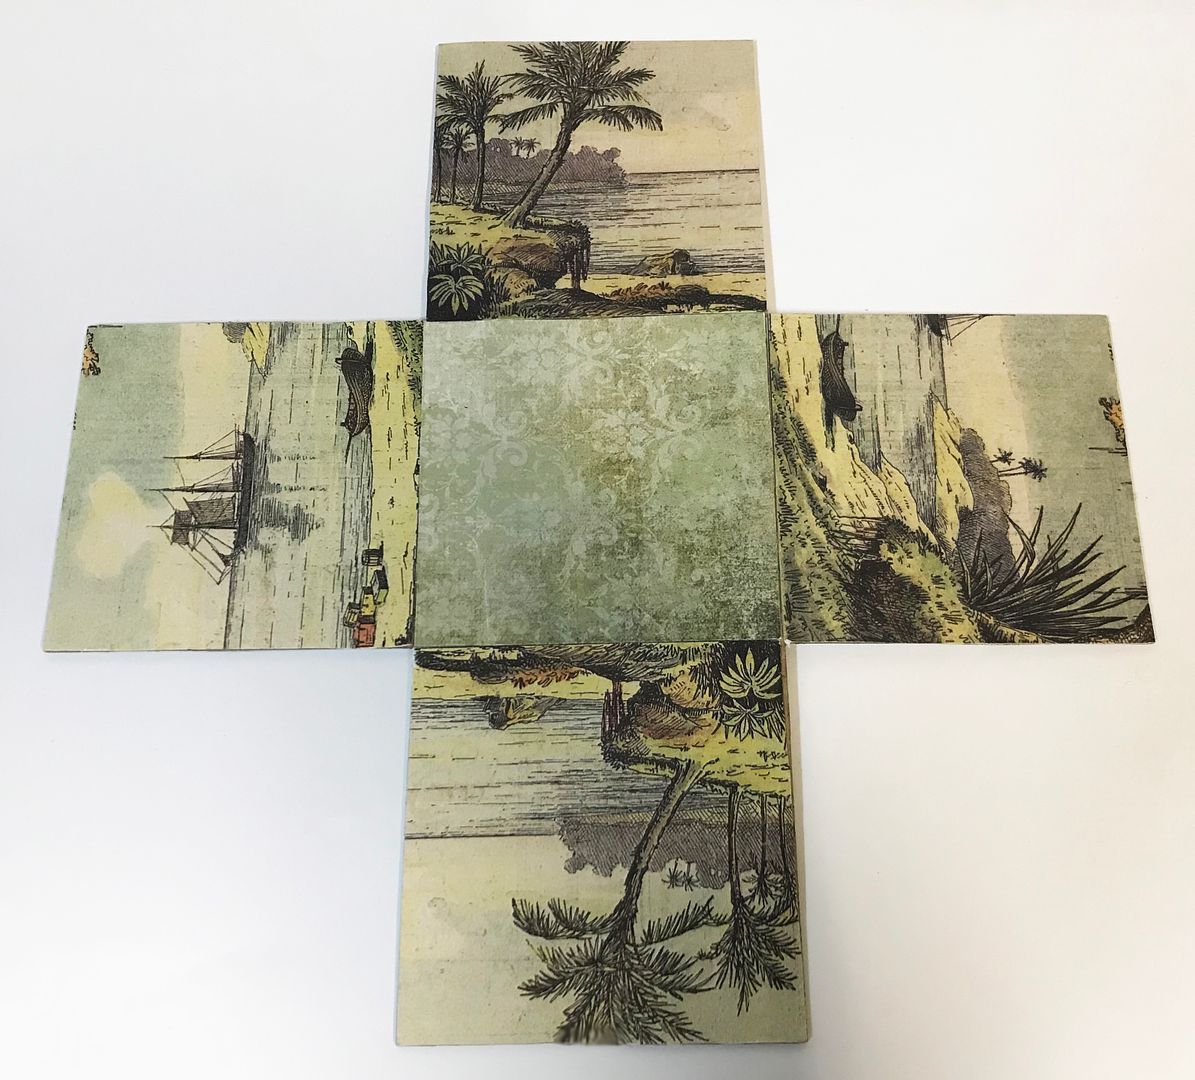
I use the Beach and Shore Backdrops Collage Sheet to cover the outside of the largest box.
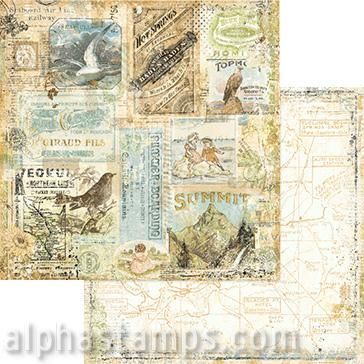
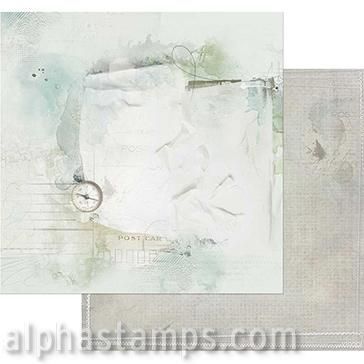
I used the paper below to cover the inside of the large box.
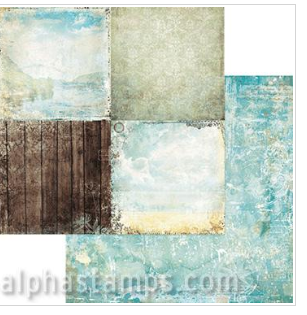
I used the paper below to cover the inside and outside of the small box.

The outsides of the box are covered with images from the Beach and Shore Backdrops Collage Sheet.
For the handle, I used a bead cap on which to mount the ship wheel.

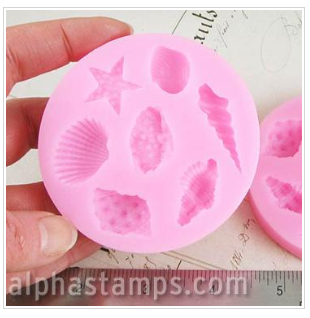
I used a variety of metal, plastic (see the detail supply list further down in the post), and clay shells to decorate the lid of the box. 

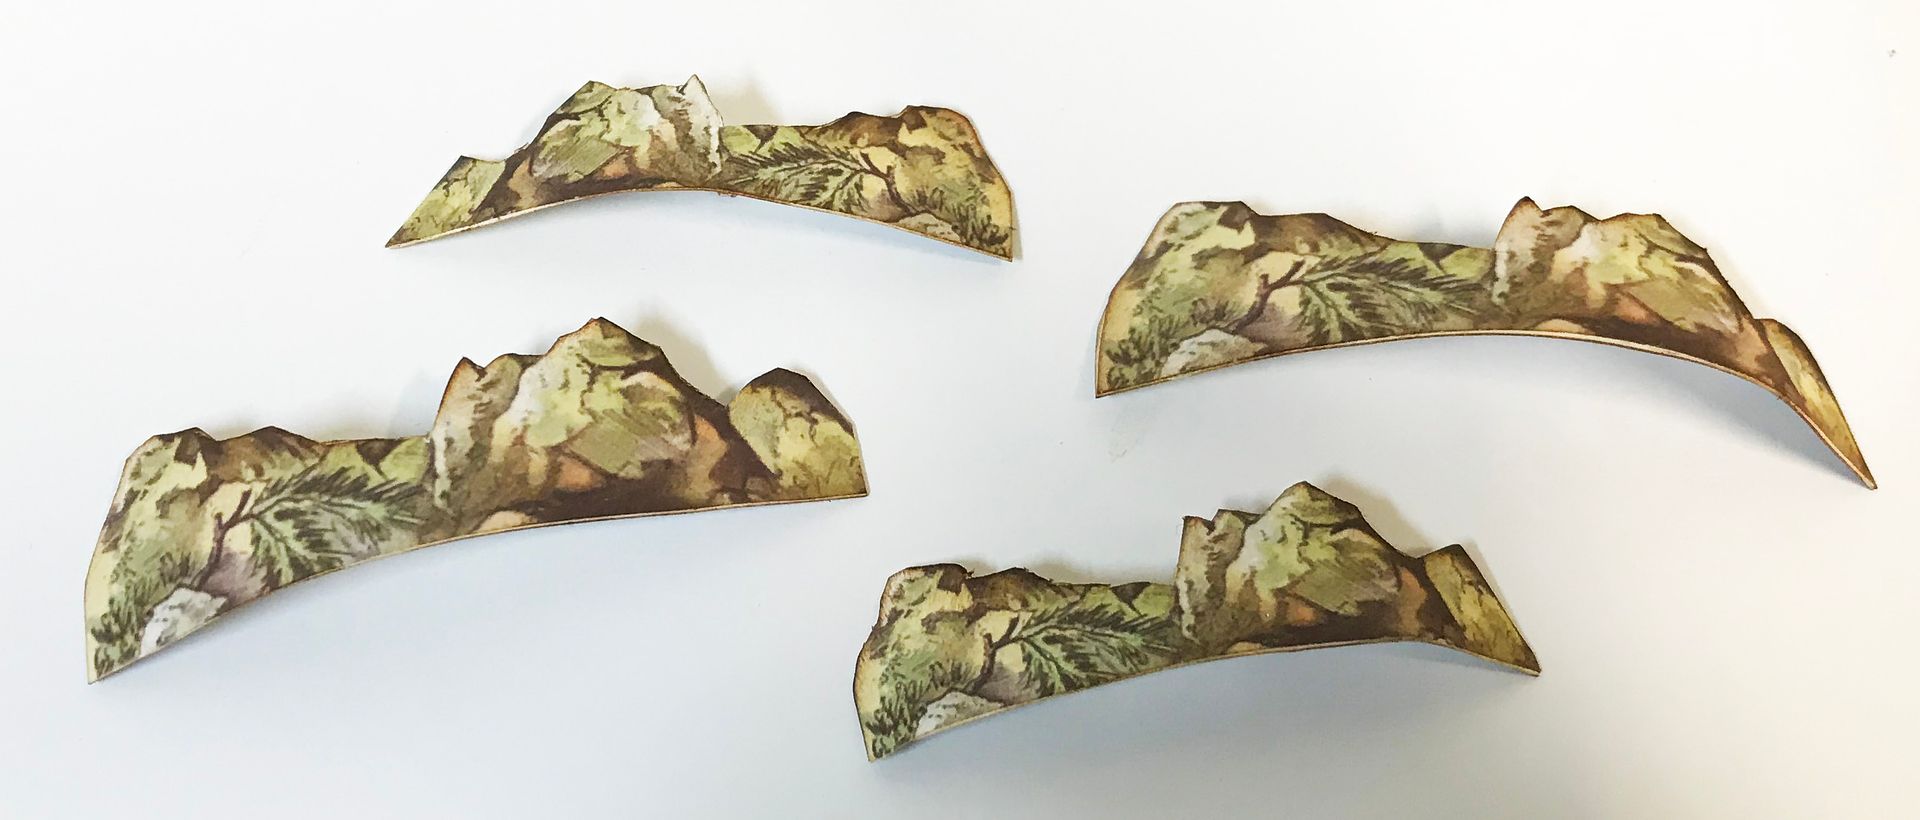
 Below is the mold I used for the clay shells.


I used images from the Over the Summer Sea, Seaside Victorian Children, and Shell Postcard collage sheets to decorate the inside of the large box.
 I used the paper below to cover the lid and to make the boat.

I used images from the Over the Summer Sea and the Seaside Victorian Children collage sheets for the inside of the small box and also the children standing in the middle.
I used images from the Beach and Shore Backdrops Collage Sheet to make the circle in the middle.
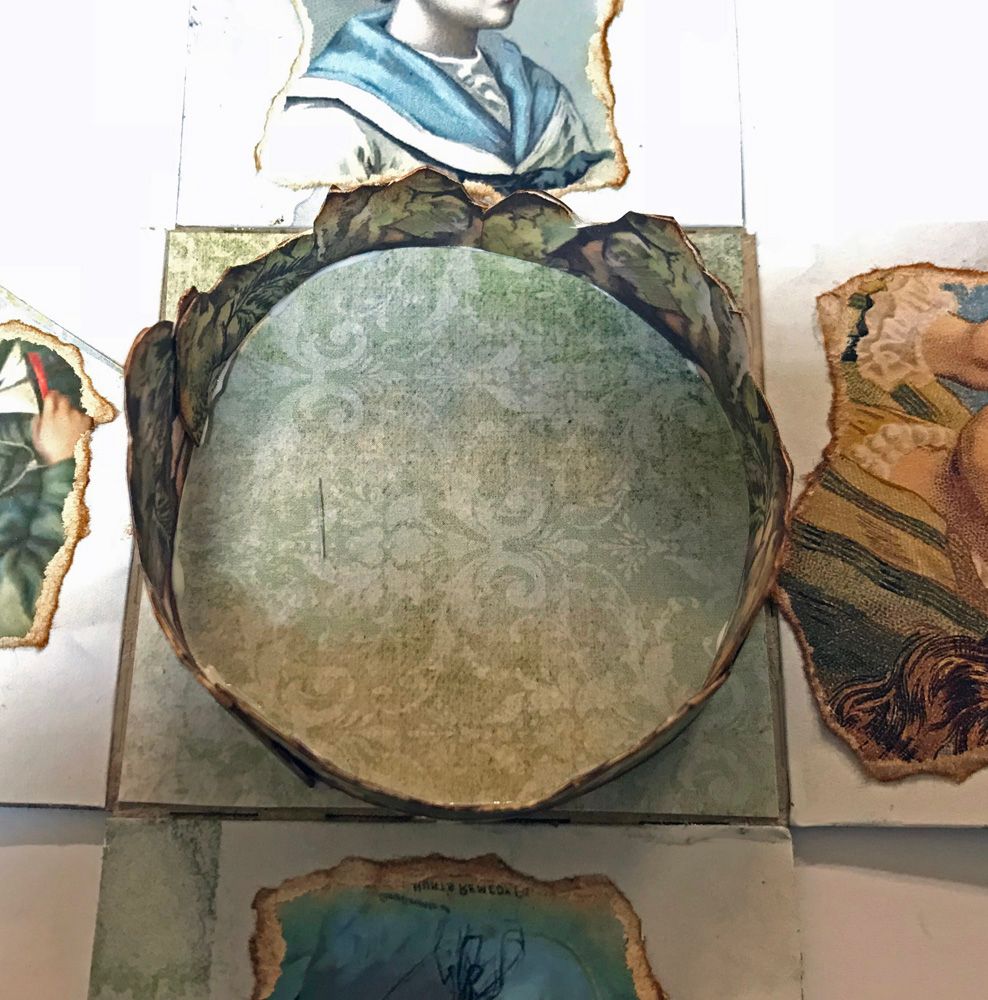
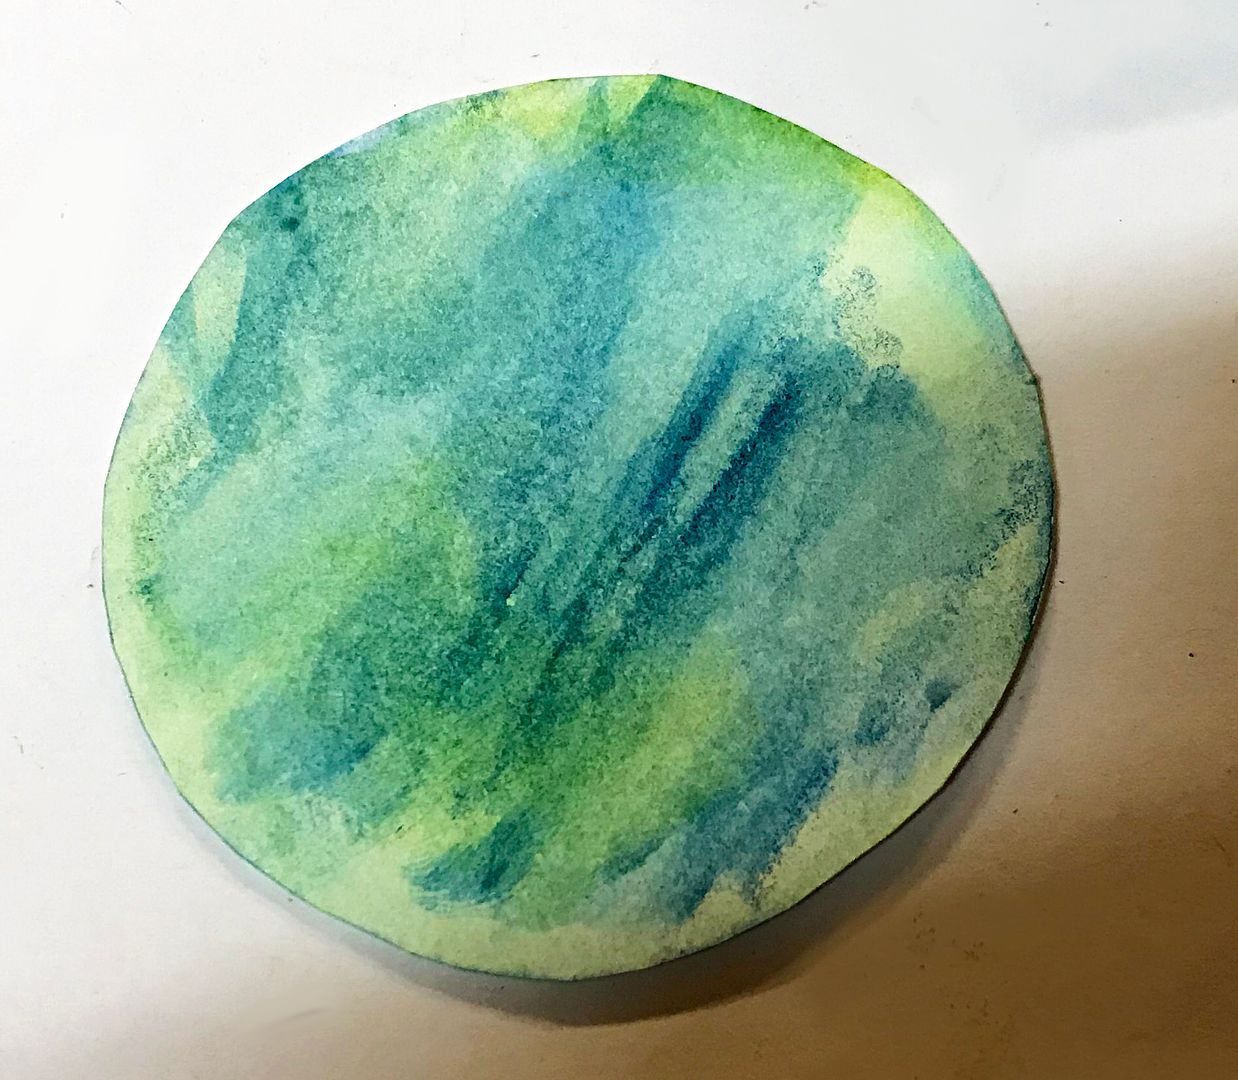
To create the water, I used watercolor pencils to color a piece of paper which I glued inside the circle.  I painted it with Glossy Accents to make it look like water.  
Next, I added some sand in a few spots.
The pail is made by painting a thimble, adding paper for a handle, and then seashells on the sides to make it look like they are holding the handle in place.  
To make the boat, I watched the video below.
The children are double-sided and are attached to either the boat or the rock circle.

DETAIL SUPPLY LIST
Double Exploding Box

Wednesday, July 11, 2018

THE LOVE OF FLOWERS FLOWER SHOP - VIDEO TUTORIAL - NEW IMAGE SETS - STREETS OF PARIS EVENT

You'll find a new flower shop between the Black Cat CafĂ© and the Chocolatier, L’ Amour des Fleurs (The Love of Flowers).
Outside of the shop are tubs of beautiful flowers and potted plants.  Some of the items are displayed in carts.  
Under the windows are lovely boxes filled with flowers, and purple creeping phlox vines climb the walls on each side.
Step inside, and you’ll find even more flowers, plants, and elegant flower arrangements.
On the walls are Art Nouveau-style panels (from the New Art Nouveau Ladies of Nature Collage Sheet.)  Glass shelves hold flower pots.  The bags and boxes are from the New Flower Shop Bags & Boxes Collage Sheet.
Below the shelves is a work table perfect for putting together flower arrangements.
On the other side of the shop are more shelves, flowers and a table with a cash register.
More flowers and flower arrangements are displayed on stands made from woodblocks in the corners and flanking the front door.
The realistic-looking potted plants are made using the New Leaves Collage Sheet, or if you prefer to work with individual images, there is a companion digital image set.
 At night the lights (tea lights) under the awning illuminate the lovely flowers.  Further down in the post, you'll find the images I used to create the awning and the stained glass image used on the door.

NEW COLLAGE SHEETS & DIGITAL IMAGE SET
For this shop, I’ve created three new collage sheets and a digital image set; details are below.

This sheet contains 8 nature-themed panels featuring Art Nouveau ladies.  Also included are 7 Art Nouveau-style borders.  These images would work well printed on paper or as faux stained glass printed on transparency film.  To purchase this sheet, click on the image below.

This collage sheet contains a variety of flower shop-themed bag and box designs and sizes, plus a coordinating poster.  To purchase this sheet, click on the image below.

This collage sheet contains 4 copies of 45 unique leaves.  TIP: If in your project, both sides of the leaf will be visible, print a mottled green background image on one side of the paper (I have images for you to use further down in the post) and the leaves on the other side.   To purchase this sheet, click on the image below.  

This set contains 45 unique leaf images that are 1:12 scale.  They are the same images that are found on the Leaves Collage Sheet.  As the images are high resolution 300 dpi images, they can be easily resized for other sized projects.  By adding a wire behind the leaves, you can create 3D potted plants.  To purchase this image set, click on the image below. 

VIDEO TUTORIAL
NOTE: Since I have covered building the main structure in another video, in this tutorial, I will focus on putting the Flower Shop together and the materials I used.

RELATED VIDEO TUTORIALS
BUILDING A STRUCTURE TO HOUSE SHOPS


FREE IMAGES

AWNING - In addition to the images needed to construct the awning, I  have included a blank front piece in case you want to name your shop something different.

CLICK ON THE IMAGES BELOW TO DOWNLOAD


DOOR STAINED GLASS


THREE - 8 1/2" 11" PRINTABLE BACKGROUNDS FOR LEAF IMAGES


DETAIL SUPPLY LIST
COLLAGE SHEETS
Or
Architectural Trims Set Download – Floor & moldings
DECORATIVE PAPER & CHIPBOARD
Remnants Scrapbook Paper – Devonshire
Remnants Scrapbook Paper – Mayfair
Remnants Scrapbook Paper – Westfield
Mini Tudor Rose Singles – Die-cut chipboard shapes
FURNISHINGS
Tiny Plant Table
Wood Working Table
Rustic Wire Cart with 2 Baskets
Rustic Wire Display Cart
½ Inch Wooden Cube Blocks
5/8 Inch Wooden Cube Blocks
7/8 Inch Wooden Cube Block
1 Inch Wooden Cube Block
Glass Microscope Slides
Symmetrical Bronze Flourish
POTS/PLANTERS/BASKETS
Miniature Wicker Basket
1 Inch Tall Wooden Flower Pots
1 ½” Tall Wooden Flower Pots
Tiny Wooden Flower Pots
Large Antiqued French Country Planter
Large Victorian Planter – Terra Cotta
English Flower Box – Antique Green
Thimbles
FLOWERS /GREENERY
Purple Iris Bud Stems
Miniature Iris Stems - Lavender
Light Pink Hyacinth
Small Felt Flowers – Multicolor
Small Felt Flowers – Pink
Small Felt Flowers - Yellow
Small Bright Pink Mulberry Blossoms
Small Pale Pink Mulberry Blossoms
Small White Mulberry Blossoms
½ Inch Pale Peach Paper Roses
½ Inch Pale Pink Paper Roses
½ Inch Red Paper Roses
Tiny Paper Roses – White
Tiny Paper Roses – Cream
Tiny Paper Roses – Medium Pink
Tiny Paper Roses – Pink Cream Variegated
Mini Rose Buds – Pink Cream Variegated
Mini Rose Buds – Red
Mini Rose Buds - White
Red Tulips in White Flower Pot
Purple Creeping Phlox
Dusty Miller Bushes – Set of 6
Variegated Green Vines – Purple Flowers
Miniature Creeping Vine Garland
Set of 4 Bushy Plants
9cm Trees or Foliage
Red - Pollen
Green- Pollen
Brown - Pollen
MISCELLANEOUS
Scissors
Miniature Vintage Cash Register
Creative Paper Clay

Sunday, July 1, 2018

MINIATURE CONSERVATORY - Hinged Accordion Folding Book - NEW Collage Sheets & Digital Image Set

Who doesn’t love a conservatory filled with flowers, statues, and fountains all showcased in beautiful architecture.

The core of the piece is made from the Mini Conservatory Accordion Book, which is perforated for folding.  I chose to separate the pieces for my conservatory and then hinge them back together.  This approach allows for the use of more embellishments.
I’ve created two new collage sheets (details below) Mini Conservatory & Stained Glass Collage Sheet to go along with the project.  AlphaStamps is also offering a New Conservatory Parts Collage Sheet.

I used the transparency version of the Stained Glass Collage Sheet and sandwiched the images between two accordion books to create a realistic stained glass look.  Using two books allowed me to decorate both sides, so it looks lovely from every angle.

MINI CONSERVATORY COLLAGE  SHEET
This collage sheet is filled with lots of lovely images to decorate a miniature conservatory or garden-themed project.  Many images are also found on the larger Conservatory Garden DĂ©cor Collage Sheet.  To purchase this sheet, click on the image below.
STAINED GLASS COLLAGE SHEET
This sheet contains a series of stained glass images that can be used in smaller art & miniature projects.   When the images are printed on a transparency film, it creates more of an authentic stained glass look.  To look even more authentic, add and melt embossing powder on the transparency film image.  To purchase this sheet, click on the image.
This image set contains 29 separate and unique stained glass images that can be used in smaller art & miniature projects.  They would work well with 1:12 scale projects.    When the images are printed on a transparency film, it creates more of an authentic stained glass look.  To look even more authentic, add and melt embossing powder on the transparency film image.  To purchase this sheet, click on the image below.


THE DETAILS
I started separating the pieces and sanding the edges to smooth the perforated edges (used for folding).  I used two sets of the Mini Conservatory Folding Book.
Next, I painted and papered the pieces (the same on each side) using paper from the Wandering Ivy 12x12 Paper Pad.  I then added images from the transparency film version of the NEW Stained Glass Collage Sheet to most openings. 
 
I used hinges to reconnect the conservatory pieces.

Below I’ll walk you through how I embellished each side of the same piece.

EMBELLISHMENTS
I decorated both sides of each piece.  On one side, I used a door from the Mini Conservatory Parts Collage Sheet and the sundial from the Mini Conservatory/Garden Collage Sheet.  
At the bottom, I added pieces of mini creeping vine garland.  On the other side, I used the same sundial and an image of a terrarium from the same sheet.
The piece pictured below is decorated the same on both sides.  The architecture at the bottom comes from the Mini Conservatory Collage Sheet, and the finial is from the Mini Conservatory/Garden Collage Sheet.  Sandwiched between the arches is a stained glass image from the Stained Glass Collage Sheet.
The leaves at the top are made by cutting up Green Embossed Dresden Leaves.  Each leaf has 5 points, so I used each point to guide where I cut.  Using a stencil brush, I lightly applied dark green acrylic paint to give the leaf some contrast.  It also helps to bring out the embossing on the leaf.

The leaves on the side are from the Dollhouse Laser–Cut Fern Leaves.   I first painted them brown and then, using a stencil brush, lightly applied dark green and then light green paint.
The piece pictured below is decorated the same on both sides.  The architecture at the bottom comes from the Mini Conservatory Collage Sheet.  Sandwiched between the arches is a stained glass image from the Stained Glass Collage Sheet.  The leaves are stitched ribbon that I accented with beads.
The piece pictured below is similar on both sides, except that one side is decorated with a tiny green garland and pink roses.  The statue and Greenman are from the Mini Conservatory Garden Collage sheet and another image from the Stained Glass Collage Sheet.
I used another stained glass and statue image for the piece pictured below.  On one side is an image of a birdbath, three tiles from the Mini Conservatory/Garden Collage Sheet, and a resin songbird (it's part of a set of 3).
The leaves are cut out from one of the sheets of paper in the Wandering Ivy 12x12 paper pad.  For the piece below, I’ve used another stained glass image.  The paper is an embossed brick pattern.  

I embellished the top with mini wrought iron flourishes set on the top and Architextures Iron Fence at the bottom.


I used some of the Mini Wrought Iron Flourishes to add a piece to the side and an urn image from the collage sheet.  The greenery is leaves from the Mini Fern Garland.