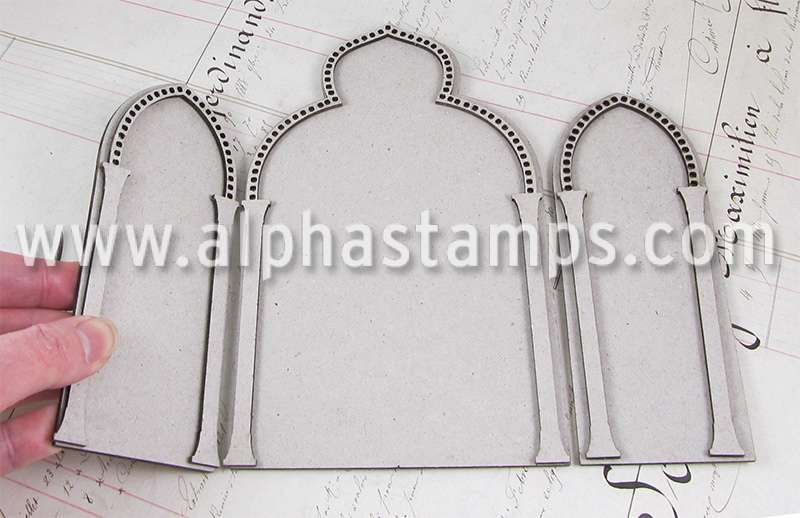
Don’t worry about how to recreate the shape of the book, as further down in this post, there are templates that you can download and use.
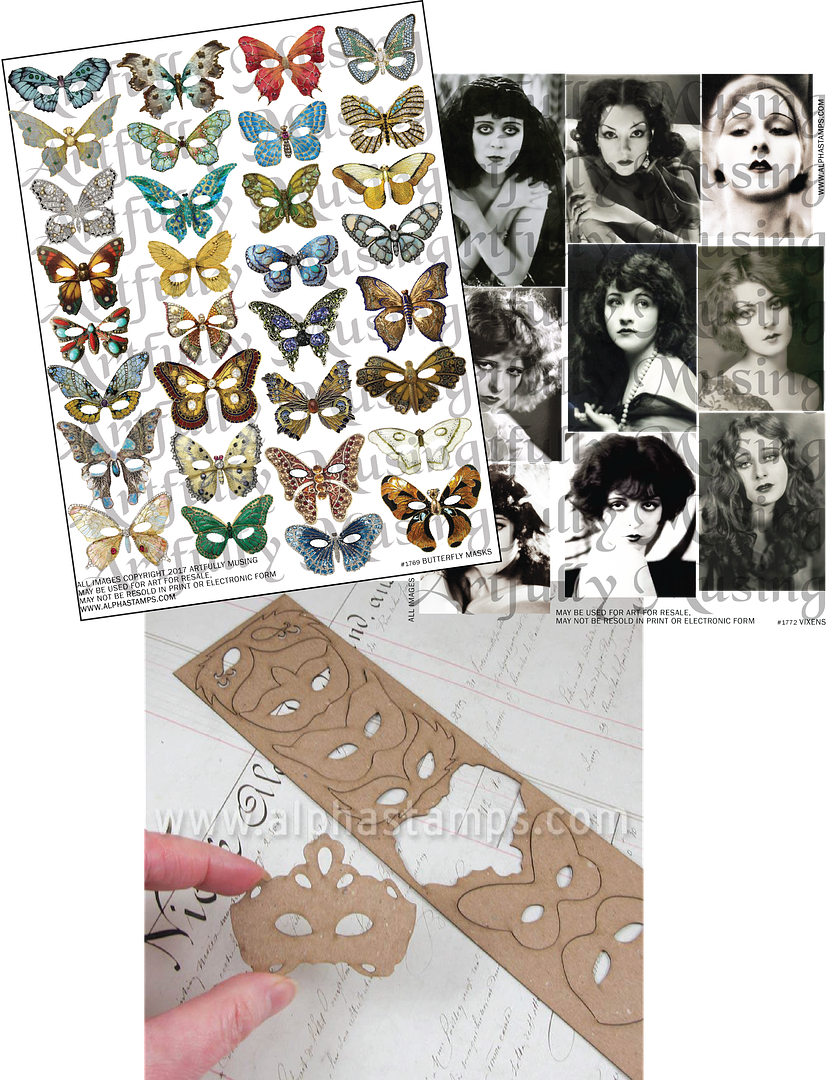
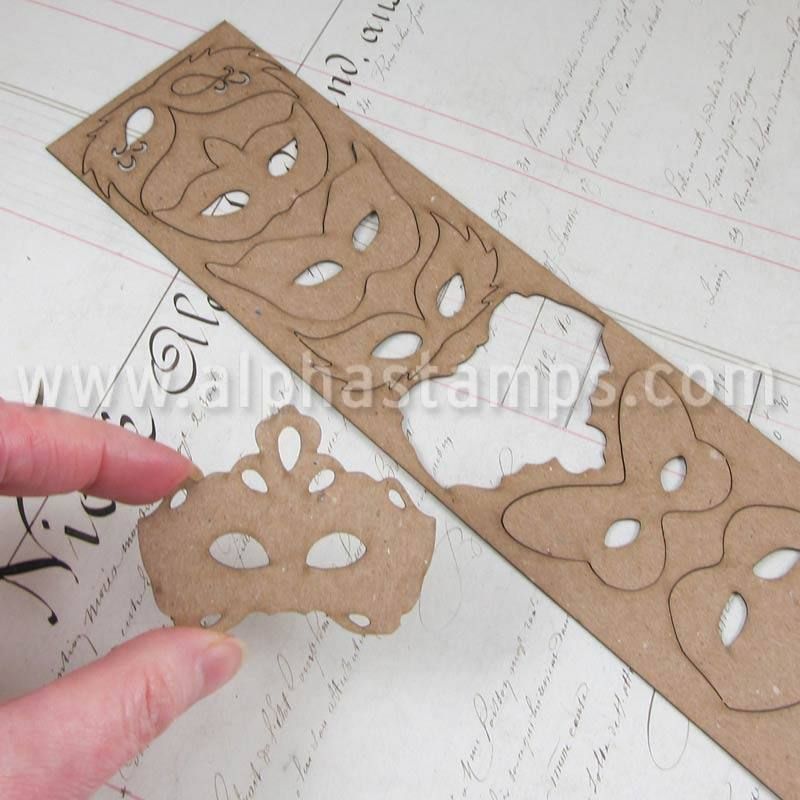
I’ve used images from my NEW Butterfly Masks collage sheet to construct the masks, and a NEW die-cut ATC Sized Mask set.
I had so much fun loading up the masks with brass, feathers, beads, faux pearls, rhinestones, acrylic, and tulle. The chipboard masks can be used alone or stacked for a layered look. Another layered option is to combine the paper butterfly mask images with the chipboard.
This sheet is packed with jeweled butterfly masks. There are a total of 32 unique masks. Many of the masks fit the women on the “Vixens Collage Sheet.” Click on the picture below to purchase this collage sheet.

This sheet contains 9 sultry women from the 1920s. Click on the picture below to purchase this collage sheet.

THE DETAILS
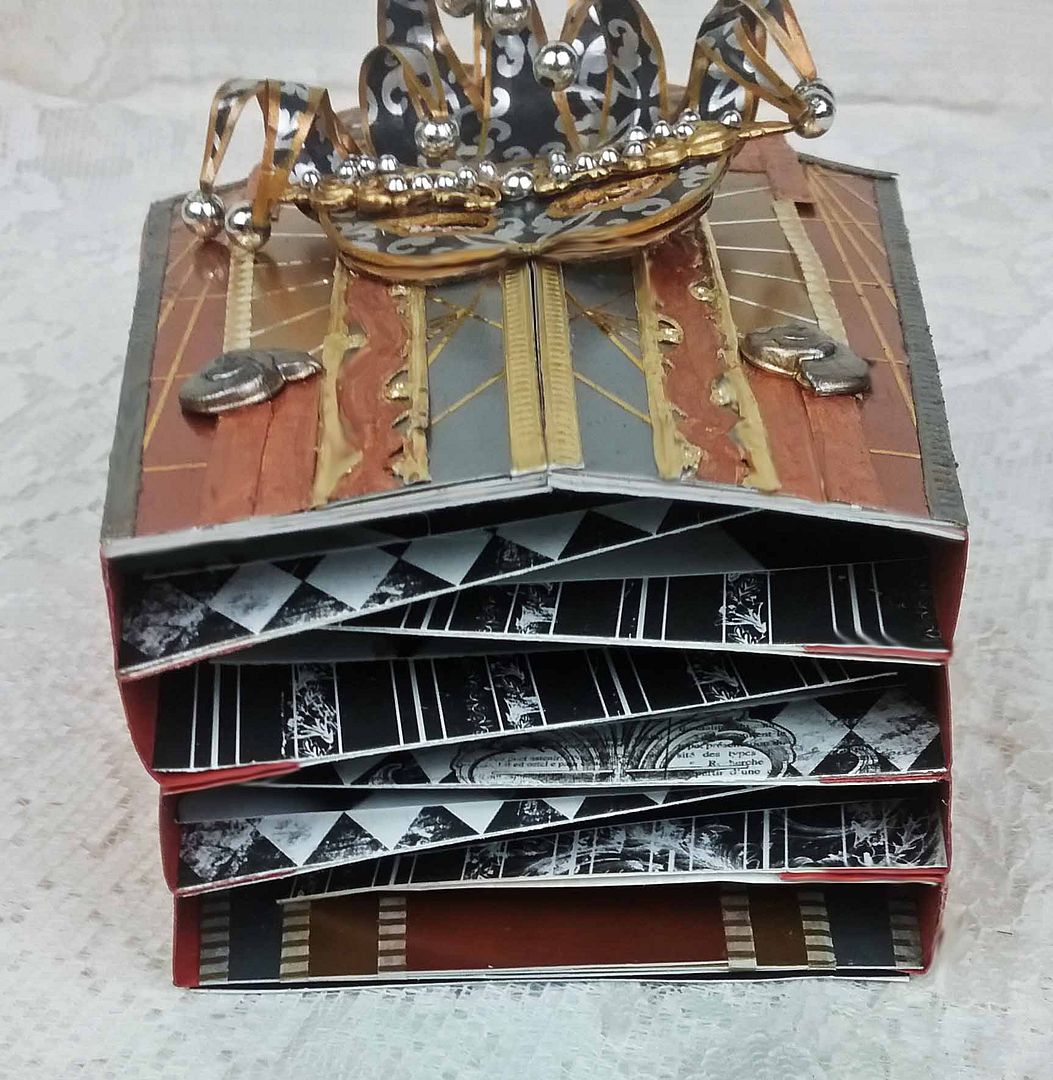
THE ALBUM
Feel free to download this template.

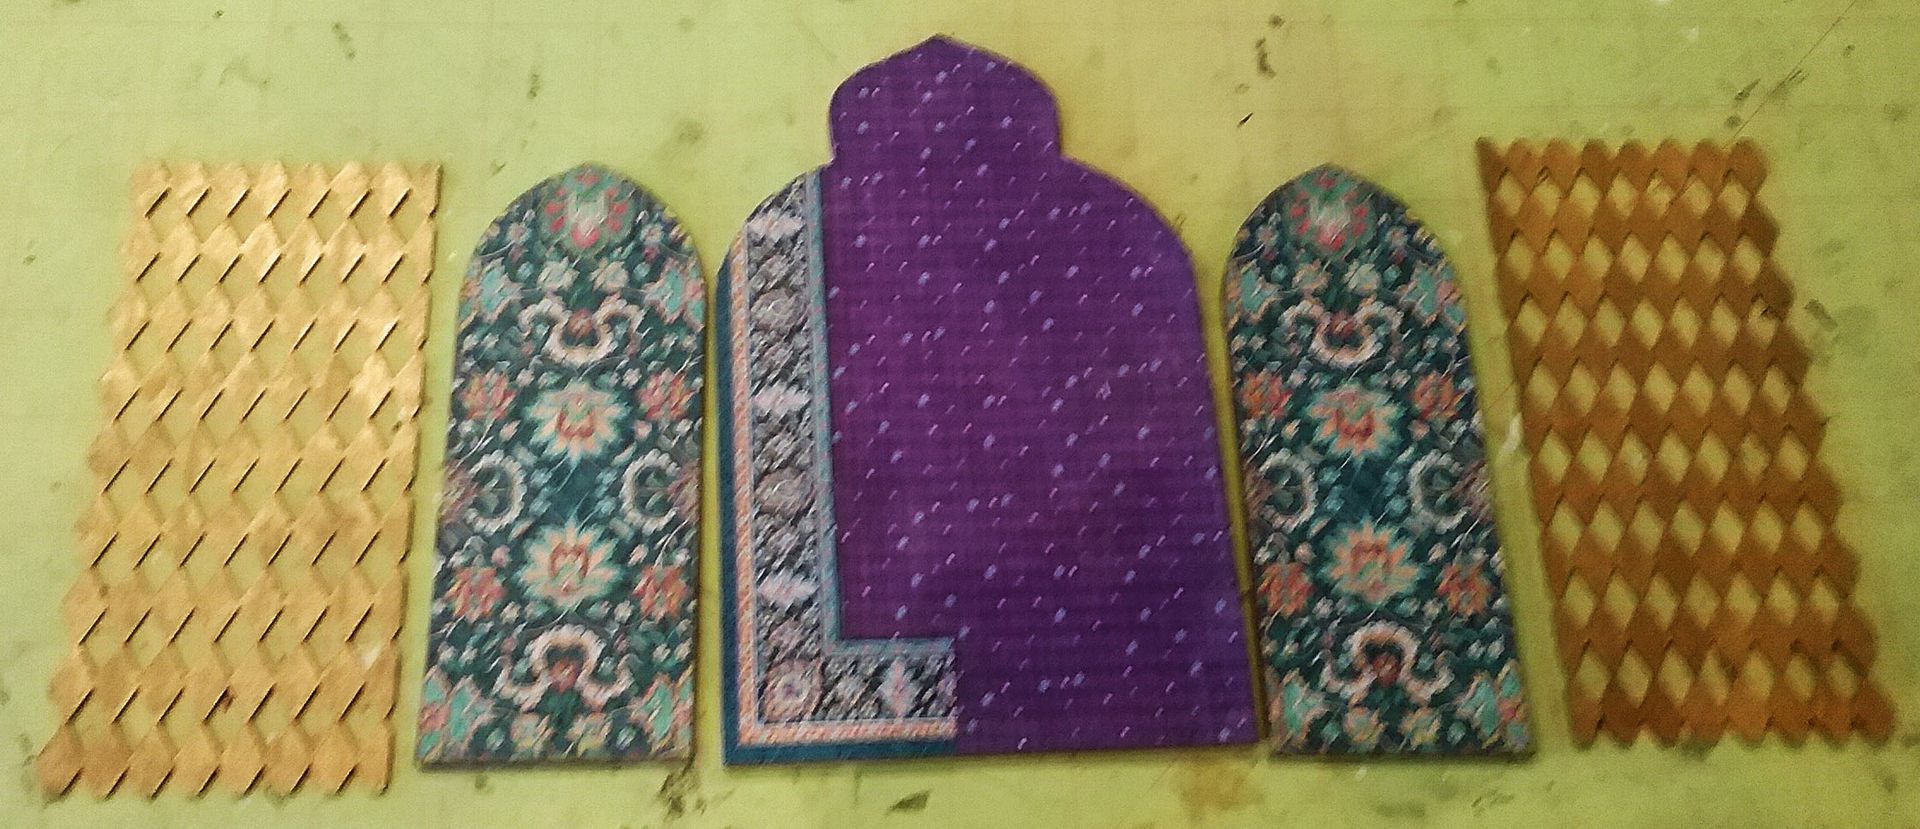
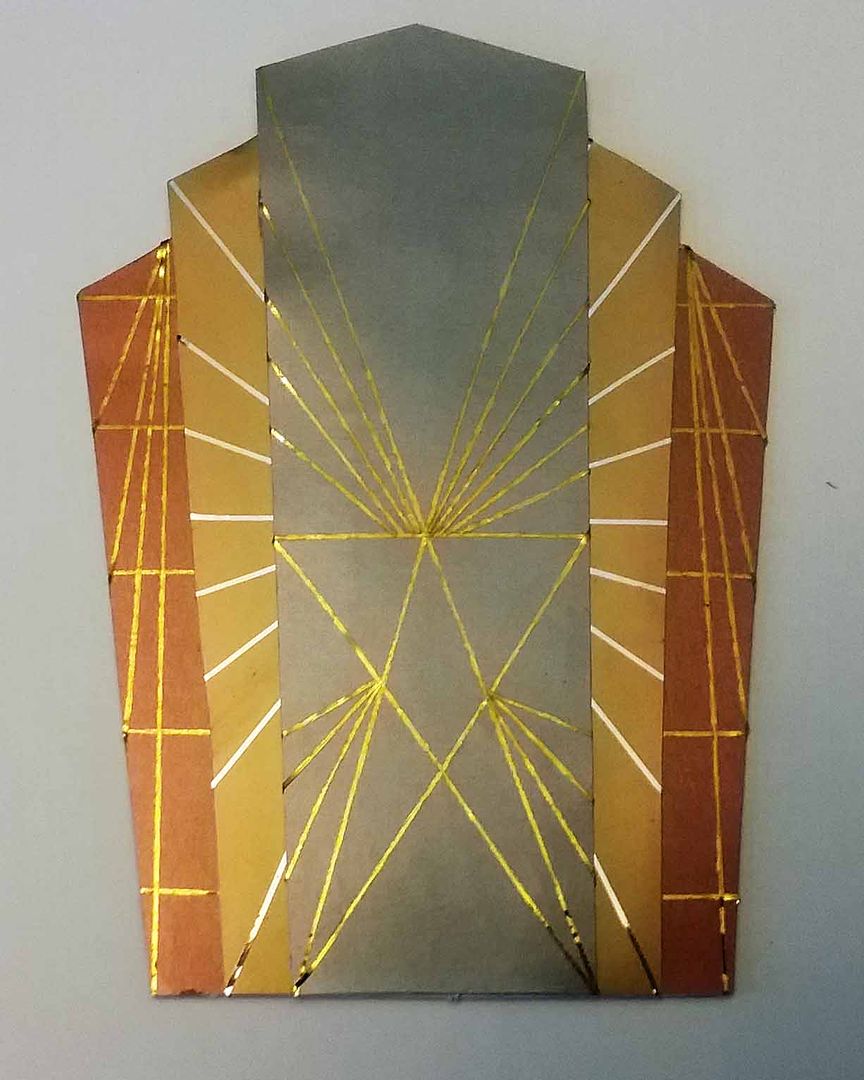
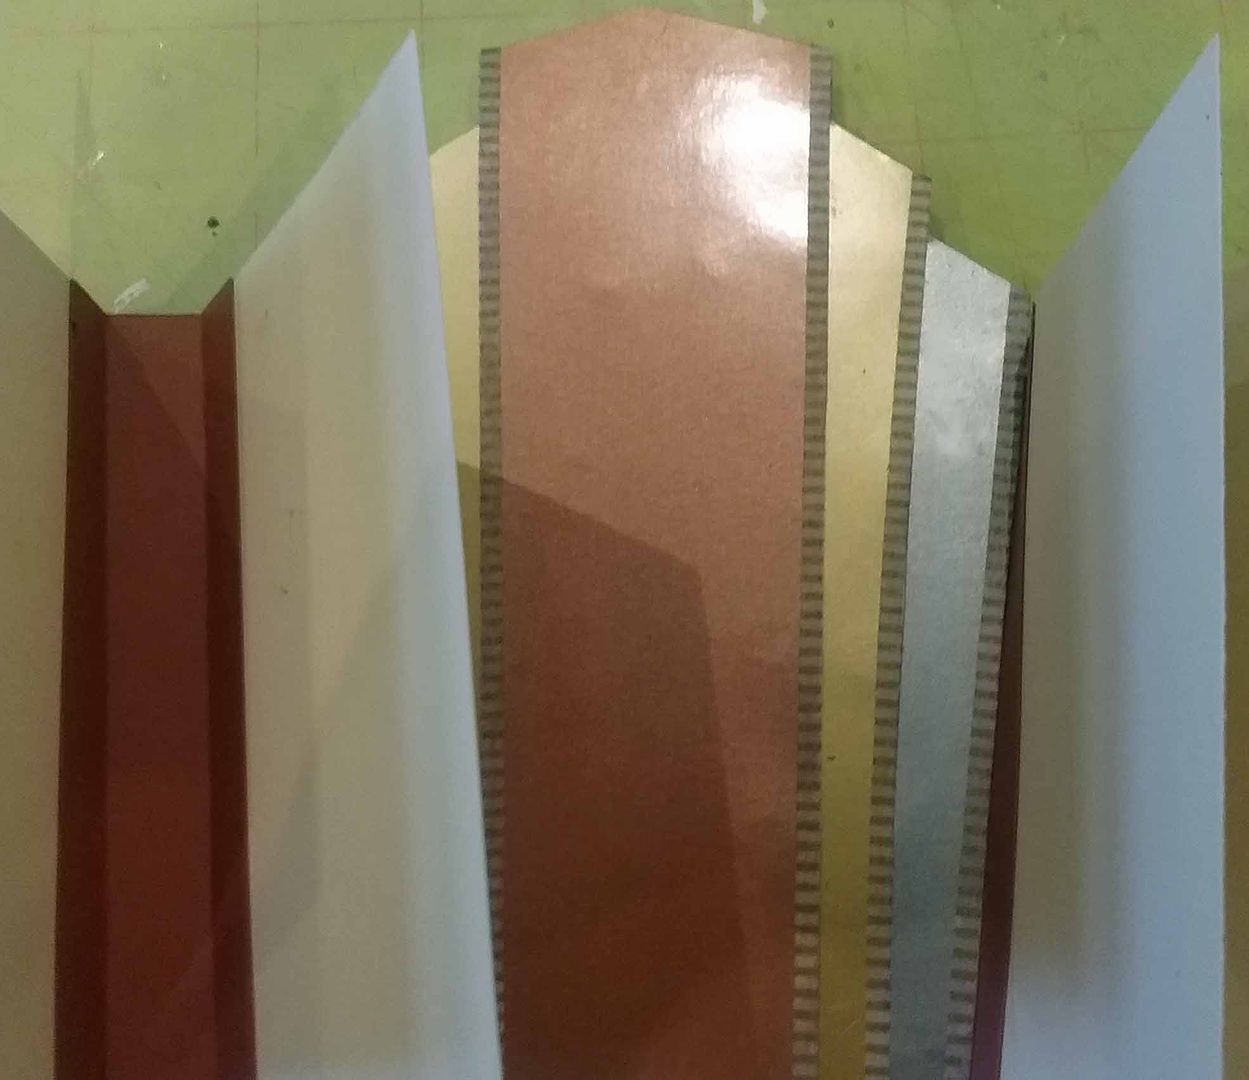
I used the template above to cut out the front of the book using metallic paper from my stash. I used silver and gold line stripe tape, which created geometric designs on the three pieces.
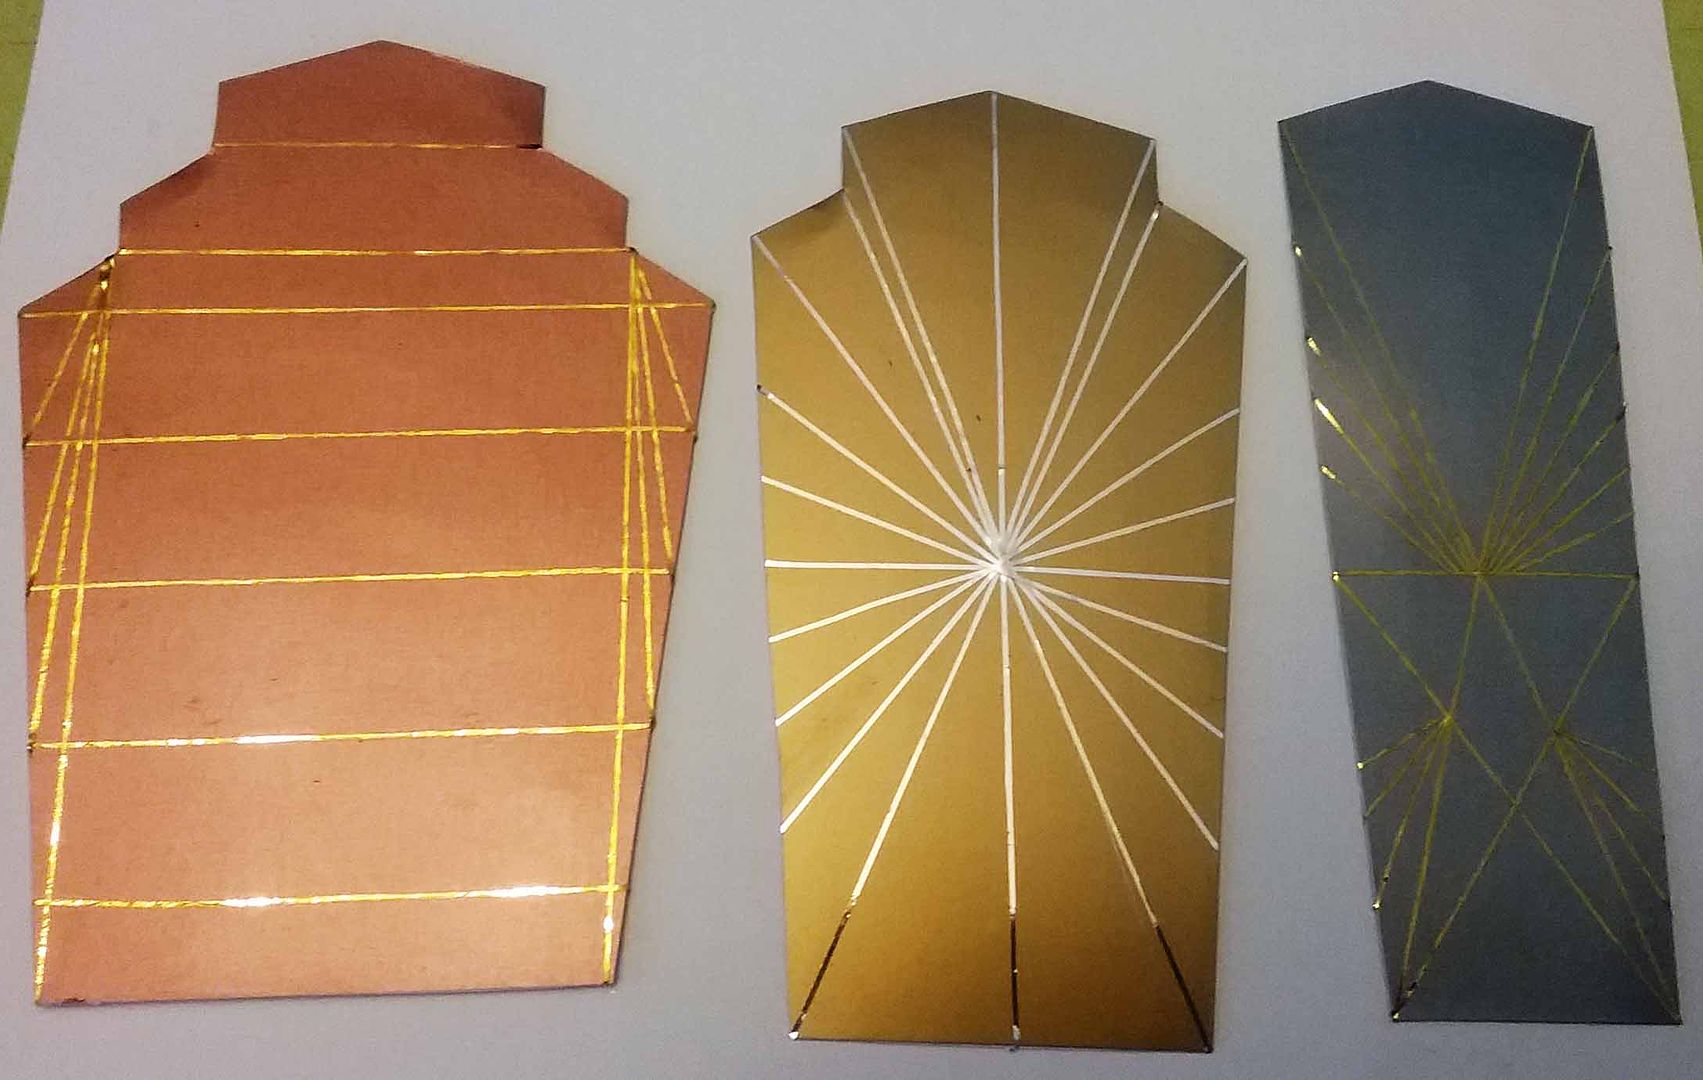
Next, I glued the three pieces together.
To make the spine, I cut 8 pieces of copper paper. Each piece measures 4” long x 1 ½” wide. I scored two lines ½” from each edge. I folded the paper along the scored lines, which created a ½” spine. The size of the spine is determined by the thickness of the embellishments you intend to use on each page of the book. The number of spine pieces depends on the number of pages. My book has 4 pages on each side of the book, so I cut 8 spine pieces.

Next, I cut the cover in half.
NOTE: The following steps apply to both sides of the cover.
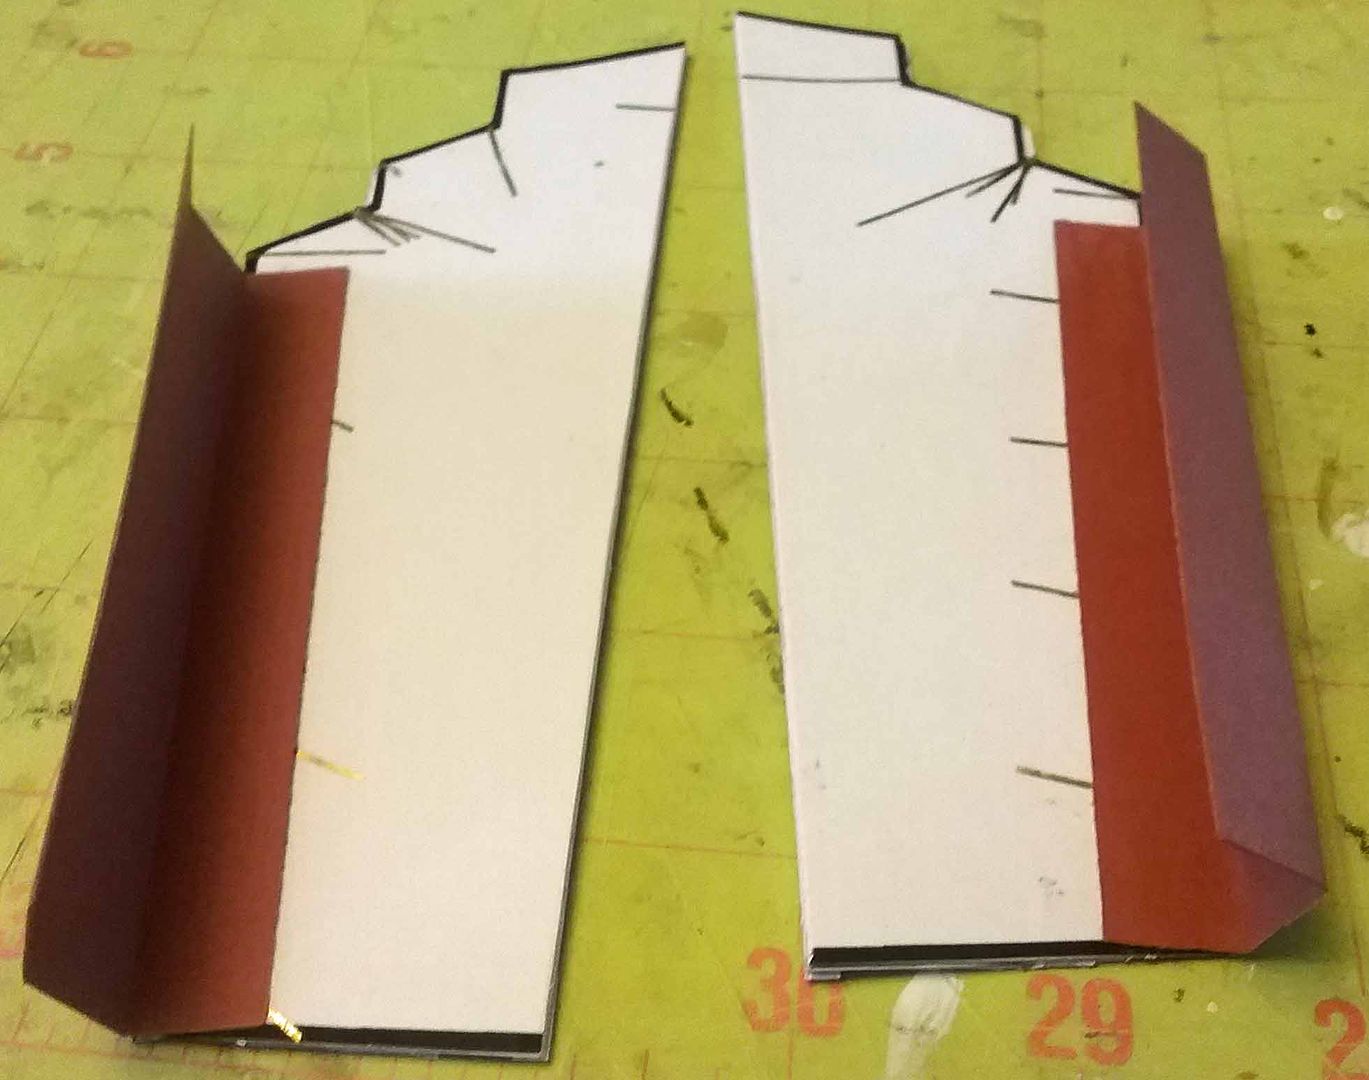
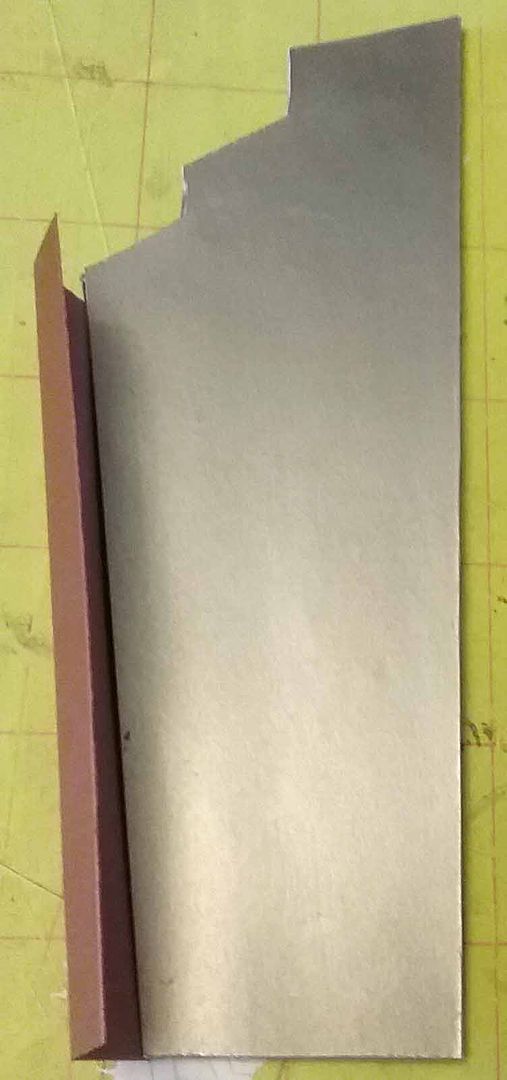
I attached one of the spines to the back of each side of the cover and then covered the backs with metallic paper, which hides where the spine is attached.
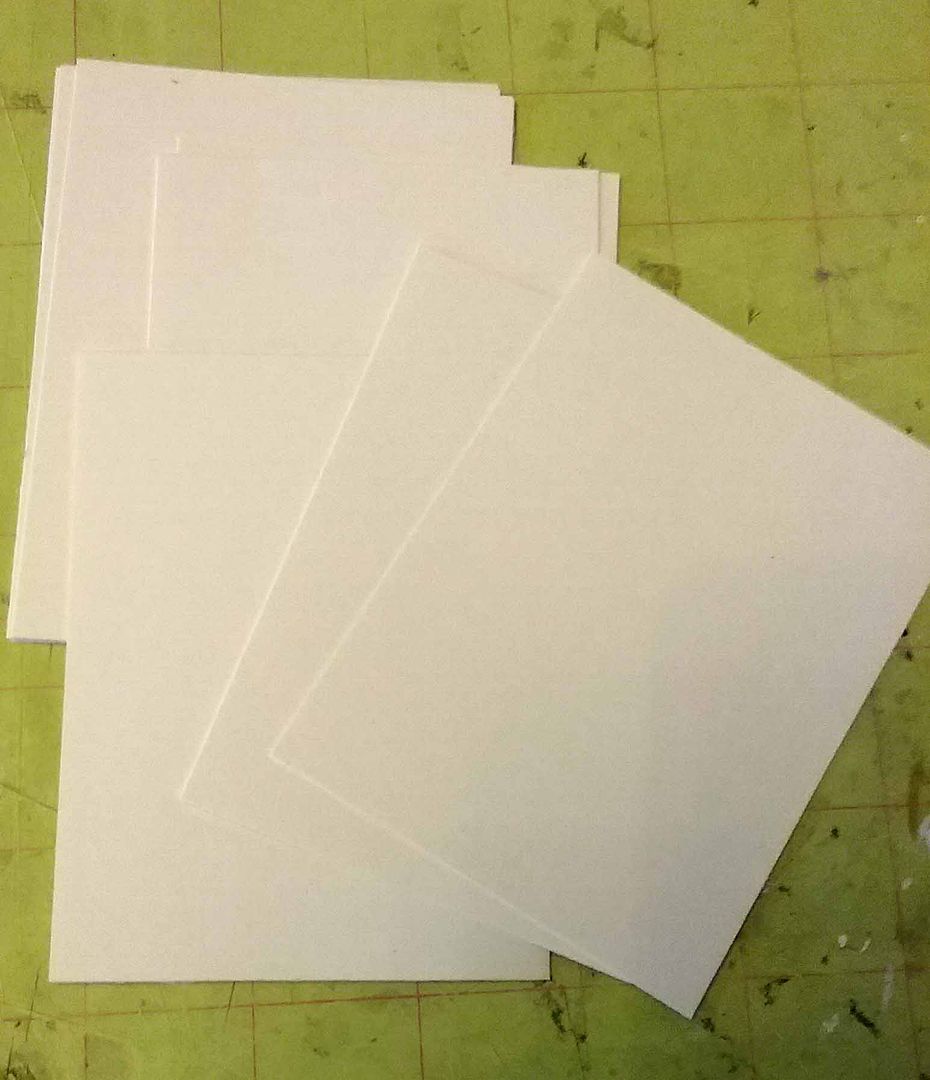
I cut 8 pieces of cardstock measuring 4” tall by 3” wide to serve as the pages. Make sure you always use an even number of pages.


Notice that since the front sides of the cover are at an angle, the pages will also be angled, which I think gives the book more interest.


For the back of the book, I used the same template pieces as I used for the front. After the pieces were assembled, I glued the last spine on each side of the book to the back side of the back cover. I covered the back side of the back of the book with more metallic paper to hide where the spine is attached. I decorated the edges of the back pieces with 3mm Thin Gold Stripes Paper Tape.
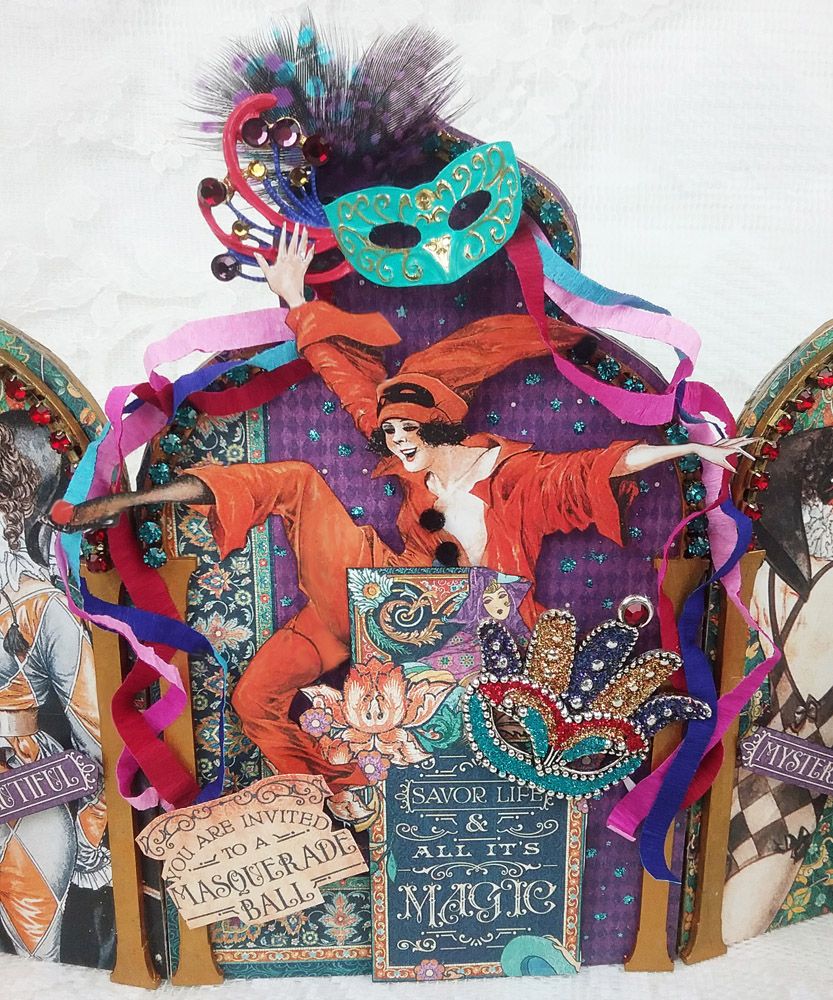
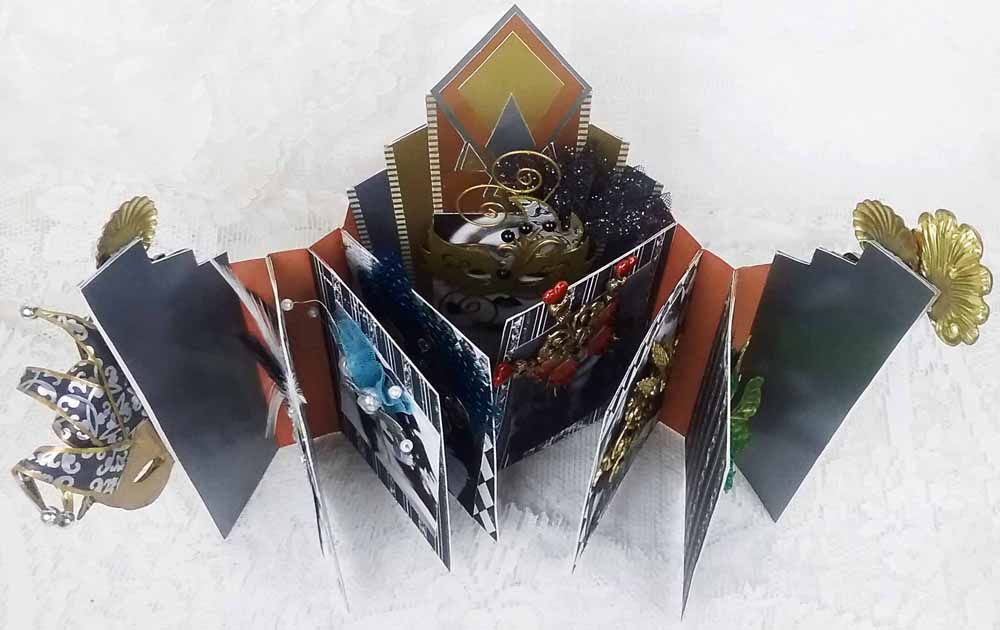
At this point, the book is assembled. The pages on each side of the book will alternately overlap, as you can see below in the finished book. I covered each page with decorative paper, which hides where the spines are attached.
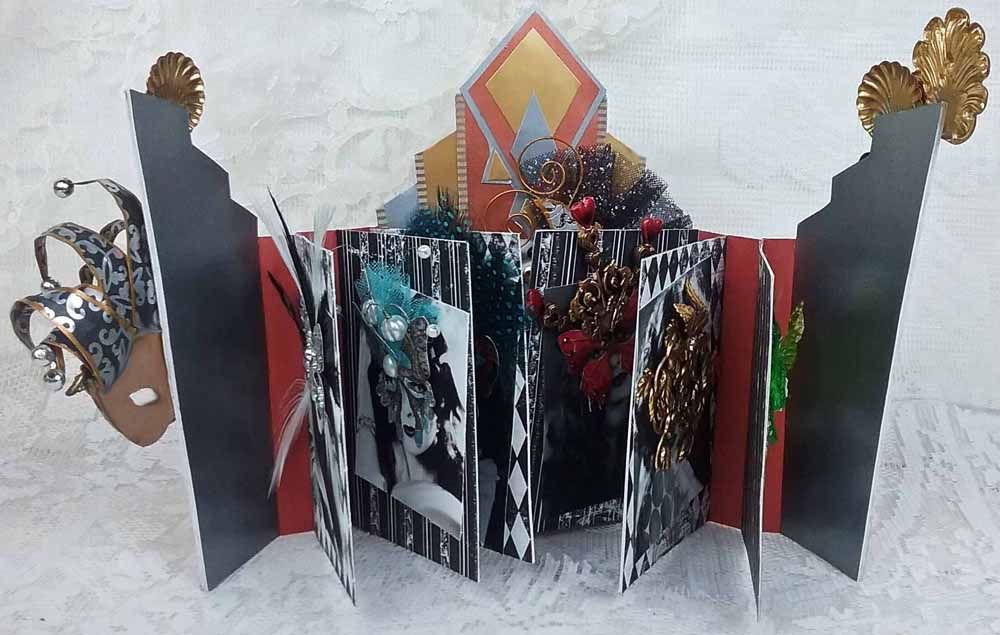
Notice below how each page is at an angle and overlapping.
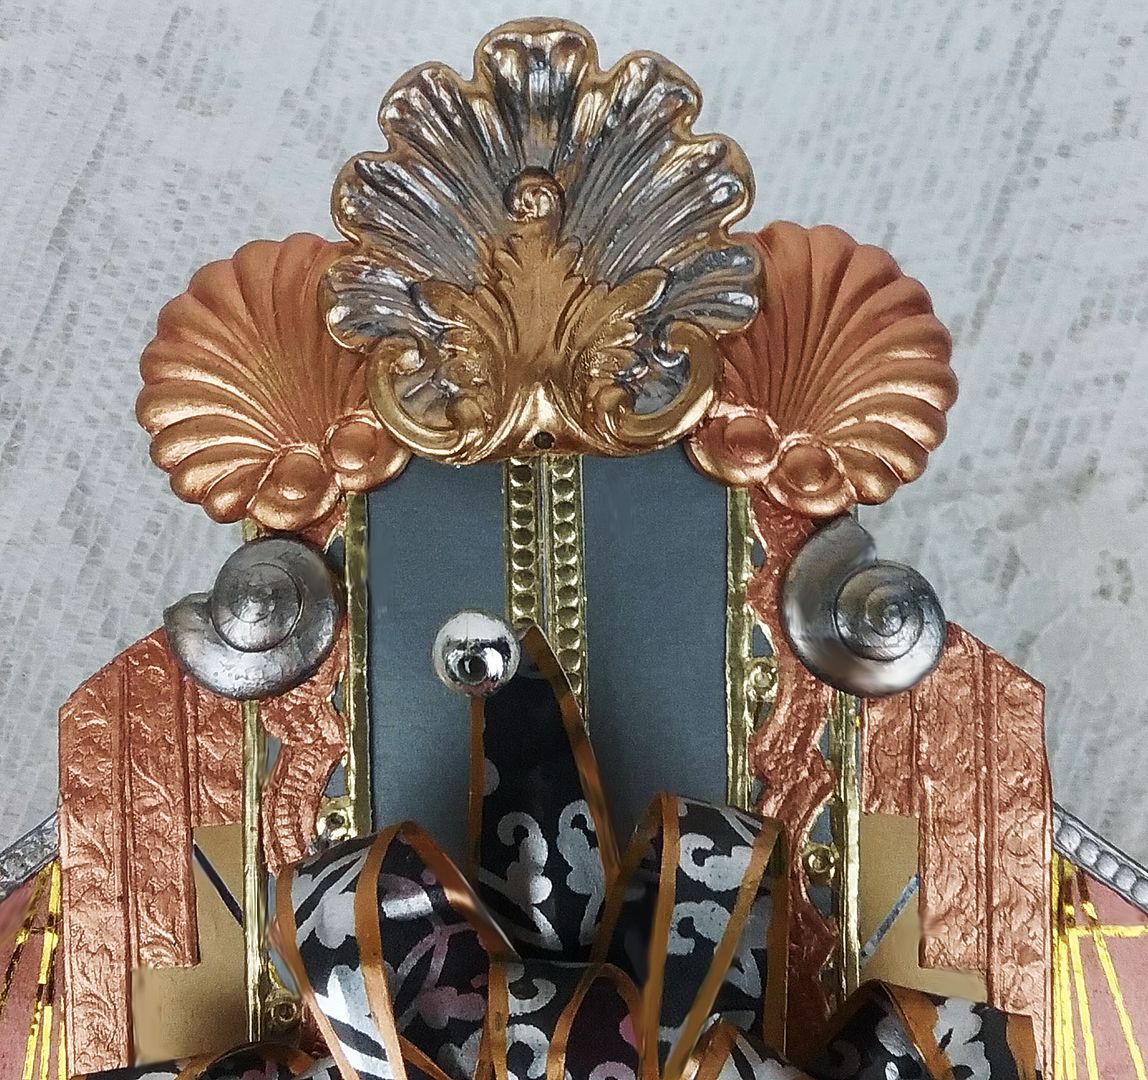
To further decorate the front of the book, I added various metallic Dresden borders and brass shell filigree pieces painted to match the metallic papers. The silver shells, parts of the Dresden, and the large acanthus leaf in the center are painted using Pewter Liquid Pearls.

In order for the book to open, I glued the large shell in the center to only the right side of the cover, and the mask is only glued to the left side of the cover.
THE MASKS
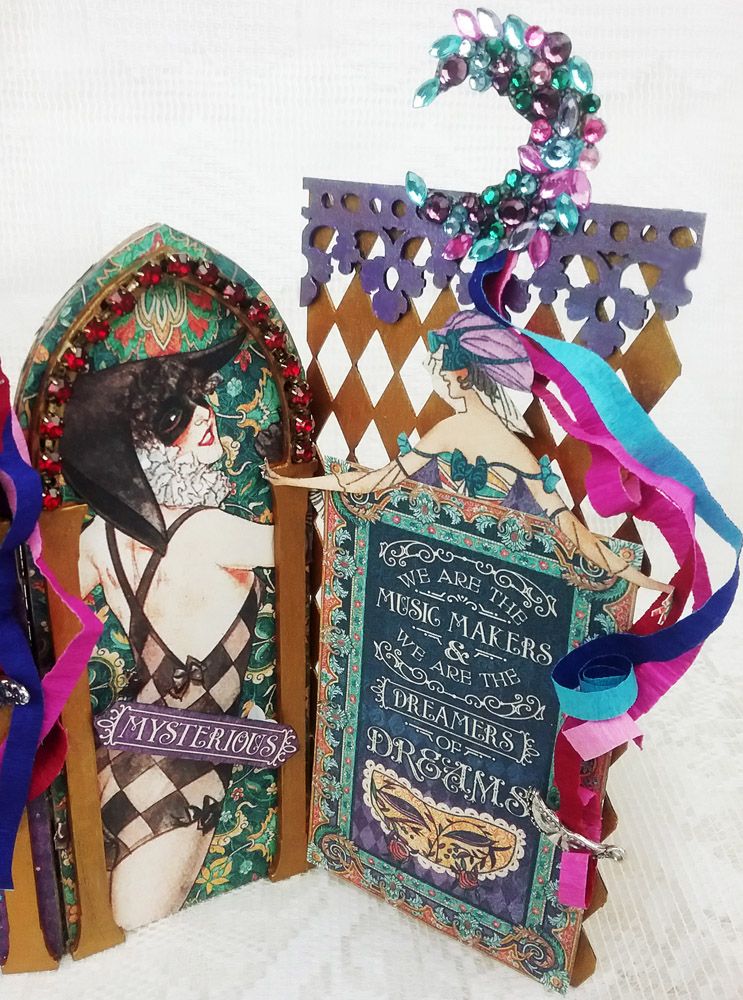
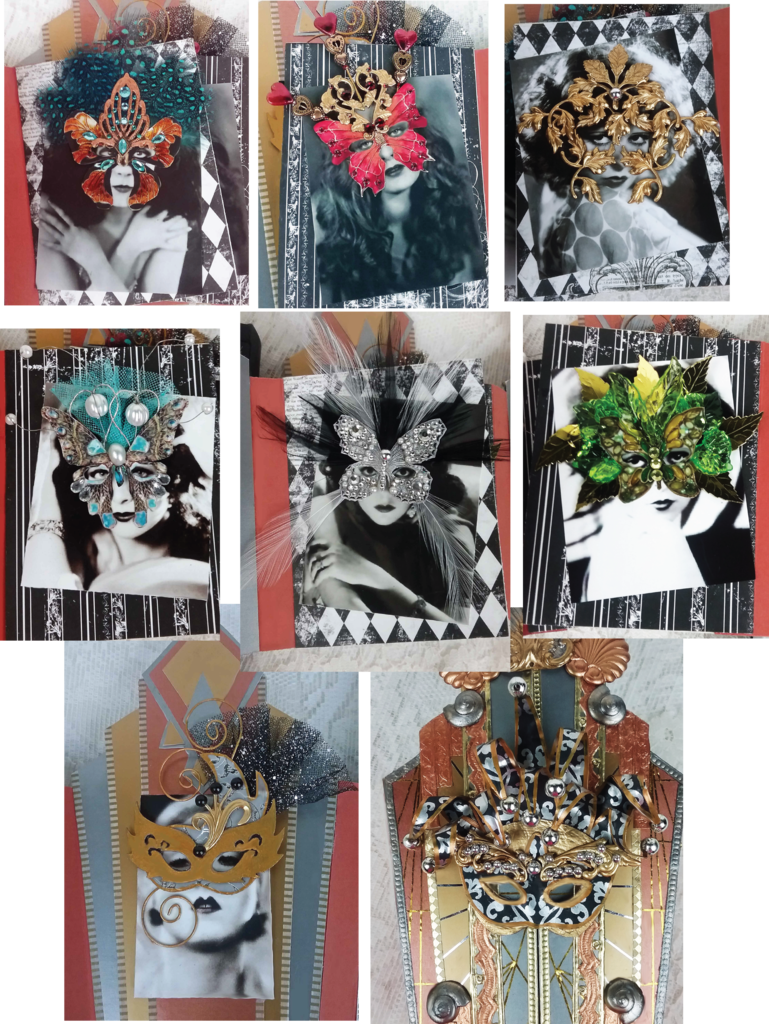
I covered the inside pages with decorative paper from my stash. I added a lovely lady from my new Vixens collage sheet wearing a mask to each page.
The base of the masks is made from either die-cut chipboard masks or masks from the Butterfly Mask collage sheet.
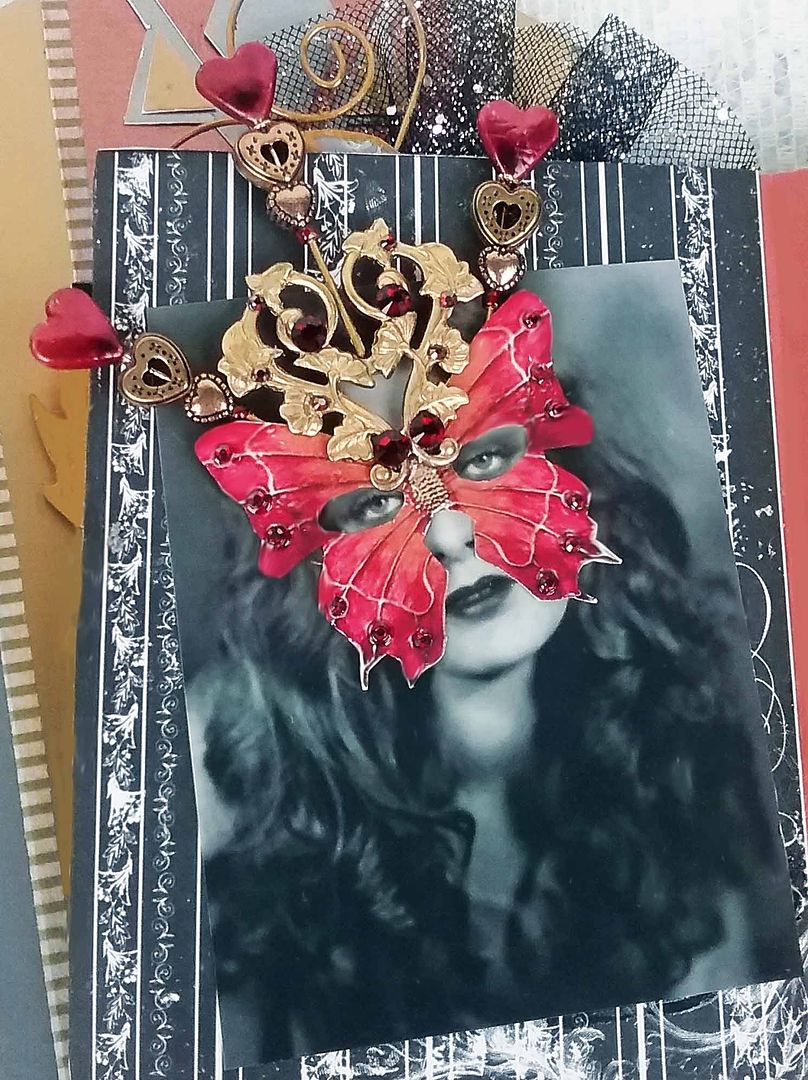
I used an image from the Butterfly Mask collage sheet for the mask below and added various heart filigree and bead pieces. The beads are attached by using heart stick pins. For the final touch, I added red rhinestones.
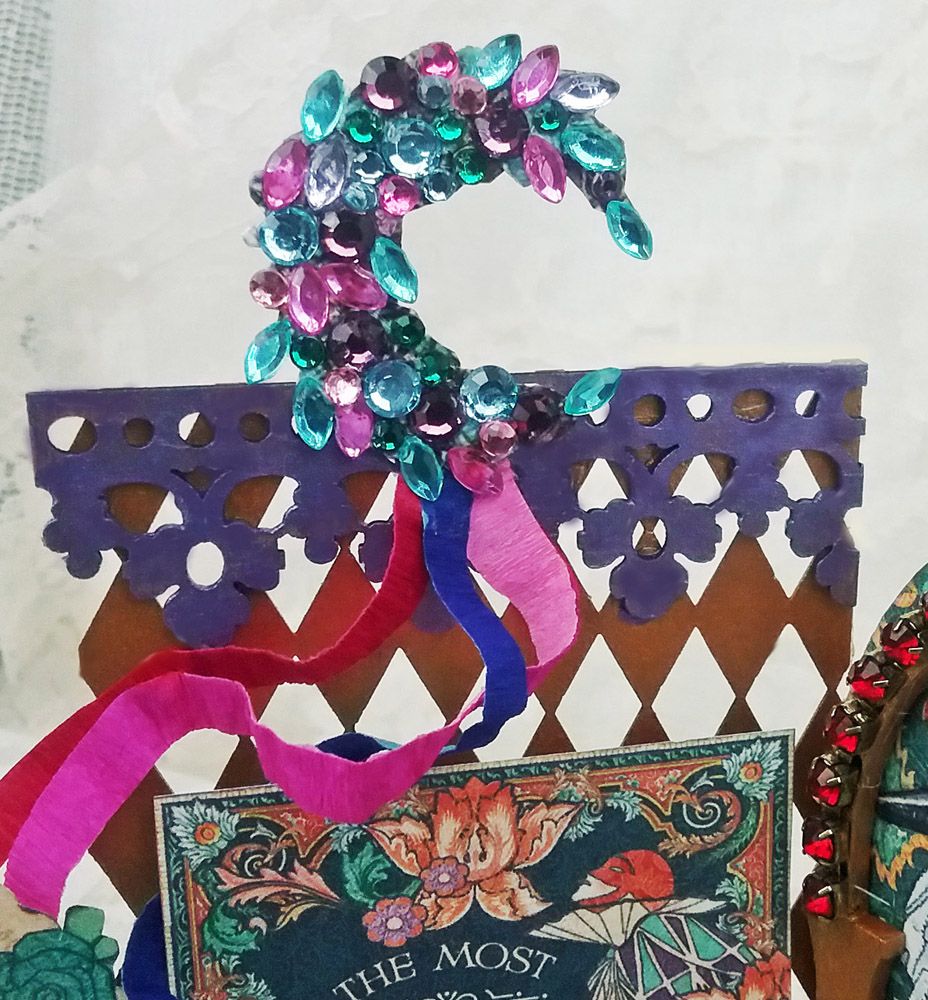
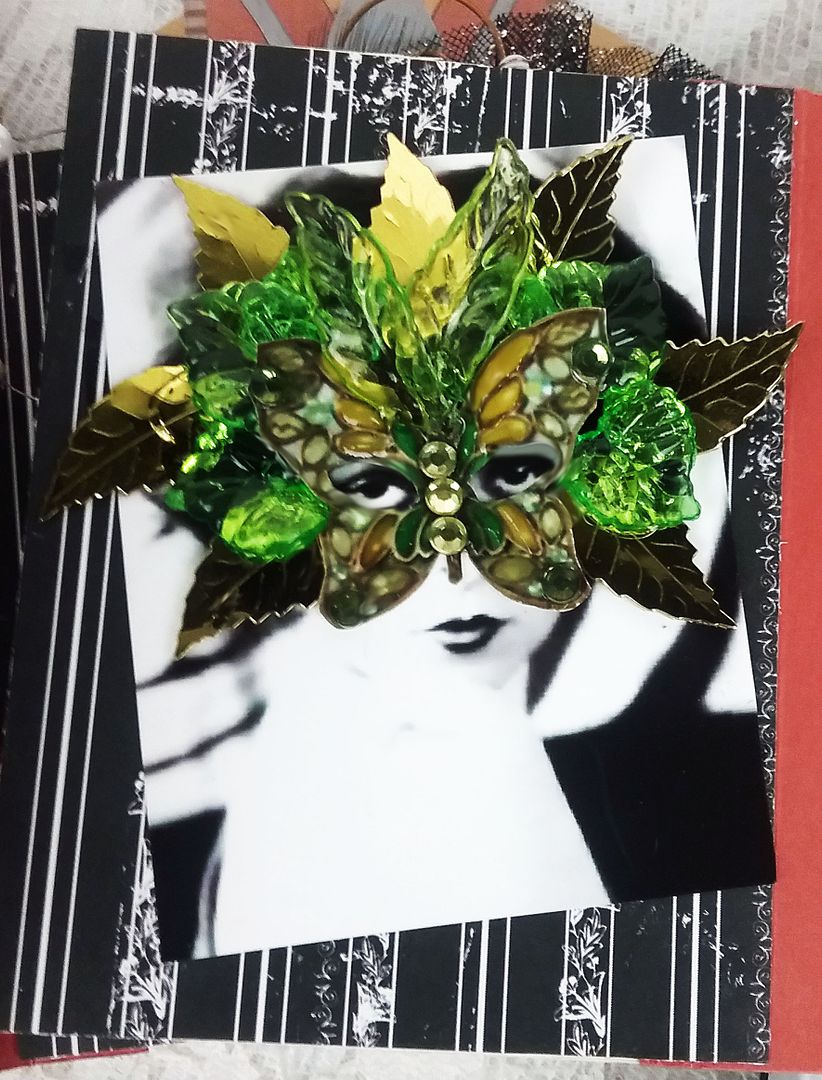
I used an image from the Butterfly Mask collage sheet for the mask below. I attached acrylic and gold sequin leaves to the back of the mask and used Glossy Accents to add dimension. To the center and edges of the mask, I attached green rhinestones.

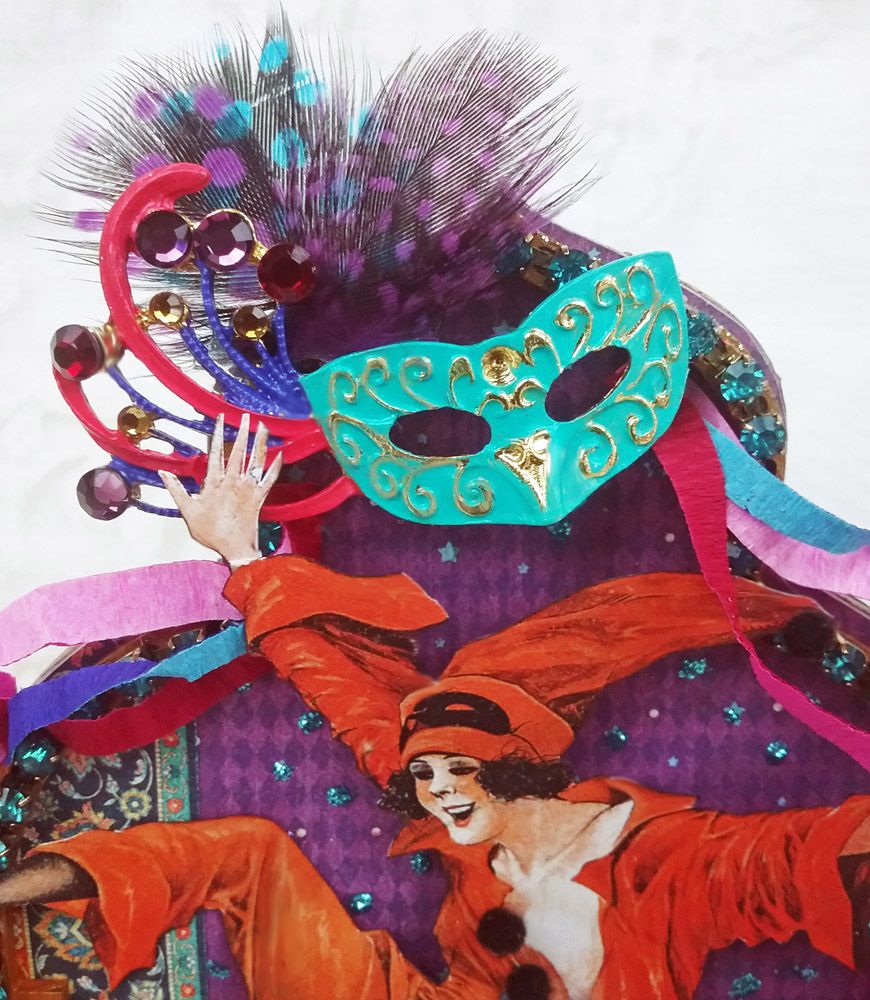
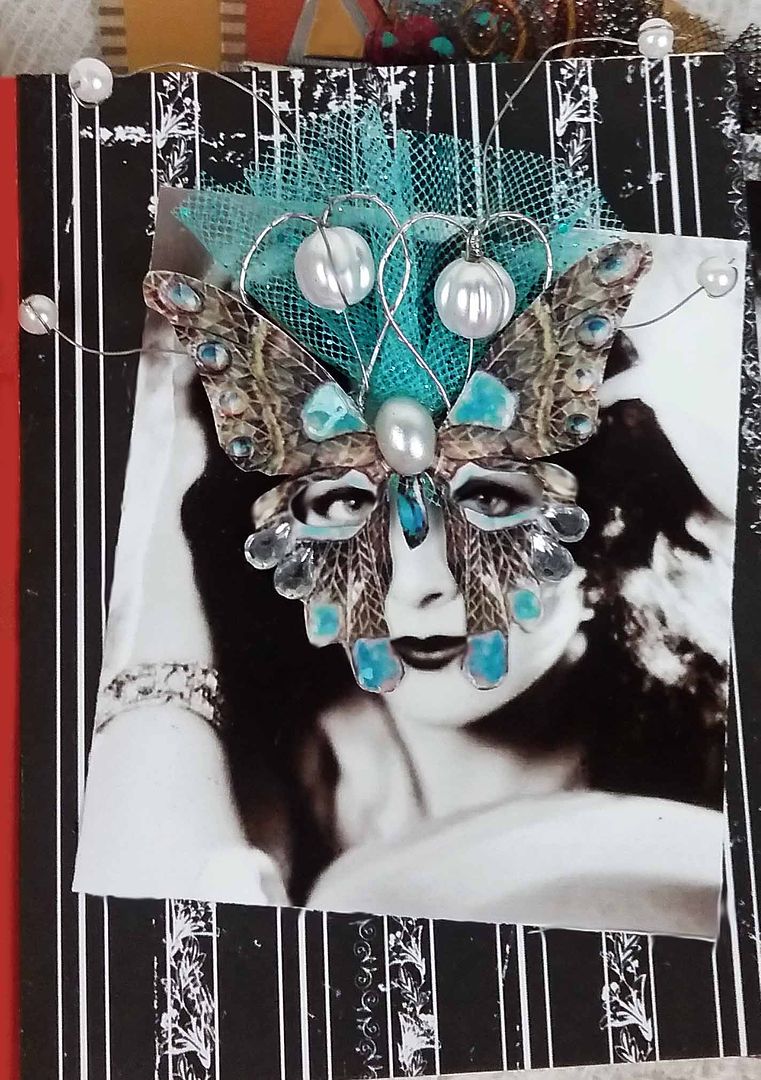
For the mask below, I used an image from the Butterfly Mask collage sheet and Glossy Accents to add dimension to parts of the mask. Behind the mask, I attached teal feathers, and to the front, I added a piece of metal filigree painted a copper color and added teal rhinestones.

For the mask below, I used two die-cut masks from the ATC Masked Set, one layered on top of the other. The masks are covered with paper from my stash. I added brass feathery scroll filigree and silver pearls to the front of the mask.
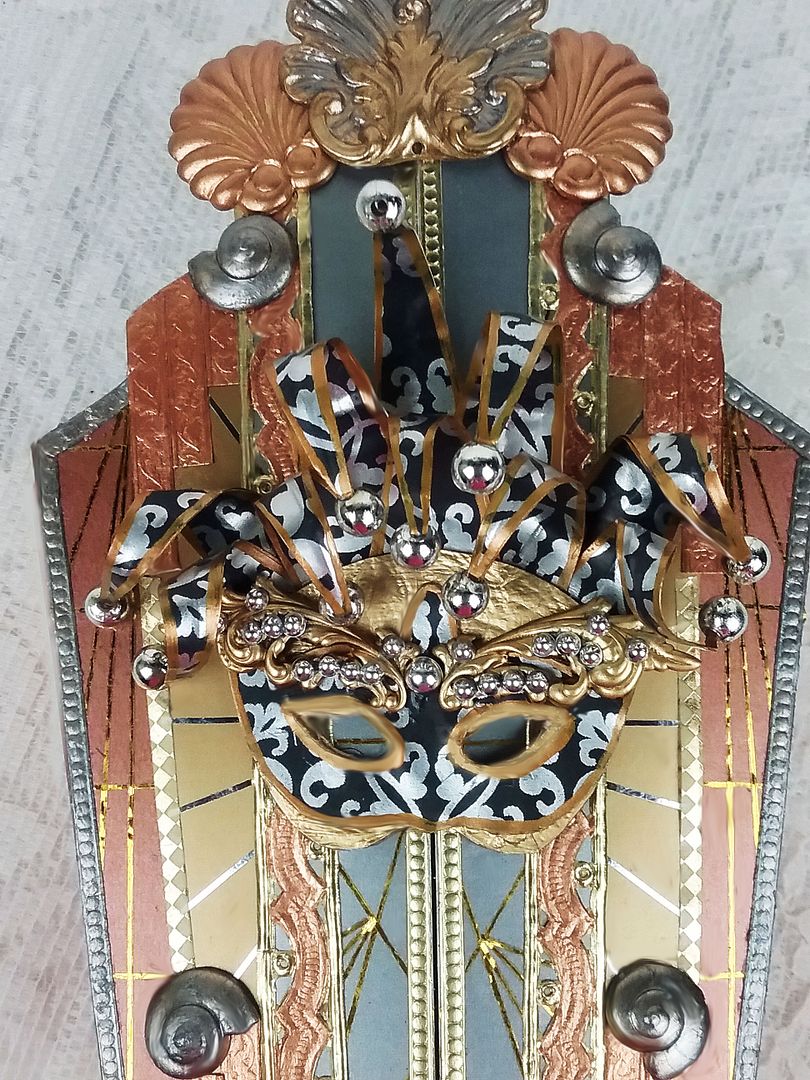
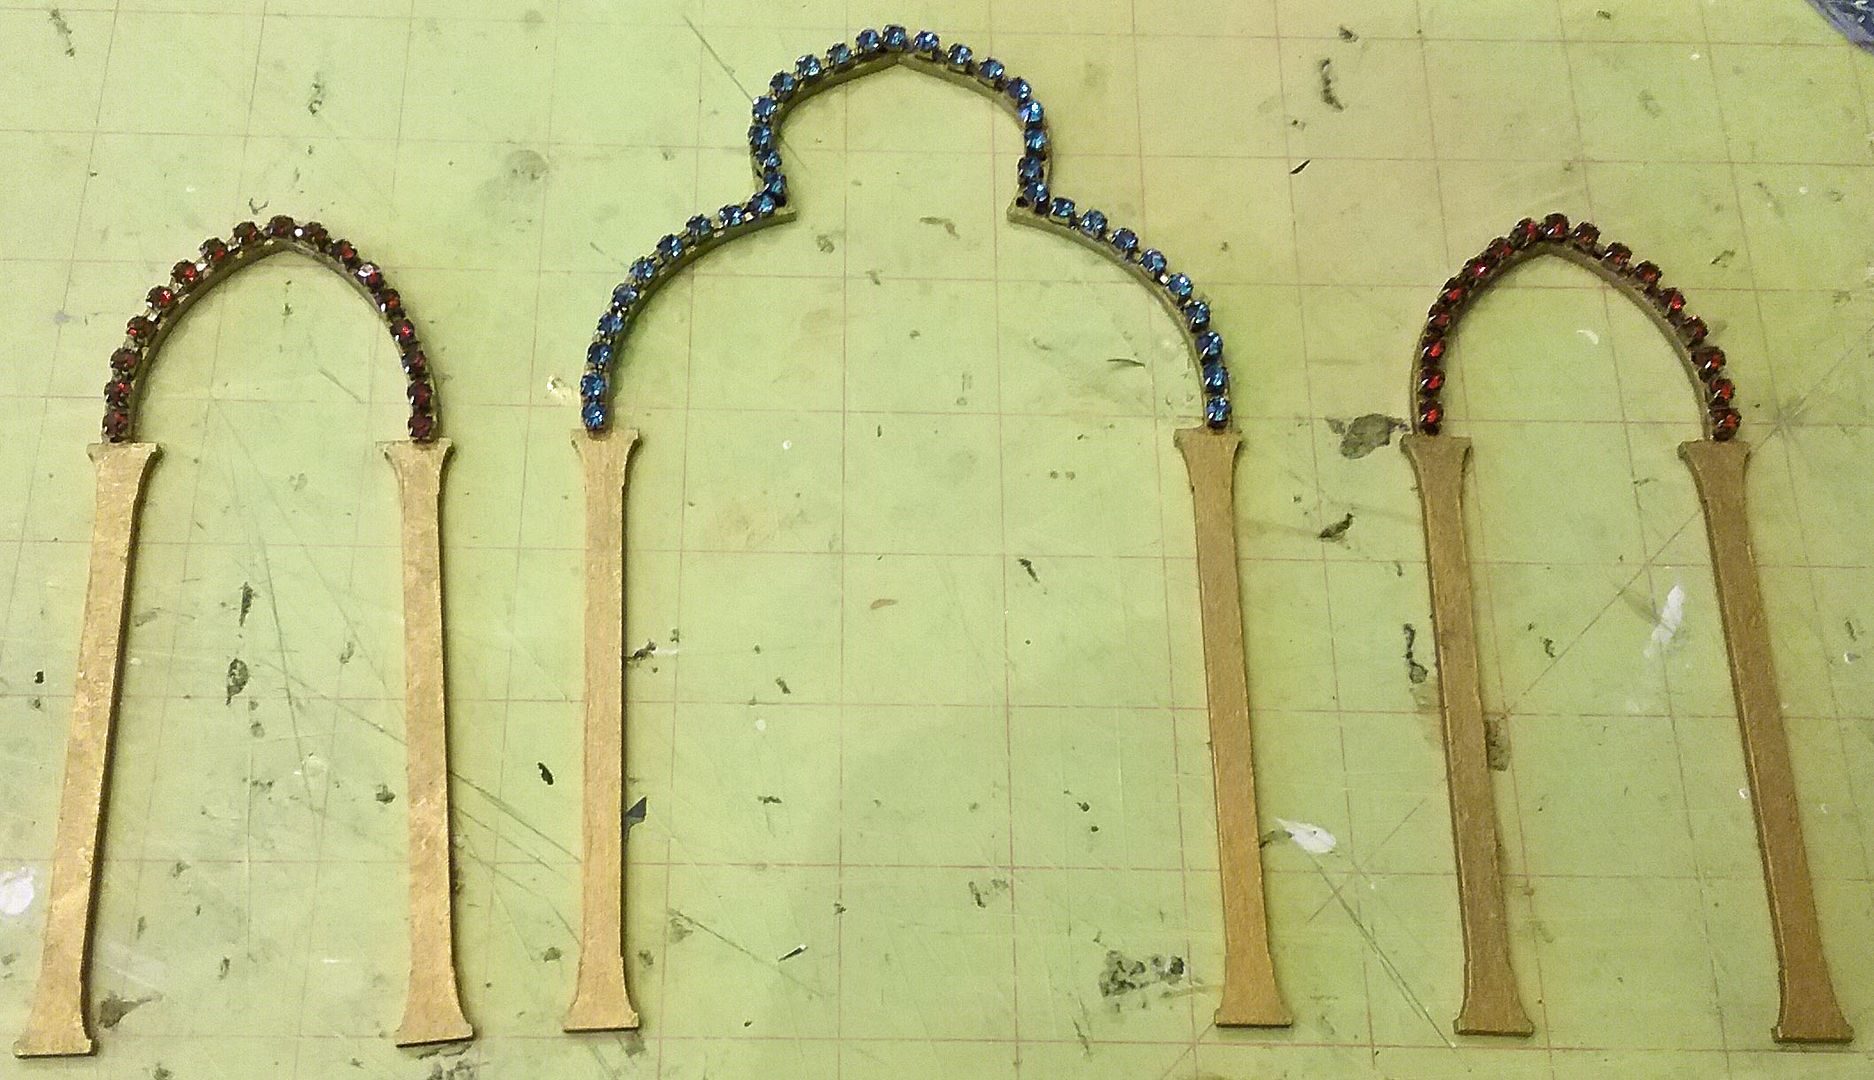
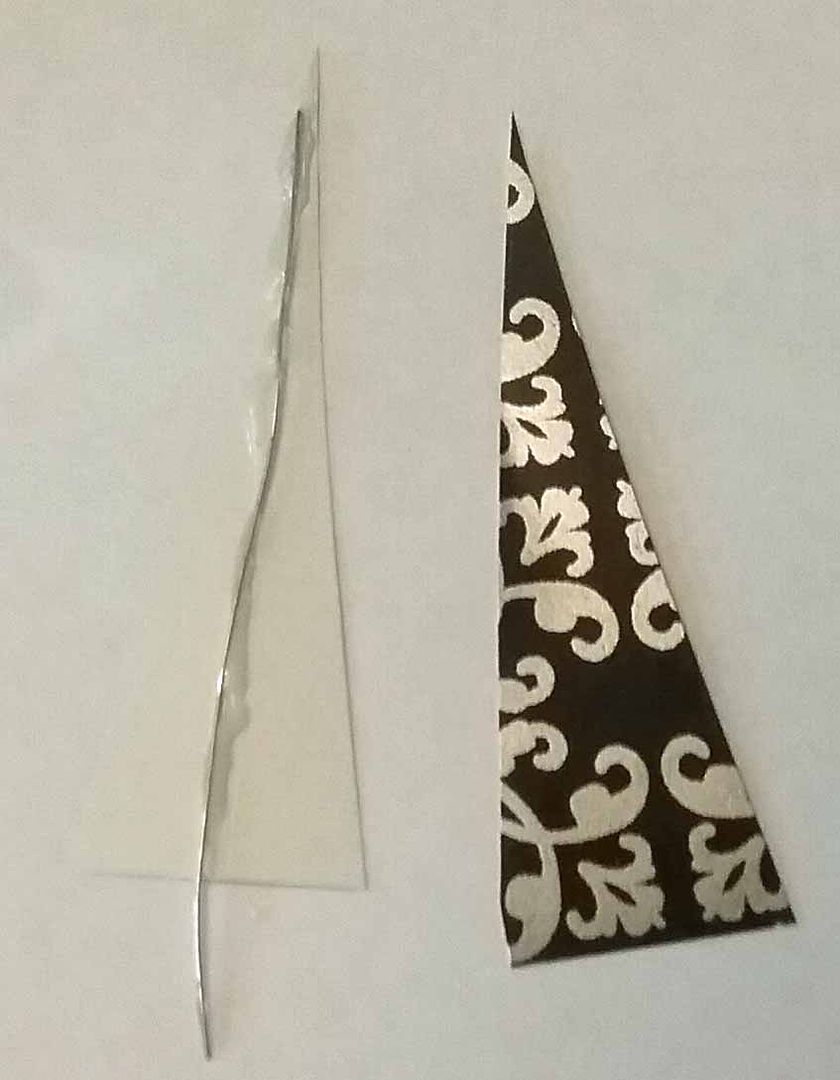
To make the curved pieces on the top like you see on Venetian masks, I cut two pieces of decorative paper in the shape of an elongated triangle.
NOTE: The best cutting method is to fold the paper in half with the blank sides of the paper in the middle. When you cut the triangle, you will be cutting both pieces, which ensures that they are the same size.
Glue a thin wire between the two pieces, which allows you to bend the triangle into the desired shape. I painted the edges of the triangles using Victorian Gold Metal Patinas paint and glued a silver bead to the end. I attached each triangle to the back of the mask and bent them into the desired shape.
NOTE: it’s easier to bend the triangles if you do a little pre-bending before they are attached. If you want to scale this technique up for a larger mask, just use a heavier wire, and/or you can use two wires instead of one. When using two wires, instead of gluing the wire in the center, glue each wire towards each edge of the triangle before gluing the two pieces of the triangle together.
IDEA: Another mask option is to combine a butterfly image from the collage sheet with a die-cut mask. I did not make a version like this, but I think the combination would look great.
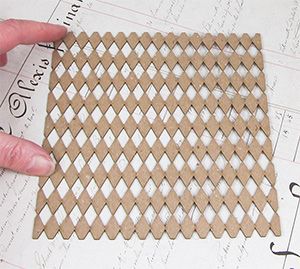
Notice on the back of the book I have added more geometric shapes. You’ll find the template for these shapes on the same sheet as the cover and back templates.

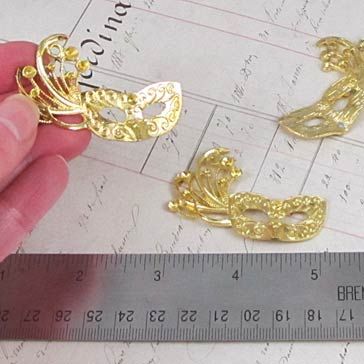
I used Florentine brass leaves and a large connected brass leaf to create the metal mask below. I glued each piece in place one at a time until I had the desired design.

DETAIL SUPPLY LIST
Masked Set – ATC Size
Large Shell or Acanthus Leaf Charms – Raw Brass
Brass Feathery Scroll Filigree
Acrylic Leaves in Tin
Florentine Brass Leaves
Large Connected Brass Leaves
Colorful Heart Stick Pins
Lightweight Hearts
Tiny Mixed Size Flat-Back Pearls
White Pearl Mix in Tin
Tiny Gold Line Stripe Tape
Tiny Silver Line Stripe Tape
3mm Thin Gold Stripes Paper Tape
Gold Dresden Langette Borders
Mini Floral Dresden Borders – Antique Gold
Tiny Dot Dresden Borders - Gold
Liquid Pearls - Pewter
Metal Patinas – Treasured Heirloom – Victorian Gold