-->

Welcome

I love answering your questions. If you ask them in the comment section, I have no way to answer you (if you haven't heard from me, that is why). If you use the "EMAIL ME" in the left column of this page, I will be able to respond to you. You can also use it if you want to be added to my newsletter. Laura

Friday, July 29, 2011

Steampunk - LOST IN TIME

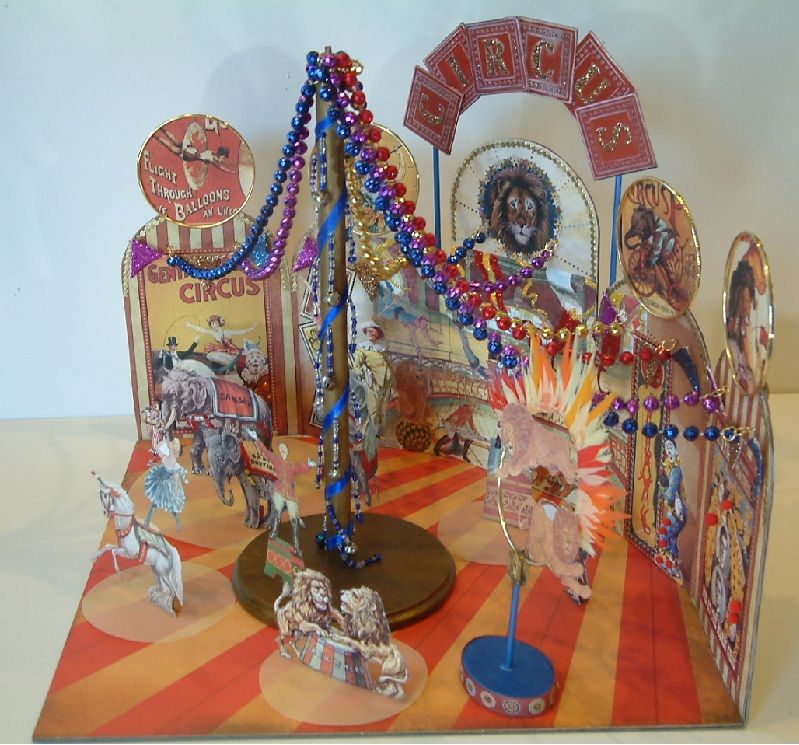
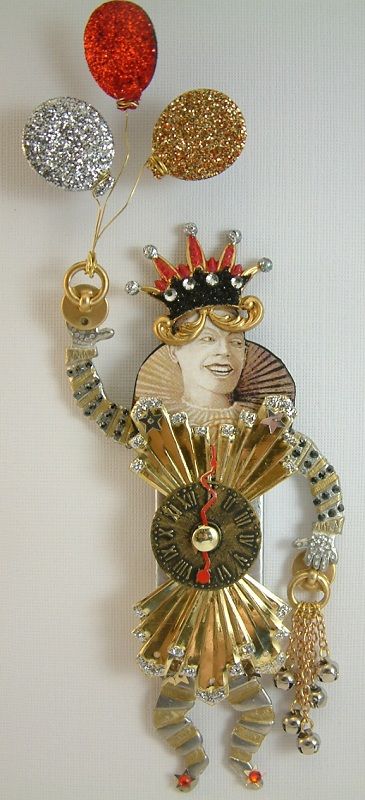
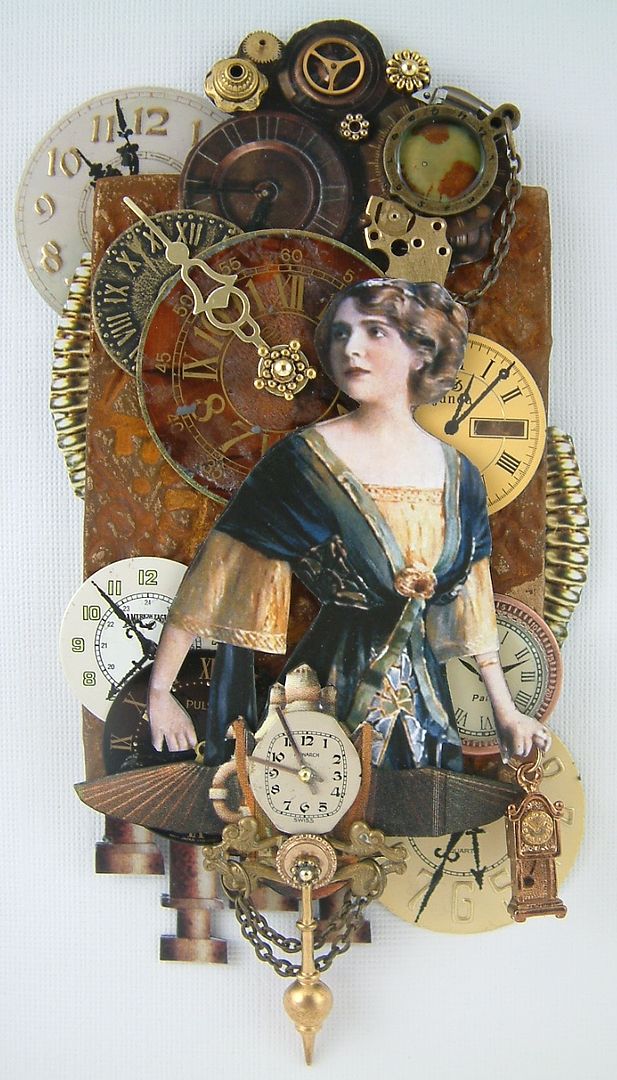
As you can see from my new blog header, I’ve been feeling a little “steampunky” lately.  It all started with this piece whose overall dimensions are 6” x 3 1/2”. 


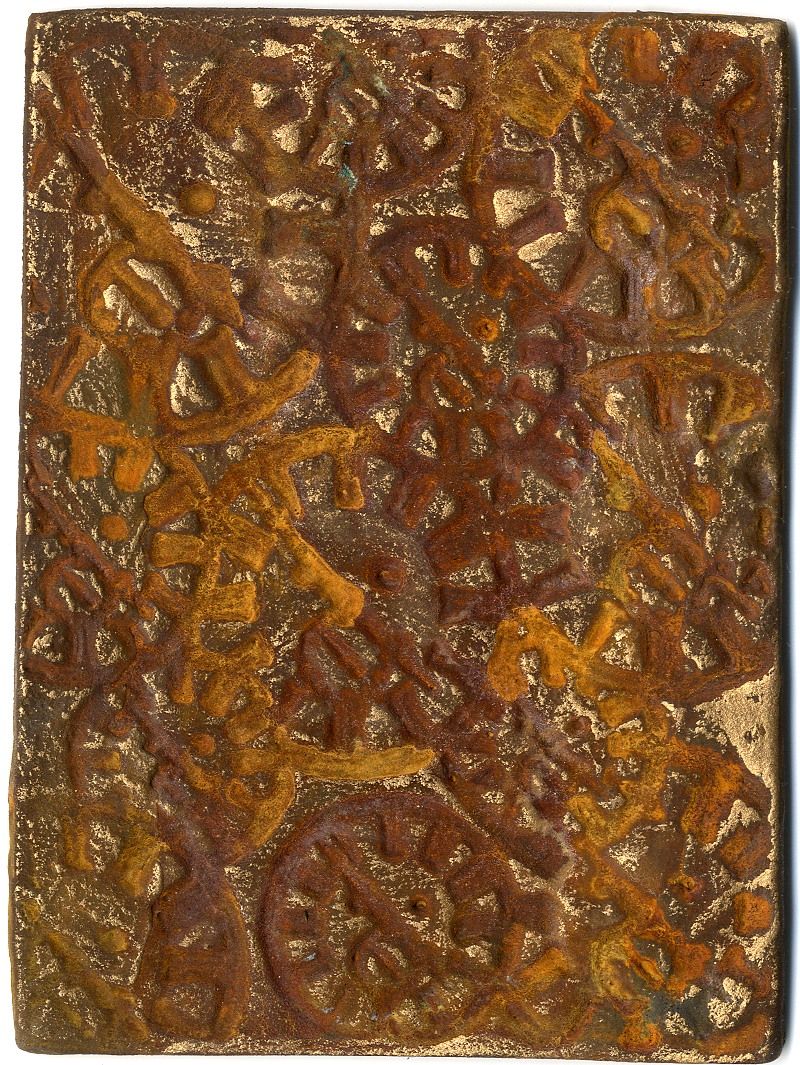
The base of this piece is made from paper clay I stamped with a collage of clocks rubber stamp.  Click here to see the tutorial on “How to Stamp Paper Clay”. 
After drying and trimming, I rusted the base (yes it’s real rust not a paint treatment).  For those of you who have been following me for a while you know that I have been promising a tutorial on this process.  Well, the tutorial finally finished.  Once I finish the posts for the rest of the month (monthly drawing, more circus and carnival art, etc.) I’ll post the tutorial.
Since I knew I was going to use this for a steampunk piece, I decided to make it look a little more metallic by adding Antique Gold Rub and Buff.
Finally it was time to junk it up.  I added lots of clocks, watch pieces, gears, metal jewelry findings, paper images and chains.   I'm happy with the end result but it's kind of a shame that so much of the background is covered up.   I guess that's just the way it goes, you can't have everything.

Sunday, July 24, 2011

Vintage Quaker Oats Grasshopper Circus Prints for Your Art

You are free to use these in your art.   To download an image, click on the image to expand it, right-click and select Save As.

Friday, July 22, 2011

Big Top Circus Tent - Diorama

This circus tent diorama is the last of the pieces I designed for Alpha Stamps and it is double sided.  You’ll need to click on each picture to see the details.
FRONT VIEW
One of the products Alpha Stamps sent me was strings of Mardi Gras beads.  In the process of trying to figure out what to do with them I thought of a tent.  I had already made the Circus Caravan out of chipboard pendants and had several left over so I thought they would make great walls.  That’s how it all started.
Basic Structure
The base is a 12 x 12 piece of heavy chipboard.  I added additional chipboard to the center pendant so it would be higher than the others.  I connected the pendants with gaffers tape (bookbinding or fabric tape) before covering the pendants with paper. 
Center Beam and Tent
The center beam of the tent is a wooden dowel mounted in a piece of wood.  I painted the beam and added beaded and belled fringe.  At the top of the post I inserted part of a wooden skewer in the dowel.  I attached a jump ring to each end of each string of the Mardi Gras beads.  I used the jump rings to attach the Mardi Gras beads to the walls and to the beam.

FRONT RIGHT VIEW
The circus sign is made of metal letters that I glittered and glued together.  Since the piece is double sided I added images to the backs of the letters.  The sign is attached to the walls in the back of the tent with wooden skewers.
FRONT LEFT VIEW
The gold metal circle posters at the tops of each chipboard pendant wall section are made from bracelets. The yellow circles are vellum and are meant to give the impression of spotlights on the acts.
DETAIL VIEWS
It’s hard to see in the photos but there are all kinds of circus acts going on in the background on the walls.  The camera only wants to focus of the acts on the floor of the circus.  I wish I had taken pictures before adding the floor acts.  The floor act images are mounted on heavy cardstock to give them support.  I glued square wooden beads to the back of each piece and glued them to the floor. 
The circle of fire the lions are jumping through is made with a bracelet.  I cutout flame shaped pieces of vellum and glued them around the bracelet to create the fire.  The bracelet is attached to a metal alligator clip which is glued to a wooden skewer.

BACK VIEW

To give the piece a tent feel I added jump rings to the back walls then use bakers twine to ancor the walls to the base.  I used a diamond shape paper punch to create the pendant flags hanging on the bakers twine and also hanging on the walls on the front side of the piece.

I was going to add figures to the back and a high wire act to the front but I just ran out of time….oh well.

Here is a list of the Alpha Stamp supplies I used for this project:
·         Arched Pennant Chipboard
·         Glitz Design Paper – Rhapsody Rays Paper
·         Glitz Design Paper – Dozer Rays
·         Collage Sheet – Clowns #1
·         Collage Sheet – Clowns #2
·         Collage Sheet – Clowns #3
·         Collage Sheet – Piffle’s Circus
·         Collage Sheet – Circus Equestrienne
·         Collage Sheet – Circus Performers # 1
·         Collage Sheet – Elephants #2
·         Collage Sheet - Tiny Circus
·         Graphics 45 Paper – Le Cirque Collection – Circus Parade
·         Graphics 45 Paper– Le Cirque Collection – Greatest Show on Earth
·         Graphics 45 Paper– Le Cirque Collection – Tags
·         Graphics 45 Paper– Le Cirque Collection – Wizards of Wonder
·         Bakers Twine
·         Mardi Gras Beads
·         Fashion Fancy Sequins – Stars

If you missed the posts on the other circus themed pieces I created for Alpha Stamps click here.
Art Doll King Clown

Wednesday, July 20, 2011

Art Doll - King Clown

This is another piece that I designed for Alpha Stamps.  The base is a 1” x 2” domino.  The arms and legs are metal that I embellished with metallic paint and crystals.
Here is a list of the Alpha Stamp supplies I used for this project:
·         Gold Metal Handle Pull
·         Metal Clock Faces with Hole
·         Brass Crown Set
·         Fashion Fancy Sequins - Stars
·         Domino
·         Collage Sheet – Clowns #2

Monday, July 18, 2011

Altered Altoids Tin – The World’s Smallest Elephants

This is another piece that I designed for Alpha Stamps.
Front
To mount the elephants inside the tin I glued small square beads to the back and then glued the bead to the tin.  The wheels are made from wooden spools and buttons. 
Back
The flags at the top are metal pieces that I purchased in the JoAnn’s craft store jewelry making supply section. To make and mount the sign at the top I used toothpicks and mounted them in the holes created by removing the lid from the tin.

VIDEO TUTORIAL – There is now a YouTube video tutorial for this project.  The video also covers 5 other altered tin projects.  You’ll find the segment about this project at minute 27:22 in the video below.

Sunday, July 17, 2011

Altered Cabinet Card - The Amazing Flying Horse

I created this piece for a swap with the Creative Team girls.  We have some sort of art swap every month or two. 
One year when I was a little girl my mom took me to the State Fair.   There were rows of tents with large posters advertising all kinds of mysterious fantastical oddities.  Of course once you paid the money and went inside the tent what you saw was not very mysterious or fantastic.  So the carnival sideshow was the inspiration for this altered cabinet card titled the “Amazing Flying Horse”.  Enter the tent and you find a wooden horse with wings on a spring. 
The hoops are bracelets that I wrapped with ribbon.  For the carnival sign at the top I used Tim Holtz Note Pins I purchased at Collage Stuff.

Friday, July 15, 2011

Behind the Garden Wall

The inspiration for this piece is the image of the woman.  I just love the colors and style of her dress and her lovely face.  I’ve had her sitting around my studio for a while as I decided what to do with her.  The paper in the far background is from Land of Nod Studios.  Deborah offered it up on one of her “Free Photo Fridays”.  Next I added an image of an old frame and a piece of architectural detail at the bottom.  The metal gate is a wire piece I purchased at Michaels craft store several years ago.  It’s one of the many things I’ve bought that I didn’t know how I would use, but knew it would be perfect for something someday.  The gold at the bottom is a piece of lace.  Lastly there are brass birds and bees, beading, paper flowers, fabric flowers, brass flowers, and images of vintage jewelry.  The overall size of the piece is 3” x 6”.

Thursday, July 14, 2011

Women on Bicycles – Free to Use in Your Art

Below are a series of vintage prints.  You are free to use these in your art.   To download an image, click on the image to expand it, right-click and select Save As.

Tuesday, July 12, 2011

Egypt Stamped Paper Clay ATC

A few months ago I posted a tutorial on “How to Create Backgrounds & Embellishments Using Paper Clay and Rubber Stamps”.  One of the example backgrounds in the tutorial was this Egyptian inspired clay ATC.  I wanted to show you how I finished it.

Below are the rubber stamps I used to stamp the clay.
Here is the stamped dry clay before painting.
First I painted the clay with various Ranger Alcohol Inks.
 Next I painted the details and the brass pieces with metallic acrylic paint.  My husband always teases me that I use a microscope and a one hair brush.  In this case he wasn't far off the mark.
I adhered the brass pieces with Ranger Glossy Accents.

Here are links to some online rubber stamp stores that carry Egyptian inspired rubber stamps.

Friday, July 8, 2011

Circus Caravan

Here is another piece that I created for the folks at Alpha Stamps as a guest designer. 

This circus caravan is double sided and made of chipboard pendants.  I used gaffers tape or bookbinding tape to connect the pendants.
Detail Pictures
I added buttons and rhinestones to sprockets to create wheels.

Here is a list of the Alpha Stamp supplies I used for this project:
Arched Pennant Chipboard
Glitz Design Paper - Afternoon Muse
Collage Sheet – Circus Performers #1
Collage Sheet – Circus Performers #2
Collage Sheet – Circus Performers #3
Collage Sheet – Circus Books
Collage Sheet – Elephants #3
Graphics 45 Paper– Le Cirque Collection – Wizards of Wonder
Gold Metal Handle Pulls
Sprocket Gears
Metallic Dresden – Large Sheet of Gold Borders
Red Glass Star Beads
Star Tinsel

Alpha Stamps Store
Alpha Stamps Gallery
Alpha Stamps Blog
Alpha Stamps Yahoo Group

Tuesday, July 5, 2011

Butterfly Images for Your Art – Fourth and Last Set

Below are a series of vintage butterfly plates.  You are free to use these in your art.   To download an image, click on the image to expand it, right-click and select Save As.