THE DETAILS
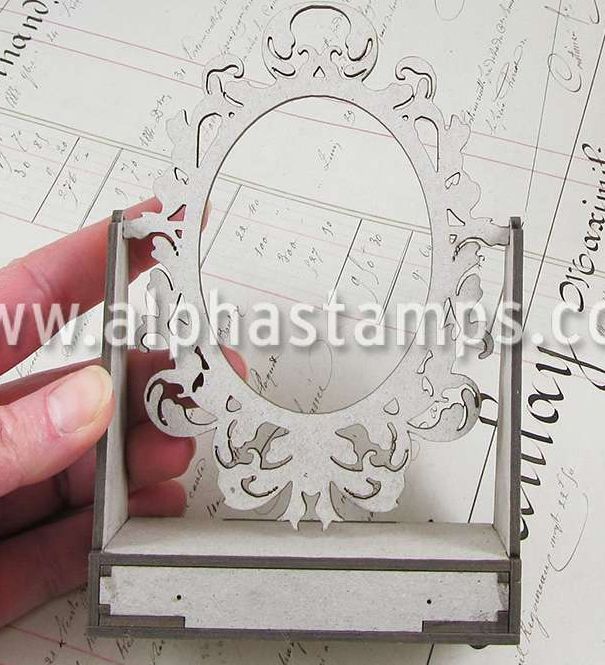
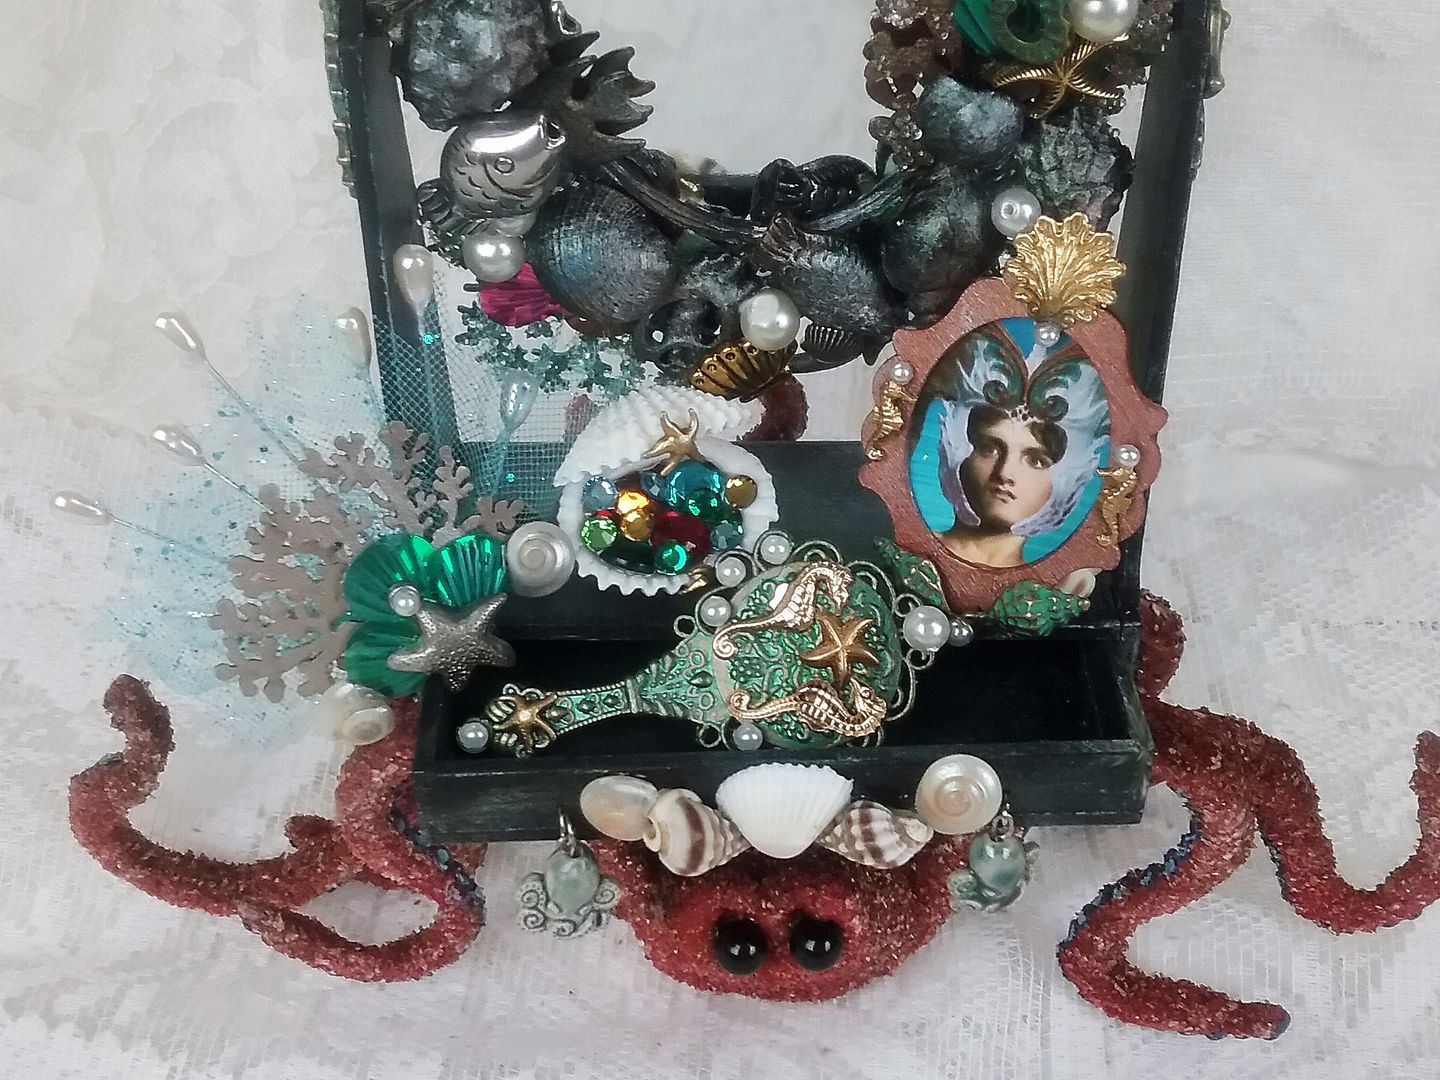
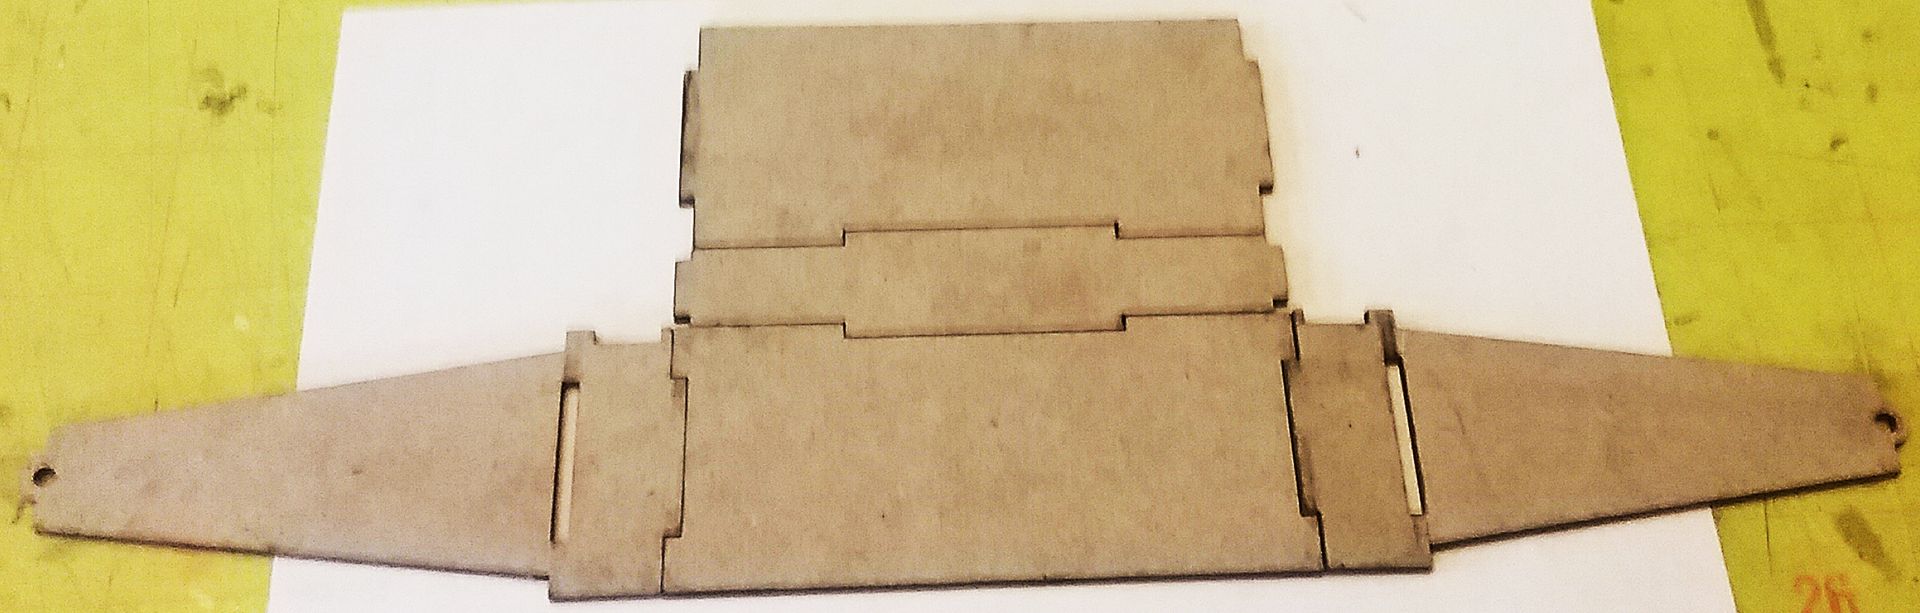
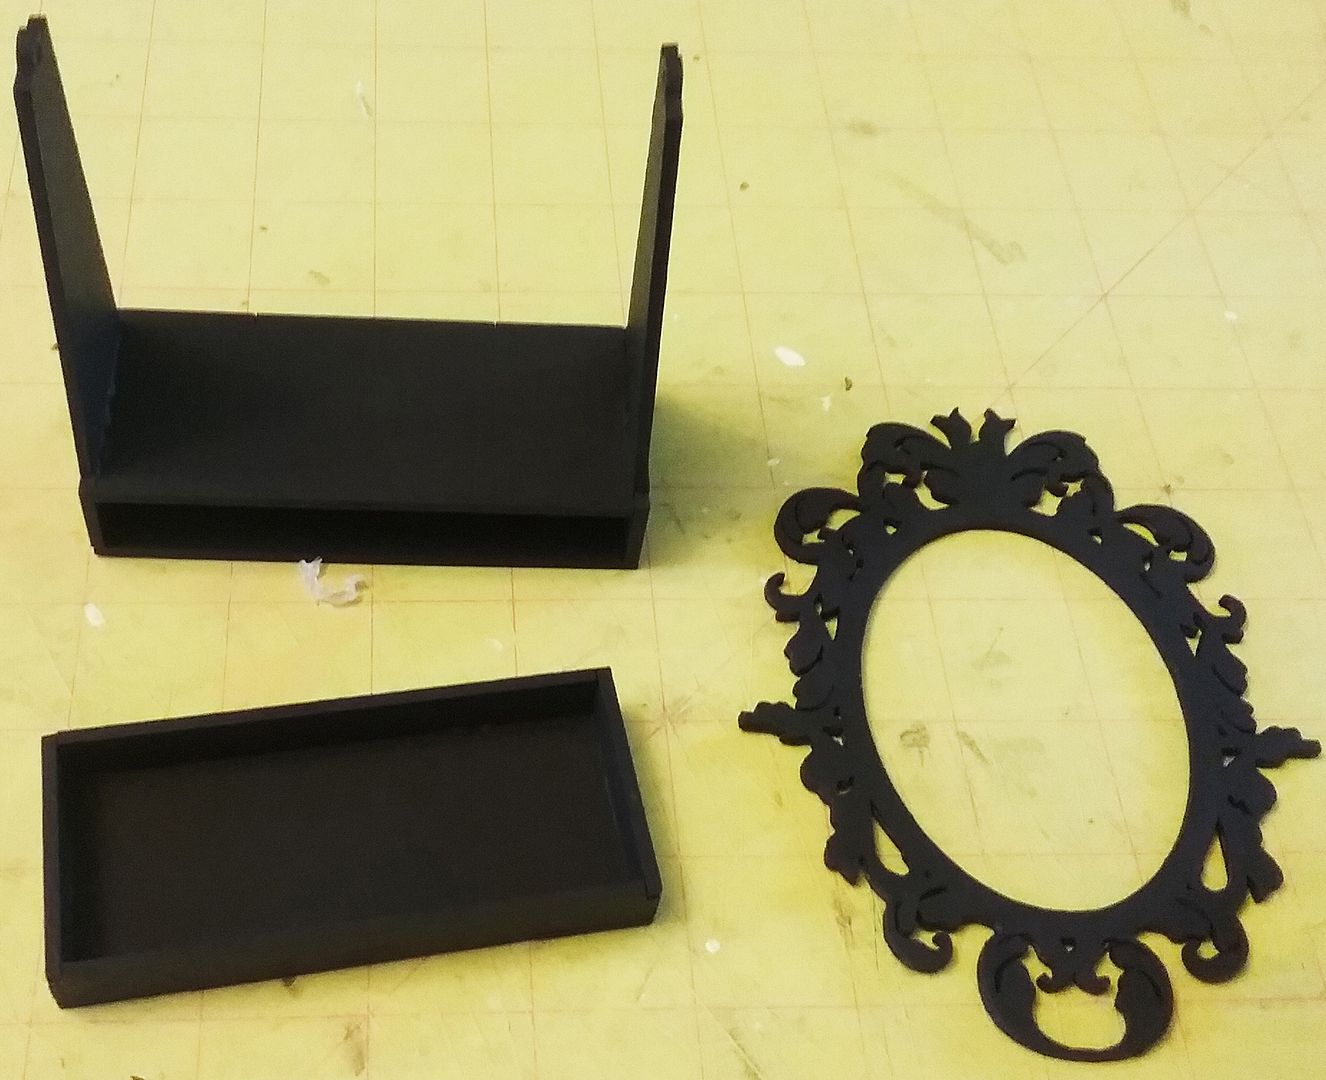
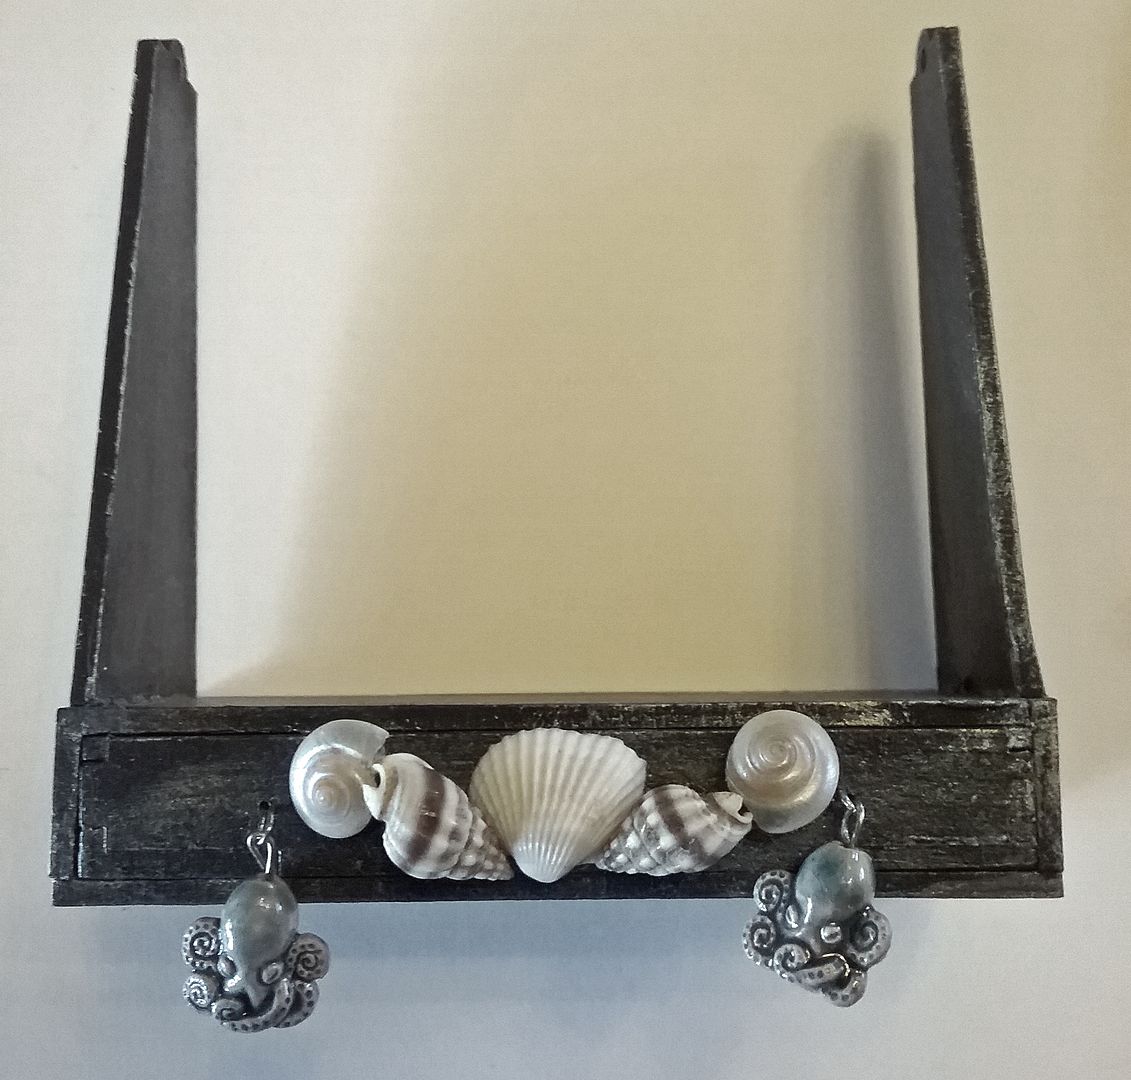
I started by assembling the drawer and mirror supports. In the picture below, you can see how they fit together.

Next, I painted the pieces black as the waxes show best in dark colors. The lighter waxes give the piece a delicate colored sheen in lighter colors. On darker colors, more of the wax's colors pop.

I then traced the outside and inside dimensions of the mirror on a piece of paper. This is to ensure that I don’t add embellishments that make it impossible to attach the mirror to the mirror supports.
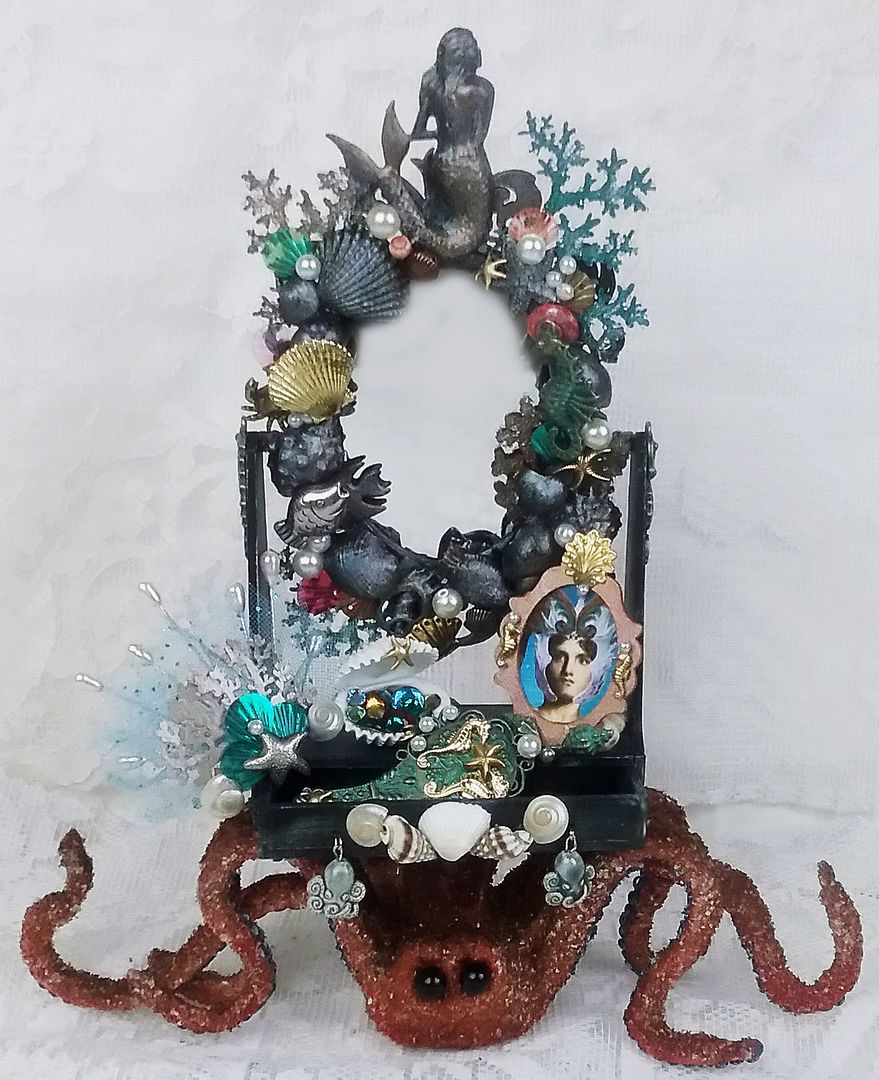
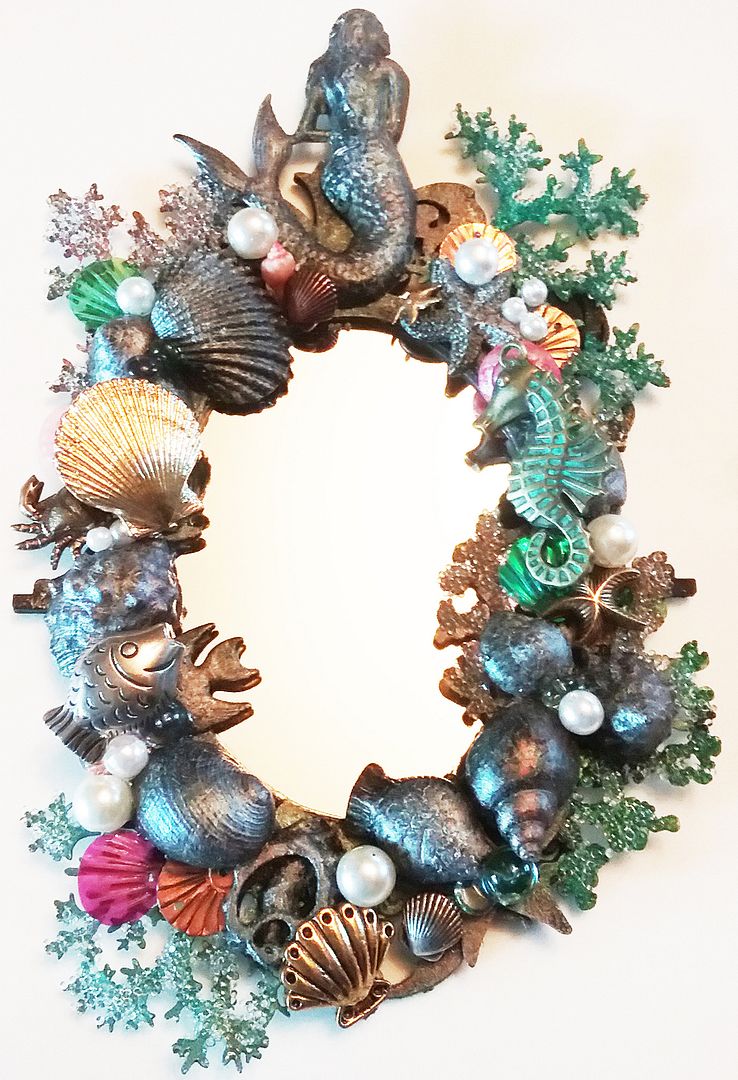
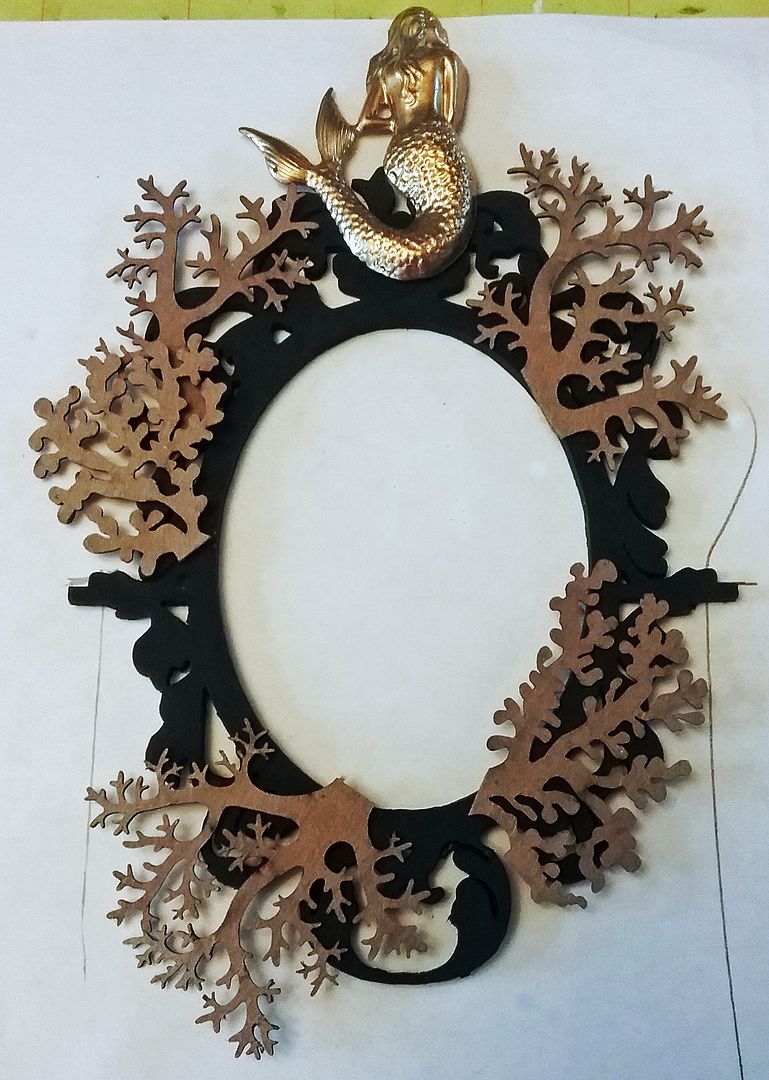
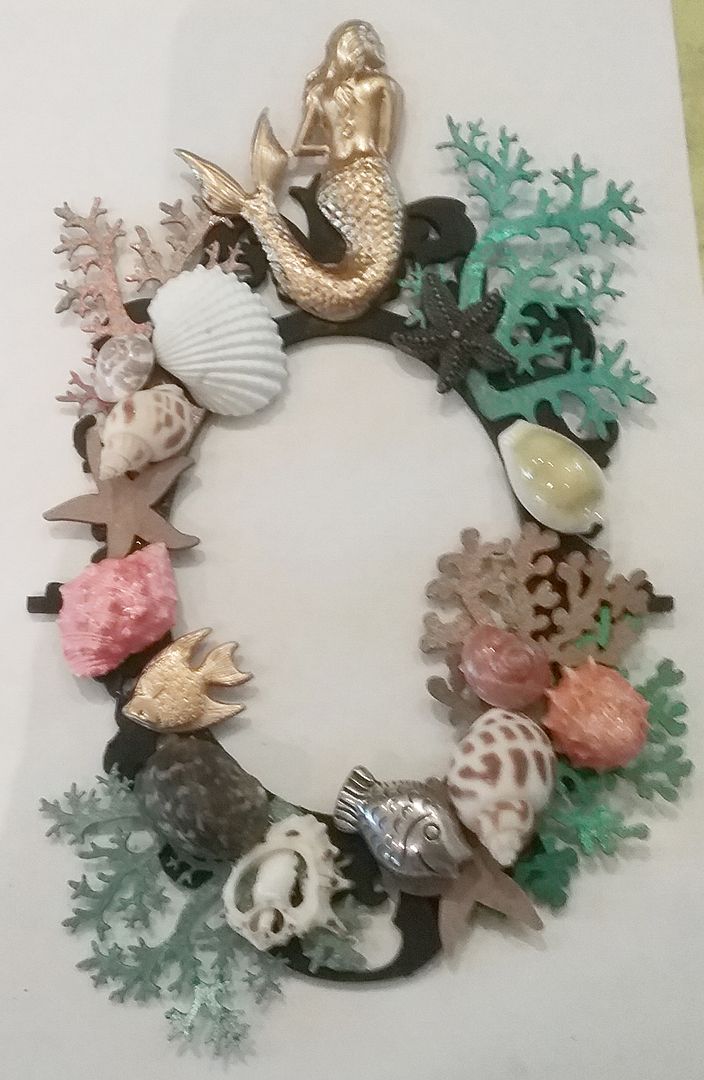
Next, I laid out some large pieces (coral chipboard and brass mermaid) around the mirror.
I painted the chipboard coral using various colors of Liquid Pearls paint and glued them to the mirror frame. I also attached the mermaid to the top of the frame.
NOTE: I filled the bottom part of the back of the mermaid’s tail with Glossy Accents until the glue was flush with the brass. This gave me a large surface with which to attach the mermaid to the frame.

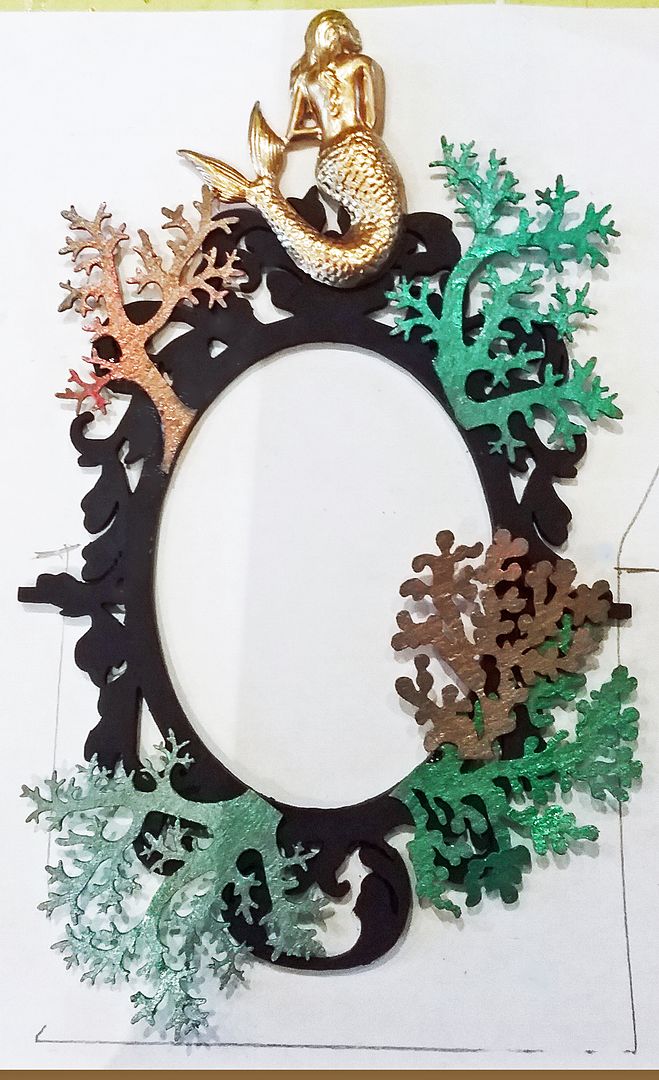
I continued adding more embellishments, such as seashells and fish.

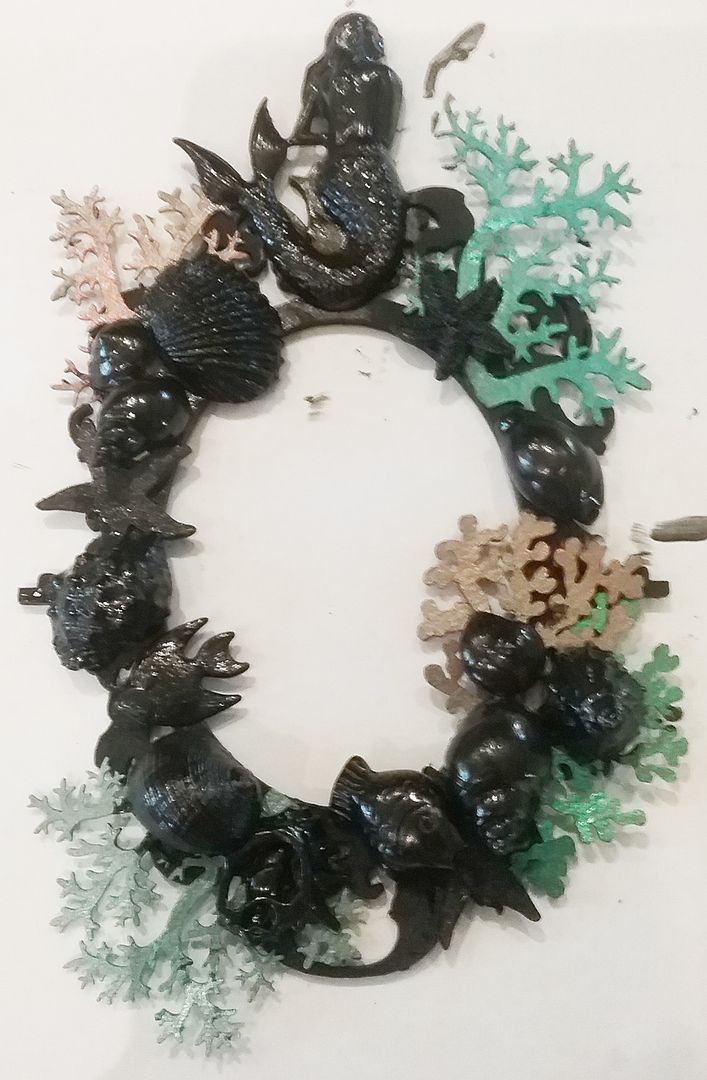
Next, I painted all of the added embellishments black, careful not to paint the exposed chipboard coral.
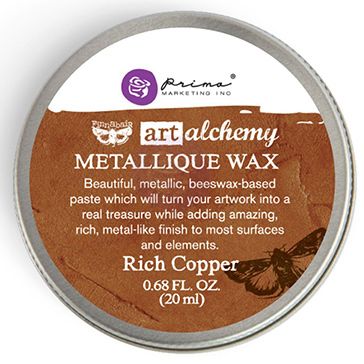
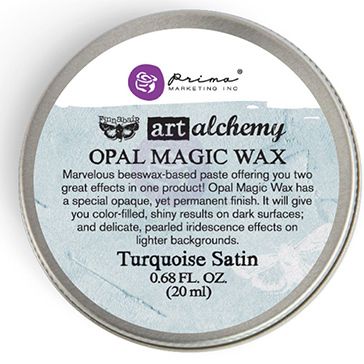
Using my finger, I began rubbing the darker waxes (Rich Copper & Bronze Age) onto the black areas. Next, I added lighter colors (Turquoise, Satin & Green Brocade).
I then added more embellishments, such as a brass seahorse painted with Liquid Pearls, seashell sequins, brass seashells, and pearls. I added clear micro beads to the chipboard coral for texture and sparkle.
This is one of those patinas that are difficult to fully appreciate in a flat photo. The colors are much more visible as the object is moved.
The last thing I added to the mirror was non-breakable mirror material. It’s made of plexiglass and looks like real mirror glass, and is easy to cut. Just peel off the protective coating before attaching it to the back of the mirror frame.

I also rubbed the waxes on the drawer and mirror supports. I added shells to the front of the drawer and used two octopus beads as pulls.
THE OCTOPUS BASE
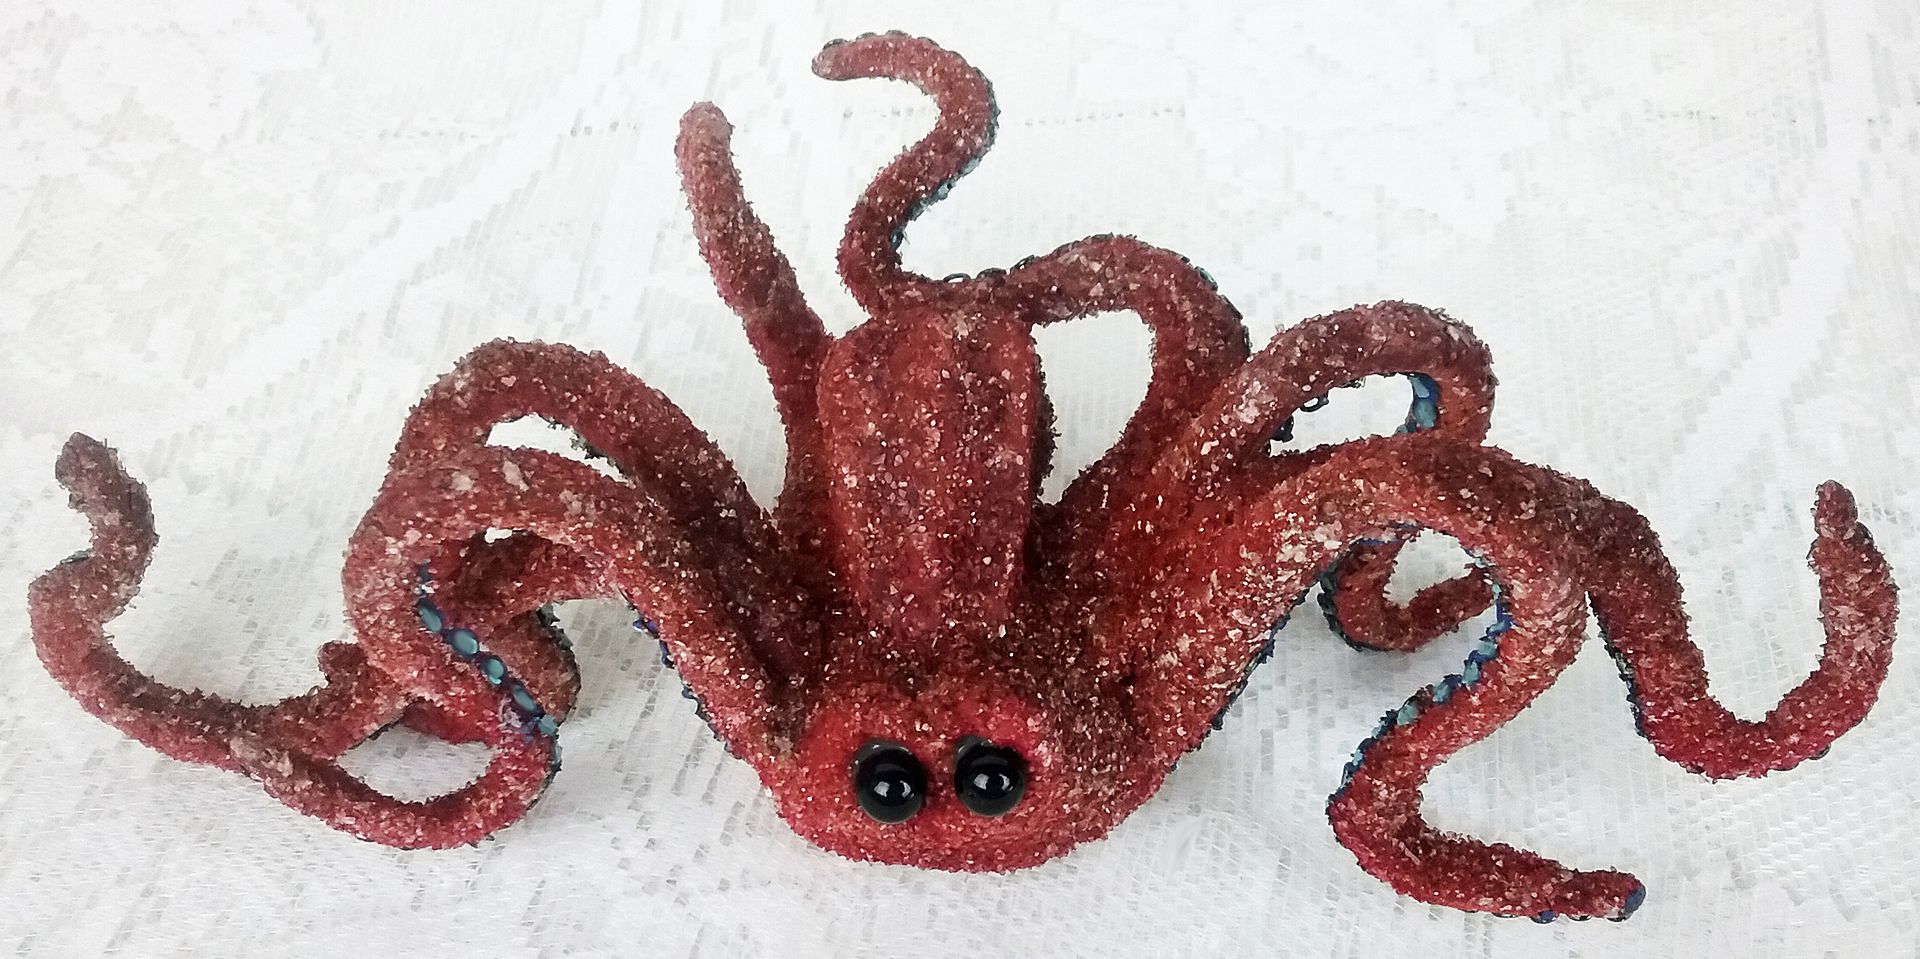
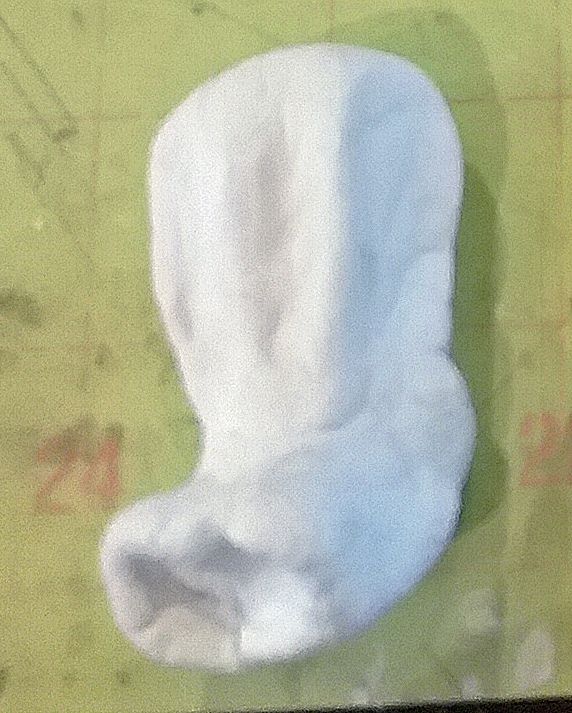
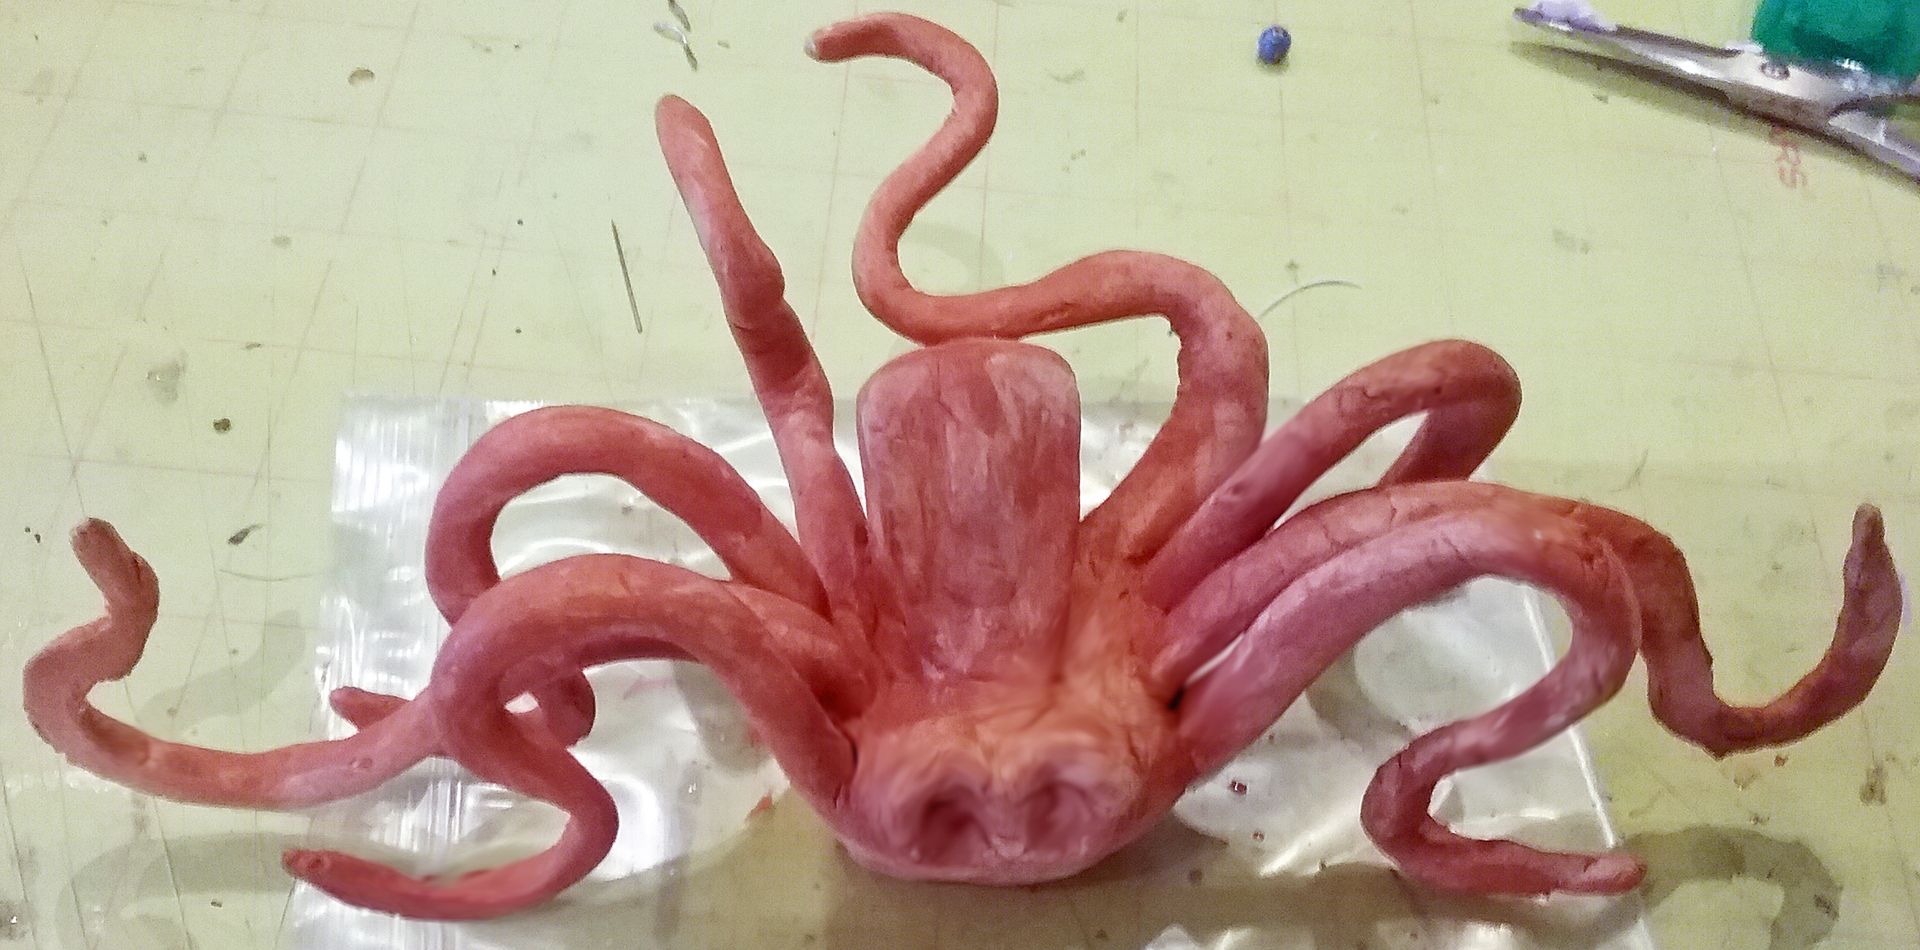
I started by shaping the head out of paper clay. I looked at pictures of various octopuses to come up with the shape.
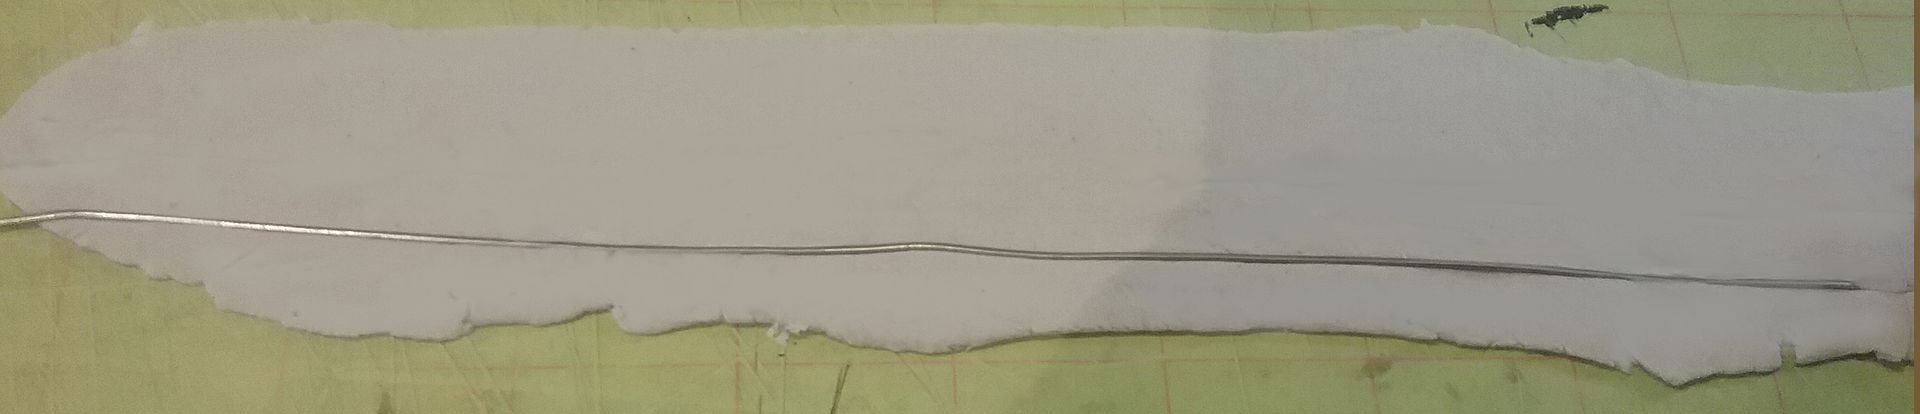
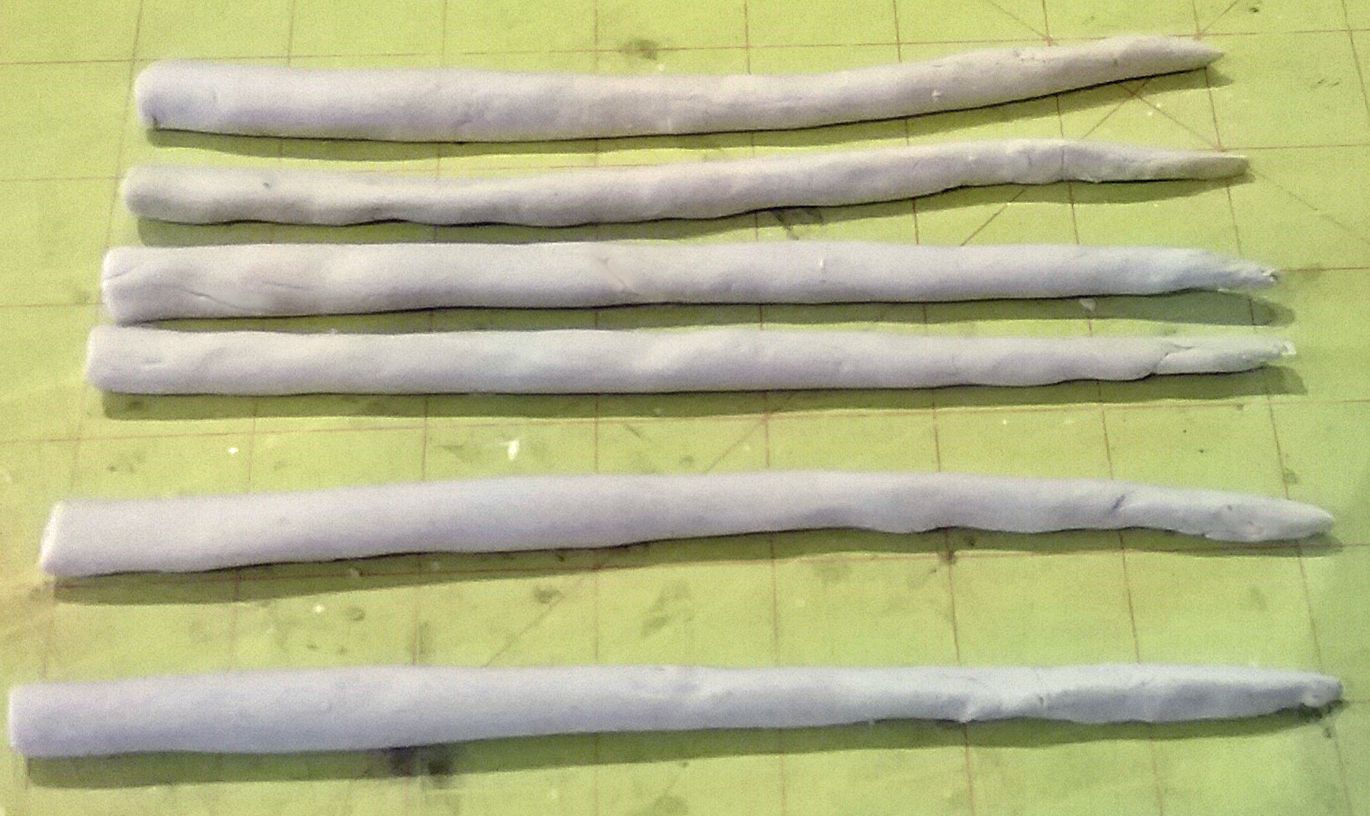
Next, I shaped legs out of paper clay. I need a way to bend and control the shape of the legs as they dried, so I rolled out sections of clay, pressed a thin piece of wire into the clay, and then rolled the clay into a leg.

You’ll need to make 8 legs, think of making clay asparagus where the shape tapers from a fat end to a pointed end.

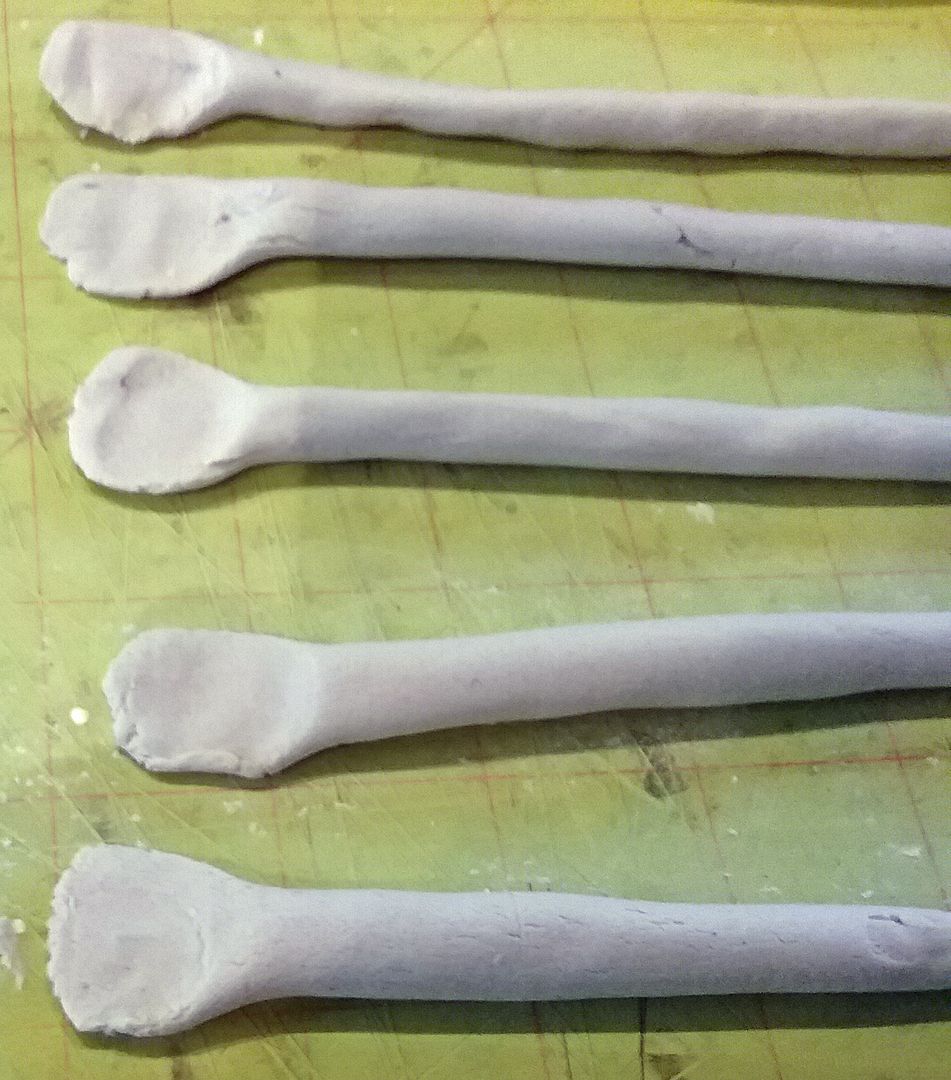
Next, flatten the clay of the fat end, which is used to attach the leg to the head.
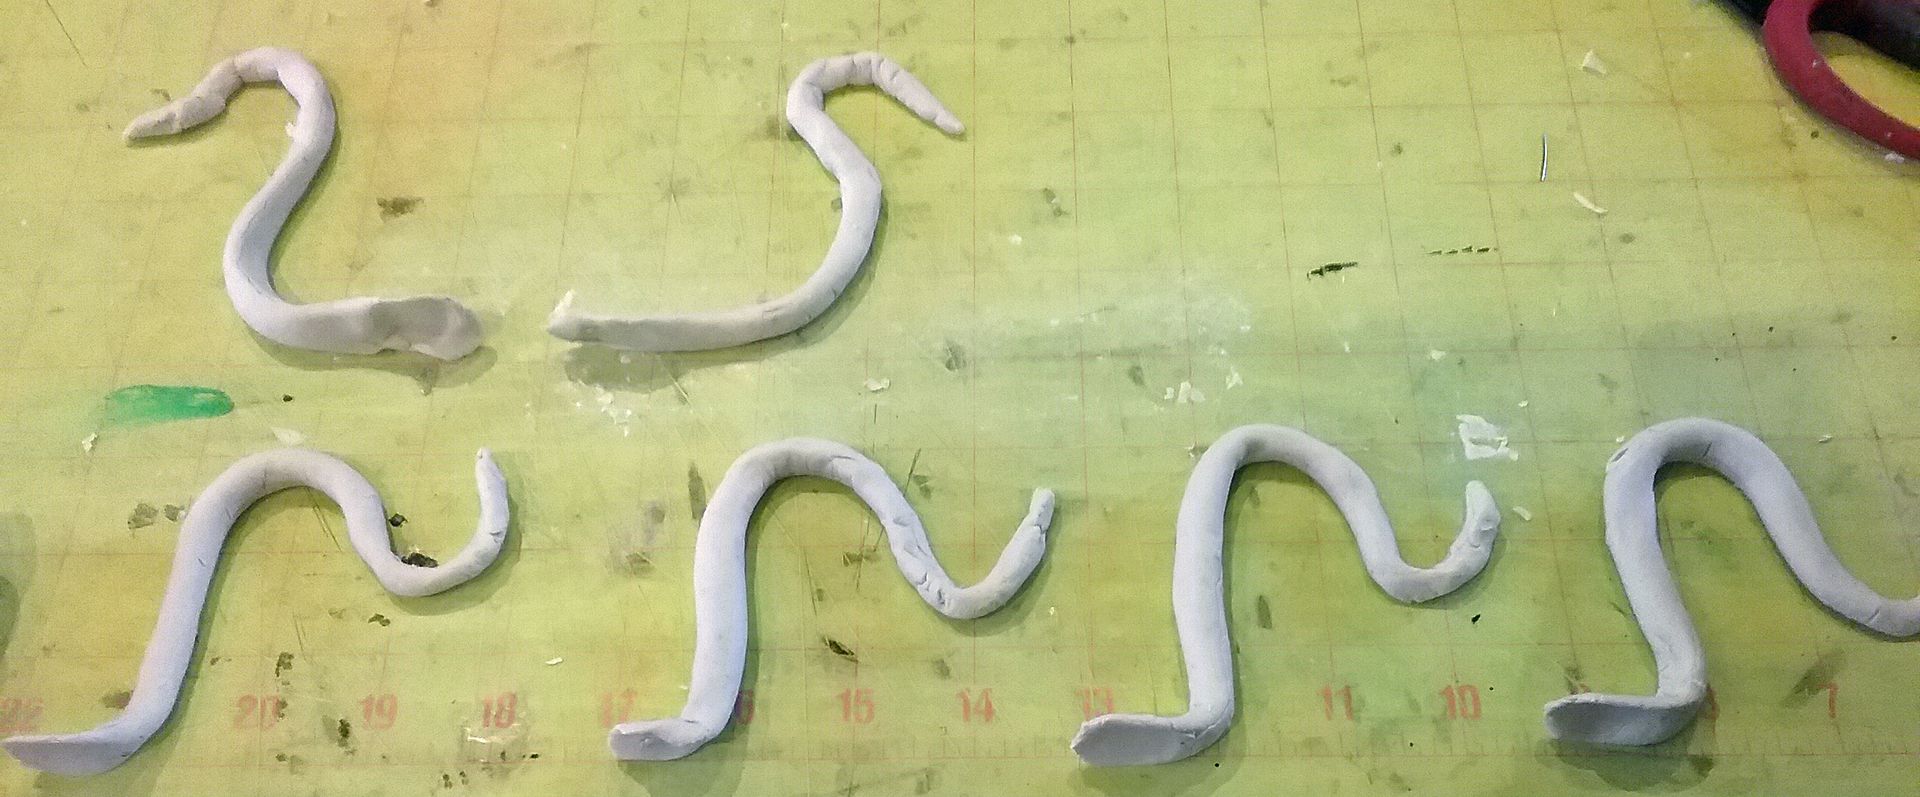
Now bend the legs in the desired shape.
NOTE: You need at least 4 legs to support the mirror, so they must be the same height regardless of how you bend them. I used a craft mat with a grid to make sure the 4 were the same height. Also, think about the direction of the bend. You need two bent in one direction (right legs) and two bent in the other direction (left legs). If you look at the two legs at the top of the picture above, you can see what I mean. I choose to just make 4 of the 8 in one direction and 4 of the eight in the other, with the tips of the legs bents slightly differently.
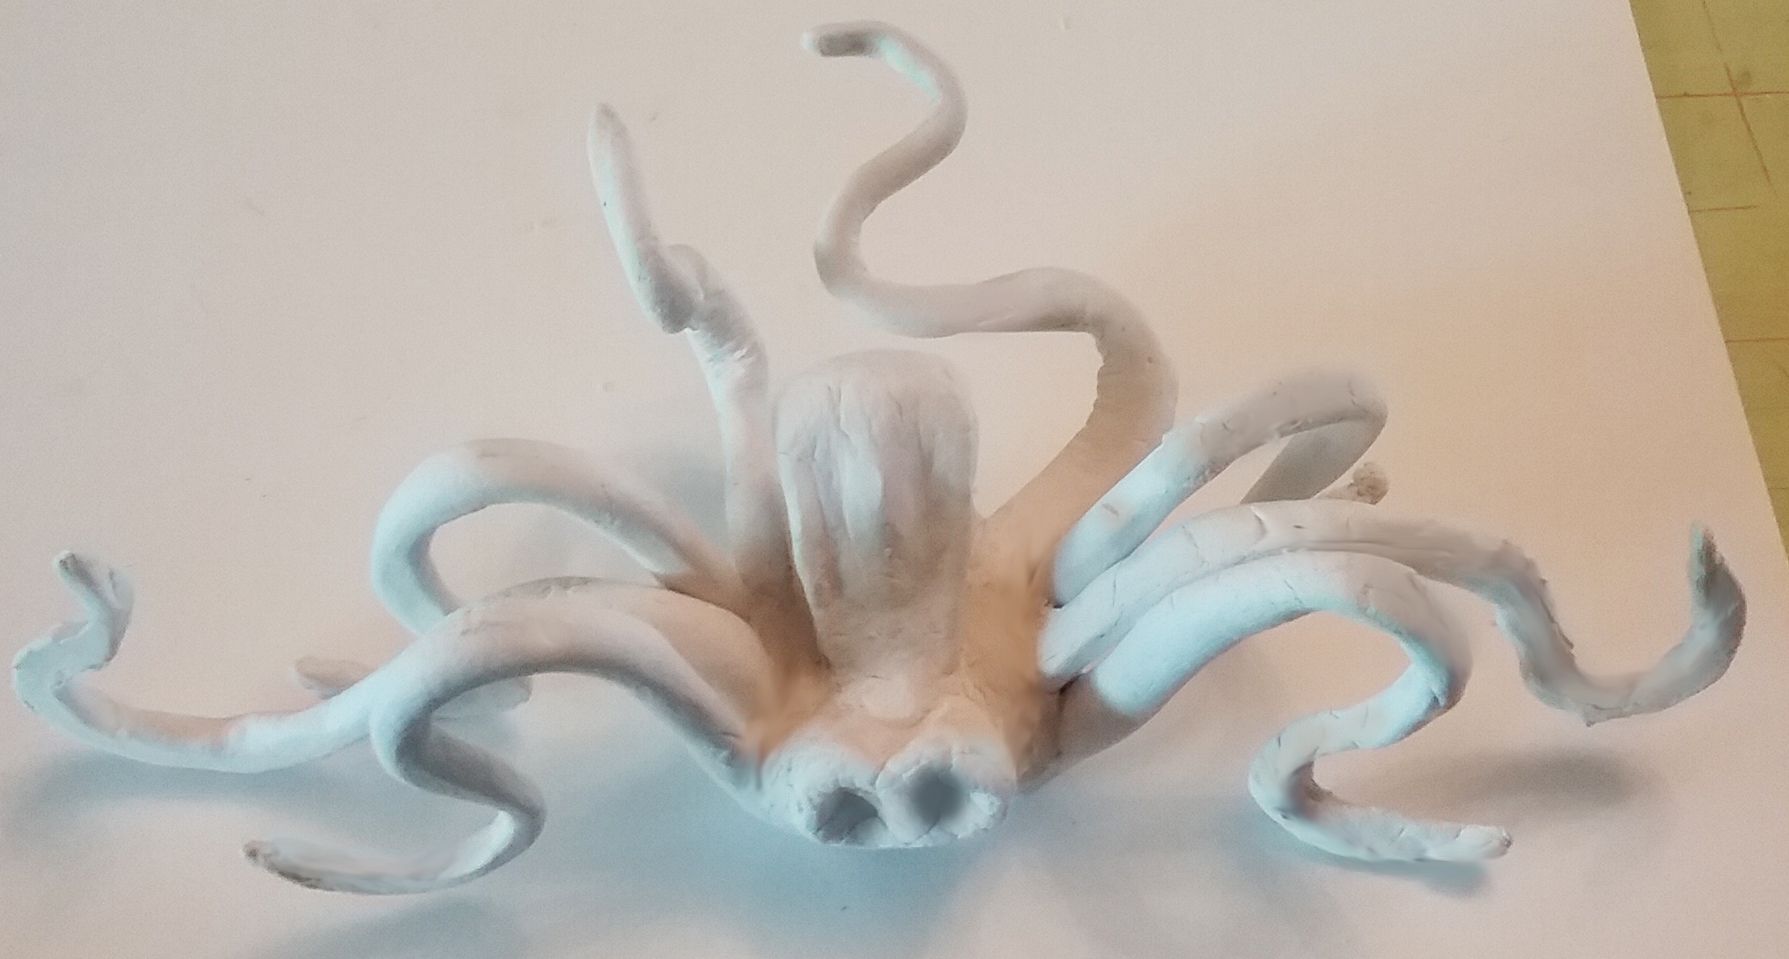
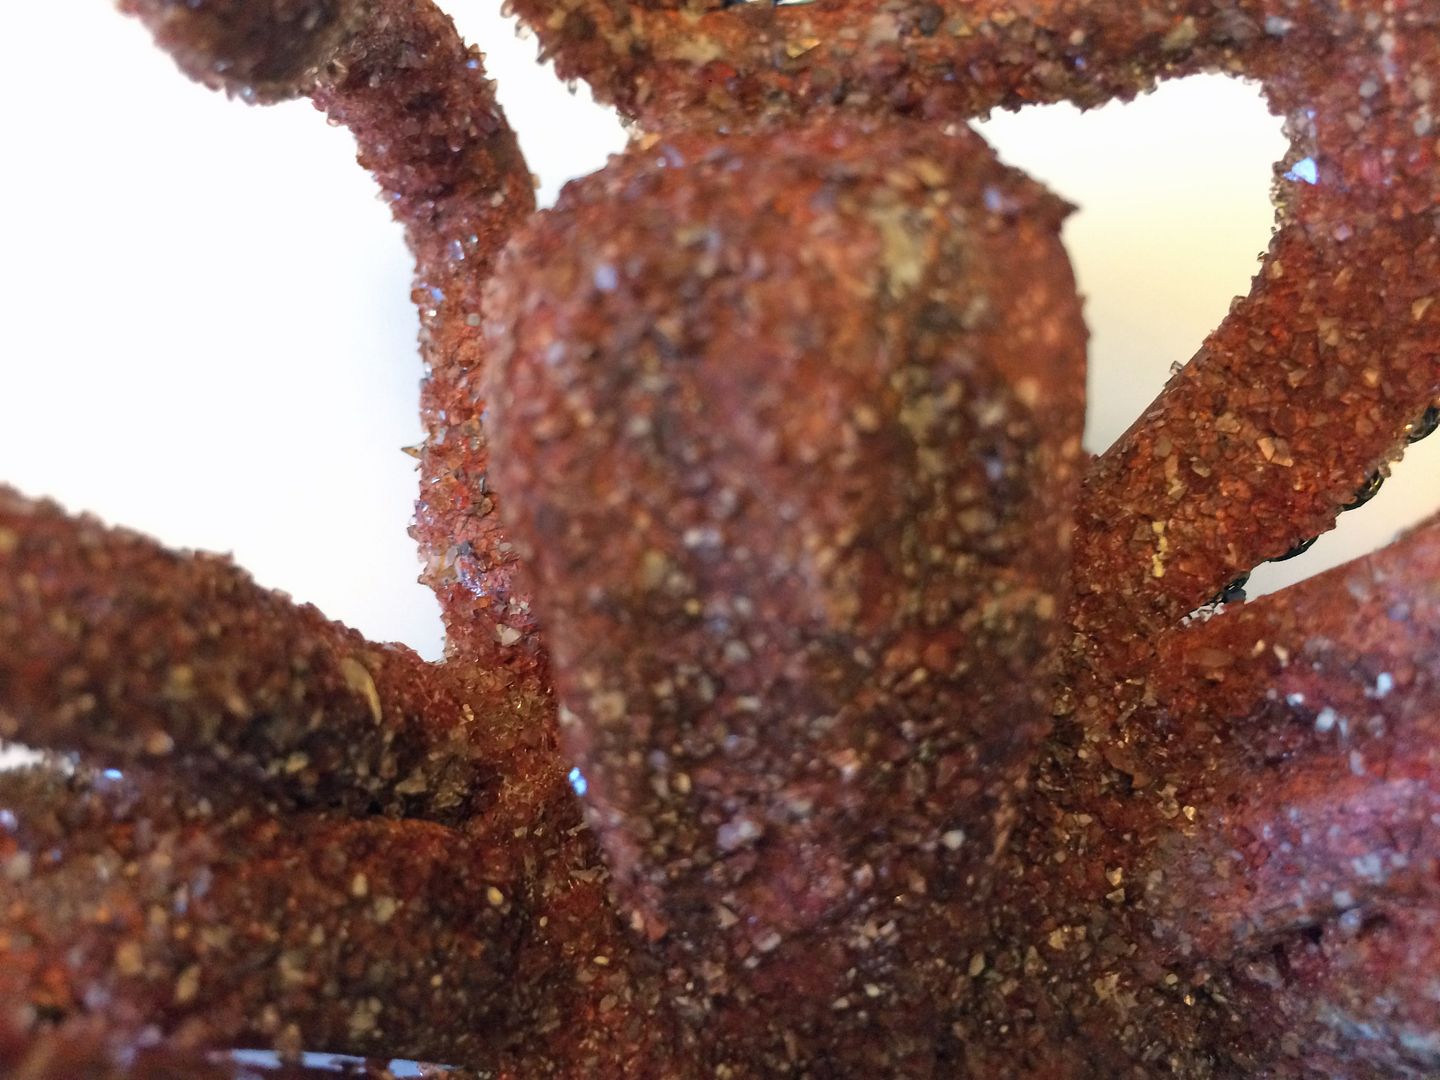
Once dry, glue the legs to the bottom of the head. Next, add more paper clay around the legs and head to cover where the legs are glued and fill in any gaps. You can get a smoother look if you dampen your fingers as you apply the clay.
If for some reason, four of the legs are not level, you can also make some minor adjustments by adding more paper clay where needed.
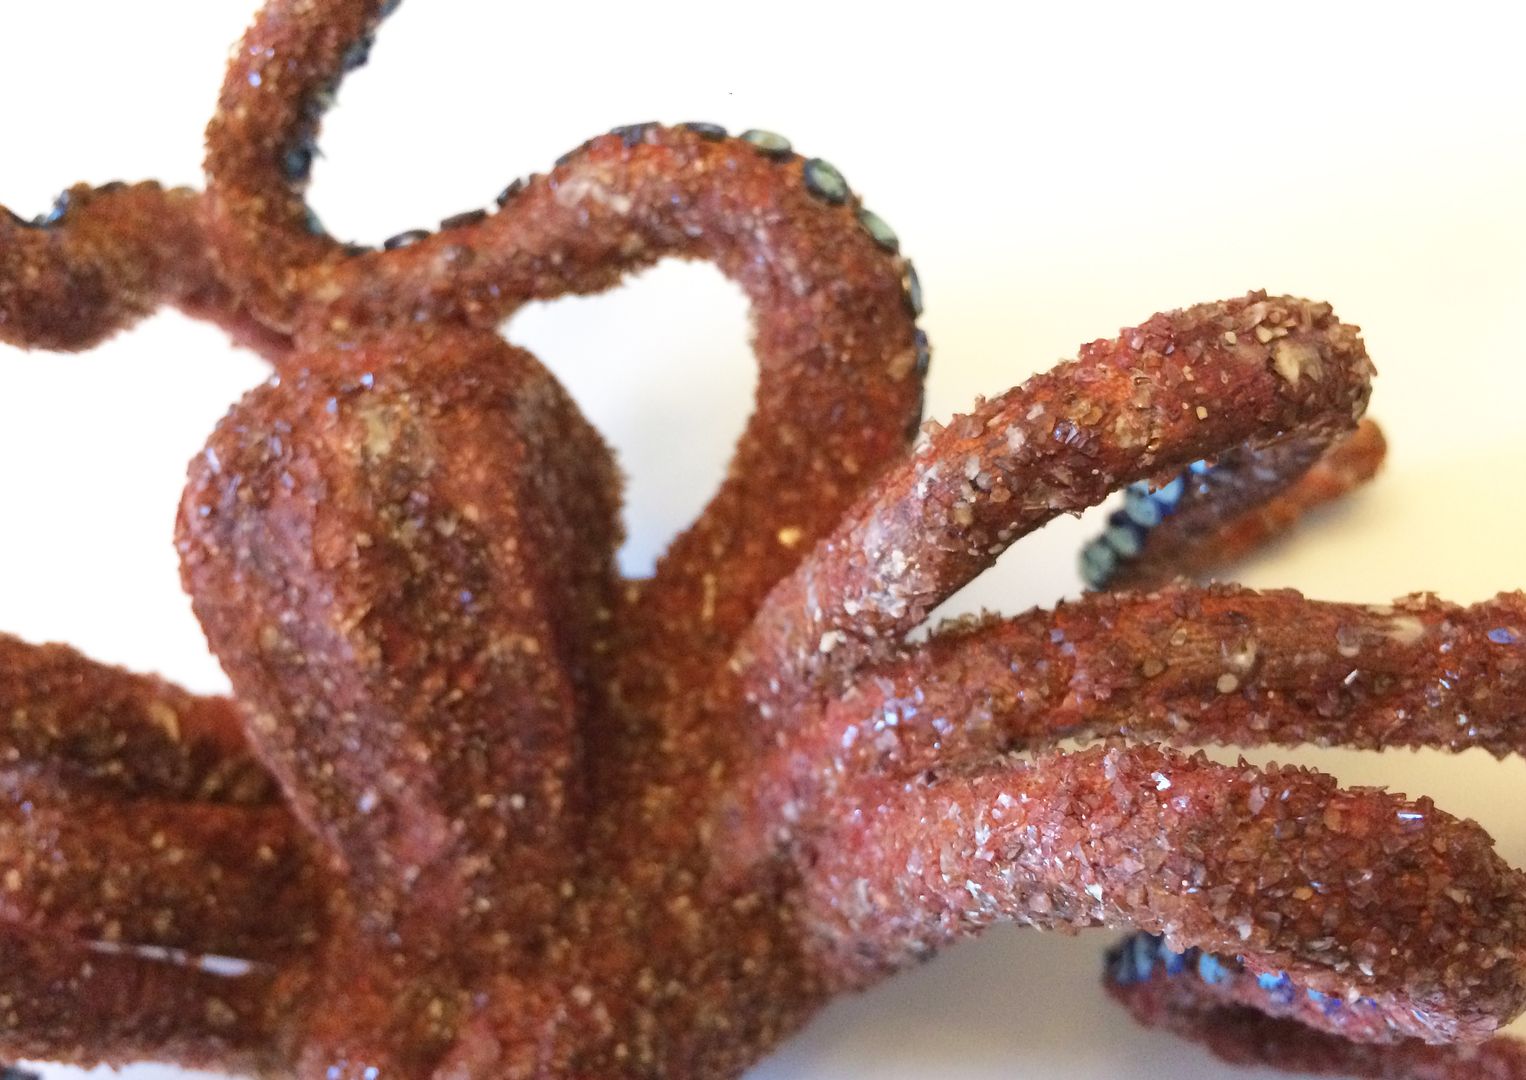
Don't fret if you have some imperfections (cracks, small holes, etc.), as once you add the Twinklets Diamond Dust (covered further in the tutorial), you won't see them.
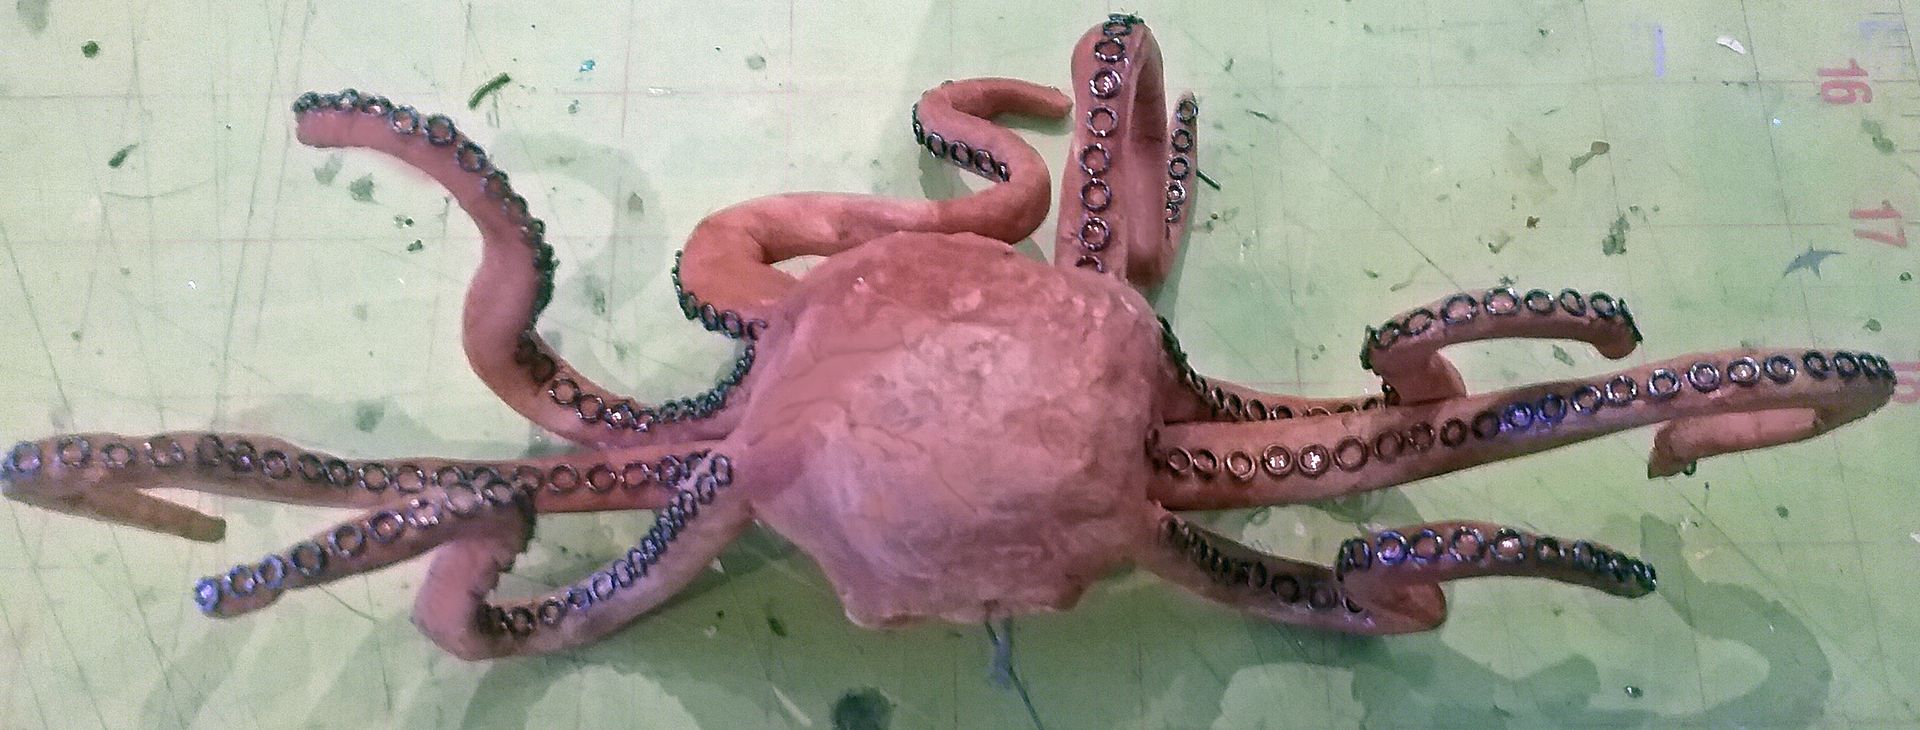
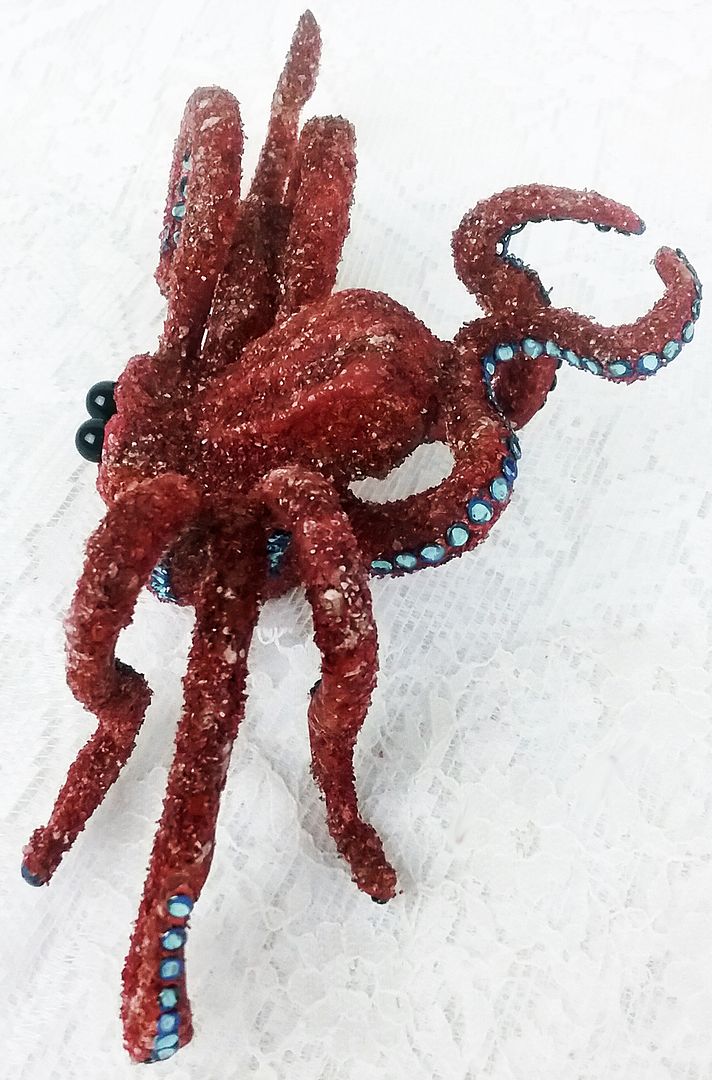
Next, I made a wash (watered down) rusty colored acrylic craft paint and painted the octopus.
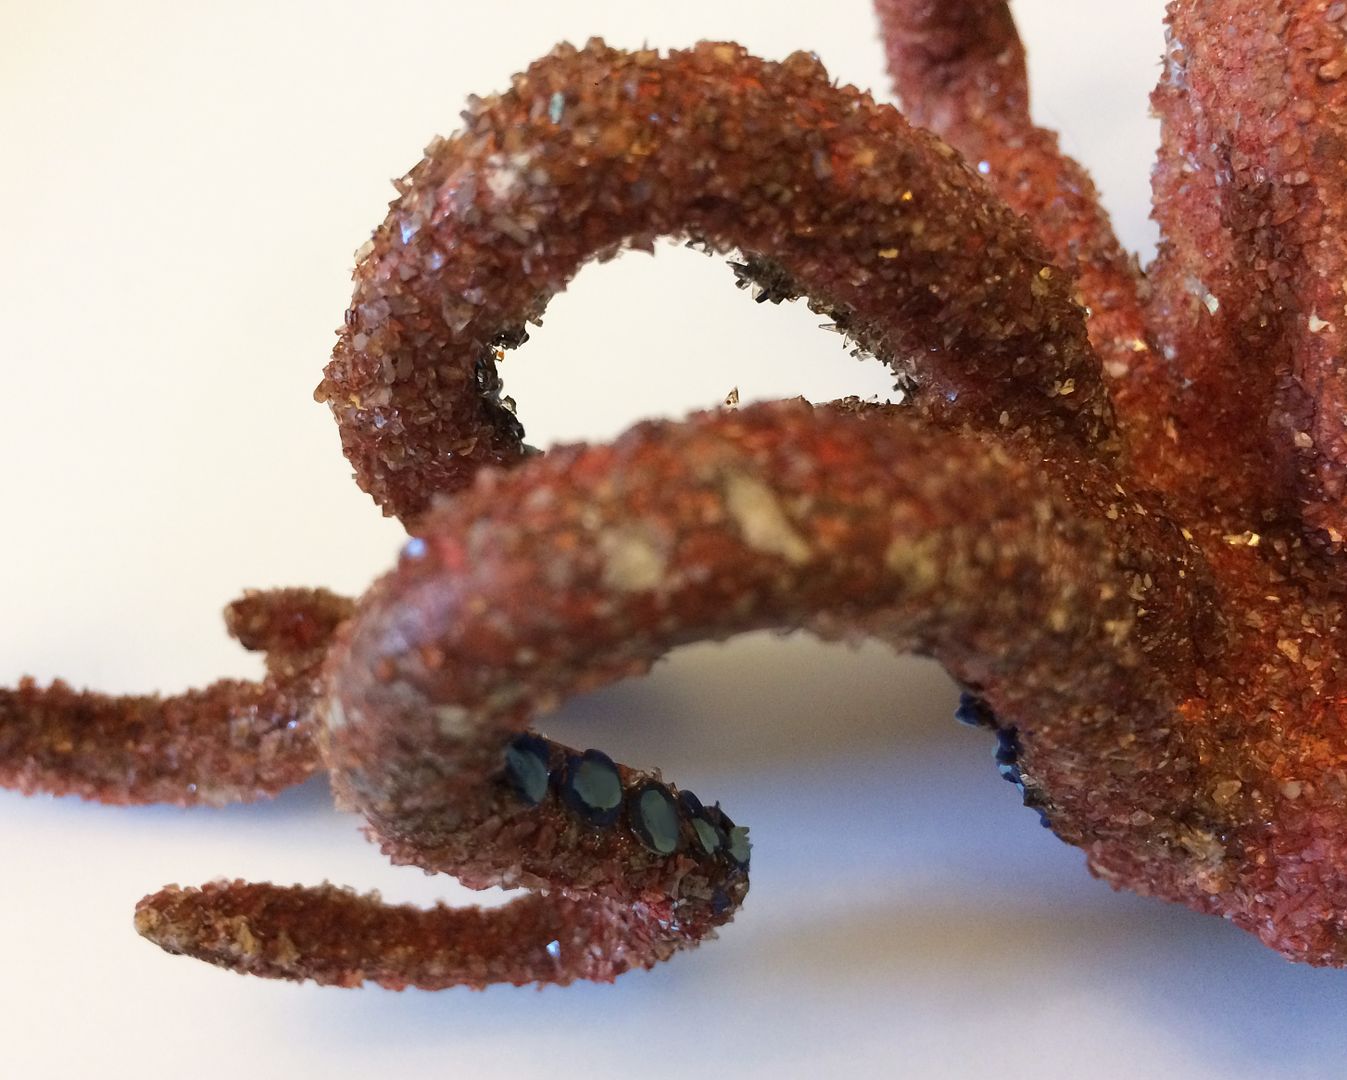
I attached black jump rings to the legs to function as suckers. The view below is of the bottom of the octopus.
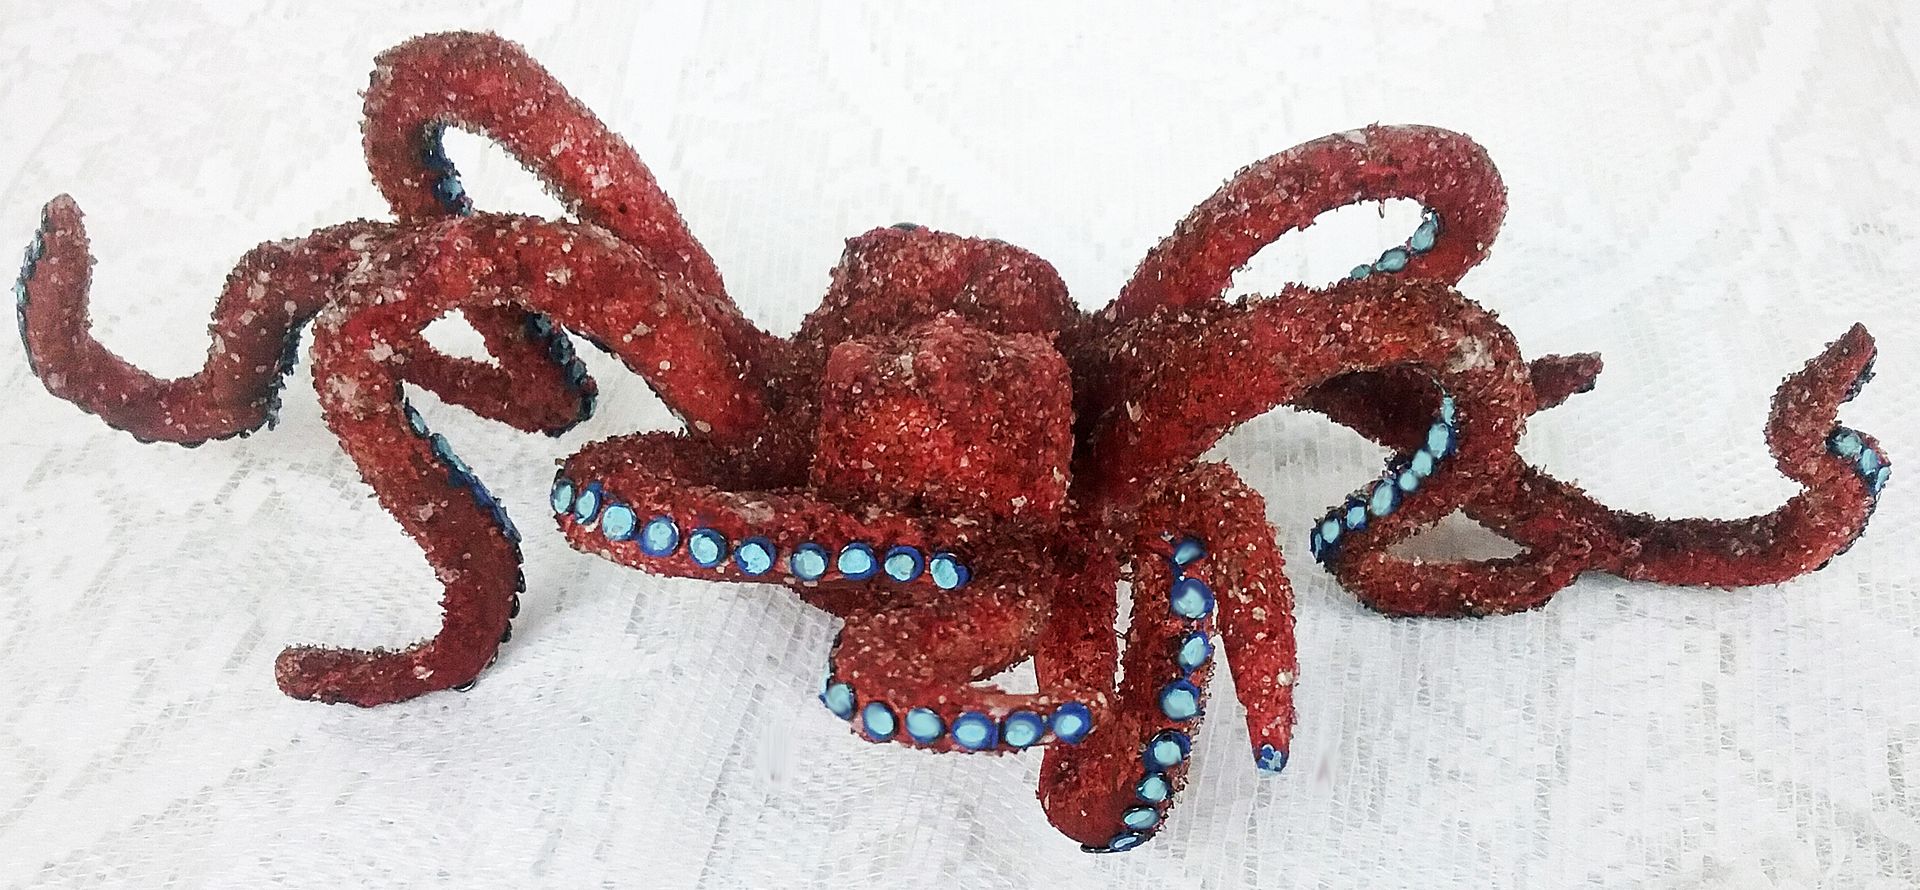
I then sprayed the octopus with Vintage Photo Stain.

I added Twinkles Diamond Dust for sparkle and finally used a paintbrush to flick white paint onto the octopus.
The final touch was adding black beads for the eyes and painting the inside of the suckers blue.


ACCESSORIES
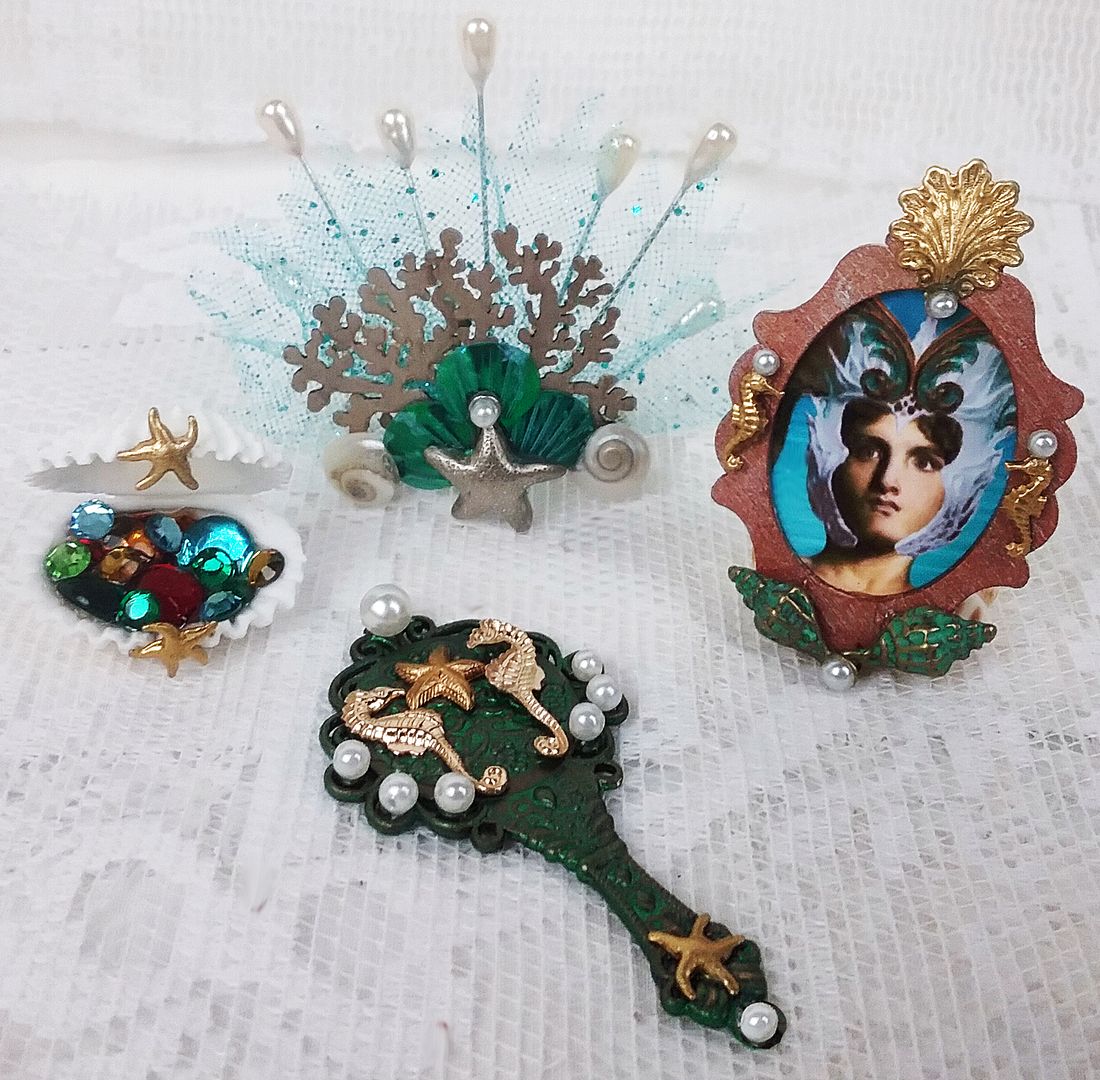
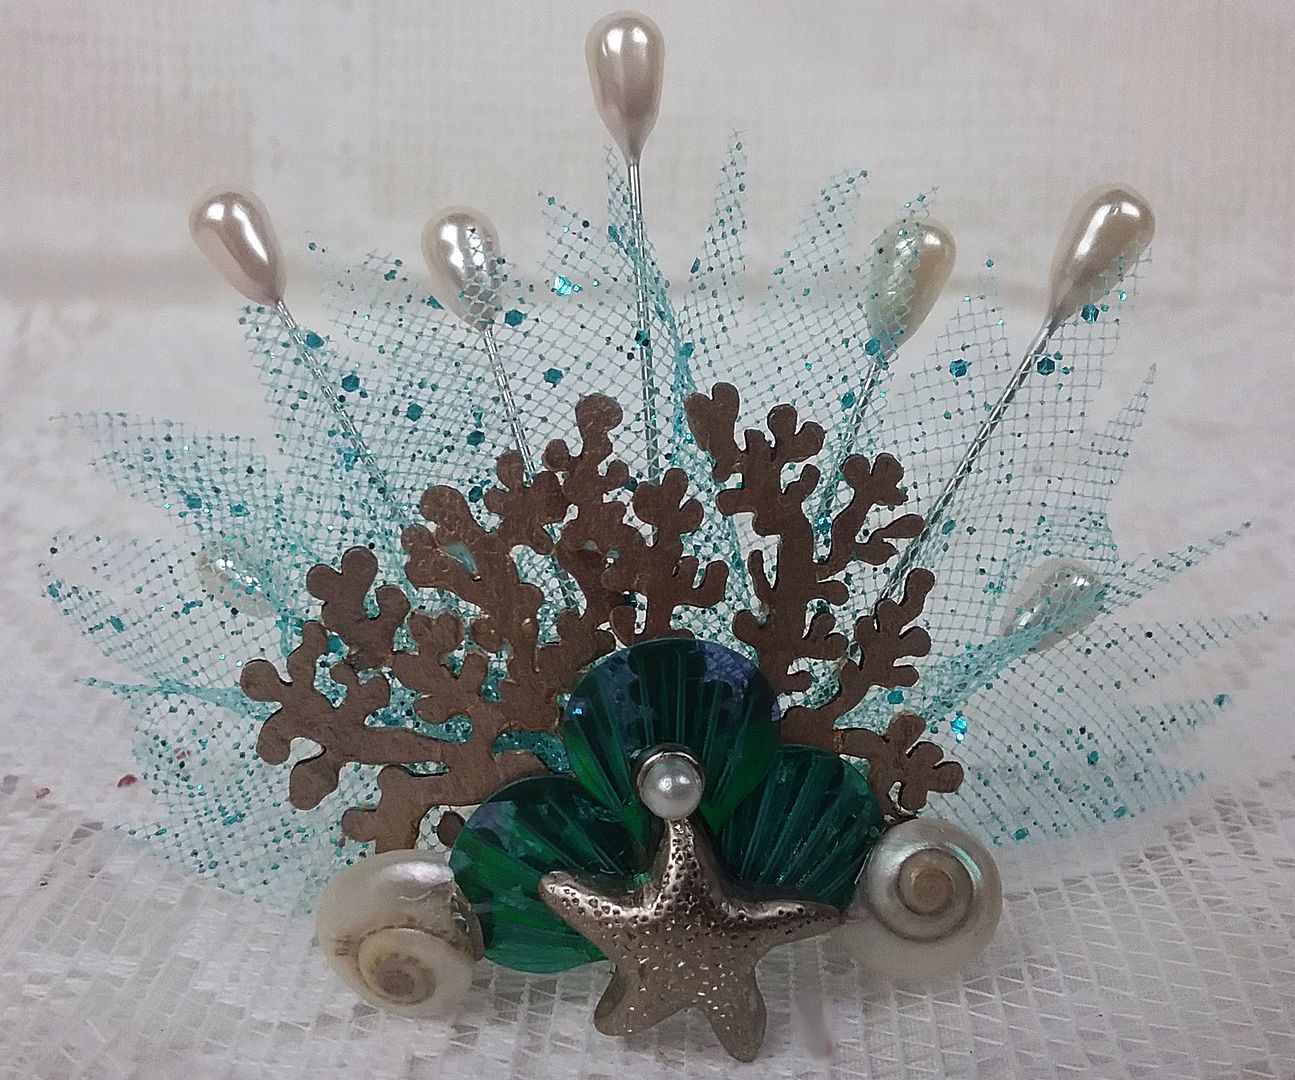
 THE CROWN
To make the crown, I used pieces of sparkly tulle from my stash with jagged cuts on one end and gathered on the other. I then added beaded stick pins.
I also used more of the chipboard coral painted gold, sequin shells, a brass shell, a pearl, and real seashells.
Everything is then glued to the crown frame, which is made of twisted wire.

THE MIRROR
I painted a fancy bronze brass mirror with Liquid Pearls and attached pearls and brass seahorses. The brass starfish are from my stash.


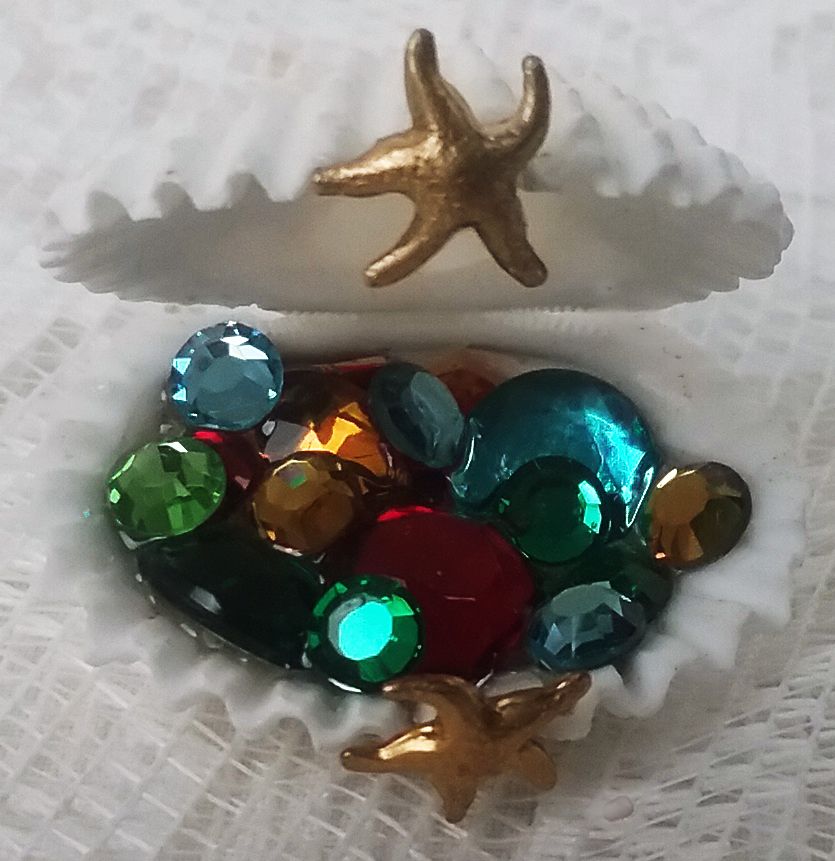
THE JEWEL BOX
 I glued two shells together to make the box and filled it with various colored rhinestones. The closure is the same brass starfish I used on the mirror.
THE PORTRAIT
For the portrait, I used a chipboard frame from my stash. It’s decorated with brash and patina shells and pearls. The image is one of the mermen that you'll find on my Mermen Collage Sheet or Mermaid Garden Digital Image Set.