-->

Welcome

I love answering your questions. If you ask them in the comment section, I have no way to answer you (if you haven't heard from me, that is why). If you use the "EMAIL ME" in the left column of this page, I will be able to respond to you. You can also use it if you want to be added to my newsletter. Laura

Saturday, October 20, 2018

Witches Apothecary Chest - VIDEO TUTORIAL

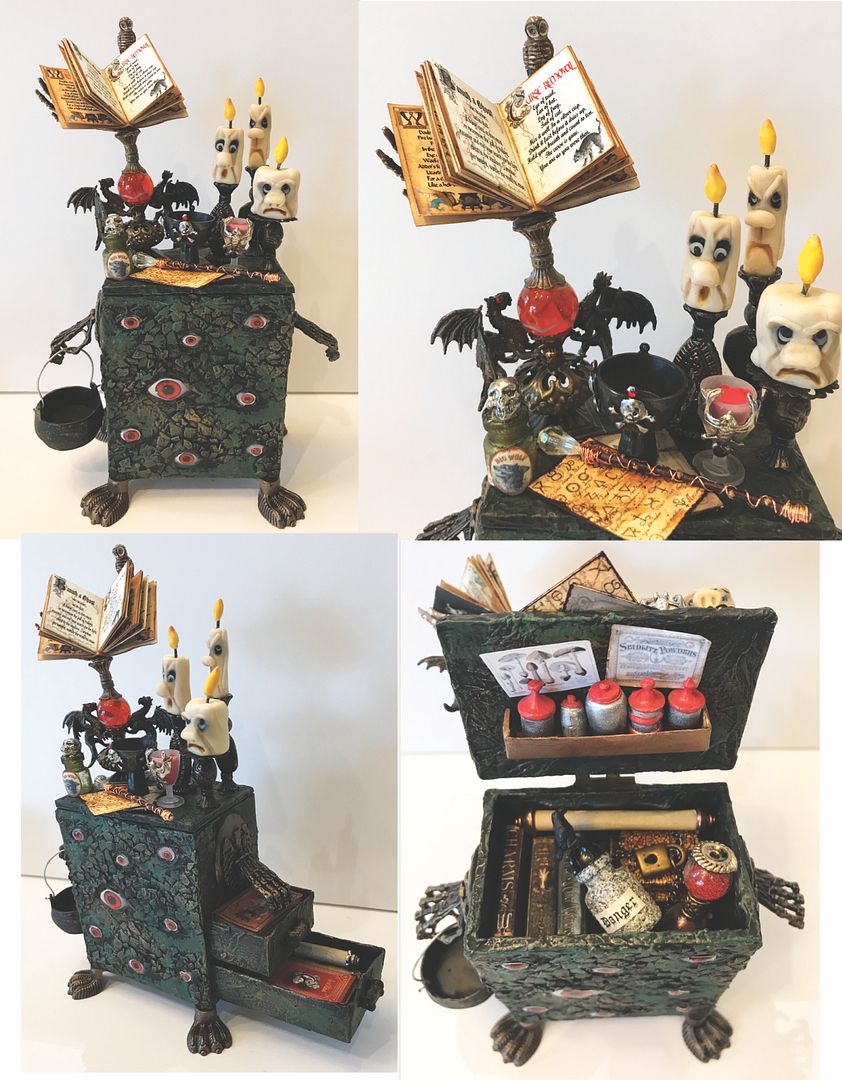
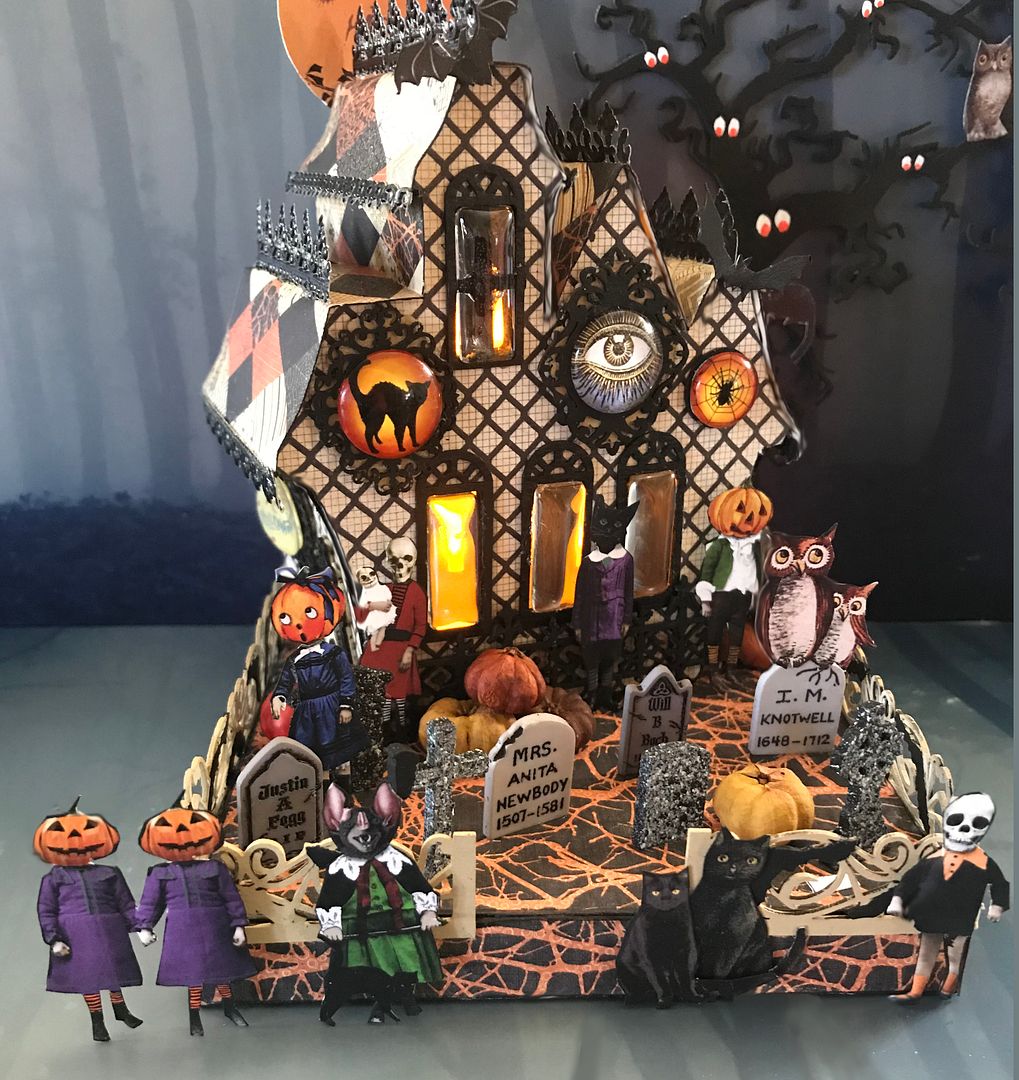
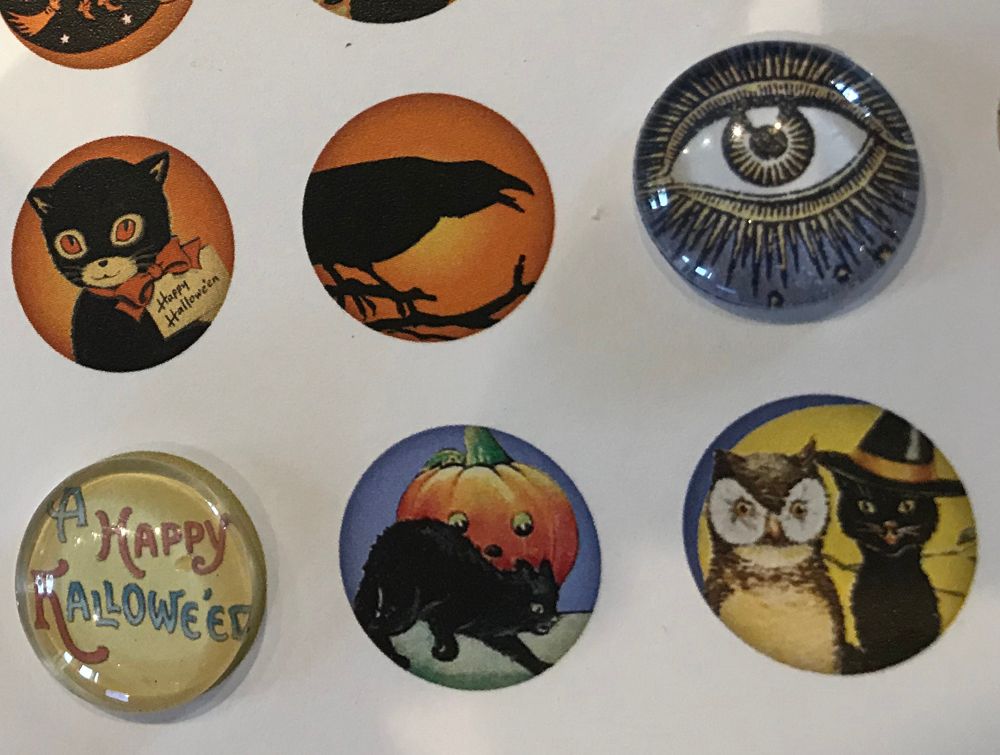
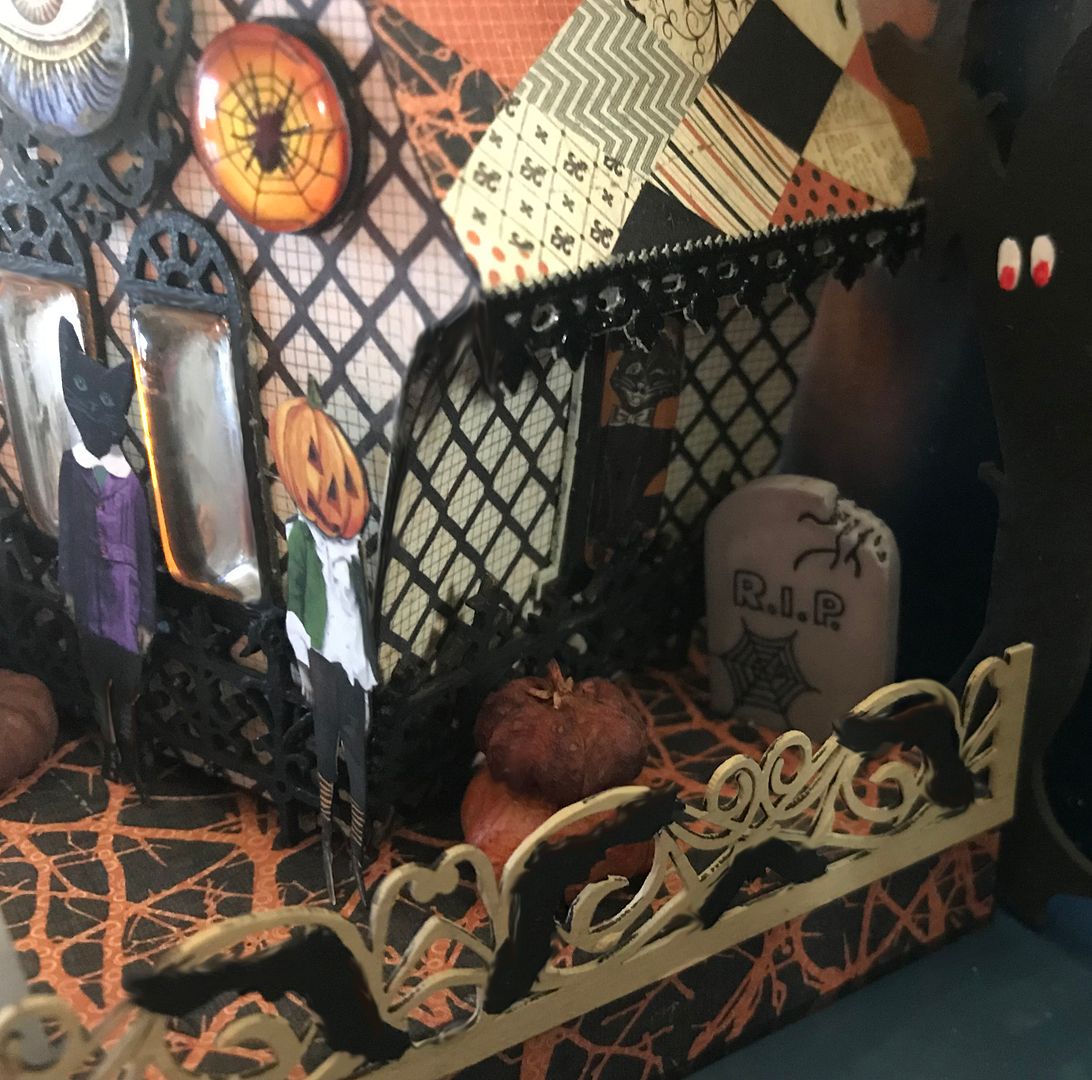
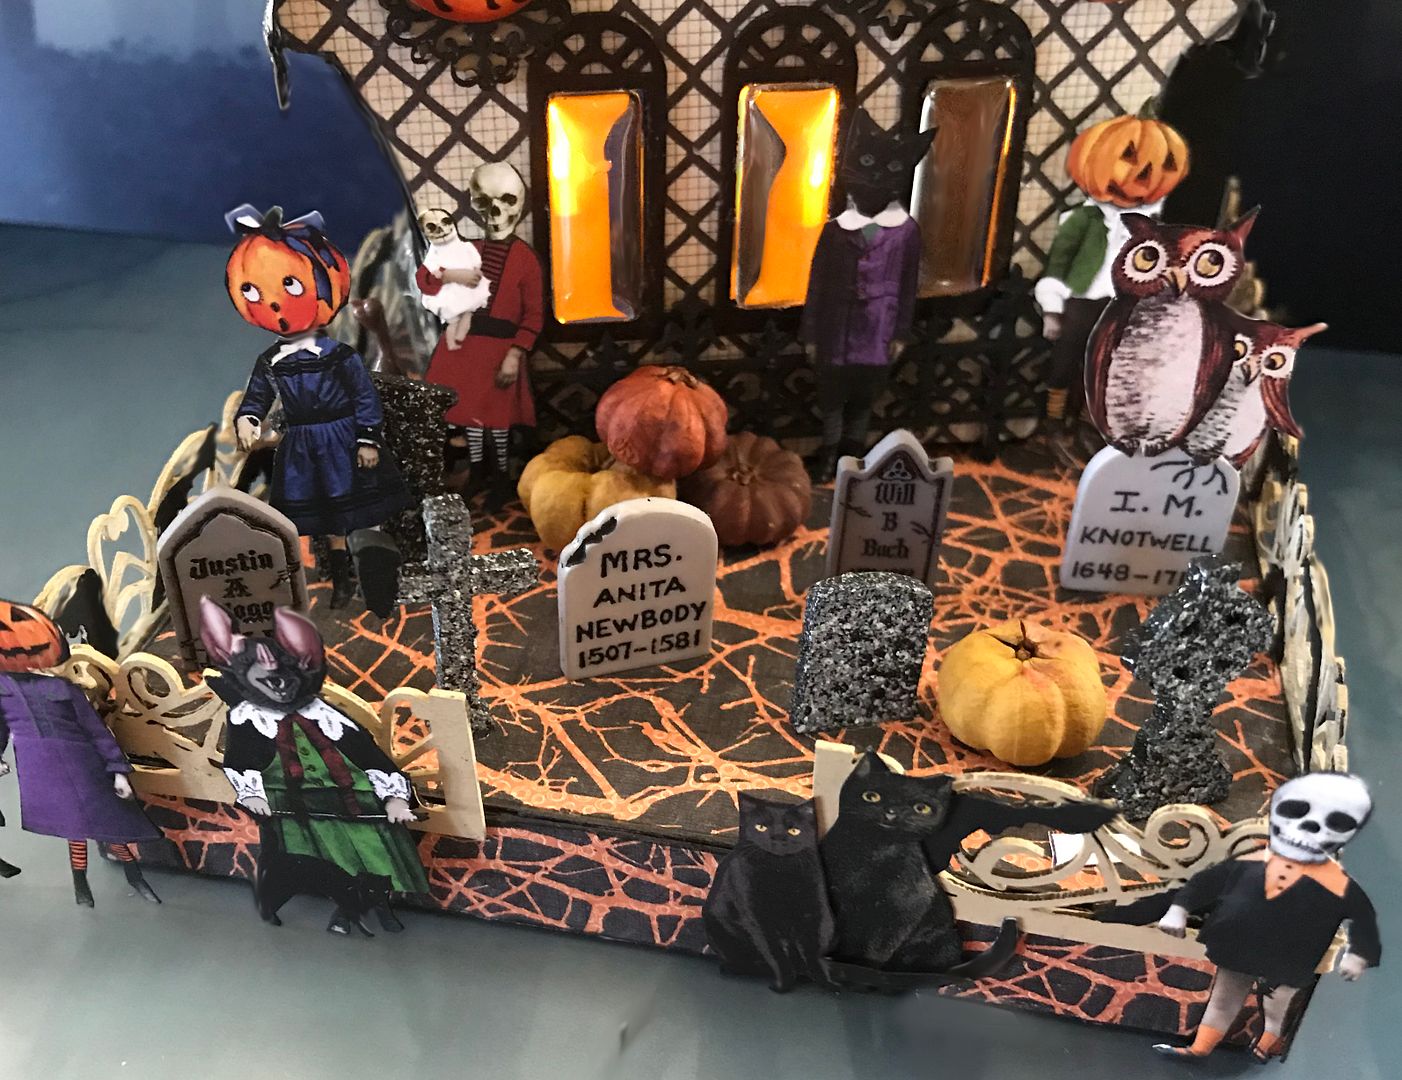
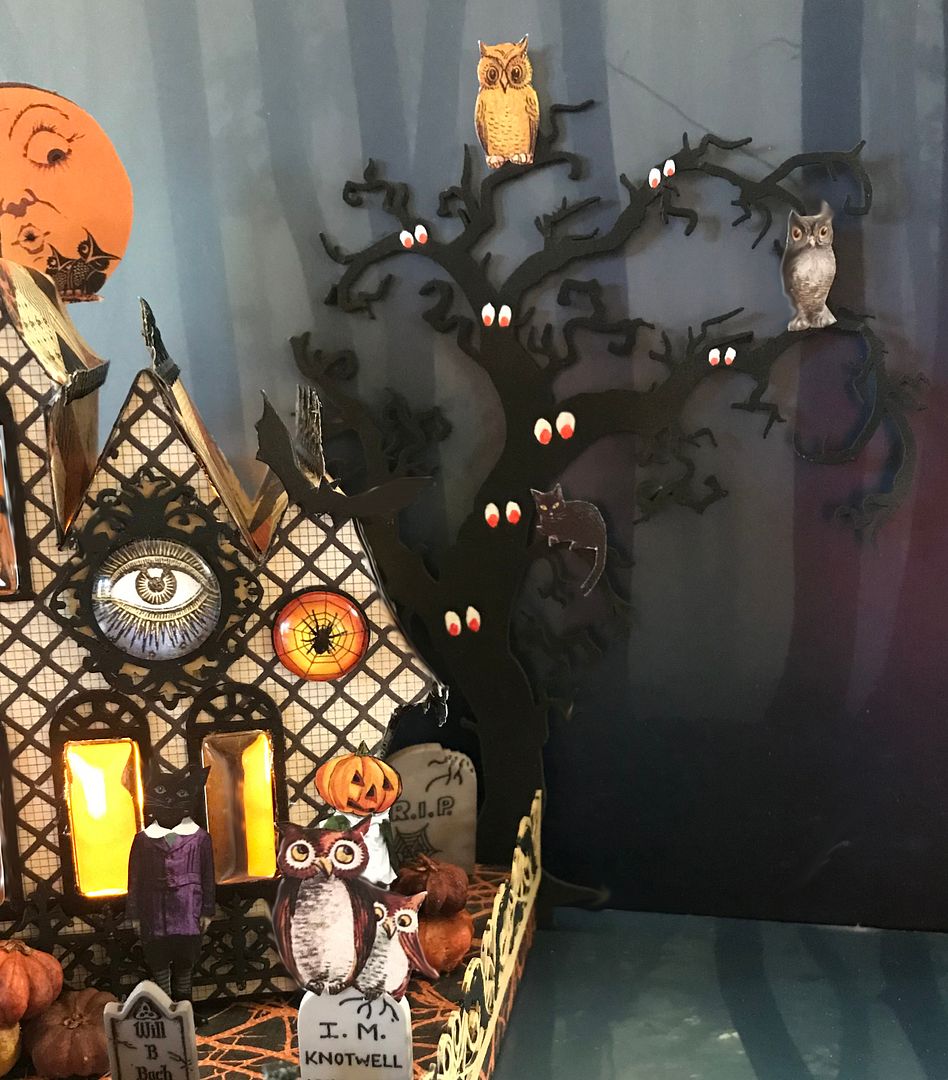
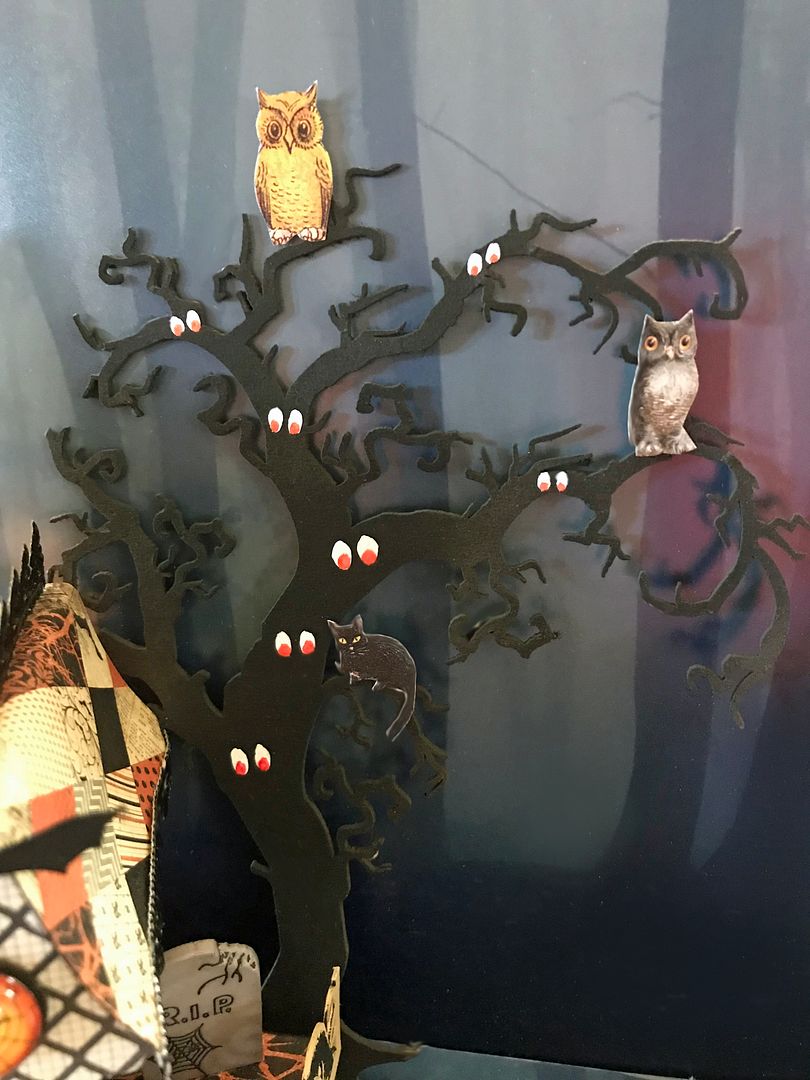
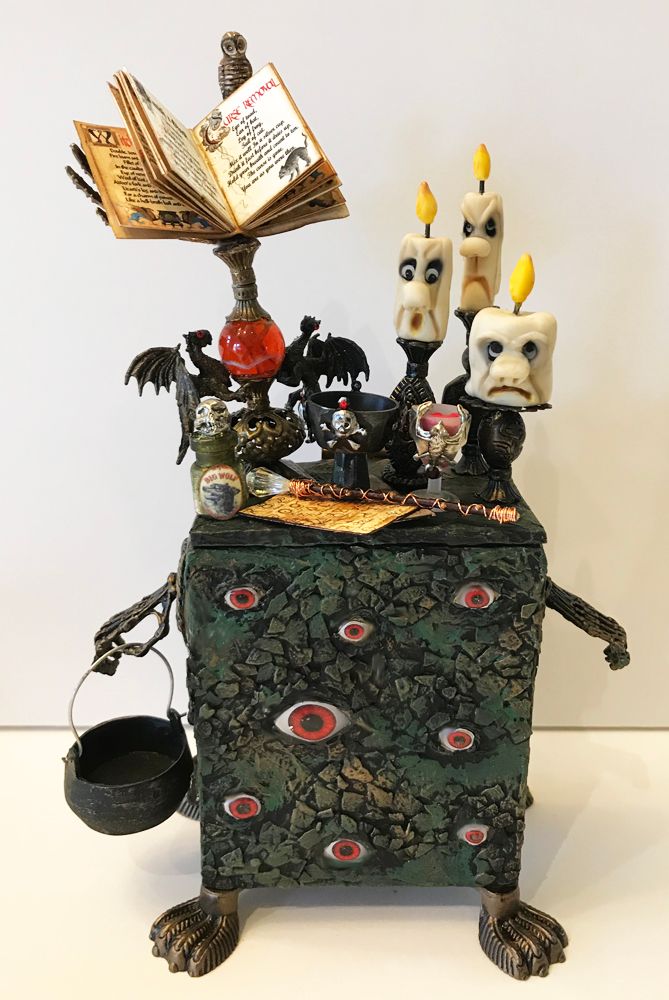
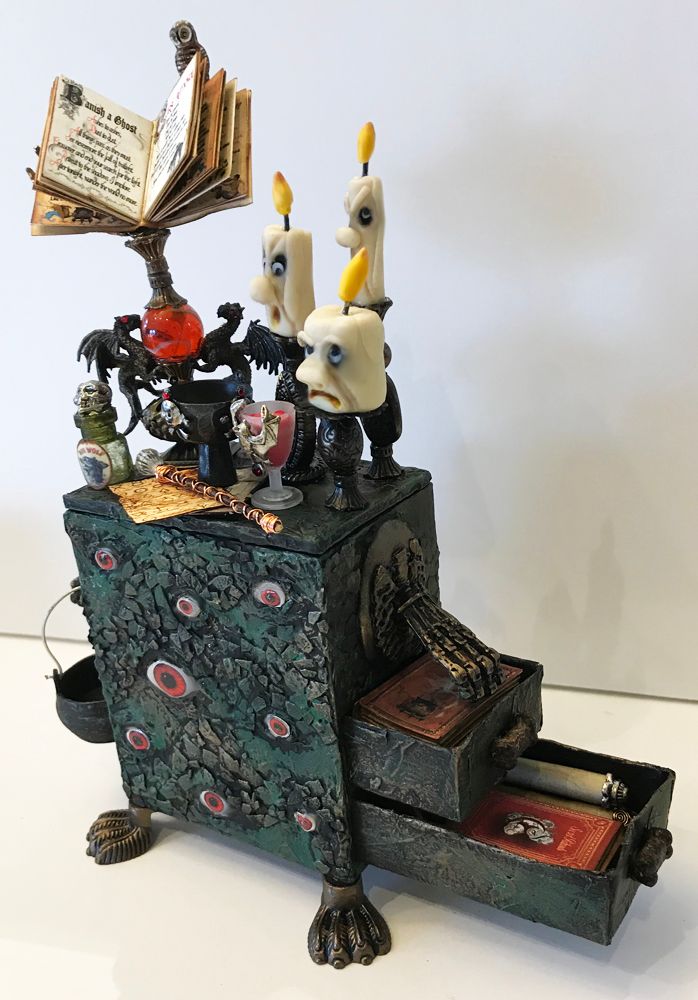
My idea for this apothecary was to make it look like it was alive complete with feet, hands, and lots of eyes (I have the image of the eyes for you further down in the post).  I can imagine the chest following the witch around while the candles argue with each other.  The core of this piece is a simple assembled Vanity Box with drawer kit.
The hands attached to the sides serve multiple purposes; they can be used to lift the chest, hold items (like the cauldron), and make the chest look alive.   I used a medallion mold with a skeleton chest and polymer clay to attach the hands to the chest.  The pulls on the drawers are bones from my stash. 
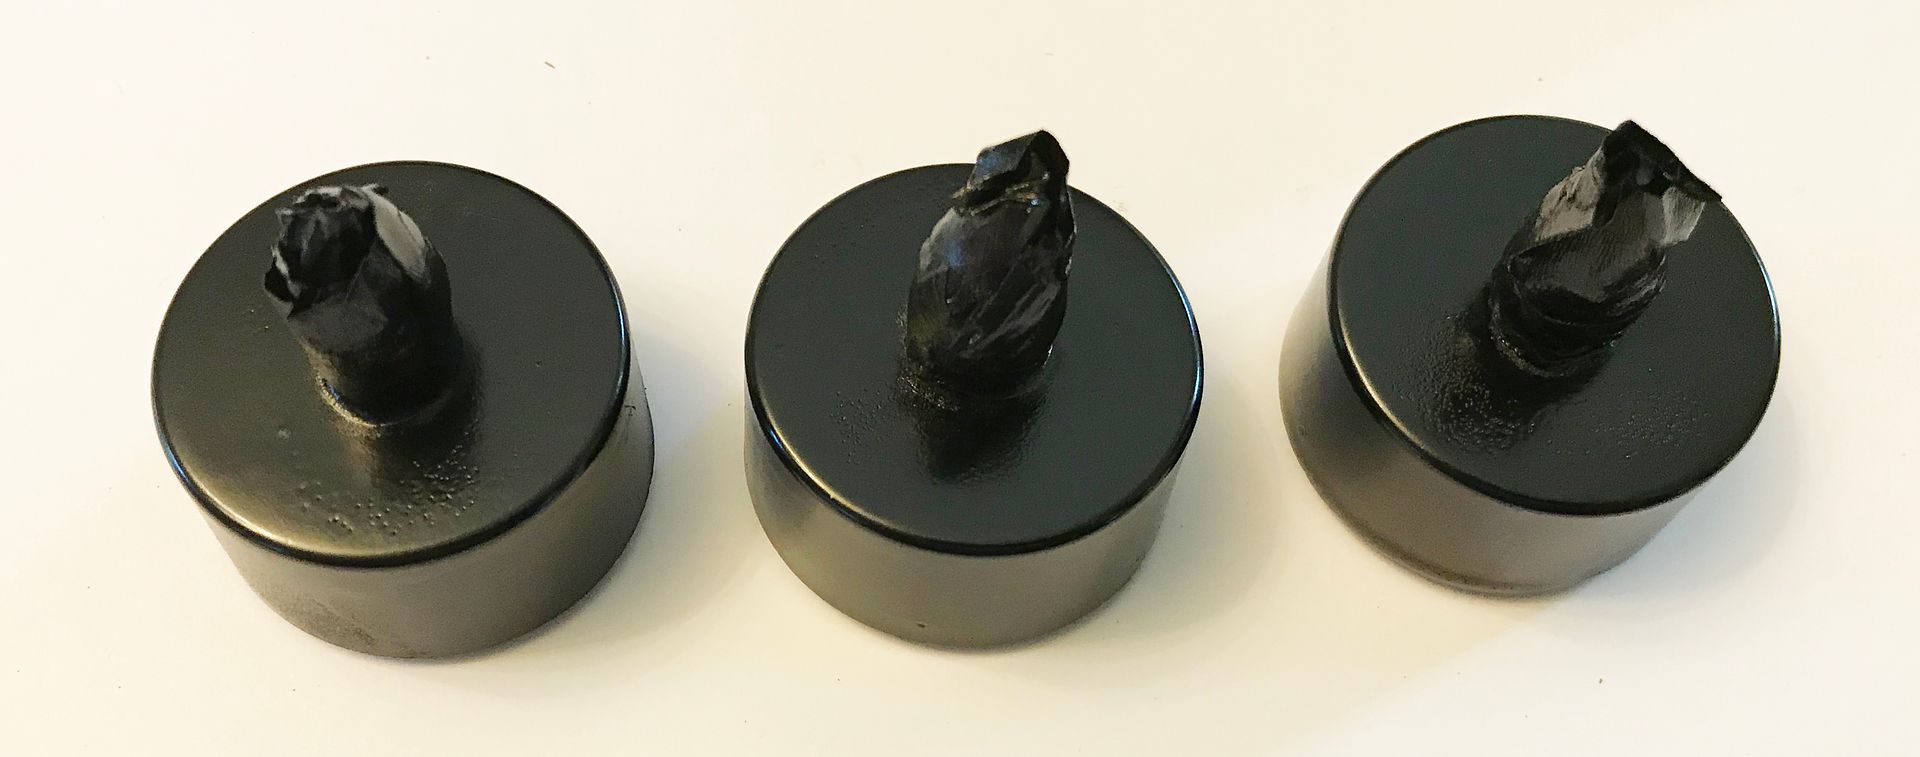
The candles with faces are made from polymer clay, which I demonstrate how to make in the video tutorial.
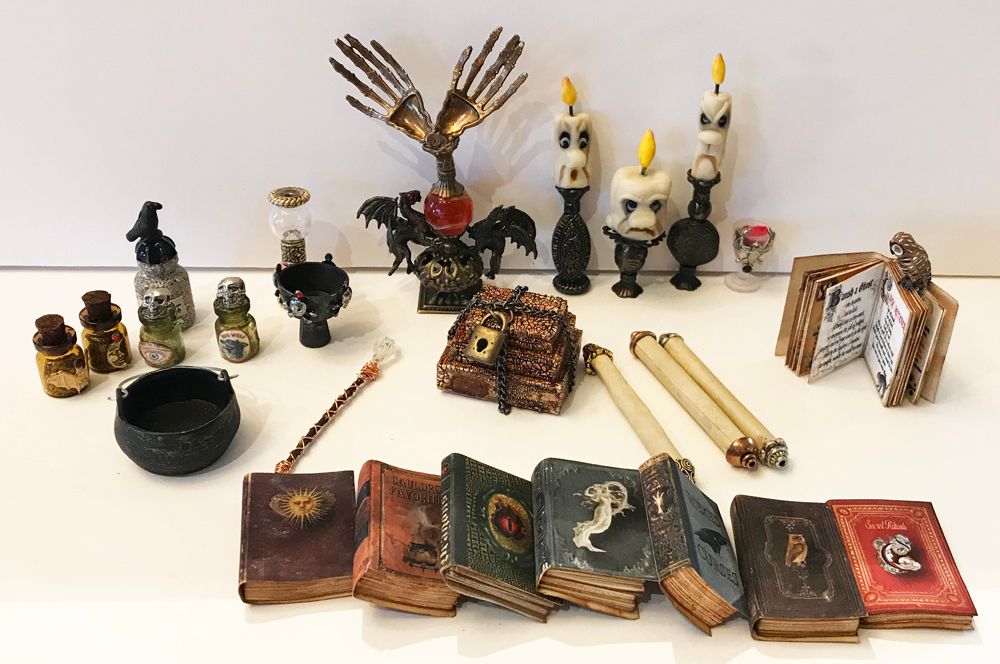
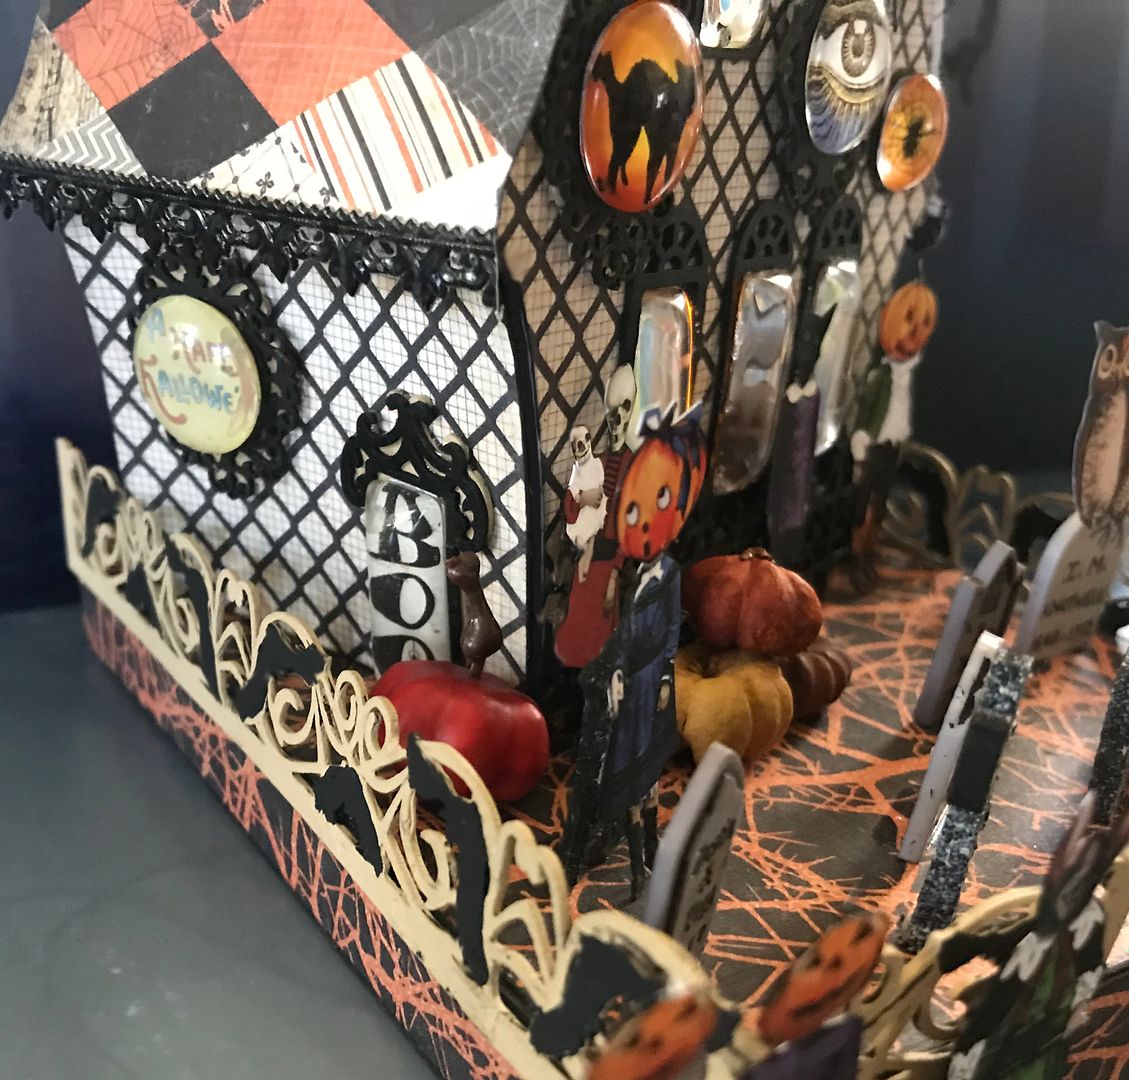
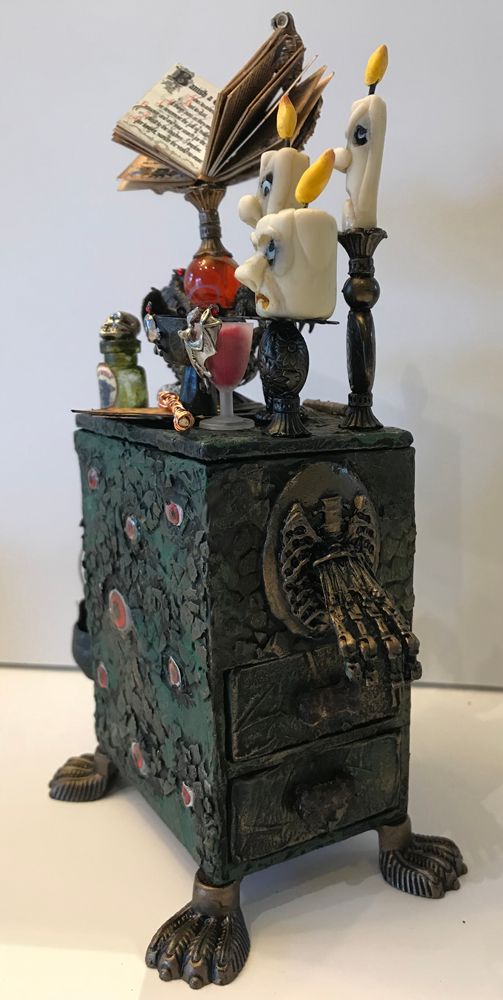
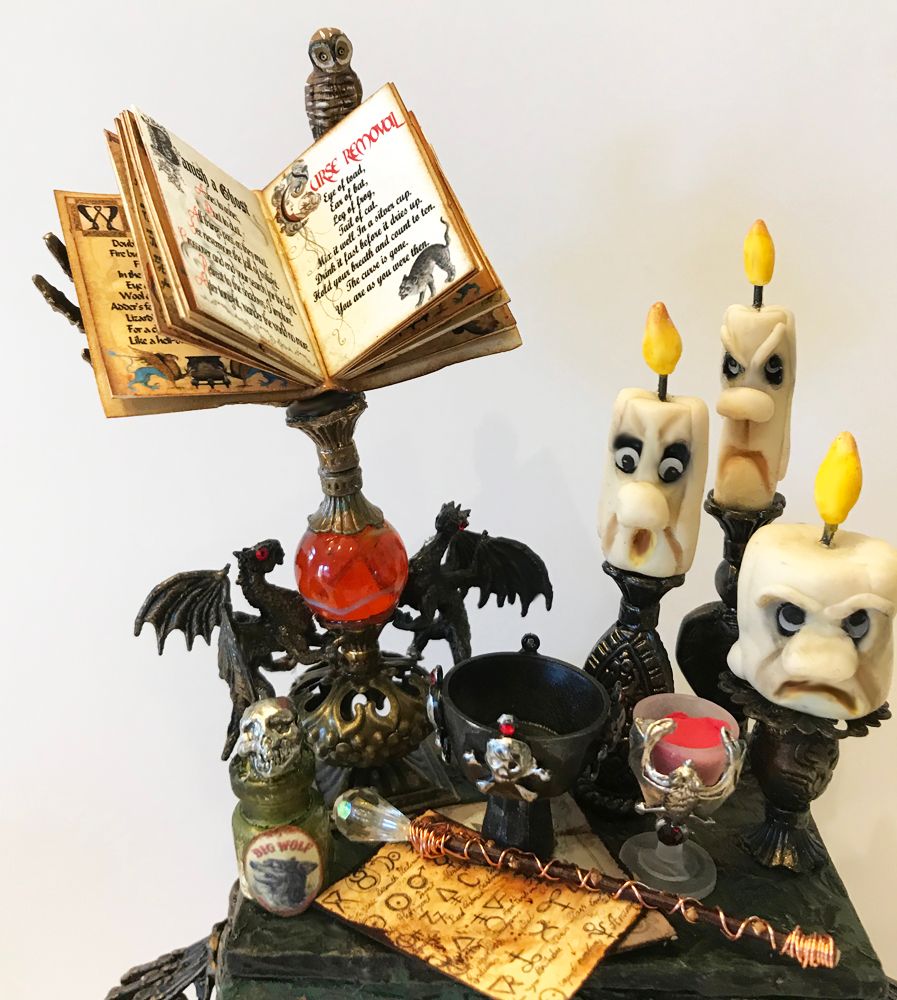
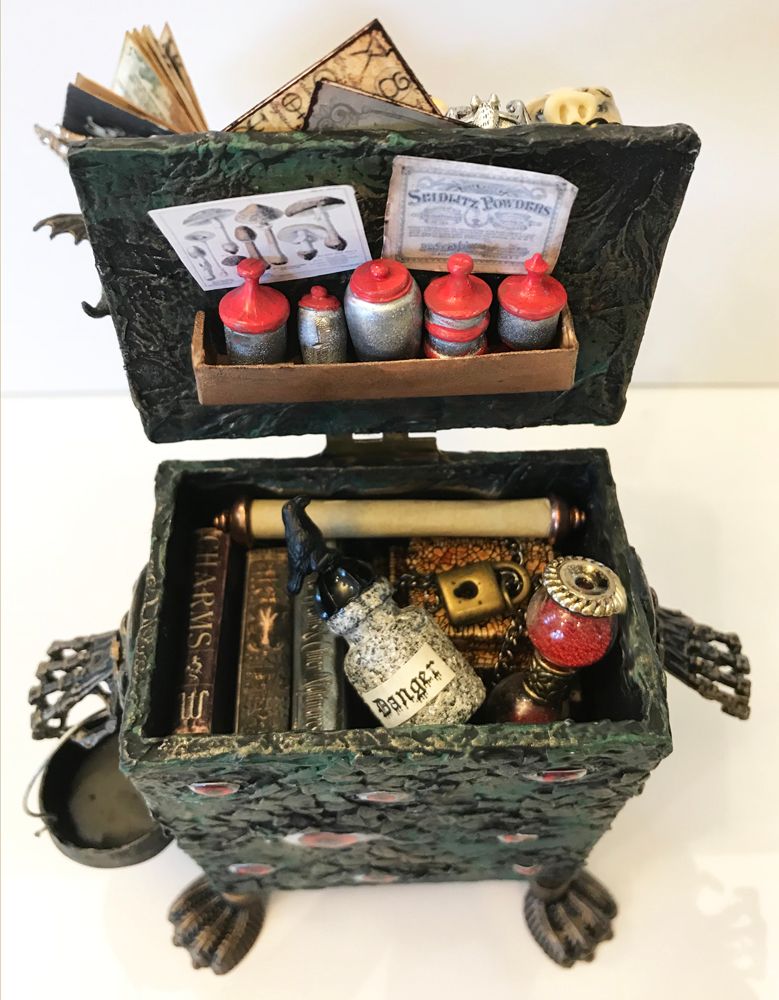
I’ve made all kinds of witchy stuff (bottles, books, a bookstand, scrolls, chalice, potion bowl, hourglass, and wand) to go on top of and inside the chest.  There must be something particularly nasty in the stack of boxes as it is chained and locked.  Notice I’ve used another set of hands as part of a book stand for the Spells and Potion book.
The spell books are made from my Mini Witches Library Collage Sheet, and the bottle labels and other images are from the Witchy Little Labels & Ephemera Collage Sheet.

VIDEO TUTORIAL
In the video tutorial, I’ll walk you through how I assembled and constructed all of the apothecary chest elements.


FREE IMAGE - Sized to fit the front of the box.


Lighted Halloween House

This project was inspired by an easy to assemble Tea light Haunted House kit which is part of AlphaStamps's "Halloween Haunted House" theme for October.
The front and back of the kit are the same except for a large opening on one side to house the tea light.  The kit also comes with a base, fencing, and some tombstones

I started by assembling the house and painting it black then adding paper to the front and back.  To add more interest to the house, I used strips of decorative paper to create a roof, gluing the paper from the front of the house roofline to the back.  I then used pieces of black Dresden to dress-up the roof lines.
By adding paper to the rooflines, I could use an additional tea light on the back of the house to light up the second floor.  I stuck the flame part into a round window on the back.
I painted the light black to make it blend in with the house. 
In the picture below, you can see the tea lights flickering behind the cabochon windows on both the first and second floors.
To dress up the windows I used die-cut chipboard frames to which I attached round and rectangular cabochons.
I added images (from the Halloween Pendants Collage Sheet) behind some of the cabochons using Glossy Accents.
Notice that I also added paper to the sides of the house and attached faux windows and a door using the die-cut chipboard frames and cabochons.
I covered the base with more decorative paper and added die-cut spooky fencing with decorative bats.  To the base, I added pumpkins, and tombstones (some from the kit and some from my stash).  The creepy kids are from a new Mini Halloween Darlings Half Collage Sheet and the owls and cats are from the Familiars Collage Sheet.
Final touches are the bats attached to the roofline and the spooky tree attached to the back.  To make it look spookier I painted red eyes in various places on the tree.


Wednesday, October 3, 2018

Halloween Lanterns

September’s Kit at AlphaStamps is “Halloween Countdown” which includes a mini shrine.  There are 5 different shrine designs and I have picked my three favorites for this project. 
By using flickering tea-lights and glittering much of the surface the pieces really sparkle.  I’ve used Halloween themed die-cuts and vintage images to add more spooky fun.
I started by assembling the shrines and spray painting them black.  I covered the outside and inside of the shrine with decorative papers.
I then used various colors of glitter (black, purple, green, yellow, & red) to accent the fronts of the shrine.
I glittered and attached cut-outs from the Black Creepy Critters Shape Set, Wood Jack-o-Lanterns Cut-Outs & the Narrow Spider Web Flourish Borders.  I think my favorite creepy critters are the rats as they have very detailed whiskers and tails.
I then attached vintage Halloween images from various collage sheets and glittered the images to make them coordinate with the other items I glittered.
I covered the flame on 3 yellow flickering tea-lights with tape and sprayed the lights with black plastic spray paint.  The lights fit nicely into the shrines behind the border.  The final touch on the Big Cat Shrine was to add green wire whiskers.