-->

Welcome

I love answering your questions. If you ask them in the comment section, I have no way to answer you (if you haven't heard from me, that is why). If you use the "EMAIL ME" in the left column of this page, I will be able to respond to you. You can also use it if you want to be added to my newsletter. Laura

Tuesday, December 25, 2018

The Anthropomorphic Theater Presents - Death Comes to Call

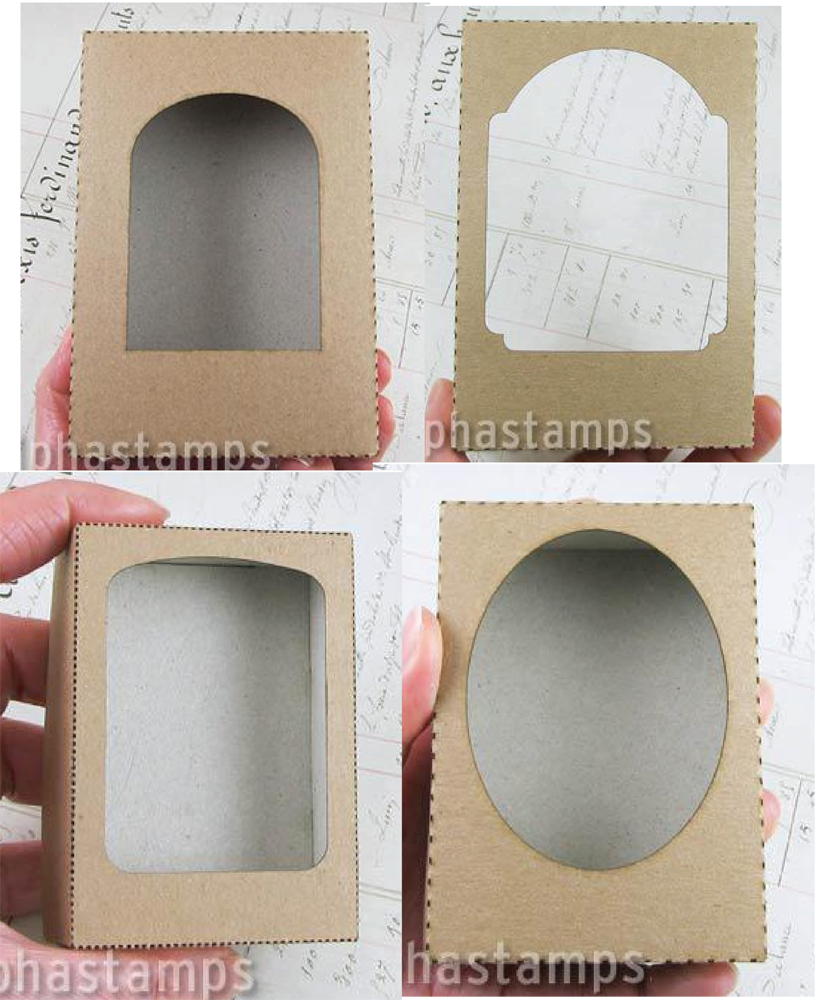
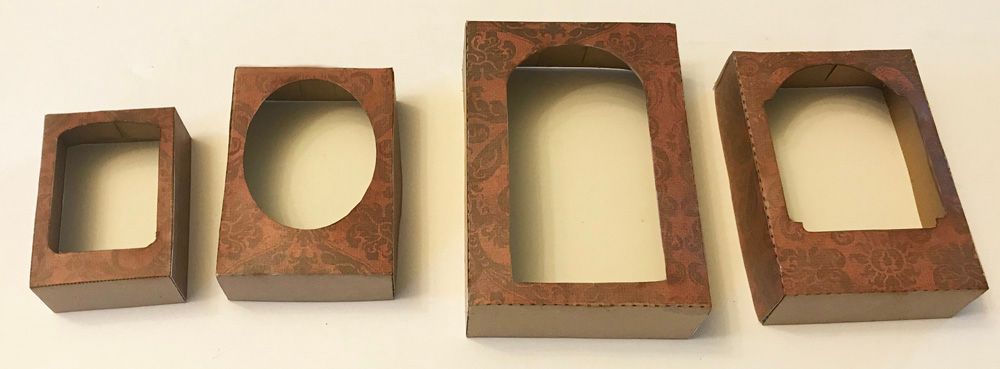
The inspiration for this project came from a series of shadow box lids with cutouts of various shapes and sizes.  I thought it would be fun to put them together to construct a theater.
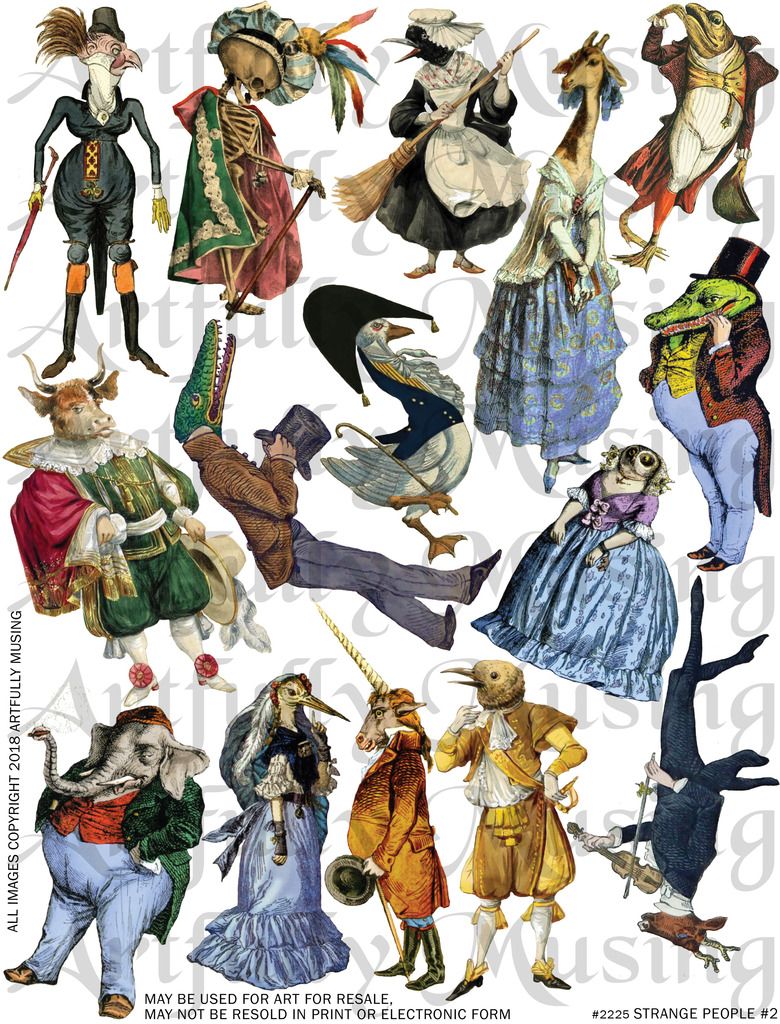
Wanting something unusual, I decided to create a new collage sheet, “Strange People #2” (further below in the post), filled with anthropomorphic characters and decided on the macabre theme “Death Comes to Call.”
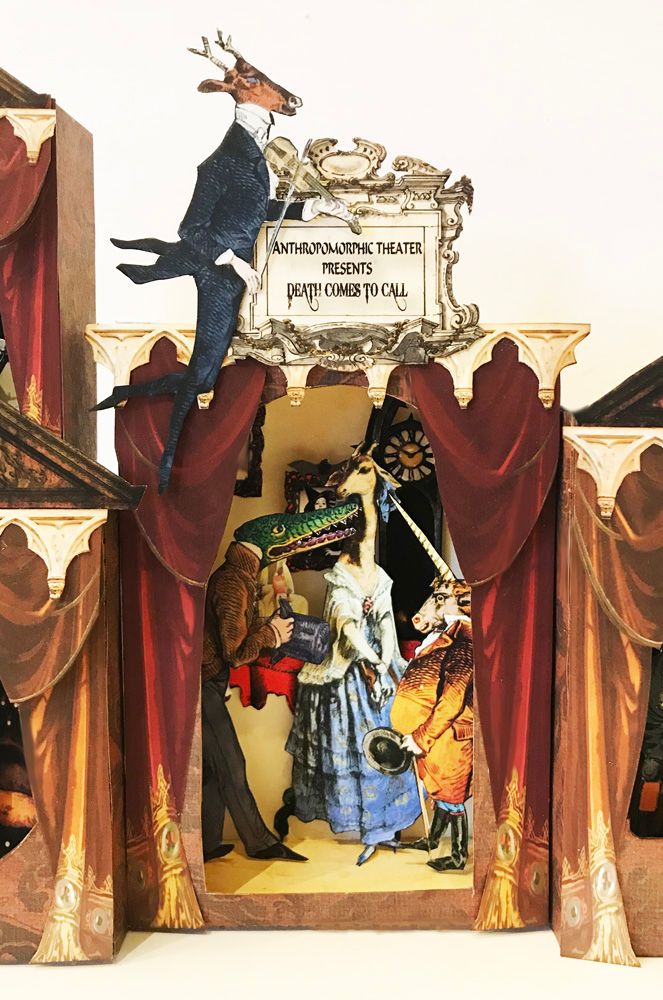
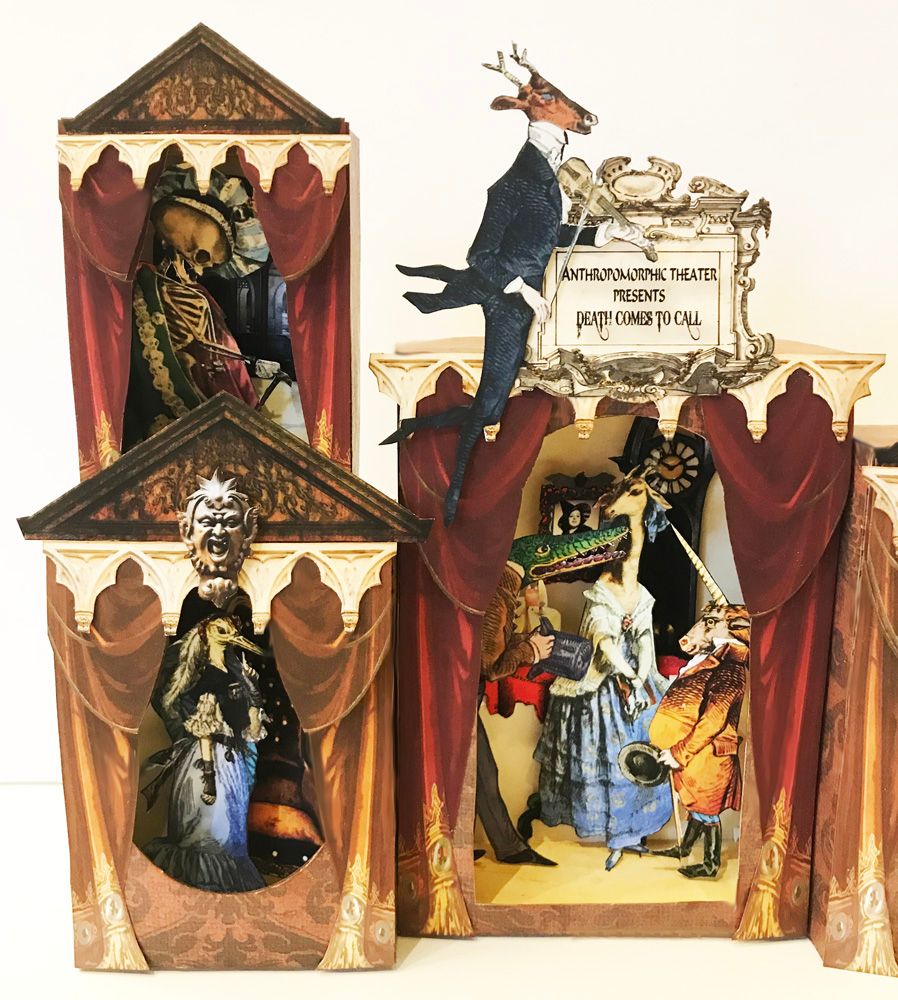
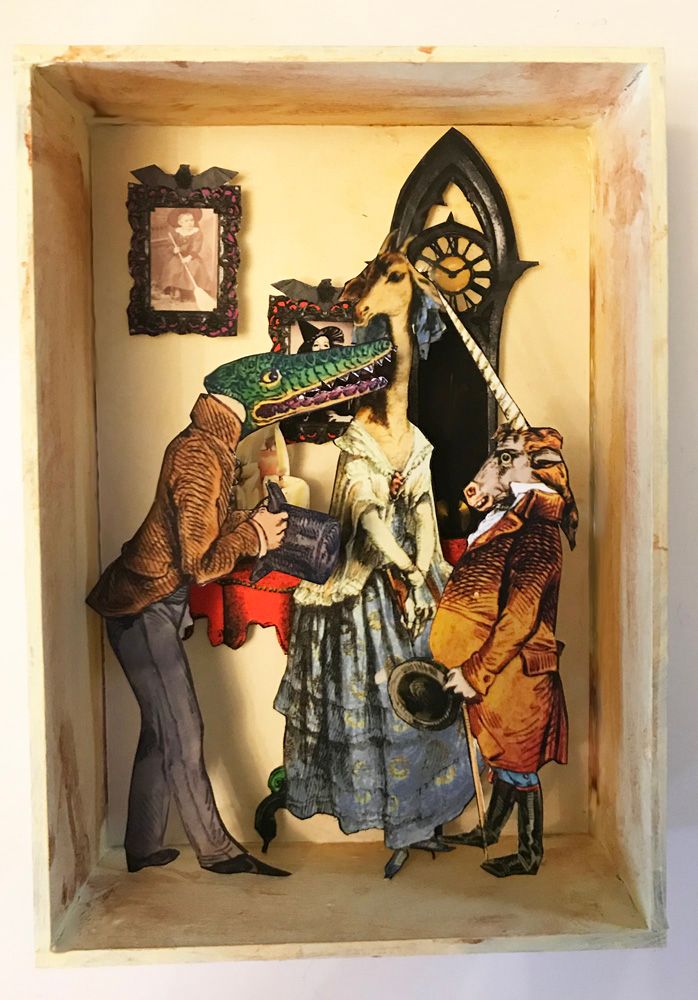
In this theater, multiple scenes are taking place at the same time.  The crocodile and unicorn vie for the attention of the giraffe.
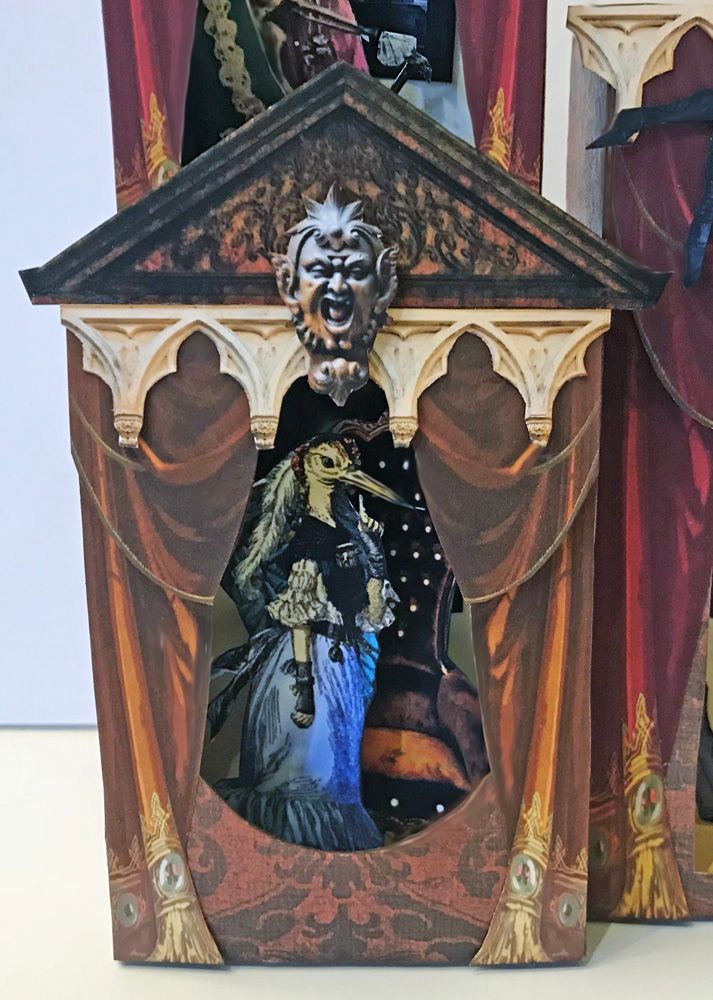
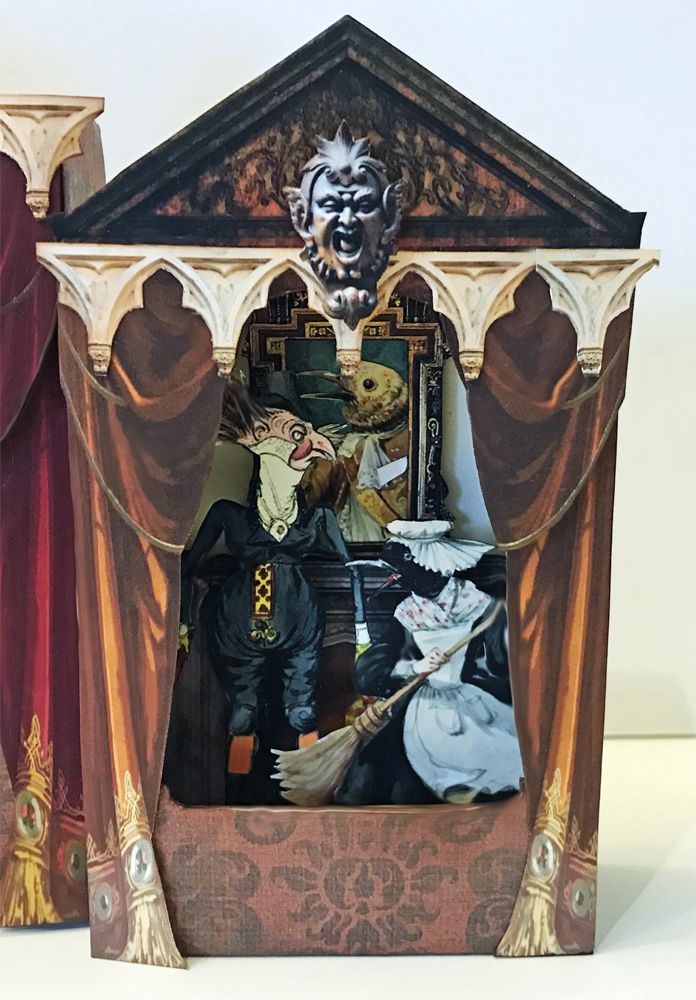
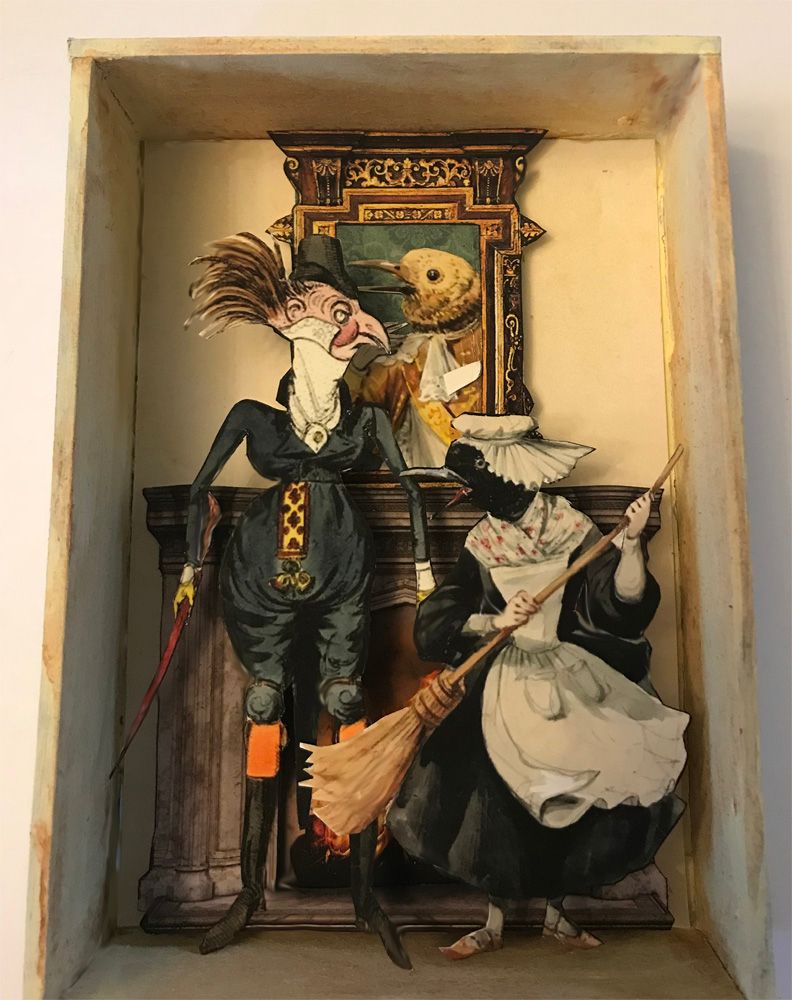
In another room, the stork pines for the crocodile who is fixated on the giraffe. While in another scene, the crow maid quarrels with her fop of a master.
Lurking at the top is Death sensing the tension between the characters while the stag plays his fiddle.
This collage sheet contains 15 anthropomorphic characters.  To purchase this sheet, click on the image below.

THE DETAILS
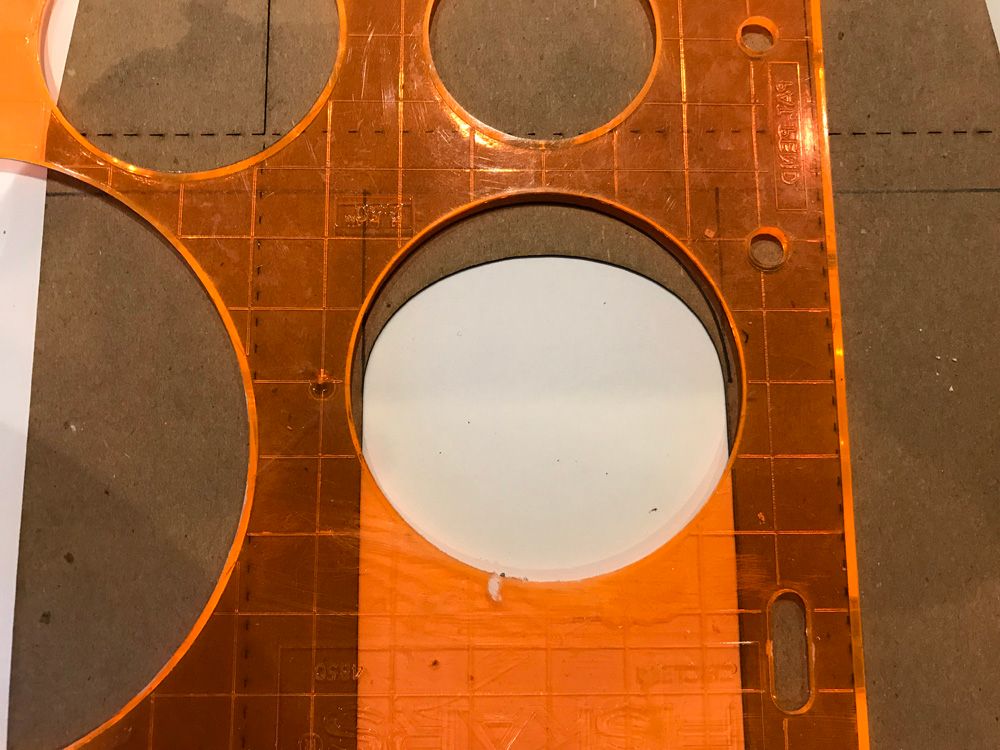
The theater is made from 4 different shadowbox lids and their corresponding shadow box kits.  I decided to make the opening larger (at the top and bottom) on the largest shadowbox lid, which is arched.
I marked cut lines on the top and bottom of the lid and then drew lines along the arch to help guide where to expand the top of the arch.  I used a stencil to help me mark the new arch line.
I covered the lids with damask style paper.

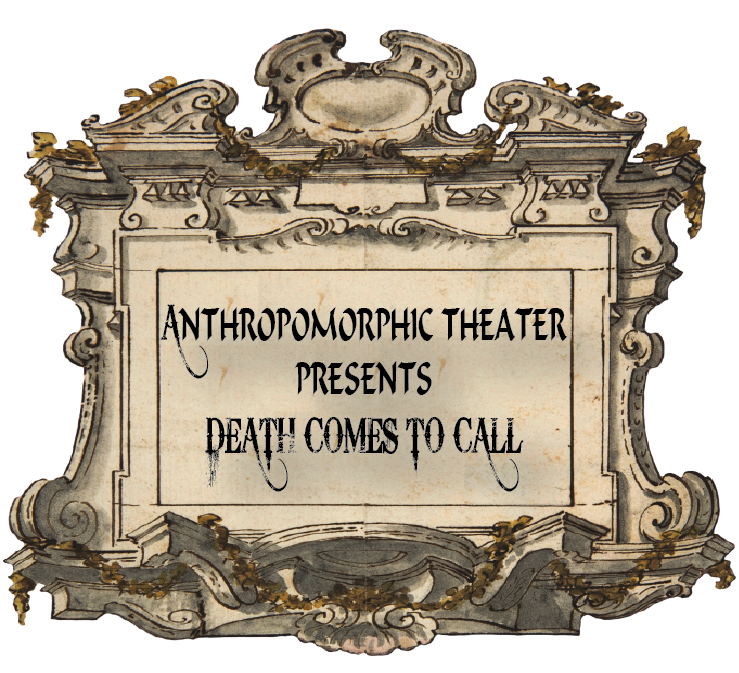
To give the lids the look of a theater, I added curtains with fringe (2 different colors).  These are digital images, so they can be sized to fit the project.  I also used architectural elements from the Mini Gothic Architecture Collage Sheet.  At the top of the large box is the theater sign, which you will find further down in the post and can download for your project.
I painted the shadow boxes on the inside and outside with a combination of yellow shades of paint and added yellow paper to the inside bottom of the box.  I chose this color as it is bright, and whatever I added to the inside would not get lost in the shadows after the lid was in place.
Next, I added furnishings from the Mini Gothic Architecture Collage Sheet and the Step into My Parlor Collage Sheet.  All of the images are popped up from the back (using double-stick foam tape) to give the impression of dimension.  Lastly, I added the characters (also popped up from the back).

Once I was satisfied with each of the scenes, I slid the lids over the boxes and then glued the boxes together, positioning the side boxes slightly in front of the center box.
FREE IMAGE
Feel free to download this image and use it in your artwork.

Sunday, November 25, 2018

Miniature Peddler's Cart - Christmas Treats - VIDEO TUTORIAL

For those of you into miniatures, how about a peddler’s cart filled with tasty holiday treats. I decorated the cart with gingerbread chipboard trim, a wreath, holly leaf images, gingerbread images, hanging lights, candy canes, and two tin soldiers.
Many of the cookies are made from polymer clay and cookie-cutter cabochons which I’ll cover in the video tutorial. 
There are chocolates (decorated with slices of polymer clay canes) and lollypops made from beads.  
I used various pre-made candy canes, cakes, and gingerbread house beads.  The large wrapped trees are paper images, and the wrapped gingerbread men are buttons (from my stash) decorated with slices of a polymer clay cane.
I jazzed up the sides with candy canes and gingerbread images, and on the side with the pull, I hung candy canes.
This piece will make a great addition to my Streets of Paris shops when I decorate them for Christmas.

You might recognize the Peddler’s Cart kit as it is the same one I used for the Streets of Paris Artist cart.

In the video tutorial below, I'll walk you through how I assembled and decorated the cart, plus how I made the tasty treats.

VIDEO TUTORIAL

Saturday, November 17, 2018

12 Days of Christmas Matchbox Ornaments - New Collage Sheet - Video Tutorial (also covering Advent Calendar Matchbox Ornaments)

The last project I posted covered making Advent Calendar Ornaments from matchboxes.  If making 25 ornaments is more than you have time for, might be interested in making a 12 Days of Christmas set.  And to go along with this post is a video tutorial to walk you through all the steps.
Just as with the Advent Calendar Ornaments, I’m using the same matchbox kit.
These also have ribbons as hangers and a number charm and tassel for a pull.

For this project, I have created a new Mini 12 Days of Christmas collage sheet whose images are sized for this project or any other small art project.  To purchase the sheet below, click on the image.


VIDEO TUTORIAL


The video tutorial covers making the 12 Days ornaments as well as the 25 Advent Calendar ornaments I covered in the previous post.


Supply List - 12 Days of Christmas Ornaments

Saturday, November 3, 2018

Christmas Project - Matchbox Advent Calendar Ornaments - 12 Days of Christmas Ornaments - Video Tutorial

Tis the season for Christmas projects and I have a few seasonal projects coming your way.  The first is two sets if matchbox ornaments one using the theme of 12 Days of Christmas (with a new collage sheet) and the other a 25 Ornament set functioning as an Advent Calendar.   I can imagine how fun it would be for kids to scan the tree each day looking for the day’s ornament, opening the box to reveal a small gift or treat. 
There is nothing complicated about this project which is made up of cutting and gluing, a good project to work on at night while watching TV.  The matchboxes (made from a simple pre-scored kit) I used are larger than the ones you find in the store which means you can insert larger items. 
 In the VIDEO TUTORIAL further down in the post I'll walk you through how I assembled these ornaments.

Saturday, October 20, 2018

Witches Apothecary Chest - VIDEO TUTORIAL

My idea for this apothecary was to make it look like it was alive complete with feet, hands, and lots of eyes (I have the image of the eyes for you further down in the post).  I can imagine the chest following the witch around while the candles argue with each other.  The core of this piece is a simple assembled Vanity Box with drawer kit.
The hands attached to the sides serve multiple purposes; they can be used to lift the chest, hold items (like the cauldron), and make the chest look alive.   I used a medallion mold with a skeleton chest and polymer clay to attach the hands to the chest.  The pulls on the drawers are bones from my stash. 
The candles with faces are made from polymer clay, which I demonstrate how to make in the video tutorial.
I’ve made all kinds of witchy stuff (bottles, books, a bookstand, scrolls, chalice, potion bowl, hourglass, and wand) to go on top of and inside the chest.  There must be something particularly nasty in the stack of boxes as it is chained and locked.  Notice I’ve used another set of hands as part of a book stand for the Spells and Potion book.
The spell books are made from my Mini Witches Library Collage Sheet, and the bottle labels and other images are from the Witchy Little Labels & Ephemera Collage Sheet.

VIDEO TUTORIAL
In the video tutorial, I’ll walk you through how I assembled and constructed all of the apothecary chest elements.


FREE IMAGE - Sized to fit the front of the box.


Lighted Halloween House

This project was inspired by an easy to assemble Tea light Haunted House kit which is part of AlphaStamps's "Halloween Haunted House" theme for October.
The front and back of the kit are the same except for a large opening on one side to house the tea light.  The kit also comes with a base, fencing, and some tombstones

I started by assembling the house and painting it black then adding paper to the front and back.  To add more interest to the house, I used strips of decorative paper to create a roof, gluing the paper from the front of the house roofline to the back.  I then used pieces of black Dresden to dress-up the roof lines.
By adding paper to the rooflines, I could use an additional tea light on the back of the house to light up the second floor.  I stuck the flame part into a round window on the back.
I painted the light black to make it blend in with the house. 
In the picture below, you can see the tea lights flickering behind the cabochon windows on both the first and second floors.
To dress up the windows I used die-cut chipboard frames to which I attached round and rectangular cabochons.
I added images (from the Halloween Pendants Collage Sheet) behind some of the cabochons using Glossy Accents.
Notice that I also added paper to the sides of the house and attached faux windows and a door using the die-cut chipboard frames and cabochons.
I covered the base with more decorative paper and added die-cut spooky fencing with decorative bats.  To the base, I added pumpkins, and tombstones (some from the kit and some from my stash).  The creepy kids are from a new Mini Halloween Darlings Half Collage Sheet and the owls and cats are from the Familiars Collage Sheet.
Final touches are the bats attached to the roofline and the spooky tree attached to the back.  To make it look spookier I painted red eyes in various places on the tree.