-->

Welcome

I love answering your questions. If you ask them in the comment section, I have no way to answer you (if you haven't heard from me, that is why). If you use the "EMAIL ME" in the left column of this page, I will be able to respond to you. You can also use it if you want to be added to my newsletter. Laura
Showing posts with label Dominoes. Show all posts

Saturday, June 11, 2016

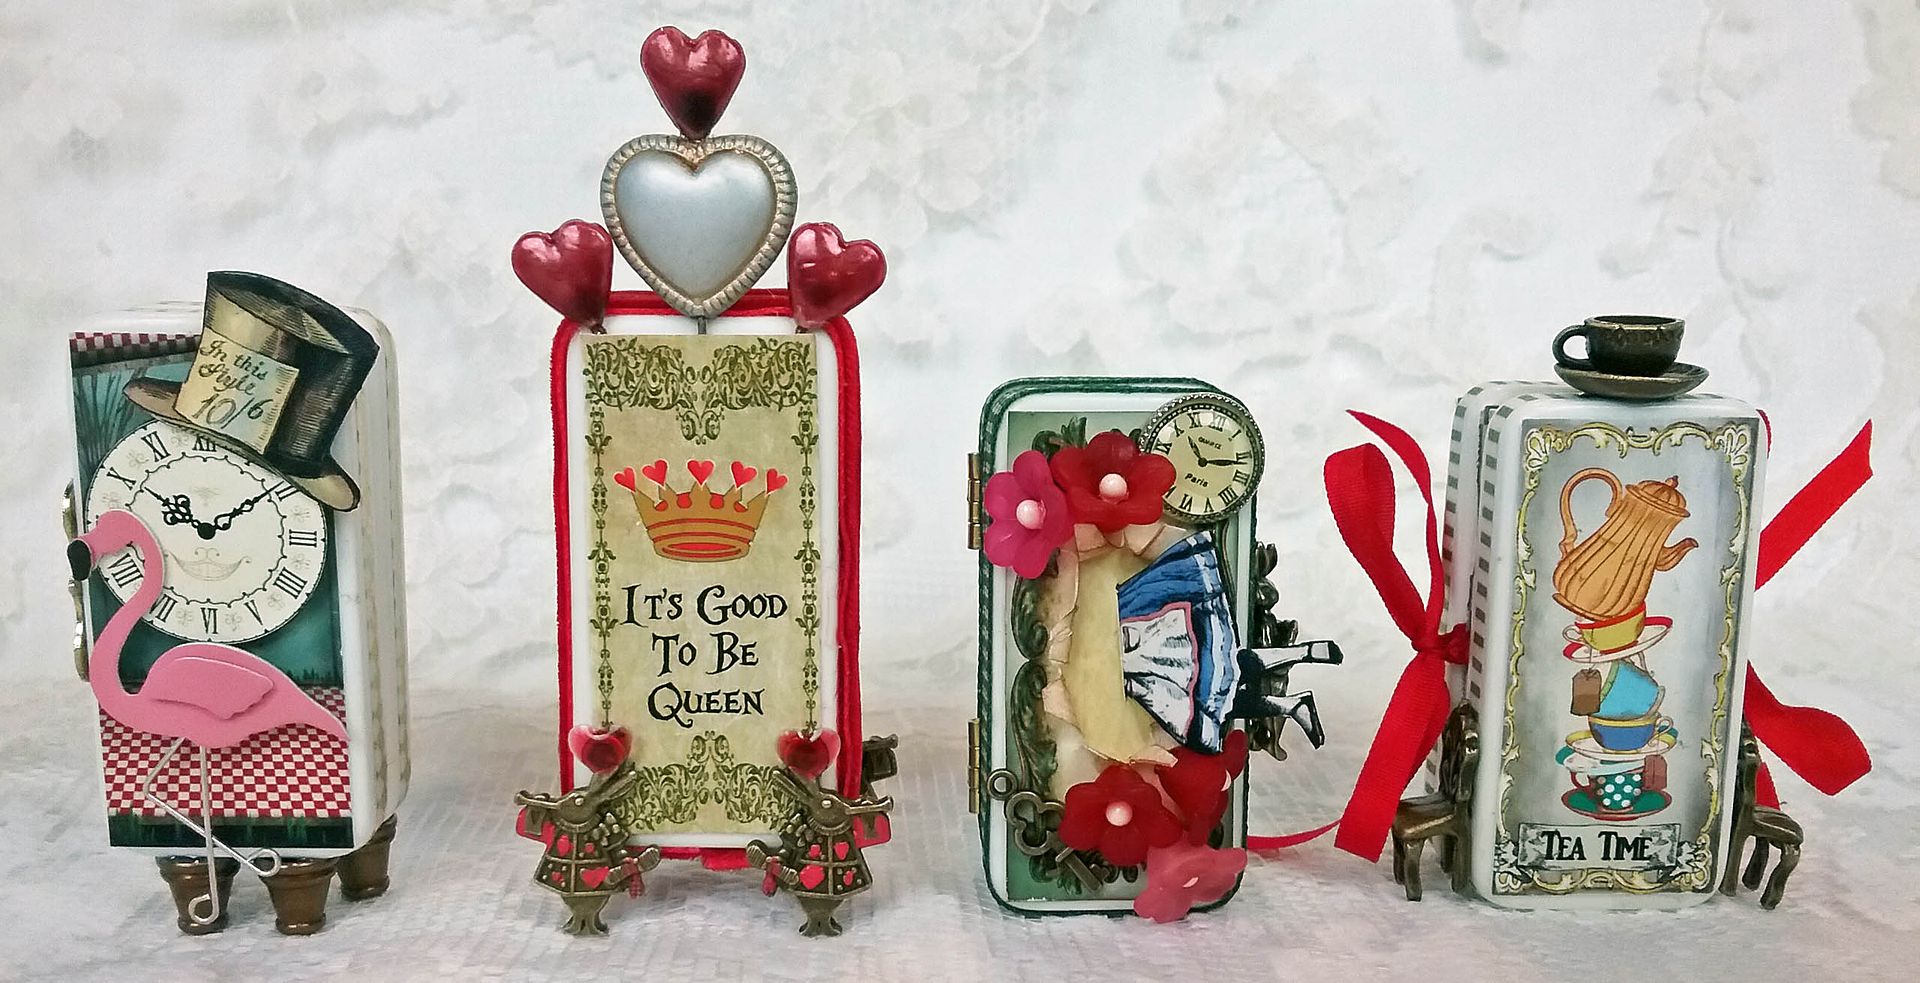
Alice in Wonderland "Down the Rabbit Hole" & Four Alice Themed Domino Books Plus a New Collage Sheet & Digital Image Set

 
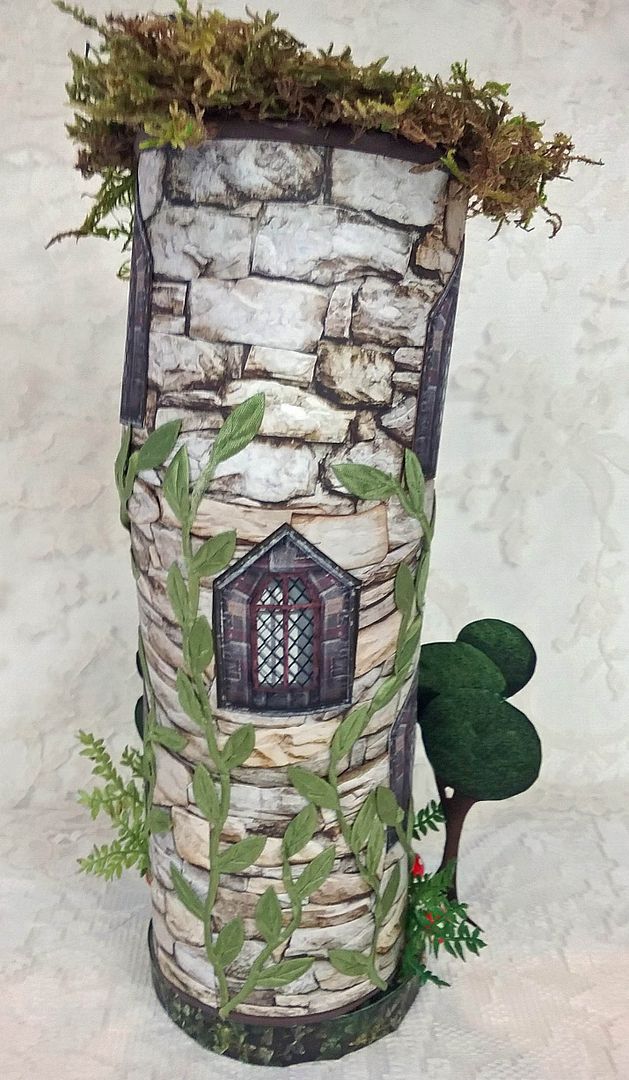
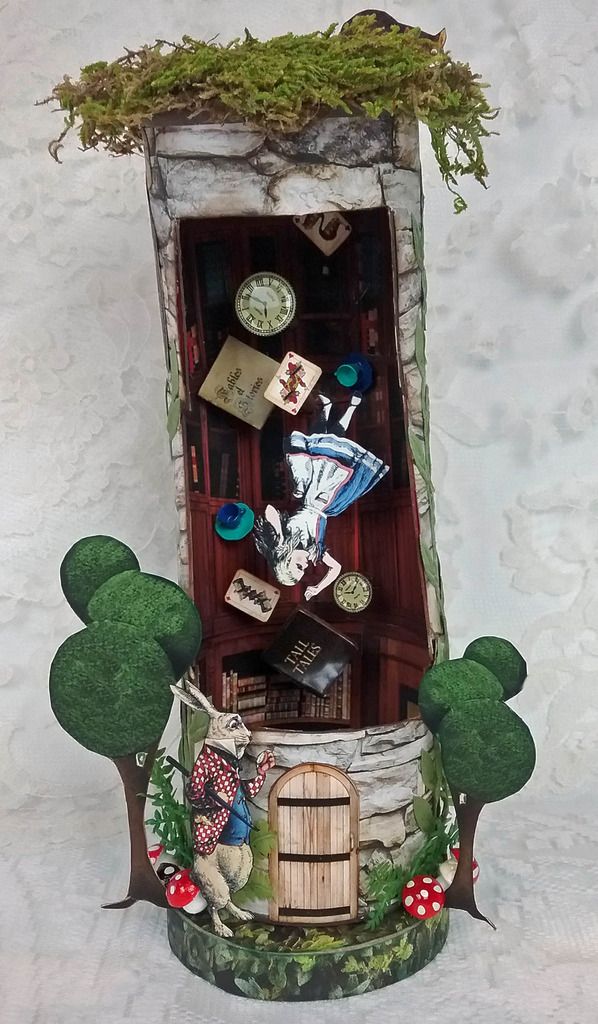
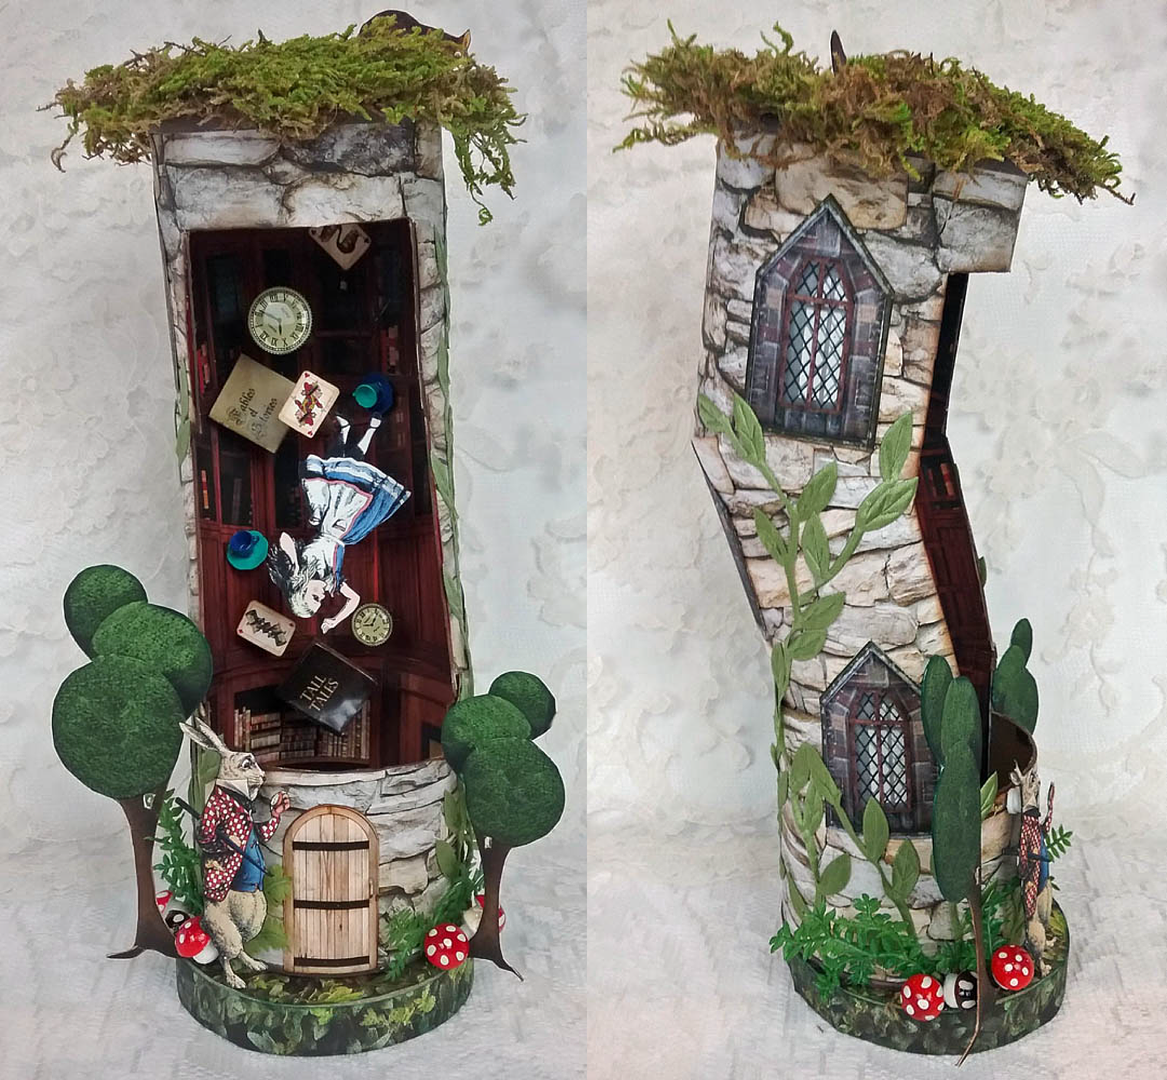
Cut up a Pringles Potato Chip can glue it back together cattywampus, and you get Alice falling down the rabbit hole.  To create the effect of Alice and other objects free-falling down the hole, I used wooden dowels and double-stick tape to suspend and anchor the images and items to the back wall.
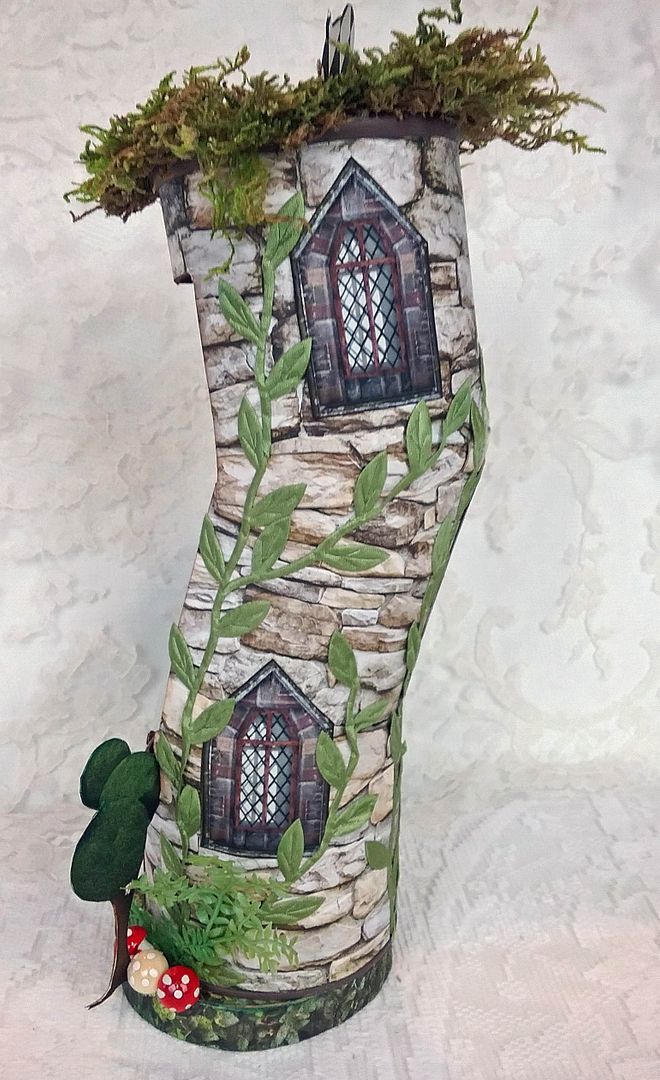
Cobblestone paper, window and door images, leaf ribbons, ferns, and mushrooms decorate the outside.
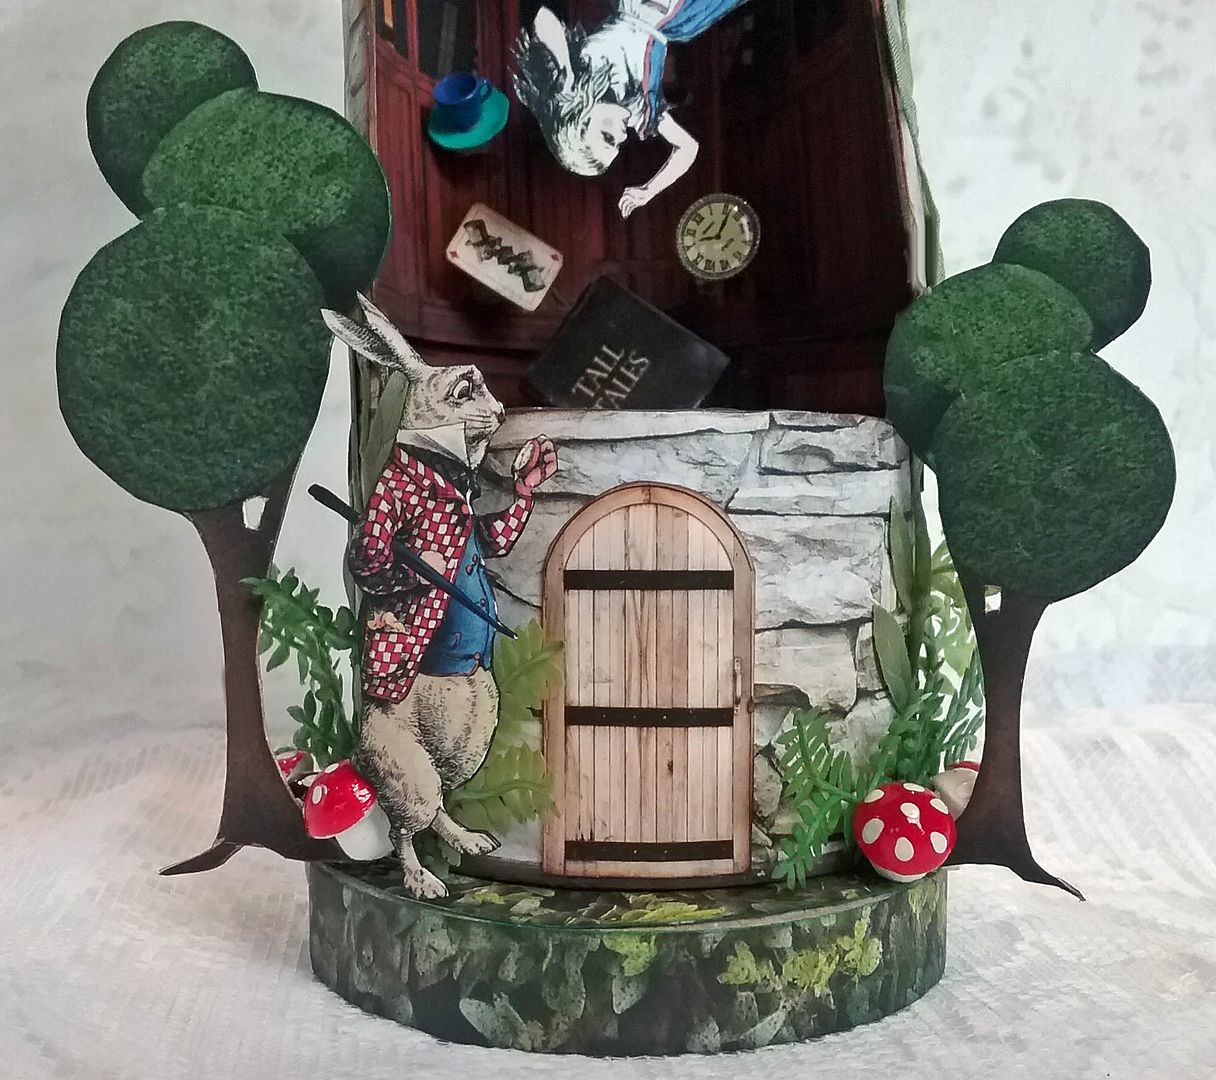
In the front at the bottom, you’ll see the White Rabbit waiting impatiently for Alice at the door.

ALICE DOMINO BOOKS
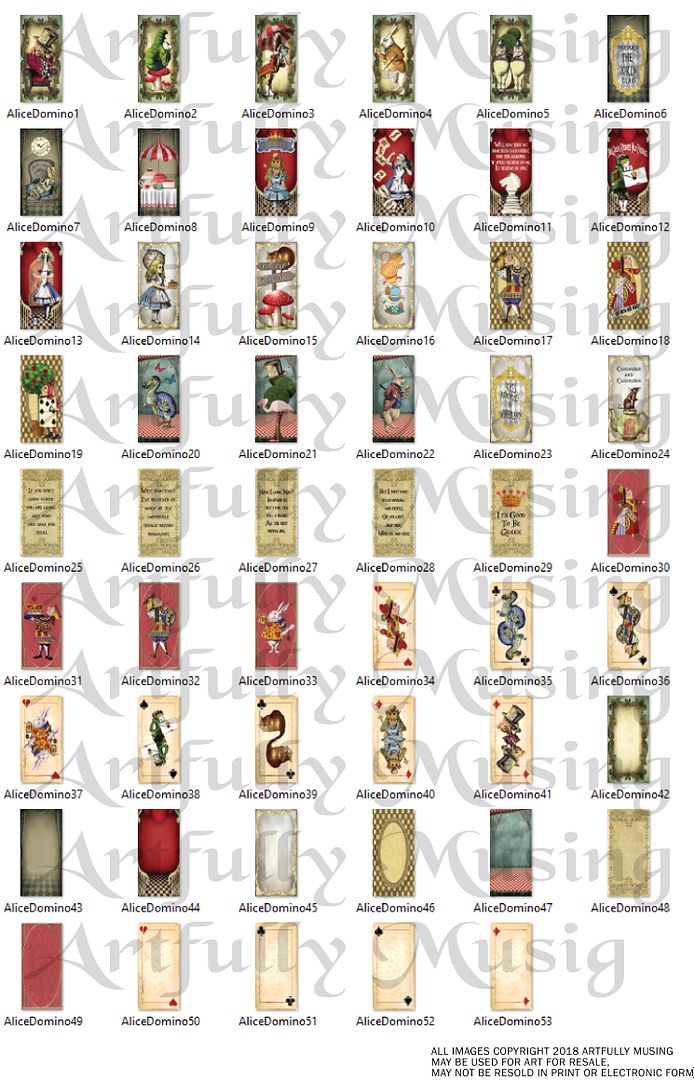
If you are looking for a smaller-scale project, you might want to create an Alice-themed domino book.  Domino books are so easy to quickly put together.  I’ve created a new Alice-themed collage sheet filled with domino panels that are sized for standard 1” x 2” dominoes.  In addition, there is an Alice domino digital image set. I also have 4 sample books to give you some ideas.
This sheet contains 40 Alice in Wonderland-themed panels that are sized to fit a standard 1” x 2” domino.  These panels work great for domino jewelry and books.

This set contains all of the images in the Alice in Wonderland Domino Books Collage Sheet, plus an additional 13 images for a total of 53.  All of the images in this set can be re-sized for your project as they are high-resolution (300dpi) PNG formatted images. 

I chose to keep the dominoes the original white color for all of the domino books.  I thought white worked well with the images; leaving them white was less work (great if you want a fast project).  I used ribbon and paper tape to add color to the dominoes' sides.

6 Impossible Things Domino Book
On the front of this book, I used one of the panels from the collage sheet, a couple of images from the Tea Party Alice Collage Sheet, or you will find the same images in the Tea Party Alice digital image set, plus a layered mini pink flamingo sticker.  I can’t look a pink flamingo and not smile.  Also, notice the raw brass box feet attached to the bottom of the dominoes.
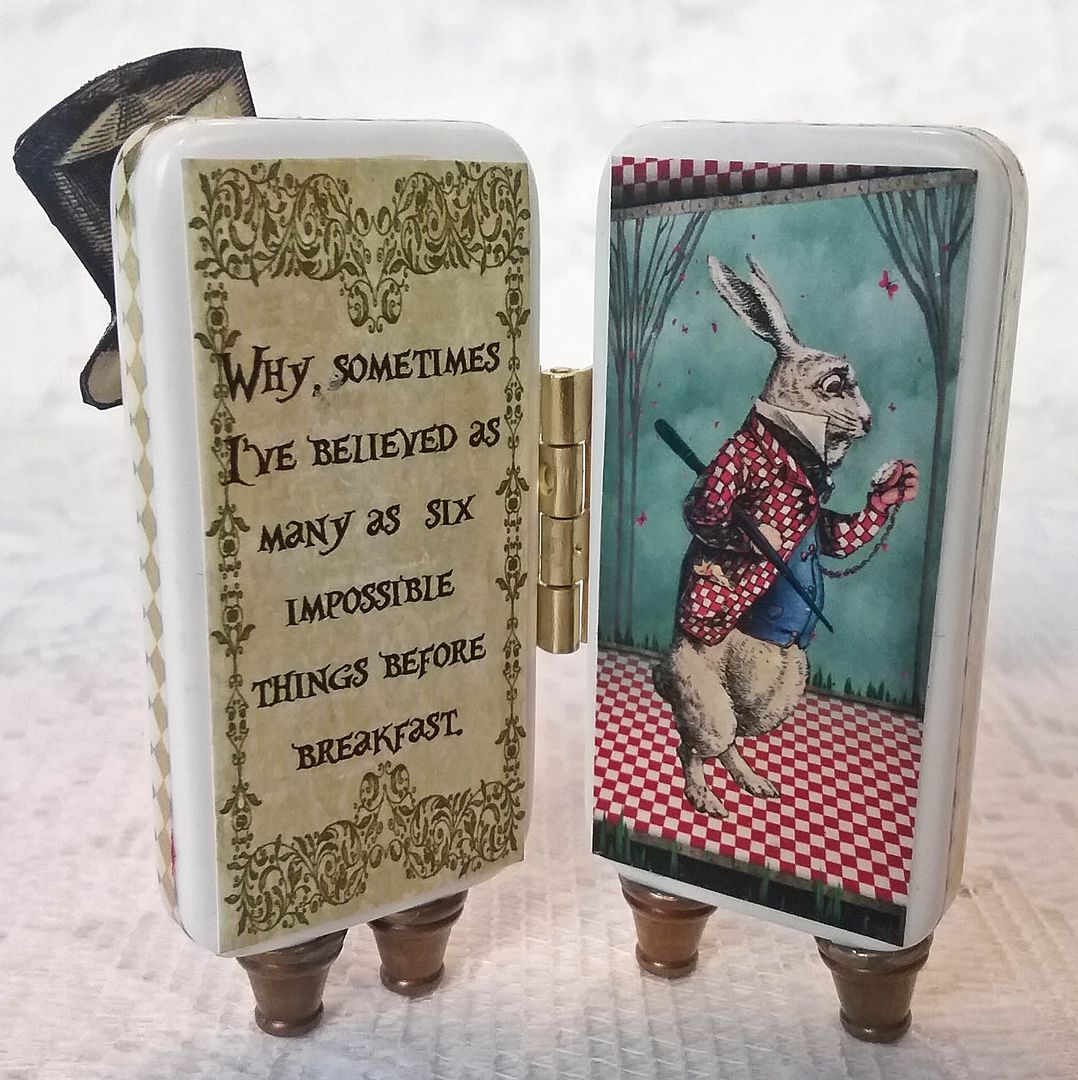
Inside the book, you’ll see two of the panels from the new collage sheet.
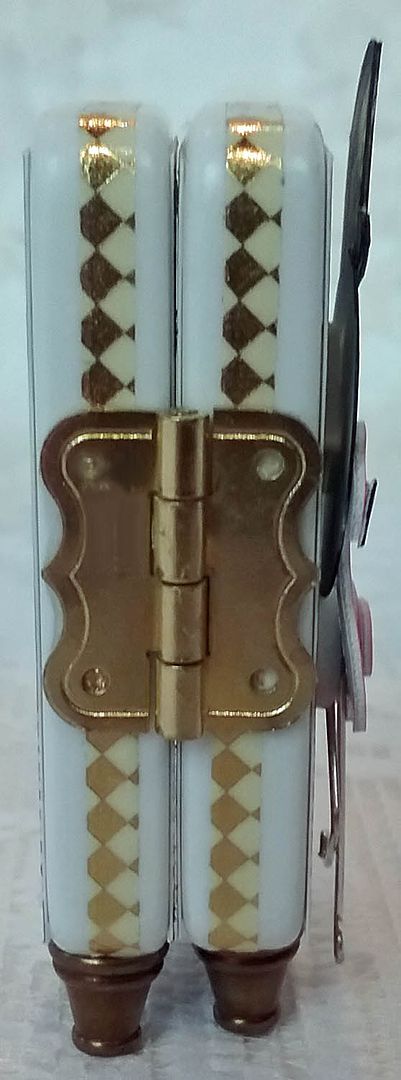
Below is a side view of the book.  I’ve dressed up the sides with diamond paper tape and attached the hinge to the outside of the dominoes.
On the backside is another panel from the new collage sheet.

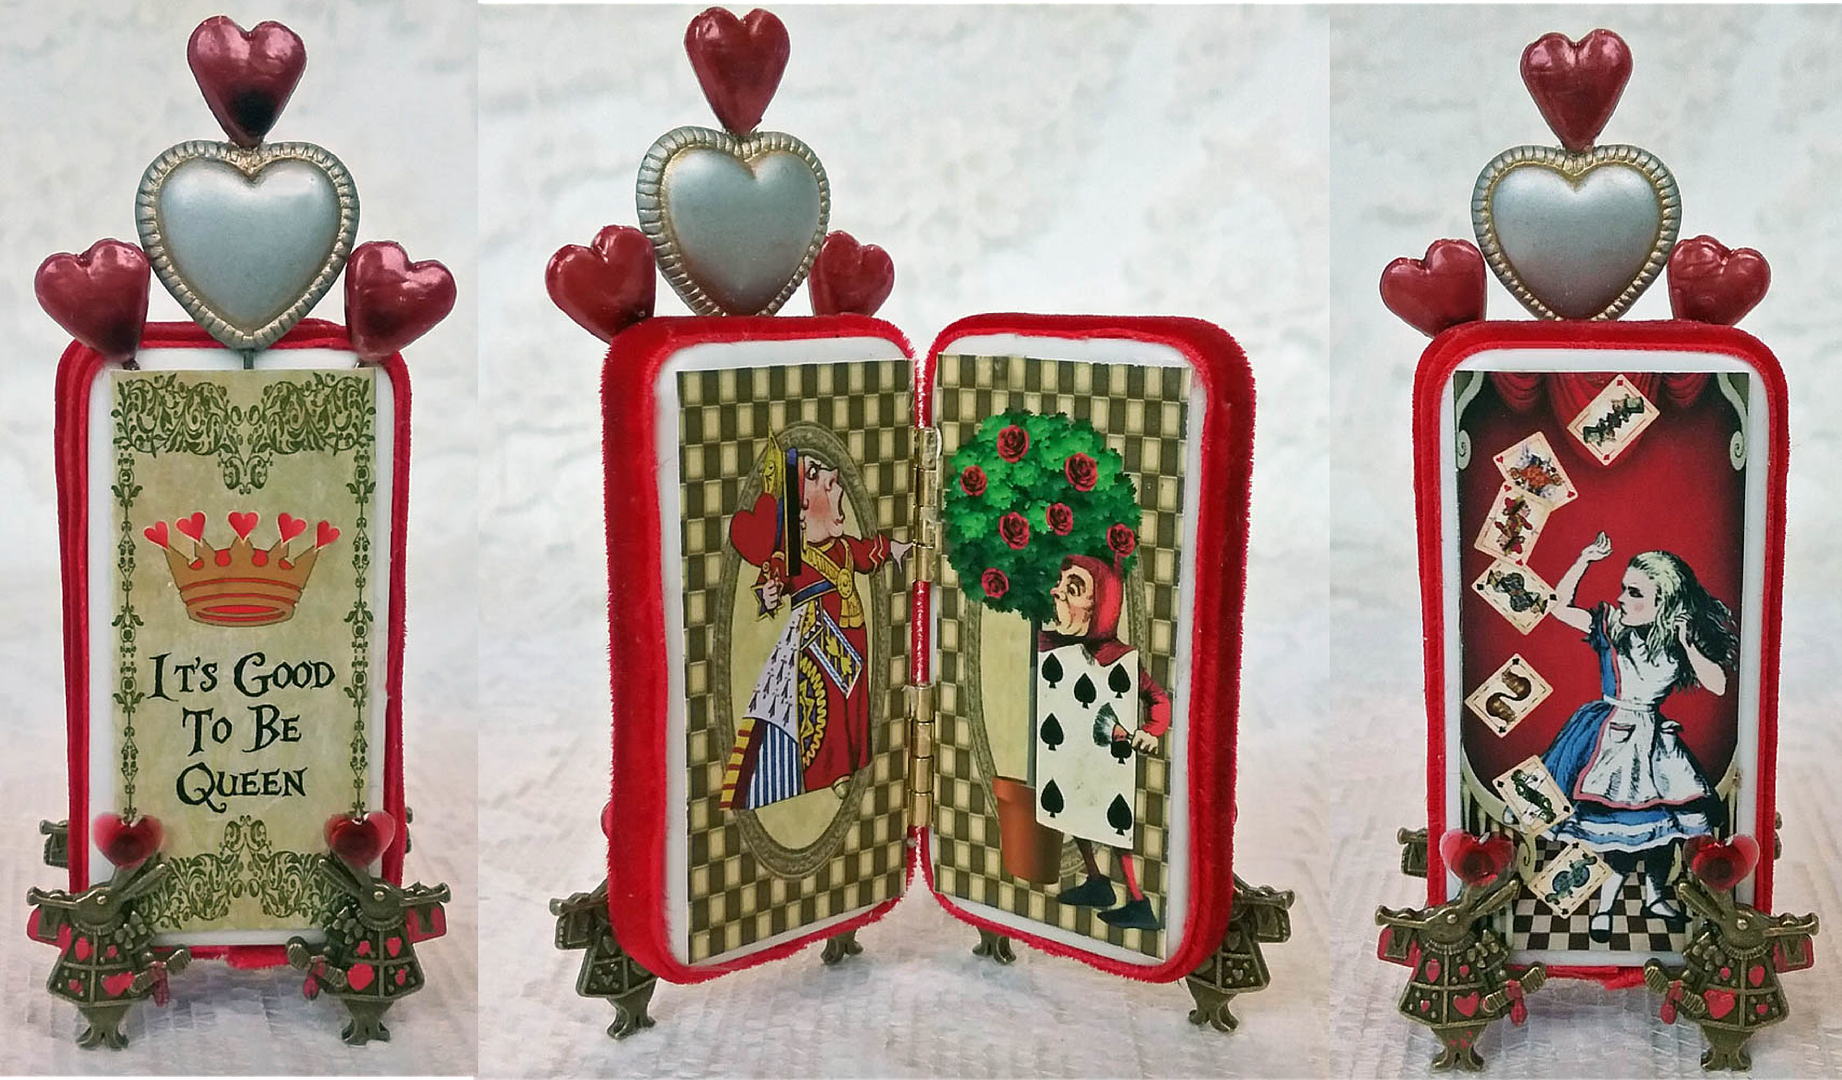
It’s Good to Be Queen Domino Book
I think this one is my favorite of the bunch.  Dominoes may be small, but many surfaces add dimensional elements.  Before attaching a panel from the collage sheet, I glued place heart stick pins.  One of the stick pins is threaded through a puffy heart bead.  On the bottom, I’ve used bronze White Rabbit charms as legs.  
Inside the book are two images from the collage sheet.
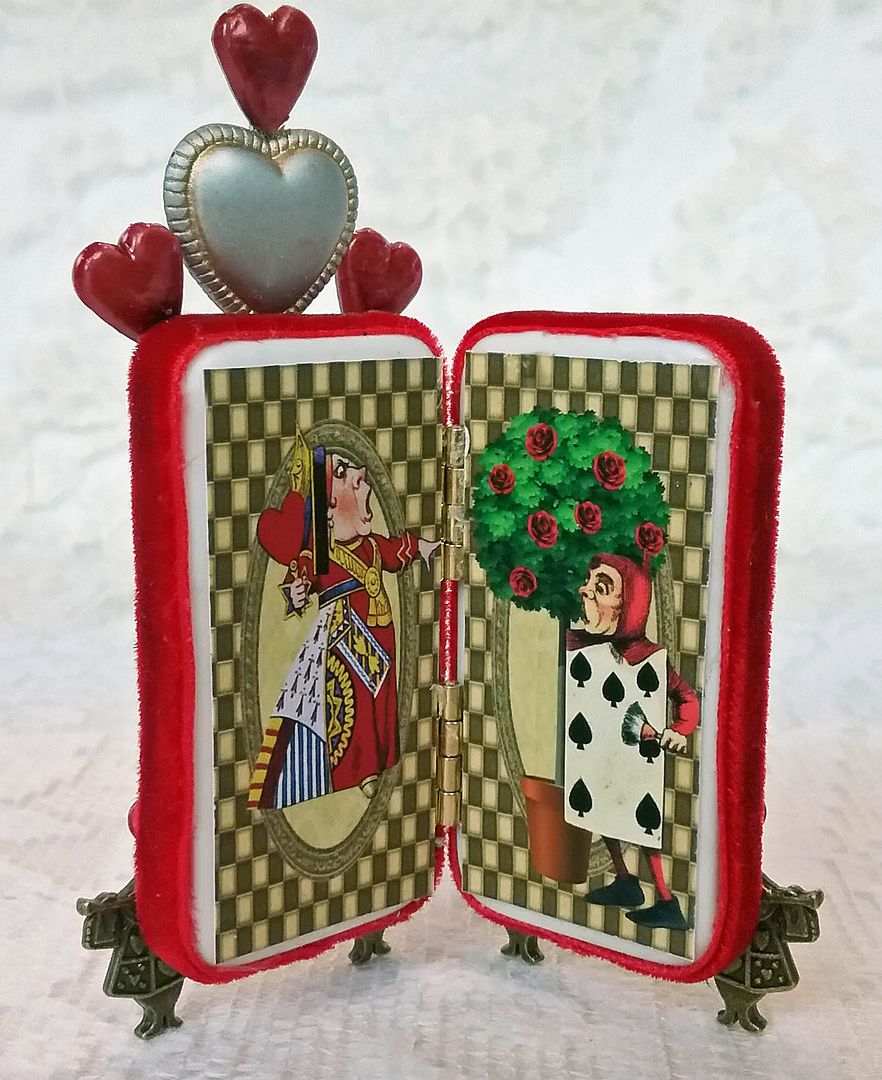
On the sides, I used a red velvet ribbon.  I ran it through my Xyron machine to attach the ribbon, which applies dry adhesive that won’t bleed through the ribbon.  You’ll also notice that the hinges are hidden and can only be seen from the side view.
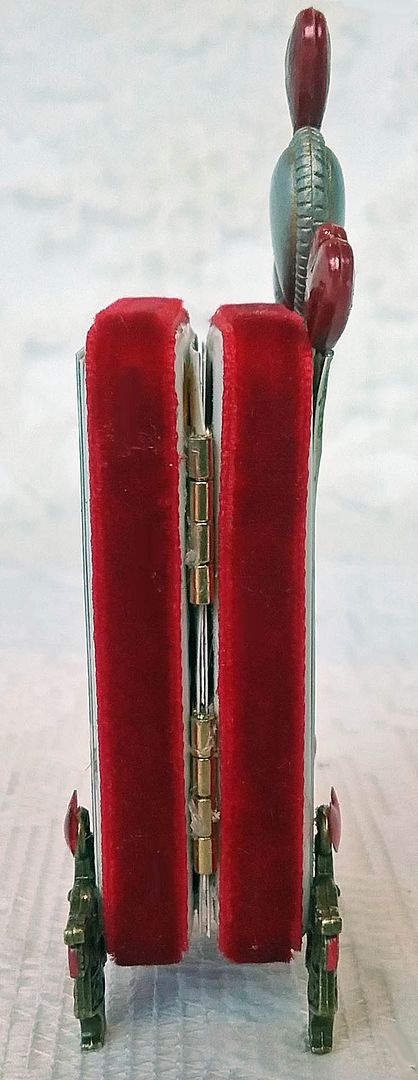
On the back of the book is a panel from the collage sheet.

Down the Rabbit Hole Domino Book
On the front of this book are acrylic flowers, a key, and a clock that surround a hole that Alice is falling into.  The flowers and key are from the Alice in an Altoids Tin Kit from Alpha Stamps, which is full of Alice-themed embellishments.
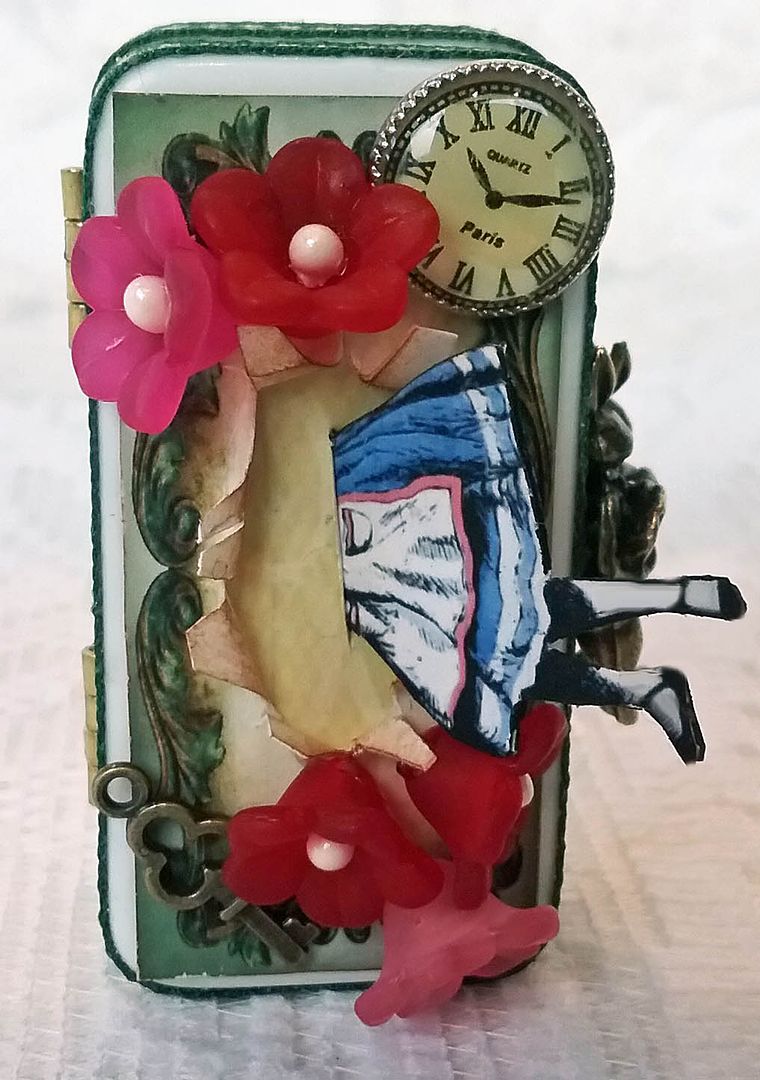
Below you get a better view of how the front is put together.  I used one of the background panels from the new digital image set.  I cut a hole in the panel and peeled back the edges of the hole.  Next, I glued the panel to a piece of decorative paper and cut a slit in the hole, which is where I inserted the partial image of Alice.
I used ribbon for this book to decorate the edges and attached two bronze 3D White Rabbit charms.
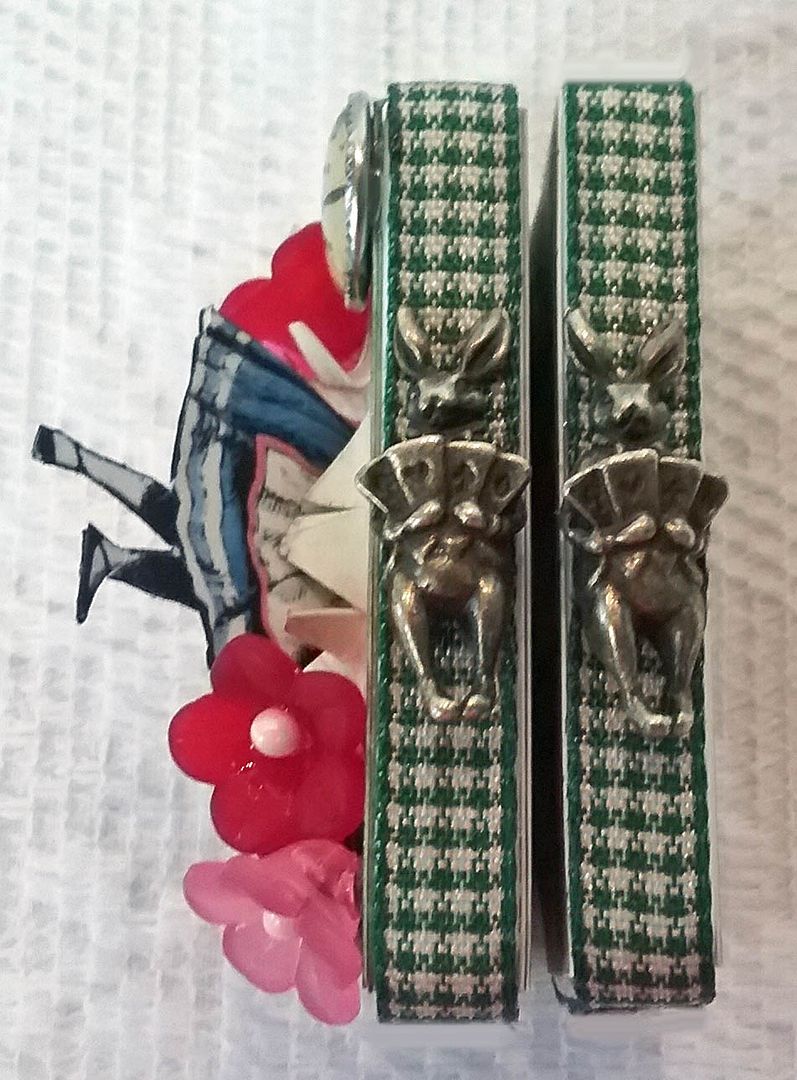
Inside are two panels from the collage sheet.
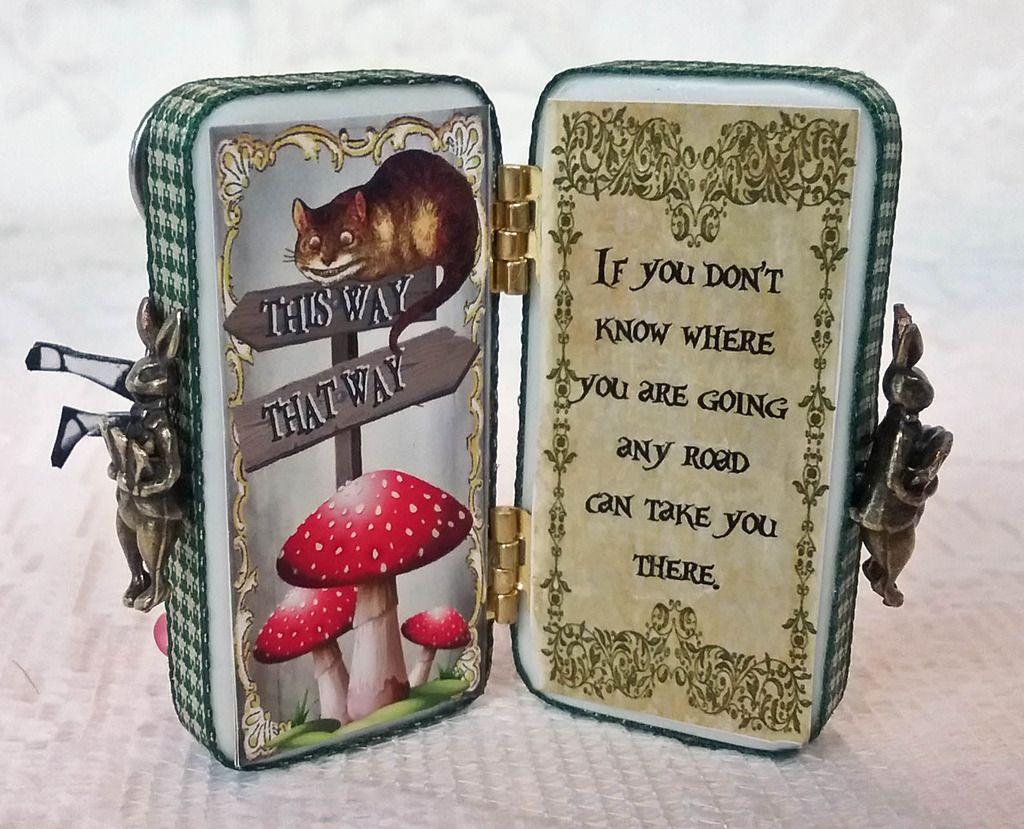
The hinges are hidden just as with the “It’s Good to Be Queen” domino book.
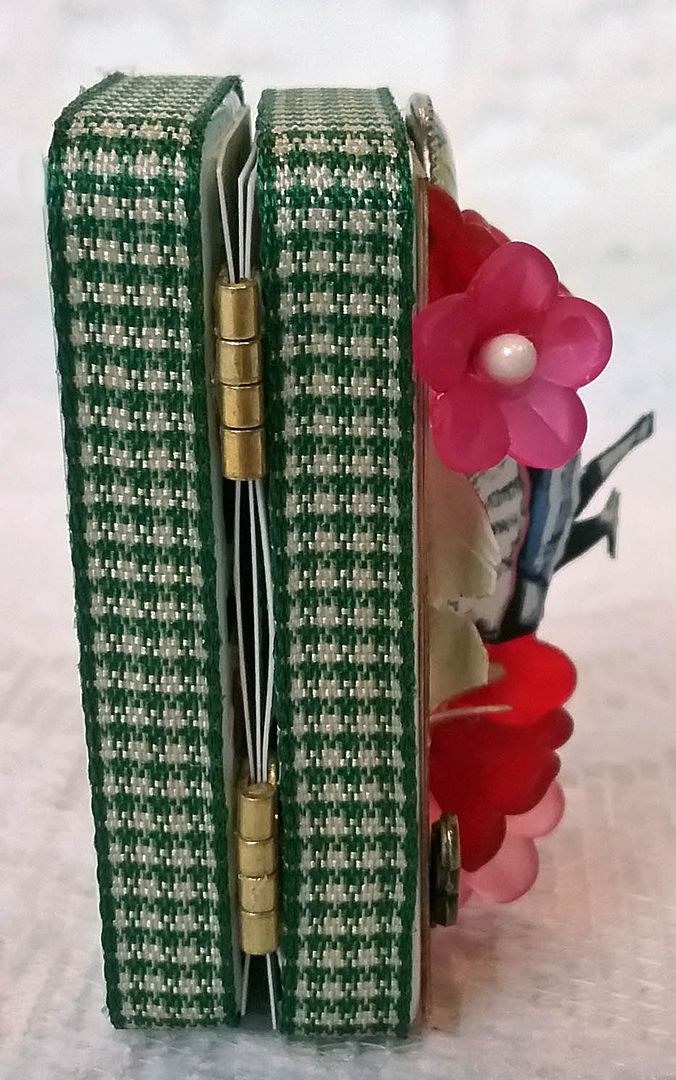
To hide the hinges, glue them to the inside of the dominoes before adding the panels.
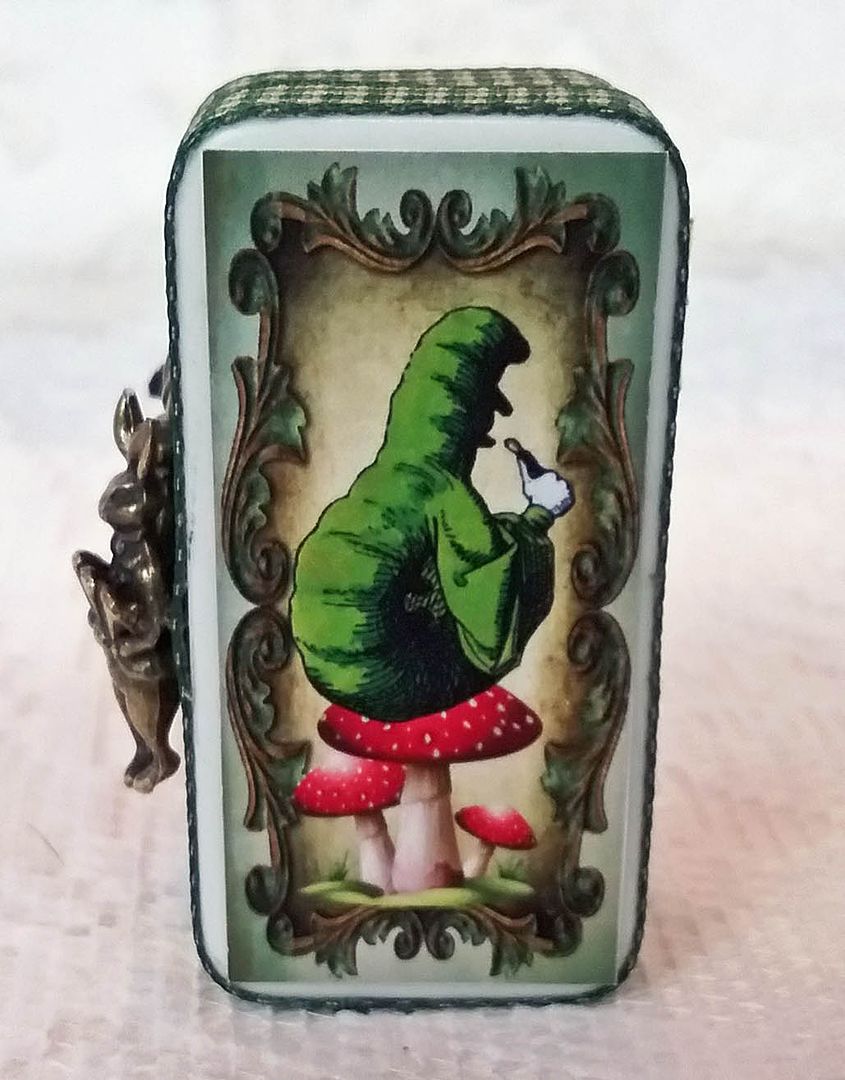
On the back is another image from the collage sheet.
Tea Time Domino Book
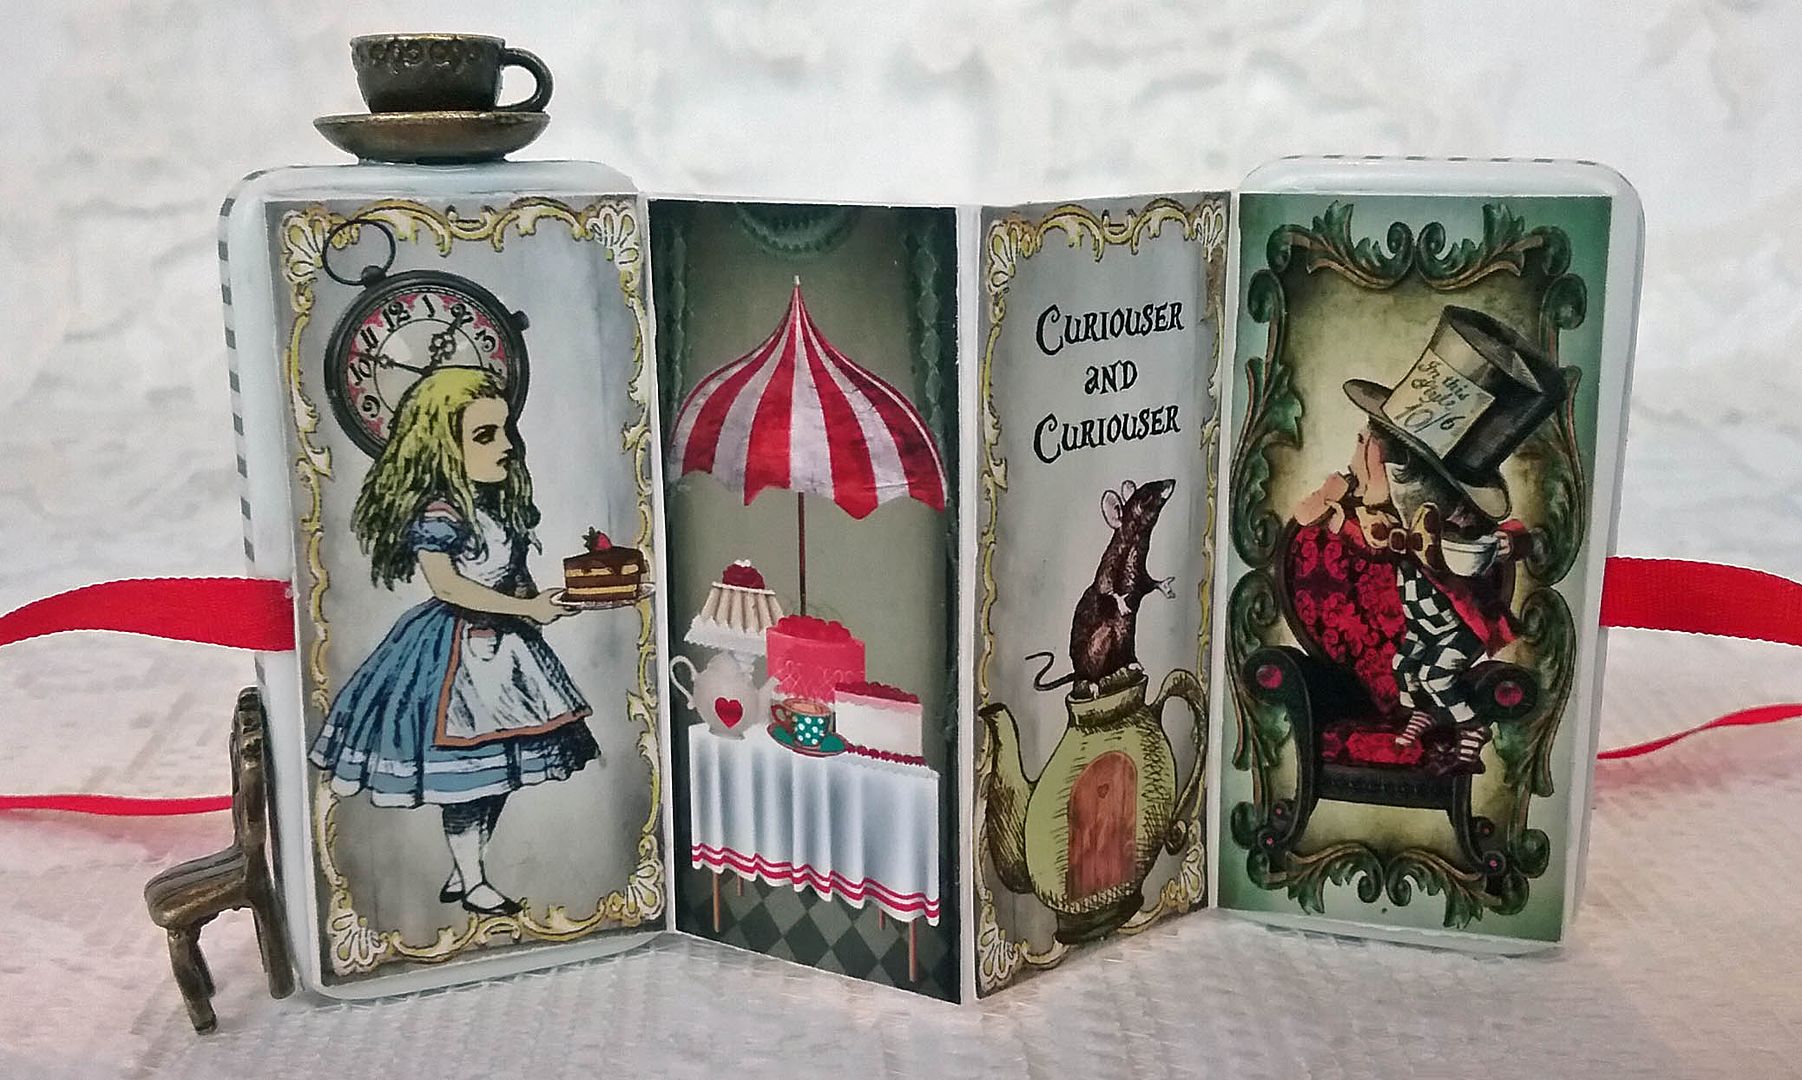
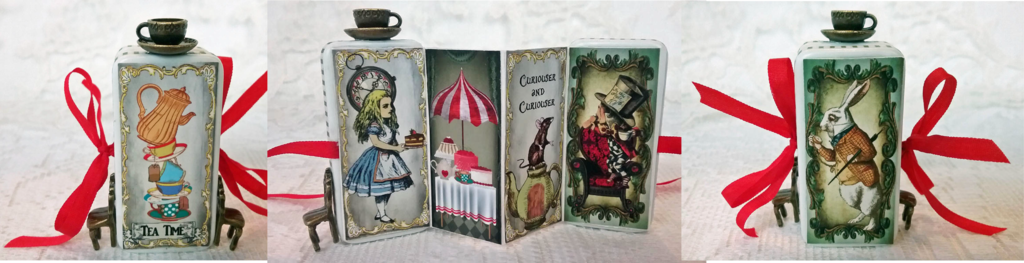
This book is different from the others in that it has a ribbon on each that acts as the closure, and inside are accordion folded pages.
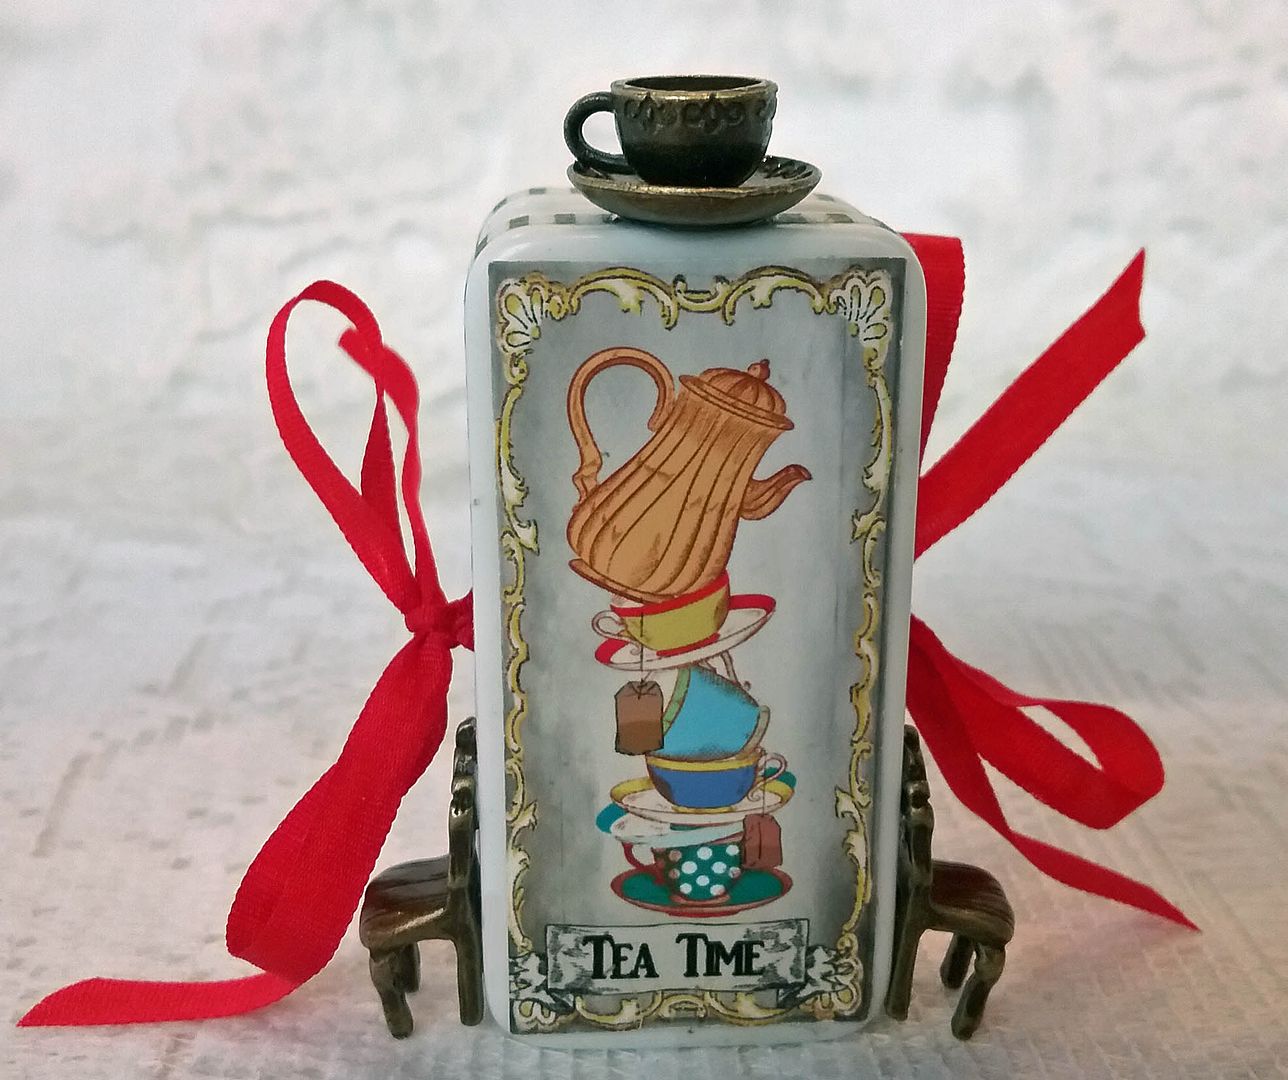
Notice the metal chair pendants attached to each side of the front domino and the teacup and saucer on the top.  Inside are a series of panels from the collage sheet.  You can have as many panels as you like as long as it is an even number.
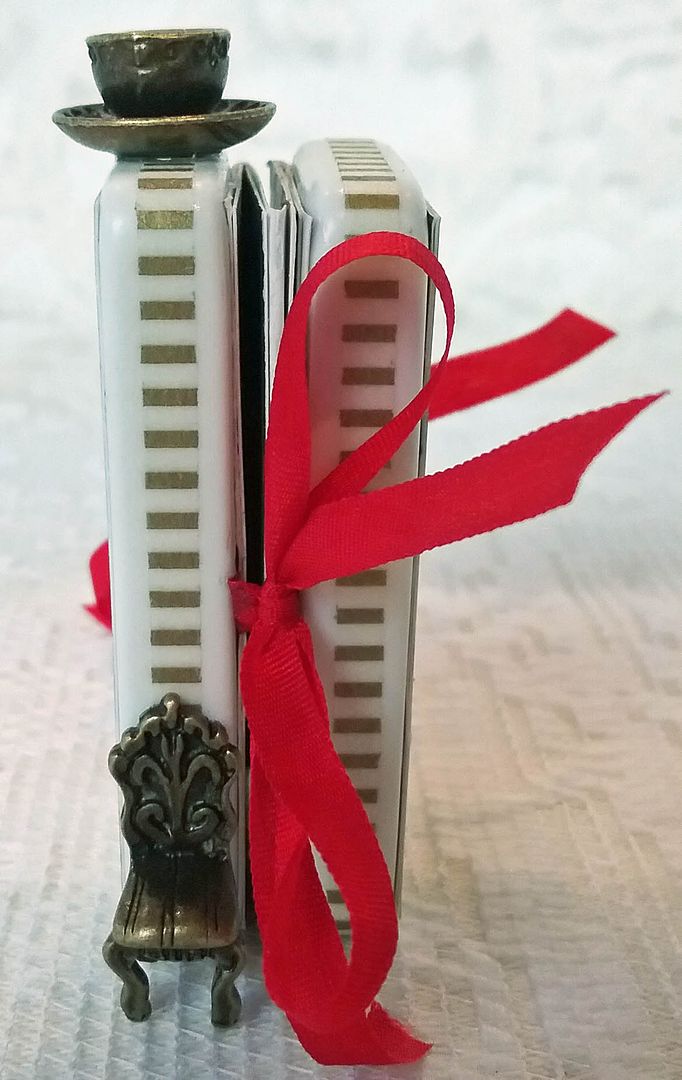
Below is a side view of the cup and chair.  You can also see that I used gold-striped paper tape to decorate the sides.
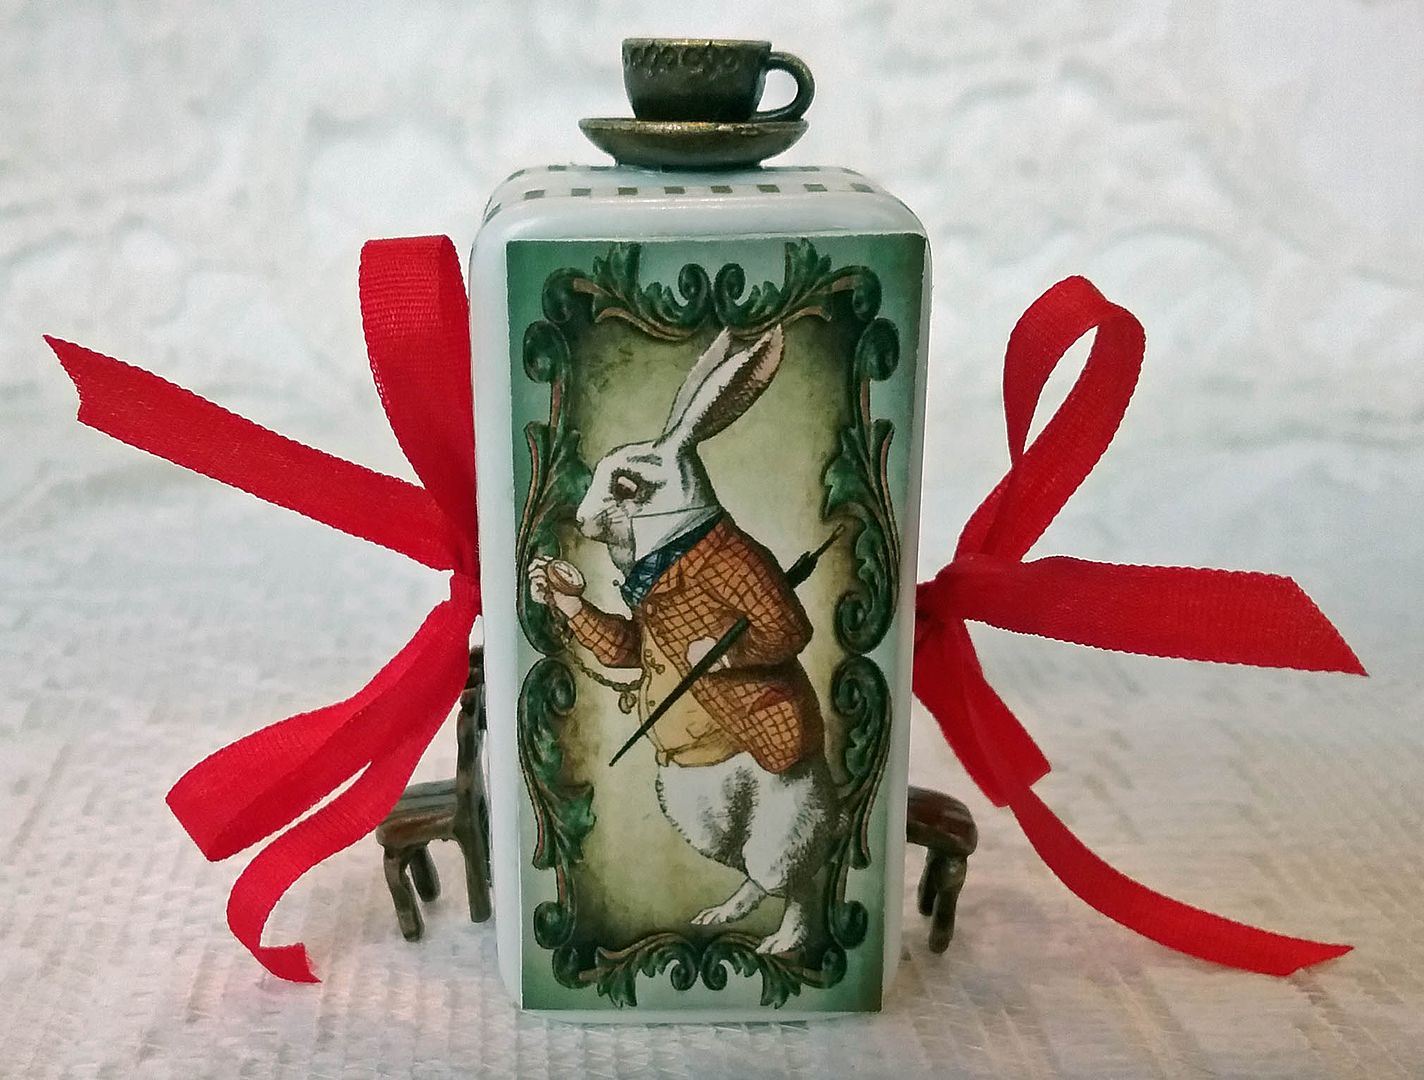
On the back is a White Rabbit panel from the collage sheet.
DOWN THE RABBIT HOLE (altered Pringles can) TUTORIAL
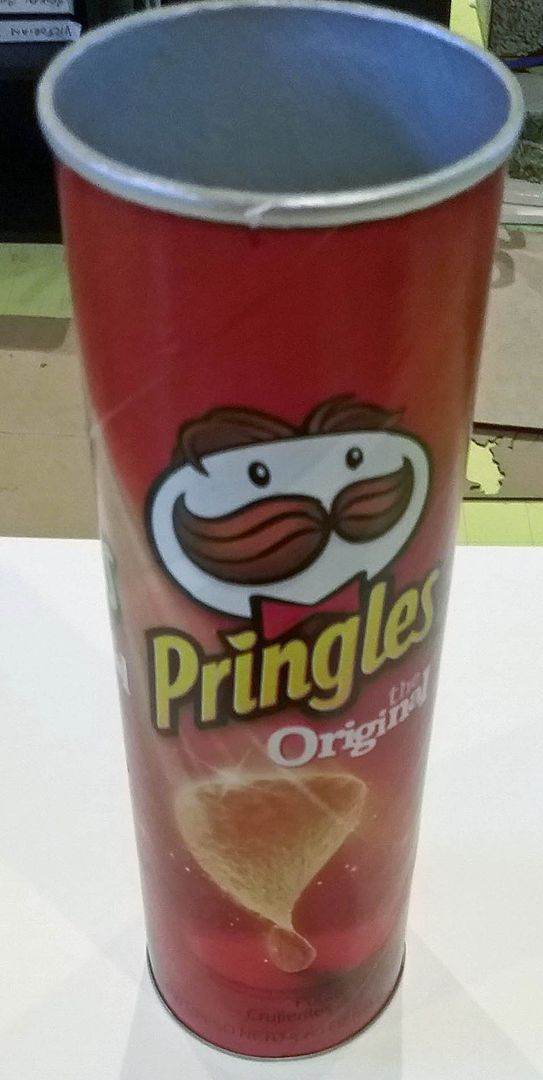
Start by cutting a long rectangular hole on one side.  I found that the nutrition label edges were a good guide for the long sides of the hole.  Leave approximately 1 inch on the top and 2 1/4 inches on the bottom.
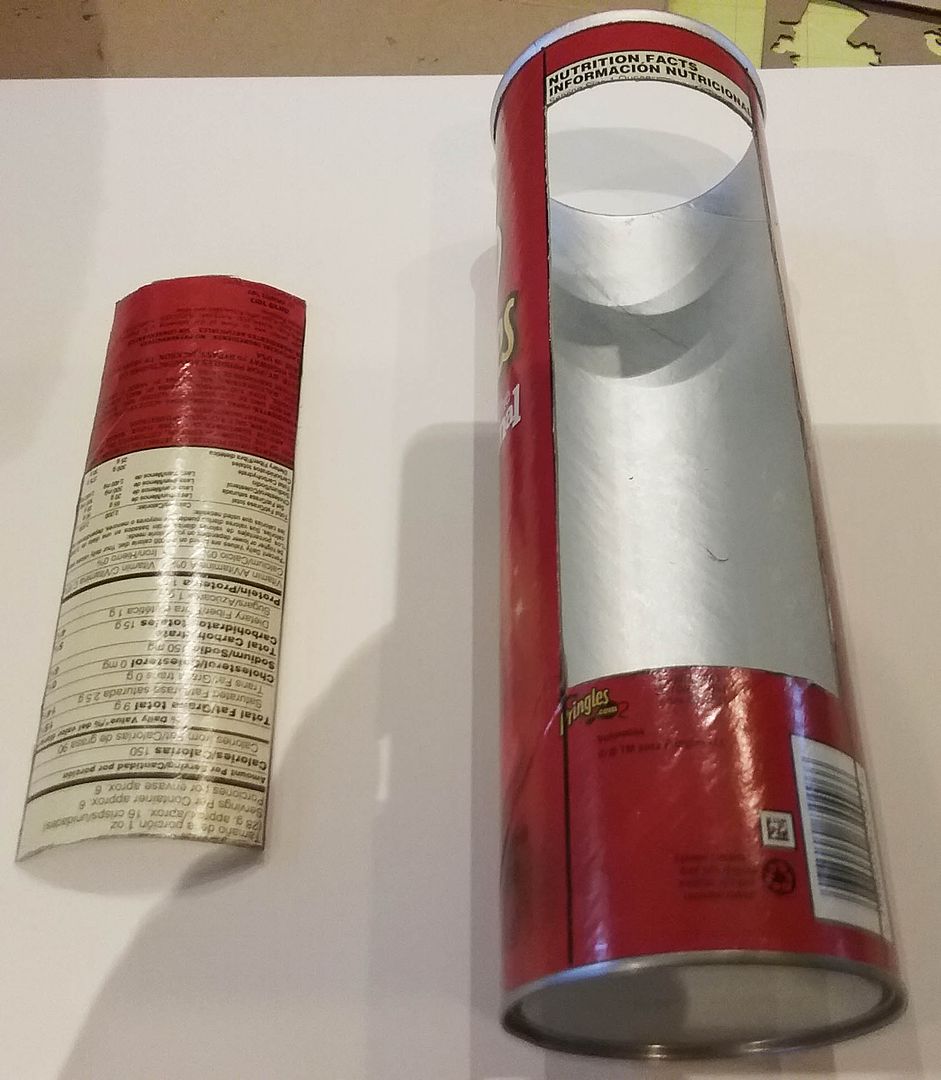
Next, you are going to cut the can into 3 pieces.  The top piece should be approximately 3 inches tall, and the bottom piece should be approximately 2 3/4 inches tall.
To make the can cattywampus, you need to cut the middle piece at angles on each end.  First, insert the middle piece at an angle into the top piece using the top piece and the middle piece.
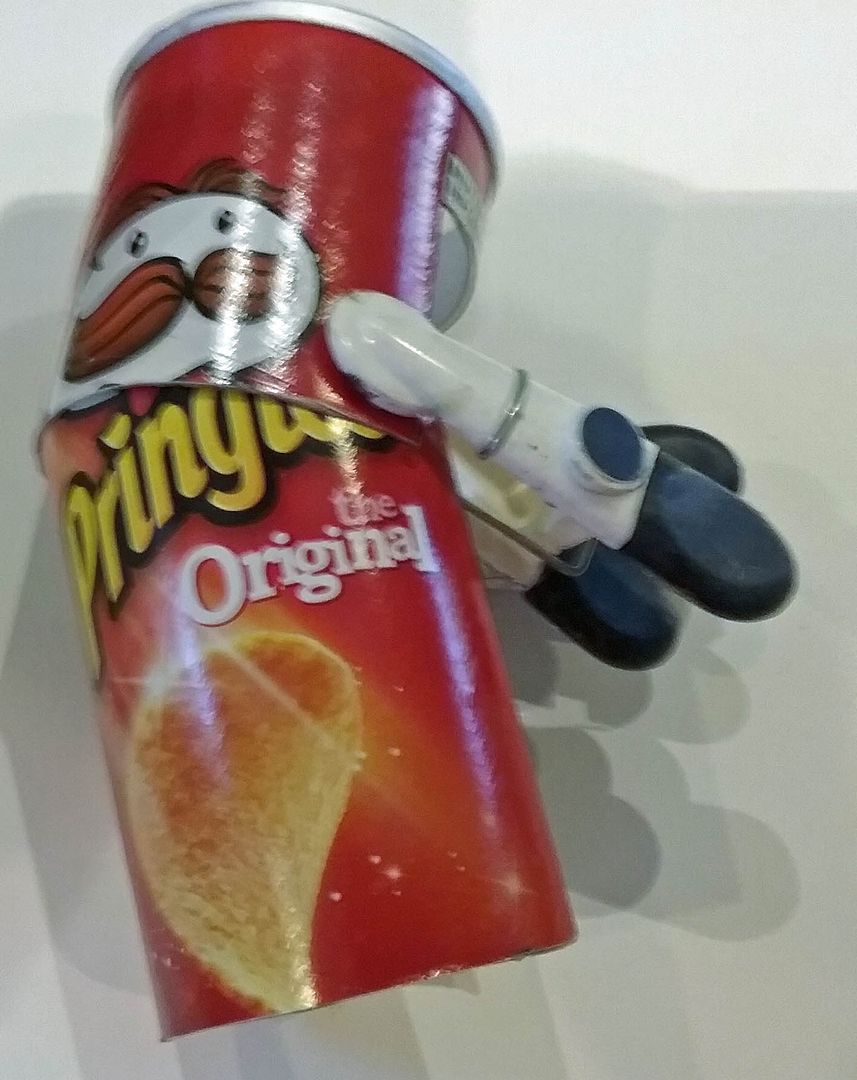
 
Mark a cut line on the middle piece using the edge of the top piece as a guide.  Note how I have used a clip to keep the pieces in place so that I can mark the cut line.
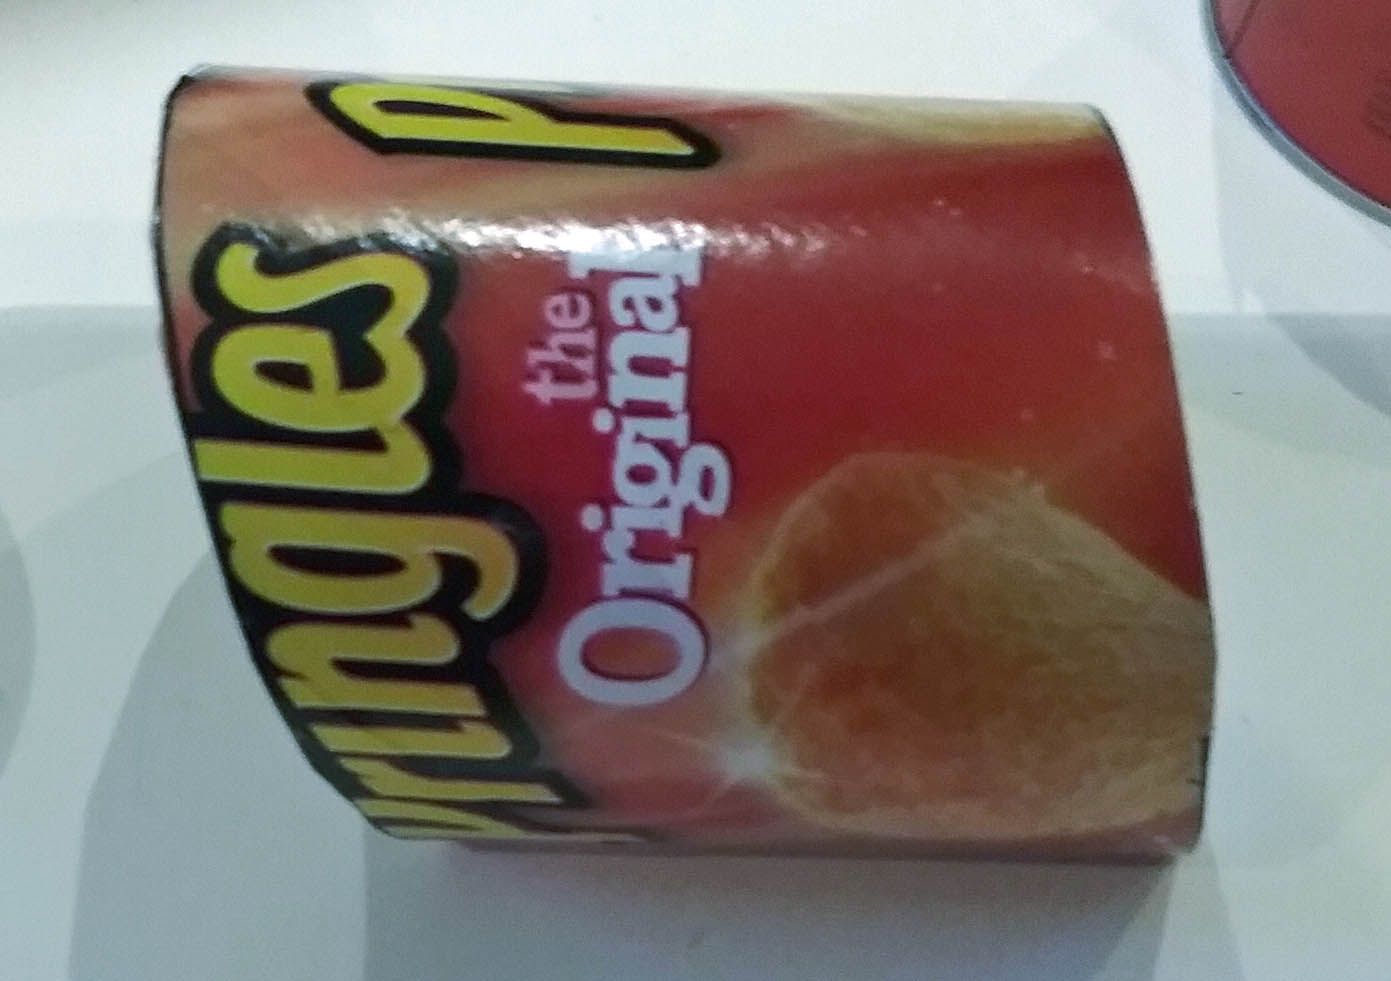
Next, repeat the same process with the middle and bottom pieces.  You should have two angled cut lines on the middle piece.  Cut away the marked sections on the middle piece.  NOTE:  I made the angle on the top more severe than the angle on the bottom.
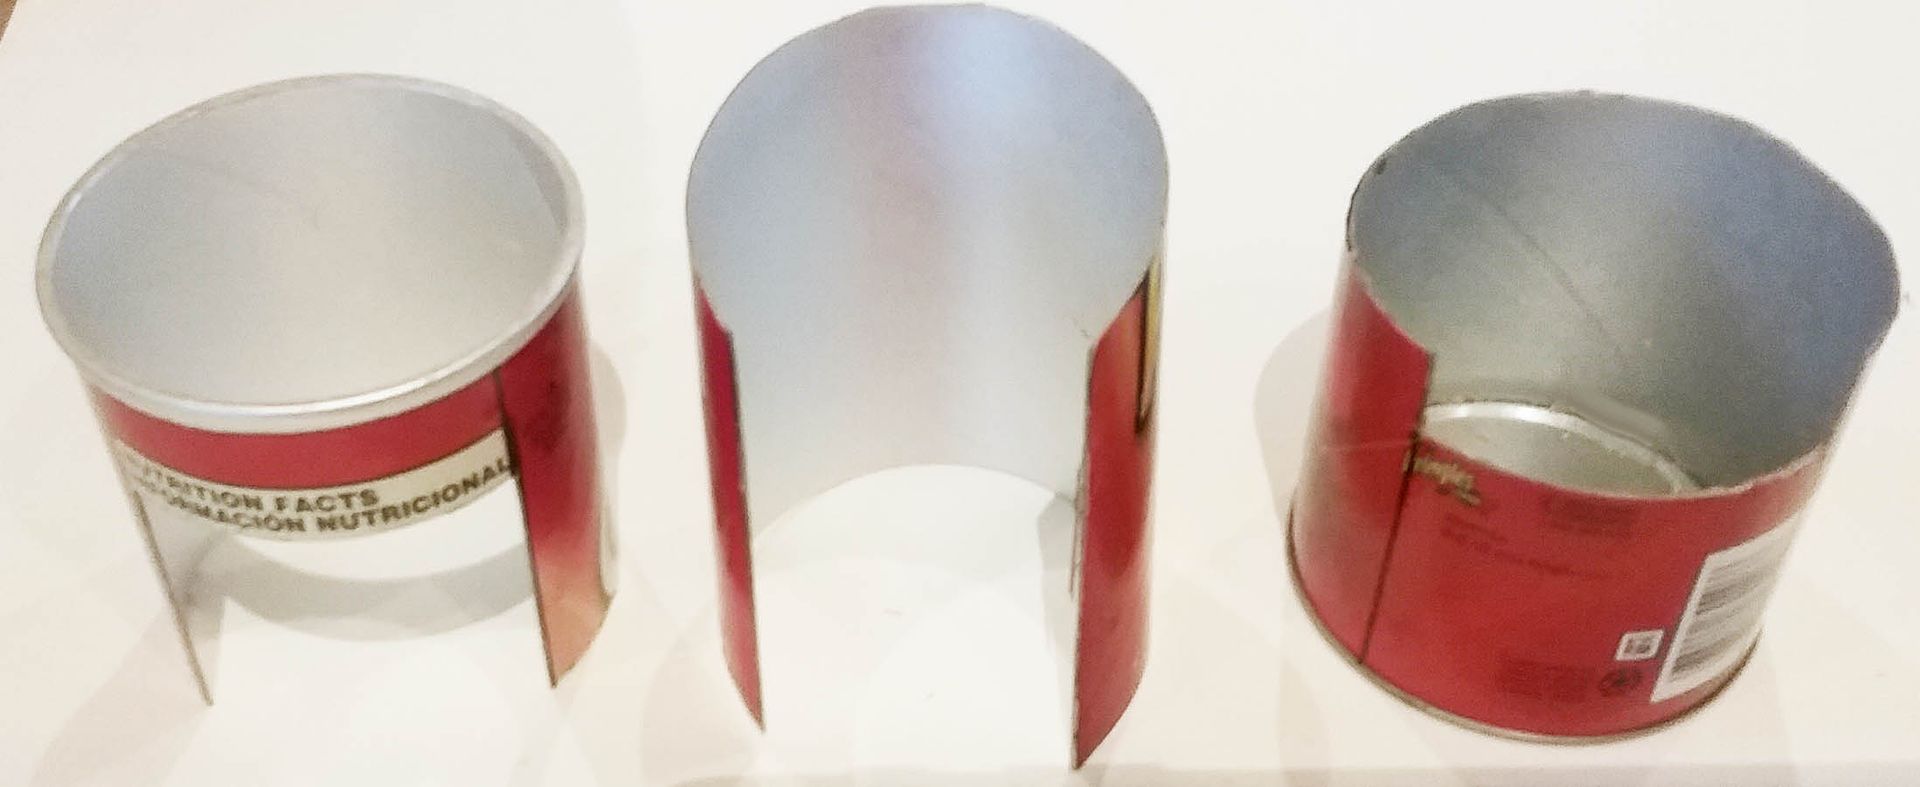
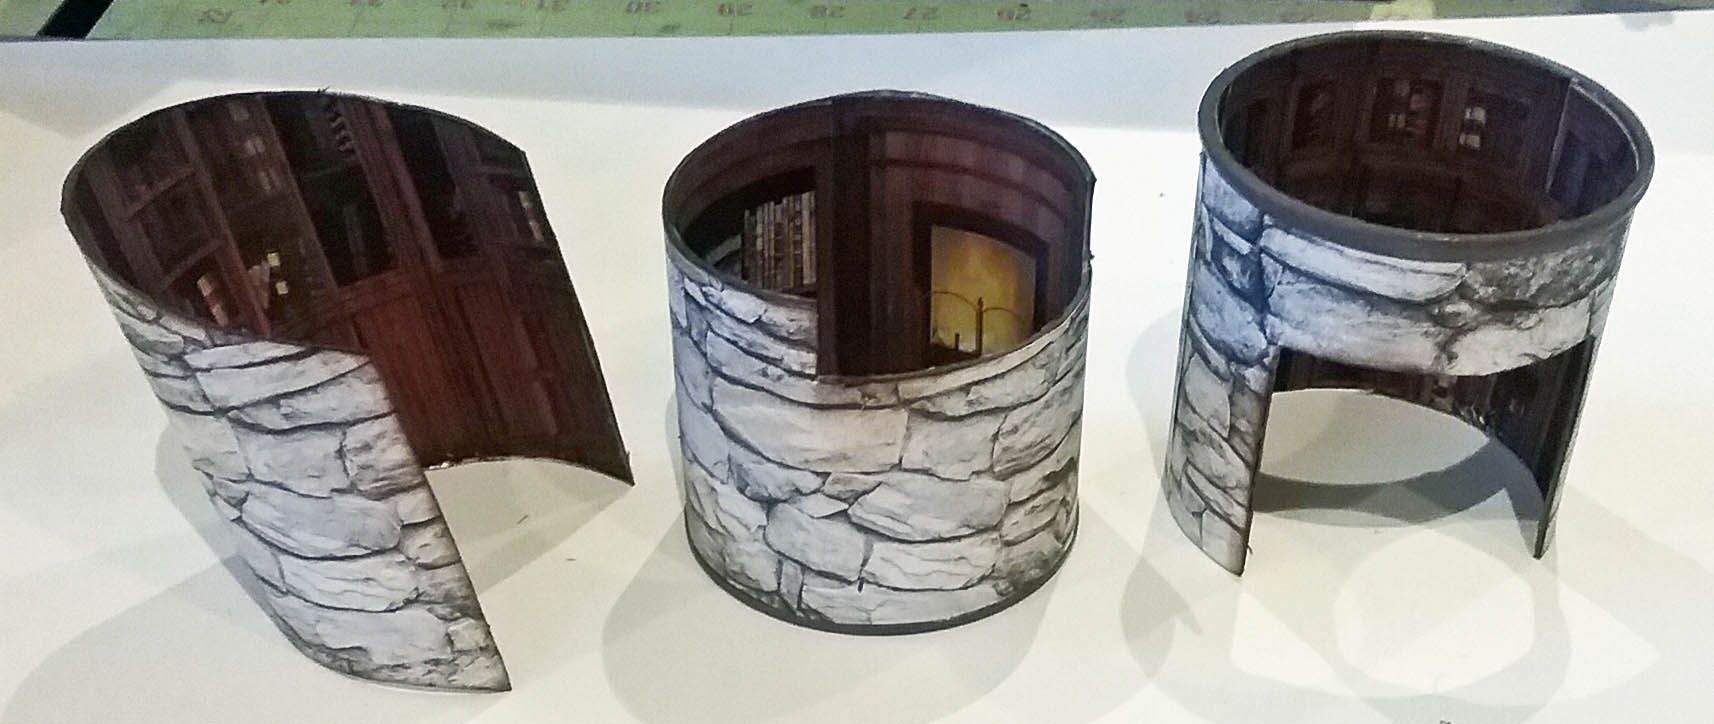
Below you can see the three pieces.  The bottom and top pieces are cut straight, and the middle piece is cut at an angle on the top and bottom.
Next, paper the outside and the inside of each piece.  I used cobblestone scrapbook paper on the outside and an image of a library from the Steampunk Time Machine digital image set.  Notice that I painted the top and bottom metal rims brown.
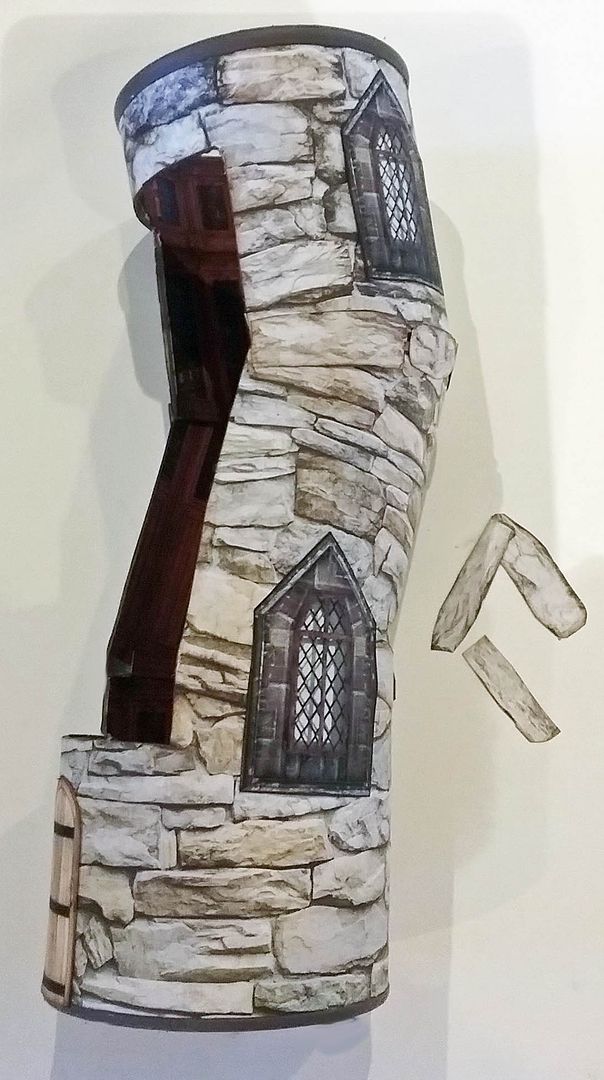
Glue the pieces together, matching the edges.  To hide and blend the seams where the pieces are connected, I cut out stones from the paper and glued them on the seams.  Notice how I added windows to the outside, which can be found on the More Old Windows Collage sheet.
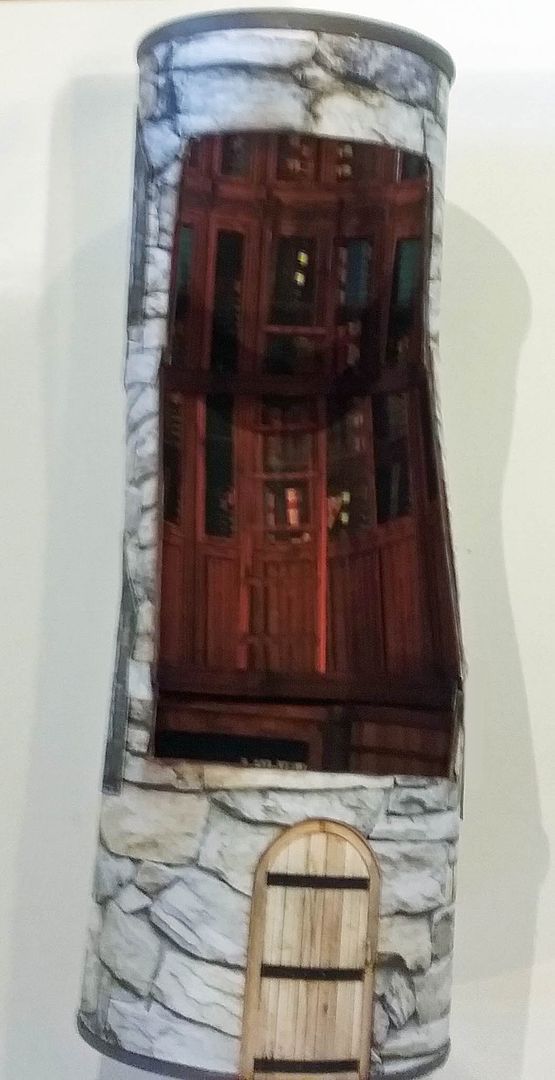
On the inside, I cut strips from the library image and used them to hide the seams on the inside.
To attach the images and object inside and to give them the appearance of floating, I used wooden dowels and double stick tape to pop them out from the walls and to secure them in place.  I cut the dowels at various lengths.  When you attach them to the wall, think about the angle you will be looking at as you view the piece.  Use this to determine where to attach the image or item so that you will not see the dowel when you look in the opening.  For smaller items like the card and teacups, I used double-stick tape. 
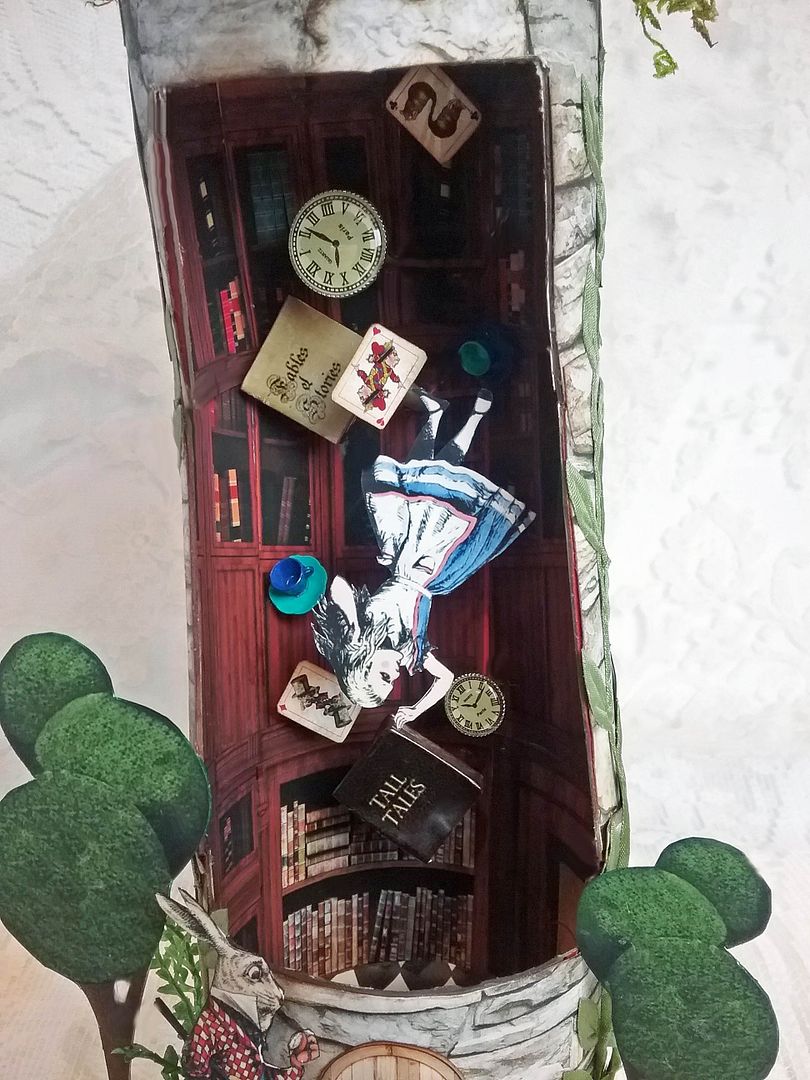
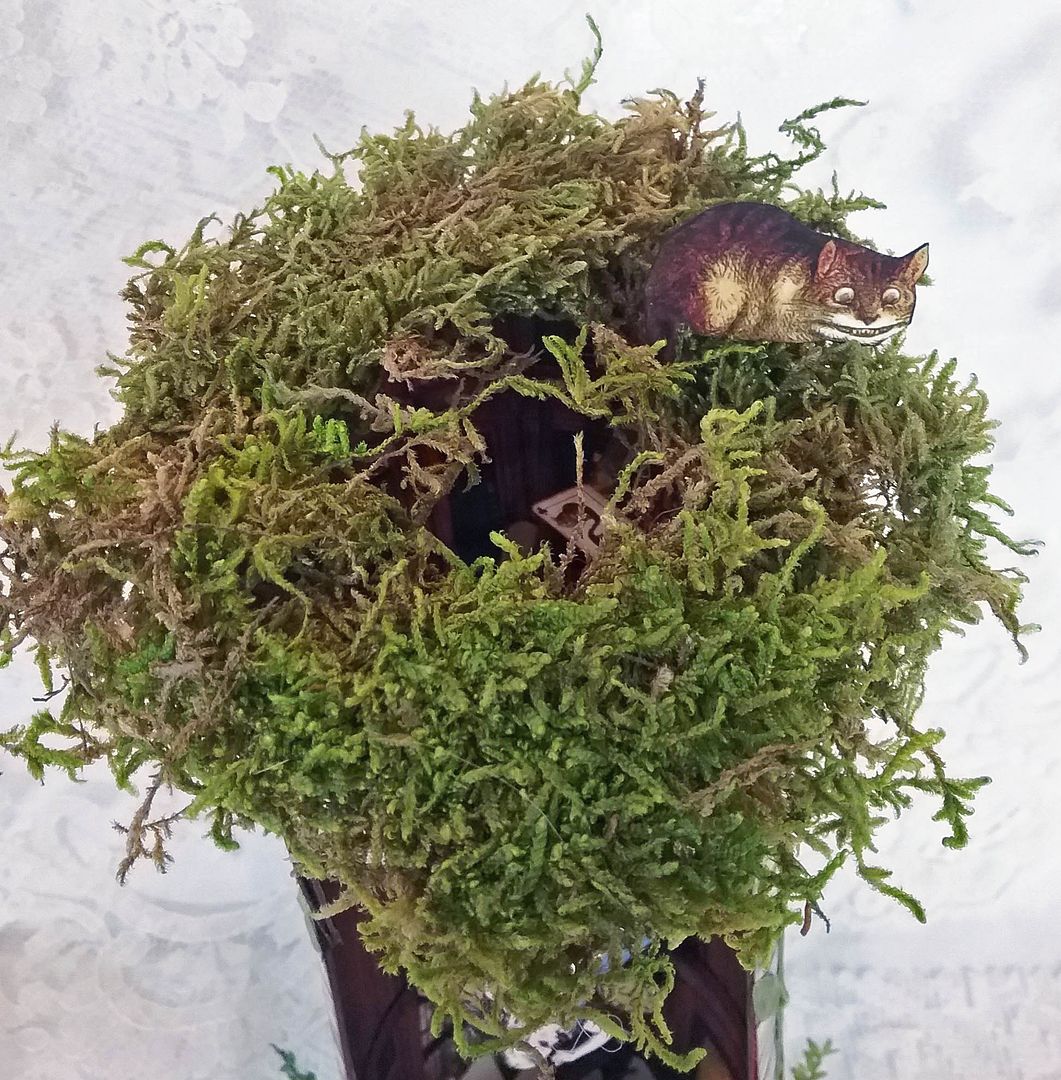
At the top, I used sheet moss, leaving a small hole for Alice to fall through.  Notice the Cheshire Cat sitting in the moss.
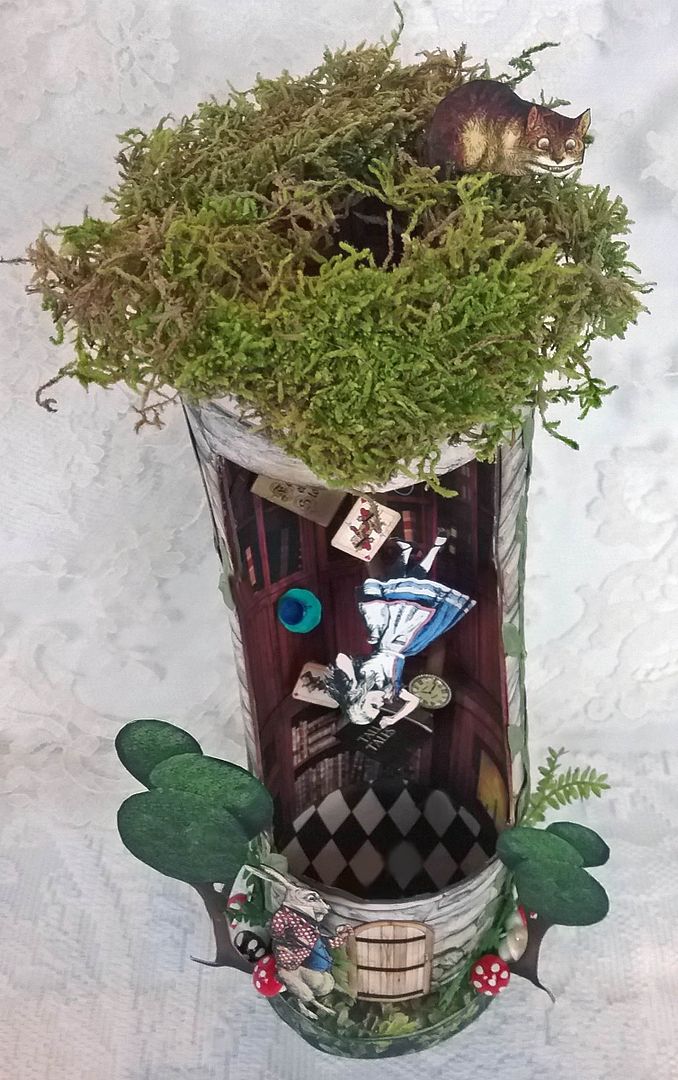
At the bottom, I’ve added a door from the Mini Old Windows and Doors collage sheet, the White Rabbit, and trees from the We Are All Mad Here collage sheet.  I also used mushrooms and ferns.  The base is a round box lid from my stash covered with hedge scrapbook paper.
Climbing up the can is stitched leaf ribbon that I ran through my Xyron machine, which applies dry glue that will not bleed through the ribbon.
COLLAGE SHEETS - Down the Rabbit Hole
Mini Old Windows & Doors Collage Sheet – Door Image
Time Machine Digital Image Set – Library Image
More Old Windows Collage Sheet
or
Old Windows & Doors Digital Image Set - Window Images
Wednesday, July 30, 2014

It’s All About BEEs – Domino Books, Accordion Book Box & Coasters – Tutorials & New Collage Sheets & Giveaway

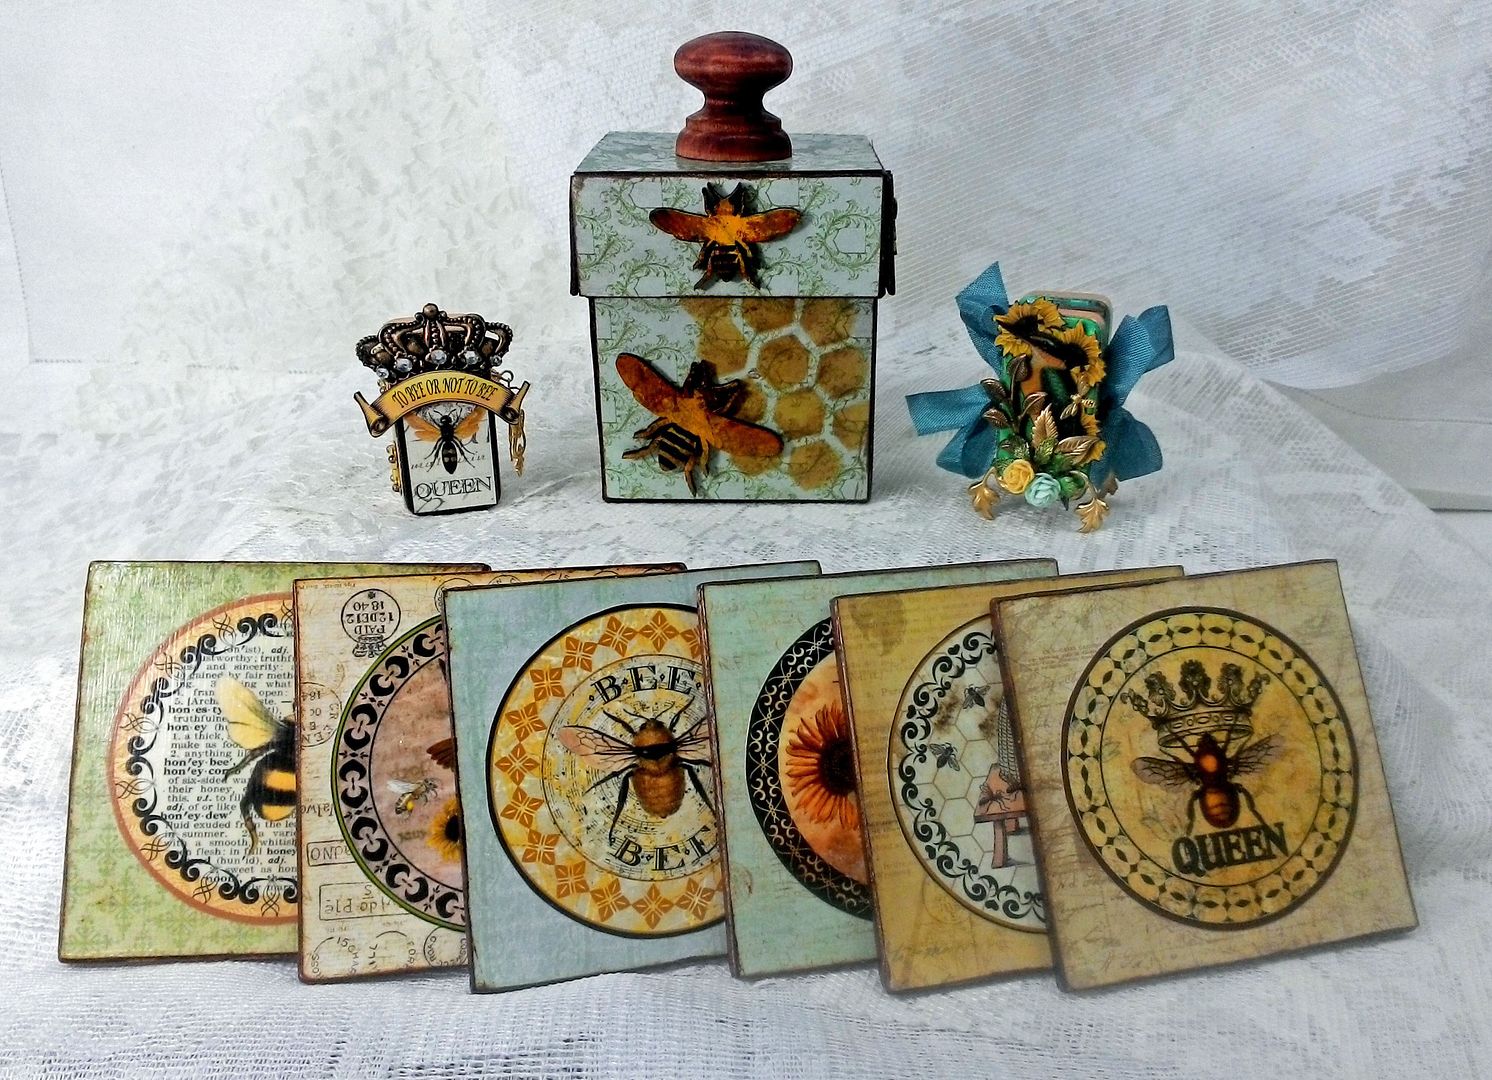
Let’s hear it for the fuzzy buzzing bees that make our lives so sweet!  I love everything about bees.  I’ve used the tiny busy creatures as inspiration for four projects and two new collage sheets. 

The projects include two different domino books; which I’m giving away (details below), an accordion folded book in a box and a set of coasters.  I’m thinking any of these projects would make great gifts.
NEW – Bee Themed Collage Sheets

Colorful bee themed medallions and faux postage fill this sheet.  The medallions make great labels for bottles, jar lids and on coasters. The faux postage can be used as ephemera on your artwork or to jazz up envelopes.

This sheet is loaded with bird and bee themed art.  Included are 12 small panels are sized to fit on a 1” x 2” domino and a long panel that can be accordion folded to fit inside two 1” x 2” dominoes like a book.  There are also ATC sized collaged images and extra birds and flowers.


TUTORIALS

Accordion Fold Domino Book
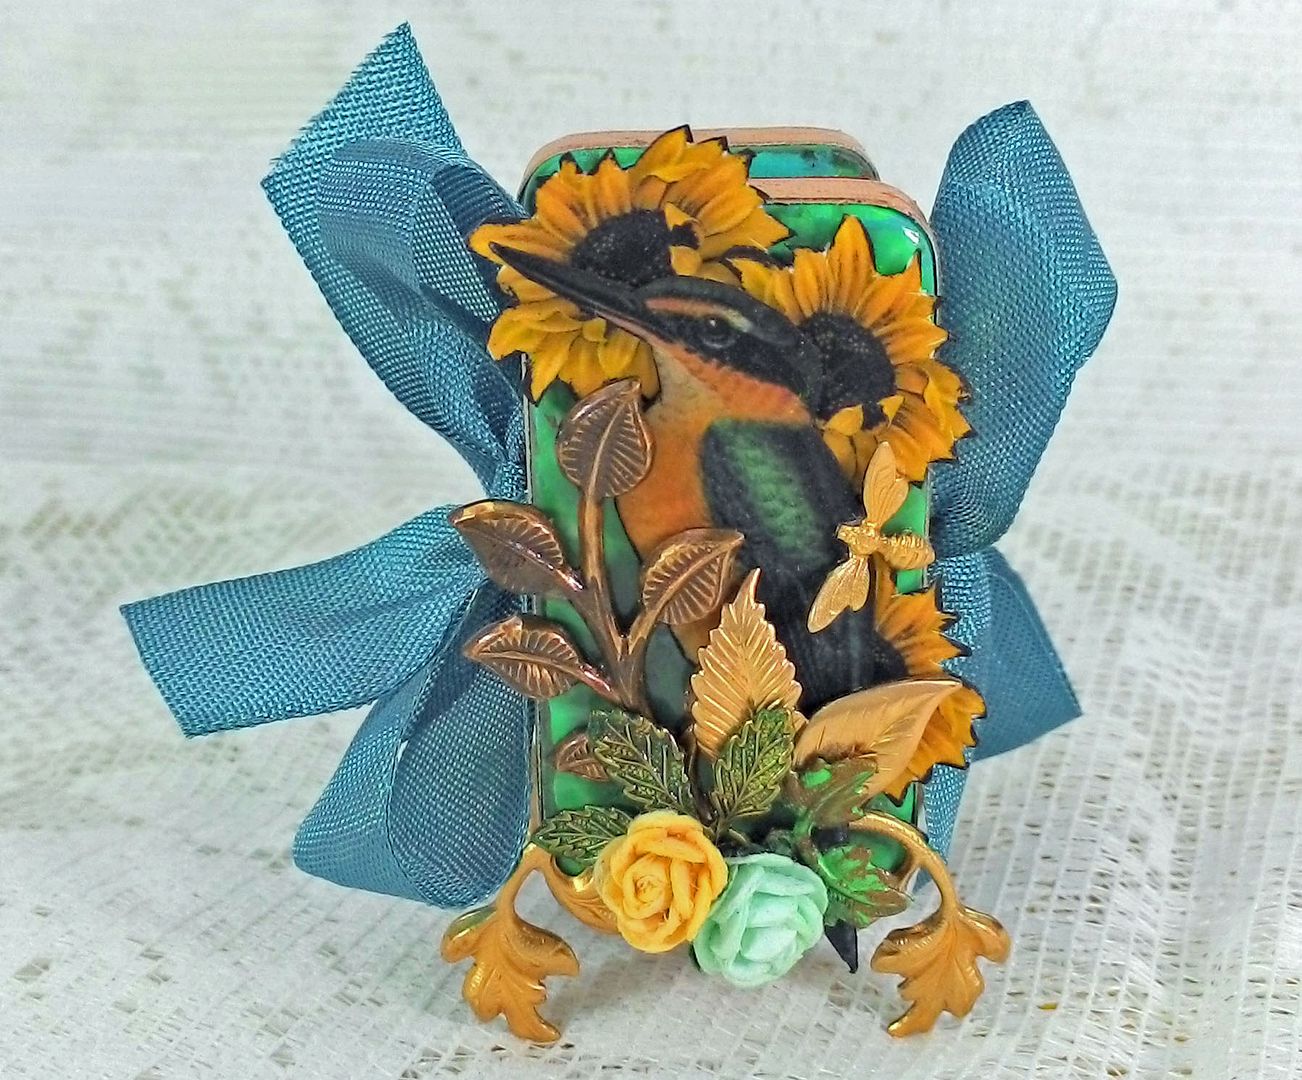
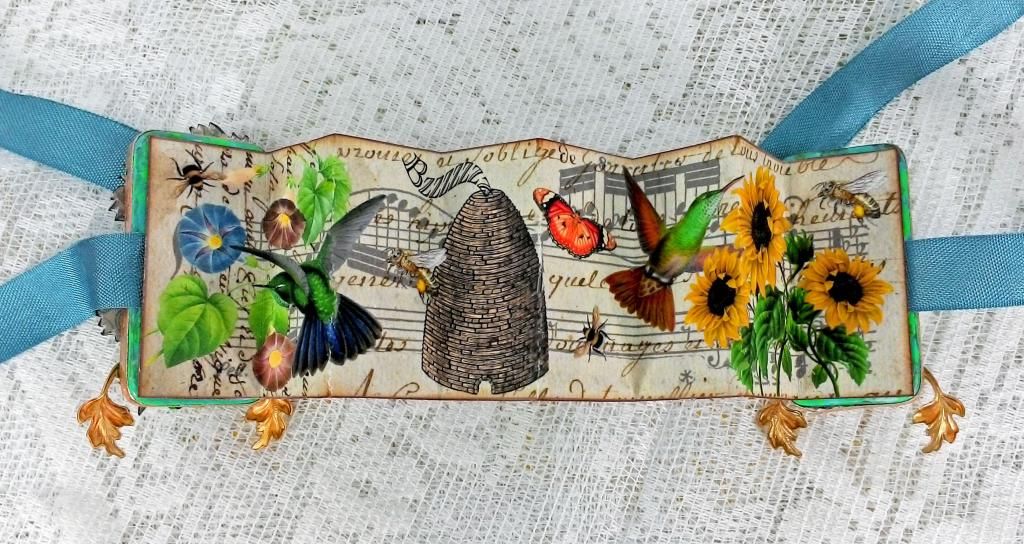
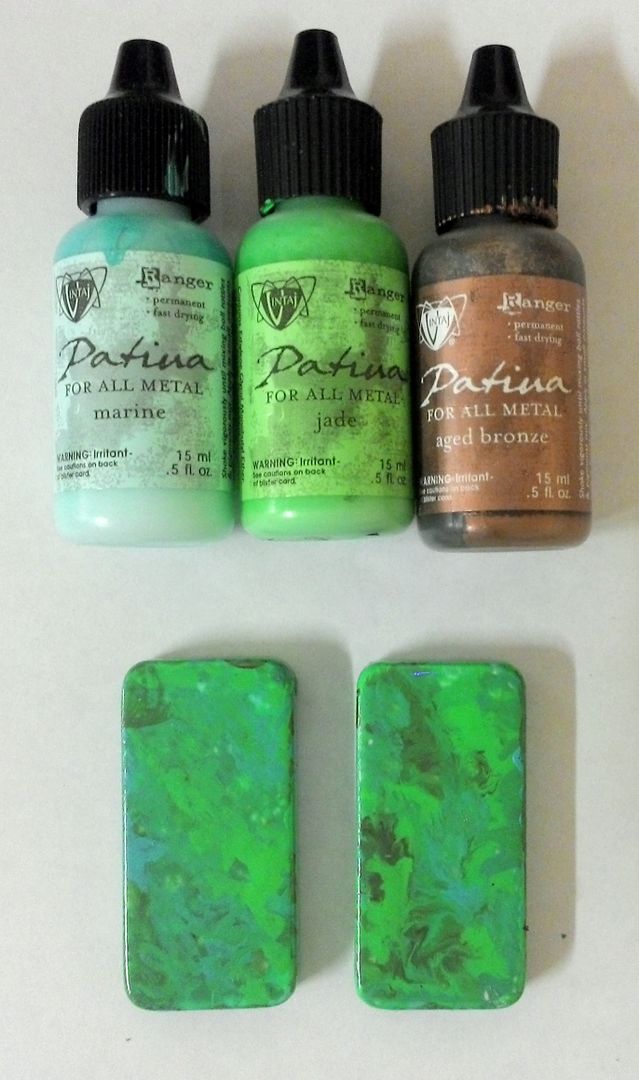
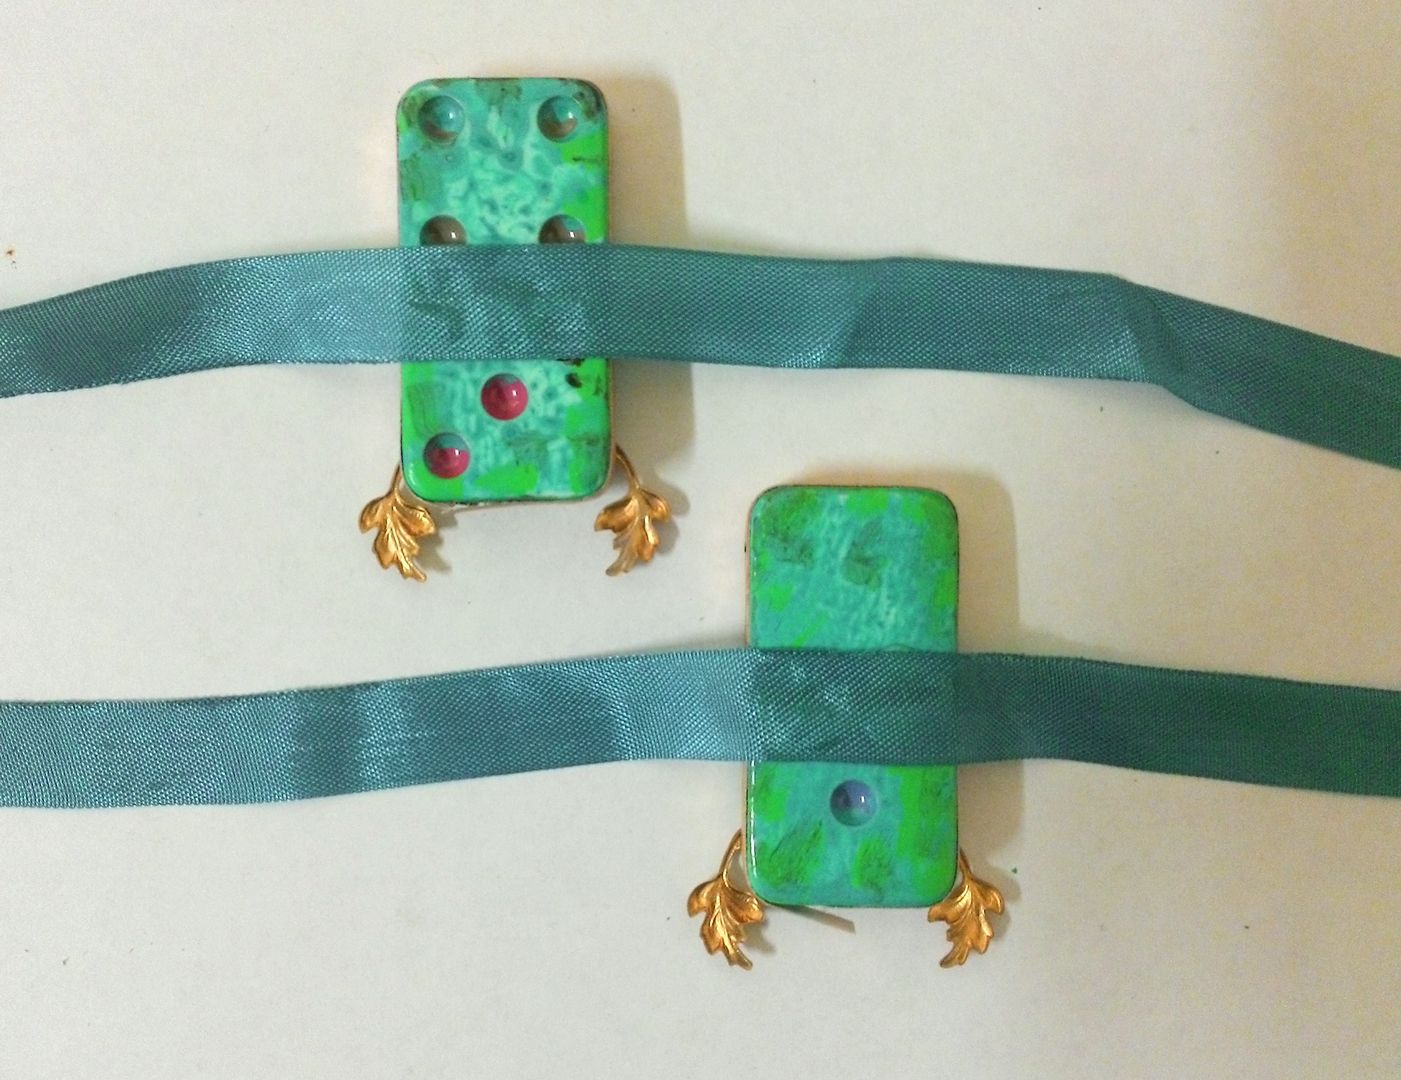
I started by painting the domino's front, sides and edges of the backs with a combination of Patina Paints.
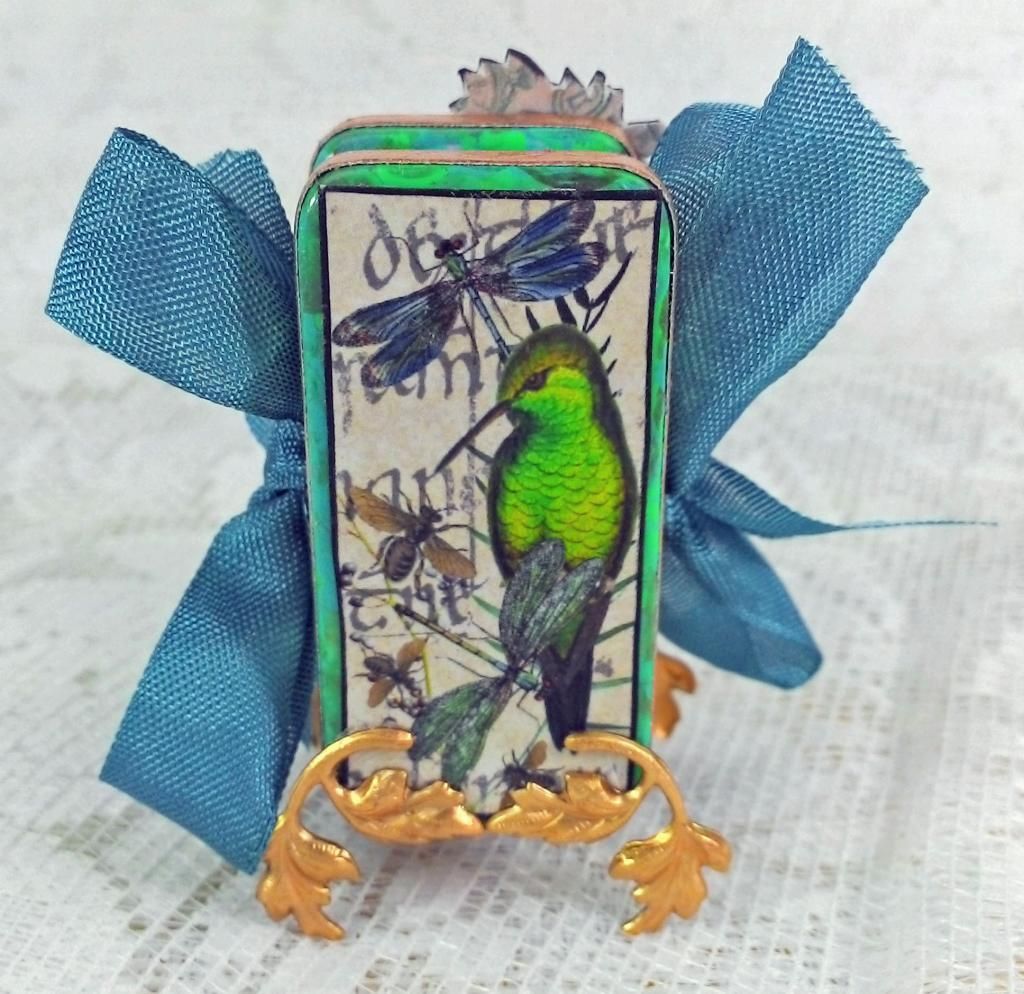
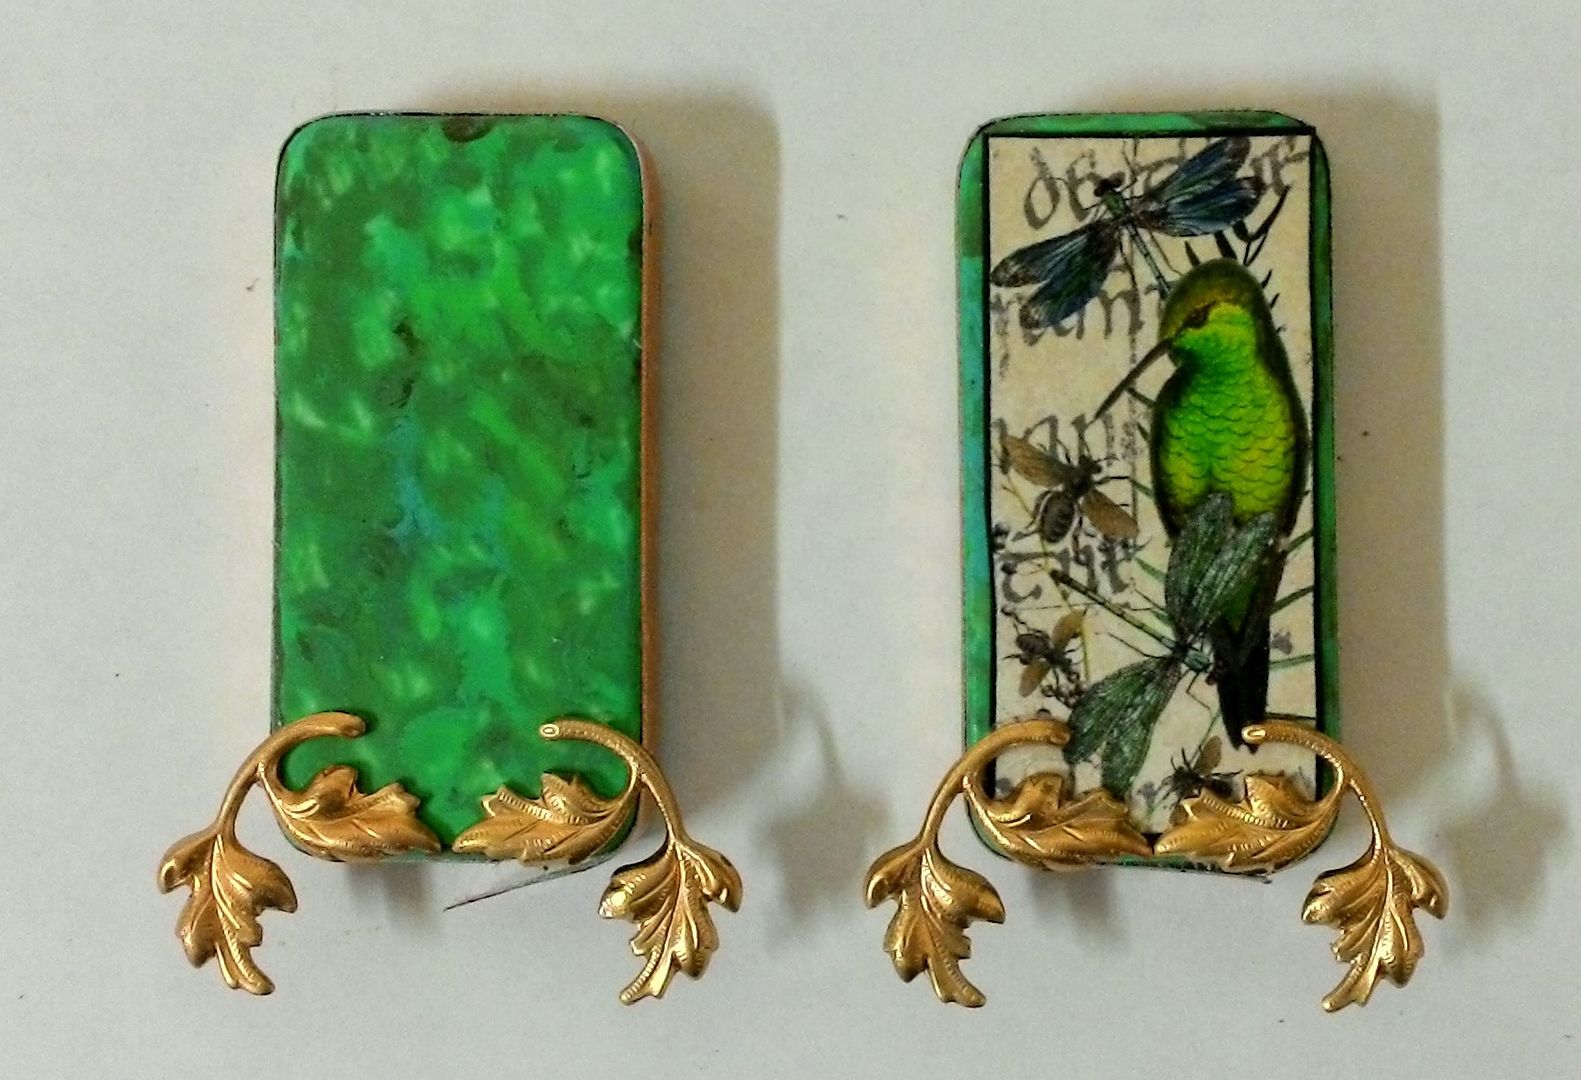
Next, I glued a panel from the collage sheet onto what will become the back of the book and glued a strip of Dresden around the edges of each domino.
Using E6000, I attached the brass leaves to the bottoms of the dominoes to serve as feet.
To the backsides of each domino, I attached ribbon which is used to tie the book closed.  Don’t worry if you see the glue seeping through the ribbon as it will be covered with the accordion folded pages.
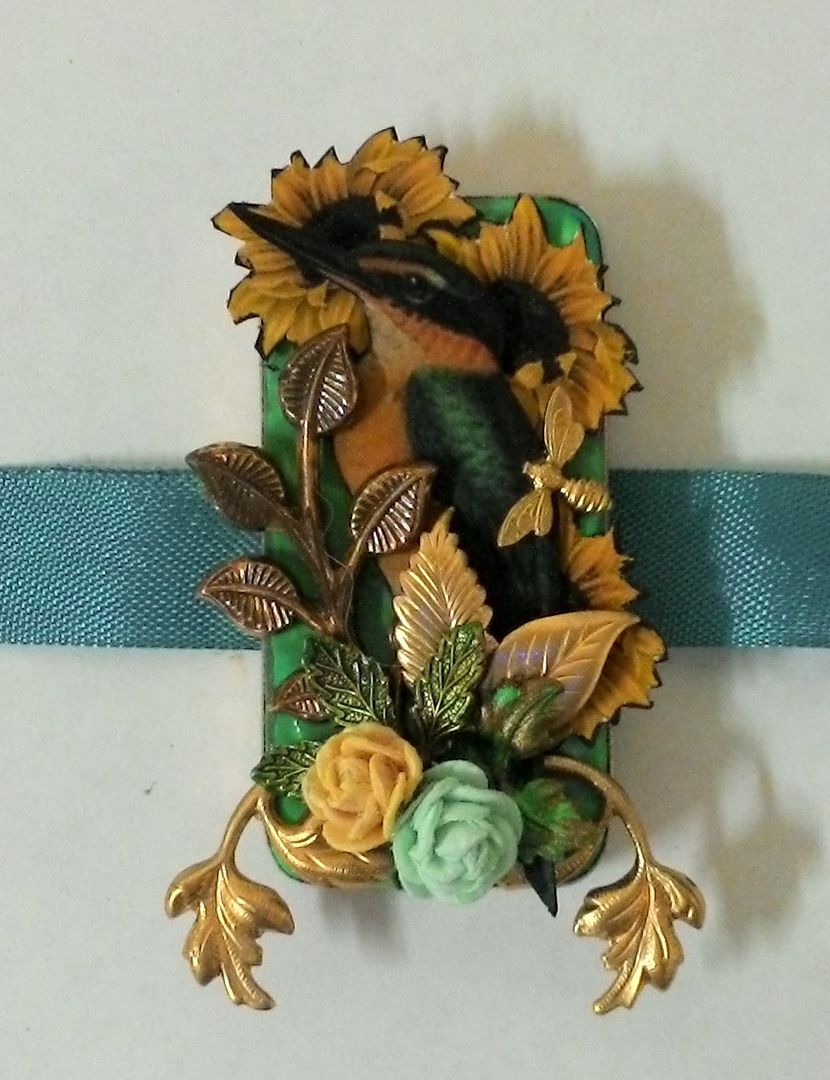
On the front domino I collaged images from the collage sheet (flowers & bird), various brass leaves, paper roses and a bee.
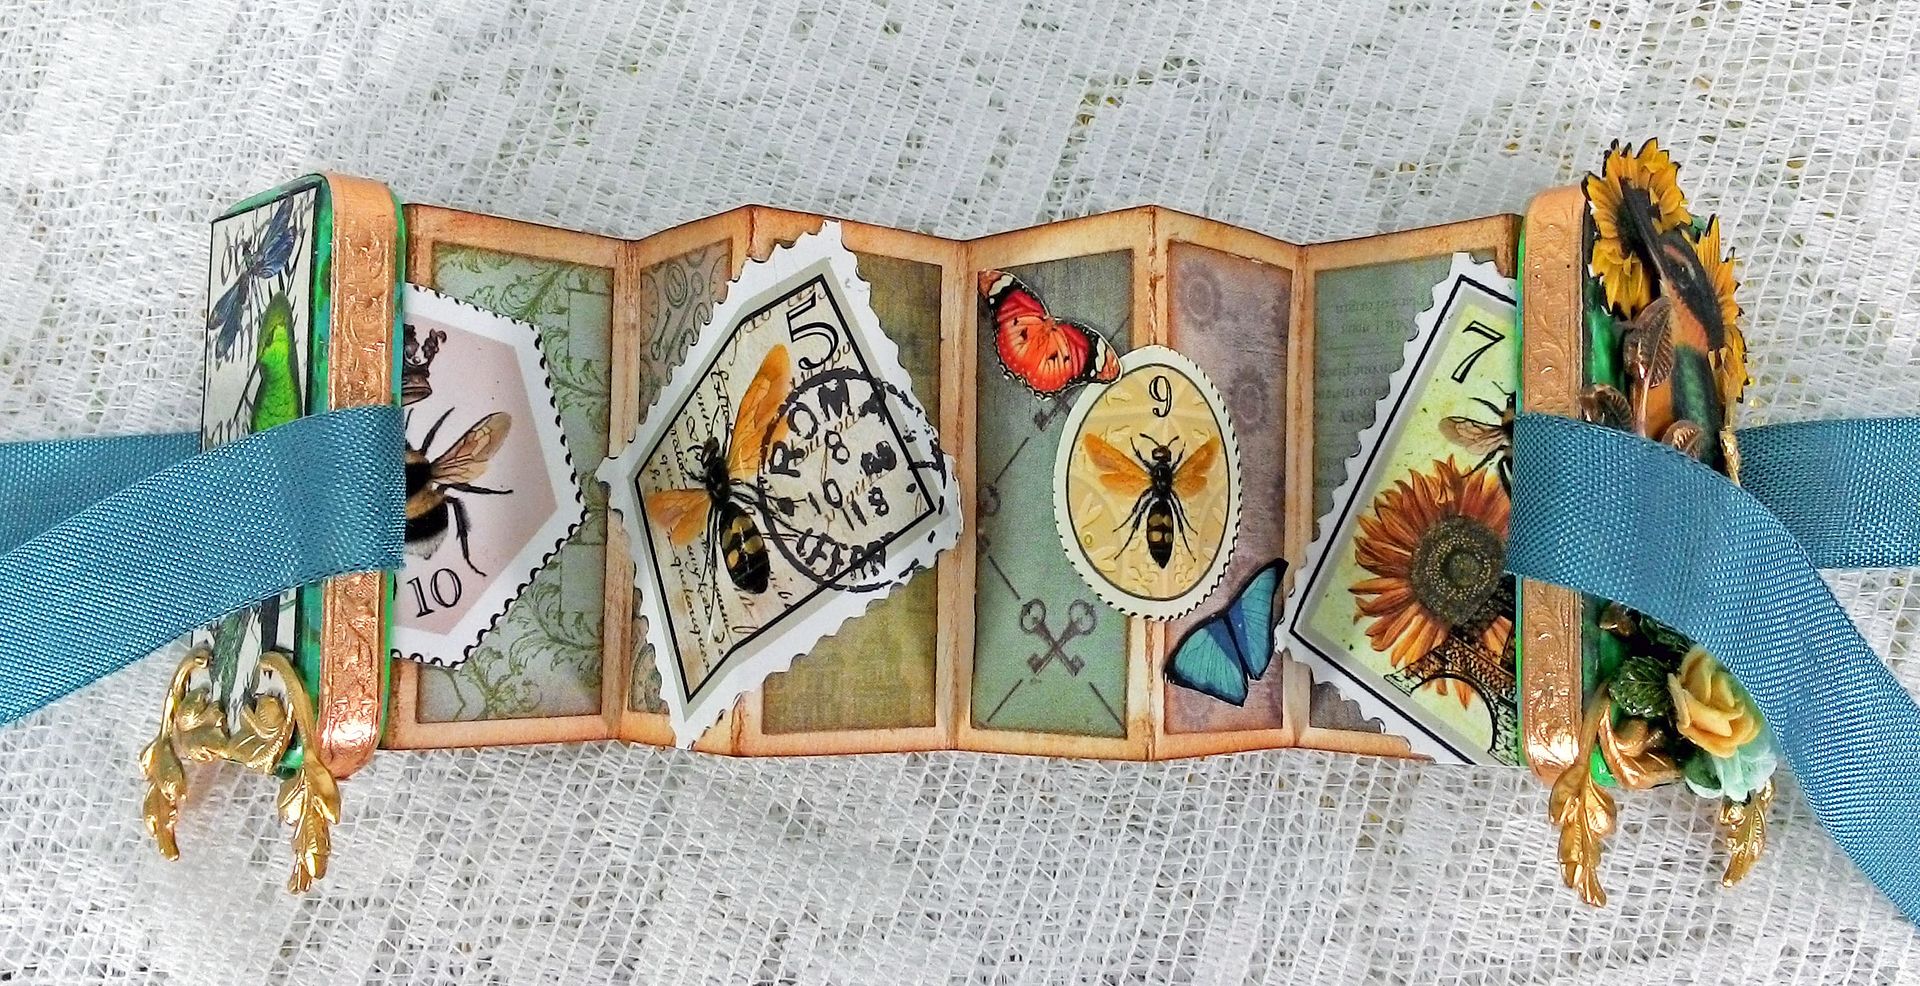
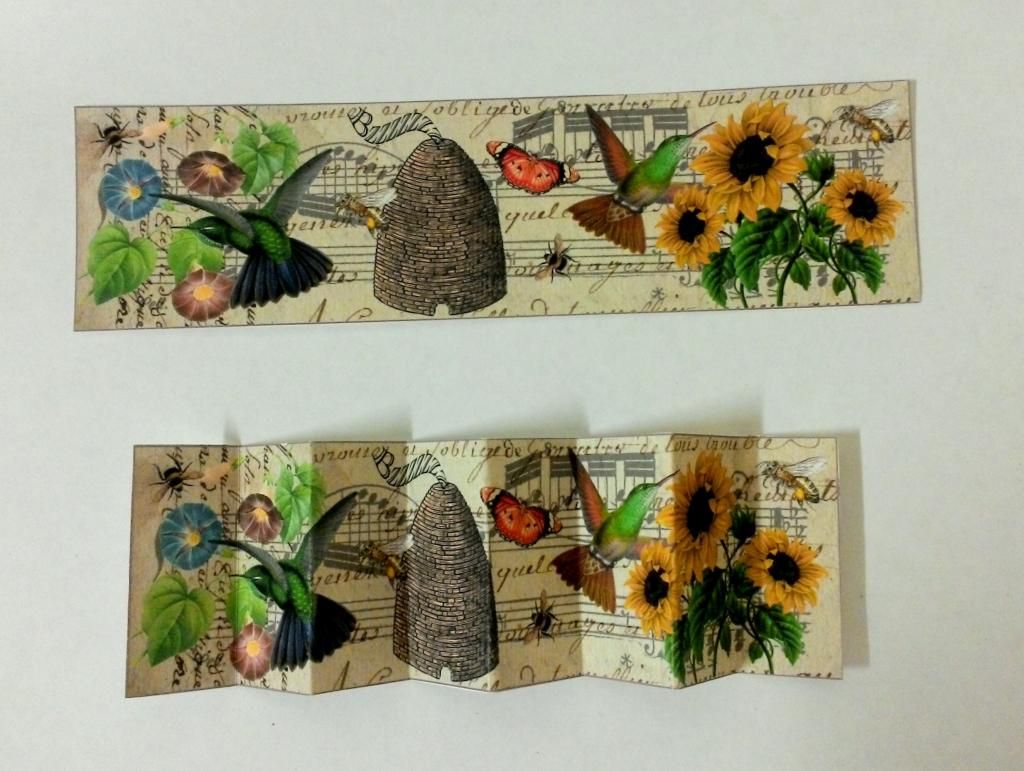
The long panel on the collage sheet measures 1 7/8” x 7” which is slightly shorter than a standard 2” tall domino and long enough to create an accordion folded strip with 8 panels.  If you are not using the image from the collage sheet for your book just be sure that when you fold your strip you end up with an even number of panels (to facilitate attaching it to the domino covers).

Mark and score along the panel every 7/8” and accordion fold the panel.  
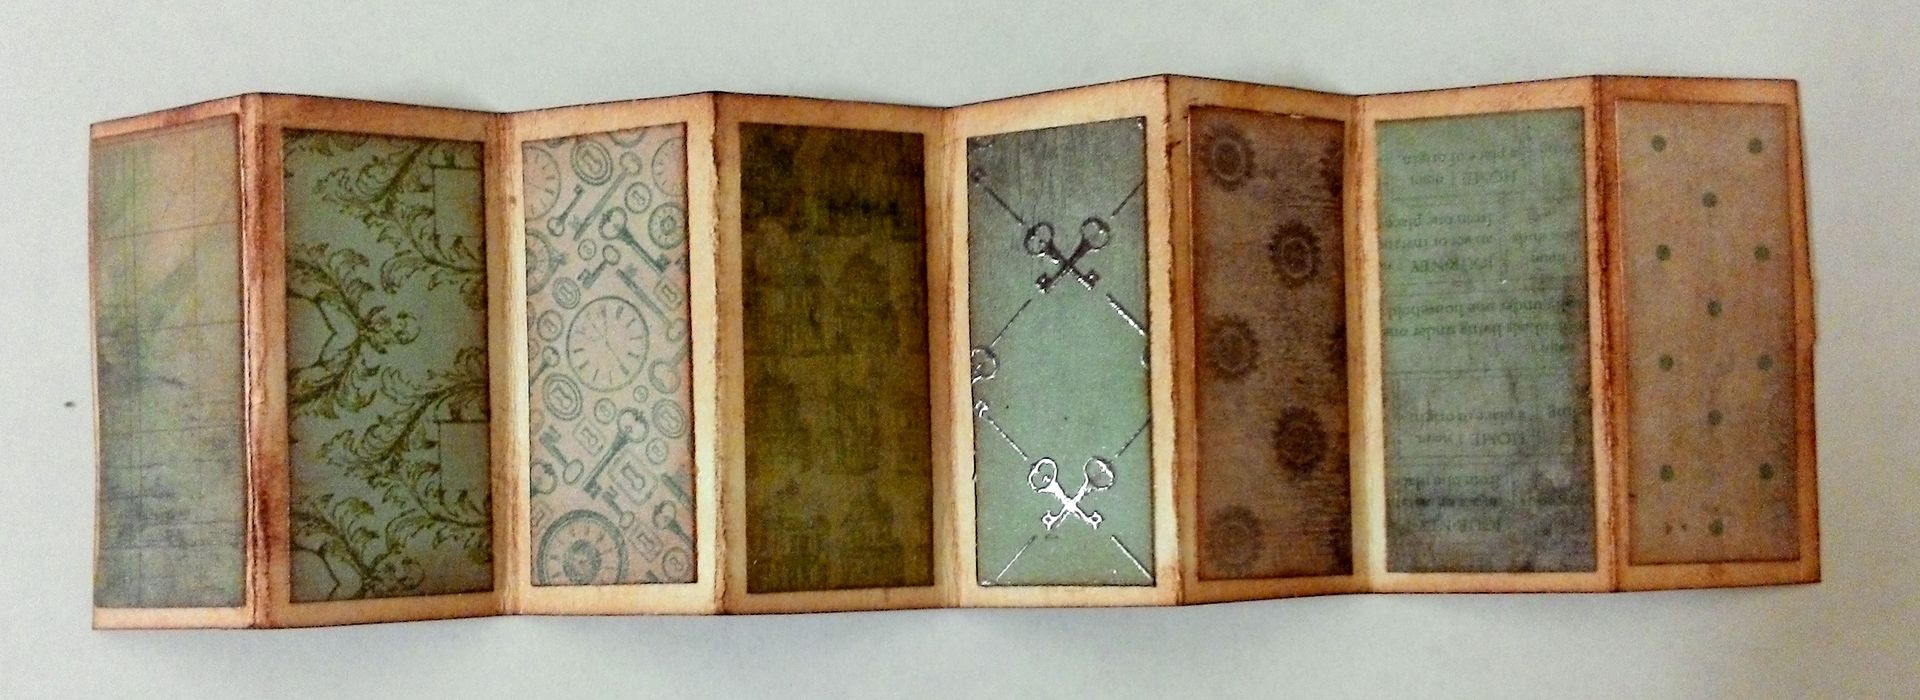
Ink the edges and the back of the panel.  I used Vintage Photo Distress Stain.  Cut 8 panels from decorative paper and glue to the back.  I cut my panels 1 5/8” x 6/8”.  You could also use the small panels on the collage sheet but you would need to reduce them first.
The final touch to decorate the back is the addition of some of the faux postage from the collage sheet.
The last step is to glue the end panels to the inside of the dominoes and you are finished!

Hinged Domino Book
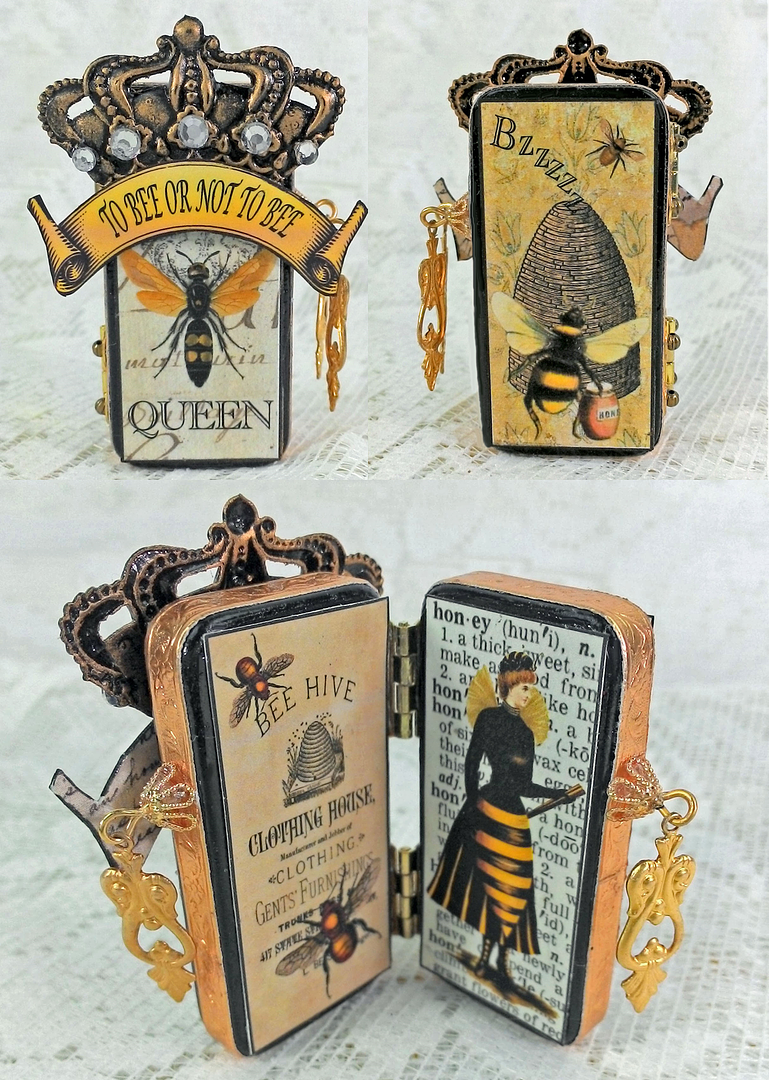
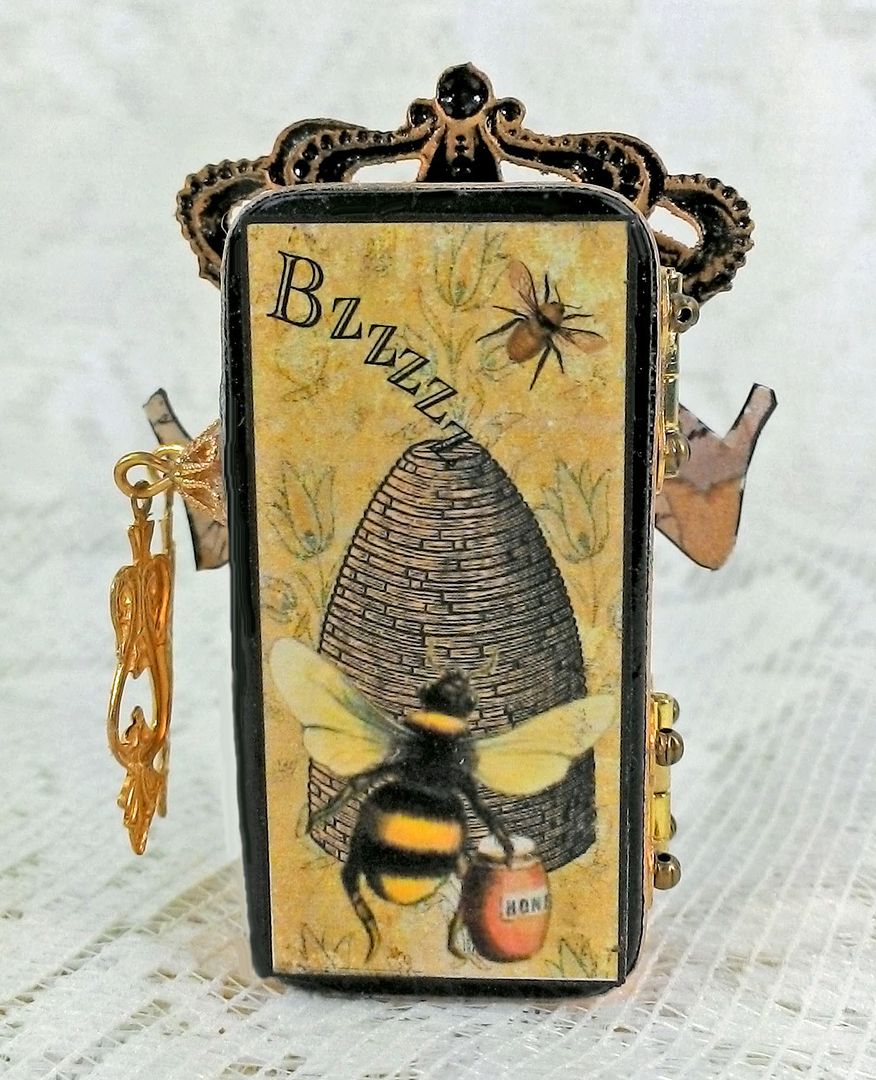
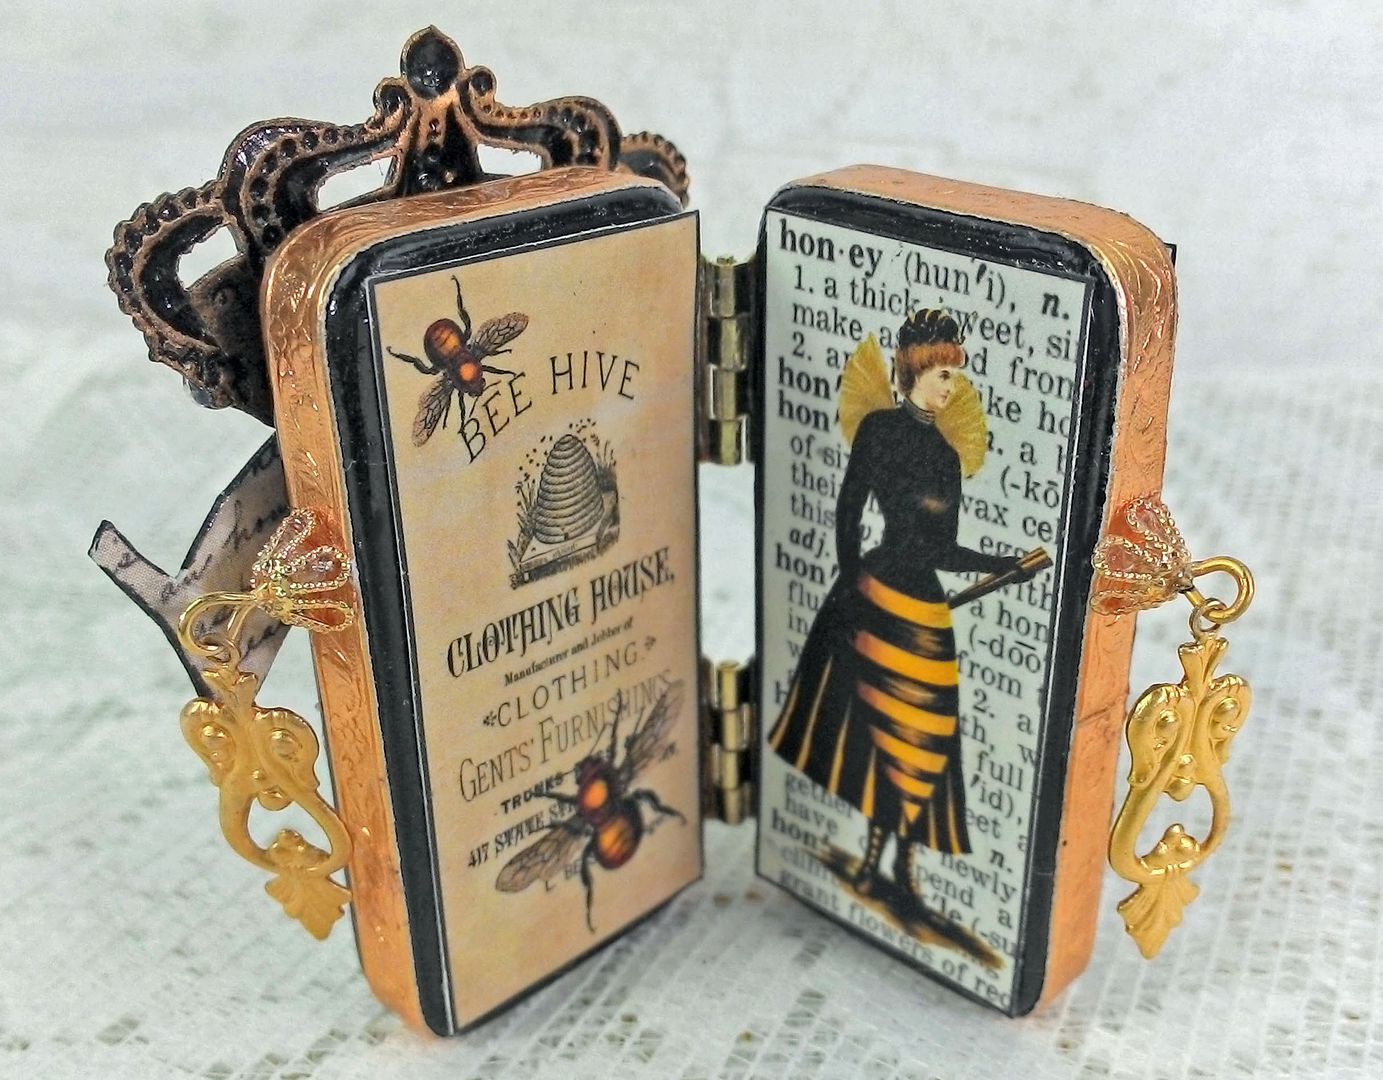
To Bee or Not to Bee…Queen (always a tough decision)
This type of domino book is much simpler to put together as it consists of simply hinging two decorated dominoes.
Start by coloring your dominoes on all of the surfaces that will remain exposed after embellishing.  I used Onyx Patina to paint mine.  I used panels from the collage sheet to cover the backs and fronts of both dominoes and glued Dresden around the edges. 

Dresden Note: In the case of a hinged domino book use sturdy glue like E6000 to attach the Dresden so that when you attach the hinges to the sides (onto the Dresden) the Dresden won’t pull away from the dominoes when you open the book.

I also added the crown (with jewels) and the bee banner from the collage sheet.
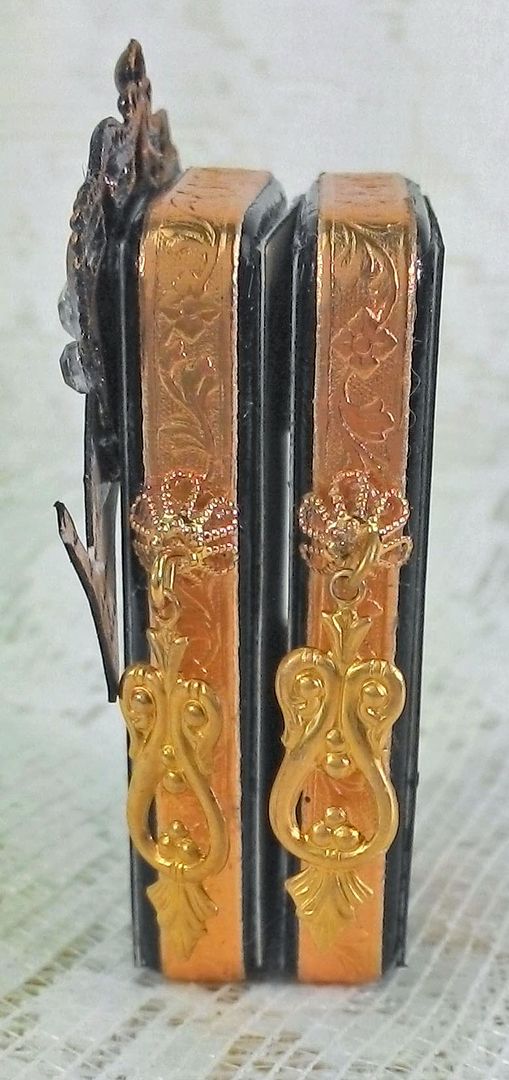
Once I had finished decorating each of the dominoes, I glued two small hinges to the sides of the dominoes (using E6000).  In the hinge holes I glued small brass beads.  Make sure you let the glue dry completely before trying to open the book.
The final touch are handles (glued in place with E6000), which are made from bead caps, eye pins and Victorian drops.

Accordion Fold Book in a Box
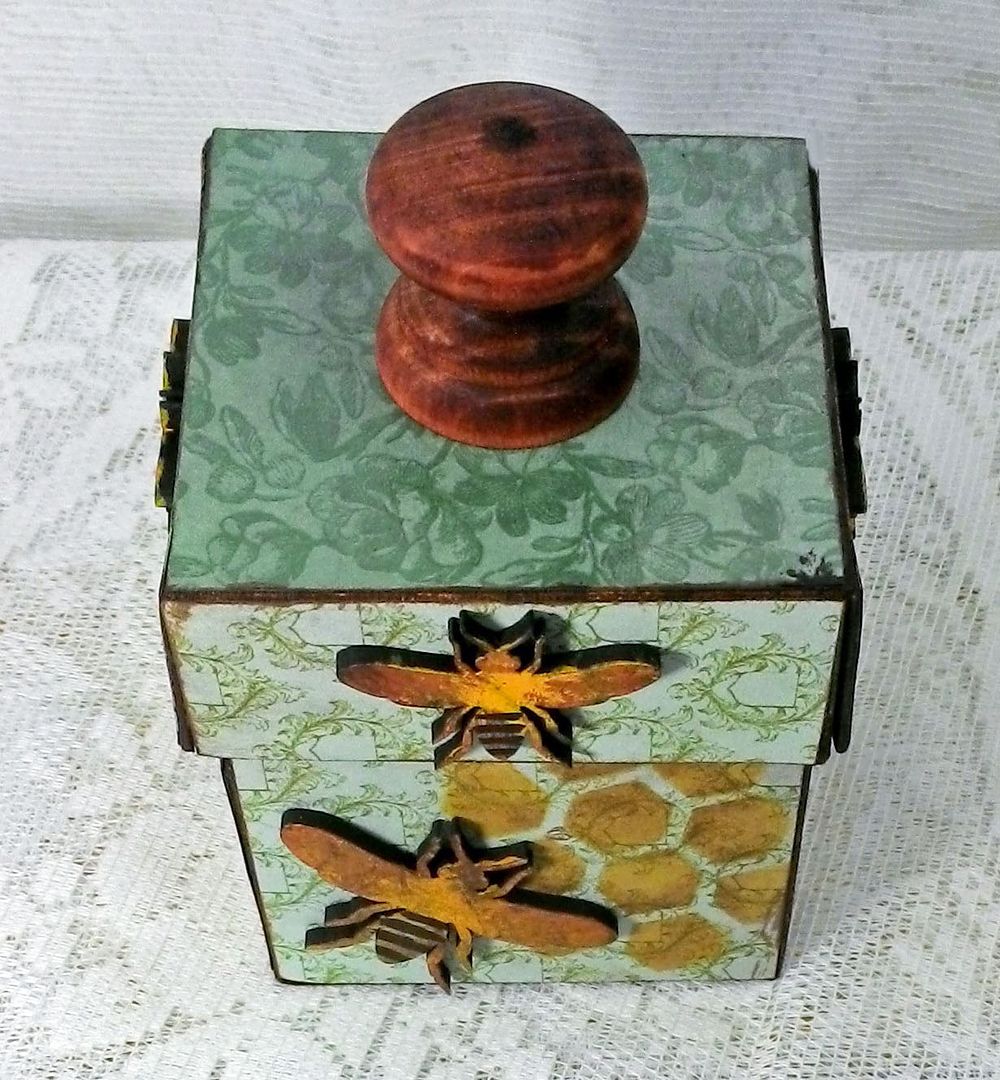
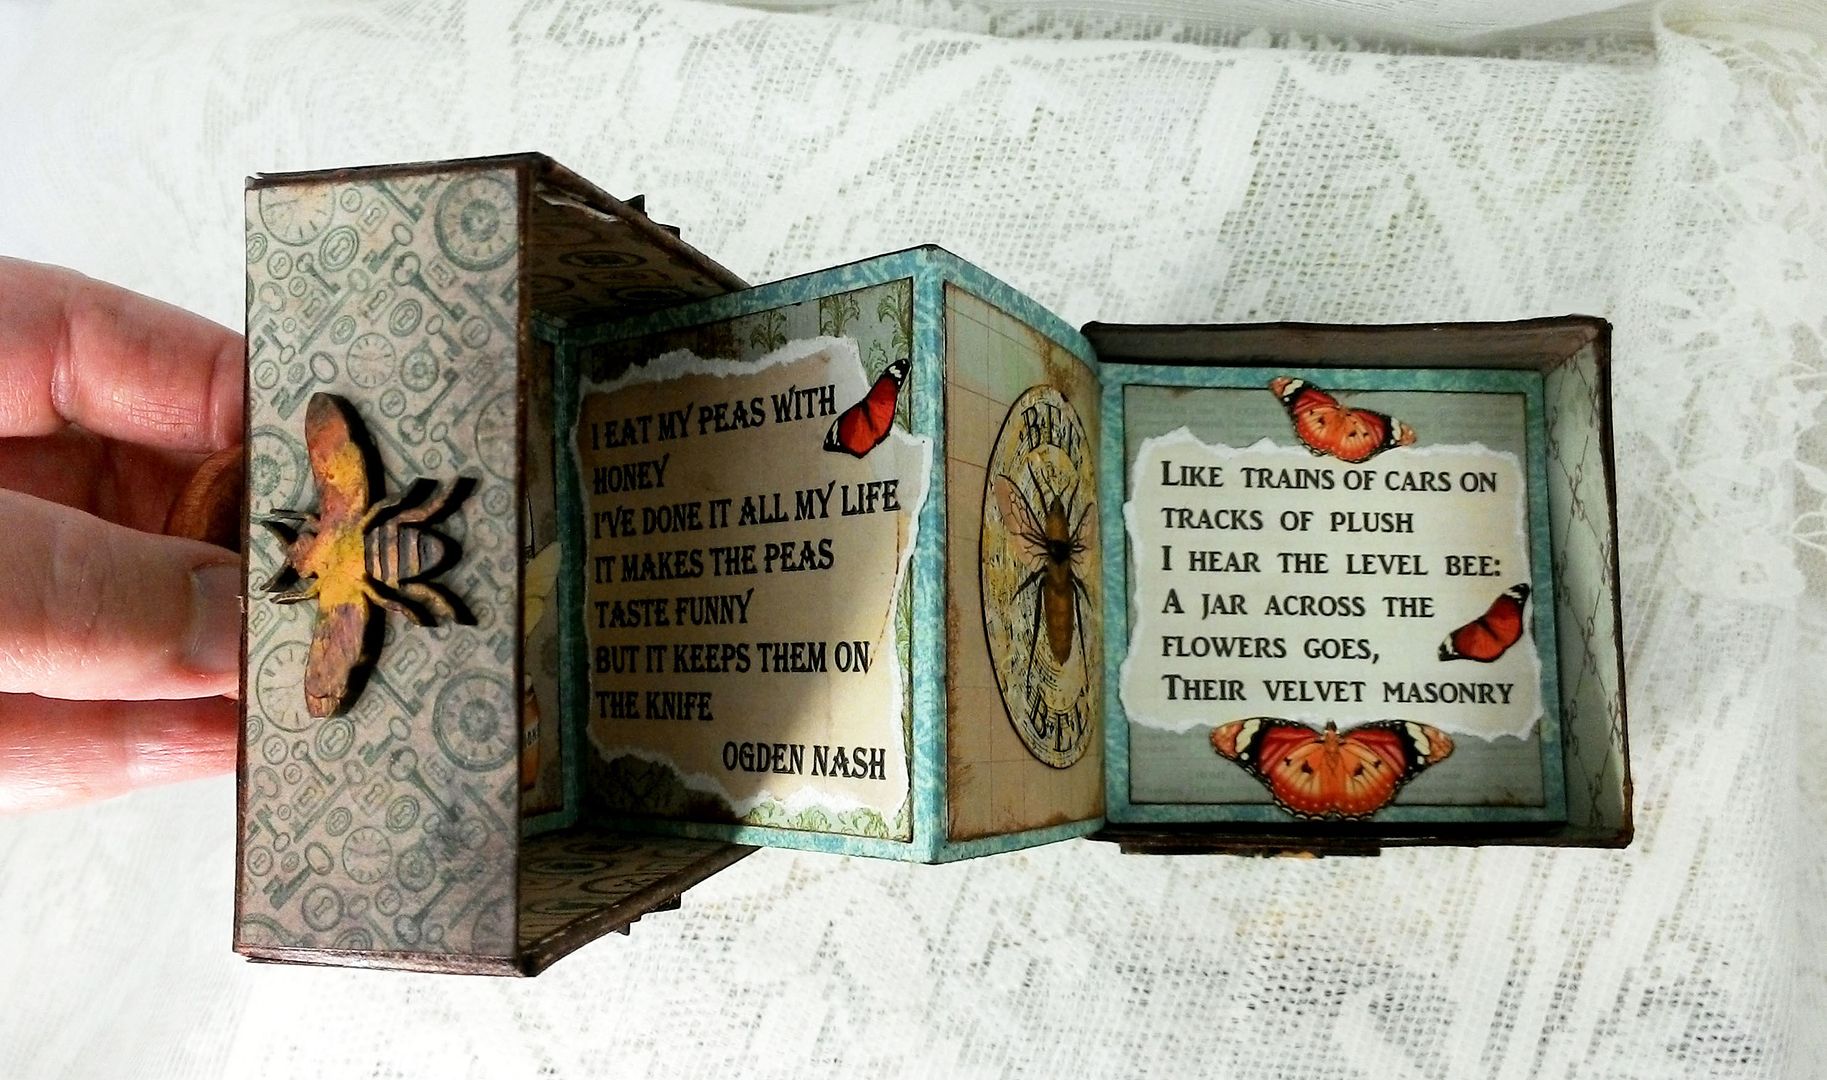
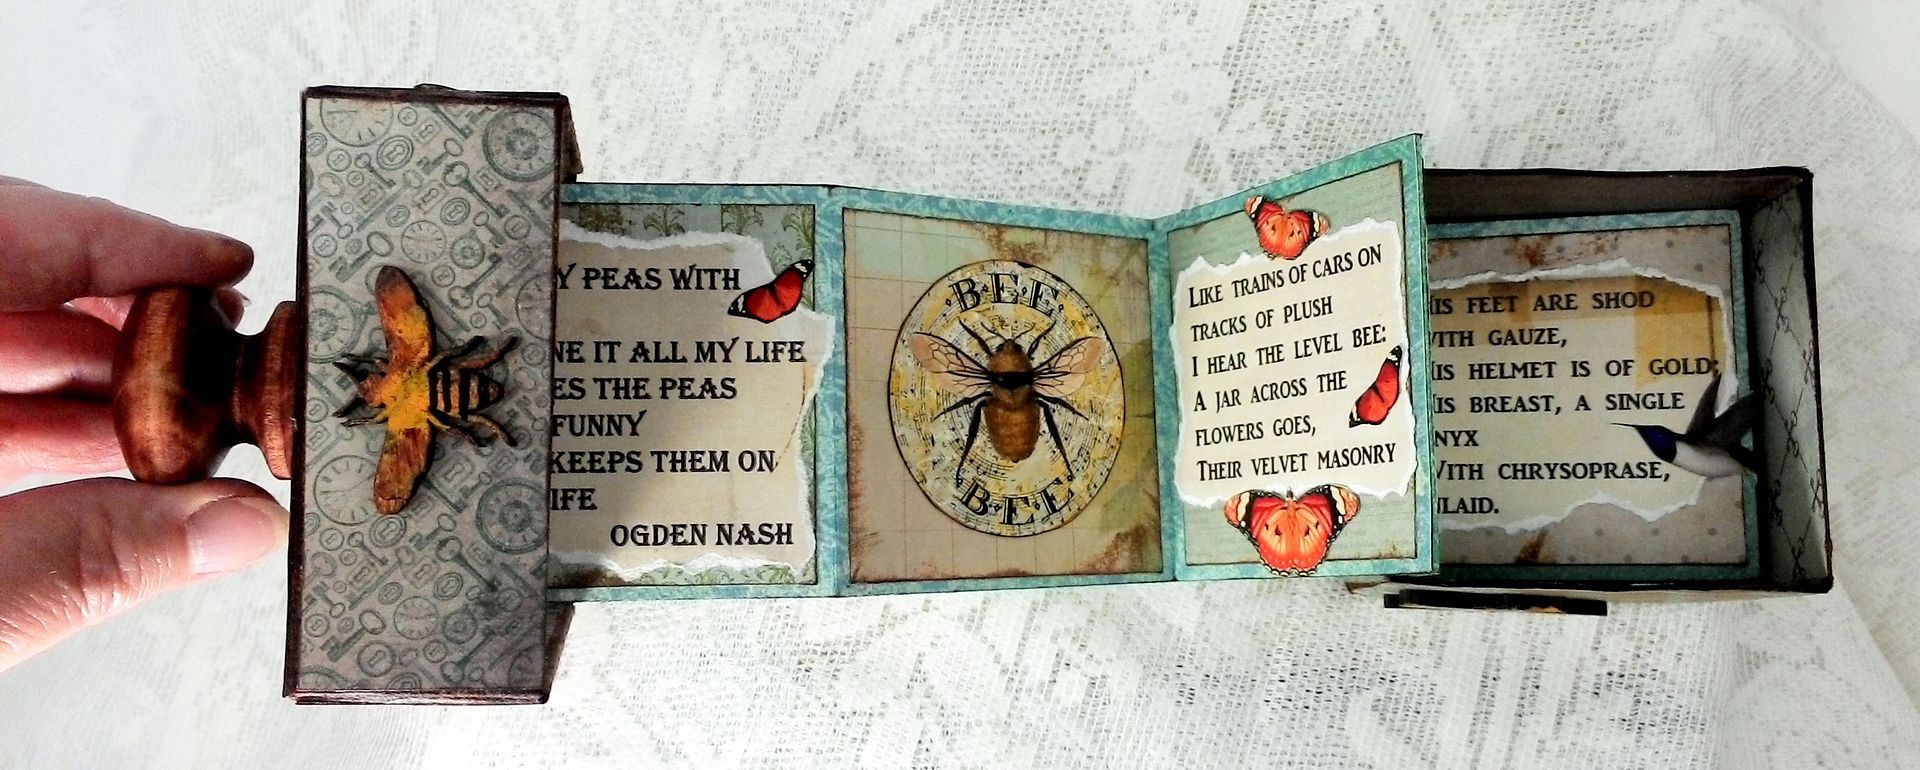
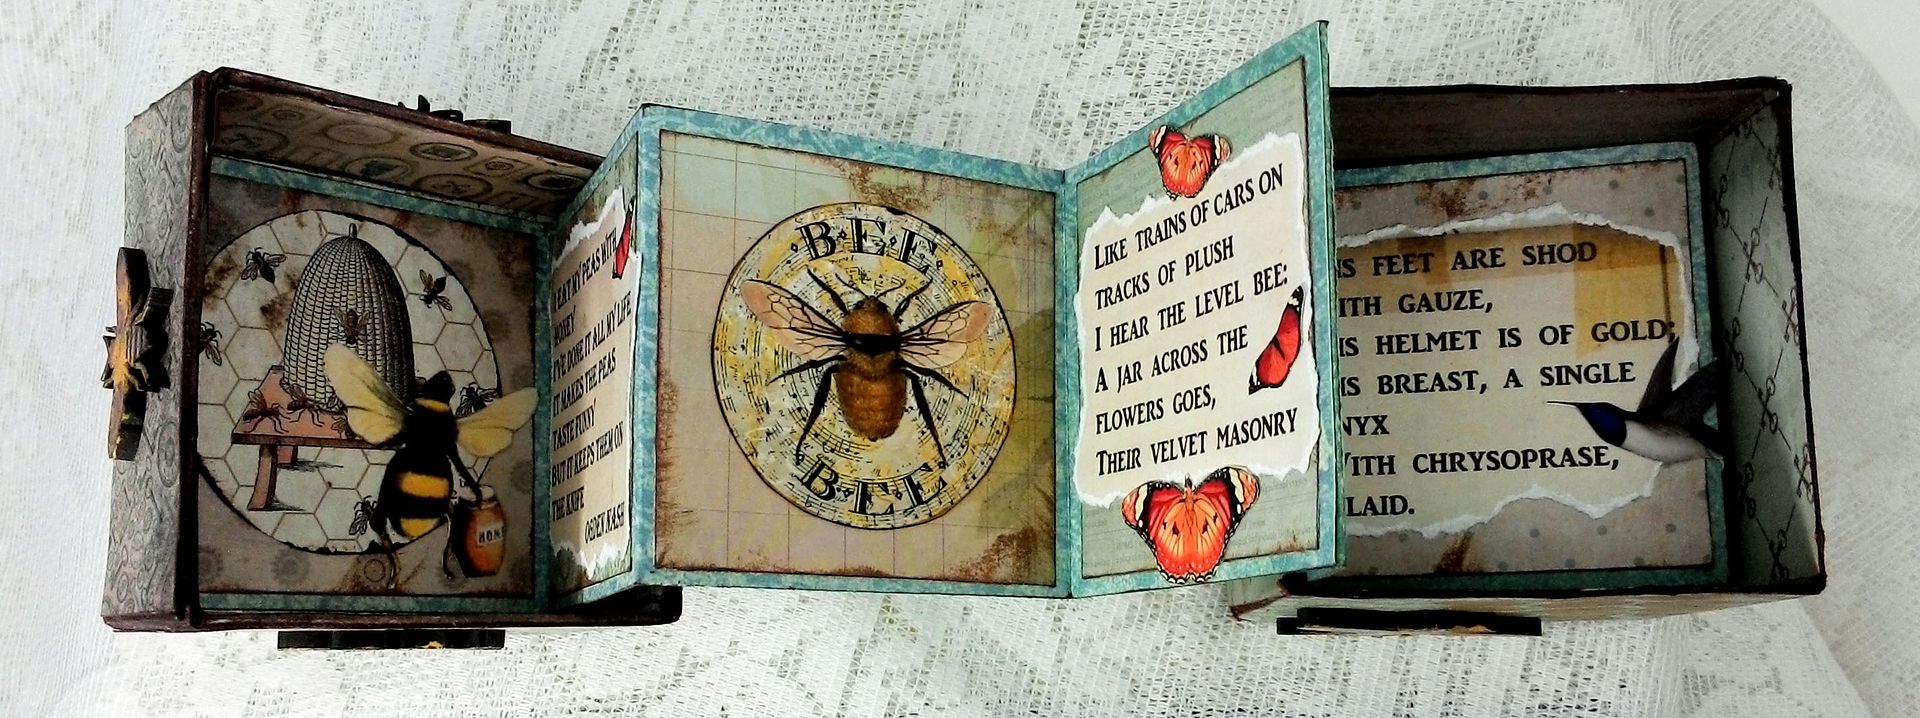
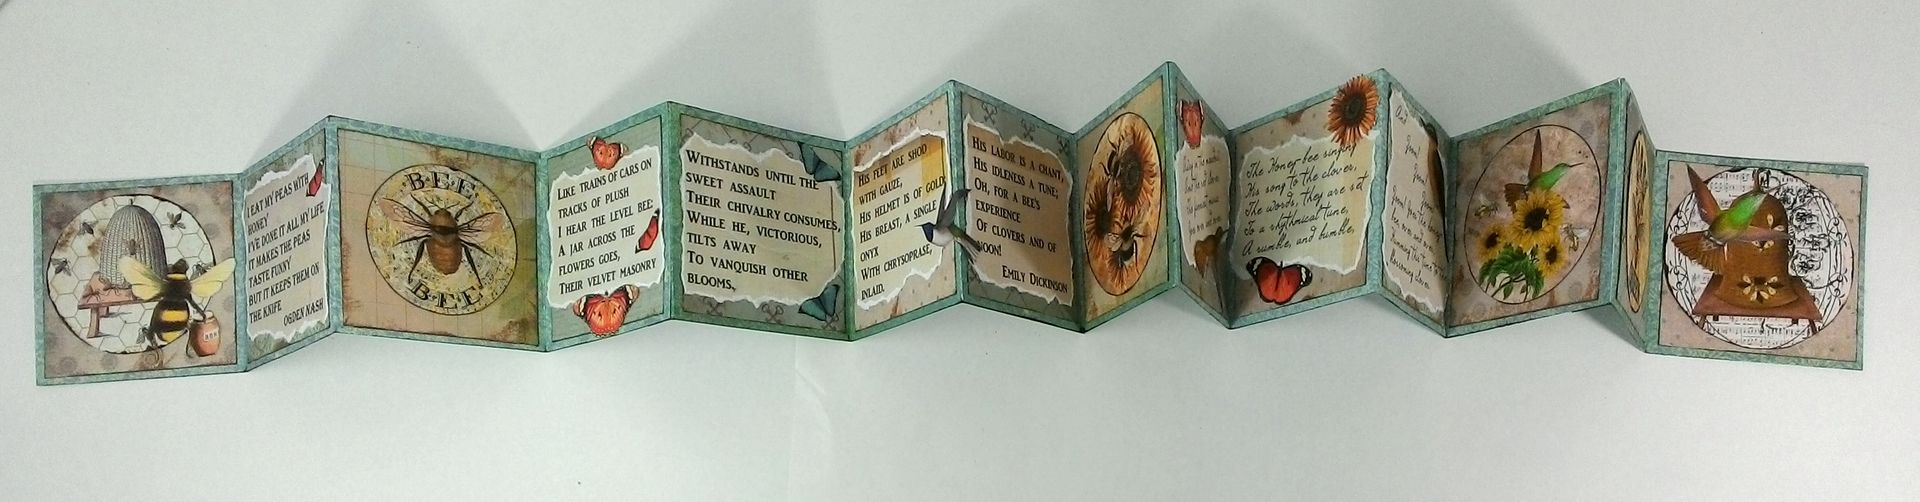
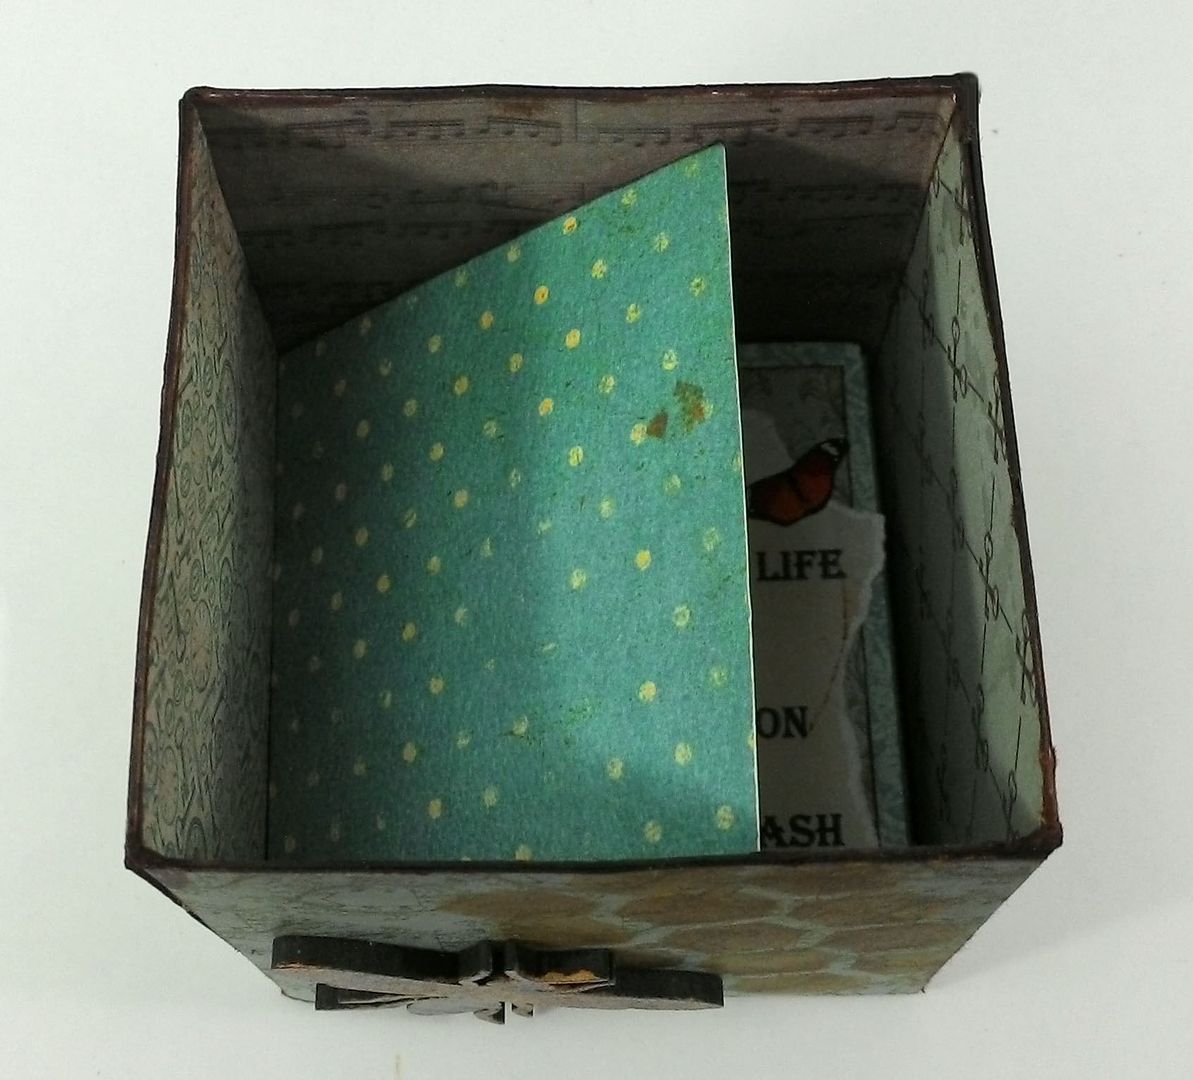
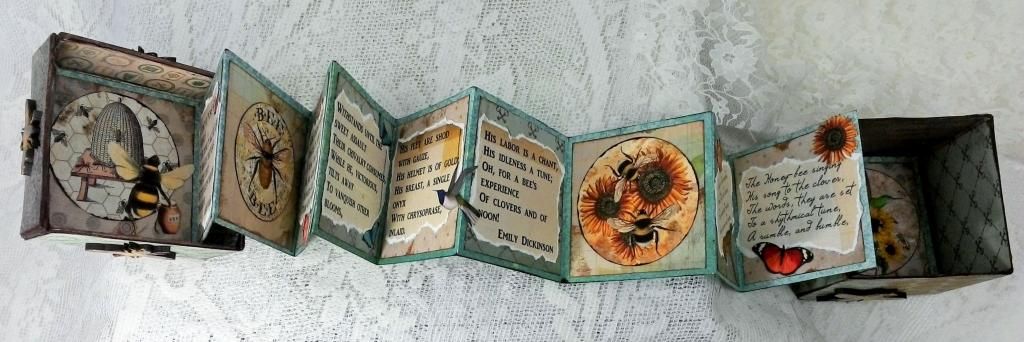
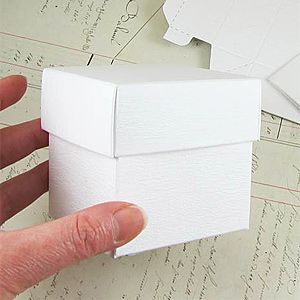
The idea with this project is to use the box as the covers for an accordion folded book.  When you lift the cover off of the box it opens the book.  The book is attached at one end to the inside lid of the box and at the other end to the inside bottom of the box.  The box I used measures 3" square.
Start by assembling the box.

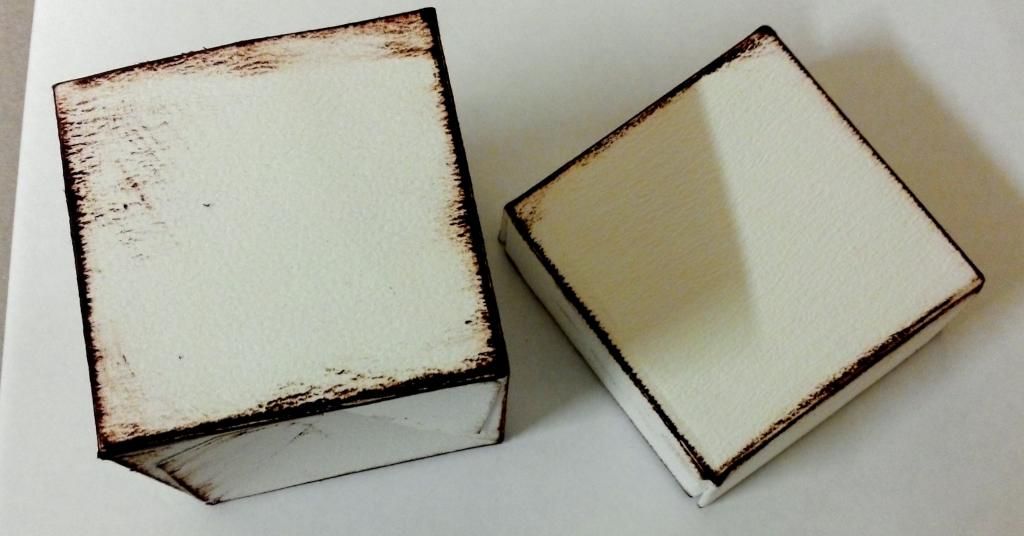
Next, I inked all of the edges inside and out.  Tip: to get in the box crevices use alcohol ink and a brush.  I have brushes dedicated to using the ink as once they are use with ink you can’t use them with other products.  I used a combination of Vintage Photo Distress ink and Caramel alcohol ink.
I applied decorative paper to all of the surfaces, inside and out.  Be sure to glue the paper down securely so that when you open and close the box it does damage or lift the paper.  Don’t use thick paper or card stock as the lid won’t fit back on the box.

I used Distress Ink and a honeycomb and bee stencil to decorate the sides. 
MASONITE BEES
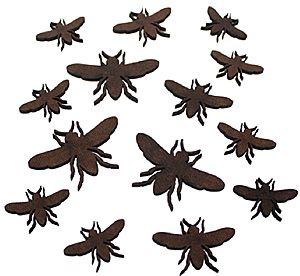
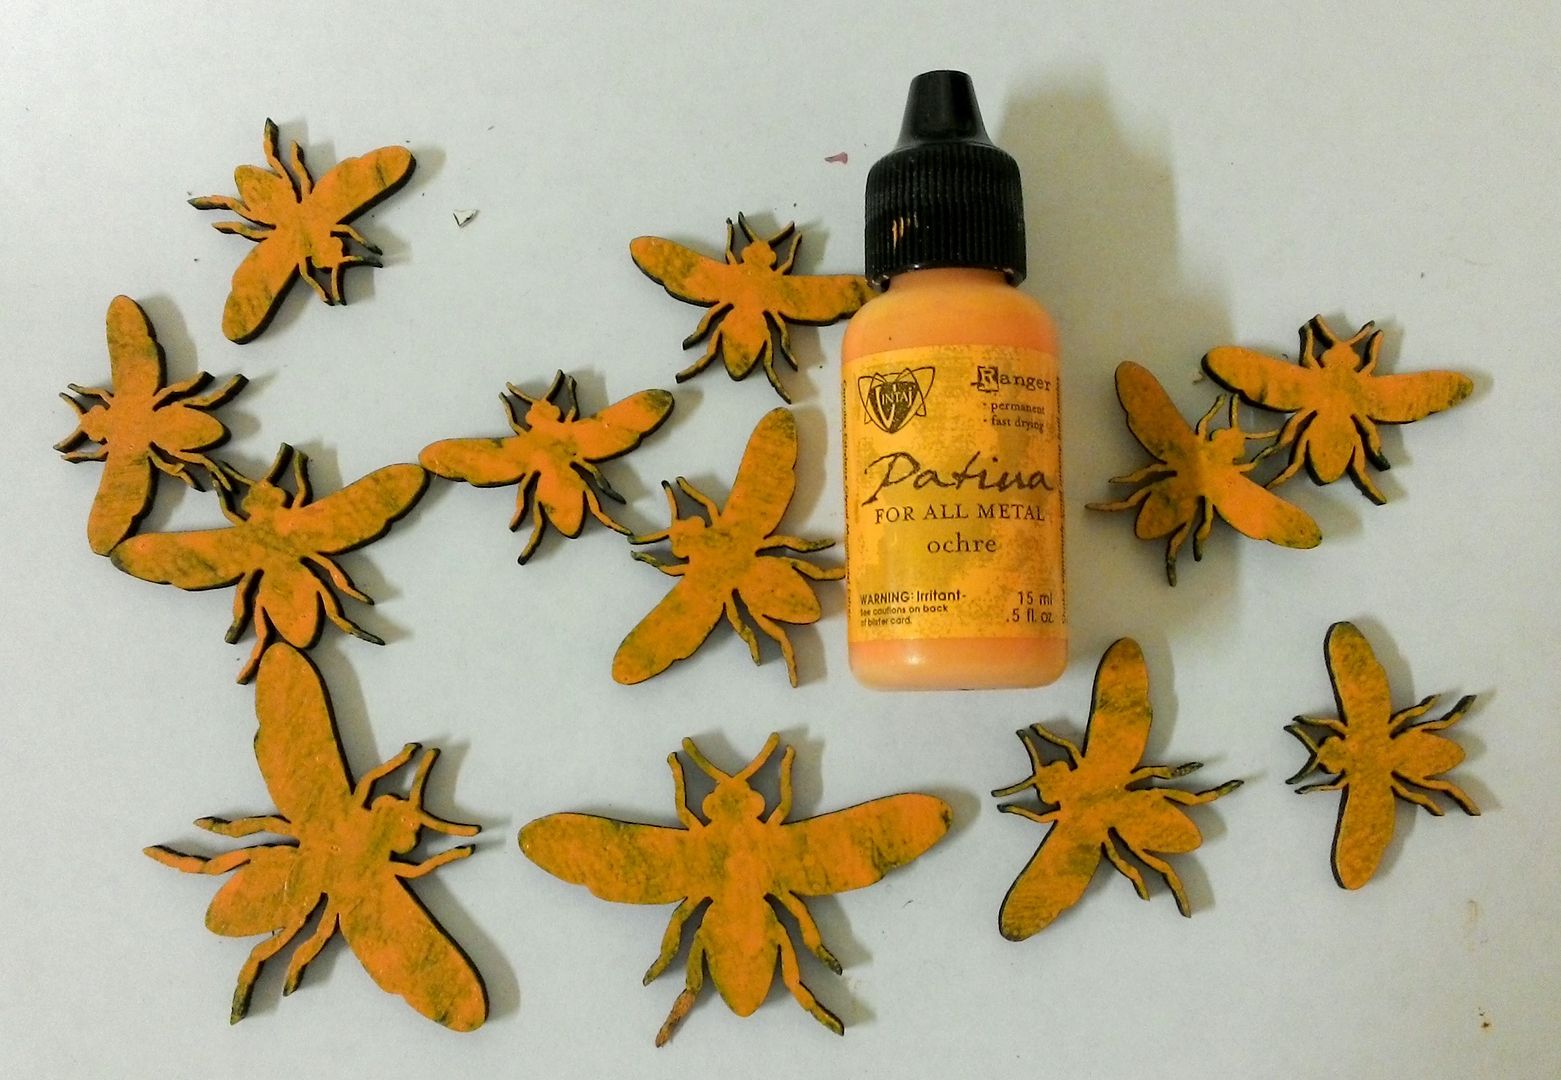
For an additional decorative touch I used Masonite bees.

I started by painting the bees with Ocher Patina paint.  I didn't completely cover up the brown of the Masonite but tapped the paint on with a brush.
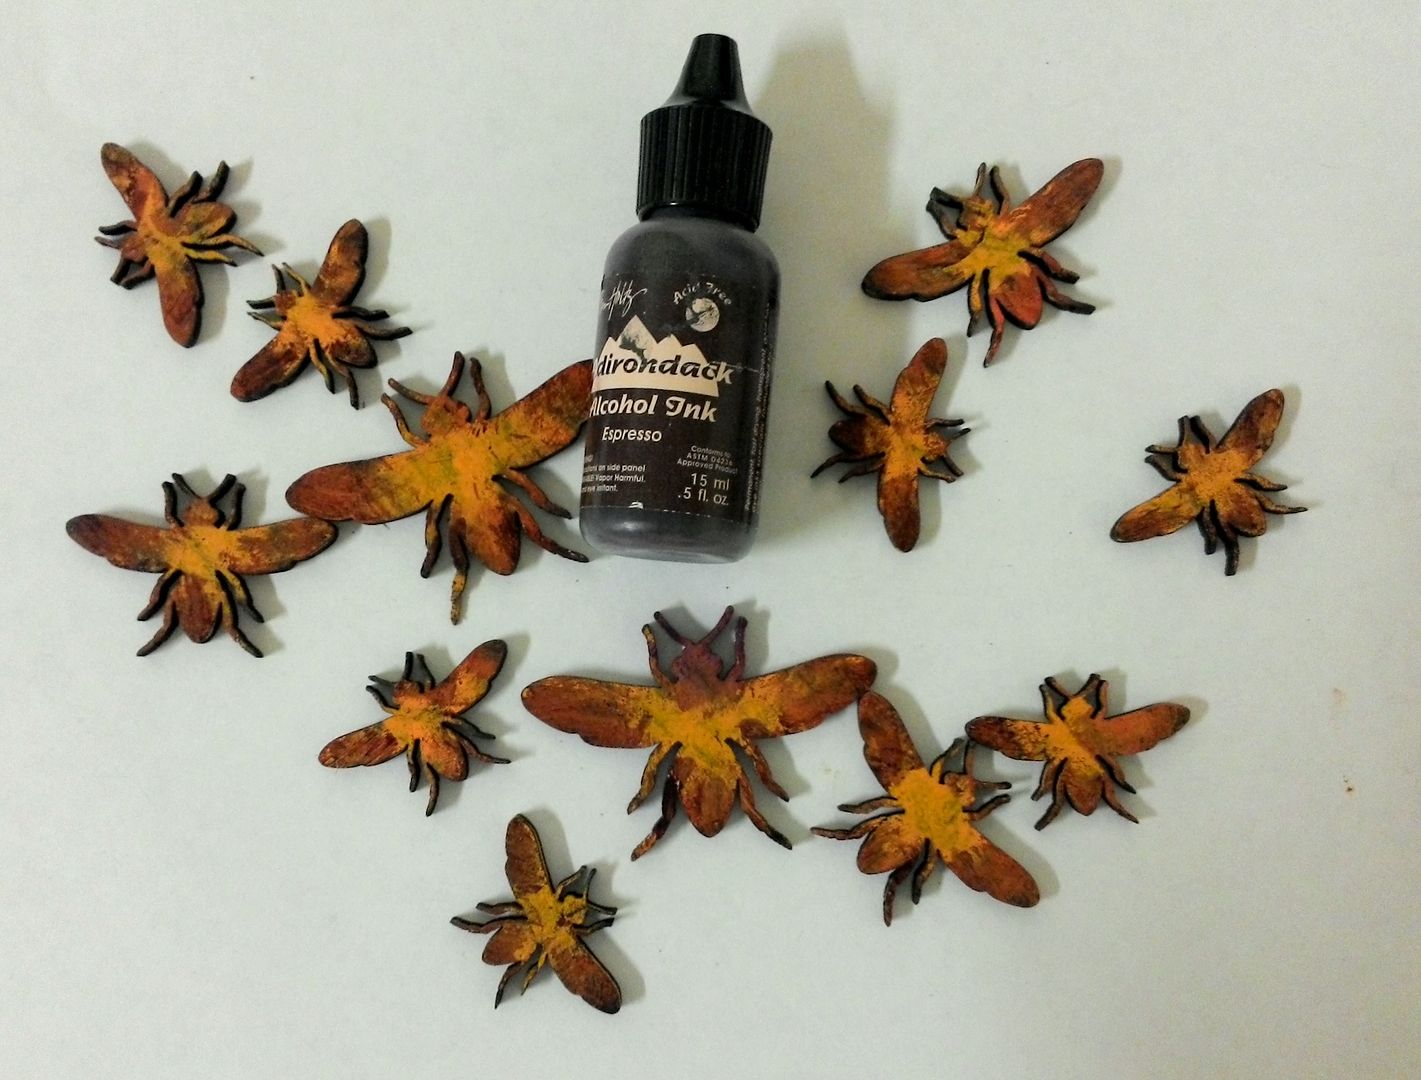
Next, while wearing a rubber glove, I used my finger to lightly brush on Espresso Alcohol Ink.
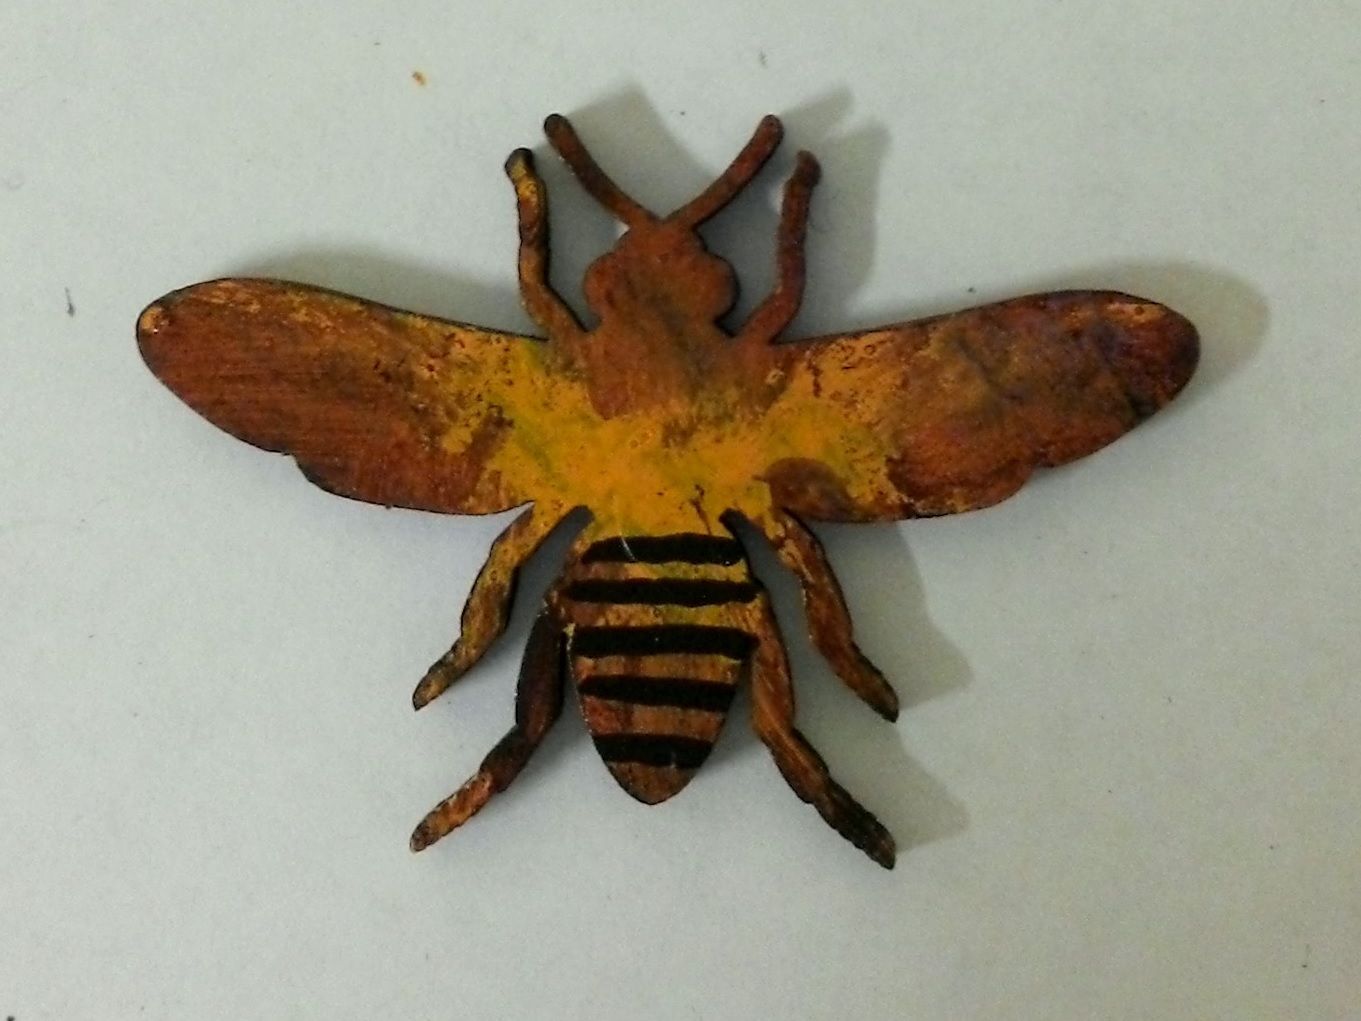
For a final touch I used Onyx Patina paint to paint black stripes.
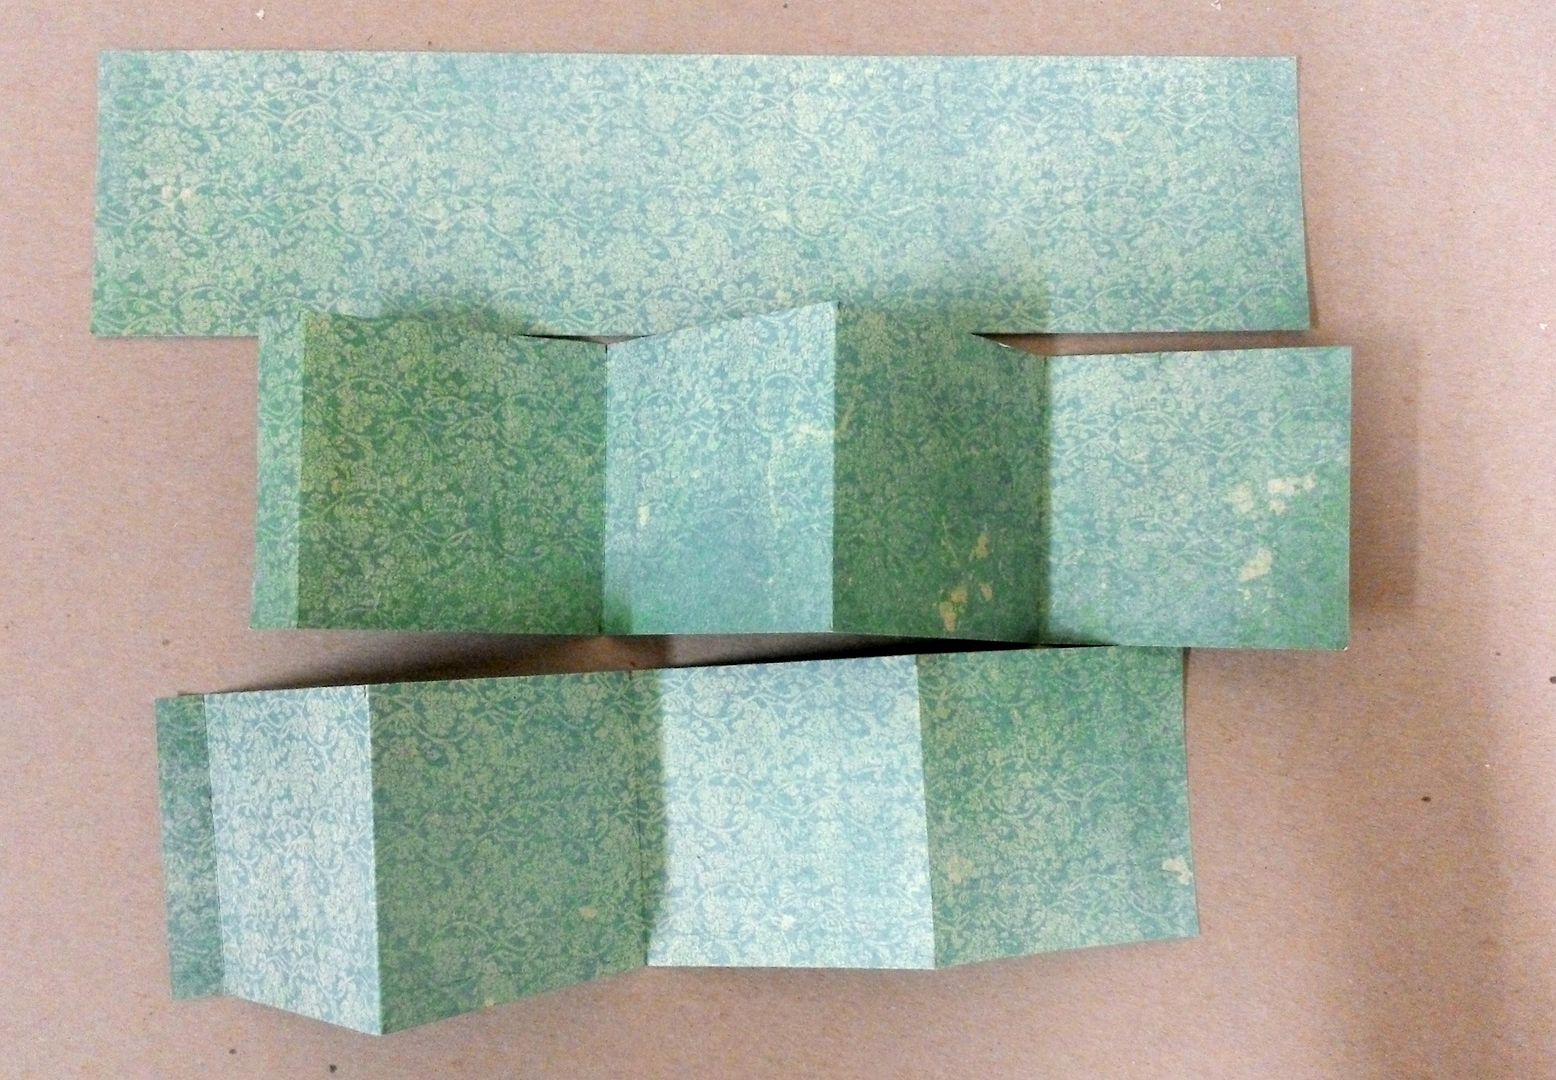
To make the book, cut strips of decorative paper 2 7/8” tall and as wide as the paper.  Cut as many strips as you like based on how many panels you want in the book.  The only restriction to the number of strips is the size of the box and you must have an even number of panels to facilitate gluing the book to the box.  I suggest using 12x12 paper as the strips will be longer and you will have to cut and glue fewer together.

Score and fold the paper strips every 2 7/8".  You should end up with a short piece at the end of each strip which will be used to connect the strips together.  For the sample piece, I cut 4 strips.
Connect the strips together.  Cut away any short sections that you didn’t use to connect the strips.  I decided to go with 14 panels.  Notice the direction of the folds and how the end pieces lay flat on the surface (this means the book is folded in the right direction.  Decorate the pages.  Be mindful of the bulk of the book to make sure it will fit in the box.  In addition to using images from the collage sheets I also used bee poems.
Glue one end of the book to the inside bottom of the box and the other end to the inside lid of the box.
Lastly, I added a stained wooden knob to the top of the box.

Coasters
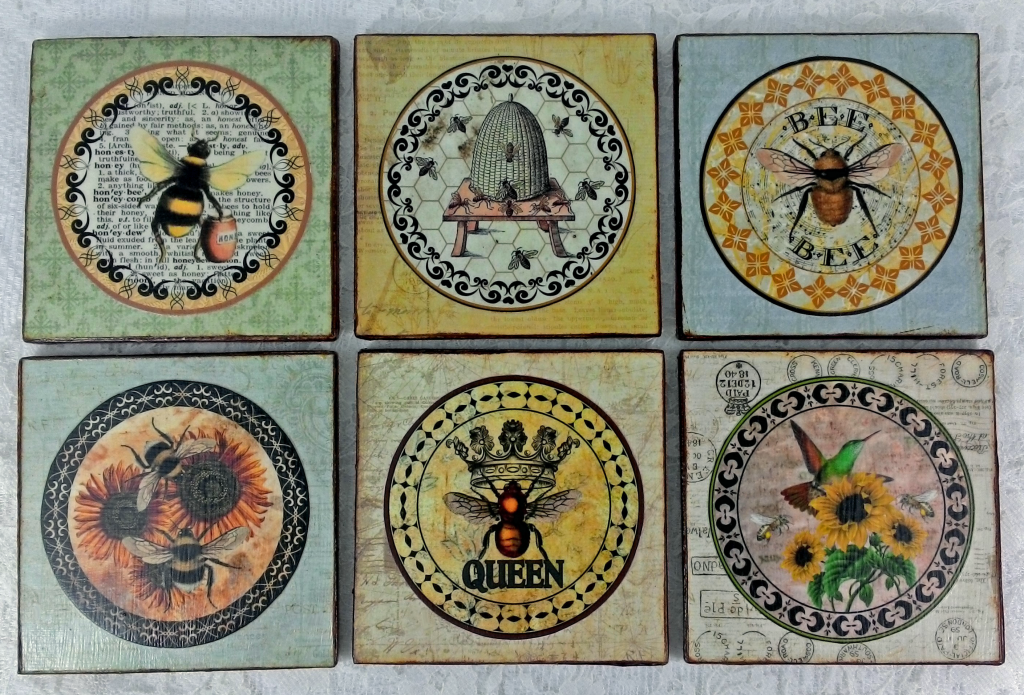
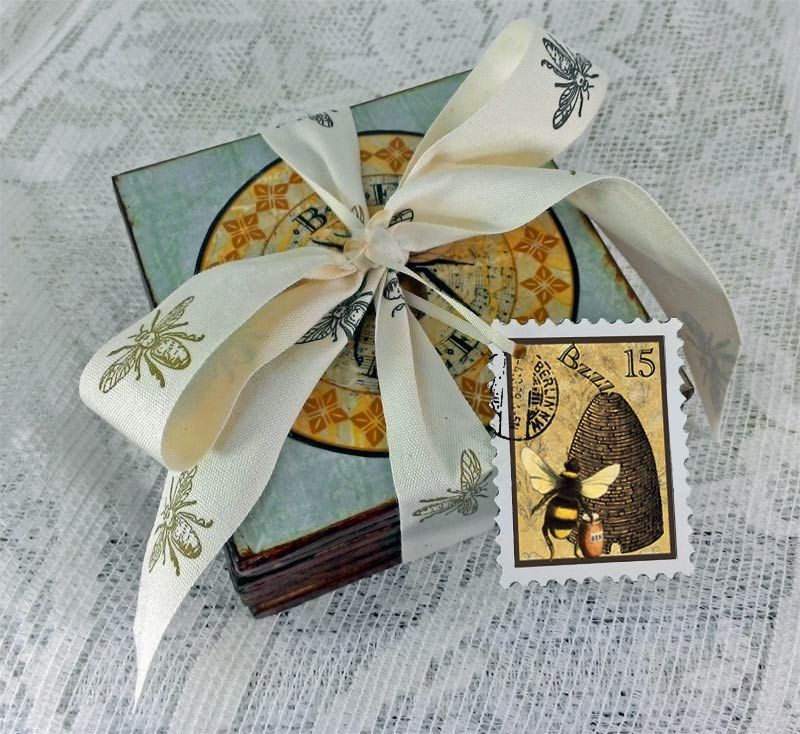
After creating the Bee collage sheets with the round medallions, I was thinking that they would be perfect for coasters (I need a new set of coasters).  I think they would also make a great gift.
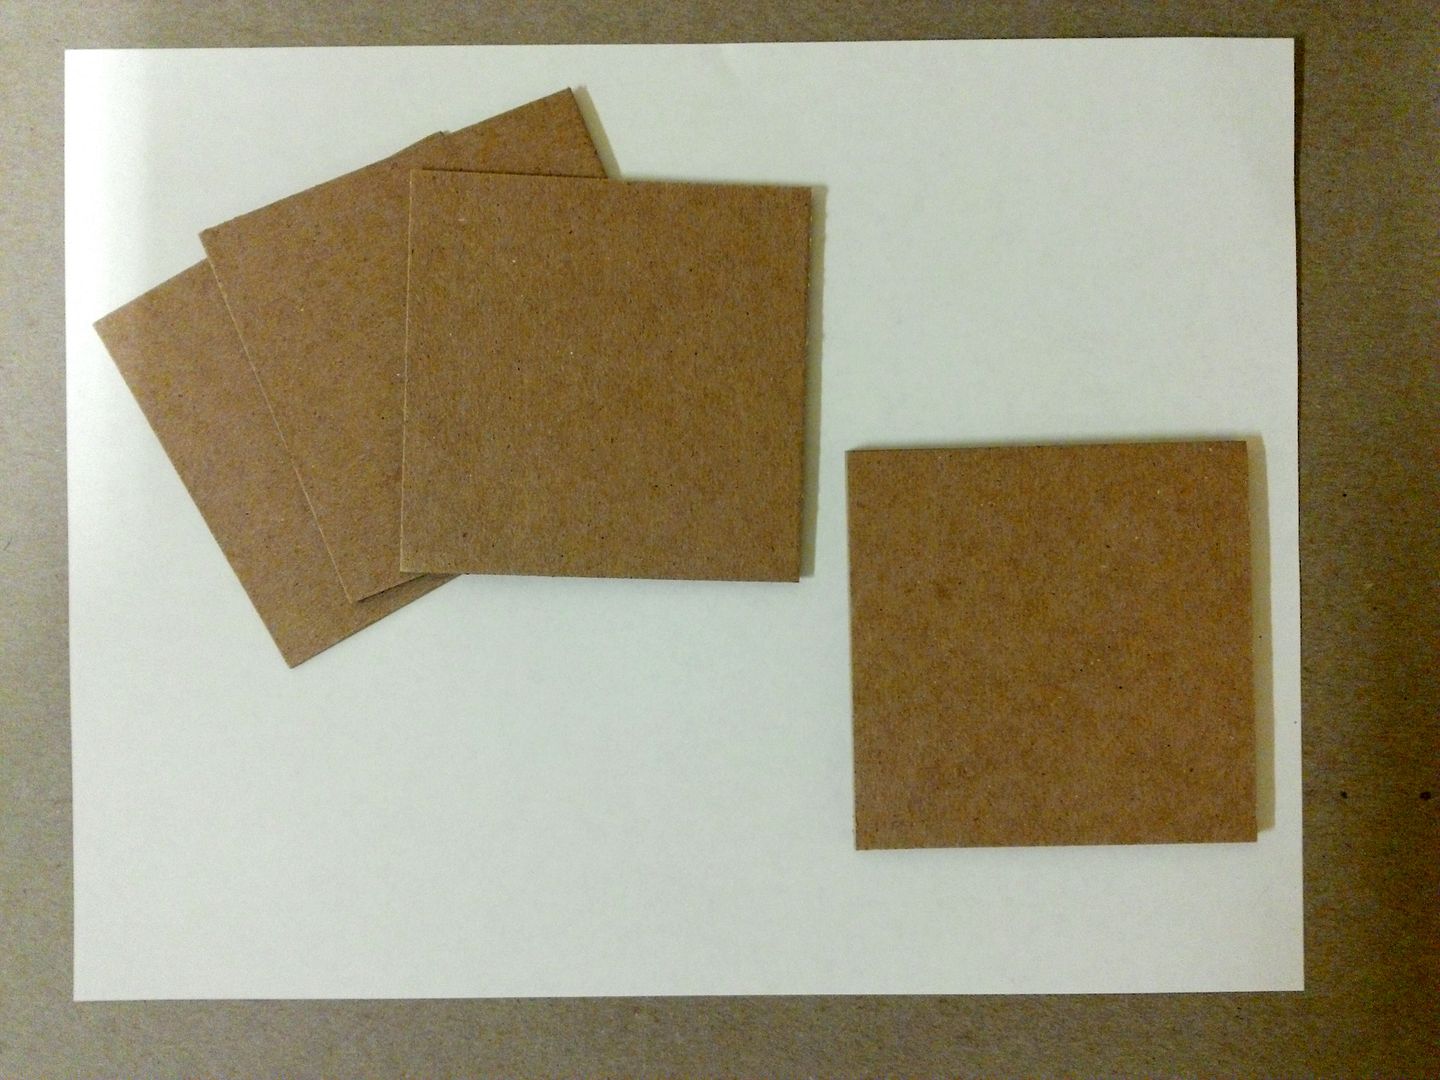
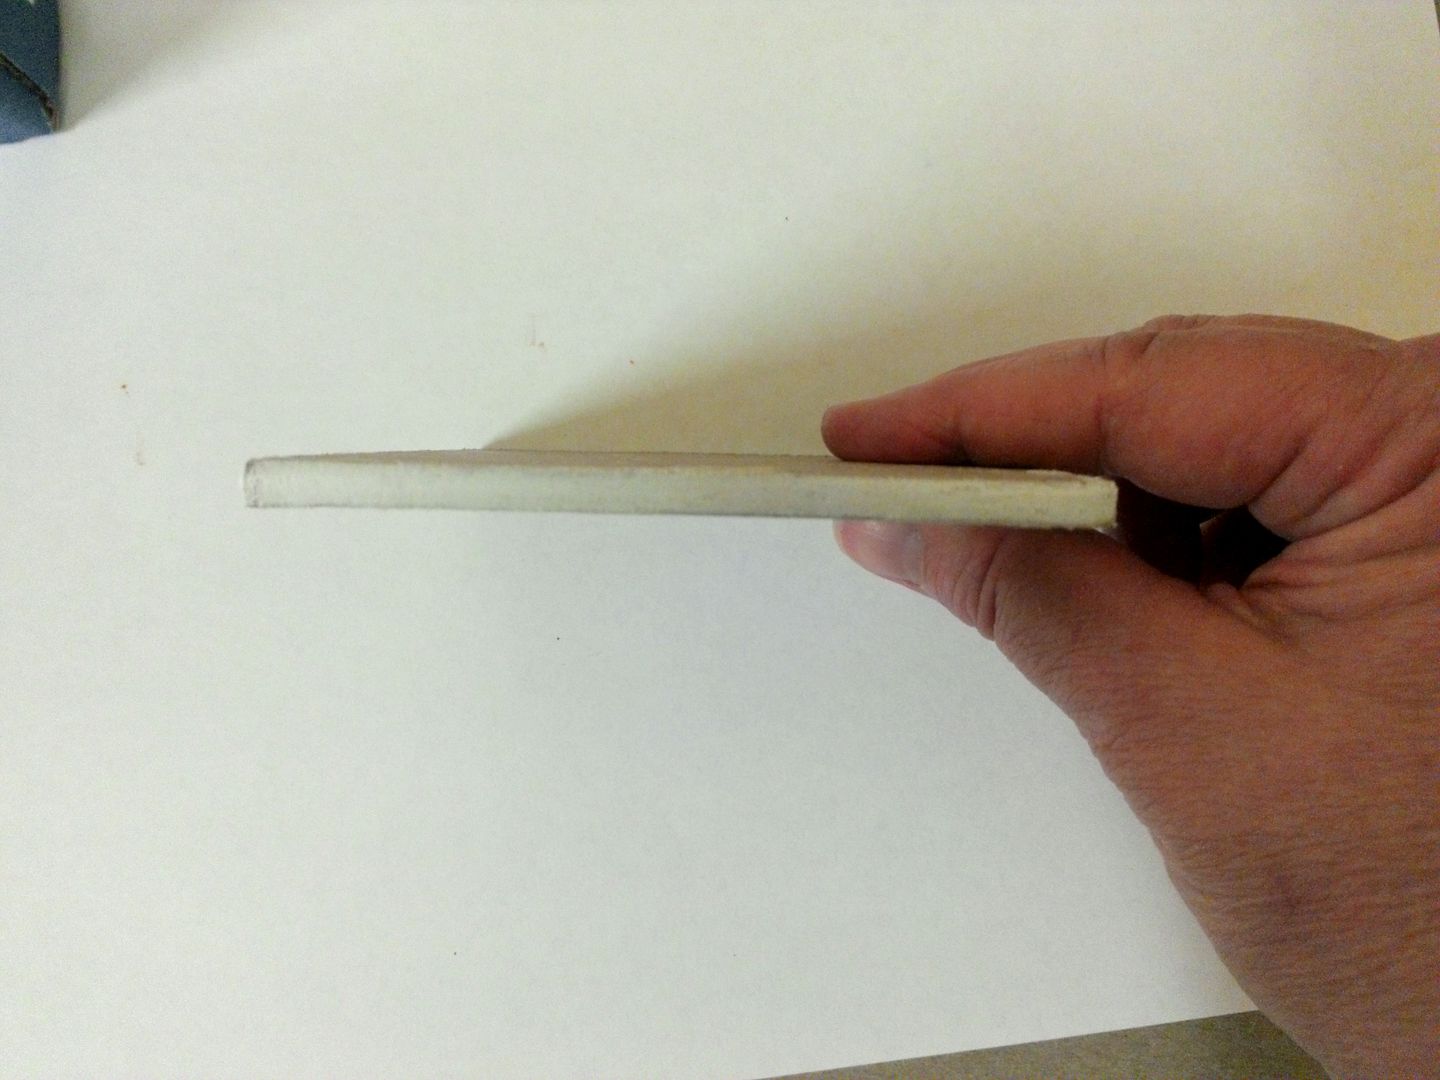
To make each coaster I cut 3 pieces of heavy chipboard 3 ½” square.  I glued the 3 pieces of chipboard together to form one coaster.
I sanded the edges to make sure they were even and that there were no loose bits.  Next, I applied a product called Texture Magic to the edges so that you could not tell that there were 3 pieces layered together.  I used this product because it was handy but you could use anything that you might have like Gesso, wood filler, embossing paste etc.; anything that hides the layers.
I lightly sanded the edges one more time to make sure they were smooth.

Next, I used Vintage Photo Stain to color the edges (you could also paint them).  Depending on the product you used to cover the edges, you may or may not be able to stain them.  I glued decorative paper to each side and then the medallions from my Bees collage sheet.  I sealed the coaster by painting it with multiple layers of Mod Podge.