

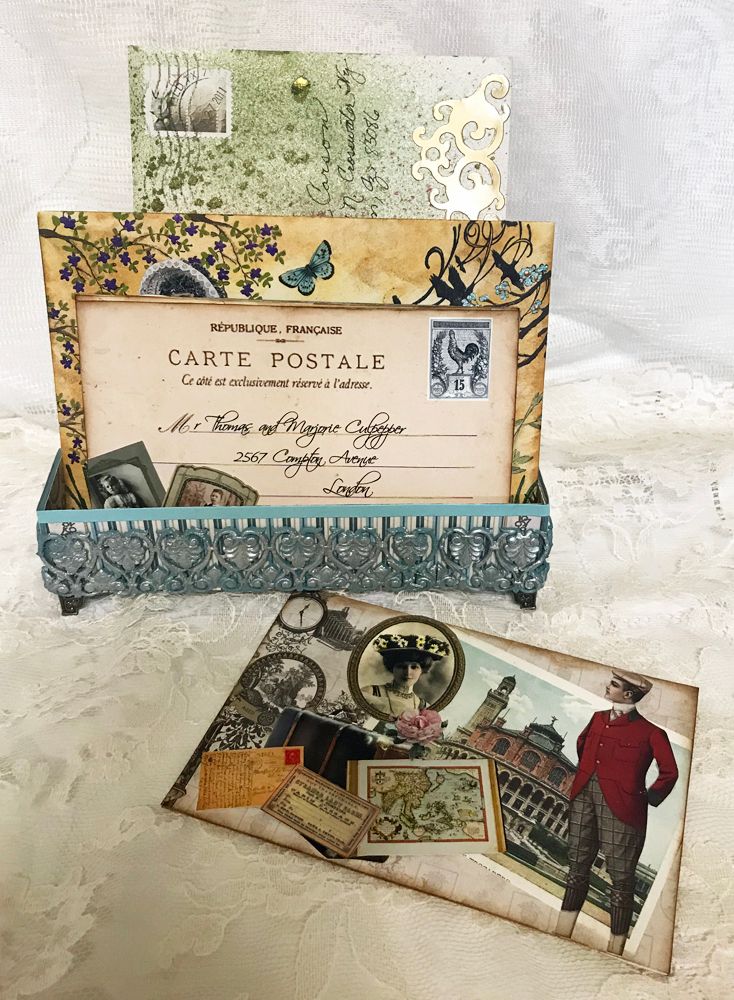
This project was inspired by the
Gentleman’s Emporium 6x6 paper pad. I
haven’t done a collage project in a while, so I thought it would be fun to make
some faux postcards and a simple holder (which I’ll show you how to make) with
which to display them. I also displayed some of my altered envelopes behind the
postcards.

In terms of a theme for the cards, I went
vintage (of course), and then I thought I would have a little fun.
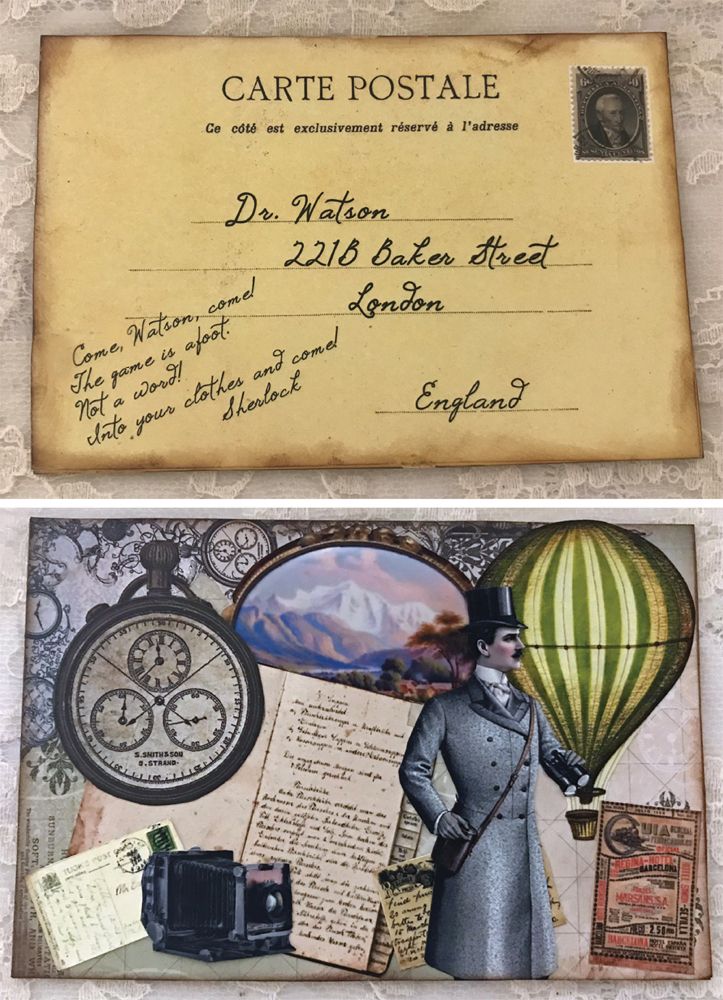
The first card is from Sherlock Holmes (who
is in Argentina on the trail of his nemesis Professor Moriarty) to his sidekick
Dr. Watson.
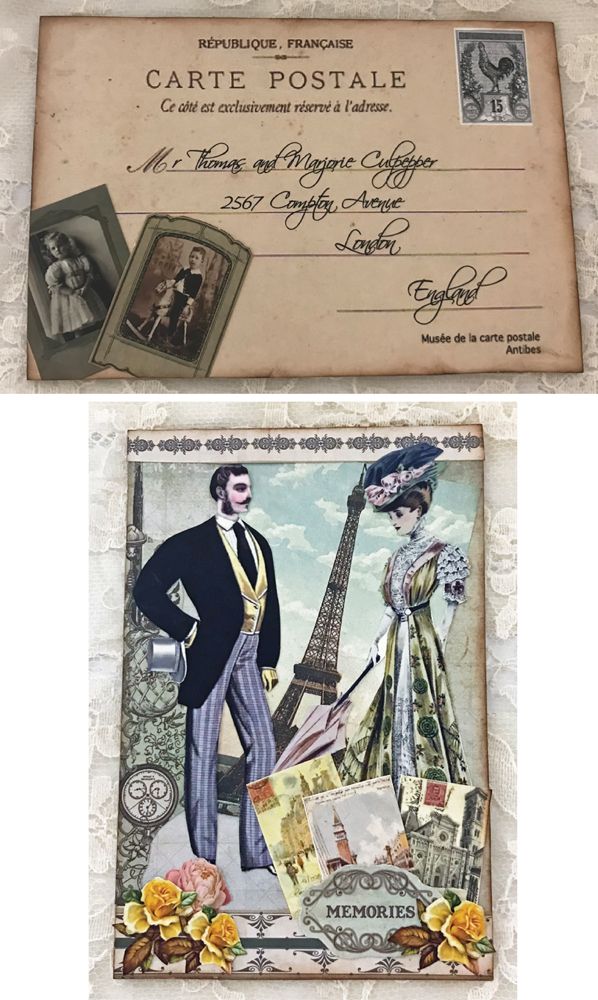
 The second card is a couple vacationing
in Paris, sending a postcard back to their children in London.
The second card is a couple vacationing
in Paris, sending a postcard back to their children in London.
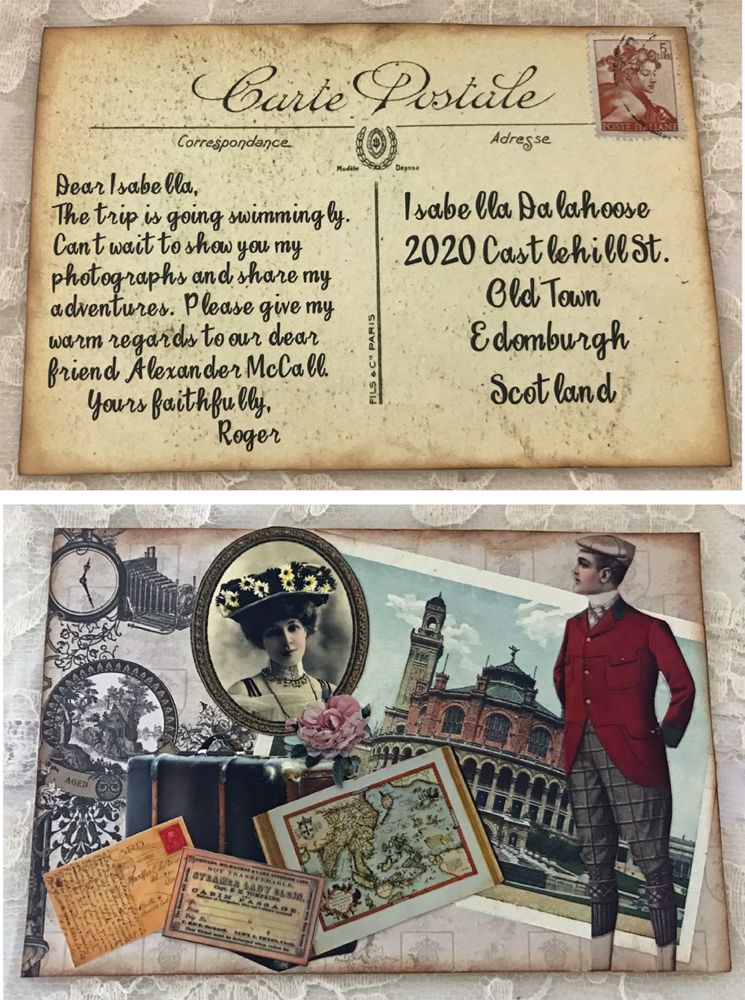
The third is a Scotsman on tour writing
to his friend Isabella. One of my
favorite authors is Alexander McCall, who lives in Scotland, and one of my
favorite series he writes is set in Edinburgh and revolves around Isabella Dalahoose.
The images I used to decorate the cards
come from new collage sheets and image sets, as well as some older collage
sheets (more info below and in the tutorial portion of the blog post). You’ll also find a Free vintage postcard image
further down in the post.
NEW COLLAGE SHEET & DIGI IMAGE SETS
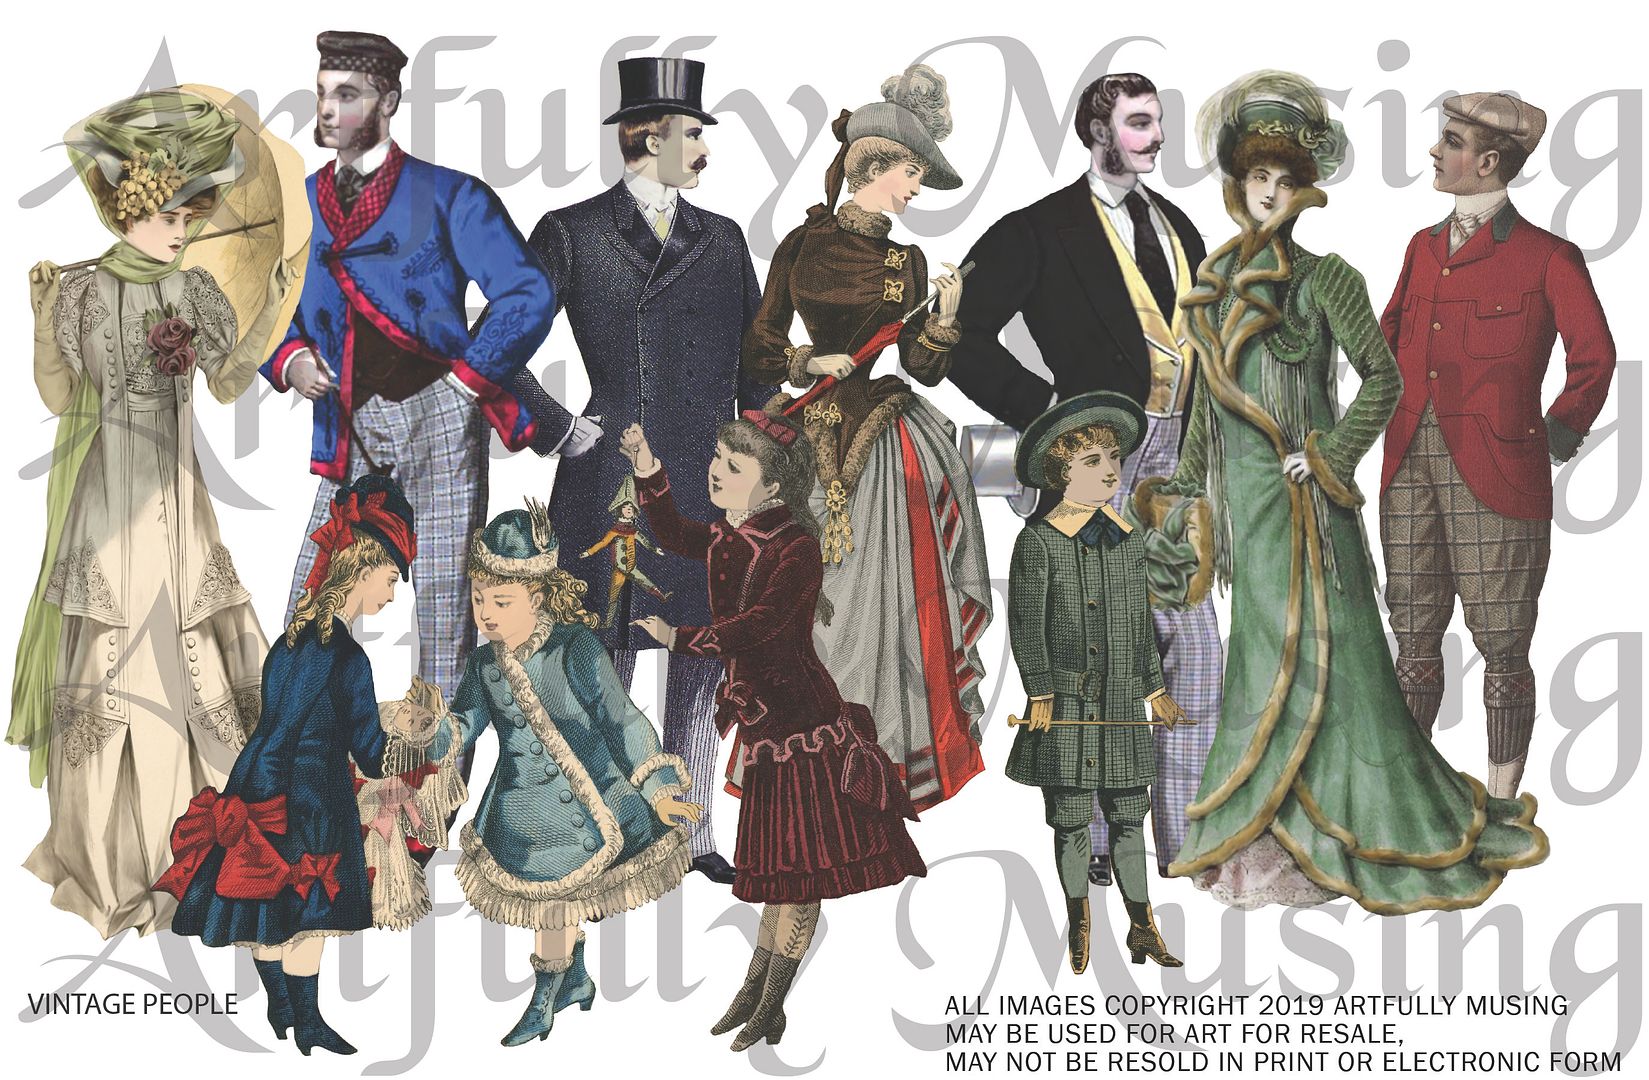
This sheet contains 11 smartly dressed men from the Victorian and Edwardian periods. To purchase this sheet, click on the image below.

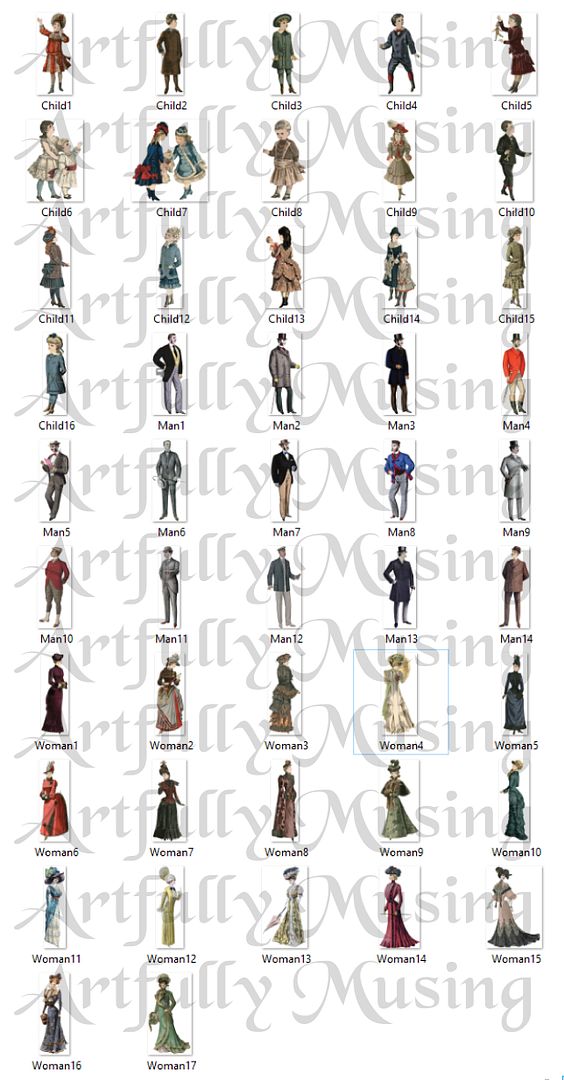
This set is packed with men, women, and
children from the Victorian and Edwardian periods. Included are all of the images from the
Dapper Fellows Collage Sheet, the Victorian Women Collage Sheet, and the
Victorian Children Collage Sheet, plus an additional 11 images for a total of 47
images. To purchase the image set, click on the image below.
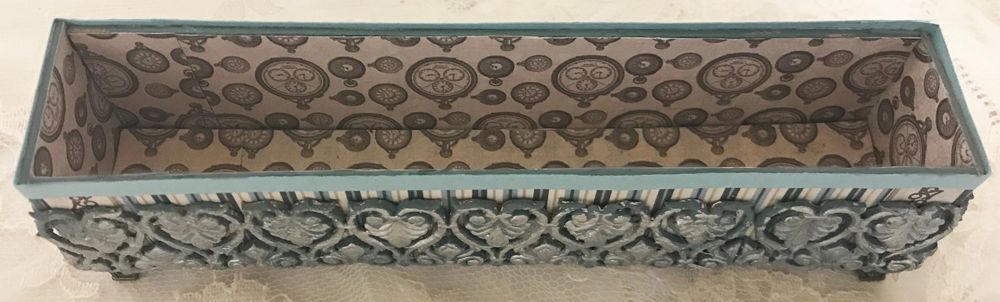
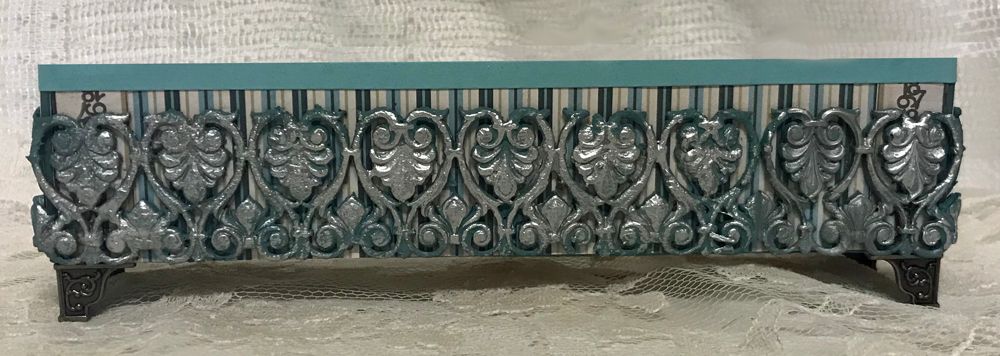
MAKING THE HOLDER

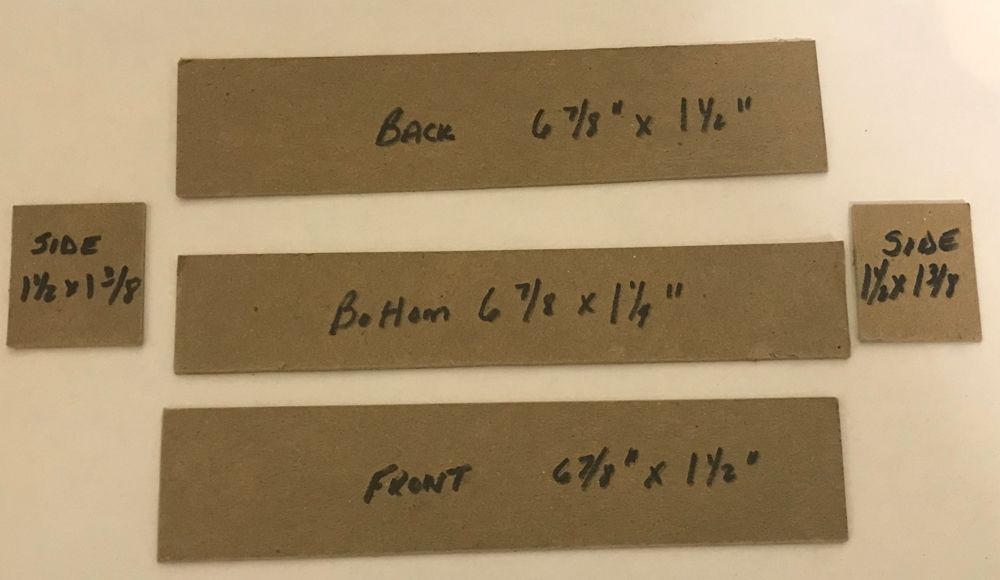
I started by cutting 5 pieces of thick chipboard (you could layer thinner chipboard). To determine the measurements, I used a combination of the size of the postcards, the side of the clay trim, and the size of the feet.
Front and Back – These needed to be at least as long as the postcard but also long enough to work with the trim. I used a silicone mold and polymer clay (you could use paper clay or Mold & Pour) to make the trim. The trim has a repeat design, so I wanted to make sure the trim started and ended between the designs. The measurement I used was 6 7/8” wide x 1 ½” high. The height is arbitrary. It needs to be high enough to hold the cards, and I wanted it low enough to see as many of the cards as possible.
Bottom – The bottom piece was cut the same width as the front and back (6 7/8”) and wide enough to hold however many cards you want to display and to accommodate the size of the feet (1/1/4”).
Sides – The height of the sides is the same measurement as
the height of the back and front. But
the width needs to be a little wider than the width of the bottom. The reason for the difference is based on how the
pieces are glued together; you need to not only use the bottom width measurement
but also include the depth (edge) of the back and front pieces. In the case of my holder, that ended up being 1
3/8”, which I derived by the bottom width of 1 ¼” + the depth of my chipboard, which was
1/16” for the front and 1/16” for the back.
 Assembly
& Decoration
Assembly
& Decoration
I first painted all of the chipboard
edges with a color that would complement the decorative paper (sand the edges
before painting if necessary). Next, I covered all of the chipboard (back and
front) with paper. It is much easier to
paper before rather than after you assemble the pieces.
 I glued the front and back pieces to the
bottom piece. Once dry, I attached the
side pieces. Attaching the side
pieces last gives the holder the best support as they are glued to the edge of the front, back, and bottom pieces. Because you are attaching the side pieces
last, the width measurement needs to include both the width of the bottom and
the depth of the front and back chipboard.
I glued the front and back pieces to the
bottom piece. Once dry, I attached the
side pieces. Attaching the side
pieces last gives the holder the best support as they are glued to the edge of the front, back, and bottom pieces. Because you are attaching the side pieces
last, the width measurement needs to include both the width of the bottom and
the depth of the front and back chipboard.
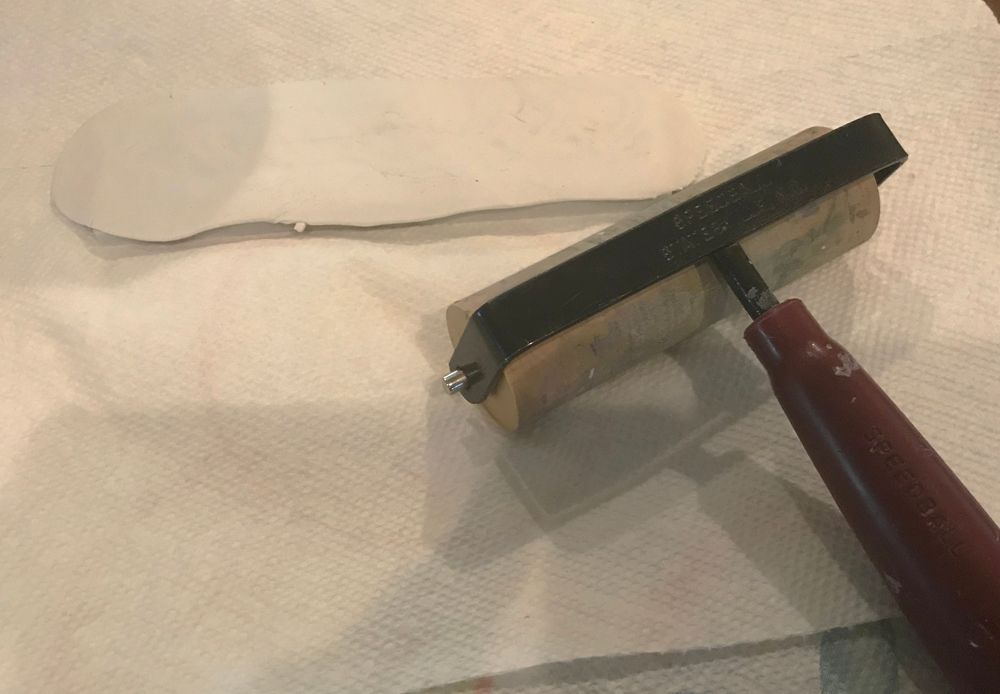
Making
& Attaching the Border
 I used silicone mold and polymer clay to
make a border to fit around the holder.
Because the mold is so detailed, I used a roller to press the clay into
the mold.
I used silicone mold and polymer clay to
make a border to fit around the holder.
Because the mold is so detailed, I used a roller to press the clay into
the mold.
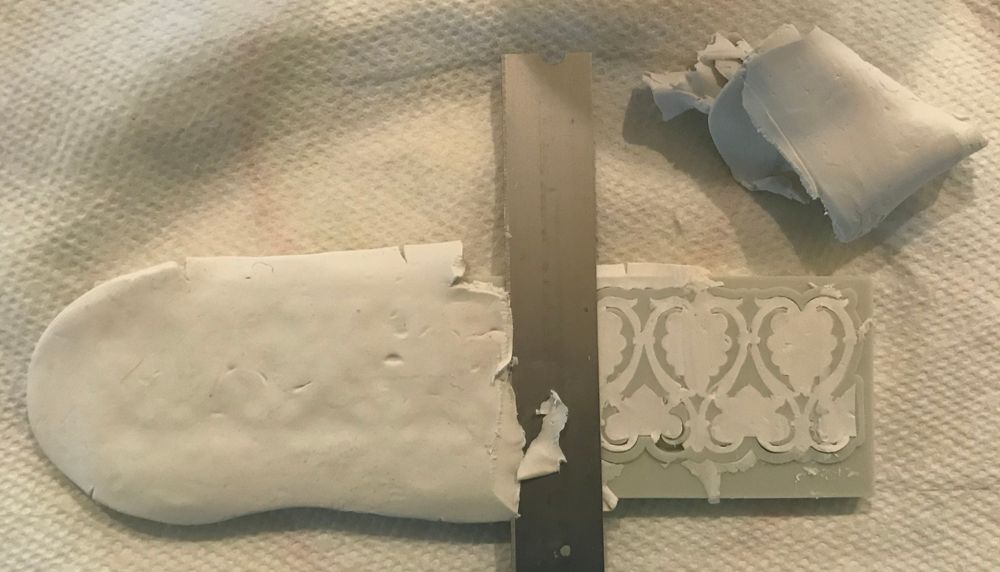

The border is shorter than the width of
my holder. Because of the pattern of the
border, it is easy to use a full strip and then piece a few more sections of the
pattern to cover the entire width.
 I also made it just long enough to be slightly longer than the holder. The reason is when I attach the border to the
side pieces, they will butt up against the back of the front pieces to give me a nice
edge. Early I discussed using this
consideration in determining the length of my front and back pieces.
I also made it just long enough to be slightly longer than the holder. The reason is when I attach the border to the
side pieces, they will butt up against the back of the front pieces to give me a nice
edge. Early I discussed using this
consideration in determining the length of my front and back pieces.
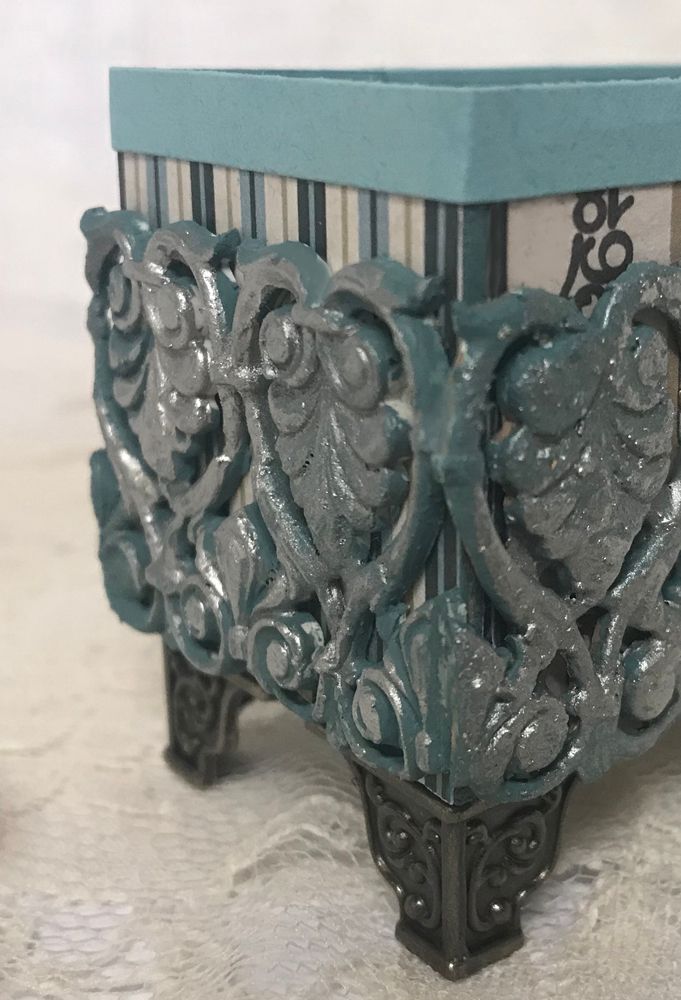
 I covered the backside with paper from
the Gentlemen’s Emporium 6x6 Paper Pad.
I covered the backside with paper from
the Gentlemen’s Emporium 6x6 Paper Pad.


Lastly, I added feet to the bottom of
the holder and a strip of paper to the top as trim.
POSTCARDS
For the front, I used images
of vintage postcards (you will find them further down in the post and can
download them for your own use.) Before I
printed the postcard images, I added an address and message. I
mounted the images on a thin piece of chipboard to make them sturdier.
Next, I collaged images from the new
collage sheet and image sets, plus two other collage sheets, Rose Garden and Paris Postcards. I also cut out detailed images
from the paper pad.
Lastly, I inked the edges of the cards with Vintage Photo Distressed Ink.
FREE POSTCARD IMAGES
Feel free to click on each image to download these images and
use them in your art. To download the images, right-click on the images and select "Save Image As" from the popup menu.
1 comment:
I'm so sorry... but I'm stuck.... I downloaded the postcards, but they are "read only"... how can I change that so I can alter them? Thanks so much!
Post a Comment