

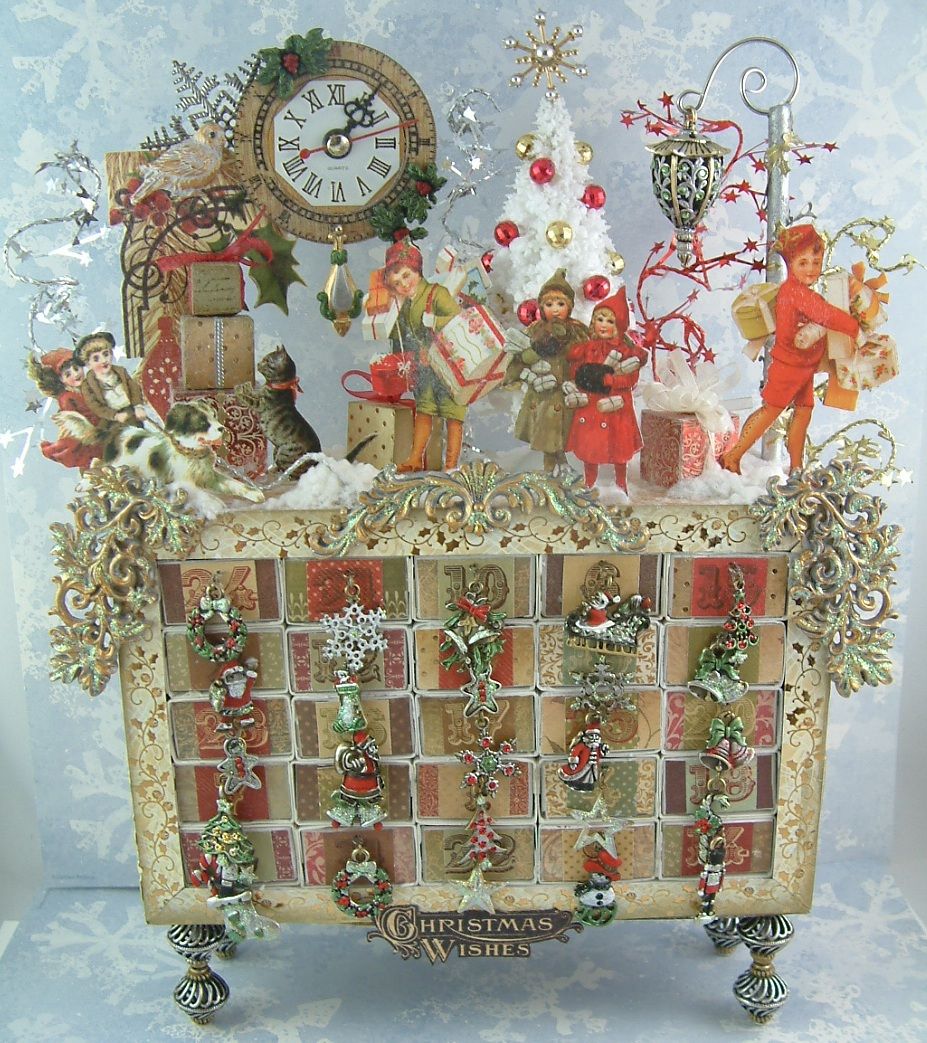
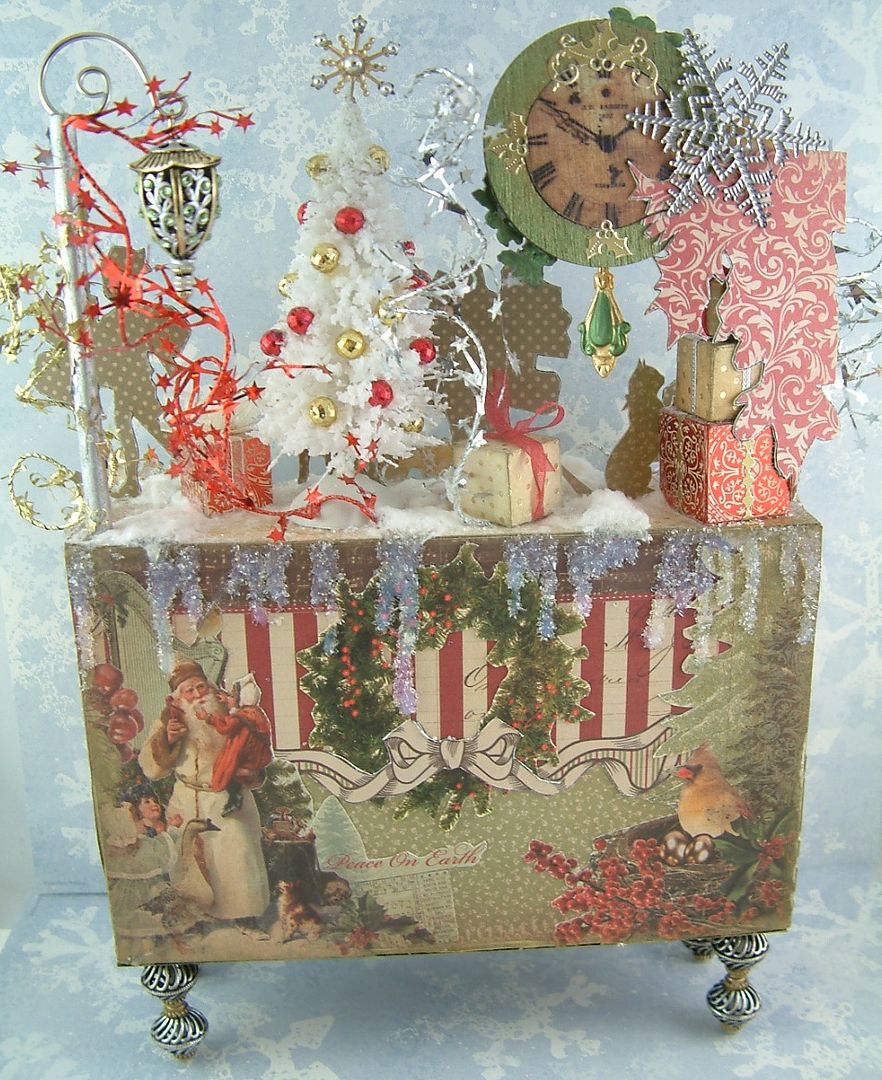
In this calendar each day is represented
by a matchbox drawer. There are 25
matchboxes in total (5 across and 5 high).
With having a drawer as opposed to a door you can have larger surprises. The overall dimensions of the cabinet are:
Entire
Piece: 11” High x 7 ½” Wide x 2 3/8” Deep
Drawers
with Foam Core Border: 4 ½ “ High x 7
¼” Wide x 2 ¼” Deep
Height
of Feet: 1 ¼” Tall
Stuff
on the Top of the Cabinet: 5” Tall
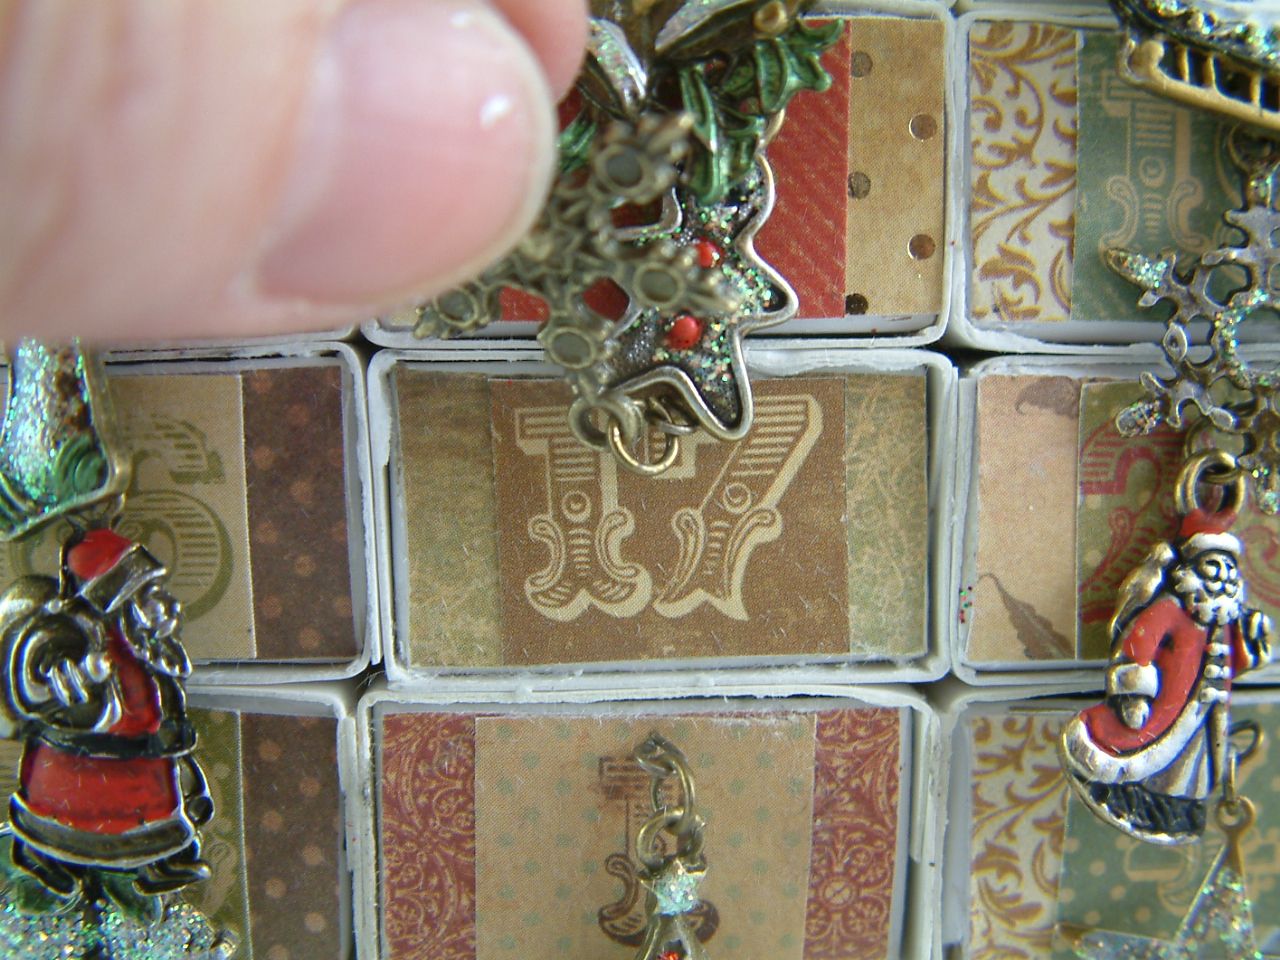
The charms are the drawer pulls. To see the number or date of the drawer you
just lift the charm. The numbers are not
in order as I think that is more fun.
In this post I’m going to cover the
differences between the matchbox chest I demonstrate in the video tutorial and
this Matchbox Advent Calendar Chest. For
general information on how to make a matchbox chest you can watch my video
tutorial.
At
the bottom of this post is a complete list of products I used for this project
that are carried by Alpha
Stamps.
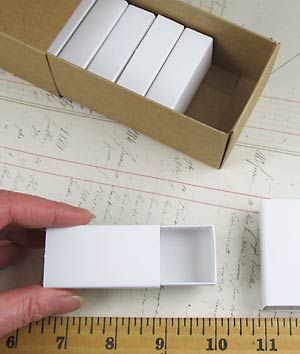
MATCHBOXES I USED
For this project I used a different matchbox
than the one I used for the matchbox chest tutorial. I needed a larger font to accommodate the day
of the month and the Christmas charm that acts as a pull. You can see in the picture below the
difference in the matchboxes. The one on
the right is the one I used for the advent calendar and the one on the left is
the one I used for the matchbox chest.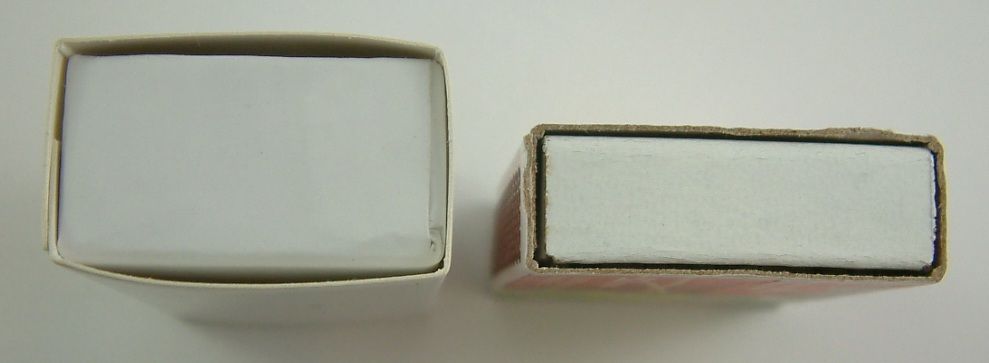
The one I used for the calendar is 2 ¼”
long x ¾” tall by 1 ¼” wide. Alpha
Stamps is carrying them and they come in a box of 8. You’ll need 4 boxes to make this cabinet. The container that the individual matchboxes
come in, are also a large matchbox. Stay
tuned for another project using the larger matchbox container.
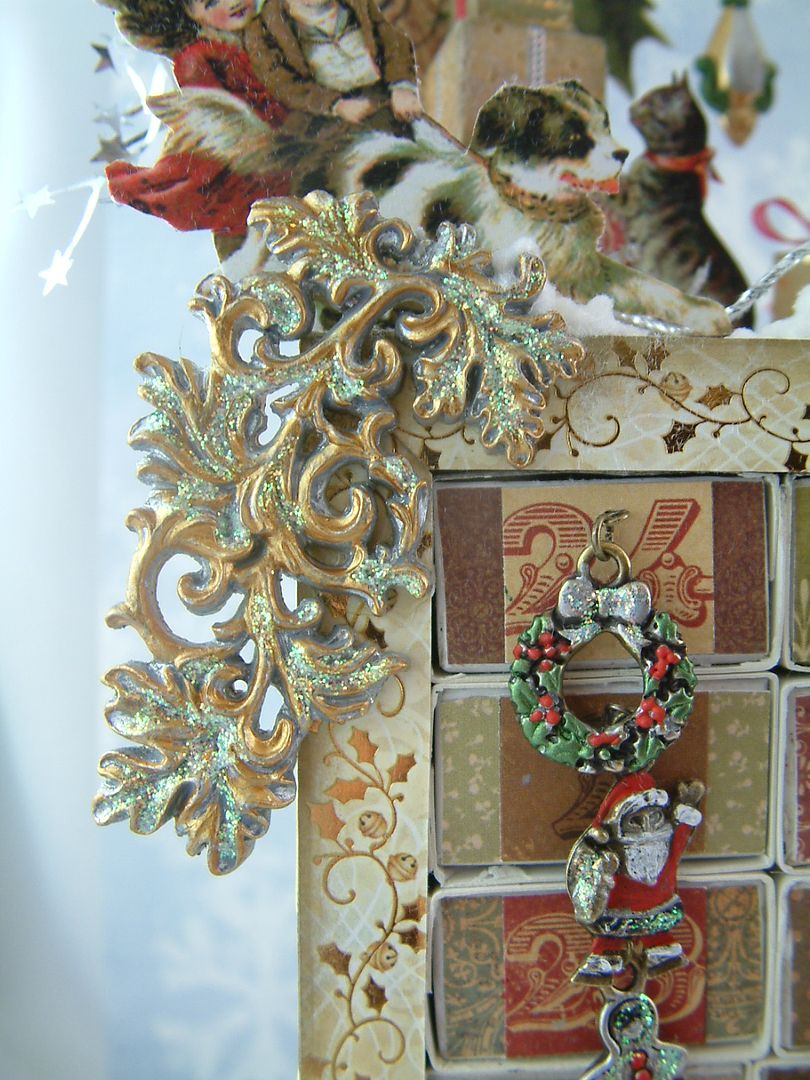
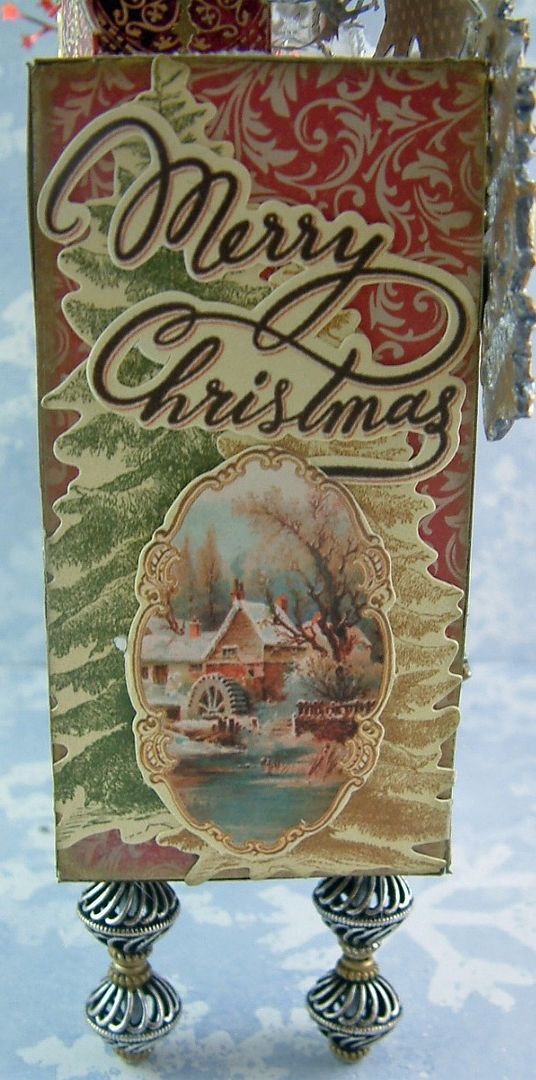
I did this for a couple of reasons. First, it gave me a nice deep frame around
the front of the chest to accommodate the paper and embellishments. You can see in the picture below where I have
glued the Antique Silver Leaf Flourishes to the front of the cabinet. These were originally silver, I added some
gold and then Diamond Stickles in the grooves for sparkle.
Second, it gave me a surface that I could
easily poke with a pin to insert dimensional embellishments. One of the tricks I use to get paper images
to stand up by themselves is to insert a pin in between the image and the
backing of cardstock and or decorative paper.
In the picture below I used this technique to attach the images to the
top of the cabinet. The Star Tinsel is
wired so you can strip off the coating and stick the wire into the foam core as
well.
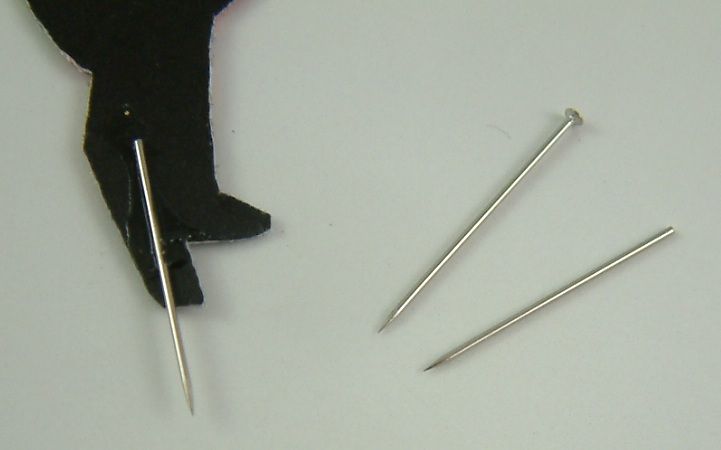
ADDING A STRAIGHT PIN TO THE IMAGES
- Snip the head off of a small straight pin.
- Glue your image to a piece of light cardstock. You want to use light cardstock because by the time you have all three layers together it gets hard to cutout the image. The light cardstock makes the image stiffer but not too hard to cut out. Cutout the image.
- Glue the pin to the cardstock at the point where you want to attach the image to the foam core. I used Glossy Accents.
- Glue the cardstock to decorative paper. This is so that it will look pretty from the back side. Another option is to print the image in reverse and back the original image with a reverse of that image that way it looks the same from both sides.

Now you are ready to add the image to
the chest. To attach the image to the
top of the chest I pre-poked a hole with a needle then inserted the image with
the pin into the hole. Voila! The image is standing by itself, it looks
good from both sides and you can’t see the pin.
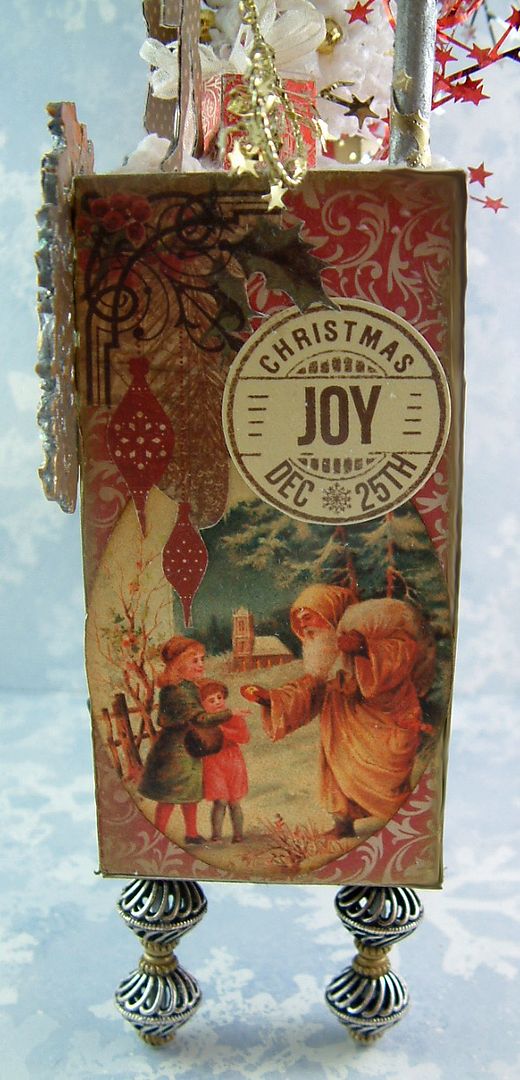
ADDING FEET TO THE CABINET
You all know how I love adding feet to
my projects. For the chest I used two
beads glued together. I thought the
beads looked like Christmas ornaments.
These beads have large holes so I inserted a wooden skewer (painted with
Silver
Alcohol Ink) to give them more stability. I added a little Glossy Accents to the dowel
before sliding it through the beads.
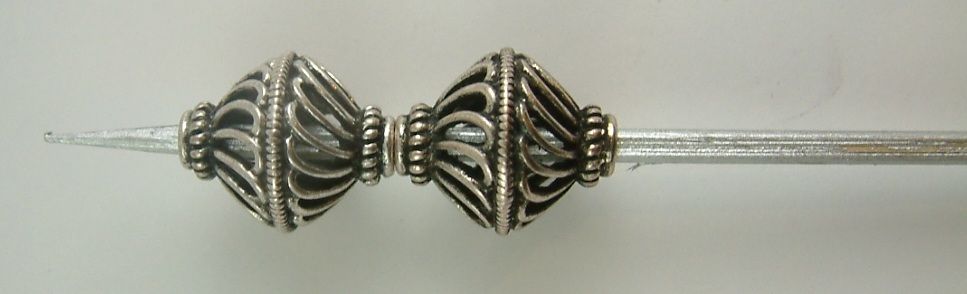
I sniped off both ends of the dowel so
that it was flush with the beads. I
painted parts of the beads with Gold
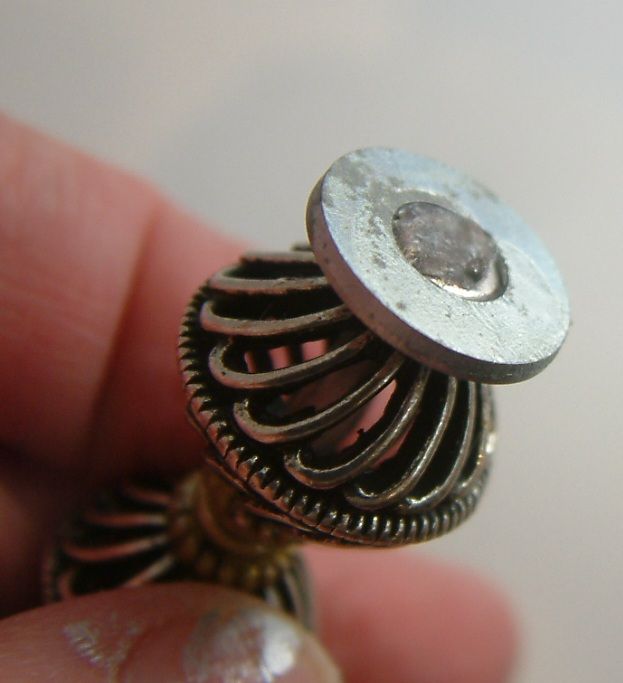
Alcohol Ink. Before attaching the
beads to the bottom of the cabinet I glued them to a silver washer. This was to give me more surface area to glue
the beads to the bottom of the cabinet.
Just gluing the tip of the bead to the cabinet did not provide enough
surface area to make the feet stable.
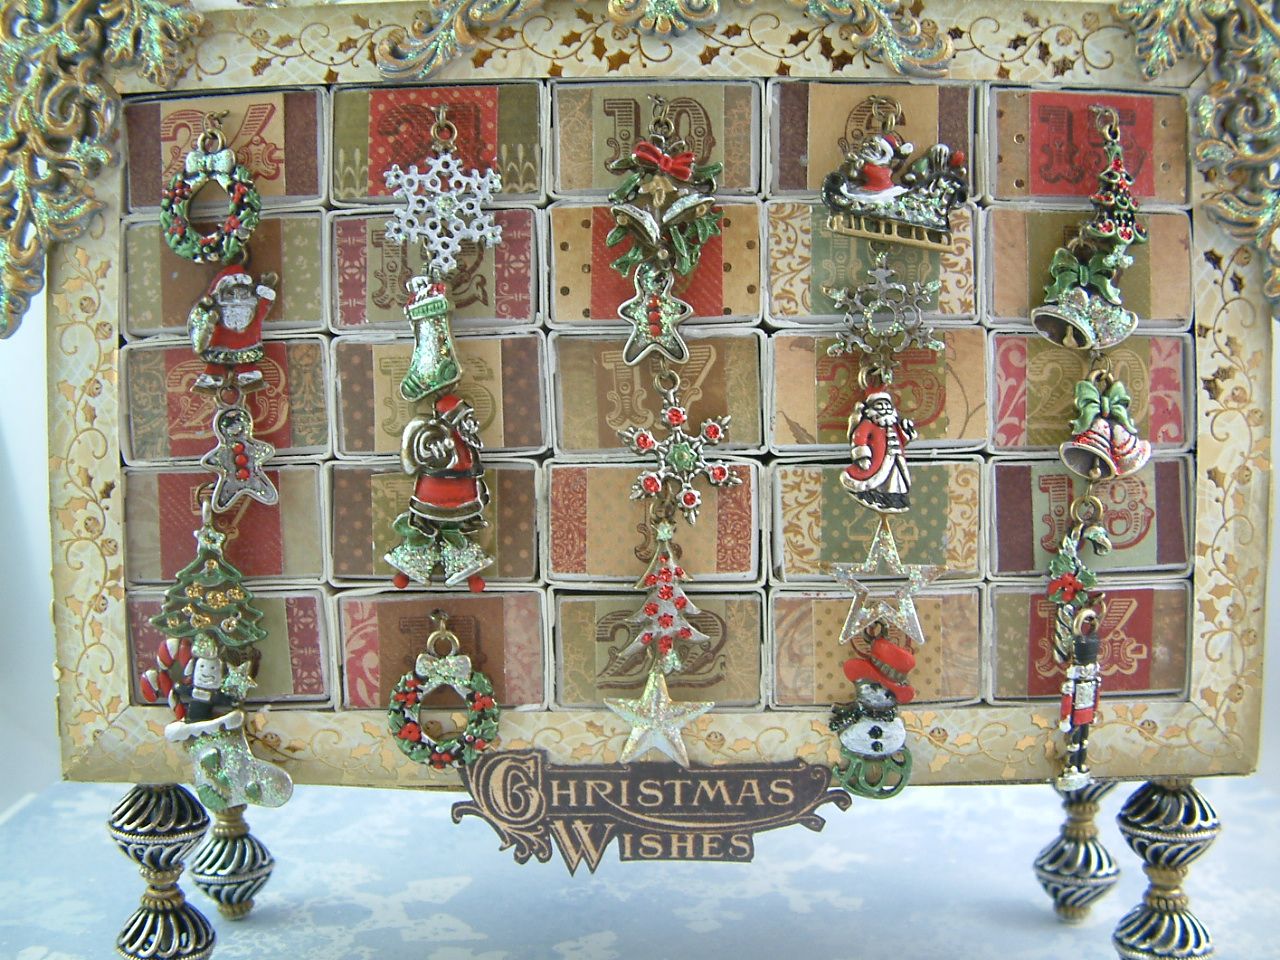
THE DRAWERS
The front of the drawers is the only thing
decorated on the matchboxes. The white
of the boxes matched my color scheme. I used the number stickers from the Turtle Dove line for the numbers on the
front of the drawers.
The charms act as the drawer pulls. Lifting the charm reveals the number or
date. All of the charms were originally
a gold color. I jazzed them up by adding
silver, red, black and green paint and Stickles for sparkle.
Paper lines that would work well for this project are: Joyeux Noel 6x6 Paper Pad and Festive 6x6 Paper Pad – These are the papers I used for my Christmas Mini Albums & Bookshelf Tutorial. Click here to see the tutorial if you missed it. Two others are: City Sidewalks 8x8 Paper Pack and Santa Journey 8x8 Paper Pad.
Paper lines that would work well for this project are: Joyeux Noel 6x6 Paper Pad and Festive 6x6 Paper Pad – These are the papers I used for my Christmas Mini Albums & Bookshelf Tutorial. Click here to see the tutorial if you missed it. Two others are: City Sidewalks 8x8 Paper Pack and Santa Journey 8x8 Paper Pad.
IDEAS FOR YOUR DRAWERS
You can fill your drawers with whatever
you like such as candy or small presents.
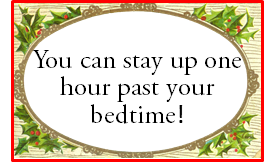
I also thought it would be fun to have other types of treats or prizes
such as getting special privileges like being the one to pass out the presents
(this was a big one in our house) or being allowed to open a present
early. Below are some of the ones I
could think of. Feel free to download
the images and use them as prizes in your calendar. I also included a blank one in case you want
to create your own. They are sized to
fit the matchbox drawers or you can roll them up and tie them with a ribbon
(prolonging the suspense).


Pulling
from a grab bag would be a great way to deal with items that are too big to fit
in the drawers.

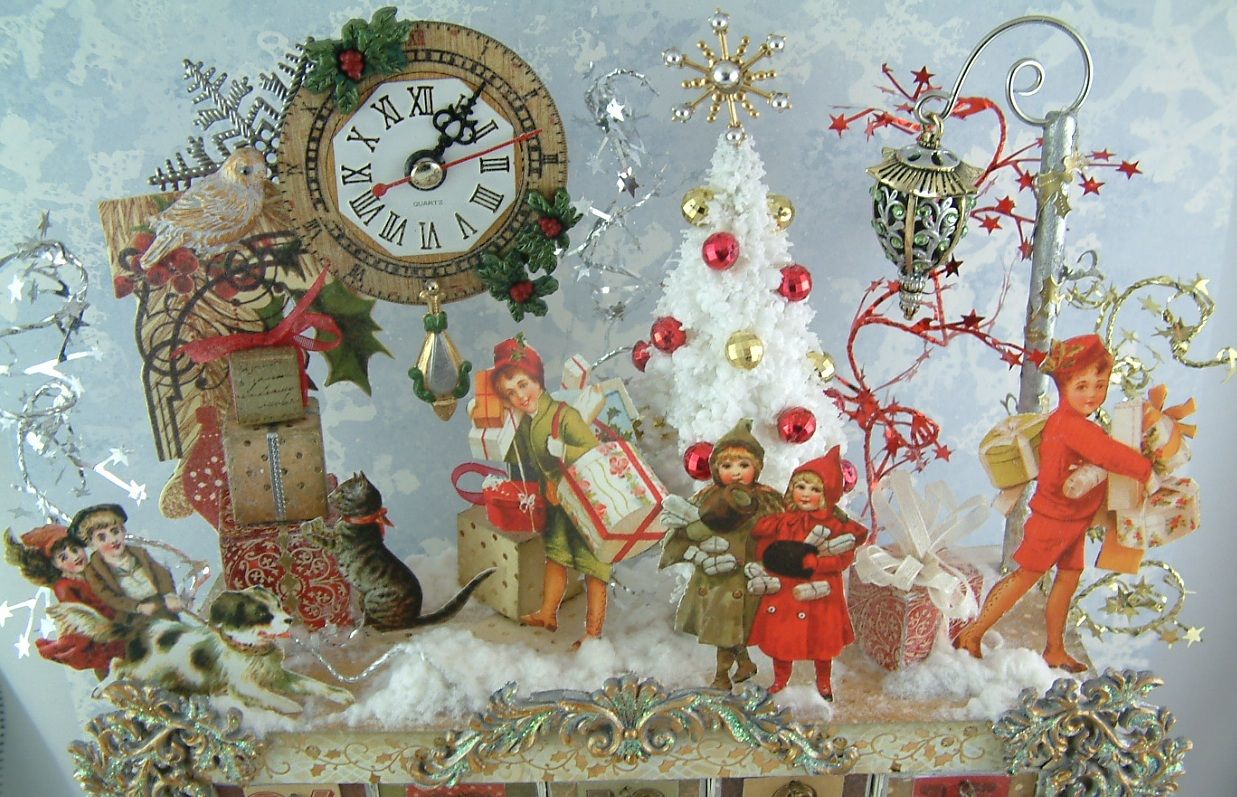
THE CABINET TOP
There is a lot of space at the top of
the cabinet to add whatever you desire.
I certainly had fun filling it up will all kinds of stuff. As I discussed previously, having a foam core
top made is so easy to attach elements like the images and the Star Tinsel.
The tree comes already flocked in
white. I cut up Mardi gras beads and
glued them on the tree with Glossy Accents.
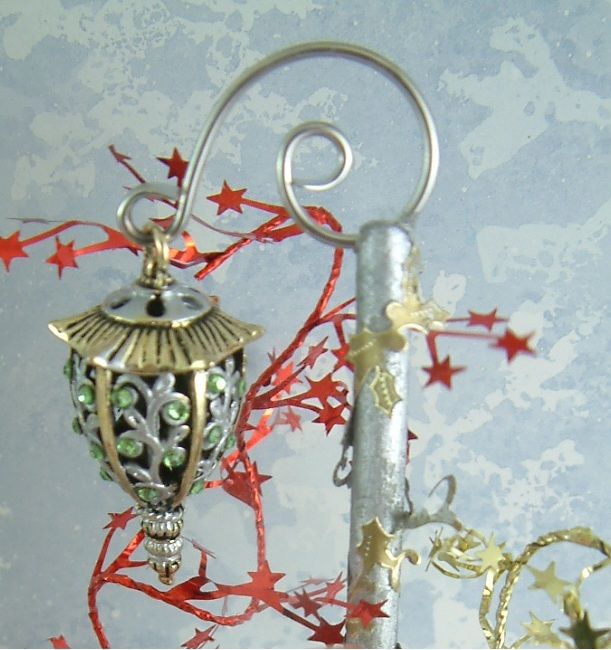
The lantern (oh the lantern)….I LOVE
this lantern and you are going to see it again and again in more of my projects. The pole is a wooden dowel. I cut a notch in the top of the dowel and
glued the ornament hook in the notch (using E6000 glue). The lantern was original all gold. I used Silver Alcohol ink to paint the scrolls
and then added green crystals. With the
top of the cabinet being foam core it was easy to punch a hole in the top and
insert and glue the dowel in place.
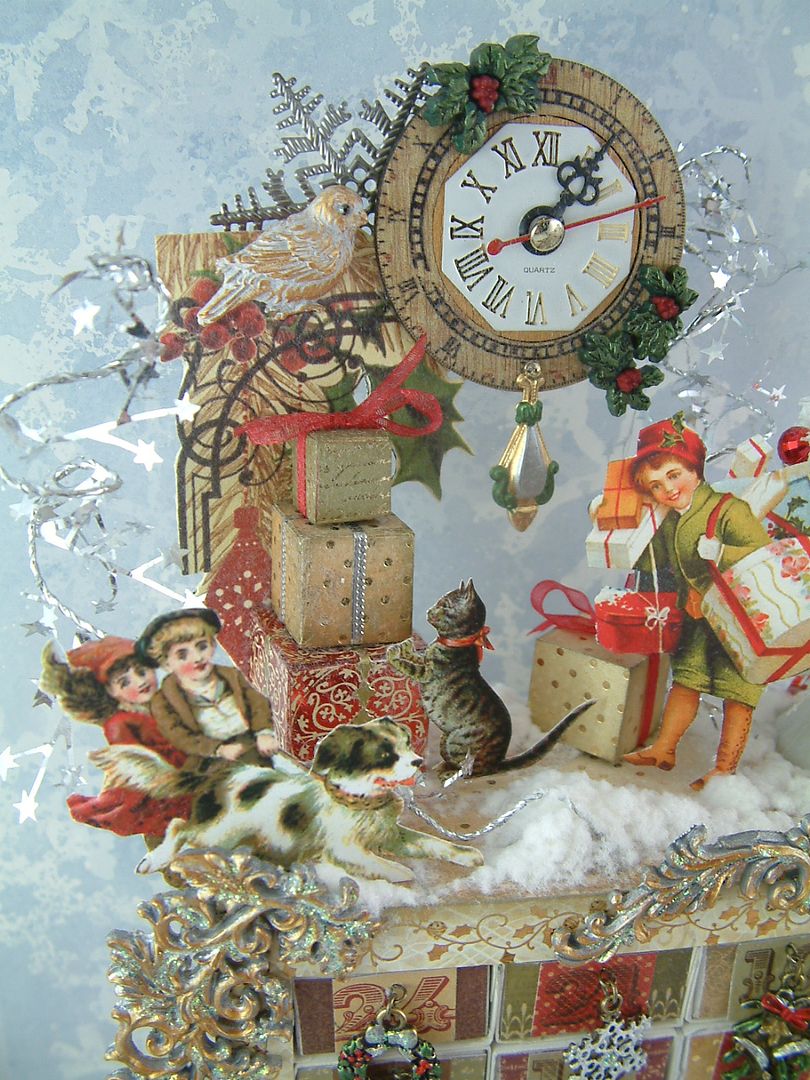
I decided to add the packages (which are
blocks of wood covered in the Turtle Dove paper) to give me a way of suspending
the clock. The paper die cut (from the
Turtle Dove line) is backed with light cardstock and decorative paper (to make
it stiff). The packages are glued to the
top of the cabinet, the die cut image is glued to the packages and the clock
and other embellishments are glued to the die cut image. My thought process started with me wanting a
clock and then I worked backwards to figure out how to hang it. The swirls in the die cut image made me think
of a decorative pole so I just needed a way to anchor it to the top of the
cabinet and that’s where the packages came in.
The whole assemblage was too heavy for my straight pin trick.
THE SIDES AND BACK OF THE CABINET
I used the decorative paper die cuts to
cover the sides of the cabinet. Because
the sides are foam core you could use the same trick to poke stuff in the sides
as in the top.
BACK OF THE CABINET
I added snow to the top of the cabinet
by drizzling Glossy Accents on the top and then sprinkling the glue with white
flocking. What I didn’t realize is that
some of the glue dripped down the back of the cabinet. Eeek!!! My solution was to add more glue to the back
and sprinkle it with Diamond Dust to create ice cycles. Problem solved!
I hope you have fun creating a cabinet for your family
and enjoying it for years to come.
CLICK HERE TO DOWNLOAD A PDF VERSION OF THIS TUTORIAL
ALPHA
STAMPS SUPPLIES USED IN THIS PROJECT
Matchbox
Full of Matchboxes – You’ll need 4
Antique
Silver Lantern Bead – Feet
Antique
Silver Leaf Flourishes – On the front of the cabinet
Papers,
Borders & Stickers
Visions
of Christmas Die-Cut Cardstock Borders – Trim
around the front of the cabinet
Turtle
Dove Numbers Sticker Sheet – Numbers on the front of drawers
Christmas
Emporium: Joyous Noel Scrapbook Paper – Wording at the bottom of cabinet
Dazzles GoldHolly Stickers – Clock from
back view
and pole
Paper
lines that would work well for this project are: Joyeux
Noel 6x6 Paper Pad and Festive
6x6 Paper Pad – These are the papers I used for my Christmas Mini Albums
& Bookshelf Tutorial. Click
here to see the tutorial if you missed it.
Two others are: City
Sidewalks 8x8 Paper Pack and Santa
Journey 8x8 Paper Pad.
Images
on the top of the cabinet
Other
Embellishments
Mardi
Gras Beads – On the
tree
Large
Brass Snowflake with Hole – Tree
topper
Fly
Away Resin Birds Set – By the clock
Christmas
Green Buttons – Around the clock
Star
Tinsel – On the top
Giant
Snowflakes – Behind the clock
Swirl
Ornament Hooks – To hang the lantern
Tiny
Sheer Ribbon Red and Cream – Used on the Packages
Drawer
Pulls
Antique
Bronze Christmas Charm Set – I used two sets
Nutcracker
Charms - Gold
Candy
Cane Charms - Gold
Wreath
Charms - Gold
Christmas
Bell Charms - Gold
Used
to Decorate Drawer Pulls & Leaf Flourishes
29 comments:
Now this is the magic of Christmas! Your creation is breathtaking and I love it. Thank you so much for sharing your very special techniques. Blessings to you...
Stunning work as always! Thanks for sharing your tips & tutorials! Hugs,Tee
Can I still be surprised by your ingenuity? YES! This is so charming Laura. Terrific tip on how to get those little people to stand on top of the cabinet. Thank you.
Super cool project Laura. I have lantern envy Big time.
Hi Laura, Oh My Goodness!!!! I was in AC Moore just yesterday and they had a white configuration type box for an Advent Calendar...I HAD IT IN MY HANDS....but ended up putting it back!!! Am I ever glad that I did. This Advent Calendar made with Matchboxes is a definite must make for me. It is beautiful. But then again all your work is...
Thanks so much for the Tutorial.
Have a great weekend.
Take care,
Diane
It would take from now until next Christmas to do something like this.You are incredible and this should be in a museum.
This is just amazing with so many ideas to think about and inspire.It is so kind of you to explain how you make everything and I feel that may be one day I will be able to make one myself.
Love Chrissie xx
What a lovely project! So much detail to absorb. It's gorgeous, thanks for sharing it!
You continue to amaze and tempt me. I would love to make this but alas, not this year as I wouldn't be able to source everything in the UK in time. But - my lovely step daughters and I plan crafty sessions next year, so watch this space. Thank you again Laura.
xx
Quel merveilleux monde féerique ce calendrier de l'avent. C'est tout simplement splendide. merci de ce beau partage.
Laura this is soo amazing... thank you so much for sharing the tutorial...
hugs
As always out of this world! Wish I had time to make my own, I'me still playing with my apothecary LOL.
I love the lantern. It looks amazing. X
WOW Laura, This is AMAZING!!! I'm speechless!
hugs Lynn
Laura, you have done it again! This is truly incredible! Omg, that lantern:) Thank you so much for sharing your tips.
Deb
So much work, but it is so beautiful!
I love it.
Stunning piece.
You are brilliant---your creations are amazing!
this is absolutly amazing! I LOVE everything about it!Stunning! :)
What a stunning craft creation! Unbelievebel how much work this must have been...
Came here for the first time and looked around; you make so many beautiful crafts!
And thank you for sharing the free images; coppied a few to use in the futere. Greetings, Gerrina
Pure enchantment! When one closes their eyes and dreams of Christmas surely this is what they see. How absolutely wonderful♥
This is just breath taking-someone shared this with an altered art group which is where I saw it and I have sent it on to my design team for inspiration-so its traveling the world-Congrads on your remarkable work!!!
Thank you soo much for showing the back and your advice with the patterned paper
WOW Laura this is another stunning piece of work, I love it, Hazelxo
If I wasn't so worn out still from doing the wonderful Potions and Poisons APothecary...I might attempt this! Next year.
FABULOUS,Laura!
Oh Laura how can you imagine so fantastic things! It's so beautiful, that I went on Alpha stamp and bought a lot of decorations and boxes! LOL
kisses
I love this tutorial, thanks so much for sharing! it is a shame that Alpha takes so long to ship their product, I ordered the same day you posted this and live in the same state and I still don't have it, this is the second time this has happened and I hoped to get one finished for my Grandchildren. Wonderful products they have and poor service. Maybe you can pass the on the info.
Hugs Marilou
I just discovered your blog today and am excited to start following it. You have very fun ideas. Thanks for sharing them.
It has been a while since I scrolled through your blog and here is just sooo much beautiful things to see!
<3
Gorgeous creations!
Post a Comment