

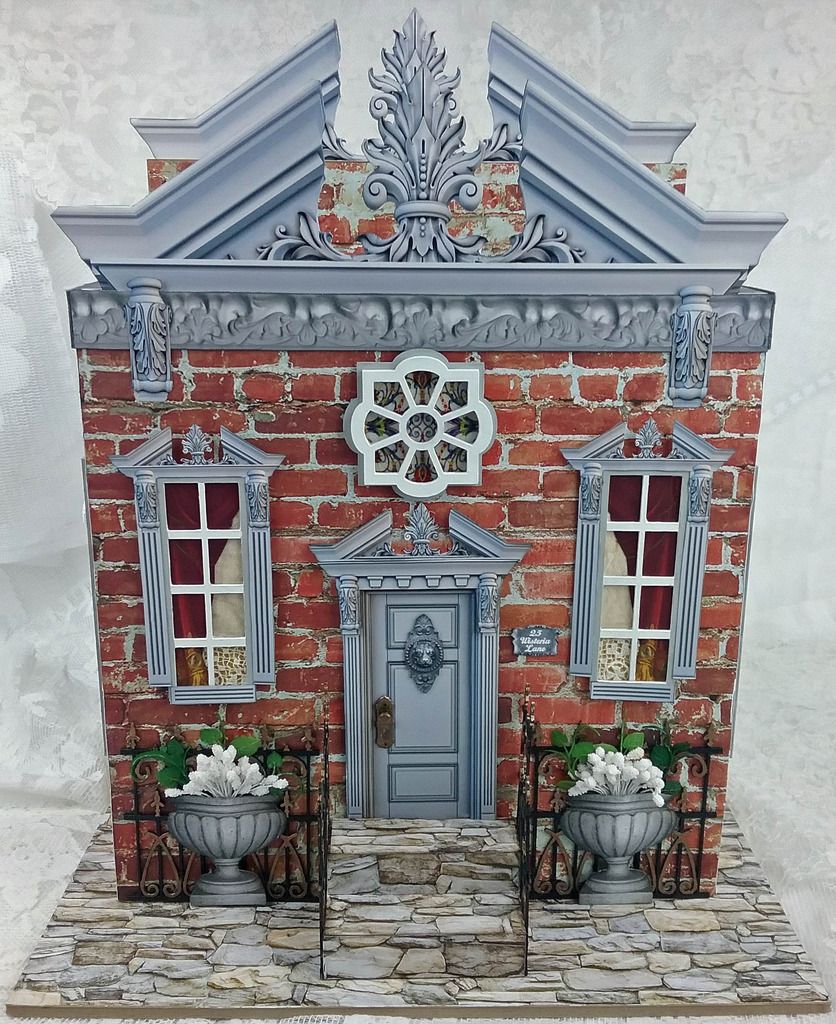
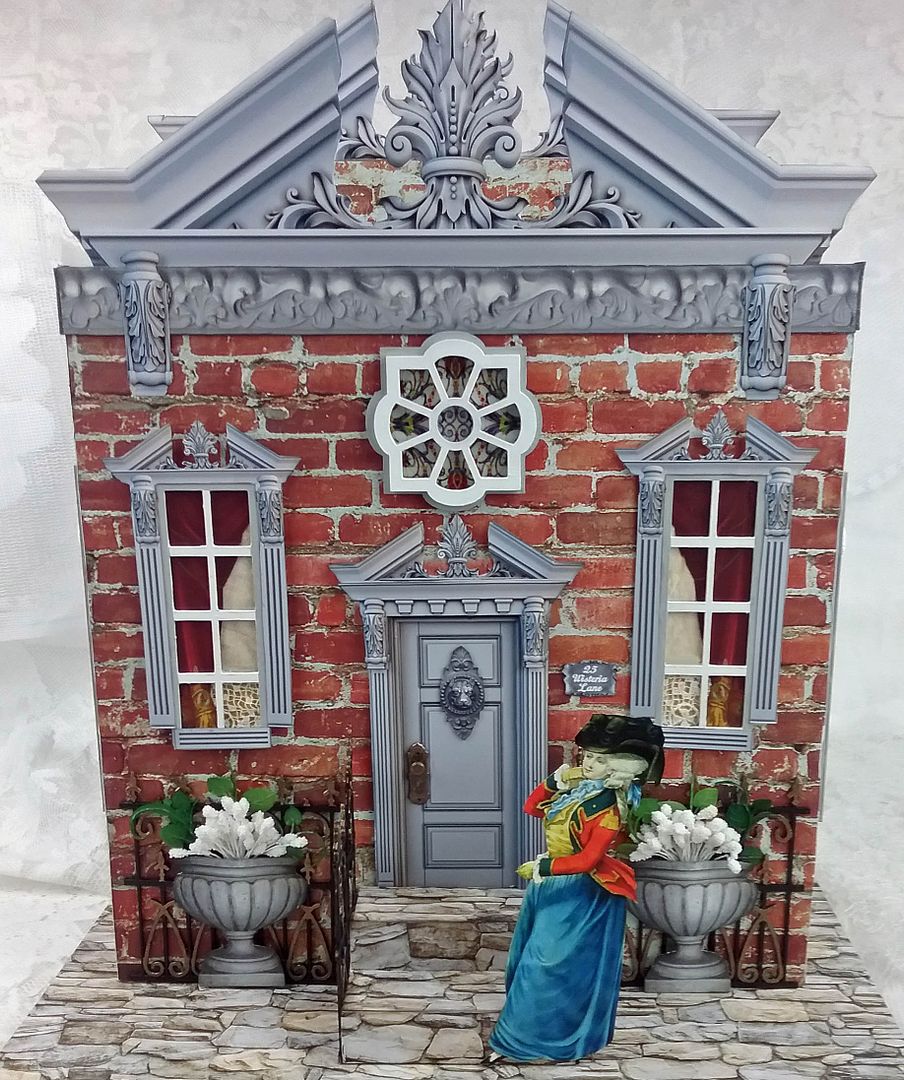
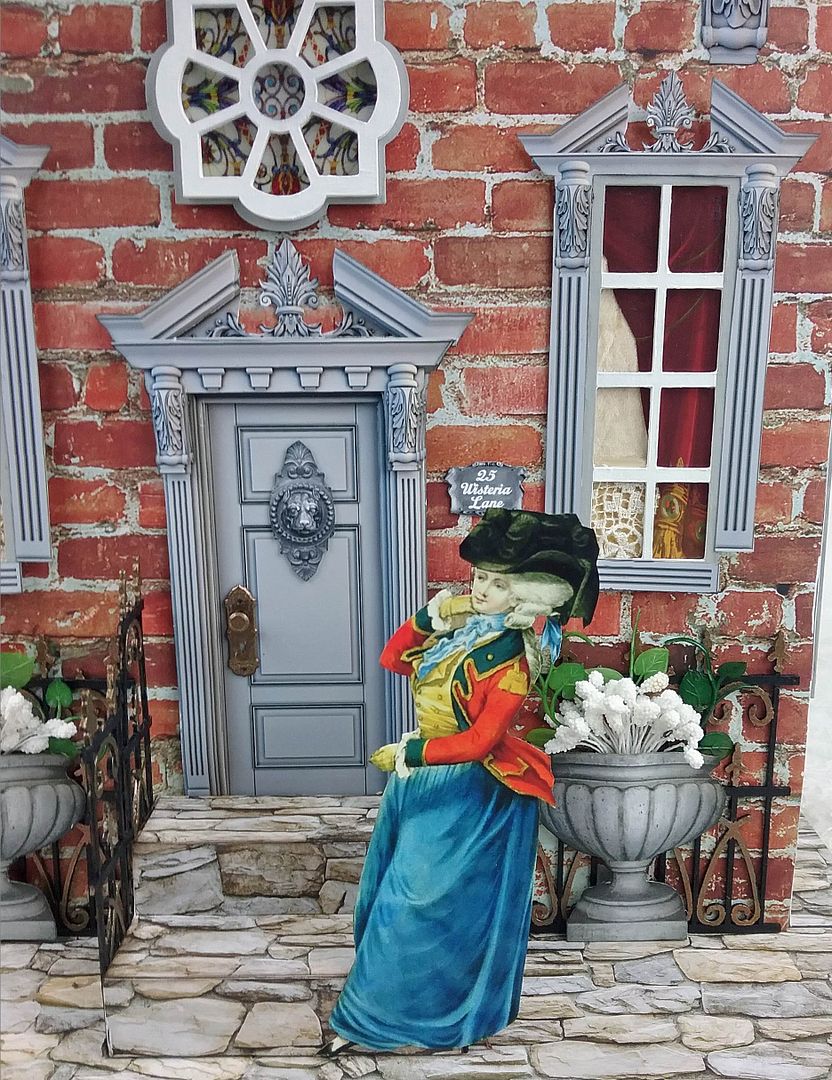
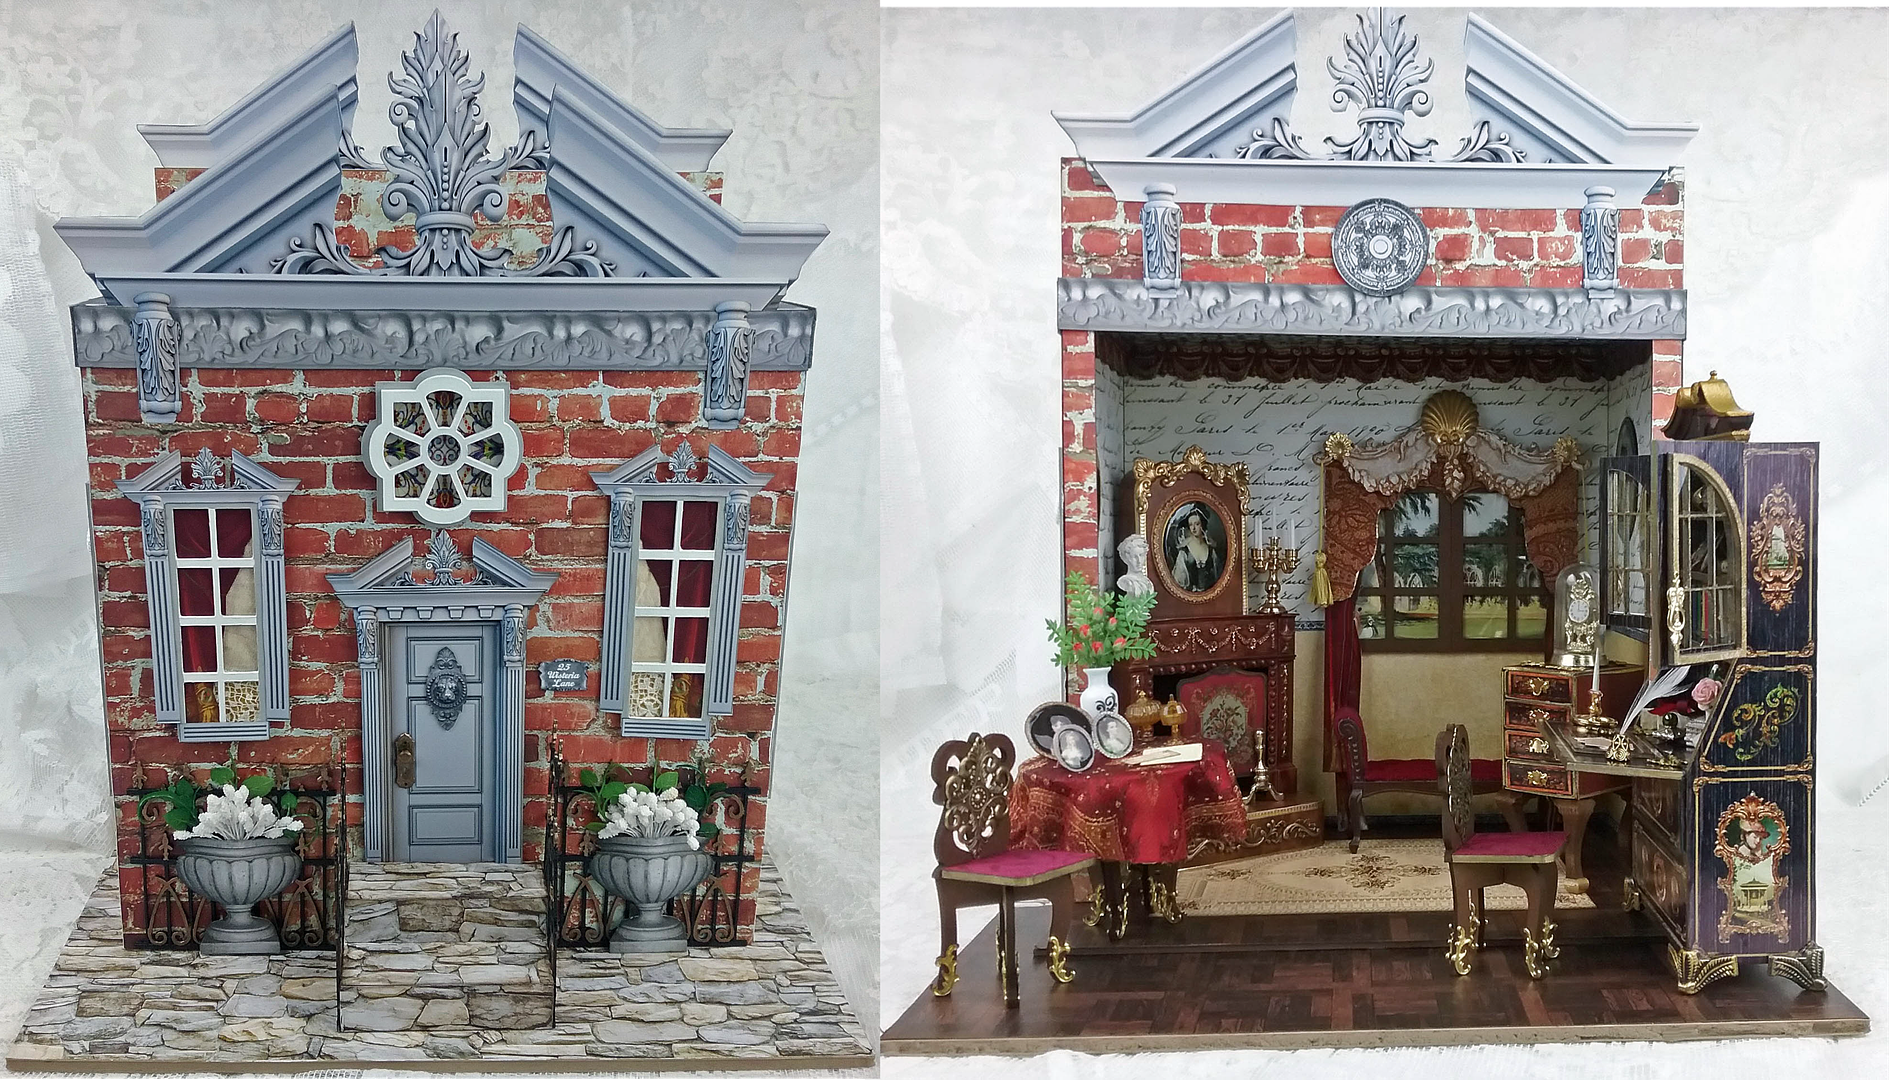
It’s a sunny spring day at 25 Wisteria
Lane. Flowers are already blooming in
the urns that flank the front steps.
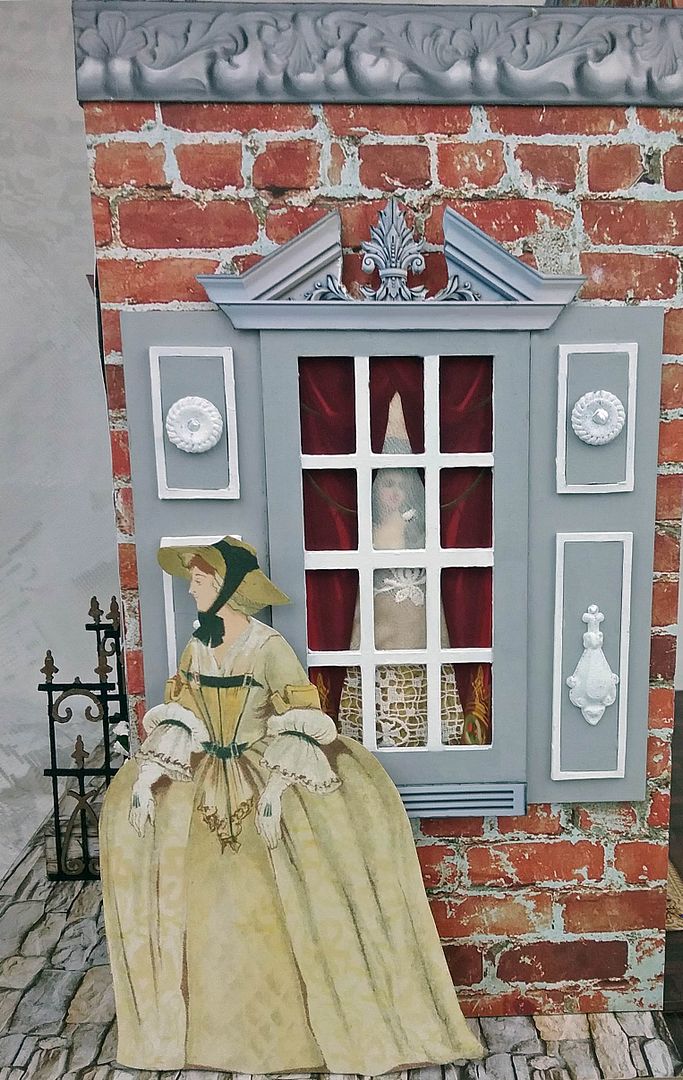
Standing on the side of the Georgian
house is a lovely lady. You can see a portrait hanging on the wall through the curtained window.
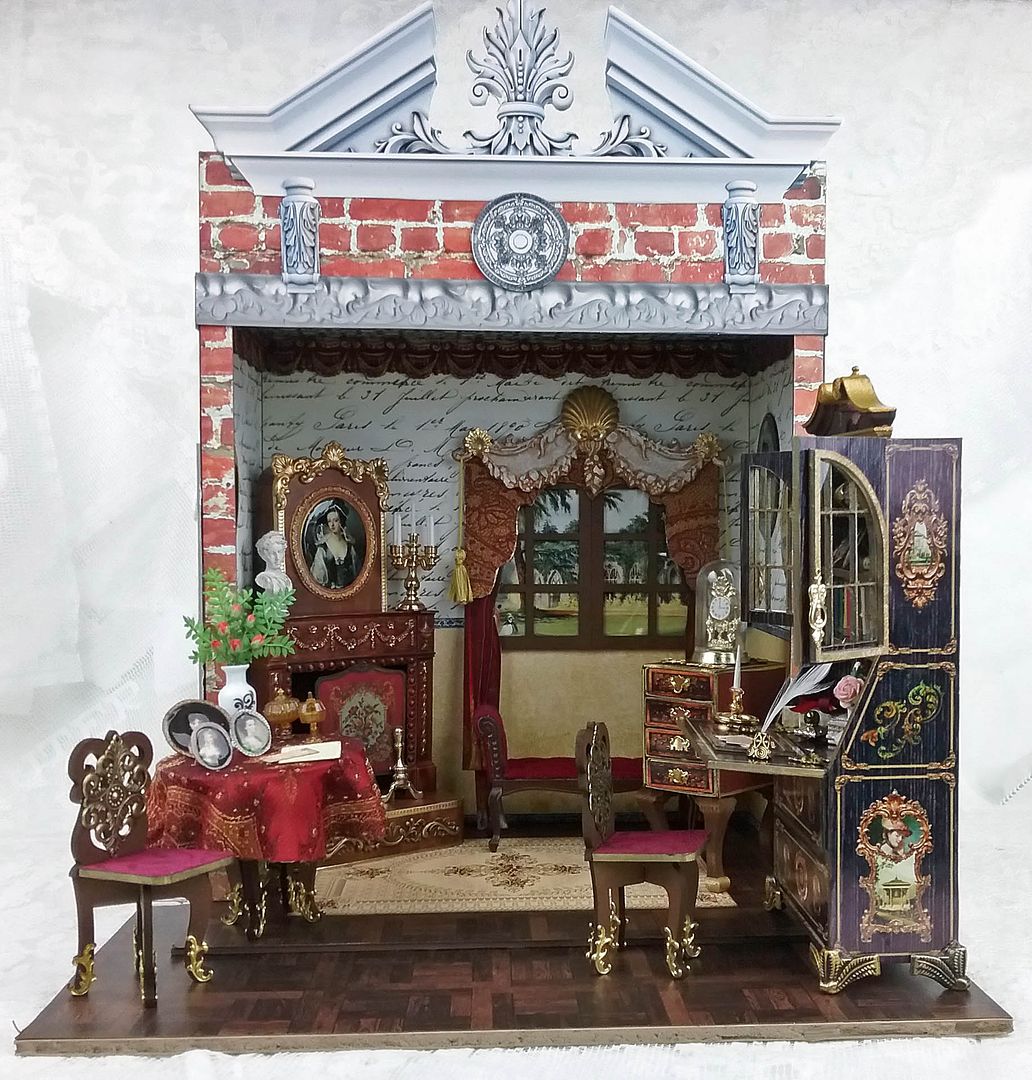
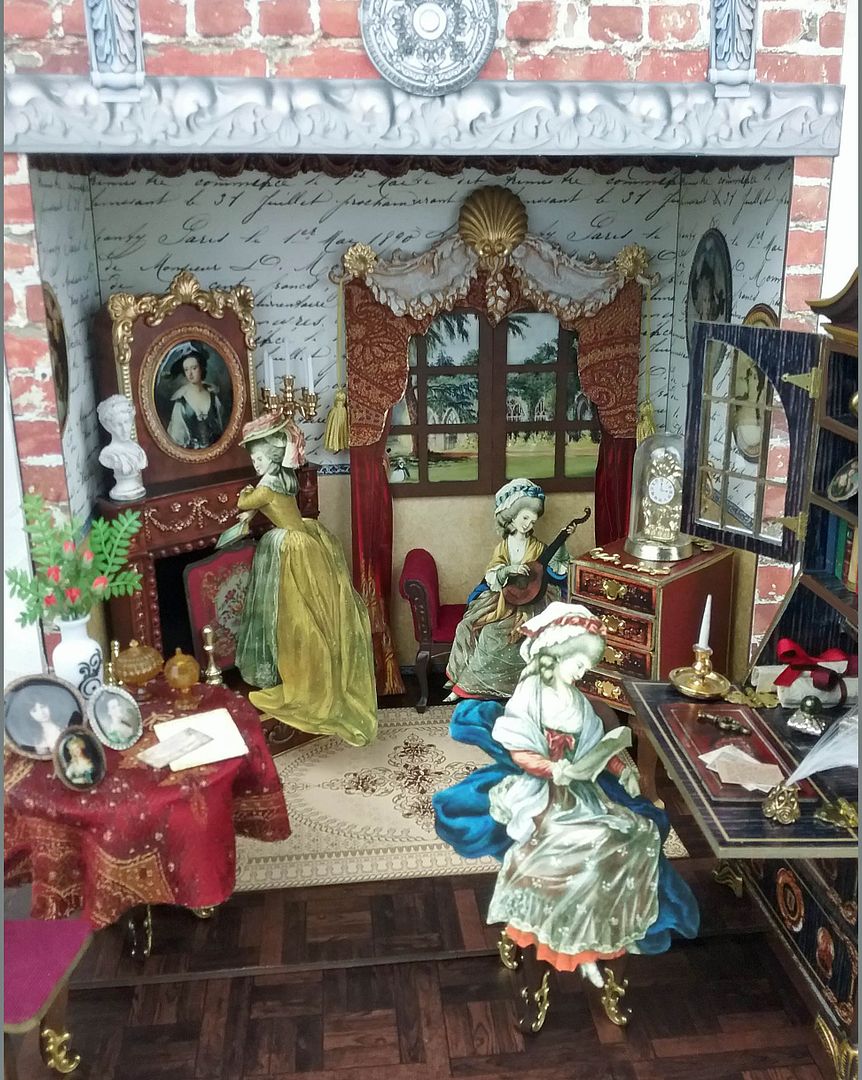
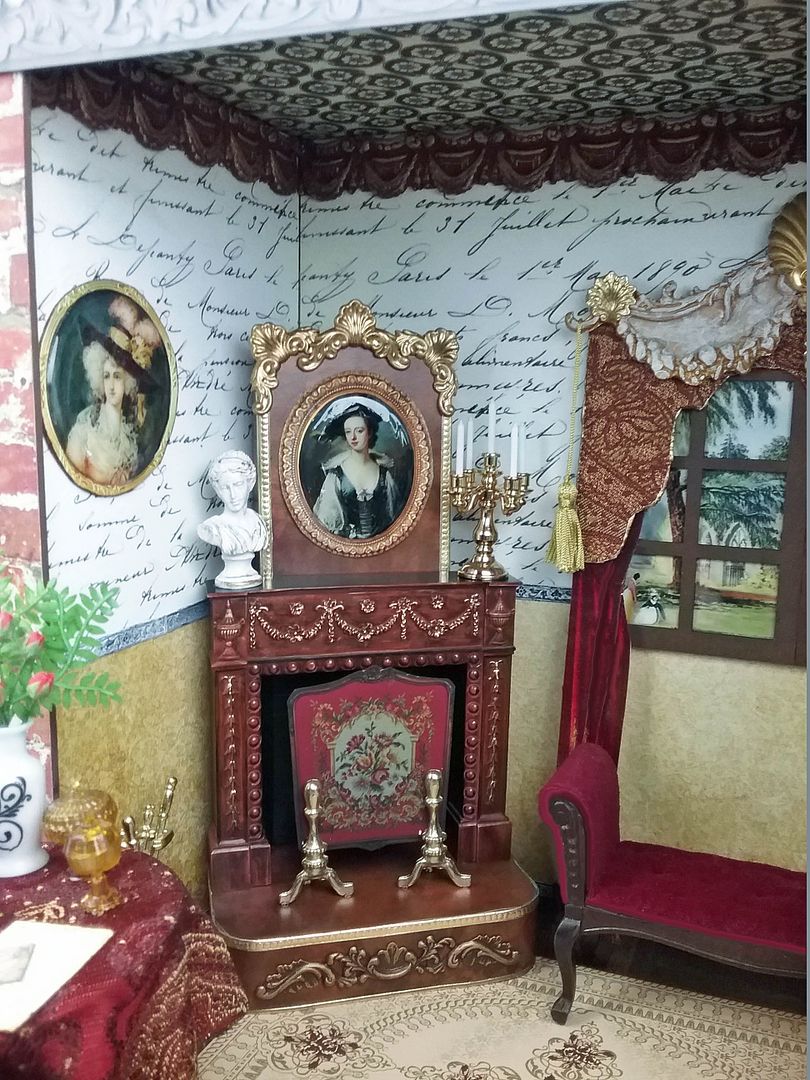
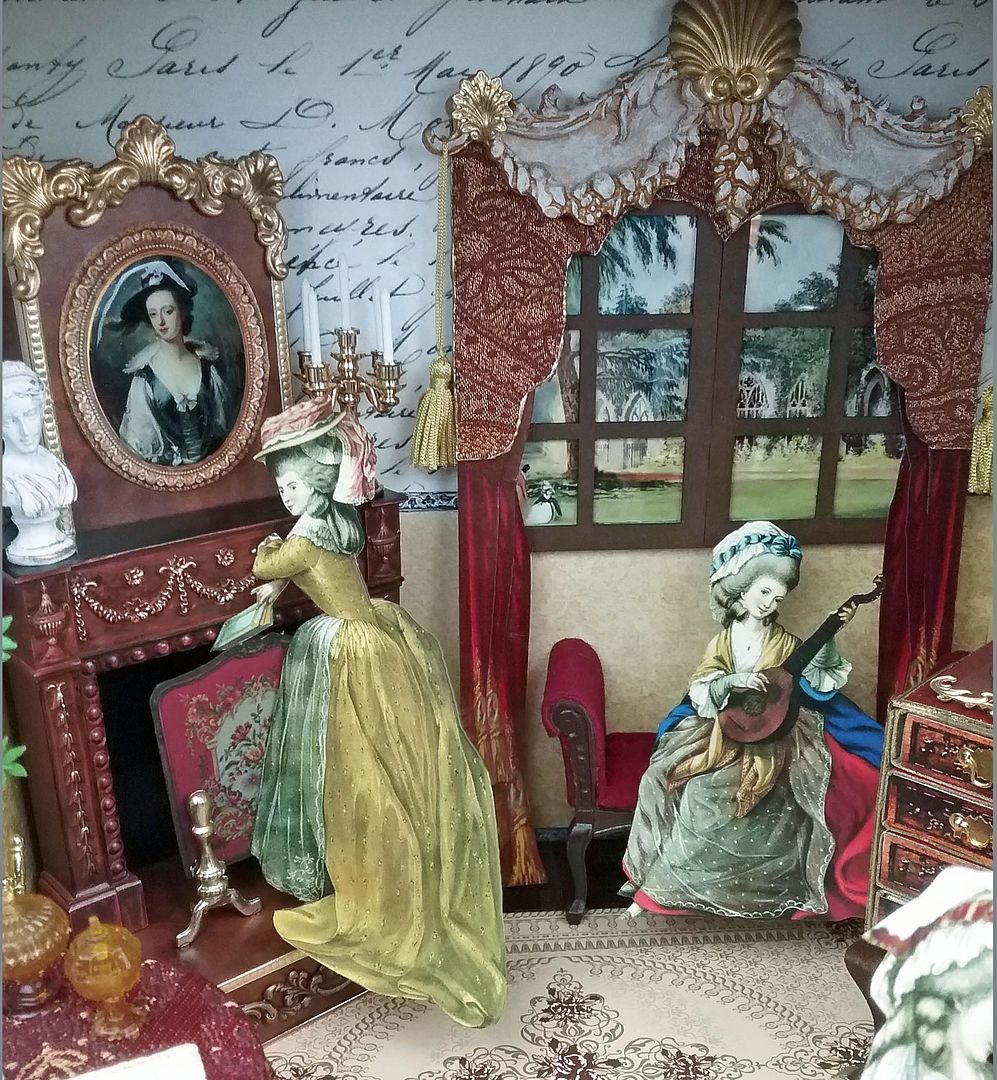
Inside the house is a ladies' parlor
filled with beautiful furniture and décor. Below you can see three women enjoying
the parlor; perhaps they are sisters.
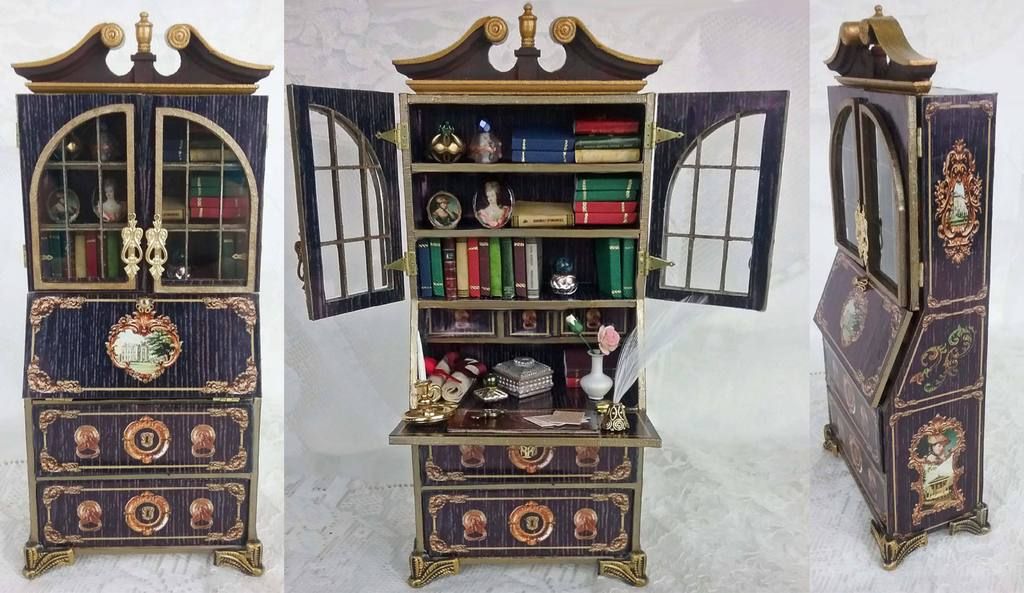
The star of the room is a secretary made from a chipboard kit. This is the inspiration for the entire project.
Leslie at Alpha Stamps asked me if I would like to design a collage
sheet to work with the secretary. I said, “of course.” My next thought was what to
do with it and how best to showcase it.
One thing led to another, and I decided to create a Georgian style façade using a Deep Open Front Room Box kit and a parlor room to show off the secretary.
I also couldn't resist slipping in a matchbox chest.

Of course, the fireplace isn’t too shabby, either. Would you believe that the top
and bottom are Altoids Tins, ah the magic of Altoids tin.
One of the women is sitting on an elegant velvet settee. The elaborate decorative top of the curtain is made from paper clay.
This project includes a series of
new collage sheets and digital image sets.
As usual, I have a detailed tutorial (and many more pictures) explaining how I made the house and all the pieces in the parlor. Even if you don’t want to tackle a project
this large, you might find individual elements like the secretary something of interest. The collage sheets come in both 1:12
scale and 1:24 scale.
This sheet contains the images I used
for the Georgian façade. It also includes
images I didn’t use, such as stone angels and a variety of stone plaques. Click on the image below to purchase this collage sheet.

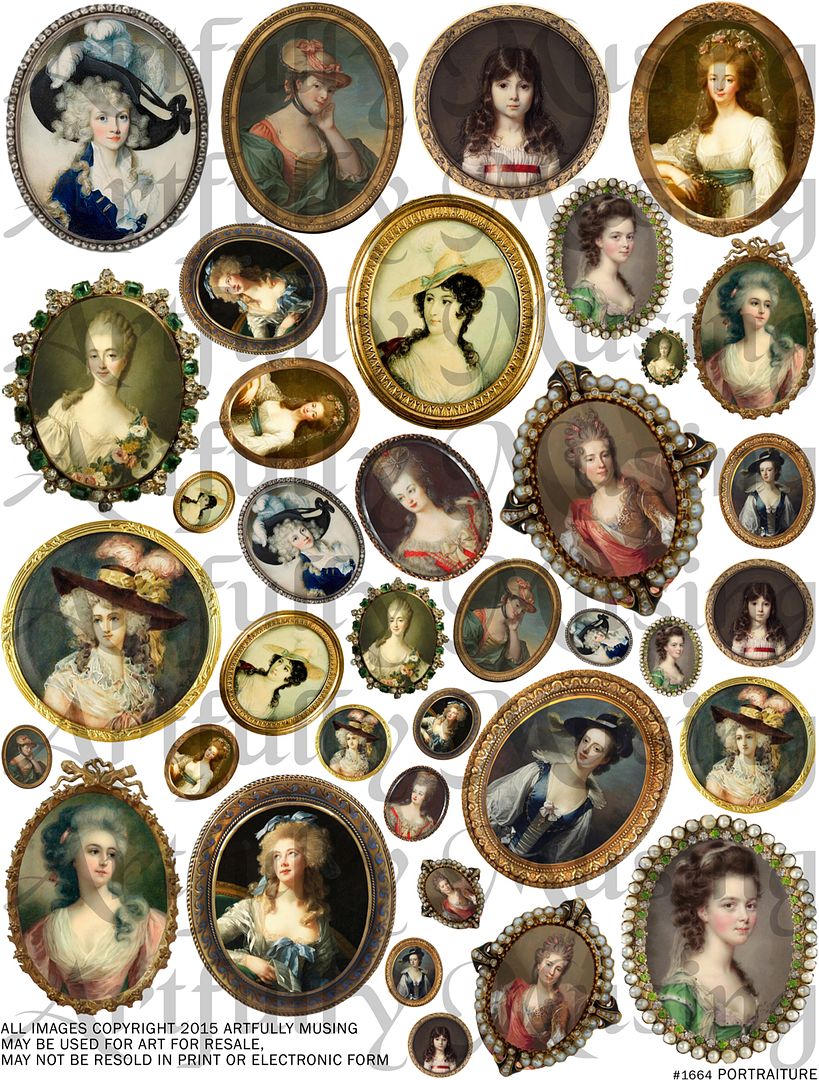
This sheet is packed with vintage framed lovelies. Some of the smaller images are sized to fit in the Oval Frames Silicone Mold. For the sample projects, I printed the sheet on glossy presentation paper. Click on the image below to purchase this collage sheet.
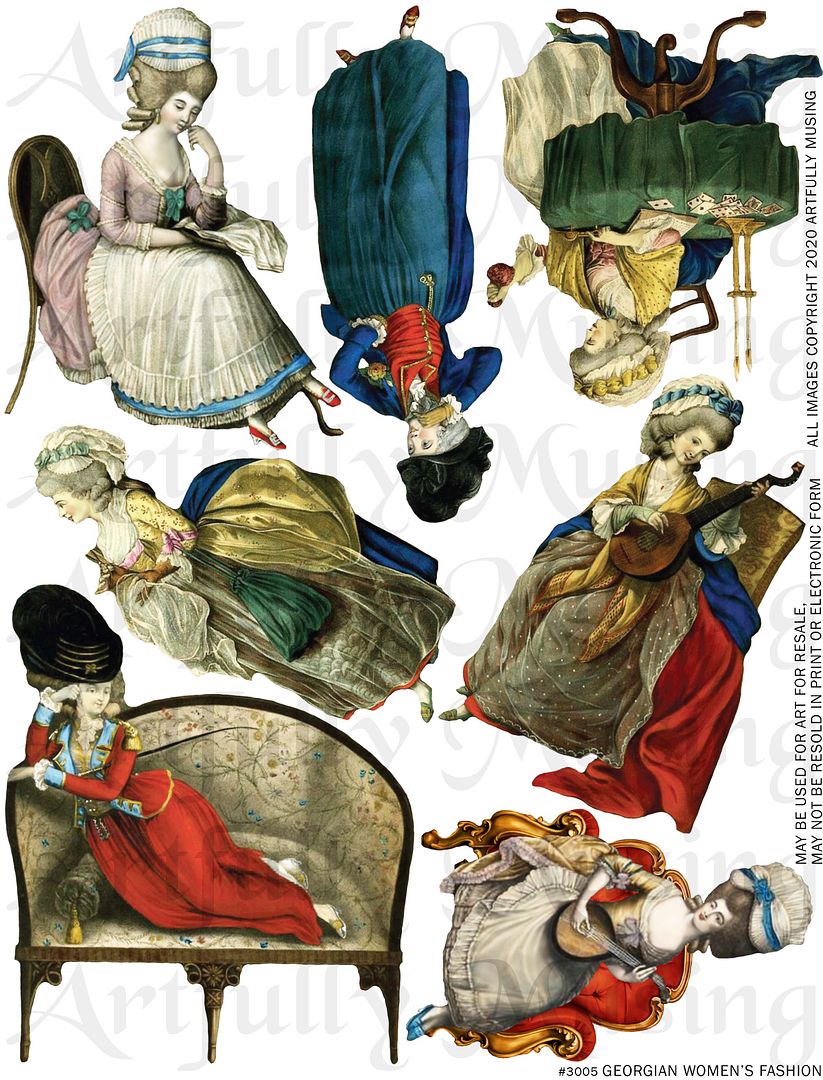
This sheet contains 7 ladies dressed in 1830s fashion. Click on the image below to purchase this collage sheet.

This sheet contains 7 ladies dressed in 1830s fashion. Click on the image below to purchase this collage sheet.
These drawer fronts fit the smallest Diamond brand matchbox, measuring 1 3/8" x 7/16" x 2/16". Click on the image below to purchase this collage sheet.

The image set pictured below includes 17
architectural images ranging from a door, pediments, moldings, plaques, and
other decorative elements. The images
are scaled to fit the Open Room Box carried by AlphaStamps but can be easily
resized for your project as the files are high resolution (300dpi).


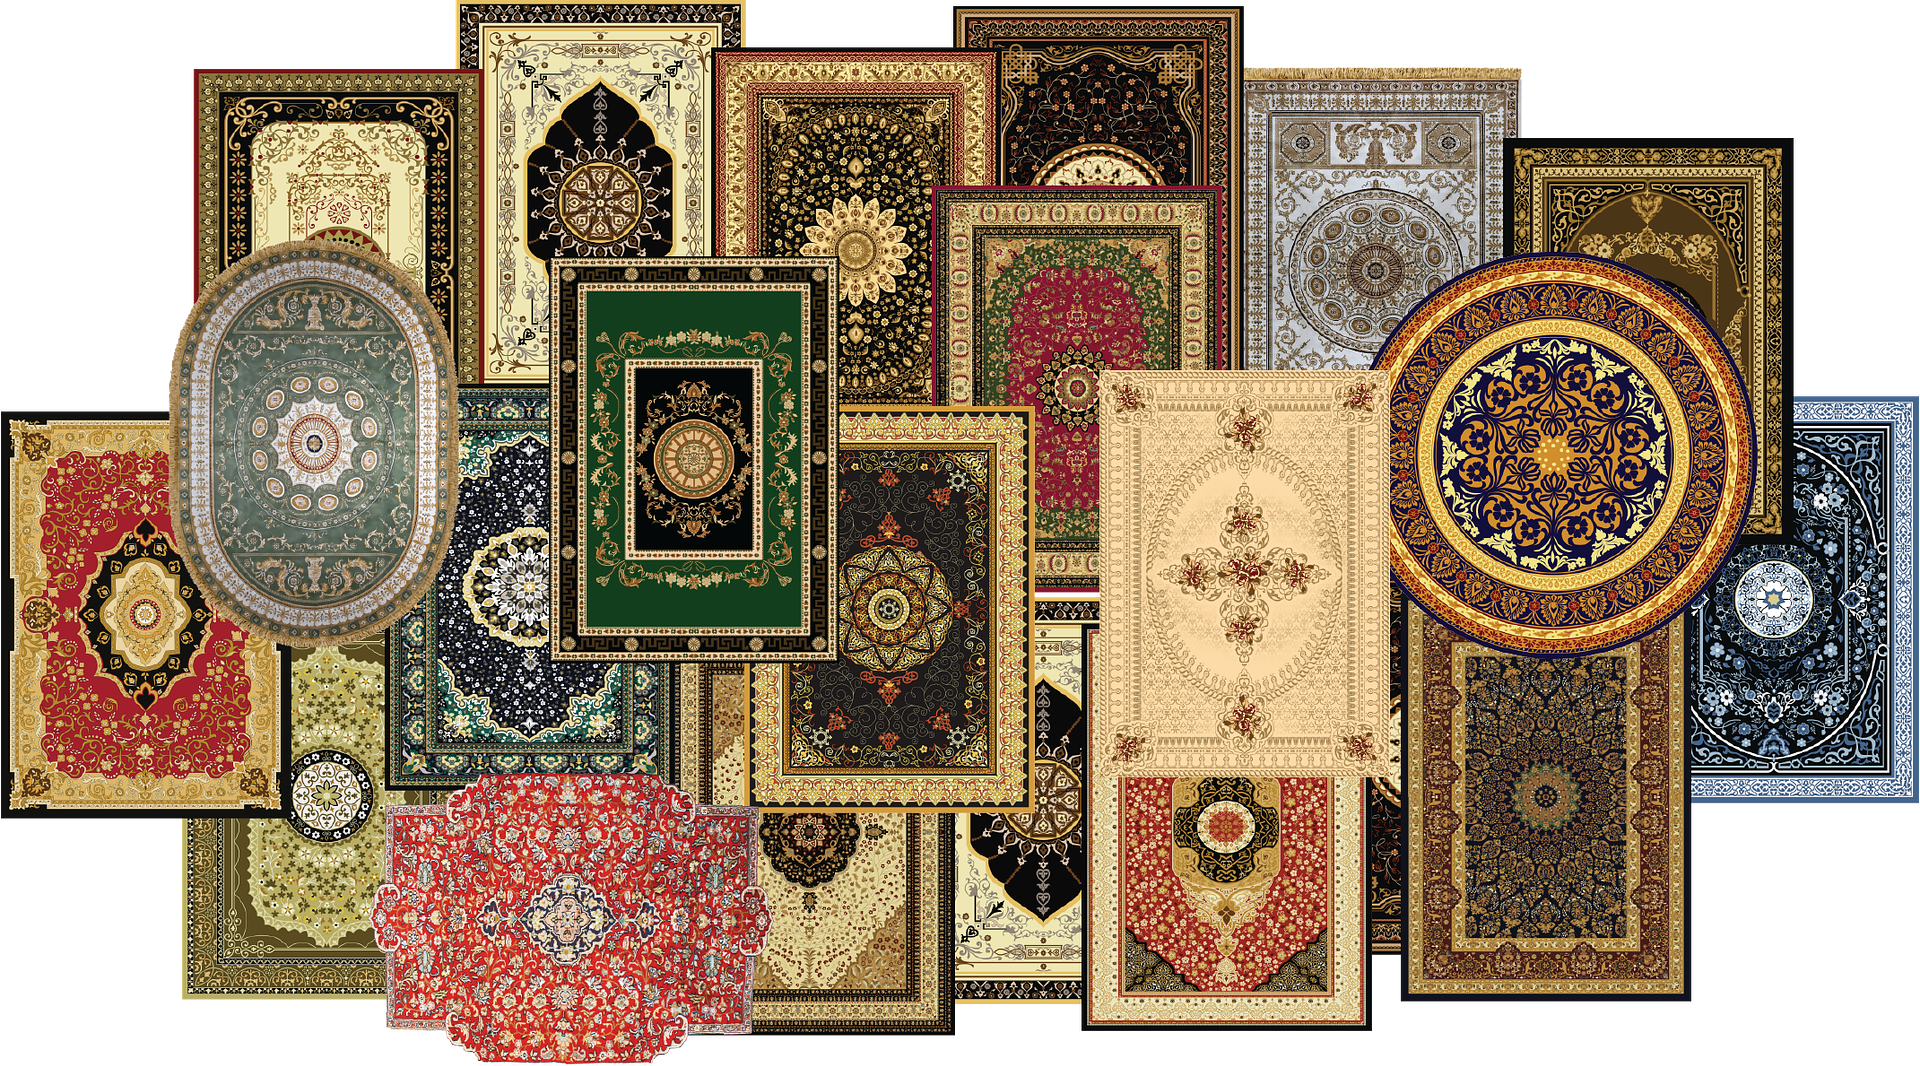
This image set includes 20 rugs sized 7”x5”. Since the files are high resolution (300dpi), it’s easy to size them for your particular project. Click on the image below to purchase the digital image set.

This collage sheet set contains all the images you'll need to decorate the 1:12 scale secretary.


This collage sheet set contains all of the images you'll need to decorate the 1:24 scale secretary. Unlike the larger secretary collage sheet set, this sheet contains extras like the back piece and extra wood grain.

This set includes 22 images on the Secretary Collage Sheet plus three additional images; a back piece, a desk pad, and an extra image of wood grain that can be used to cover other pieces that you might want to coordinate with the secretary.

TUTORIAL
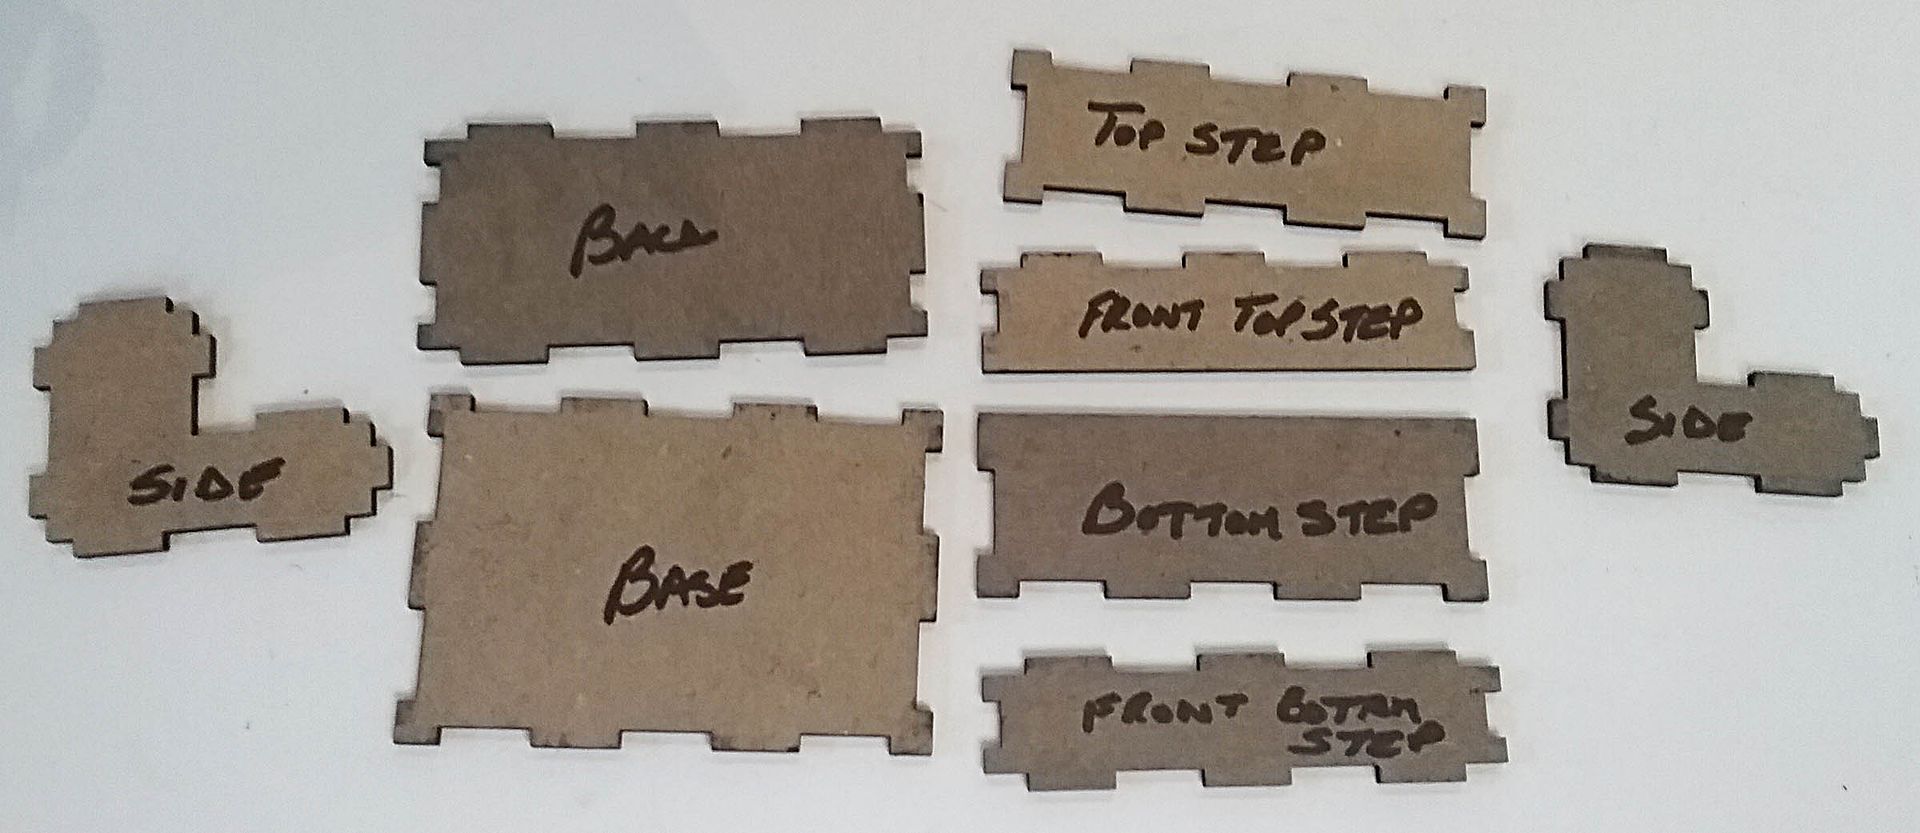
ASSEMBLING THE ROOM BOX
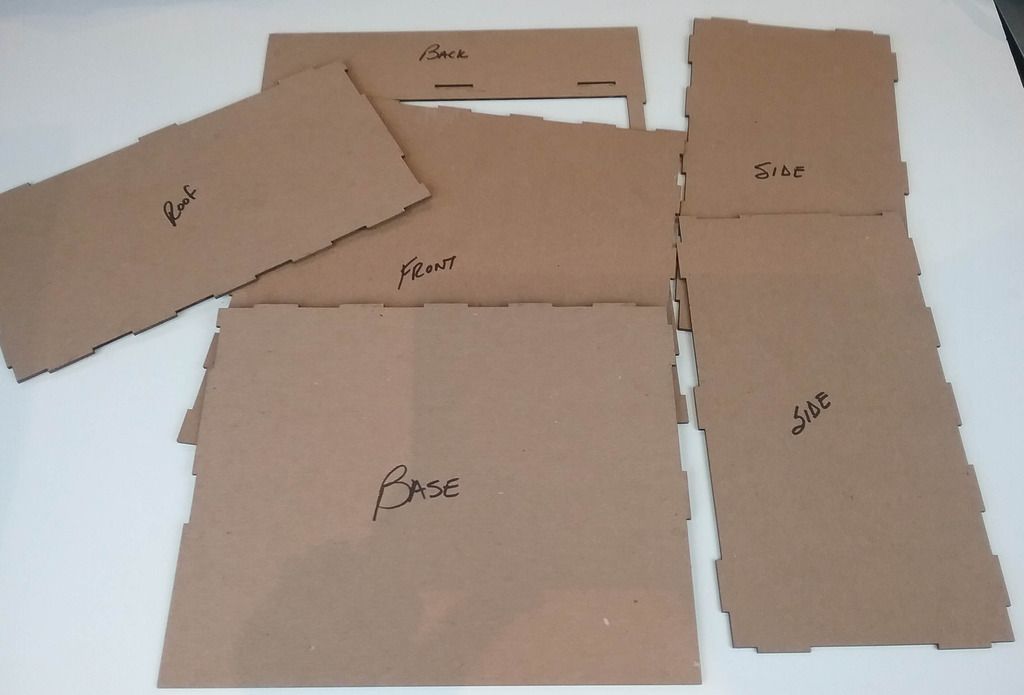
The structure of the piece is made from
a Deep Open Front Room Box kit. In the picture below, I have labeled the pieces to help with assembly.
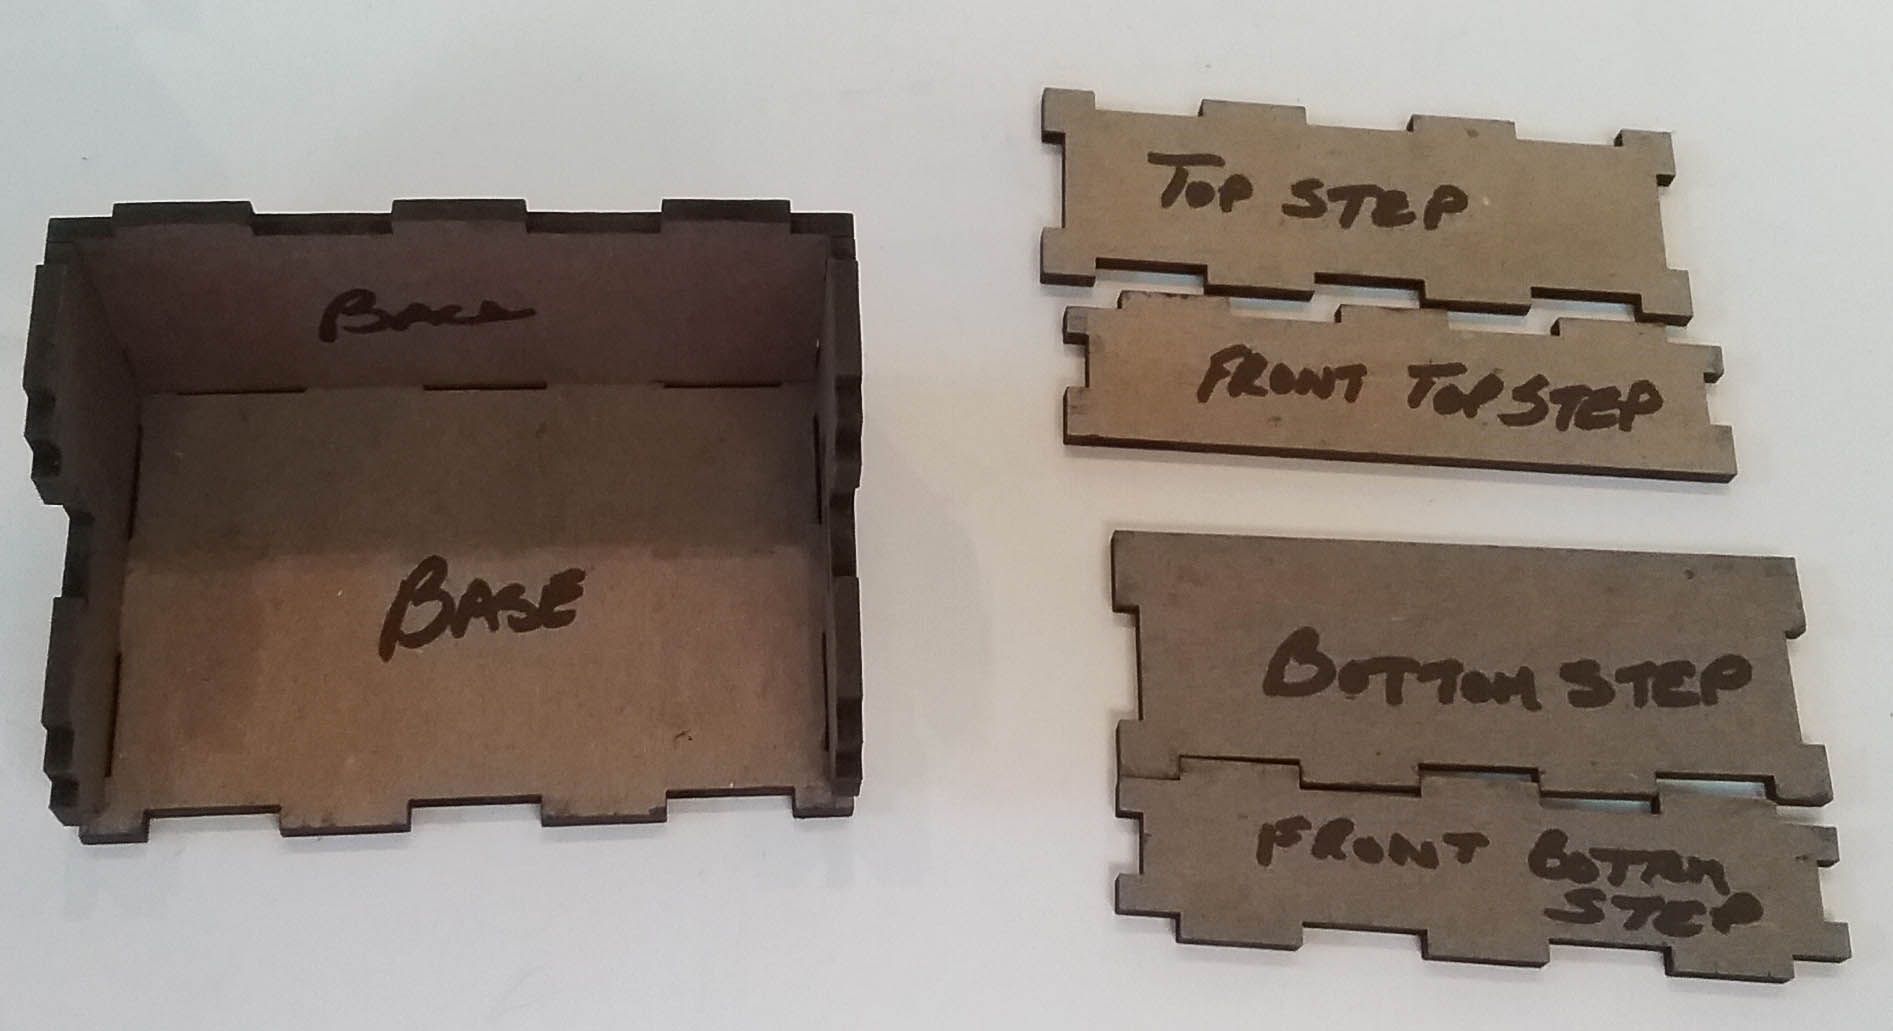
I started by gluing together the front,
base, and sides. Notice that I cut away
the bottom piece of the back.

Next, I added the brick paper to the
front and sides.

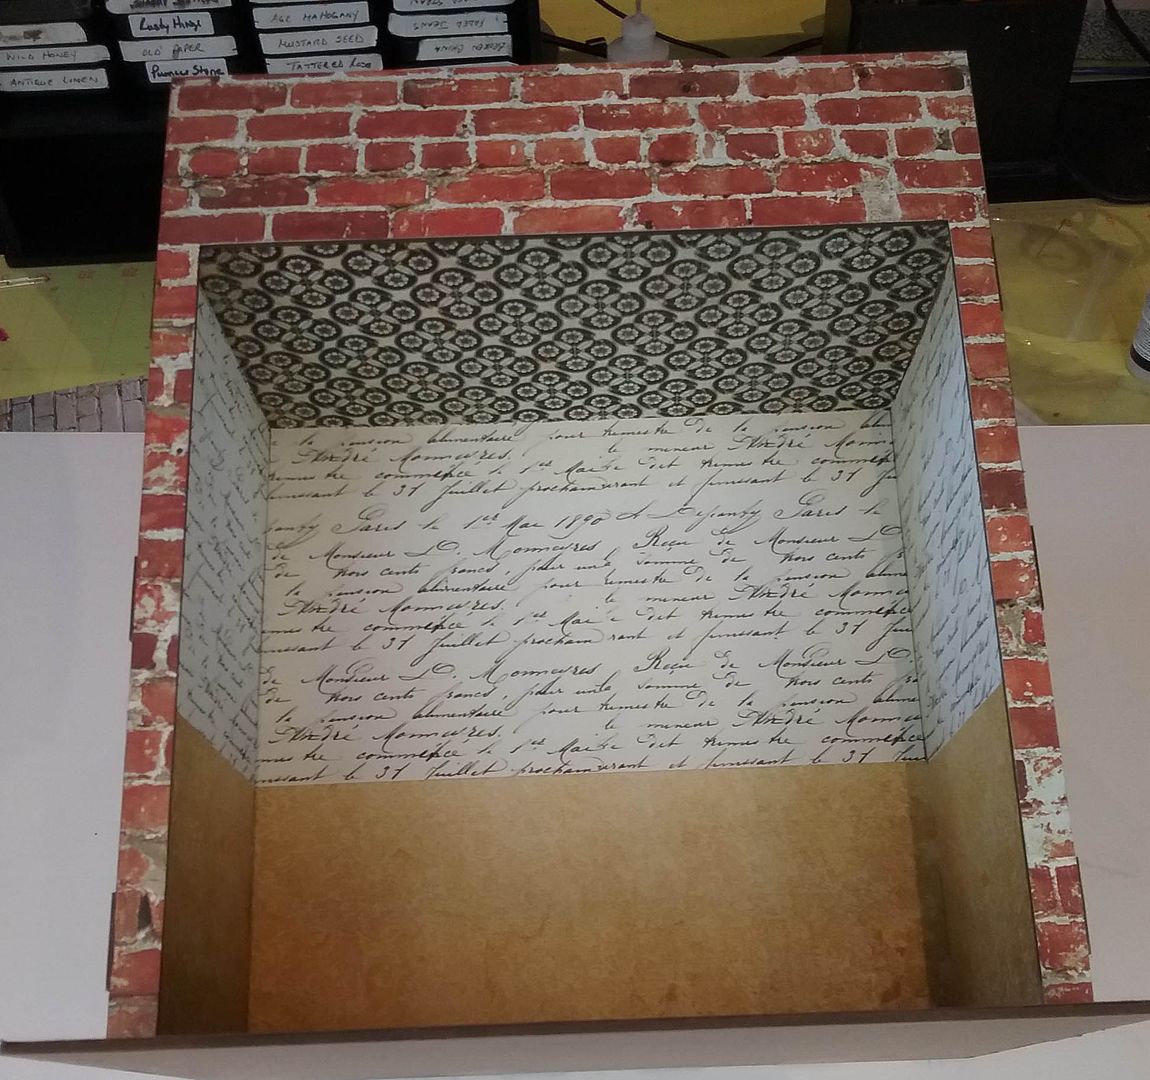
To the inside, I added 3 different
papers to the ceiling and walls. I also
added parquet paper to the floor.
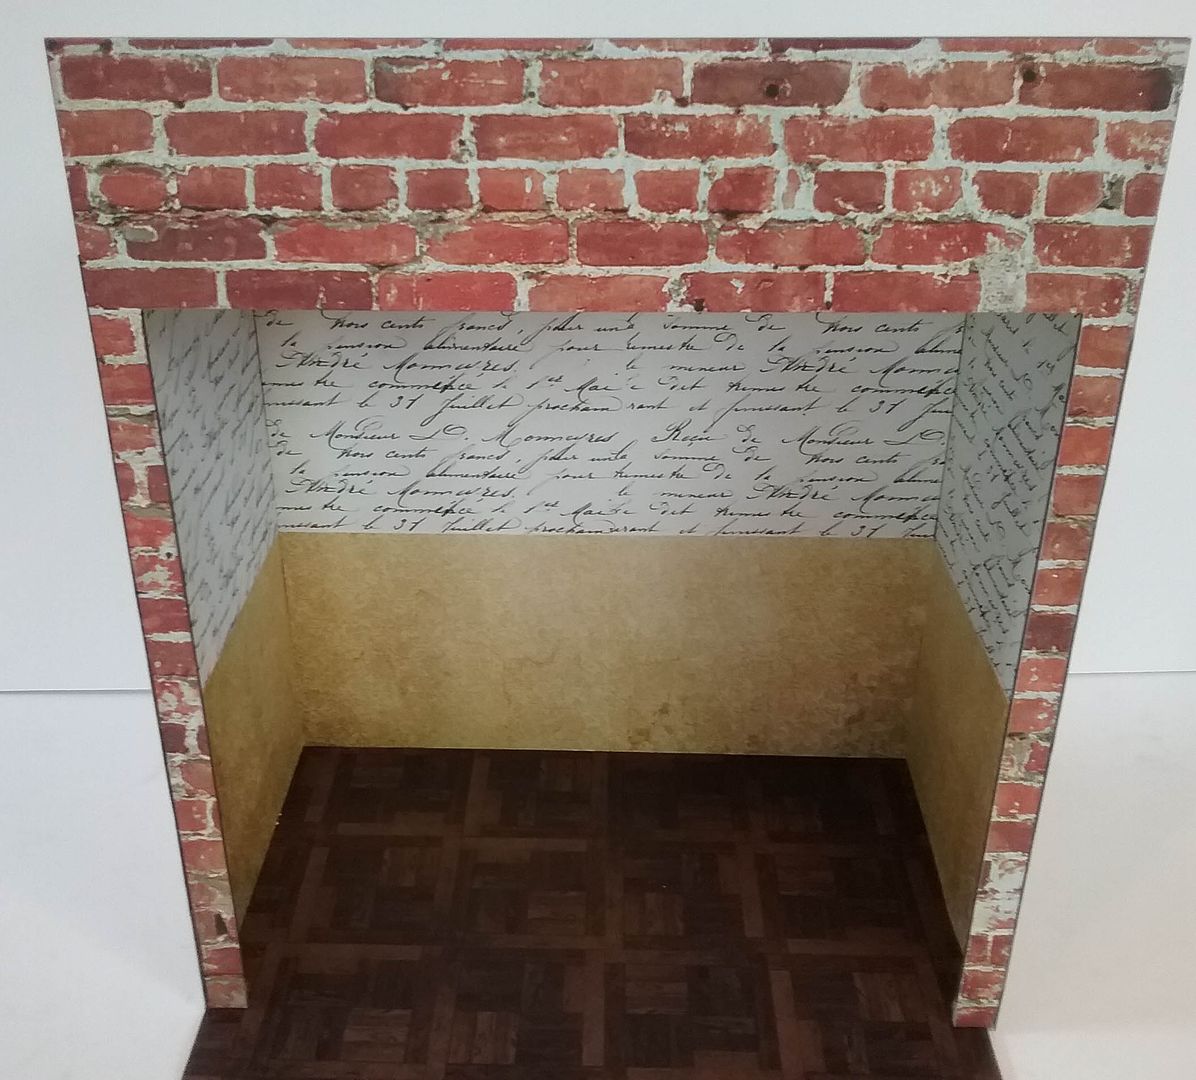
I next papered the front side of the
back piece and then glued it to the box.
Lastly, I papered the back and roof sides of the back piece.
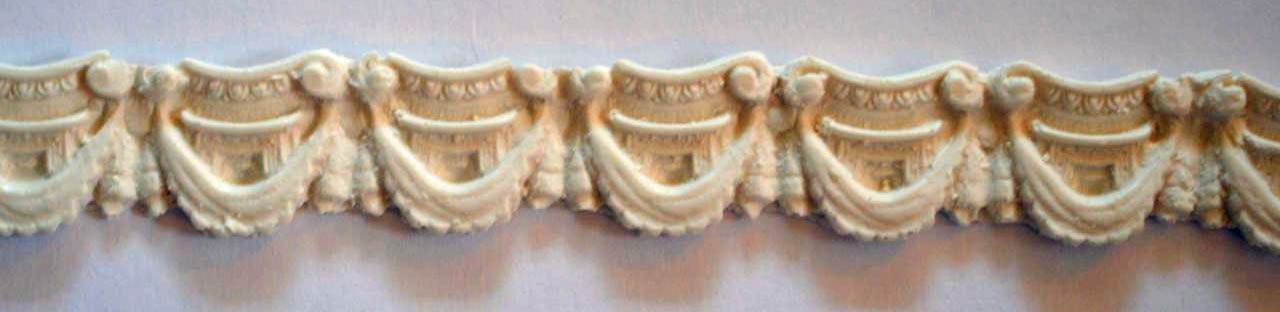
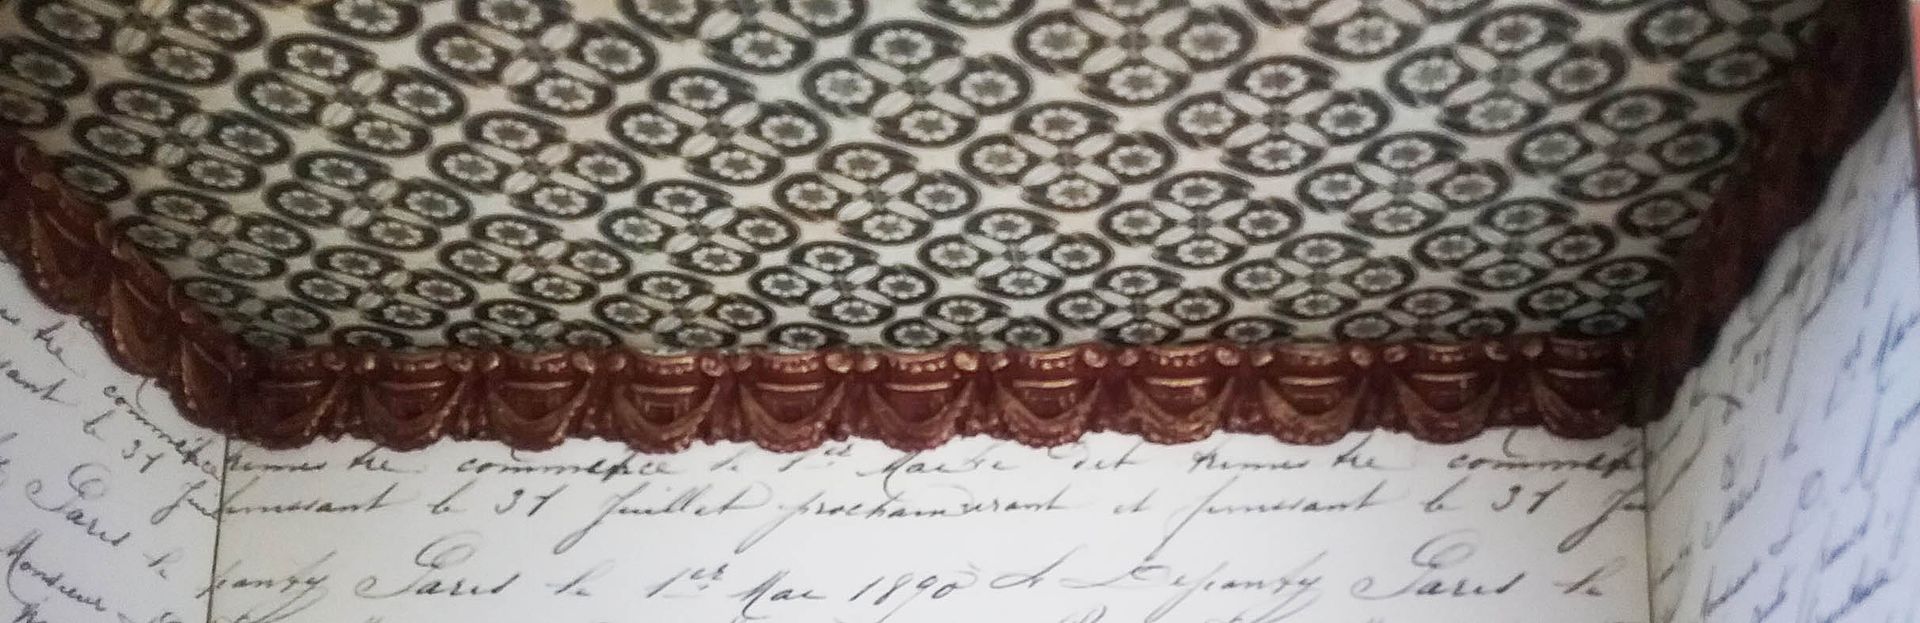
The cornice inside the box is a resin molding that I painted with burgundy acrylic paint and then rubbed with gold.
THE FAÇADE
Around the top outside of the room box, I
attached molding from the Facade Architecture collage sheet backed with lightweight chipboard.
WINDOWS
Looking through the windows on both the
front and the sides of the house, you can see paper and lace curtains and a
picture hanging on the wall.
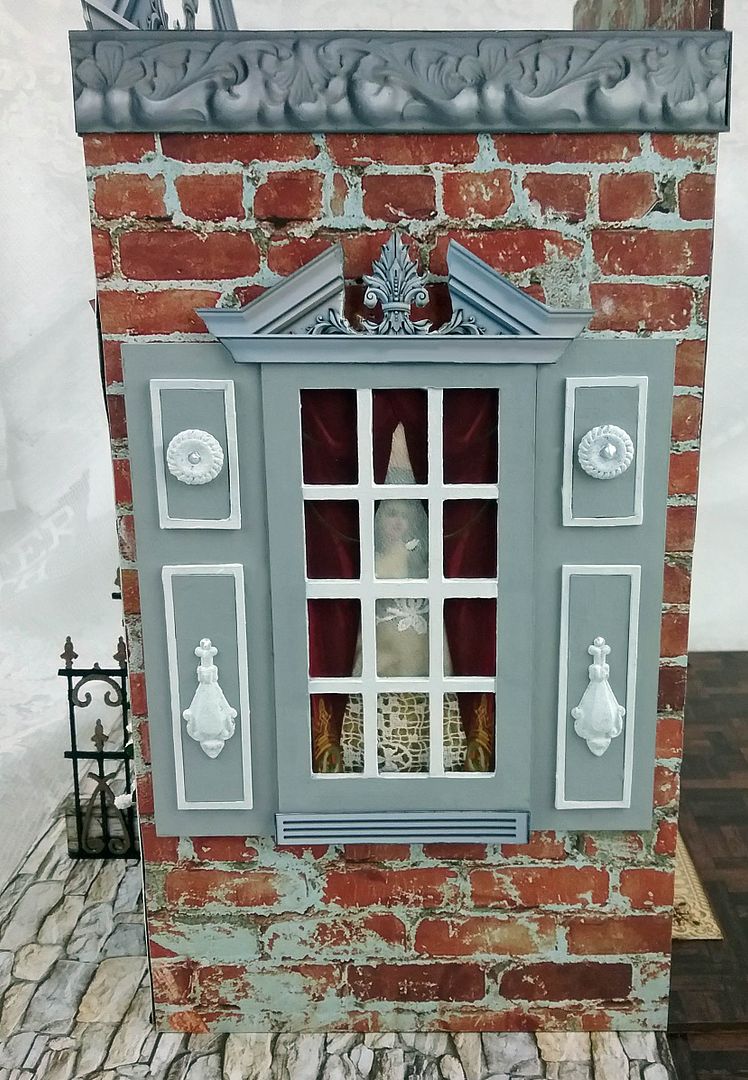
The side windows are from a window set. I used the 12-pane window and shutters
from two sets.

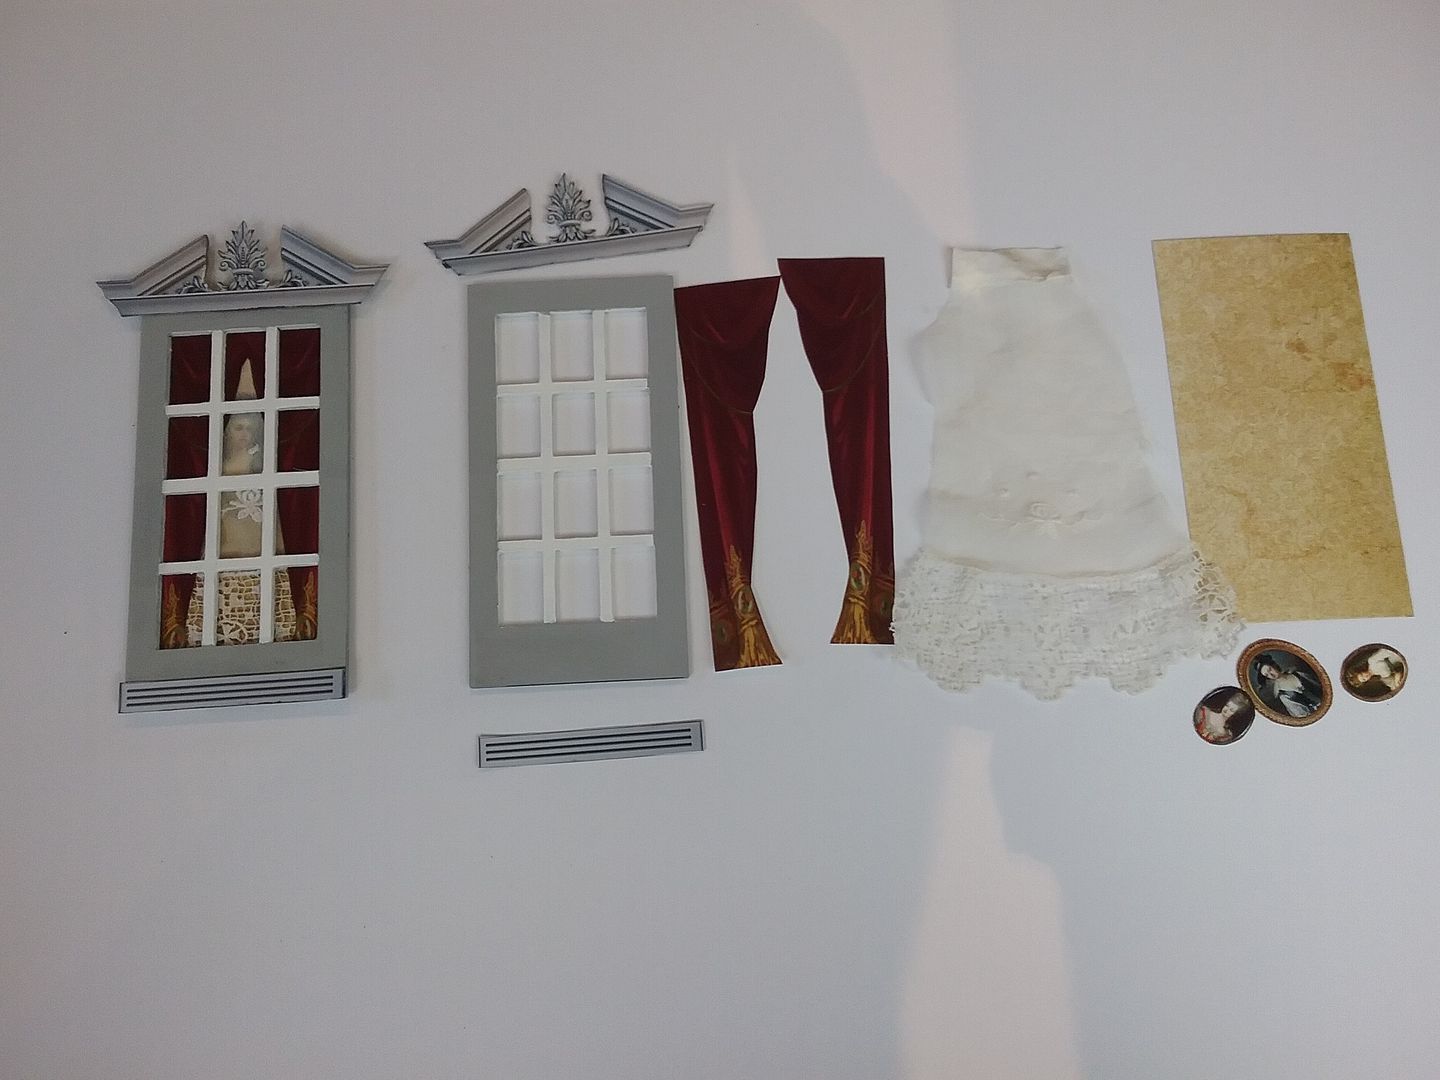
In the picture below, you can see the
process I used to put the windows together.
- Painted the window grey (Craft Paint Country Grey acrylic paint)
- Painted the panes white (Folk Art Ivory White acrylic paint)
- From the Façade Architecture collage sheet, I added the pediment and bottom trim.
- Glued the curtains to the back of the window,
- Glued the piece of lace to the back of the window
- Glued pictures from the Portraiture collage sheet to the paper
- Glued the paper to the back of the window
I painted the shutters using the same
paint as the windows. To add more
interest to the shutters, I added a brass drop and a rondelle painted with Ivory
White paint. I stippled the paint on to
give it more texture.

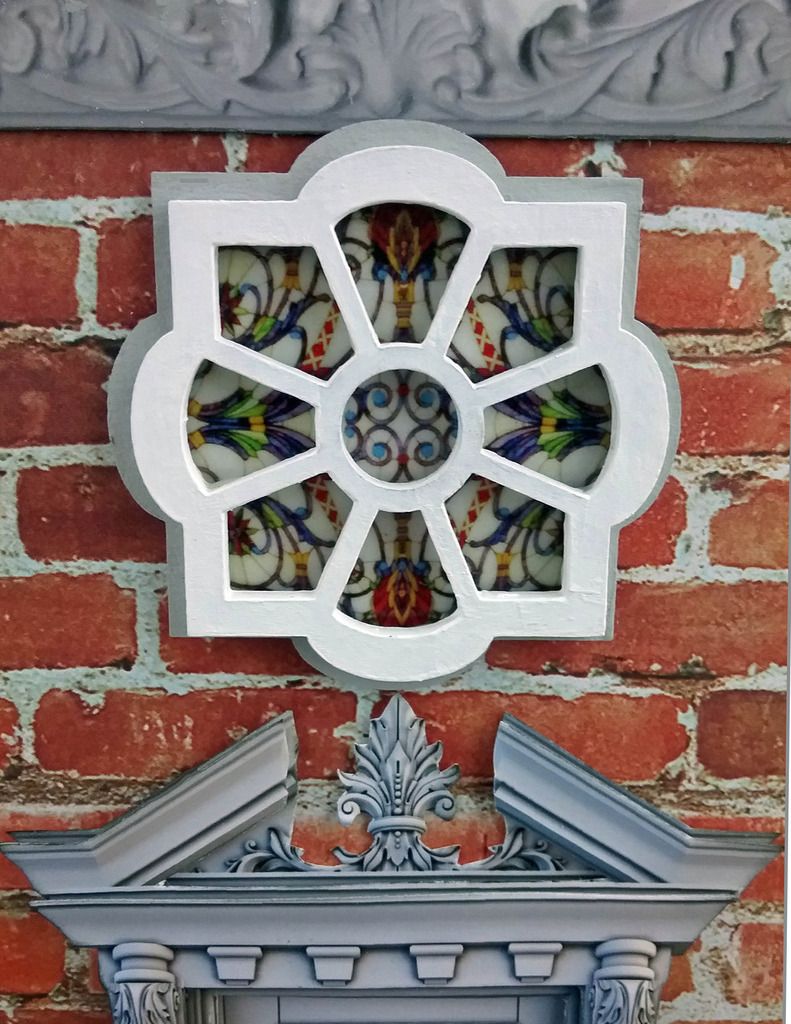
The window above the door is from a set of decorative windows. Behind the window
is an image that I printed on vellum, coated with VersaMark, sprinkled with
embossing powder, and then melted the powder with a heat gun. This technique makes it look more like stained
glass. I backed the image with white
paper to block out the brick paper and to make the image look brighter. You'll find the image I used at the bottom of this post.

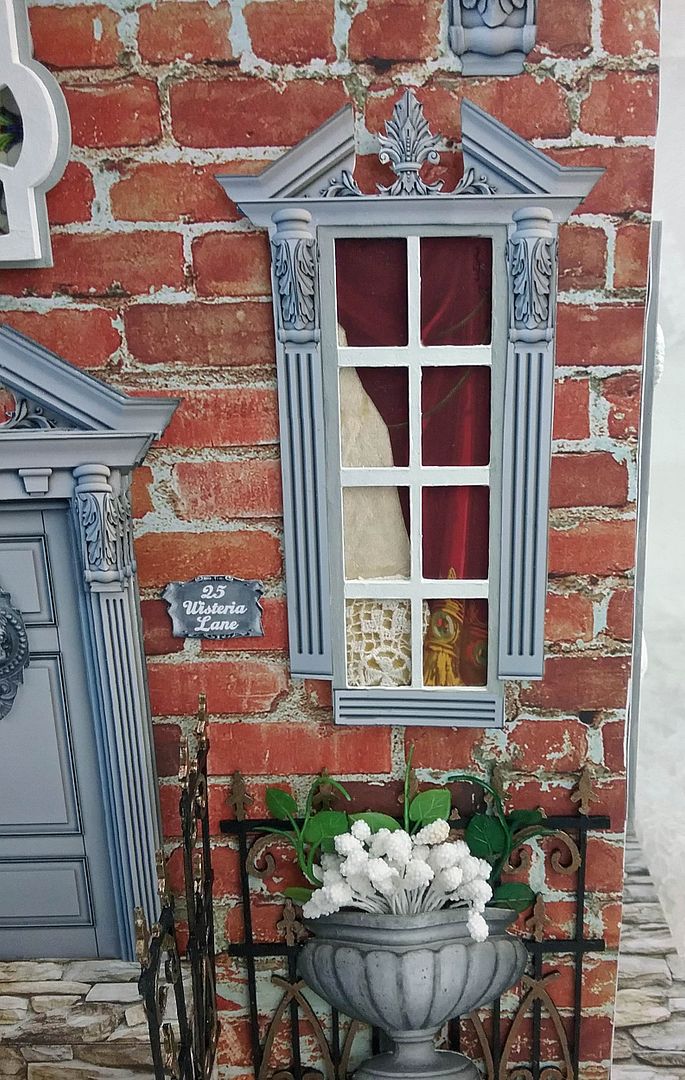
The front windows are made the same way
as the side windows (minus the shutters) but with a set of 2 narrow windows. I also used an image from the Facade Architecture collage sheet
to dress up the windows.
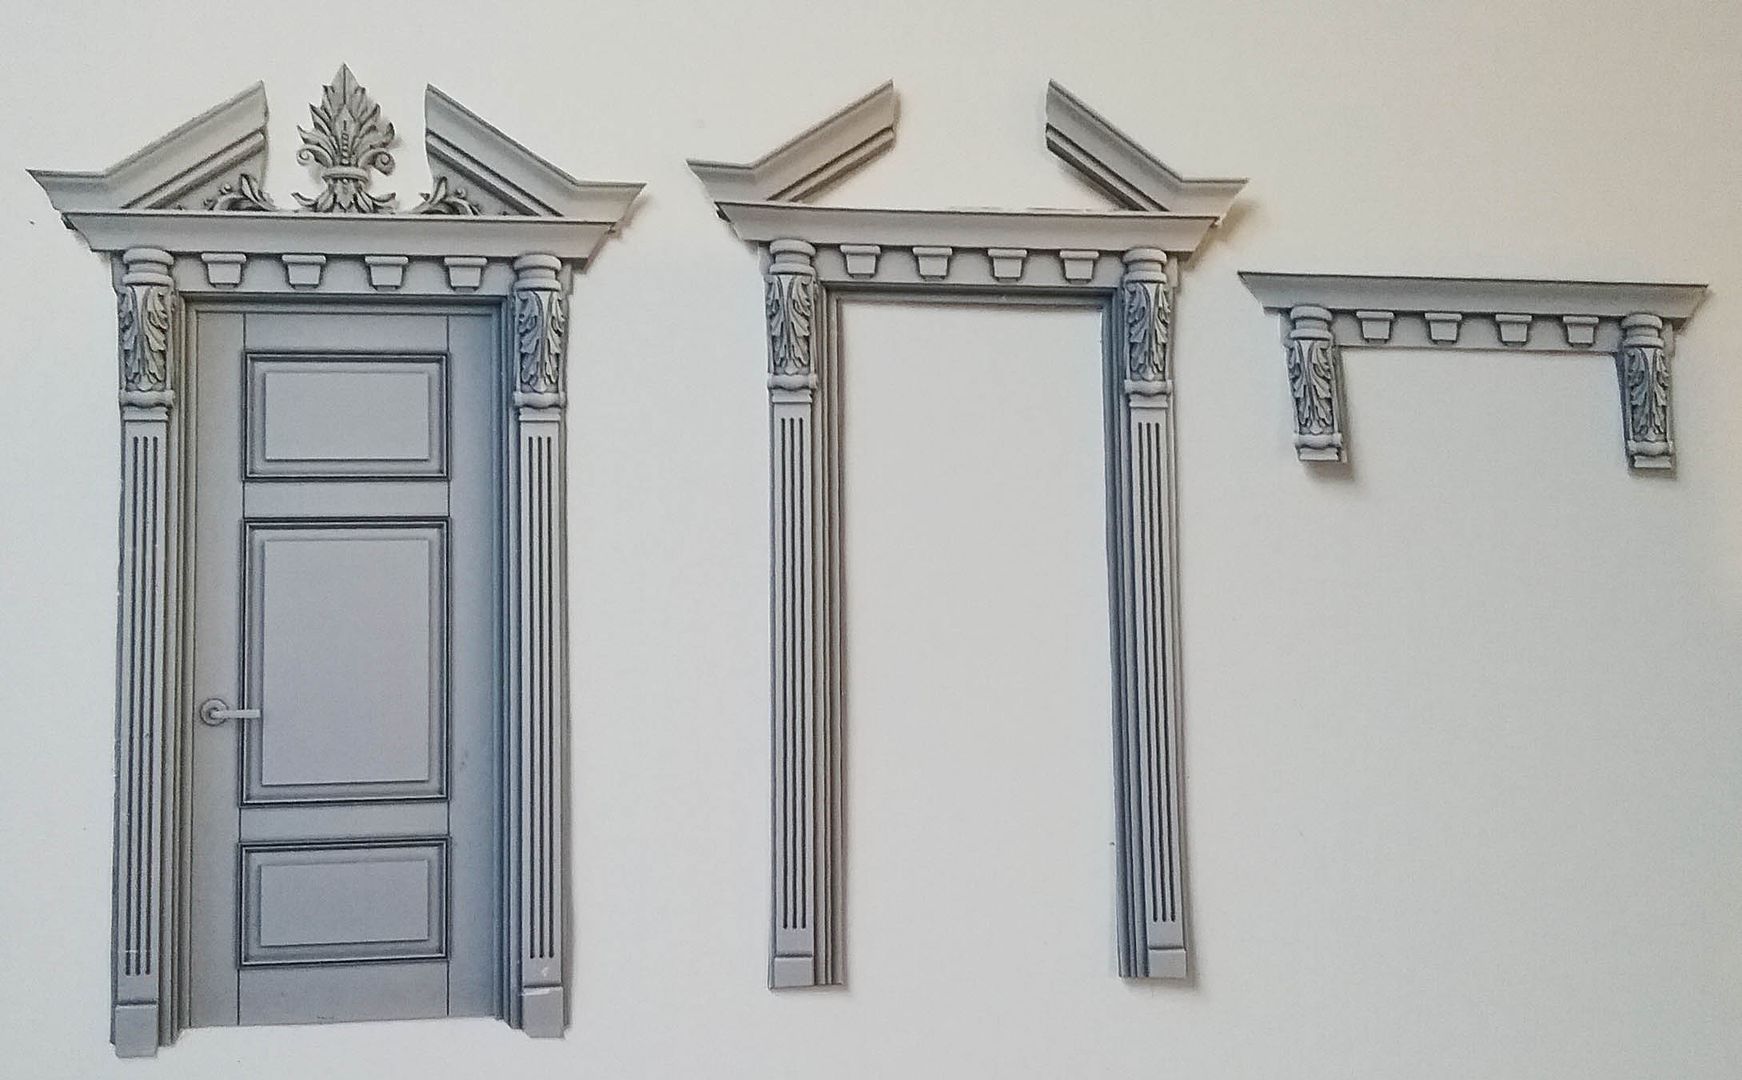
THE DOOR
To add dimension to the door, I printed the image three times. Below you can see what I did
with the three images. I added double-stick foam tape to the 2 images on the right and then stacked them, one on top
of the other, going from the image on the right to the left.
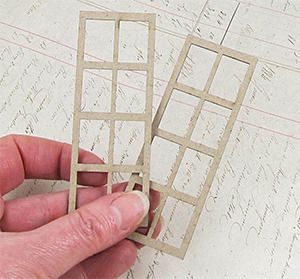
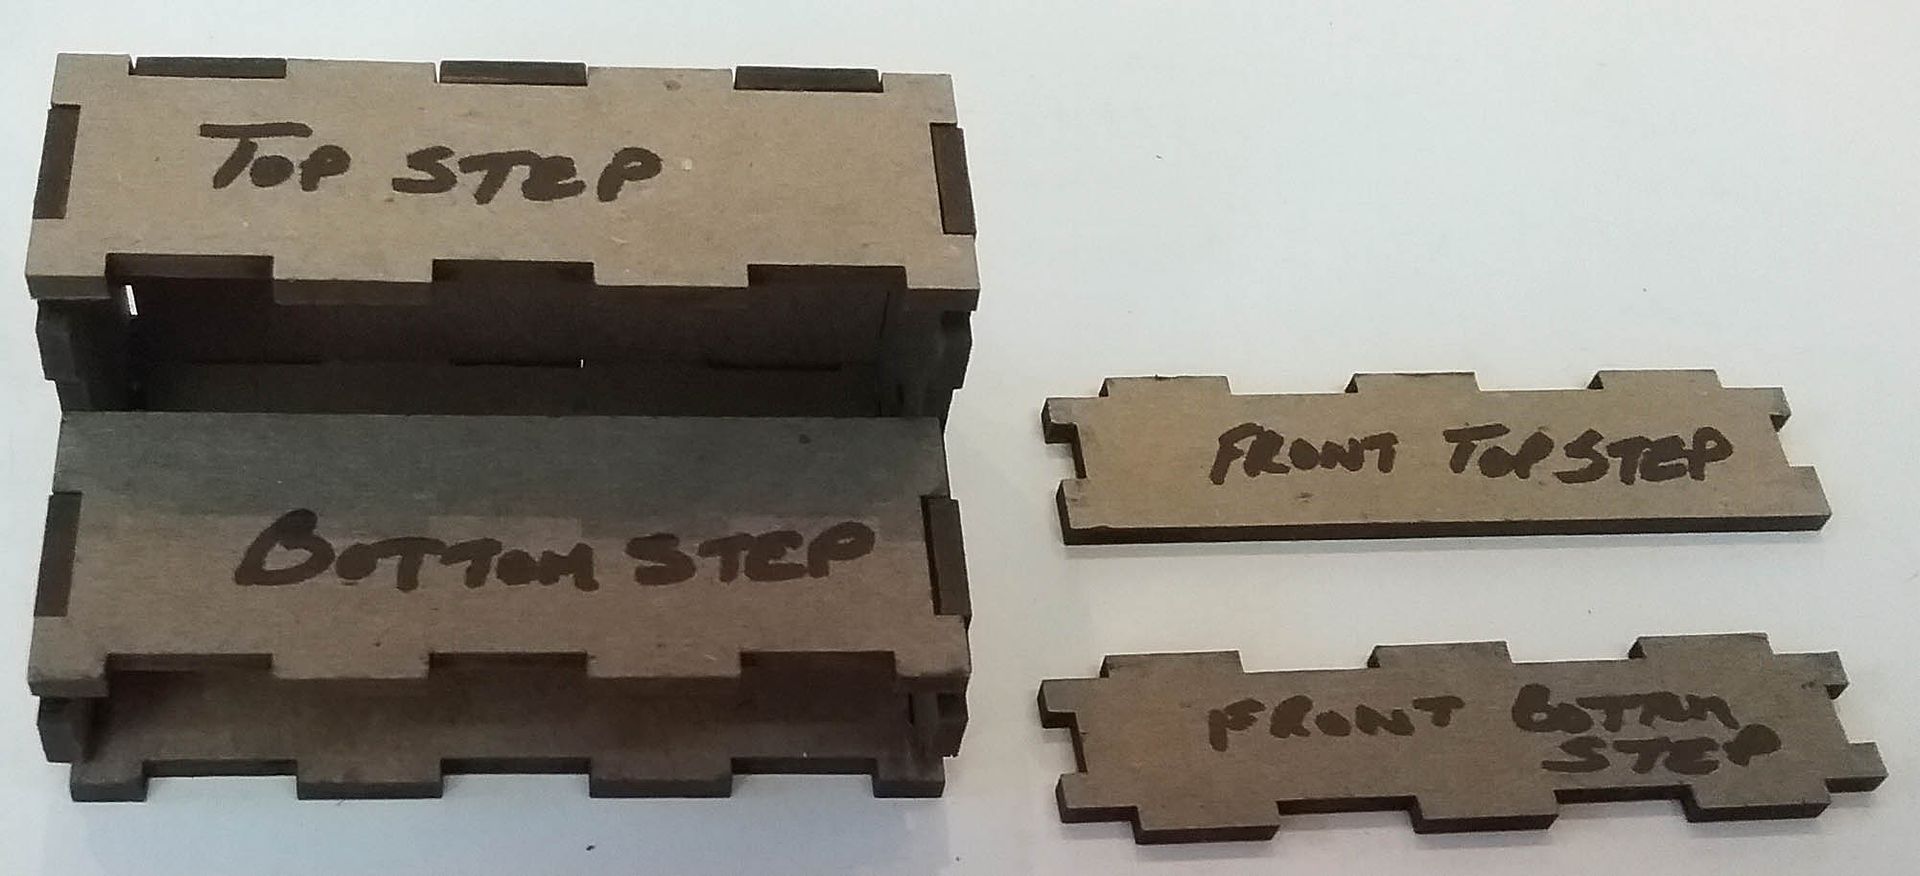
THE STAIRS
For the stairs, I used a 2 stair kit. Below I have marked the pieces to help you
with assembly. I also have pictures that show the order in which I put the pieces together.

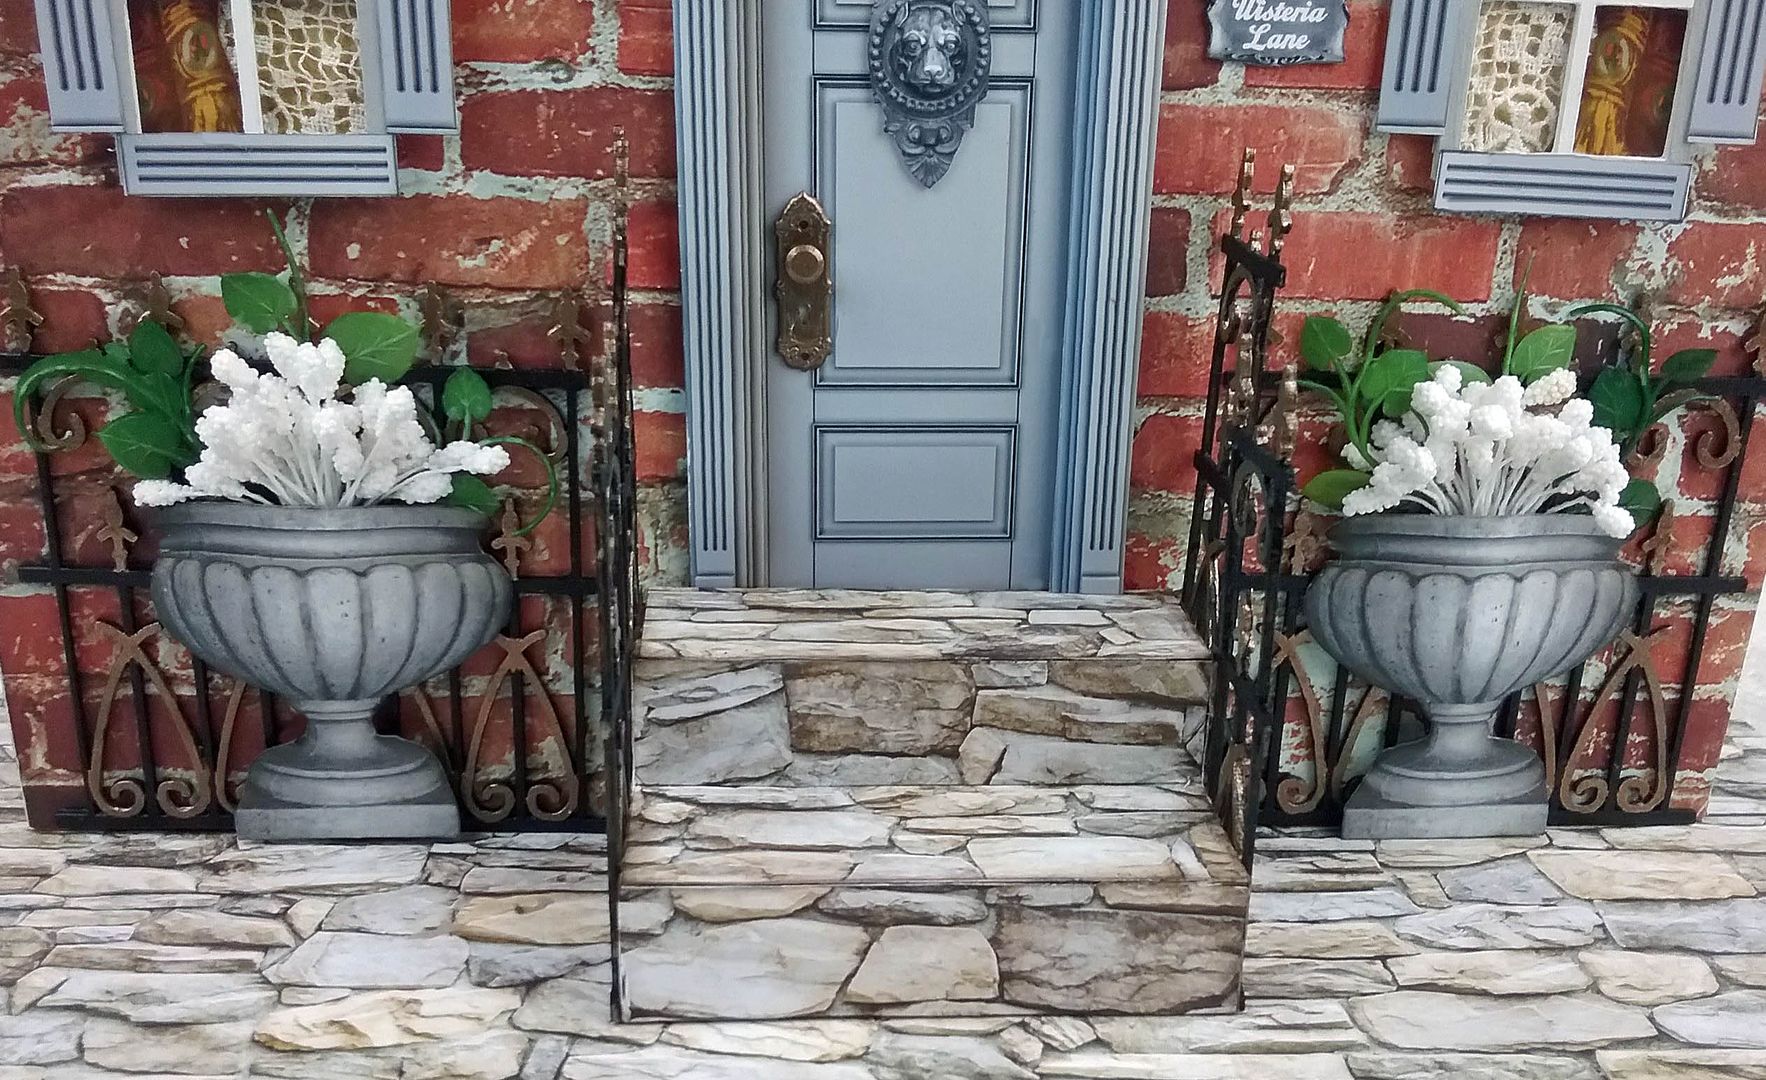
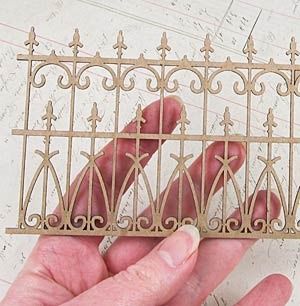
THE FENCE

I used two pieces of chipboard fencing to create the fence flanking the stairs and in front of the house. I painted the fence black and then accented decorative details with gold paint. The
urns are from the Facade Architecture collage sheet and are filled with white stamens and greenery
from a fern garland.
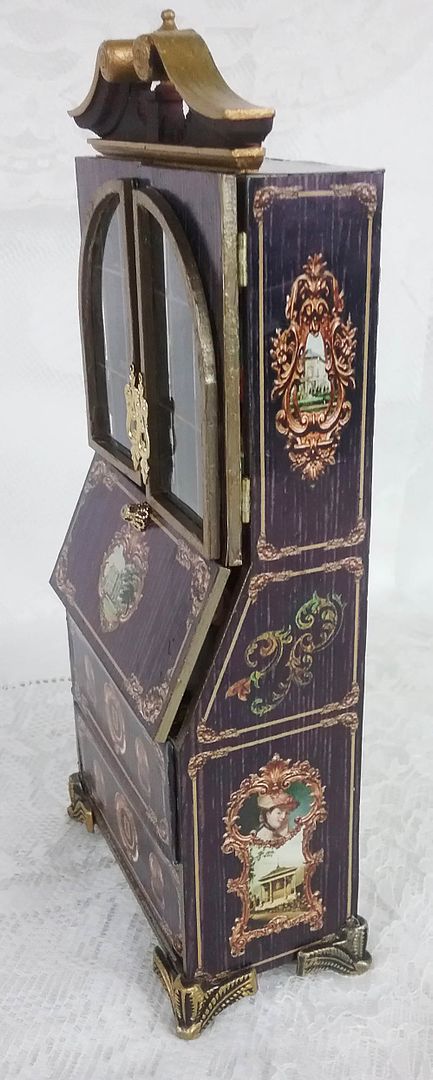
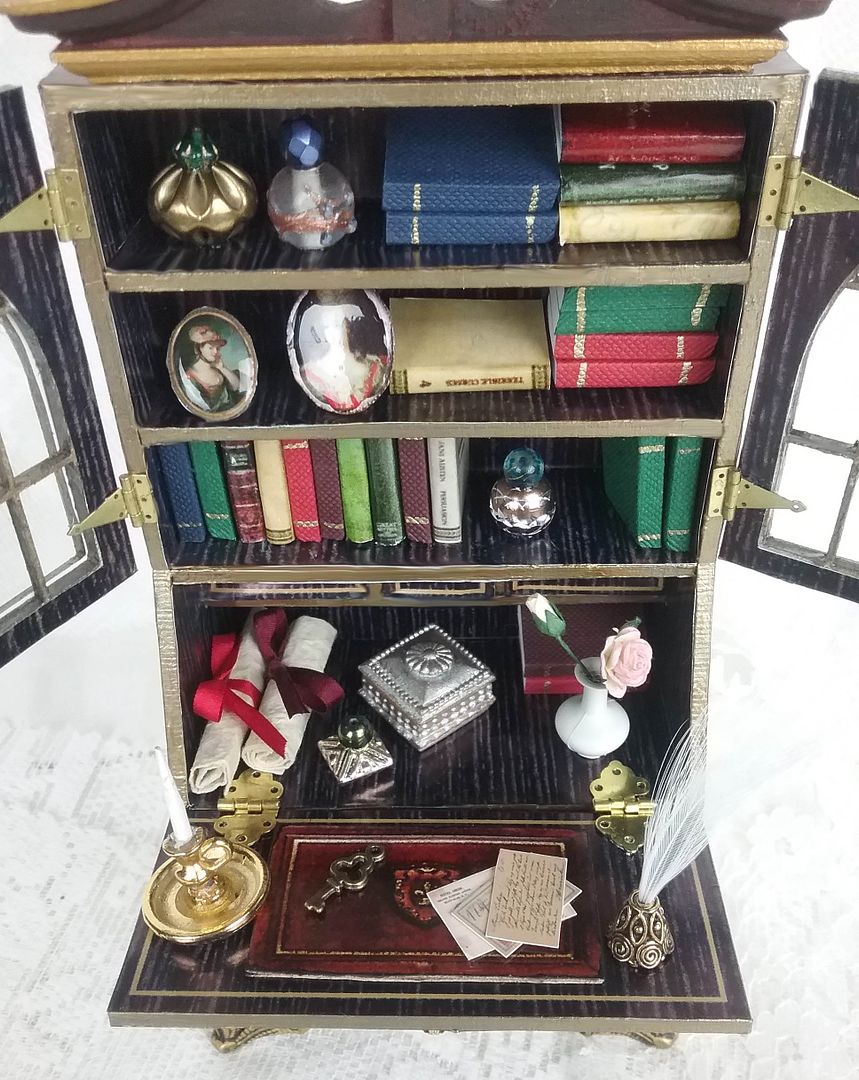
THE SECRETARY

The secretary is made from a kit. Alpha Stamps is carrying both a 1:12 scale
kit and a 1:24 kit. The kit used for
this project is 1:12. The Secretary collage sheet set (or digital image set) contains all of the images that you will need to paper the
secretary.
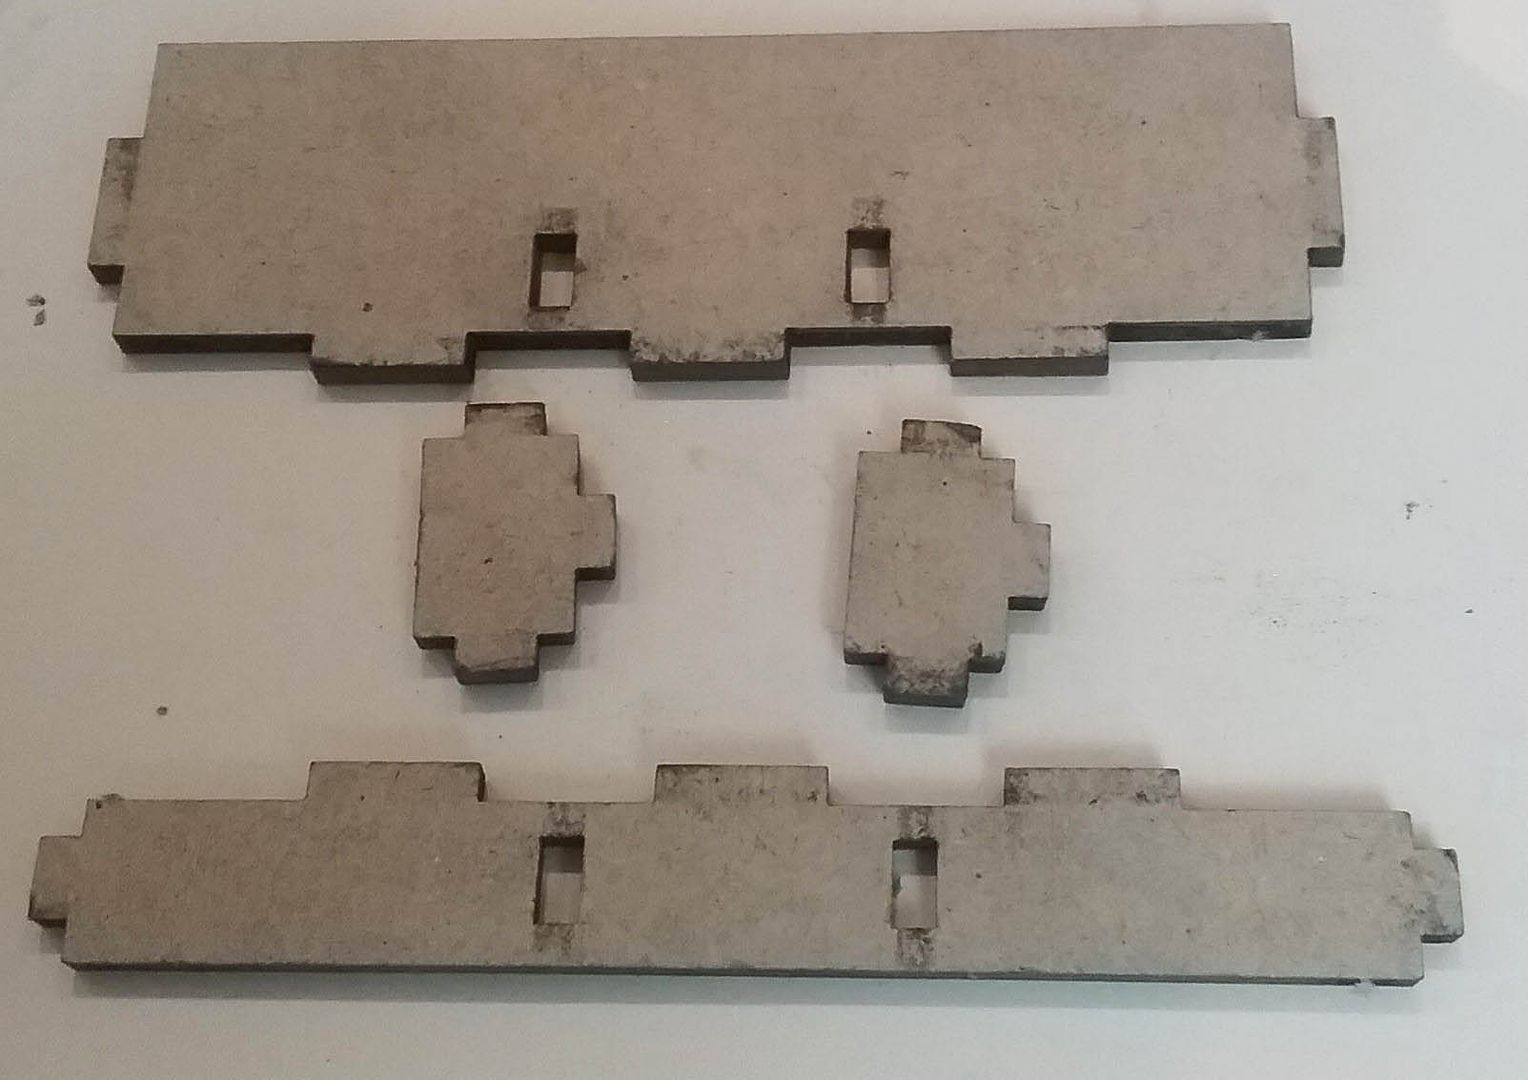
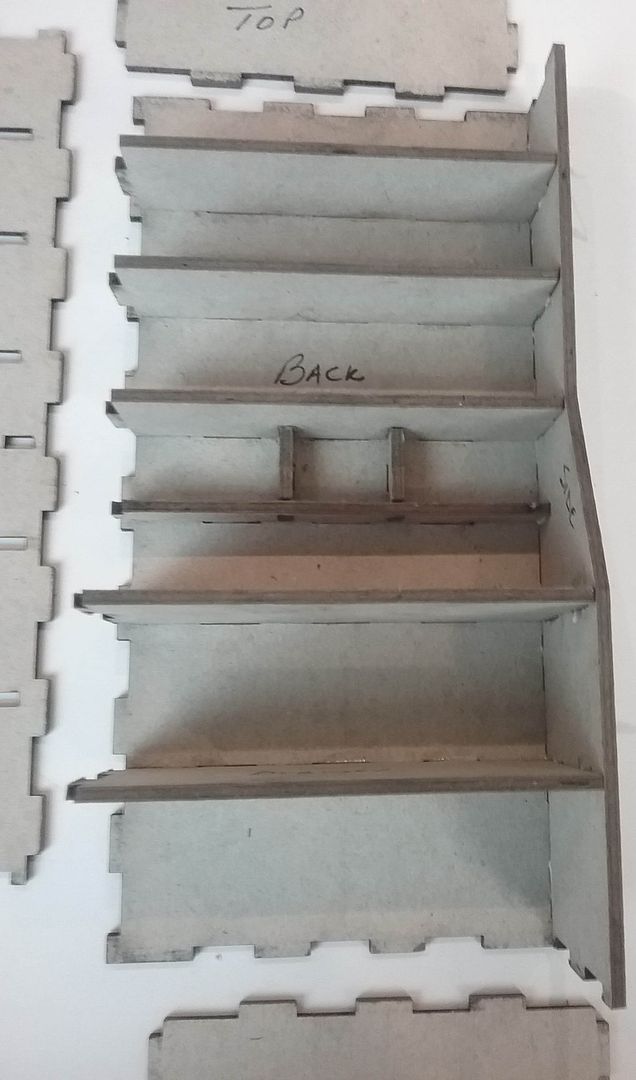
Below is a picture of the pieces in the kit. I have labeled each piece to
help you in the assembly of the secretary.
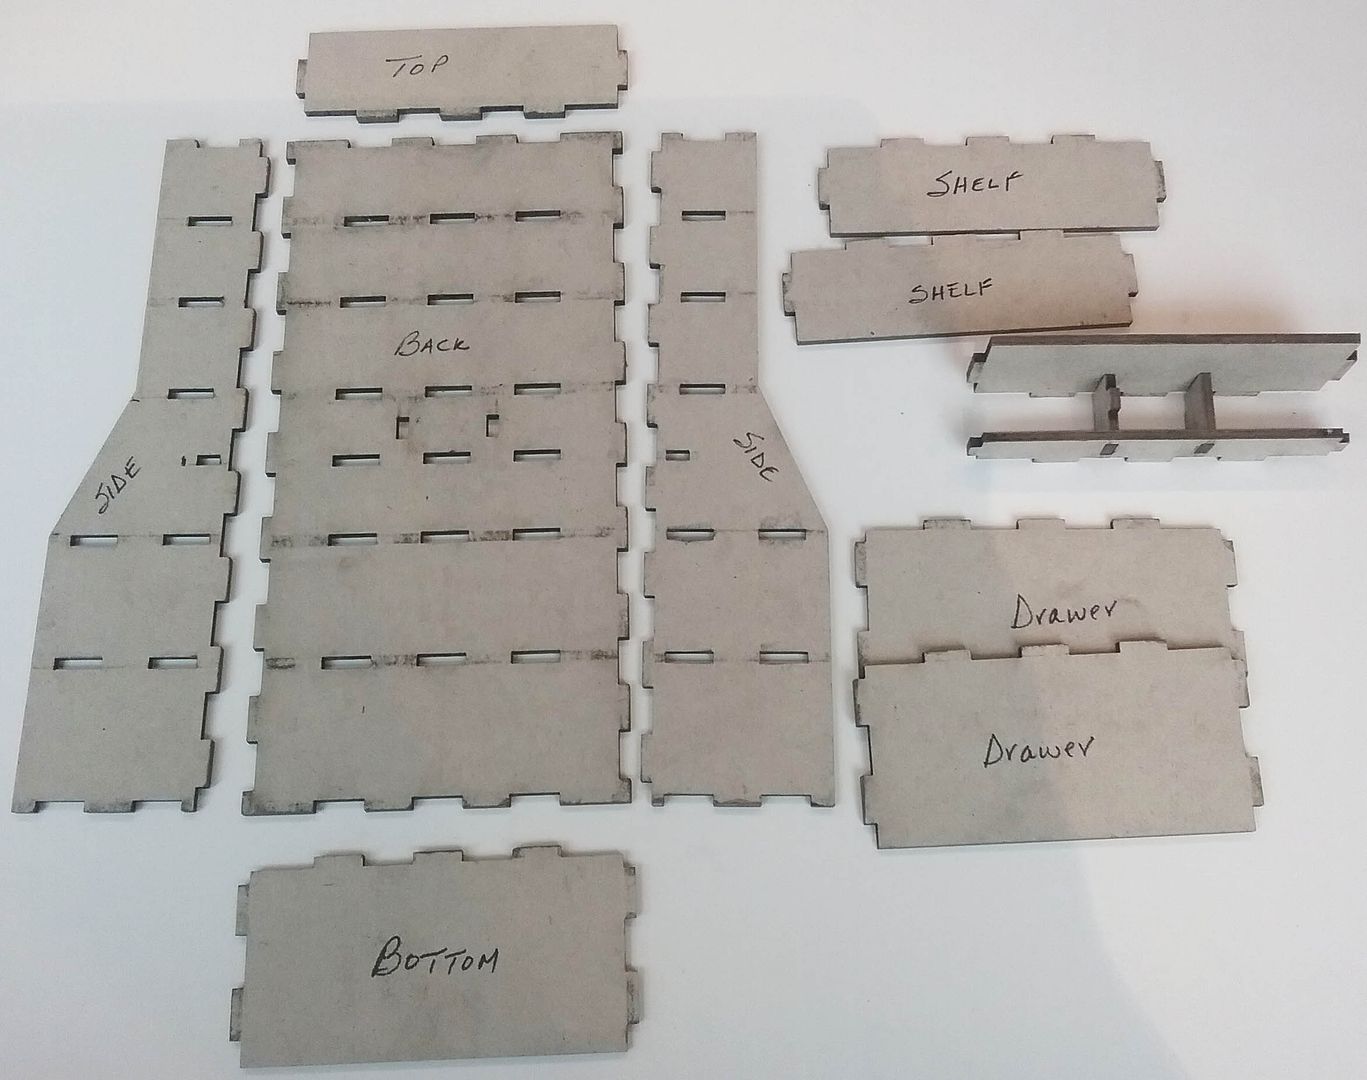
First, I glued in place the shelves on
the top and the separators for the drawers at the bottom.
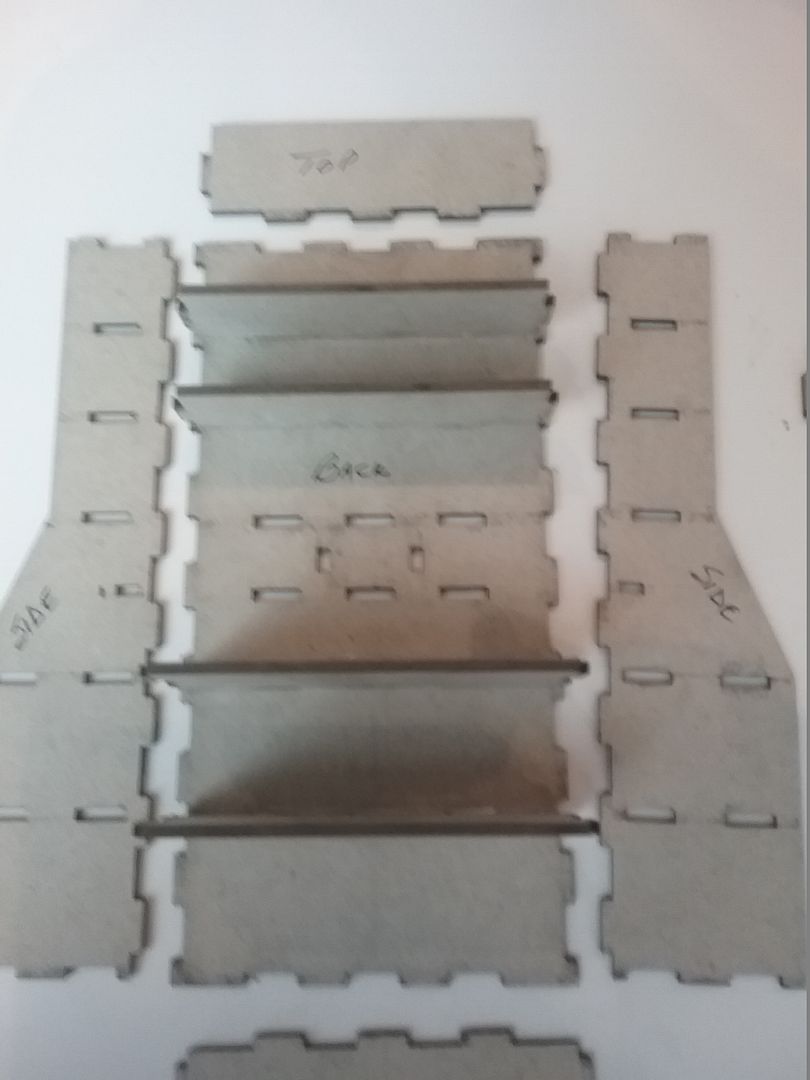
Next, I glued together the center section, which accommodates the small drawers in the desk part of the secretary.
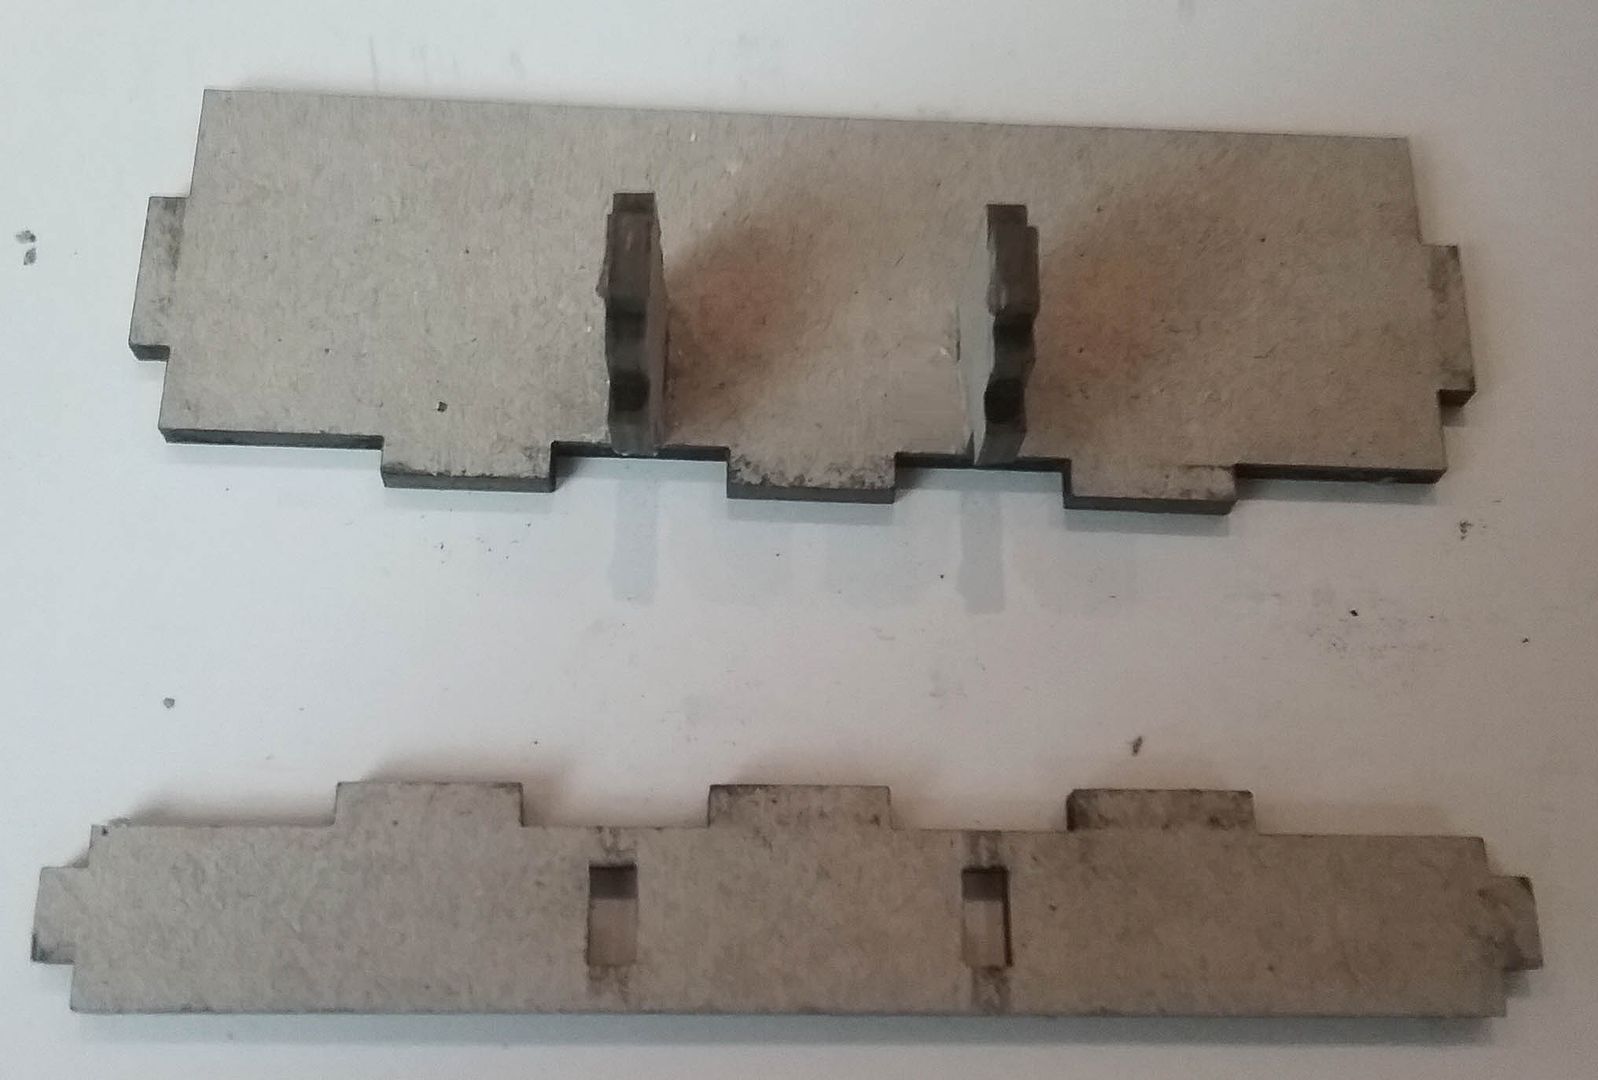
Then, I glued the center section in
place.
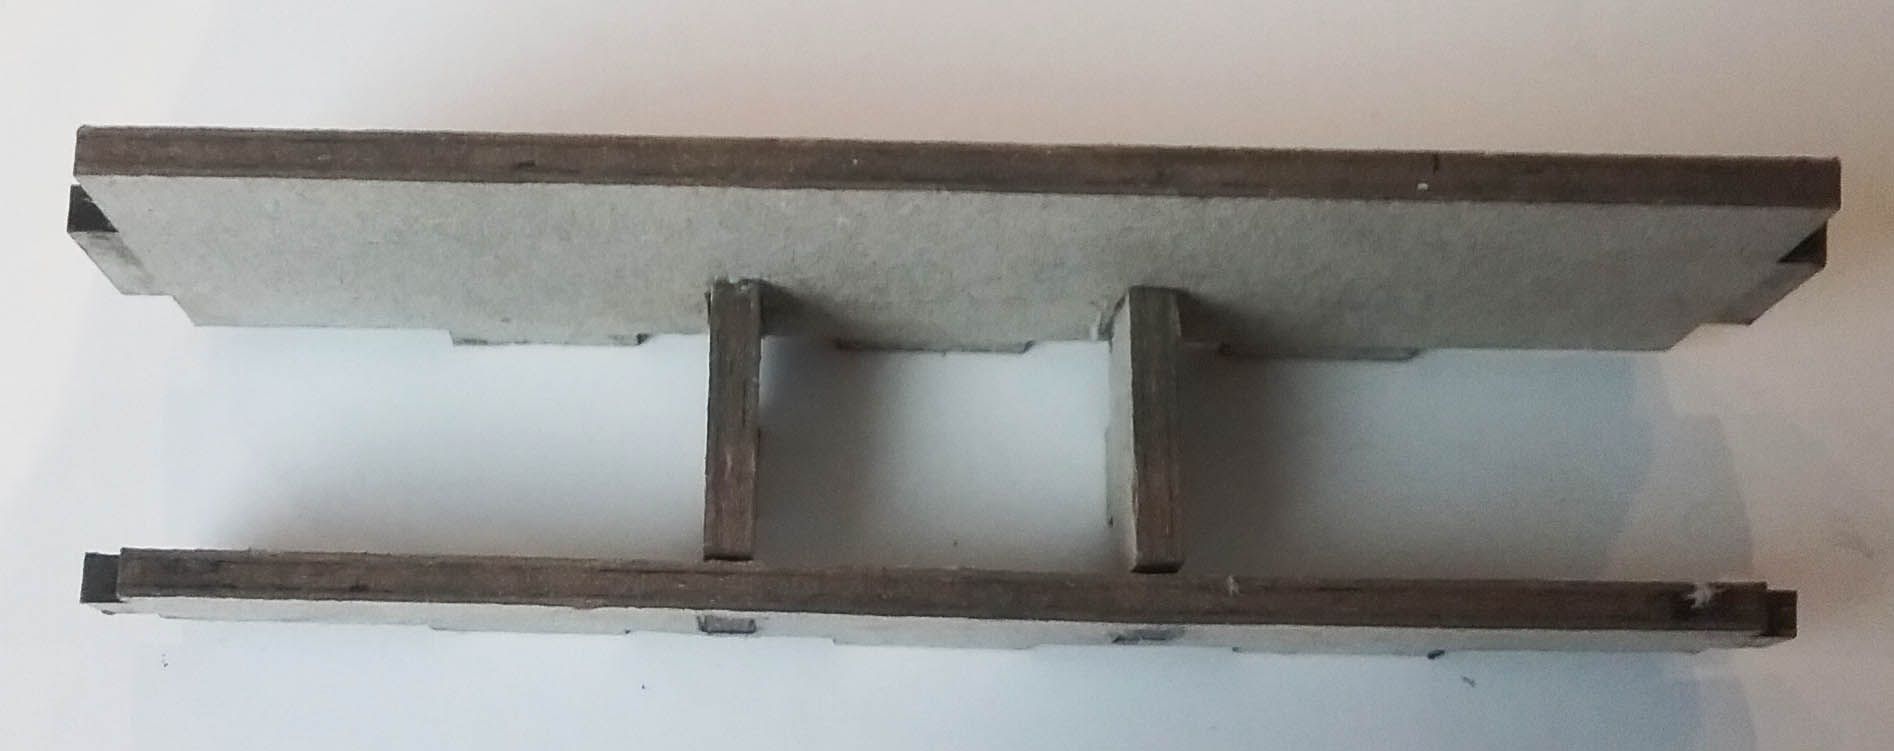
I glued one of the sides in place and then the other.
Lastly, I glued the tops and bottoms in
place.

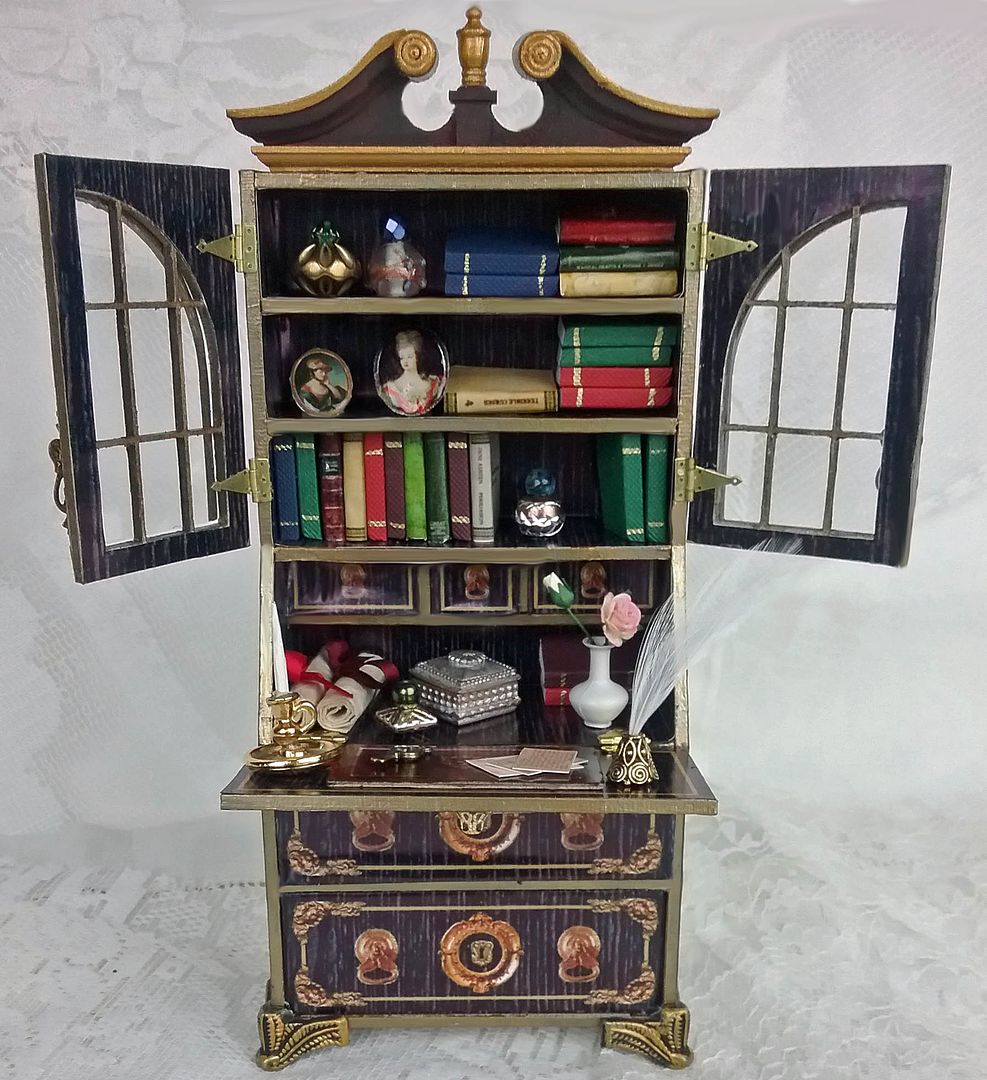
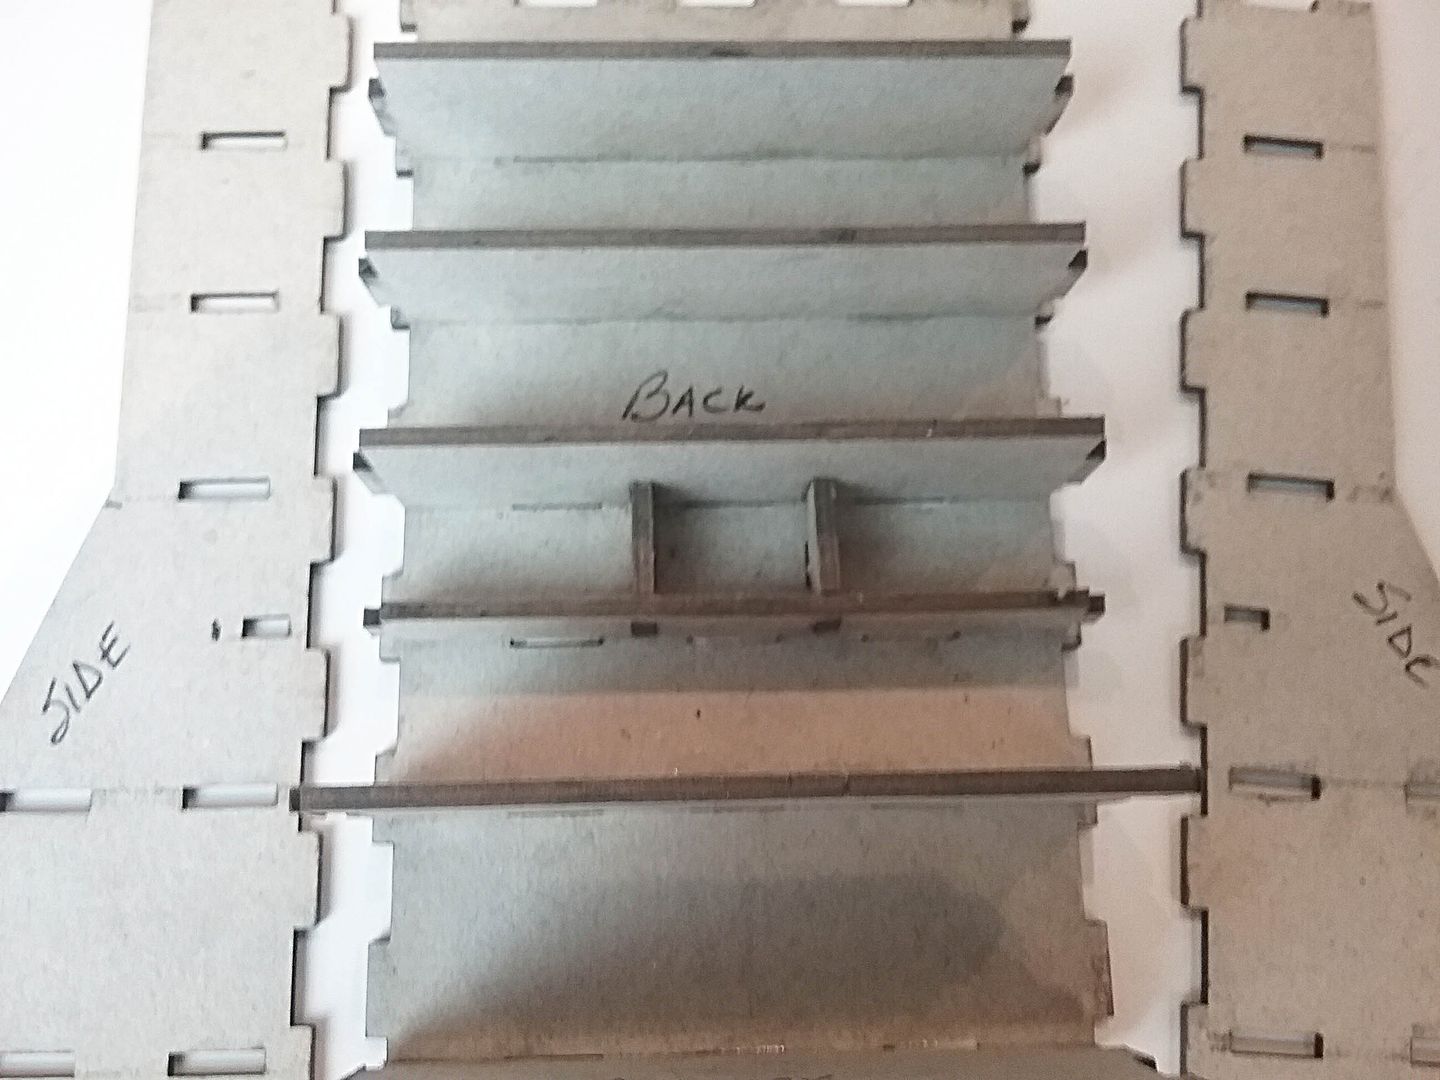
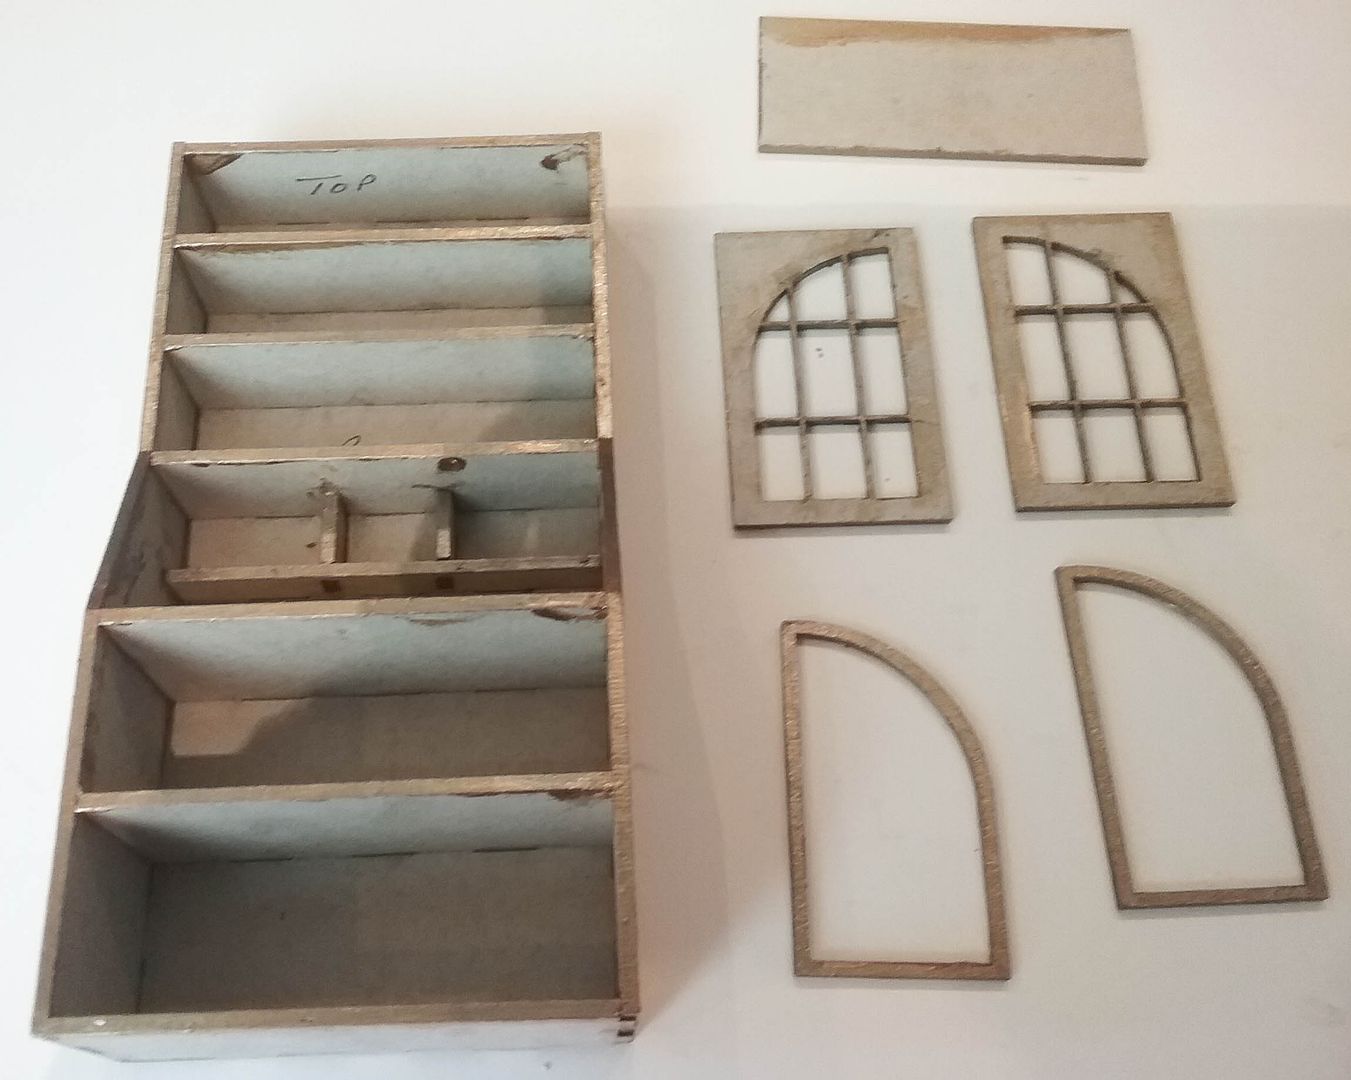
Below you can see the assembled
secretary minus the glass and drop-down doors.

Below you can see the doors
which have decorative trim pieces.


Before adding the images from the
collage sheet, I painted all of the edges with gold paint. Basically, paint anything that might show
after adding the images.
Fold and add the image
inserts to the shelves and glue in place the glass door hinges.
DESK
SECTION & DRAWERS:
- Add the images to the drop-down door. NOTE: Be sure to glue them in the right direction, as the direction is different for the outside image of the framed picture and the inside image of the desk pad.
- Add the images to the desk bottom and sides. NOTE: be sure to add the desk side images (ones with the notches) to the desk sides before adding the small drawers.
- Fold and insert the small drawers and large drawers in place.
- Add the rest of the desk images (back, under the small drawers, and on top of the desk). These images are small strips of the wood grain.
- Glue one side of the hinges to the edge of the desk.
- Glue the other side of the hinge to the drop-down desk door.
GLASS
DOORS:
- Cover the front and back of the doors with the images from the collage sheet.
- To the back of the decorative trim, I added clear plastic that looks like glass.
- Glue the decorative trim to the front of the doors.
- Glue the hinges to the doors.
- I added connectors to the front of the doors to serve as pulls.
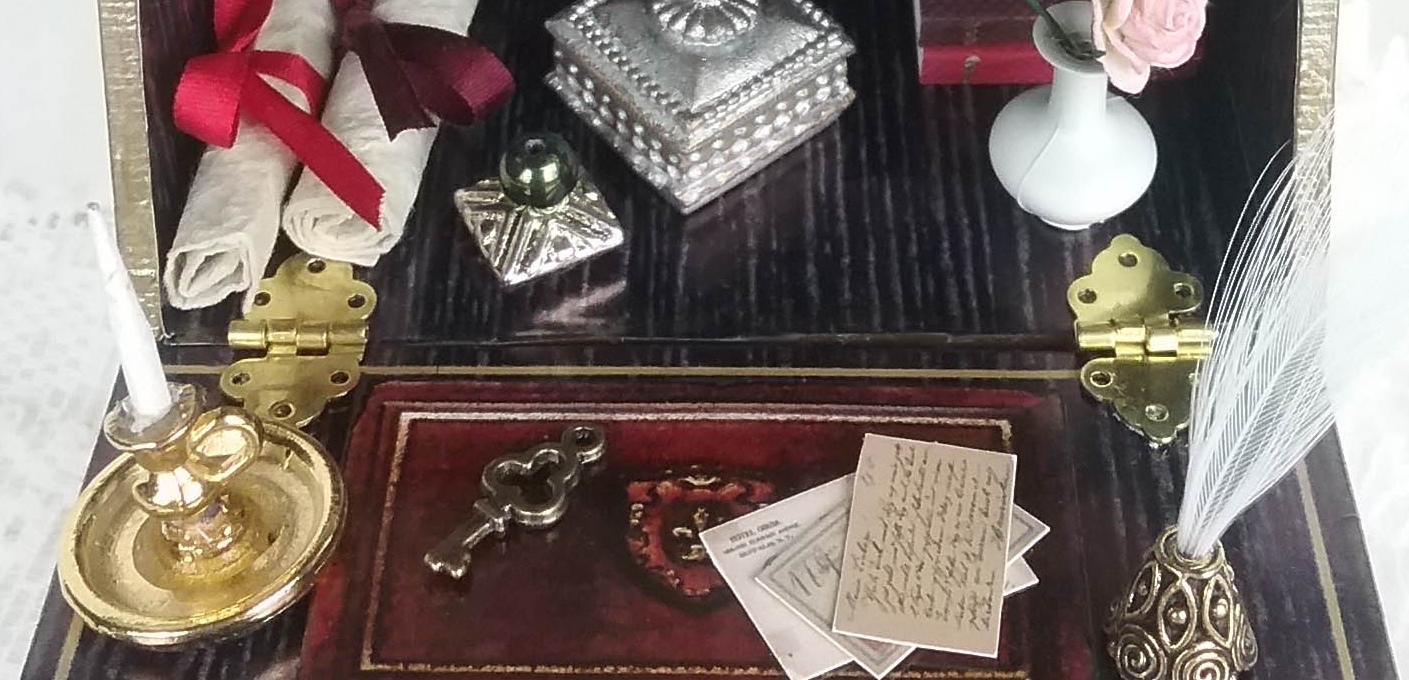
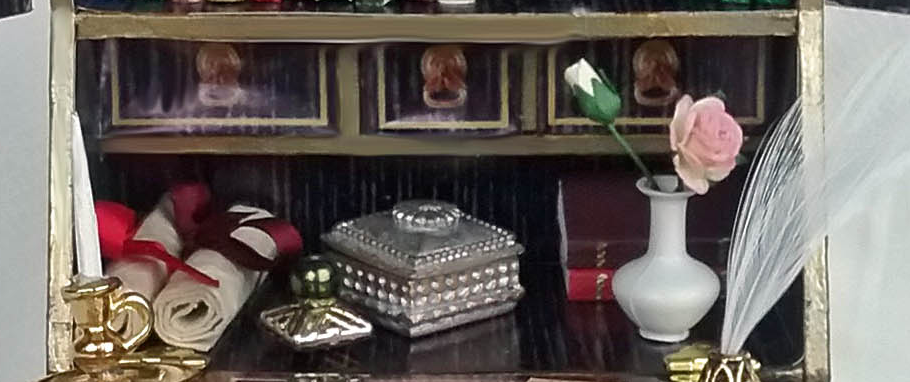
The final architectural touches are a wooden pediment at the top and brass feet at the bottom. I filled the secretary with miniature books, bottles made from beads, and images from the Portraiture collage sheet with
Glossy Accents applied to make them look like glass. A metal box, candlestick, vase with roses, an
inkwell with a feather quill, and scrolls of paper tied with ribbon.
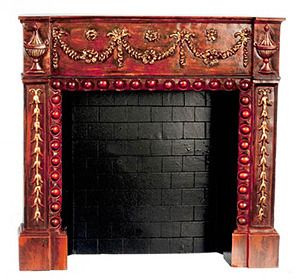
THE FIREPLACE

In the center is a miniature Victorian fireplace. I wanted to scale the piece
up, so I used Altoids tins at the top and bottom.
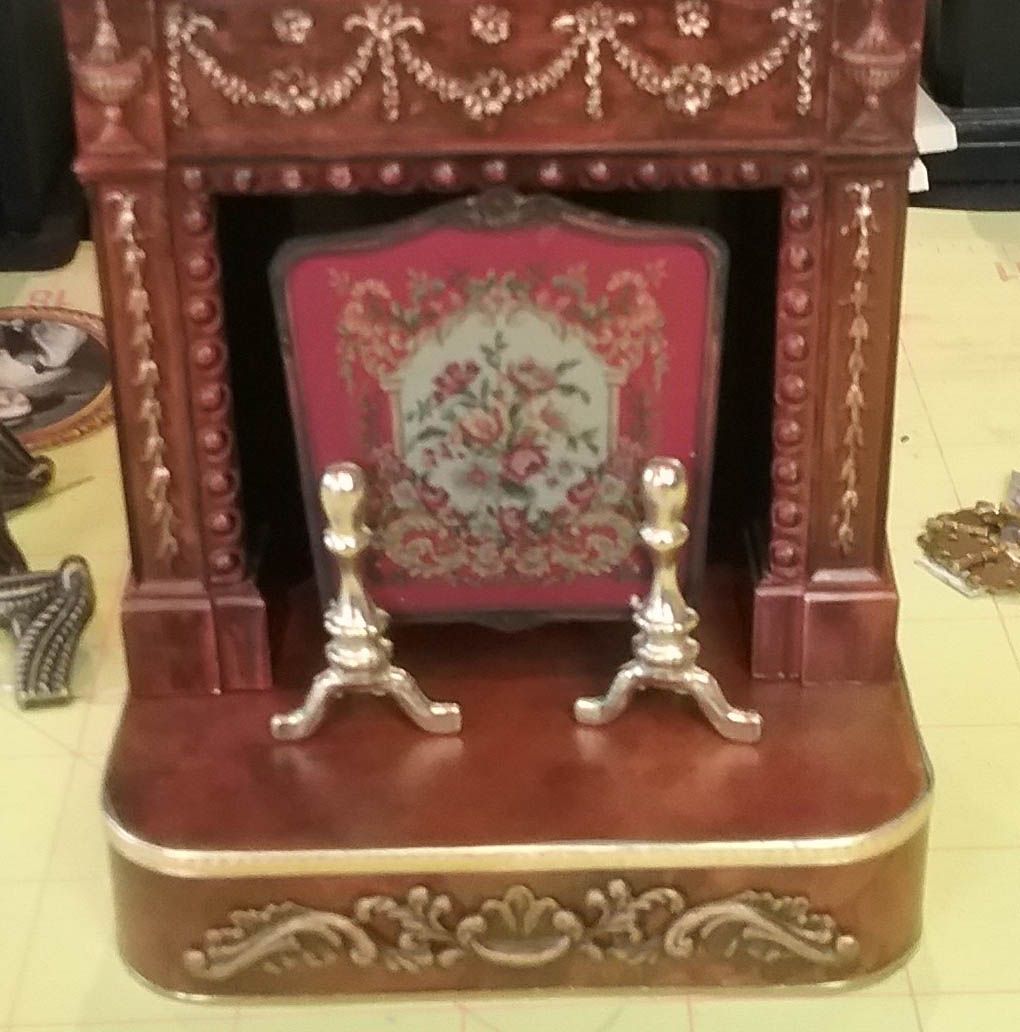
The tin on the bottom is covered with
decorative paper from my stash; it just matched the fireplace's patina. I added a piece of filigree and Dresden to dress up the base. In front
of the fireplace is a screen made from a set of fireplace accessories and an image
that you will find further down in this post.
The tin on the top is covered with the same paper and trimmed with the same Dresden. To further dress up the top, I attached three brass shell corners. In the center, I attached a picture from the Portraiture collage sheet with a faux glass dome made from Glossy Accents. On the mantle is a bust of Diana and a candelabra.

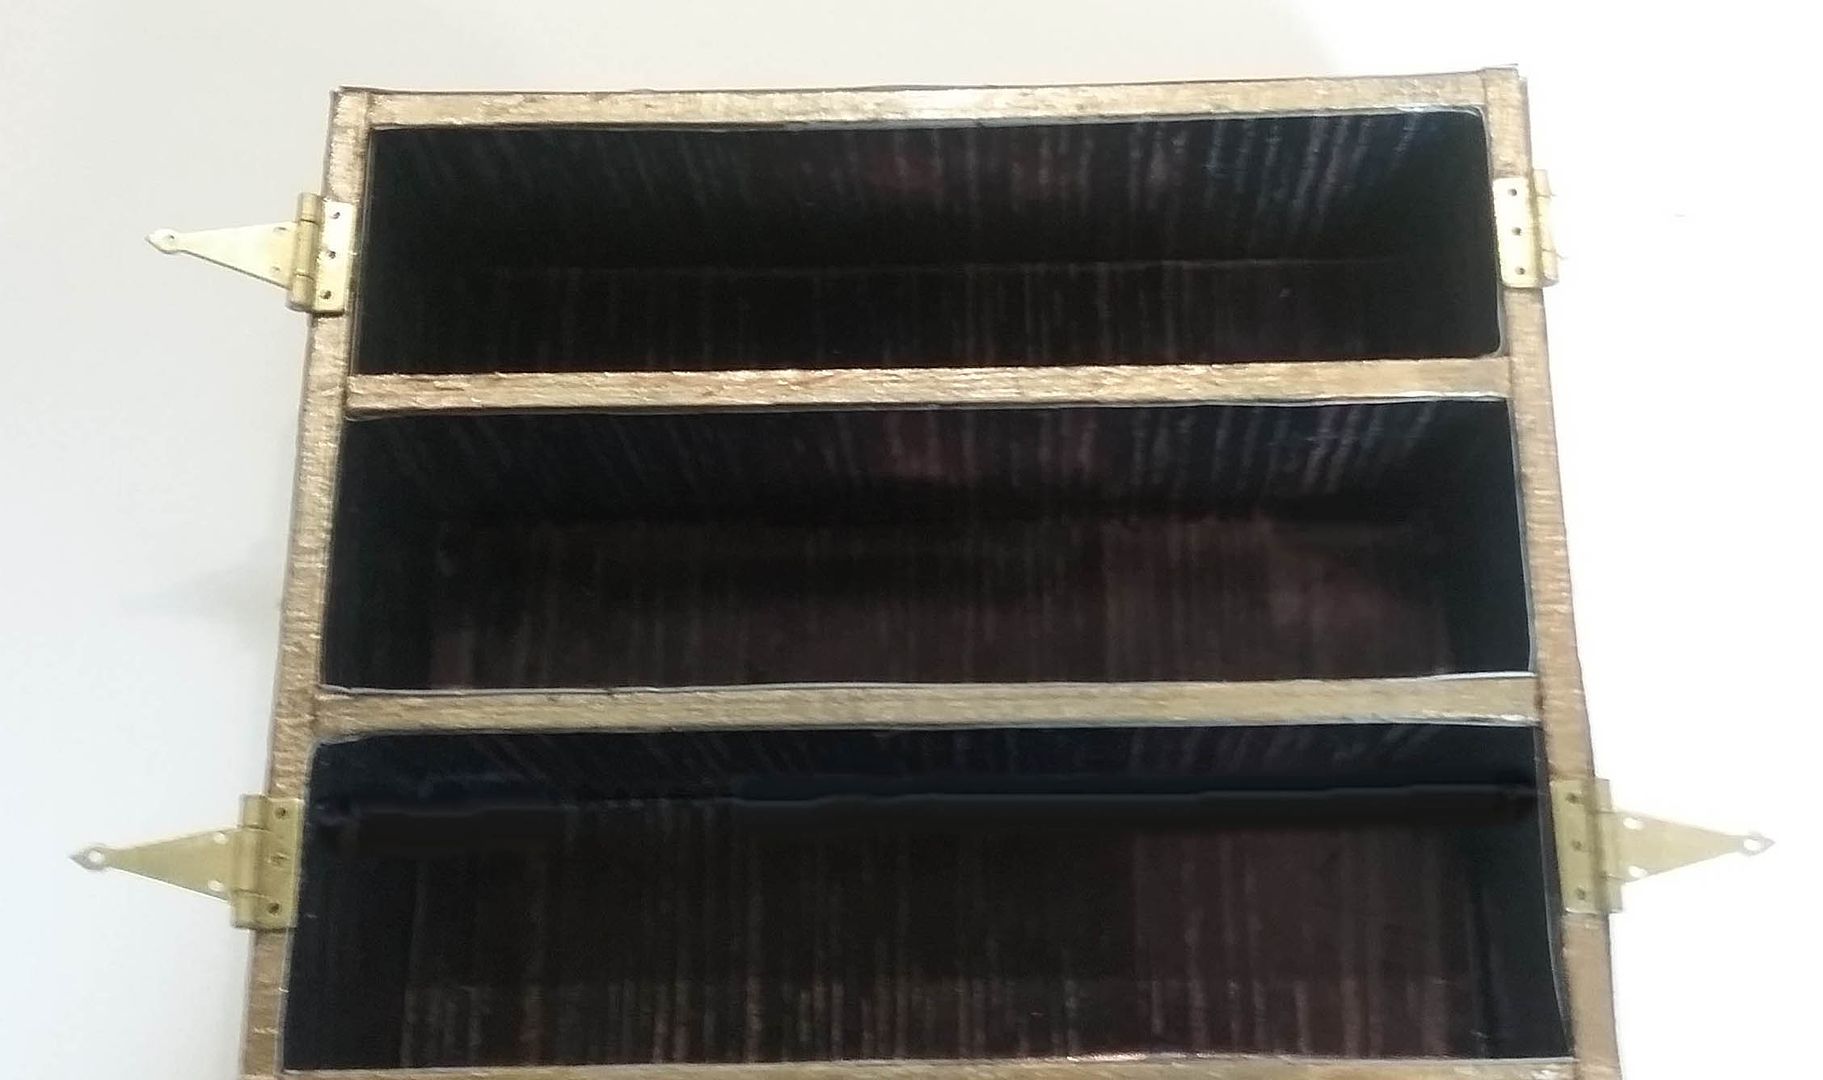
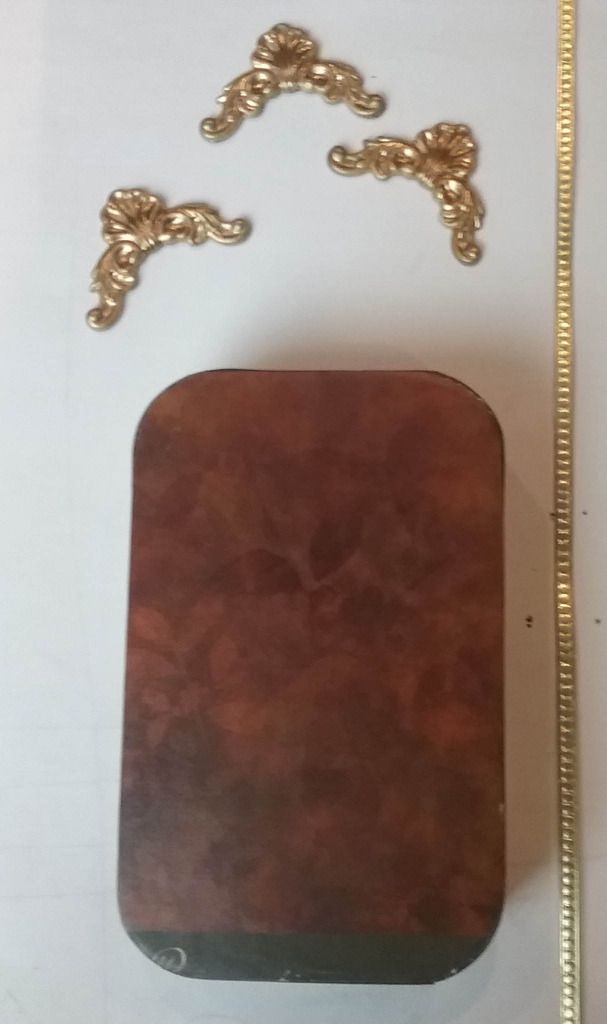
THE MATCHBOX CHEST
The chest is made from a stack of 4
matchboxes and cabriole legs. On the
outside is a faux leather paper from my stash.
The images on the fronts of the drawers are from the Matchbox Drawers collage sheet. The pulls are cute miniature brass
drawer pulls, which would also work well on the secretary.
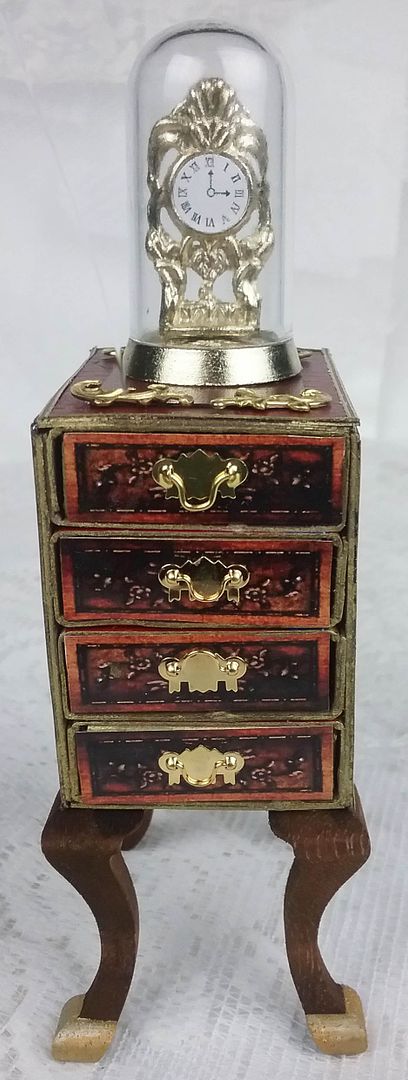
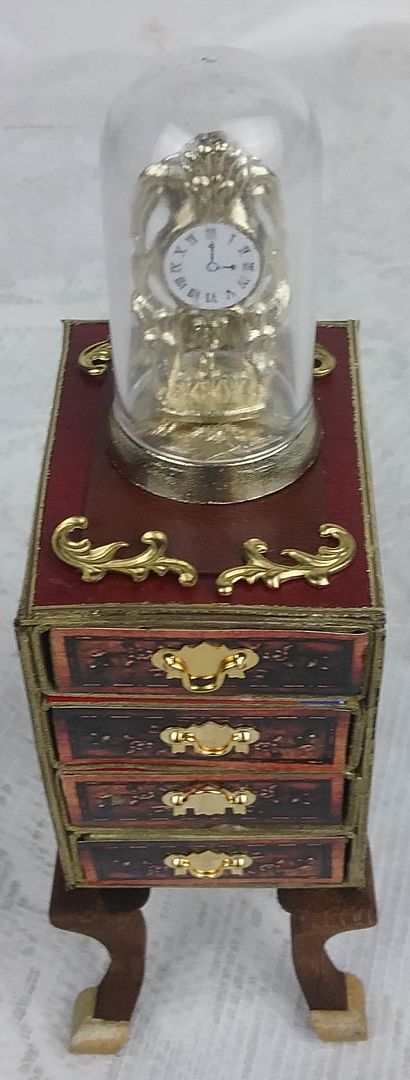
The clock on top comes with the fireplace accessory set. I decorated the top of
the chest with brass flourishes.
THE TABLE & CHAIRS
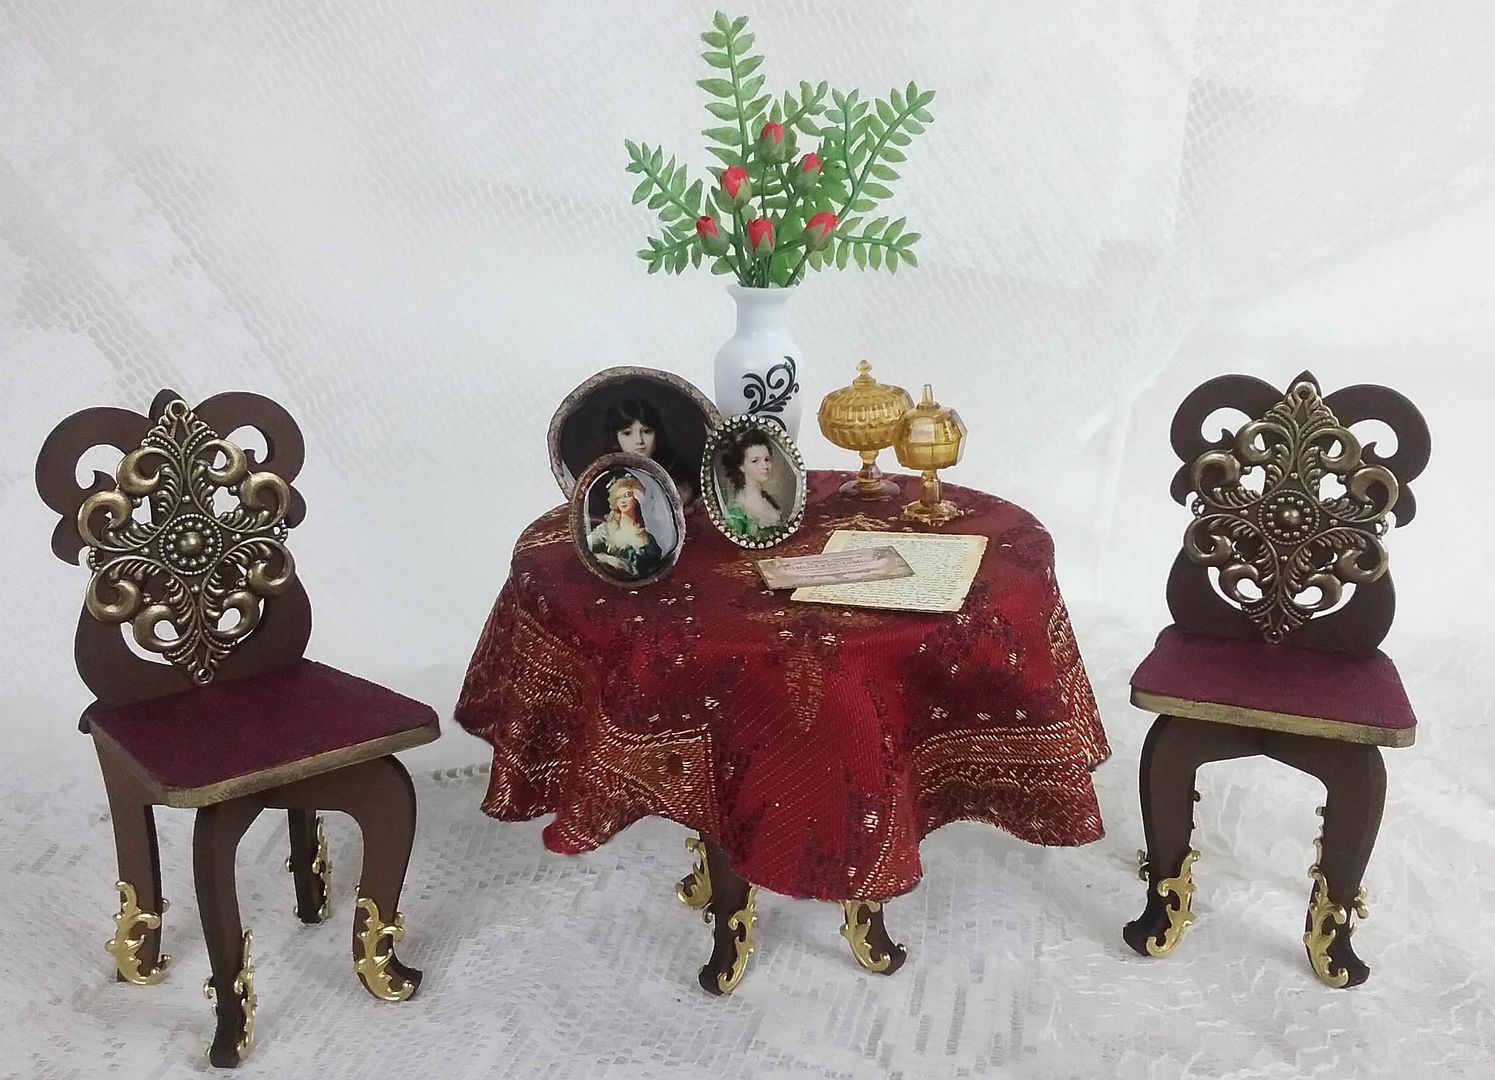
The table and chairs are from a chipboard set. I covered the table with fabric from
my stash. The chairs are covered with
fabric paper also from my stash. To
dress up the legs of the chairs and tables, I used brass flourishes. I added a brass filigree to the backs of the chairs. On the table is a mini vase
with roses. This vase and the one in the secretary come from a set of vases.
Also on the desk are amber candy jars and more pictures from the Portraiture collage sheet.

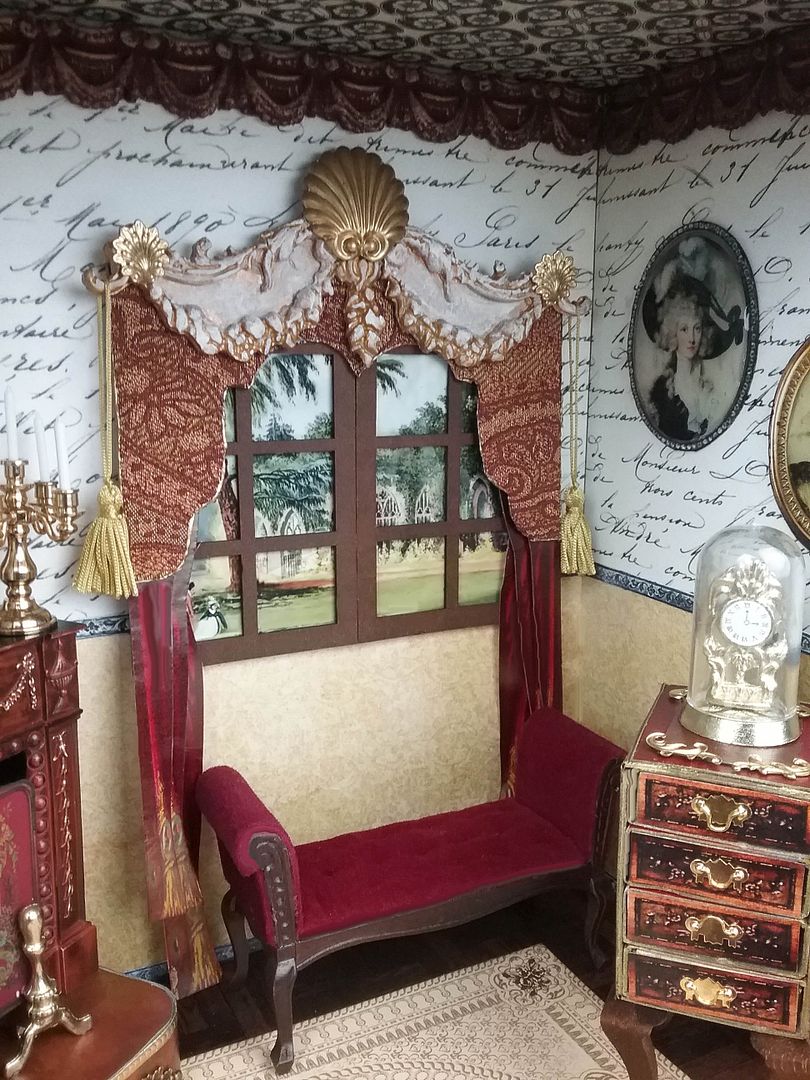
THE INSIDE CURTAINS
The burgundy curtains are the same ones
I used on the outside windows and are as a downloadable image. On top of the curtains is a cornice made from
chipboard and covered with the flip side of the fabric I used on the table. Feel free to download the cornice template
below.
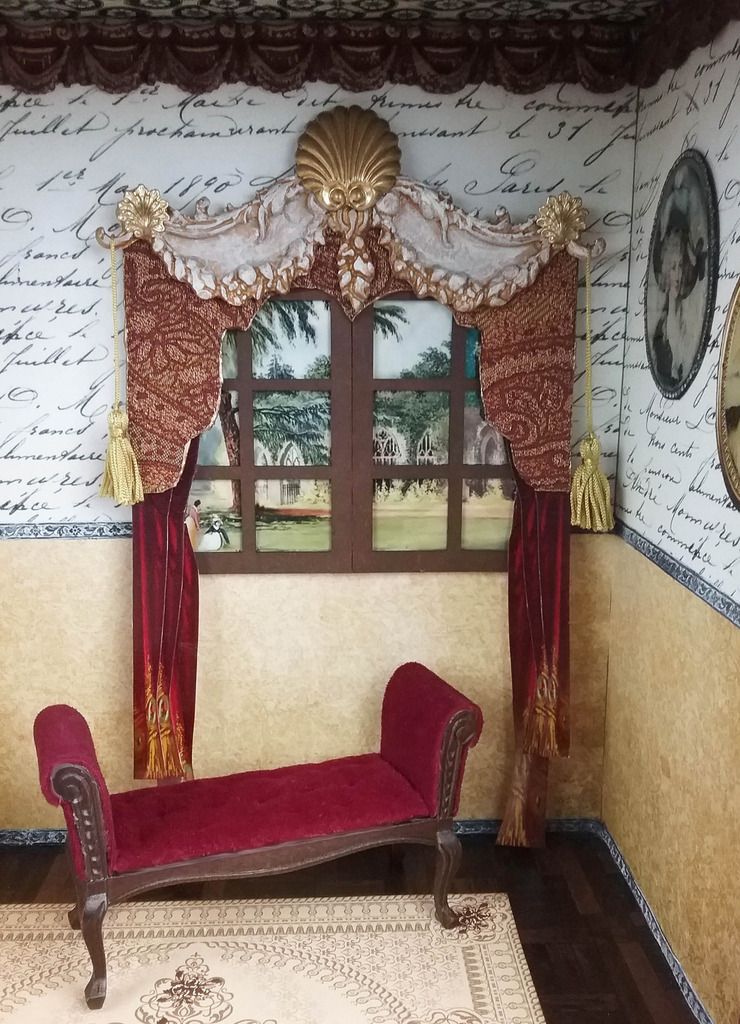
On top of the cornice is a decorative
piece made from clay, a baroque medallion, and a filigree silicone mold.
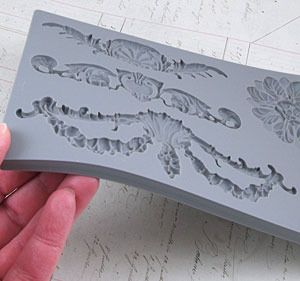
I
first painted it gold and then when over it lightly with ivory acrylic
paint. The finish touches are brass
shell pieces and gold tassels. The window is made from two rectangular windows glued together. Behind the window is clear plastic (the same plastic I used for the secretary), and behind the plastic is a scene that you will find further down in this post.
On the walls are more images from the Portraiture collage sheet.
CORNICE TEMPLATE

FREE IMAGES
Feel free to download the stained glass window and fireplace screen images I used in the project.


OTHER IMAGES
Side
Curtain with Fringe – Red Download – Used on the outside and inside windows
14 comments:
U r just superb
Everything looks SPLENDID! Sumptuously Rich and perfectly Baroque! :D
Hello
Wonderful work!
Kisses
Absolutely stunning, as always I am in awe of your work!
Quelle belle ambiance, le secrétaire est merveilleux
thank you for sharing
Truly fantastic project, I love making 3 d projects and this is so inspiring.
Julie x
Absolutely wonderful! Please provide a tutorial on just how you created the fireplace from Altoid tins?? This is just fabulous Laura, as are all of your creations.
Laura you never see cease to amaze me with your talents. This is absolutely stunning! Being an avid rare book collector, I have been slowly working on a library design. You've jump started my need to get this completed. Thank you for sharing your wonderful talents and tutorials.
Wha...how....whe....did....wow
Never mind. Consider my mind blown.
This is my fave of everything you've done to date. Just astonishing!
Oh!! And I just entered the AS drawing!! I can't believe they're giving away your complete supplies lost!! Gak!! So the rest of you should go to alpha stamps (Laura has a click thru) and enter. I don't work for AS and while I hate to have more competition for this prize, I know that everyone commenting would love the chance to make this using your generous and UNBELIEVABLY DETAILED TUTORIAL!! Do you know how much I've paid to the Orta's and Hankinsof this world for tutorials? Not that I mind...everyone deserves to make a living and they're good. But you are easily the best out there and you do all of this for FREE. Tytytyty!!!!
How beautiful! I absolutely love the incredible details. You constantly inspire me to push myself and my art to new levels. I can't wait to see what you'll come up with next!
This is beyond amazing! The details you think of are so impressive.
One thing I would find helpful is an estimate of both the time and money spent to create these projects. I would love to create one (or more) for myself, but it seems like these projects must take months to plan and execute, not to mention a small fortune with all the products.
You are just outstanding.
amazing as always, love all the photo close-ups and how-tos!
Post a Comment