

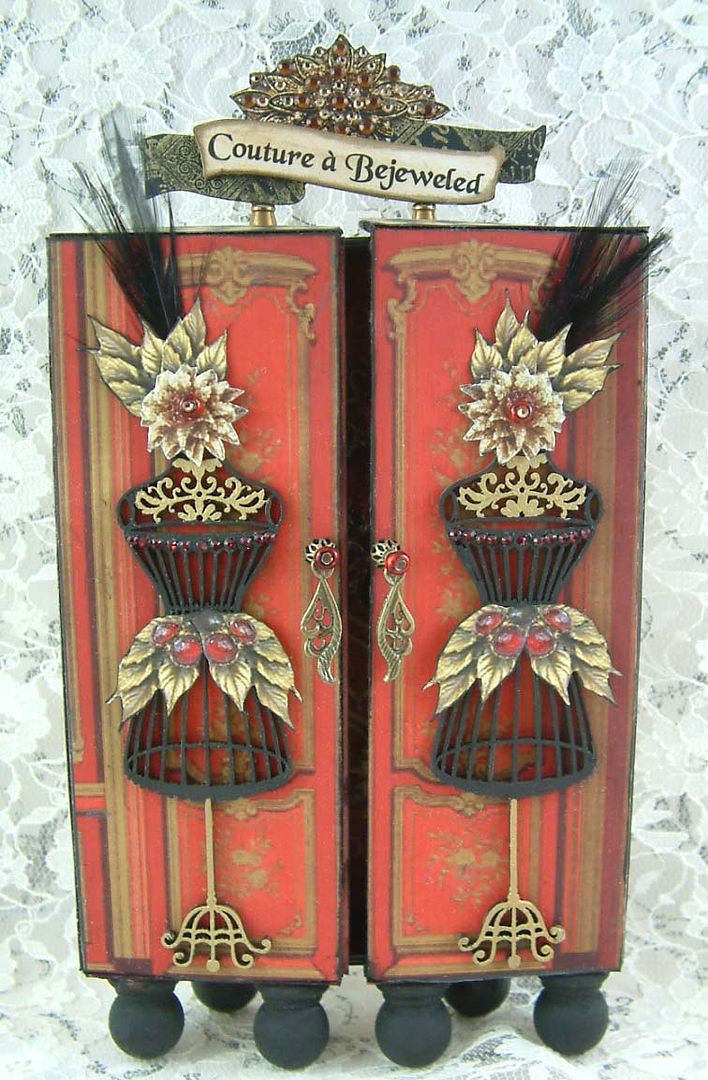


Images of vintage jewelry are one of my favorite things to use as an embellishment. The great thing about using an image (instead of the real thing) is that you can use it over and over in different ways. An image is easy to “jewel up” by adding rhinestones, Glossy Accents, microbeads, glitter, and Stickles.

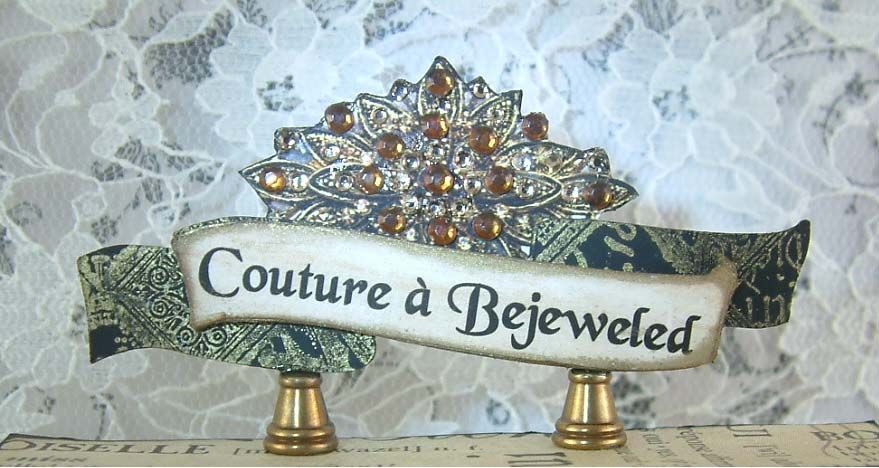
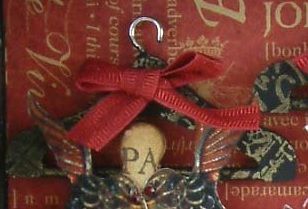
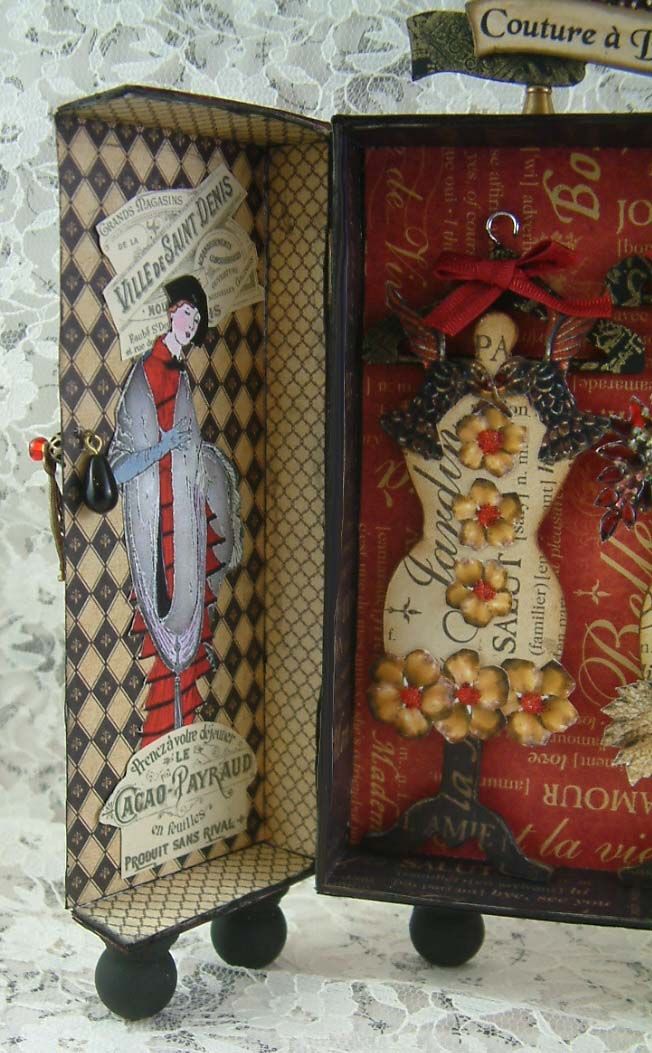
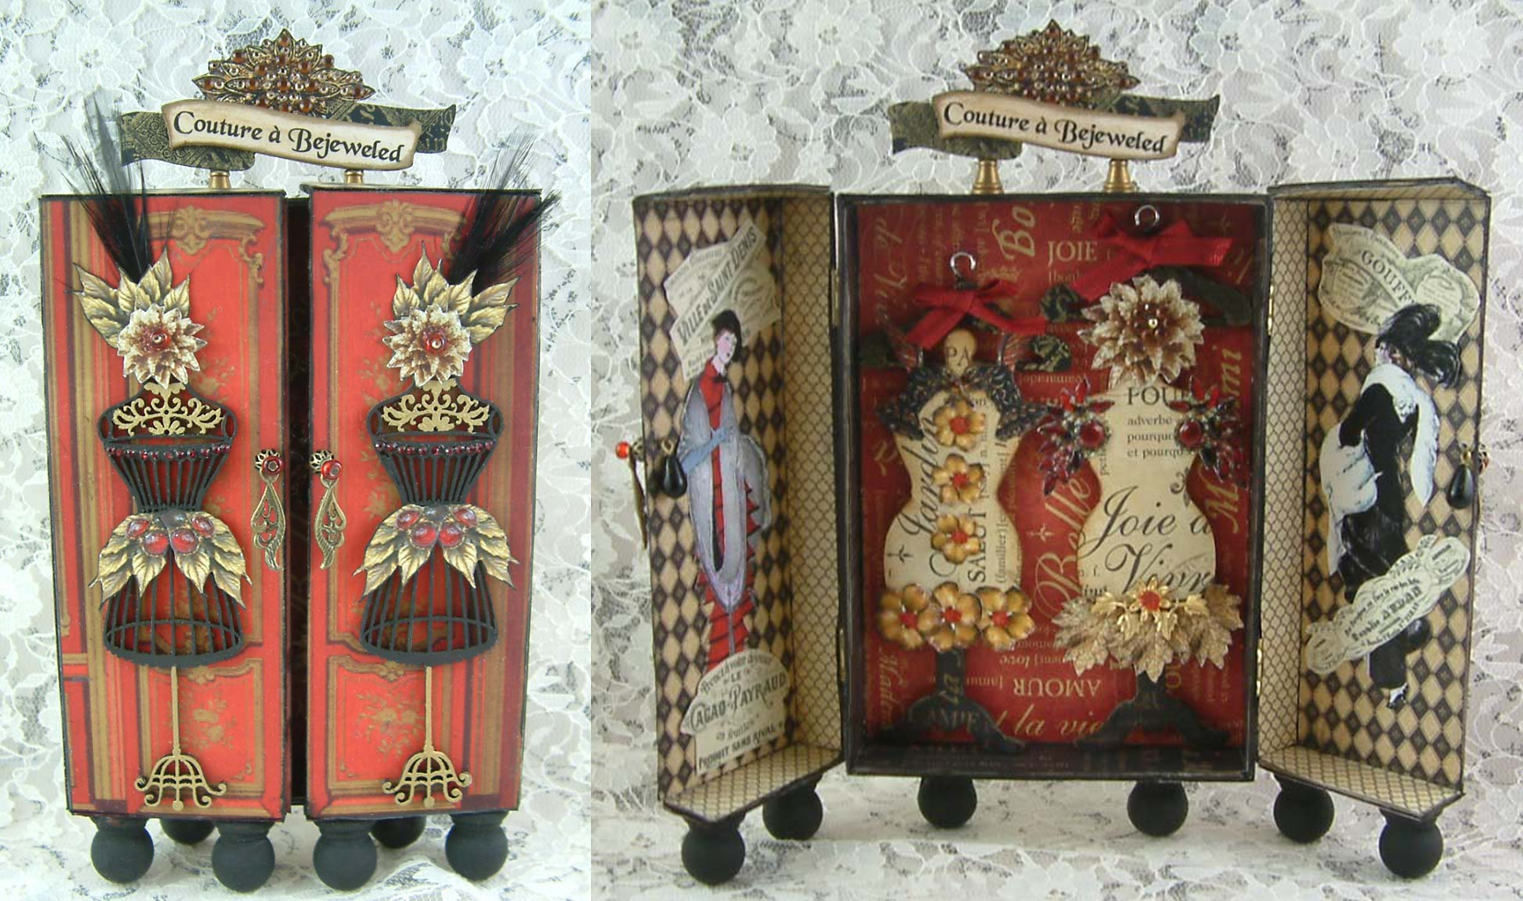
To “jewel up” the sign on the top of the cabinet I added rhinestones.
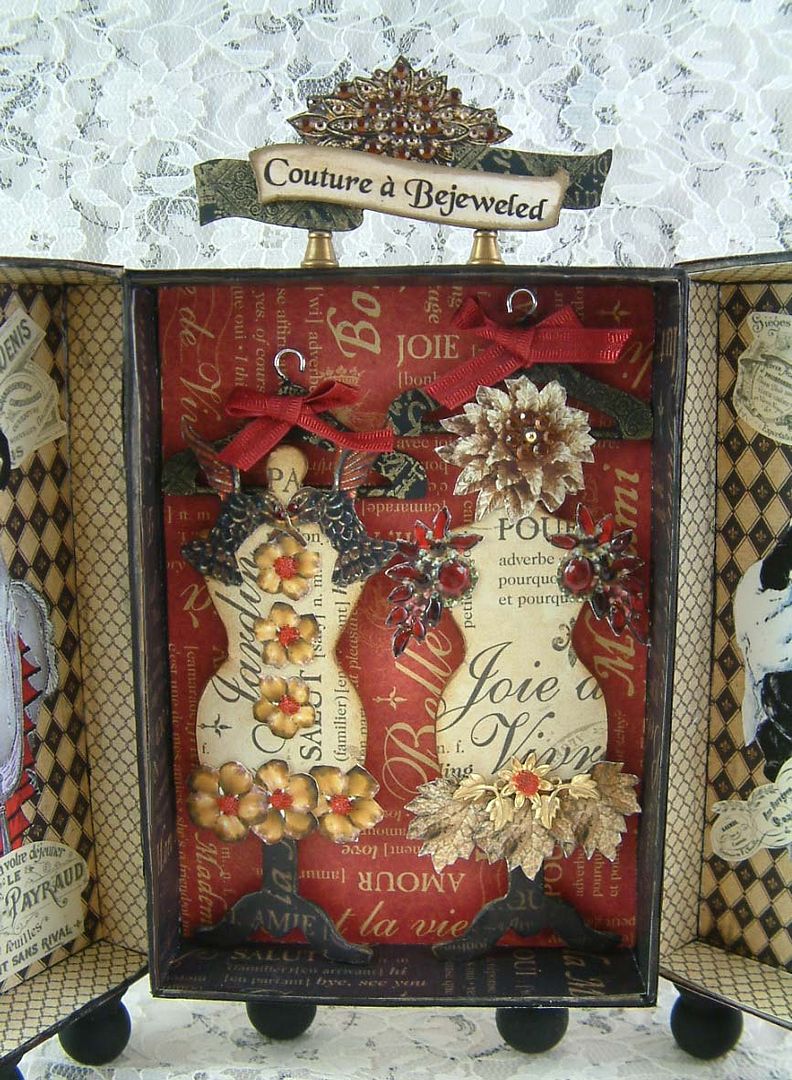
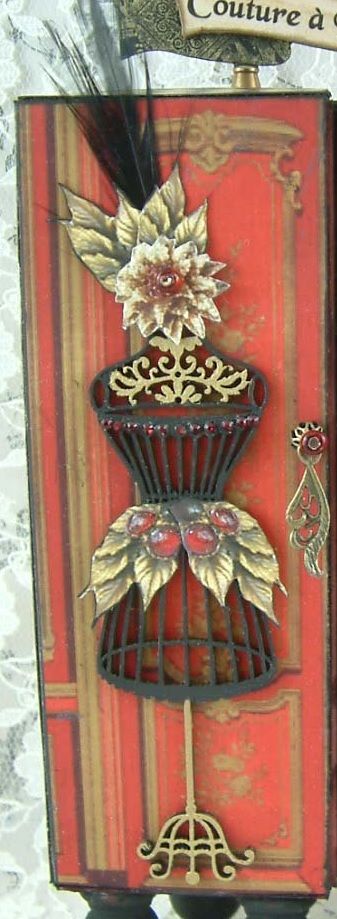
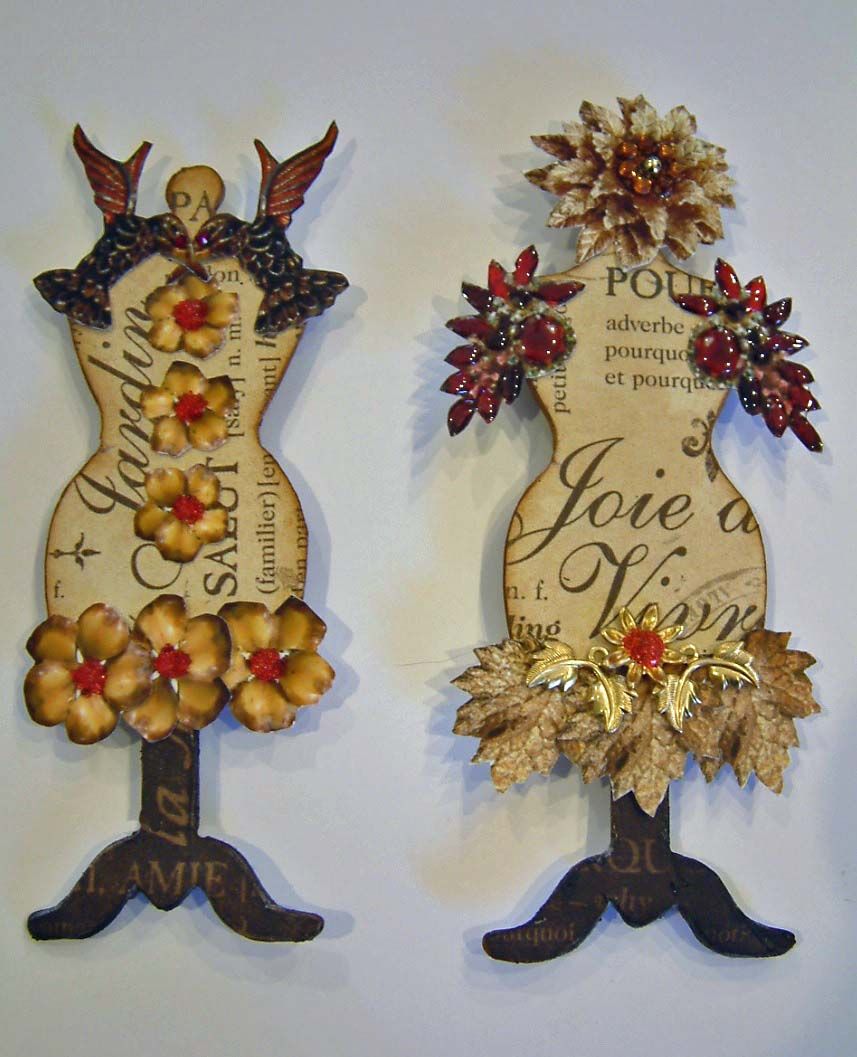
For the mannequins inside I used a chipboard dress form for the base. I added paper and images from my Bejeweled Collage Sheet. For the dress on the left, I used hummingbirds as sleeves and added dimension to the flowers with microbeads. For the dress form on the right, I added rhinestones to the image at the top and Glossy Accents to the red sleeves. The large leaves at the bottom are also images from the collage sheet. Stickles and glitter are another options for “jeweling up” these images.

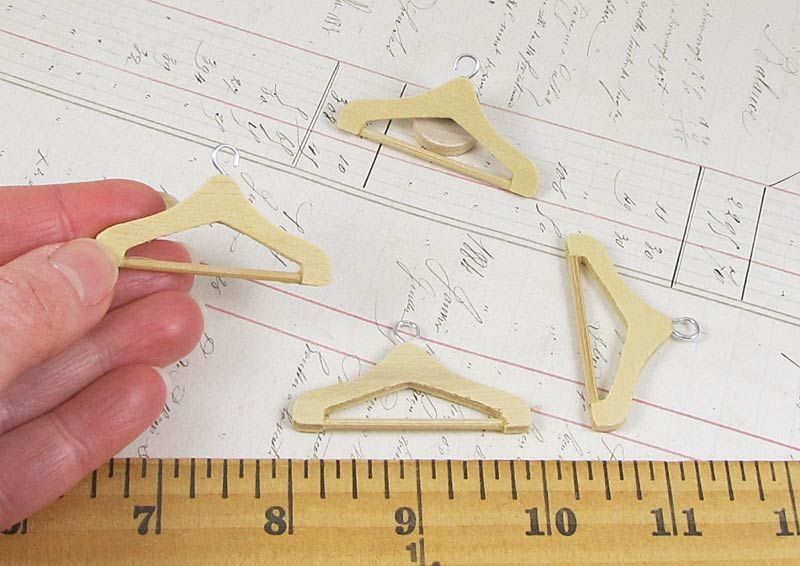
Inside the cabinet, the dress forms are attached to wooden coat hangers. I painted them black and stamped them with gold ink.
ASSEMBLING THE BOX
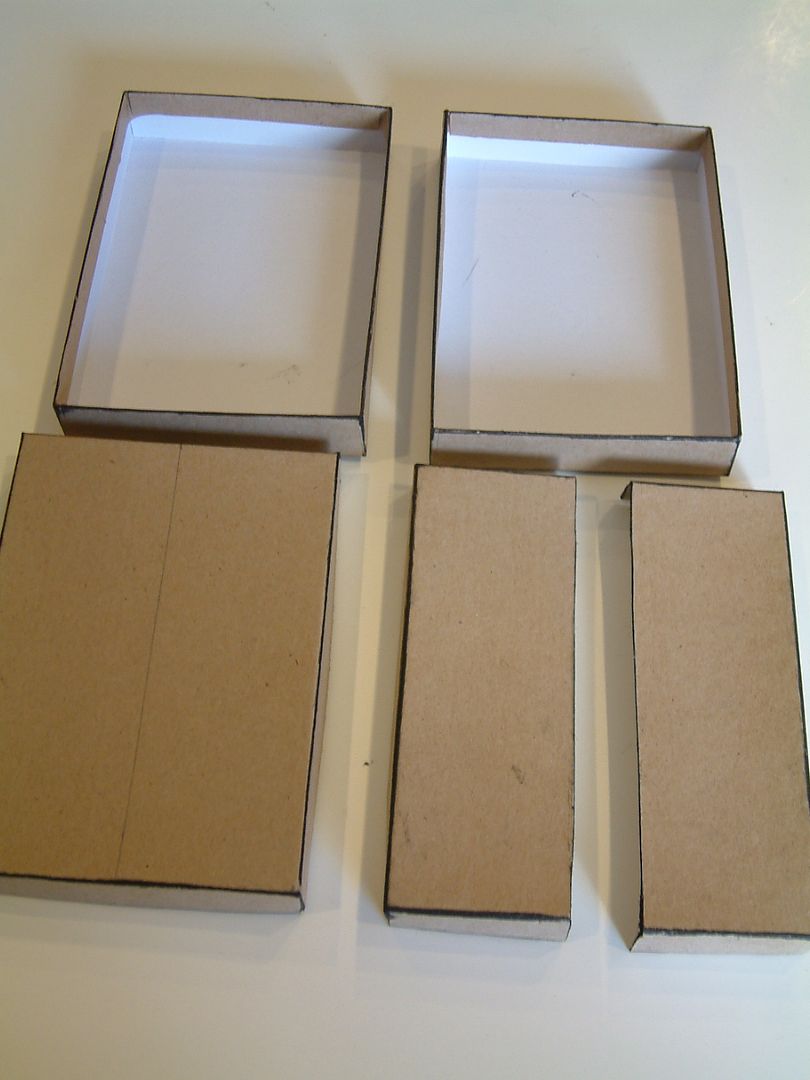
The box I used for this project measures 5 ¼” x 3 ¾ and 1” deep.
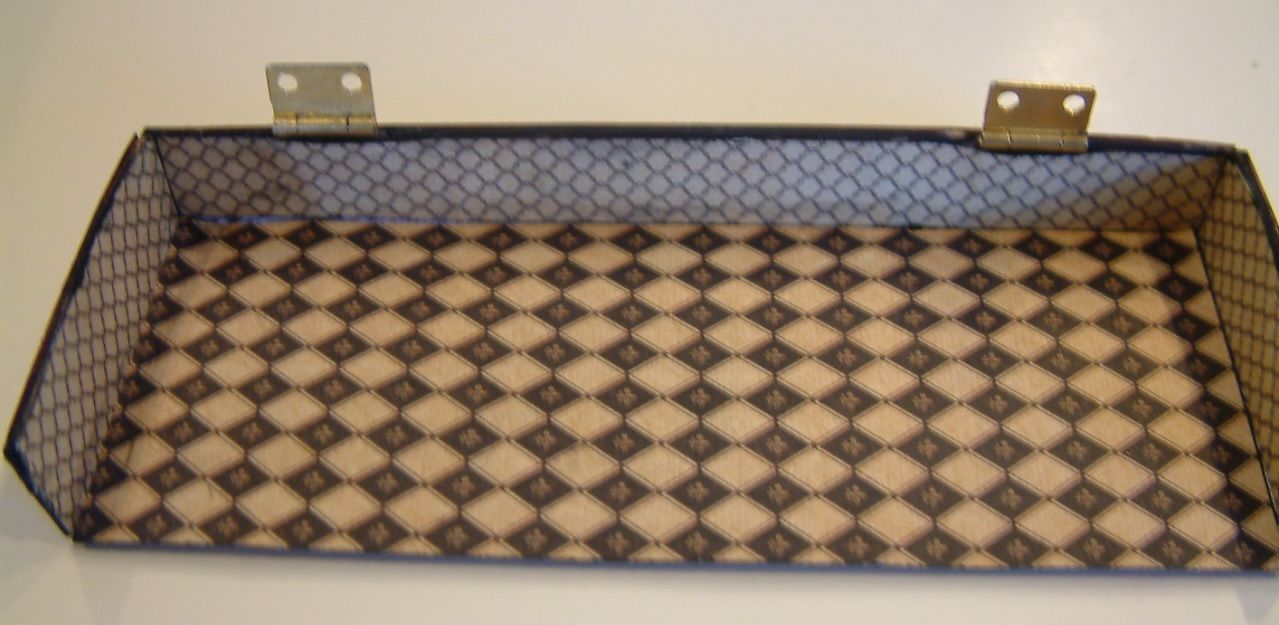
STEP 1: CUTTING THE LID
- Mark a line down the center of the box lid.
- Cut along the line (I used a combination of a large box cutter and heavy scissors).
- Sand the cut edges until smooth.
STEP 2: HINGING THE LID (or doors) TO THE BASE OF THE BOX
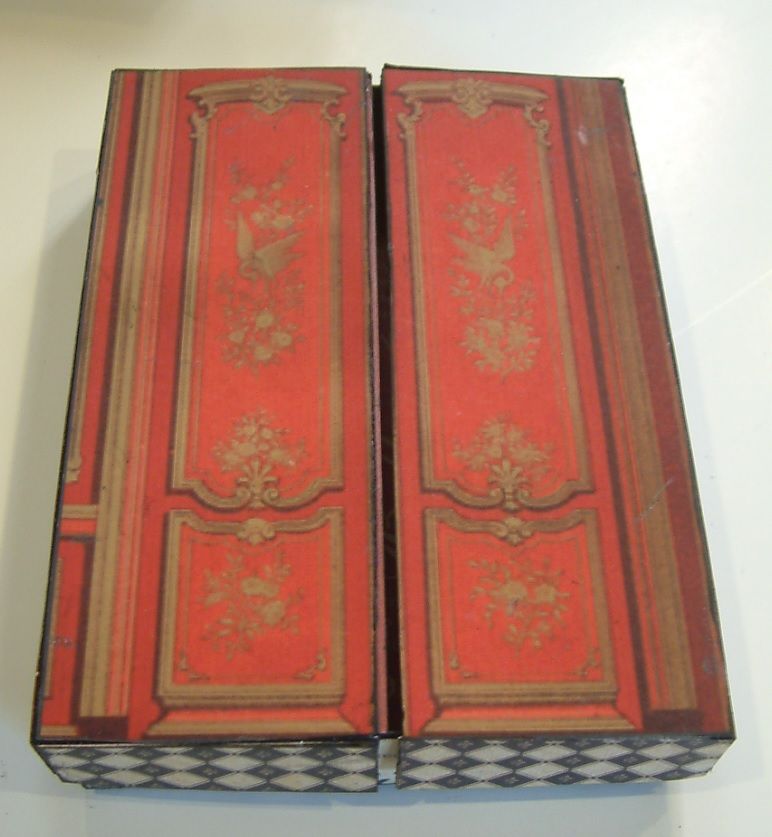
- Since I was covering the box with the paper I first inked all of the edges.
- If you are covering the box with paper, cover the outside of the lid halves and the outside of the box.
- Re-ink all edges.
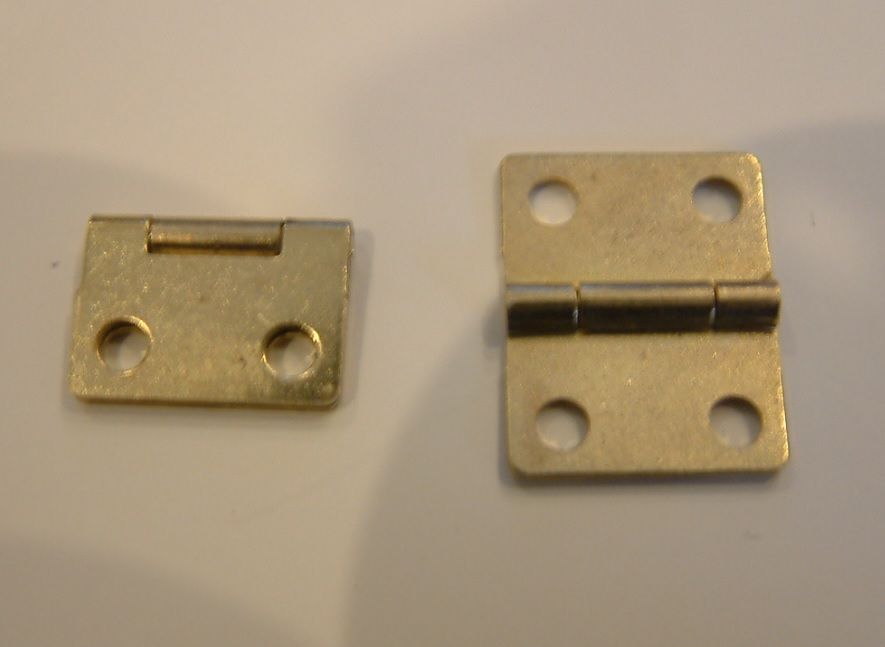
- You can use either two small hinges for each side or one large hinge for each side. Fold the hinges in half. Hinges will fold in half only one way. If the hinges are stiff oil them before attaching them to the box.
- Place the hinge on the inside of the lid with the join of the hinge just barely off the edge.

- Mark the holes.
- Repeat the placement and marking for all 4 hinges.
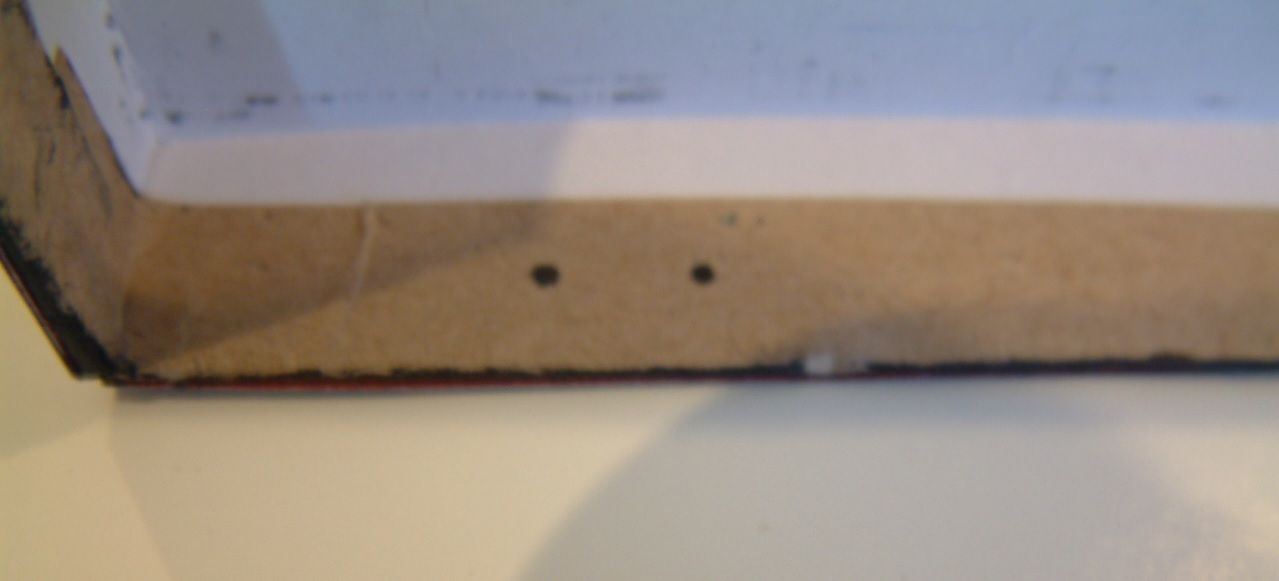
- Poke the holes where marked on the 2 lid pieces.
- Put the lids back on the box, and using the holes in the lids, transfer holes onto the base of the box.
- Attach hinges to the lid pieces using brads. Place the hinge inside the lid and insert the brads from the outside of the lid to the inside of the lid. The direction of the hinge – You should be able to fold the hinge toward the inside of the box or on top of the brads.
- Paper the inside of the lids. The paper will cover the brads and hinges.
- Attach the hinges to the base of the box. You can see in the picture below that you are attaching them to the outside of the box. Place the hinge against the outside of the box and insert the brad through the hinge and into the box.
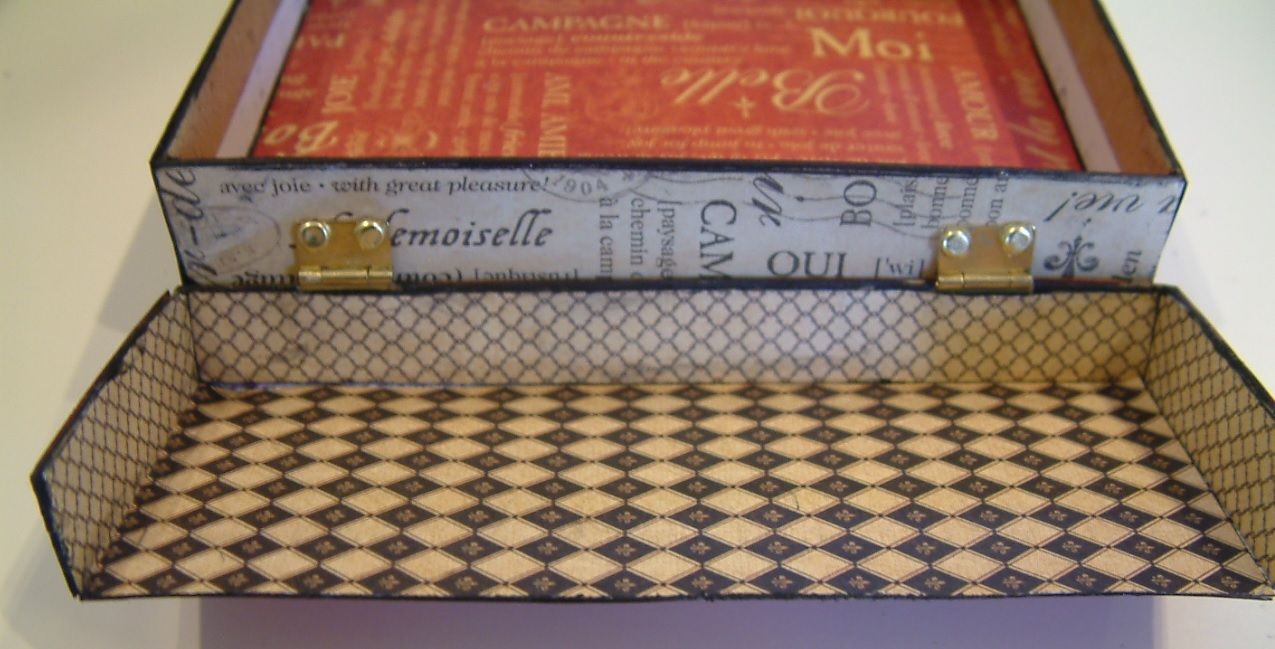
- Paper the inside of the base of the box. The paper will cover the brads and hinges.
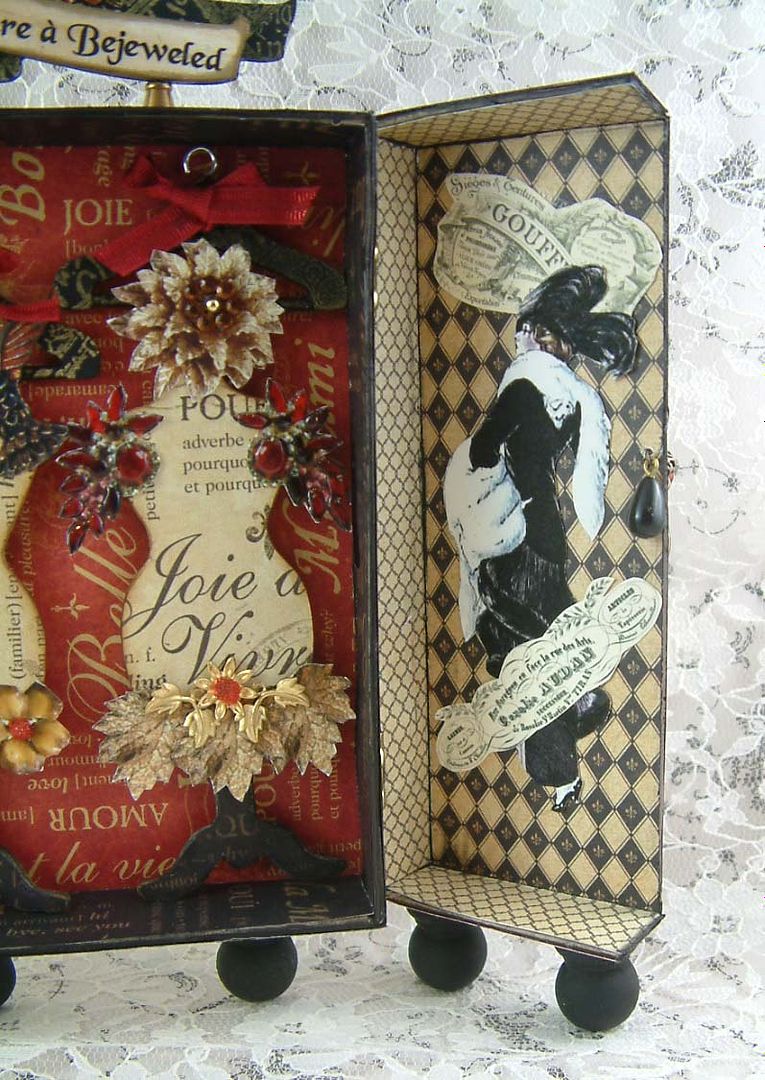
I used wooden finials for feet. In order for the box to stand when open, I attached 2 feet to the back of the box and two feet to each side of the lids.
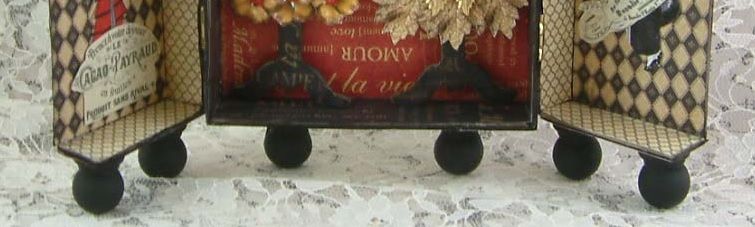
I cut the wooden finials attached in the back in half. When the lid is closed, there is not enough room to attach the finials without them sticking out past the back of the box. Cutting the finials in half made them flush with the back of the box. It’s really up to you if you want them flush or not.
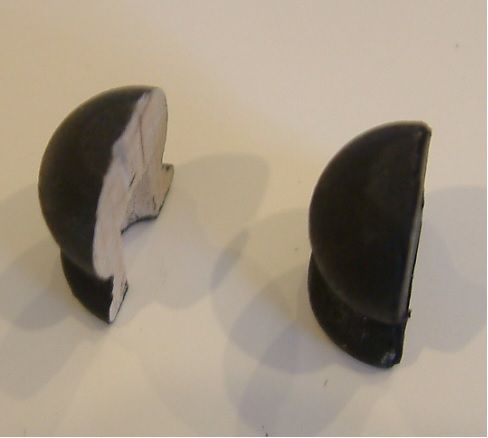
I covered the exposed center part with black cardstock.

Another thing to consider when adding feet is that when standing, the box and the lids are at different heights. To make the cabinet level I added layers of cardstock to the top of the 2 back feet before I attached them to the box.

11 comments:
Laura your new sheet is fabulous! Thanks for sharing another great tutorial.
Great tutorial. Love it! ~Alicia
Lovely project Miss Laura! This subject matter is perfect for your style. I can see lots of uses for that collage sheet too. Thanks for sharing your inspiration.
Beautiful cabinet! Just ordered your fab sheet too! Hope your chest arrives soon! X
You make the most beautiful projects! Love the doors and how the dress forms look.
Great job.
I think I am going to have to go get your jeweled collage...lol
Happy Crafting
Tracie
http://homeofthepurskey.blogspot.com
what a great projekt, what a great tutorial!
many,many thanks!!!
greetings
margit
what a delightful project,
hugs
Thank you for sharing something as lovely as this and how to make something so stunning.
you the best.
hugs
susan s
Laura, my heart stopped! This is the most wonderful thing you've ever done (well, except for your bottles, and ATC's and the dresser, and, and, and it goes on). Those colors on the front doors are divine. All of it is divine.
It's very beautiful!
Ciao,
Ilenia
This is just fabulous. Thanks for the tutorial as well. Beautiful box!
Post a Comment